Efficient time management and planning are crucial in today's fast-paced work environment. Odoo 18 enables the Calendar module to link with calendar providers such as Google Calendar and Microsoft Outlook. This allows for synchronizing meetings and events into a single, centralized system, even if it is still considered a stand-alone application inside the calendar module. Events are created in Odoo or on an external calendar file; calendar events are synchronized across platforms, ensuring that all schedules remain up-to-date. Syncing information prevents double booking, minimizes the need for manual calendar entries, and promotes increased productivity. This integration enhances the Odoo application's workflow, making it more efficient, faster, and reliable for scheduling meetings or appointments.
Synchronize Google Cloud with Odoo 18
Create a Project
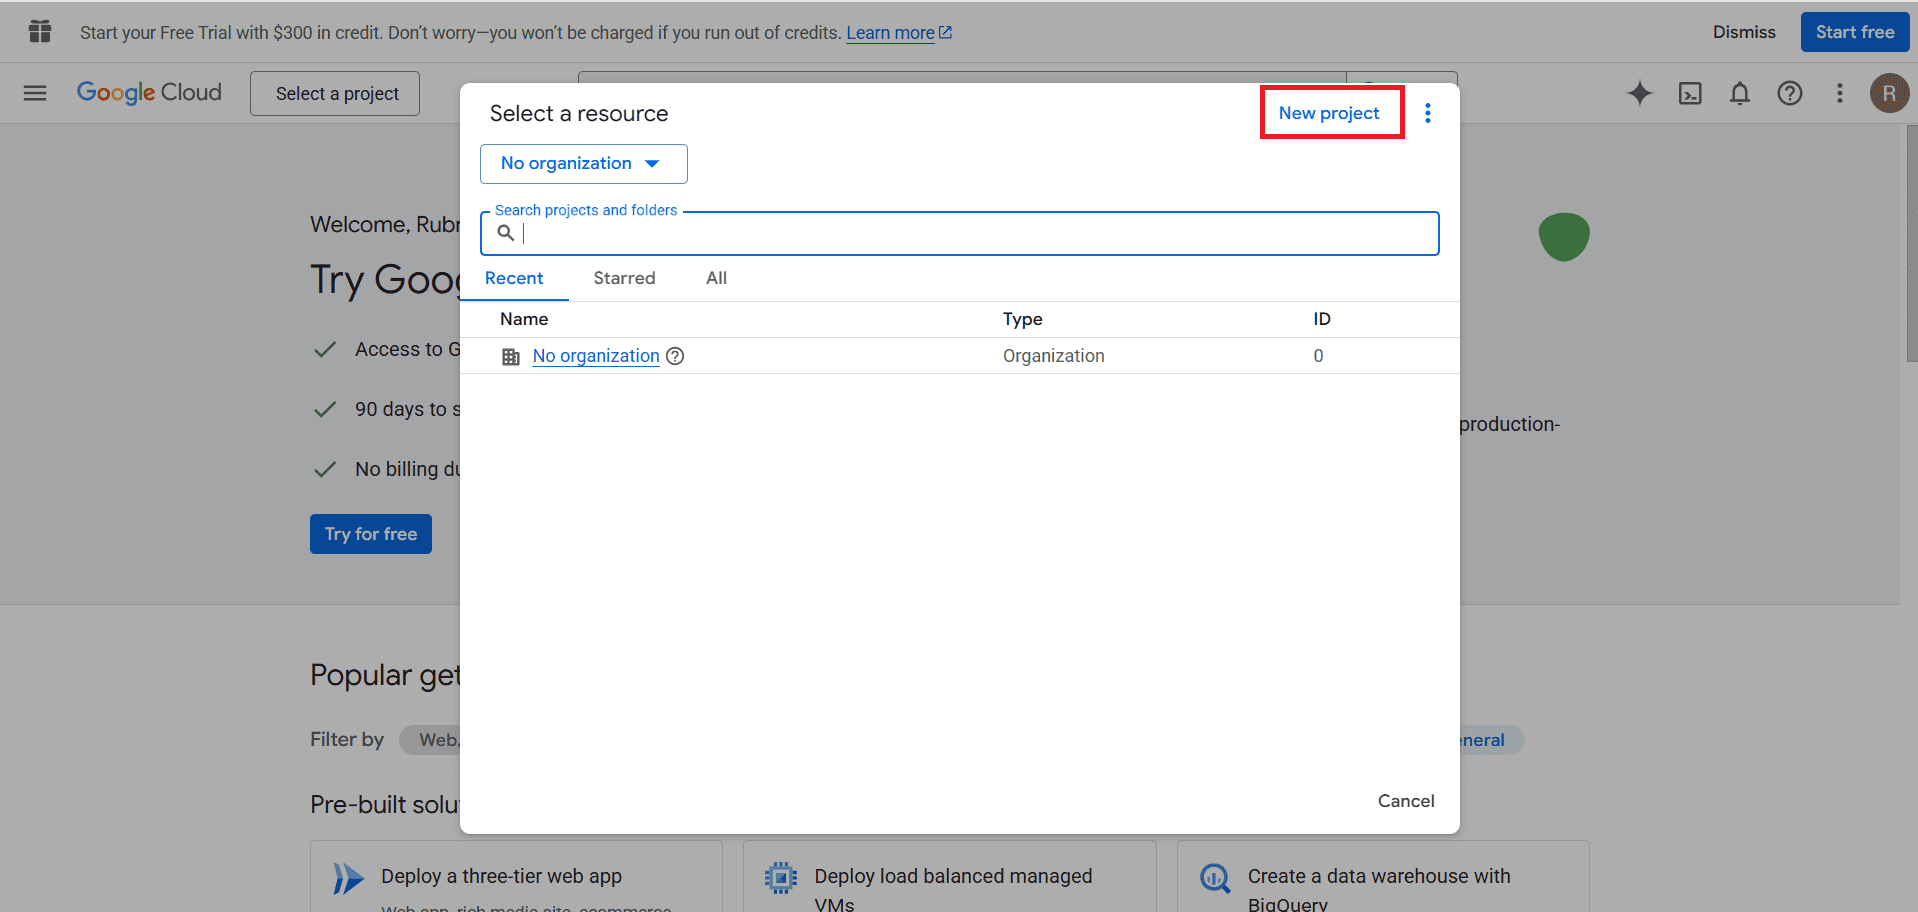
To create a new Google API project, go to https://console.cloud.google.com/ and click the "Select a project" icon, located on the left side of the screen. Once the new pop-up window opens, select the New Project button as shown below:
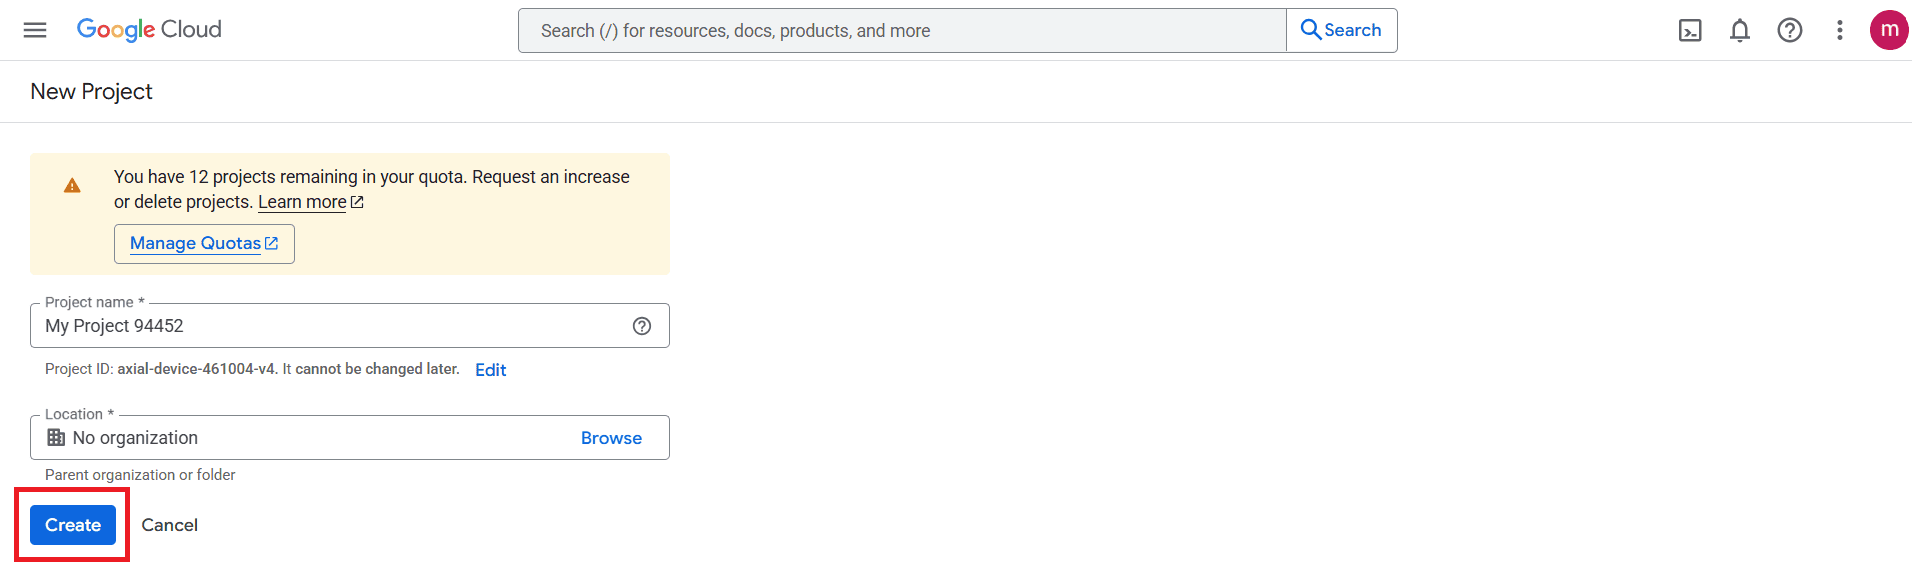
Provide a name for the project under Project name, and then proceed by clicking the Create button, as shown below:
Enable Google Calendar API
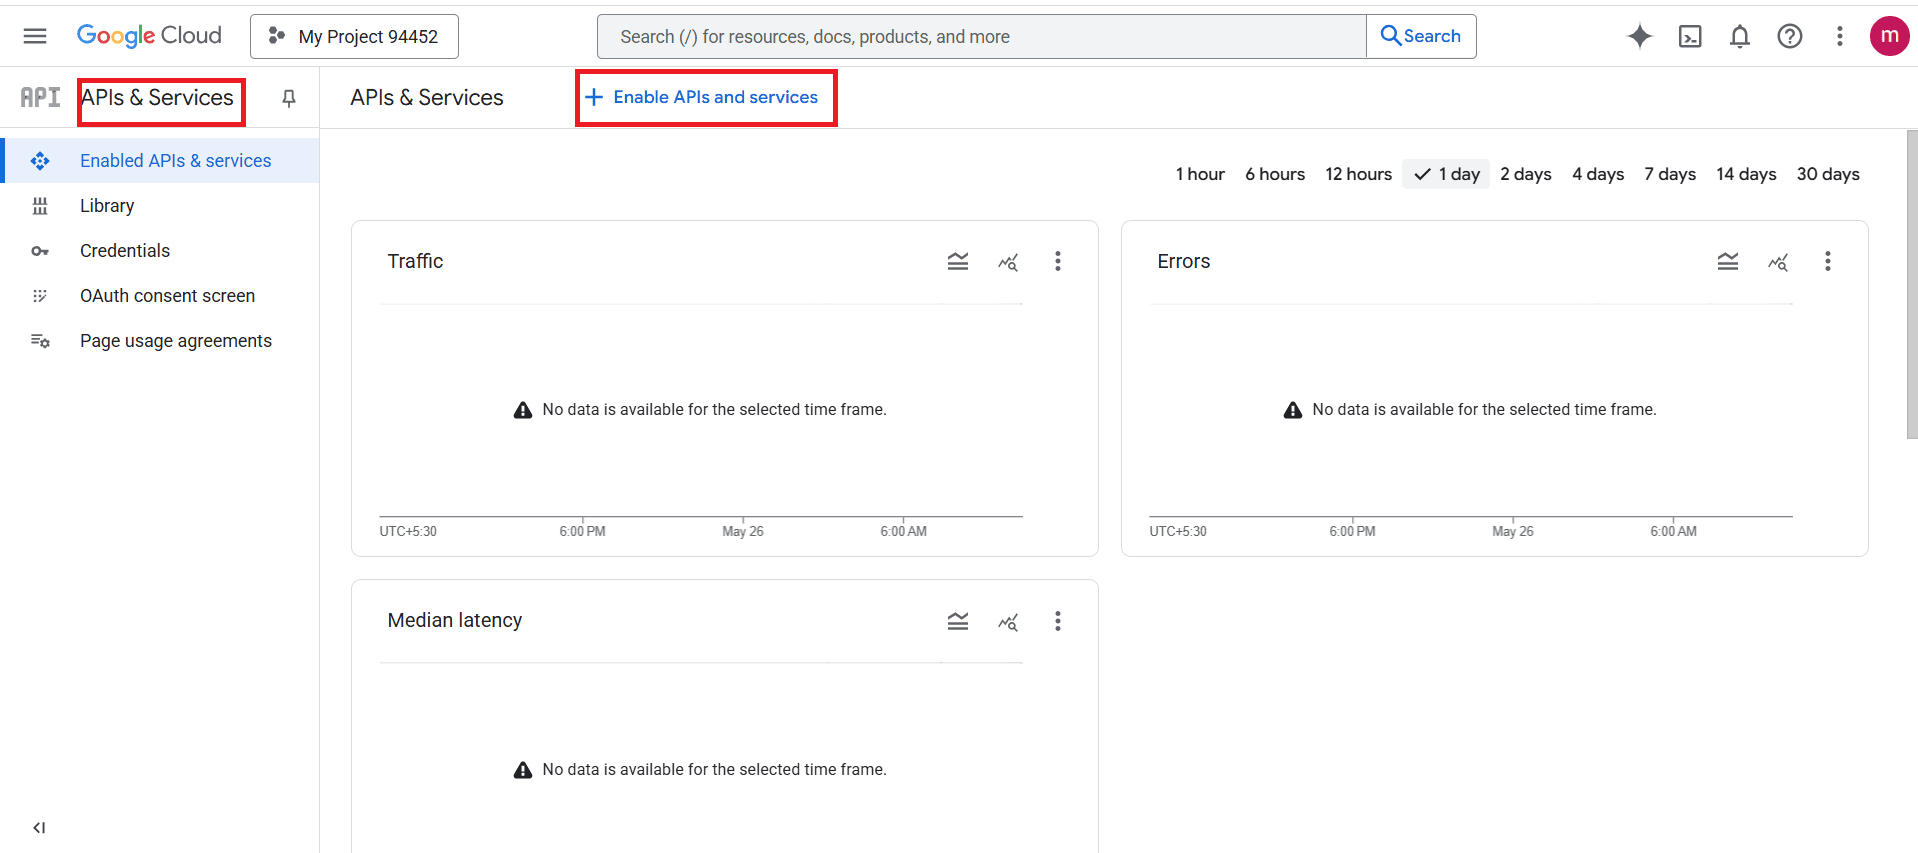
In APIs & Services, click on + Enable APIs and Services as shown below:
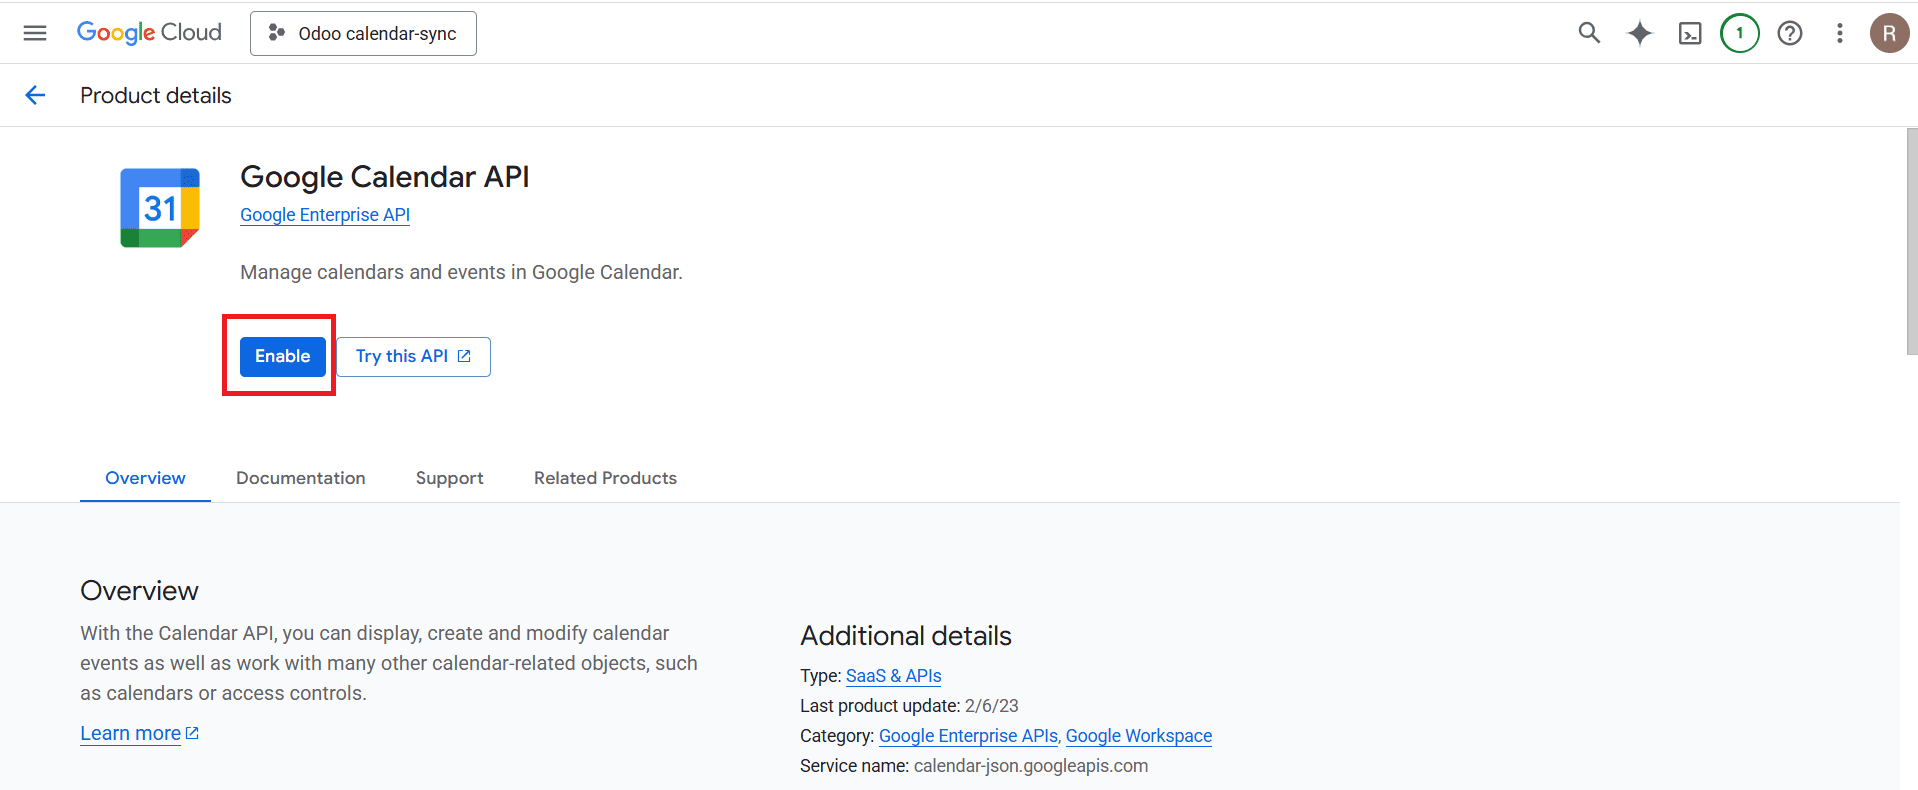
Search Google Calendar API from the search bar and click on the Enable button to activate the API, as shown below:
OAuth Consent Screen
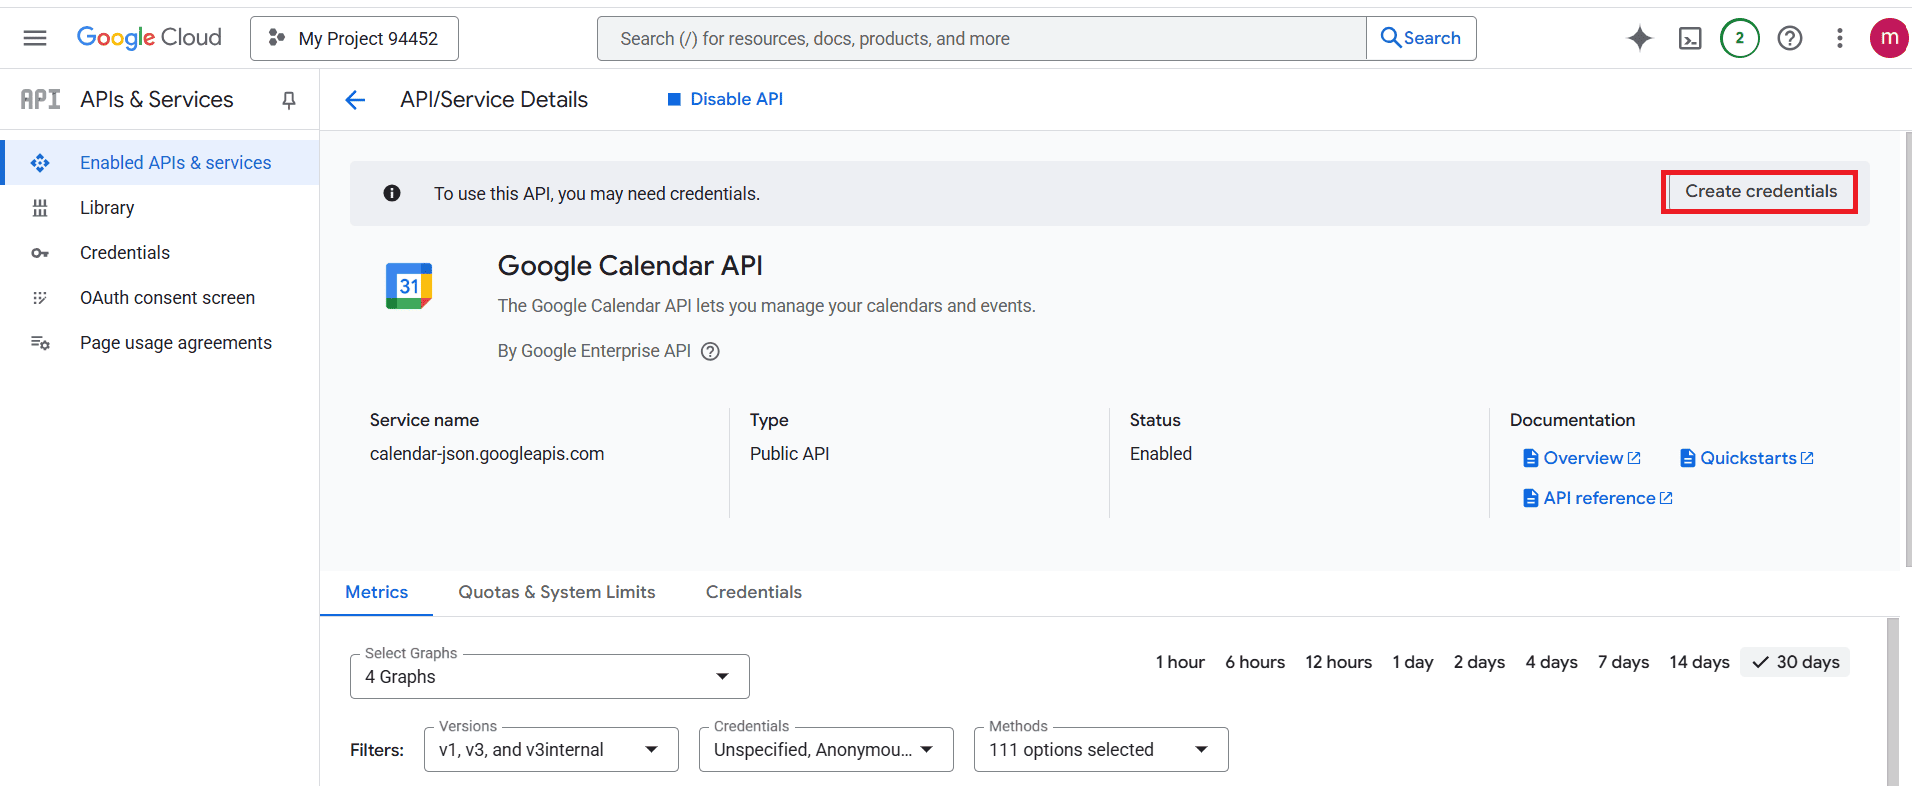
In the API & Services, press the Create credentials button as shown below:
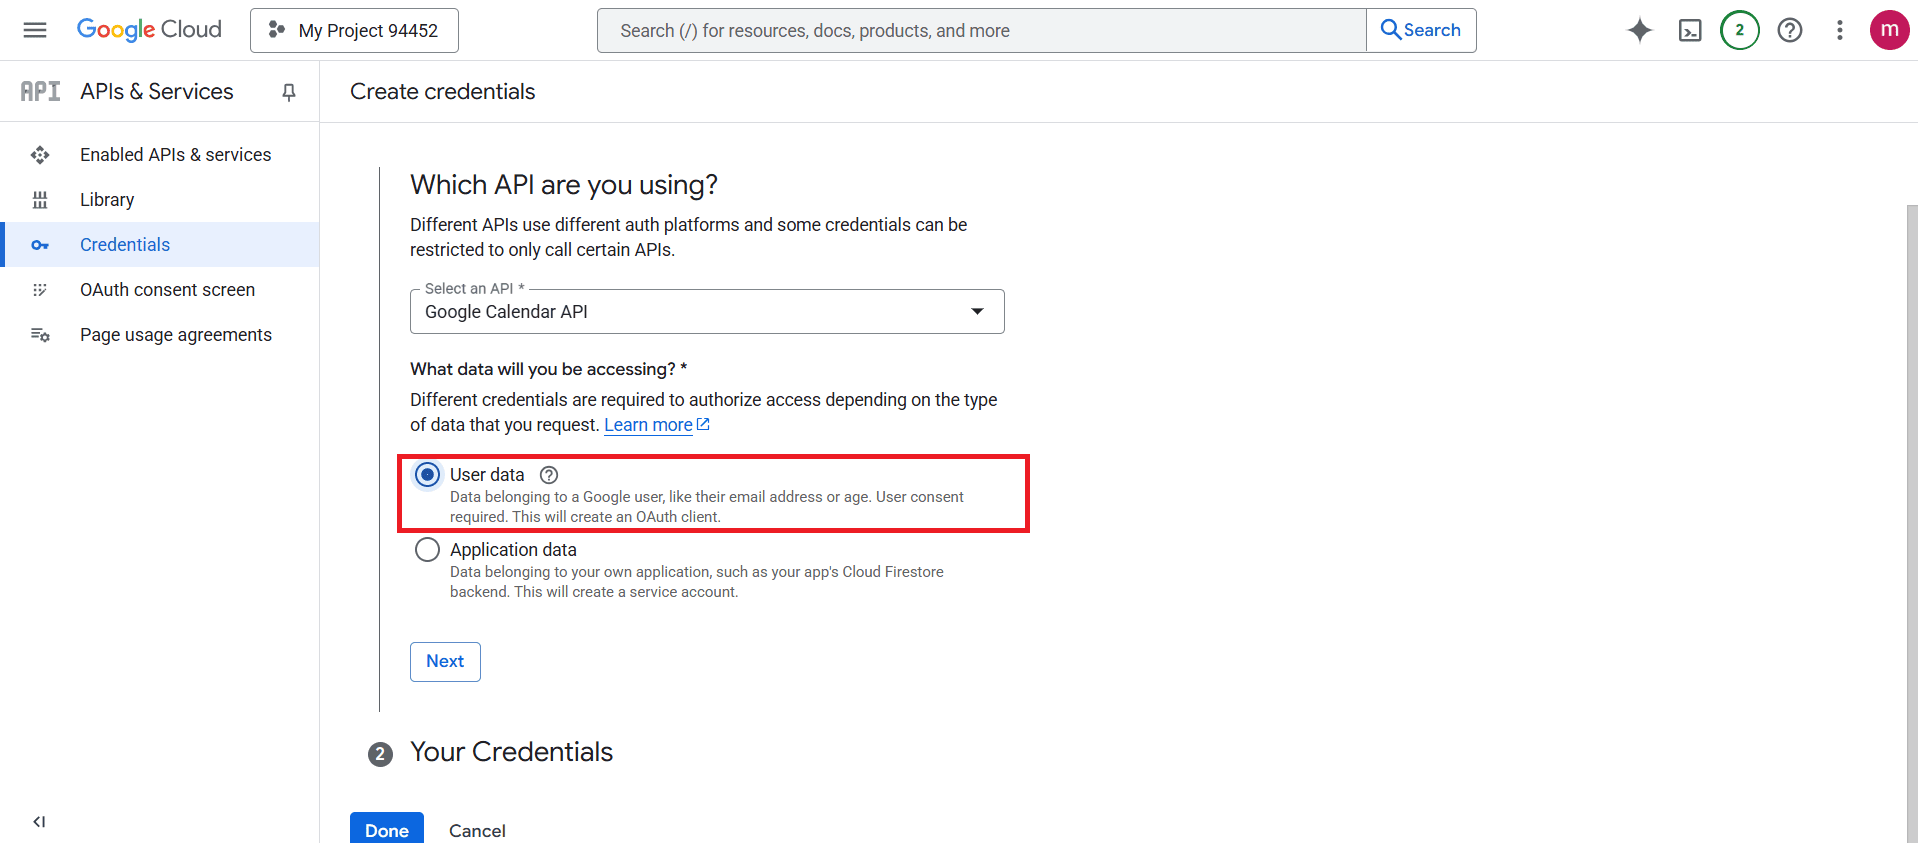
Then add the App name as Google Calendar API and select User data for access.
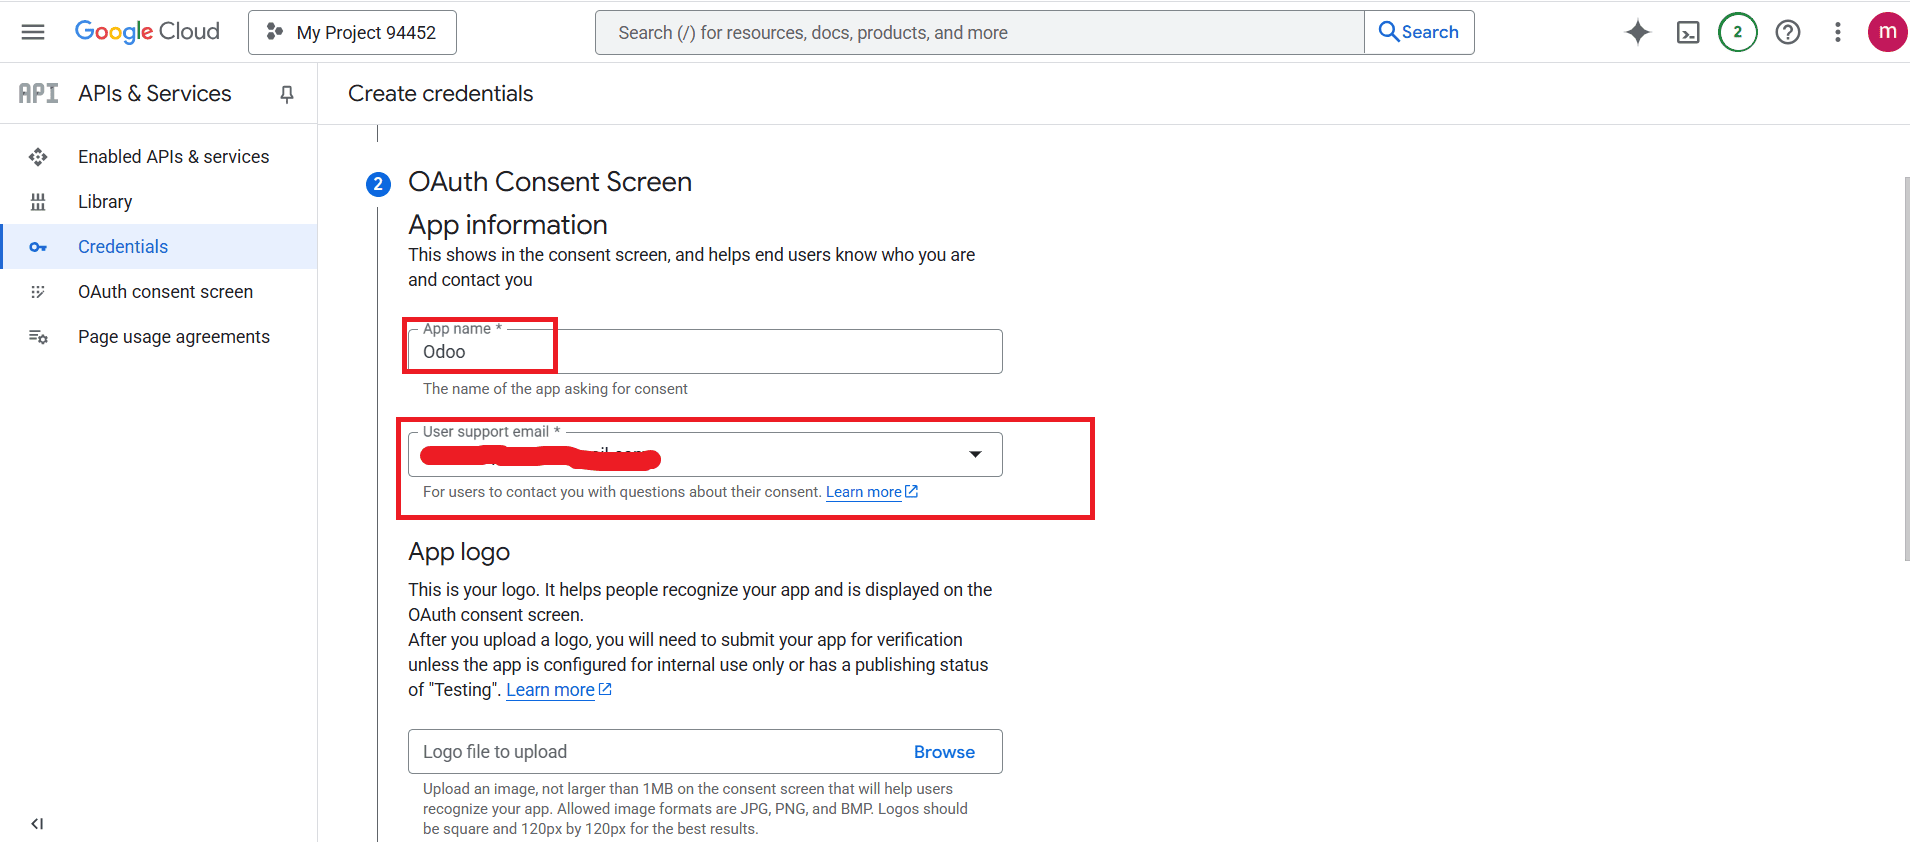
Next, provide the necessary App information on the OAuth Consent Screen as shown below. Under the App Name field, add Odoo. Then, add an email address for User support.
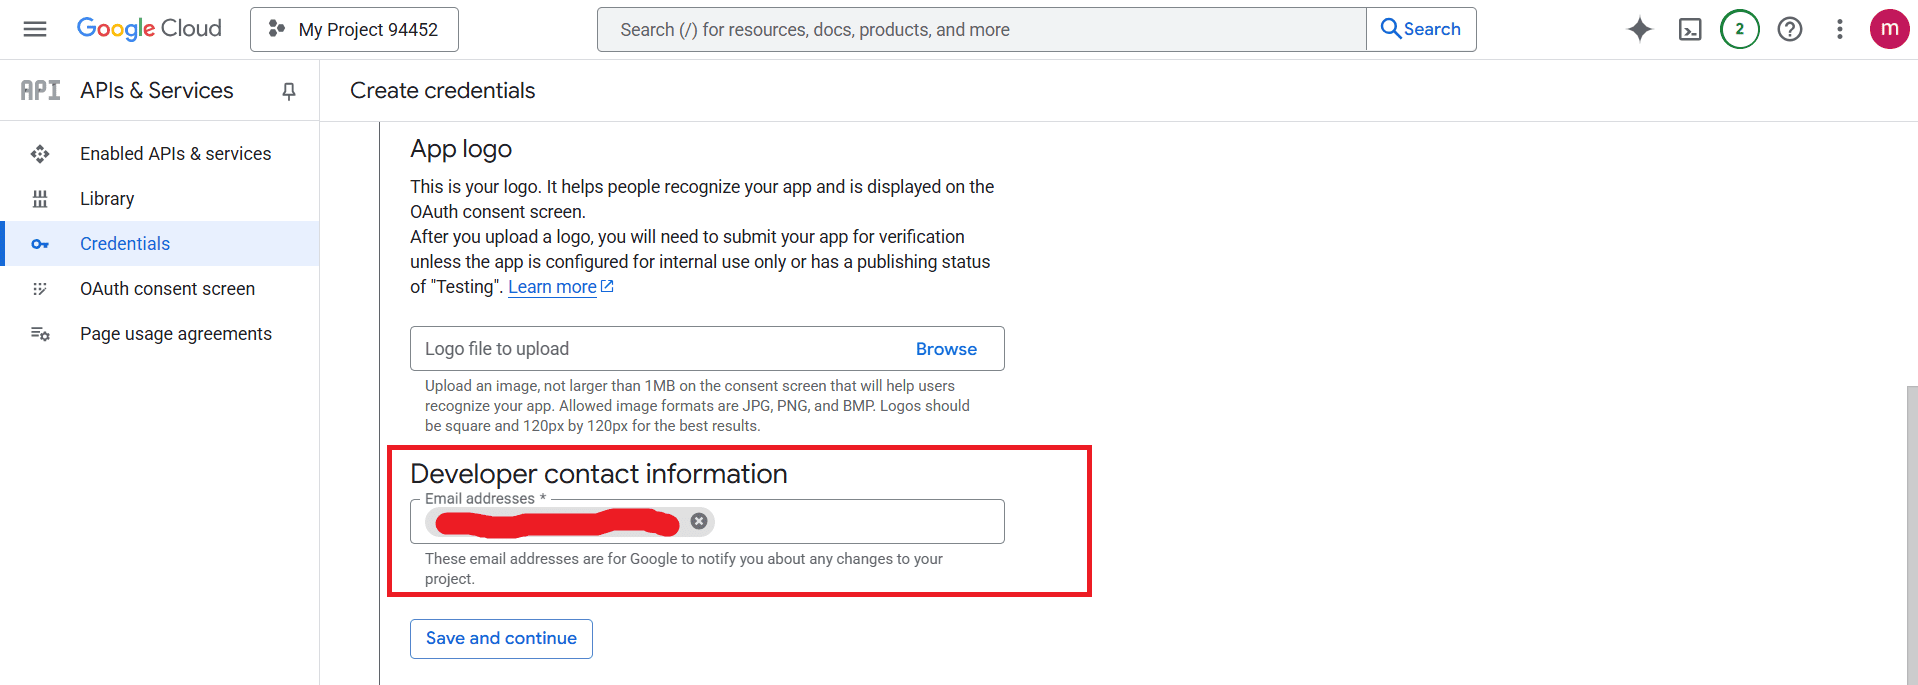
In the Developer Contact Information section, enter a valid email address and proceed to the next step by clicking Save &Continue.
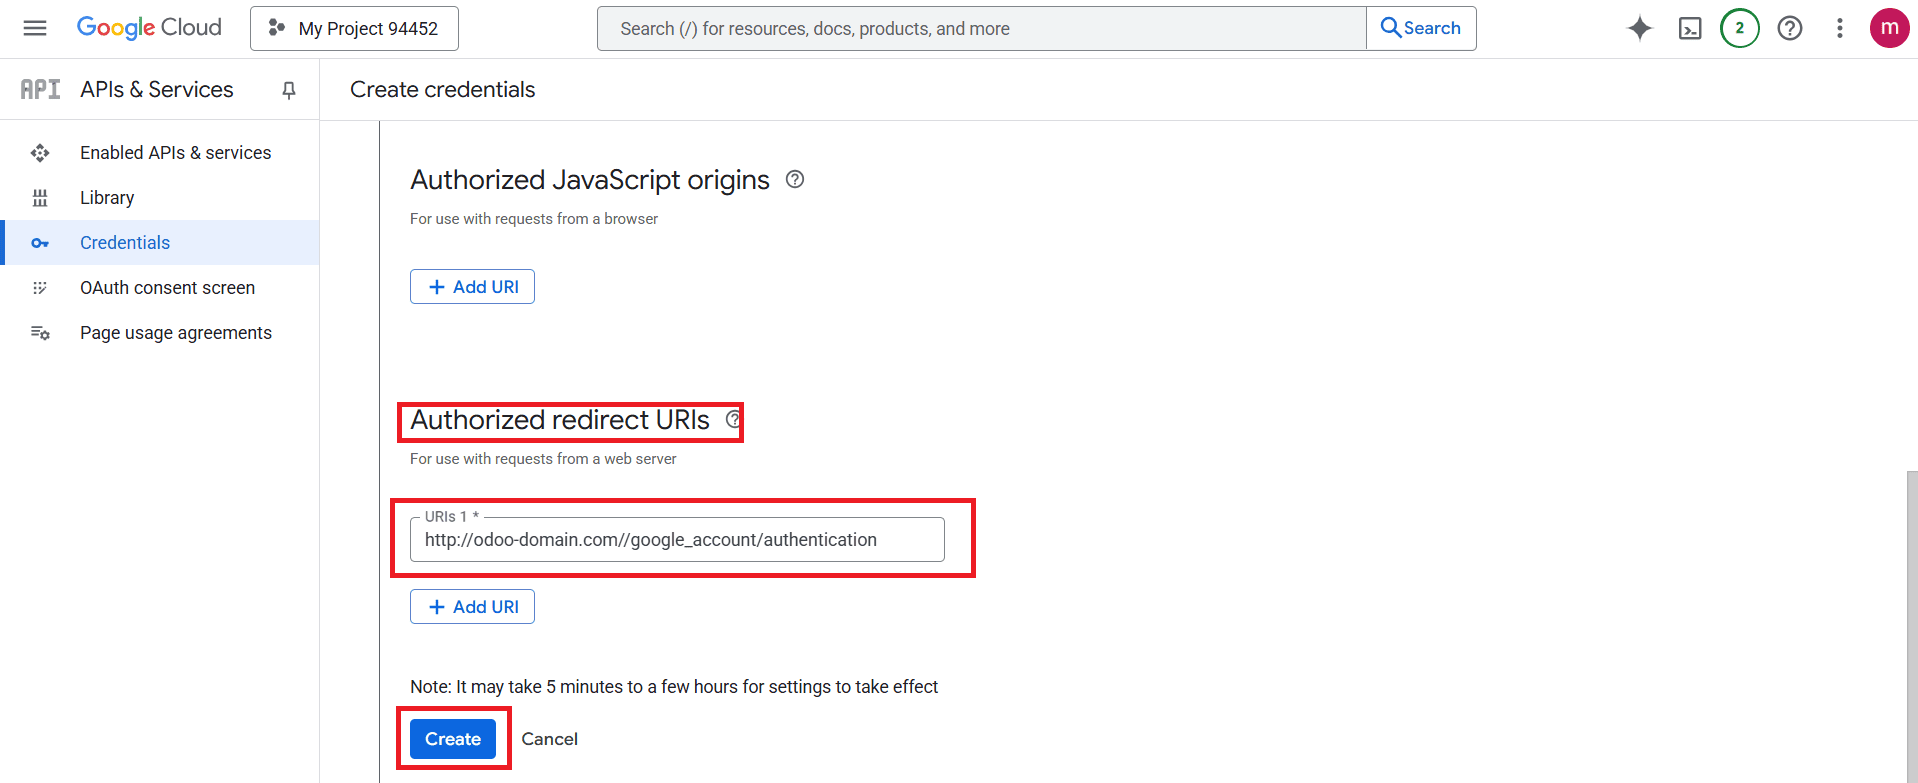
Here, add an Authorized redirect URIs, and click on the Create button as shown below:
Now, a Client ID and Client Secret appear on the right side of the screen. Download and keep it safe somewhere.

Configuration in Odoo
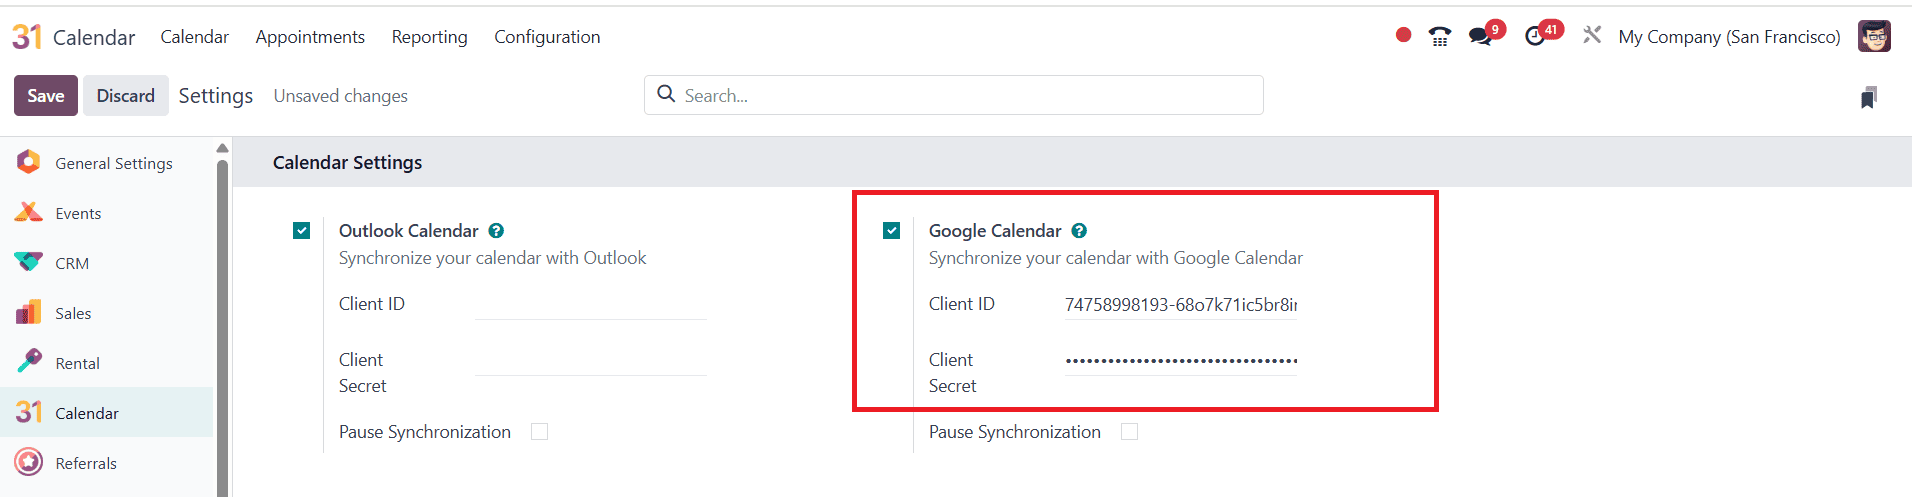
Once the Client ID and Client Secret are obtained, select the Calendar module for Odoo. In the Calendar module, navigate to Configuration > Settings. Copy the Client ID and Client Secret from the Google Calendar API and paste them into the designated fields in Odoo as shown below:
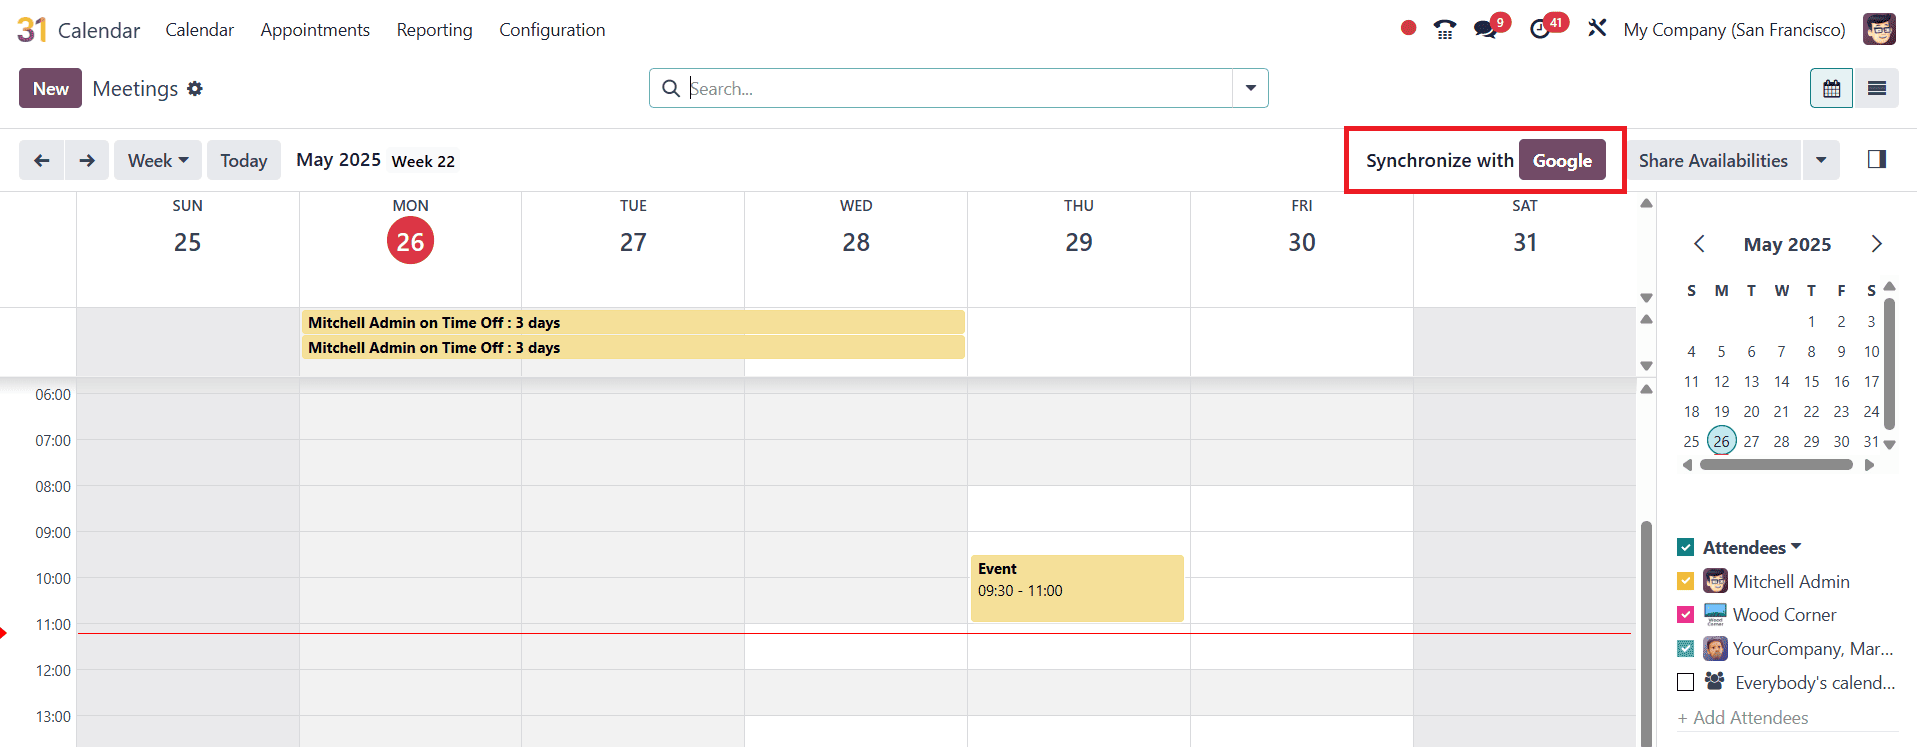
Once completed, the synchronization between Google Calendar and the Odoo Calendar module will be established.
Synchronisation with Outlook Calendar
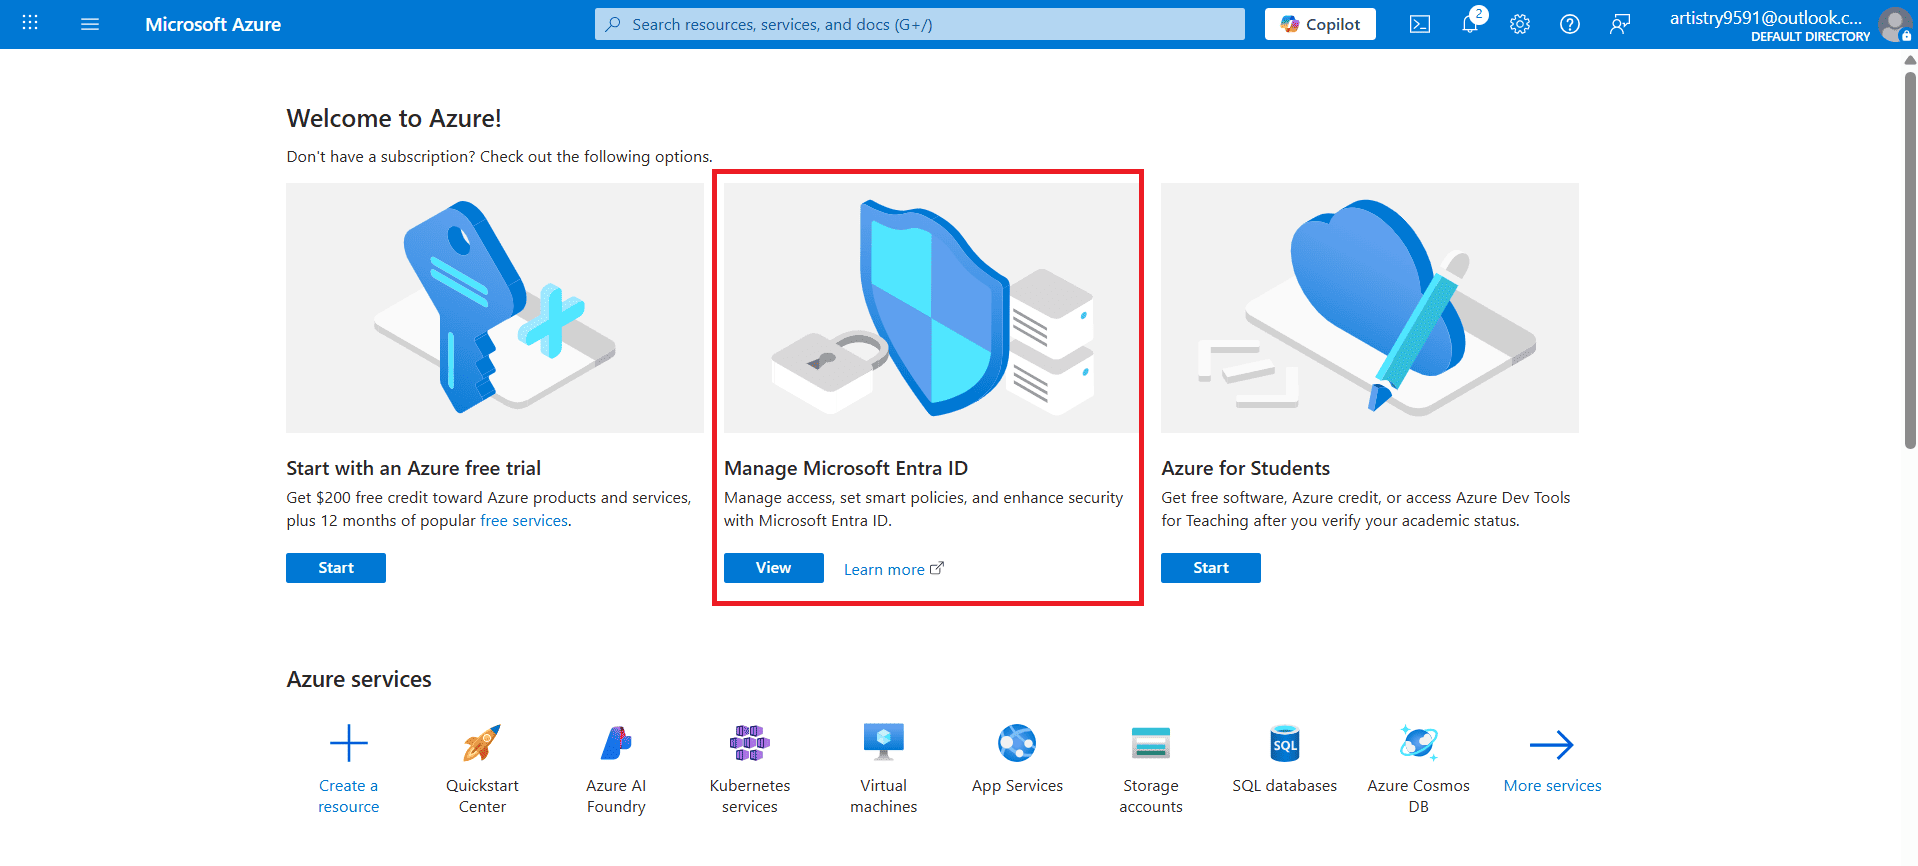
To sync Odoo Calendar with Outlook Calendar, you need an account in Microsoft Azure. Then, click on the View button under the Manage Microsoft Entra ID, as shown below:
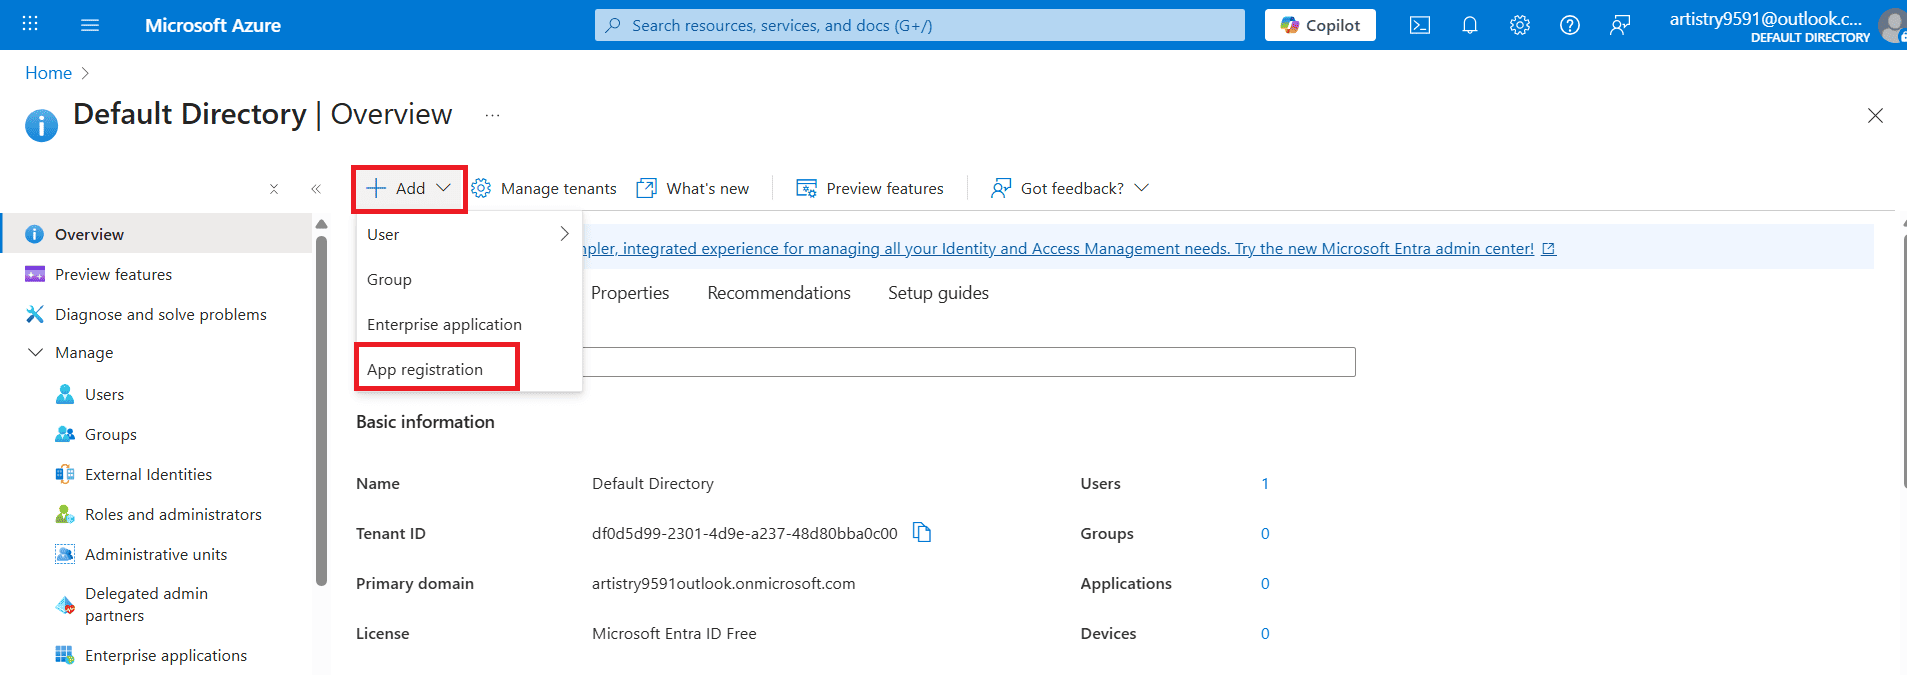
Register Application
To register an application in Microsoft Azure, click on the +Add and select App registration as shown below:
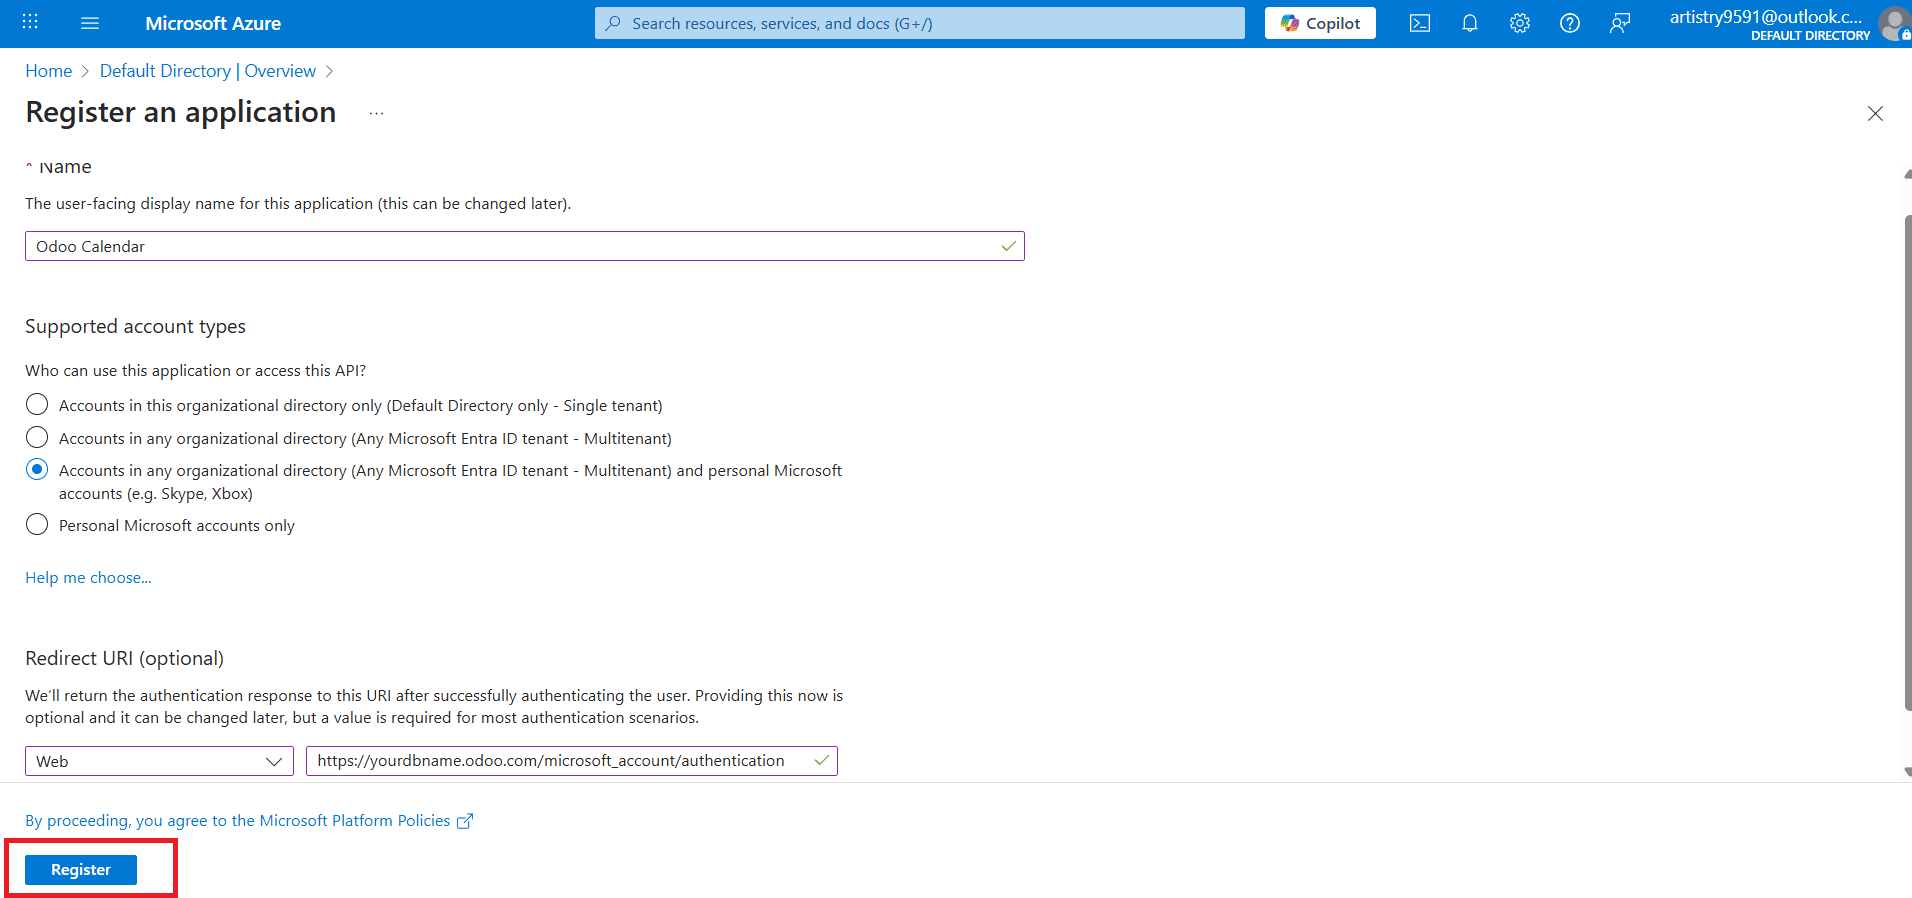
Under the Name option, add Odoo Calendar as the name for your application. Within the Supported account types, choose Accounts in any organizational directory (Any Microsoft Entra ID directory - Multitenant) and personal Microsoft to integrate Outlook Calendar with Odoo. Next, navigate to the Redirect URI section and choose Web as the platform. Then, add the Odoo database URL
https://yourdbname.odoo.com/microsoft_account/authentication. Next, click the Register button to complete the application registration as shown below:
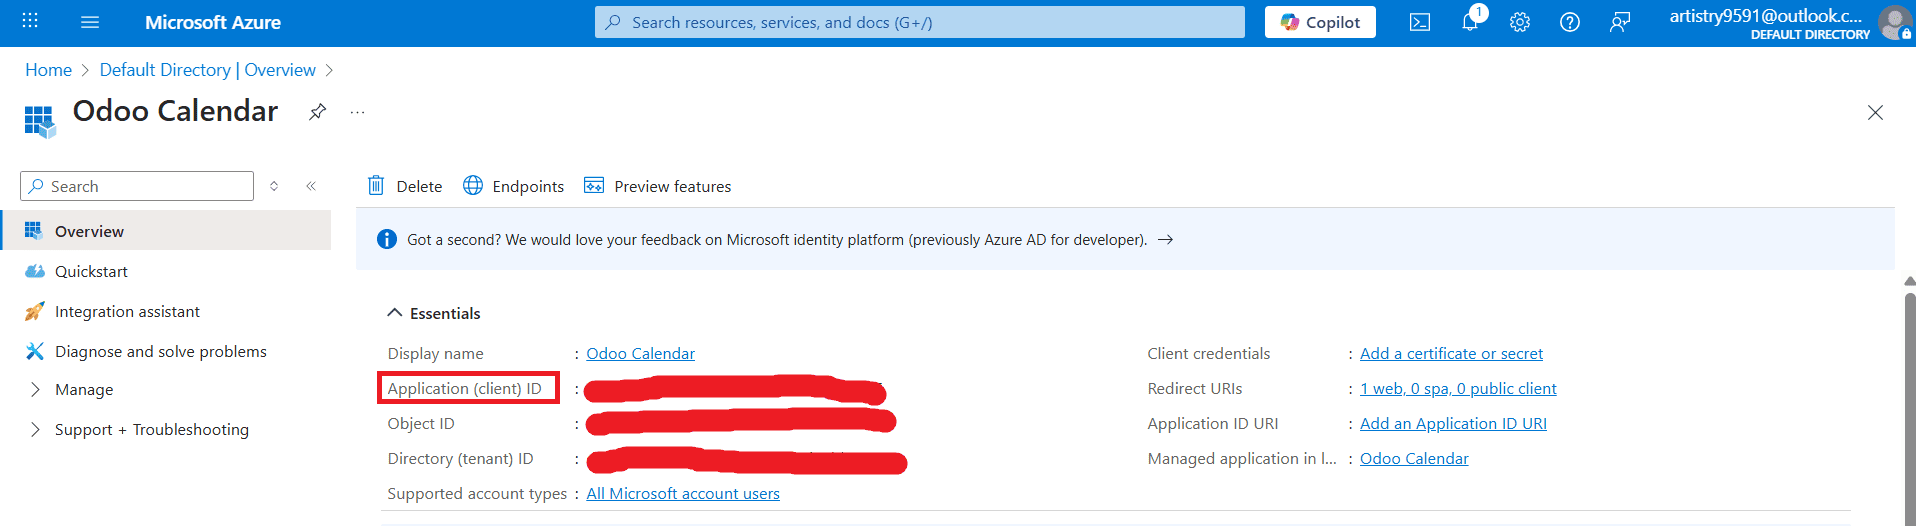
At this stage, the Application (client) ID will be generated. You can copy the value for further use.
Create Client Secret
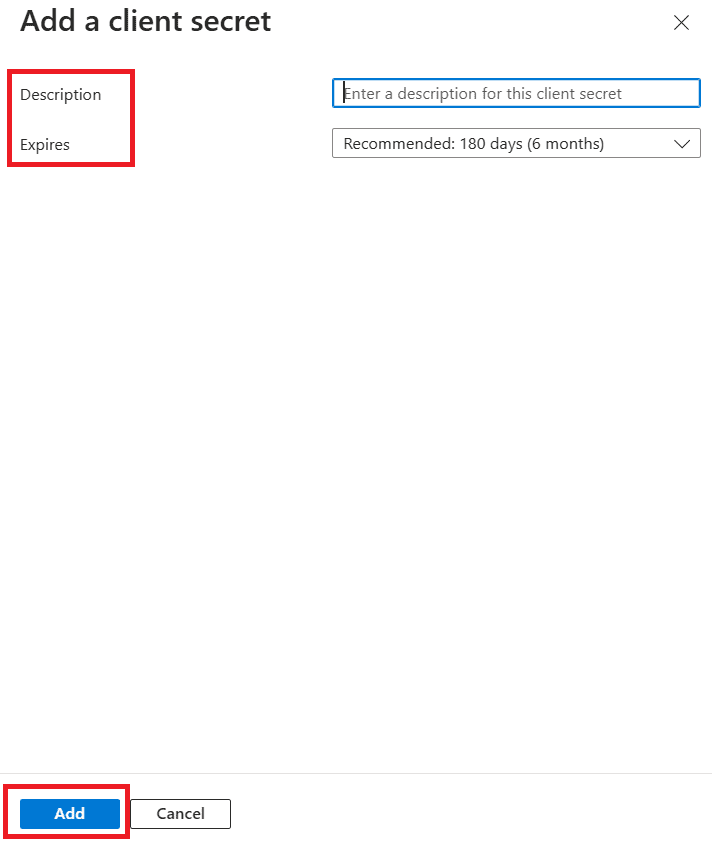
To create a new client secret, select Certificates & secrets. Go to the Client secrets and click on +New client secret to generate a new one.

Here, you can add a Description and Expires for the Client Secret and click on the Add button as shown below:
Here, you can see the newly created Client Secret. Under the Value option, copy the value for further use.

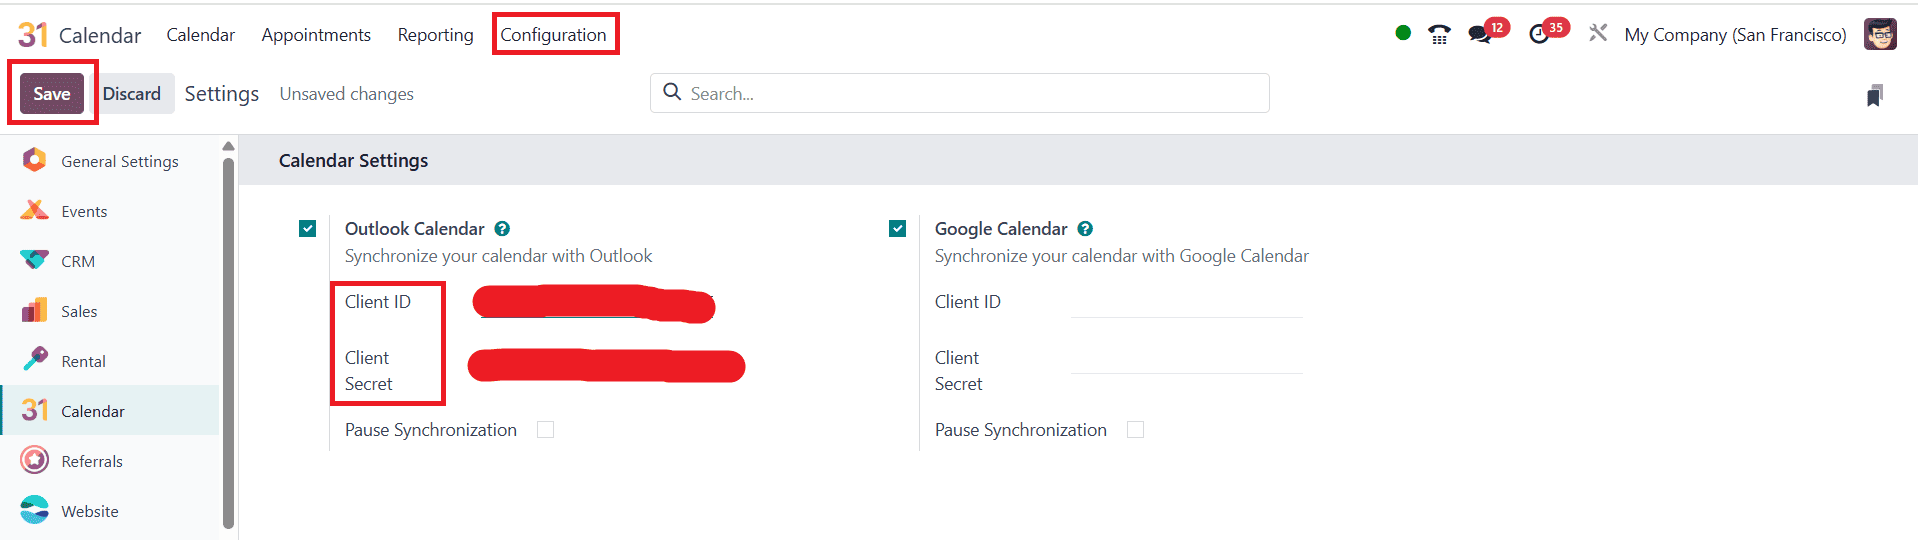
Configuration in Odoo
To configure Outlook Calendar in Odoo, select the Calendar module from the Odoo 18 dashboard and go to Configuration >Settings. From the Microsoft Azure Portal, copy the Application (Client) ID and Value (Client secret value), paste them into Odoo’s Client ID and Client Secret fields, and then click the Save button.
And finally, you can sync Outlook Calendar with Odoo by clicking Synchronize with Outlook, as shown below:
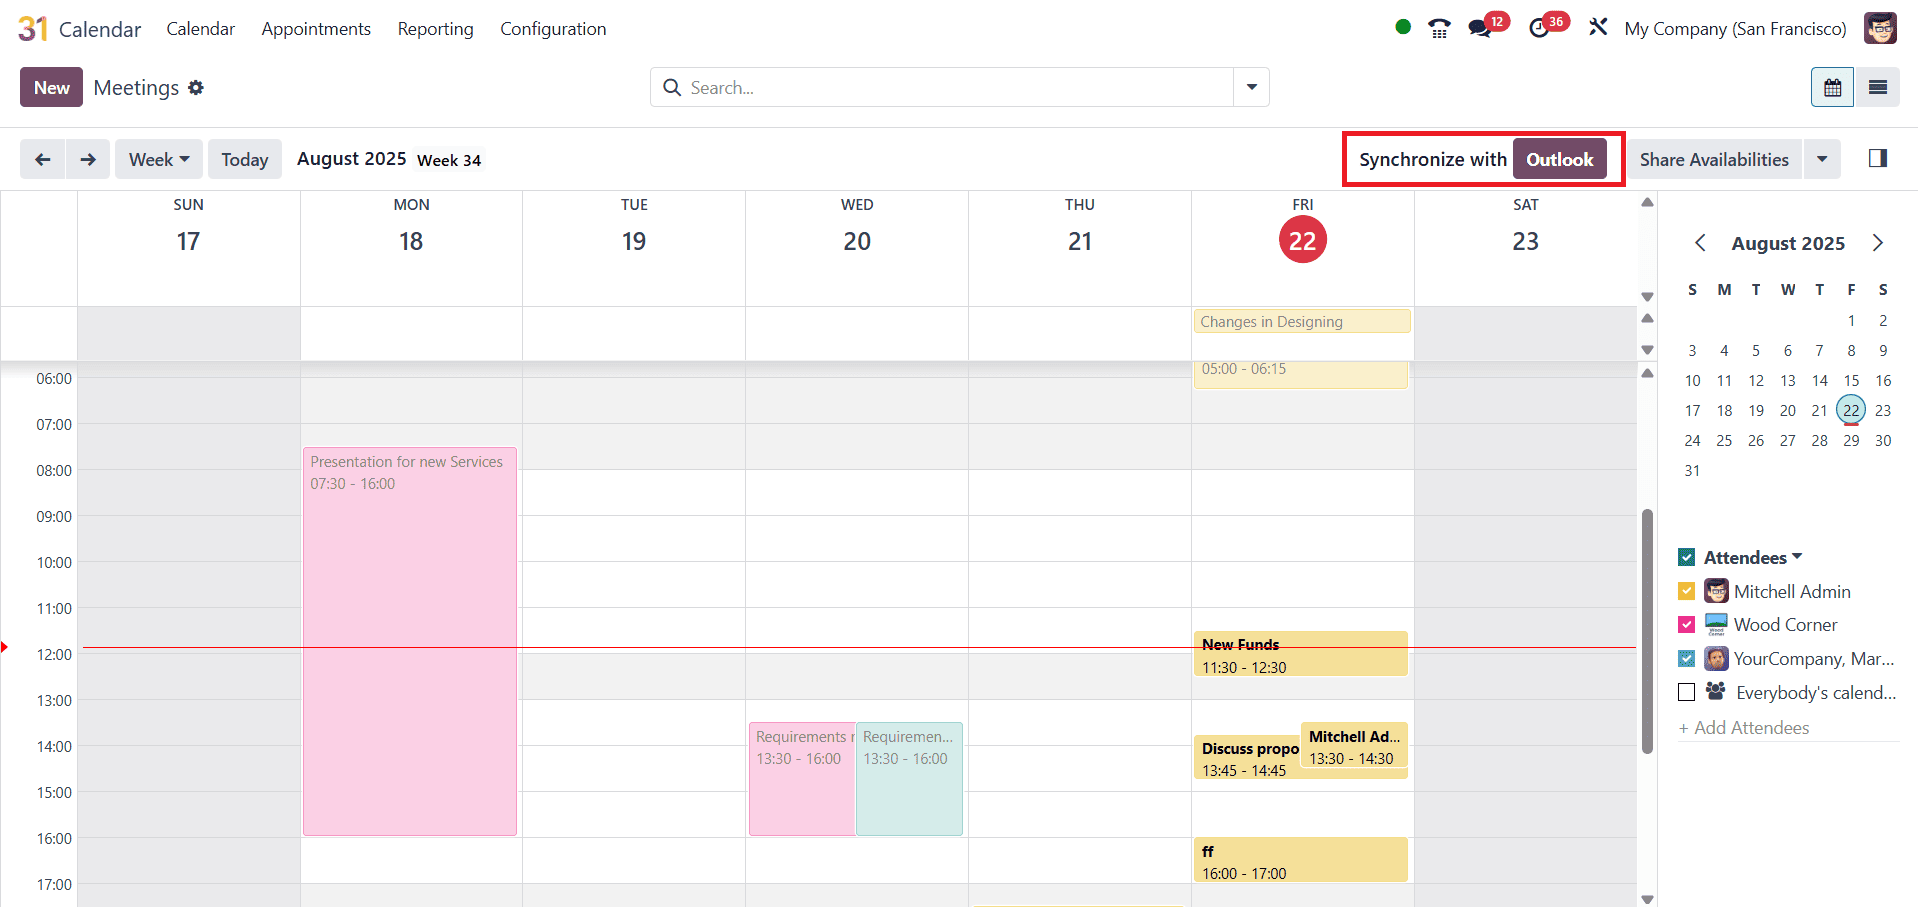
All of your meetings and schedules will synchronize seamlessly and in real-time with the help of Odoo 18’s integration with Google and Outlook calendars. It decreases the possibility of scheduling conflicts and reduces the need for manual entries by updating automatically across platforms. This seamless sync ensures everyone is on precise schedules, enhances teamwork, and keeps the team organized. Businesses may depend on this tool for effective time management, whether they are handling internal meetings, client appointments, or project deadlines. Odoo 18 calendar integration improves productivity, streamlines processes, and saves time, making it a vital tool for contemporary businesses.
To read more about Overview of Odoo 18 Calendar Module, refer to our blog Overview of Odoo 18 Calendar Module