In many service-based businesses, it is common for clients to pay in stages rather than settling the full amount at the beginning of a project. This approach, known as milestone-based billing, allows businesses to receive payments as different phases of the project are completed. It not only improves cash flow but also builds trust with customers, as payments are directly linked to measurable progress. With Odoo 19, managing milestone-based billing becomes straightforward, as the system allows you to define milestones, track their completion, and generate invoices accordingly.
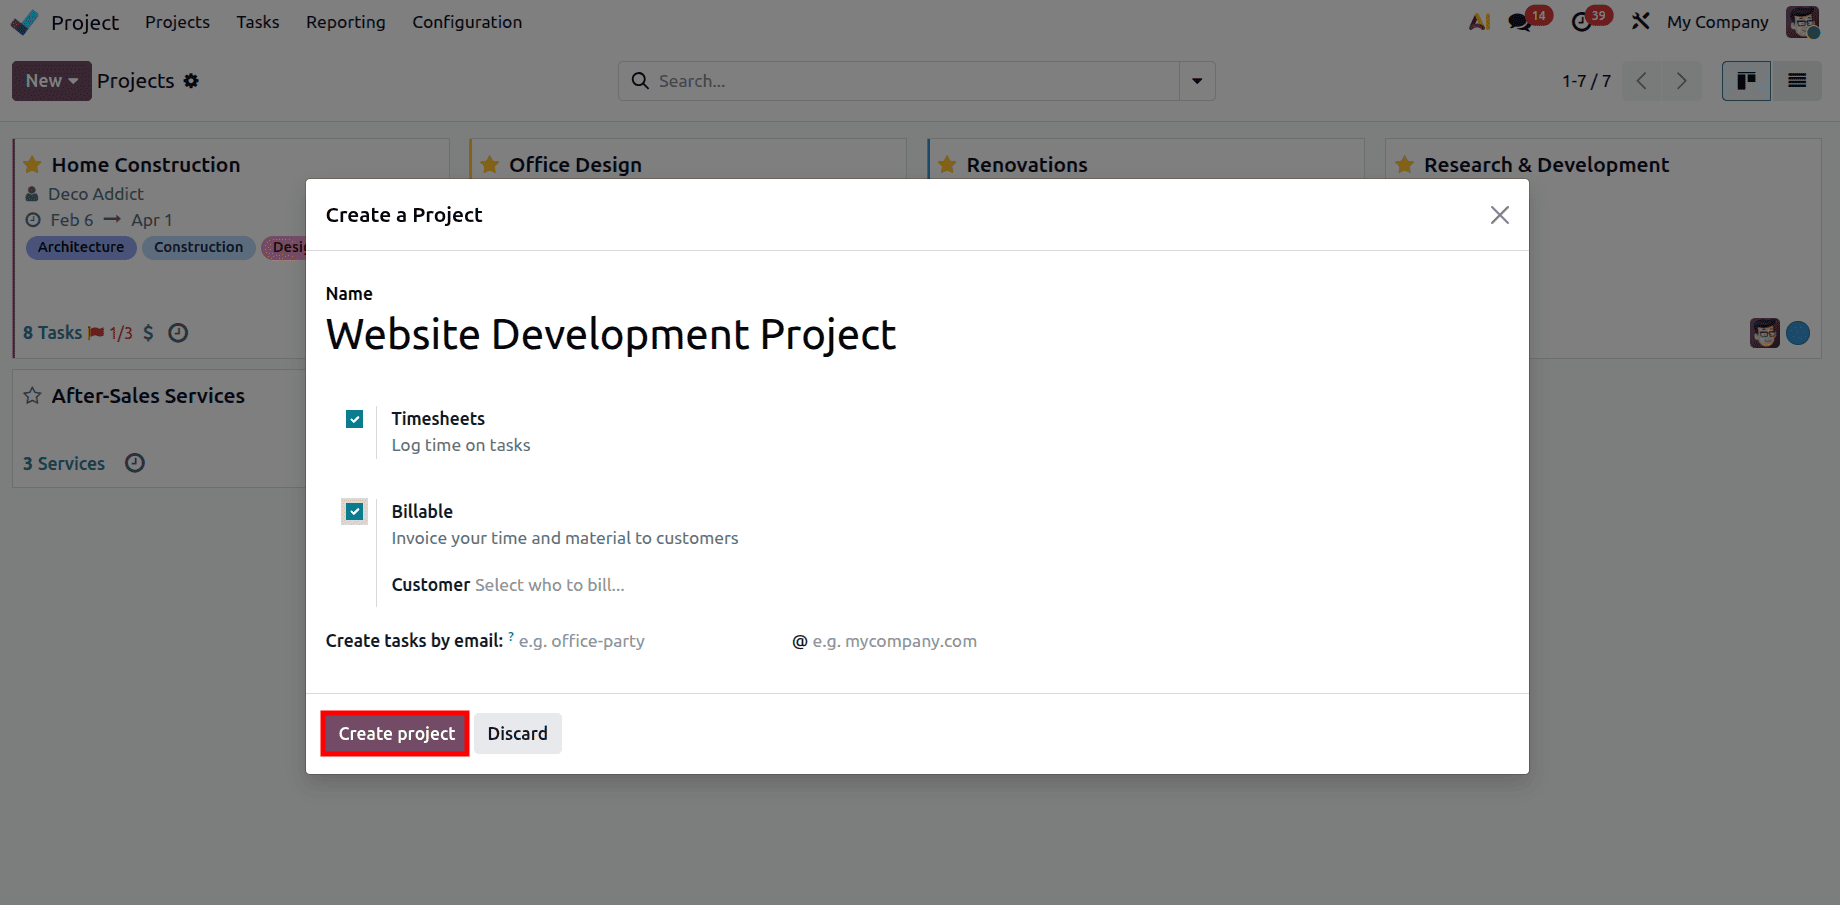
To use milestone-based billing in Odoo 19, the project must first be configured properly. Open an existing project or select New option to start a new one by heading to the Project dashboard. While creating the project, enable the Billable option so that invoicing can be performed for the project.
After configuring the required options, click on Create Project to save the project and add required task stages to the project.If required, the project can also be created using project templates, allowing predefined stages, tasks, and configurations to be reused instead of setting everything up manually each time.
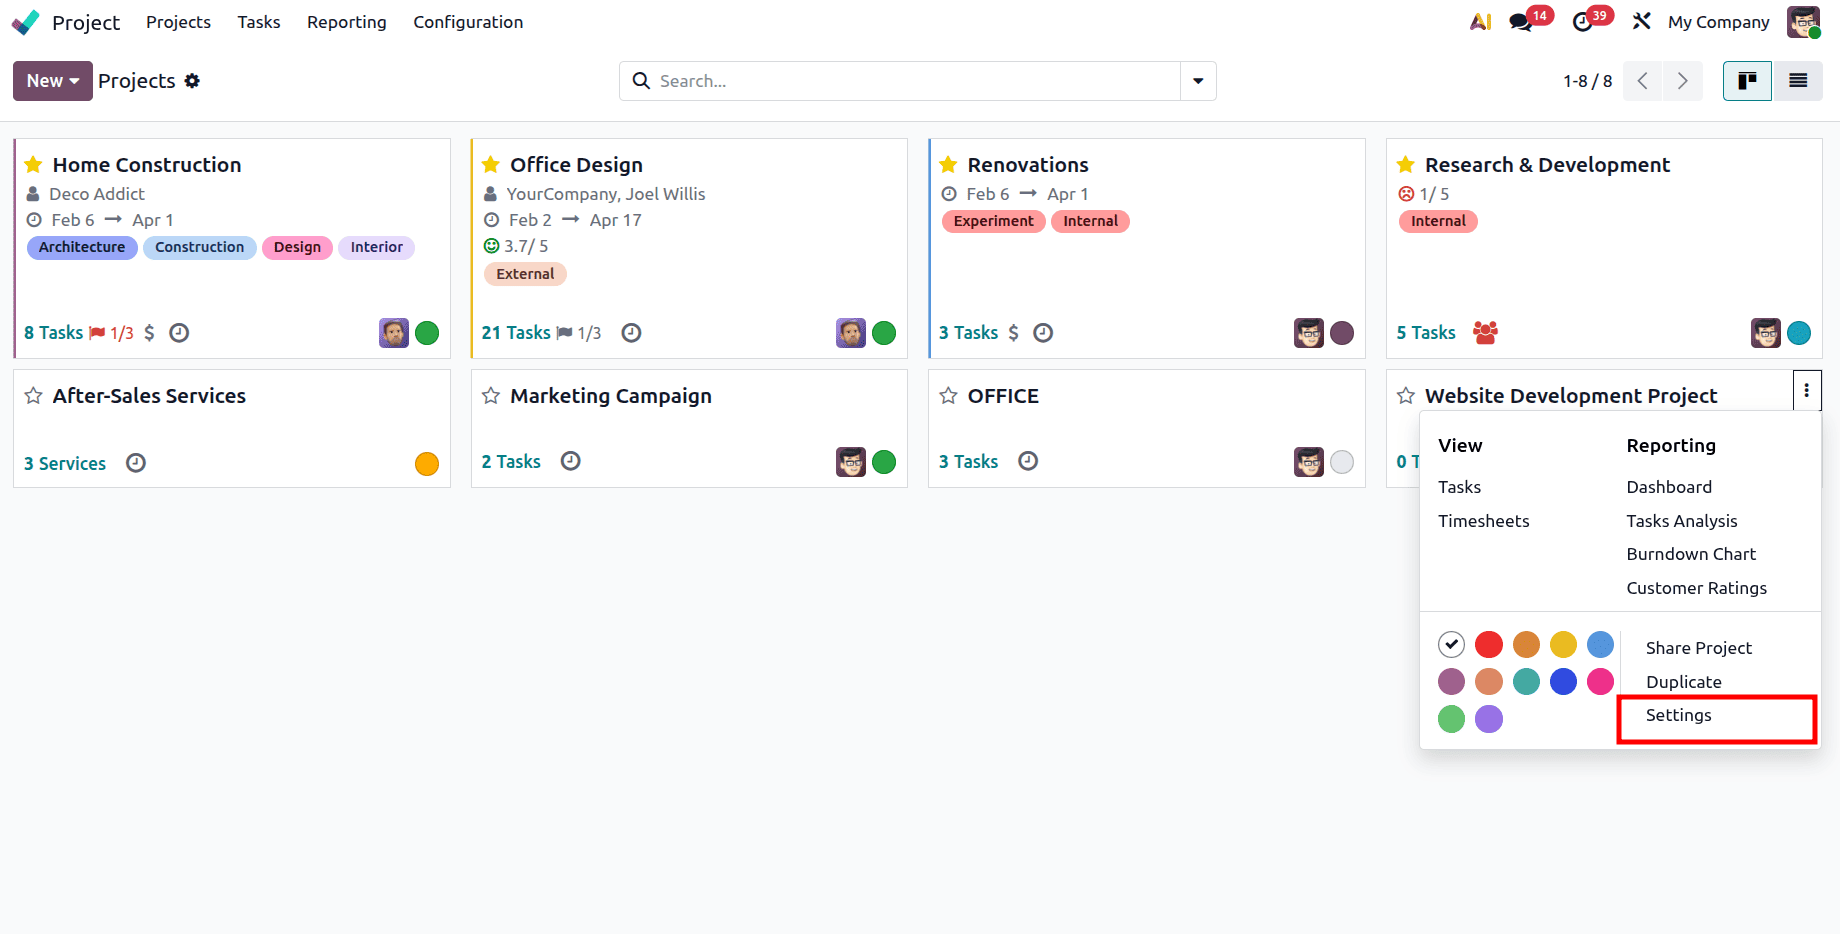
Then enable the Milestones option from the project settings, which allows milestones to be added and tracked within that specific project. For that, go to the settings of the project.
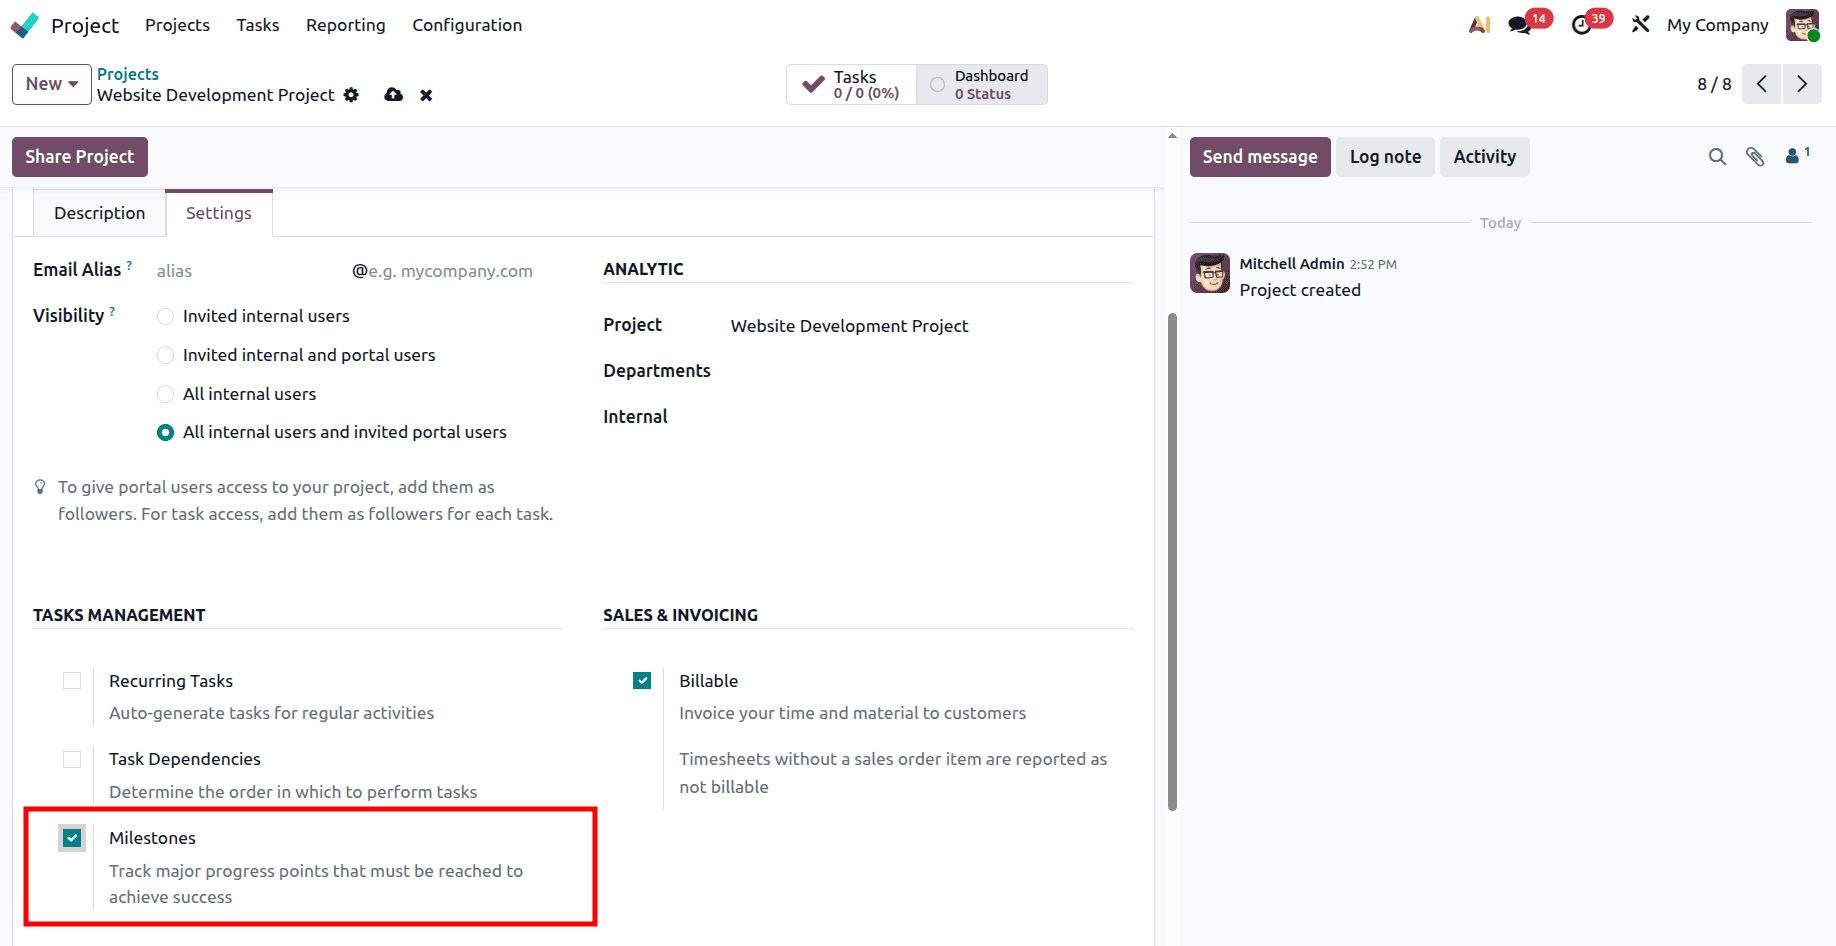
And enable the Milestones option from the settings.
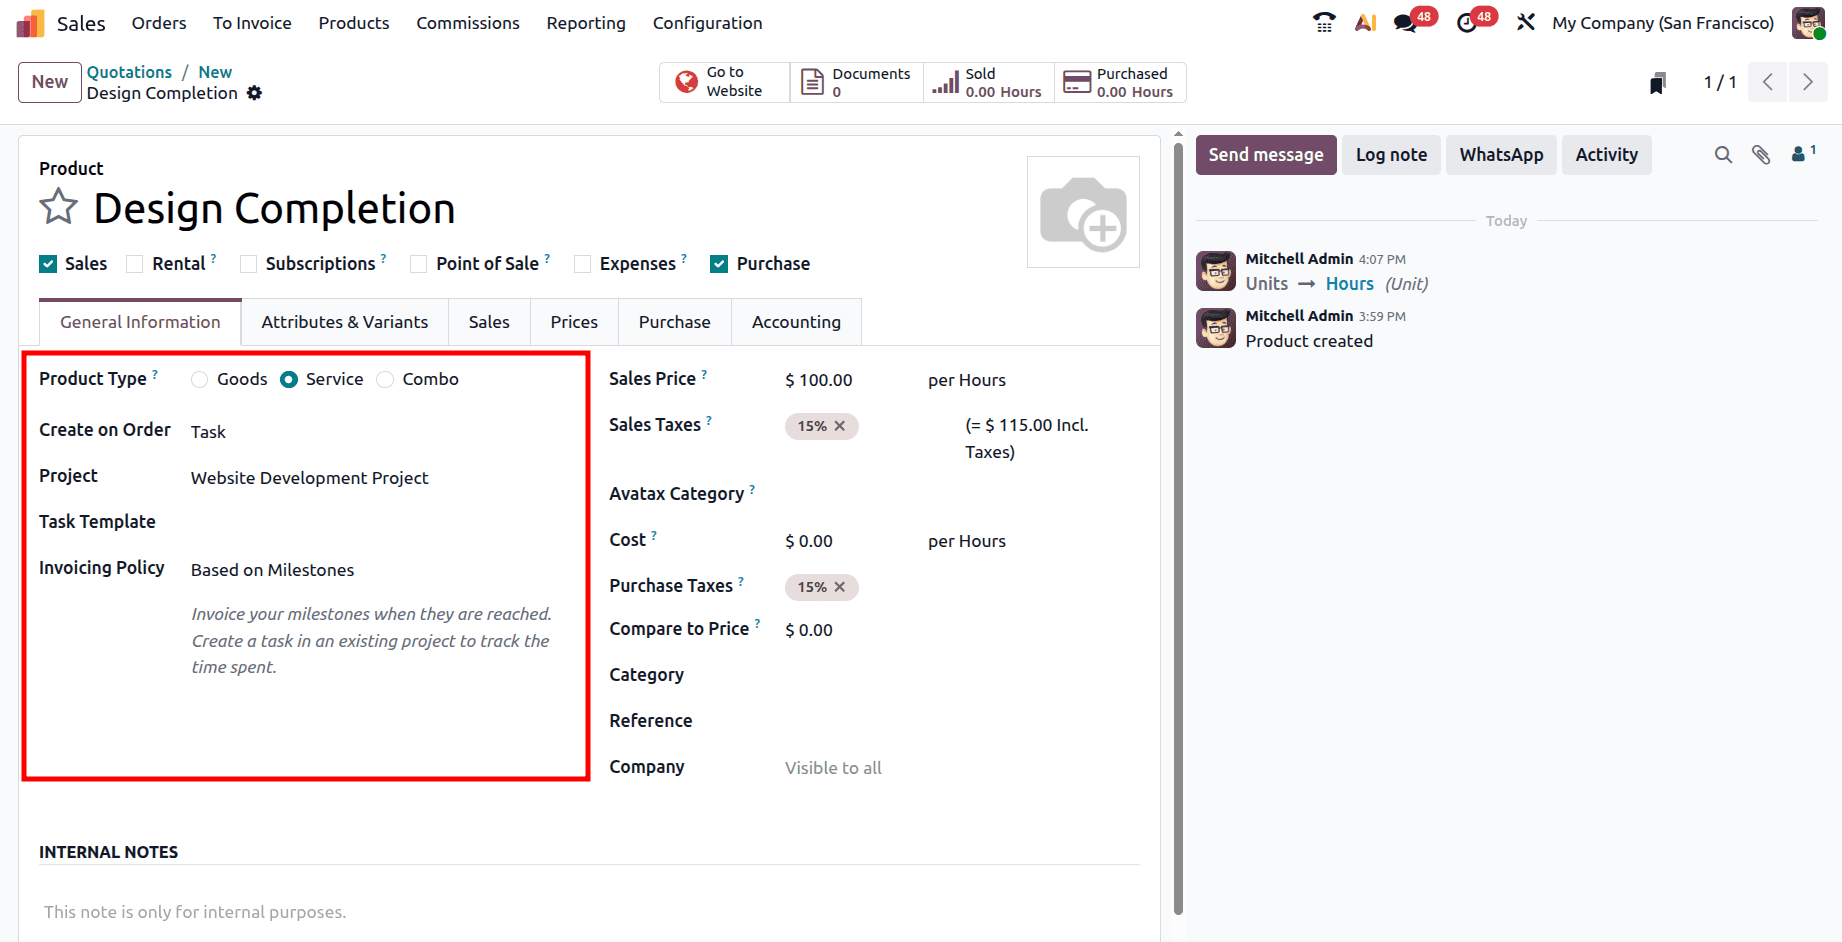
Once the project is ready, the next step is to create a service product that will be used in the sales process. To create a new product, go to the Sales module and choose the Products option from the Products menu and select the New button. Then, select the "Service" option as the product type and "Create on Order" as the task in the product form.
When this option is selected, a new field appears where you can choose the project. Select the project you created so that tasks will be automatically generated under that project when a sales order is confirmed. It is important to set the Invoicing Policy to Based on Milestones, as this ensures that invoices are generated only when milestones are achieved.
With the product configured, you can proceed to create a sales order. Go to Orders > Quotations and click on the New button. Enter the customer details and fill in the required information, then add the service product that was created earlier.
Because the Create on Order option was set to Task, Odoo automatically creates a task under the project selected in the product configuration after the quotation is confirmed. After confirming the order, you will notice the appearance of smart tabs such as Project, Task, and Milestones, which help you quickly navigate between related records.
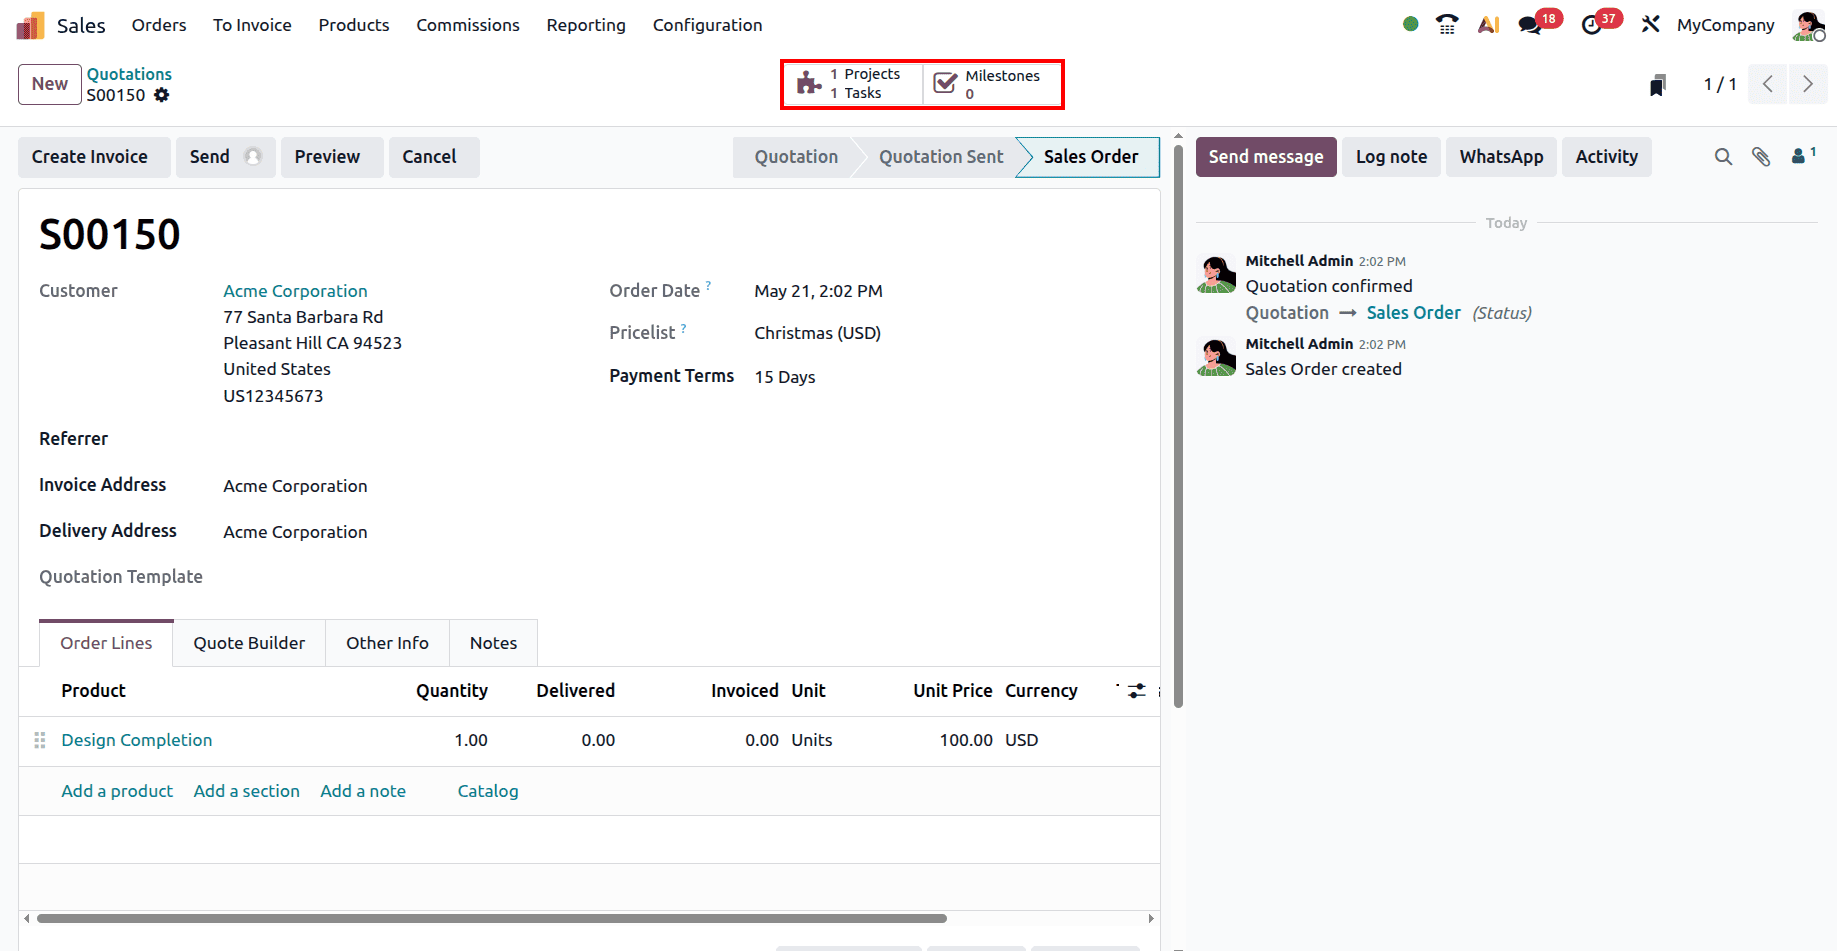
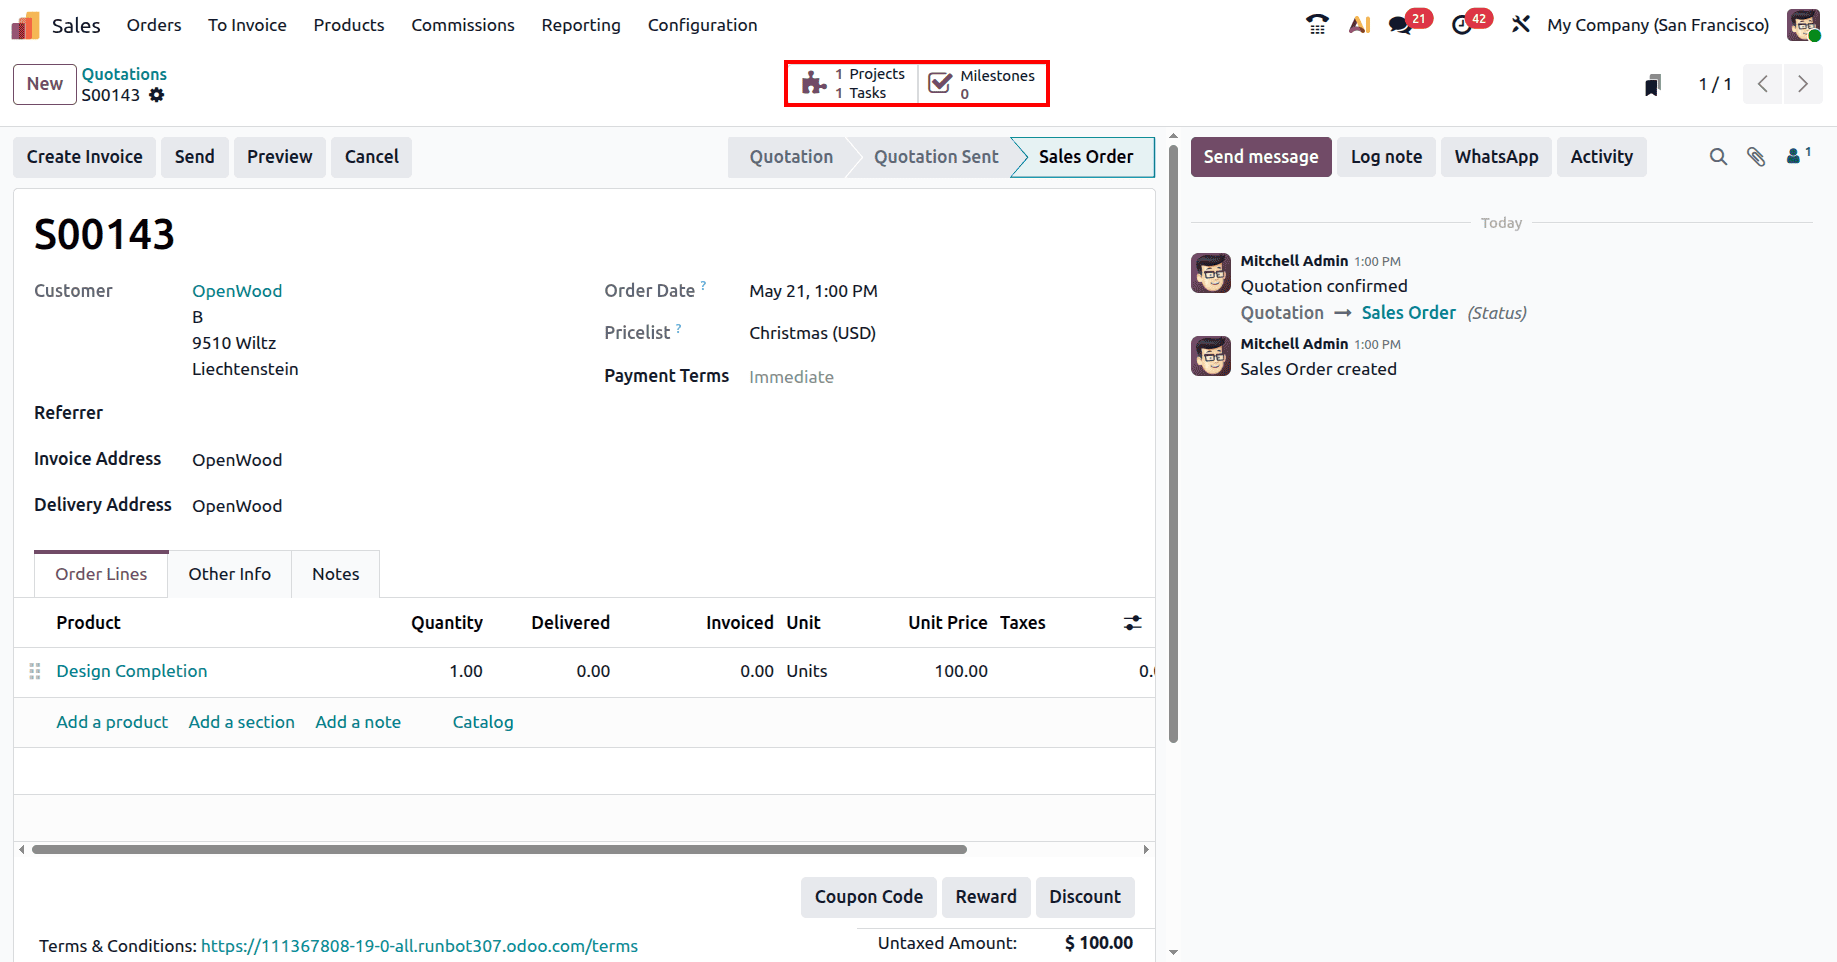
To define milestones for the project, click on the Milestones smart tab. Clicking the New button will bring you to a new page where you can add multiple milestones. For each milestone, you can enter details such as the name and deadline. There is also an option to mark whether a milestone has been achieved using the checkbox provided.
One of the key fields here is Quantity (%), which represents the portion of the total project that can be billed when that milestone is completed. For example, if you create two milestones and assign 50% to each, then completing one milestone allows you to invoice half of the total project value. Here, you can see two sample milestones as shown in the screenshots provided below.
Milestone-1
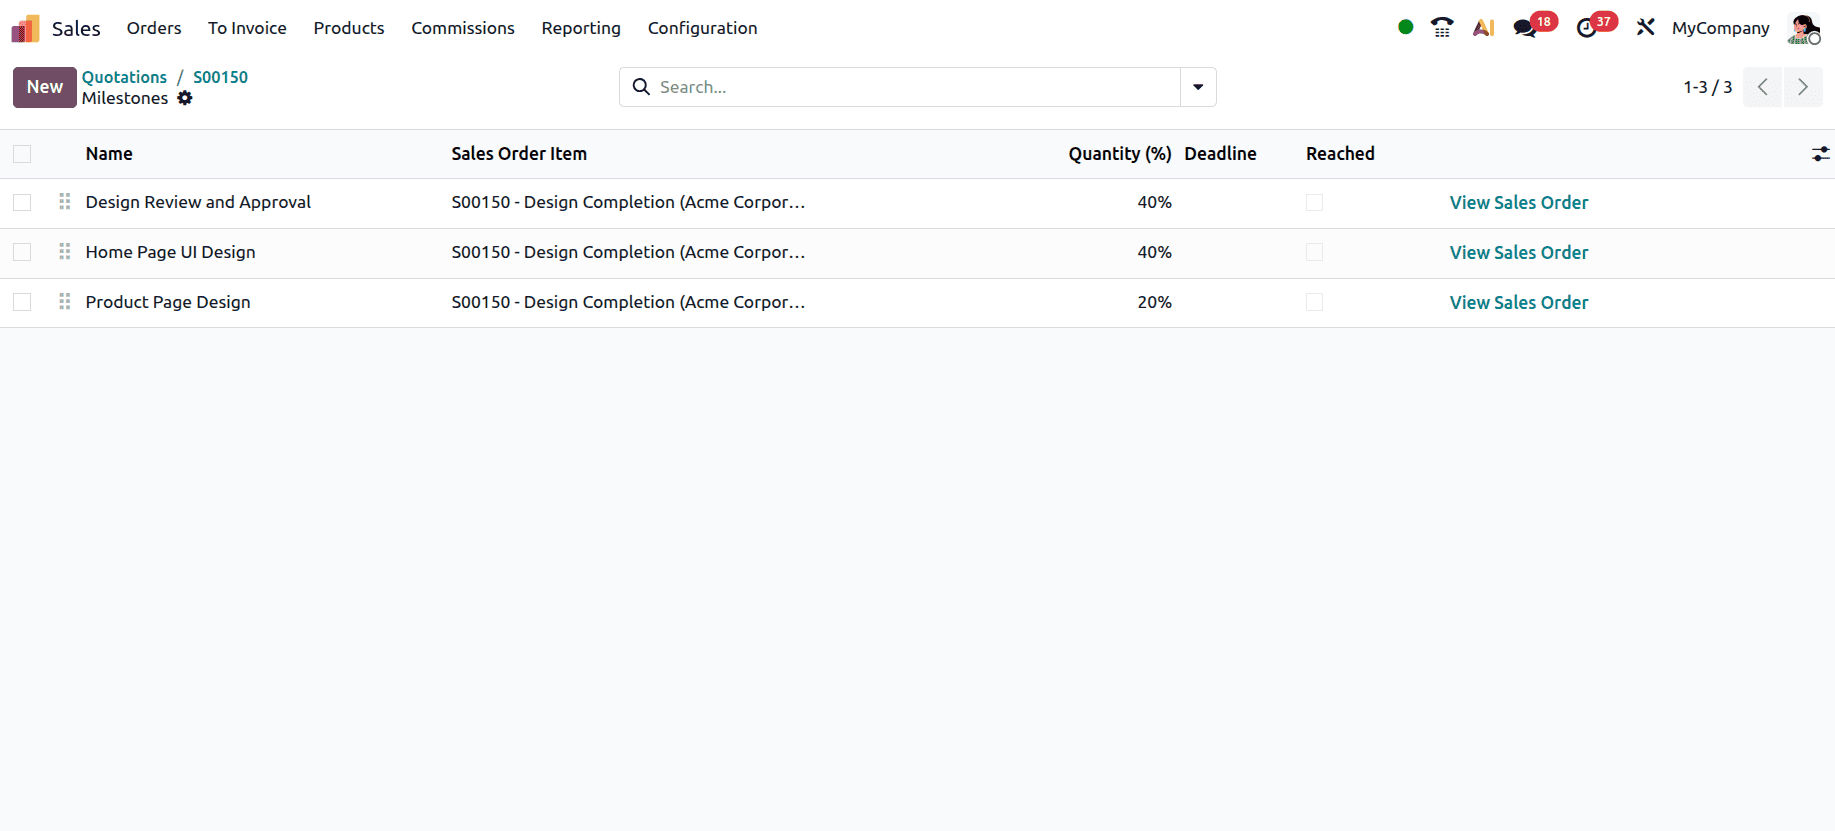
Milestone-2
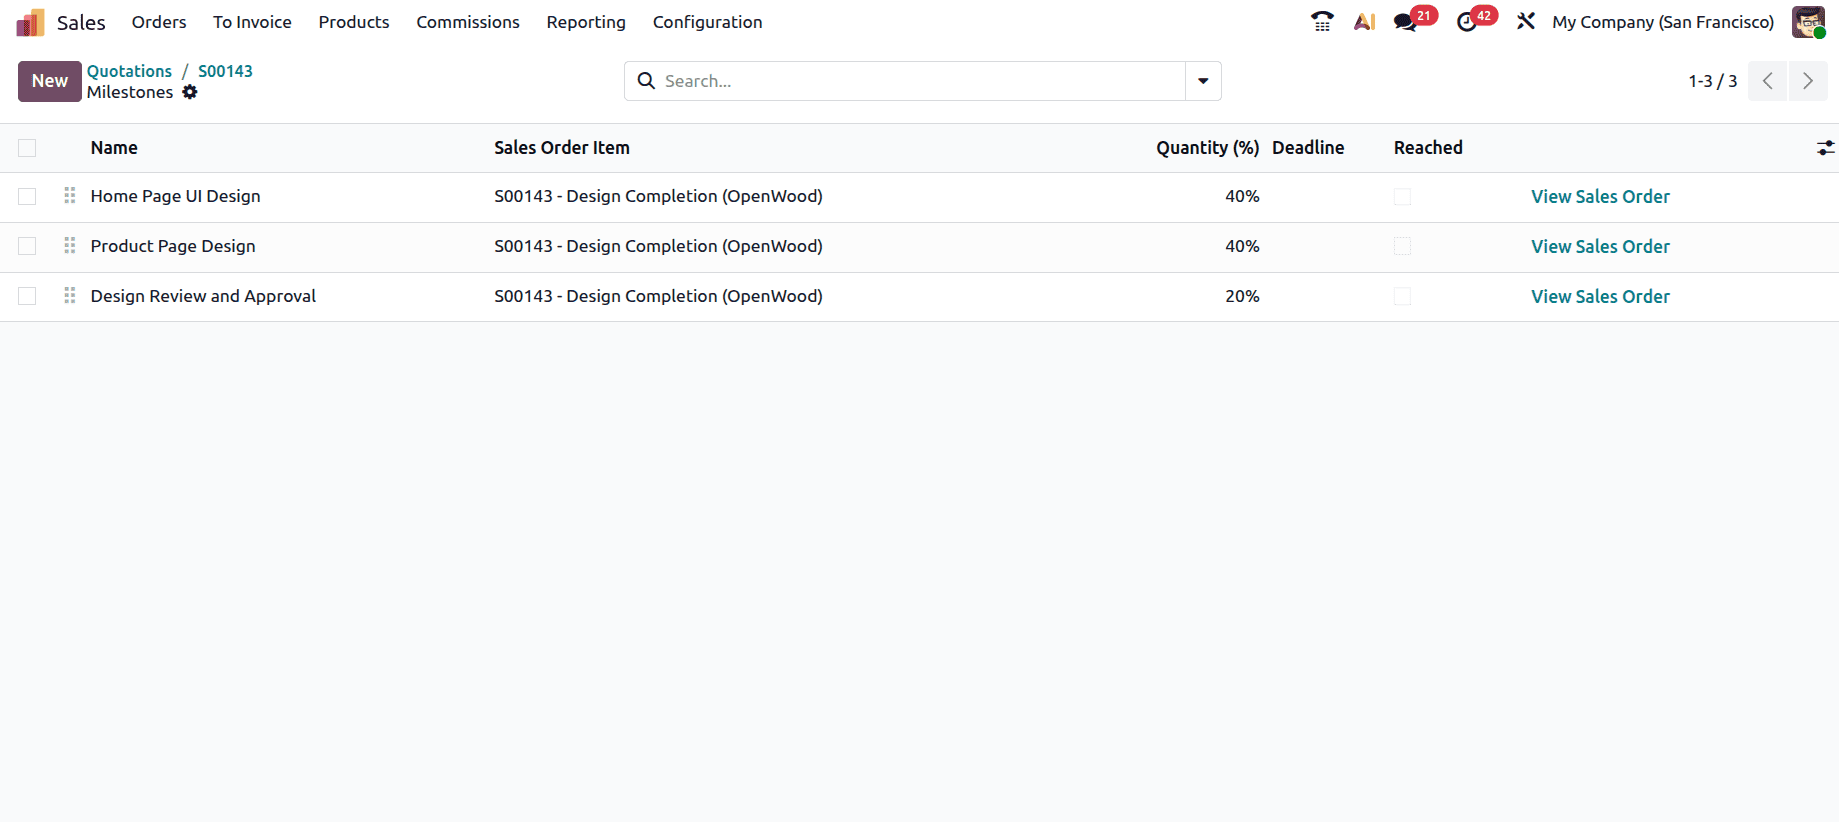
Once the milestones have been established, you can return to the sales order and select the Task smart tab to get the task's detailed view. The Customer field is automatically populated based on the sales order, ensuring that all records remain properly connected.
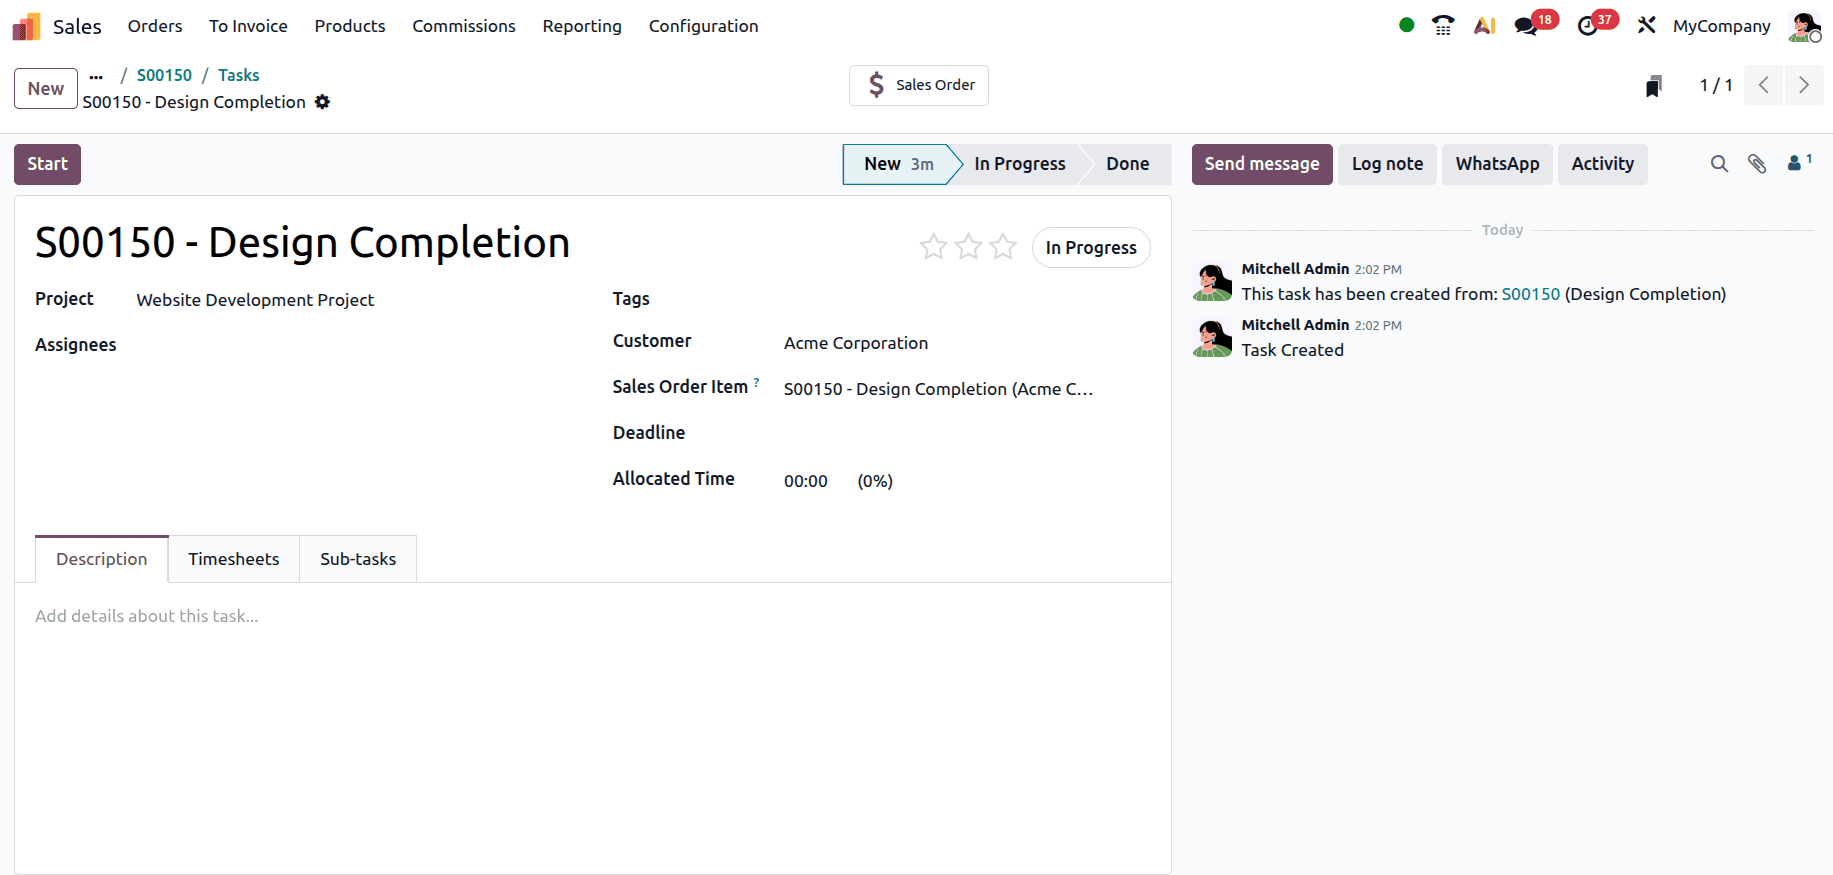
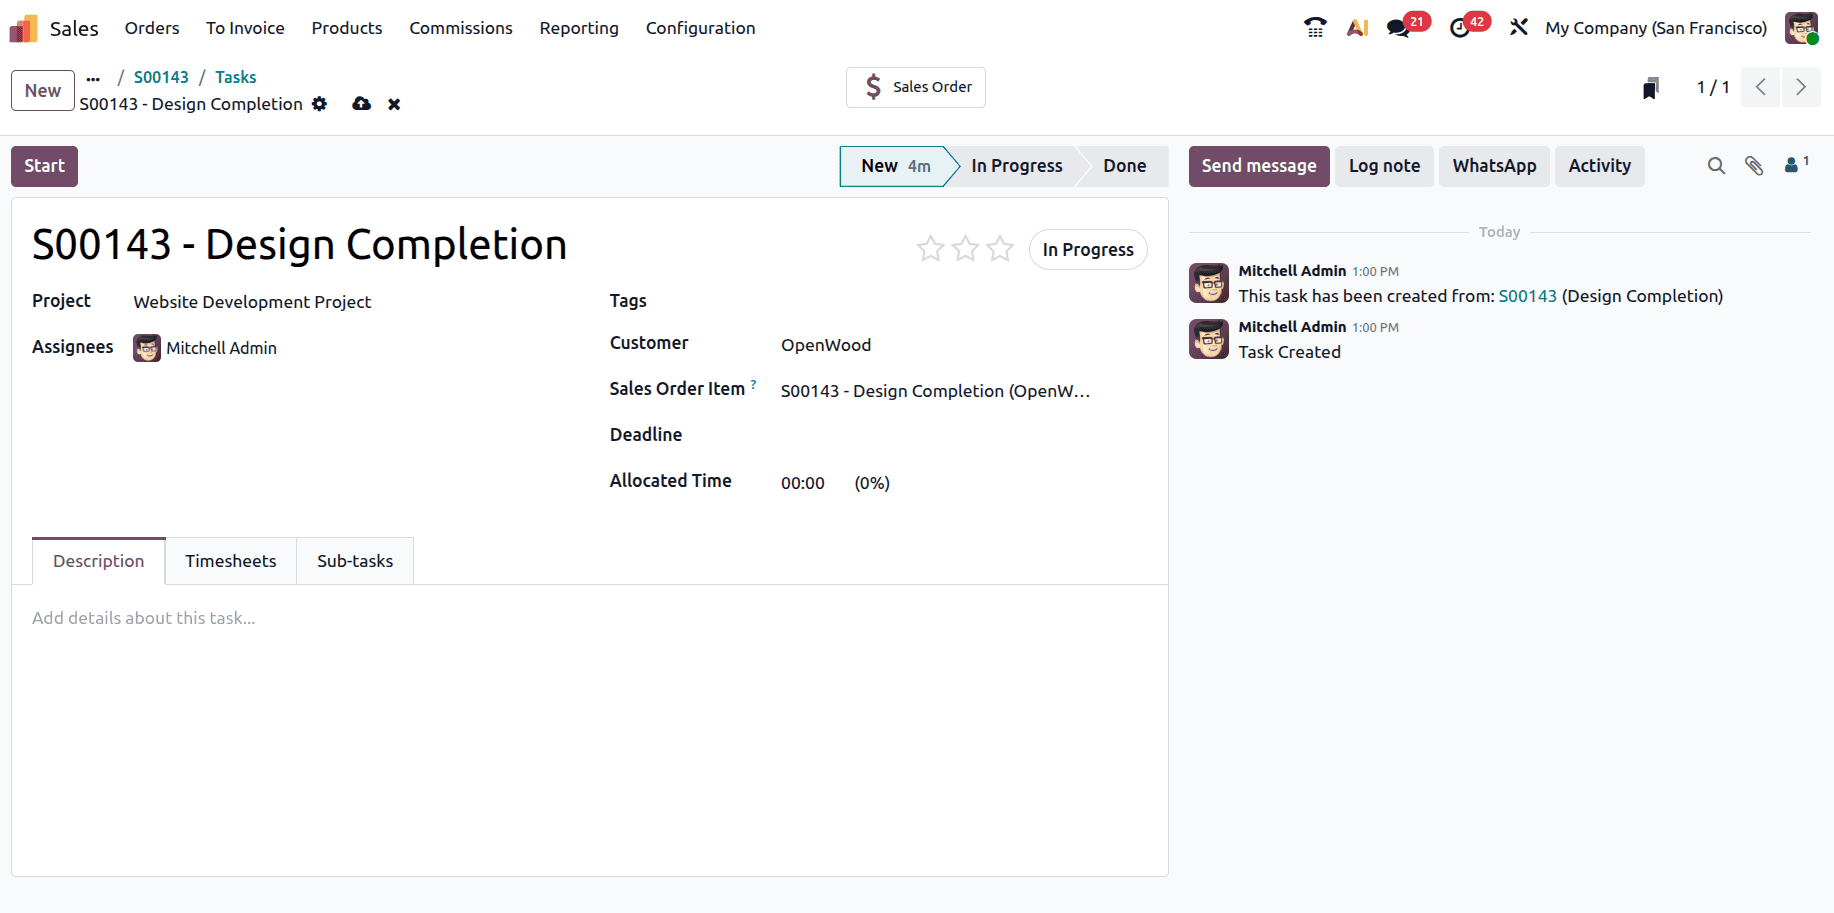
As the project progresses and work is completed, the corresponding milestone can be marked as achieved. To do this, go back to the sales order, open the Milestones smart tab, and select the checkbox for the milestone that has been completed, then click on the Save button.
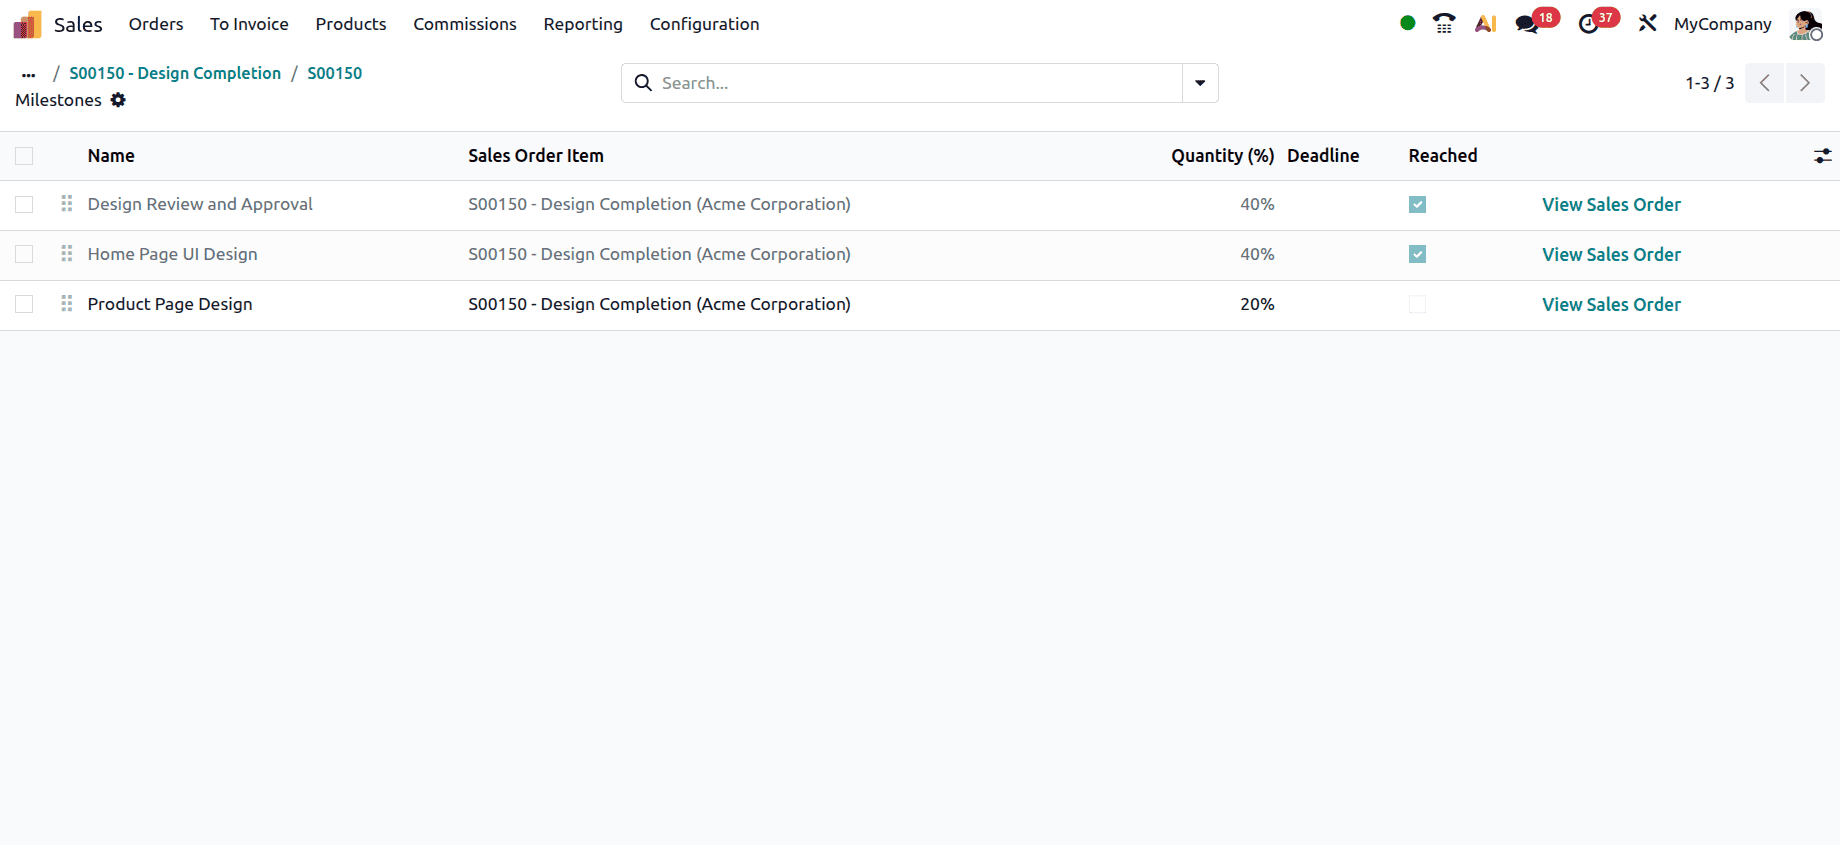
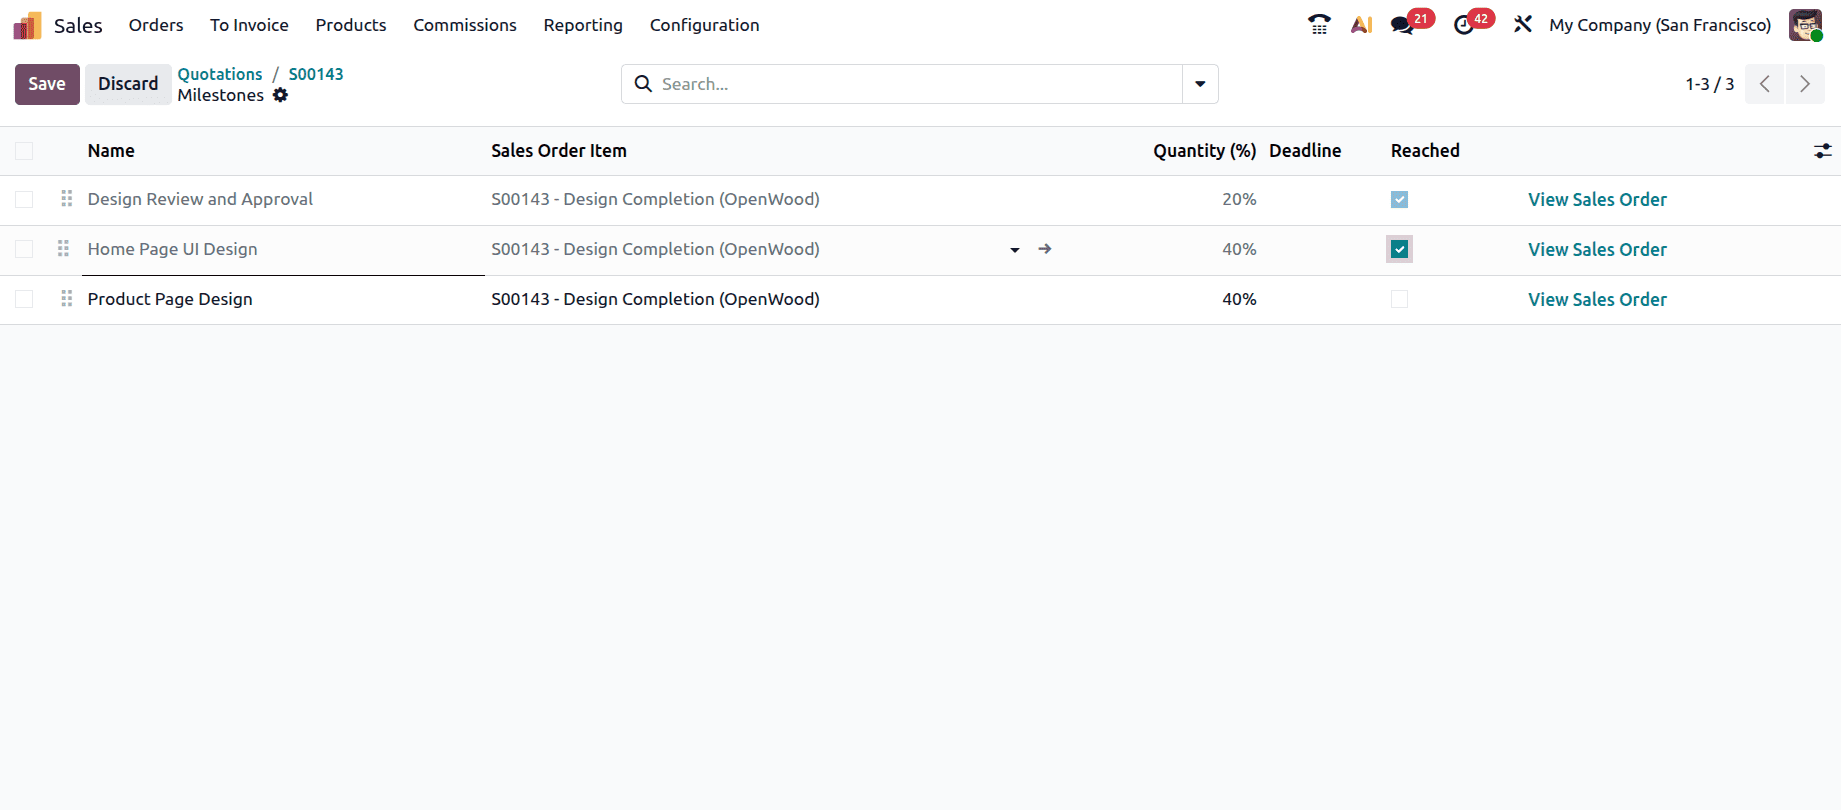
Once a milestone is marked as achieved, Odoo updates the delivered quantity in the sales order based on the Quantity (%) defined for that milestone. For instance, if a milestone is set to 50%, then achieving it will reflect 0.5 as the delivered quantity, indicating that half of the project is now ready to be invoiced.
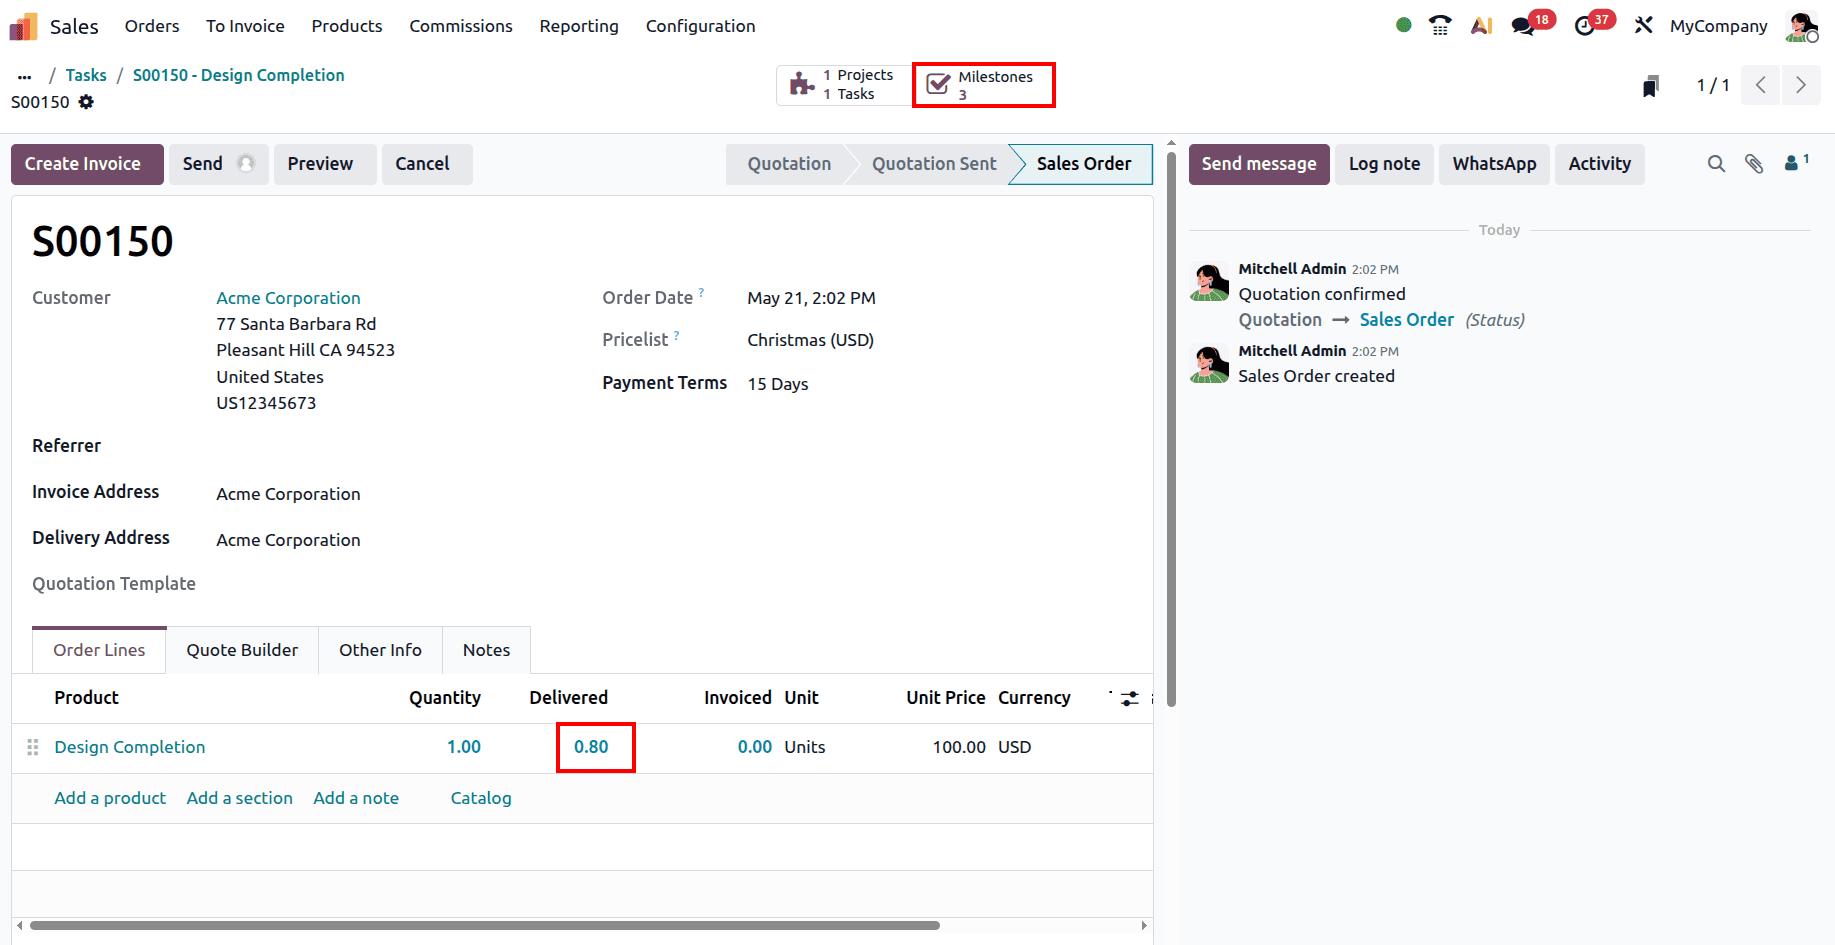
After marking the milestone as achieved, you can proceed to generate the invoice. Click on the "Create Invoice" button from the sales order. Options like Regular Invoice, Down Payment (%), and Down Payment (fixed amount) will be shown to you. Finally, click on the Create Draft option after selecting the necessary option. Odoo will then generate a draft invoice based on the delivered quantity, which corresponds to the completed milestone. After reviewing the invoice details, click on Confirm to finalize it, and then you can proceed to register the payment.
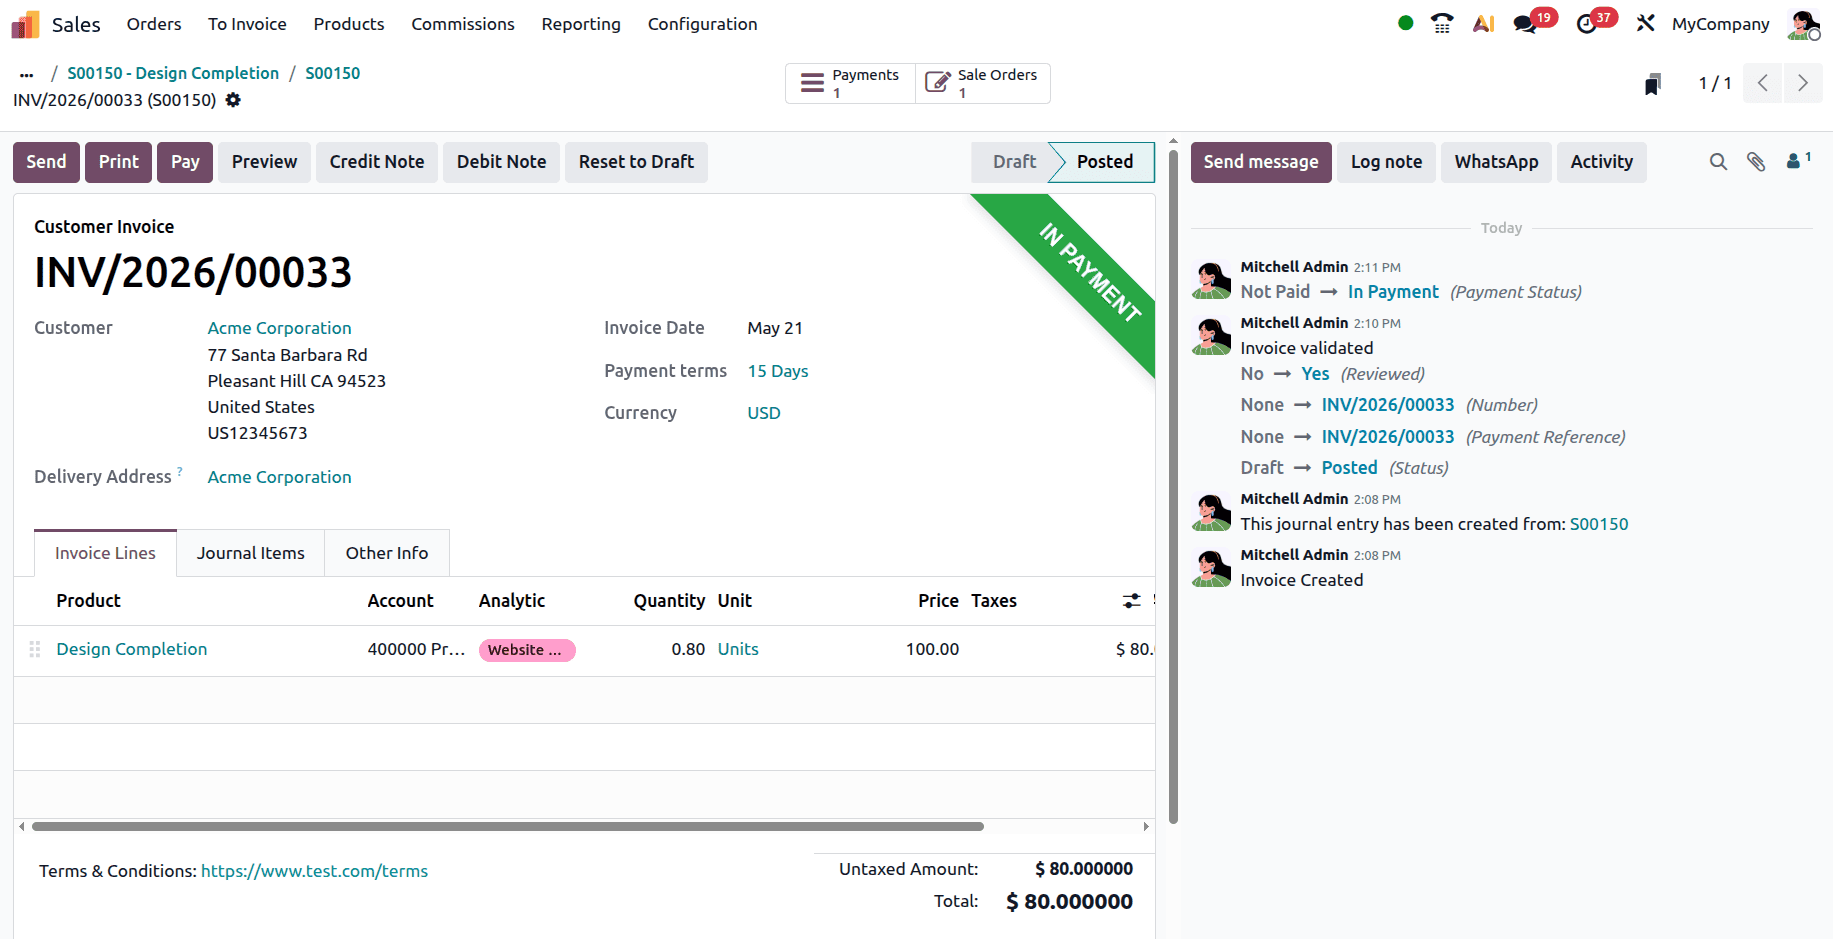
Here, it can be seen that the invoice has been created only for the quantity delivered. Milestone-based billing in Odoo 19 provides a structured and efficient way to manage project invoicing. Instead of billing everything at once, businesses can align payments with actual progress, reducing financial risk and improving cash flow. It also creates a clear agreement between the business and the client, as both parties understand when payments are expected and what work must be completed before invoicing.
In conclusion, milestone-based billing is a practical approach for managing projects where work is completed in stages. With the features available in Odoo 19, setting up and managing this process becomes simple and efficient. By enabling milestones, configuring projects correctly, and linking them with sales and invoicing, businesses can create a smooth and transparent billing process that benefits both the company and its clients.
To read more about How Project Can Be Billed Based on Milestones in Odoo 18, refer to our blog How Project Can Be Billed Based on Milestones in Odoo 18.