Contact management is an essential aspect of any organization or business firm. Leads, employees, customers, vendors, sub-contractors, and many other people should be required to be managed in order to keep organizations well functioning. This will be a big dilemma for the responsible authorities.
But no need to worry about your contacts anymore!!
The Odoo 16 Contacts module is efficient for successfully handling an organization's entire contacts. It can be possible to manage even from the contact details of the business from leads to customers. Also, the system allows you to manage the contact details of the suppliers, vendors, and even partners.
Like in the previous editions of the Odoo, the 16 edition also encompasses an efficient and more advanced Contacts module to keep all the contact information in your database systematically. Each contact can be saved into the system separately or have a personalized interaction with your business contacts. By keeping the contact details systematically, you can always have a look at the former and the current relationships with the contacts. The platform helps you to have better collaboration with your contacts. This will be very essential for the productivity of your organization.
In this blog, let us have a brief overview of the Odoo 16 Contacts module.
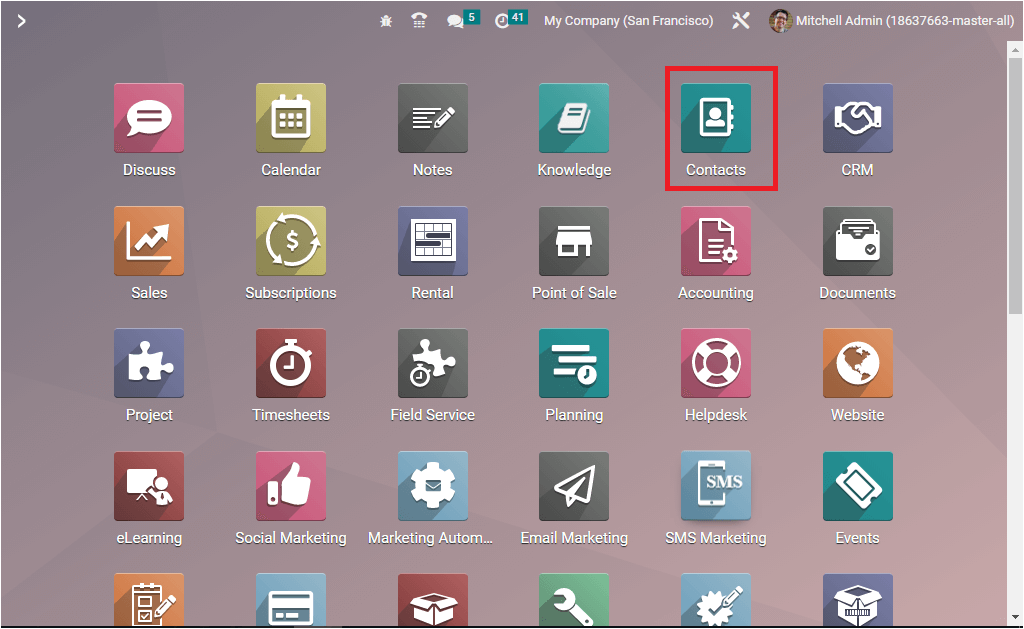
You can view the Contacts modules menu icon in your main dashboard window of the Odoo database, as emphasized in the image below.
A single click on the menu icon will take you to the home dashboard window of the module, as shown in the image below.
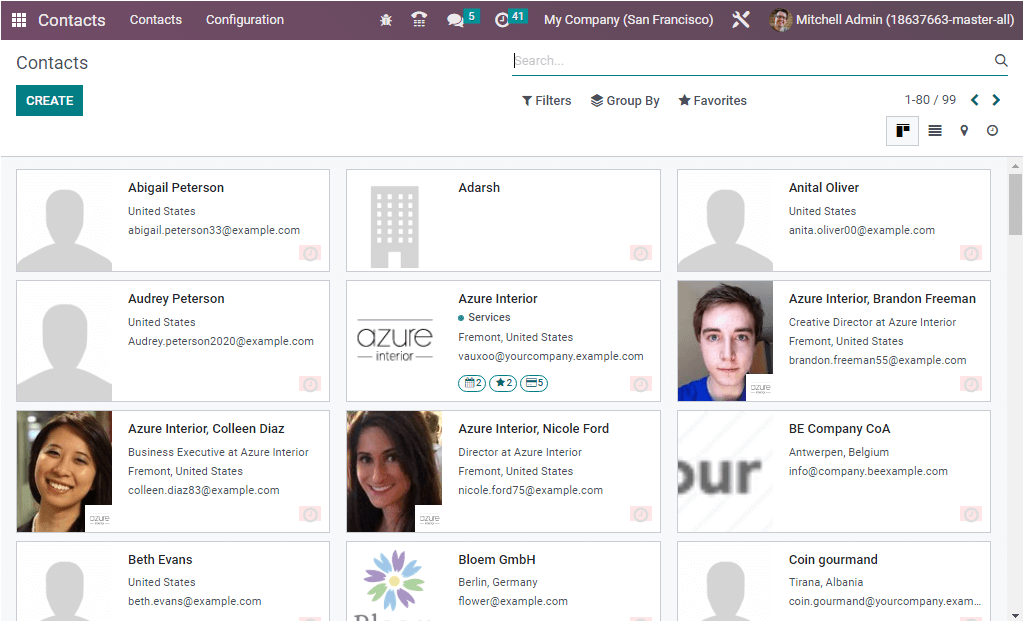
Here in the home dashboard window, you will get a unified view of all the contacts that you saved on your system. The Odoo system allows you to view the pre-configured contacts in multiple views such as Kanban, List, Map, and Activity view. The image displayed above is the Kanban view of the Contacts window. The icons for altering the views are arranged in the top right corner of the window as highlighted in the screenshot below. In addition, the window offers its users filters and grouping options in the top center of the window, you will find the Filter, Group By, Favourites, and Search options that will also be highlighted in the image below.
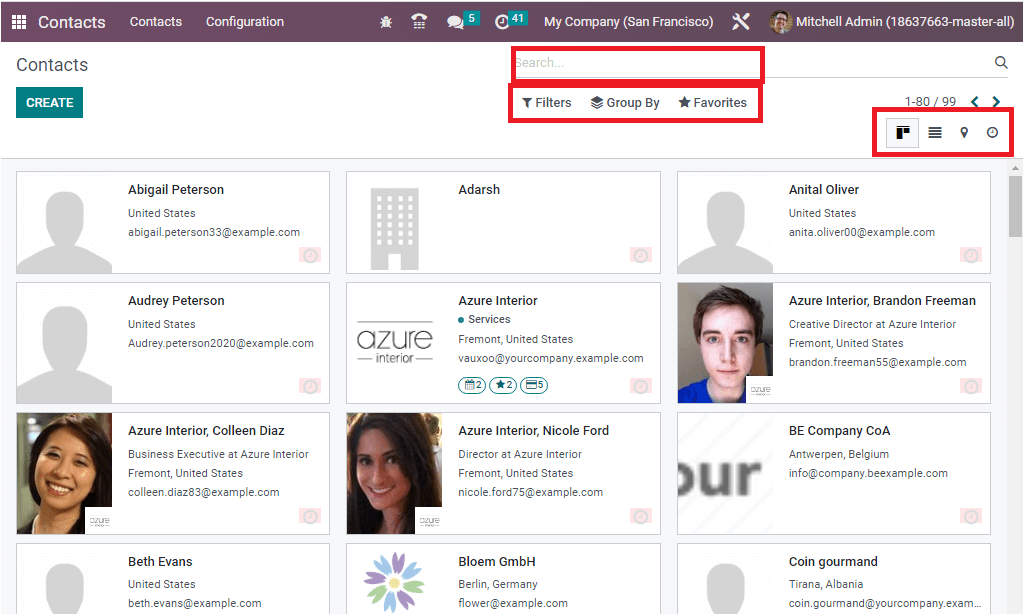
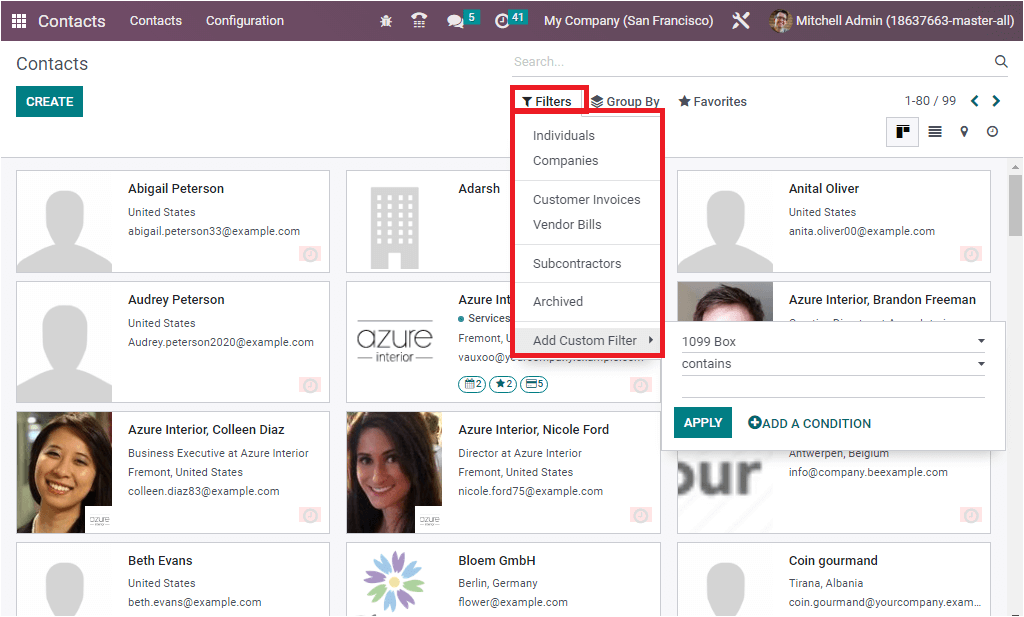
These options are available in all windows of the Odoo platform. That will help you easily search and systematically combine similar records in one group. The default, as well as customizable filters, are available in the option. To access it, you can click on the Filtres option. Then you will get a list of all the default and customizable filters. The same thing also can be viewed under the Group By option.
Similarly, the Favourites tab includes the options such as Save current search, Import records, Link menu in a spreadsheet, and Add to my dashboard options.
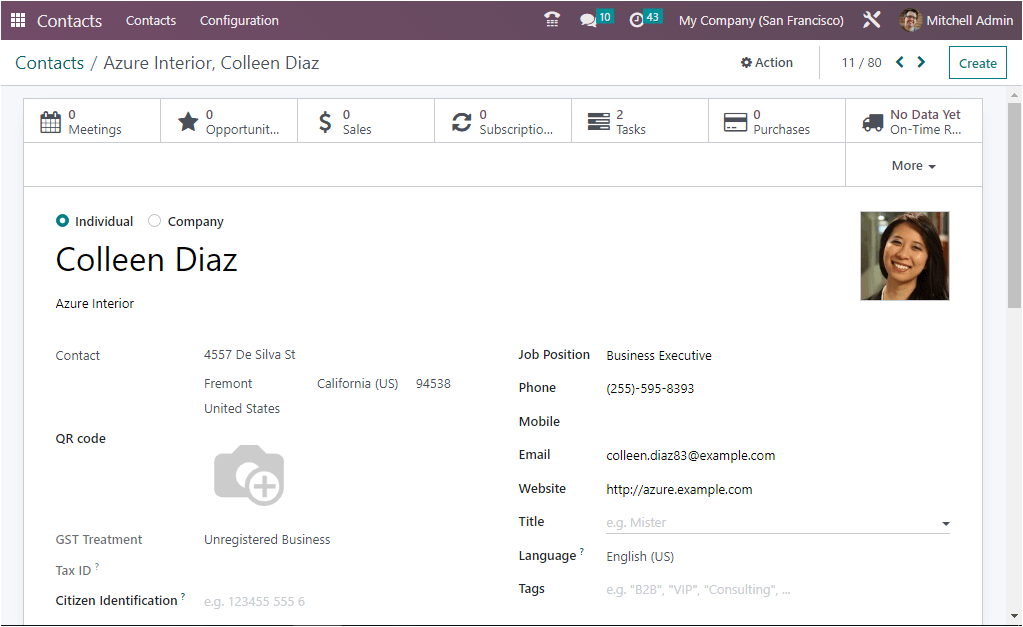
The preview displays the contact's name, state, and mail id. When you click on the preview of a particular contact, you can view the complete details of that specific contact. For example, let us click on the Contact named Azure Interior, Colleen Diaz, and the system will depict the entire information about the contact as shown hereunder.
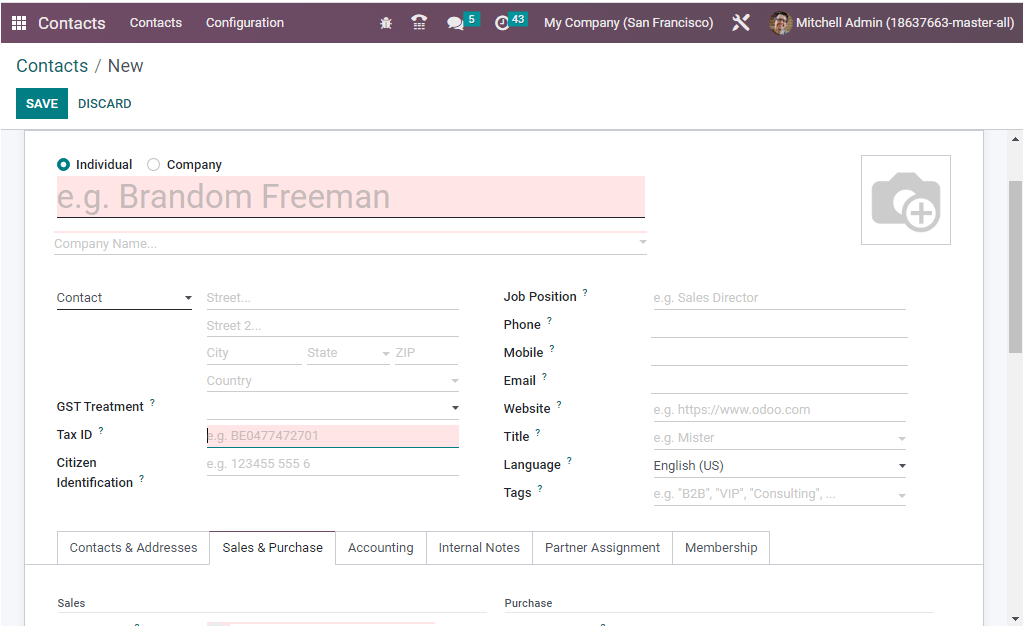
The Odoo 16 Contacts module assists you in effortlessly creating and configuring your contacts. The form view in the 16 edition is changed from the previous versions. To create a contact, you can click on the CREATE button. The create button can be accessed in the top right corner of the Contacts page. The image of the creation page is displayed below
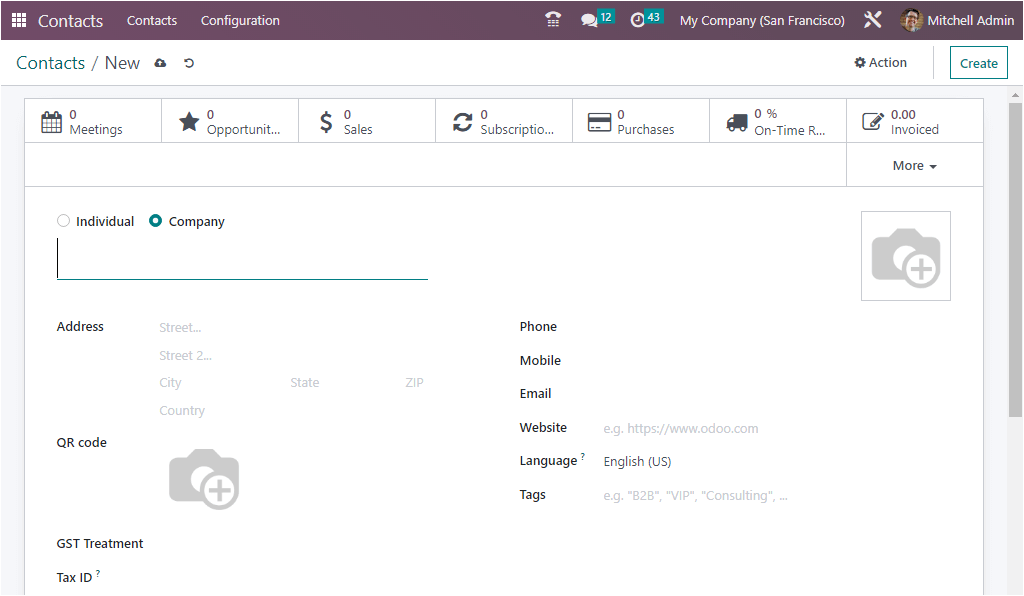
Using the creation form, you can create any contact that you want to keep for your business requirements. The main benefit of the Odoo Contact module is that the platform enables you to create and save the contact details of both individuals and companies. That means if you want to save a company as your contact, you can save the company as a contact.
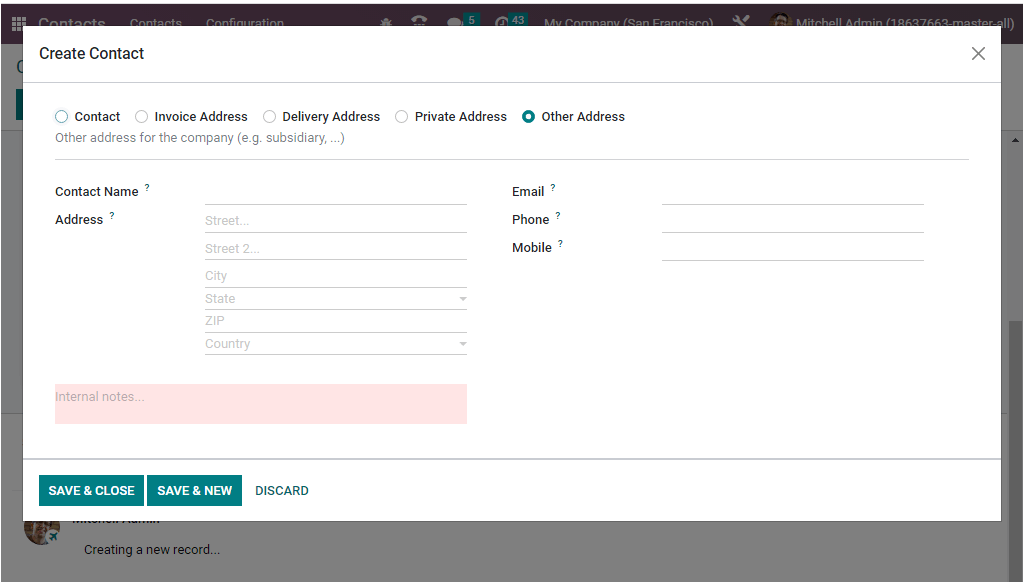
Now, let us move on to the Creation window. Here in the creation window, initially, you can specify whether the contact is a Company or an Individual by marking the required option. If it is a Company, you can mention the company's name in the allotted space. Then you can specify the Address, GST Treatment, Tax ID, Phone, and Mobile Number. It is also possible to mention the QR Code in the provided space. Then you can give the Email and Website details. Later you can allocate the language in the Language field. If you want to mention any tags for easily identifying the contact, that can be given in the Tags field. The photograph of the contact can also be given in the allotted space. Later you can view various tabs, including Contacts&Address, Sales&Purchase, Accounting, Internal Notes, Partner Assignment, and Membership. In the Contacts & Address tab, you can view the ADD button.
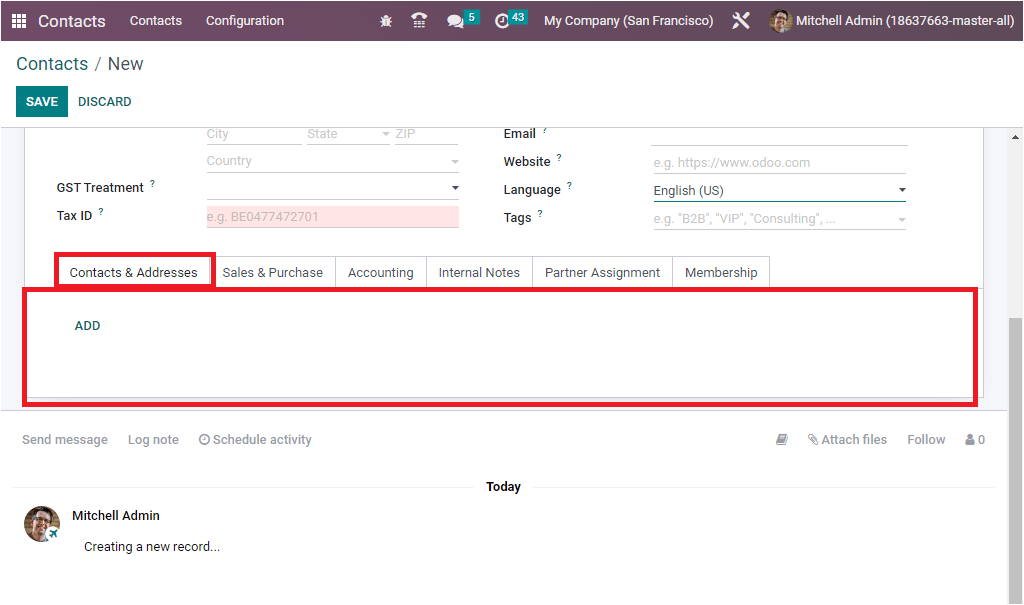
Using the ADD button, you can create various contact addresses such as invoice addresses, delivery addresses, private addresses, and many other address forms.
Likewise, you can click on each tab, and you can provide the required information. If you are creating an Individual contact, you will get another form with additional options for adding the Company name, Citizen identification, and many other details.
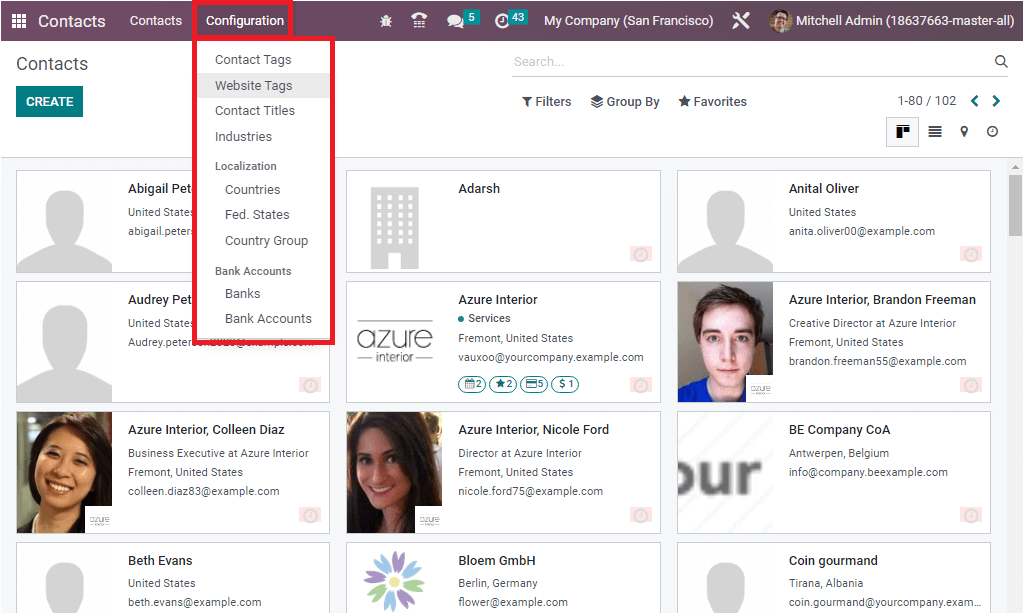
The Configuration tab included in the Contacts module contains different options such as Contact Tags, Website Tags, Contact Titles, Industries, and under the Localization section, have the Countries, Fed.States, and Country Group. Also, in the Bank Accounts section, you can view the Banks and the Bank Accounts menus as given below.
Let us discuss each of the menu icons below.
Contact Tag
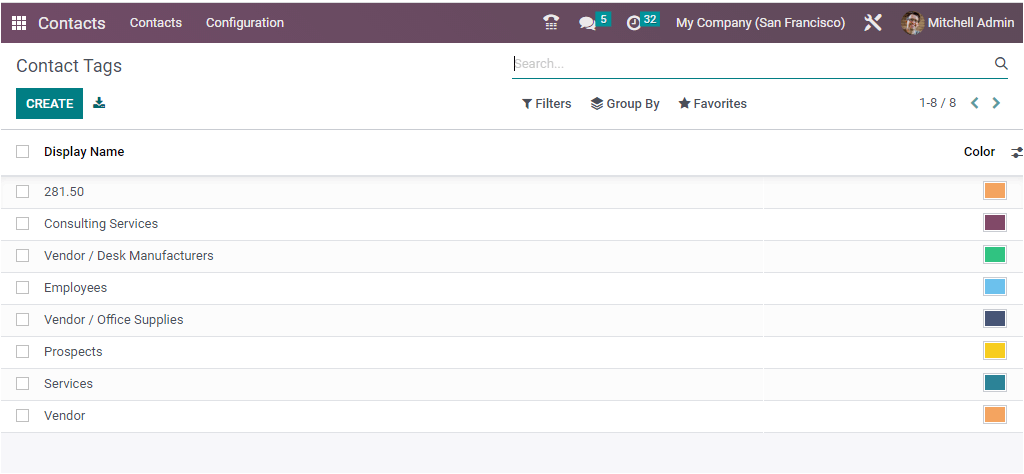
The Contacts Tag option available in the Odoo Contacts module helps you to configure various contact tags, and you can easily apply the tags when configuring new contacts. All these pre-configured contact tags will be displayed in the form view of the Contacts creation window.
The image of the Contact Tag window is depicted below.
Website Tags
The Website Tags menu displayed under the Configuration tab of the Odoo Contacts window will allow you to configure various website tags. This will be very useful for the tracking and analysis processes.

Here you can provide the Category Name and Class.
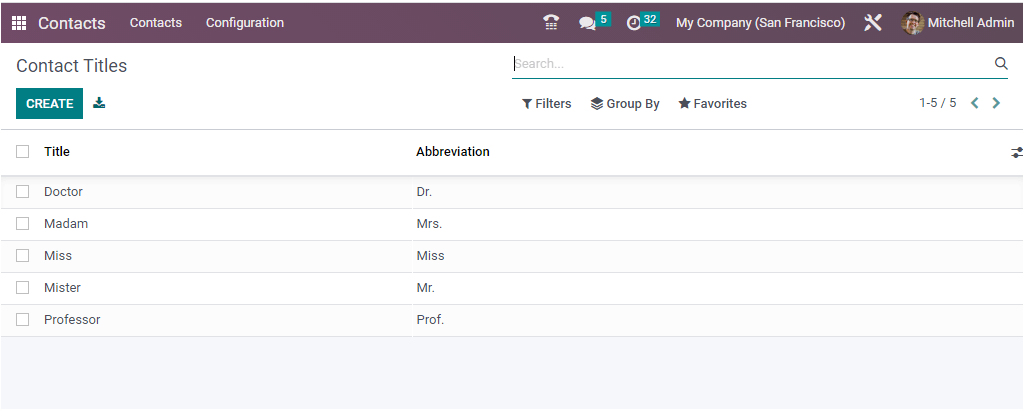
Contact Titles
The Contact Titles option allows you to configure various Tags and their Abbreviation forms. All the preconfigured Contact Titles will be displayed in the Contact Titles window. The Title and Abbreviation forms will be displayed as seen in the image below.
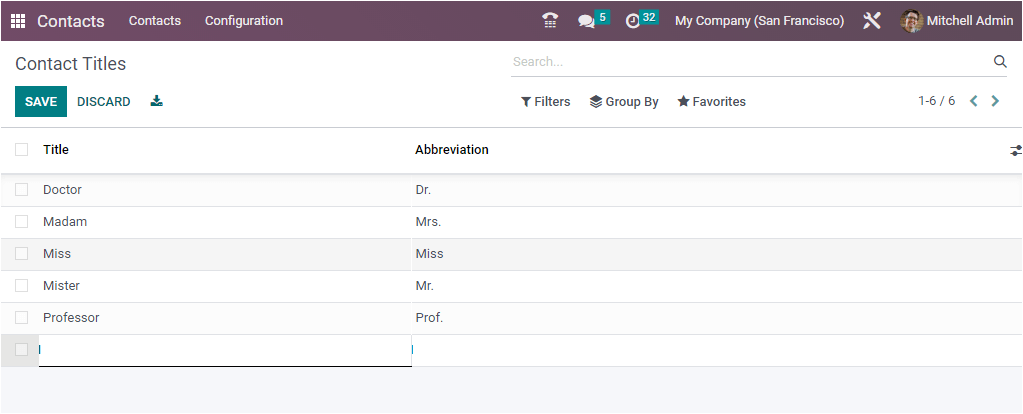
To create a new Contact Title, click on the CREATE button. Now a new line will be displayed in the same window as shown in the image below.
Industries
Another new menu available on the Configuration tab of the Contacts module will allow you to manage the name of the various industries. When you press on the Industries menu icon, you will depict the Industries window, as shown below.
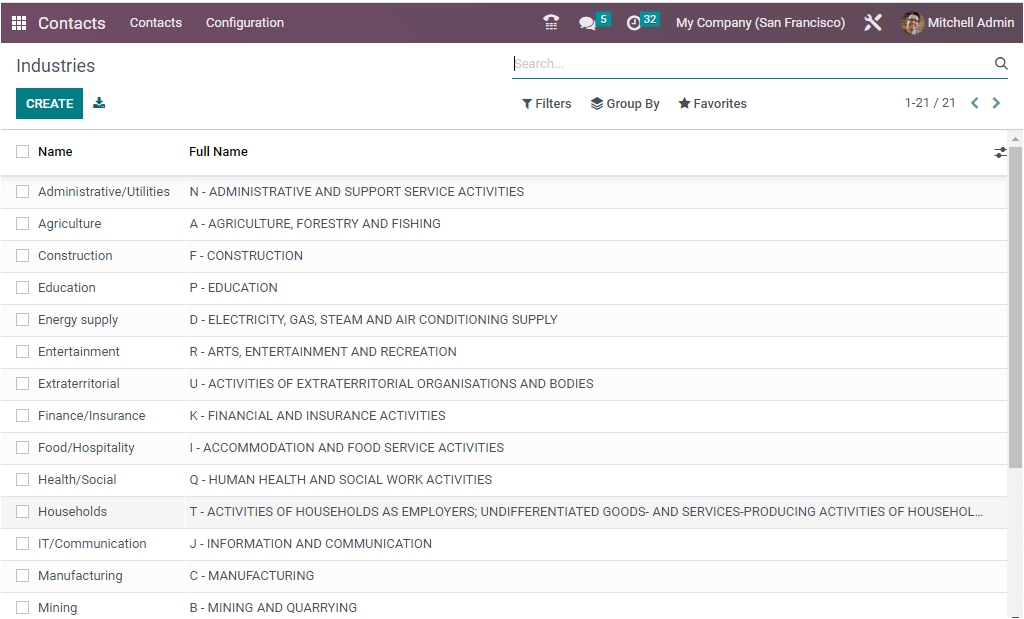
Here you can view the name of the industry and its full name. Also, the window will depict a new space to configure the details of a new industry.
Localization
Under the Localization section of the Configuration tab, you can view the Counties, Fed.States and Country Groups menus. Let us have a look at each option.
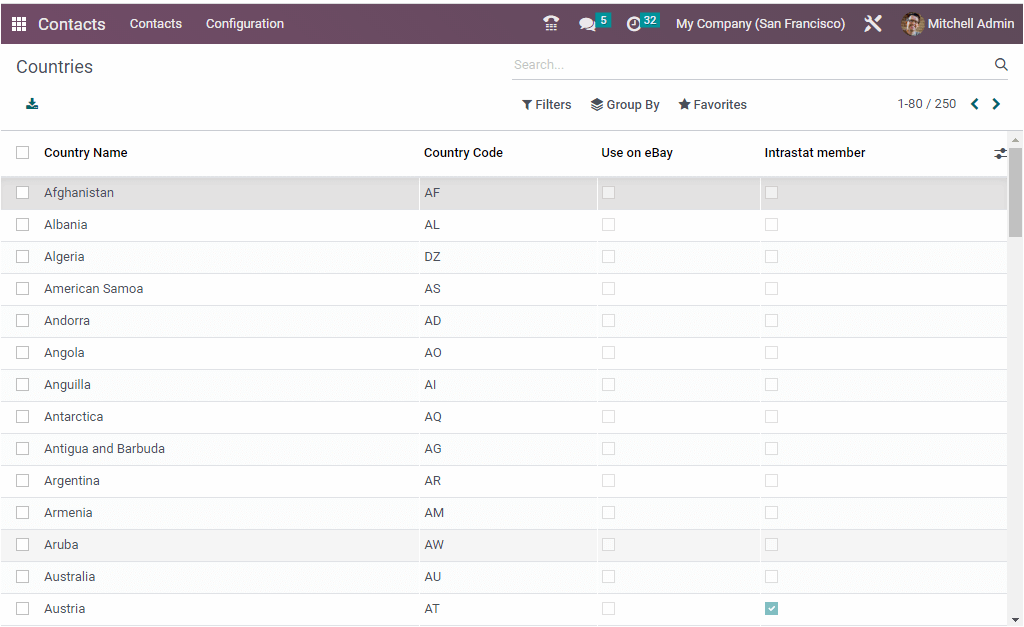
Countries
The Countries option allows you to manage various country names, their code, and other details. Let us click on the Countries menu icon to view the details of the Countries window. Here in the Countries window, the system allows you to manage Country Name and Country Code. Also, you can check the box near the options such as Use on eBay, and Intrastat member if the country has the specifications.
Fed.States
The Fed.States menu helps you to get into the Fed.States window where you can configure various state names, state codes, and countries. The Fed.States window will showcase all the previously described Fed.States.
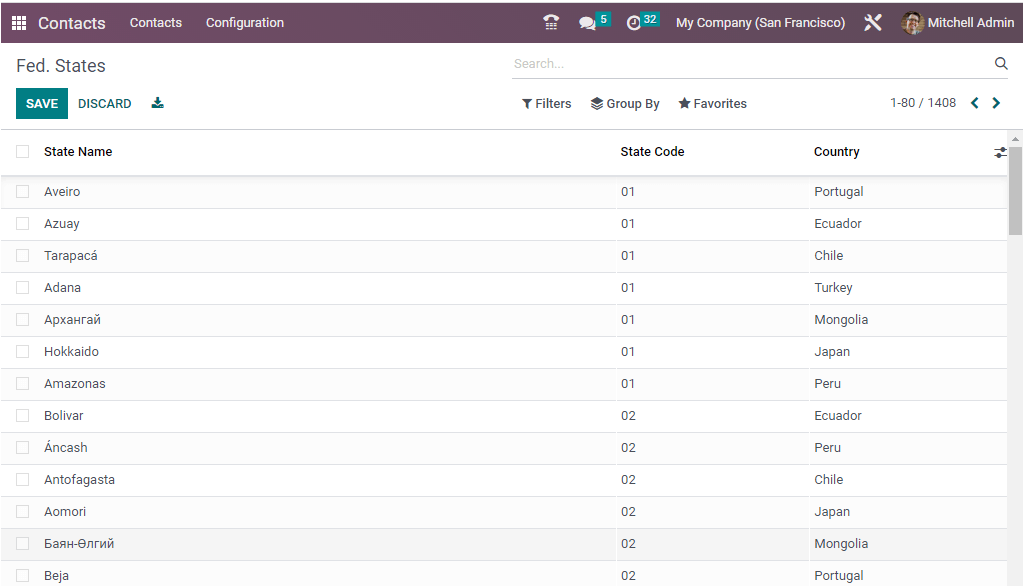
Using this window, you can configure various Fed.States.
Country Group,
The Country Groups window is very comfortable for creating and managing various country groups. This will also be very beneficial for managing a business contact.
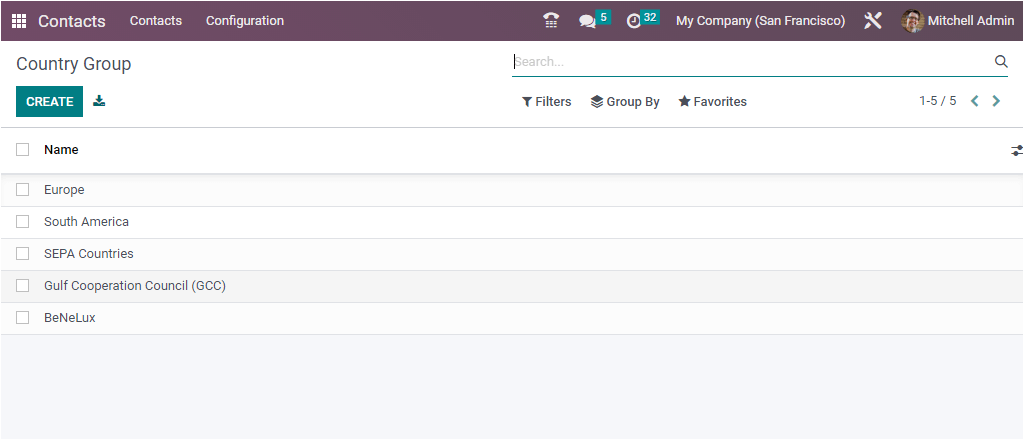
The Country Groups window keeps the record of each country group created in the platform. Also, the window offers you the CREATE button. Using the CREATE button, you can configure new Country Groups. The display of the Form view will look like in the image below.
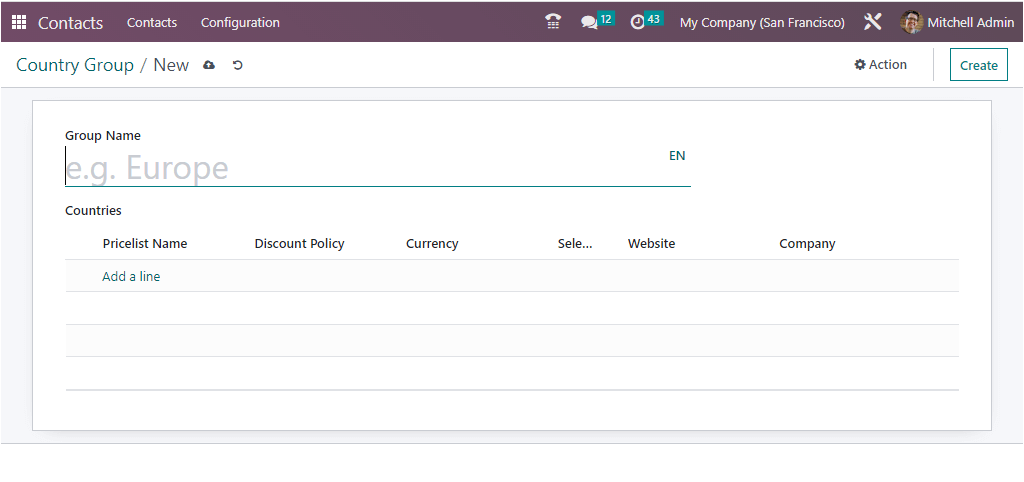
Here in the Country Group creation window, you can provide the Group Name to create a new Country Group. Then you can mention the name of the countries that come under this particular country group. After, you can mention the Pricelist Name, Discount Policy, Currency, Website Company, and other details by clicking on the Add a line button.
Bank Accounts
Under the Bank Accounts category in the Configuration tab of the Odoo 16 Contacts module, you can view the Banks and the Bank Accounts menus.
Banks
You can click on the Banks menu to access the Banks window. Here you will depict the Bank's details if you were already configured any banks

With the assistance of the CREATE icon, you can create new Bank details.
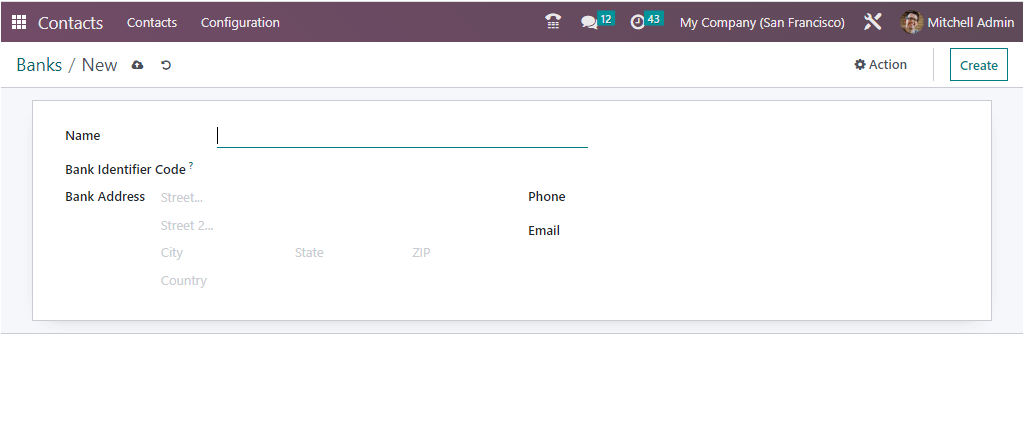
In the creation form, first, you can provide the name of the Bank. Then you can allocate the Bank address. Later, mention the bank identifier code in the Bank Identifier Code field. After, you can submit the Phone and Mobile Number. After entering all the details, click on the Save button to save details.
Bank Accounts
The Bank Accounts option is very convenient for managing the bank accounts of your contacts. Here in the window, you can view all the already described bank accounts along with their details, such as Account Number, Name, Company, and the name of the Account Holder
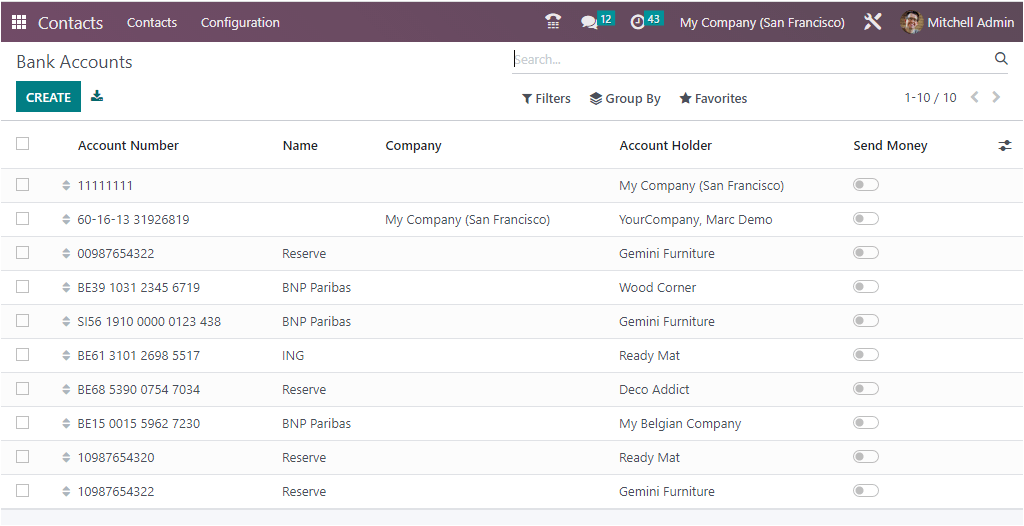
When you need to configure new bank accounts, you can make use of the CREATE button on the top left corner of the window.
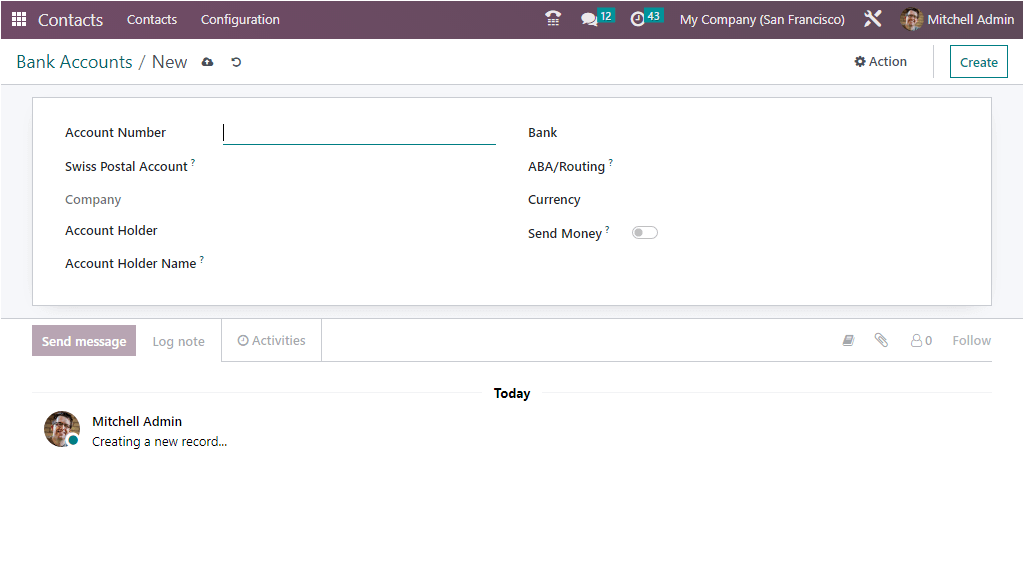
Here in the creation window, you can enter the Account number, Company Name, and Account Holder Name in the given space.
This is all about the Odoo 16 Contacts module. As an entrepreneur, keeping and maintaining contacts manually or following other traditional methods in accordance with your company's growth will be very painstaking. The Odoo 16 Contacts module allows you to keep all your contacts, and you can retrieve all these contacts based on your requirements. The various default and customizable options like Filters, Group By, Export All, Search options, and many others help you to manage your contacts effortlessly.