Making your online store easy to use and simple to navigate is very important. In Odoo 18, you can organize your products into eCommerce categories to help customers move through your product list more easily. This makes shopping smoother and can help increase sales. This article shows you how to create, sort, and publish eCommerce categories within the Odoo 18 Website module.
Why Use eCommerce Categories in Odoo?
eCommerce categories in Odoo are different from the product categories used for managing inventory or accounting. They are made for grouping related products, making it easier for customers to find what they need. These categories help show clear menus on your website’s store page, making the whole shopping experience better. They also allow for multi-level categories, like parent-child structures, which let you build complex and simple-to-use catalog systems. For example, you can make a category like Clothing > Men > T-Shirts, helping customers look for products step by step.
Creating eCommerce Categories
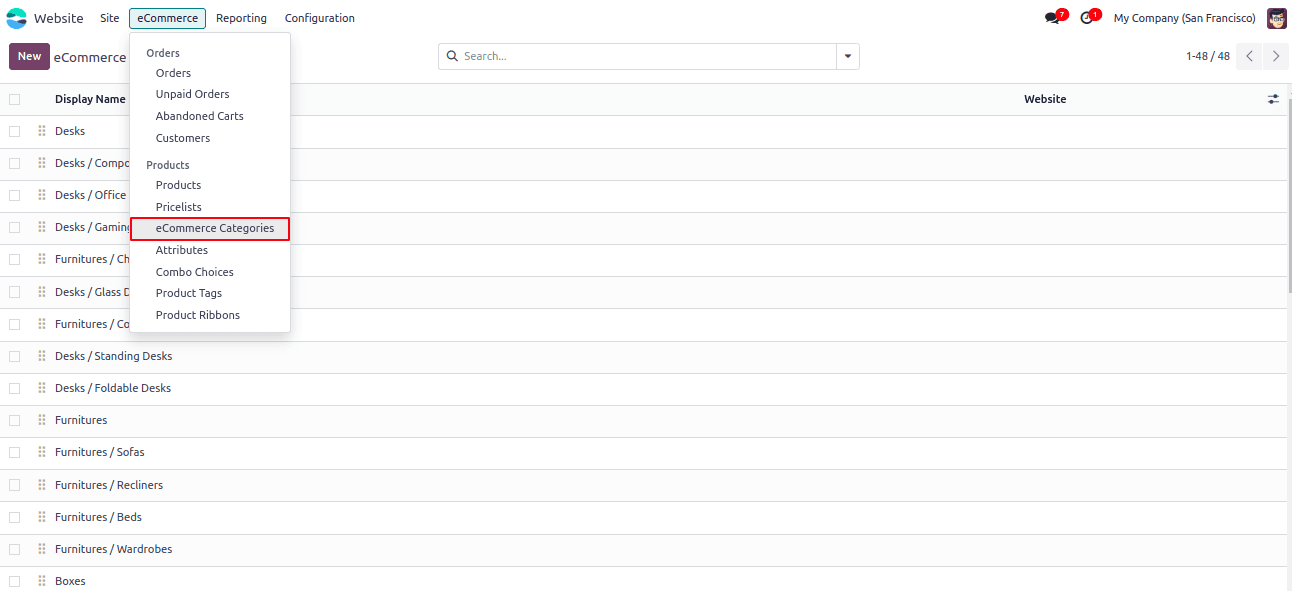
To start sorting your products in Odoo 18, go to Website > eCommerce > eCommerce Categories and click on “New” to make a new category.
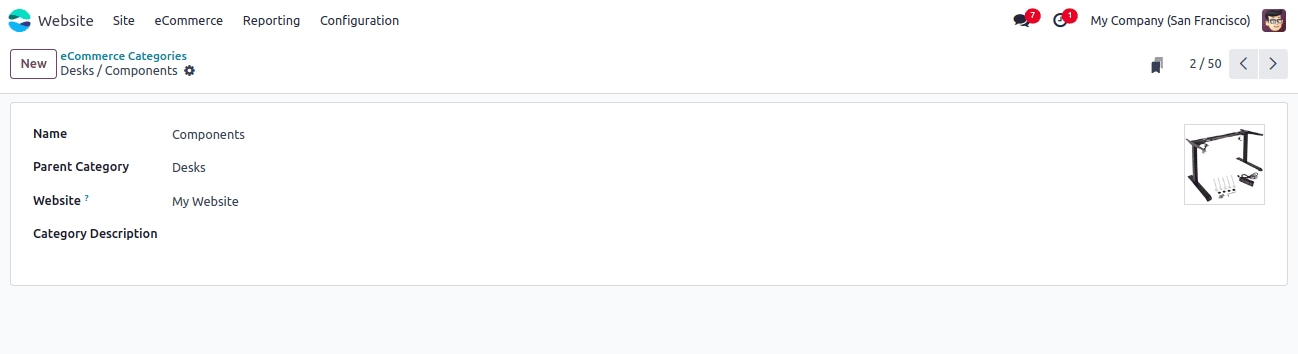
Enter the necessary details, such as the Name (e.g., “Accessories”), select a Parent Category if the new category should be nested under an existing one, choose the Website for multi-website support, and Category Description.

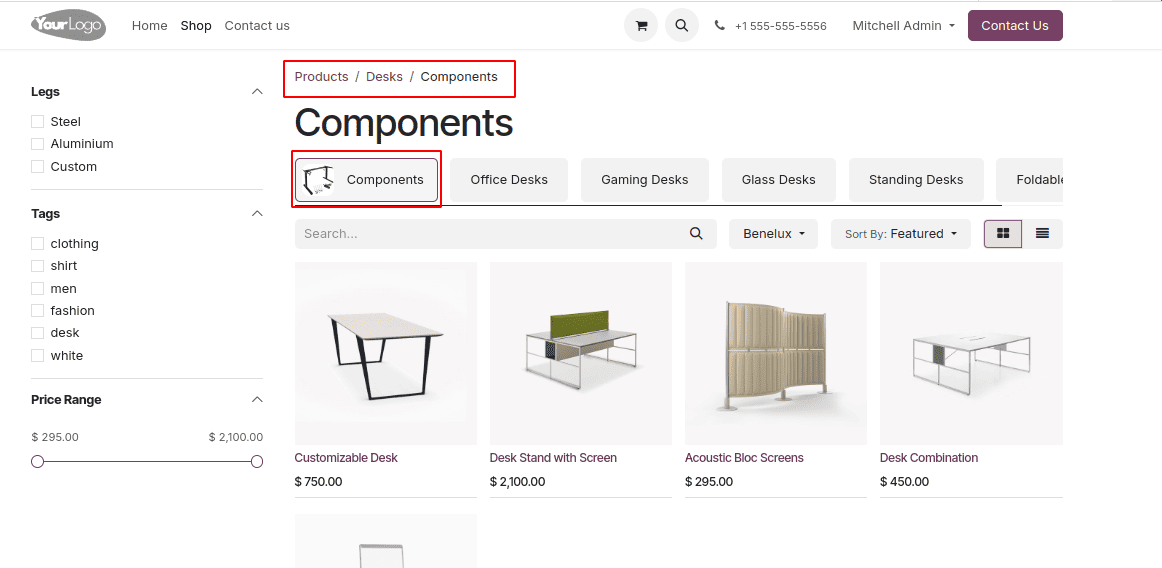
Odoo enables you to create a multi-level website catalog by linking parent and child categories. For instance, you could create a main category called Desks, with subcategories like Office Desk, and then further split into Glass Desks and Foldable Desks. This makes your product list more organized and easier to follow.
Assigning Products to eCommerce Categories
After making your categories, you need to link products to them. Go to Website > eCommerce > Products, and select a product you want to update. Under the Sales tab, find the eCommerce Category field and pick the right category for the product. Although a product can only be linked to one category for display on the frontend, it can also belong to multiple tags for better filtering options on the website.
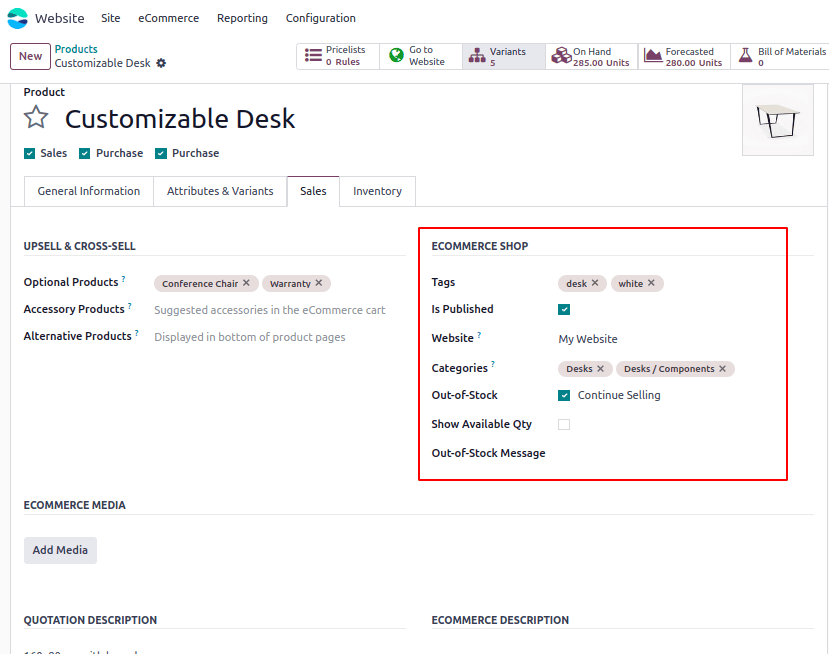
To show the product on the website, open the product form and enable the “Is Published” option. Then, set up website-specific details such as the eCommerce description and extra images under the eCommerce media section. After saving, the product will appear on the Shop page, under its assigned category, and will be visible to your online customers.
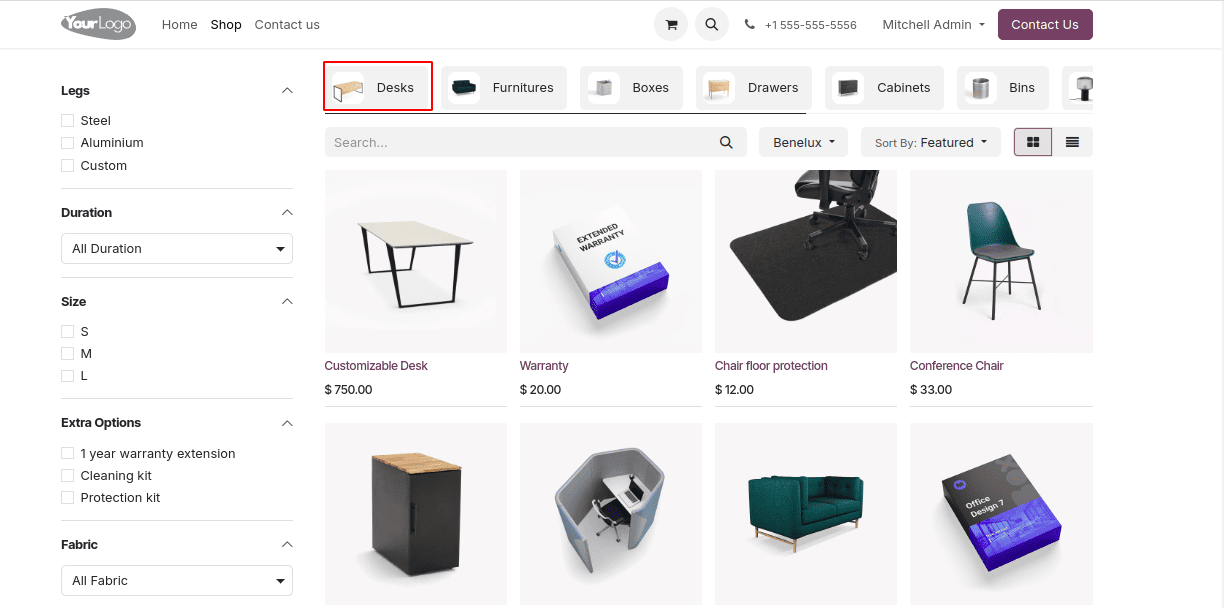
Once your categories are set up and products are assigned, go to the Website and view the Shop page. The categories you created will appear in the top navigation bar. When a customer clicks on a category, the shop page will show only the products in that category, making it easier and more satisfying to shop.
Using eCommerce Categories in the Odoo Website offers several key benefits. One of the major advantages is improved SEO, as each category has a unique URL that can be optimized for search engines, increasing visibility and traffic. It also enhances the user experience by allowing customers to quickly find the products they are looking for through clear and logical navigation. Additionally, eCommerce categories support enhanced merchandising, enabling businesses to highlight seasonal collections or trending product groups, ultimately driving more engagement and sales.
Using eCommerce Categories in Odoo 18 Website is a simple yet powerful way to structure your online store and deliver a superior shopping experience. Whether you're selling fashion, electronics, or groceries, organizing your products with clear category hierarchies ensures better discoverability and higher engagement.
Start categorizing your products today and make your Odoo website stand out with clean navigation and optimized user flows.
To read more about How to Build & Customize Your Website Using Odoo 18 Design Tool, refer to our blog How to Build & Customize Your Website Using Odoo 18 Design Tool.