The Email Marketing module in Odoo 19 comes equipped with an easy-to-use system that enables users to create and manage successful email campaigns. The easy-to-use interface allows users to design professional-looking email formats, personalize the campaign content, and select from various pre-designed templates or even design their own from scratch. The email can then be sent to the right target group.
This module offers the significant advantage of enabling precise audience targeting. Rather than sending the email to all contacts within your address list, you can target only specific audiences, such as leads, prospects, or customers. Further, the audience can be refined according to various parameters like country, date, etc. This way, irrelevant emails will be prevented from reaching the audience, which will enhance email opens and clicks.
Effective email marketing campaigns in Odoo are built on well-organized mailing lists and contacts. Mailing lists are useful for segmenting your customers according to demographic factors, interests, or behavior, and mailing contacts contain vital data such as names and email addresses. Odoo offers an easy-to-use tool for adding, importing, and managing mailing contacts, associating them with one or several mailing lists. Keeping track of your contacts in this way is important not only for sending customized messages but also in order to adhere to laws regarding opting in and out of email lists. To access mailing list features, use the Mailing Lists menu, which offers two sub-menus – Mailing Lists and Mailing List Contacts.
Mailing List
It becomes easy to manage and send emails to certain individuals or a selected group using the Mailing Lists feature of Odoo 19 Email Marketing. This feature makes it easy for businesses to classify their contacts according to certain groups so that they can plan and conduct email marketing campaigns for their promotions, events, newsletters, or any other type of announcement. The interface to manage mailing lists is available easily in the Email Marketing module through the main menu.
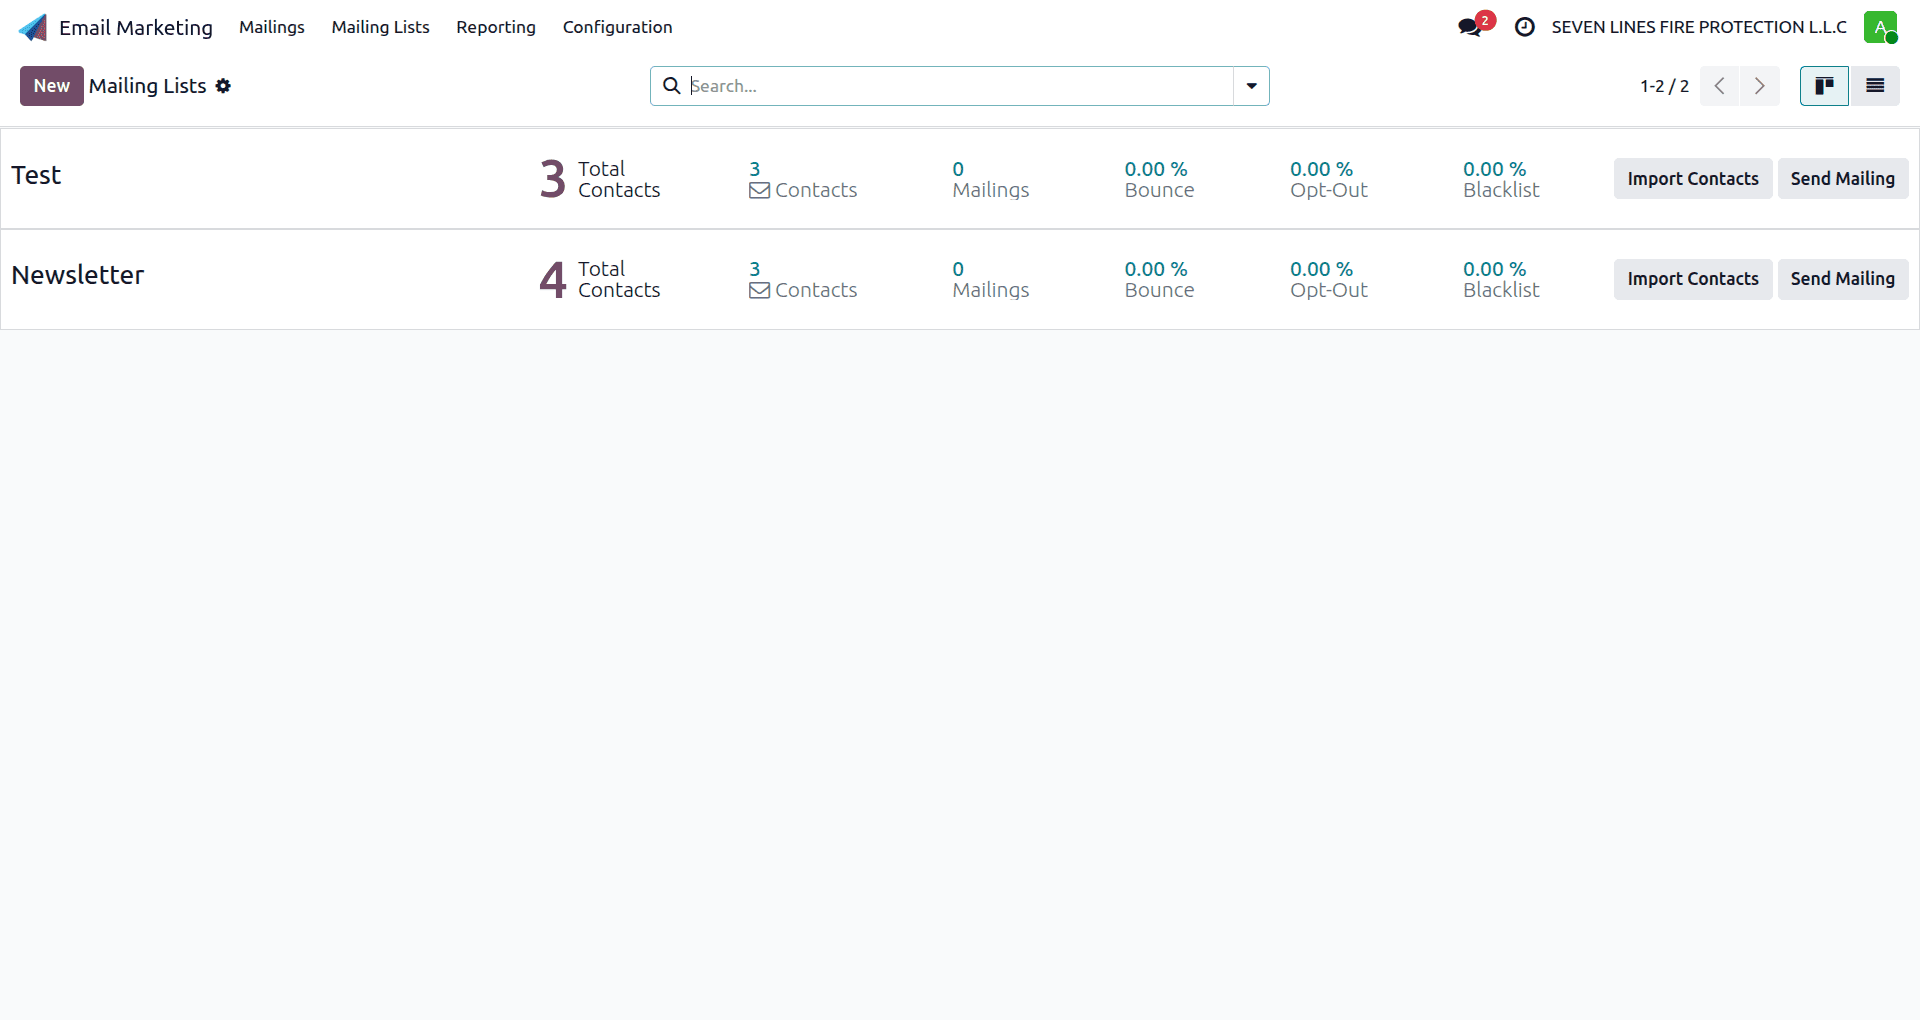
After clicking on the Mailing Lists tab, Odoo takes you to the page in Kanban view, which shows you a glance at all the mailing lists. The information about each mailing list is shown on individual Kanban cards in the form of the total number of contacts for that particular mailing list.
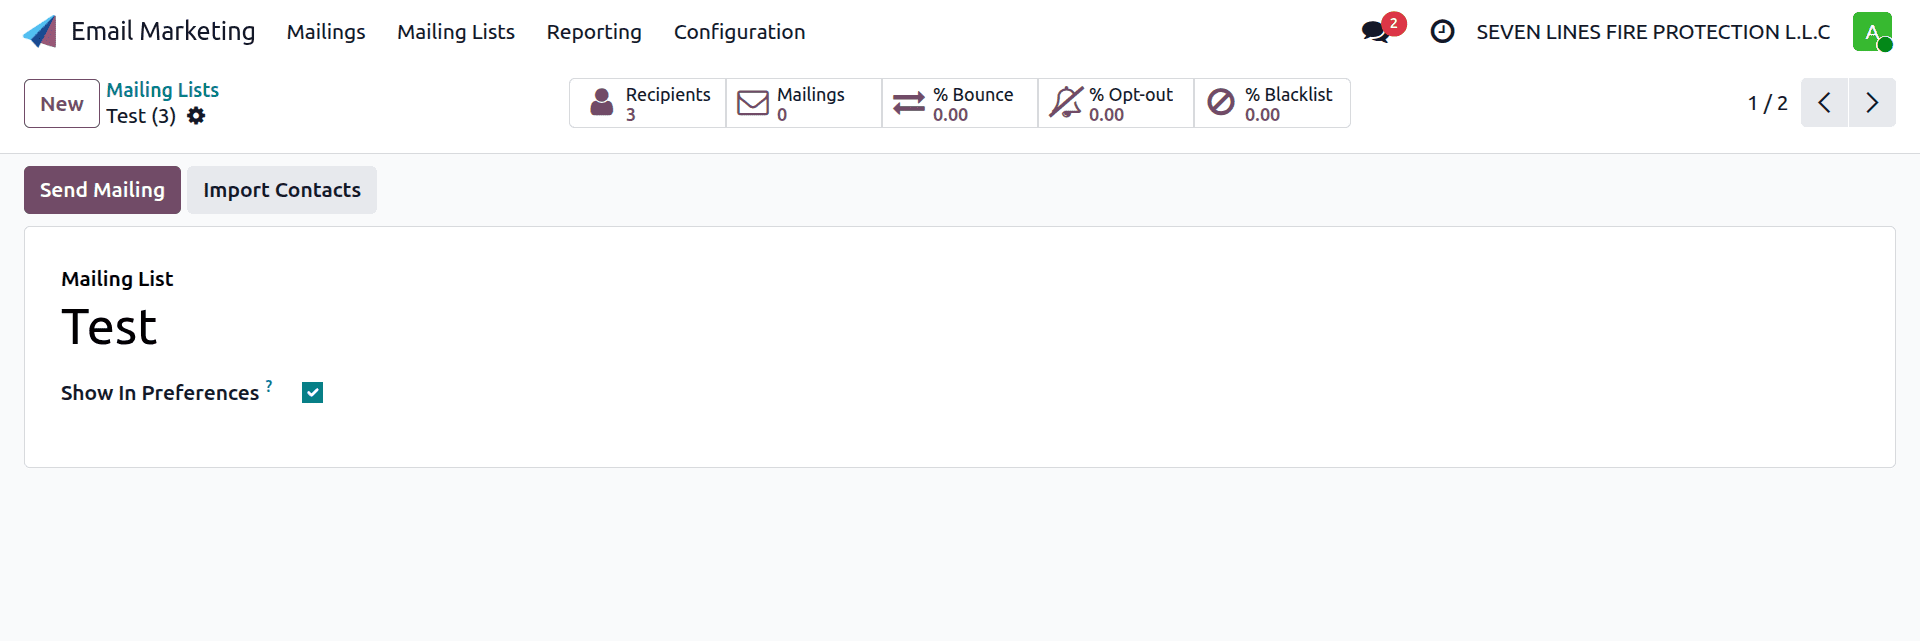
Once a particular Mailing List is opened, Odoo shows all the necessary data related to the contacts that belong to the mailing list. These statistics include such items as the number of opted-out contacts, bounced messages, and blacklisted recipients. Besides, the page shows a history of the emails that have been sent to the contacts on the mailing list.
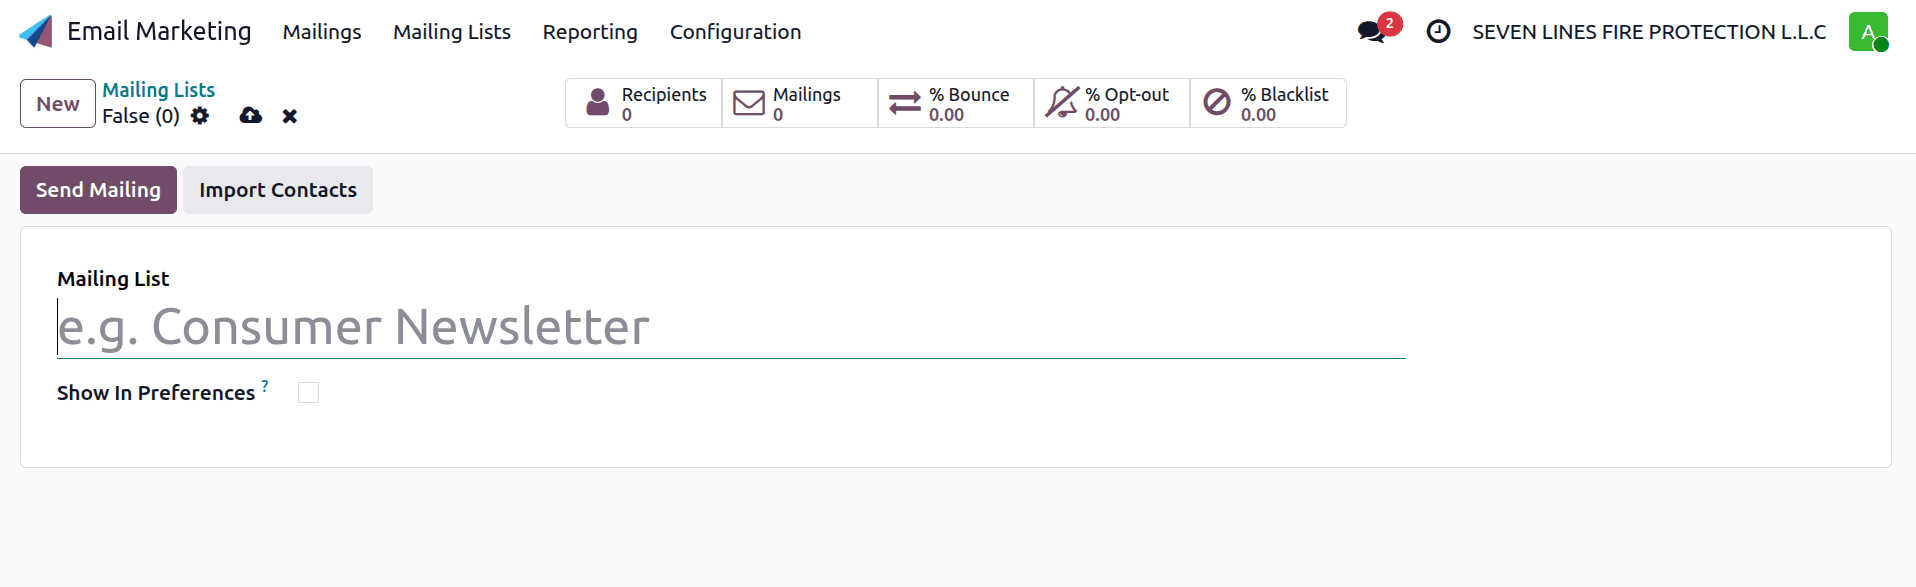
A mailing list can be created by clicking the New button. Specify the name of the mailing list, and, if needed, check the Show in Preferences field. If the field is checked, the recipients will be able to control their subscription preferences from the unsubscribe page by selecting the mailing lists they wish to stay subscribed to.
Using the Import Contacts function in Odoo 19 Email Marketing, it becomes possible to insert several contacts in one go into a mailing list. Once you press the Import Contacts button, a new window will appear, allowing you to write or copy and paste several email addresses. It will save you a lot of time when creating mailing lists, since you will not need to add contacts manually.
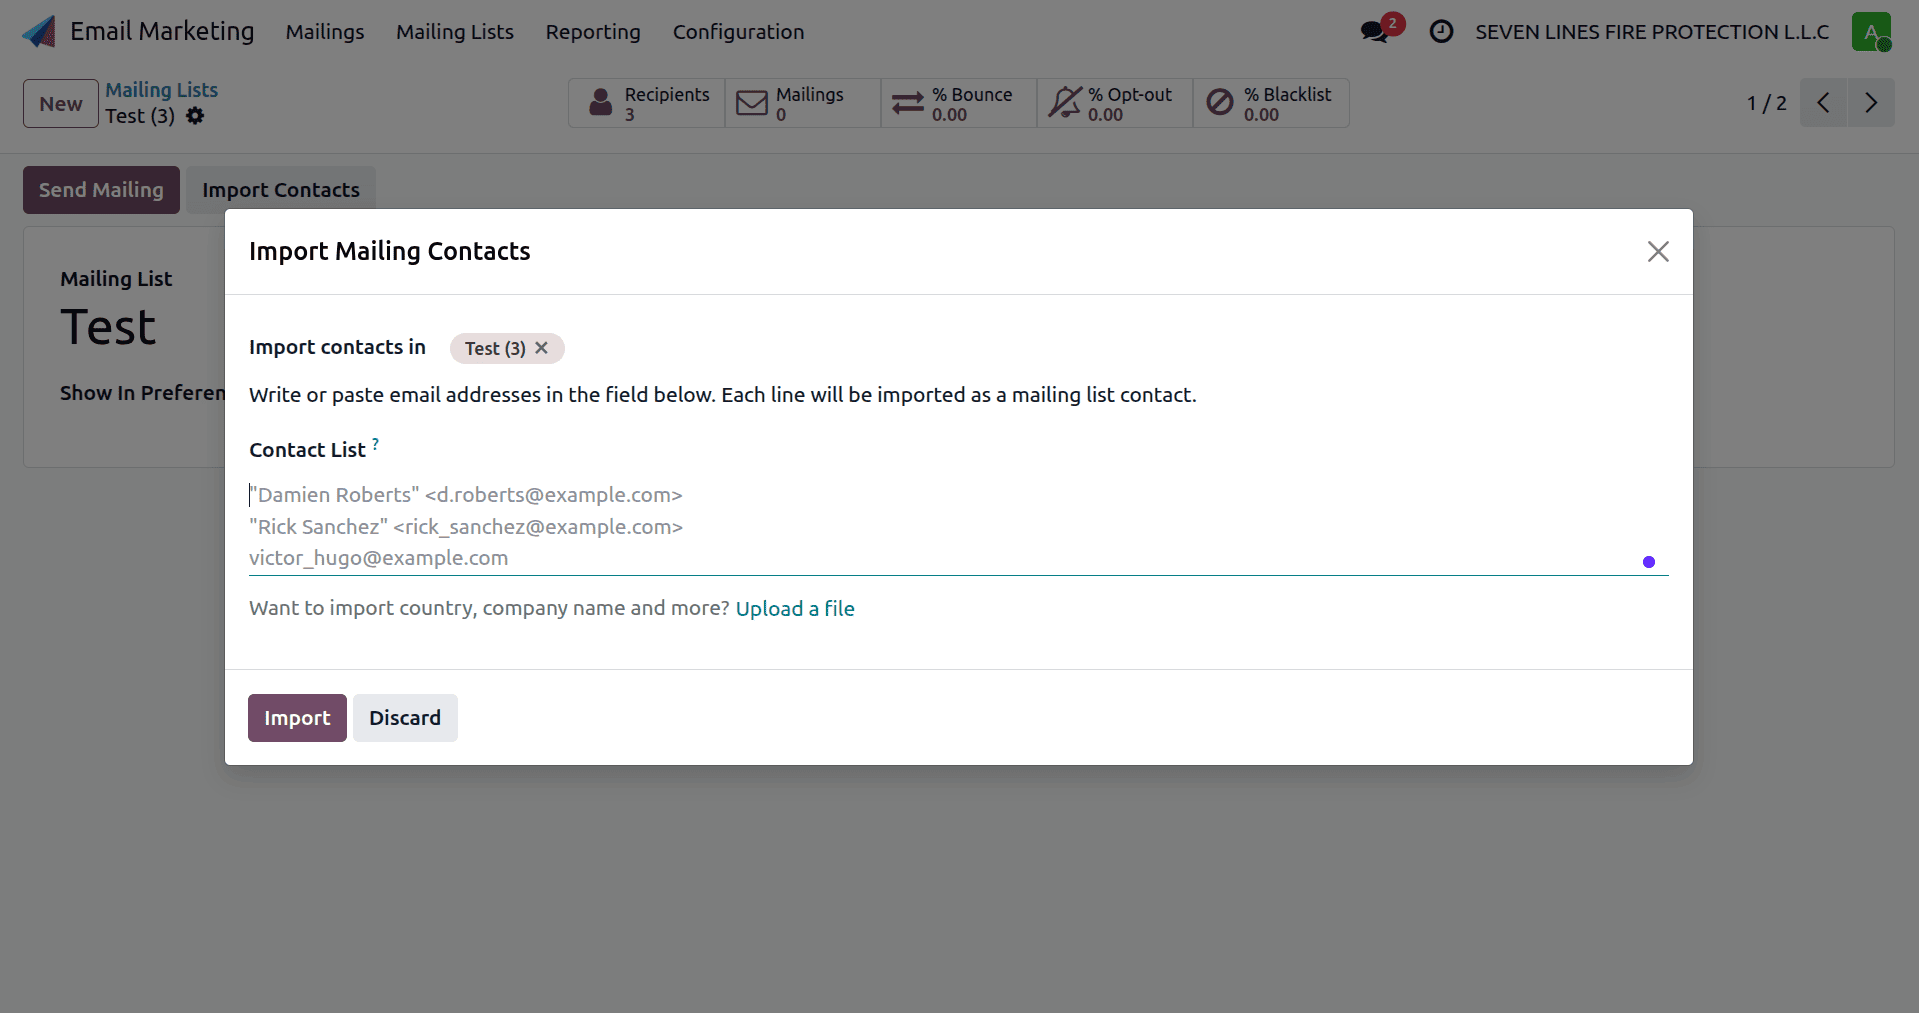
Email addresses that are added one per line are added as a single mailing contact each and are added to the chosen mailing list instantly. After the import is done, these contacts will be ready to be used for email marketing purposes straight away, which makes the entire mailing list management process fast and effective.
Mailing List Contacts
The Mailing List Contacts function in Odoo 19 Email Marketing enables the user to organize their contacts according to the particular mailing list that they have created. This feature helps companies organize their contacts and target their emails to the correct audience. In order to access this feature, a user is required to select the Mailing List Contacts option in the Mailing Lists section.
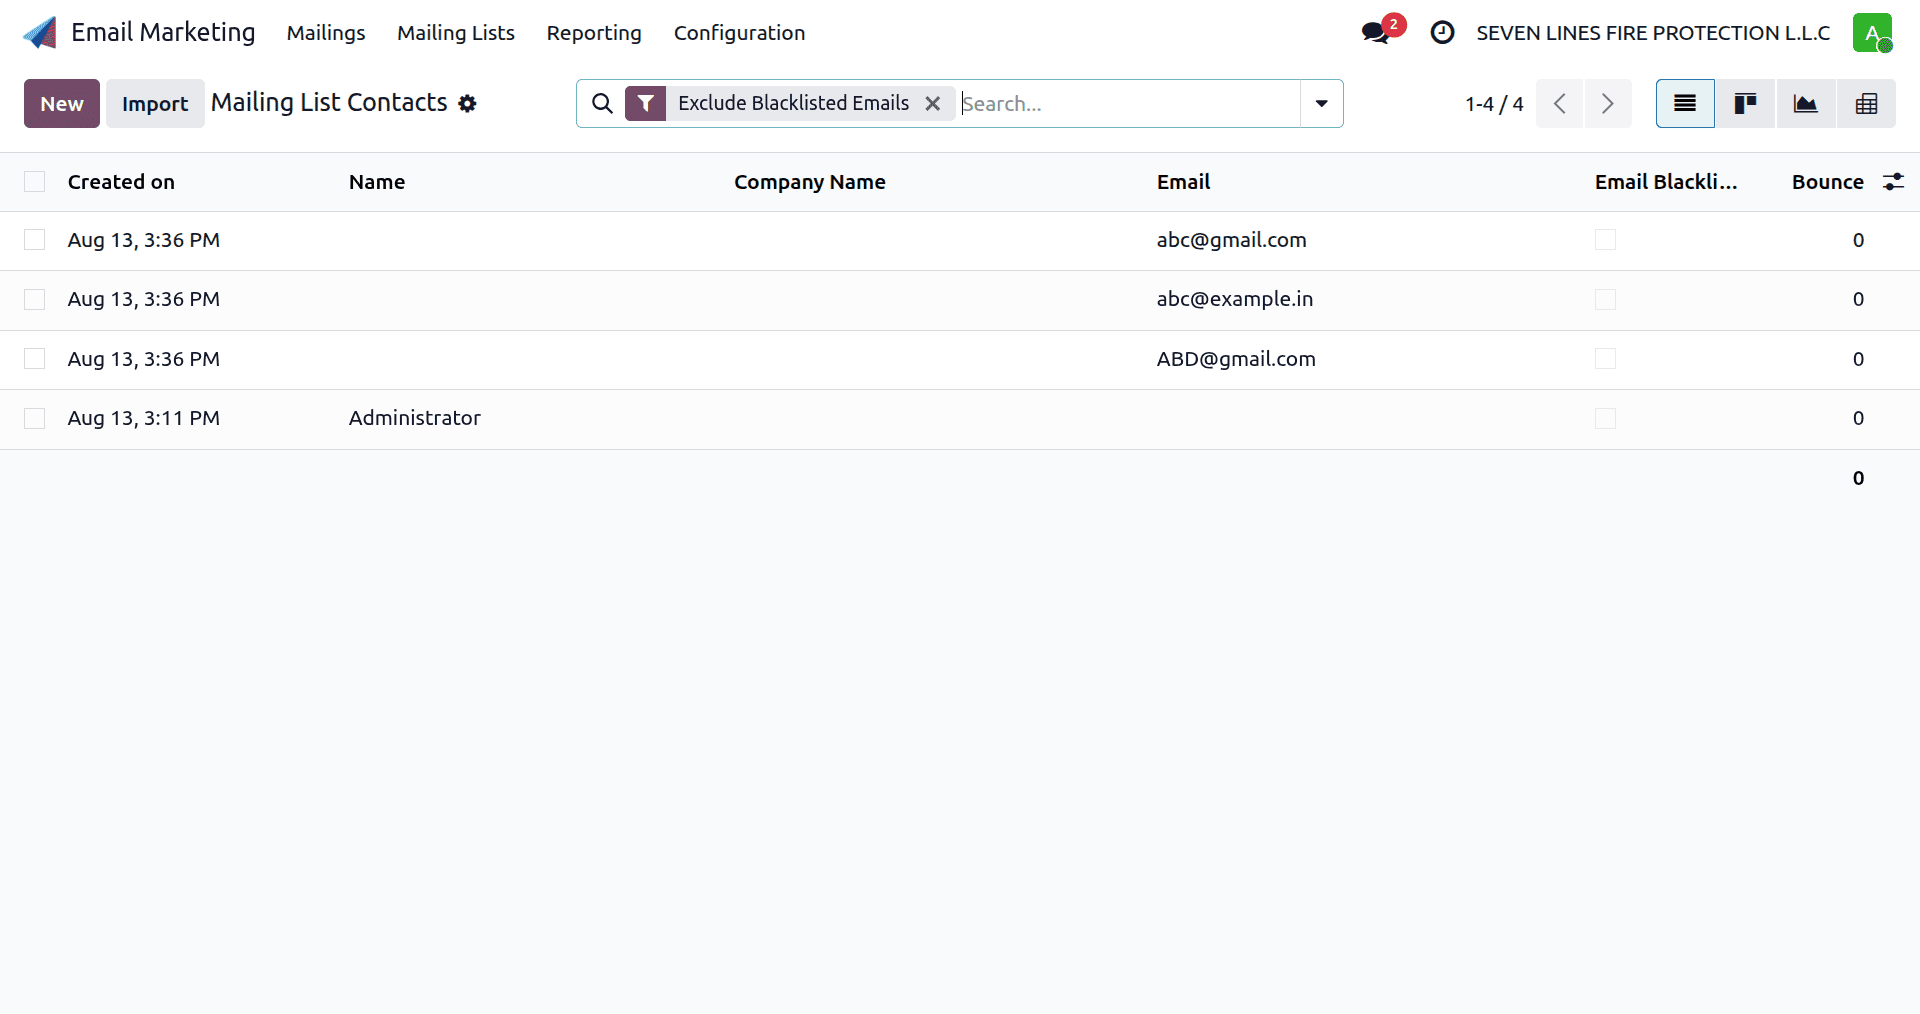
The Mailing List Contacts page provides key details about each contact, such as their name, email address, and company. It also displays important details such as the creation date, blacklist status, and email bounce statistics, helping users maintain a clean and reliable contact database.
To simplify contact management and analysis, Odoo offers multiple view options, including List, Kanban, Pivot, and Graph views. These views make it easier to organize, monitor, and analyze contact data based on different requirements.
In case a contact's email or phone number is blacklisted, Odoo will inform you about the status of the contact. Contacts who have been blacklisted will be automatically removed from all the mass emails sent out. This means that such contacts will never receive emails from any mailing list.
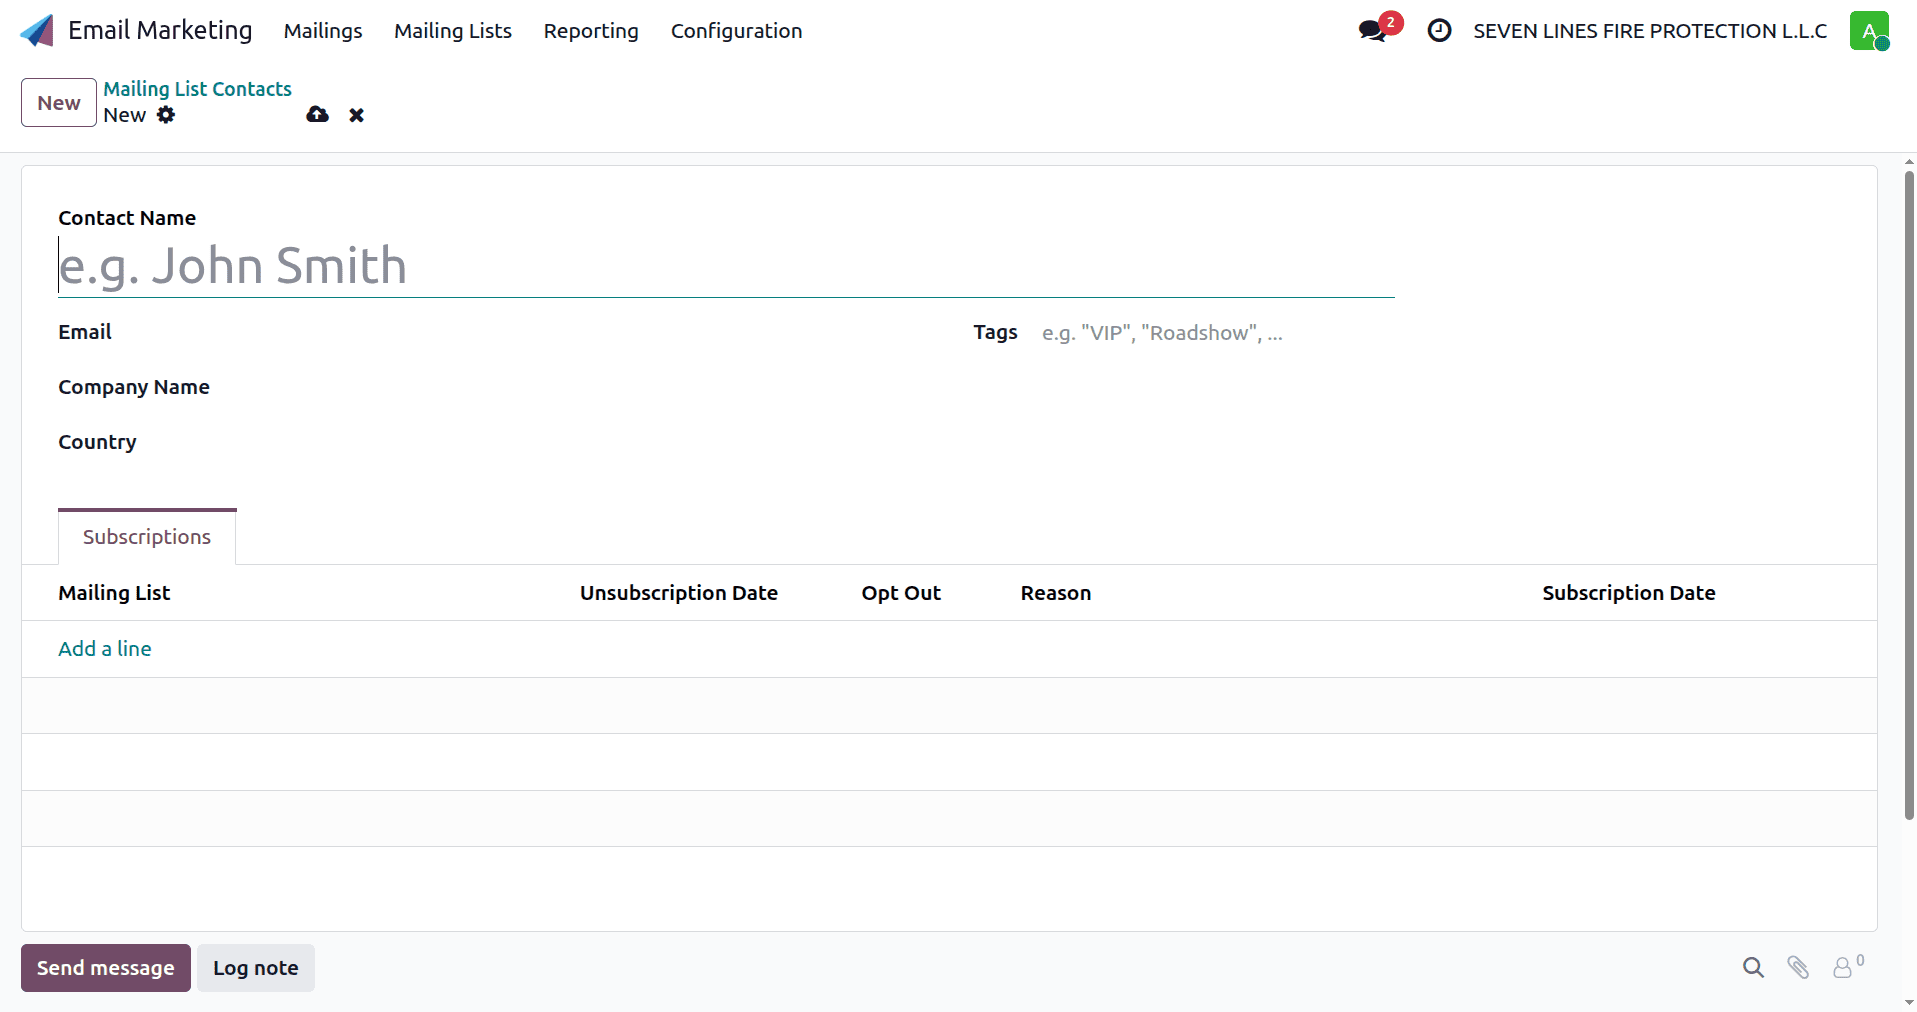
A new contact can be added to a mailing list by clicking New on the Mailing List Contacts page and entering details such as the name, email address, mobile number, title, company, and country. After providing the contact information, you can associate the contact with one or more mailing lists by clicking Add a Line in the Mailing Lists section and selecting the appropriate list. After entering all the required details, click Save to create the contact and add it to the selected mailing list.
Alternatively, you can make use of the opportunity to import multiple contacts to a mailing list from the Mailing List page. All you need to do is to navigate to the concerned mailing list and select the "Import Contacts" button that is located at the top-right corner of the screen. Once the pop-up window appears, the selected mailing list will be automatically populated.
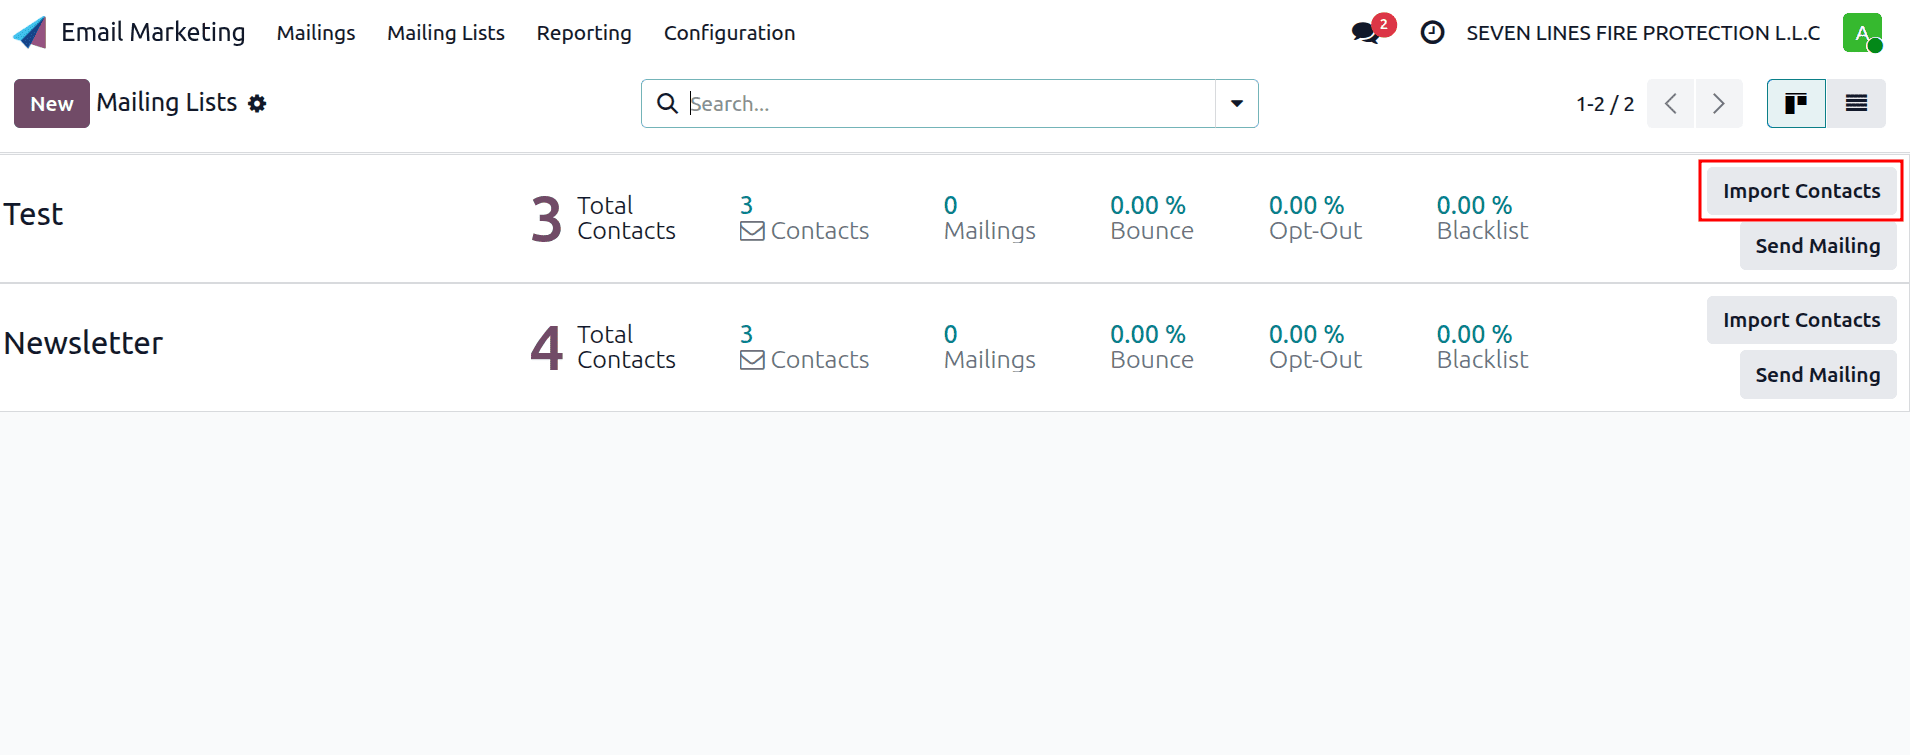
The pop-up window titled "Import Mailing Contacts" will appear on your screen when you click on the "Import Contacts" button. You can add many contacts to the chosen mailing list through the "Import Mailing Contacts" window.
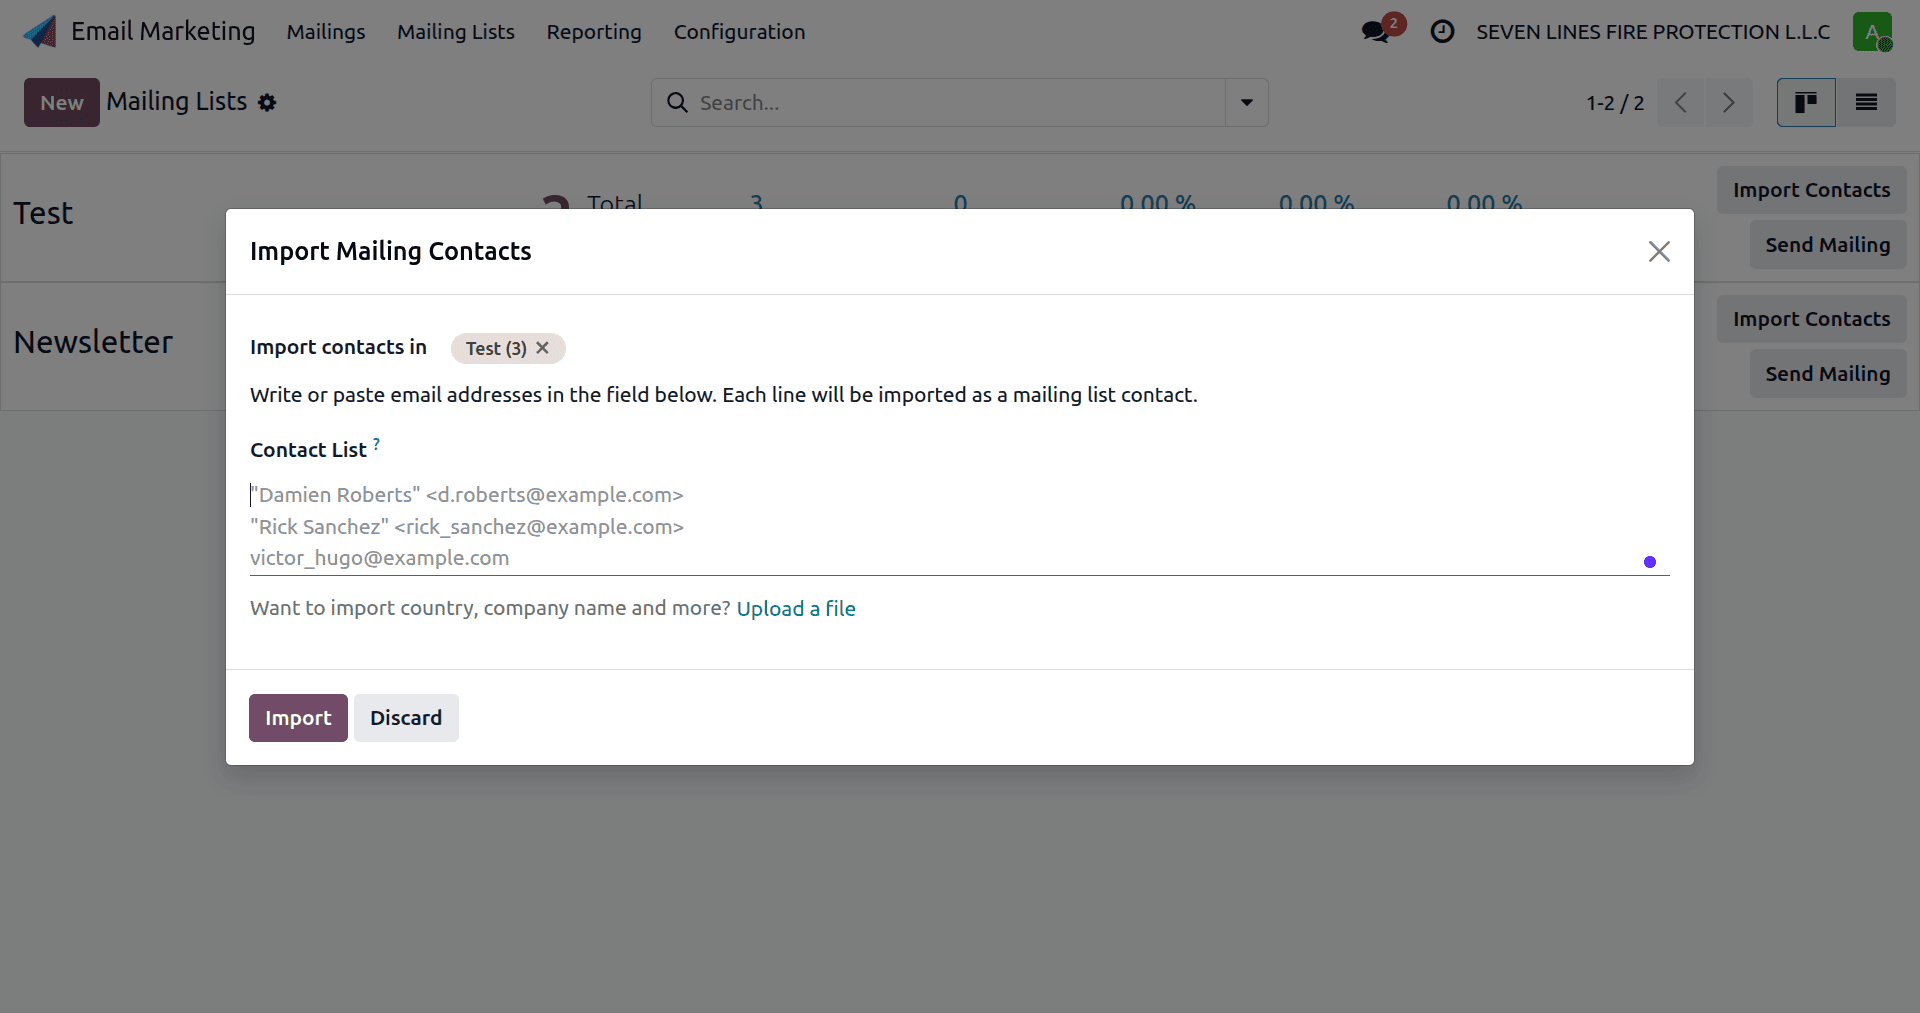
In the Import Mailing Contacts pop-up window, the Import Contacts In field is automatically populated with the selected mailing list. You can then enter or paste multiple email addresses into the Contact List field, with each email address placed on a separate line.
To import additional contact information, such as the company name, country, or other details, click Upload a File at the bottom of the pop-up window. Upload a supported file containing the contact details, review the import settings, and click Import to add the contacts to the selected mailing list.
The Blacklist feature in Odoo 19 Email Marketing helps prevent emails from being sent to recipients who no longer wish to receive marketing communications. When a recipient clicks the Unsubscribe link on the Subscription Management page, their email address is automatically added to the blacklist. Users can also manually add contacts to the blacklist whenever required.
Navigate to Email Marketing > Configuration > Blacklisted Email Addresses to view and manage blacklisted email addresses. This page displays all blacklisted contacts in the database, allowing you to review and manage recipients who are excluded from future email campaigns.
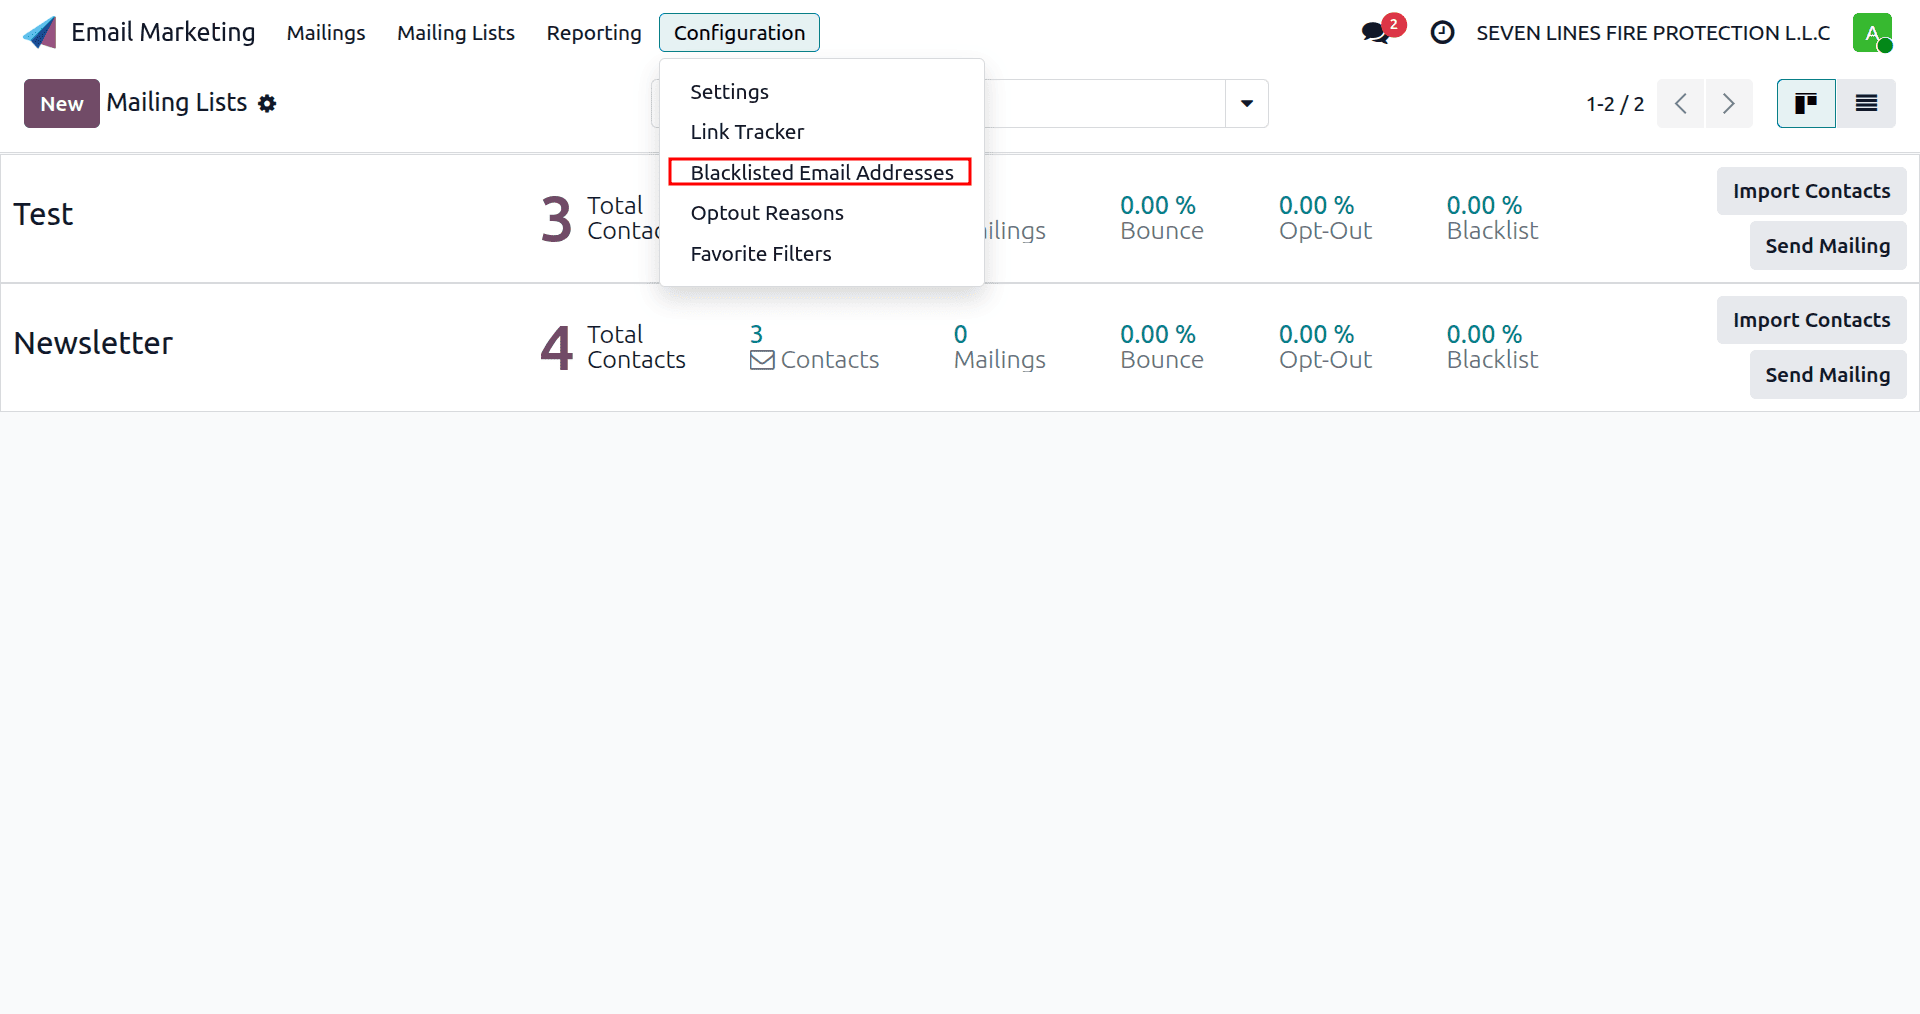
To manually add a contact to the blacklist, click the New button in the top-left corner of the Blacklisted Email Addresses page. On the form that appears, enter the recipient's email address and, if required, specify whether the blacklist entry is active. After saving the record, the email address will be excluded from all future email marketing campaigns until it is removed from the blacklist.
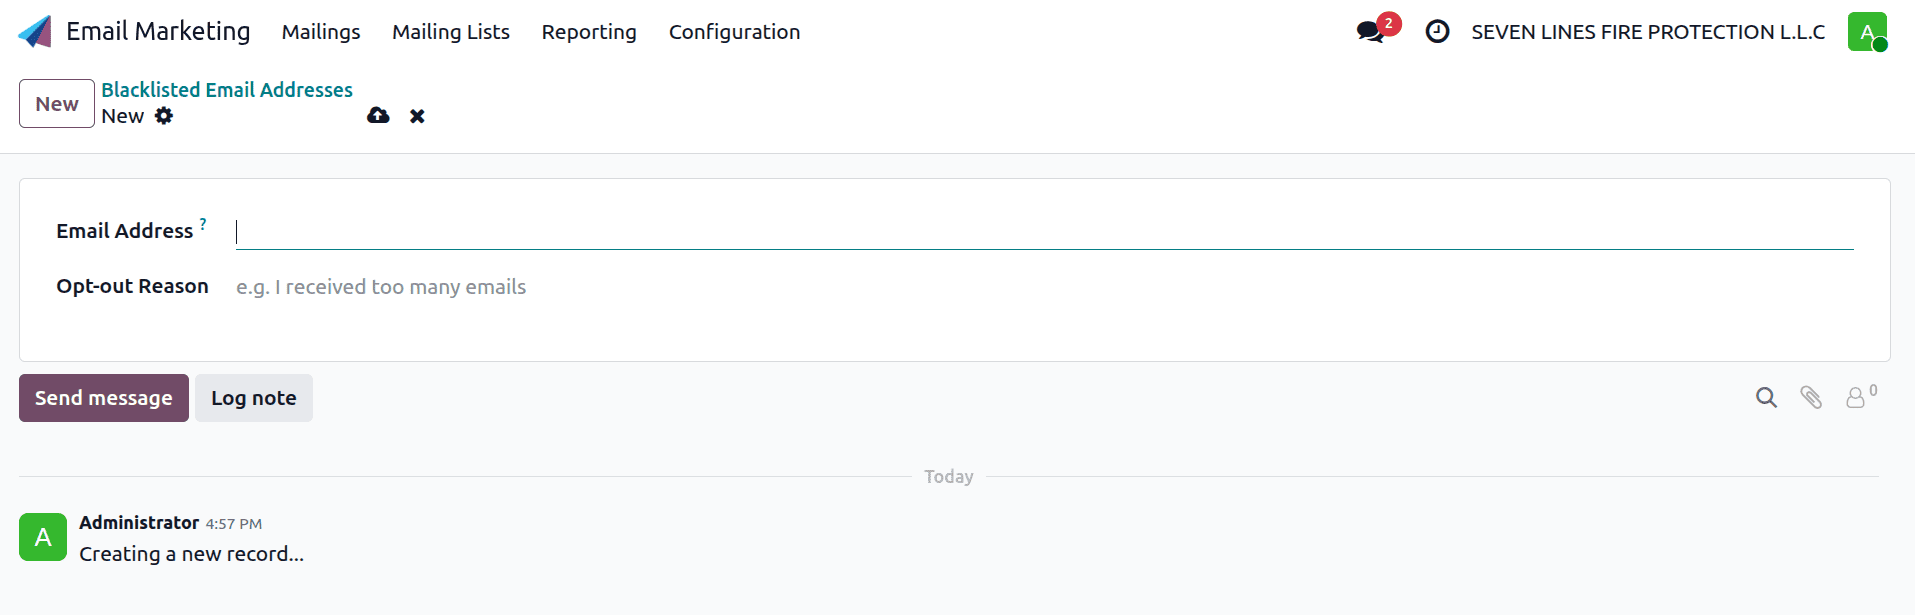
Click Save to add the completed record to the Blacklisted Email Addresses list. To remove an email address, select the relevant record from the dashboard and click Unblacklist. Once unblacklisted, the contact becomes eligible to receive future email marketing campaigns.
The first thing that needs to be done for a successful campaign using Email Marketing in Odoo 19 is the maintenance of Mailing Lists and Mailing Contacts. This allows companies to organize recipients in mailing lists and maintain correct contact information, which enables delivering personalized campaigns resulting in high-quality outcomes. With Odoo’s Email Marketing tool, it becomes very easy to manage the segmentation of your audience, their subscriptions, blacklisted contacts, and send campaigns. It is critical to have well-organized mailing lists for any kind of campaign – whether it be a promotion of products or events or nurturing of leads.
To read more about How to Configure Mailing Lists and Mailing Contacts in Odoo 18 Email Marketing, refer to our blog How to Configure Mailing Lists and Mailing Contacts in Odoo 18 Email Marketing.