In company access towards the official documents keeps differing from one individual to another. It totally depends on the individual’s position or employment status in the organization. Being in a supervisory role, Managers get access to almost every document in the workplace.
However, the employees will have access only to their work-related documents. Same with the case of a Customer or the Supplier. They too will have very limited access to the official records. Thus it is quite essential that the business maintains certain protocols and gateways to pass documents. Setting users and accessibility in the system helps in ascertaining only related documents are passed to each user.
Setting user types makes sure that the individual access to their own documents and refer only related works. Odoo considers users into three types that provide different access depending upon the type of user. We can easily manage this by using Odoo.
This blog explains the following three segments:
1. How to create user with different user types?
2. How to set the password for users?
3. Difference between Internal and Portal users.
How to create user with different user types?
First, go to the main settings and activate developer mode(debug mode)
Note: Manager(admin) can only create a user.
In the main settings click on users & companies -> users
Click the create button for creating a user.
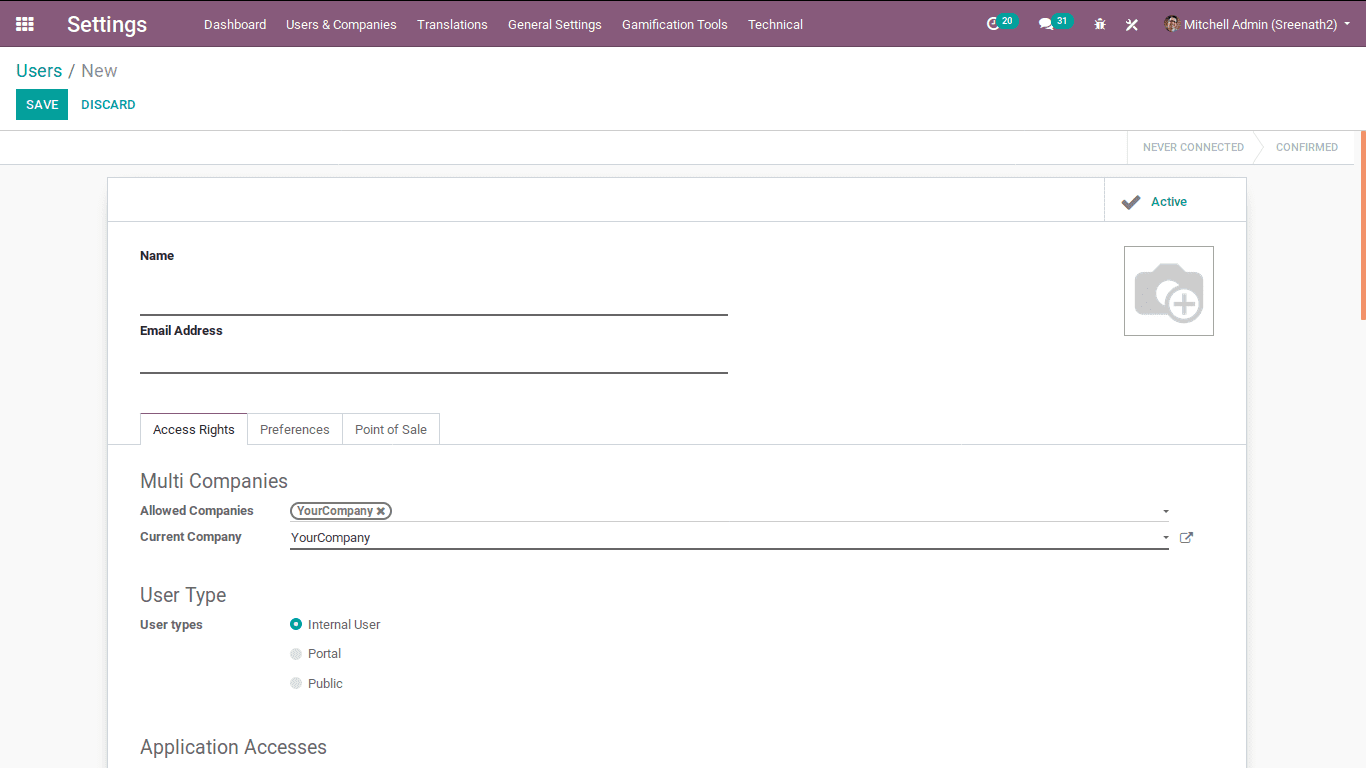
There are some mandatory fields Name and Email.
Name is used to identify the user
Email Address is used to login as an individual. It is unique.
There can be seen other fields under the access rights.
Let’s check different types of user types.
User types:
There are three types of user permitted in odoo.
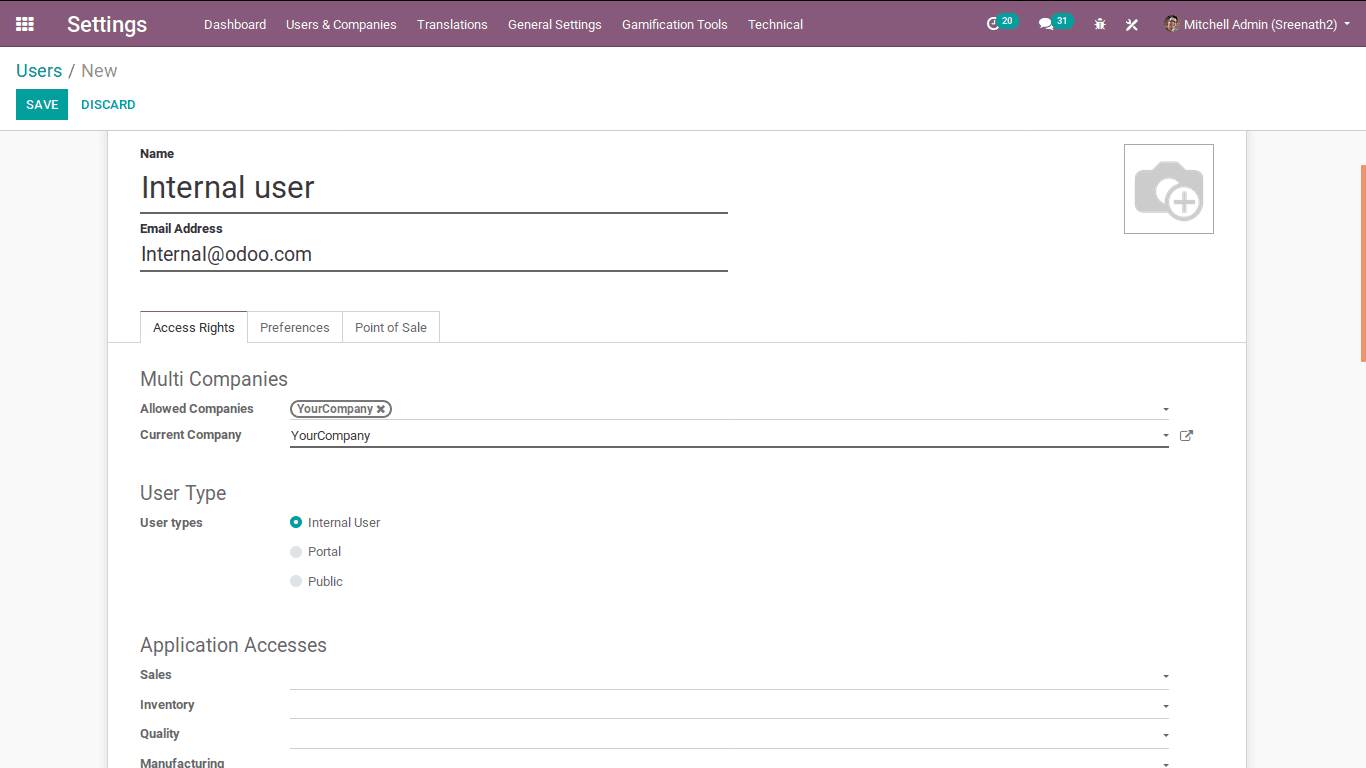
1. Internal user
2. Portal User
3. Public User
Internal user:
In this case, one can see application accesses. Here we can specify the access for each module.
Now I am going to create an Internal user,
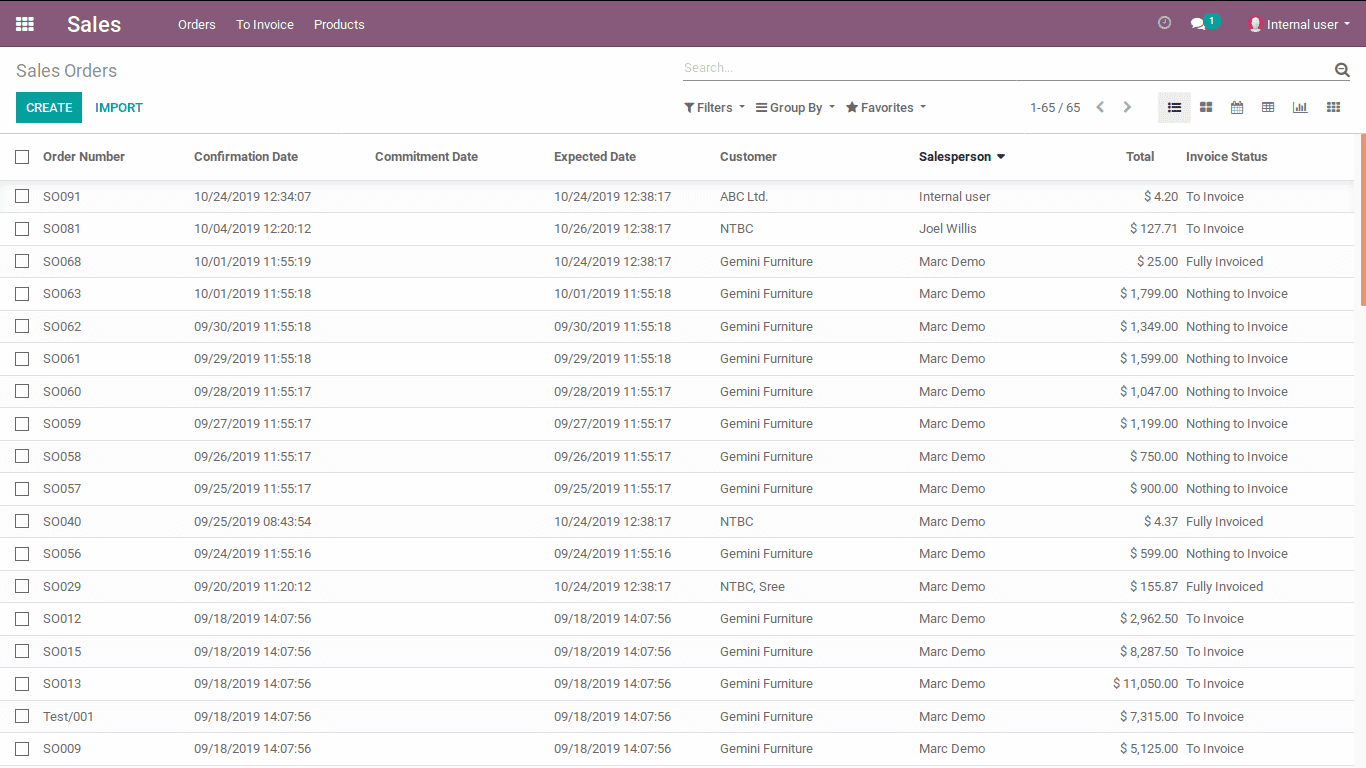
We can check how it works in the case of sales.
Click on the sale’s drop downfield. Here one can see some security groups for different types of internal user access provided by the corresponding module. We can manually change this permission by altering the .csv file of the related module.
In the case of sales module, it provides with three types of permissions:
User: Own Documents Only
In this case, the user gets access to created documents.

User: All Documents
In this case, the user gets all documents under the module and gets to make the next operations on that document.
Manager:
In this case, the user will get all permission that allowed for the Manager (Administrator).

We can see in this picture; the user will get all menus that allowed to the Manager.
Note: The above feature keeps differing from one module to another.
We can check how it works in each module.
Purchase:
User: Access to all documents in this module.
Manager: Reporting, Configuration settings of the module. The manager can only lock and unlock a document.
Inventory:
User: Access to every document in this module.
Manager: Reporting and configuration settings of the module.
Accounting & Finance:
Billing: Access to Documents related to customers and vendors.
Accountant: Access to Accounting Overview, Reporting and 3. Configuration menu.
Advisor: Will get the Accounting menu and configuration settings.
Manufacturing:
User: Access to Overview, Operations, Planning, Master Data, and Reporting Menus.
Manager: Will additionally get the Configuration menu.
Quality:
User: Access to Overview and Quality Control menus.
Manager: Access to Reporting, Configuration menu and control points in the Quality Control menu. The manager can change stages from pass to fail after validation of the user.
PLM:
User: Access to all documents, Overview, Engineering Change Orders and Master Data.
Manager: Access to Reporting, Configuration settings of module and manager can only create stages in Engineering Change orders.
Employees:
Equipment Manager: Will get all employees and badges. Cannot make any operations on the documents in this module.
Officer: Access to Departments menu, Challenges and Goal history in Challenges menu. Officers can create and make any operations on documents.
Manager: Access to Configuration and can create contract.
Leave:
Officer: Access to all documents and can make any operations.
Manager: Can see the overview of this module.
Recruitment:
Officer: Access to all documents and make any operation on this document.
Manager: Access to settings on the Configuration Menu.
Expenses:
Officer: Access to My Expenses and Expense Report Menus.
Manager: Expenses Analysis Report and Configuration Menu.
Timesheets:
User: Access to all documents and can make any operations on own documents.
Manager: Access to all operations on this module with reporting and configuration.
Attendance:
Manual Attendance: Can create own attendance only.
Officer: Can manage all attendance and get attendance reports.
Manager: Configuration Menu.
Appraisals:
Officer: Access to every appraisal.
Manager: Access to Reporting.
Payroll:
Officer: Access to created documents only.
Manager: Access to all documents, Payslips Batches and Configuration.
Events:
User: Access to all documents, however, cannot create and edit events.
Manager: Access to every operation on this module with reporting and configuration settings.
POS:
User: Access to Dashboard, Orders, and products. Users can only start a new session.
Manager: Access to Reporting and Configuration. The manager can resume and close a session.
Website:
Restricted Editor: Access to dashboard view and can open the website.
Editor and Designer: Access to Configuration menu in this module and they will get more controls on the website.
Administration:
Access Rights: Access to settings in apps. They will get some menus like Users & Companies and Translations.
Settings: Will get Dashboard and General Settings.
Portal user: Is a customer with specific portal access. This type of user only gets to see their own documents. Portal user denotes providing system access to customers or suppliers.
There is another easy method for creating a portal user by using contact module.
Choose any contact of customer:
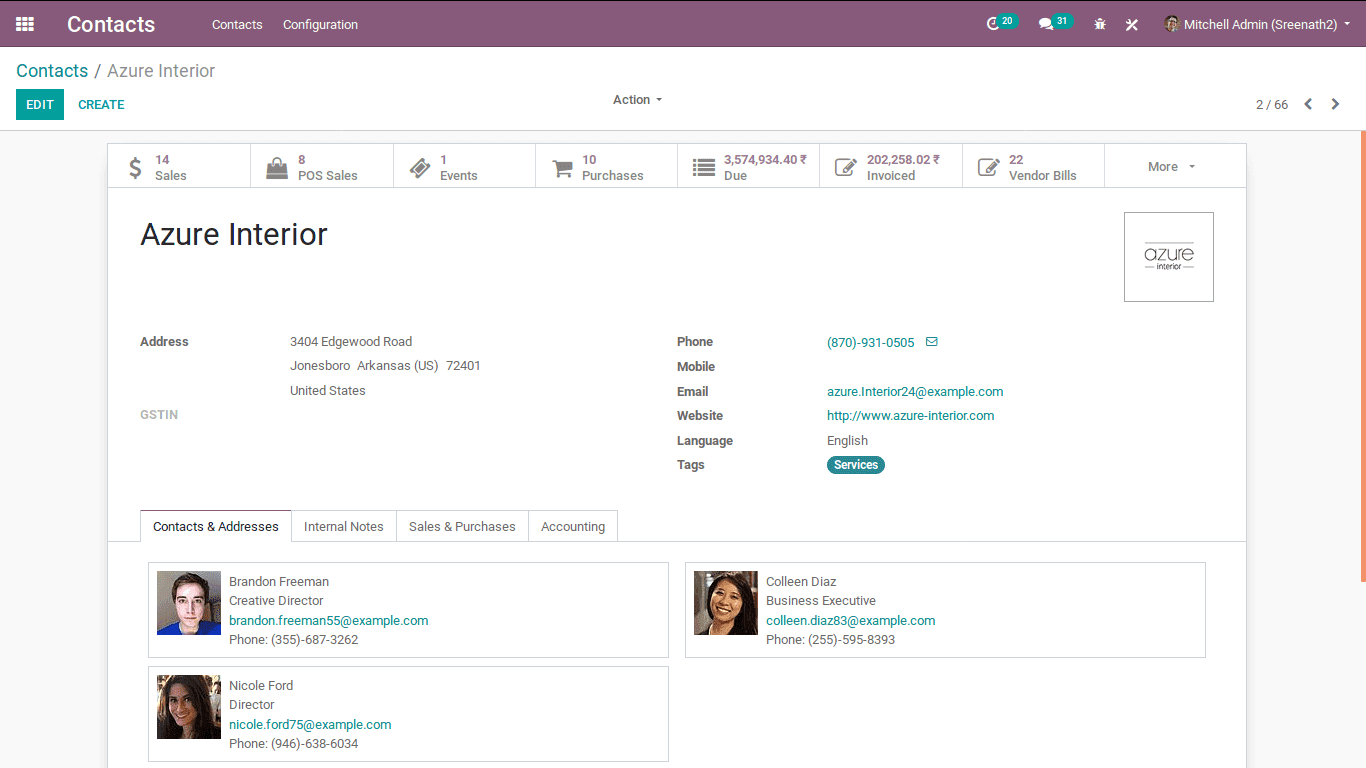
Here I am choosing the contact of my partner “Azure Interior”
In the action menu, one can see “Grant Portal Access”. Upon clicking it, a popup will appear.
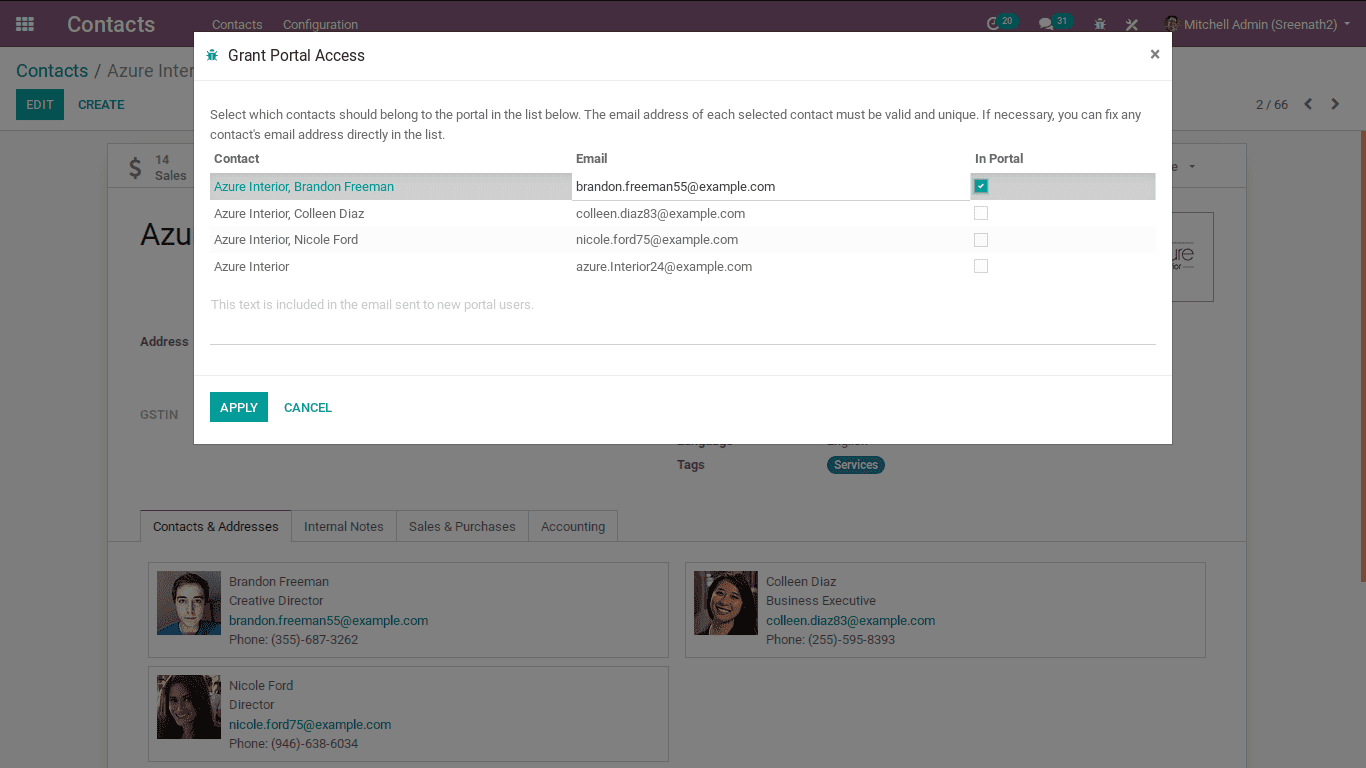
Here one can enable the portal access. Later click on the apply button.
At the time a portal user will be created with the name of the contact name of that partner.
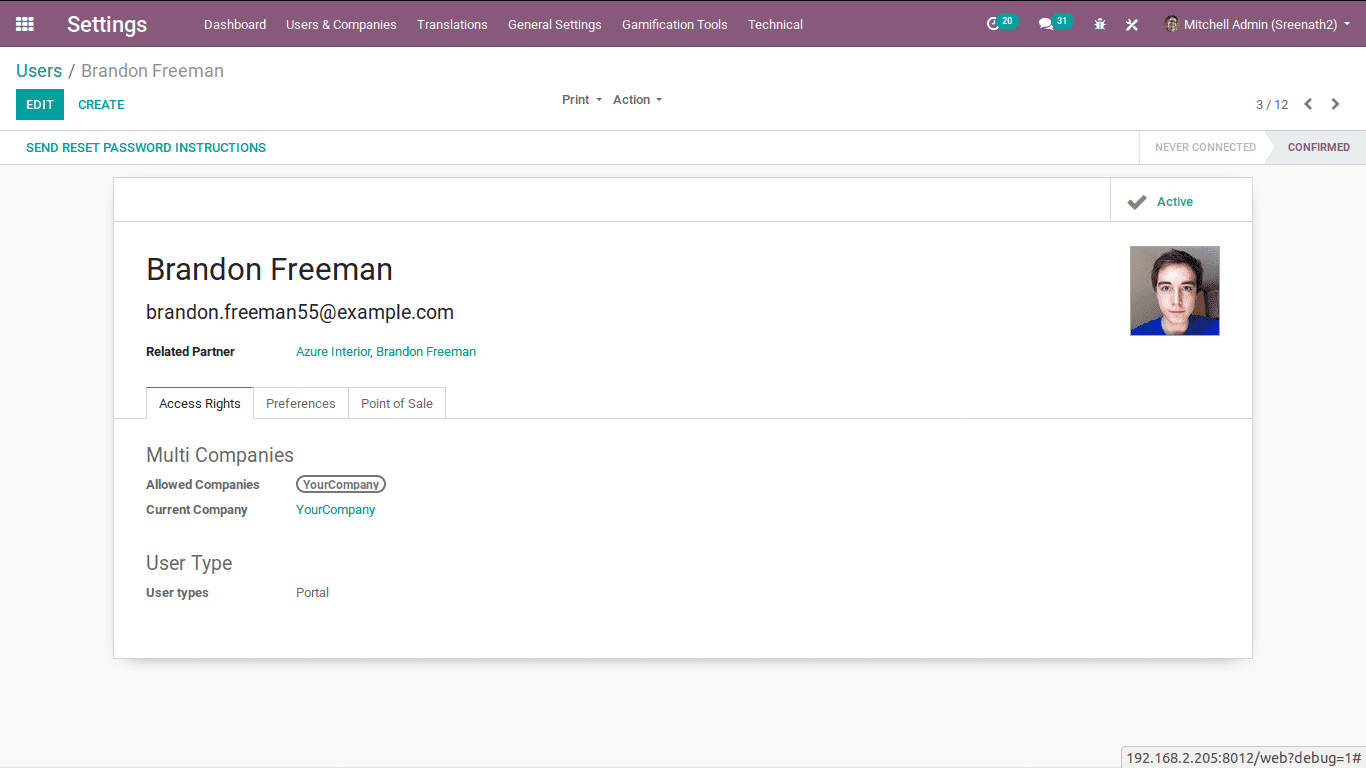
In the above image, we can see the created portal user. Set a password for the user and login with this Email id and password.
That time a website view will appear.
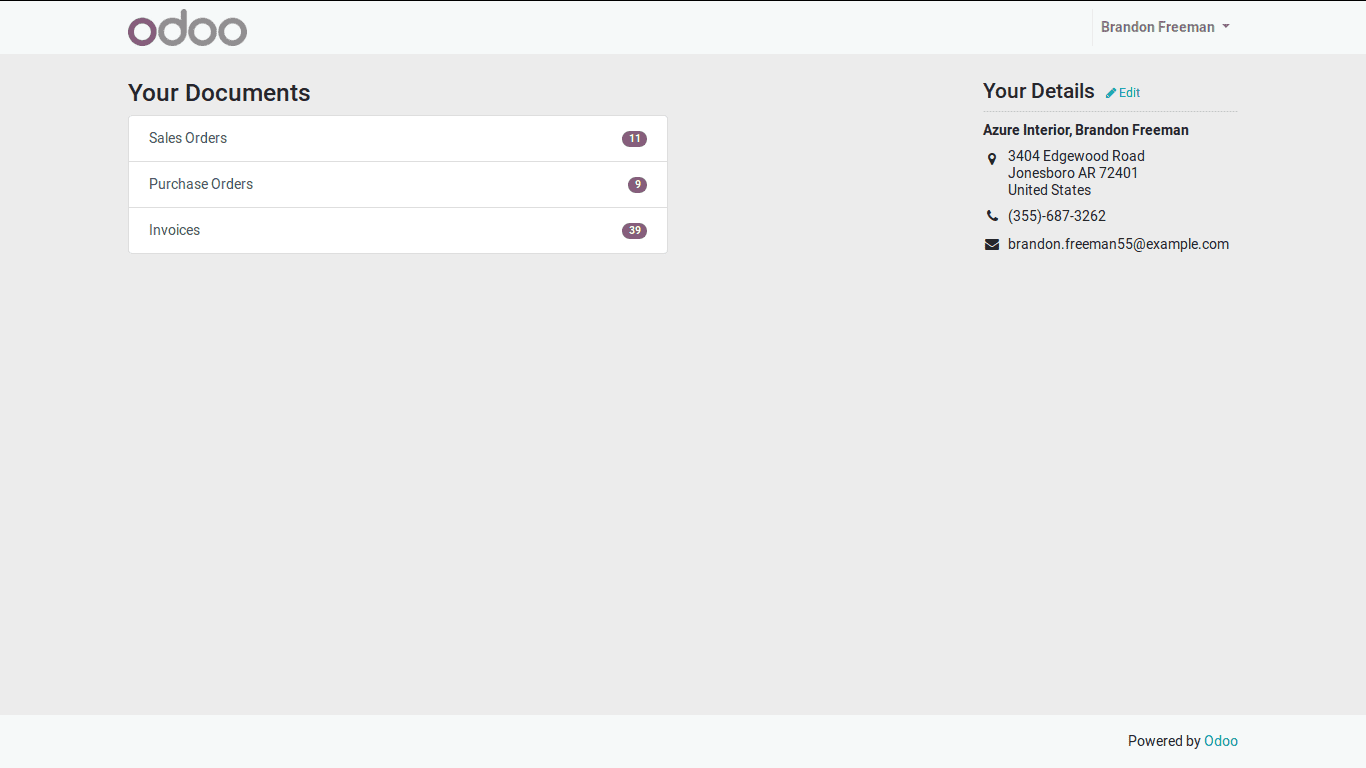
In this image, you can see all the documents related to that customer. Upon clicking it, you get more details of it.
Public user: It is a user type, where public users can access our website using its URL. When the user type is public, access is limited.
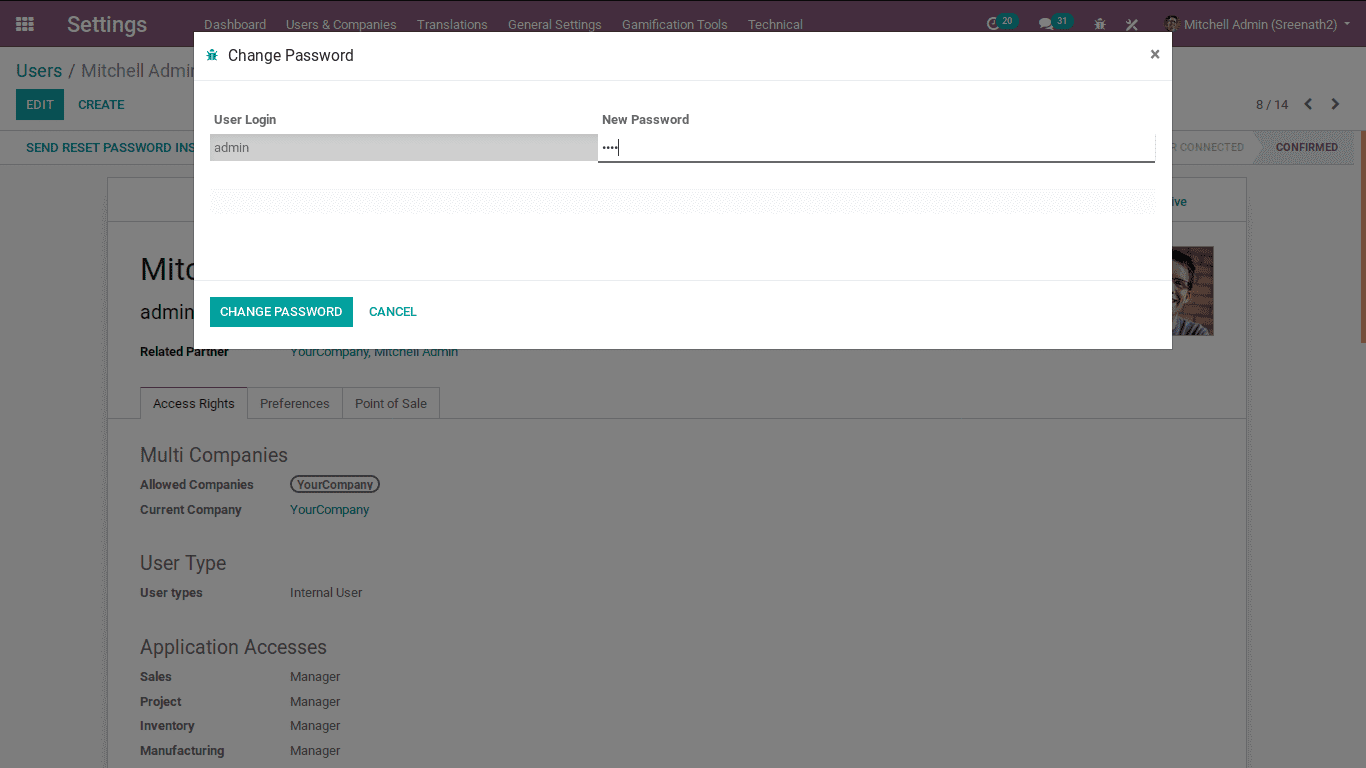
How to set password for users?
After creating a user, one can see an option for change password under the action menu. Upon clicking, a popup with user login and password field is emerged.
There you can specify the new password for the user and click the button change password. Then the user can log in with this login id (Email) and password.
Difference between the portal and Internal user
The internal user is the employee (it can be manager or user). They have access to applications.
The portal user is the customer or supplier. They have only access to the website where they get their corresponding data.