Odoo has many widgets available in the user interface to perform different functionalities such as Status bar, Checkboxes, Radio button, etc. which makes the operations in Odoo simpler and run with ease.
In this blog, I will be explaining about different default widgets in Odoo, its purpose, and its implementation syntax.
You can also have read our Odoo 13 new widgets blog
1. Ribbon Widget
2. Calculator Widget
Many2many Checkboxes
This field displays a list of checkboxes. Usually used to display one or more related items as depicted in the following image
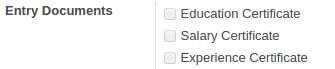
Use the code widget=’many2many_checkboxes’, to get the many2many checkbox effect.
Statusbar
Used to display the status of a process which is running, completed or triggered. Furthermore, we can use the code widget=’statusbar’ to obtain the Status Bar effect.

Percentpie
The widget is used to display a progress chart of the process which can be obtained by using the code widget=’percentpie’. Moreover, this widget is applicable for both integer and float fields where the float value will be converted into an integer value.

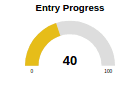
Guage
Guage is a widget available which is similar to ‘Percentpie’ which can be obtained by using the code widget=’guage’. However, in the case of gauge widget, you have to add another field, for the maximum value which can be set by configuring the following option in the XML code.
<fieldname="entry_progress"widget="gauge"style="width:120px;height:90px;cursor:pointer;"
options="{'max_field':'maximum_rate'}">
 EntryProgress
</field>
Here ‘maximum_rate’ described is an integer field.
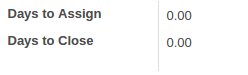
Progressbar or Progress
The progress bar widget displays the progress of a process. Moreover we can Use the code widget=’progressbar’ to get the effect.

Many2many Tags
Similar to the many2many checkbox the many2many tags operates however, it displays multiple items as tags as depicted in the below image. Furthermore we can use the code widget=’many2many_tags’ to get the effect.

Handle
The handle widget is used to drag the line up and down. In addition, this widget is mainly applicable to the tree view and can be used by assigning the code widget=’handle’ to get the effect.

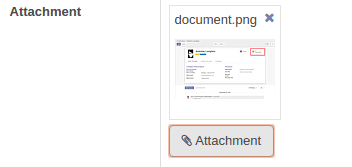
Many2many Binary
Many2many binary fields will provide you with an option to upload a file and view the preview of it. Moreover, the widget is available only for the binary fields which can be obtained by Using the code widget=’many2many_binary’
Many2many Kanban
We can use the code widget=’many2many_kanban’ to get the many2many kanban effect. Additionally, we can set ‘many2many’ fields as a kanban view by using ‘many2many_kanban’ widget.

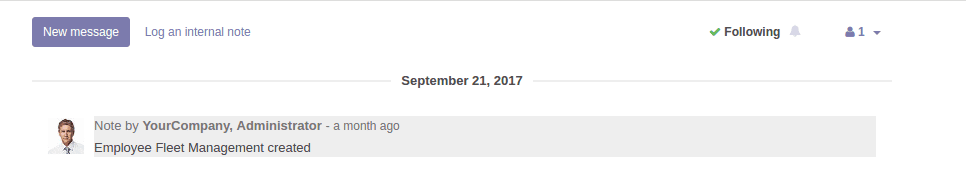
Mail Followers & Mail Thread
We can track every model using the ‘mail_followers’ widget. Moreover we can use the code widget=’mail_folowers’ to get the effect.
Selection
The selection widget displays a list of items. In addition, the effect can be attained by using the code widget=’selection’ and It is applicable only for ‘many2one’ field

Radio
The radio widget can be used to attain a button effect. Moreover we can use the code widget=’radio’ to get the radio button effect.

Float Time
The flot time widget can be attained by using the code widget=’float_time’. Furthermore, to have the widget in operation you have to define the field type as ‘float’.
Image
The image widget available is used for binary field operations and can be obtained by using the code widget=’image’.

Email
If we set the widget as ‘email’ for a character field the character will be displayed as an email link. Additionally when the user clicks on the data field it will redirect them to compose mail form. Moreover, we can use the code widget=’email’ to get the effect.

Phone
If we use the mobile application, then we can directly dial the number to the clipboard by using the code widget=’phone’.
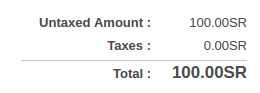
Monetary
The field allows the user to append currency with our amount which can be done by using the monetary widget. In addition, we can use the code widget=’monetary’ to get the monetary effect
URL
If we set the widget as URL for a character field the character will be displayed as a hyperlink. Furthermore the code widget=’url’ can be used to attain the effect.

Checkbox
The widget displays checkboxes allowing you to define checkboxes for opertison. Moreover we can use the widget=’checkbox’ code to get the effect.
Integer
A field set as the integer will allow only integer values to be entered. Furthermore we can use widget=’integer’ code to get the effect.

Date
The date widget will convert the DateTime field into the date field. Moreover we can use widget=’date’ code to get the following effect.

Html
We can use the Html widget to get the following effect. Furthermore the code widget=’html’ will provide you with the operations.
Html Frame
We can use widget=’html_frame’ to get the HTML frame effect. Moreover it will provide the default frame for our field.
Priority
The priority widget is one of the useful tools of operations. Moreover, we can use widget=’priority’ to get the priority widget.

Boolean Button
The boolean button widget is useful to set toggle values for the field. Furthermore the code widget=’boolean_button’ can be used to get the field.

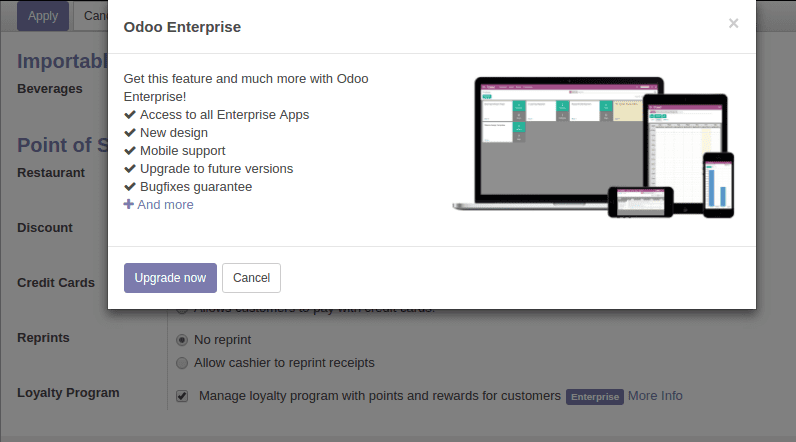
Upgrade Boolean
We can use widget=’upgrade_boolean’ to get the following effect. When we click on the field of ‘upgrade_boolean’ widget, then it will pop up the window as depicted below.
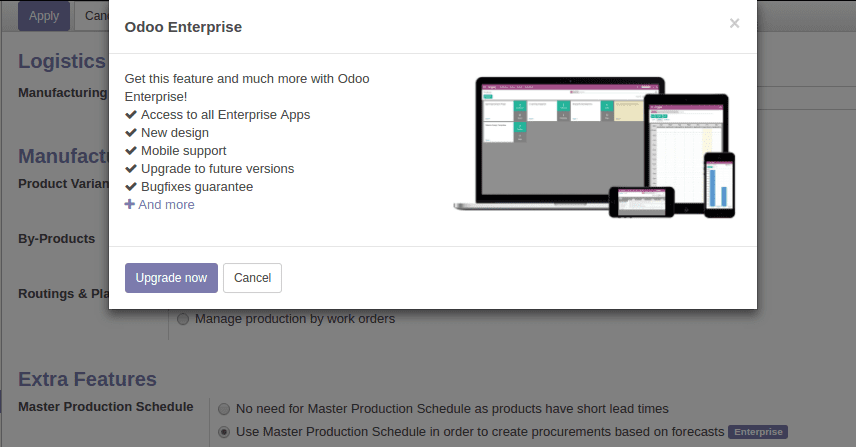
Upgrade Radio
We can use widget=’upgrade_radio’ to get the effect as depicted in the below image.
Char Domain
We can set the domain for a particular field using the ’char_domain’ widget. Furthermore providing the code widget=’char_domain’ will get you the effect

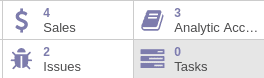
Statinfo
Use widget=’statinfo’ to get the following effect. The widget will display the count.
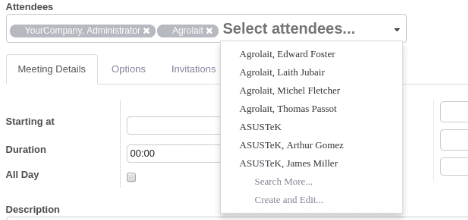
Many2many Attendee
We can use the widget=’many2manyattendee’ to get the following effect as shown in the image.
On2many
The on2many widget can be obtained by using the code widget=’one2many’, which will provide the effect depicted in the following image.
One2many List
Use the one2many list widget by providing the code widget=’one2many_list’ to get the following effect as in the below image.
Widget on Button
The widget on button will provide you with accessible buttons. Moreover, we can use the code widget=’widgetonbutton’ for the following effect.
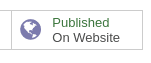
Website Button
If you want the website button to navigate you to the website form the back end to the front end of the platform you can use the website button widget. Moreover, the code widget=’website_button’ will give you the effect as depicted in the below image .
If you want to learn on How to Create a Widget in Odoo, we have explained it in detail by providing the screenshots for each step of operation.
You can read about the Widget list in Odoo 14, Where almost all types of widgets are covered and explained