Chatter
Chatter is the means of communication tool located on most of the records in odoo.
It lets you email customers immediately from a purchase order, sales order, etc.,
For example, to discuss details and stay in touch. Employees can use internal notes
that are not visible to customers to notify one another about progress or problems
in the workflow. Other users can also be prompted to join a conversation by being
added as a Follower to the document, even if they weren't initially involved.
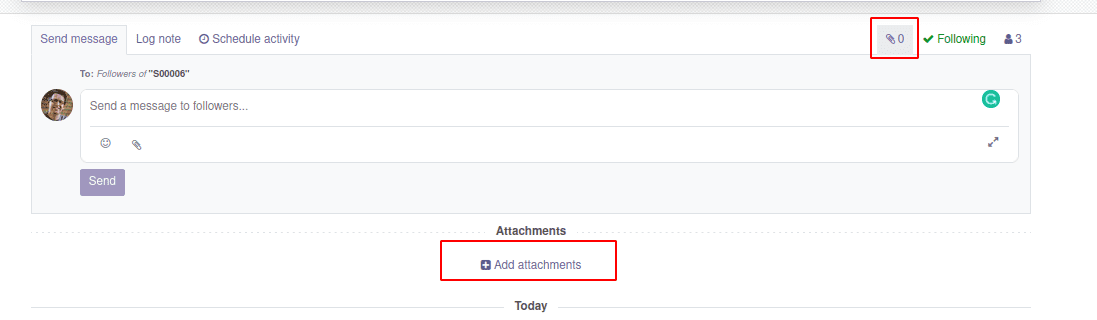
For example, if we take any sale order inside the form towards the bottom or to
the right of the document, look for the chatter.
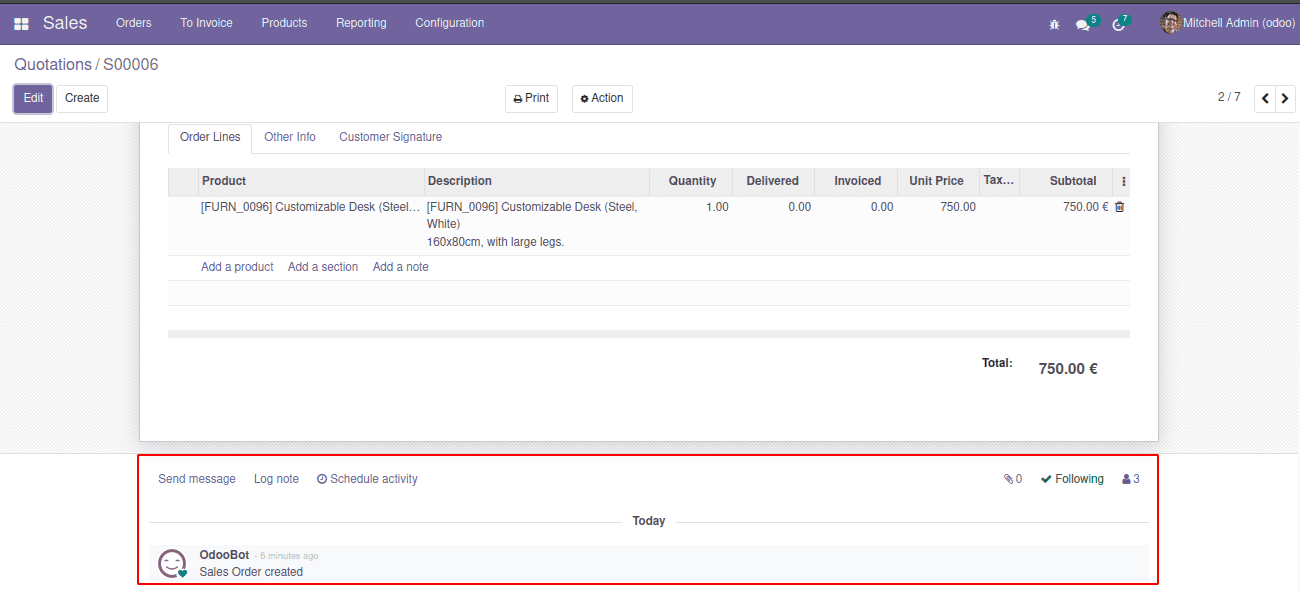
You'll find the following options there:
Send Message: You can compose a message and send it to your followers.
An email is sent to all people who are actually following the document. Customers
who are reading the document can respond, and their responses will be routed back
into Chatter.
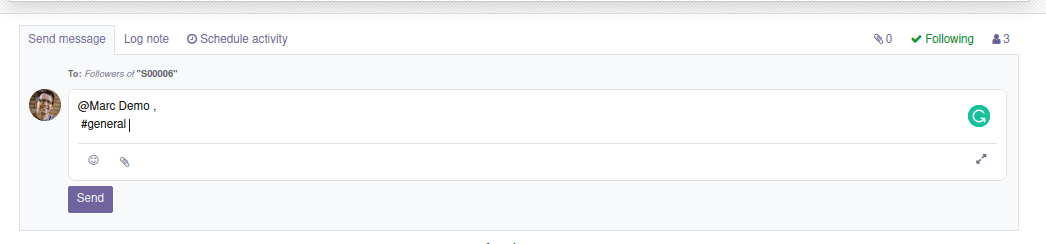
To mention any person, the symbol ‘@’ can be used, and to mention the channels ‘#’
is used. Here any reactions using the emojis can be posted. In case anyone needs
to add an attachment, that is also possible.
Log Note: This is useful for keeping track of progress without
giving too many updates to the customer or initiating a conversation with other
staff that you don't want the customer to know about.
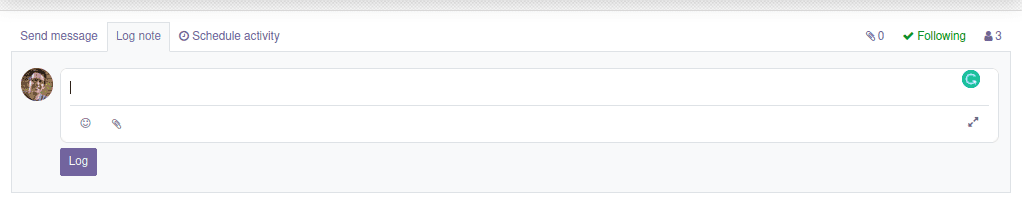
Here also attachments, as well as special mentions, can be added.
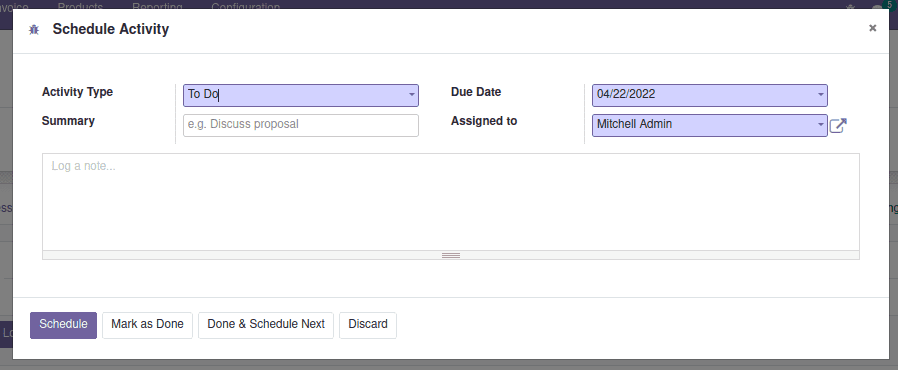
Schedule Activity: This allows you to schedule activities and assign
them to people.
📎: It shows the number of attachments and leads to the facility
to add attachments.
Follow/ Following: It shows whether you're following it at a glance.
One can unfollow the record by hovering over the ‘following’ and clicking on the
‘unfollow’
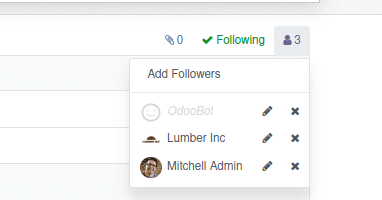
Next to this, there is a button to show the followers. It will show the number of
followers, and by clicking on this it will show the list of followers. From here,
one can edit and remove the followers and add a new member to the follower list.
When you click on the option ‘Add Followers,’ it will pop a window like this;
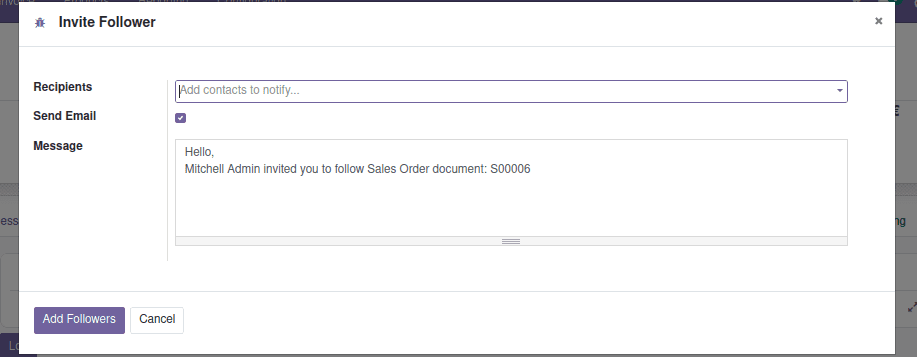
From here, we can add the followers we wish.
The edit option available on the follower’s list will show the list of subscriptions
that can be allowed or disabled to the follower we select.

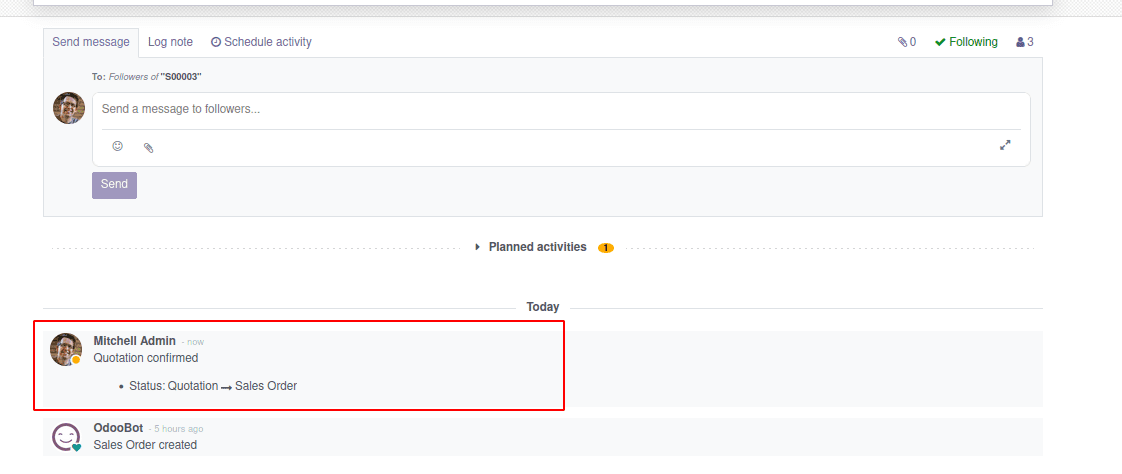
After adding the messages, logging notes, or scheduling the activities, everything
will appear in the chatter of the form view. So this is the feature described on
the chatter.
Sometimes, if we change some fields inside the form view, the change will trigger
and be shown inside the chatter. This feature is known as “Tracking”.
It is simple to enable tracking for a field. In the field declaration, if we mention
the ‘tracking’ attribute. We can enable tracking by setting this attribute as True.
That is tracking=’True’ inside the field declaration. Odoo is a multi-user platform,
and the same record may access and update any of the users at any moment.
In these circumstances, we must keep track of the field values. Odoo chatter keeps
track of this information automatically.
How to Add Chatter to the Form View
Chatter is a basic functionality available in Odoo. It can be added to the form
view with a few steps. In order to have the basic chatter to a required form, you
will need to inherit the model ‘mail.thread’ in the python file.
class ClassName(models.Model):
    _name = 'custom.model'
    _inherit = 'mail.thread'
Also, we will need to add the dependency inside the manifest file as ‘mail’. These are
the things that need to be added to the python file. Next, we need to move on to the XML
file. Hereafter the sheet of the form we can define the chatter;
For example,
<record id="view_id" model="ir.ui.view">
    <field name="name">name.name</field>
   	<field name="model">model.model</field>
 	<field name="arch" type="xml">
        <form string="">
            <sheet>
            </sheet>
            <div class="oe_chatter">
                <field name="message_follower_ids" groups="base.group_user"/>
                <field name="message_ids"/>
            </div>
        </form>
    </field>
</record>
Here the division ‘oe_chatter’ defines the chatter. Inside this, there are two fields
‘message_follower_ids’ and ‘message_ids.’ These fields refer to the basic fields of the
chatter. There is one more feature called ‘Schedule Activity’ in order to have this you
will need to inherit one more model and that is 'mail.activity.mixin' and inside the XML
file we can add the field.
<field name="activity_ids" widget="mail_activity"/>
Together the basic chatter including the activity option can be added by inherting the
models;
_inherit = ['mail.thread', 'mail.activity.mixin']
And inside the XML file following code can be applied;
<div class="oe_chatter">
   <field name="message_follower_ids" widget="mail_followers"/>
   <field name="activity_ids" widget="mail_activity"/>
   <field name="message_ids" widget="mail_thread"/>
</div>
One of the most essential reasons to include chatter in your module is to keep track of
activity in a certain region of the module. So this is how we can make use of the
chatter in Odoo.
Activity
Activities reduce the risk of uncertainty by providing explicit instructions for the next
step. Planning activities is a captivating method to keep focused on the work. Most Odoo
records allow you to schedule activities. We'll use an opportunity in the CRM software
for the example.
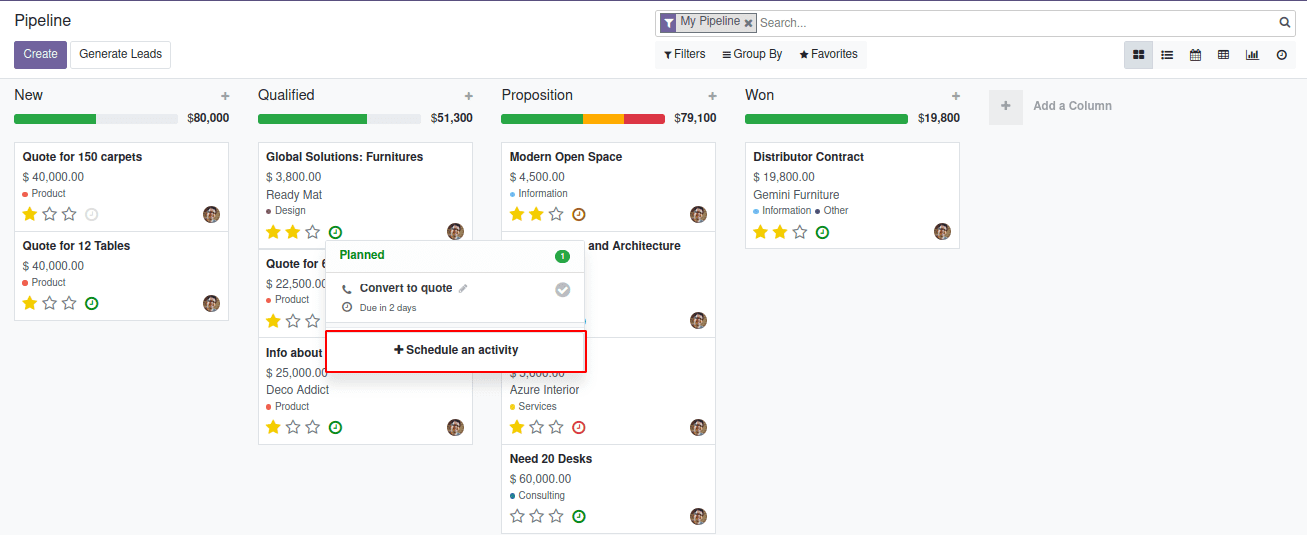
Here inside the pipelines, there are the opportunities we have. Then, on an opportunity
card, click the clock symbol to see the option to schedule the activity. This will show
a window to schedule an activity.
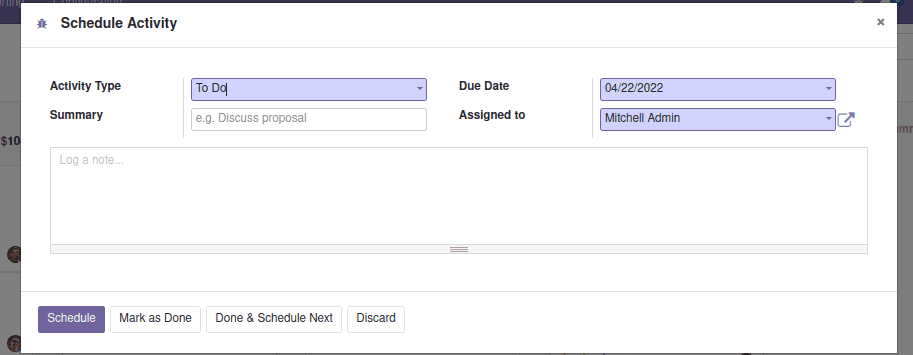
Here fields are;
Activity Type: Here we can choose the activity type which we would like
to use.
Summary: It’s the description of the activity that is selected.
Due Date: This is the deadline for completing the activity.
Assigned To: This is the person who is in charge of the activity.
By clicking on the schedule button, this activity will save it. In the Kanban view, the
opportunity cards have the clock symbol with different colors; If the clock symbol is
green, the opportunity has already been scheduled for activities. If the color is
yellow, the activity is due today. If it's red, it's time to get to work. If it's grey,
there aren't any activities planned right now.
The activities can be planned from the tree view, form view, and calendar view of the
records as well.
The users can create the types of activities as they want. For this, it will be in the
configuration of the CRM module or in the general settings of Odoo.
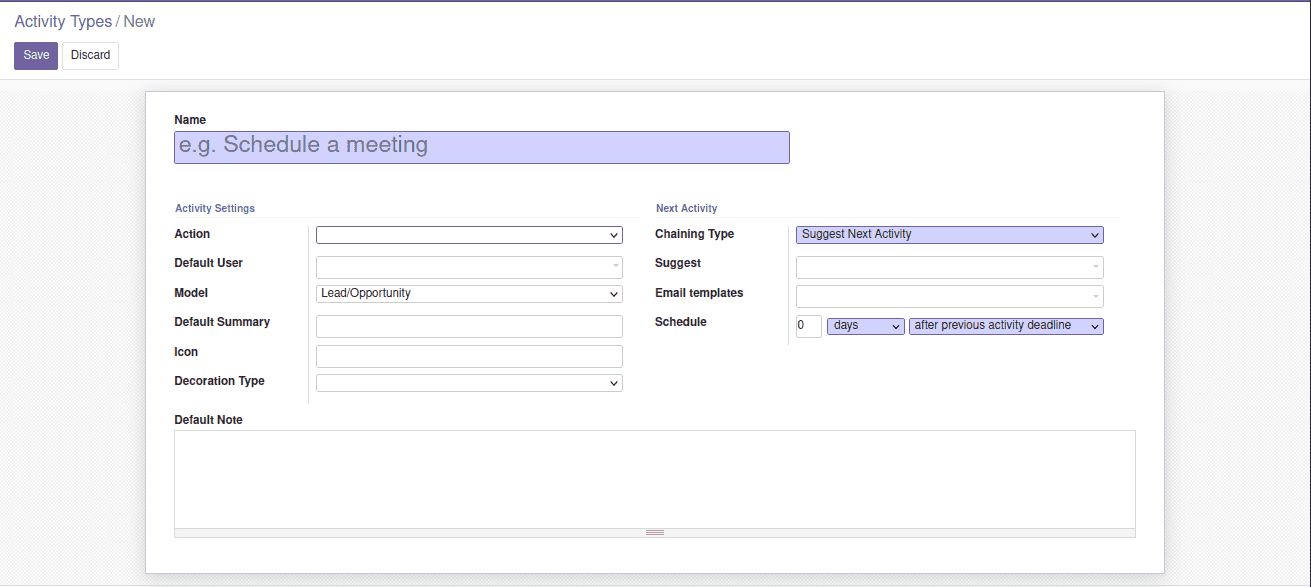
Name: Name of the activity type.
Action: Specific behaviors might be triggered by certain actions, such
as opening the calendar view or automatically marking it as done when a document is
uploaded.
Default User: Choose a user to whom this activity should be assigned by
default.
If you leave this field blank, you'll be able to manually assign the activity each time
it's selected.
Model: When you want to make the deployment activity of the starting
model of a comment unique to one model and not available when managing the activity of
the other model.
Default Summary: Enter a brief description of what the activity entails.
This is frequently left unfilled.
Icon: Fonts of icons such as fa-envelope, etc.
Decoration Type:It will change the background color of the related
activities.
For, Next Activity
Chaining Type: Select the method for selecting the next activity. Select
either Suggest Next Activity or Trigger Next Activity as your next activity.
Suggest: The choice that shows is determined by the Action and Chaining
Type that has been chosen. When you want to make the deployment activity of the starting
model of a comment unique to one model and not available when managing the activity of
the other model.
Email Templates: Email template to be used for the activity if needed.
Schedule: Set a number of days, weeks, or months for the next action to
occur, as well as when it should occur, such as after the first activity's completion
date or after the prior activity's deadline.
Log Note: Notes to appear on the activity.
In this way, one can create the activity types.
Click the icon in the upper right-hand corner of any page to see all of your scheduled
events. The number next to the icon indicates late actions.