Configuration
Options such as settings, event template, event stage, event tag categories, event question, mail scheduler, lead generation, booth categories, booth, track stage, track location, track tag categories, track tag, track visitor, sponsor level, quizzes, quiz questions, and website menus are available under the configuration.

1.1 Settings
You can post the event calendar on your website and get talk proposals from various speakers with the Odoo 19 Events module. The Events module's Event Tracks menu will record all of the tracks from events that have been posted online. Activate the Schedule & Tracks option in the module's Settings menu.
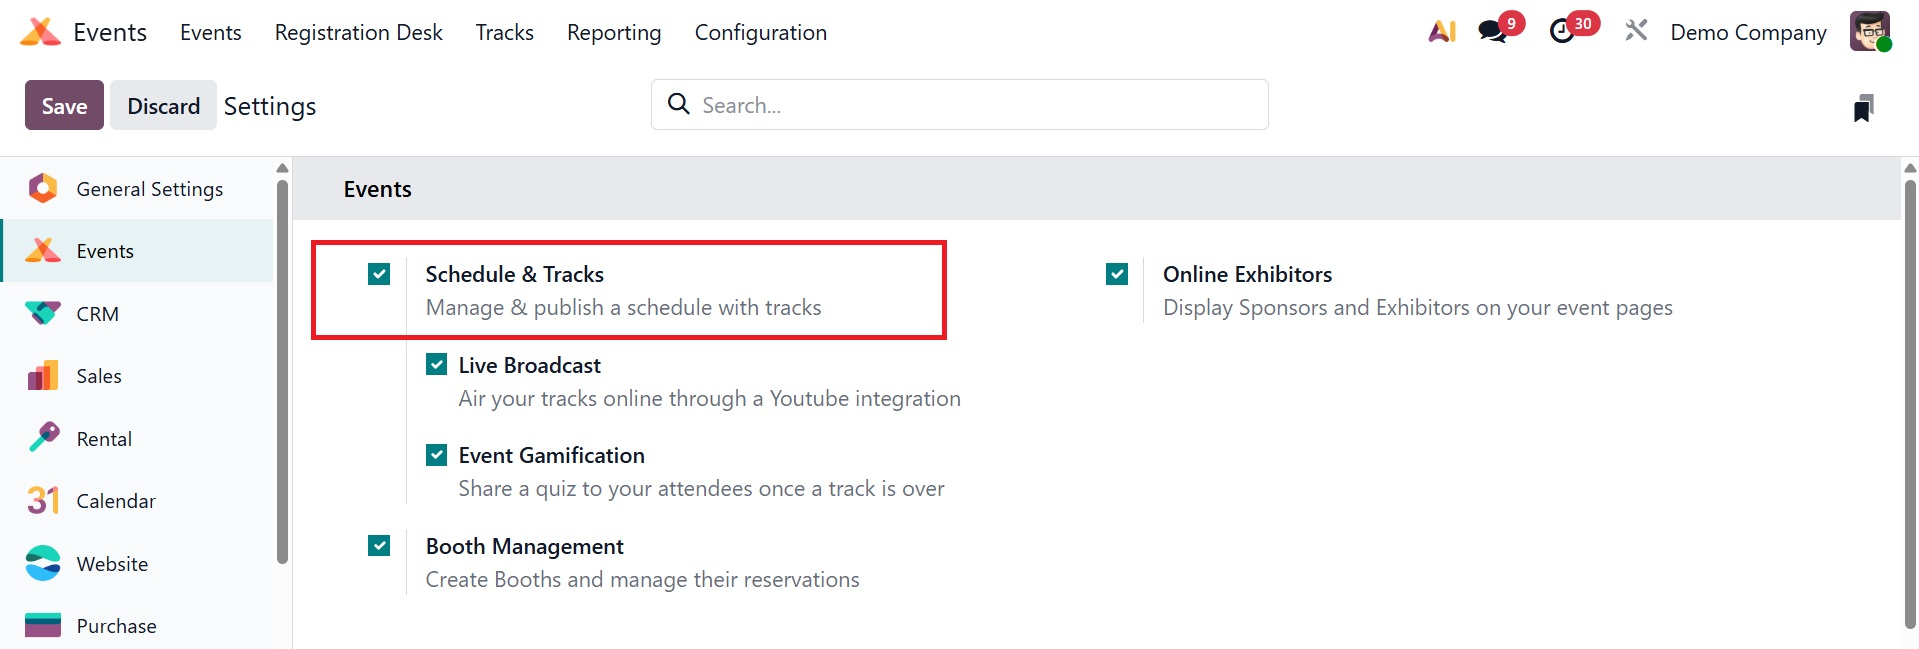
This will give the web pages for your event a navigation menu with tracks, a schedule, and a track proposal form.
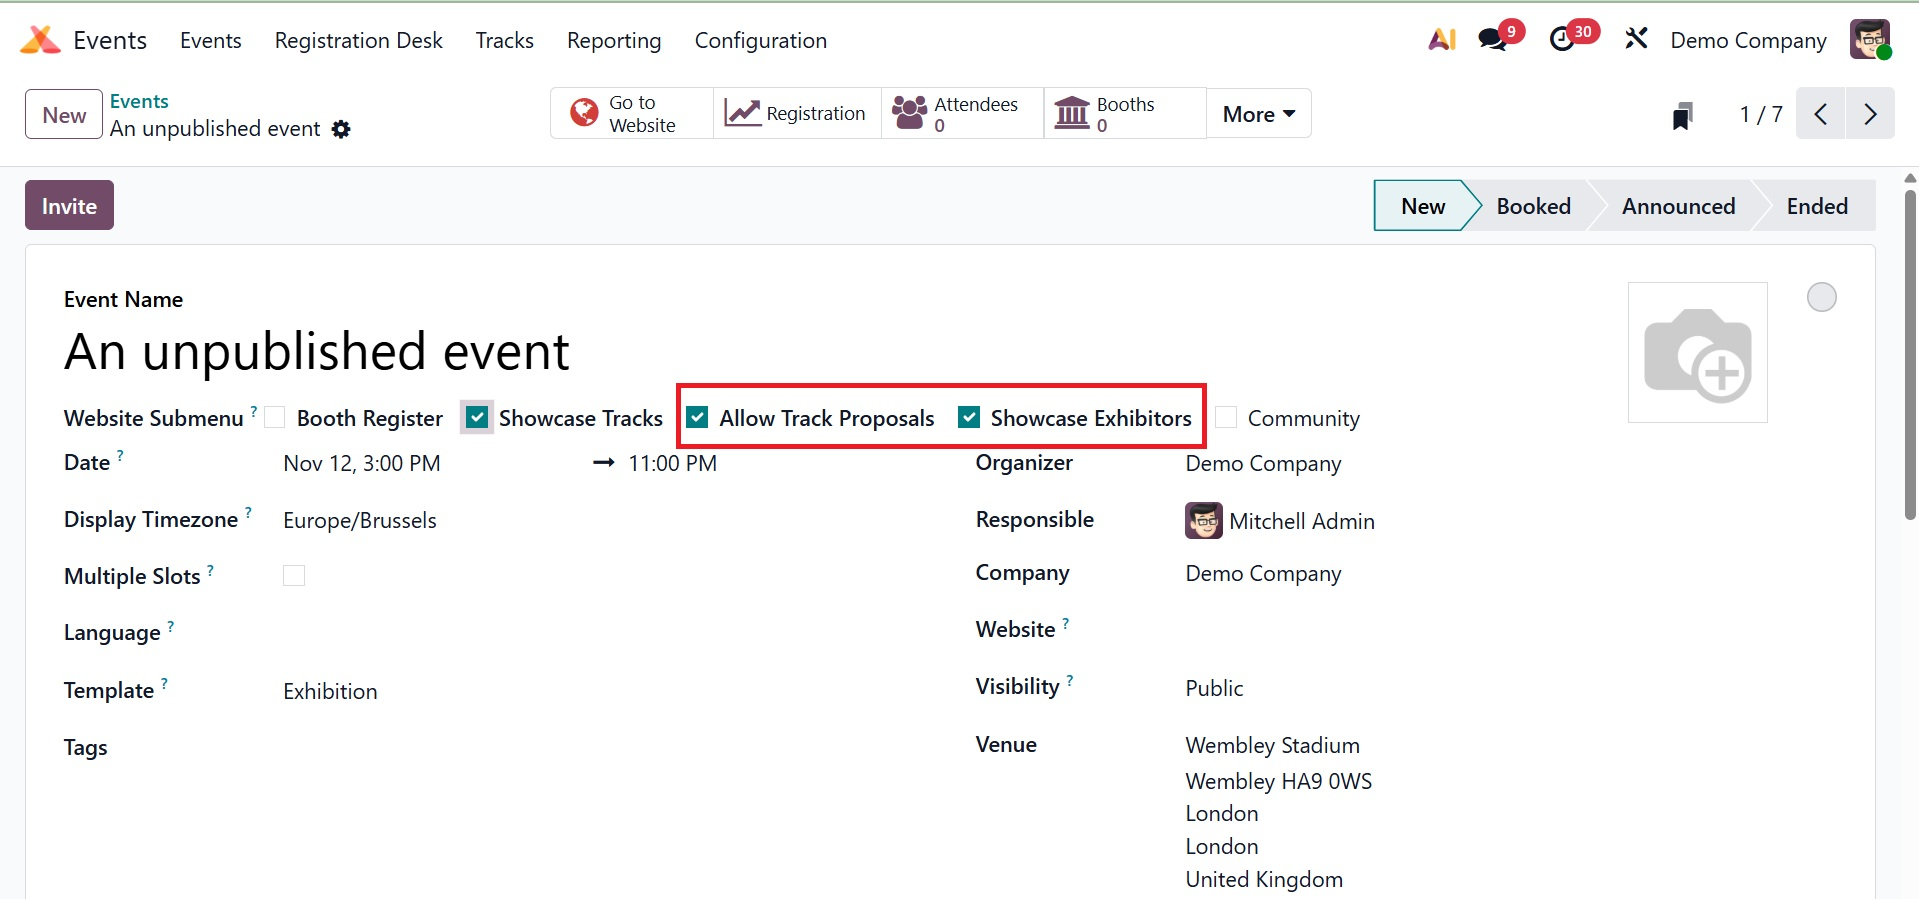
The Showcase Tracks option in the event setup box allows you to display the event's tracks, and the Allow Track Proposals option allows you to make a track proposal form accessible to speakers on your website.
The 'Go to Website' button on Odoo 19 will take you to the website for this specific event.
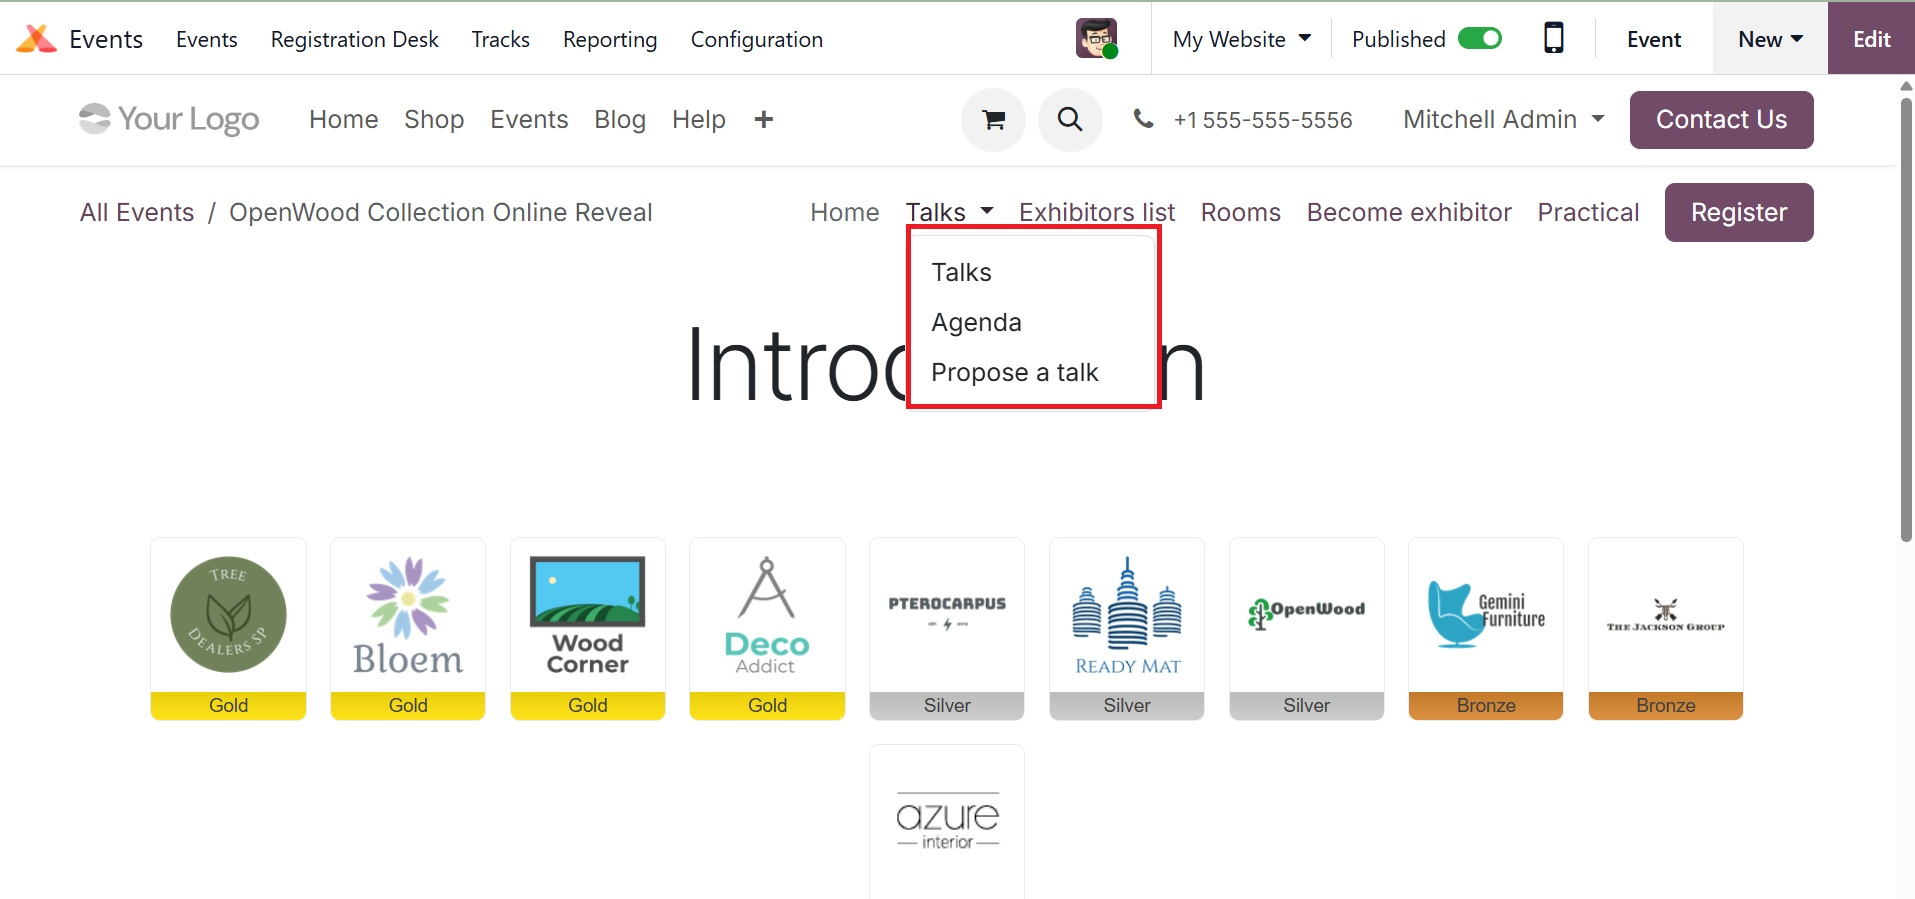
The Talks website, depicted in the top image, displays every comment made by various speakers about the event. To fill out and submit a proposal for a discussion at the event, go to the discussion proposal website. Details about the talk may be included by the speaker in the Talk Into field. The talk's title, introduction, and categories are included in this section.
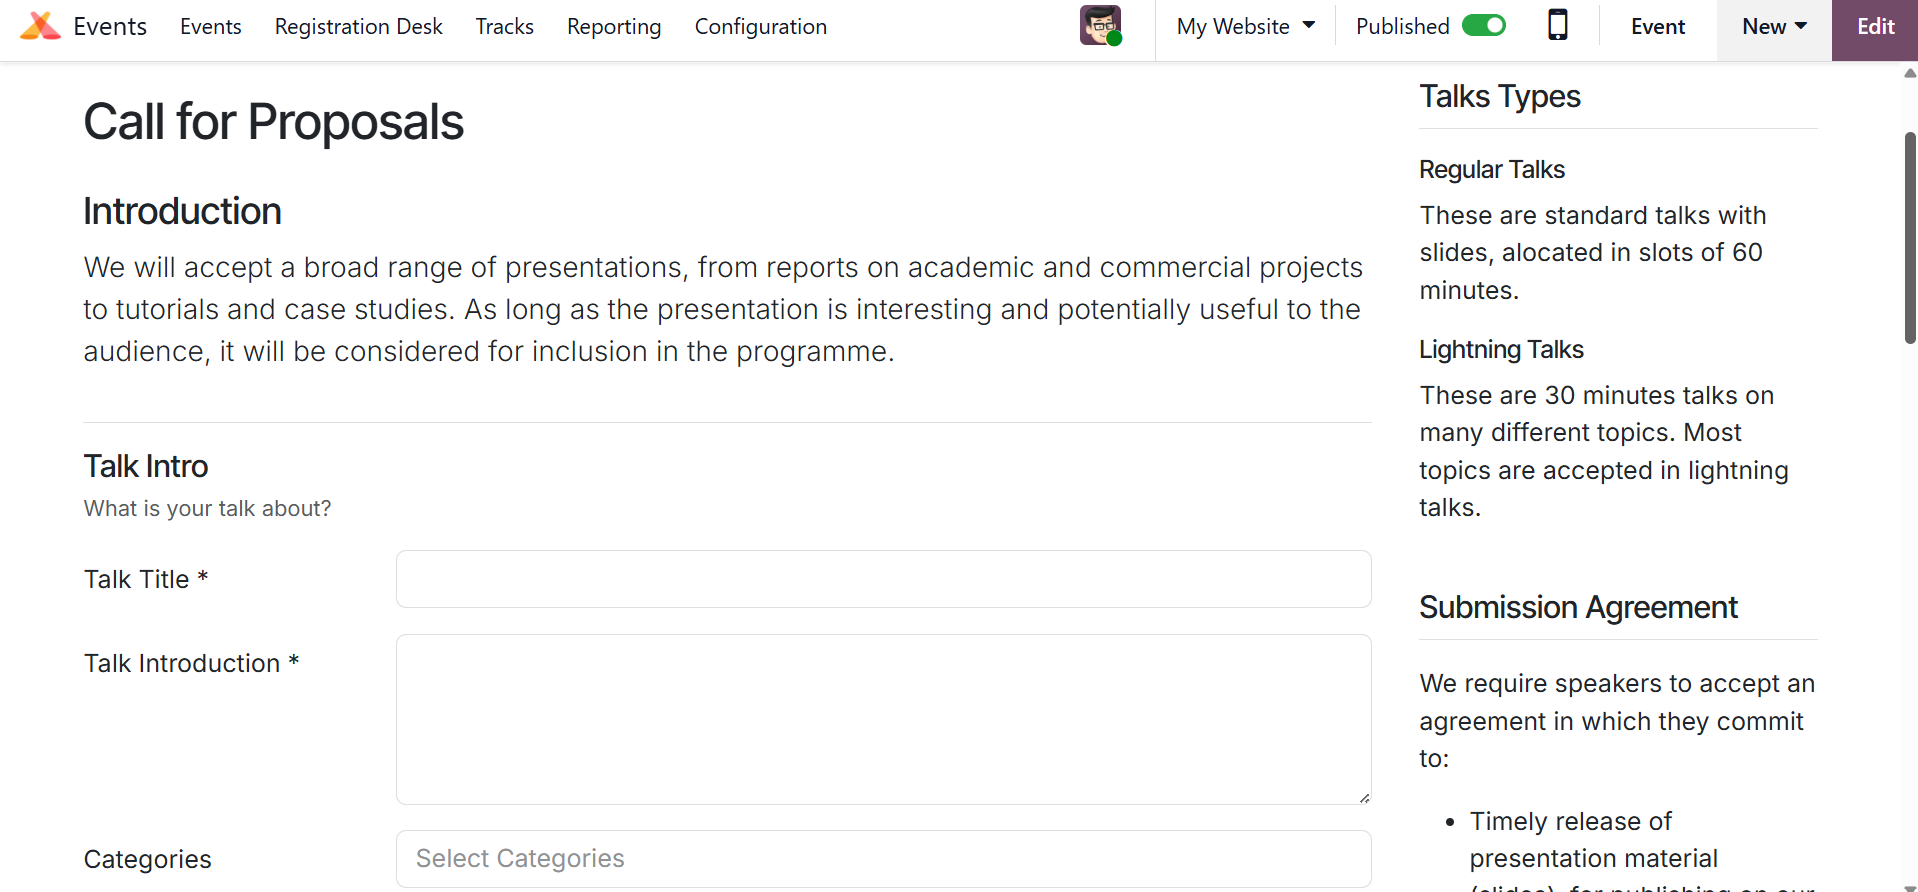
In the Speaker Profile's Picture section, the user can input the speaker's name, email address, phone number, job title, biography, and photo. The user will be given more opportunities to provide more contact information if they want to enable the "Contact me through a different email/phone" option.
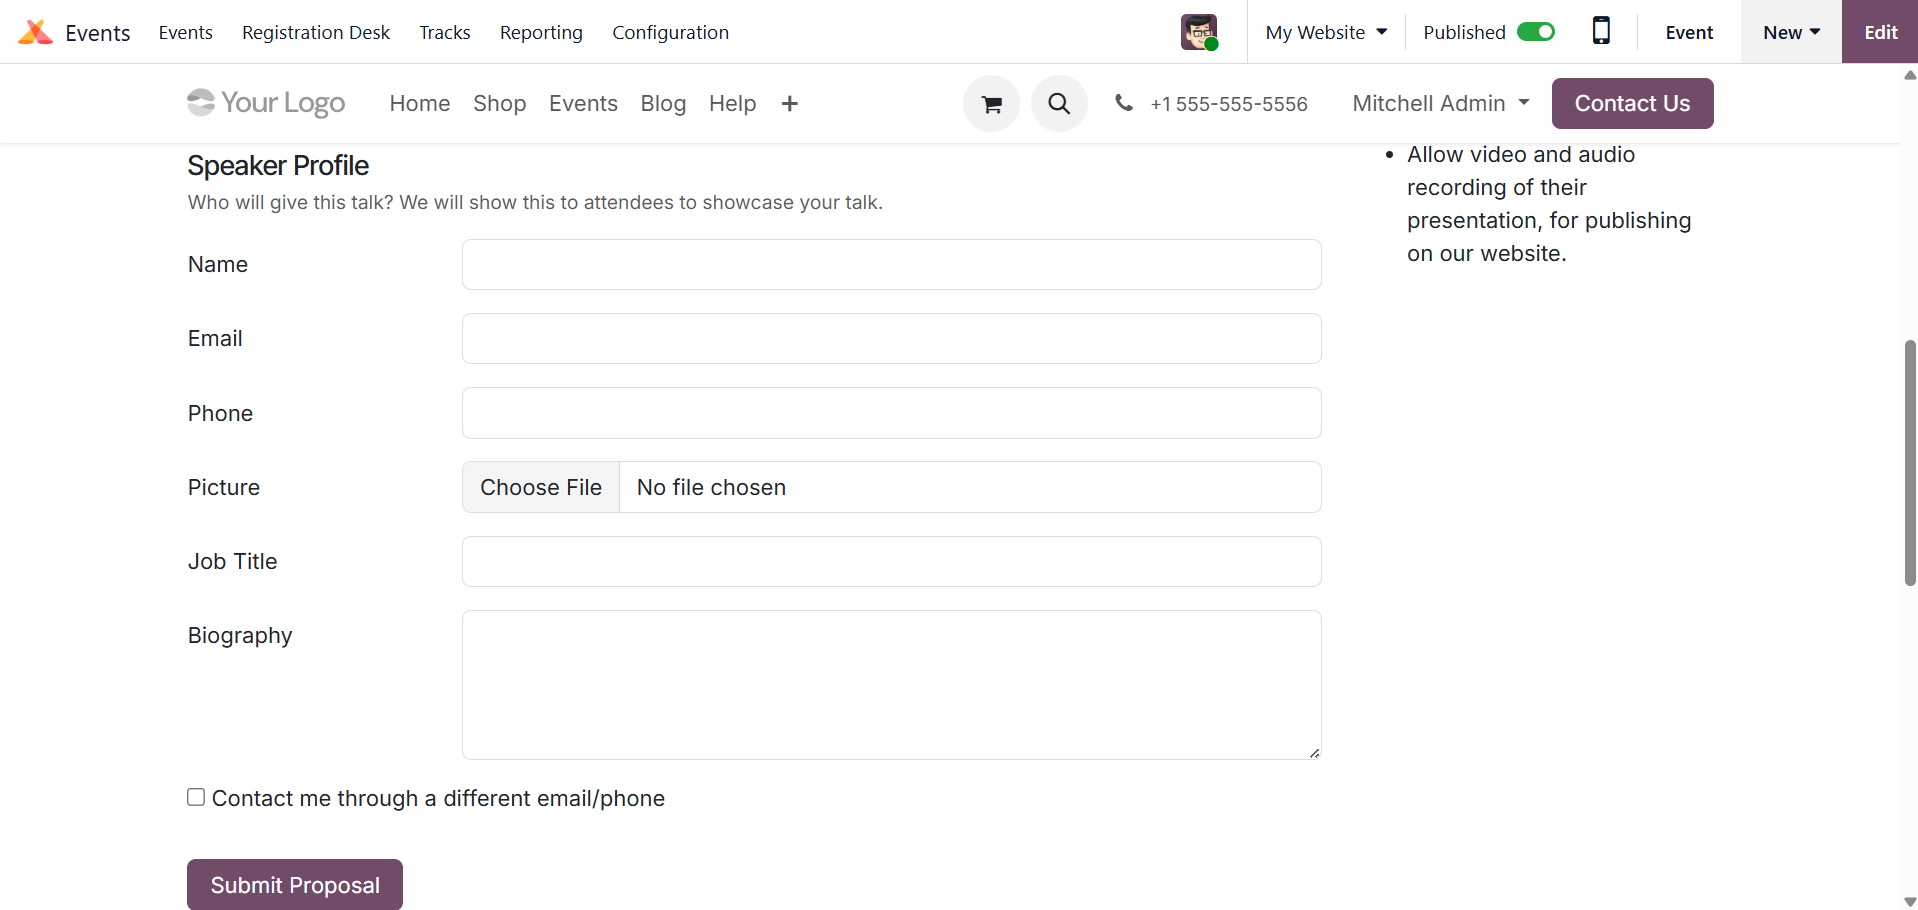
To submit the proposal, click the Submit Proposal button.
You can also view options like "Tickets with sale" and "tickets with POS" under the settings option, as shown in the image below. Sales orders are used to sell tickets with the sale option, while the point of sale is used to sell tickets with the PoS option.
Then, through their connected Odoo website, customers can sell event tickets online with the Online Ticketing setting. To activate an option, check the box next to the label of the feature you want to use, then click Save to complete the process.
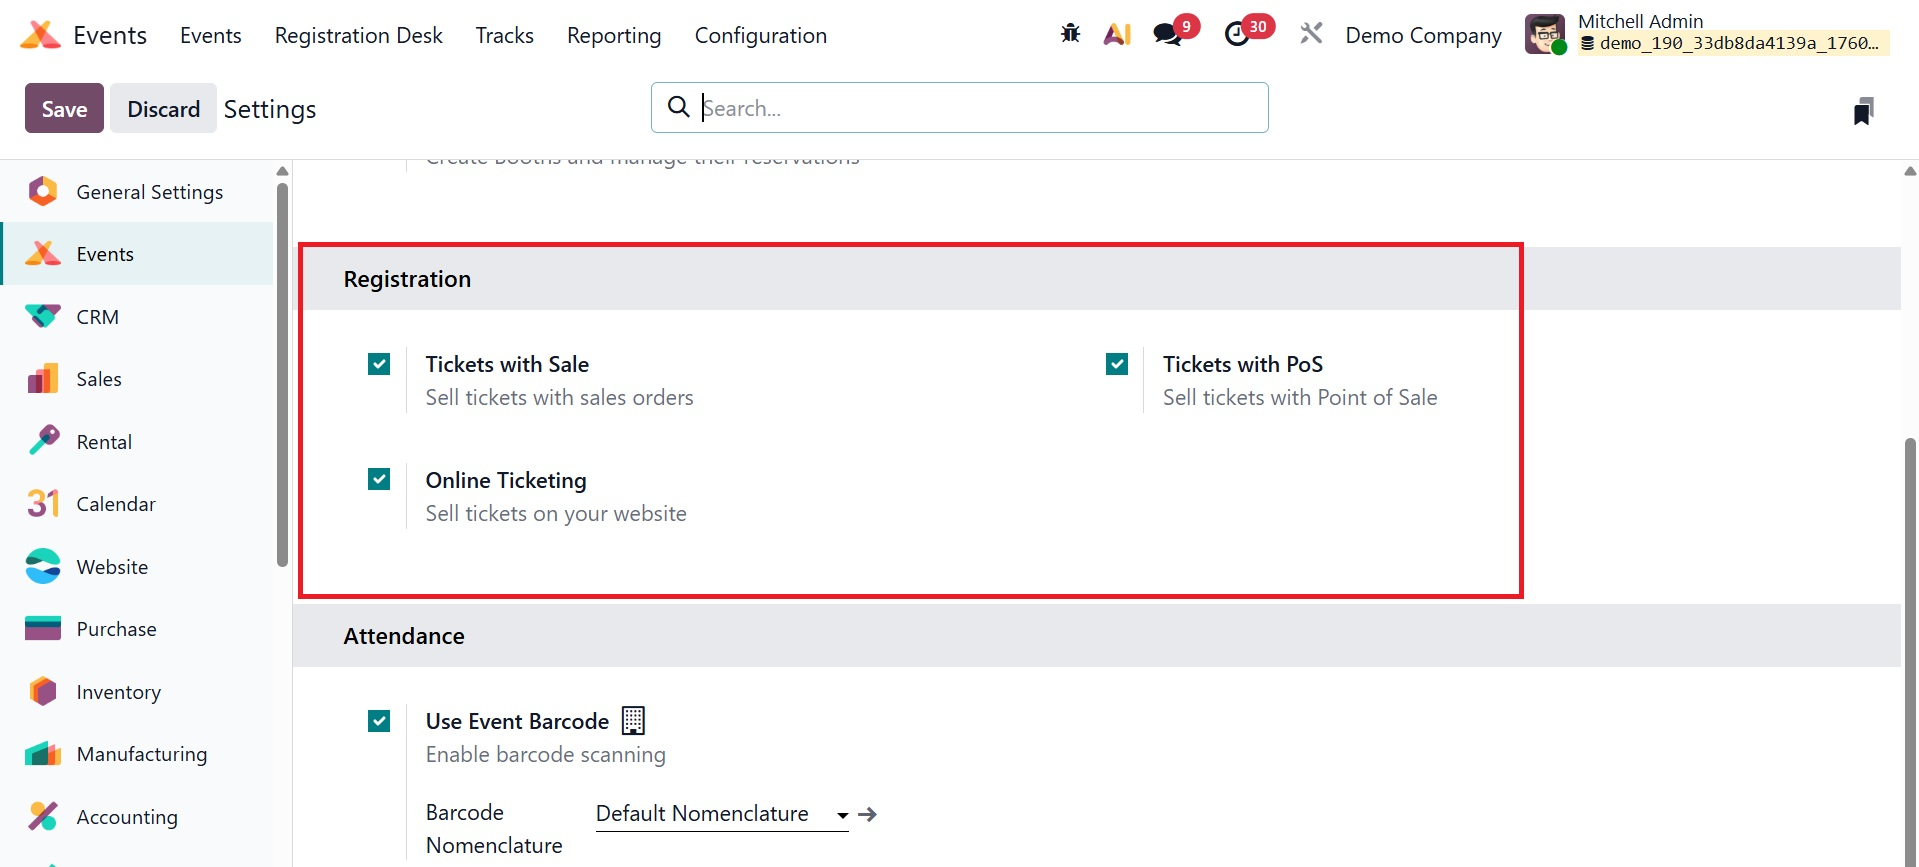
Below that, you have the Attendance field, where you can activate the use event barcode option.

This feature enables guests to enter the event via barcodes or QR codes. Attendees may check in quickly and easily thanks to this simplified procedure, which also makes it easy for Odoo users to collect, manage, and analyze attendance data. The Barcode Nomenclature field, which is located beneath this setting, has "Default Nomenclature" selected by default. Users can, however, alter the terminology to suit their own requirements, providing even more freedom in controlling guest access.
1.2 Event Template
The Event Template option in the Configuration menu can be used to generate templates that are appropriate for Odoo 19 events. These templates can be used when creating a new event. This platform allows you to design a variety of templates based on the type of event. As seen in the screenshot below, you have the option of creating a new template for your event or choosing from one of the pre-made ones.
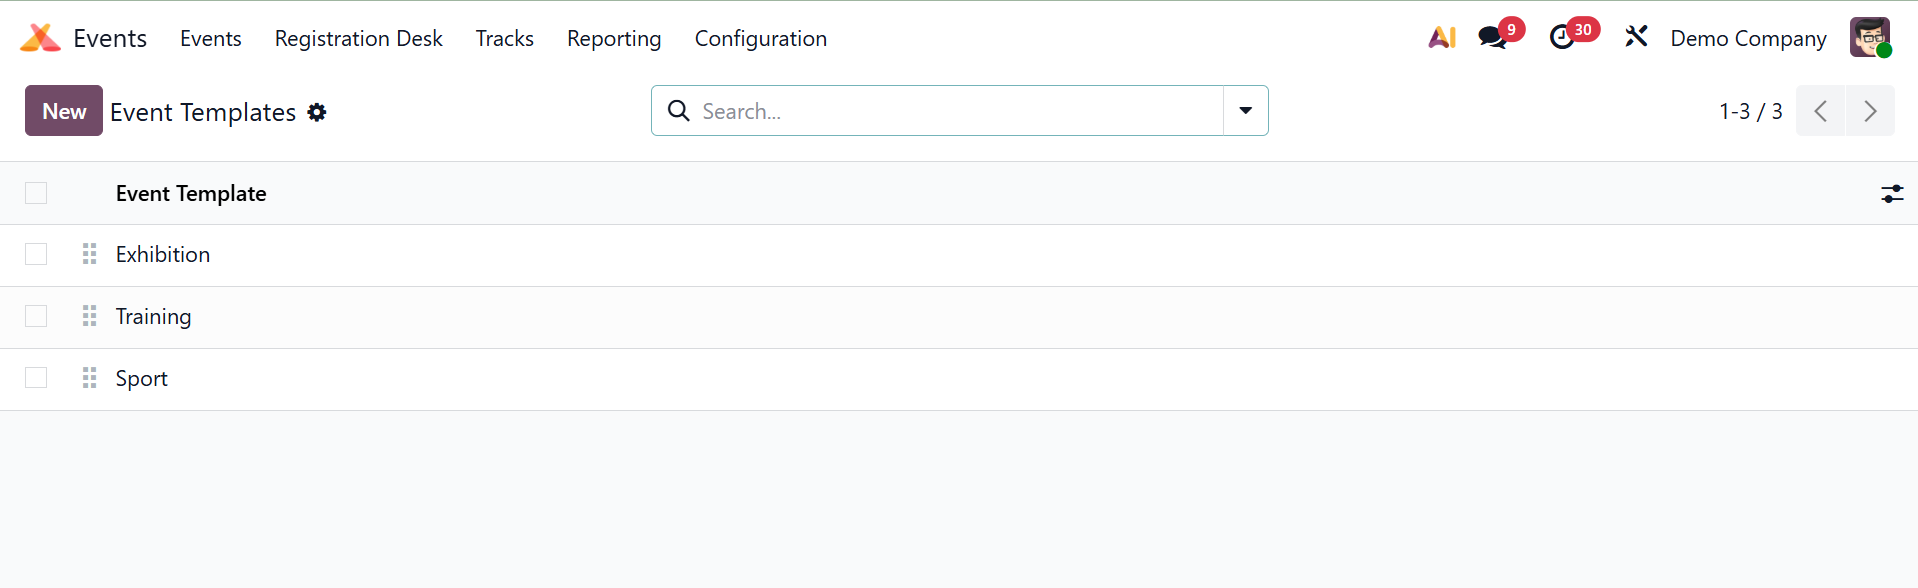
Clicking the New button will allow you to build new templates.
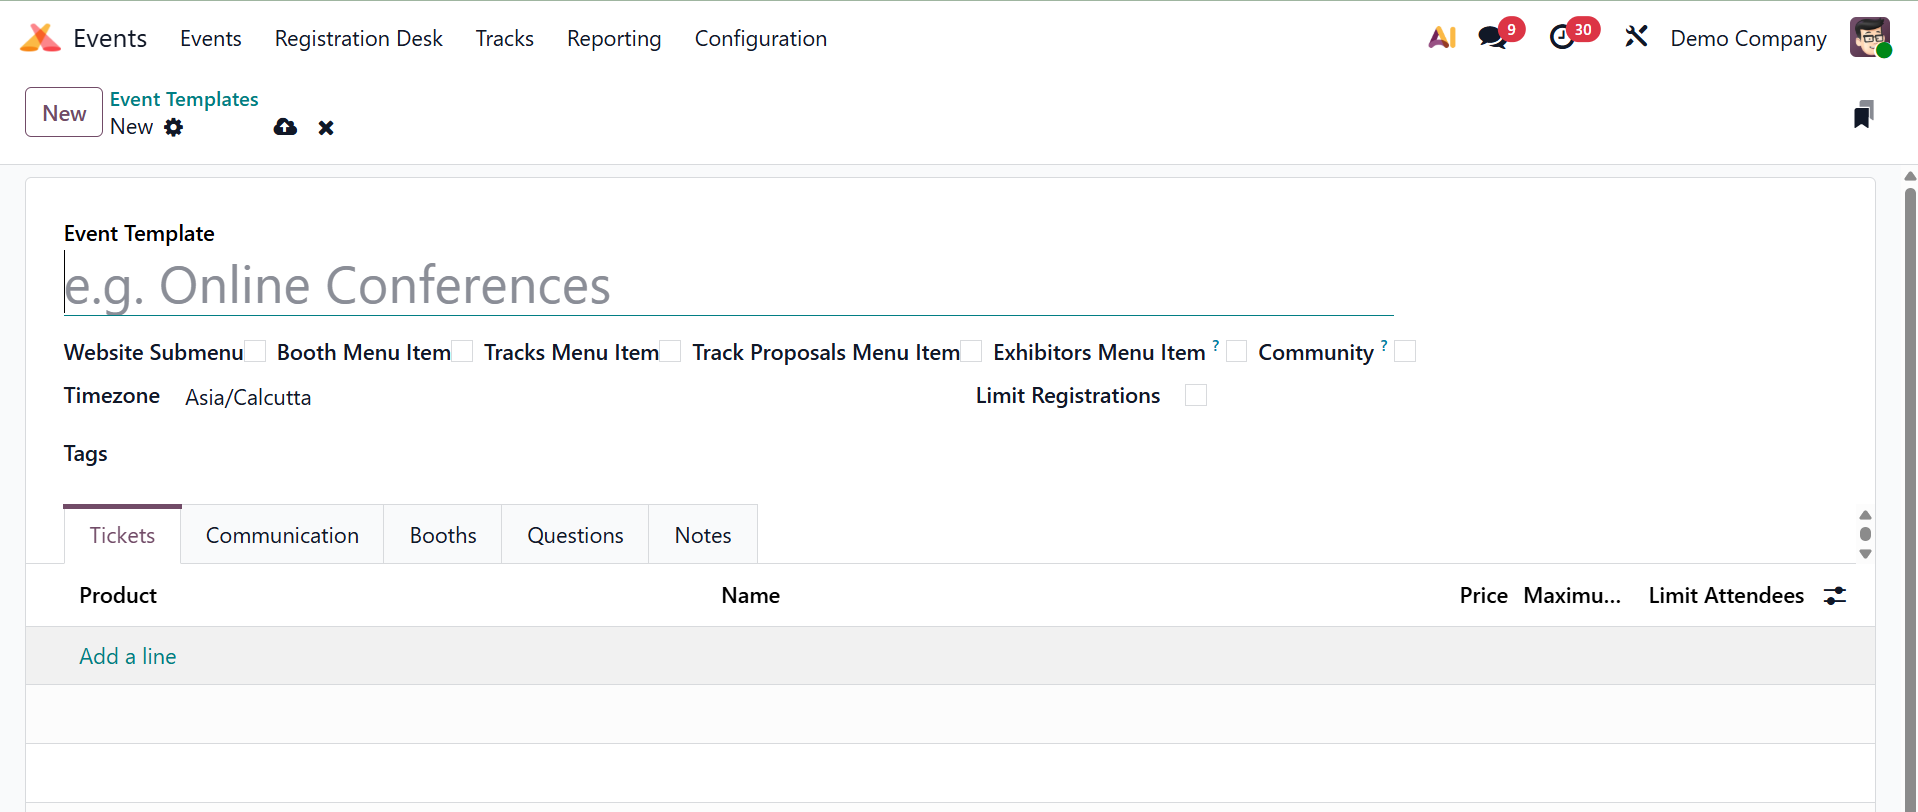
The Event Template box can be used to enter the name of the new template. The fields that are used to create new events are identical to those in the other fields. As we covered in the Events session earlier in this chapter, you may complete the template by adding information about Tickets, Communication, Questions, Booths, and Notes. When you create a new event that falls under the same category, you can use these freshly made event templates.
1.3 Event Stage
By giving occurrences distinct stages based on the process they are going through, the occurrences module facilitates the classification and organization of occurrences. To add extra stages to the event, select the Event Stages option from the Configuration menu. The Events module's steps can all be altered, as the following example shows.
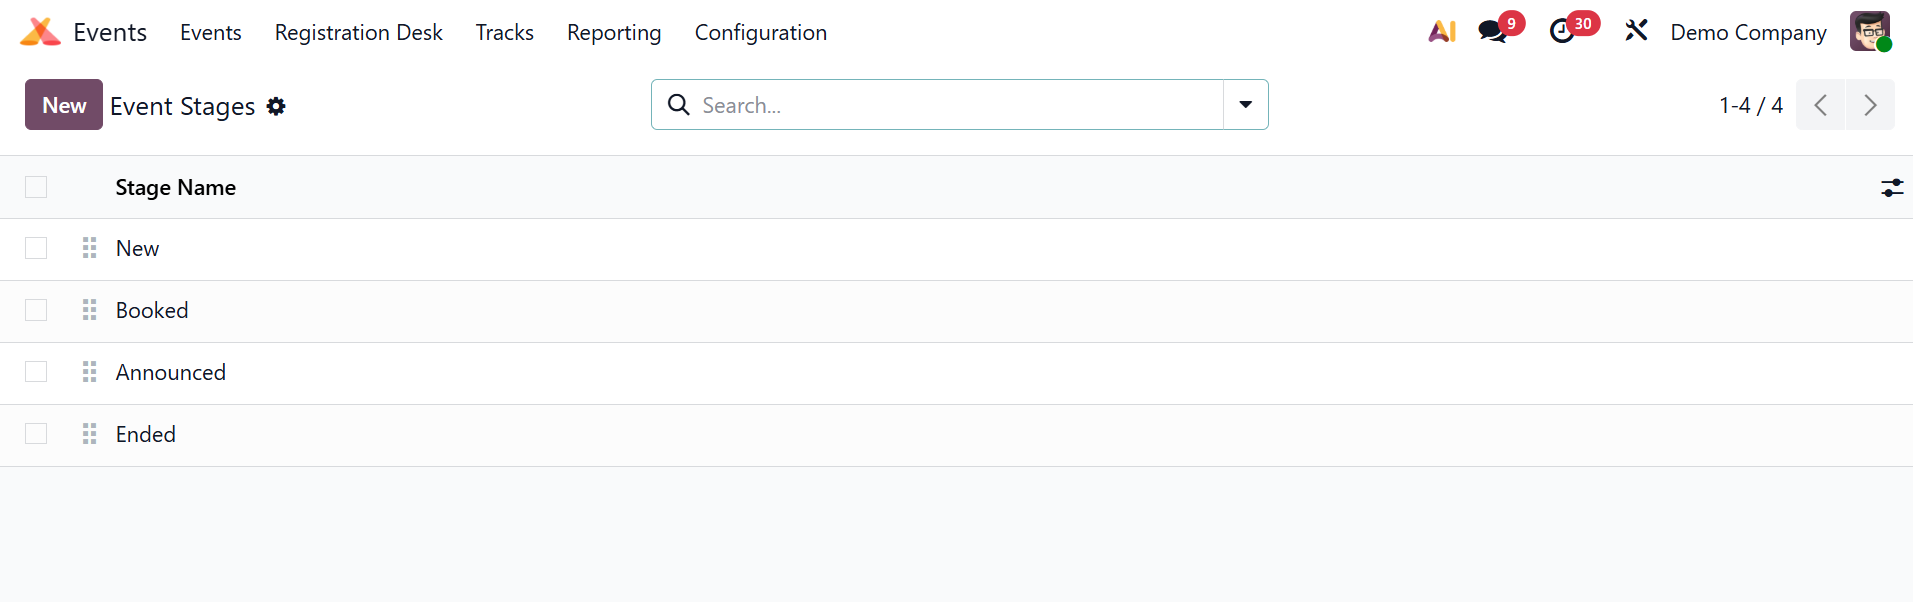
To create a new stage, click the New button.
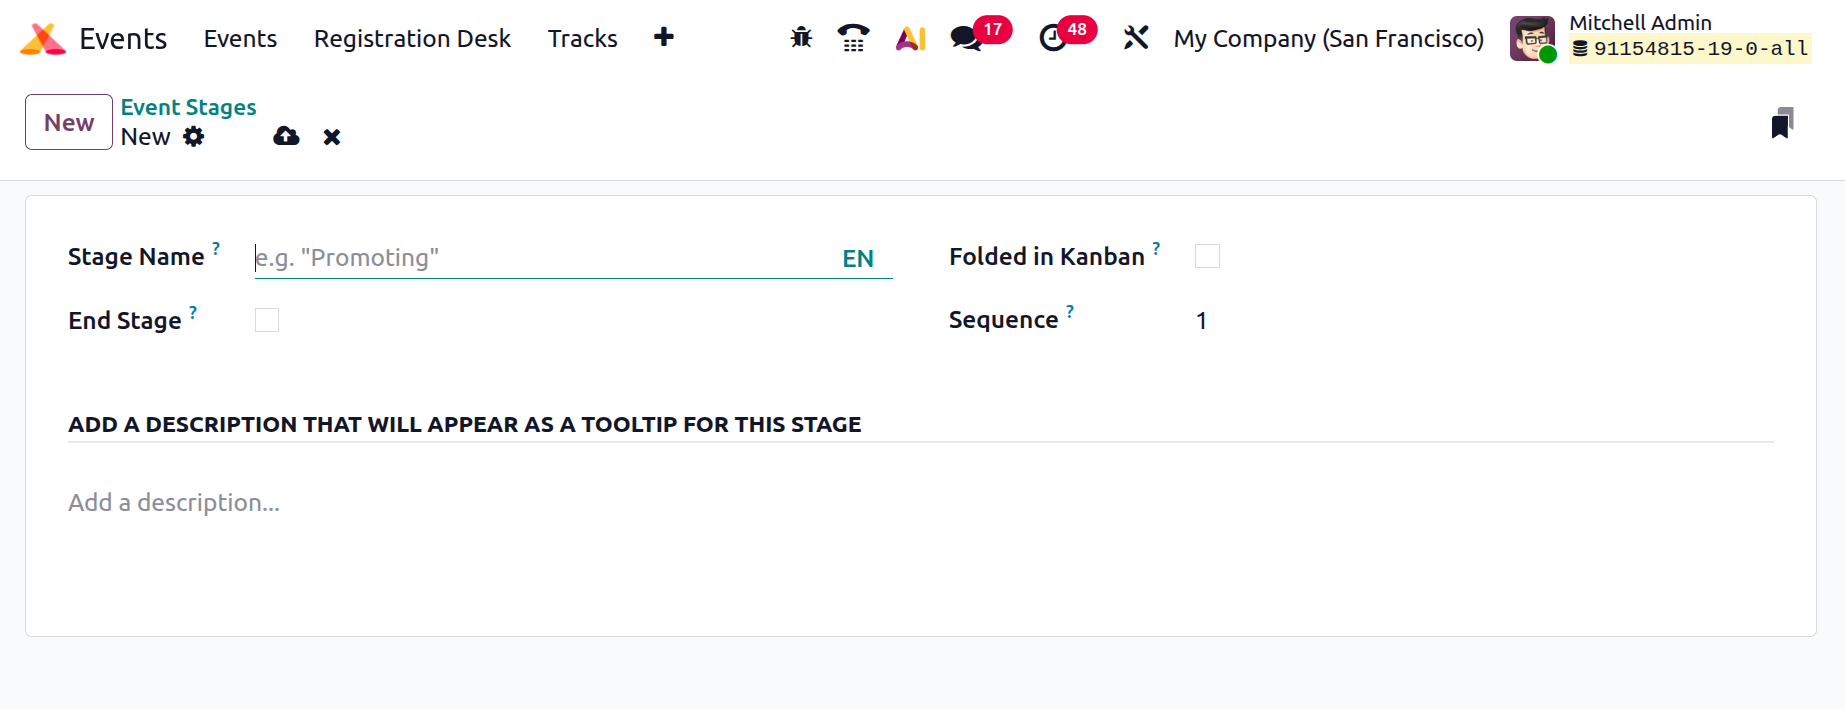
Include the stage's name in the Stage Name field. When the End Stage option is activated, Odoo19 will automatically move the completed events to the End Stage. You can activate the Folded in Kanban option to fold this stage in the Kanban view. In the designated field, type the stage's Sequence number. Under the Stage Description and Tooltips tab, you may give this stage a description and several labels. Click "Save" once all the fields have been filled out.
1.4 Event Tags Categories
You can properly tag events in Odoo 19 by using the Events module. Classifying events is made simple by these tags, and you may search for specific occurrences by using the tags that have already been applied. Other categories can also use event tags. The Event Tags Categories option in the Configuration menu allows you to group tags under a specific category.
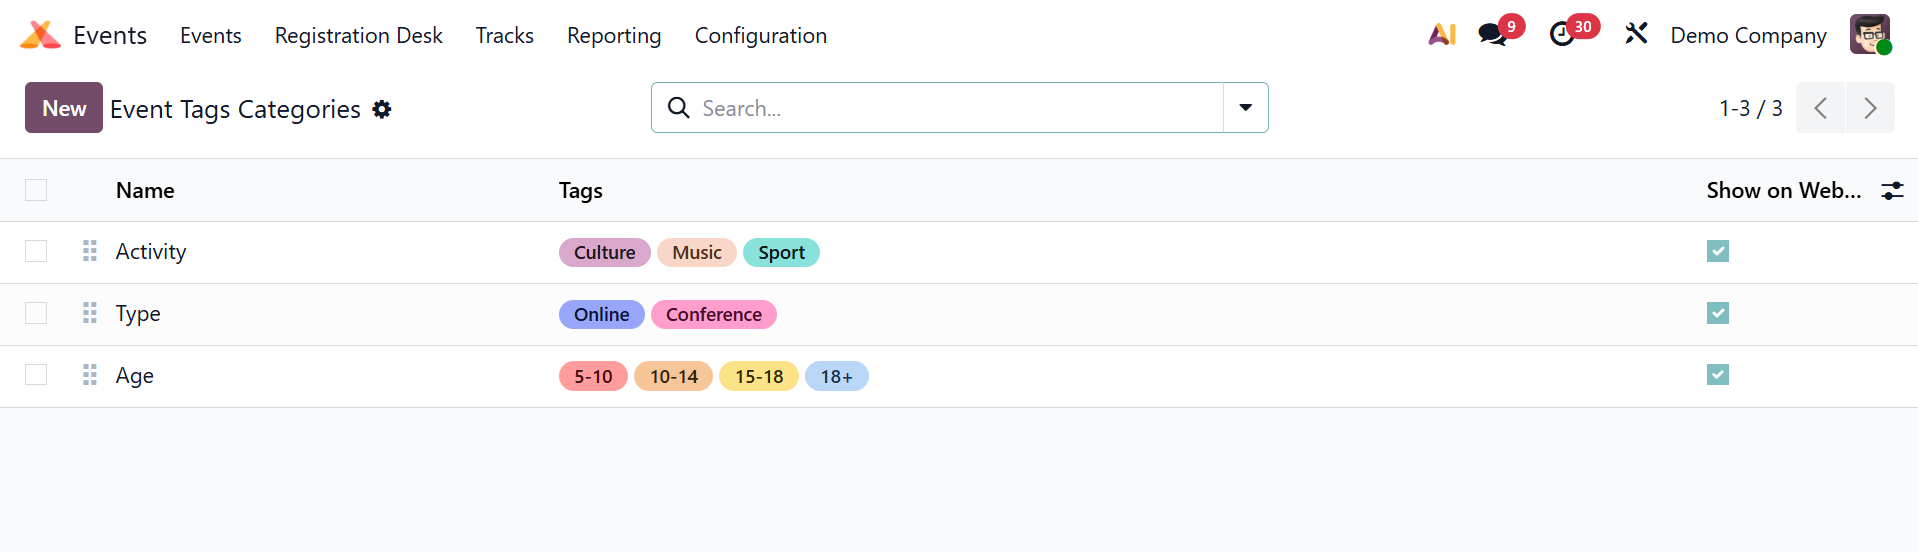
This contains several tag categories that were developed in the Odoo19 Events module. The category name, the tags that fall under each category, and Show on Website options are all available here. You may now quickly create a new category for the tags in the module by using the New button.
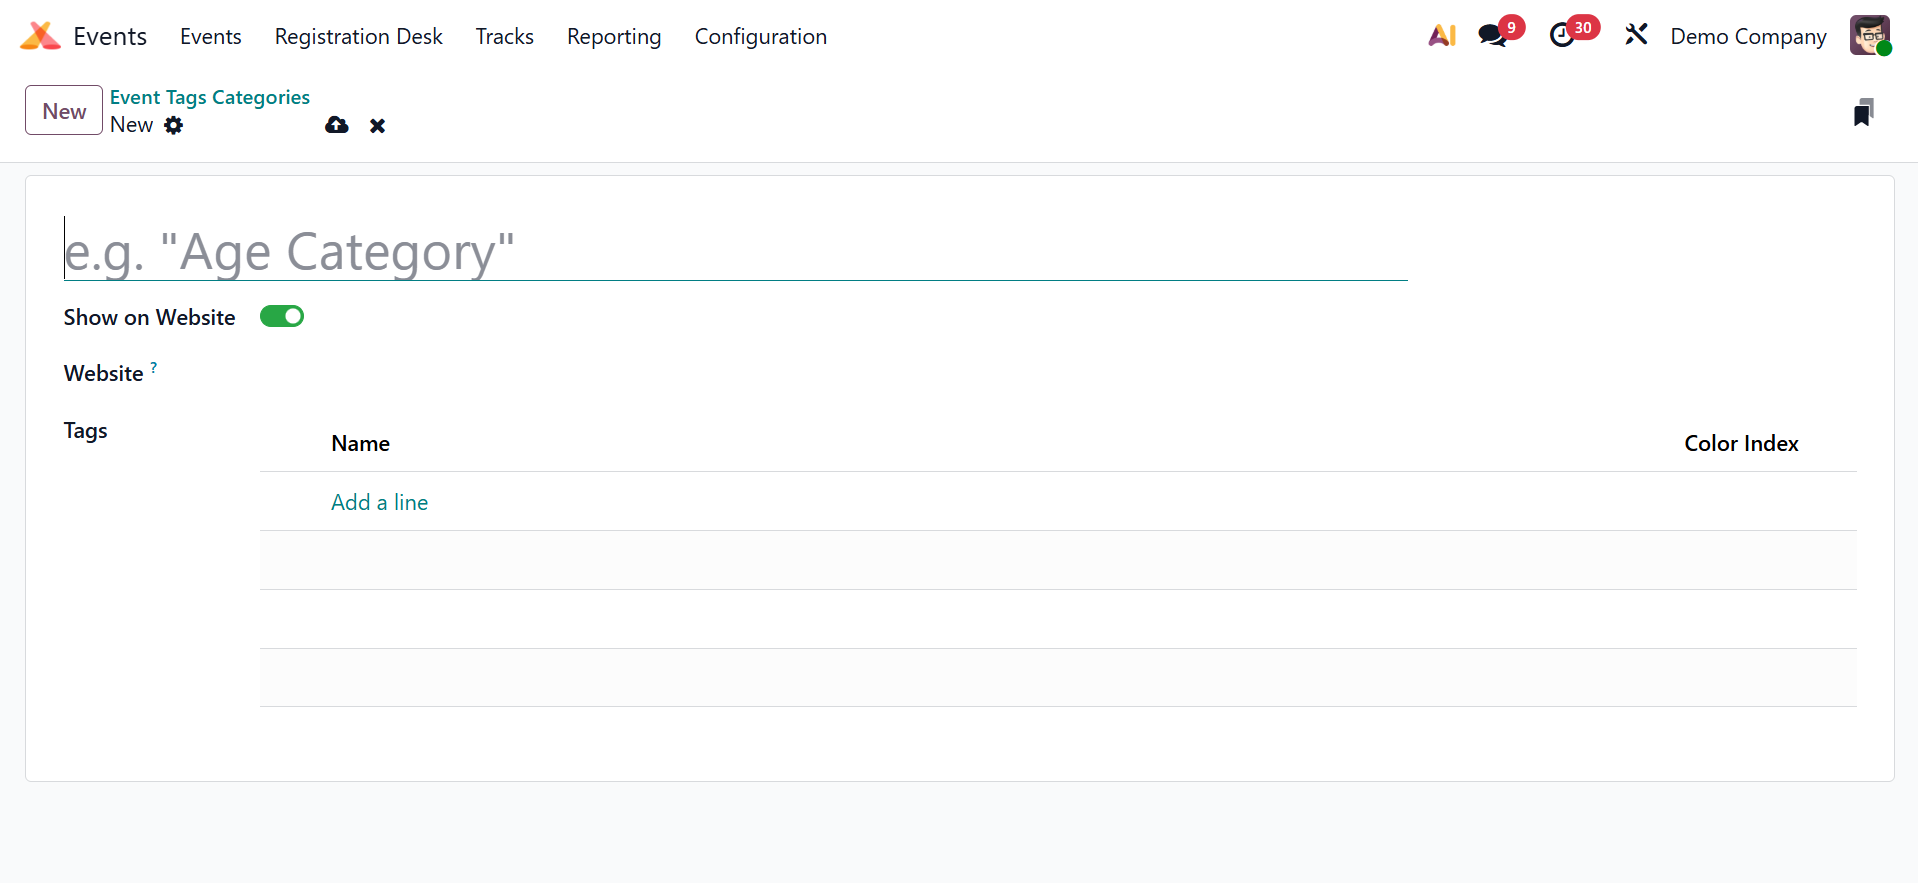
To make the tag category visible on the website, type its name in the appropriate field and choose Show on Website. You can add tags to this category by choosing Add a Line from the menu. For every tag that falls under this category, choose the appropriate colors. To include this new category in the current list, click the Save button.
1.5 Event Questions
Event Questions are modifiable surveys that can be linked to event registrations or event tracks (sessions within an event) in Odoo's Event module. These inquiries are intended to elicit special data from participants either during the registration procedure or following their viewing of a given session. On selecting the page, you will get the page, as shown below.
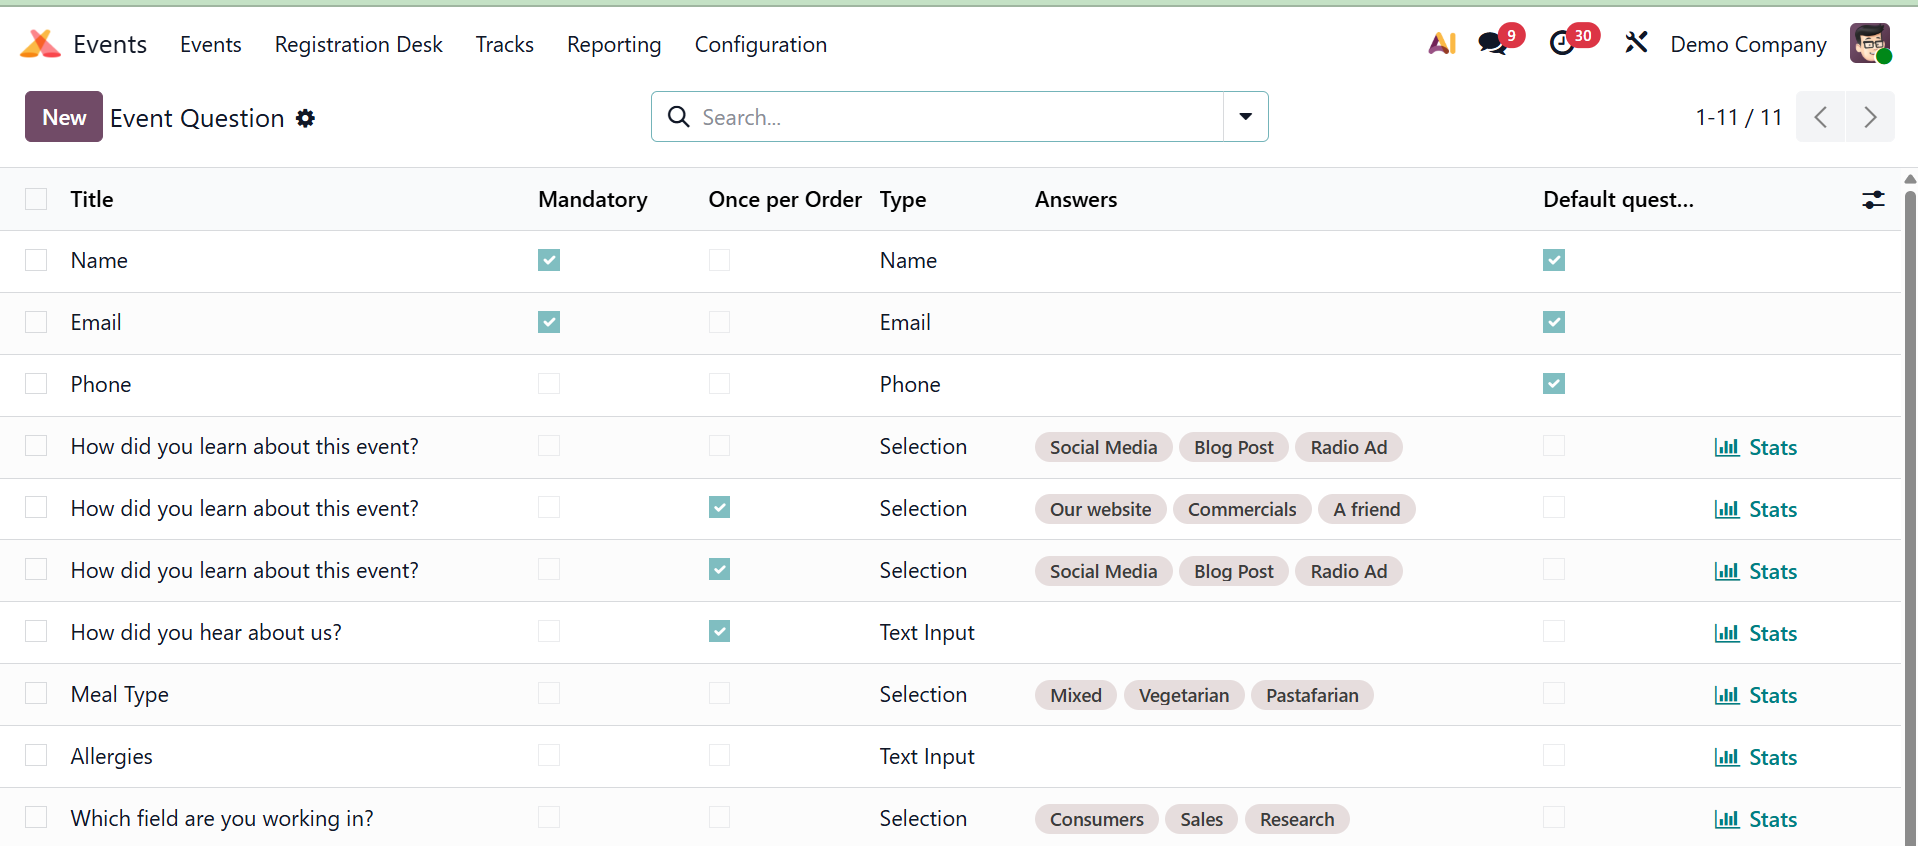
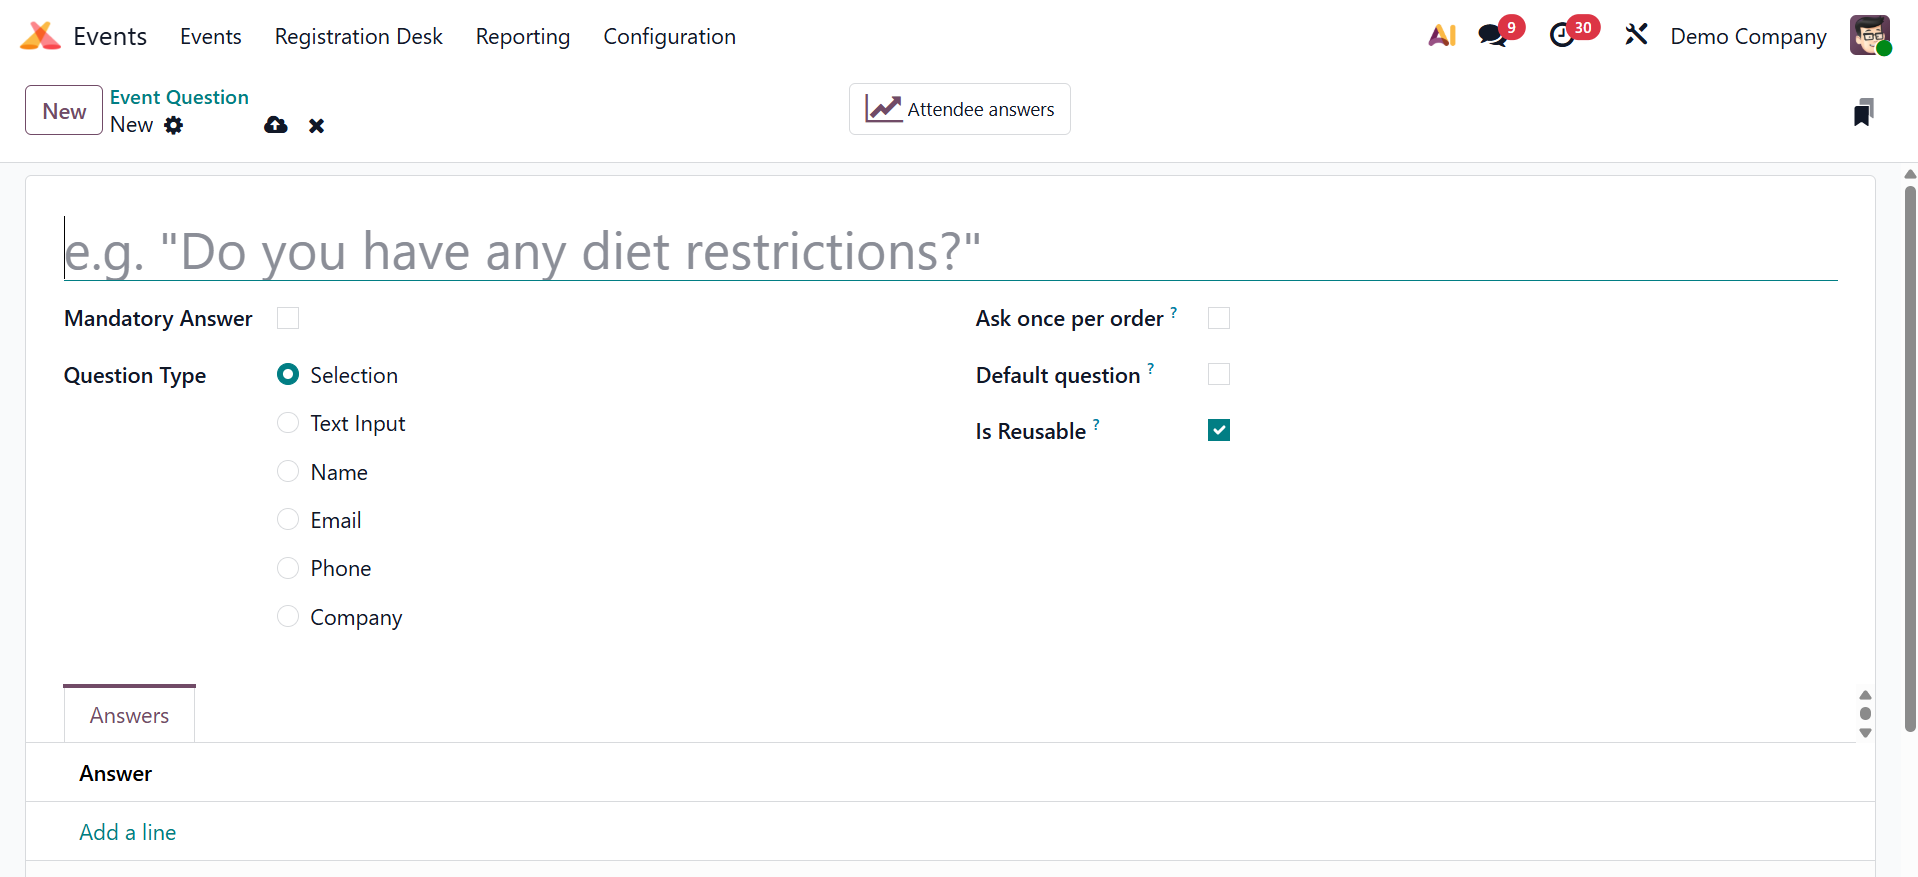
To add new questions, you can make use of the New icon and the creation page will be, as follows. In the new page, you can provide the question, activate the mandatory answer field, set the question type as selection, text input, name, email, phone, or as company. The, if required, you can activate the Ask once per order, Default Question, and Is Reusable fields as well. Below that, you have the tab to add the answer to the particular question created as well.
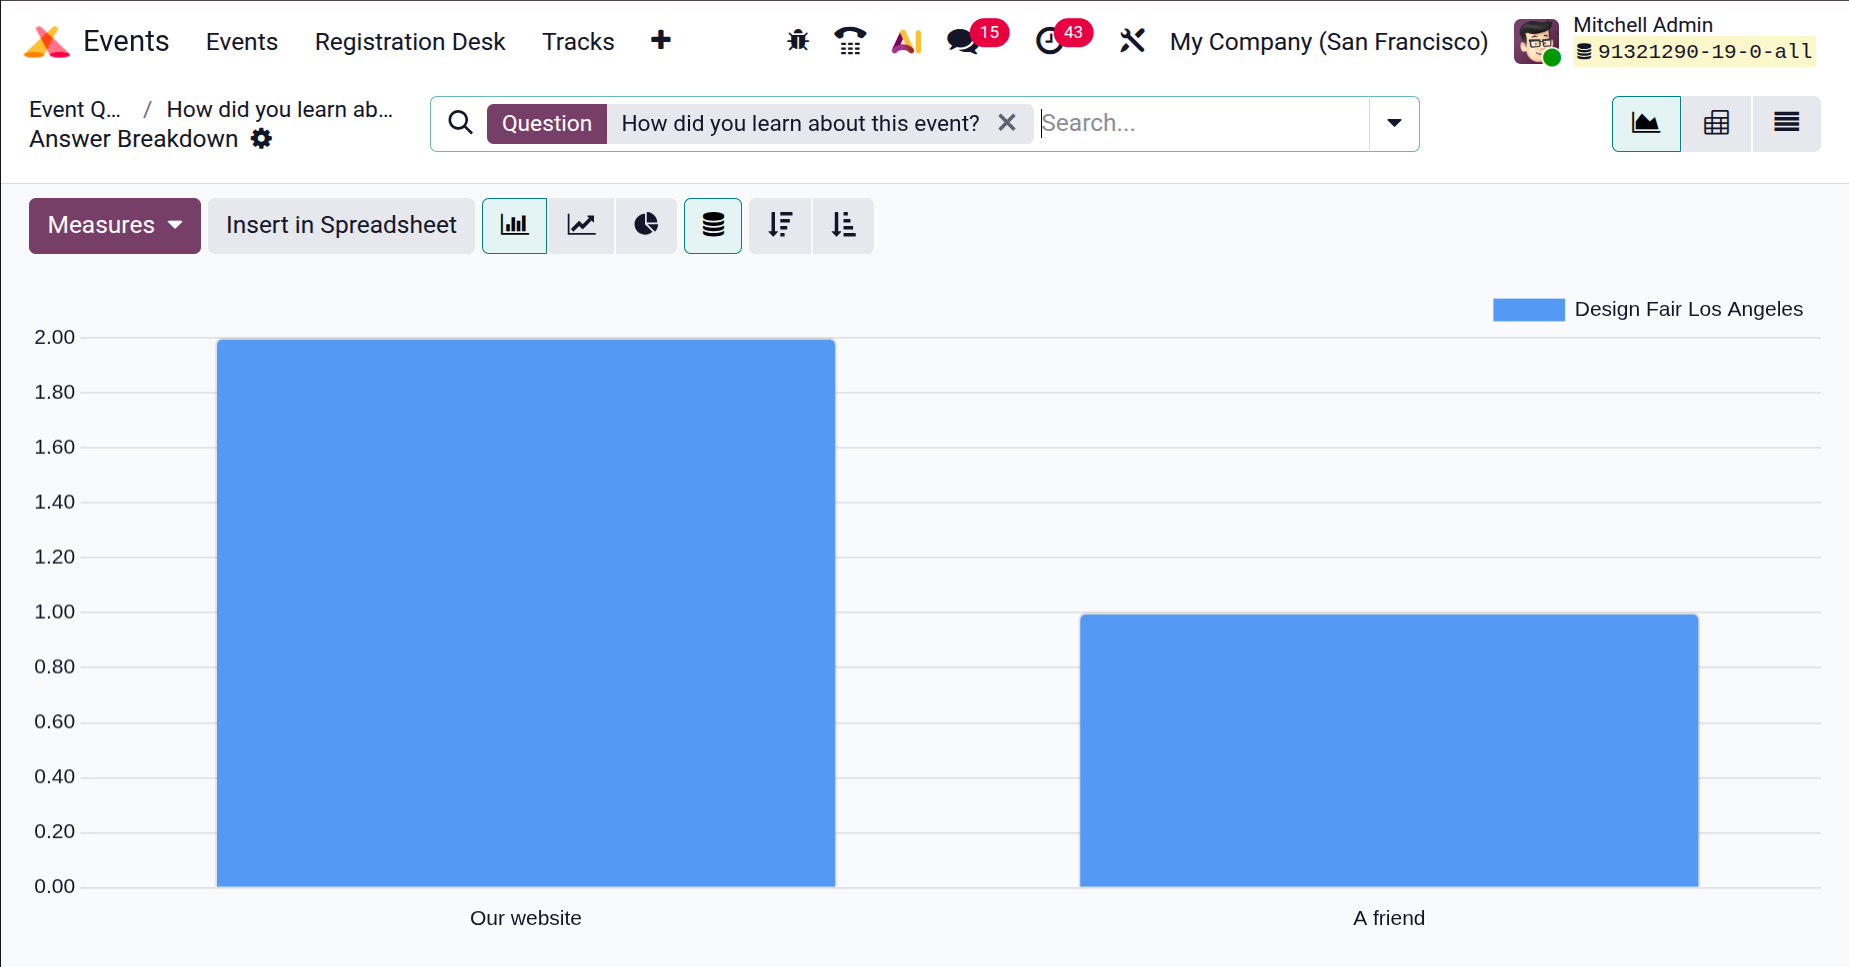
On the page, you will be provided with the smart tab, Attendee Answers, which on opening, you will get the page, as shown below.
1.6 Mail Schedulers
Every time a new event is created in the Odoo19 Events module, we have the email/SMS schedulers set up to notify attendees by email or SMS. The Events Mail Scheduler option displays a list of all planned emails and SMS.
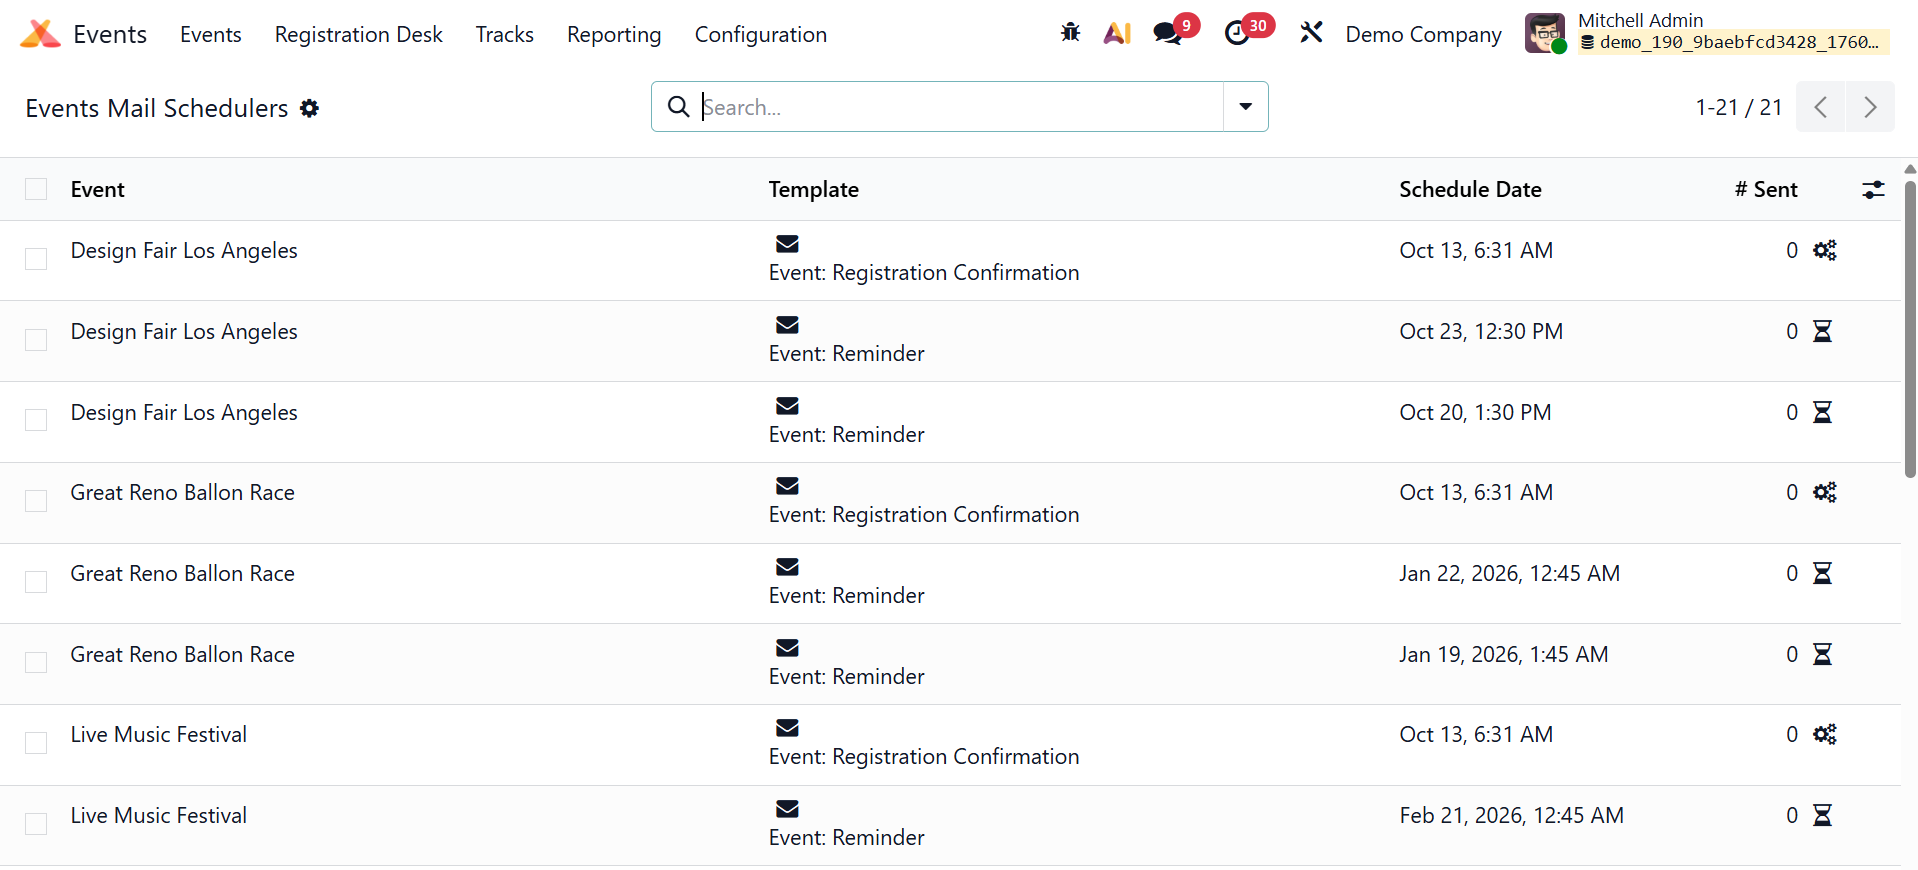
The event name, Send, Template, Schedule Date, and the total number of emails and SMS sent are displayed in the list preview.
1.7 Lead Generation
Odoo19 lets you create leads right away by using the information of people who have signed up for an event. Use the Lead Generating option from the Configuration menu to create lead-generating rules.
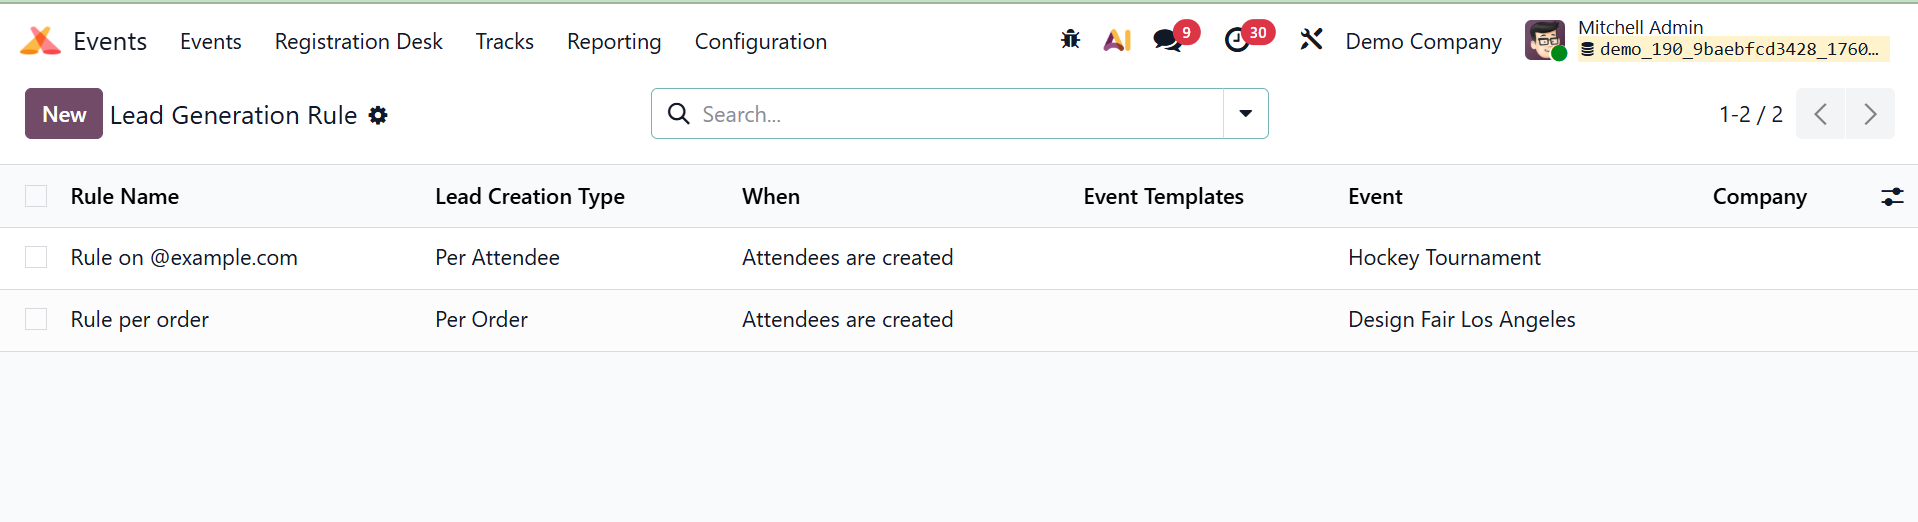
On this platform, a list of the most recent lead-generating guidelines will appear. The Rule Name, Lead Creation type, When, Event template, Event, and Company will all be covered. To create a new lead-generating rule, click the New button.
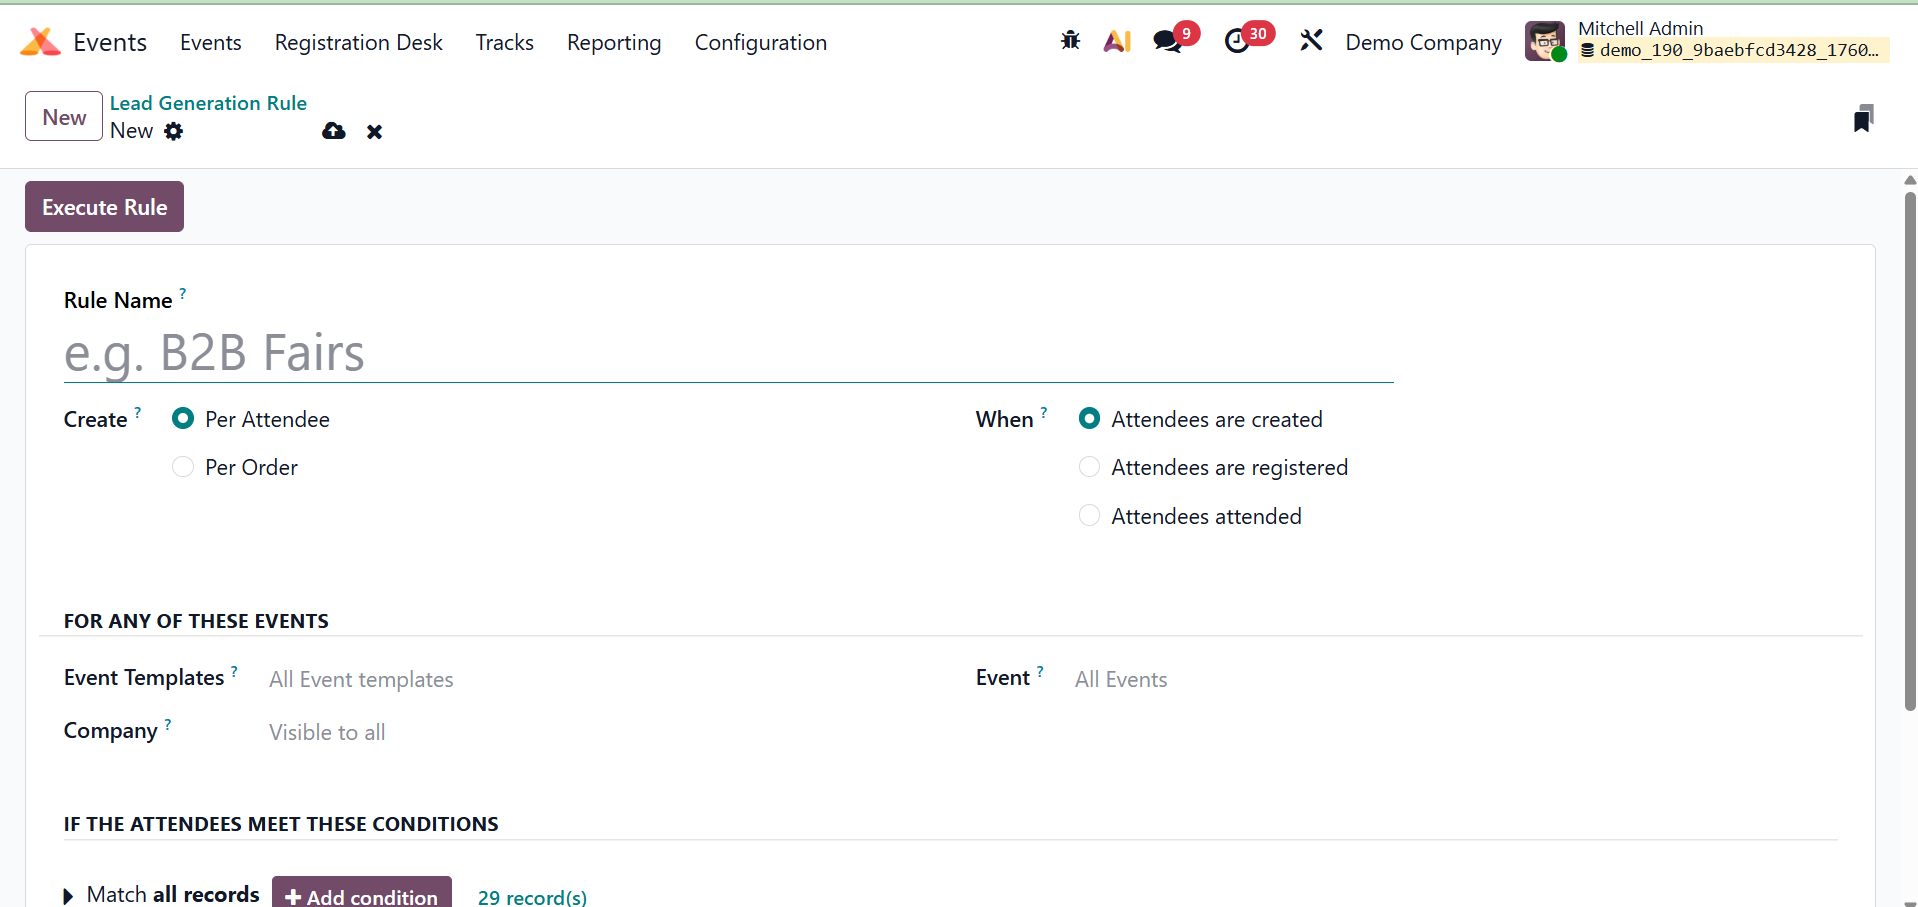
First, enter the Rule Name in the appropriate field. Leads might be generated via attendees or per order. In the appropriate fields, these parameters can be set. Then there is the When option. It indicates the best time to create the lead. They are:
- Attendees are created: The creation of attendees occurs at the time of initial registration.
- Attendees are Confirmed: Upon confirmation of attendees' registration.
- Attendees attended: The number of attendees is indicated as confirmed when the event is tagged as "Done
Then, you have the For any of these Events option, which describe the rule's parameters:
- Event Categories: Apply the rule to particular types of events.
- Company:. Limit the regulation to activities related to a certain business.
- Event: Assign the rule to certain, distinct occurrences, as shown in the screenshot below.
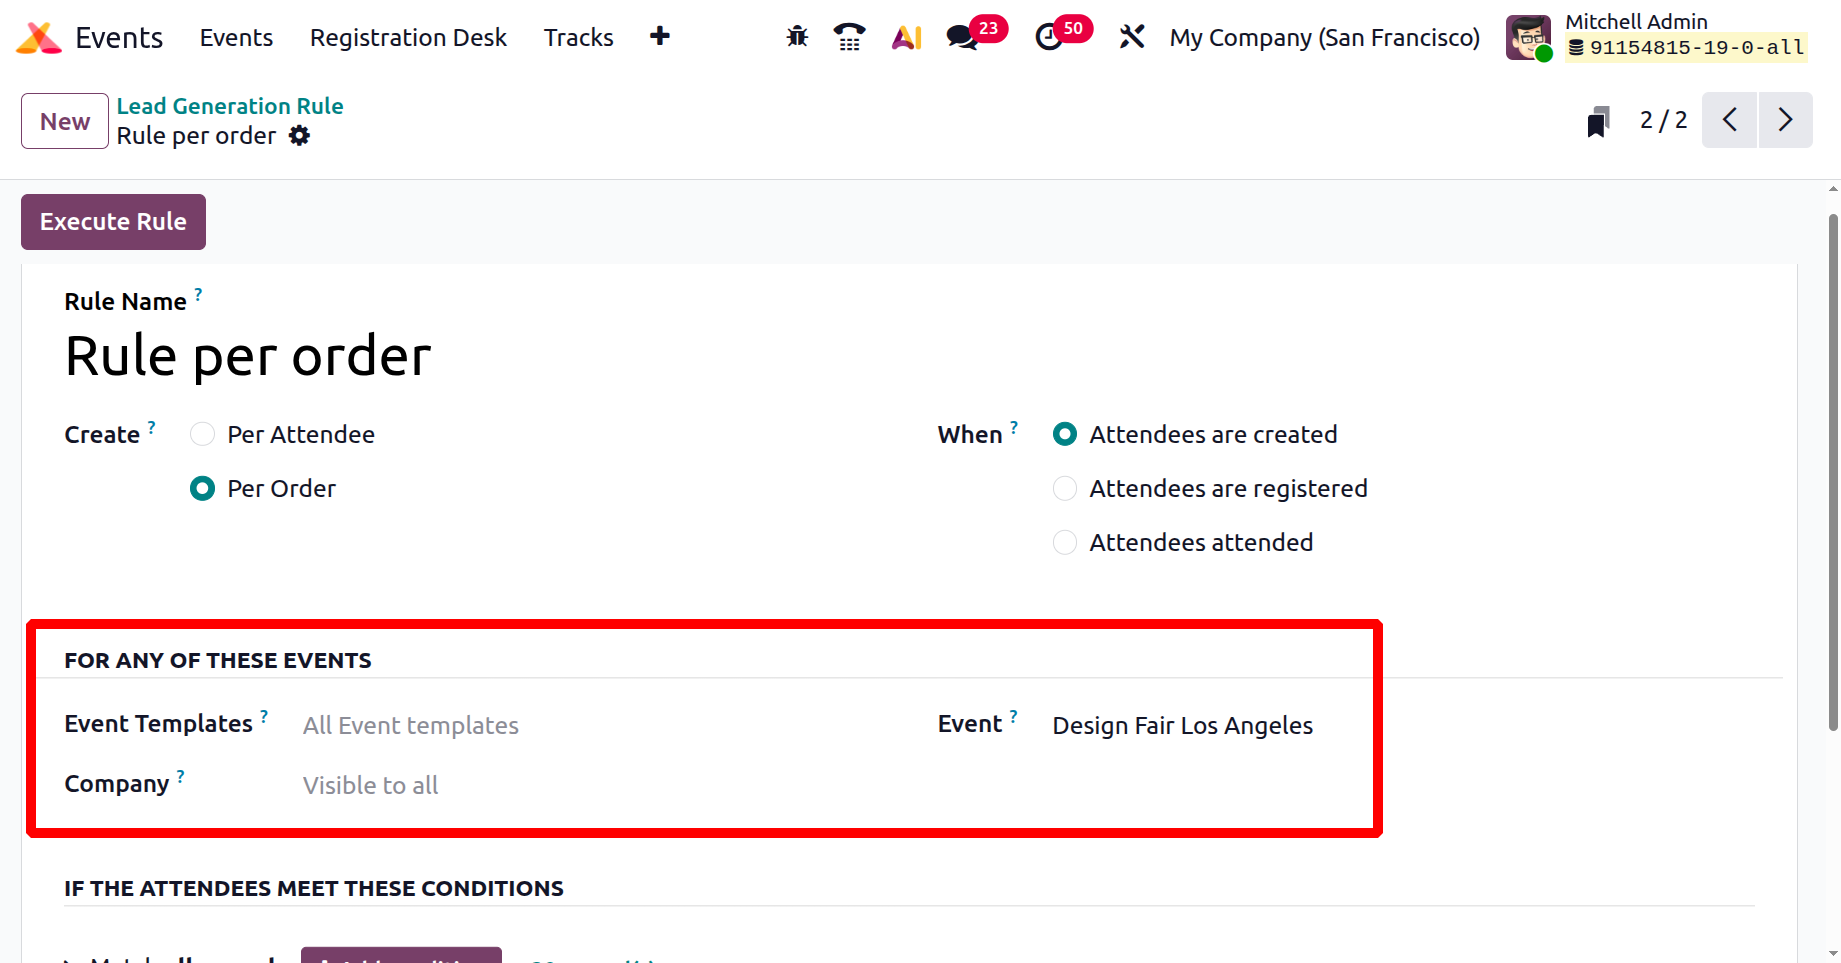
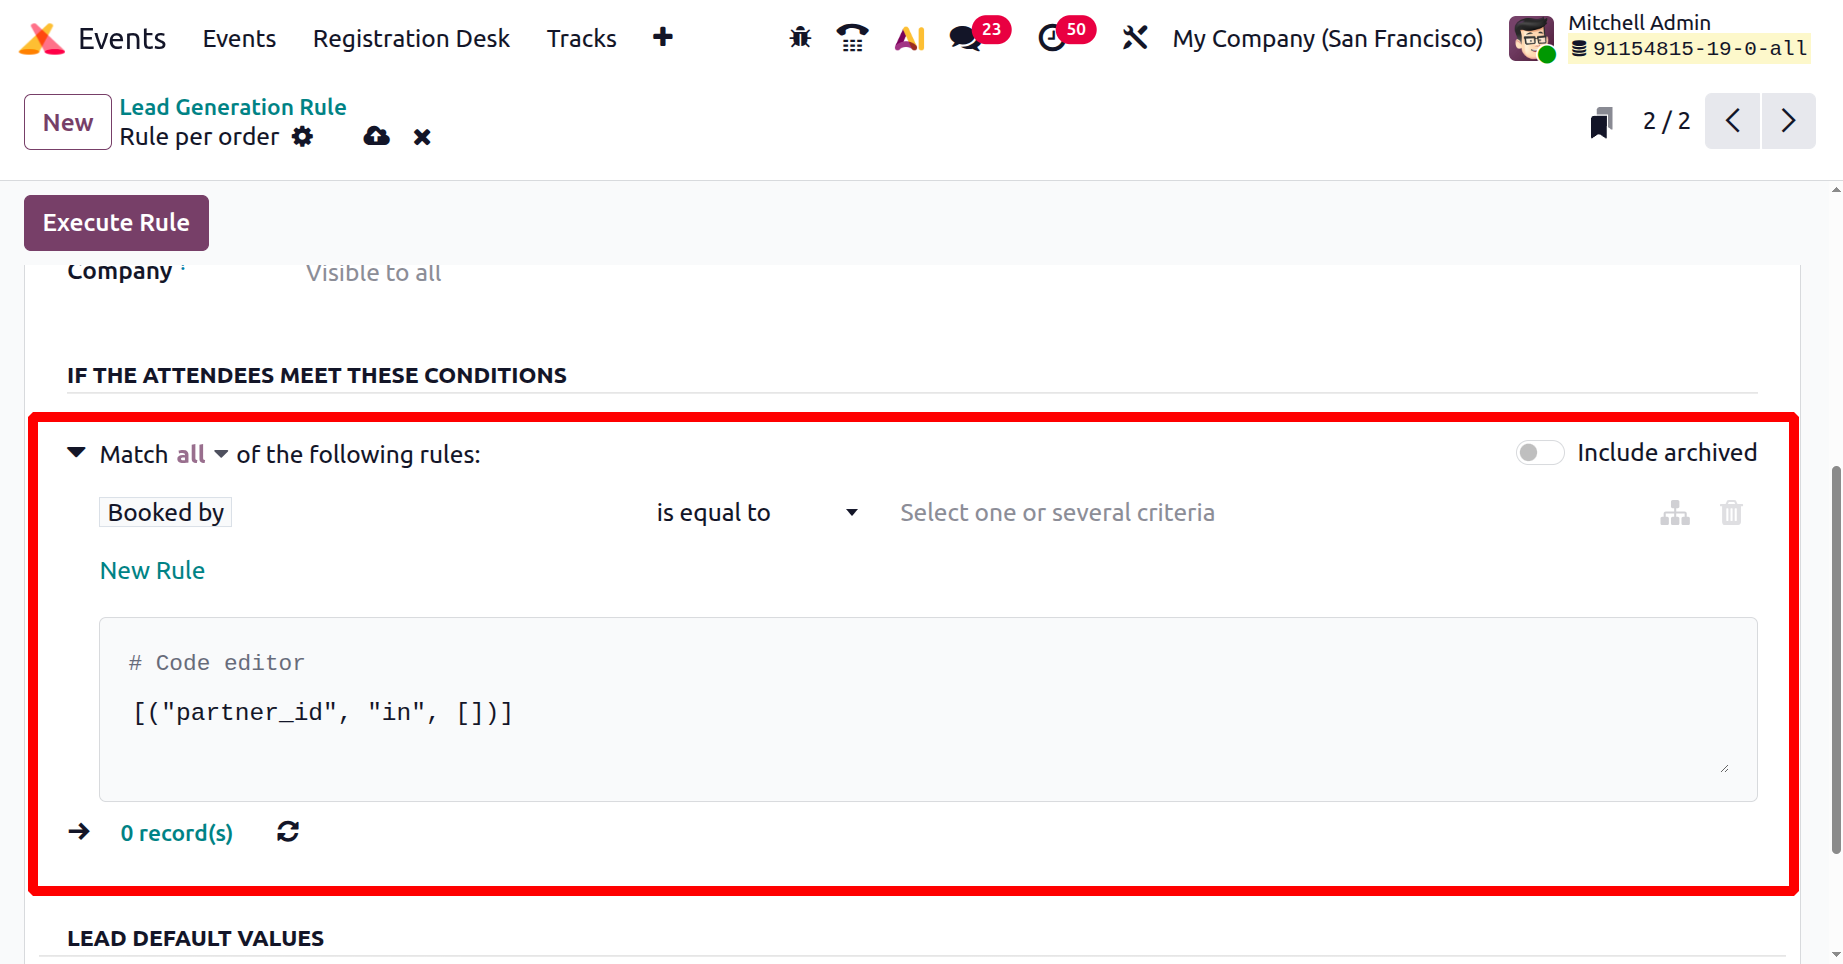
To apply this rule to all participants who are part of a particular event category, firm, or event, you can mention that event in Odoo 19. You can also set criteria to filter participants using the Add Conditions tool.
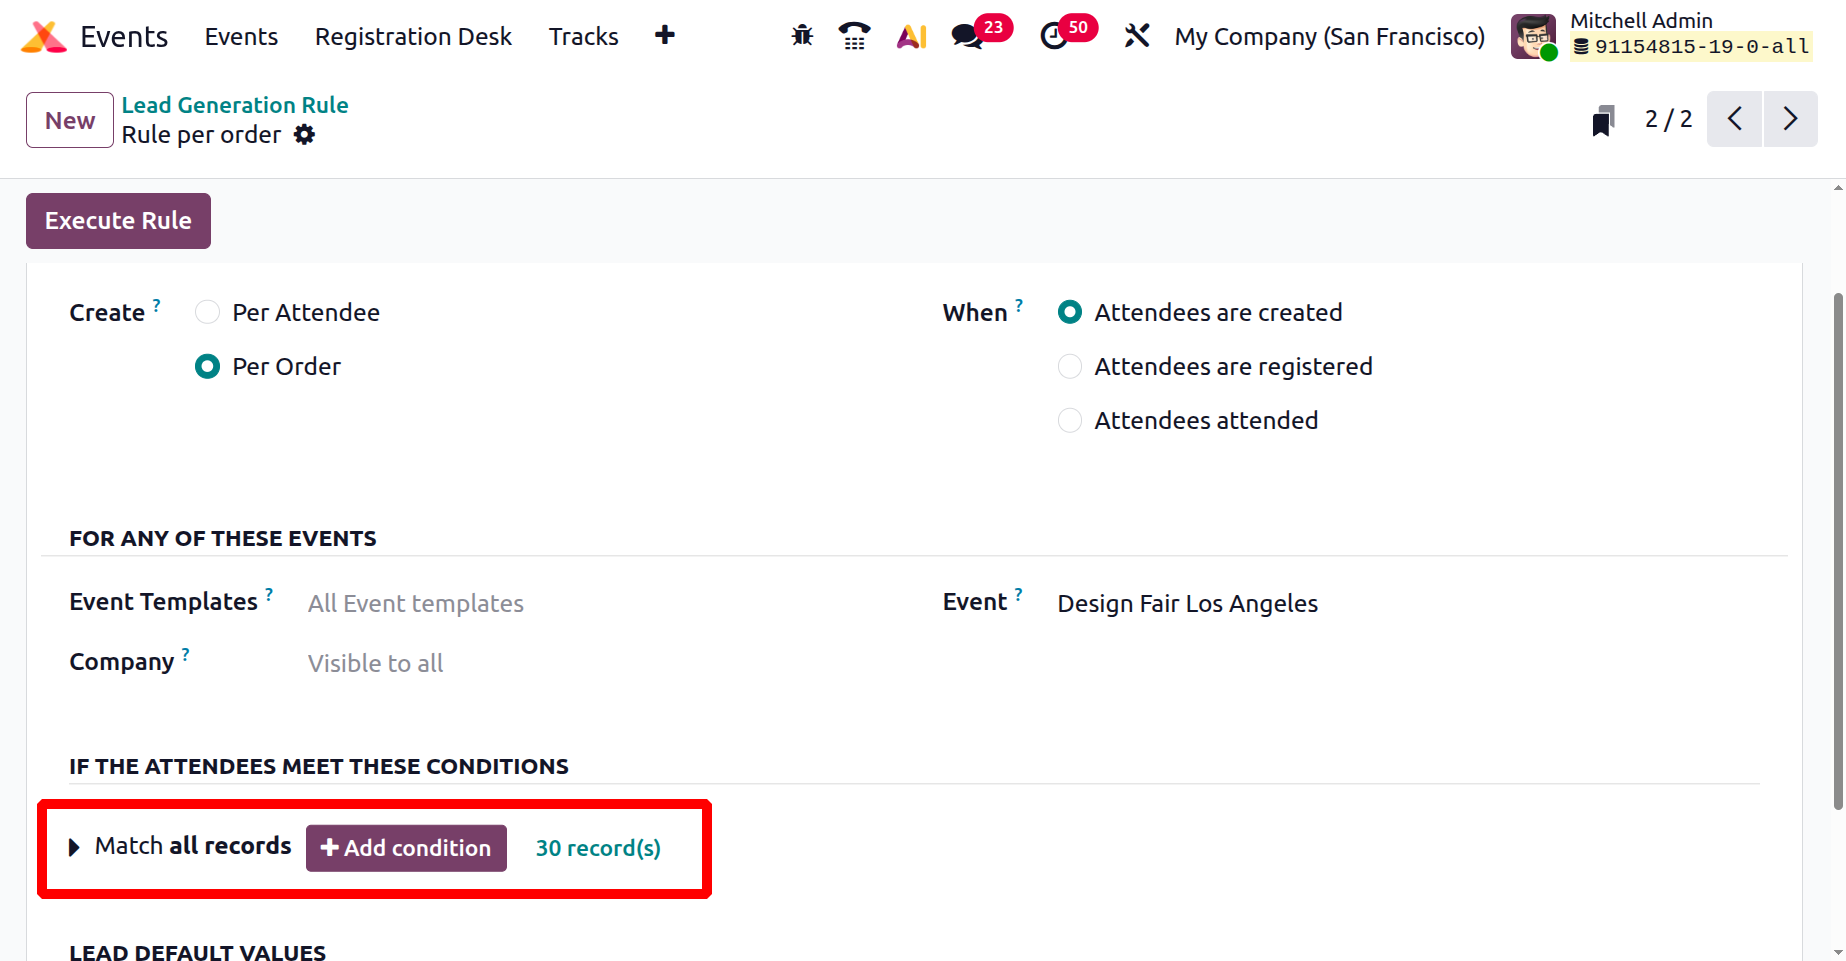
You can filter attendees according to particular criteria to find out which ones initiate the lead generating process by selecting the "If the Attendees meet these Conditions" option in the lead generation rule for an Odoo event. To make sure that only pertinent attendees produce leads, you utilize this section to provide the conditions, such as particular event categories, the firm an attendee belongs to, or other custom data. For more accurate lead generation, this serves as a domain filter to narrow down the rule's target audience.
You can enter the generated leads in the relevant fields to assign them to a certain sales team, sales representative, and can add related tags here. .
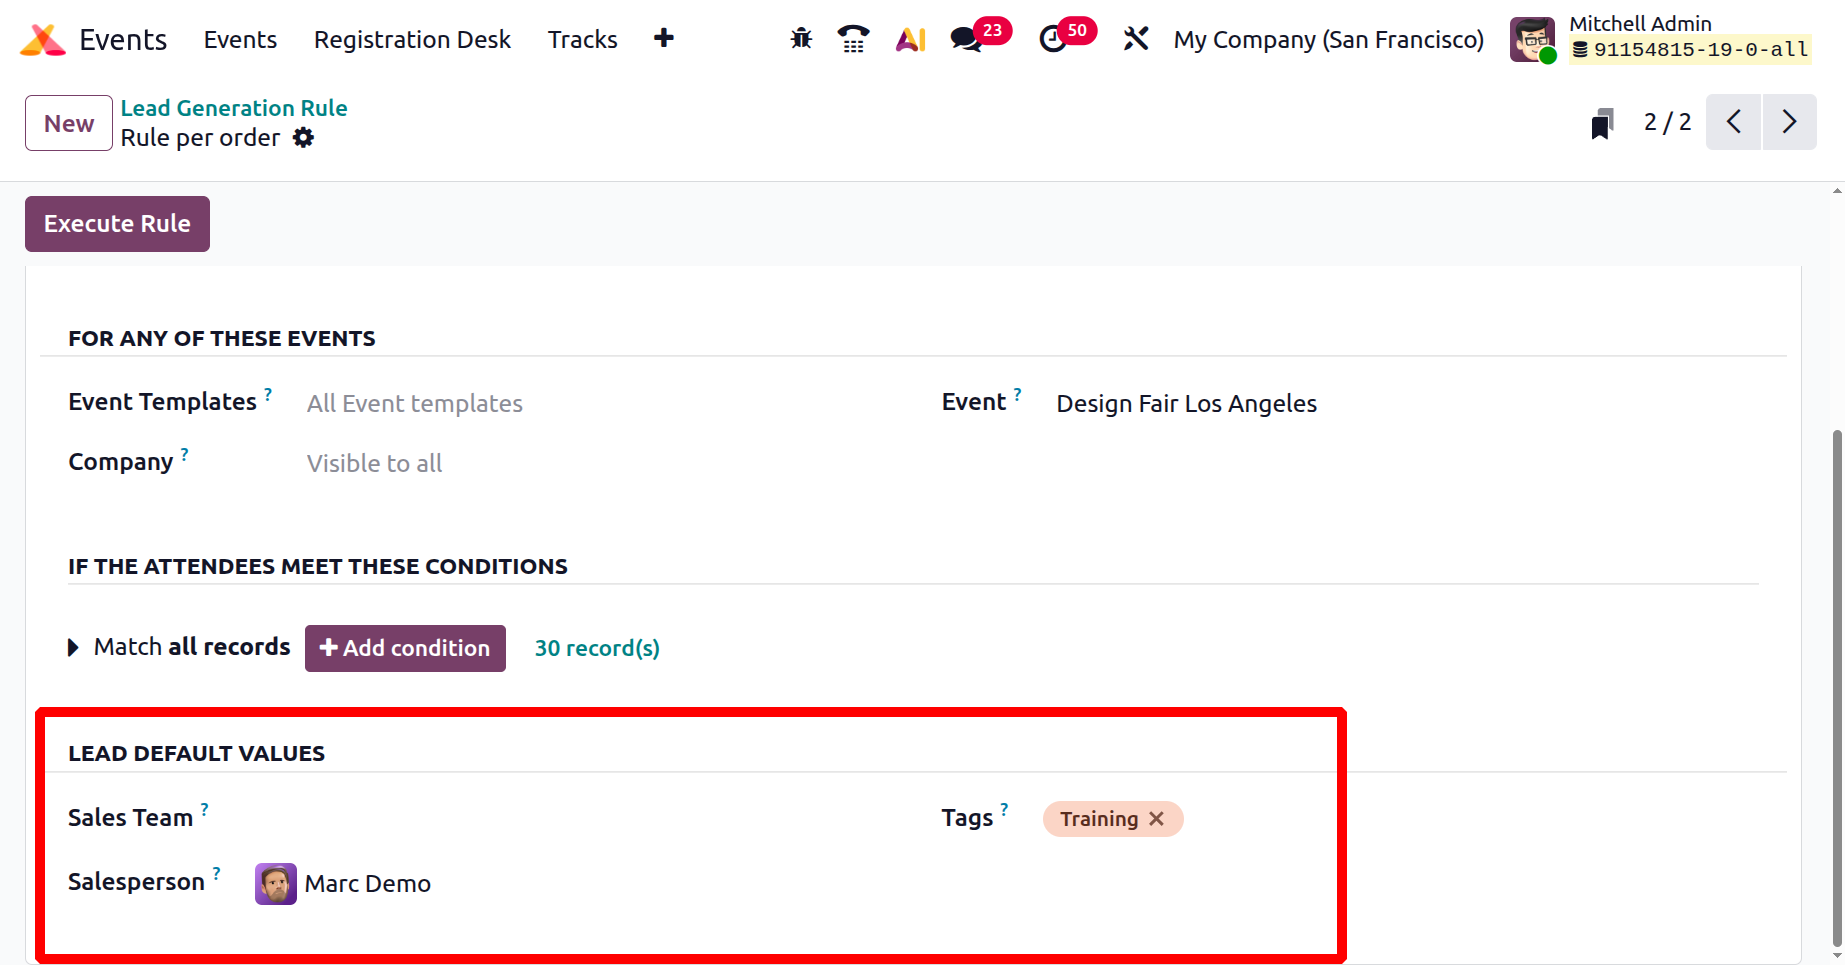
For the leads in this window, tags, a sales team, and a salesperson may also be indicated. You may save the newly established lead generation rule by selecting the Save option.
1.8 Booth Categories
The Booth Categories option is located in the Configuration menu of the Odoo19 Events module. You can use this tool to group booths into different categories.
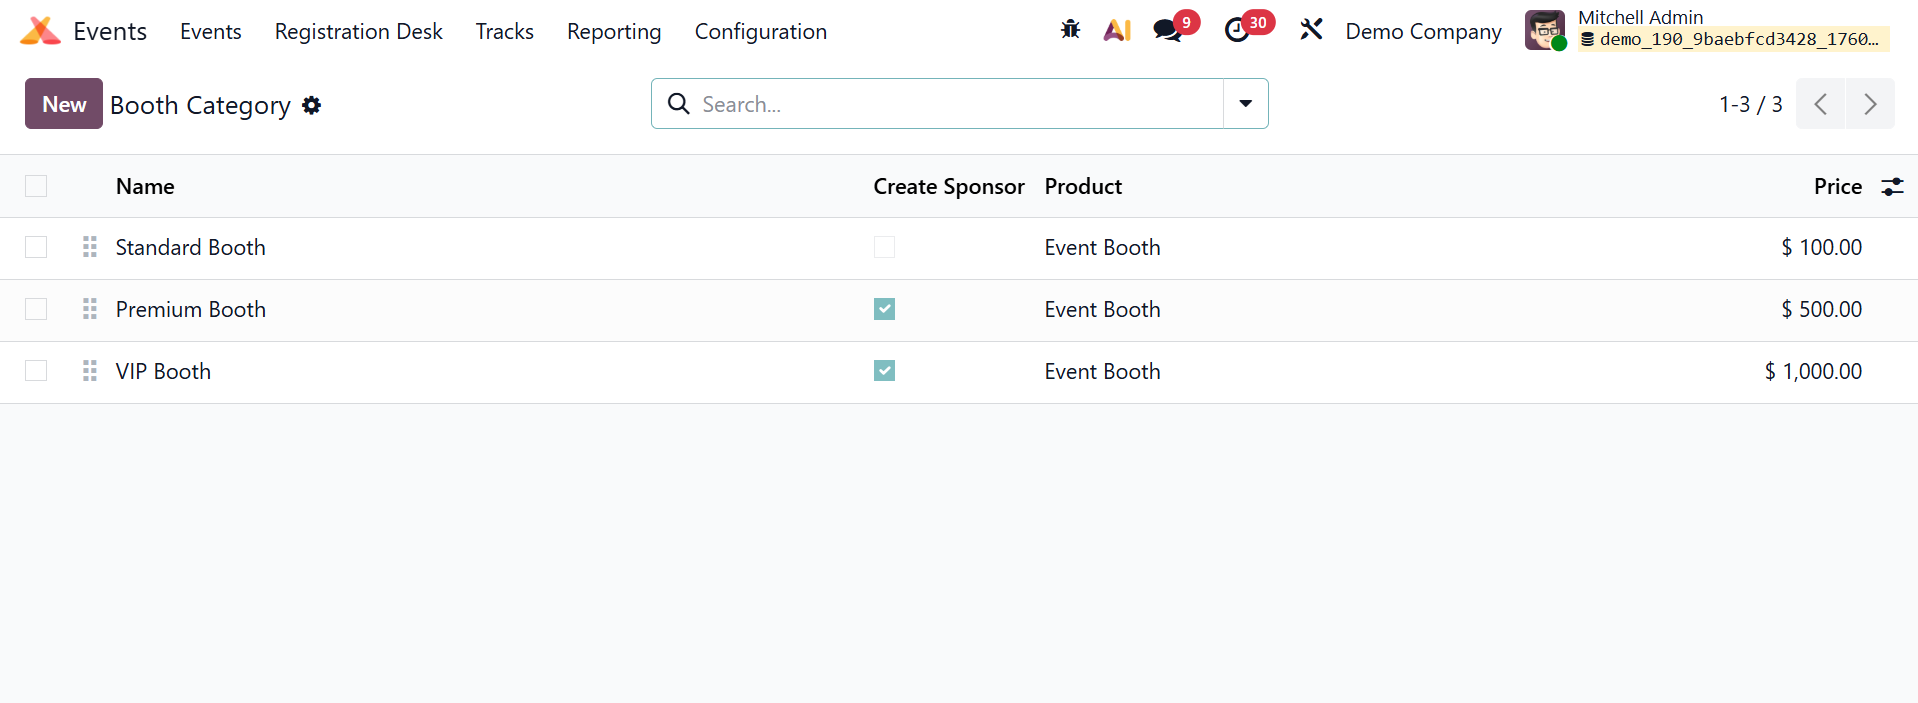
This list may provide you with information regarding Name, Product, Price, and whether or not you created a sponsor. To add a new booth category, click the New button.
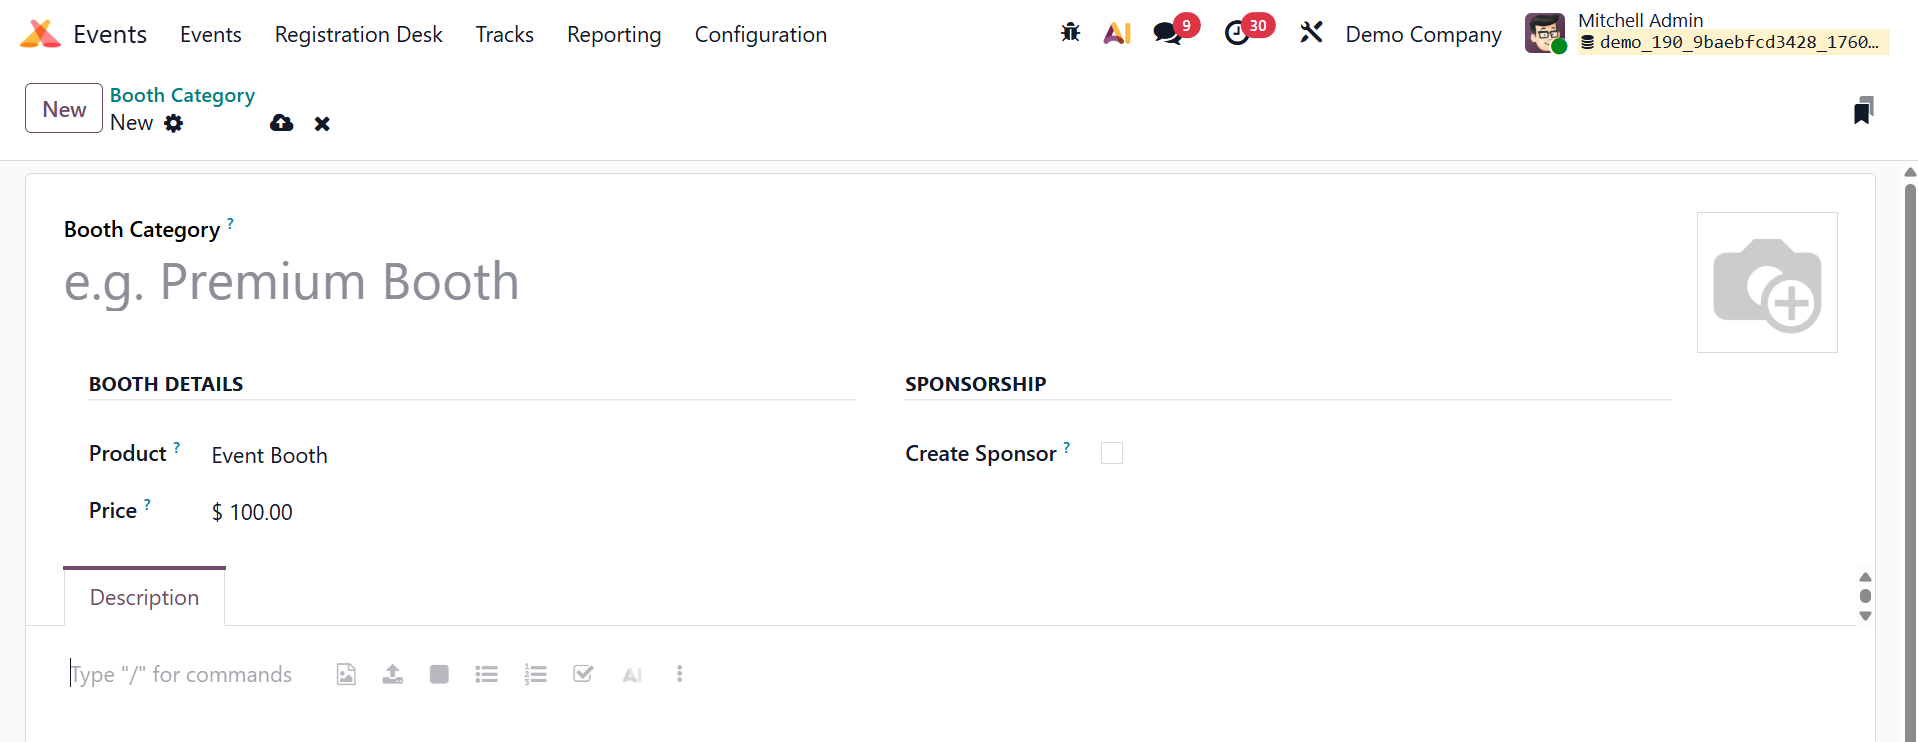
ou can input the Booth Category in the space provided in this window. The Event Booth can be listed as the product in the Product column. In the appropriate field, enter a price for this booth category. A sponsor creation field is present. When a user makes a booth reservation, a sponsor is created. You can provide more information about the booth category using the Description option. The new booth category will be saved when you click the Save button.
1.9 Booth
When a new event is created in the Odoo19 Events module, booths can be set up. The event website will provide access to the configured booths. A company or organization can reserve a booth through the event website if they wish to advertise or expose their goods or services to the guests of a certain event. You can set up more booths under the Events module's Configuration option.
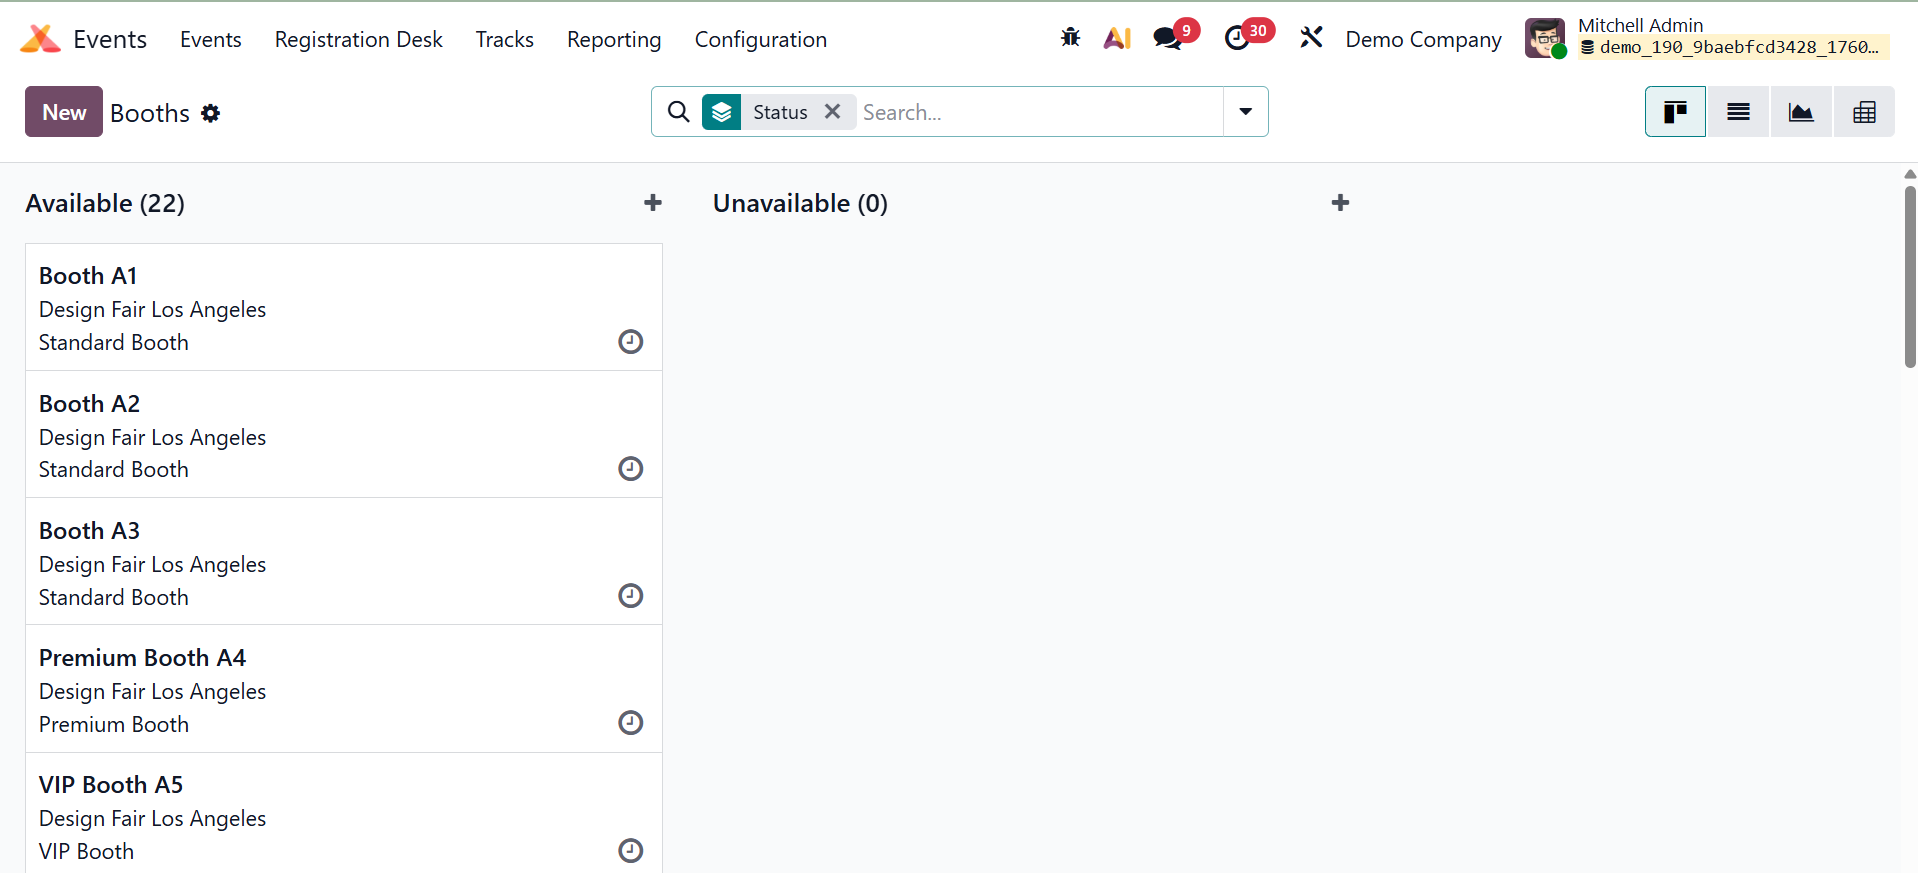 The configured booths were divided into Available and Unavailable groups using the Kanban view in the Booths pane. The Filters and Group By features of this platform are available to you. The New button makes it simpler to add a new booth to this window. alt="oodo 19" width="1363" height="495" />
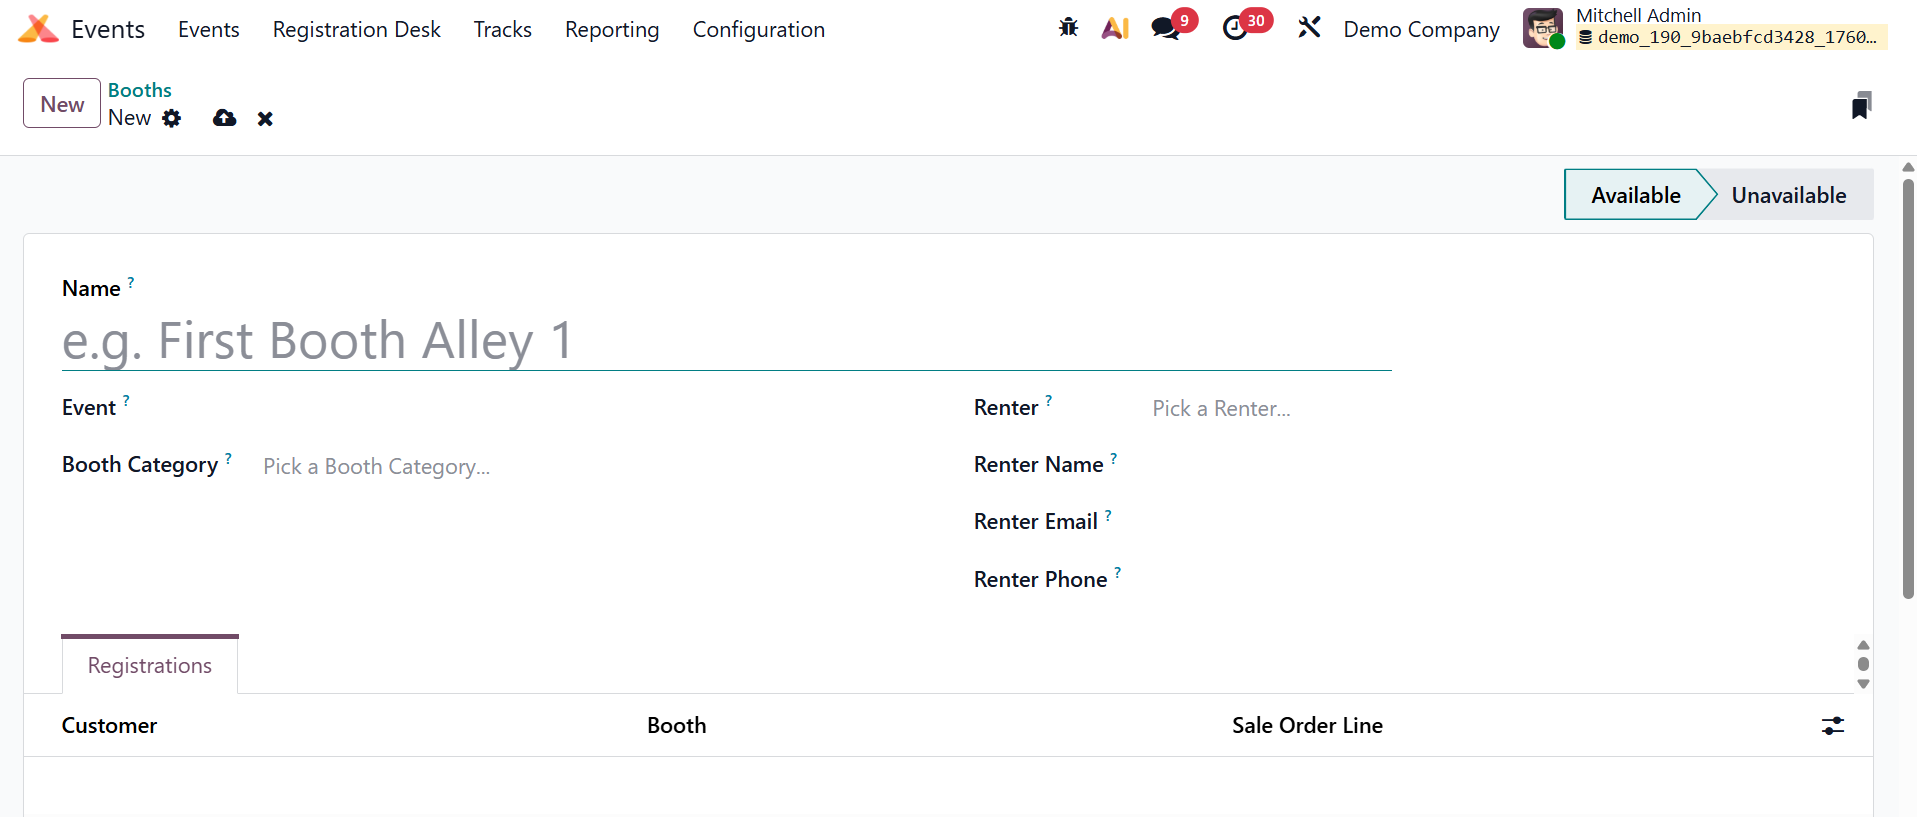
The appropriate areas can be used to insert the booth's name, event, category, renter, renter's name, email, phone number, and mobile number. Under the Registration page, you can view the information of the customers who registered for this booth. To save the new booth, click the Save button.
1.10 Track stages
The numerous phases allocated to the event tracks will give participants a clear understanding of the actions taken and the progress made. To create and manage different stages for the tracks, use the Track Stages option from the Events module's Configuration menu.
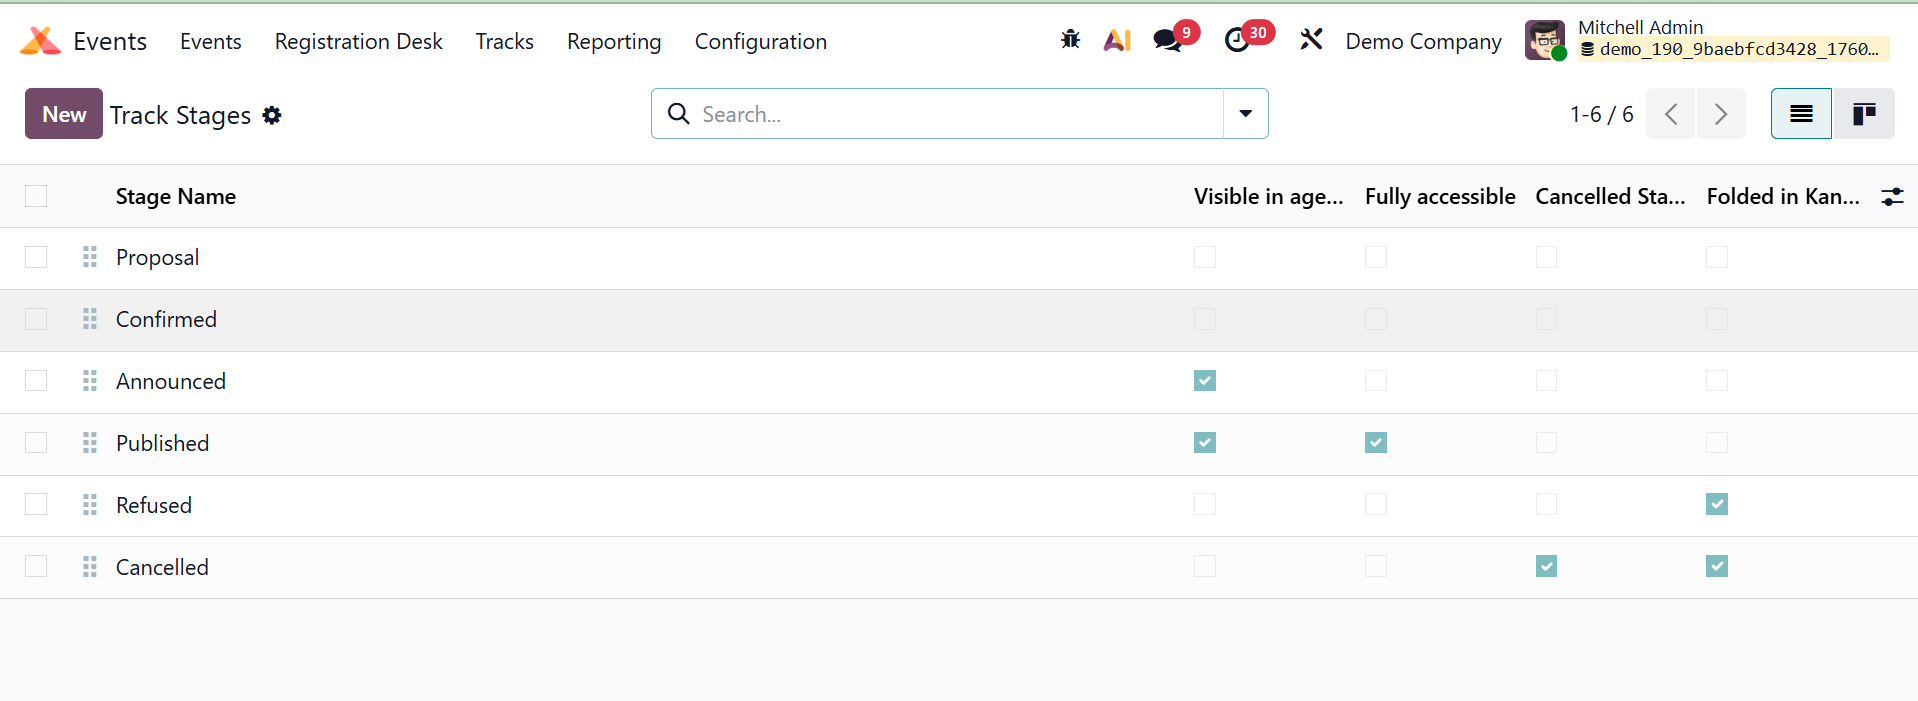
As seen in the screenshot above, this pane displays previously constructed stages. To create a new stage, click the New button. In the corresponding field, type the stage name. When an event reaches this stage, Odoo19 will automatically send the customer an email if you have uploaded an Email Template. To make the relevant track visible on the frontend, enable the Visible in agenda field.
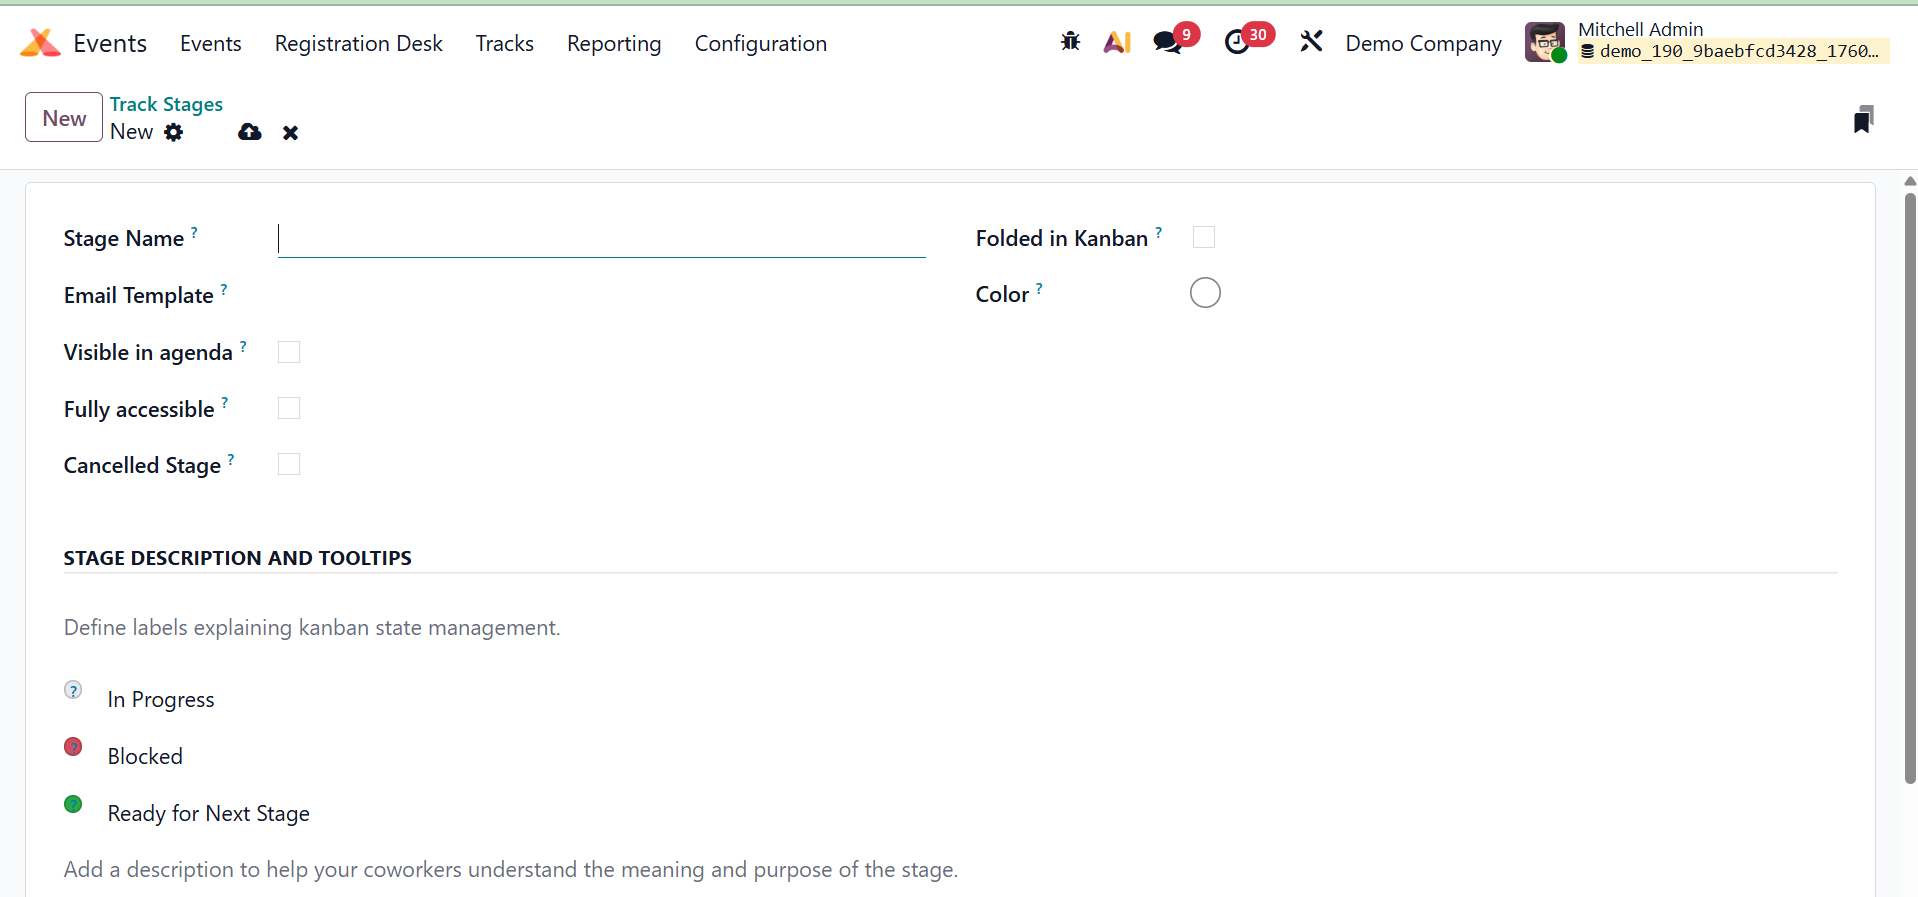
For customers to have access, the Fully accessible field needs to be activated. All canceled event tracks will be added to the Canceled Stage while it is in use. Enable the Folded in Kanban field to fold this stage in the Kanban view. The Color option allows you to choose the colors of the stage. The Stage Description and Tooltips tab allows you to customize the stage's labels and description. Click the Save button once all the fields have been filled out.
1.11 Track Location
The location of the event must be included when creating a new event or event track. The Track Location option displays these designated places.
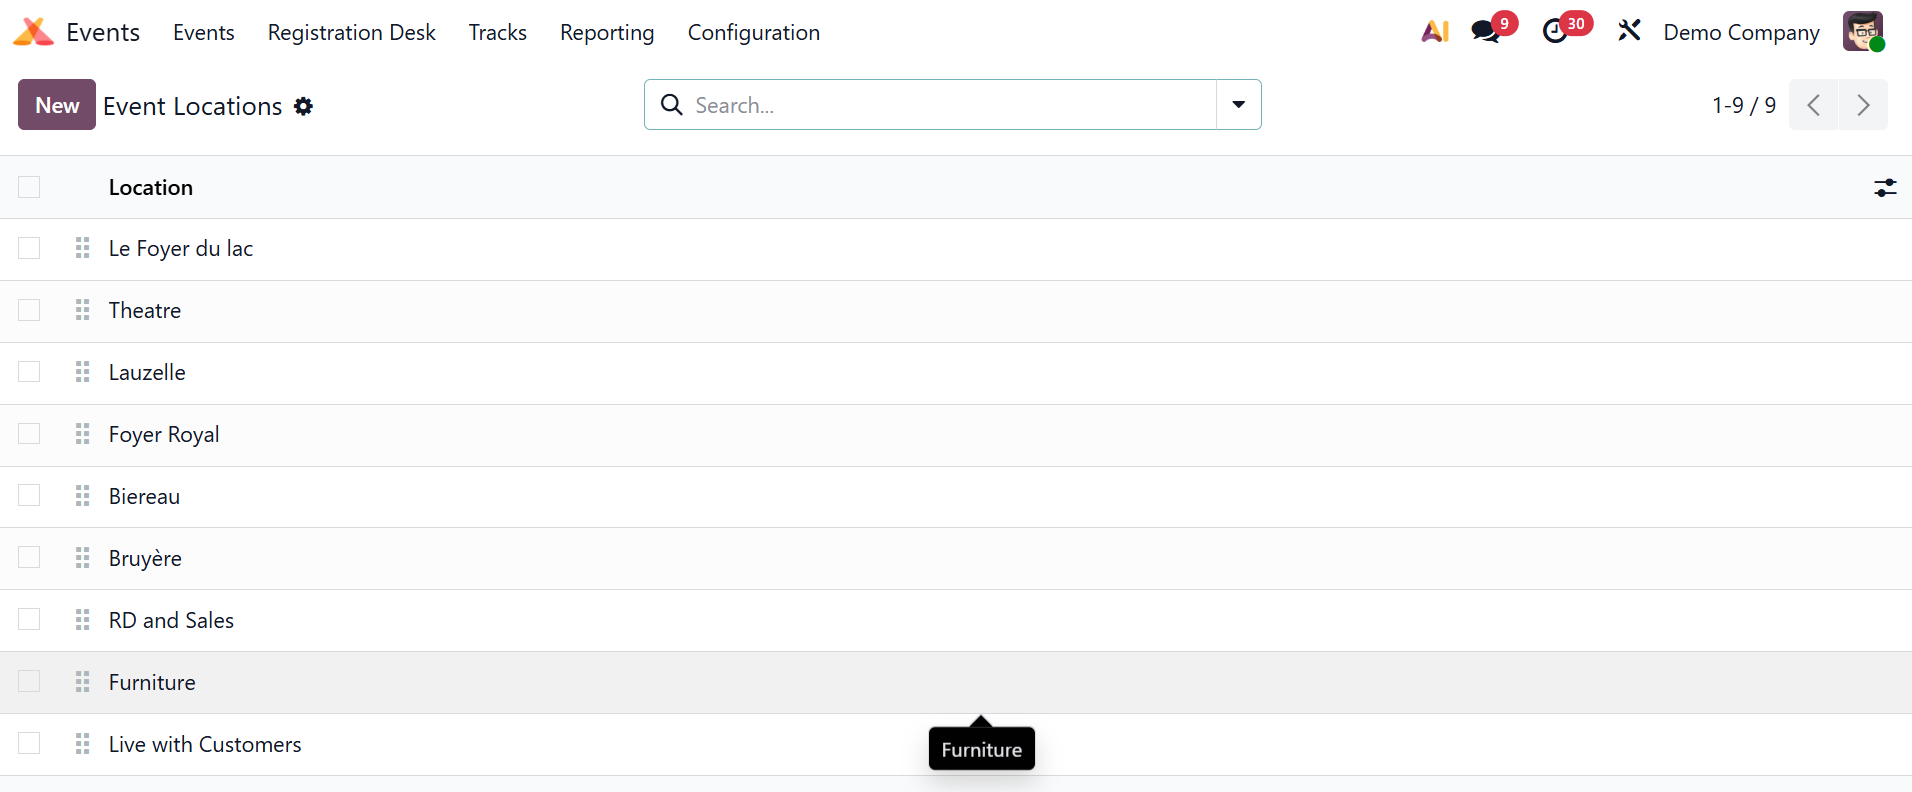
All of the venues for the events and event tracks made in the Events module are listed here.
1.12 Track Tag Categories
Furthermore, the development of Event Tag Categories was covered earlier. You can create categories for track tags in a similar manner. In Configuration, use the Track Tag Categories option to accomplish this.
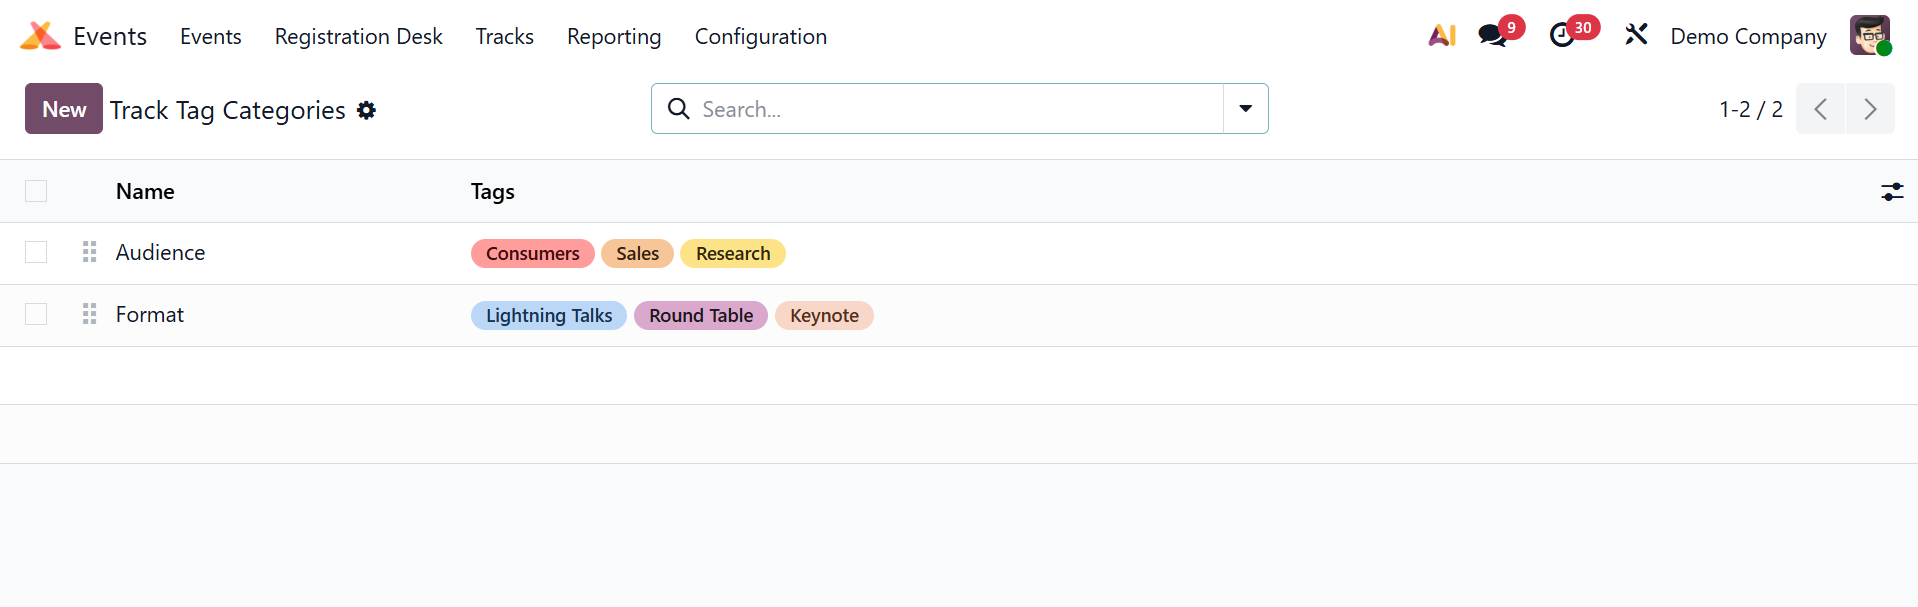
As seen in the image above, you can see the name of each category on this platform along with the tags that belong to it. To add a new track tag category, click the New button.
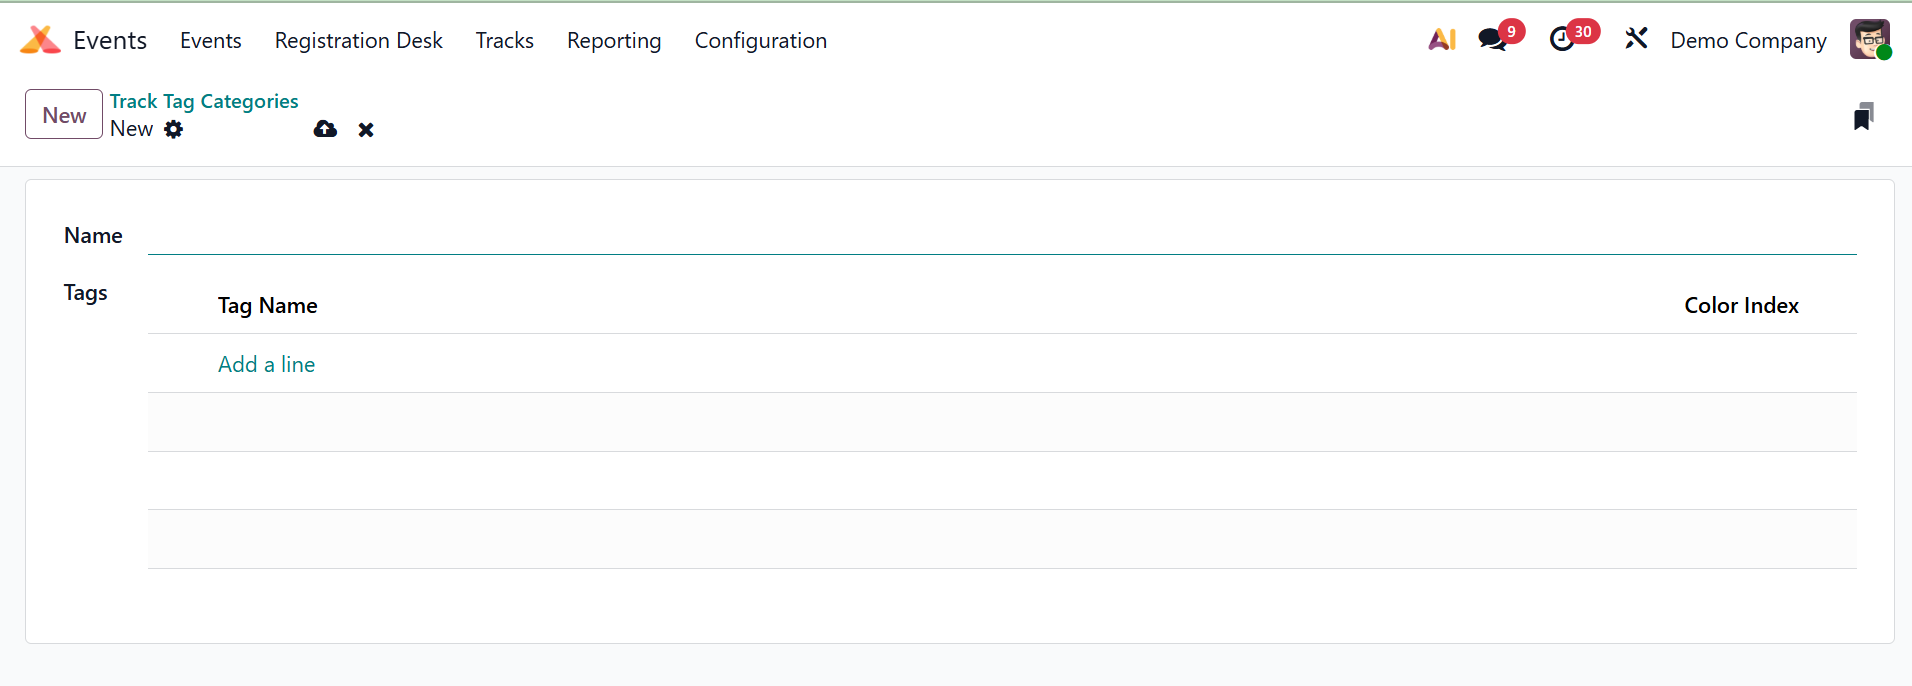
The Category Name can be entered in the appropriate field. To add tags for this category, click the Add a Line button. Click the Save button once all the information has been entered.
4.13 Track tag
Now, by choosing the Track Tags option from the Configuration menu, you can quickly create and manage track tags.
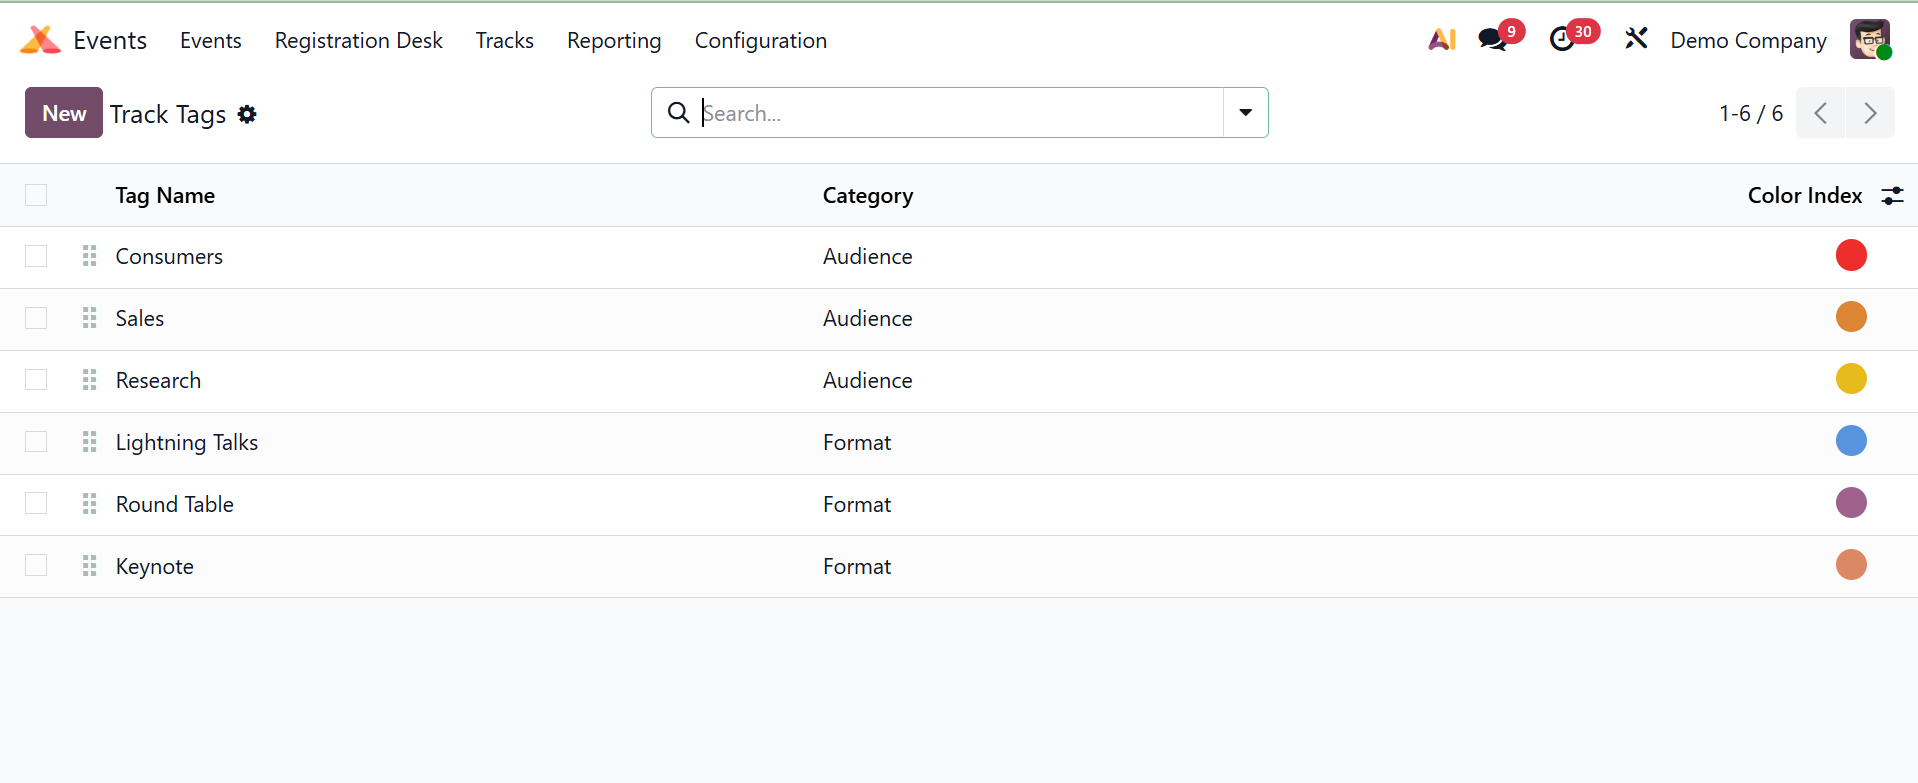
The Tag Name, Category, and Color Index will be displayed in the list. You can put the name of the new tag in a new line that appears beneath the current tag list by choosing the New button.
Choose the category using the drop-down menu, then give the track tag a color. The changed tag can be stored by selecting the store option.
1.14 Track Visitor
Information about visits to a published track can be tracked using the Track visits option in the Configuration menu.
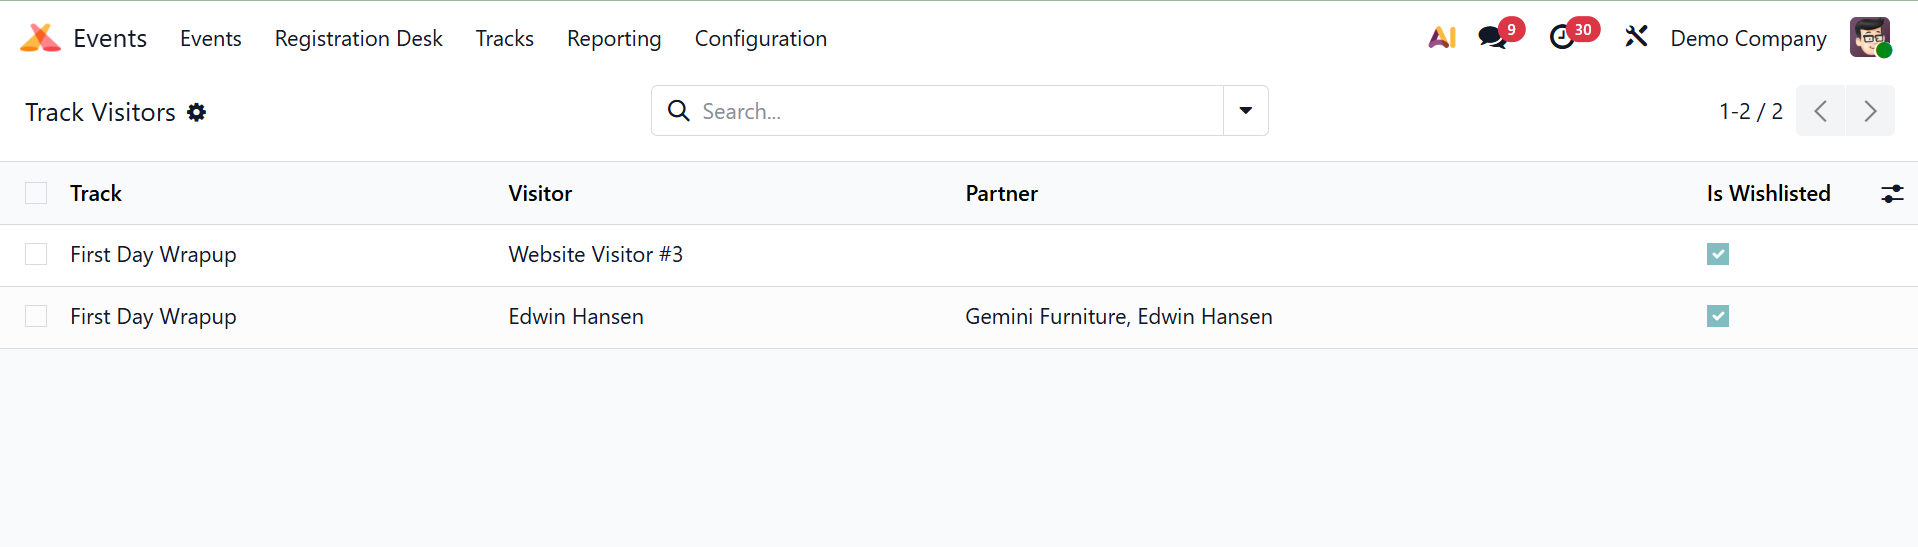
Each visitor's Track Name, Visitor, Partner, and Quiz Points are listed. If a visitor puts the music to their wishlist, it will be indicated as checked in the 'Is Wishlisted' column. If the visitor completed the track, the 'Completed' field will be recorded as checked.
1.15 Sponsor Levels
You may easily assign the event sponsors to various tiers using the Events module. To do this, go to the Configuration menu and choose the Sponsor Levels option.
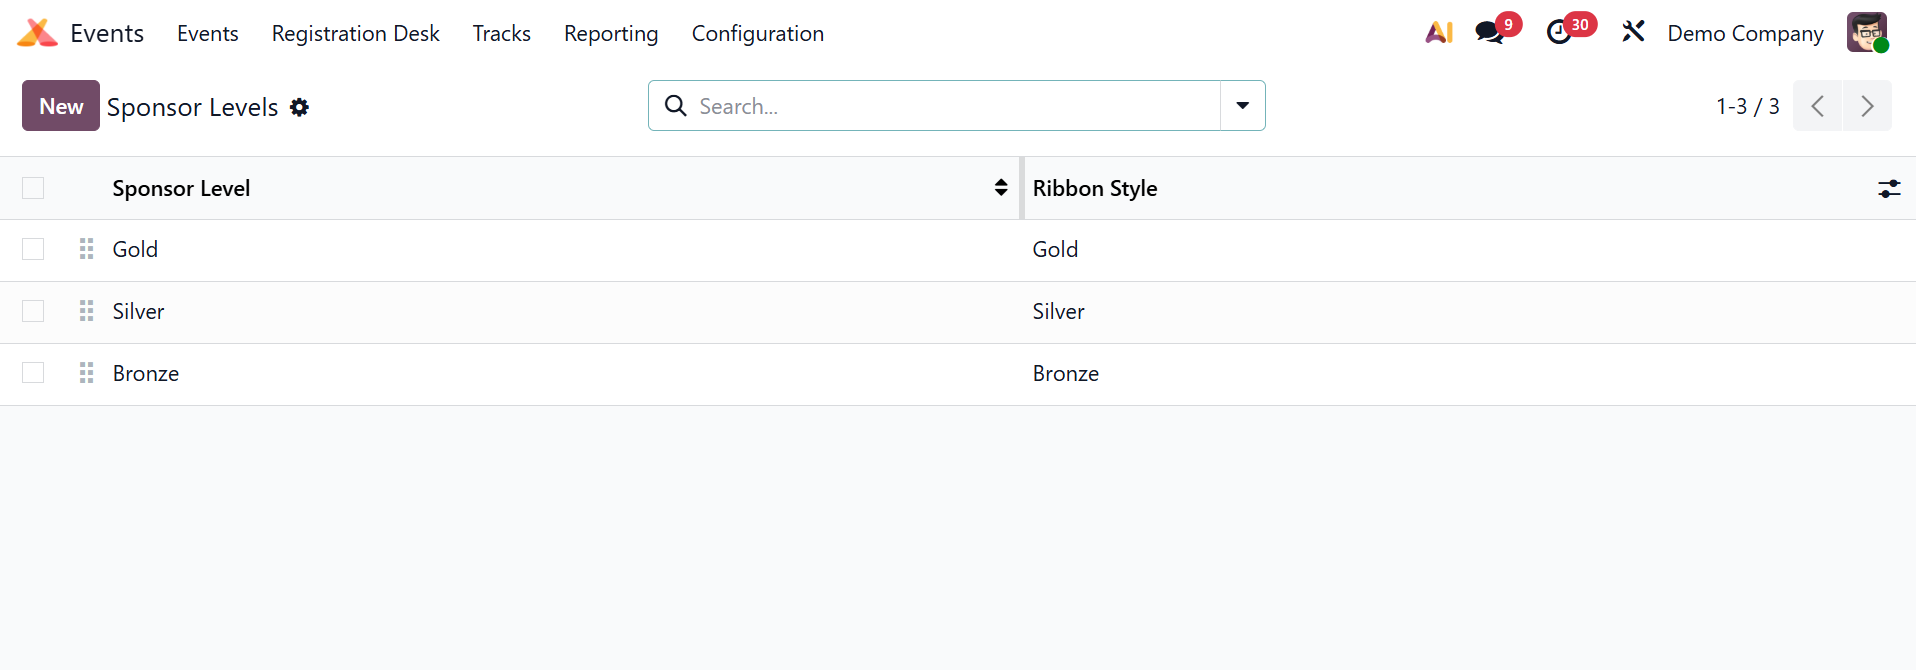
You will receive an image of the ribbon design for each level as well as a complete list of all the levels made for the sponsors. You can add a new level for sponsors by selecting New.
1.16 Quizzes
The Event Quizzes option in the Configuration menu contains the quizzes we made for every event. All quizzes made in the Events module will be recorded by this platform.
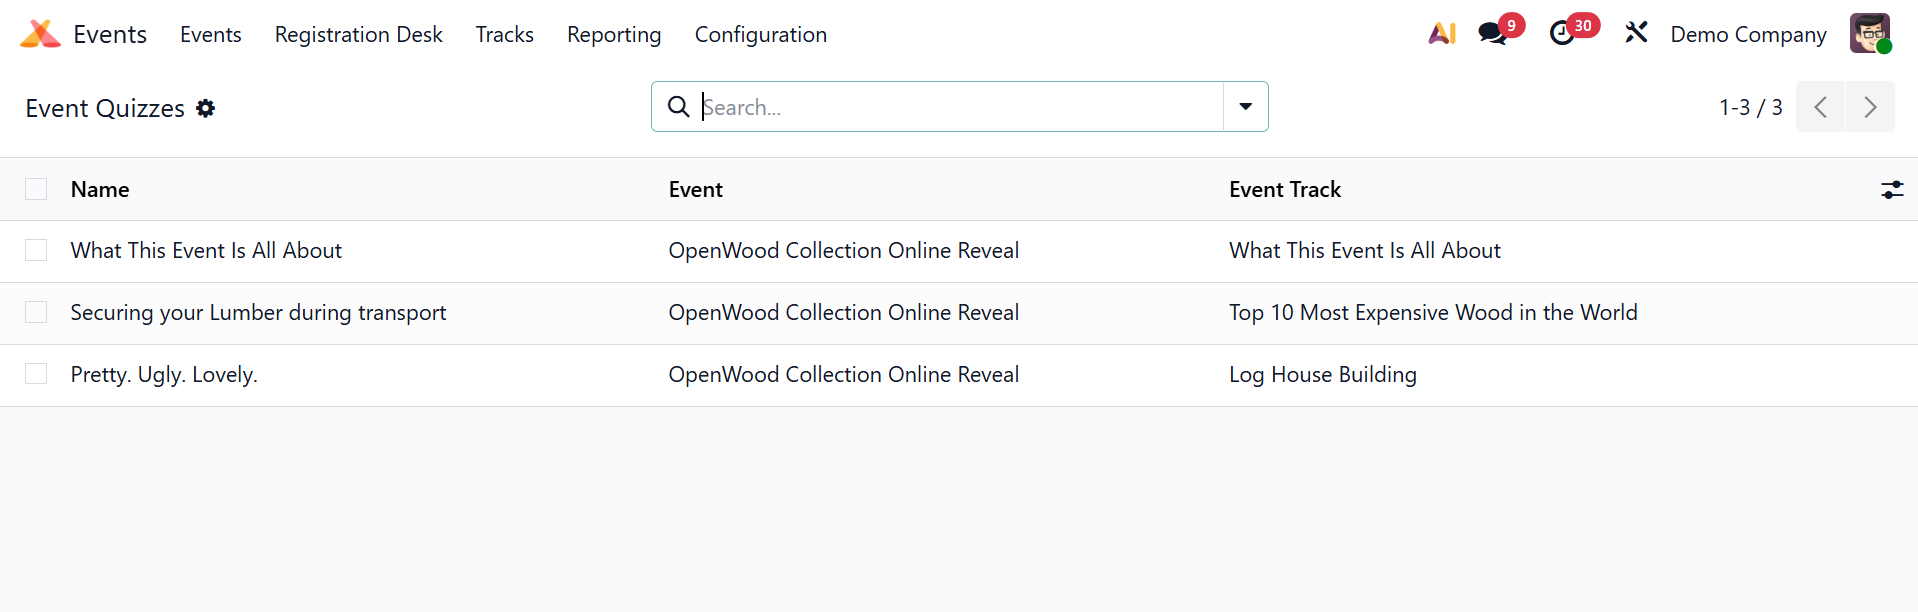
The Name, Event, and Event Track will be displayed in the list preview. To find out more information on a particular quiz, click on it.
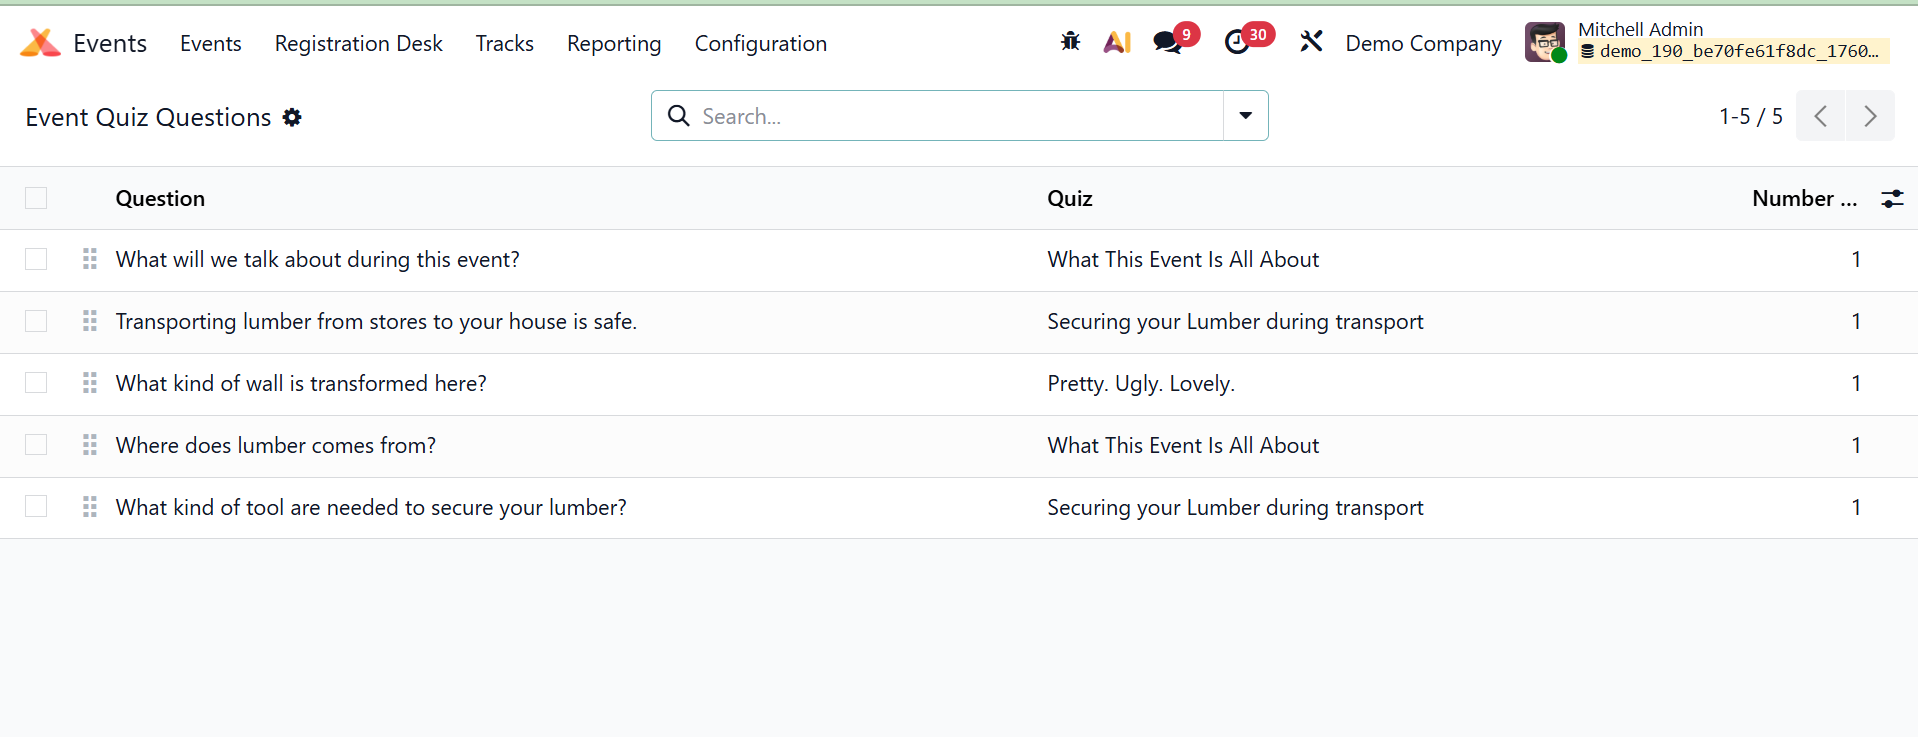
1.17 Quiz questions
Under the Configuration option on the Quiz Questions platform, you will find a record of every question that has been made for various quizzes.
1.18 Website Menu
As seen below, the Website Menu option in the Configuration menu displays the record of all configured Website Menus.

The Menu Name, the Event, the View, and the Menu Type were listed.