Odoo 19’s Social Marketing module helps companies centrally manage all their social media accounts. It enables users to plan, produce, and distribute content on YouTube, Facebook, LinkedIn, Instagram, and X. The dashboard provides real-time insights into audience interaction, reach, and performance. Odoo 19 allows users to track conversations, reply to comments, and even turn them into leads. Through this integration, marketing initiatives are streamlined, brand awareness is increased, and customer relationships are improved. Businesses can effectively organize campaigns, monitor operations, and assess results with its unified, intuitive interface. This chapter helps you understand the key features and functionalities of the Odoo 19 Social Marketing module.
The five menus of Odoo 19’s Social Marketing module are Feed, Posts, Campaigns, Visitors, and Configuration. Each menu helps to manage social media activities efficiently.
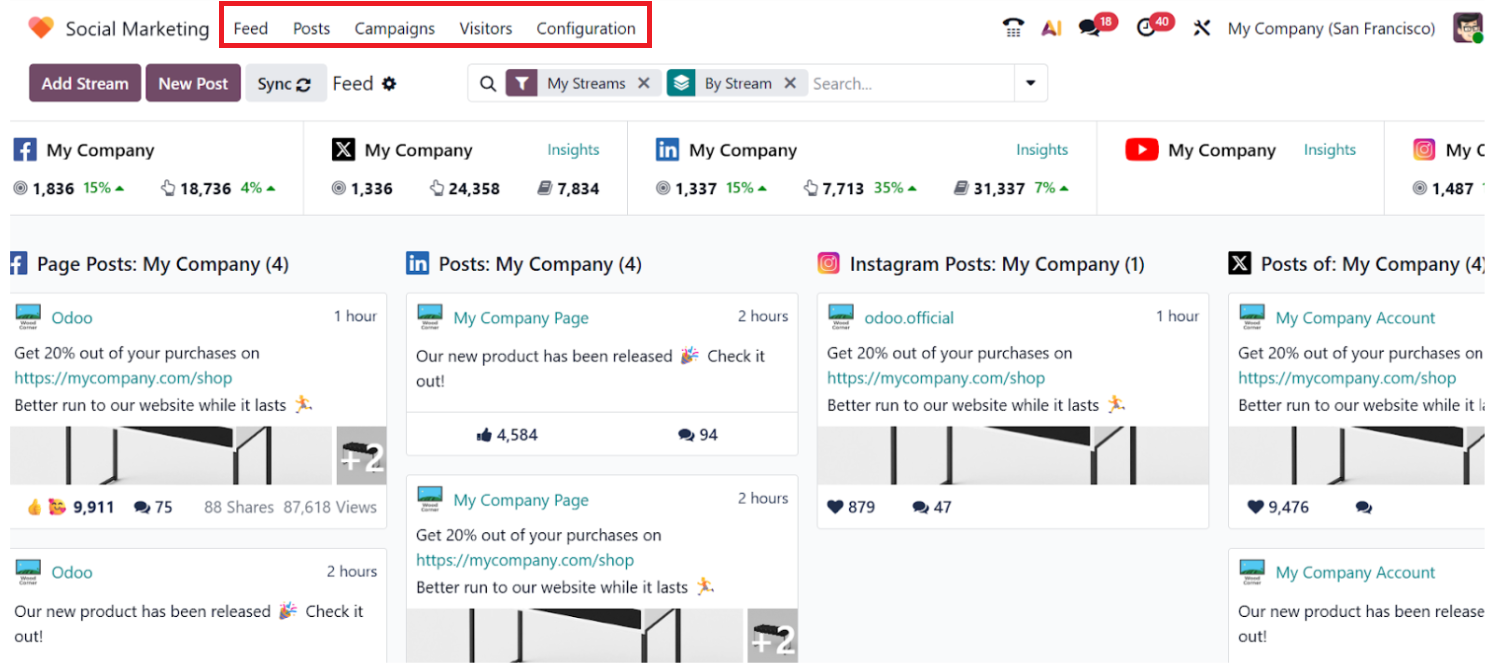
1.Feed:
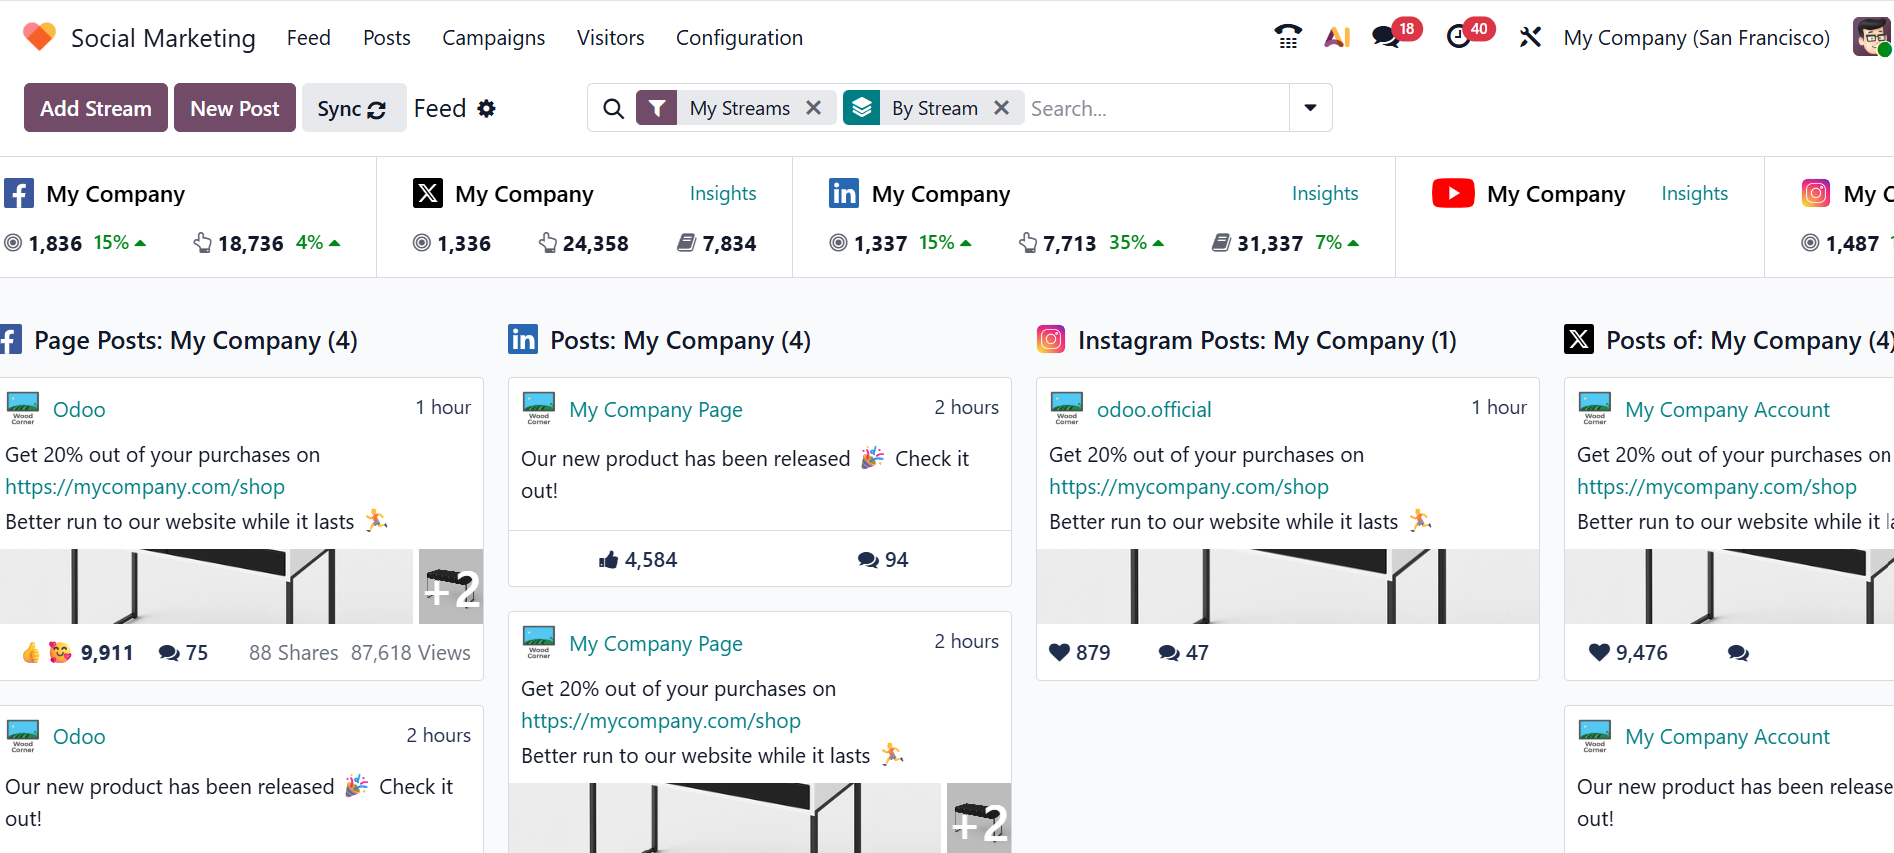
By default, Feed is the dashboard view in the Social Marketing module. In the Feed, you can see all the connected social media streams, such as Facebook, LinkedIn, Instagram, X, and YouTube. You can view all feeds, published posts, and real-time post engagement in the dashboard. You can also easily access all the latest posts from each stream and monitor post engagement in a single platform.
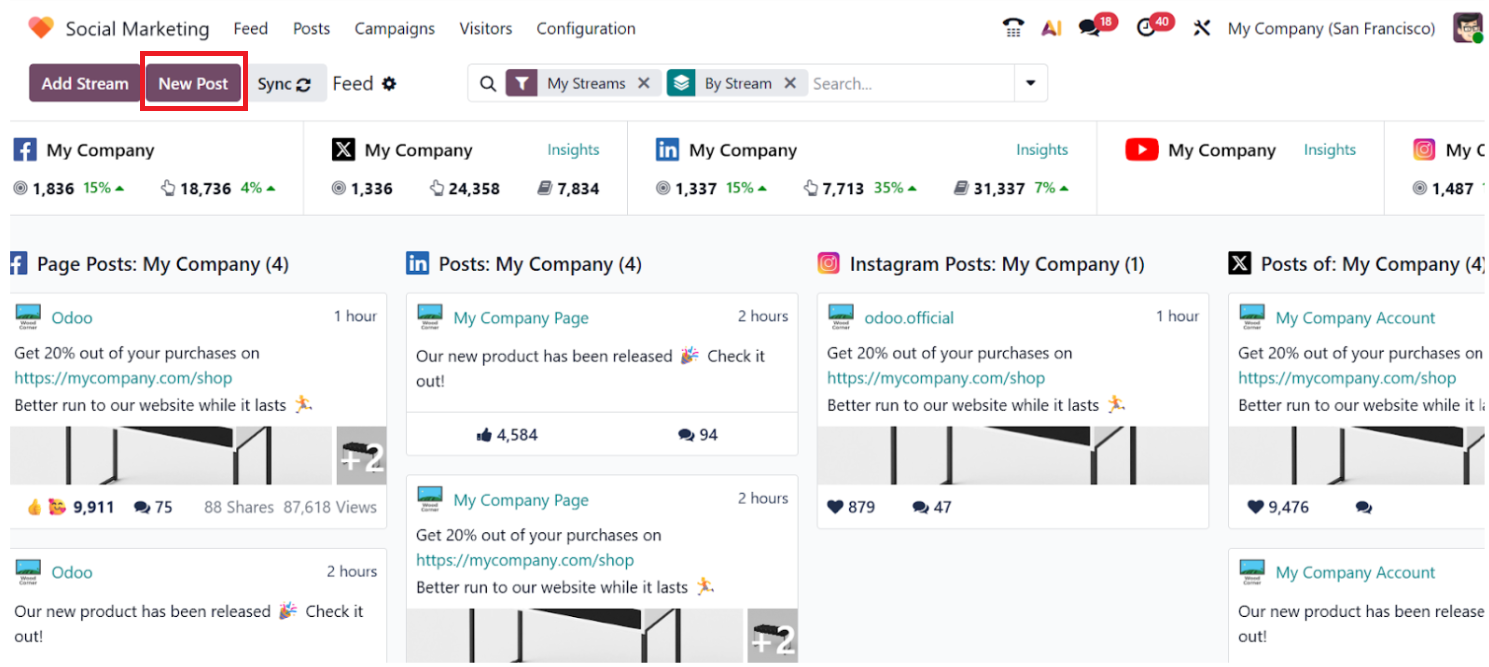
In the dashboard view, the social media accounts are arranged in a multi-column layout. Each social account with its posts is arranged in columns. Under each social media account, you can see their real-time insights, number of followers, reach, impressions, and audience engagement.
Under each column, all the posts are arranged as cards. You can analyze the number of shares and views of each post and show the engagement status, such as likes, shares, and comments. In each post, you can also reply, like, or convert comments into leads.
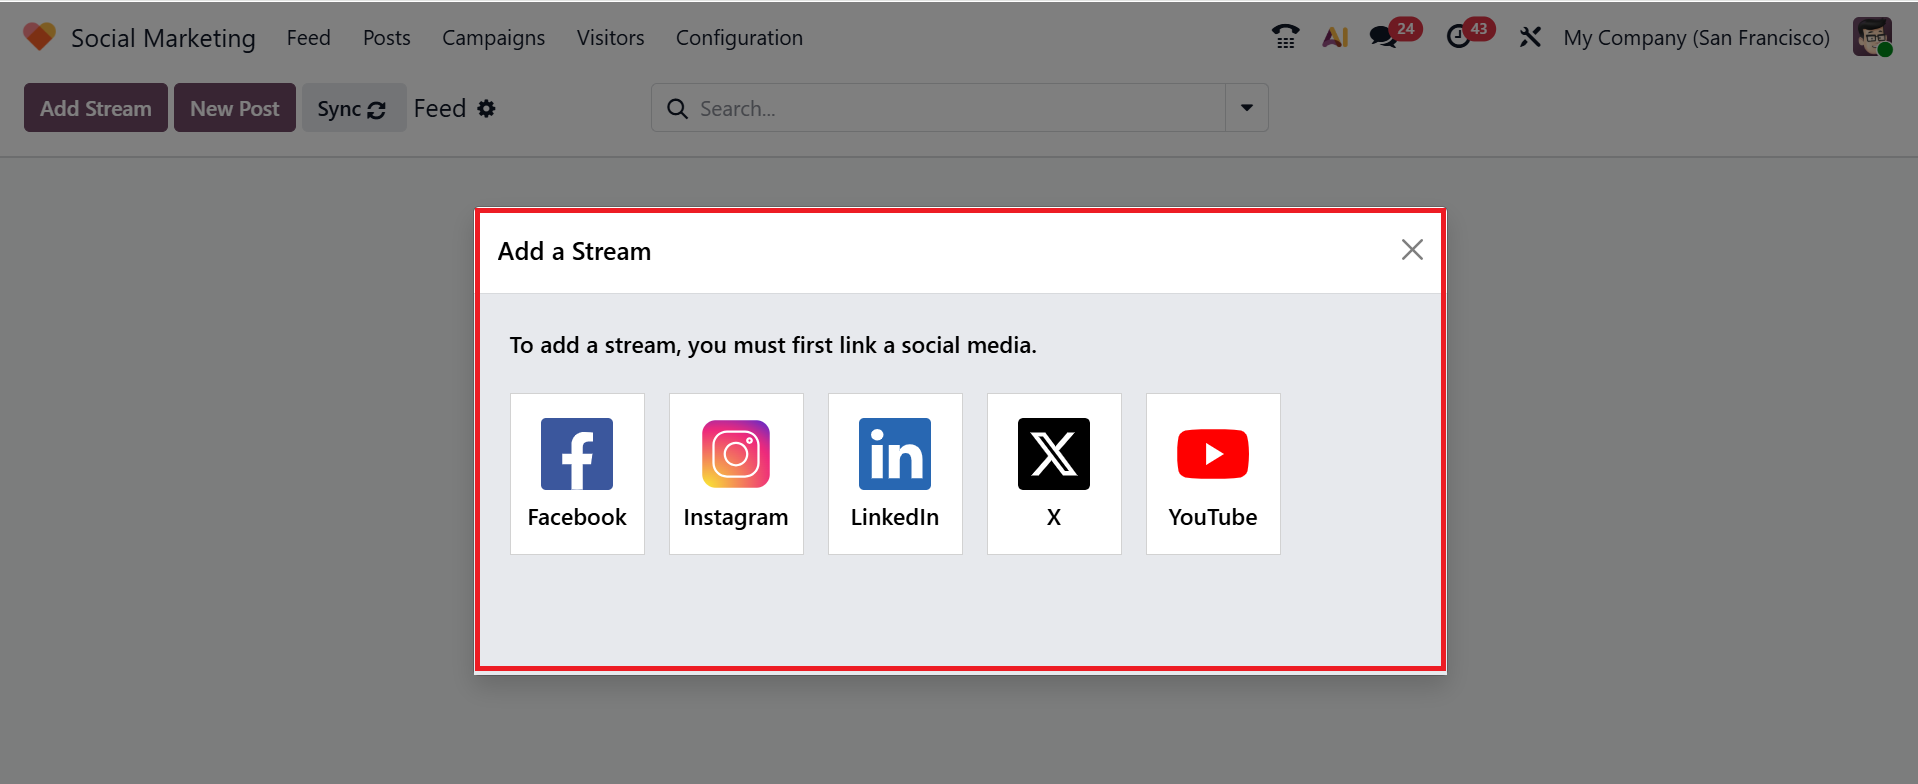
Click on the Add Stream button in the upper-left corner of the dashboard to add a social media account as a new stream. A pop-up window will appear where you can see the social media platforms, such as Facebook, Instagram, LinkedIn, X, and YouTube.
To add a stream, you can select an already linked social media account, or you can link a new social media account. After selecting the social media accounts, a new column will appear in the Feed page where you can view all the posts and related activities. The Add a Stream feature makes it simple to configure and manage your social media profiles directly within the Social Marketing module.
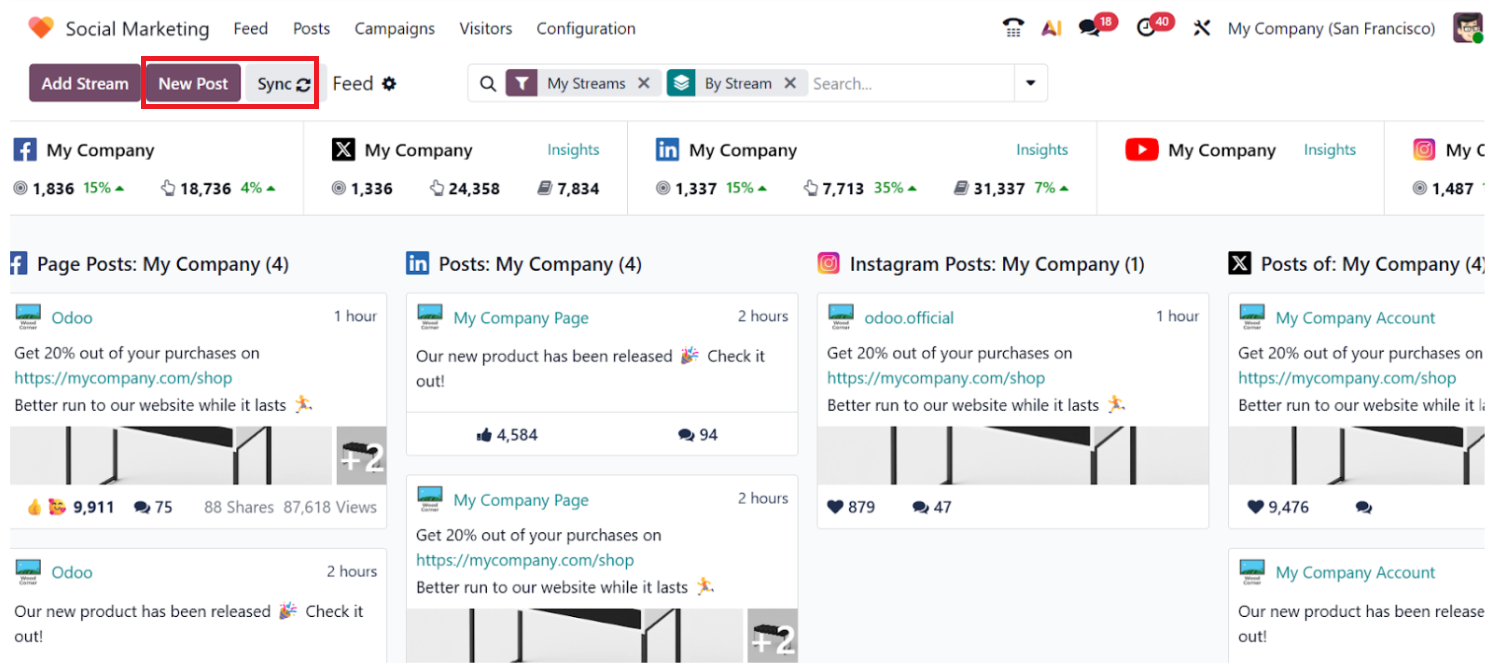
You can also use the Synchronization button to refresh the module to view the latest activity. This helps you to keep the data up to date. To create and publish a new post, you can use the New Post button in the Social Marketing module, which will be explained in the section below.
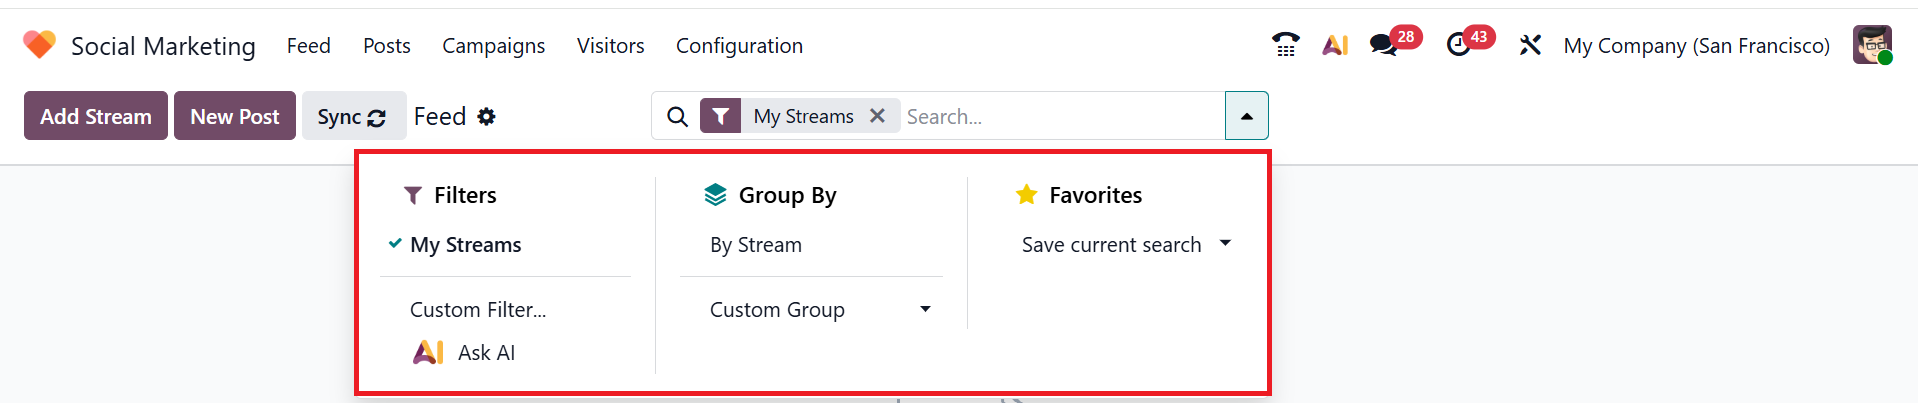
When you click on the drop-down menu in the search bar, you can see three options: Filters, Group By, and Favorites. You can filter the feed as My Streams, Custom Filter, or Ask AI. You can group the feed page as By Stream or Custom Group. Under the Favorites option, you can save the frequently used filter for quick access.
2.Posts:
On the Feed page, you can create a new post by clicking the New Post button. This feature lets you create and publish posts directly in the dashboard.
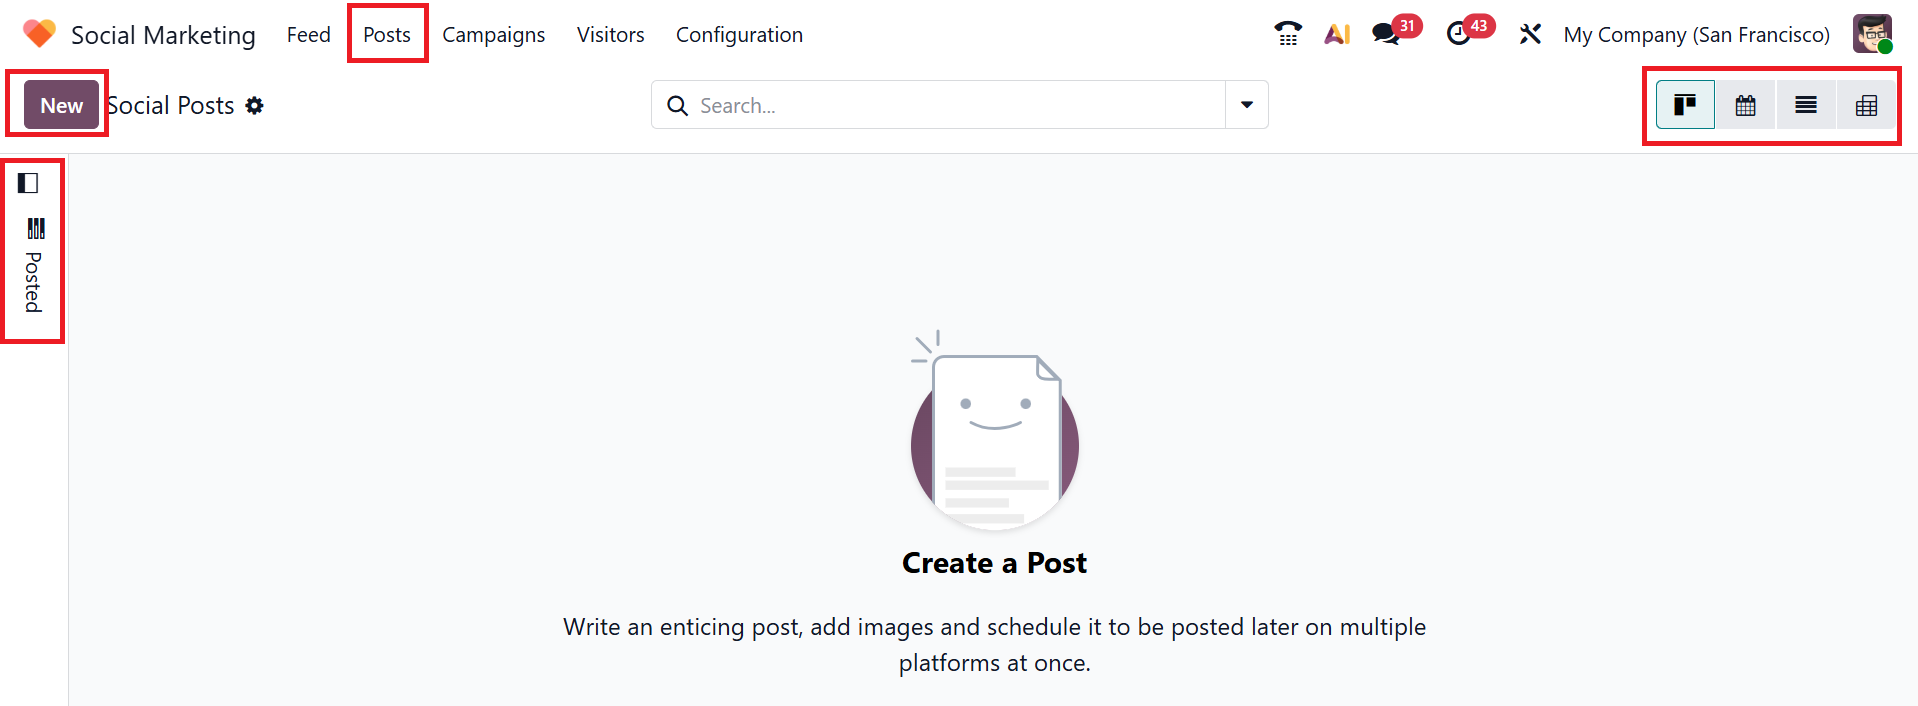
To create, manage, and review posts, go to the Posts menu in the dashboard's top bar. This window shows as a central hub for publishing posts, including launches, promotions, events, and other business-related announcements. You can view the Posts in Kanban, Calendar, List, and Pivot views. By default, Posts can be viewed in Kanban view, where each post is displayed on a separate card for quicker access. You can view a Filtering Panel on the left side of the screen to sort posts based on scheduled, posted, etc. Use the New button shown below to create a post.
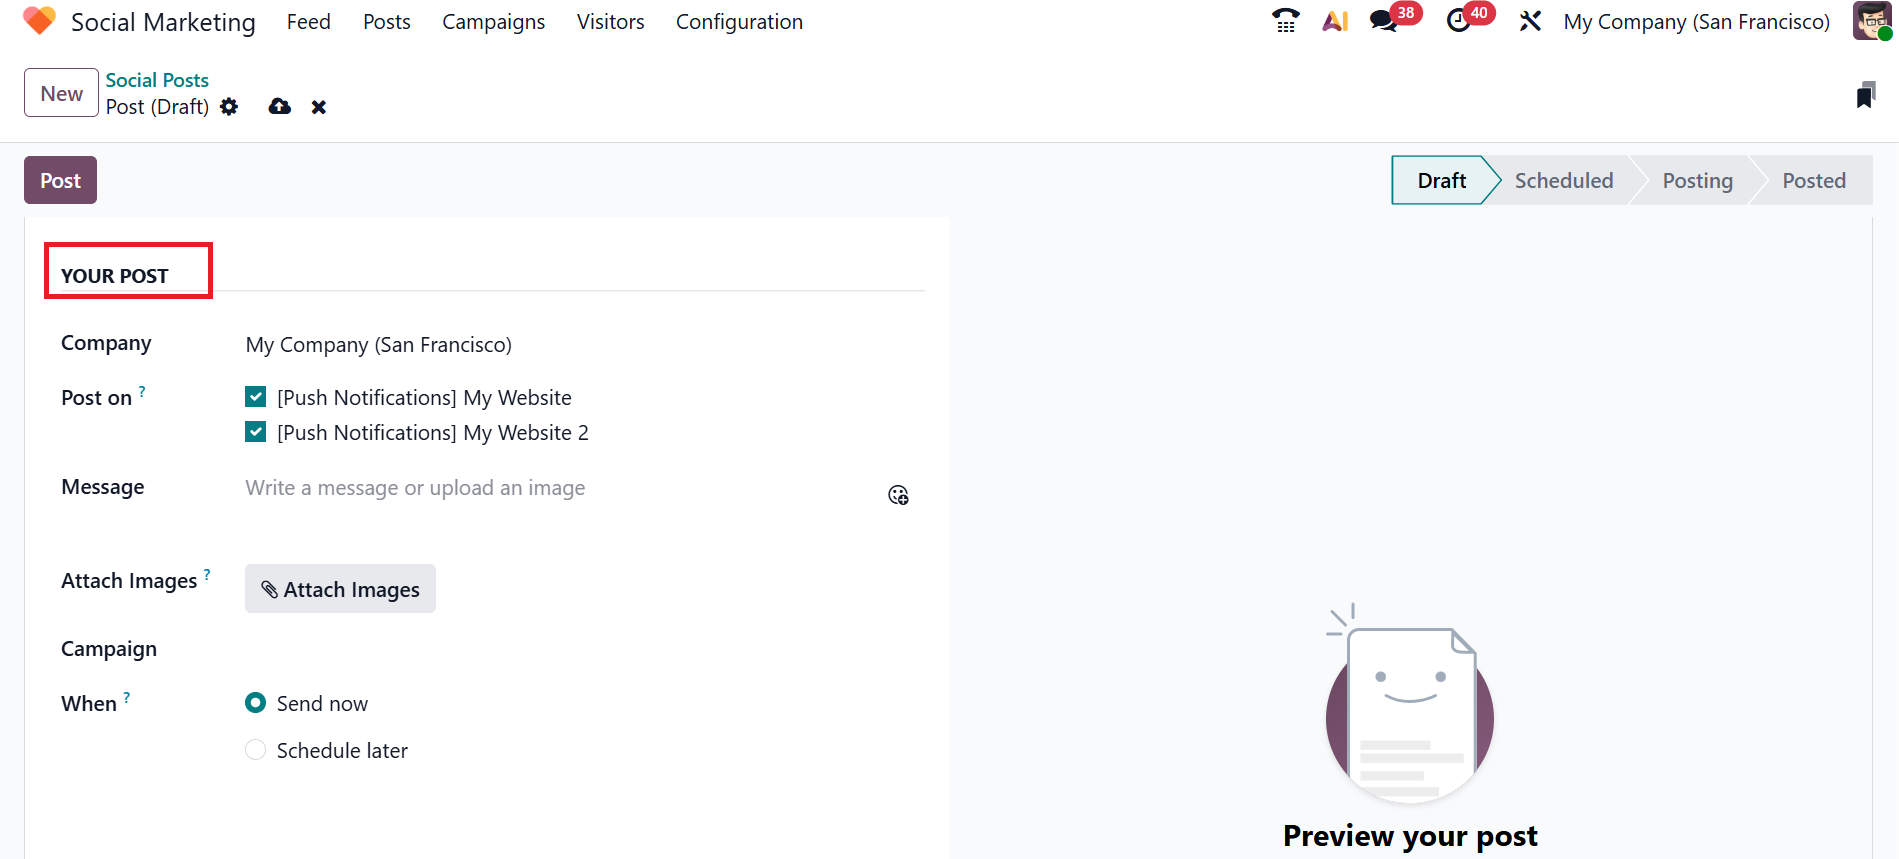
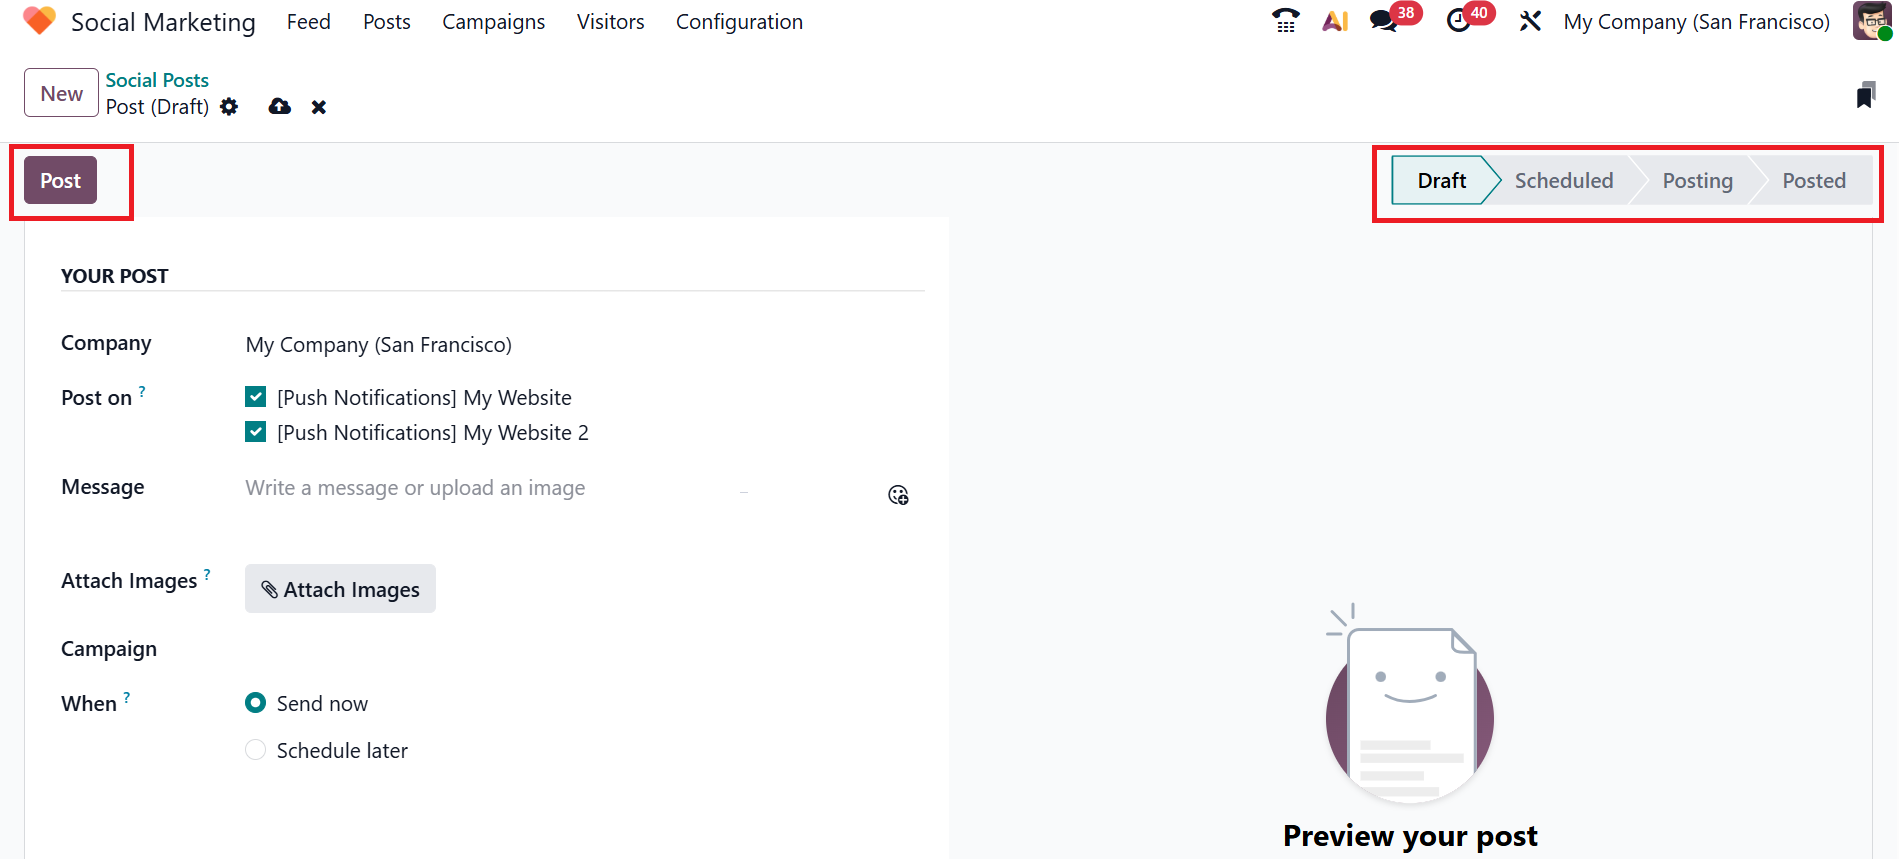
A new window will open for entering your post details. Under the Your Post section, you can add the name of your company to connect to the selected social media account in the Company field. Use the Post On field to choose the account for publishing the post.
In the Message field, you can add the content of your post, and if you need to add any visuals to the post, click on the Attach Images button in the Attach Images field.
In the Campaign field, you can link the post to the pre-existing marketing campaign or create a new one by selecting either Create or Create and Edit. In the When field, you can select either Send now or Schedule later to publish the post. If you select the Schedule Later option, a pop-up calendar will appear, allowing you to choose a date and time to publish the post.
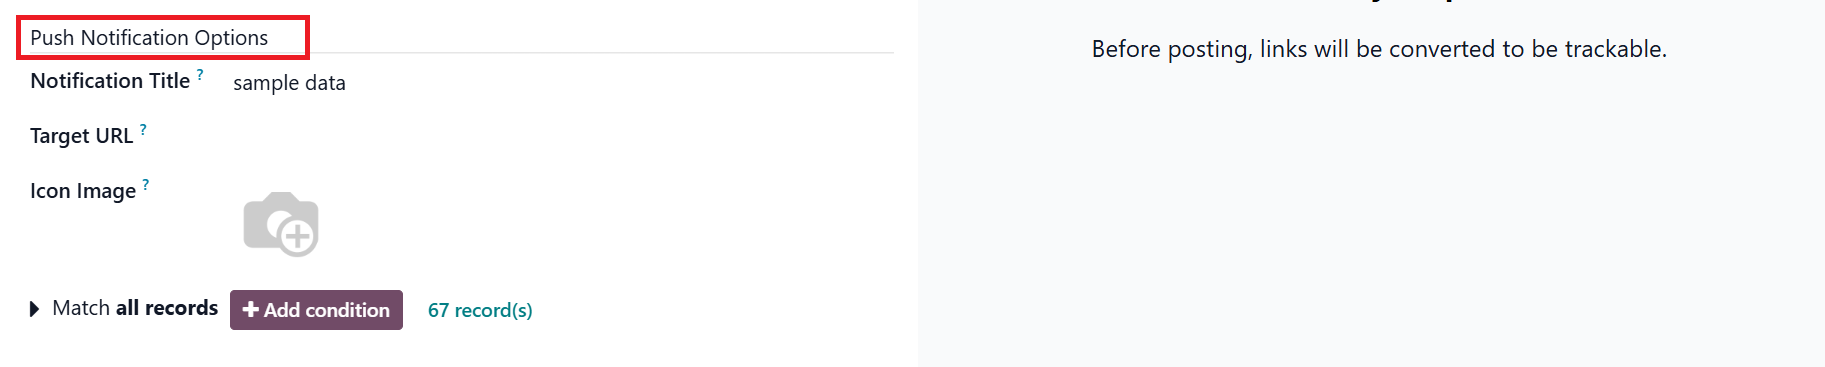
After selecting [Push Notifications] in the Post On field, a new section named Push Notification Options appears at the bottom of the window. This feature helps to send direct messages or alerts to your customer's device or browser when a new post is published.
In the Notification Title field, enter a title for the push notification. In the Target URL field, add the website page’s URL, which should trigger the Push Notification. In the Icon Image field, add an image to display in the browser notification.
In the Match all records field, you can target a group of recipients in Odoo based on criteria, and the rules can be applied as all or any to receive an alert. When you click on the +Add condition button, it provides an equation like the rule field.
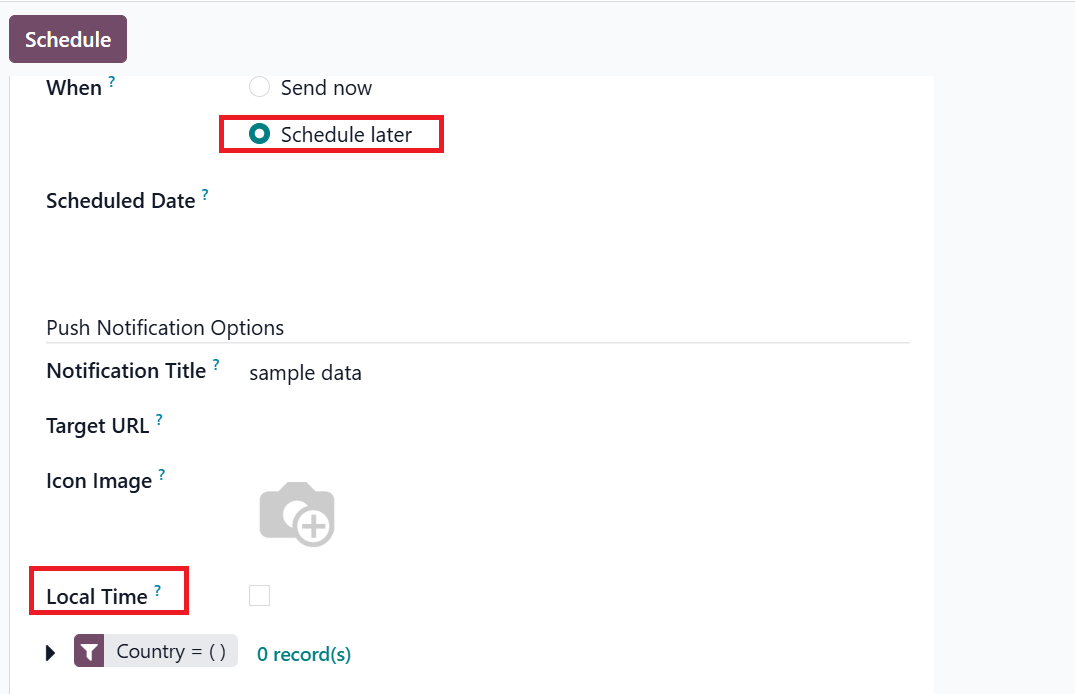
When you select the When field as Schedule Later, a new field named Local Time will appear. There, you can select a time for delivering the push notification to the recipient.
Click the Post button after completing the details. Then, the social post will move to stages such as Scheduled, Posting, and Posted from the Draft stage.
2.Campaigns:
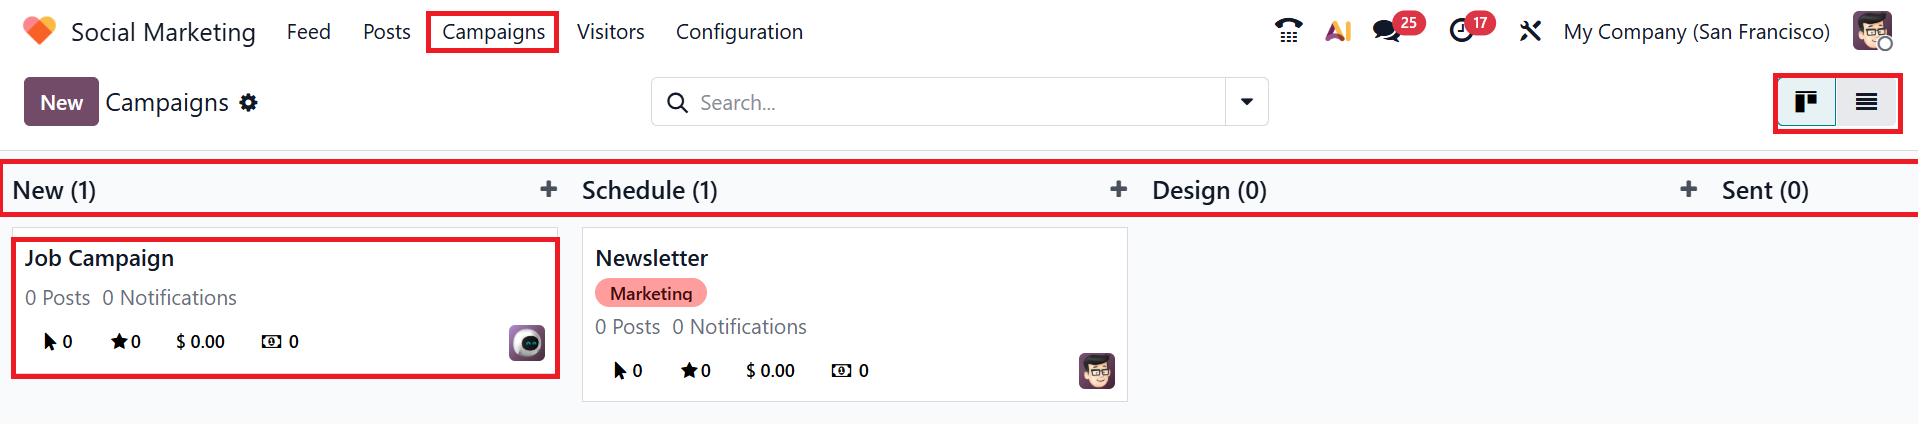
A Social Marketing Campaign in Odoo 19 helps organize and manage social media activity. It ensures consistent, effective marketing performance by enabling users to plan, schedule, and monitor posts or notifications across multiple platforms from a single platform.
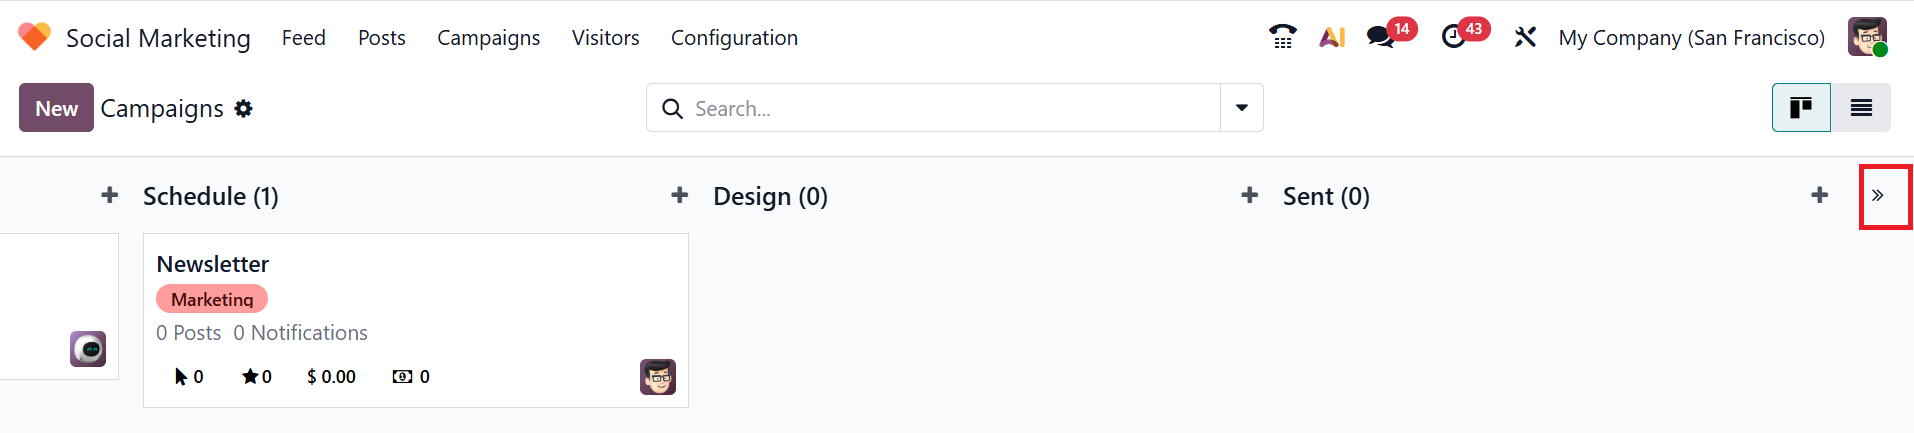
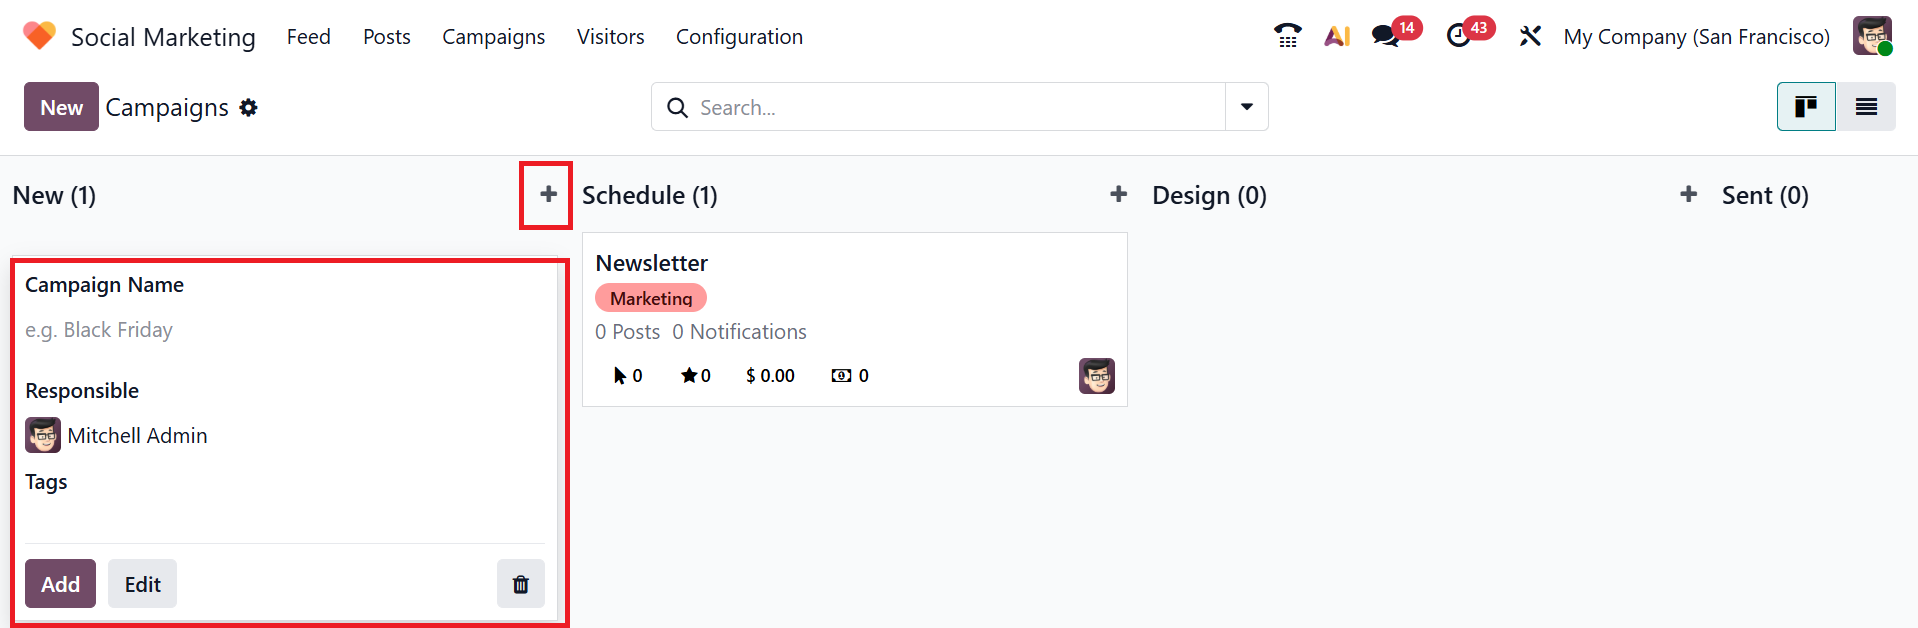
In the campaigns dashboard, each column represents the stages as New, Schedule, Design, and Sent. Under each stage, you can see campaigns as cards. Each card shows the campaign name, type, number of posts, number of notifications, number of clicks, number of opportunities, revenue amount, and number of quotations. By default, campaigns are displayed in the Kanban view. You can also change the view to List view.
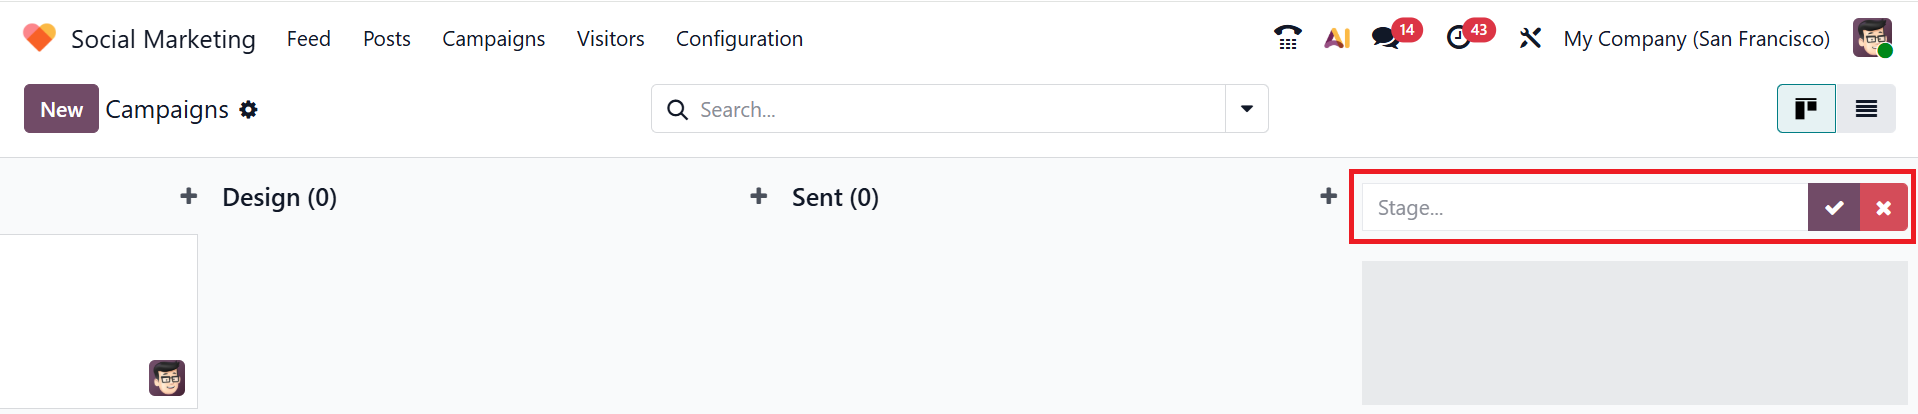
To create a new stage, click on the >> Add column button as shown below:
Then enter a name for your new stage and click the tick button to save it, or click the cross button to discard it.
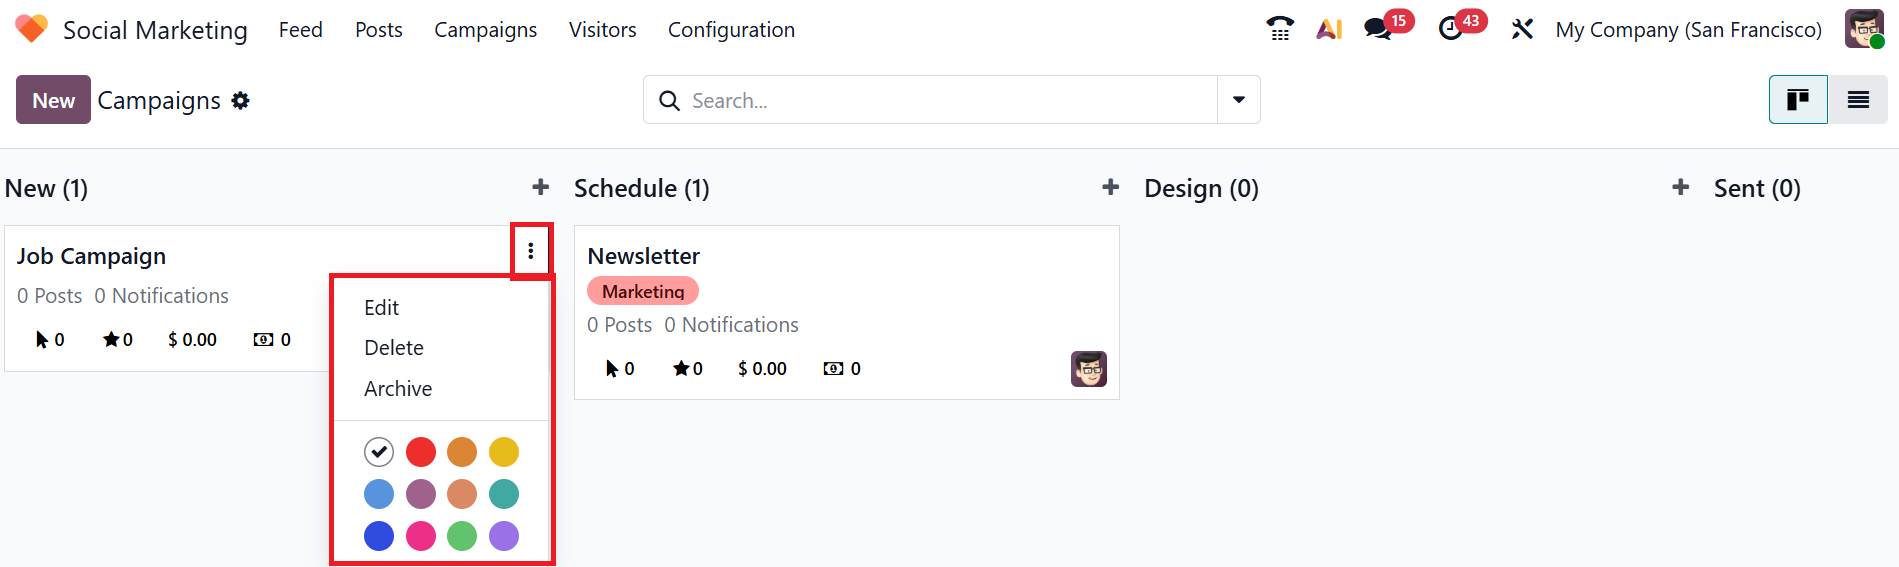
Then, click the three-dotted dropdown menu to
- *Edit:helps to modify the campaign’s details
- *Delete: removes the selected campaign permanently
- *Archive: hide the campaign from the dashboard
- *Color: assign a color to the campaign card
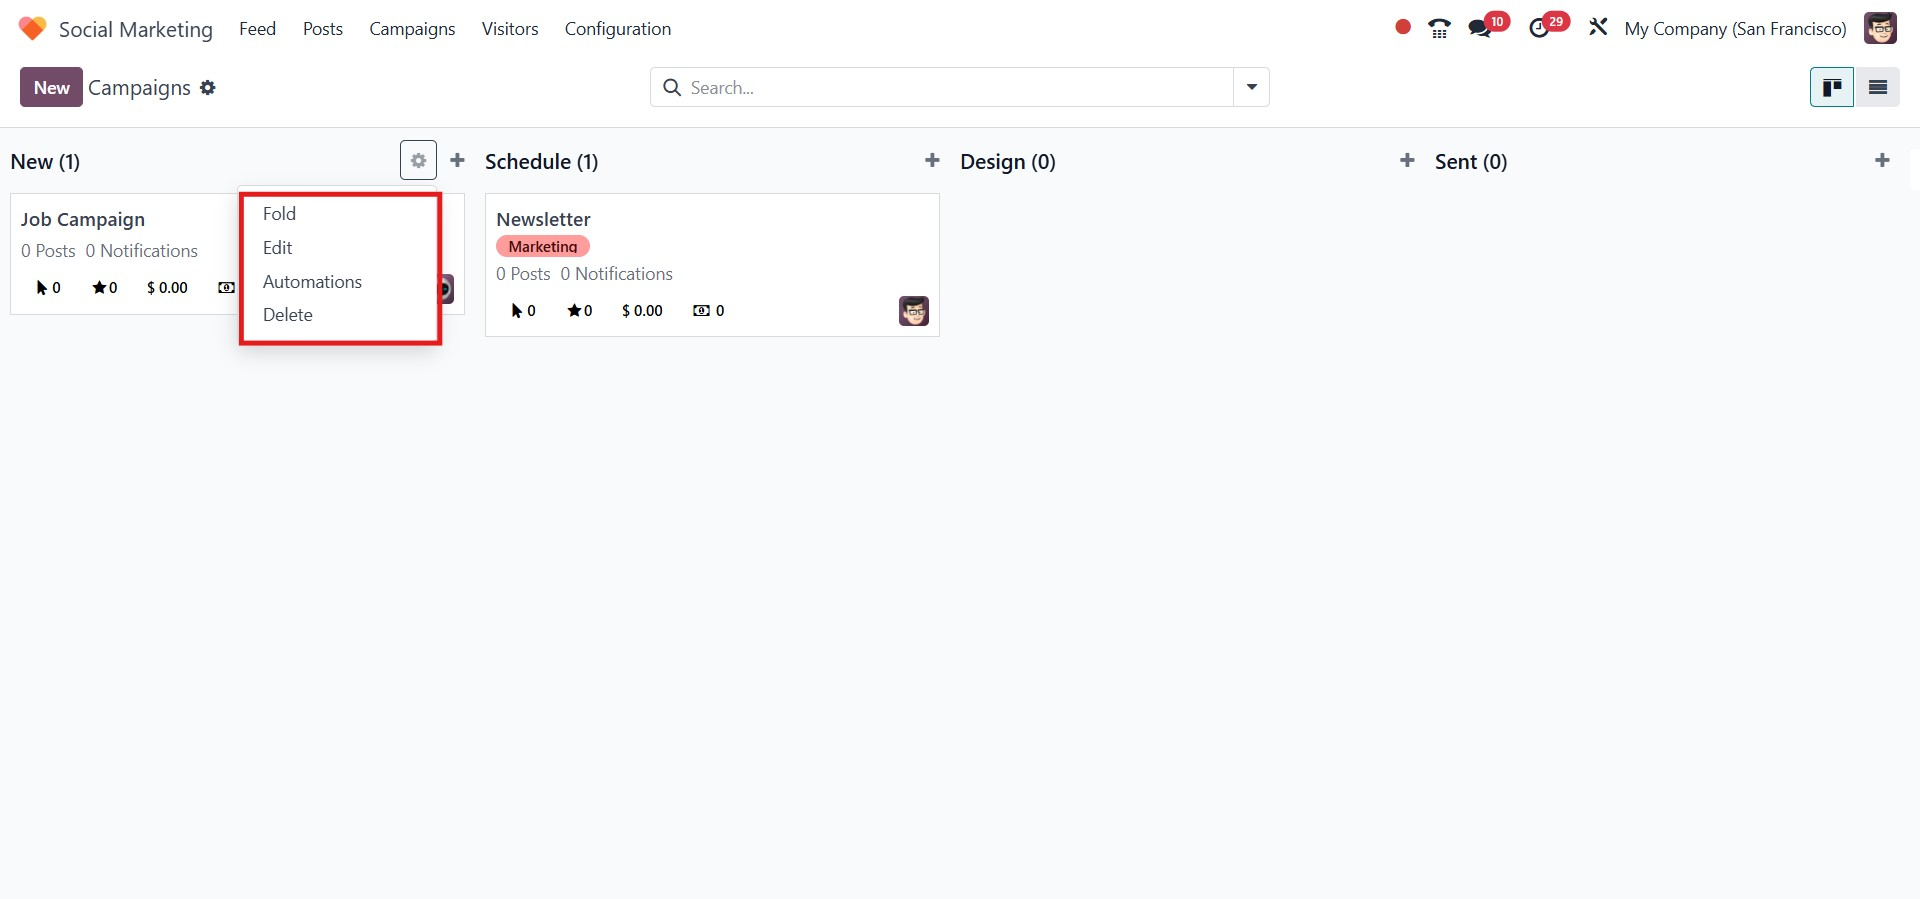
To manage the campaign workflow efficiently, click on the gear icon to adjust the settings, such as:
- Fold: helps to hide or minimize the stage in the dashboard.
- Edit: helps modify the campaign details.
- Automate:helps to set automation rules for campaigns at that stage.
- Delete: permanently removes the selected campaigns.
To create a new campaign, click the New button or the + icon. Then enter a name for your campaign in the Campaign Name field. Under the Responsible field, add a member to manage the campaign. Under the Tags field, add relevant tags to categorize the campaign. To save the campaign, click the Add button, and to update it, click the Edit button.
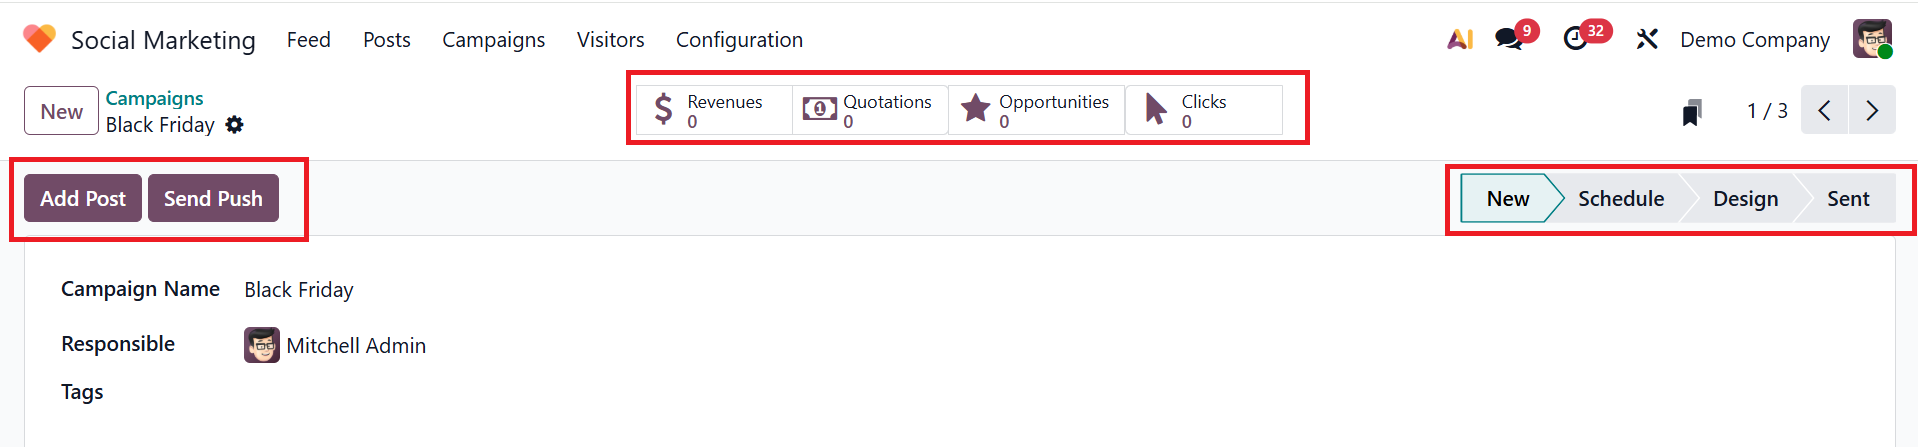
A new window will appear, where you can see the details of the new campaign, such as Campaign Name, Responsible, and Tags. Click on the Add Post button to add the campaign as a new post in the social media account. Click on the Send Push button to send push notifications. You can also update the campaign stages to New, Schedule, Design, or Sent. To quickly review the campaign’s key performance, utilize the smart tabs, including:
- Revenues:show the total income earned through sales linked to this campaign
- Quotations: shows the number of quotations created through this campaign.
- Opportunities: shows the number of leads/opportunities created through this campaign.
- Clicks: shows the total clicks on the campaign link by users.
4.Visitors:
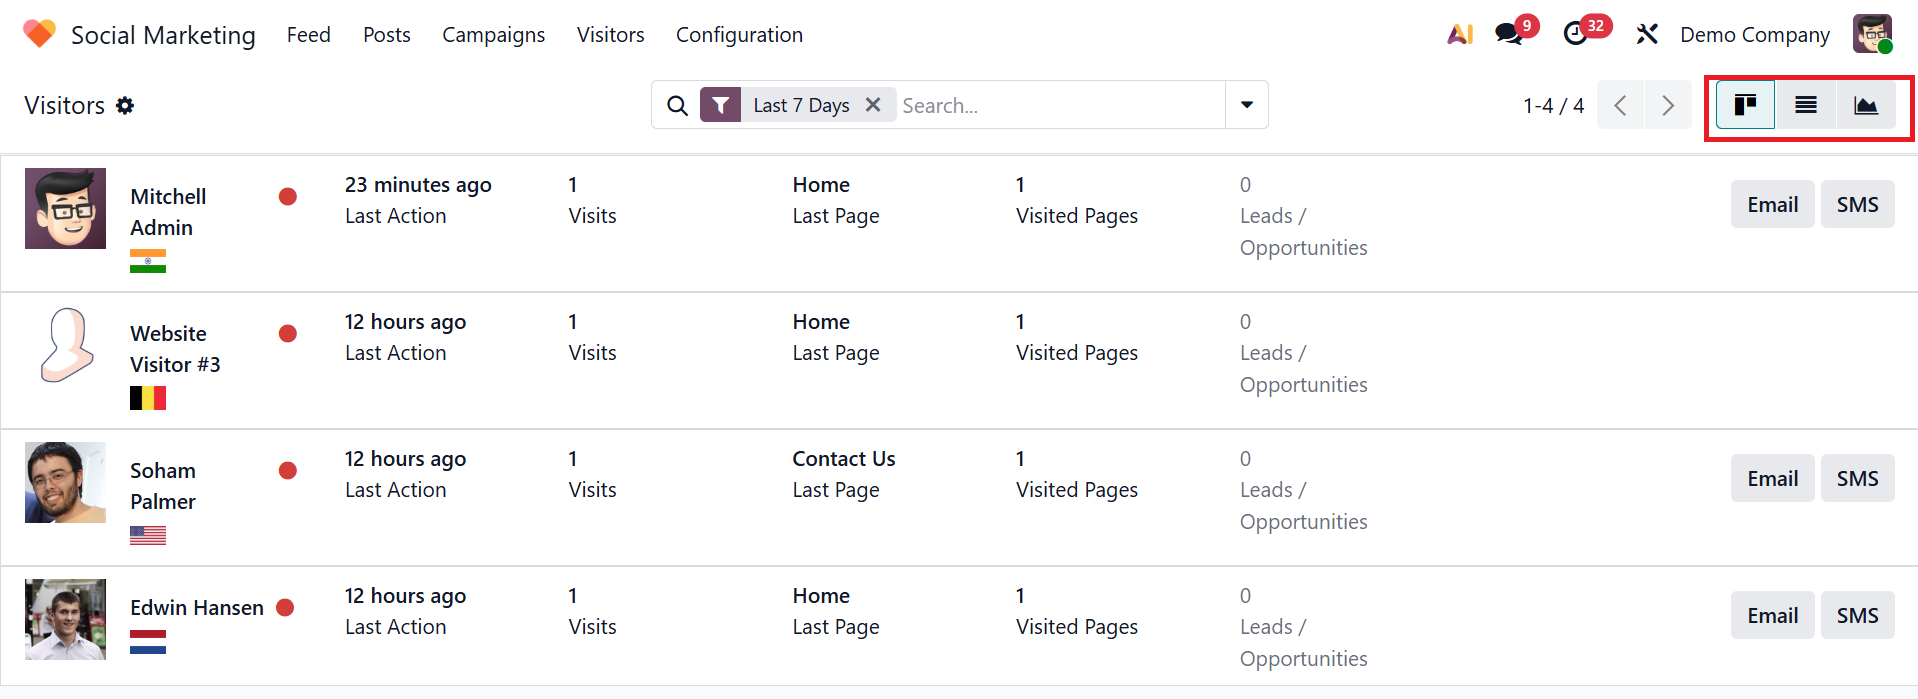
The Visitors menu displays a list of all visitors to the website. By default, you can see the visitors page in List view. You can also switch the view to analyze visitors in either Kanban or Graph format. Then you can view visitor details, such as last activity, number of visits, number of visited pages, number of leads/opportunities, last page viewed, and whether the visitor is offline or online.
Visitors can be converted into leads based on their activities, as they have the option to interact directly through Email and SMS.
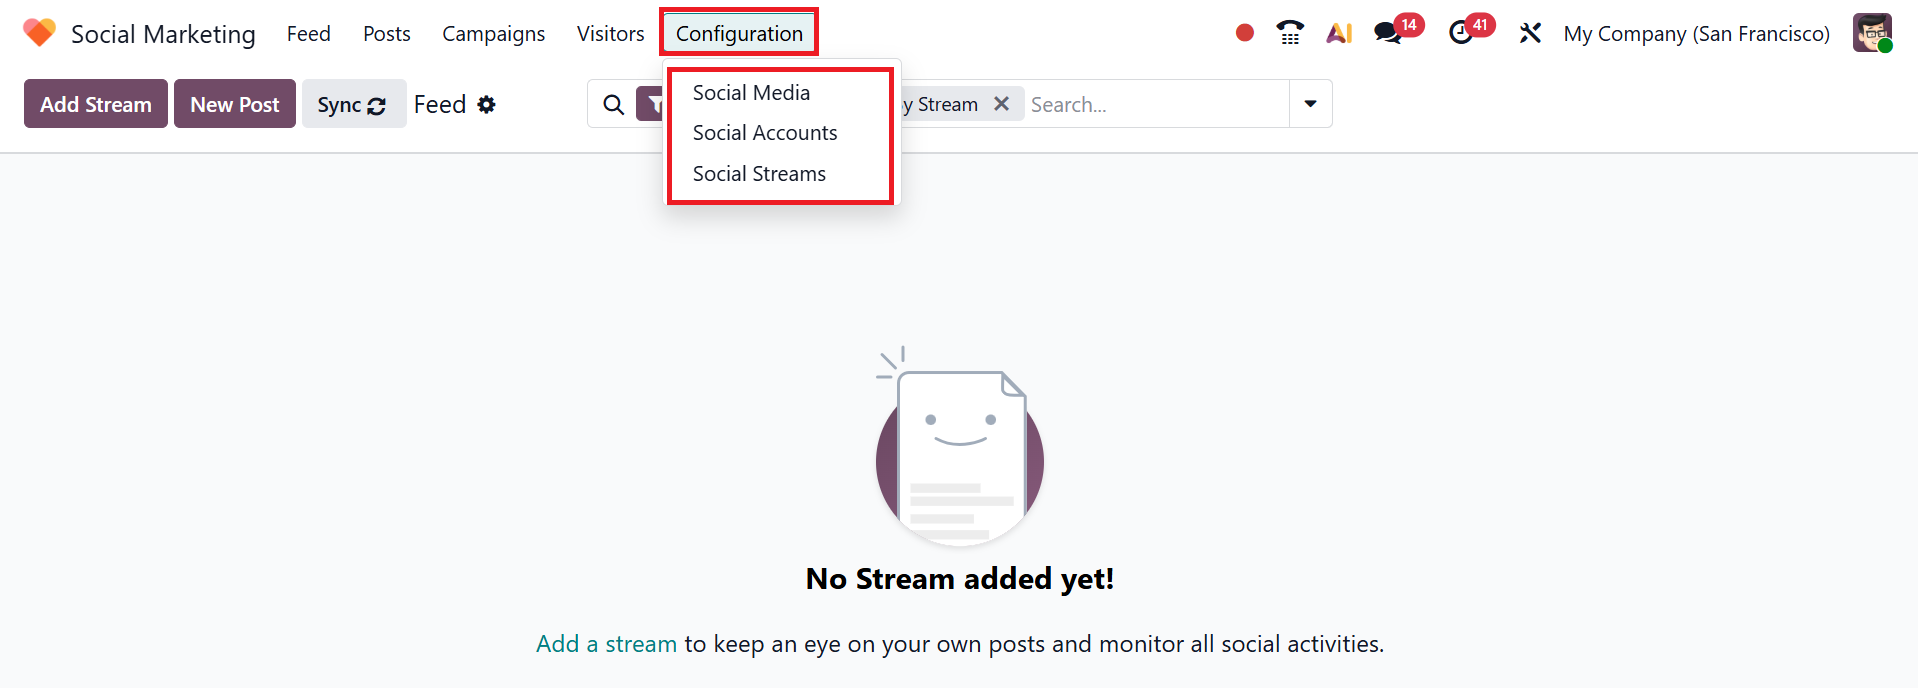
5.Configuration:
Use the Configuration menu to manage settings for Social Media, Social Accounts, and Social Streams in Odoo 19 Social Marketing.
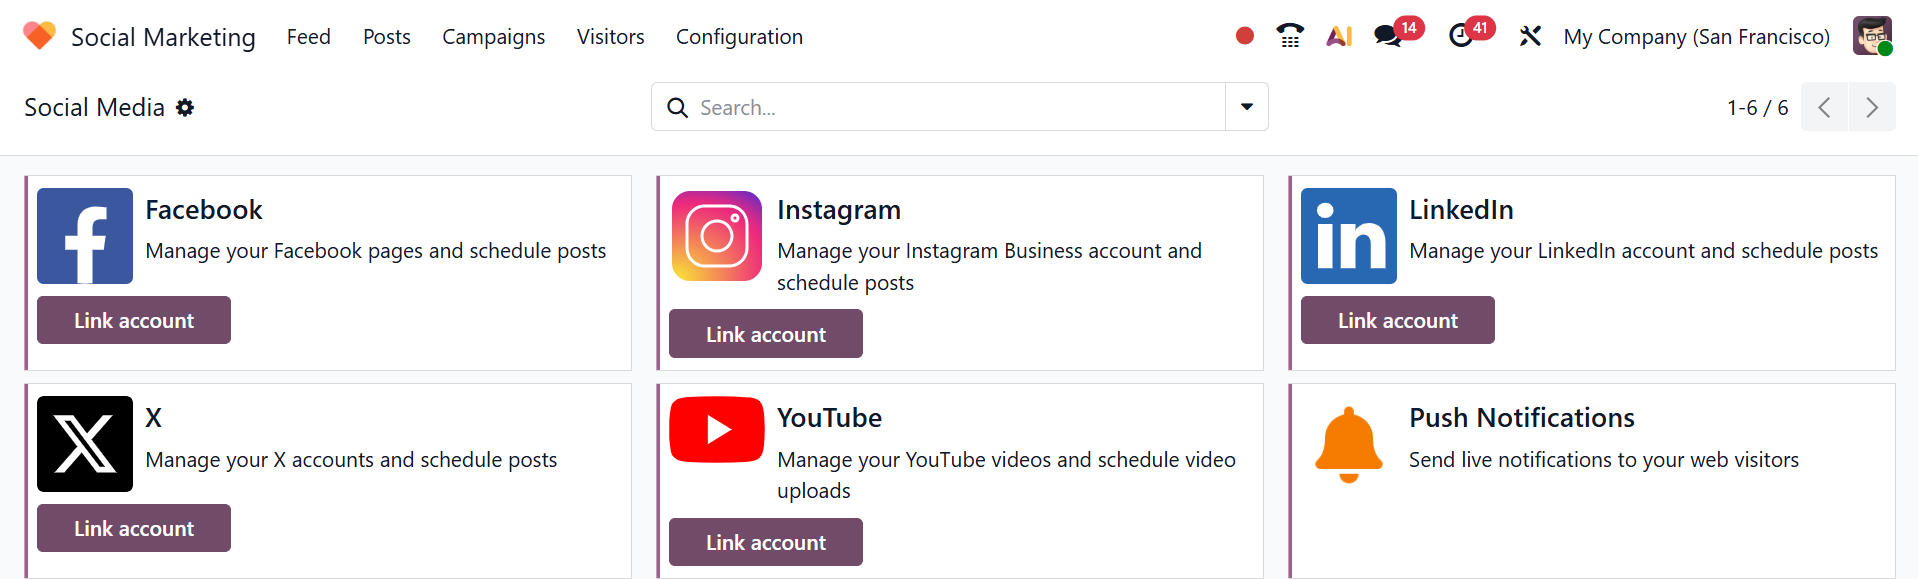
5.1 Social Media:
You can view online platforms like Facebook, Instagram, LinkedIn, X, and YouTube in the Social Media section of the Configuration menu. Select the Link Account button to associate your social media account with the Social Marketing module. You can also use the Push Notifications button to send live notifications to your web visitors.
5.2 Social Accounts:
Social Accounts are the social media profiles linked across various platforms. The social accounts are displayed in a list view, showing details such as Name, Handle/Short Name, Social Media, Created by, and Company.

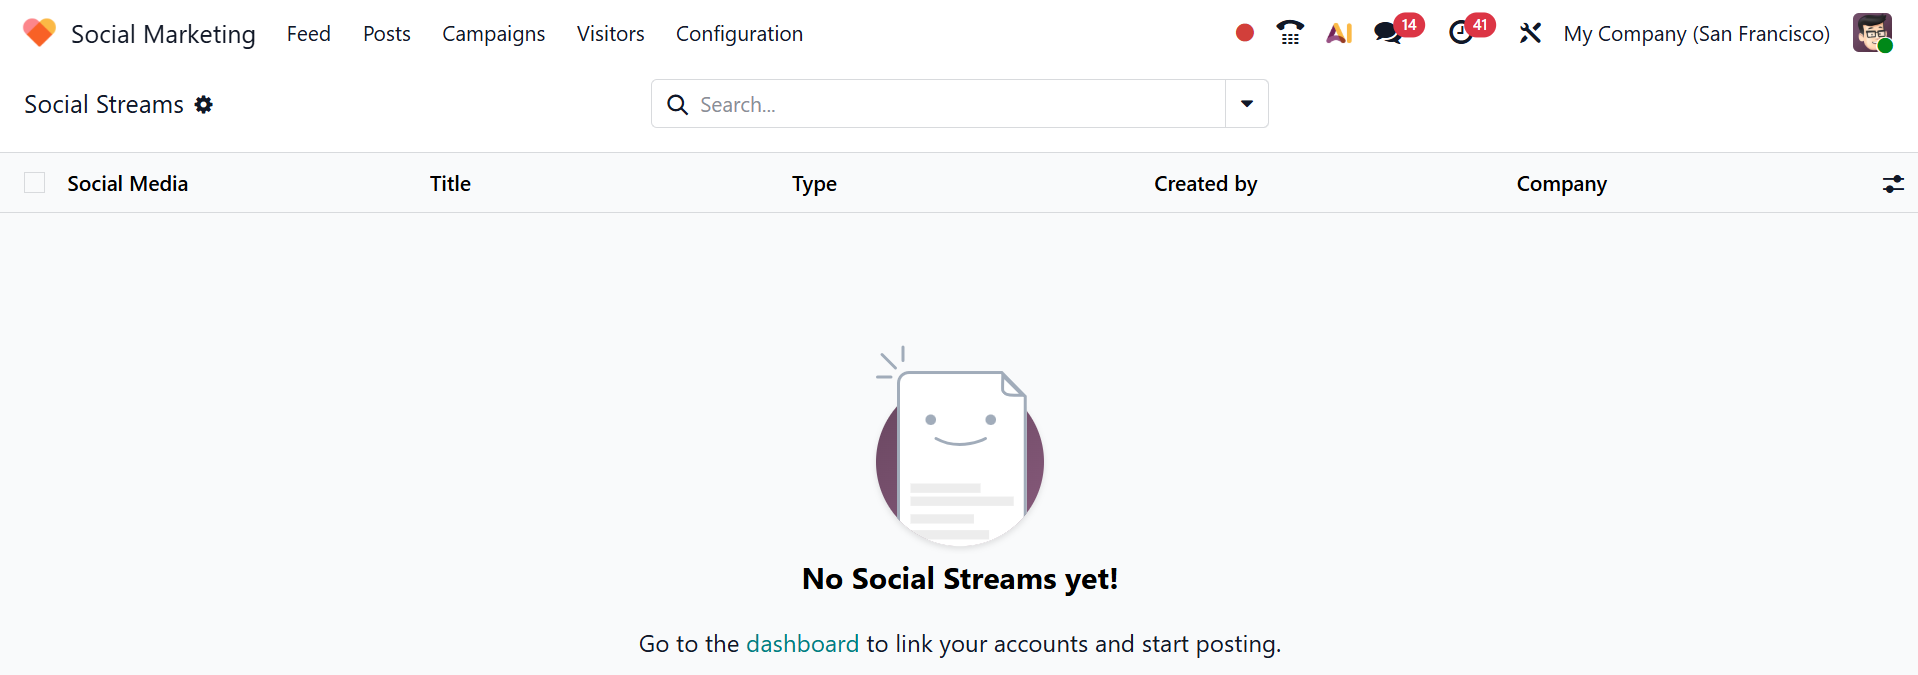
5.3 Social Streams:
Social Stream is a real-time feed that shows posts, comments, mentions, and interactions from your connected social media accounts. You can see the details of social streams, such as Social Media, Title, Type, Created by, and Company.
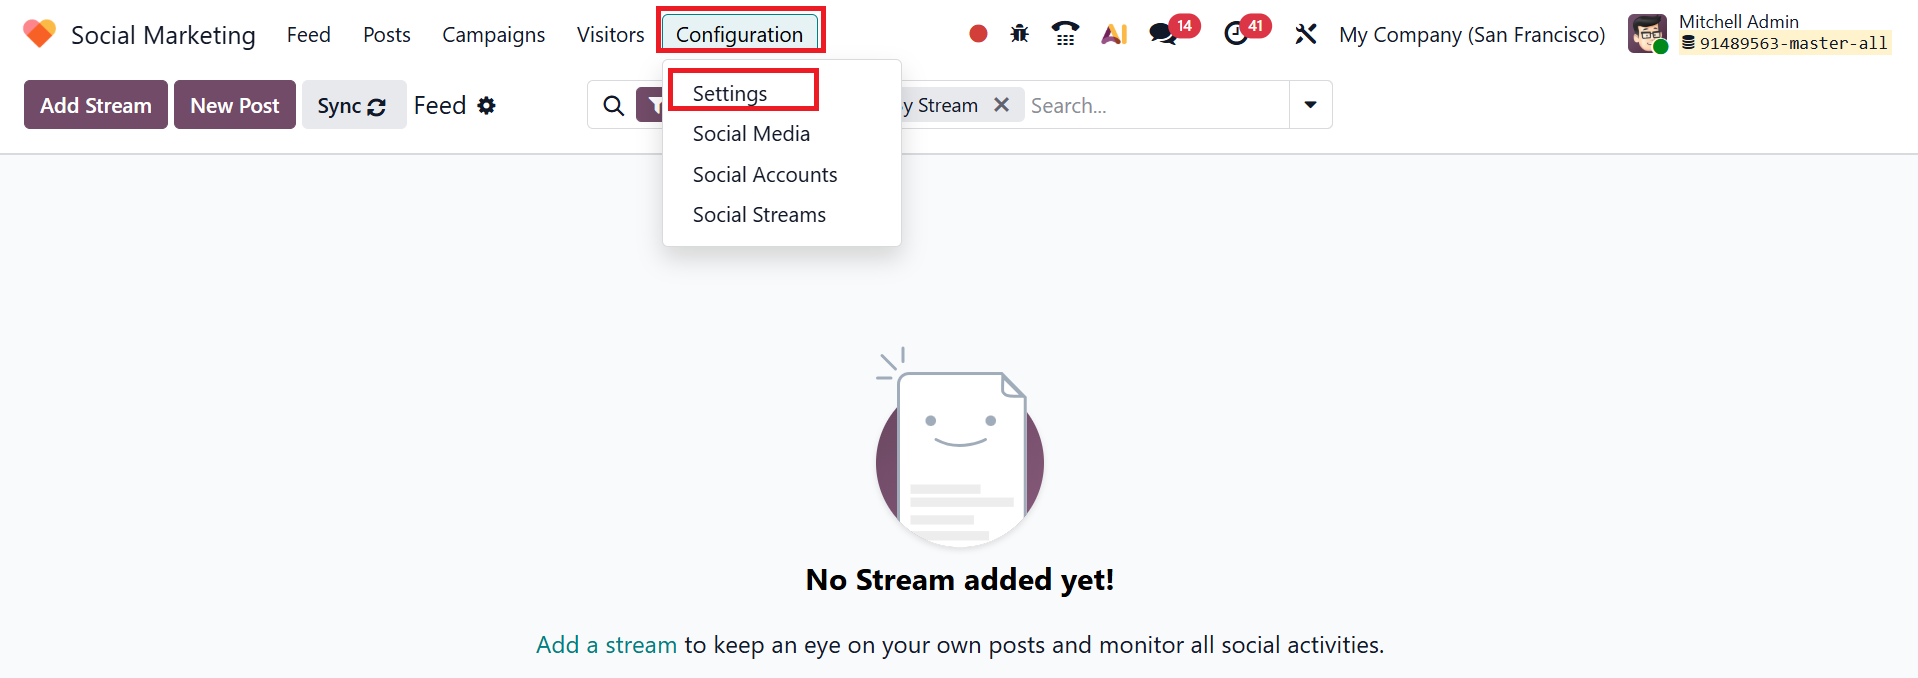
5.4 Settings:
To view the Settings option under the Configuration menu, activate the Developer Mode in the Settings module of Odoo 19.
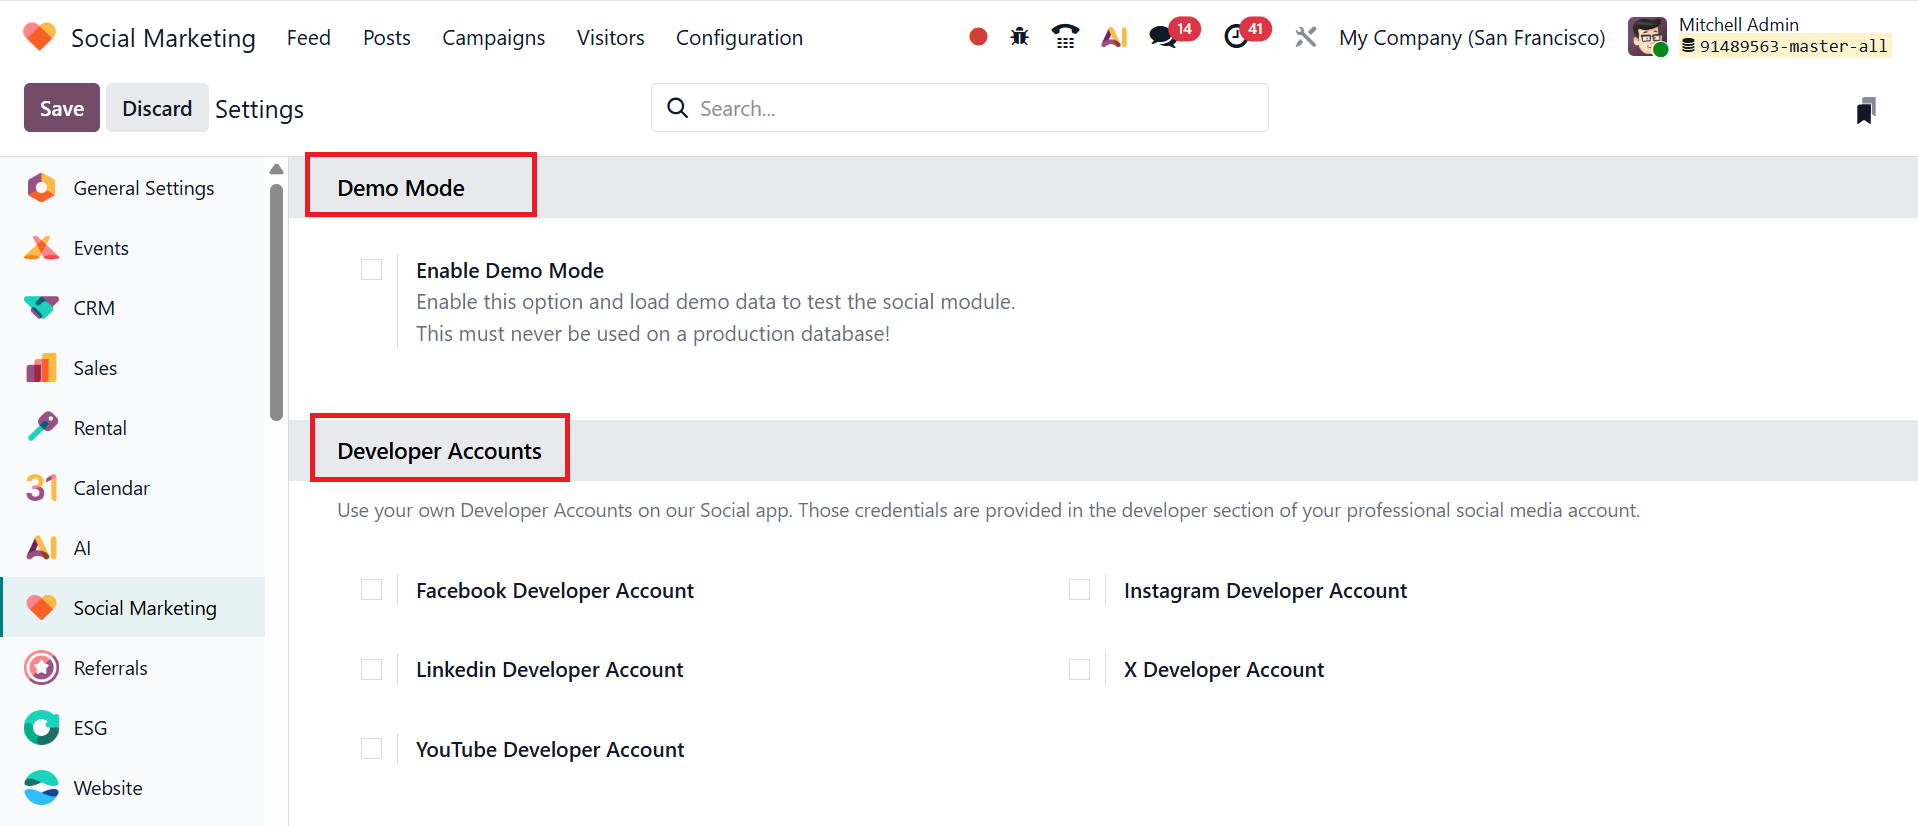
Demo Mode in the Odoo 19 Social Marketing module is a testing feature. You can enable the Enable Demo Mode option to practice the social marketing functions, like creating posts or viewing streams, using sample data without connecting real social media accounts.
Note: Demo Mode is intended for testing environments only and must not be used on a production database.
In the Developer Accounts section under the Settings option, you can provide credentials for your professional social media accounts. Connecting your developer credentials allows seamless integration between Odoo and your chosen social media platforms, enabling you to schedule, publish, and manage content directly from the Odoo interface.
For efficient social media campaign management, the Odoo 19 Social Marketing module offers an all-in-one solution. Through an interactive dashboard, users can schedule and make posts, connect several social media accounts, and track engagement. Odoo 19 is a crucial tool for modern digital marketing plans since it simplifies social media operations, automates marketing tasks, and increases brand awareness.