Shop Management
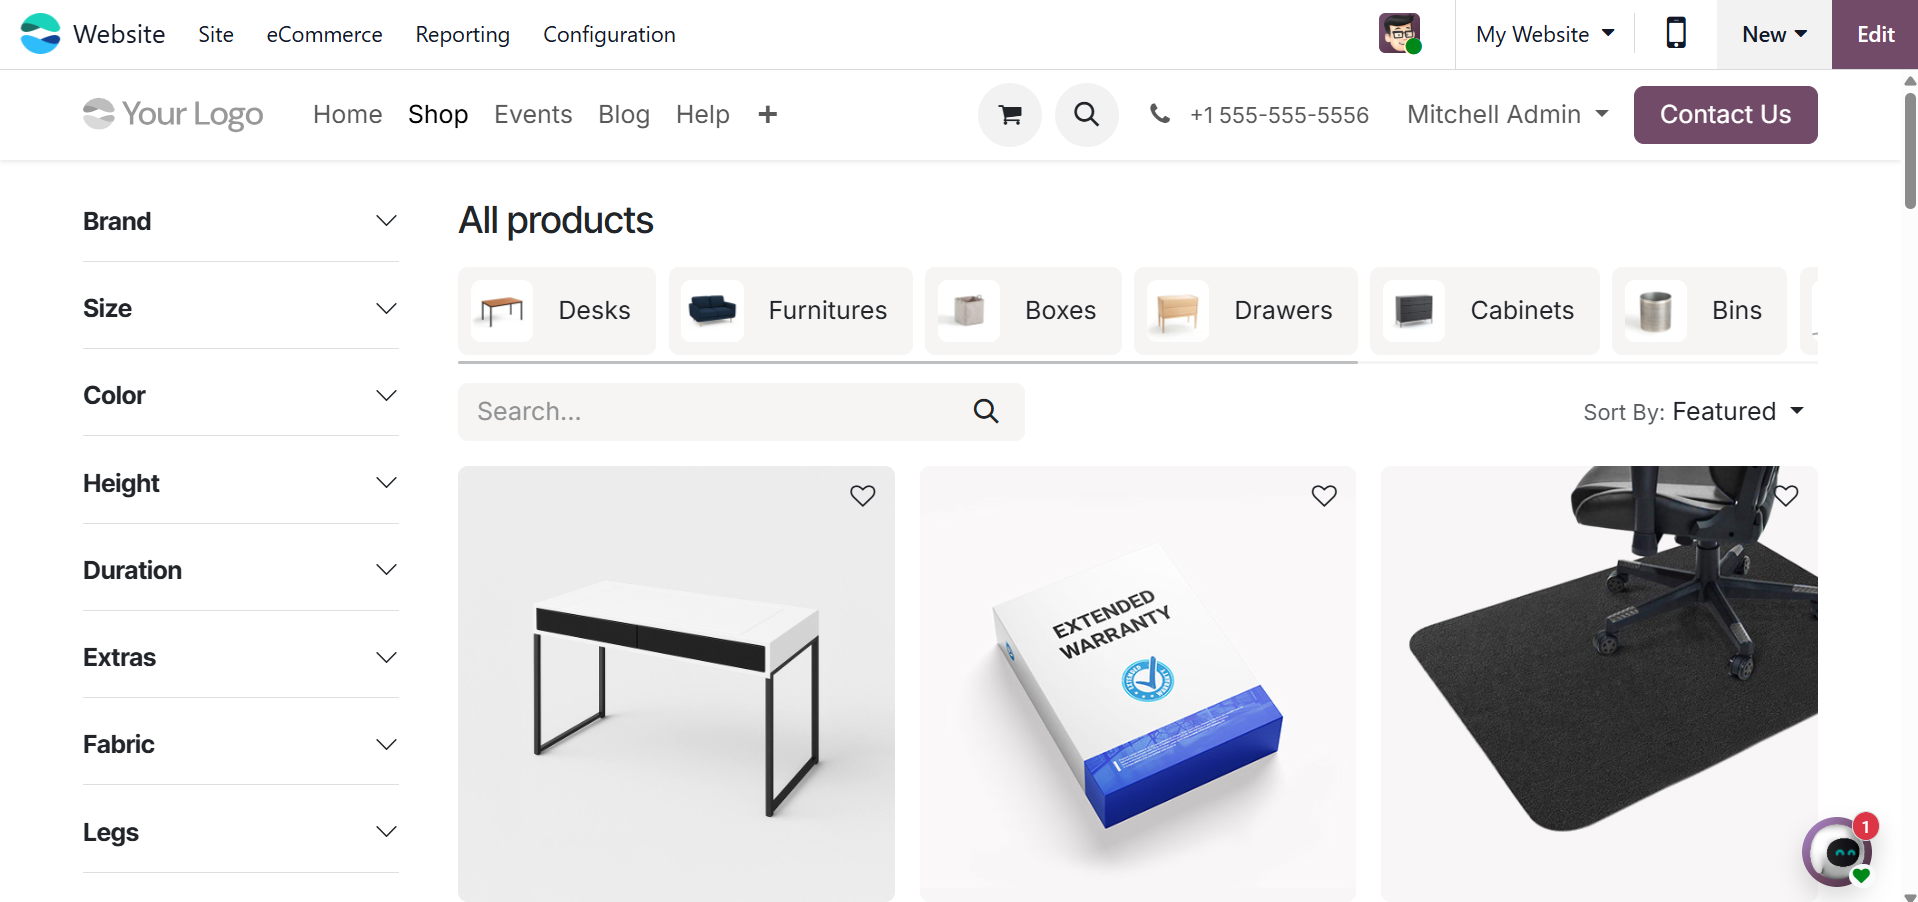
Customers can easily explore and buy products on the Shop page, which is made available on the website by the eCommerce module. Go to your eCommerce website's Shop section to investigate this function.
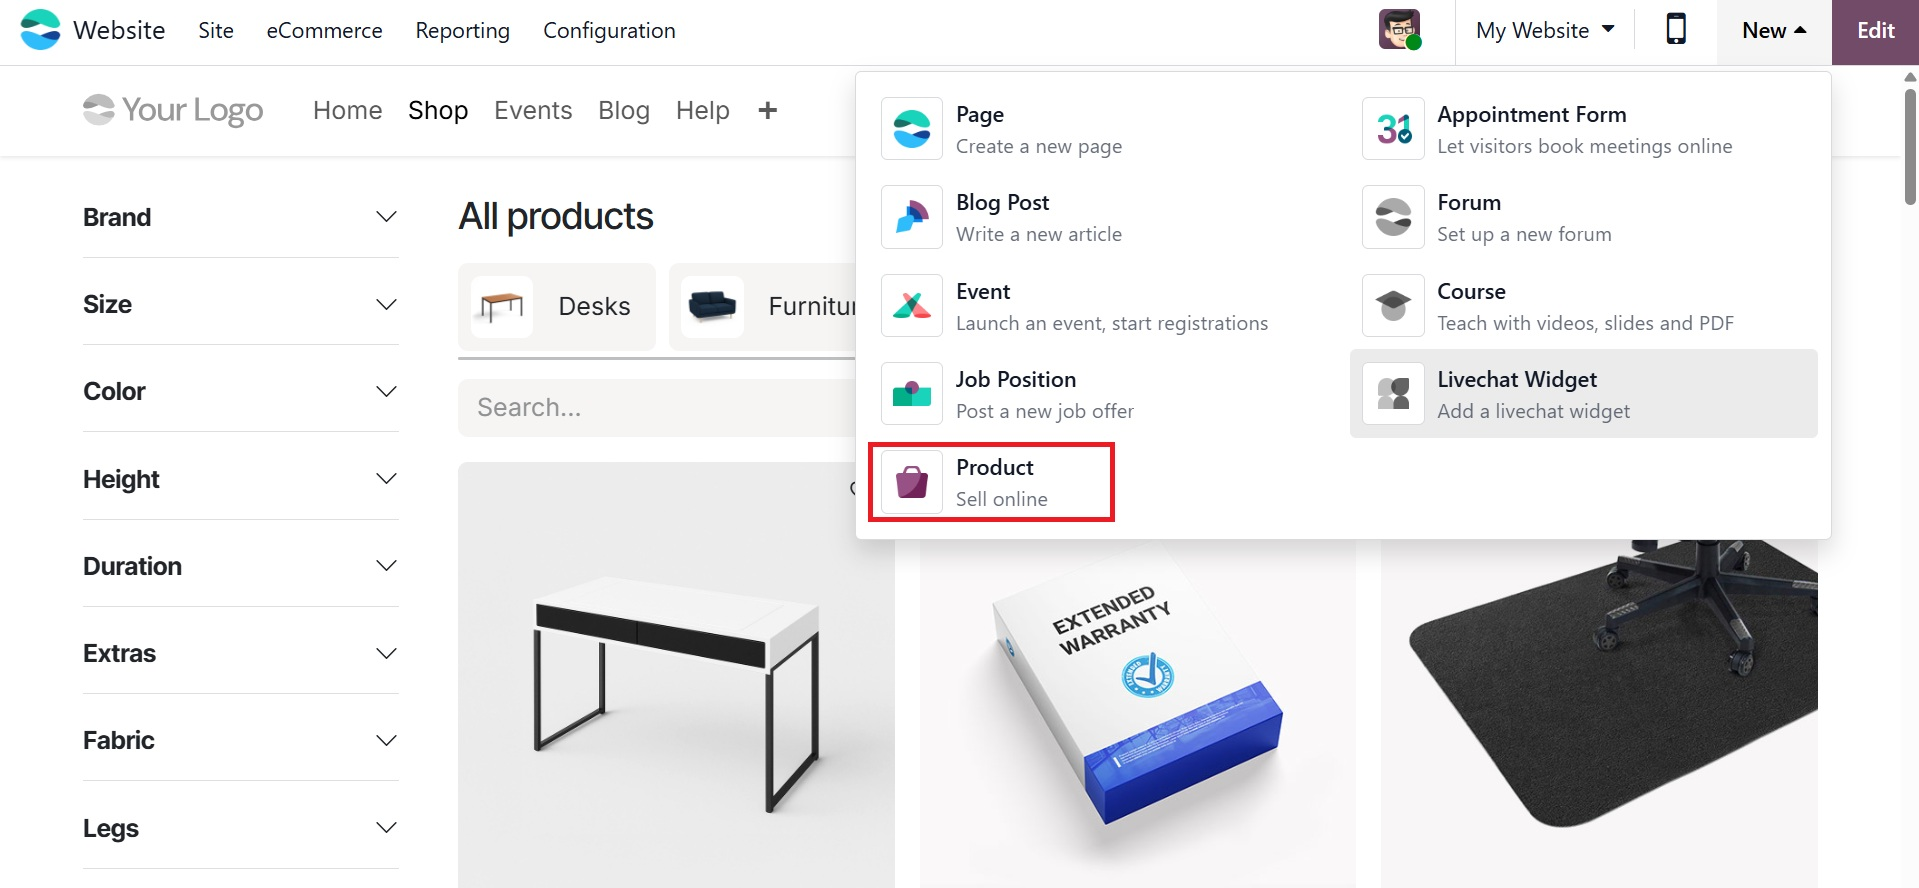
You can add new products straight to the website before doing this. To start the procedure, click the + New button in the top right corner of the screen. This option allows you to easily add a new product to your online store with only a few clicks.
The Product menu will appear when you click the + New button. After that, choose the Product option to start entering the product details in a pop-up window.
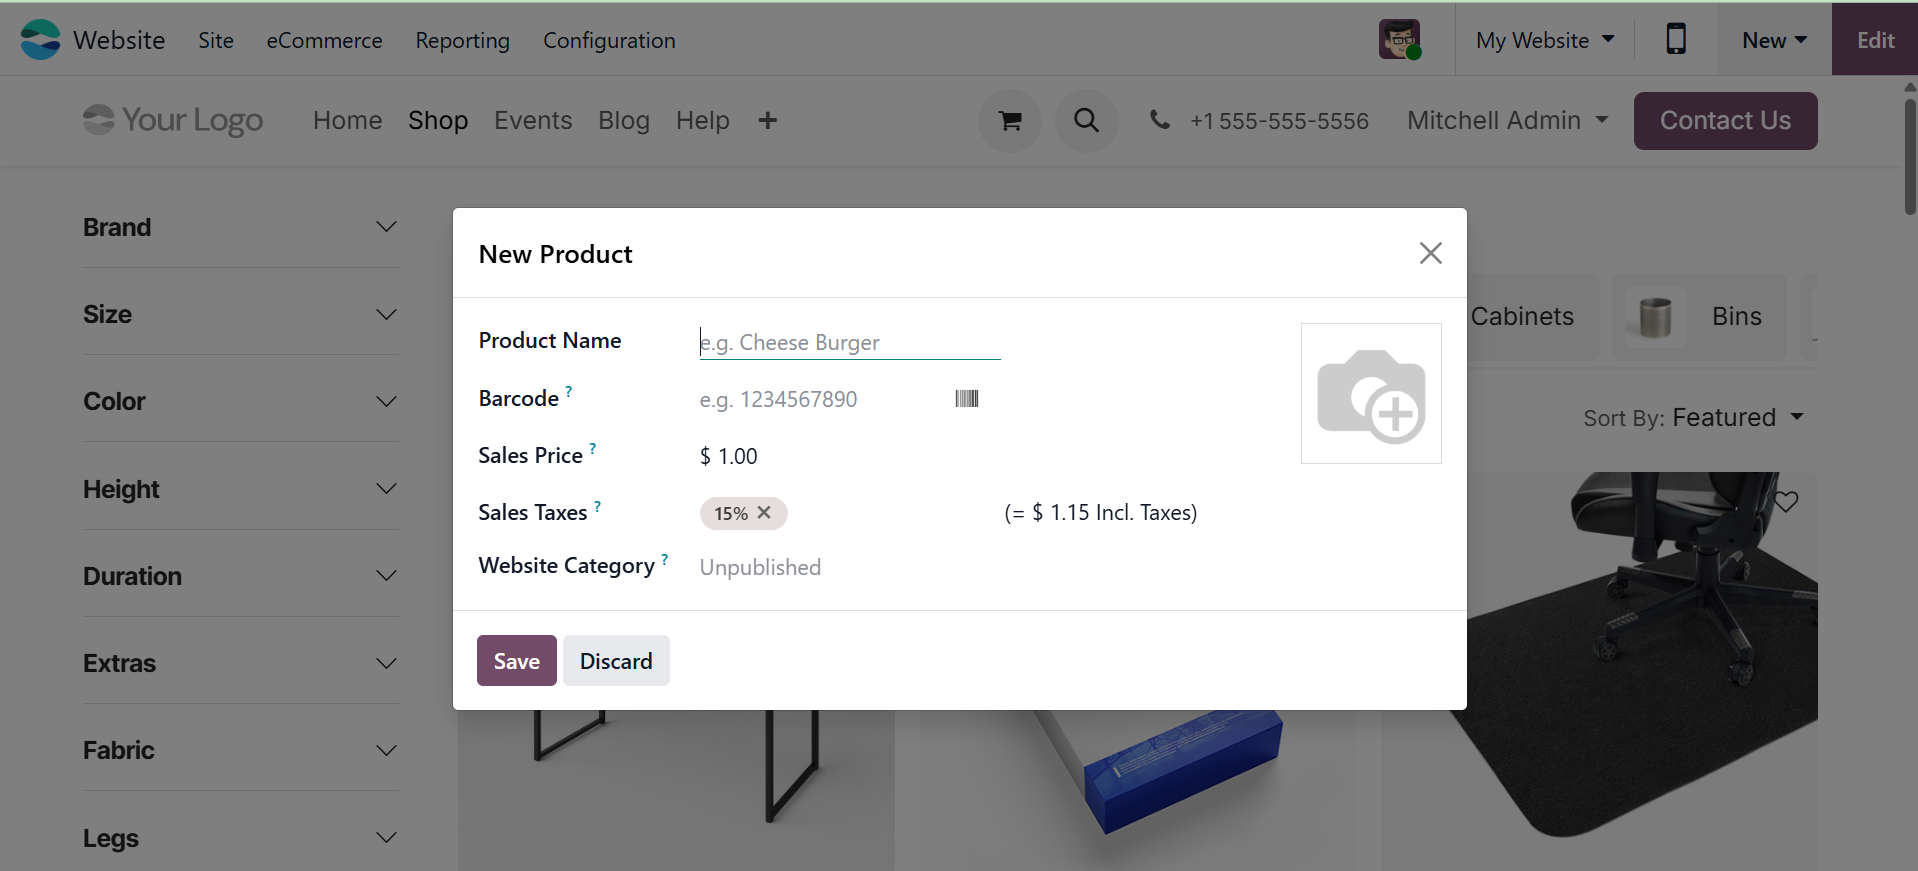
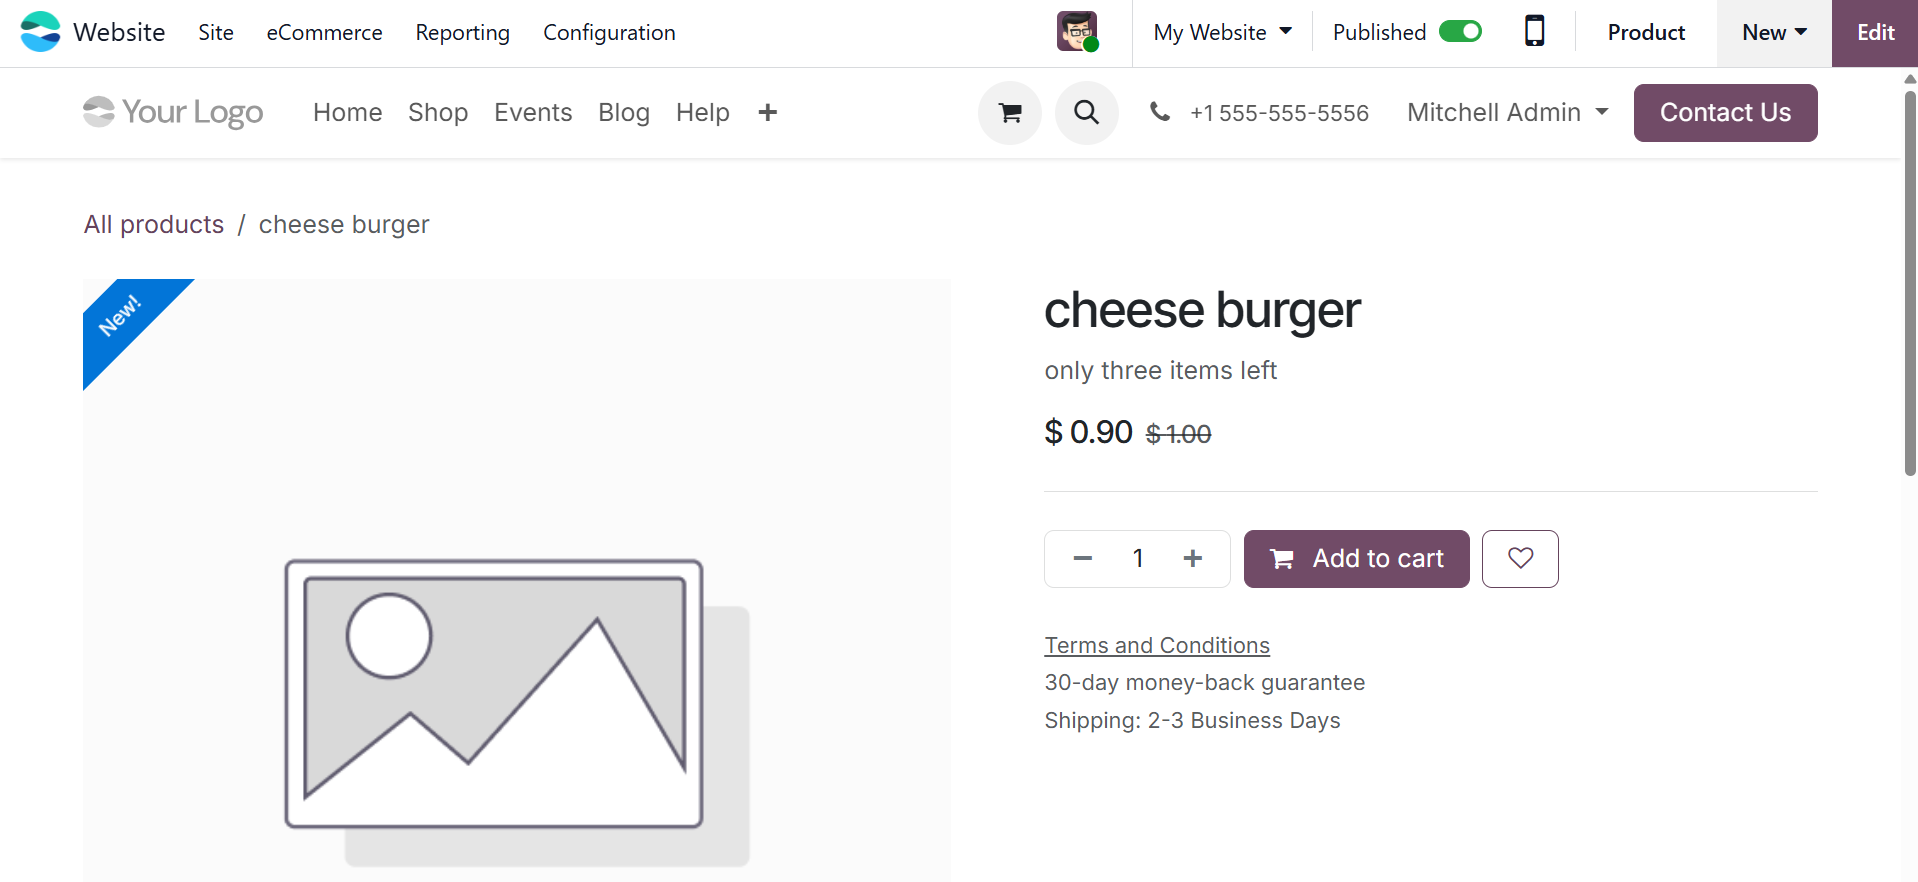
The Product Name can be entered in the appropriate field. To give clients a fast overview, a brief description of the product can be added just below the name. Important aspects like the product image, quantity available, and pricing can also be customized. Double-clicking the picture placeholder will upload an image. You will then be able to add the desired product image in a pop-up window. Click Save to publish the product on your website after entering the required information.
You may improve your product images with the editing tools in the picture pop-up window, which helps create a more polished and expert product page layout. Once the revisions are complete, publish the product on your website by clicking the Save button. This action will direct you to the product's webpage, where you can use the Publish button to make it available to the public. Click the Product button in the top right corner to make more changes to the product details.
Use the Product Description option to add a thorough product description. This tool enables you to provide important product details to prospective buyers in an understandable manner. Open the Product form in the Inventory module to handle this from the backend. You can enter or modify the product description especially for your online store in the eCommerce Shop section under the Sales tab.
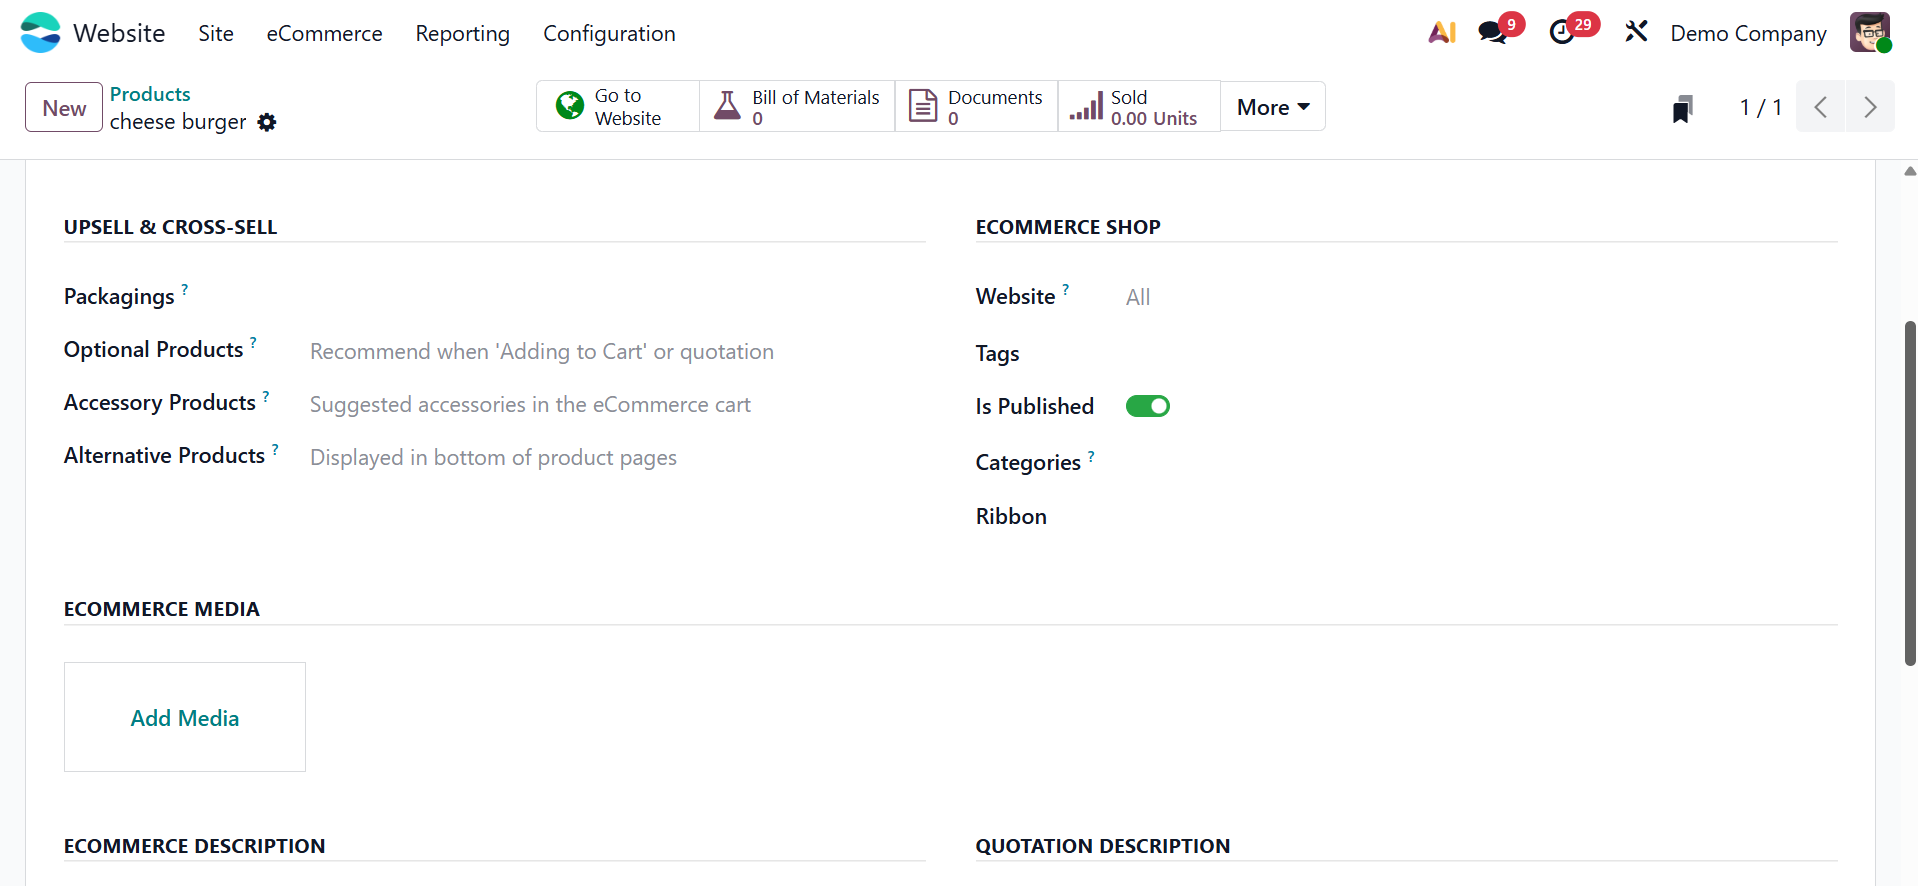
You can enumerate the pertinent websites that highlight or highlight the particular goods in this area. By linking the product across several platforms, you can increase its visibility and give customers more details or ways to buy it.
All of the websites you have made on the platform will be shown in a drop-down menu when you choose the Website option. Additionally, you can designate which categories the product will appear in. The product will be offered in every e-commerce category you specify if you select particular categories. Features like Show Available Quantity, Out-of-Stock, and Out-of-Stock Messages, which give your consumers real-time stock information, can be enabled to improve user experience.
Odoo offers an option to copy the product description for each website if you wish to list the same product on multiple websites. This can be done simply by using the Actions button, which gives you access to the Duplicate option. This allows you to maintain consistency in product information while streamlining the process of managing products across multiple websites.
Product catalog customization
Customizing the Product Catalog that appears on your company website is simple with Odoo's Website module. This customization can be made to fit your company's or business's unique requirements. Odoo provides a range of sophisticated customisation choices to guarantee smooth administration of all operations associated with your online store.
Go to the online catalog to see the customization options. There are several ways to change the way your products are displayed. Go to the Shops page in the dashboard to view and modify your website's product catalog. There, you can adjust the layout, categories, and other components to suit your business needs.
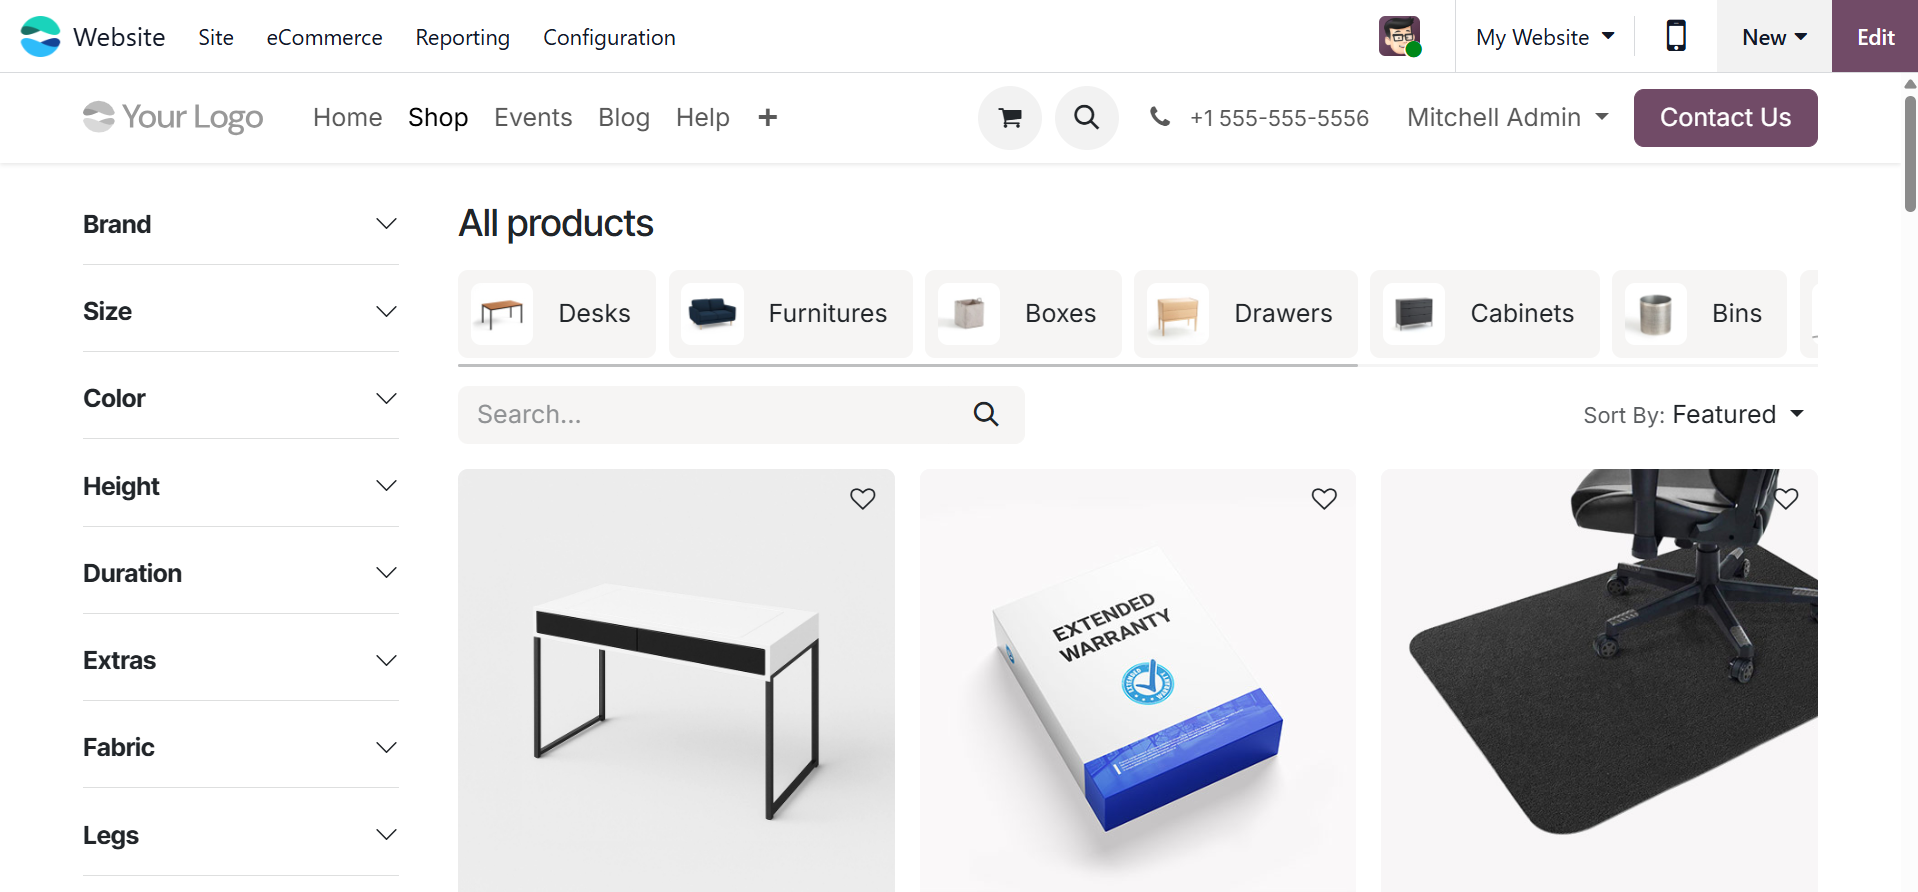
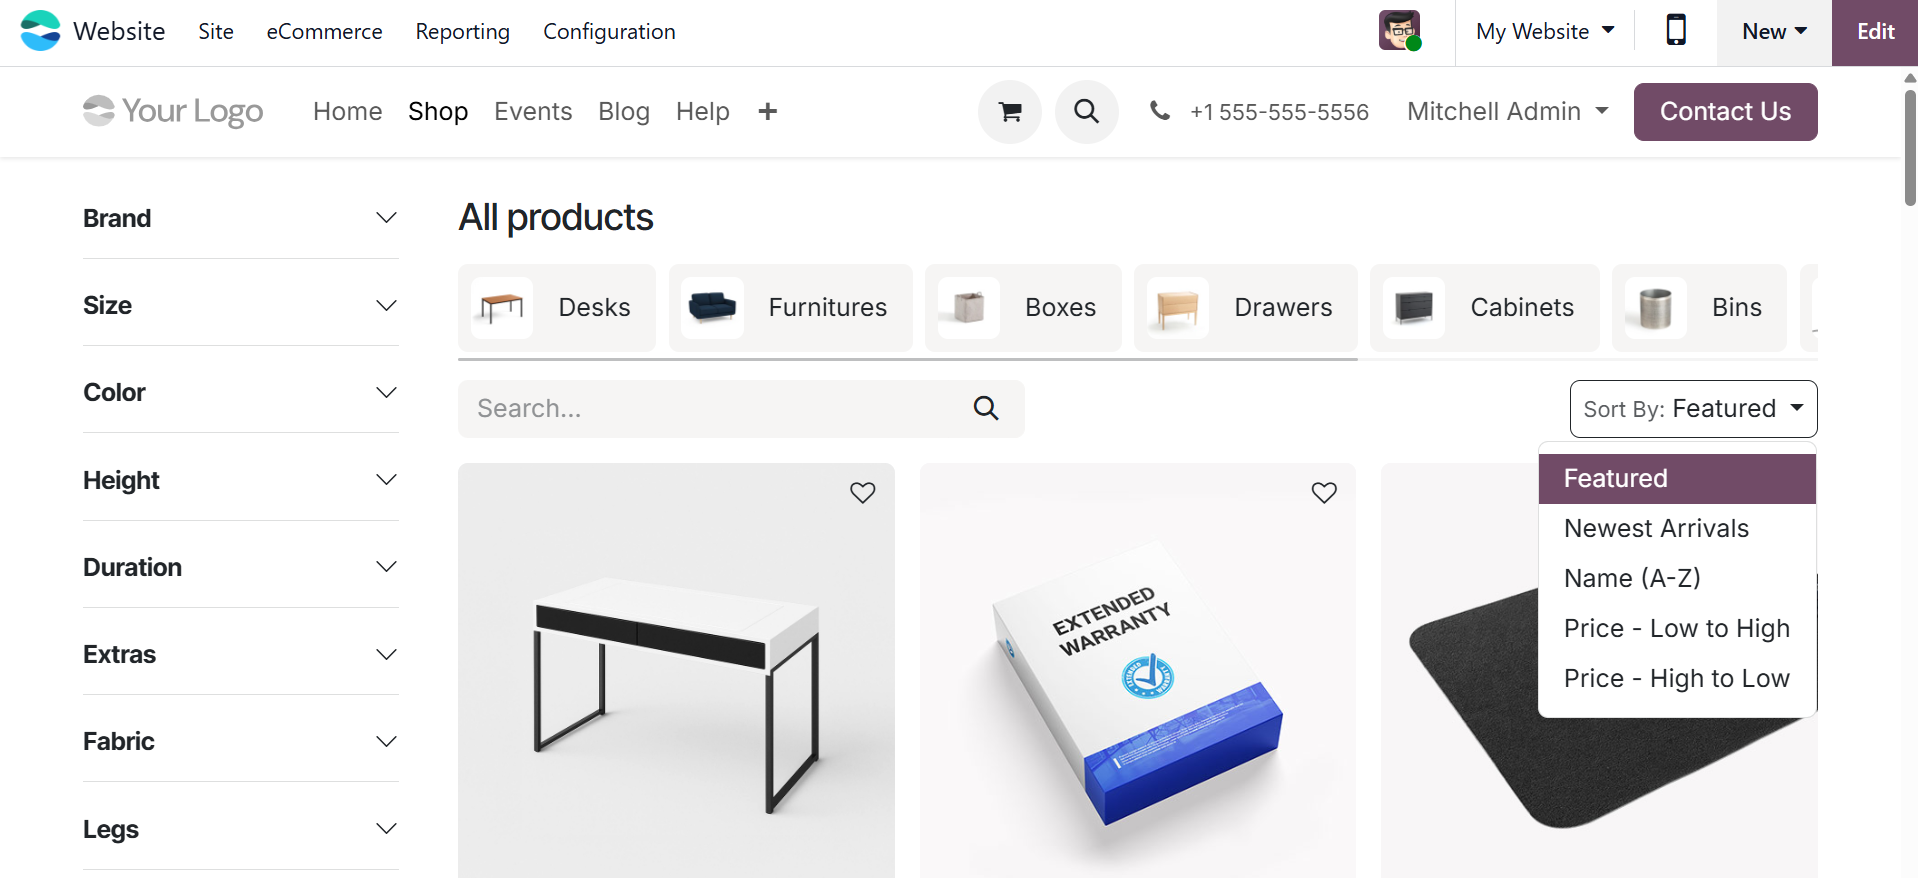
The product catalog window, as shown above, will show every item in your catalog. The page's search function makes it simple to locate a certain product. You can also arrange the products in the catalog according to a number of factors, including Name, Newest Arrival, and Price (either from high to low or low to high). Customers can more easily browse and select products based on their preferences by using the Sort By menu to access these sorting options.
There is flexibility in how product information is presented on the Shops page because it may be viewed in both List and Grid forms.
Each item on the list has its name, image, and price listed. The icons for accomplishing various tasks are always visible, including the shopping cart, comparing, and adding products to a wish list.
When you look at the left side of the site, you can see the various filtering options. The list can be filtered by attributes such as legs, duration, size, gender, and fabric, among many other factors. Icons for Facebook, Instagram, Twitter, and My Cart are displayed at the top of the window.
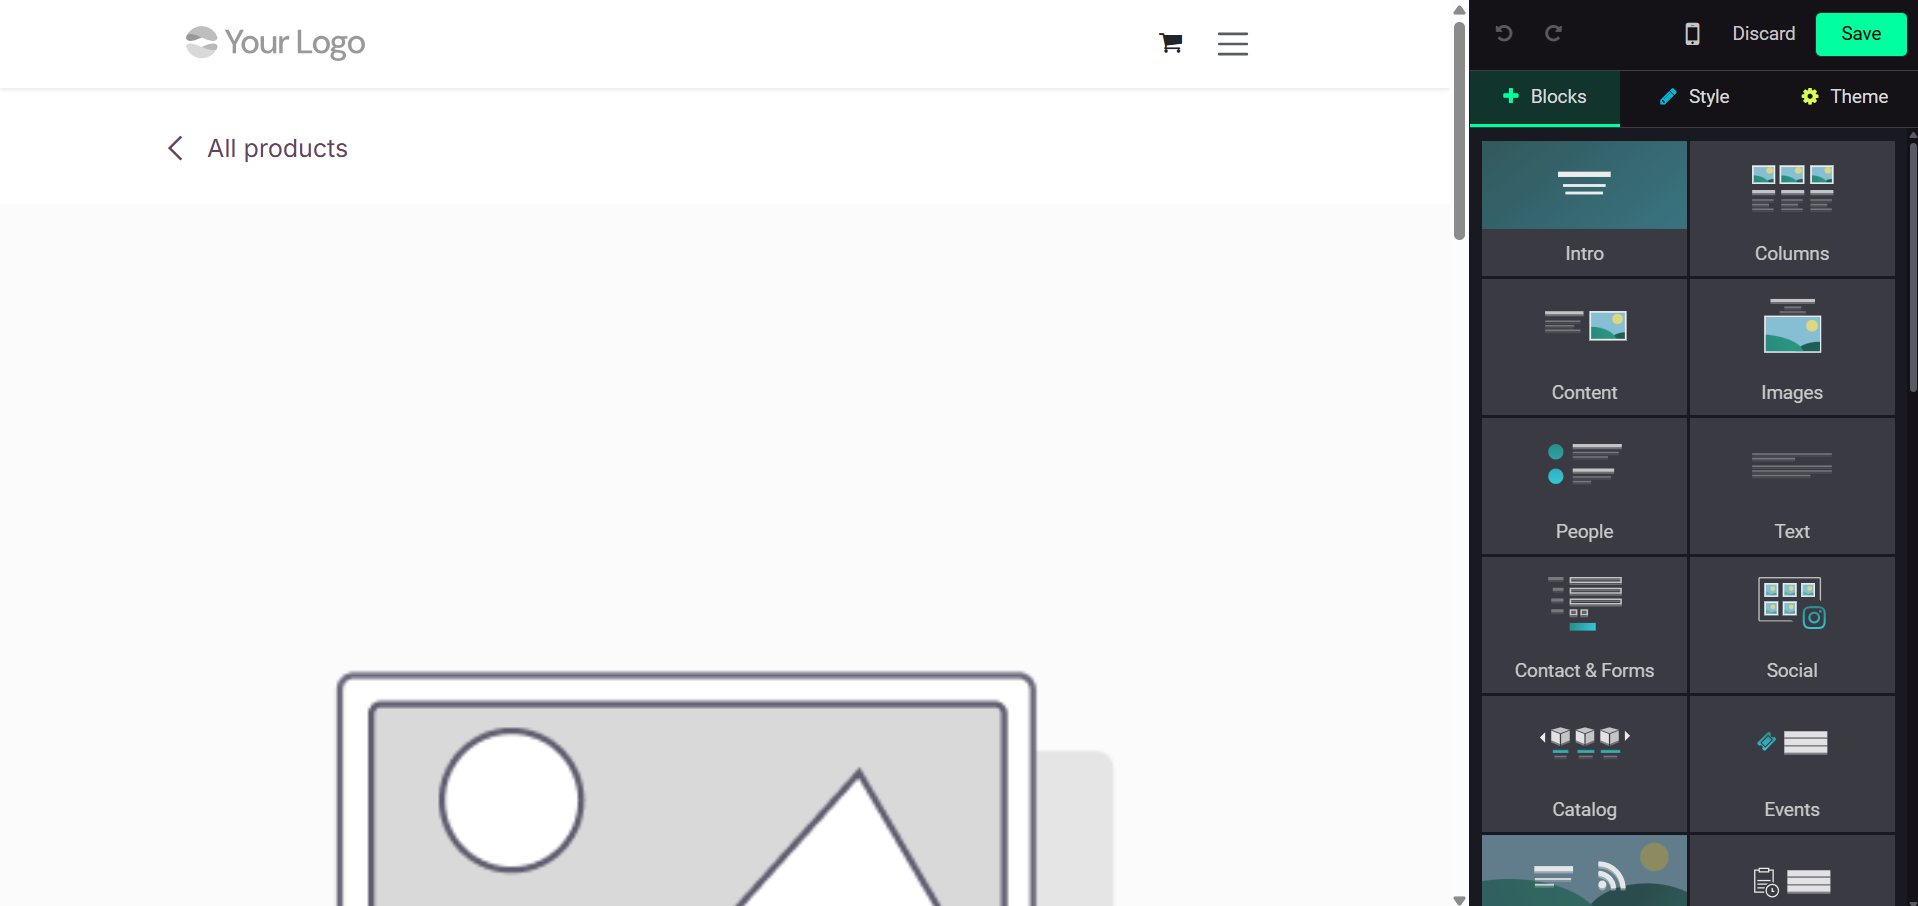
Click the Edit button to add further customizations.
Grid View and List View are the two viewing choices available for the Product Layout. By choosing your chosen Size, Style, Image Type, and fill options, you may personalize the display. Additionally, by turning on the Product, you may activate the Search bar and Product Description. Desc. Toggle: Depending on your preference, categories can be placed at the top or on the side bar of the screen.
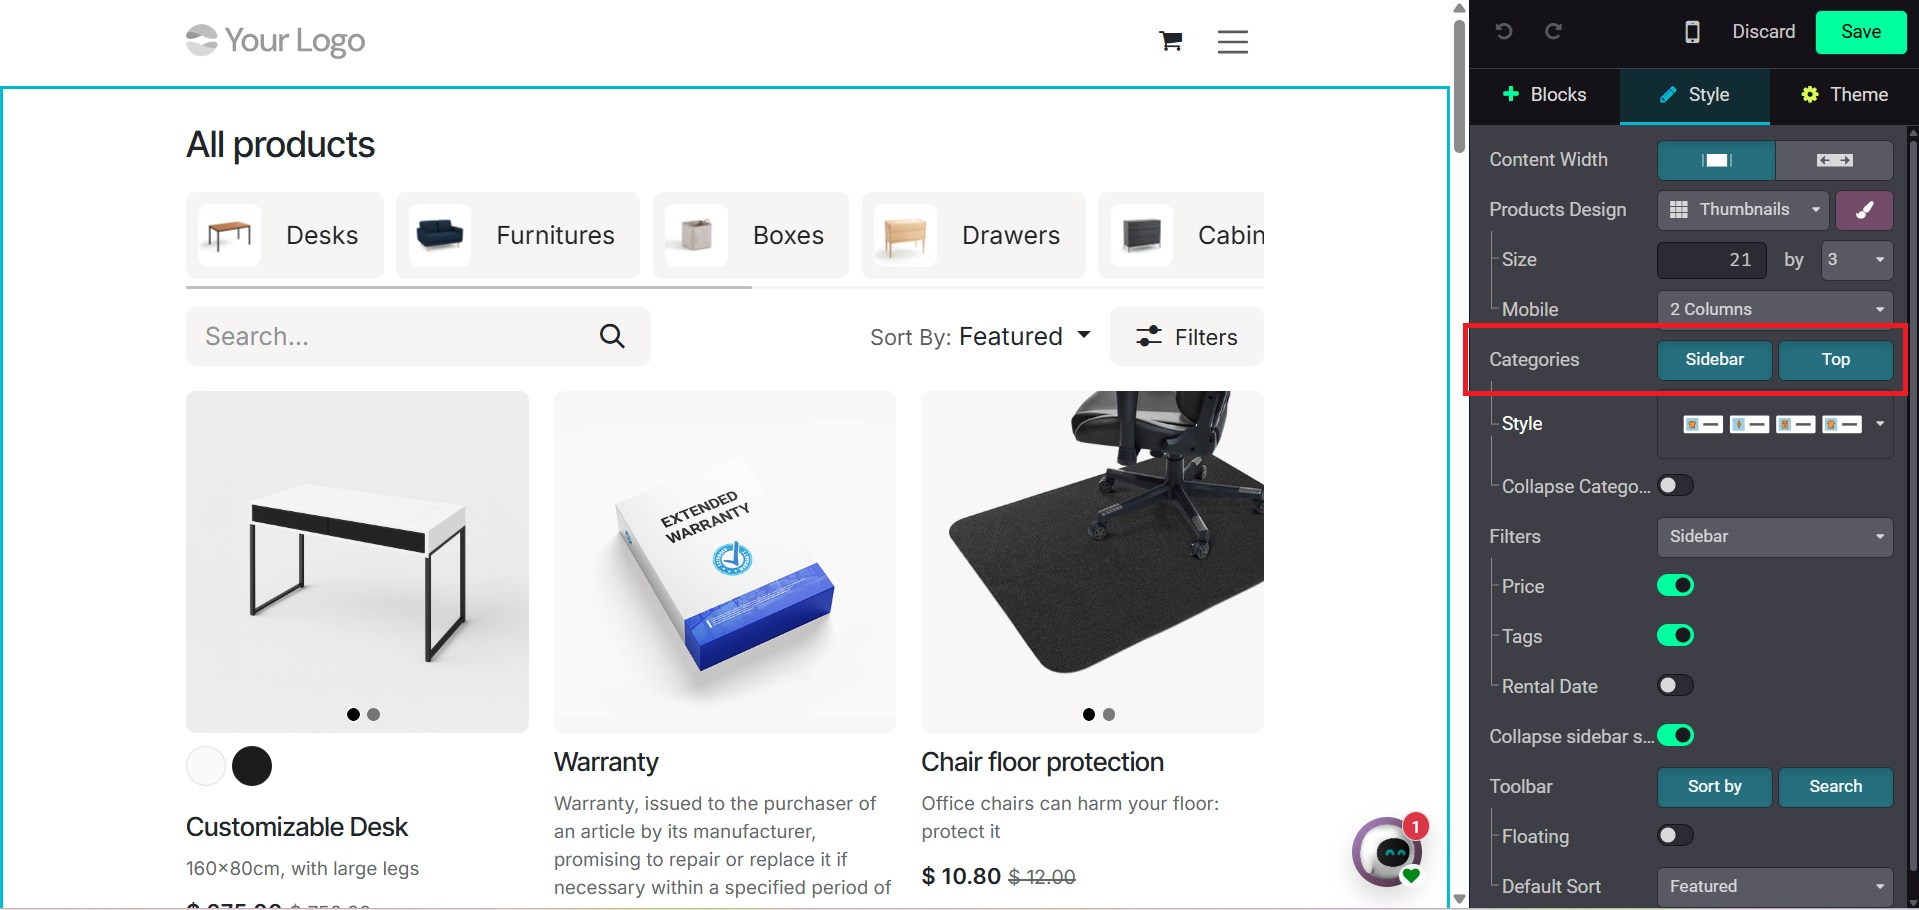
Only after they are enabled will the Price Filter and Product Tags be visible. Additionally, this customization page gives you total control over how your product catalog is displayed by letting you set up other components like the available Buttons, Default Sorting, and the Top Bar's layout.
Product comparison
By using the Product Comparison Tool, customers can compare two products straight from the website. This feature can be found in the Configuration settings under the Shop-Product section. Once enabled, it makes it simple for consumers to compare products side by side, which improves their decision-making.
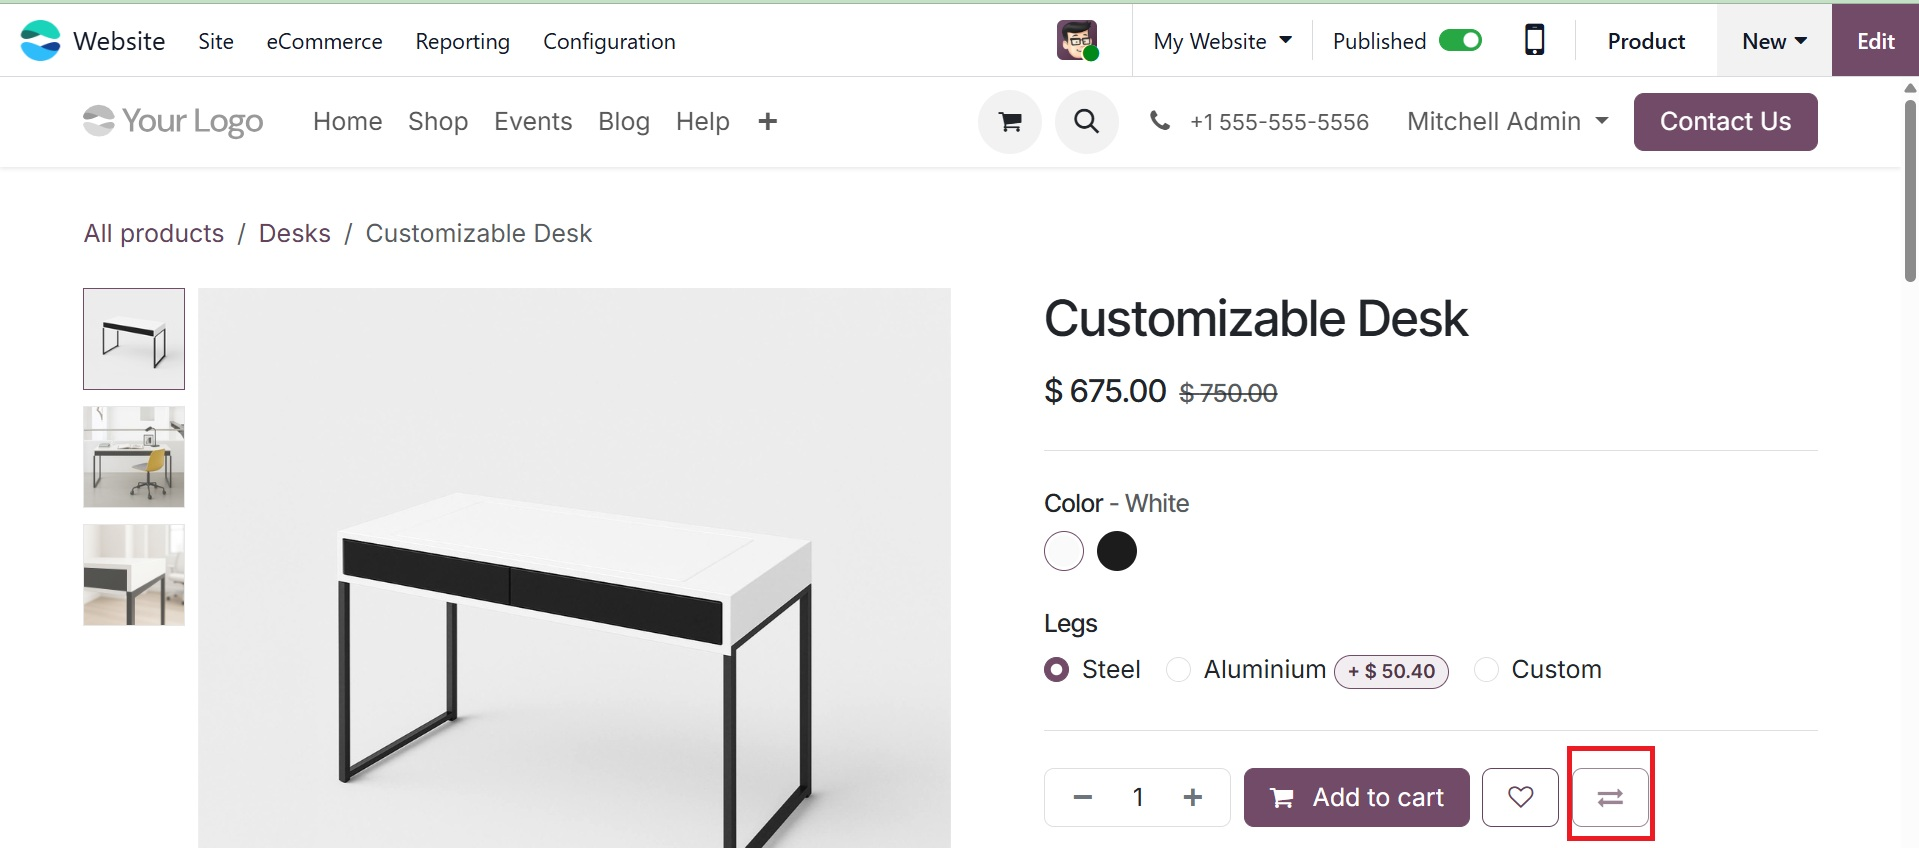
Product comparisons are available on the Stores page. Each product description has a double arrow icon with the phrase "Product Comparison." Customers can choose many products to compare side by side by clicking this, which makes it simpler to assess features, costs, and specs.
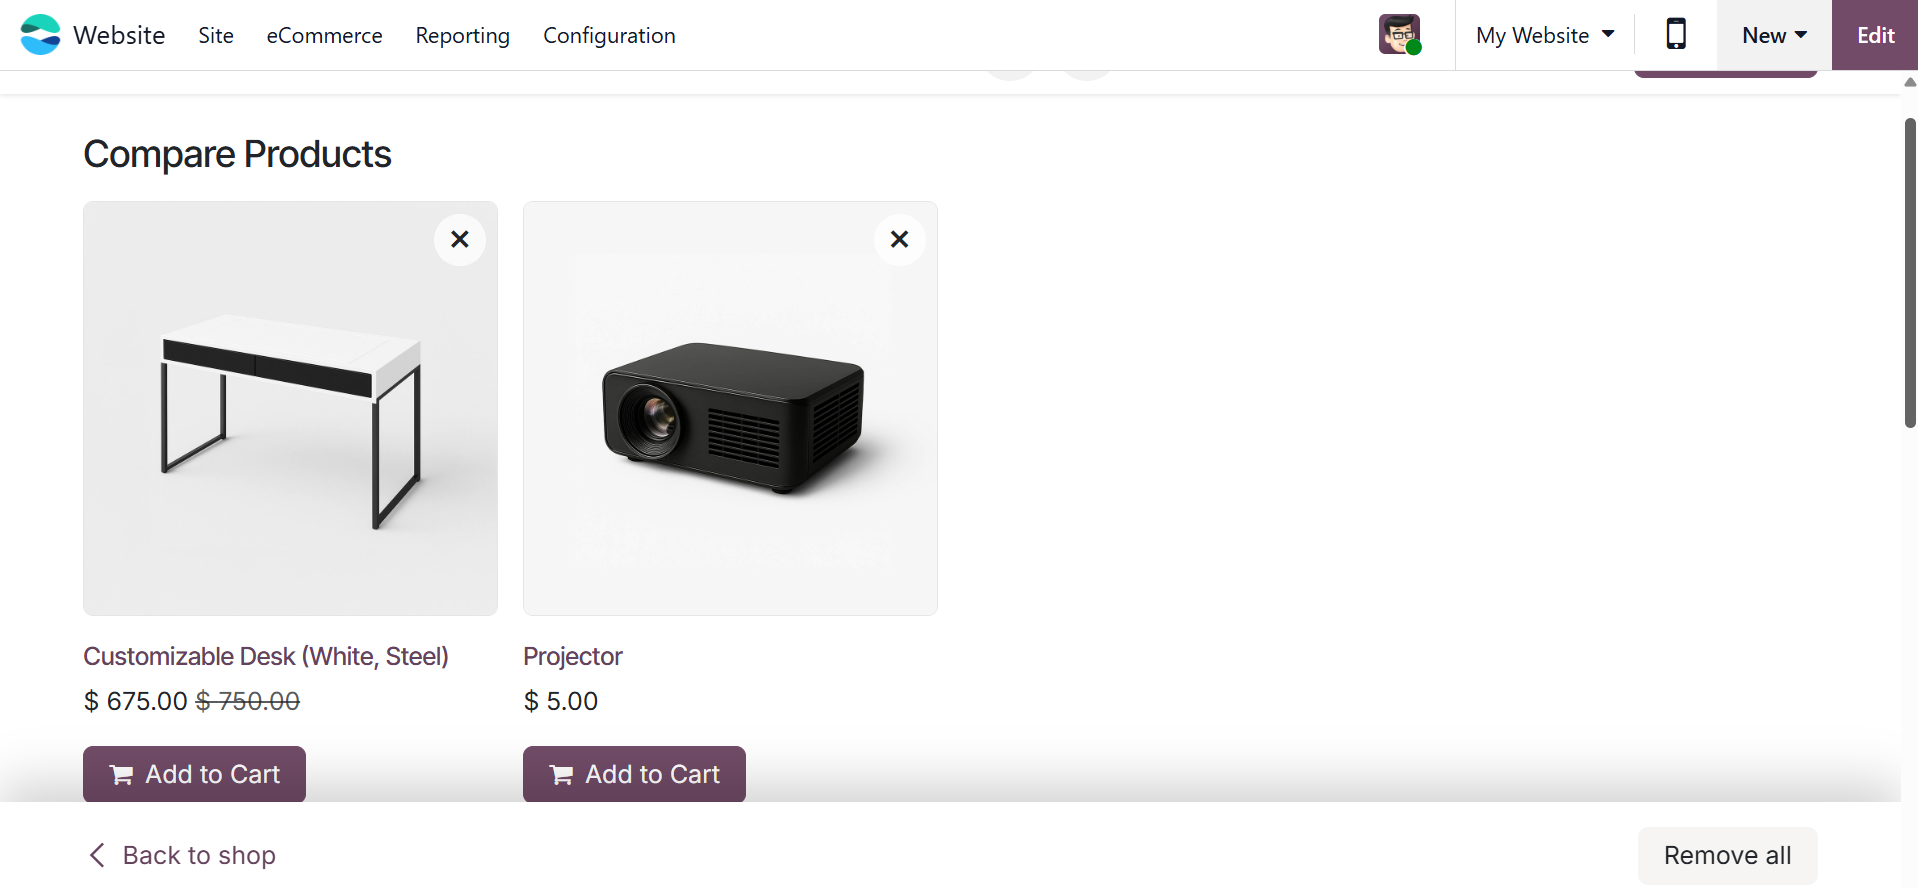
The chosen product will be added to the Compare Products page when you click on the Compare option. In order to assist clients in making well-informed purchasing decisions, this page presents a comprehensive comparison table that details the features, costs, and specifications of each selected item.
A pop-up window displaying every product chosen for comparison will emerge, as seen in the figure below. When you click the Compare button in this pop-up, you'll be taken to a different page where the features, costs, and other characteristics of each selected product are shown side by side. When you click the Compare button in this pop-up, you'll be taken to a different page where the features, costs, and other characteristics of each selected product are shown side by side.
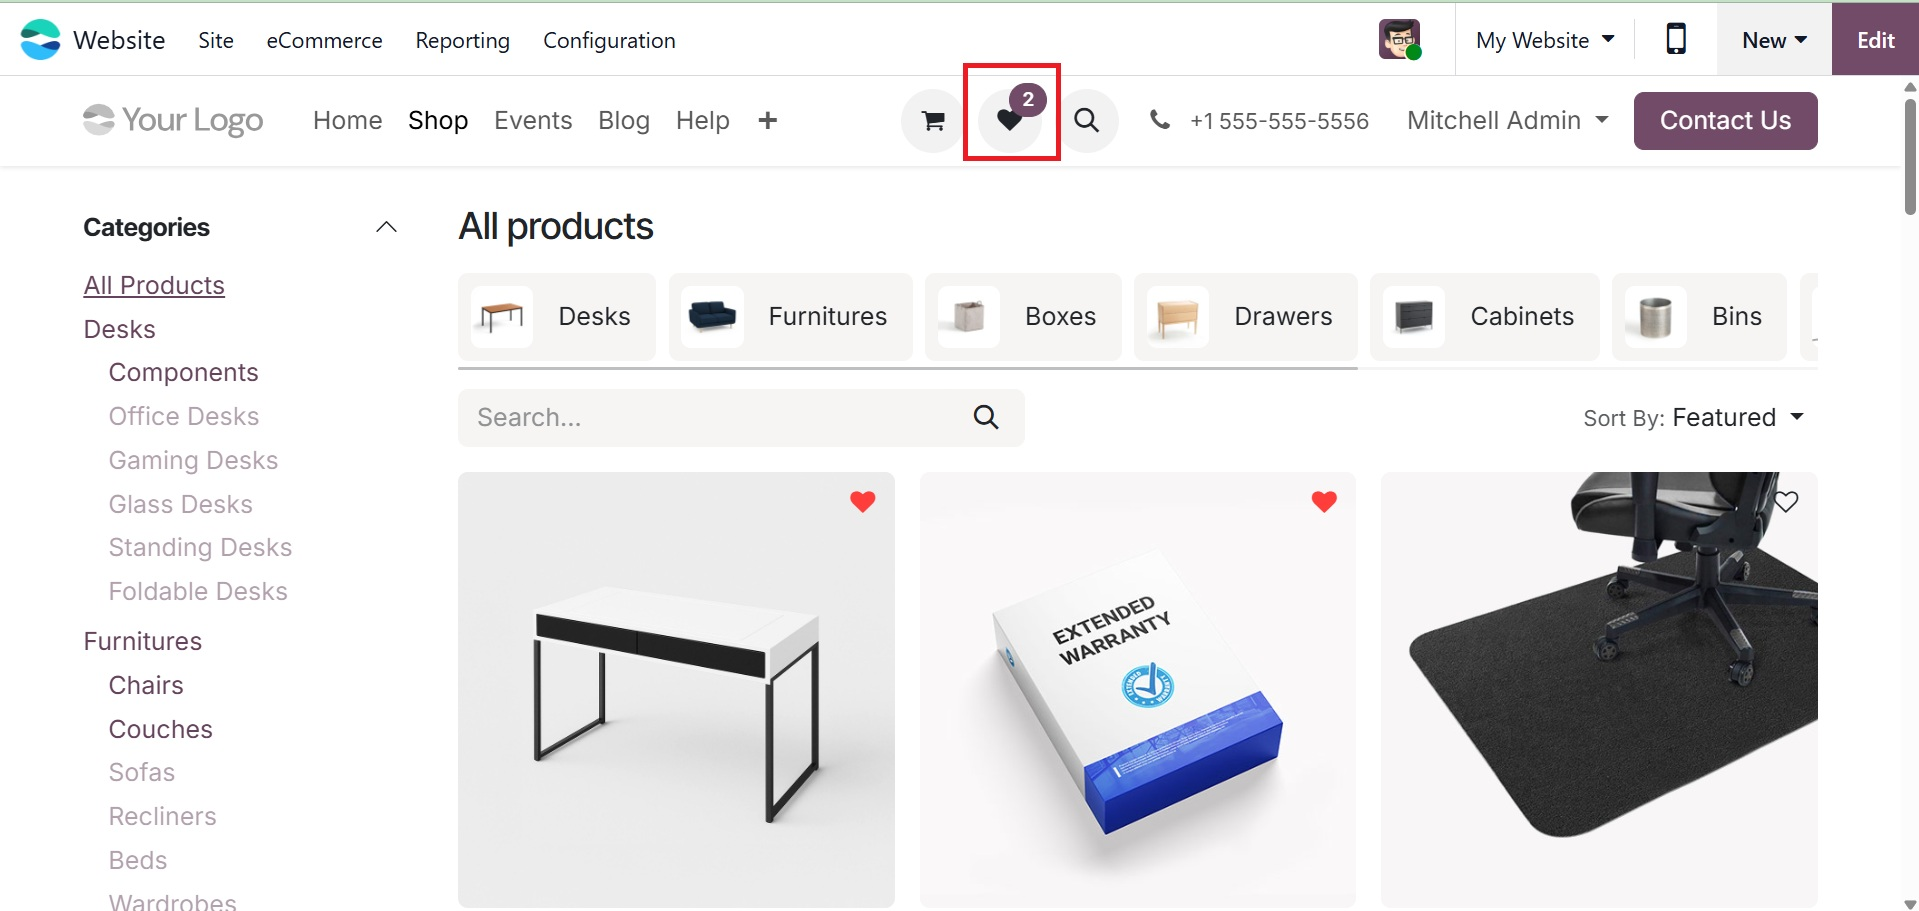
Wishlist
Customers can save goods they are interested in for future purchasing using the Wishlist function, which was included alongside the Product Comparison tool to improve the buying experience. In addition to assisting consumers in keeping track of items they might wish to purchase in the future, this is a successful marketing tactic that promotes repeat business and possible purchases.
Without feeling compelled to make a purchase right away, customers can create a customized list of items. A Wishlist symbol is included in every product description on the website, making it simple to add products to the list with just one click.
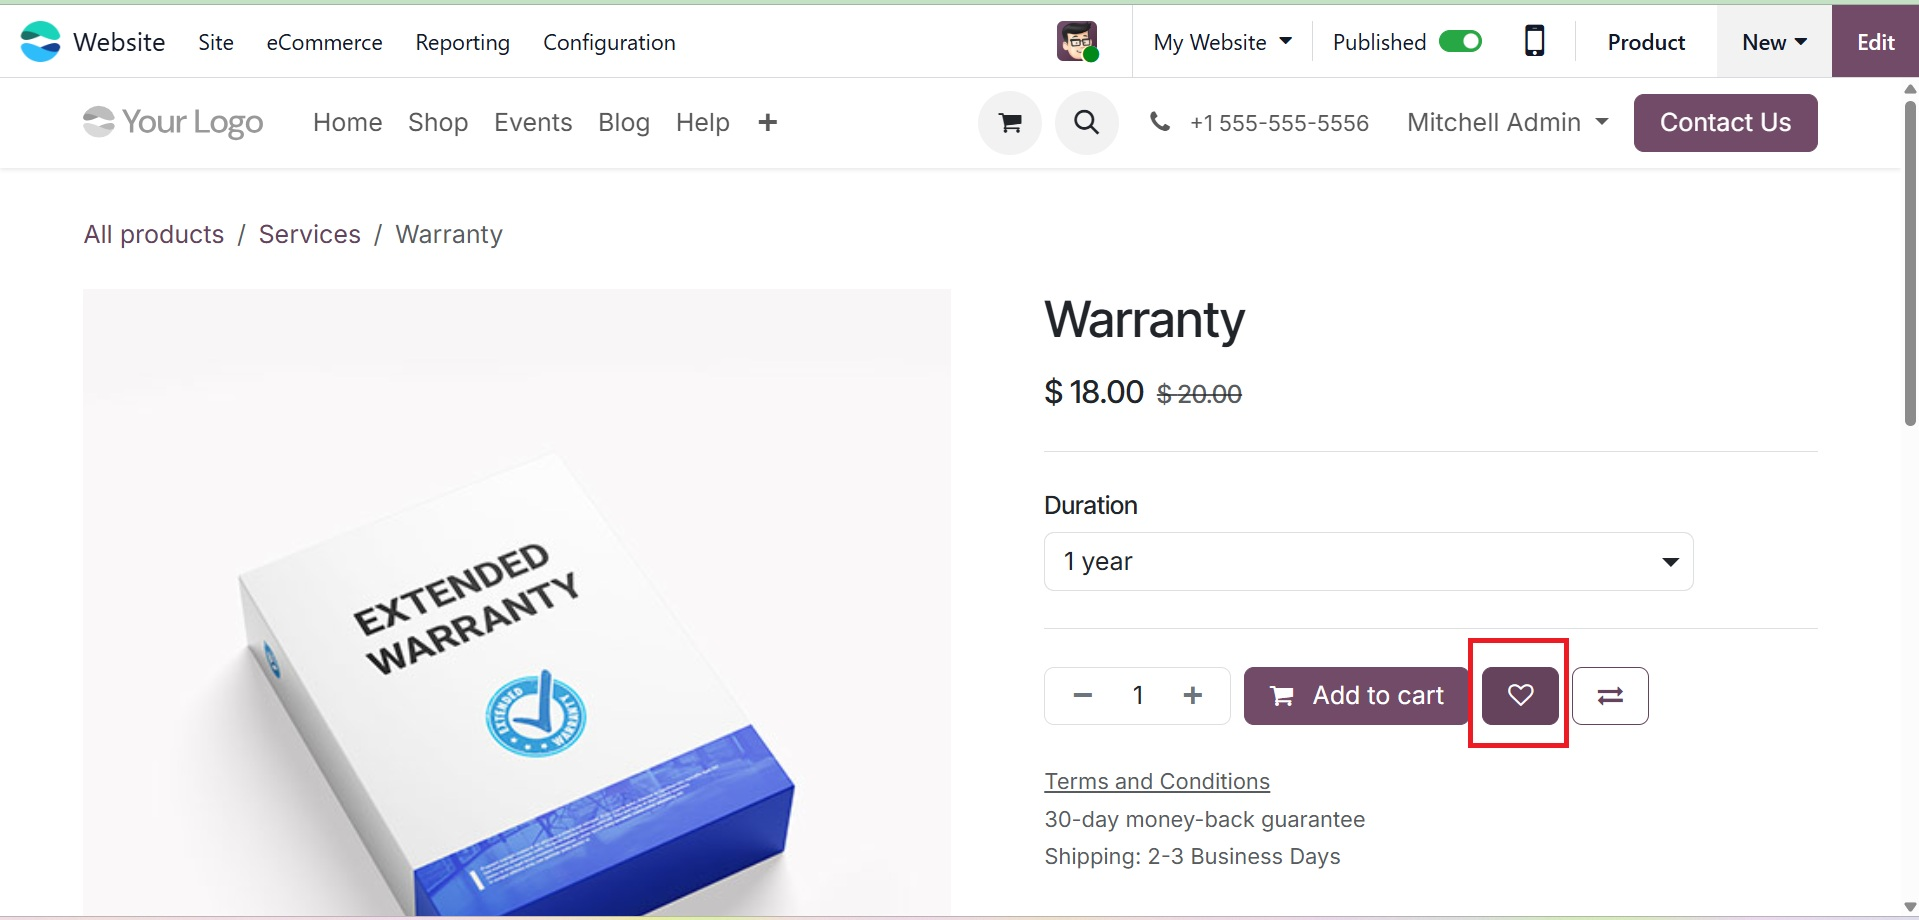
You are free to add as many things to your wish list as you like. The Wishlist is represented by the heart icon at the top of the page, which updates with each new product. This guarantees a seamless and customized shopping experience by making it simple for customers to keep track of all the items they've saved for future purchasing.
Add to cart
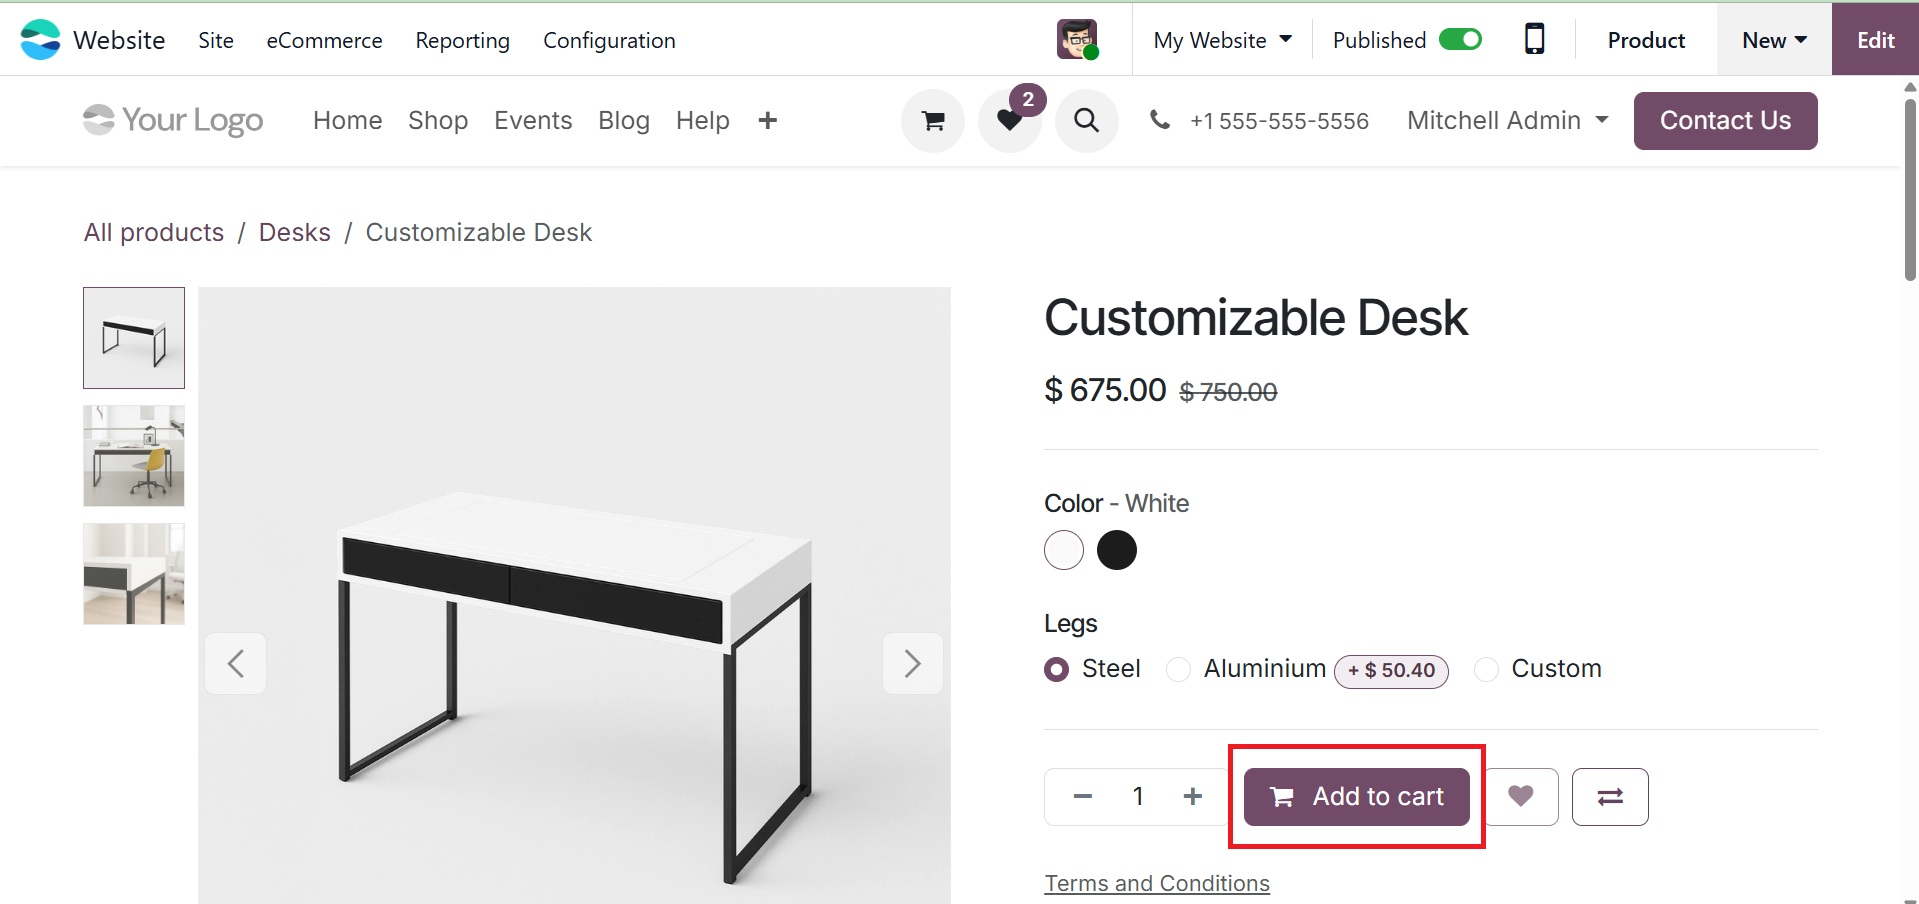
A crucial component of any online store is the Add to Cart function. It gives customers an easy way to temporarily list the goods they want to buy, enabling them to handle several items in one transaction. You can activate the Add to Cart option from the website's customisation menu, which will show the button next to each product. You also need to describe what will happen when the button is clicked in the configuration settings.
Just click the Add to Cart button to add an item to your cart. After that, to see every product you've chosen, click the Cart symbol at the top of the page. Customers can easily evaluate their choices before checking out with this cart view.
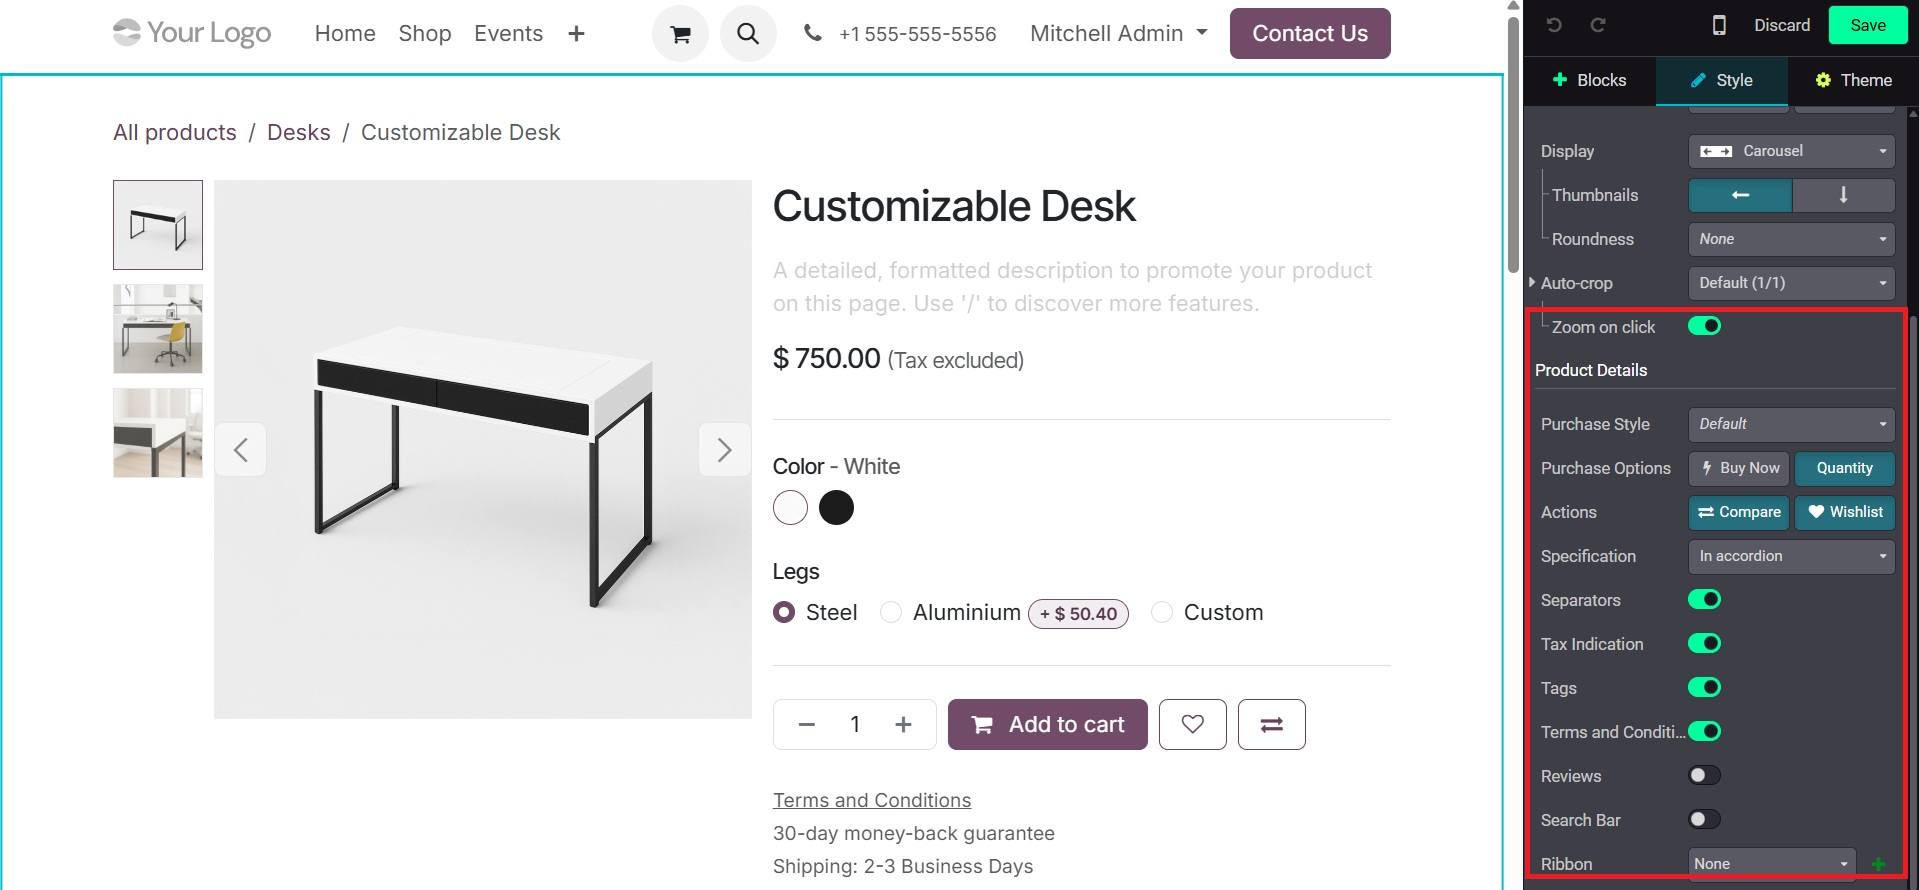
Additionally, the cart page can be altered as necessary. Clicking the Edit button will accomplish this. You can upload more than one image per product and change how they are arranged thanks to features like Extra Image. To improve the visual appeal and provide customers a better knowledge of the goods, these extra photographs can be shown as thumbnails at the bottom or on the left side of the product image.
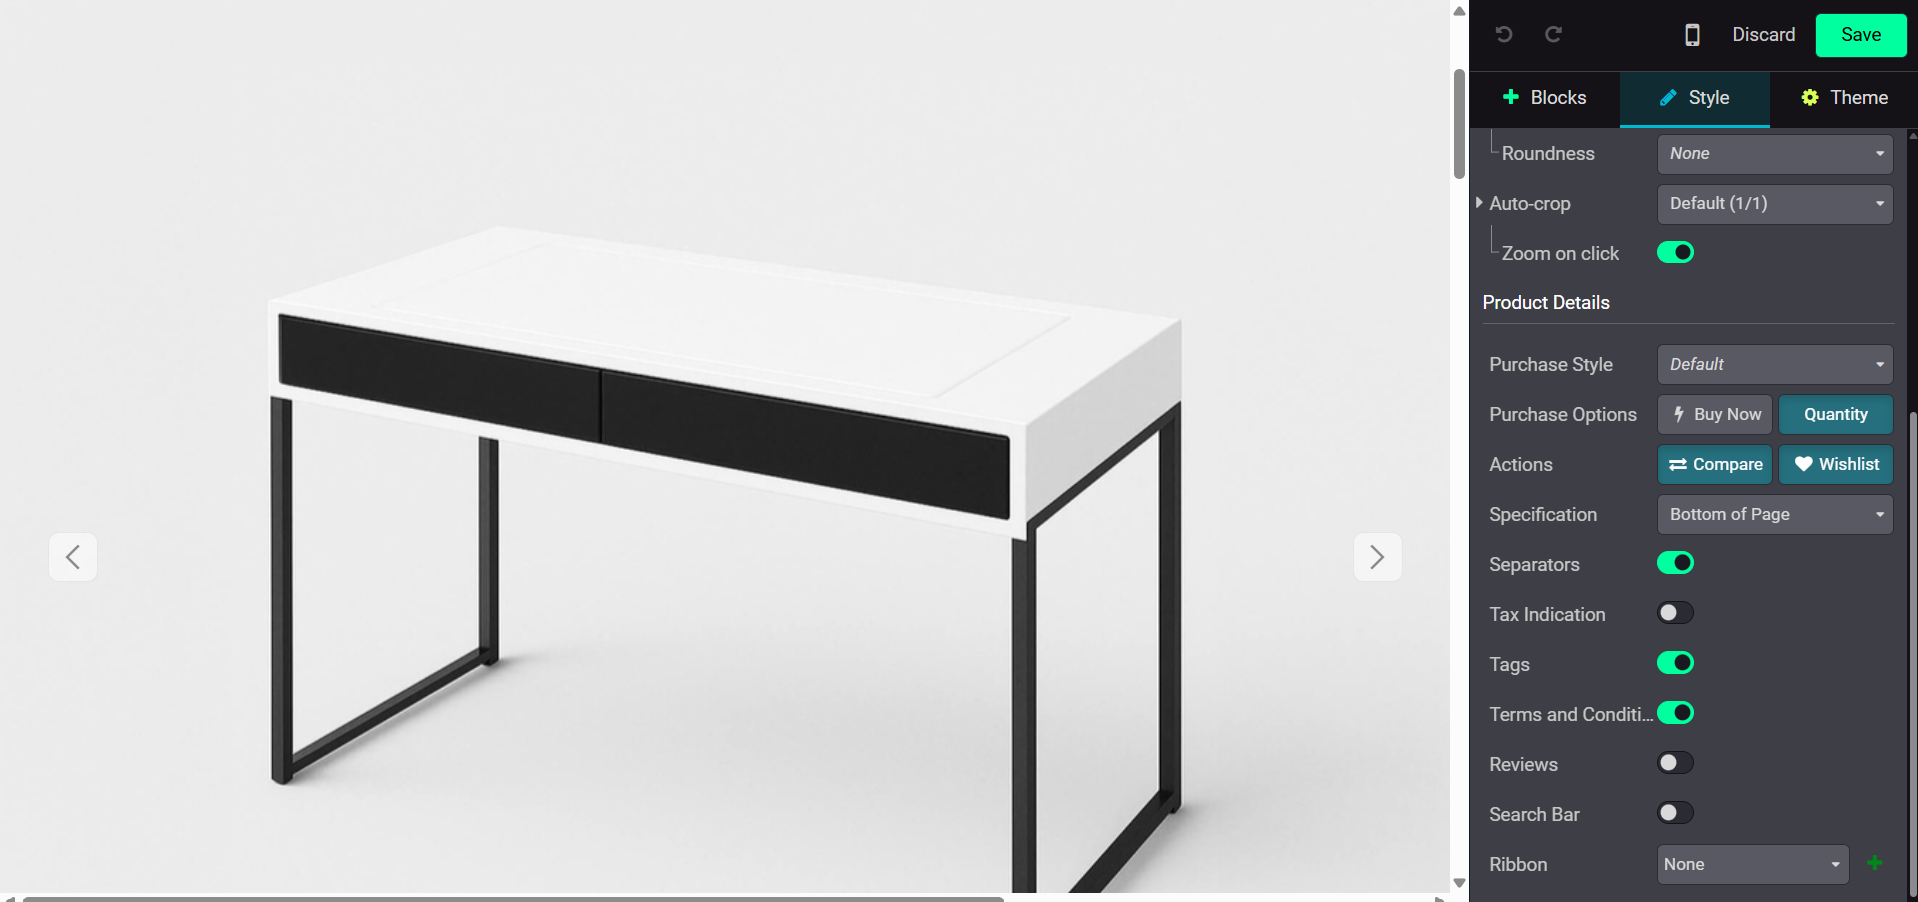
Your eCommerce website's product page can also be personalized with a number of choices found under the Customize tab. To make sure customers accept your terms before making a purchase, you can activate the Terms & Conditions option. You can market your products by displaying social media sharing buttons and client reviews in the Customers section. Users can select how many units of a product they wish to purchase by activating the Select Quantity option, and Tax Indication can be enabled to display whether taxes are included in the product price or not.
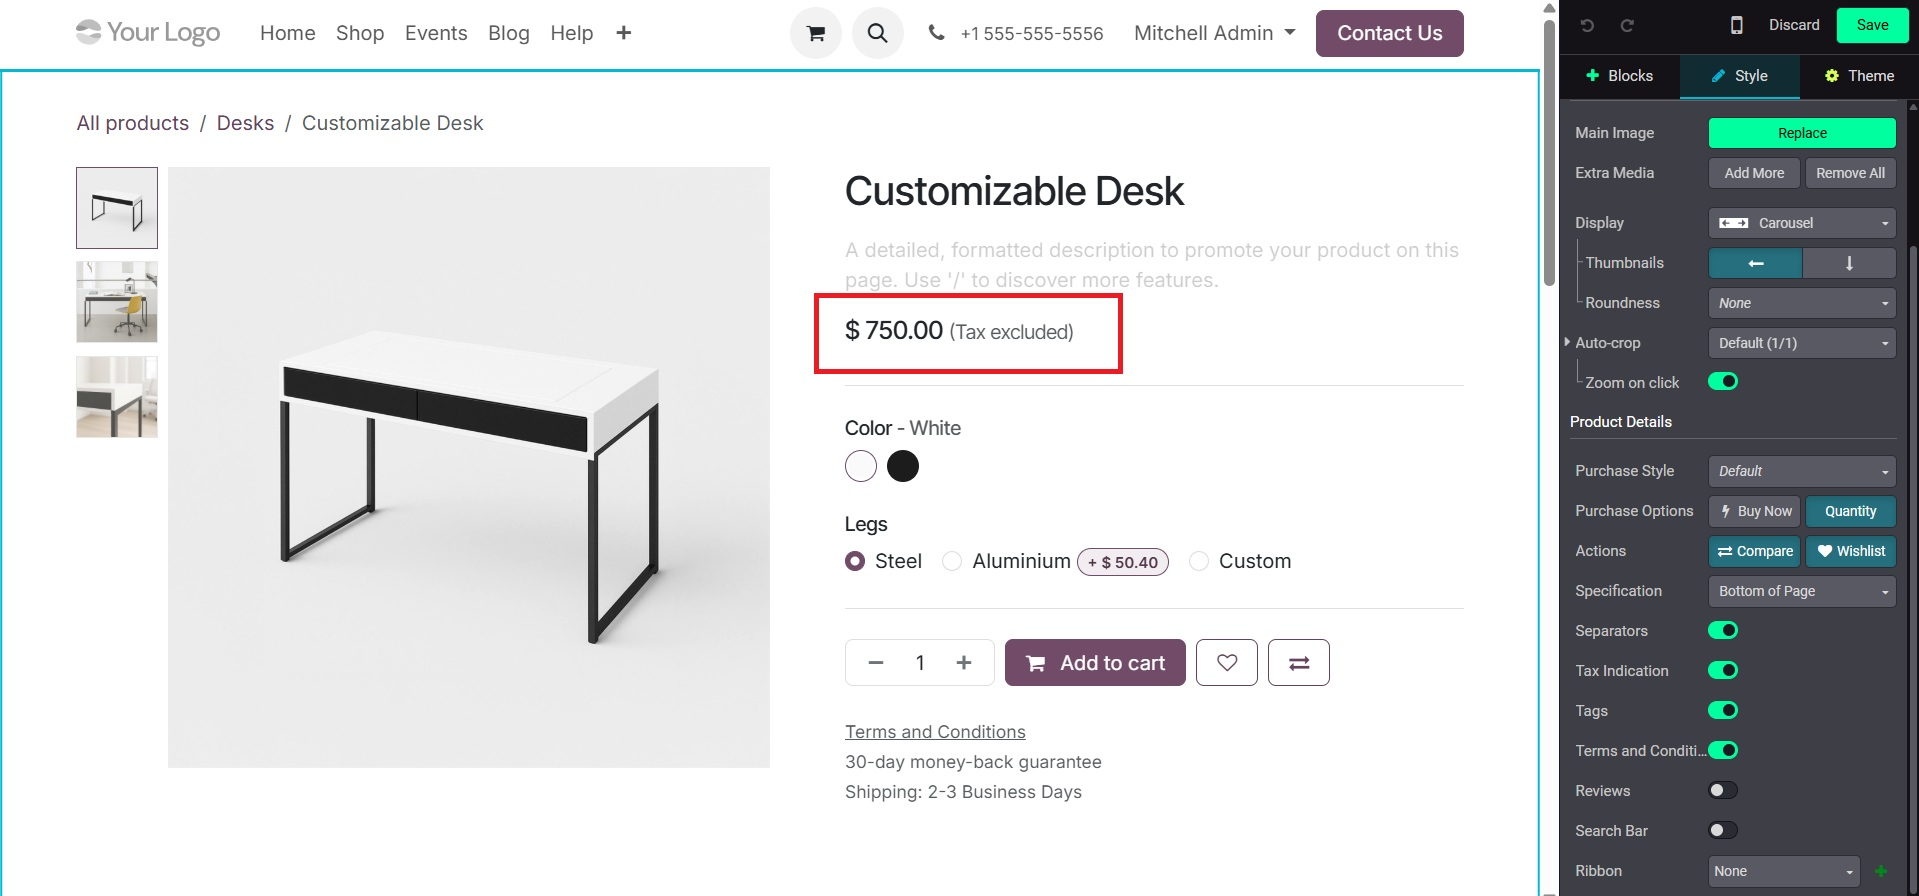
The Variants option facilitates the presentation of product variations, such as color or size, as drop-down menus or selection buttons. In order to facilitate consumers' discovery of related products using tags, you may also activate Product Tags. More freedom throughout the purchase process is provided by the Cart area, which offers the option to display a Buy Now and Wishlist button. Customers can better comprehend what they are purchasing by viewing additional product details through the More Information option.
Using the Specification setting, you can decide whether to put the product specifications on the side or at the bottom of the page. You can change the width of the product photos on the screen by using the photos Width option. You can enable Image Zoom to give customers a closer look at the product when they hover over it, making shopping more enjoyable. You can position the extra product photos to the left or below the main image using the Thumbnails setting. Use the Extra Images option to add or remove other product images, and the Main Image option to change the main image. Customizations make your product pages look better and assist clients in making wise purchases.
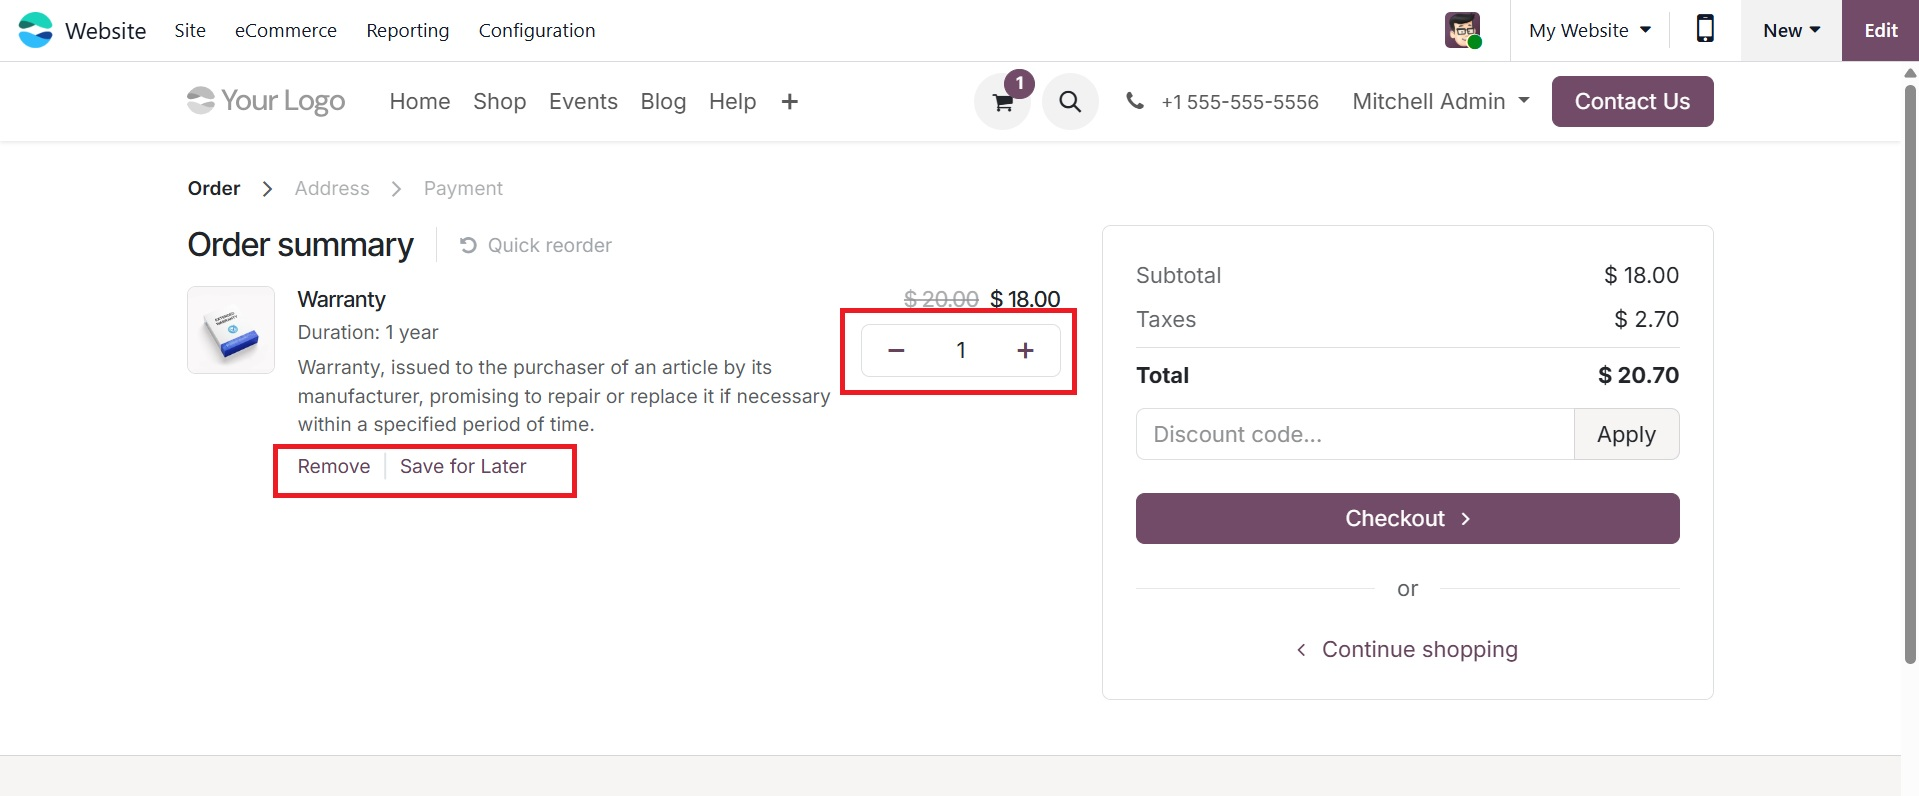
Every item that the customer has added is prominently displayed, as shown in the cart page view. Essential product information is included in this view, along with any relevant special offers or discounts. Suggested additions that improve or complement the main product will also be displayed beneath the product description if it is linked to optional items, giving buyers the choice to add them to the order.
Users can use the plus (+) and minus (−) buttons to change the quantity of a product or click the Remove symbol to remove an item from their cart.
Additionally, you can purchase it later by using the save for later option. The same window displays the pricing information, including the Subtotal, Taxes, Total Price, and any applicable Promo Codes. You may access these details by scrolling down in the cart window.
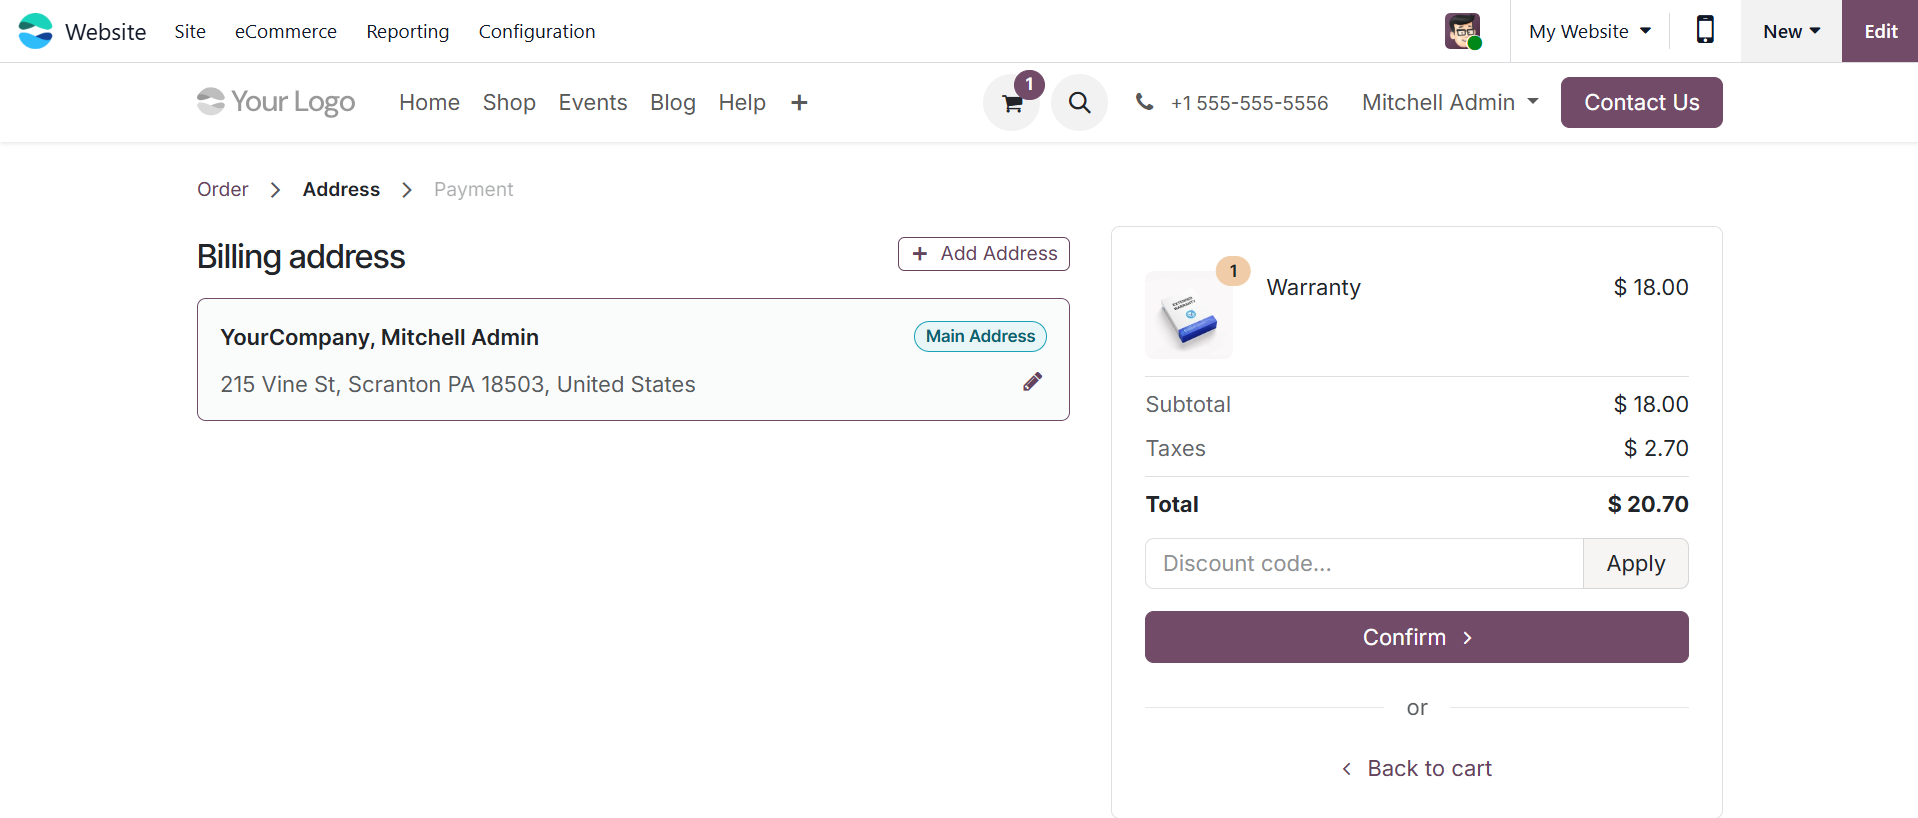
The "Continue Shopping" button, which is situated at the bottom left corner of the page, can be used if the user wants to keep looking for further products. They will return to the product listing page as a result of this action. The consumer can click the "Process Checkout" button in the upper right corner of the screen to continue when all products have been examined and approved. This will take the user to the next step, where they can verify order details, check invoice details, and finish the transaction by providing or confirming payment information and delivery address.
You can also include a delivery method in the provided space, as shown below.
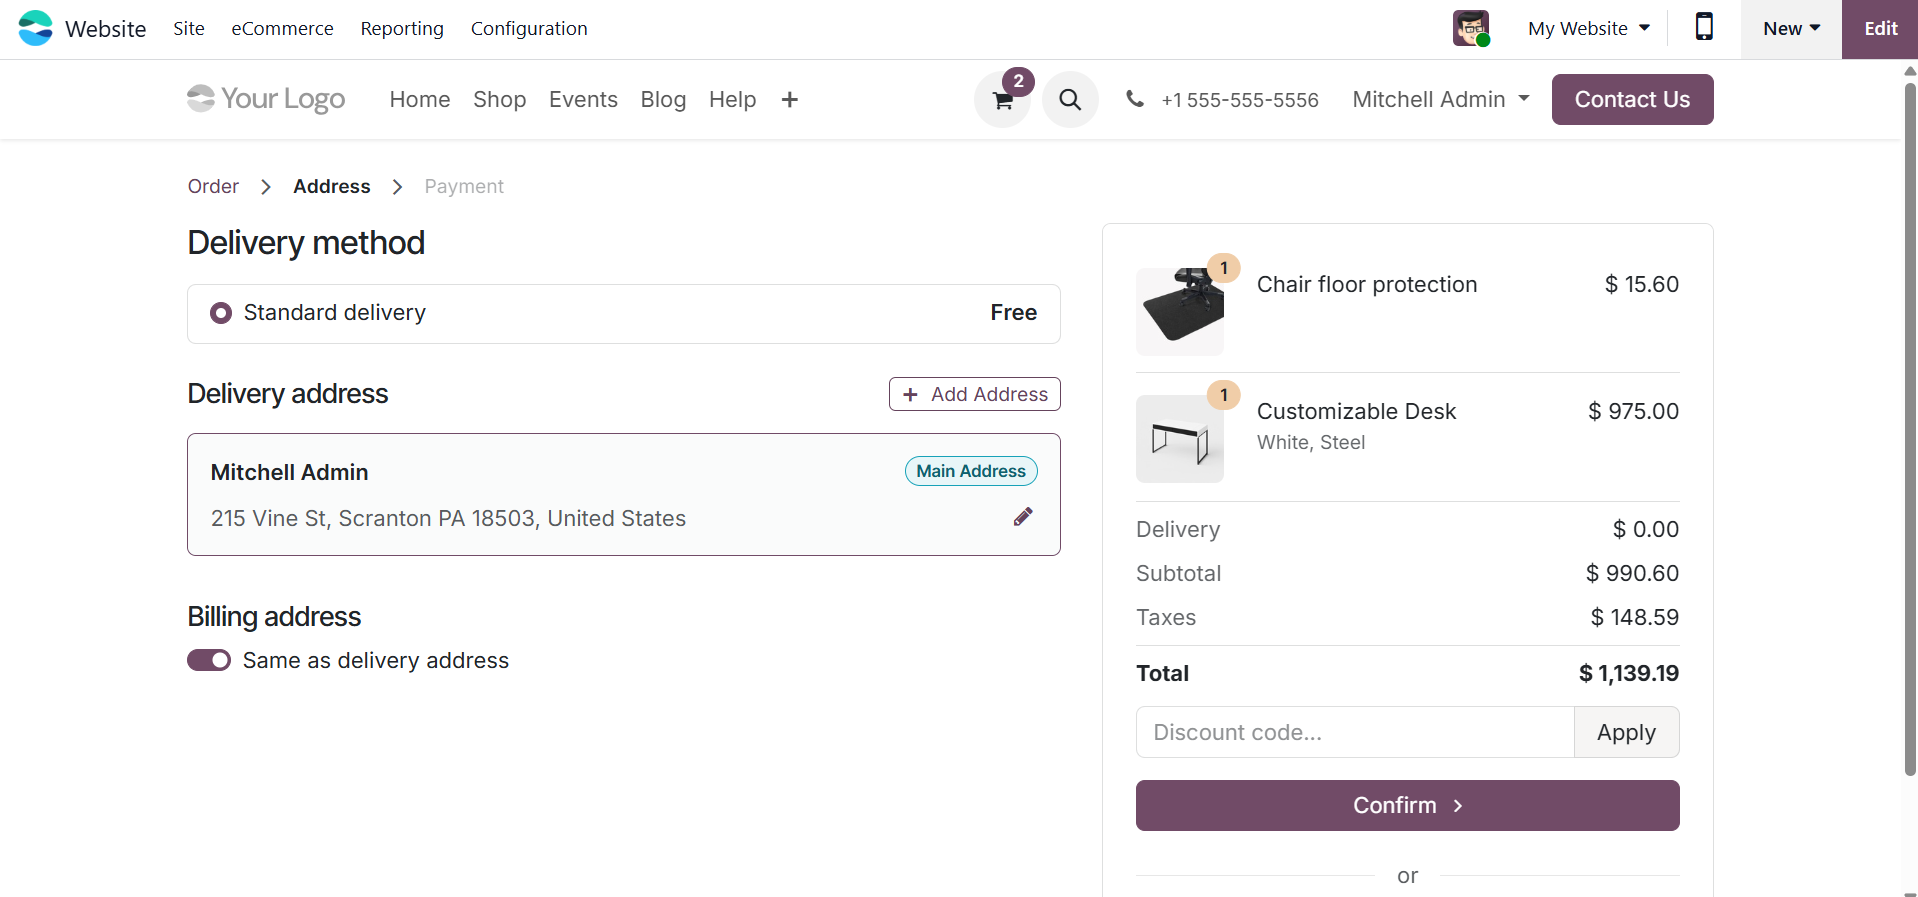
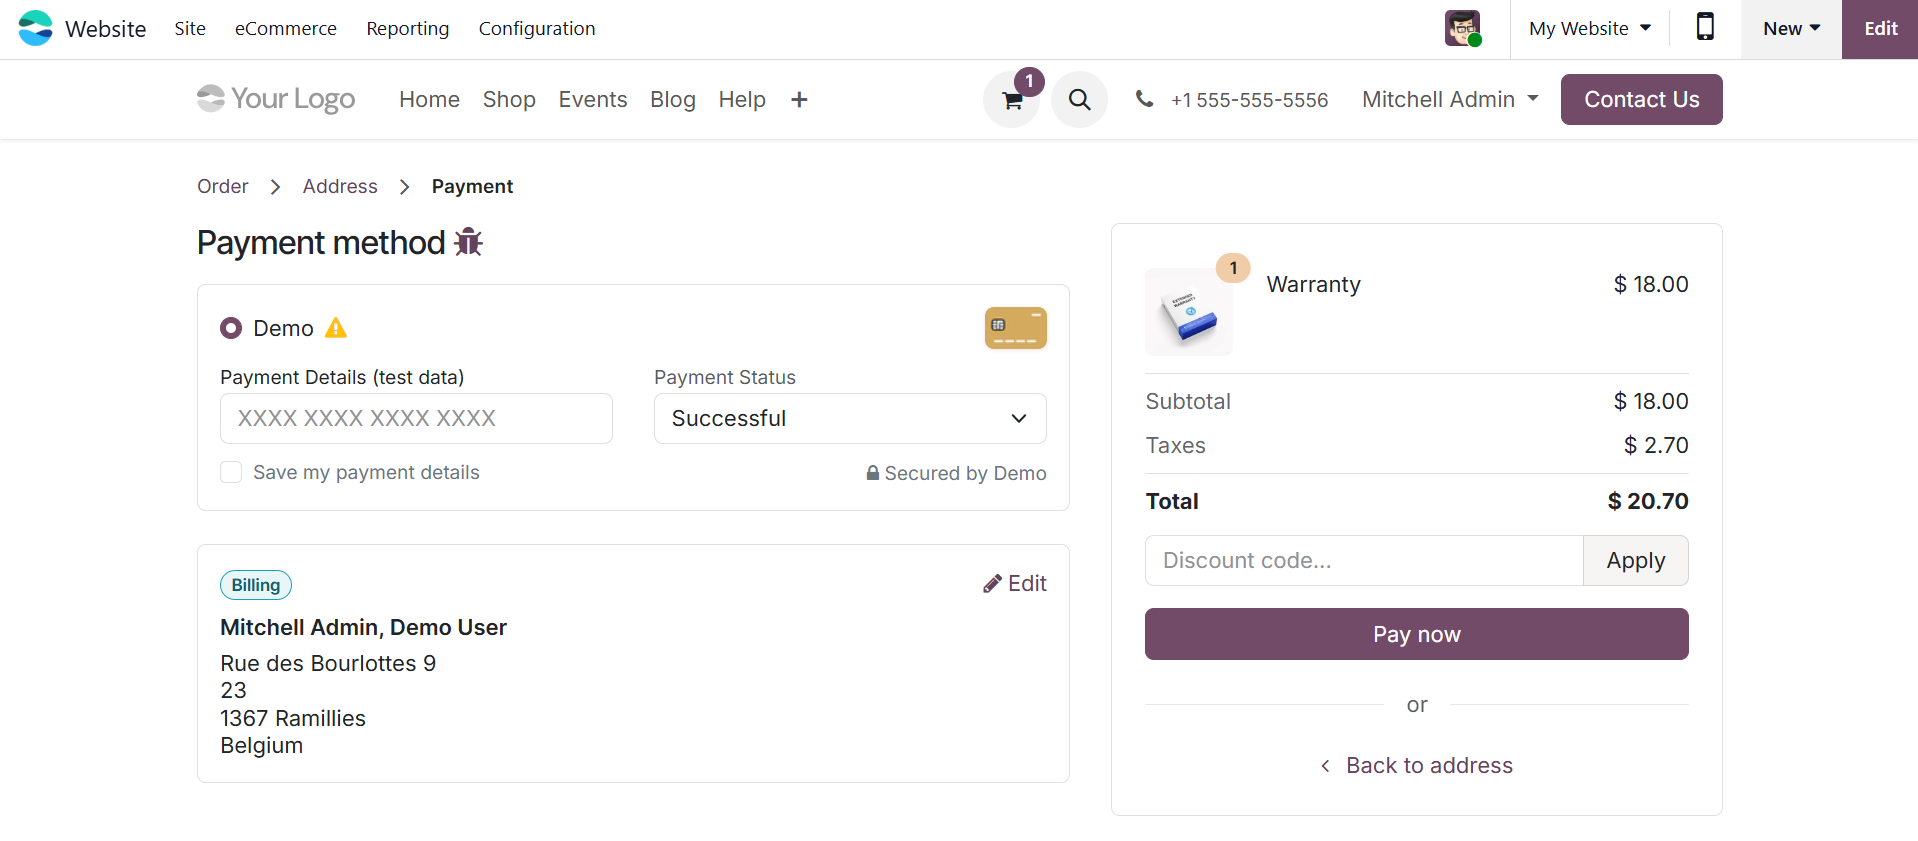
Wire transfers and credit card payments are among the choices available on the payment page. You can enter the necessary information immediately in the designated boxes if you decide to pay with a credit card. The Pay Now and Return to Cart buttons are located at the bottom of the window. Click Pay Now to finish the transaction after confirming the entered data. Your payment confirmation data will appear in the following window if the payment is successful.
Additionally, the platform allows for the installation and configuration of several payment gateways. These gateways allow businesses to customize payment methods based on client preferences by matching the various payment acquirers defined in the backend.
After thoroughly examining the Add to Cart feature and payment processing, the eCommerce module's Settings menu, which controls a number of features of website performance and behavior, should be examined.