How is the List view's data sorted?
The List view, which offers a thorough description of each element, is one view type that has extensive information. Any new apps created using the Studio Module can be configured with the List view. Additionally, the Odoo Studio module can be used to add unique elements to the current List view of all Odoo applications. When you choose the Studio module option in the program's List View, the setup box will appear. The Sort By options under the view menu include Order Reference, Creation Date, Customer, Salesperson, Activities, Company, Total, Status, and Currency.
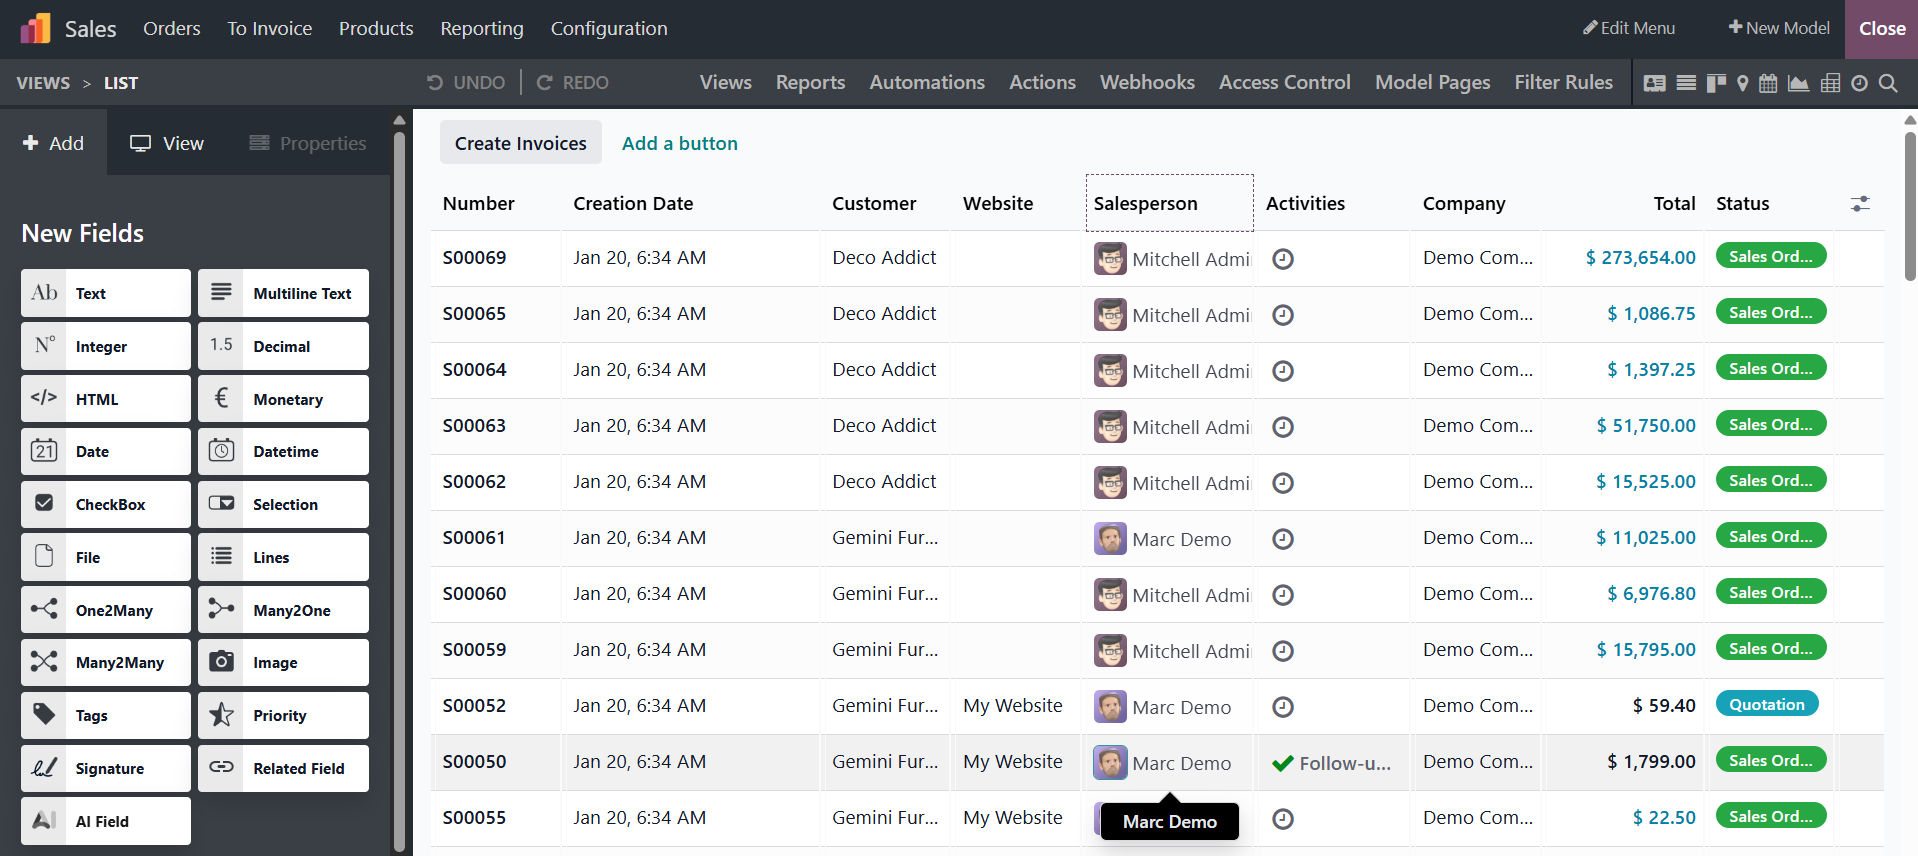
The elements shown in the List View will be sorted in accordance with the specified sorting option once the Sorting operation is enabled depending on the various parameters you have selected and the Studio Module is saved. The Odoo19 Studio module's Mass Editing capability is described in the section that follows.
Now that we have a better grasp of the Reports option in the Odoo19 Studio module, we can configure the application more effectively.
Reports Generation & Customization
One of the Odoo19 platform's most sophisticated features is reporting, and each module provides unique tools for producing reports. You can create personalized operation reports with the Odoo19 Studio module, which will enhance user-friendliness by offering a unique perspective on important areas. With the many options in the Odoo19 Studio module's Report menu, you can easily build both basic and complex reports.
The Odoo19 platform can be created or redesigned with features that can be customized. Instead of using the drag-and-drop feature that was present in Odoo 19, we are now adding fields to the report using ".fields." It is now simpler to customize reports for end users.
Additionally, pre-made tools and digestion choices can be used to set the numerous reporting menus in the newly produced apps. The definitions for each report created using the Odoo19 platform are listed here. The similar report in list form may also benefit from the Search, Filtering, and Group by options.

When producing new reports, you can choose whether to produce internal, external, or blank reports by selecting the New option. The setup menu, which lets you enter all the required data for the Translate View menu, will show up based on the Report Type you select.

As shown in the accompanying image, the platform will show a box where you may complete the Report configuration after selecting the type of report to be prepared.
The pre-existing reports in Odoo 19 can also be altered. Consider sales reports.
Choose the report that requires modification. Every field in the report is shown in the view, which enables users to modify the file name or add more fields. Based on the "Proforma Invoice" customization, choose the relevant report.
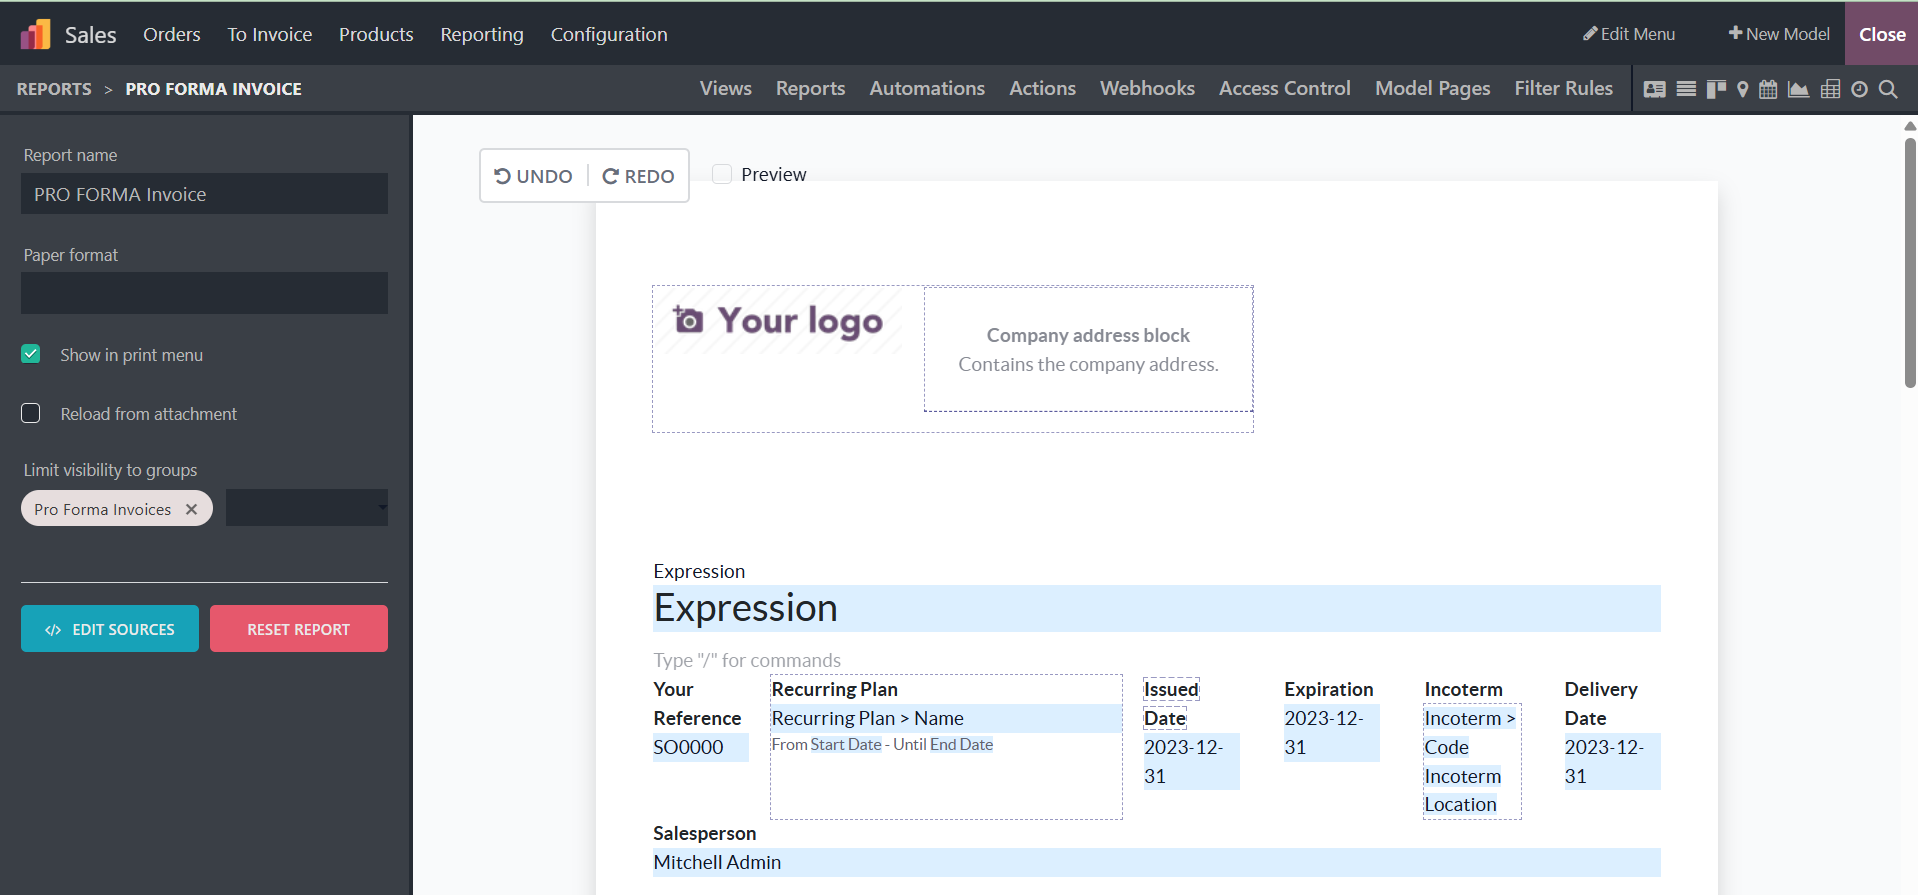
The report tool Field can be used to add a new field. Clicking on the field report tool will bring up the fields to add.
From the Report menu, you can select the Paper format and the required report name before seeing it. The Limit Visibility to Groups settings ensure that these groups may be identified by creating unique user groups for the platform. You may also make the Print option visible so that the user can print generated reports from the same report window.
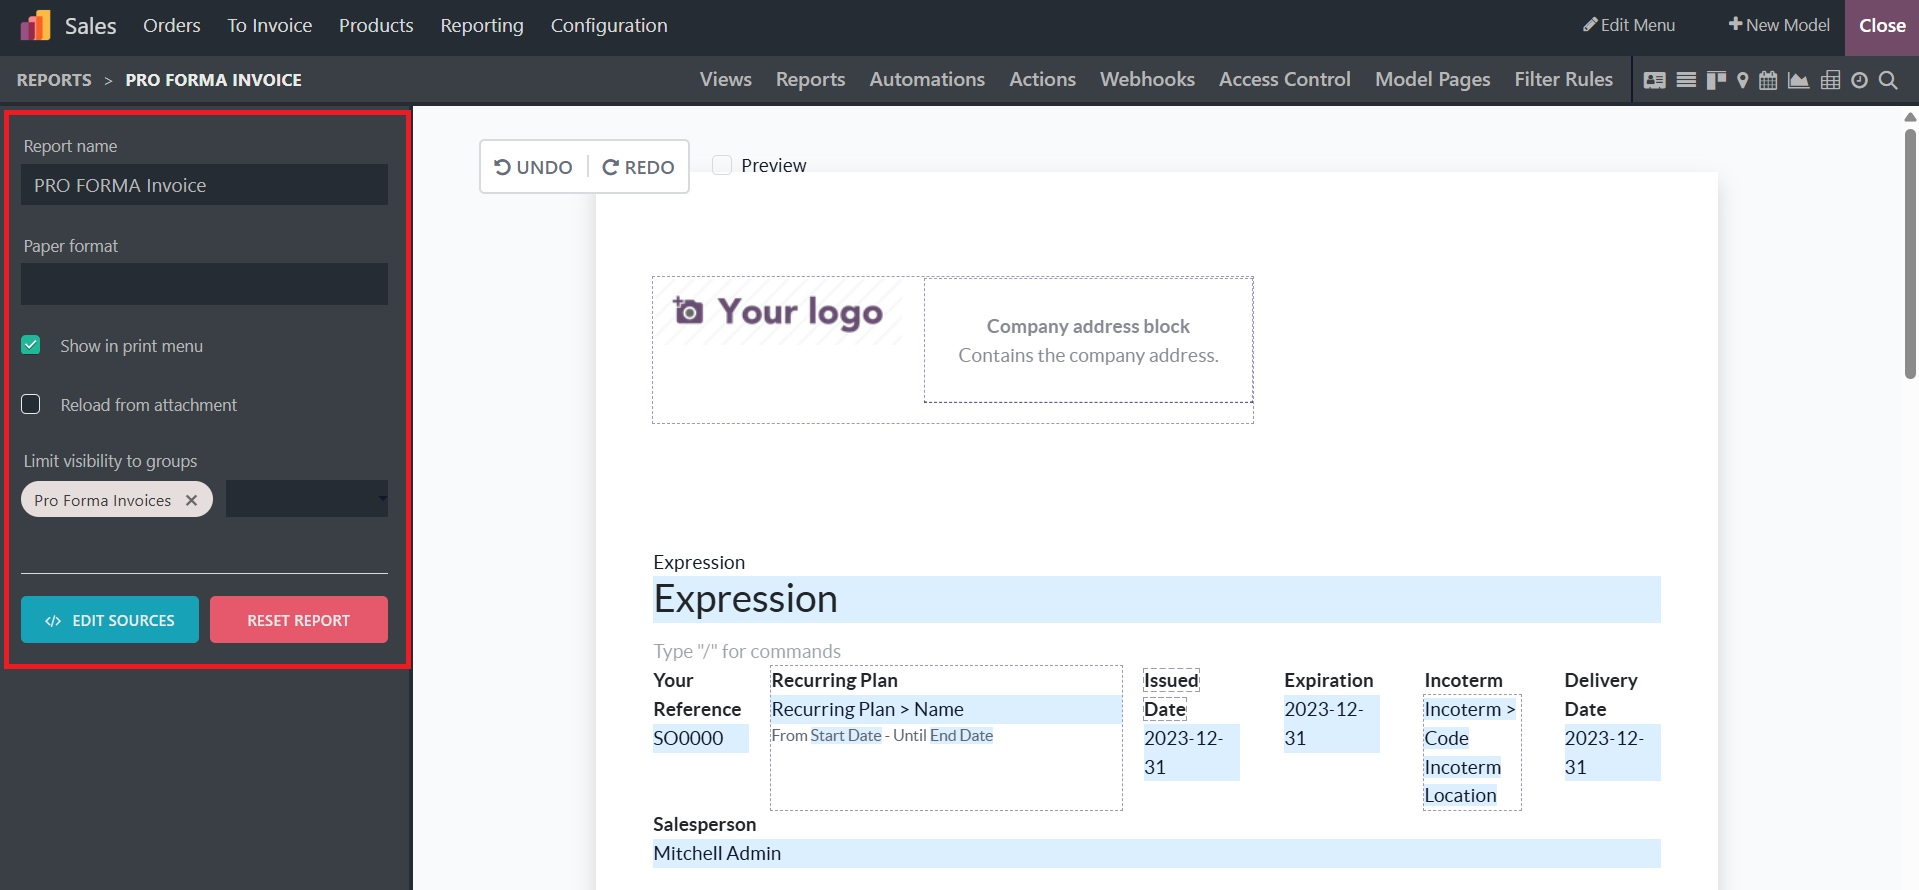
Several operational tools that are helpful for business operations can be configured in the report menus with the help of the Odoo Studio module. Just choose Add from the Print menu, then click the Reload form attachment option, which may be turned on or off depending on your needs. The user can check the procedures by using the Print option to obtain a preview of the report that will be printed. Every time new items are defined in a specific report, the Reload form Attachment activity will make sure that previously defined data is reloaded.
In the next section, we'll discuss how to comprehend the Odoo19 Studio module's Translate View.