The Marketing Automation module of Odoo 19 has been improved to make it easier for companies to develop more intelligent, goal-oriented marketing campaigns. The entire marketing process is streamlined by improved automation technologies, which increase productivity and save time. By enabling seamless end-to-end client journeys, the module enables companies to maintain constant communication with their target market.
Without human involvement, users may create unique email templates, start focused campaigns, and automate marketing tasks. Additionally, Odoo 19 adds more adaptable action types that let customers easily test and improve their marketing plans. All things considered, increasing client engagement and scaling business growth in Odoo 19 depend heavily on marketing automation.
Before you begin, install the Marketing Automation module from the Odoo 19 Apps menu.
Creation of Campaign
To view the dashboard, click the application right now.
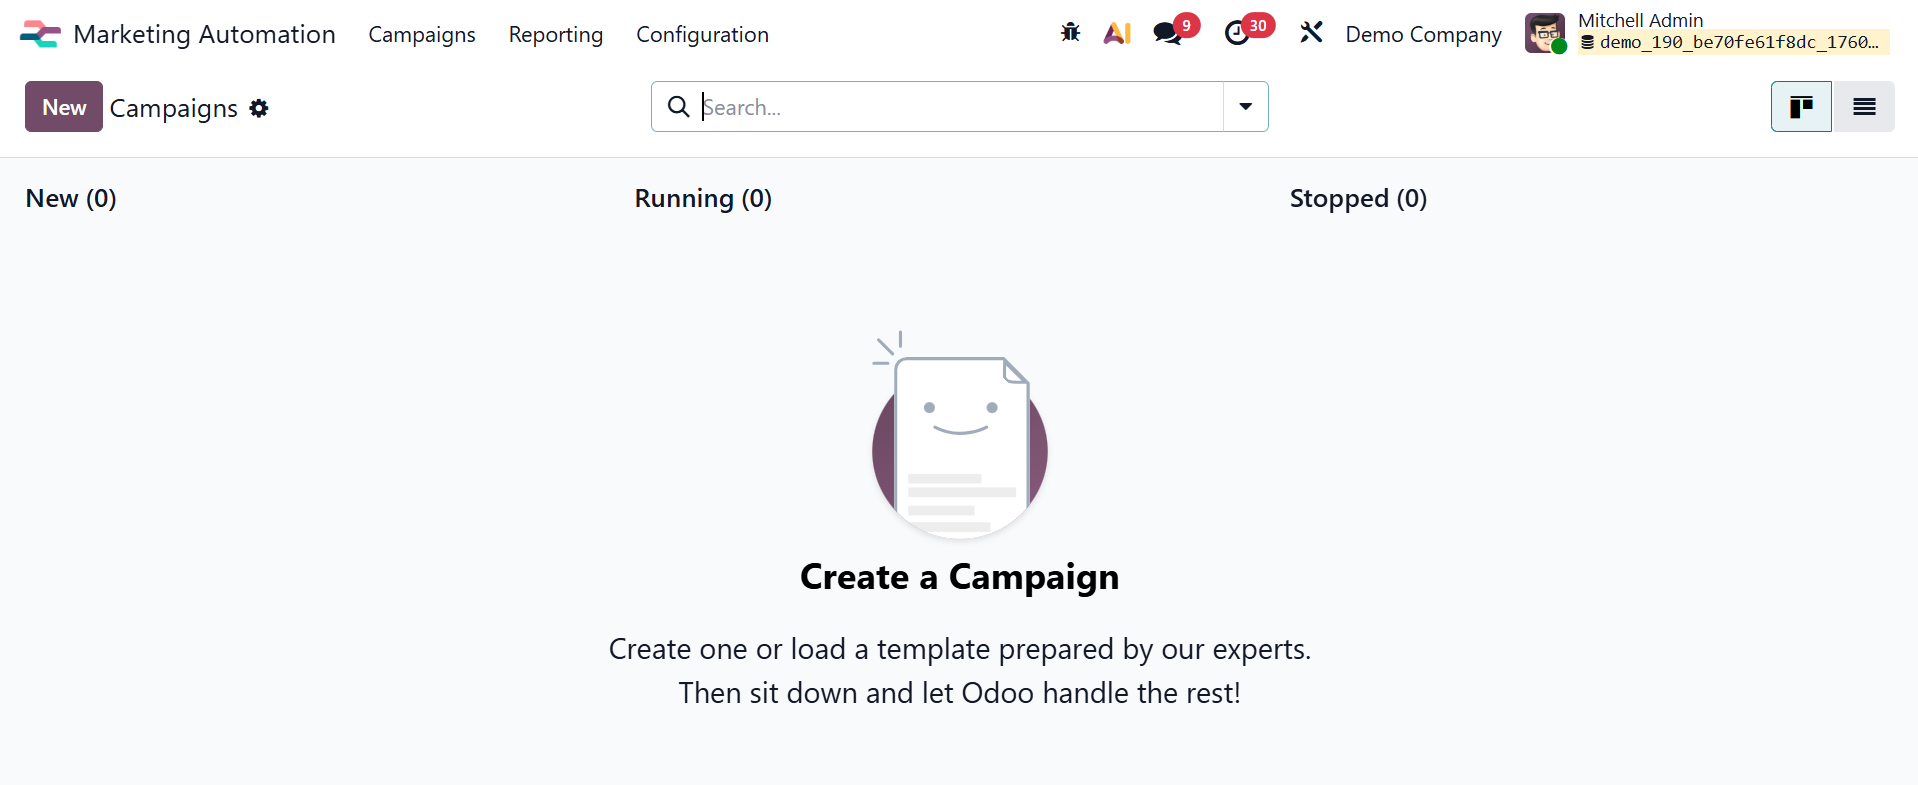
Users can either start a campaign from scratch or utilize a pre-made campaign template to get started with Odoo 19 Marketing Automation. In this context, a campaign is a series of automated marketing actions carried out according to predetermined time intervals, triggers, and filters. These procedures are made to effectively and methodically interact with a certain audience.
To launch a new campaign, use the Marketing Automation application from the main Odoo dashboard. A blank campaign form will open when you click the "New" button, allowing you to customize your marketing process to your company's needs.
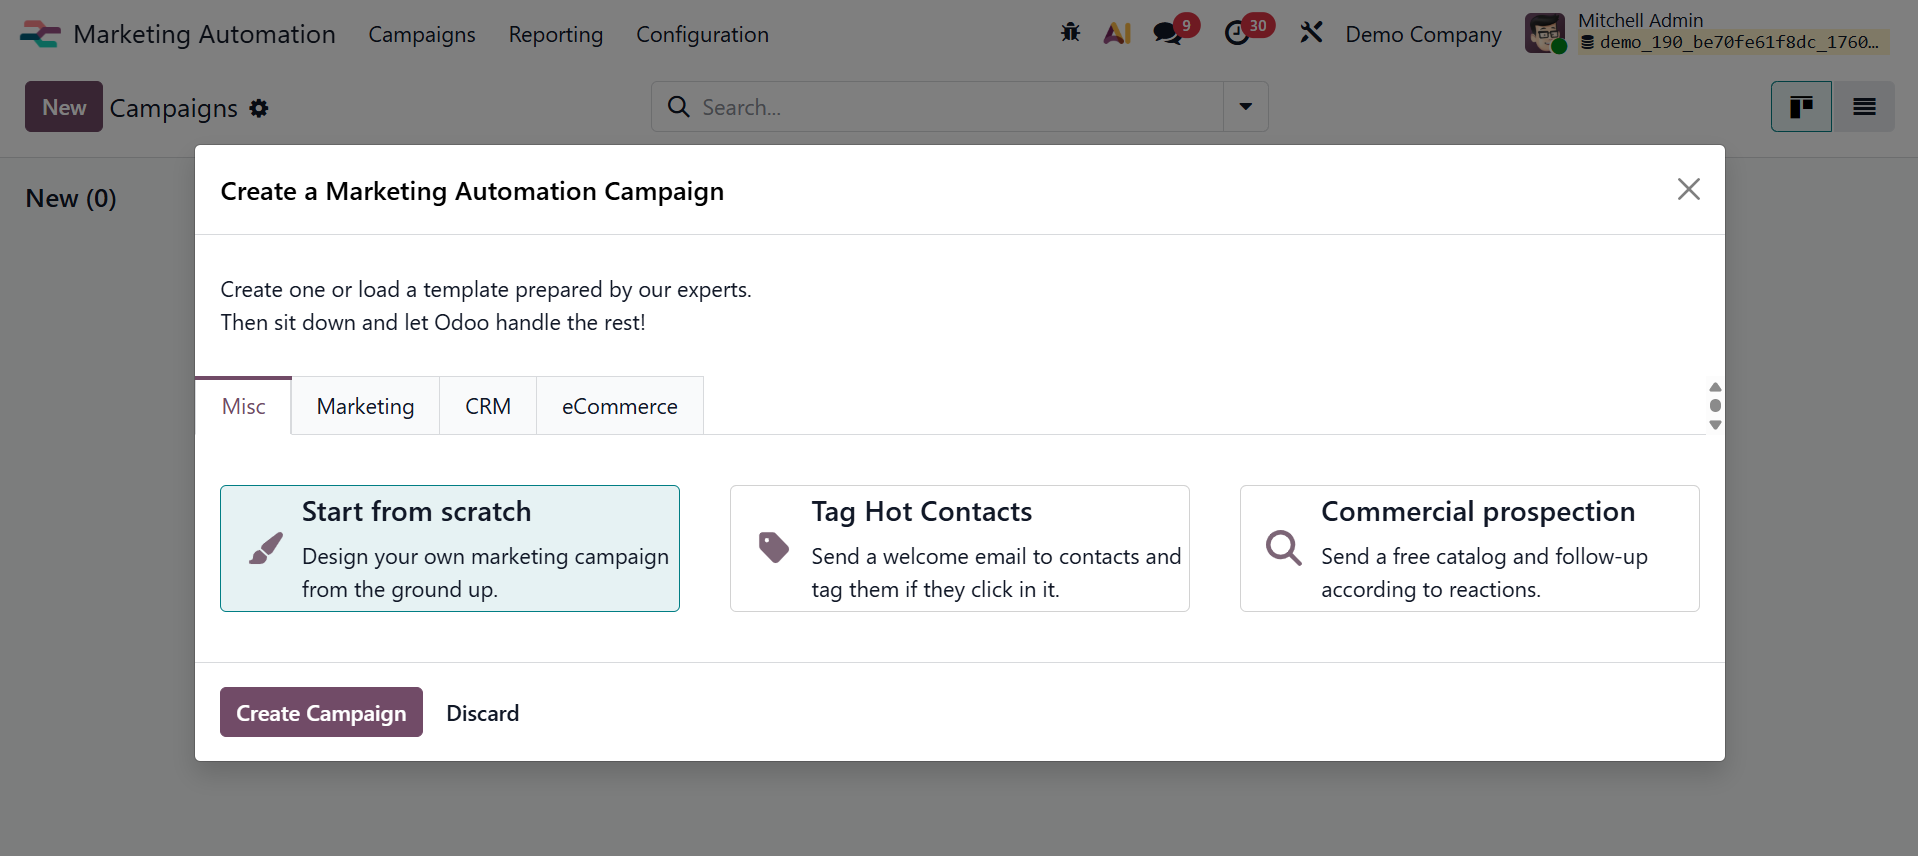
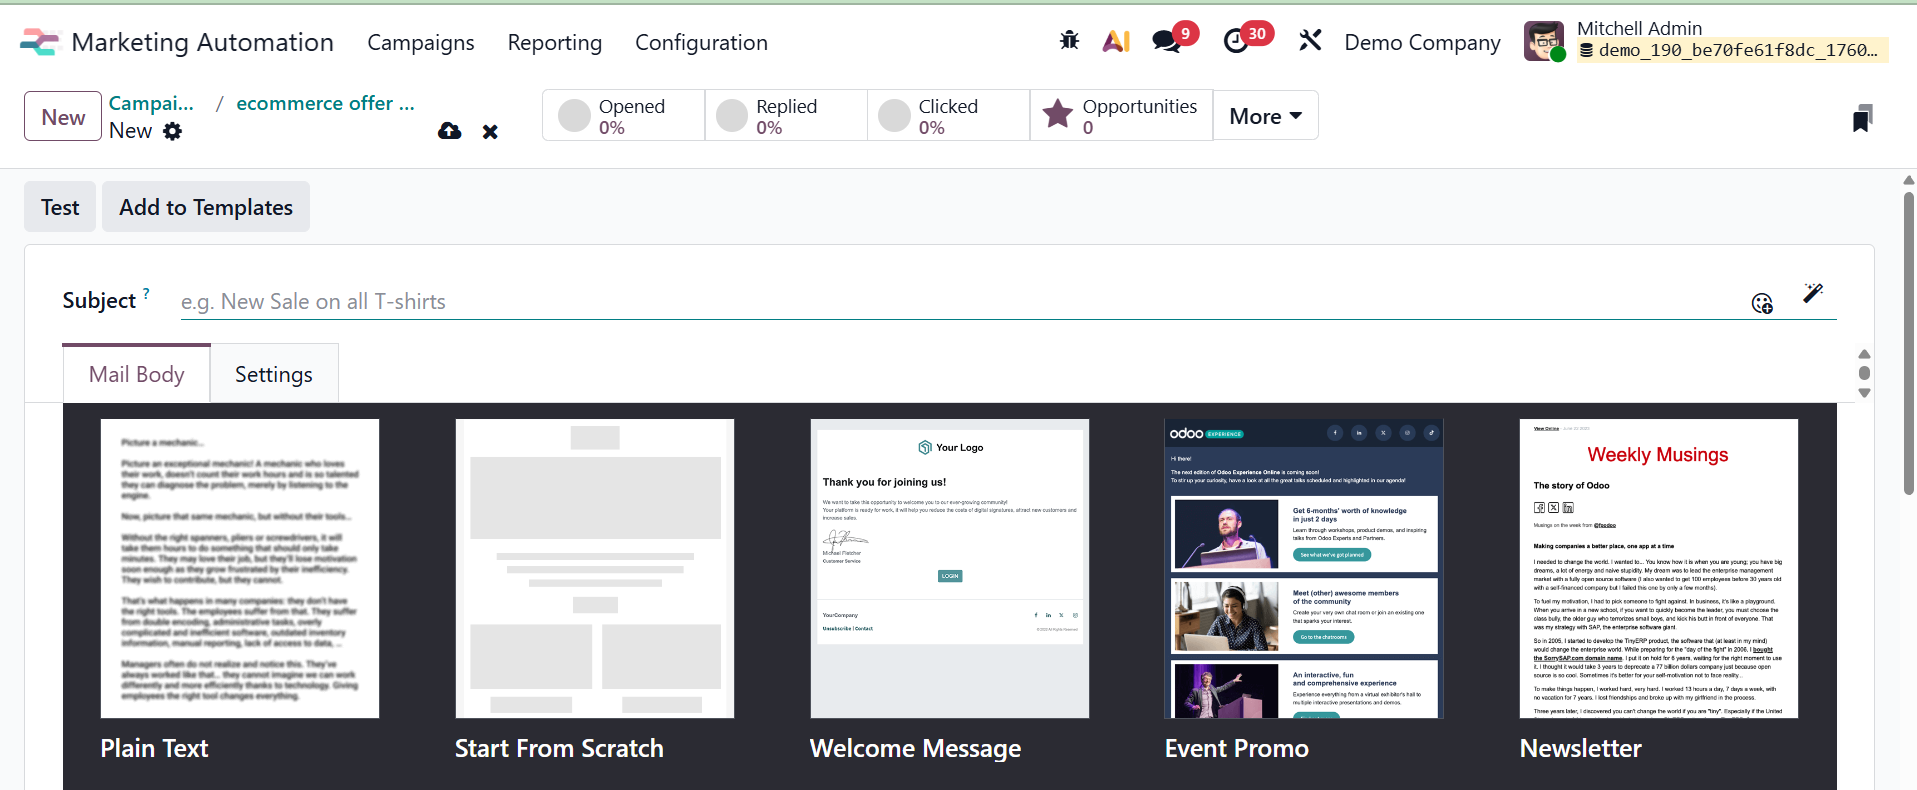
Odoo offers six pre-made campaign templates for users who prefer to begin with a predefined framework. These templates are very helpful for users who are new to marketing automation and provide a handy place to start. Note that these template cards are only displayed on the Campaigns dashboard when the system has not yet generated any campaigns. The dashboard changes to a Kanban view, showing both live and archived campaigns, as soon as a campaign is created.
The six campaign template cards shown below will appear if there are no campaigns in the database:
-
Tag Hot Contact
Sends them a welcome email, and if they click on it, a tag is applied.
-
Welcome Flow
New subscribers should receive a welcome email, and addresses that result in delivery bounces should be removed.
-
Double-opt-in
Asks new recipients by email to confirm that they want to receive future communications.
-
Commercial Prospection
Prospects receive a catalog, and depending on their response, follow-up actions are initiated.
-
Schedule Calls
When a lead is generated for an existing contact, a call with the salesperson is automatically scheduled.
-
Prioritise Hot Leads
Sends new leads an introductory email and, should they open it, labels them as high priority.
-
Purchase Follow-up
When a customer completes a transaction, this campaign is initiated. It encourages cross-selling and recurring interaction by sending a follow-up email, usually to express gratitude or offer similar products.
-
Create Repeat Customers
This campaign re-engages existing consumers with unique discounts or tailored product recommendations based on their prior purchase behavior, with the goal of converting one-time purchases into devoted patrons.
By streamlining the campaign design process, these templates let firms execute successful marketing plans with little setup time.
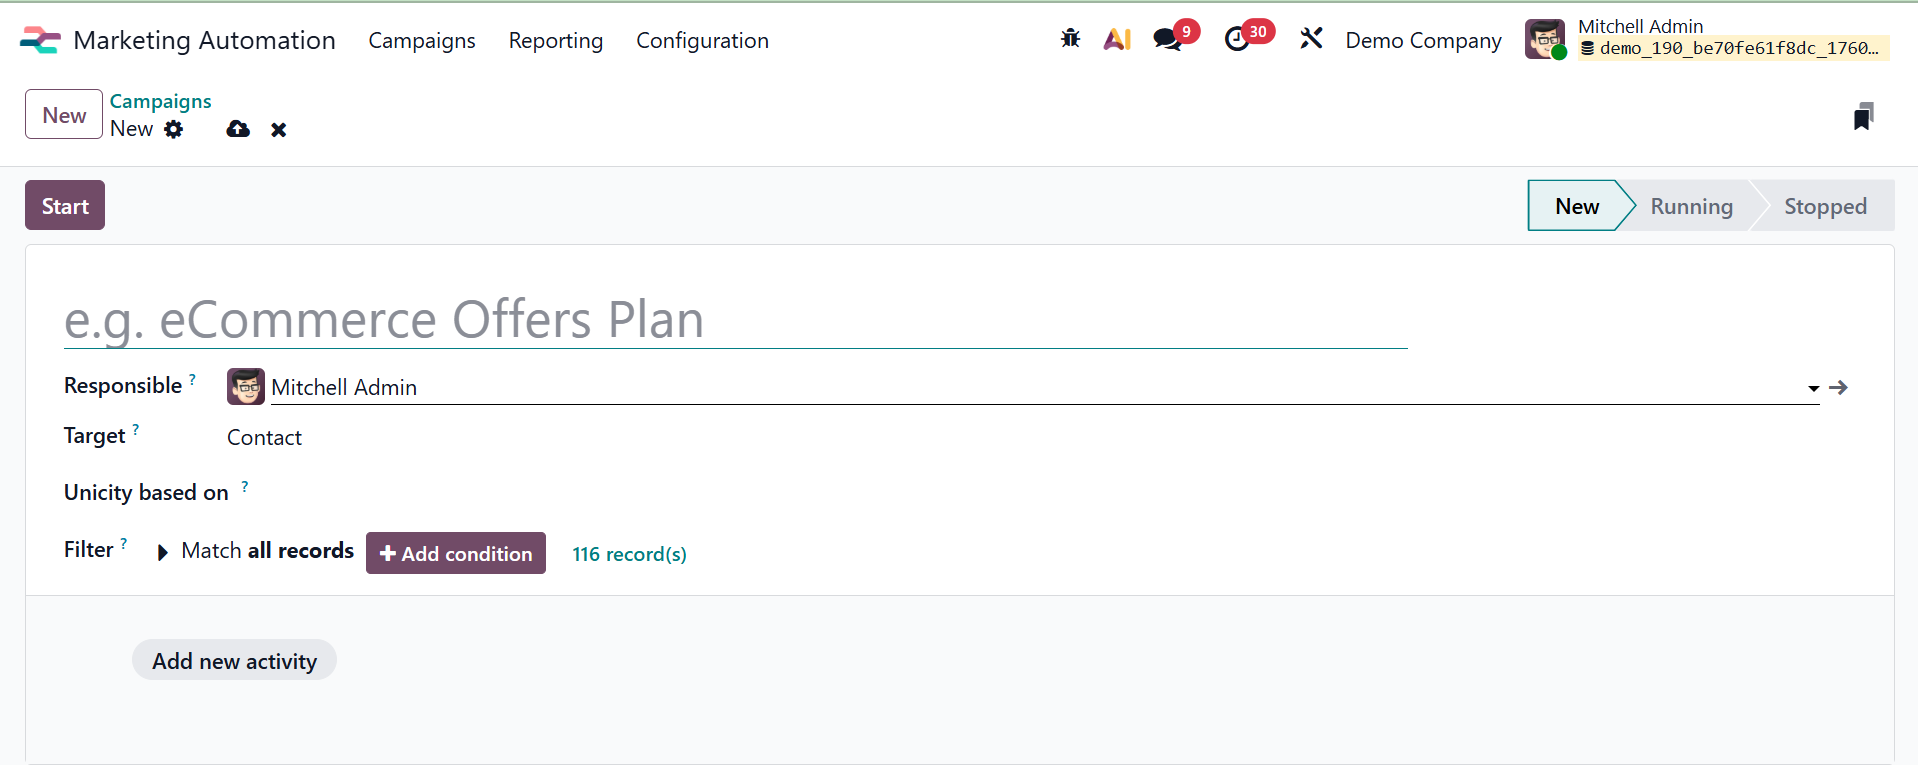
A structured form intended to gather crucial data for the campaign setup is shown to the user when they create a new campaign in Odoo 18 Marketing Automation. This form's main fields are as follows:
Responsible: The campaign title is specified in this field. It helps set the campaign apart from others in the system and acts as a unique identifier.
Target: Outlines the kinds of records, such as Lead/Opportunity, Event Registration, and Contact, that are permitted to be utilized in the campaign. The fields that are accessible throughout the campaign, including those in the Filter section and dynamic placeholders, are specified by the allocated records model.
Unicity is based on: Indicates the Target model field where duplication must be avoided. Although any available field can be used, the Email field is typically used.
Filter: To fine-tune the targeting settings inside the designated Target model, it comes with an interactive form with programmable logic. Refer to the Defining Filters section for further information.
Add a New Activity: Users can set up one or more actions to be carried out within the campaign by choosing this option.
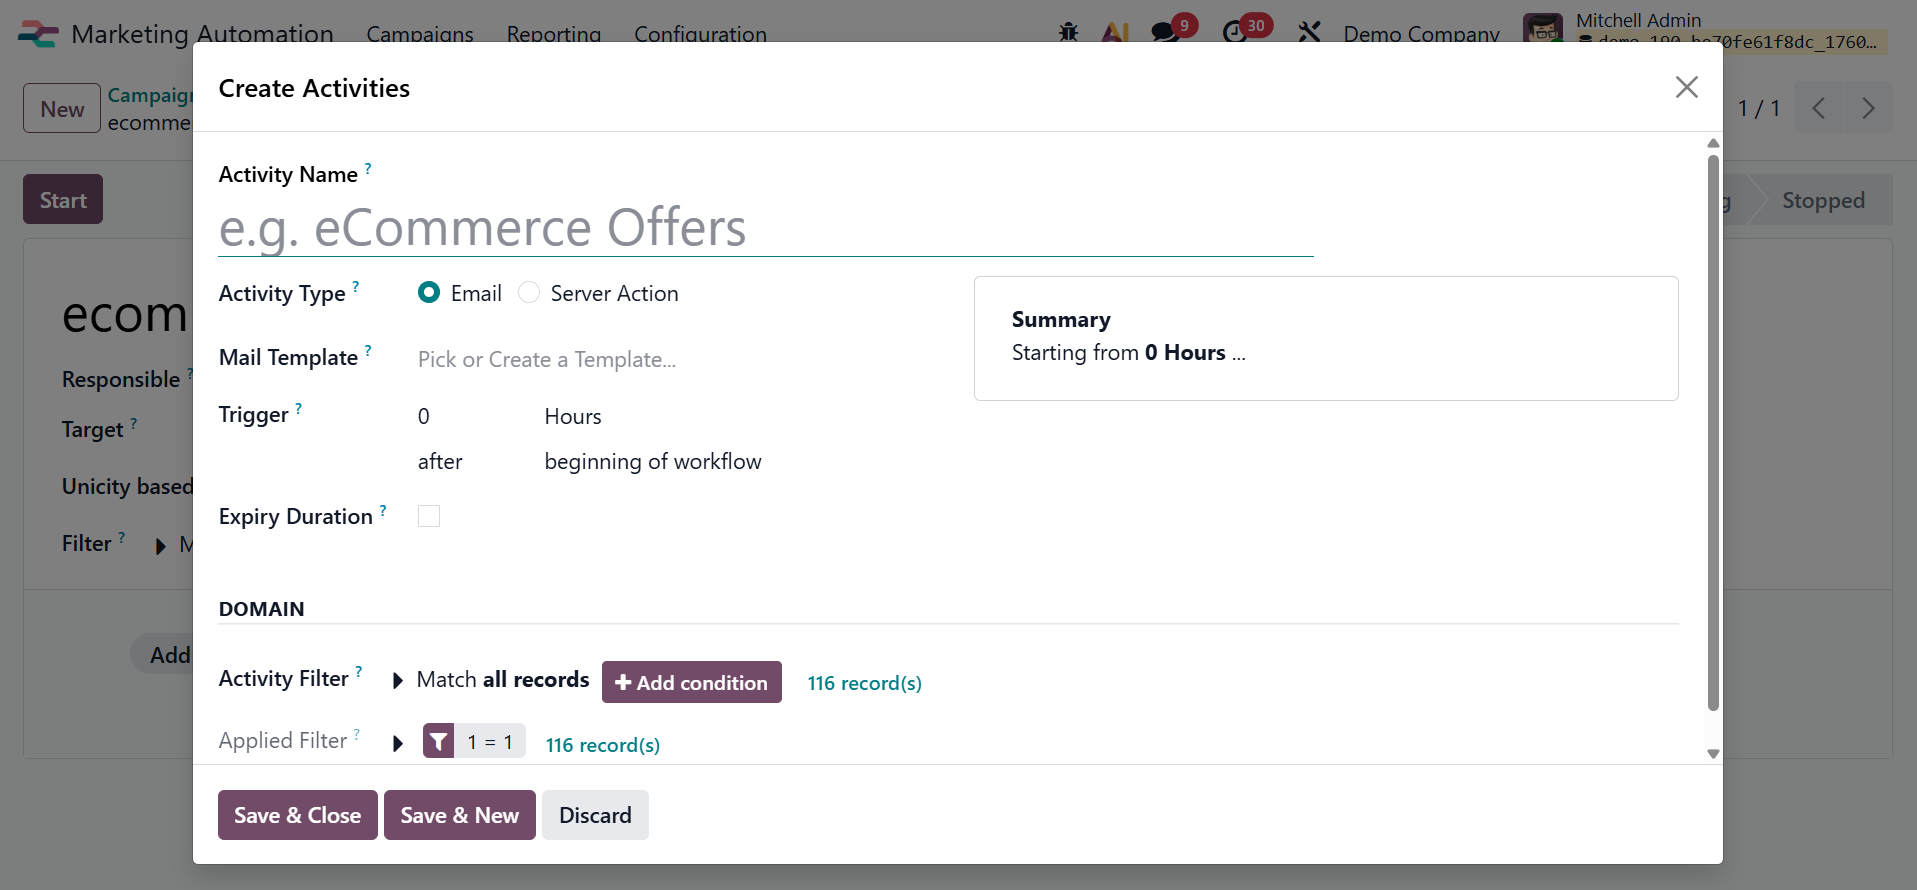
Filters, delays, and triggers can be used to customize each activity to fit the intended engagement strategy. Each action, such as sending an email, assigning a task, or applying a tag, represents a distinct stage in the marketing workflow. The Marketing Automation software offers two main kinds of activities:
Email: a message sent to the intended recipient.
Server action: It is an internal database operation that is carried out.
The other options here include:
Filter: You can choose to view just entries that follow a specific rule by using the filter.
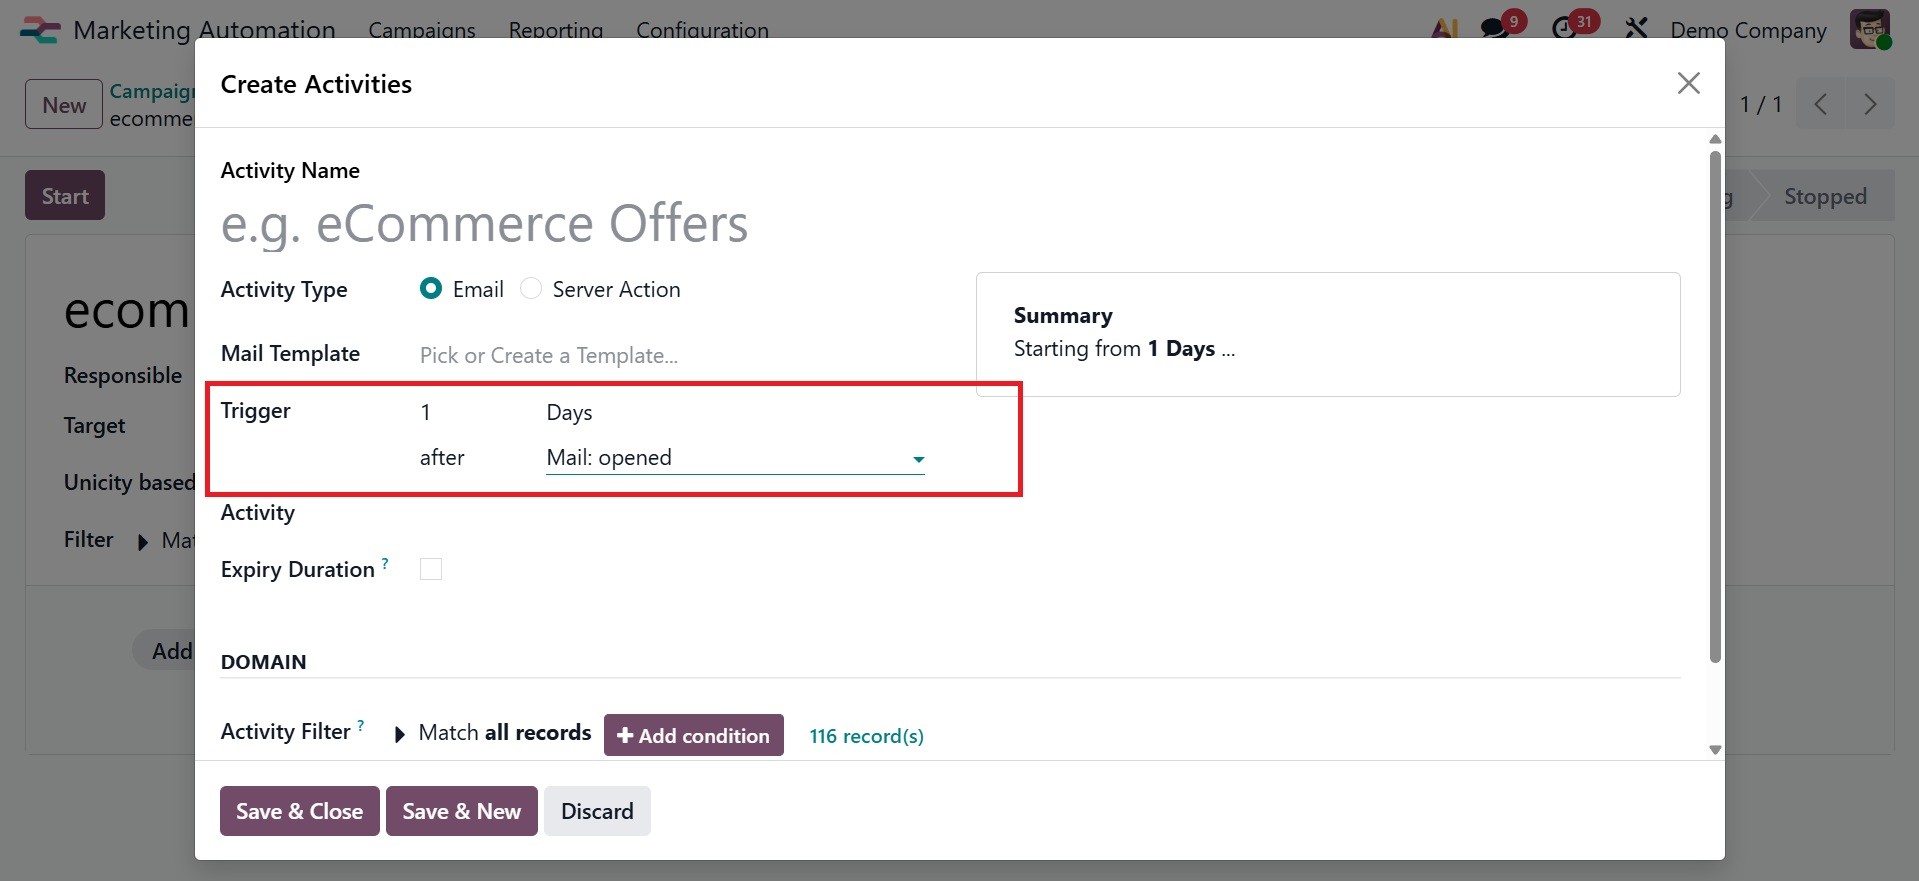
Trigger: A time frame, whether an hour, week, or month, is a trigger. You can establish triggers in various time periods, including hours, days, weeks, and months, by viewing the Trigger option.
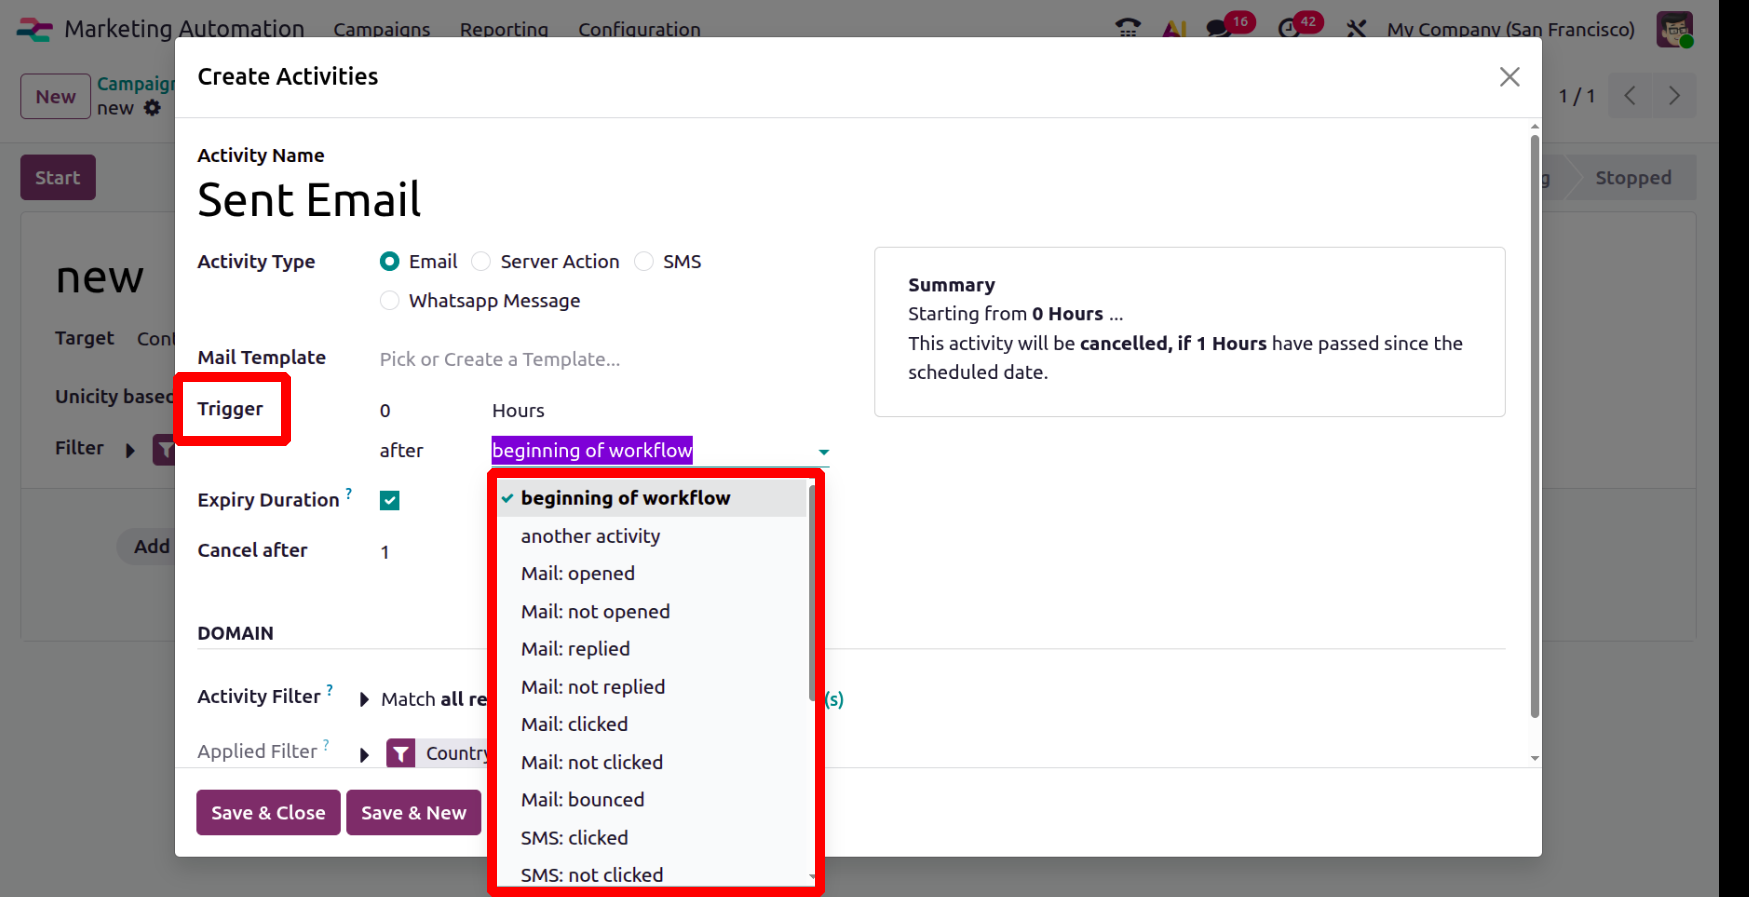
Here, for instance, we can specify one hour after the campaign starts, one day after the mail opens, and many other things.
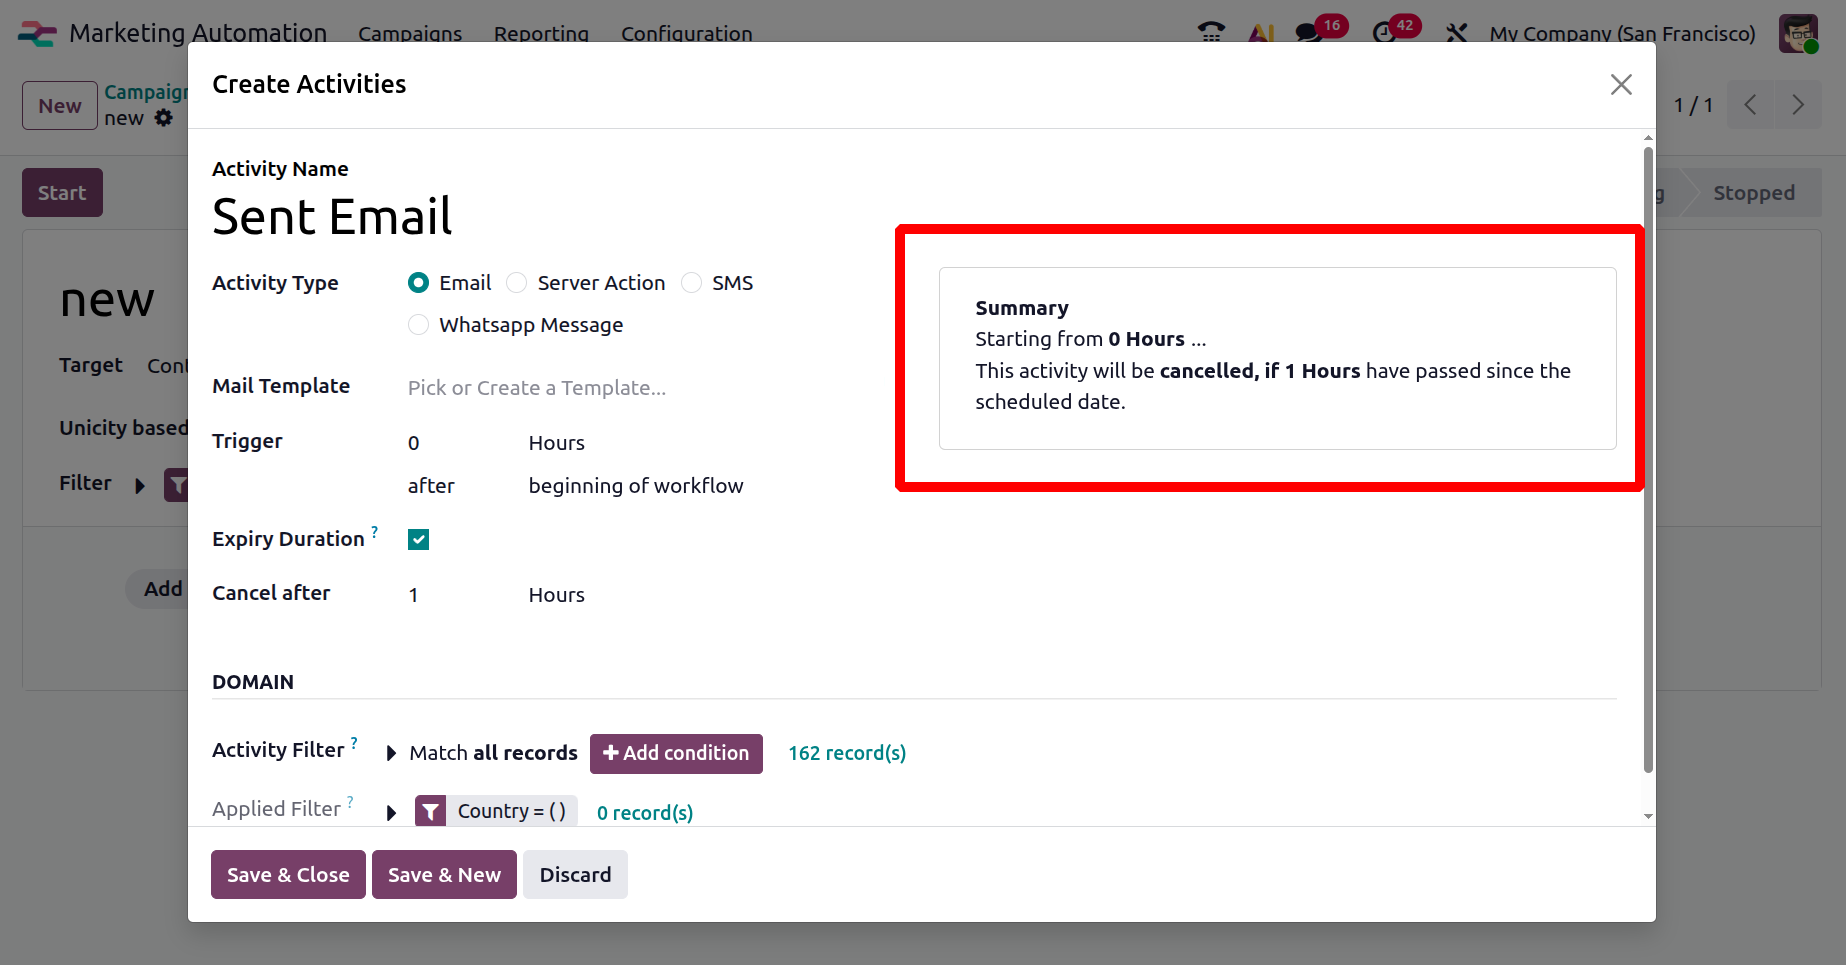
Expiration Duration: The time and date that the campaign expires is known as the expiry duration.
Domain: The domain belongs to a distinct category.
Activity filter: It makes choosing records easier.
Applied filter: The applied filter is the rule that matches the filtered document.
Clicking the Add condition button will display a new row with adjustable rule parameters, which may be used to fine-tune a campaign's filter rules. To learn more about creating filter rules, see the documentation for Search, Filter, and Group Records. A record(s) button at the bottom of the filter rules shows how many records this domain is targeting in total. The targeted records can be viewed in a Selected Records pop-up window that opens when you select the record(s) button.
Then, there is a Summary section, as shown below. Without having to travel to the entire plan configuration, the Summary area dynamically presents a summary of the selected plan, providing a brief grasp of its specifics and goal.
In order to provide clarity and ease of review prior to scheduling or confirming the activity, this section serves to compile important information about the proposed activity.
Configuration of Mail Template
You can choose a template in the Mail Template section if you choose Email as the Activity Type.
Start typing the new template's title in the Mail Template box, then choose Build and Edit to open a Create Marketing Template pop-up window. This will build a new template right from the Mail Template field. Create and set up the new email template now. It opens a pop-up window where you may choose or create a new email template for your activity.
The left side of the screen will display a large assortment of building blocks. To organize your material, simply drag & drop these blocks into the email body.
You can set up extra features, including attaching files, selecting a Reply-To email address, and modifying other sending choices, when the email content is complete. Once the setting is complete, click Save & Close to complete the email activity creation and scheduling.
After that, you will be given the option to Save and Close to go back to the main campaign form or Save and New to add another activity right away.
To finish the setup, click Save after selecting the child activity type (email, SMS, or server action) and setting its trigger. The condition you choose will determine how the child activity operates. After adding all the values, you may click Save.
Creation of Child Activity
In the Workflow part of a marketing campaign form, you can also click Add child activity, which is at the bottom of each activity block, to add a child activity.
A child activity is a sub-activity that is linked to and initiated by its parent activity, which is the activity above it. Because it is slightly indented beneath its parent action, a child activity is simple to identify.
Click the "Add child activity" button located at the bottom of the activity box to add a child-friendly activity. It is up to you to determine when the child action should start, such as when the first email is clicked, opened, or not. If a parent email is specified and a child action is added "2 days after parent is sent," Odoo will figure out when the parent was sent and then automatically complete the child activity two days later.
To start a child activity, Odoo offers a variety of triggering options, all of which rely on the trigger configurations associated with the parent activity. Hover your cursor over Add child activity under the selected parent activity to bring up a menu with options for child activity triggers, as shown below.
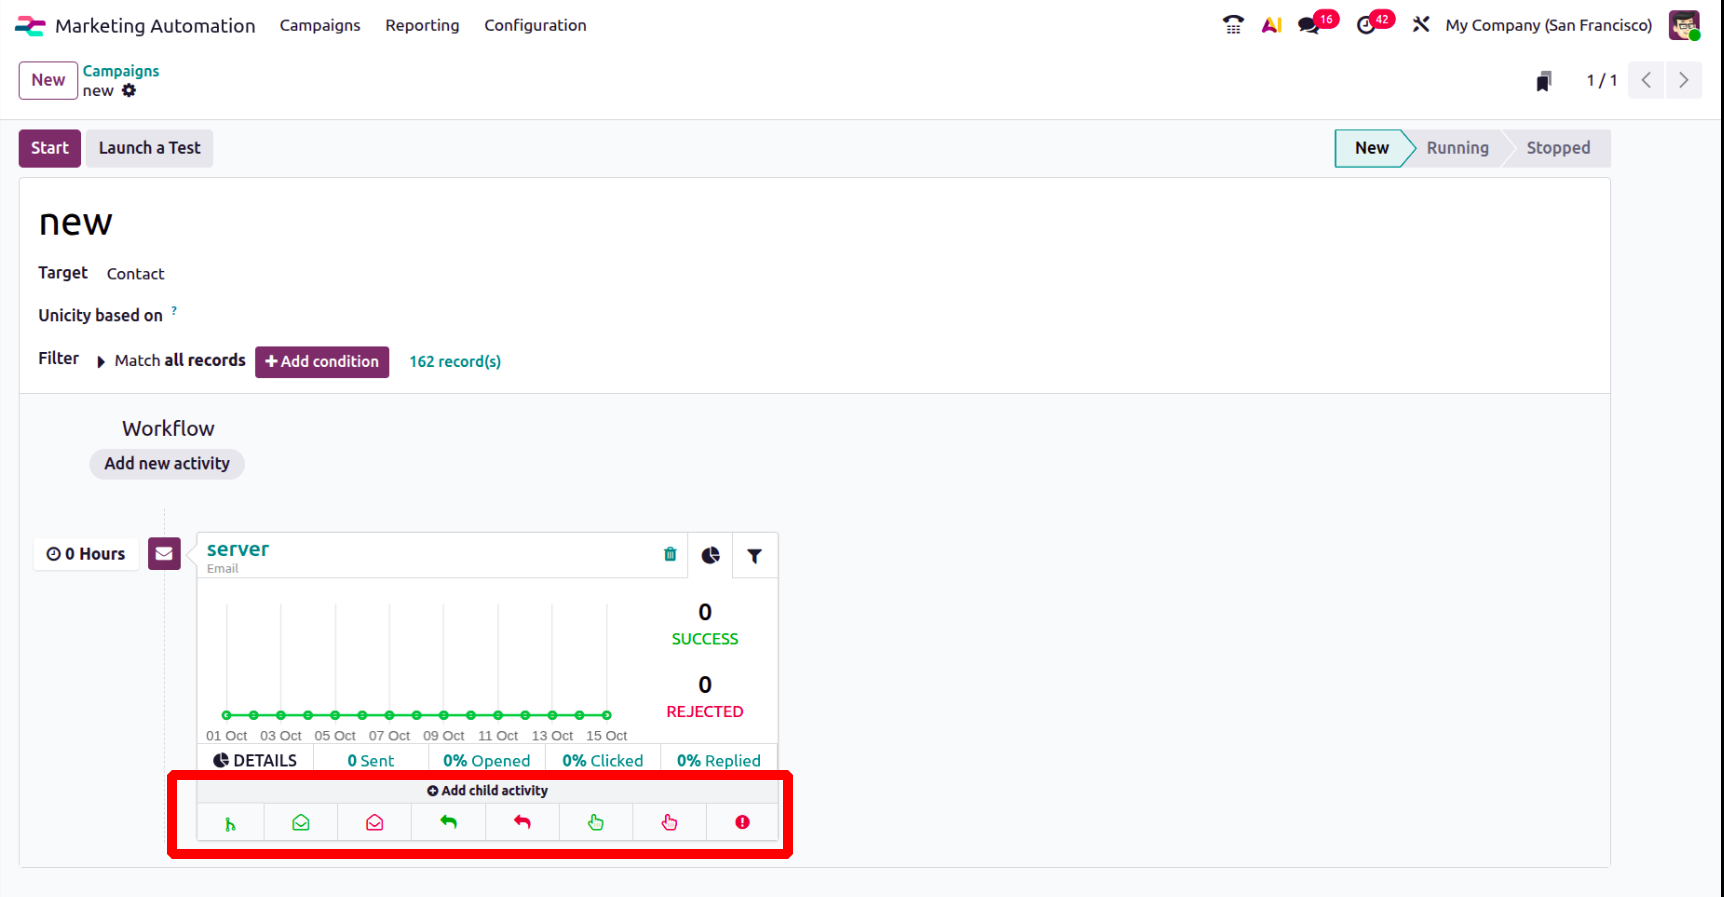
Choose from any of the following triggers for child activity:
Add Another Activity: Adds an additional activity right away.
Opened: If the recipient opens the mail, the subsequent action will begin.
Not Opened: Should the receiver fail to open the mail, the subsequent action will be initiated.
Replied: If the receiver responds to the email, the subsequent action will be initiated.
Not Replied: If the receiver does not respond to the email, the subsequent action will be initiated.
Clicked: If the recipient clicks on a link in the email, the subsequent action will be initiated.
Not Clicked: If a link in the email is not clicked by the recipient, the subsequent action will be initiated.
Bounced: If the letter is bounced (not sent), the subsequent action will be initiated.
The user can set up the child activity in the same manner as they would for a standard workflow activity after choosing a trigger.
The window for creating the child activity is very similar to the primary activity, as was already explained. Three activity types are available for users to choose from: server action, SMS, and email. To decide when the child activity should be carried out, the proper trigger condition can then be established.
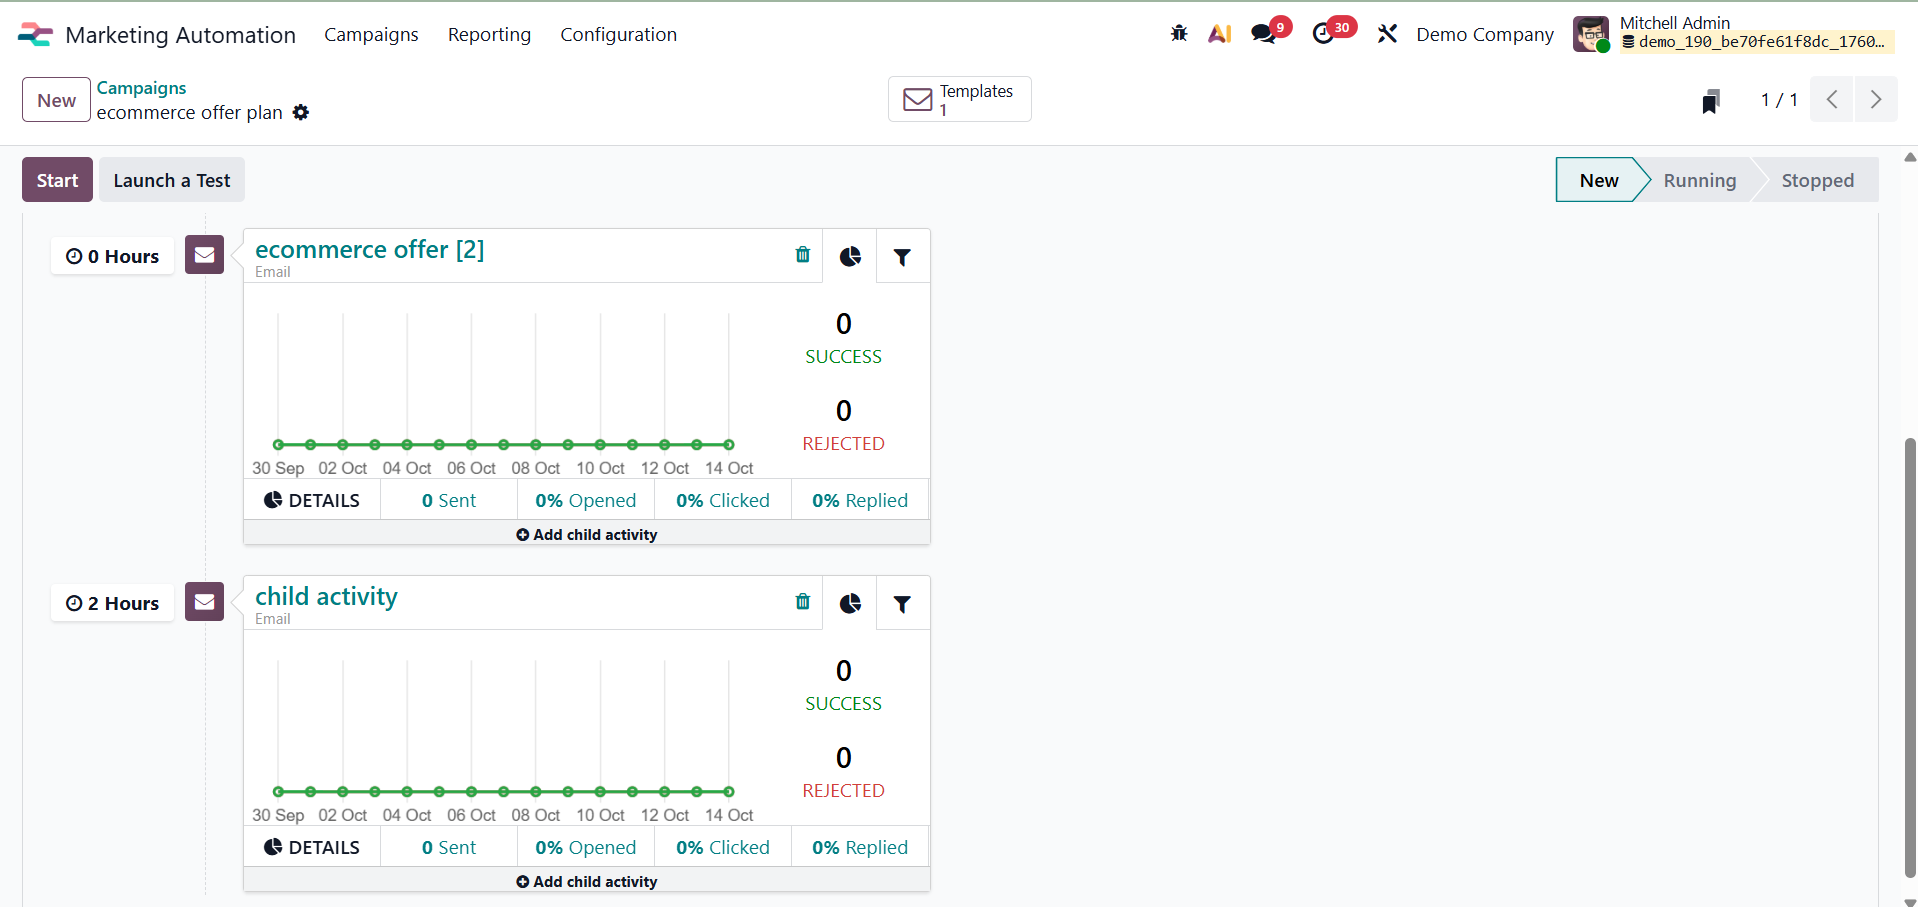
Click Save to complete the child activity after all the configuration is finished. The previous activity will be continued with the addition of this one. For instance, the child’s task could be planned to begin an hour after the receiver opens the first email.
To initiate the campaign, click the Start button. In accordance with the specified activities and trigger conditions, this will start the automated workflow.
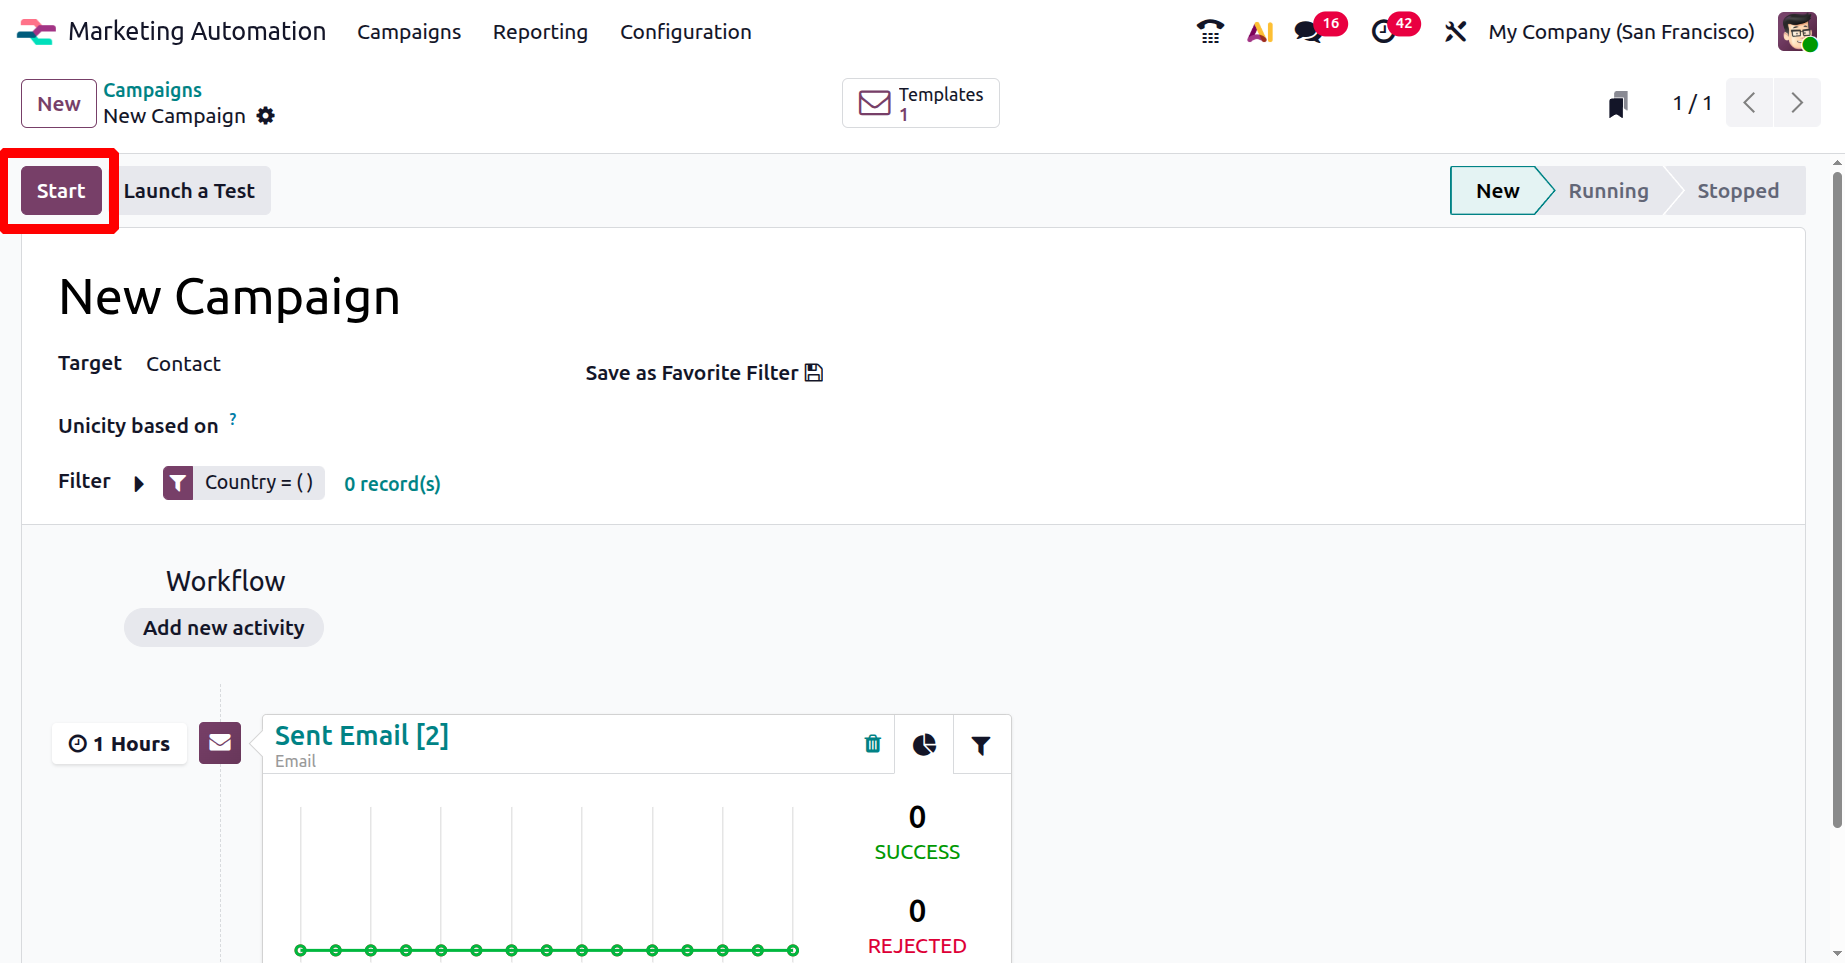
Click the Stop button to end the campaign. All planned and ongoing campaign-related activities will come to an end as a result.

Click the Launch a Test button to test the campaign. Users can now mimic the activity flow thanks to this.

Click the Play button to start the activity for a certain person.
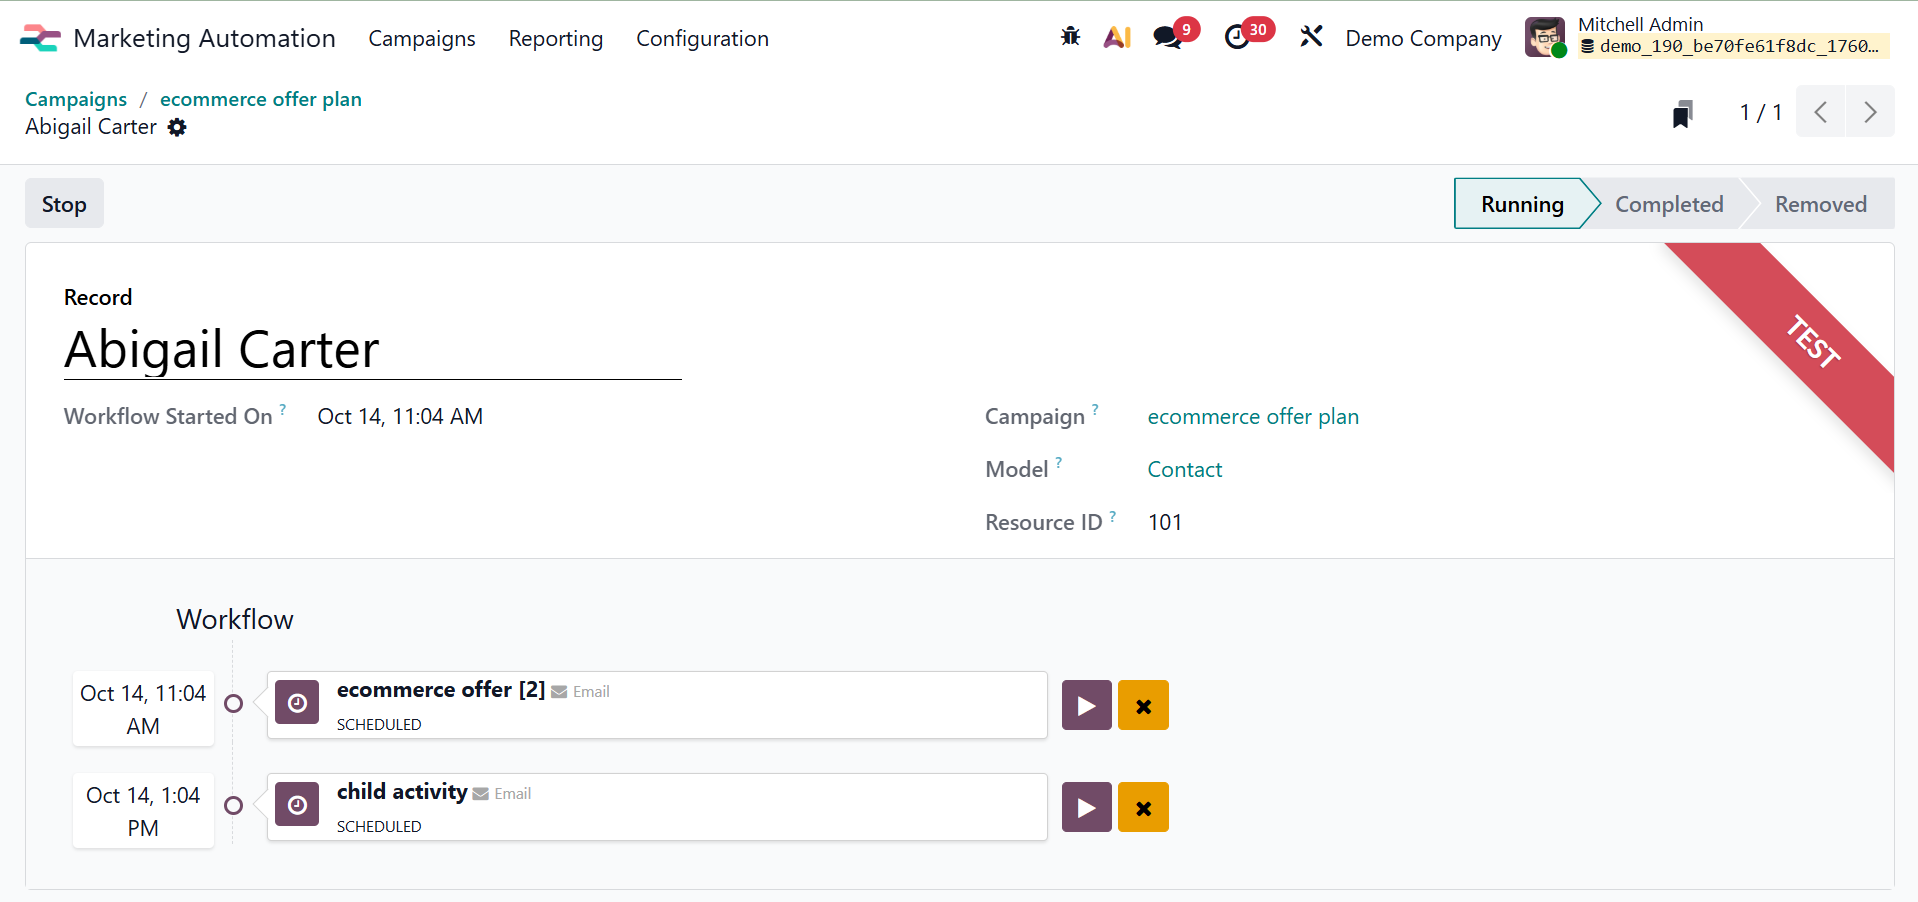
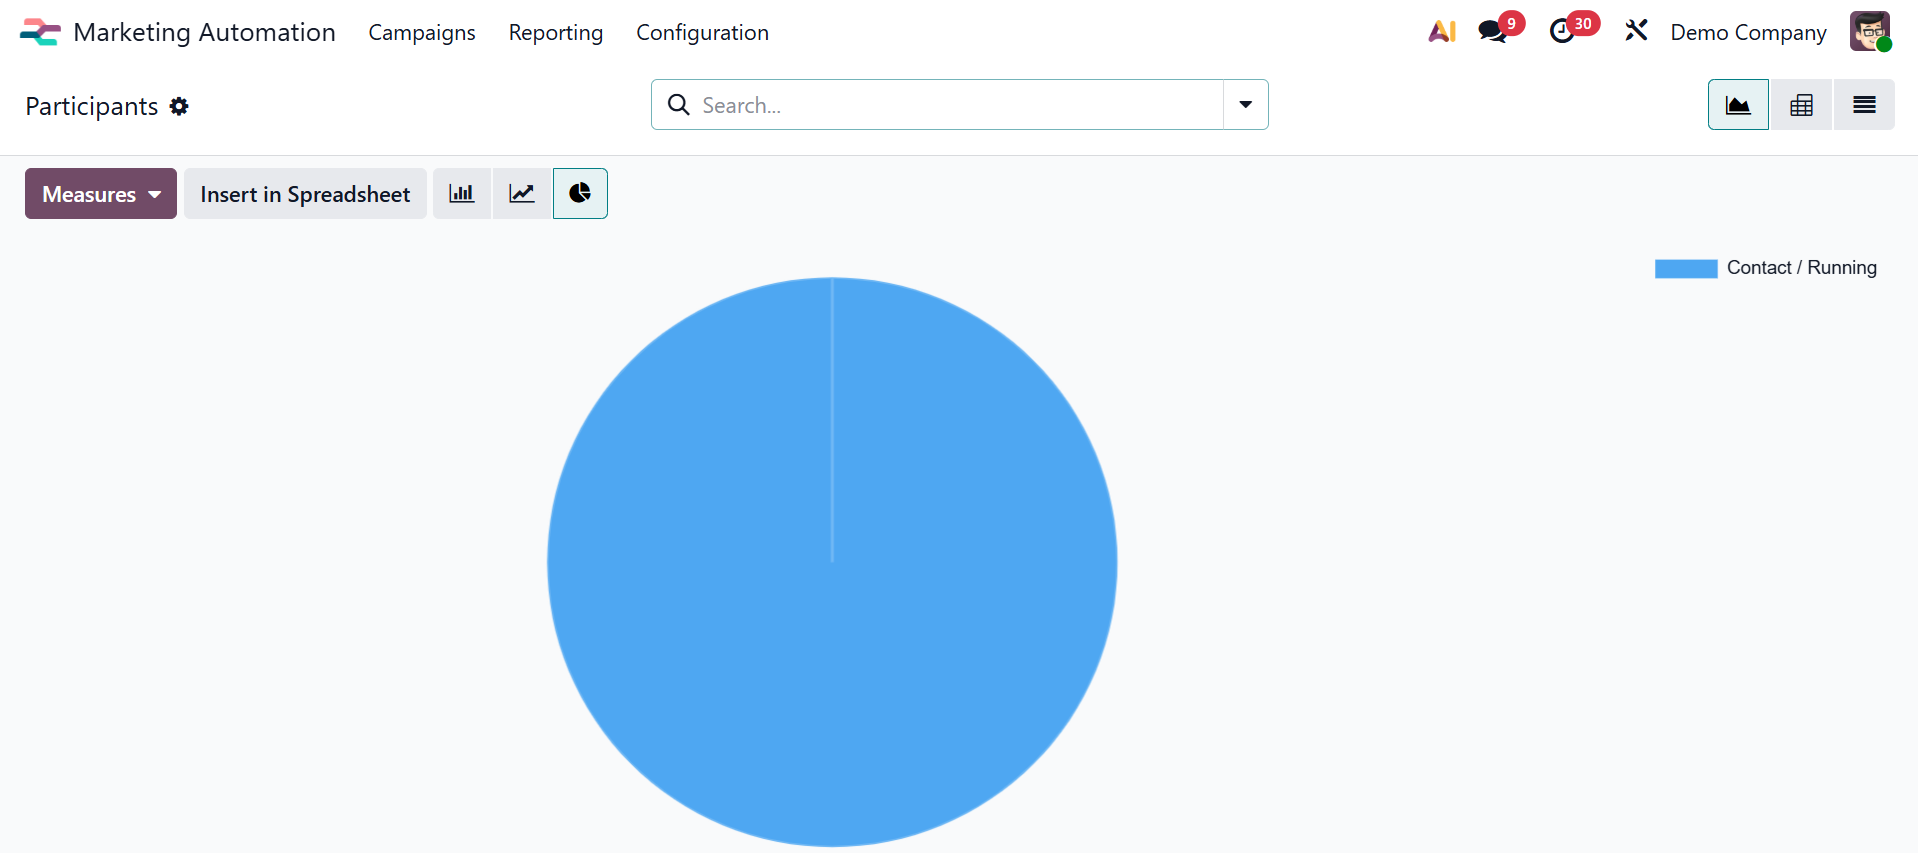
You may get a list of every participant in the campaign by choosing the Participants option. The particular activities planned for a person can be seen by clicking on their name.
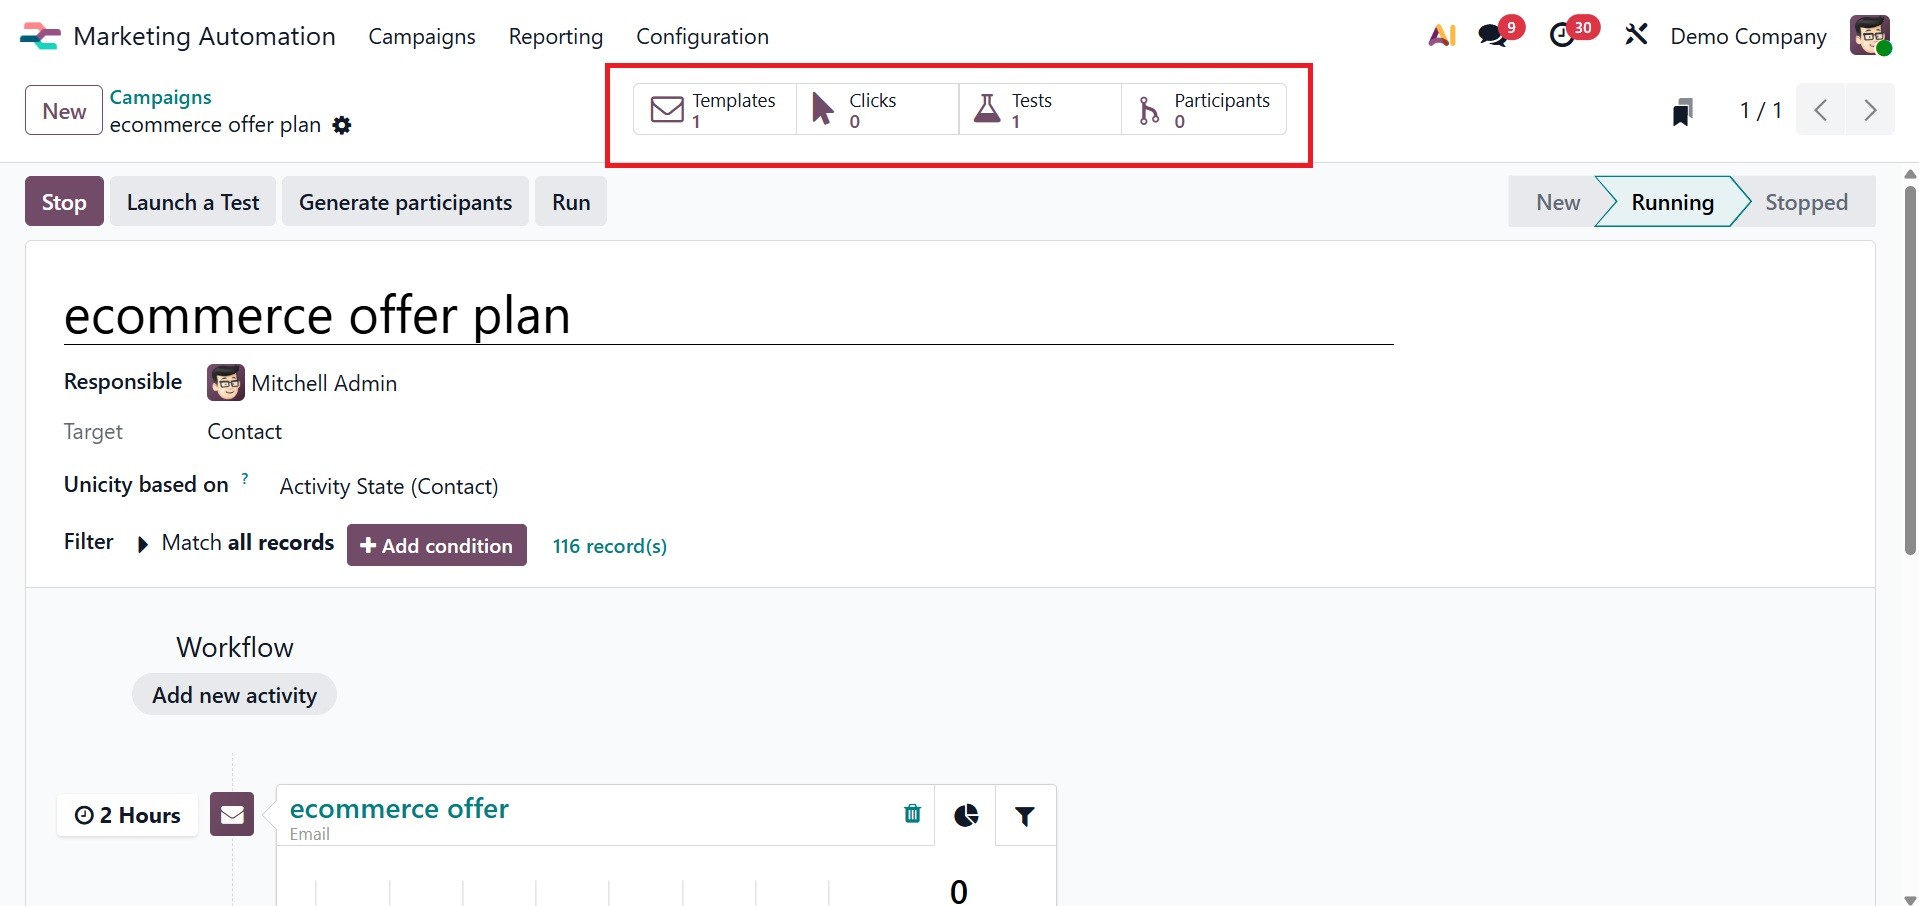
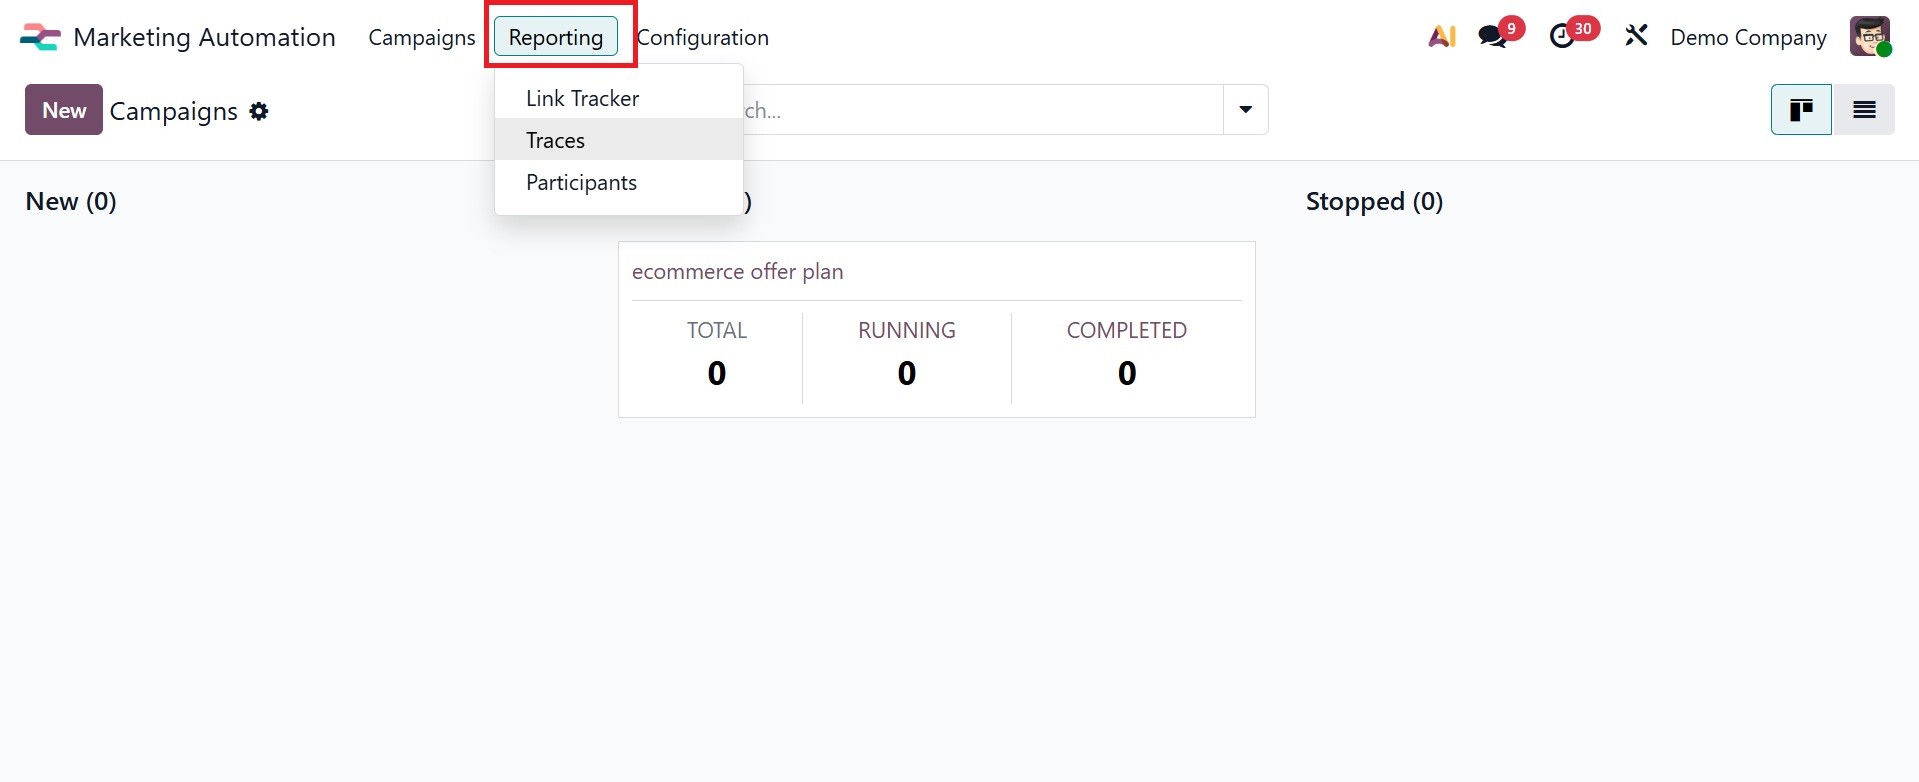
Report Generation
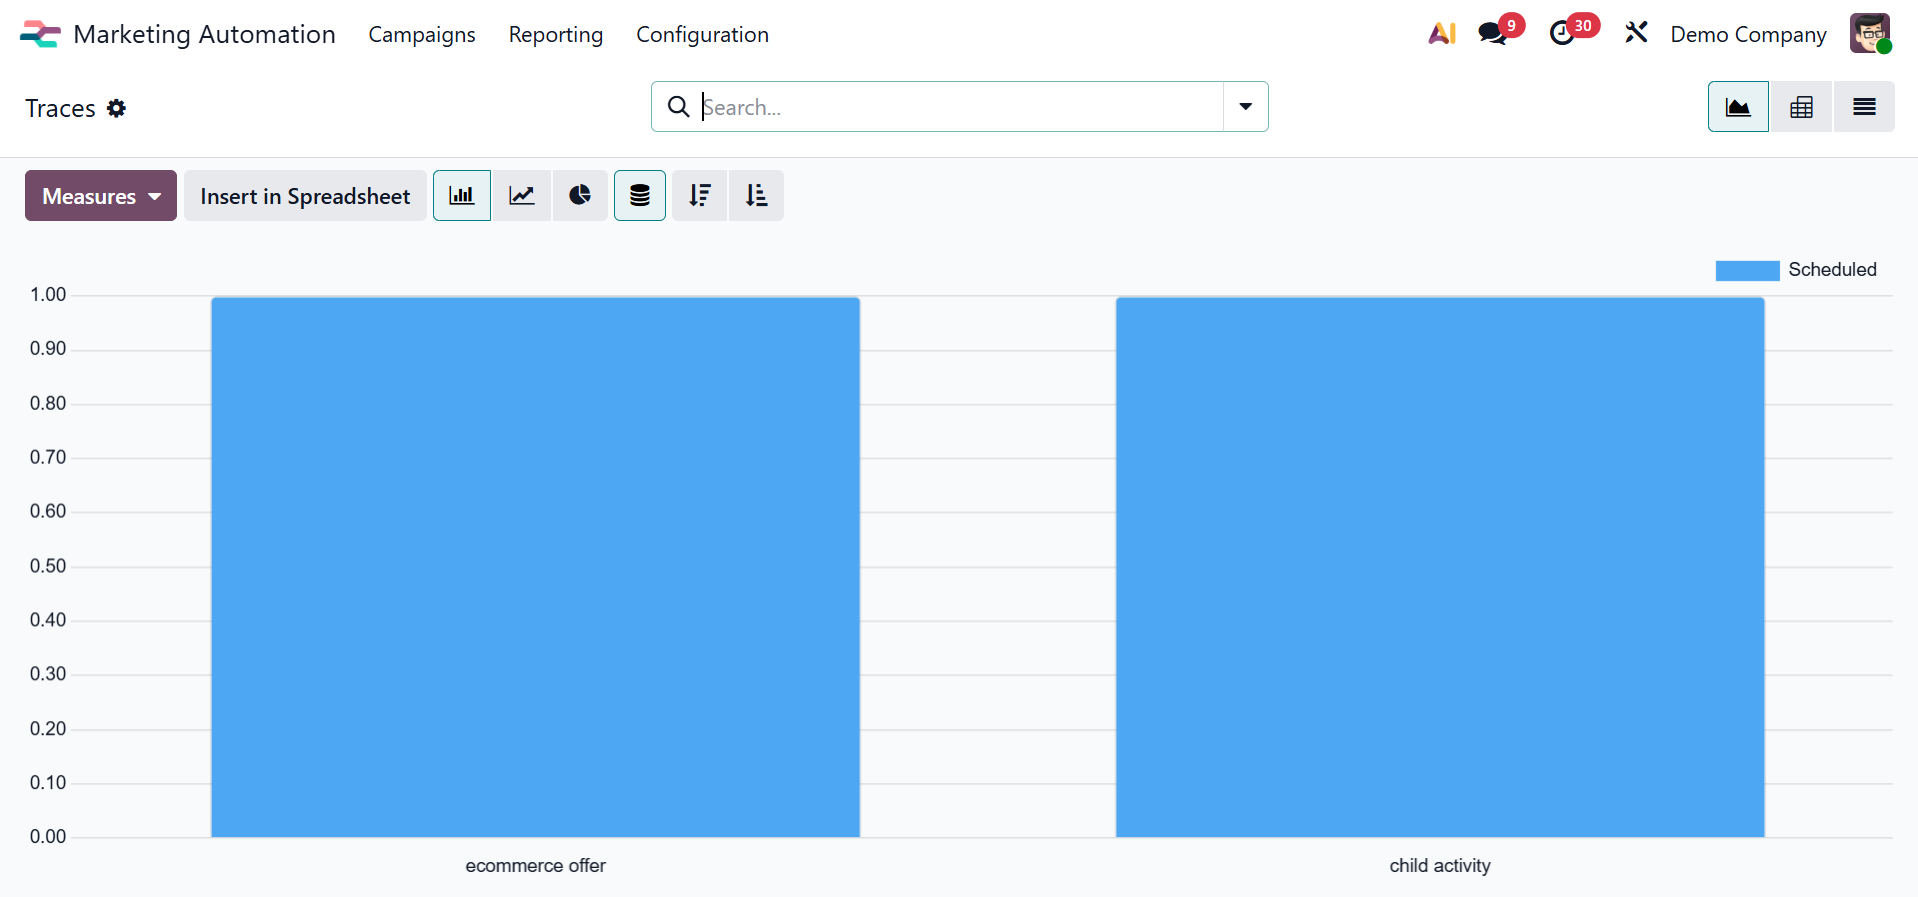
Reporting tools in Odoo 19 Marketing Automation let users assess how well marketing campaigns are performing. A range of indicators, such as Participants, Traces, and Link Tracker data, can be used to create reports.
Users can create reports on the quantity of clicks on campaign links using Odoo 18 Marketing Automation's Link Tracker tool, which offers information on recipient involvement.
The Participant Report helps users track individual involvement by classifying data by record ID and total count.
They can track the progression and implementation of marketing actions thanks to the Traces Report, which displays data by document ID and count.
Configuration
Additionally, users may save and quickly access commonly used search criteria under the Configuration menu's Save as Favorite Filters option.
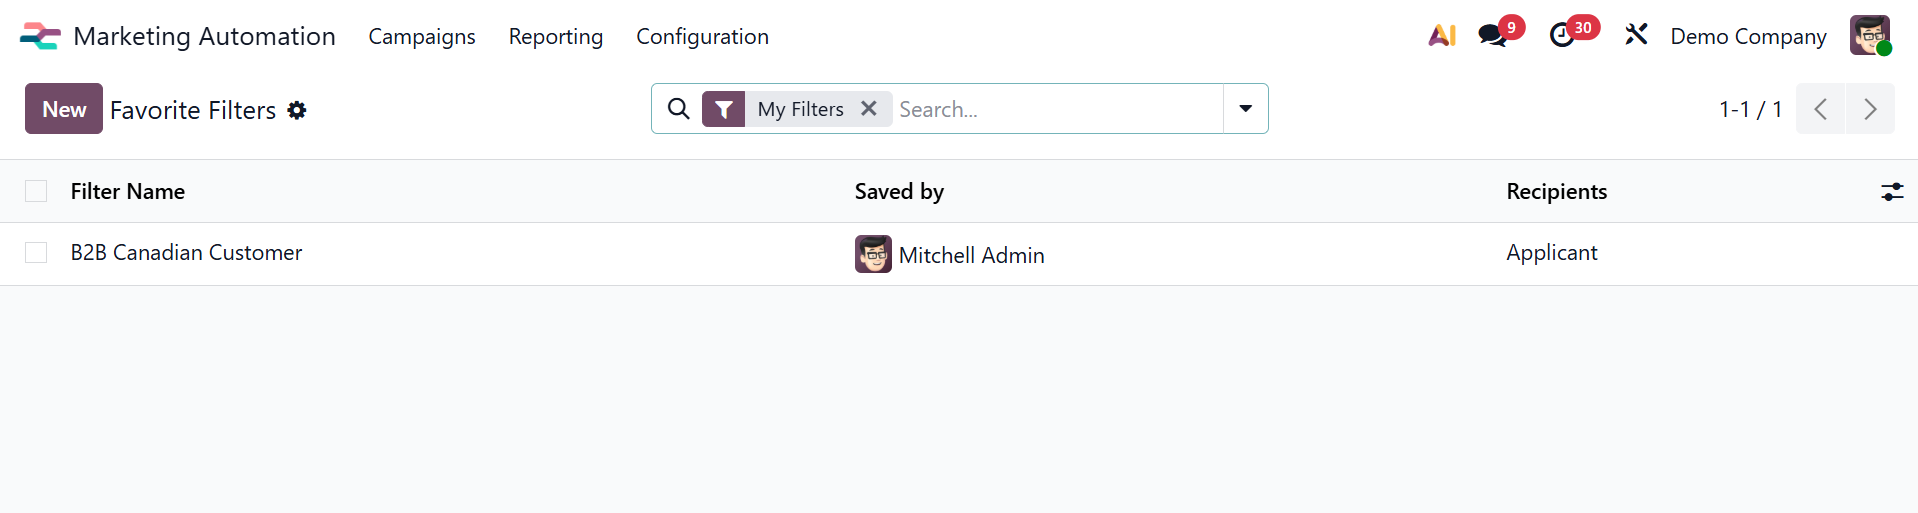
This makes administering many campaigns easier and boosts productivity by offering consistent reporting views and rapid navigation.
In conclusion, by automating and streamlining critical procedures, Odoo 19's Marketing Automation module gives companies more control over their marketing campaigns. Through effective campaign management and tailored, targeted communication, it improves consumer engagement and fosters business expansion.