Odoo 19 Enterprise’s Marketing Card is a promotional tool designed to communicate marketing messages to both current and new clients effectively. It gives businesses the freedom to contact their audience through a variety of media, both digital and physical. These cards are perfect for conveying a concise and powerful message because they are compact, eye-catching, and packed with information. The marketing card feature in Odoo 19 makes it easy for companies to create, share, and track promotional content. It serves as a tool to advertise promotions, feature products or services, publicize events, and communicate a brand's identity. To track customer interactions and conversions, the cards often include URLs or QR codes that point to websites.
With their innovative design and unified messaging, marketing cards significantly increase brand awareness and professionalism. They can be communicated online through social media, push alerts, or email, trade exhibitions, or packaging. To ensure smooth campaign management, Odoo 19 enhances this capability with automation, real-time reporting, and integration between the CRM and sales modules. All things considered, the Marketing Card in Odoo 19 enables strategic, data-driven marketing initiatives that help companies engage their target audience, improve engagement, and increase conversions.
1. Campaigns:
A Marketing Card Campaign in Odoo 19 is a feature in the Marketing Card module that enables companies to use visual marketing cards to develop, oversee, and monitor focused advertising campaigns. These cards are intended to provide targeted client groups with brief, interesting messages that advertise goods, services, or exclusive cards.
When you open the Marketing Card module from the Odoo 19 dashboard, you can see the Card Campaign feature under the Campaigns menu. By default, the Card Campaign feature is displayed in List view, showing details such as Created on, Name, Responsible, and Tags. You can add more details, such as Model Name and Post Link, by clicking on the toggle button on the right side of the screen. You can also change the card campaign view to a Kanban view.

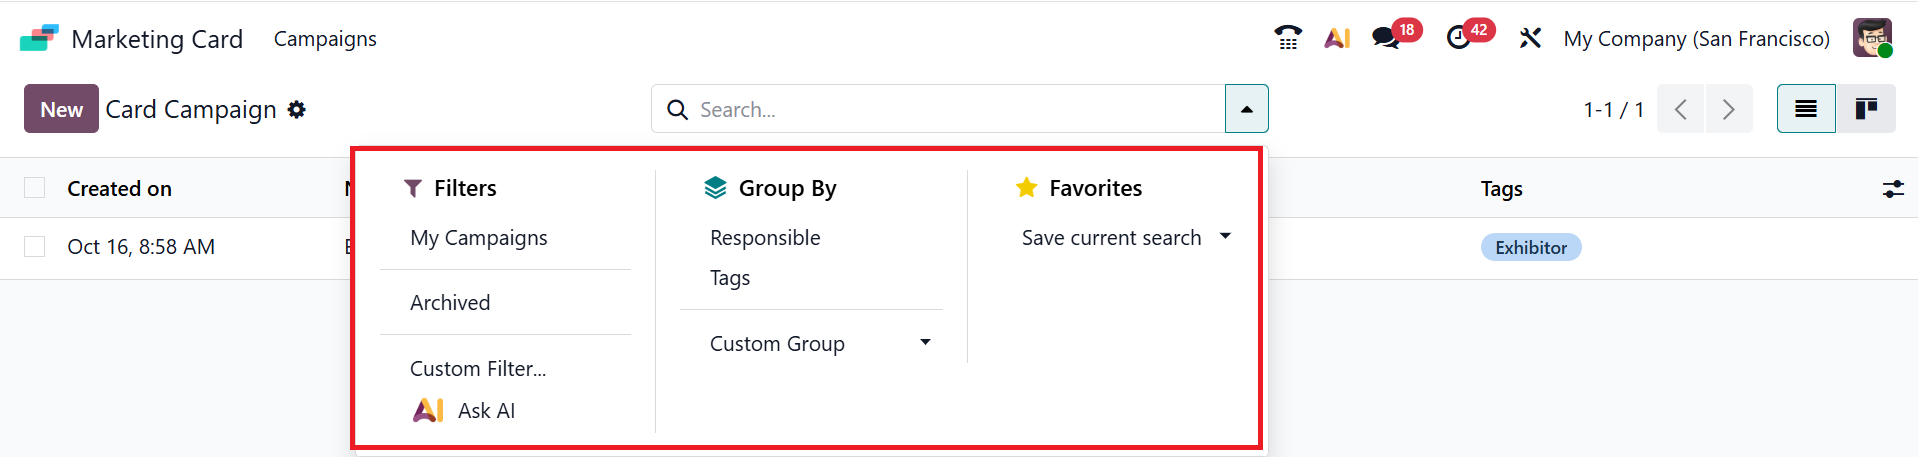
To view options such as Filters, Group By, and Favorites, click the drop-down menu in the search bar. You can filter the Card Campaign as My Campaigns, Archived, personalize a filter by clicking on the Custom Filter, or Ask AI for AI assistance. You can Group campaigns by Responsible, Tags, or use a Custom Group to personalize. Favorites let you save the current filter for later use.
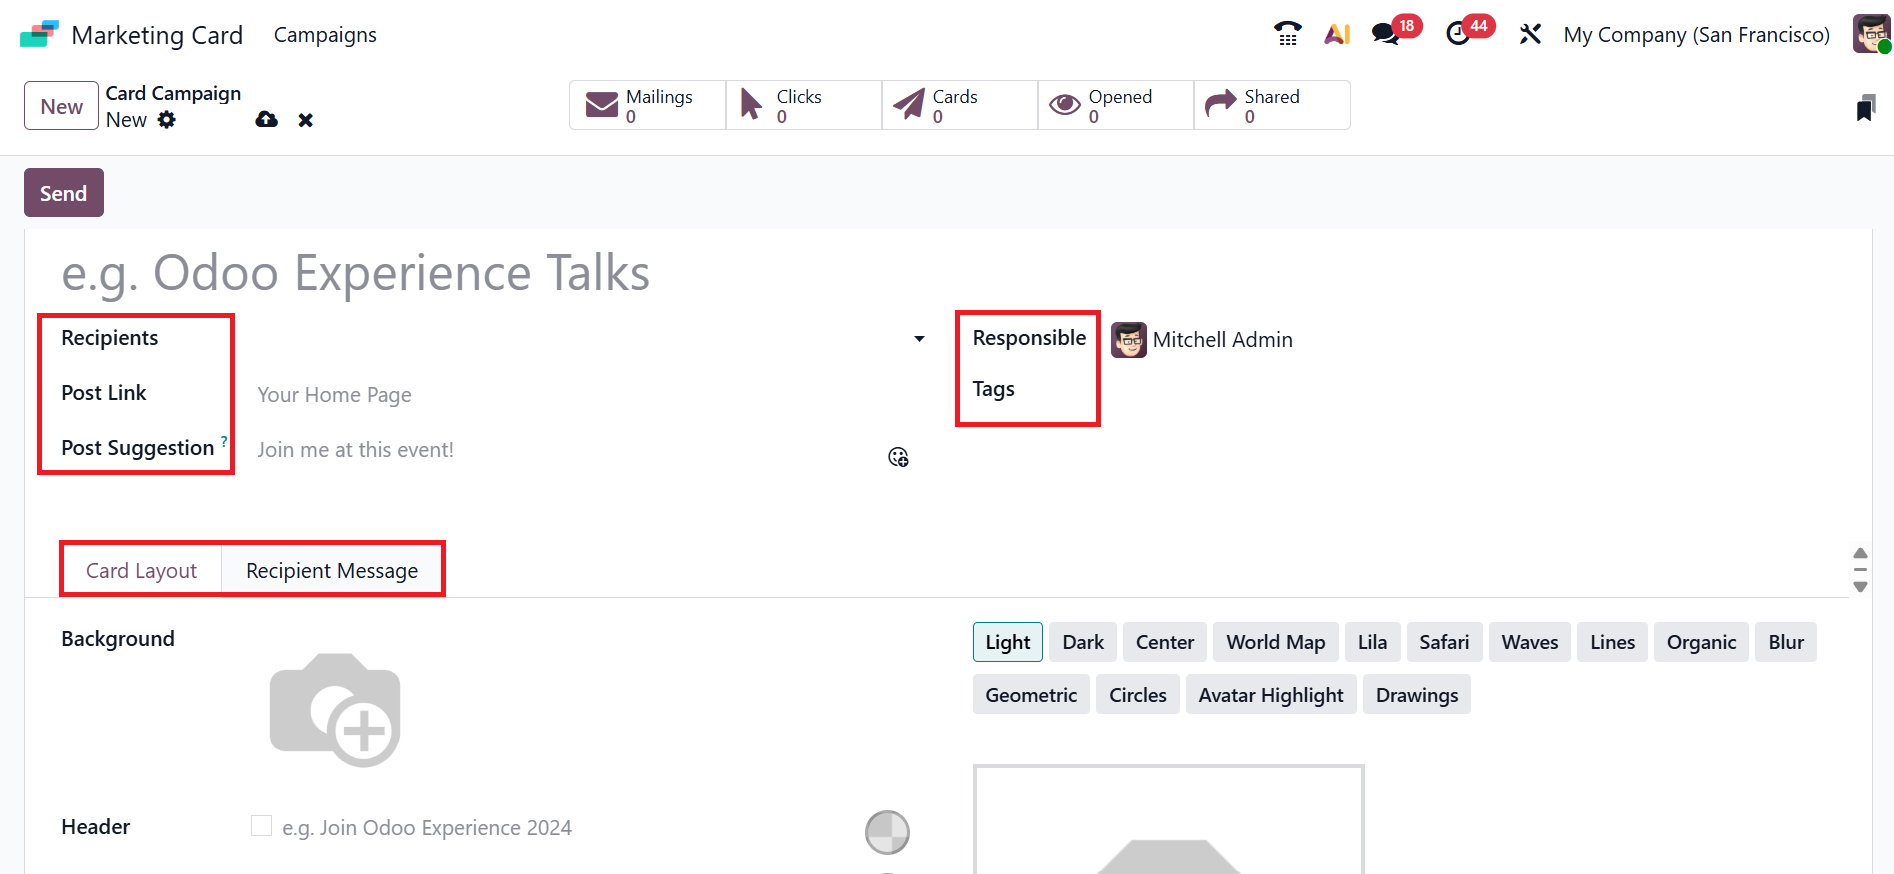
To create a new card campaign, click on the New button. A new window will open, allowing you to enter a name for your campaign. Add the Recipients as Contacts (send the marketing card to the selected customers), Event Booth (send the card to exhibitors or companies that have booked booths), Event Registration (send the cards to the individuals who have registered to attend an event), or Event Track (send the cards to participants or speakers linked to event sessions or tracks). In the Post Link field, add a target link to direct the recipients. In the Post Suggestion field, add a description to encourage recipients when sharing on a website.
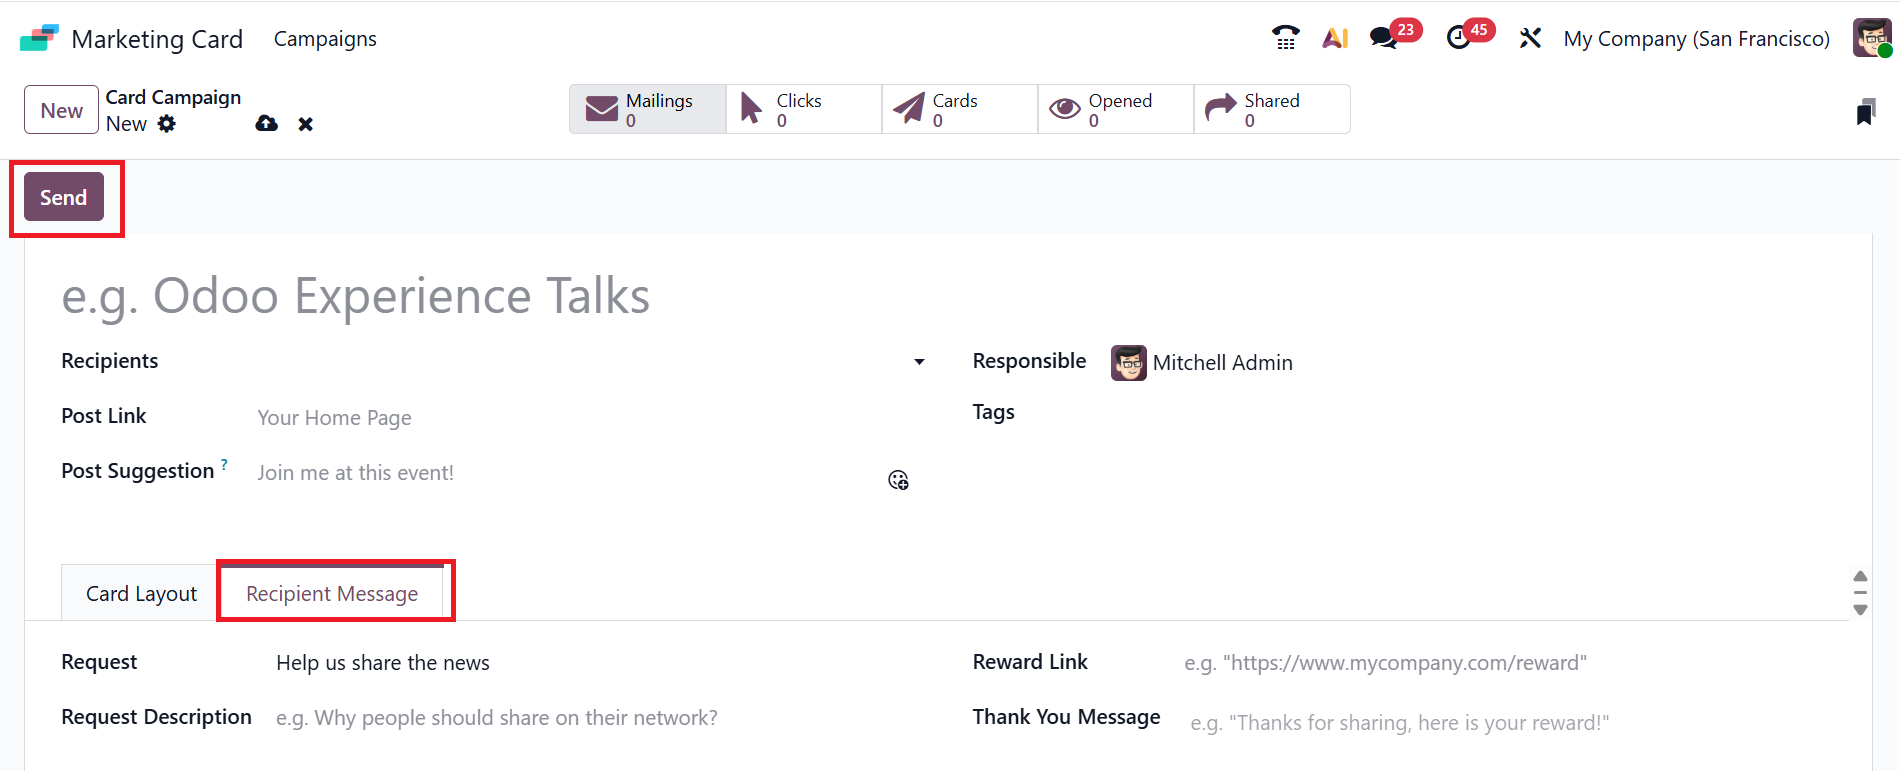
In the Responsible field, add a member to manage the campaign. In the Tags field, add relevant tags to categorize and analyze the campaigns. You can also view two tabs: Card Layout and Recipient Message.
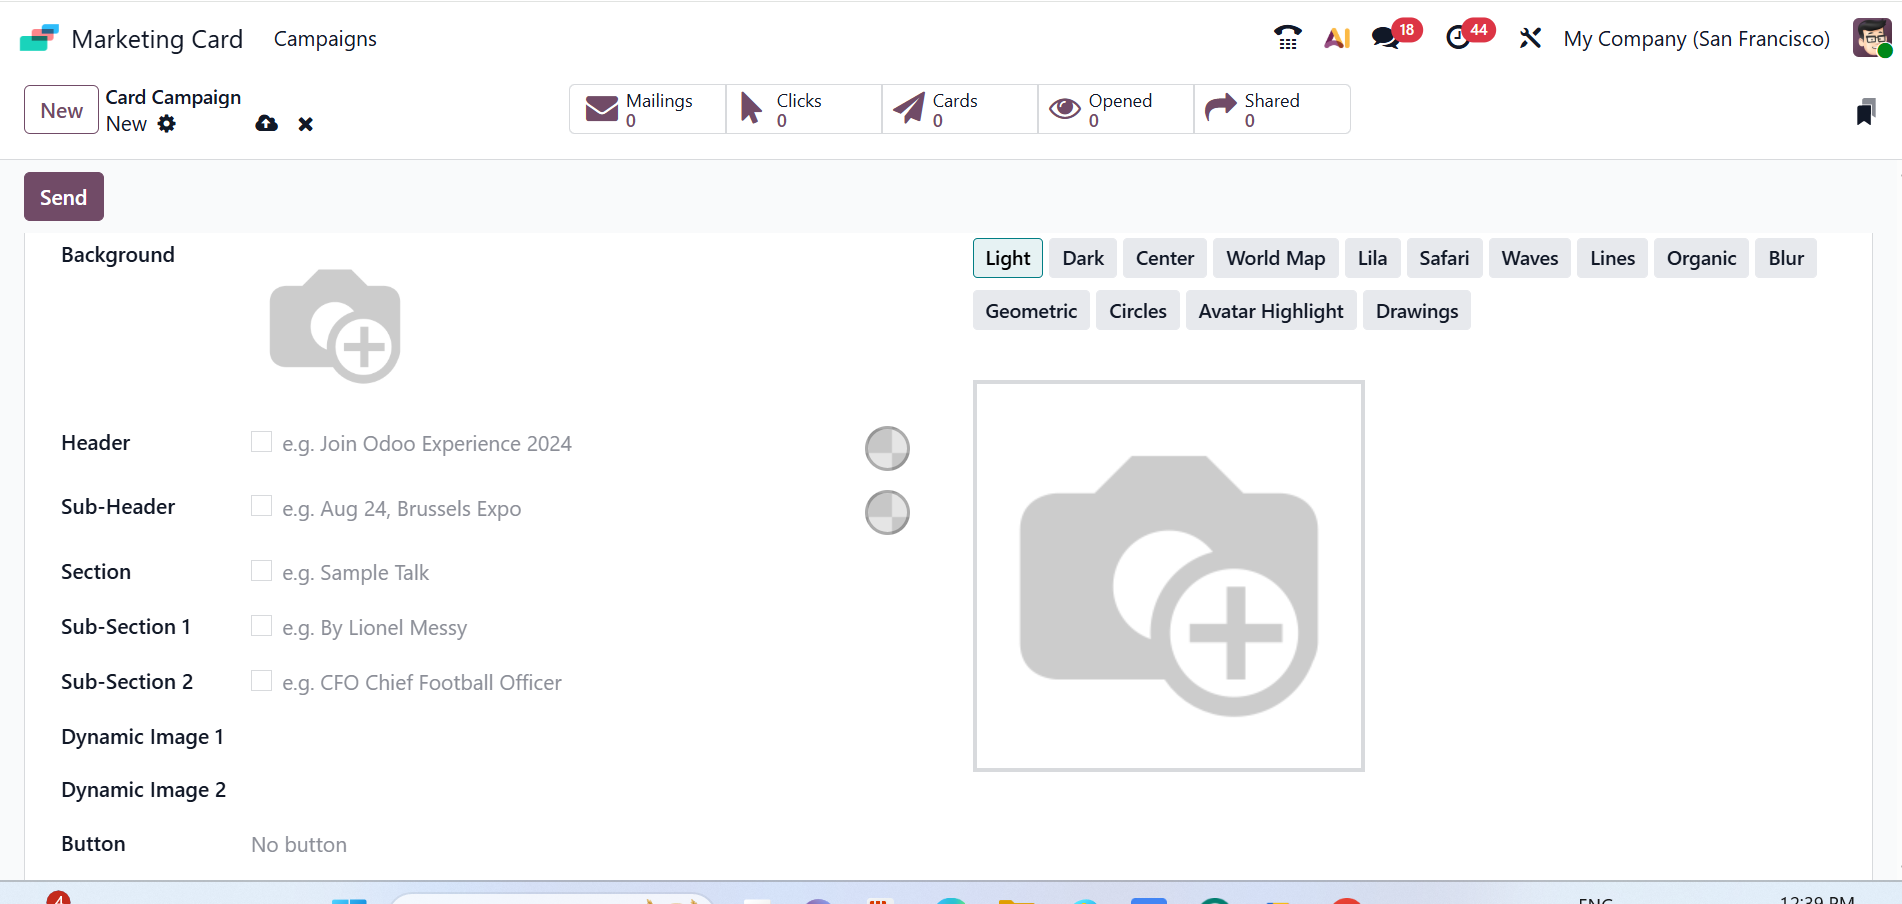
Within the Card Layout tab, you can select a background style such as Light, Dark, Center, World Map, Lila, Safari, Waves, Lines, Organic, Blur, Geometric, Circles, Avatar Highlight, or Drawings.
You can add a background image or select a theme from the list. In the Header field, you can add a content header for the marketing card. You can also choose a header color that complements the background you've selected. Then, add a sub-heading in the Sub-Header field. You can also select a Sub-Header color based on the background you selected from the color palette. Then add a card content block to the Section field. Sub-Section 1 and Sub-Section 2 are components that make up the main section. Dynamic Image 1 and Dynamic Image 2 are the personalized images automatically displayed to the recipient. The Button field links to a webpage.
In the Recipient Message tab, enter a message in the Request field that recipients can use to share the campaign. In the Request Description field, add a description explaining the importance of sharing the campaign. In the Reward Link field, add a URL of the reward page to view the offers or points for sharing the card. In the Thank You Message field, you can add messages to express gratitude for the recipient’s effort. Next, click the Send button to deliver the card.
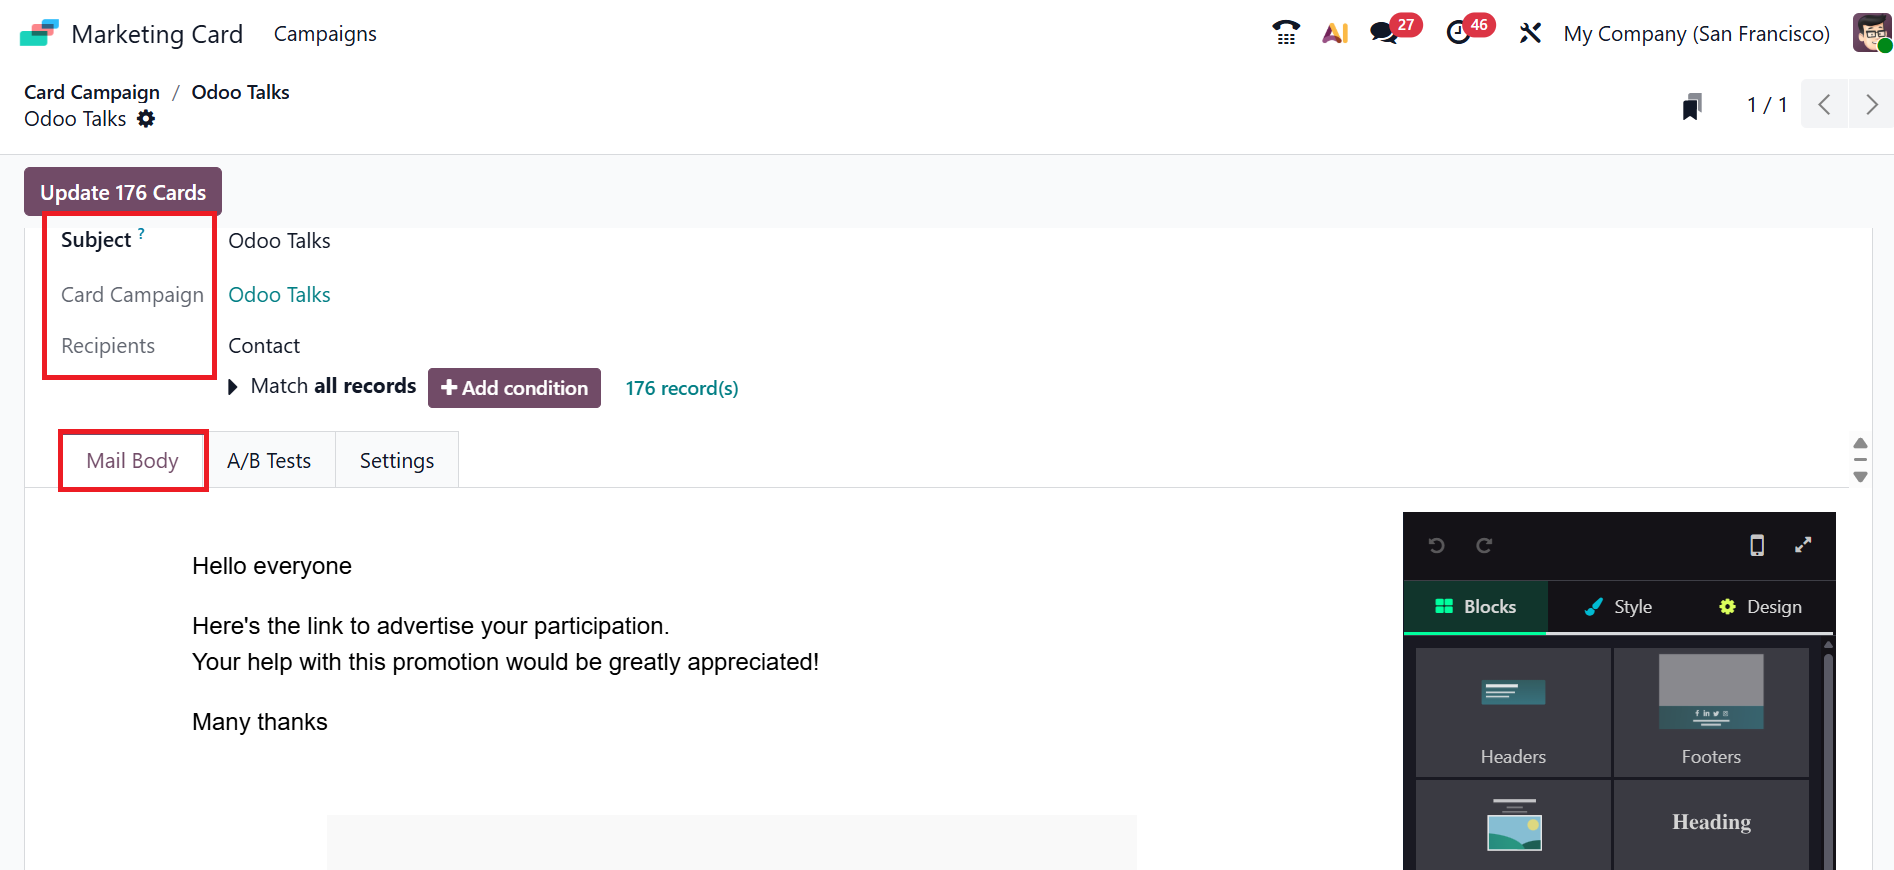
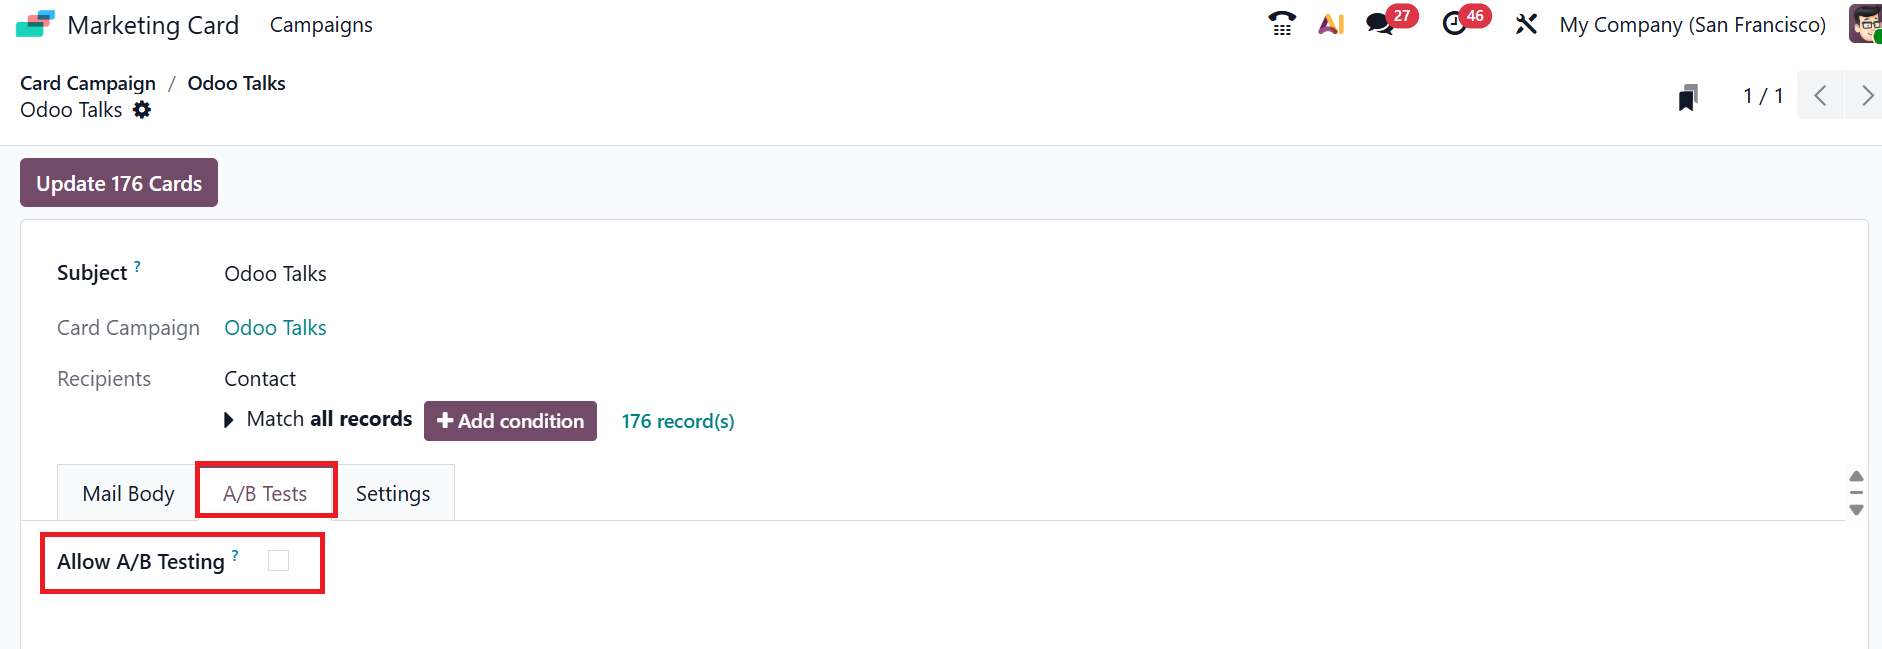
A pop-up screen appears, showing that the Subject, Card Campaign, and Recipient are automatically uploaded. You can also view three tabs: Mail Body, A/B Tests, and Settings. In the Mail Body tab, you can design the email content using customizable blocks.
In the A/B Tests tab, you have the option to enable Allow A/B Testing to ensure that each recipient receives only one version of the email per campaign. This feature helps to reduce duplicate messages and test the effectiveness of mailing.
Within the Settings tab, you’ll find two sections: Email Content and Tracking. Under the Email Content section, add a note to prompt recipients to open the email in the Preview Text field. In the Send From field, you can view who was sending the email, and in the Reply To field, add the reply-to address. You can also add a file to an email by clicking Attachments in the Attach a file field. Under the Tracking section, you can select a teammate in the Responsible field.

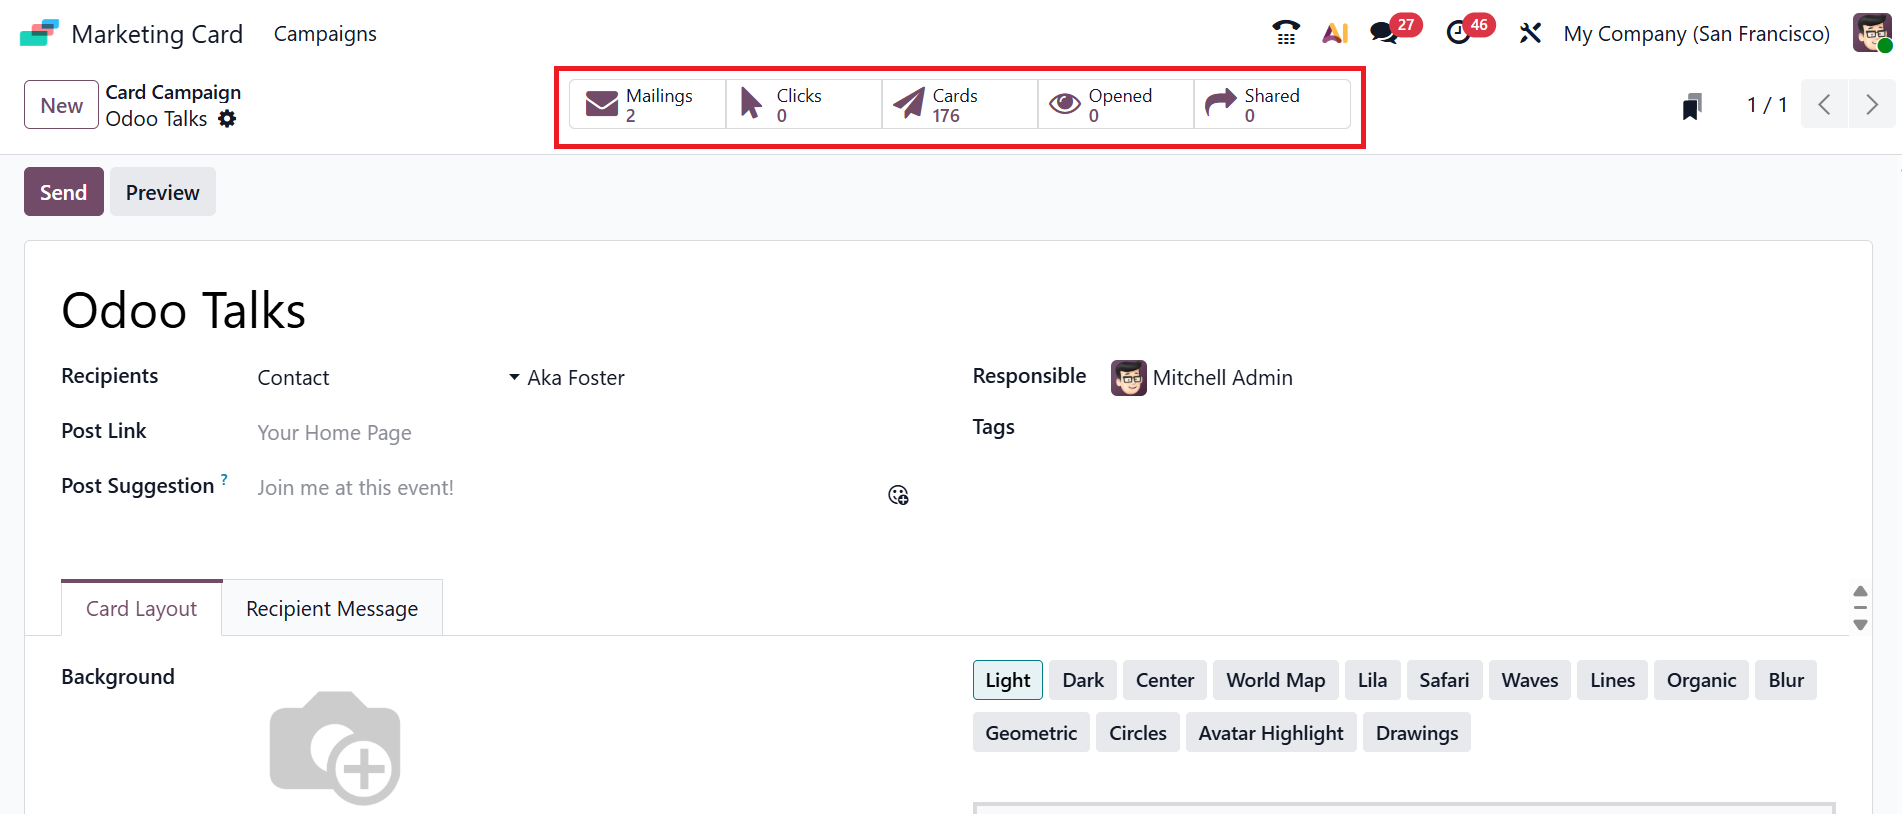
Then click the Update 176 Cards button to create 176 marketing cards for contacts.
After updating the cards, you can view smart tabs in the card campaign window, such as:
Mailings: Shows the campaigns sent.
Clicks: Displays how many times the recipient clicked.
Cards: Indicates the total number of marketing cards.
Opened: Shows how many times the recipient viewed the content.
Shared: Shows how many times they were shared.
In conclusion, Odoo 19 Marketing Card gives companies a single platform to effectively plan, coordinate, and monitor marketing initiatives. Through customized messaging and dynamic images, it streamlines audience segmentation, automates communication, and increases engagement. Odoo 19 Marketing Card enables marketers to improve client interactions, make data-driven decisions, and accomplish greater marketing results with less work.