Opening a Bar/Restaurant Session
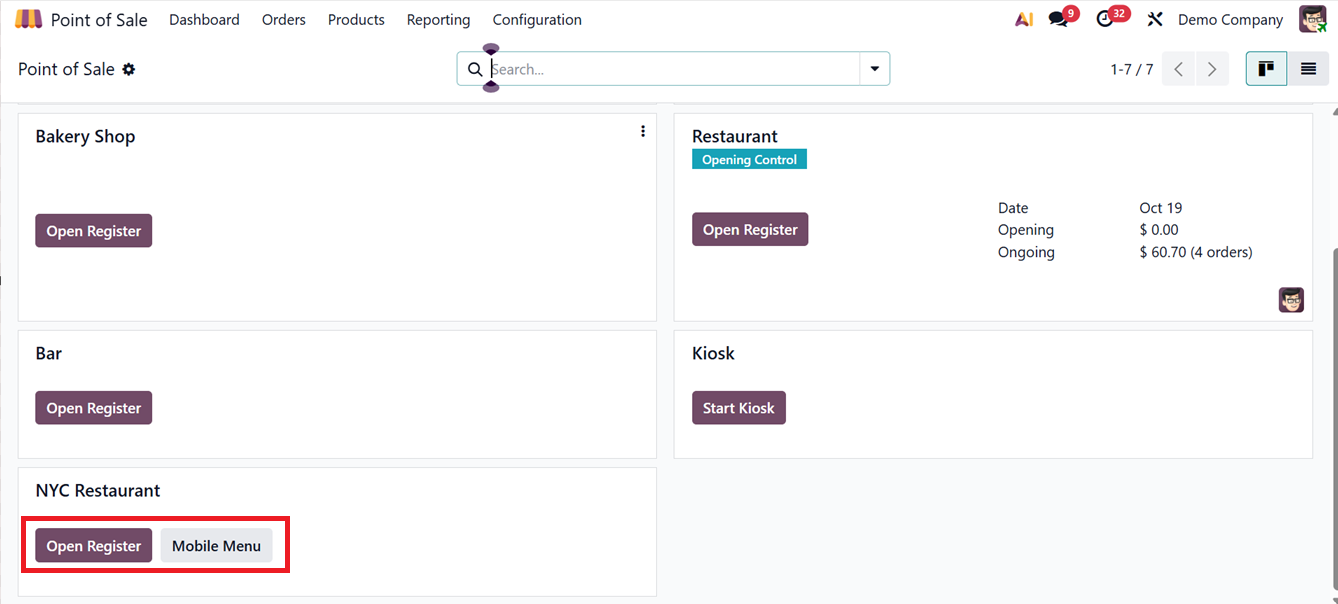
To launch a restaurant-based POS session, begin with basic configuration and proceed to adjust specific options like Sales, Taxes, Accounting, Payments, and Pricing according to your business requirements. Open the restaurant session from the POS dashboard.
Then, click on the ‘Open Register’ to access the initial control panel where you can input the opening balance and include a note for the session, as shown in the screenshot below.
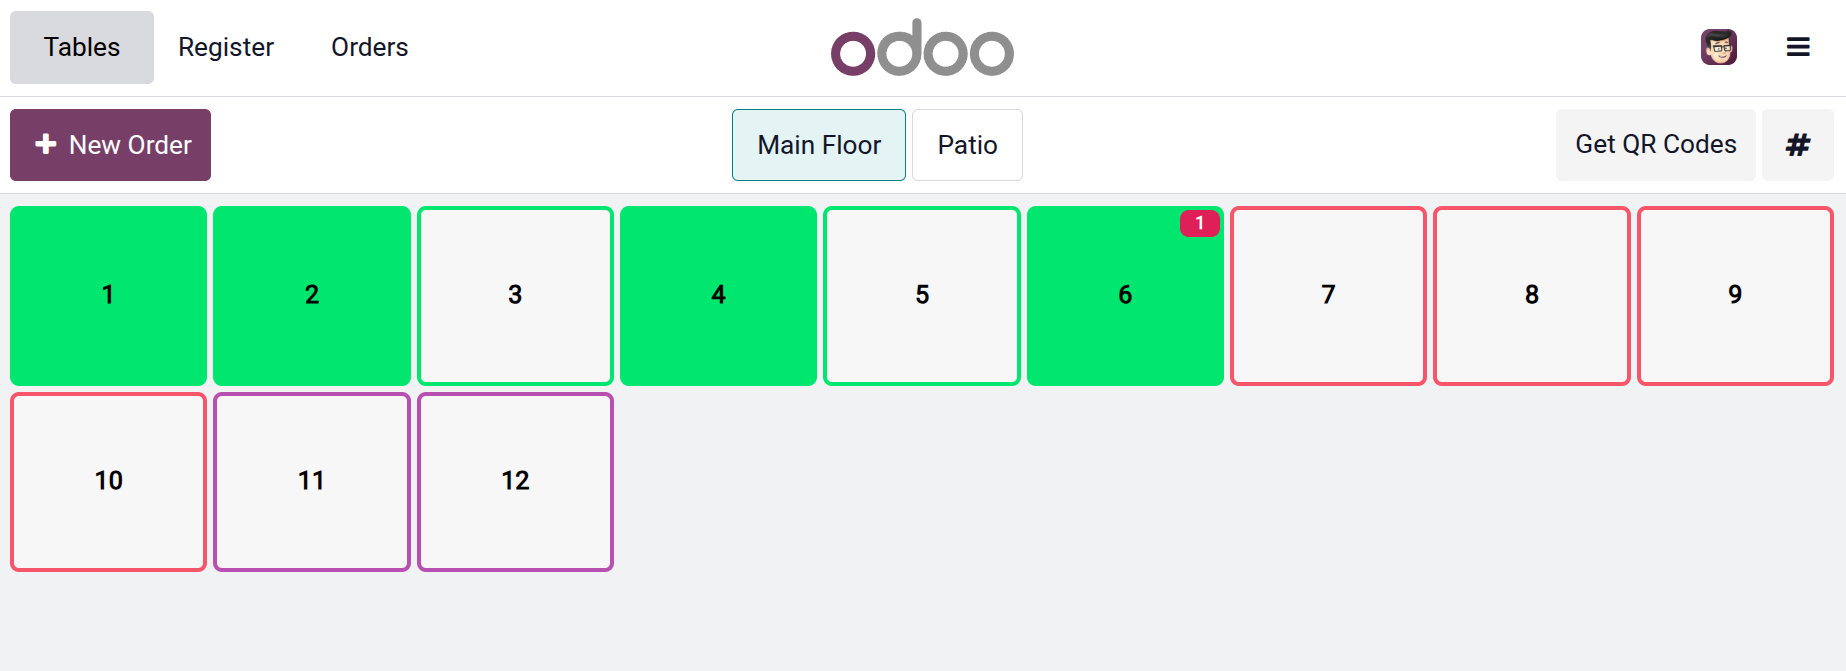
Following this, you’ll enter the restaurant session interface that presents the complete floor layout. So, you can choose a table from the floor and start ordering.

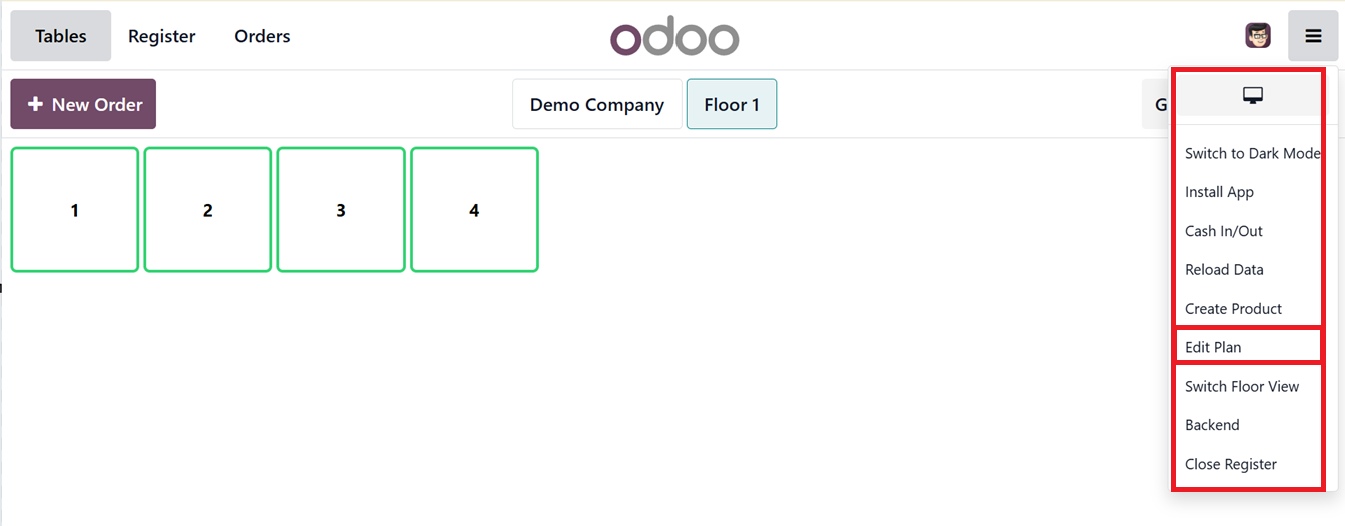
In the screenshot, you’ll notice a floor with detailed seating and table arrangements. The right-side menu gives you access to features such as Switch to Dark Mode, Install App, Cash In/Out, Reload Data, Create Product, Edit Plan, Switch Floor View, Backend and Close Register options.
Now, pick a table from the layout, and you'll be directed to the restaurant session with all available product categories. Reserve the table by clicking the ‘Booking’ tab, as depicted in the screenshot below.
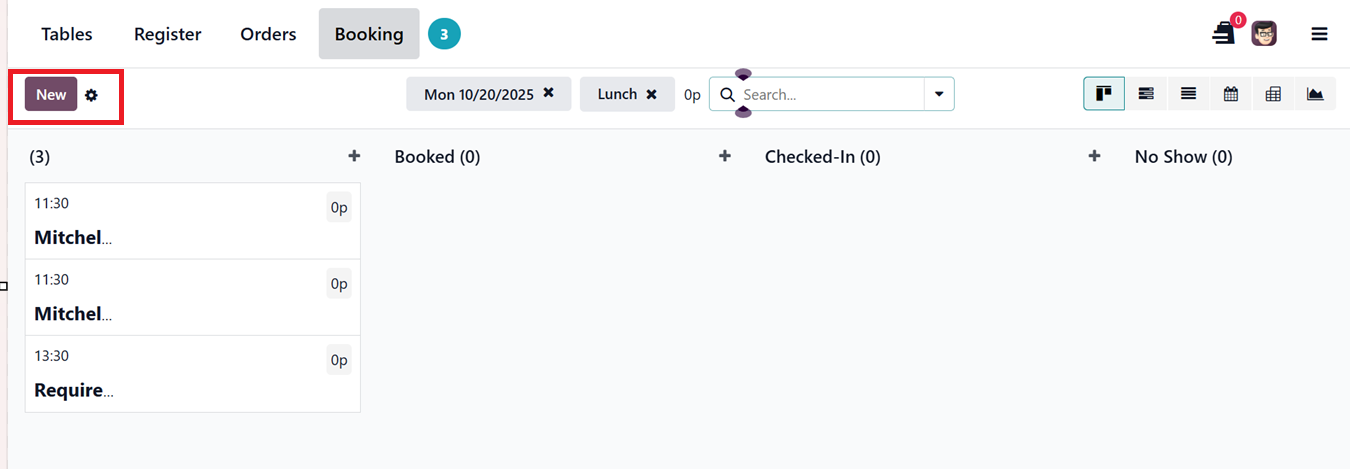
You can check the ‘Booking’ tab to manage the bookings or add a new booking as per the requirement. This tab will open the dashboard of the available booking in a kanban card, as shown in the screenshot.
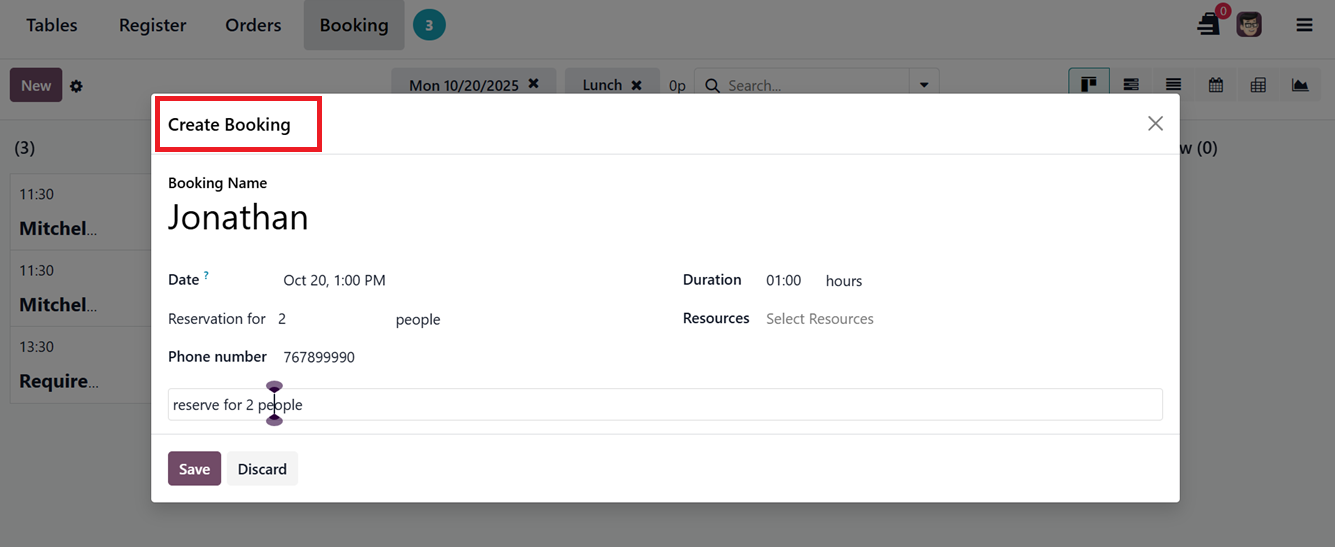
You can create new bookings using the ‘New’ button and edit the Booking Name, Date, Reservation Quantities, Phone Number, Duration and any description in the ‘Create Booking’ window, as shown in the screenshot below.
You can check the ‘Booking’ tab to manage the bookings or add a new booking as per the requirement. This tab will open the dashboard of the available booking in a kanban card, as shown in the screenshot.
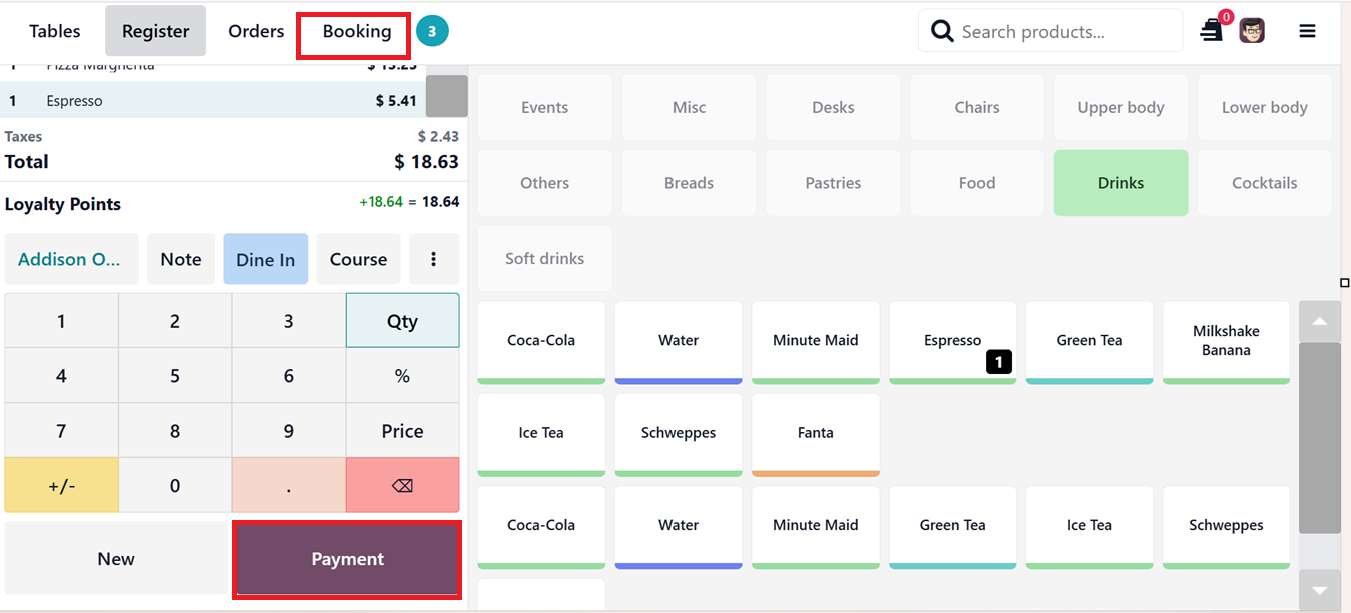
Then, you can start the sales process by adding the required products. From the product catalog on the left side, you can view the complete order total, including applicable taxes under the ‘Total’ section, as depicted in the screenshot below.

Then, you can create a new customer data or select the customer by clicking the ‘Customer’ button to display the customer list.
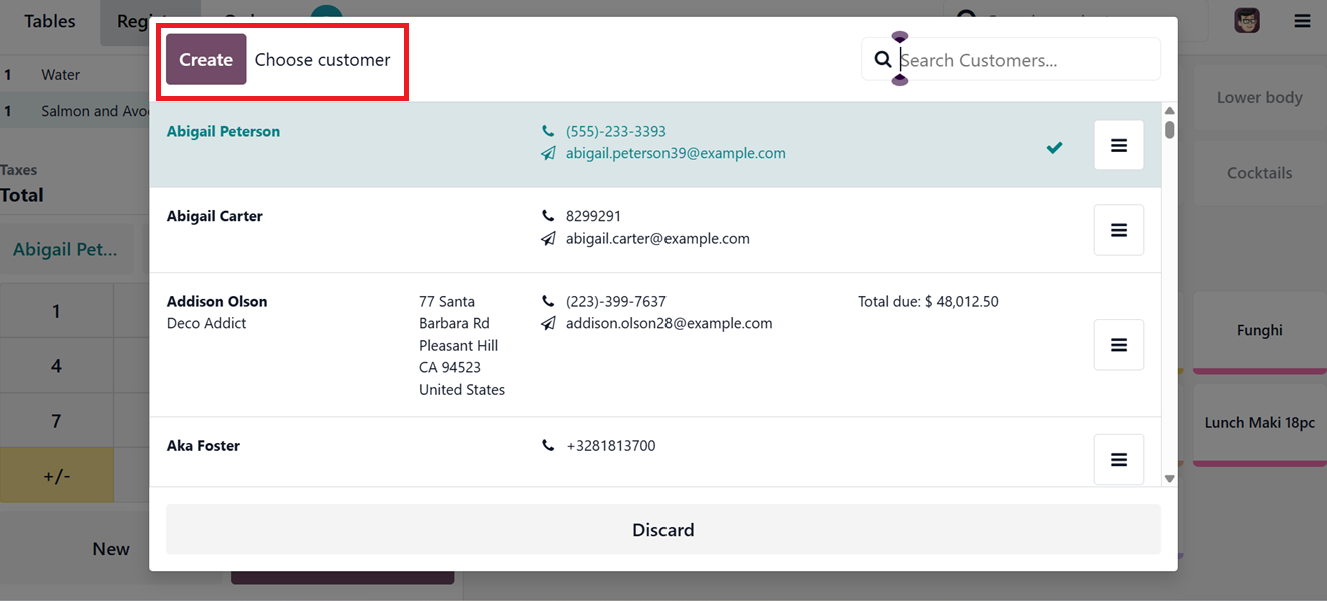
Once selected, the customer's name will appear in the sales session. To relay messages to kitchen staff, use the ‘Note’ button, which triggers a popup for writing or selecting pre-defined notes like ‘Emergency,’ ‘Wait,’ ‘To Serve’ etc. you can also create new notes using the ‘Add Note’ wizard and click on the ‘Apply’ button, as depicted in the screenshot below.
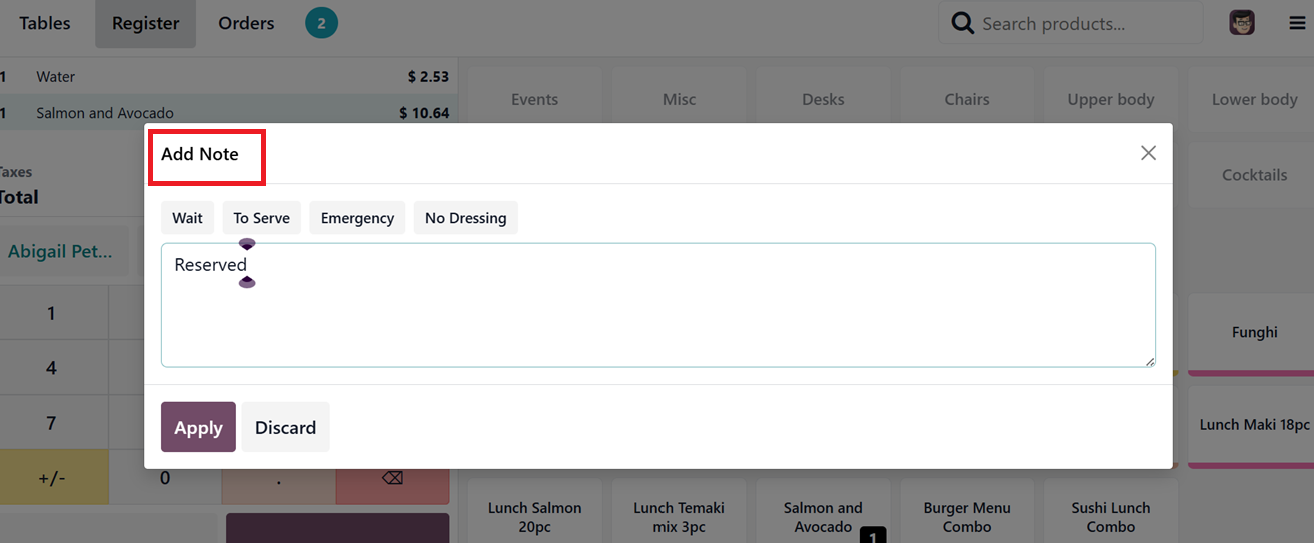
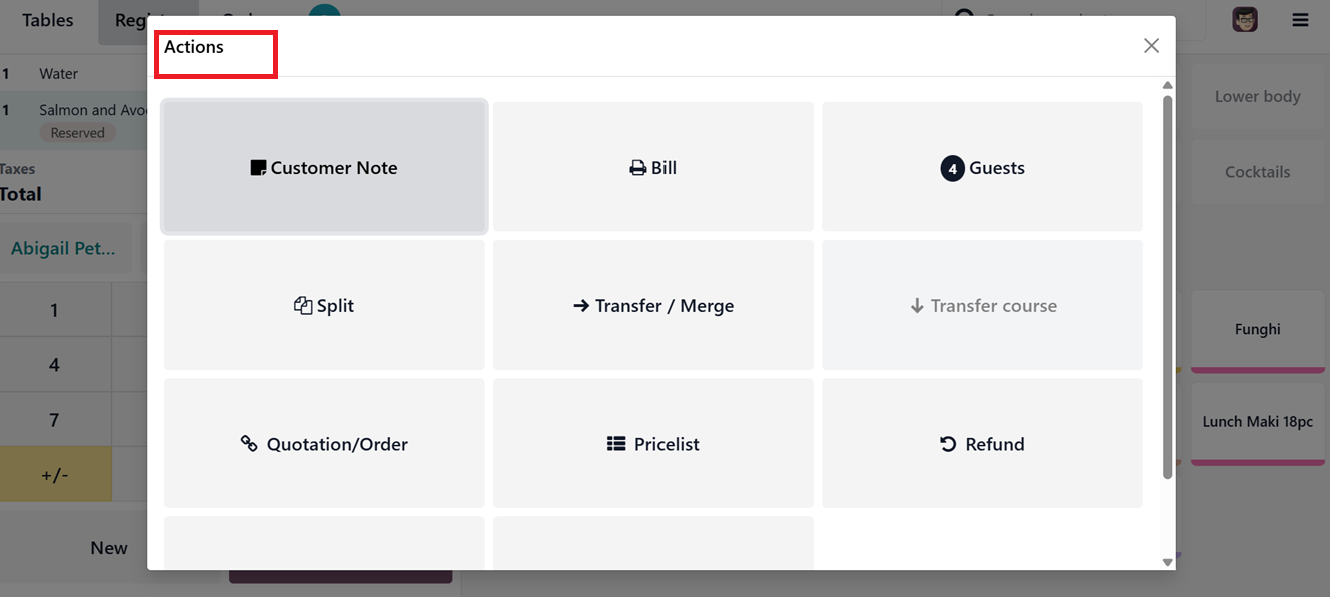
After inserting your note, click ‘Apply’. Use the ‘Action’ (Three vertical dotted)menu to access additional functions like adding a Customer Note, creating a Quotation/Order, Splitting Bills, entering Promo Codes, checking Transfer/Merge Orders, Switching Pricelists, initiating Refunds, changing to Takeaway Orders, or Cancelling Orders, as shown in the screenshot.
After finalizing your selection and applying for promotions or any other actions, confirm the order by pressing ‘Payment’ to enter the payment screen and select a preferred payment method, as shown in the screenshot below.
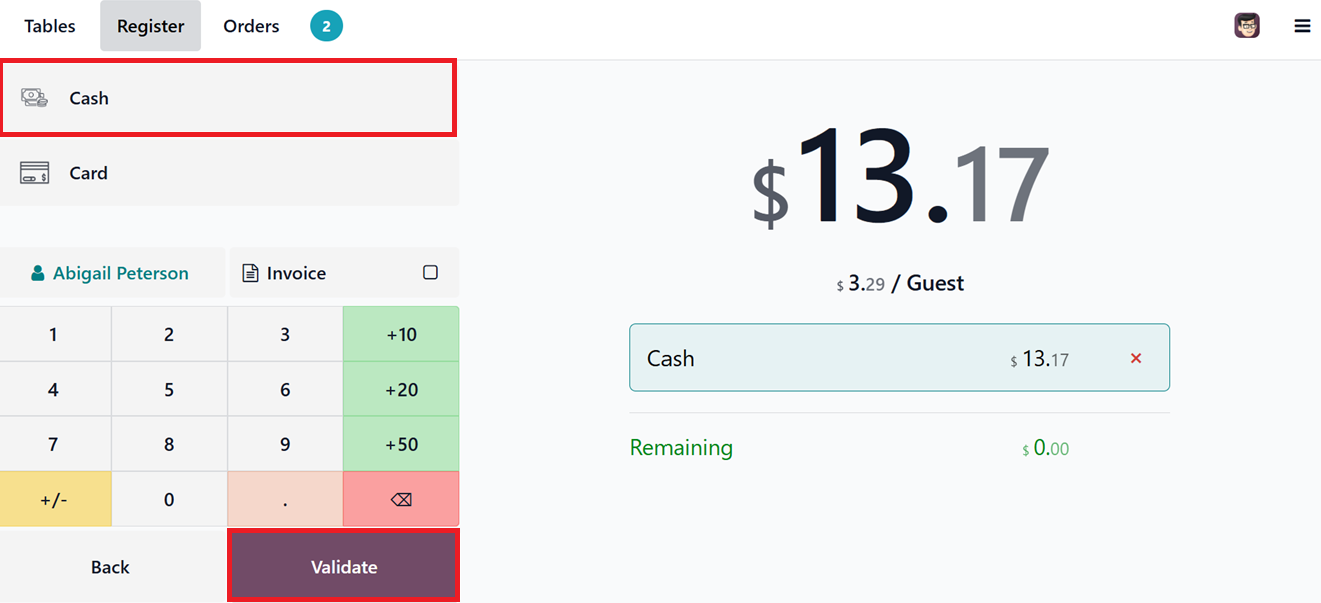
For instance, choosing ‘Cash’ will reflect it on the screen. Also, you can add a tip using the +10, +20, or +50 buttons. Complete the payment by pressing the ‘Validate’ button. Upon validation, a confirmation screen appears showing a preview of the receipt, as illustrated.
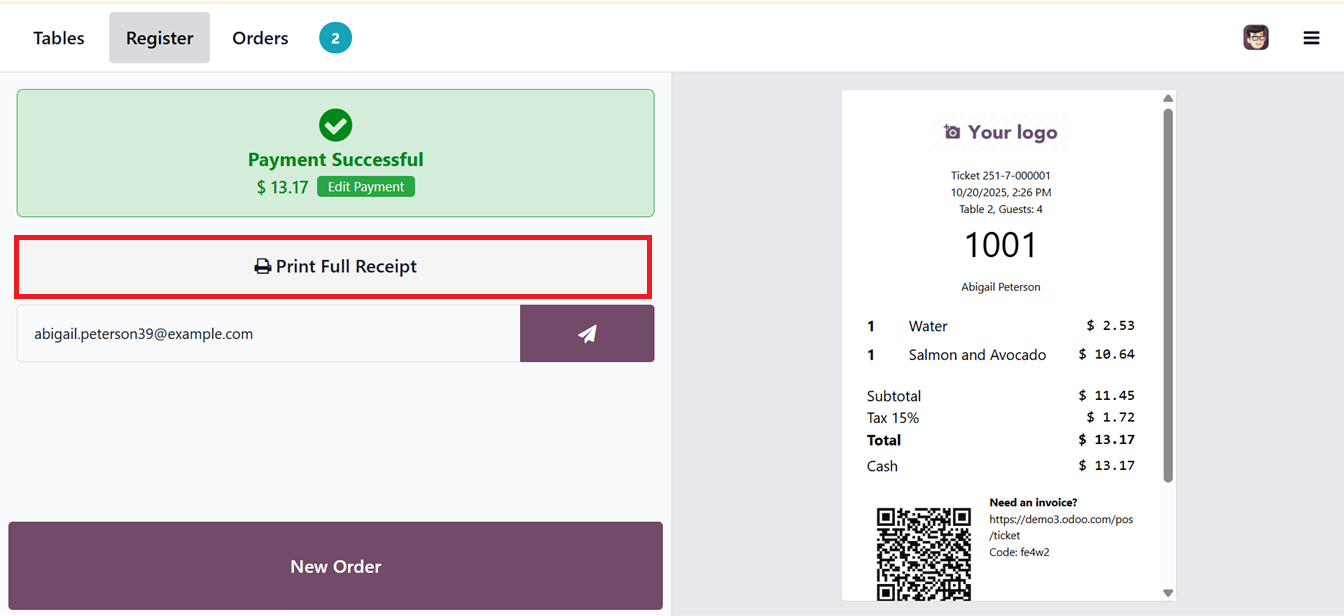
Use ‘Print Basic Receipt’ or ‘Print Full Receipt’ features to get a physical copy of the customer bill. Then, you can also email it by clicking on the send icon provided at the right side of the email address column. You can also deliver receipts via WhatsApp or SMS through dedicated icons after configuring the particular features that we have discussed earlier in this book.
To start a new transaction, click ‘New Order’. Once all sales for the day are completed, end the session by selecting ‘Close Register’ from the POS terminal menu.
Then, you can use the POS terminal menu to install the restaurant application using the ‘Install App’ button, access Order History, manage Cash In/Out, Create Products, Backend and Close Register using the respective icons shown earlier.
There are two new additional options for Bar/Restaurant. They are Edit Plan, toggle between Table View and Floor View, and access the POS backend or Close Register,
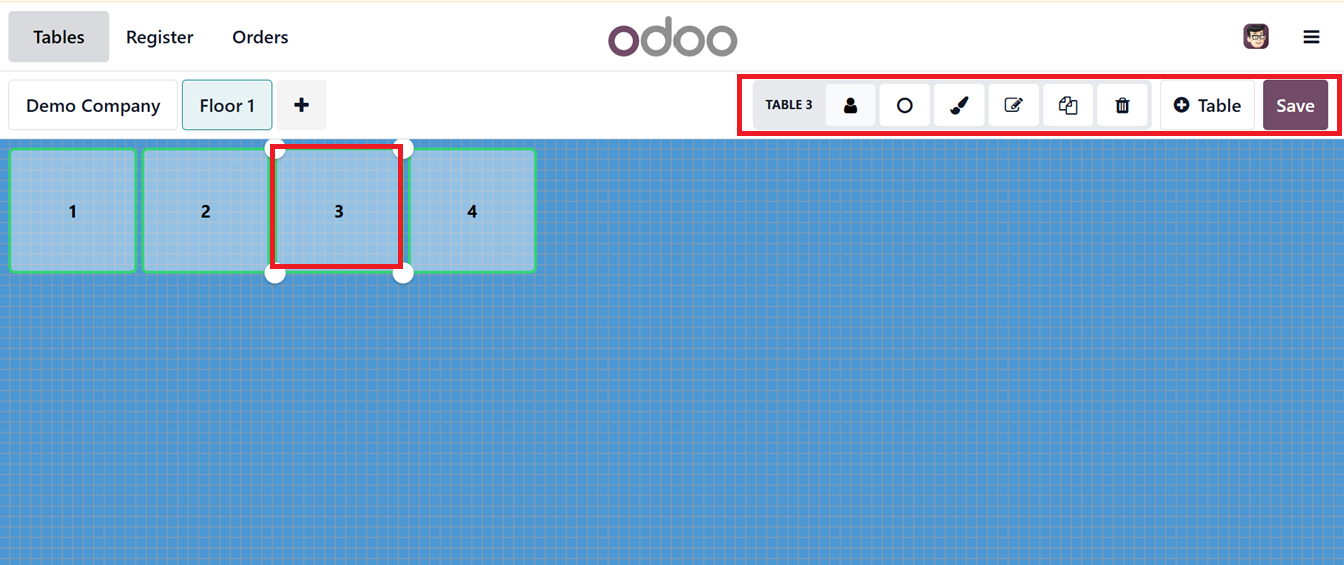
The Edit Plan feature in Odoo 18’s POS module allows users to customize their virtual floor plans, aligning them with the actual restaurant layout to improve customer service, optimize seating, and ensure efficient table use. This feature is only available for Bar/ Restaurants.
Select Edit Plan from the POS terminal menu to view the available customization tools.

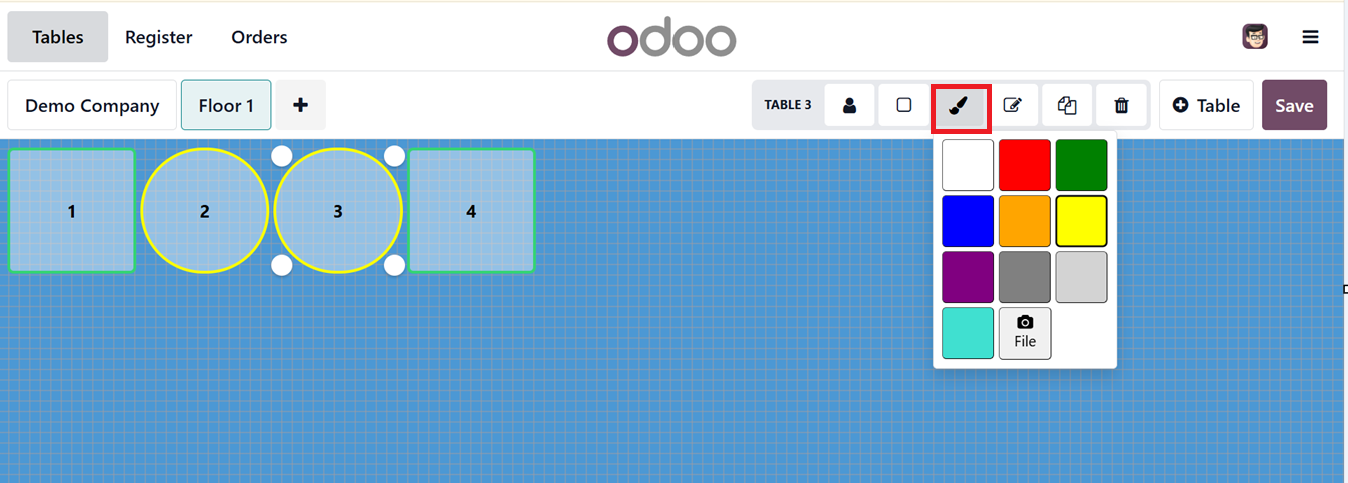
Here, you can use the ‘Change Floor Background’ tool to modify the floor background and individual table colors. For example, you can highlight a specific table and adjust its color accordingly.
Clicking on a table opens up several editing options including changing Seat Capacity, altering Table Shape, applying Color, renaming the table via Rename, cloning the table with Clone, or deleting it using the Delete icon. Use the ‘+Table’ button to add new tables as needed.
While changing the color and shape of a table, you can also add any image of the seats using the ‘File’ icon provided in the color selection field. After saving, the revised layout is displayed and you can continue with the sales process.
Once your adjustments are complete, click on the ‘Save’ to apply the changes.
Switch Floor View
To change the table view, you can utilize the ‘Switch Floor View’ option from the POS sales interface menu which is only available for Bar/Restaurant sessions.

Using this feature you can switch between different floor layouts within the POS interface. Also, it helps staff easily navigate between floors to manage tables, take orders, and monitor service across multiple areas from a single POS session. improving efficiency and organization in multi-floor or multi-area environments.
Odoo 19’s POS and Restaurant module delivers a comprehensive and integrated system for retail and food service businesses. It supports multiple payment methods, live inventory updates, loyalty programs, and offline functionality. The Restaurant module adds specialized tools like tipping, order routing, table and floor management, and course control. Combined, these features enhance competitiveness, improve service quality, and streamline operations for modern enterprises