Opening a Shop Session
After the shop or Restaurant is set up, it will appear on the PoS dashboard, as shown in the screenshot below.
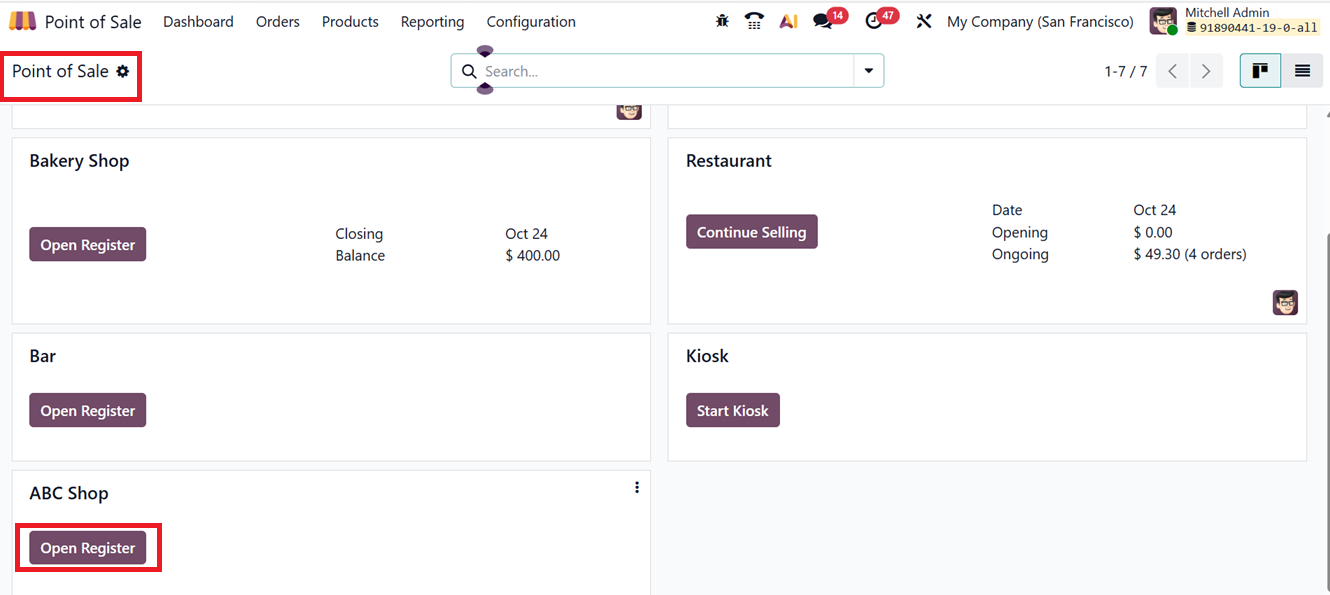
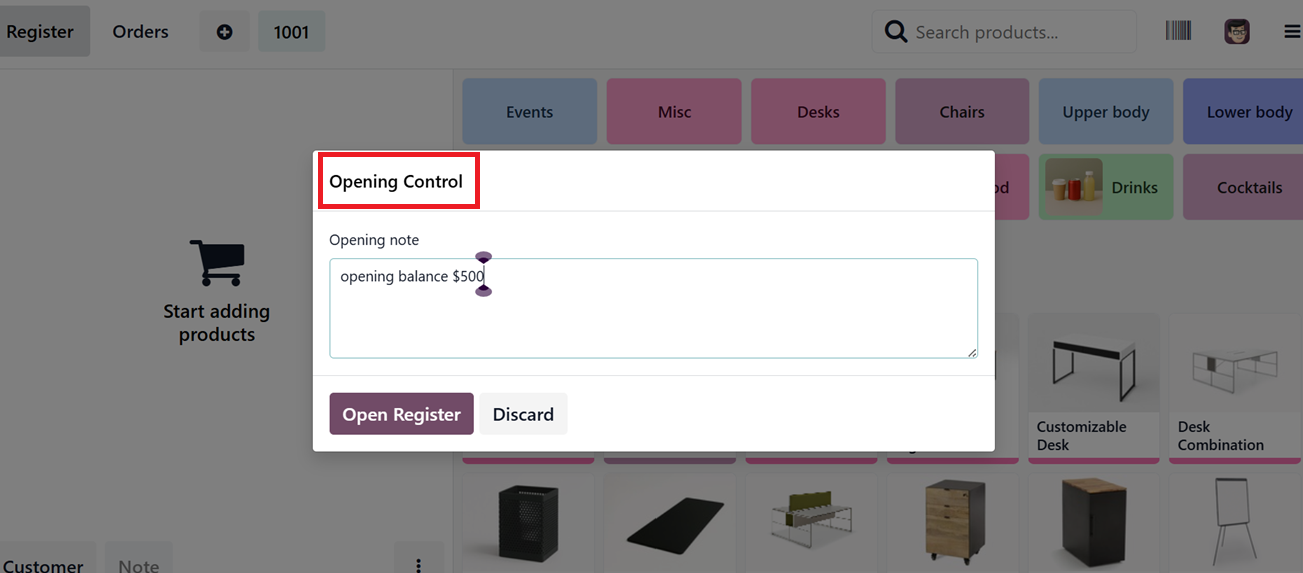
To start selling in the newly created POS Session, click on the ‘Open Register’ button from the session’s kanban card. Then, you’ll be asked to enter the opening cash balance and any notes for the session in a ‘Opening Control’ window. Click Open Register again to launch the Point of Sale interface, as depicted in the screenshot below.
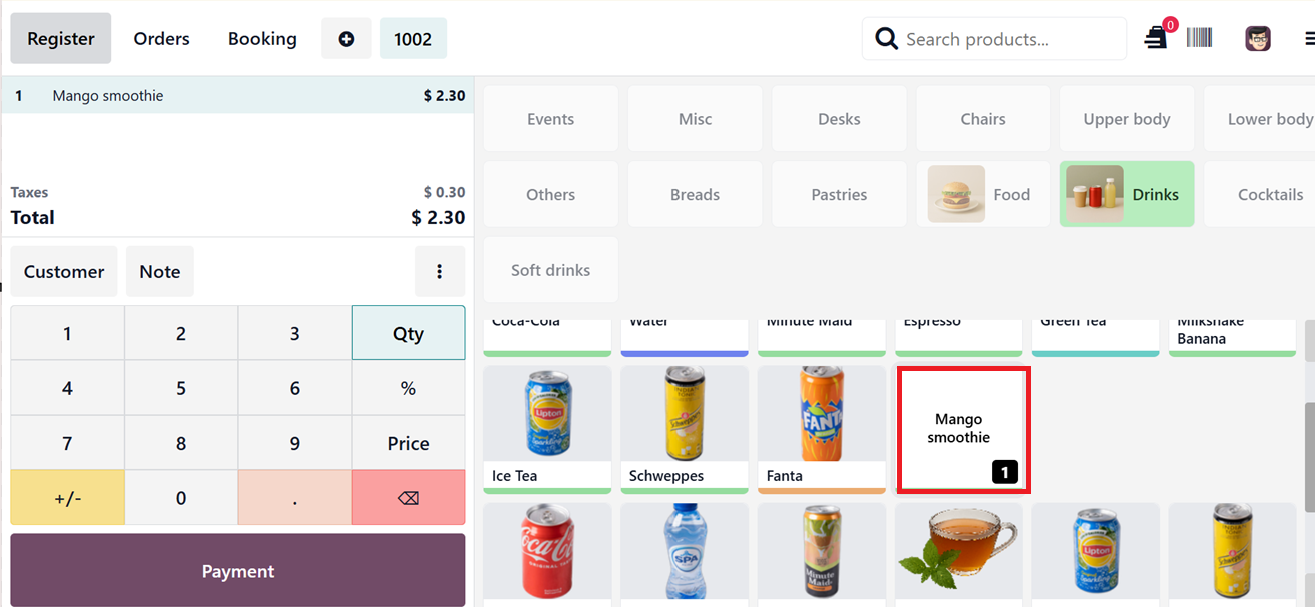
The PoS screen shows product categories at the top. If you want to limit which categories appear, you can enable Restrict Categories in the settings. You can then add items to the cart by selecting them from the product list.
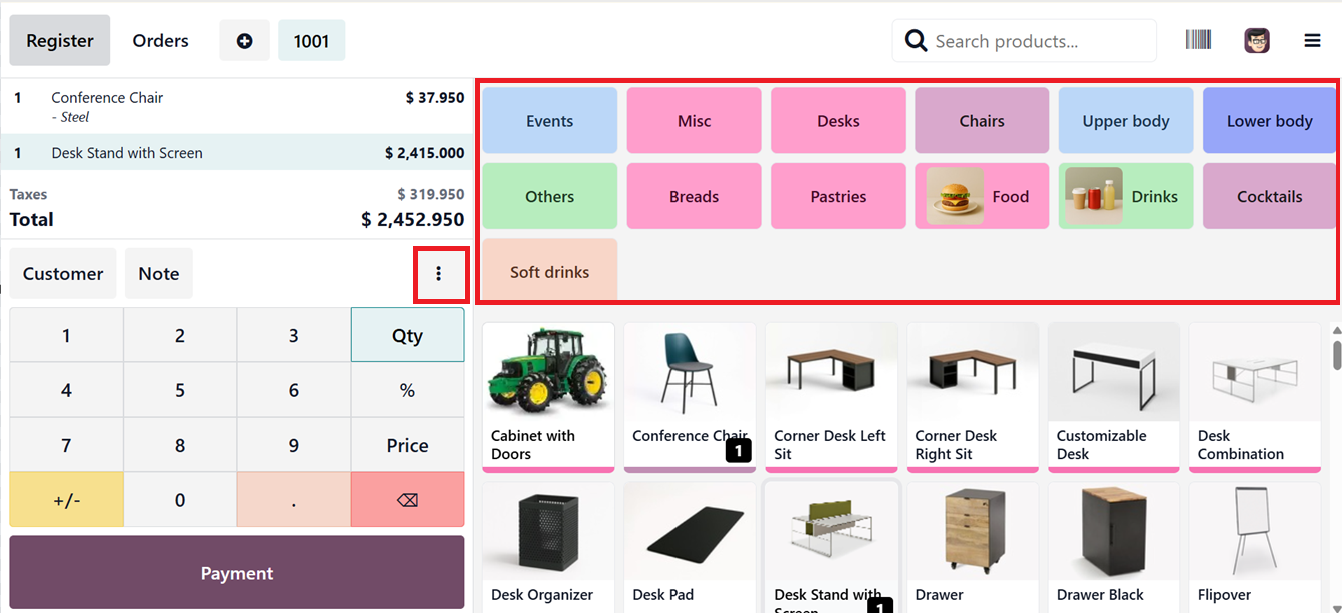
The three dotted vertical menu (Action button) gives access to more functions like adding Customer Note, Discounts, Quotation/Order, eWallet coupon codes, Pricelist, Refund, Cancel Order, Check product Info and more, as depicted in the screenshot below.

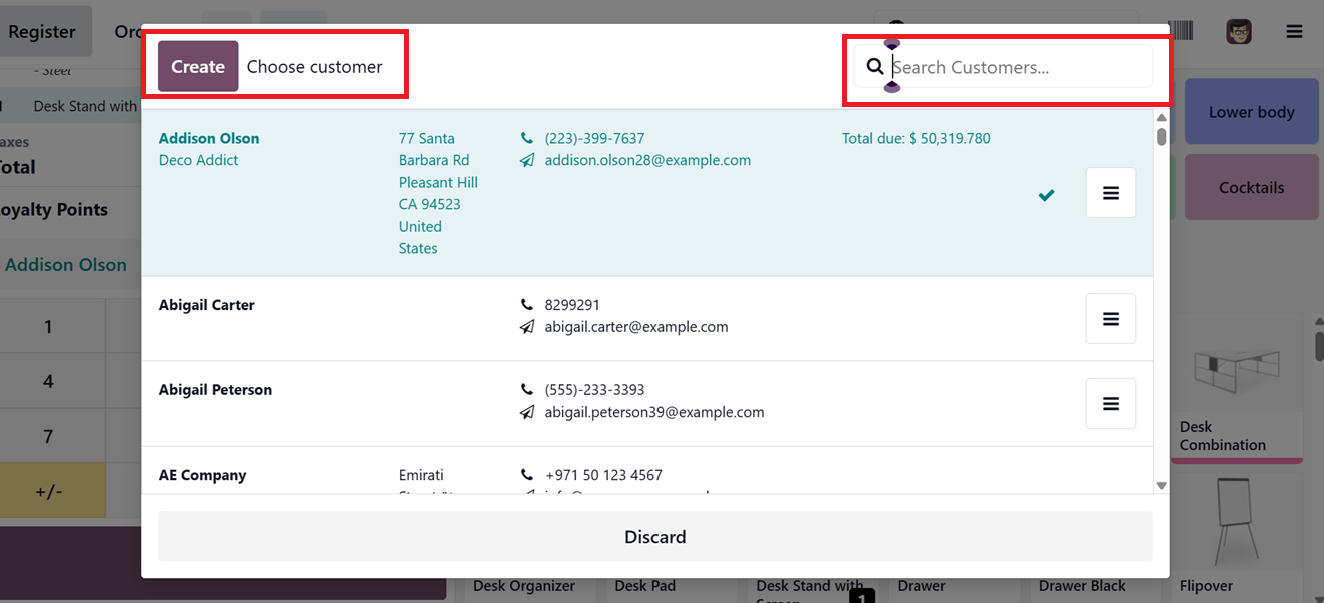
After choosing the products and choosing any other action operations from the ‘Actions’ menu, you can manage the customer by clicking on the Customer button. You’ll see saved customer profiles and can search for or create new ones.
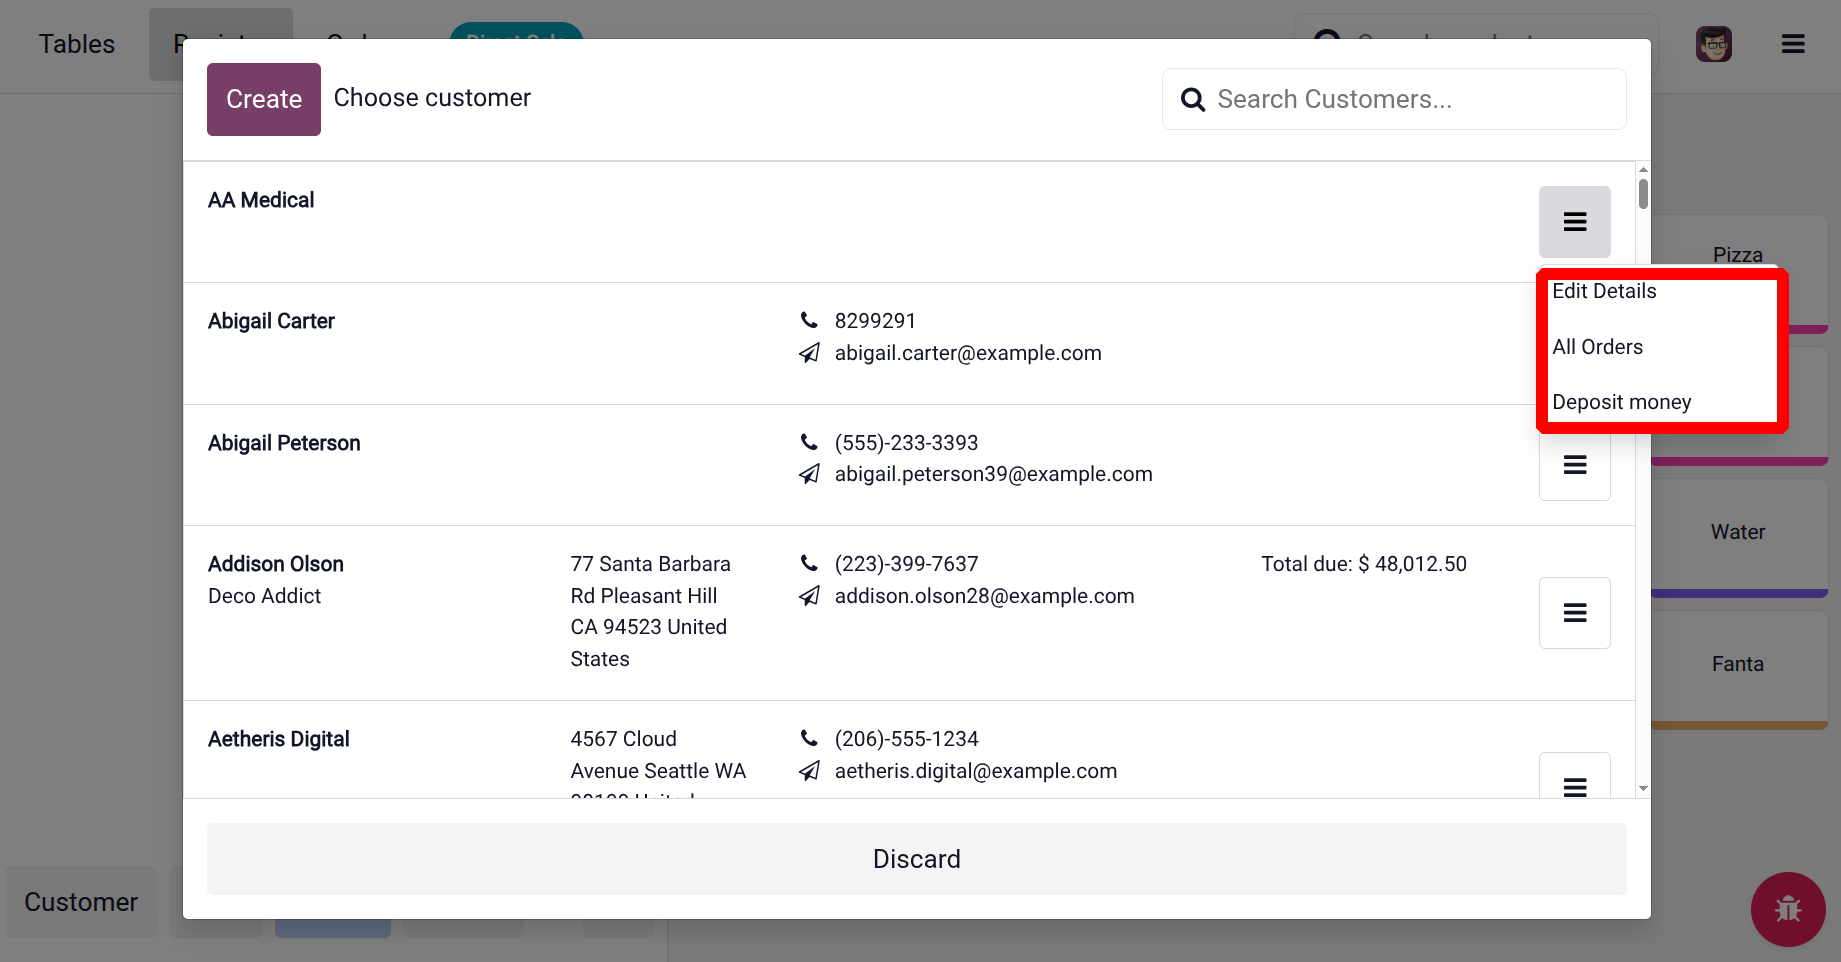
While clicking on the

icon there shows 3 options, Edit Details, All Orders, and Deposit Money/Settle Invoices, as shown in the screenshot below.
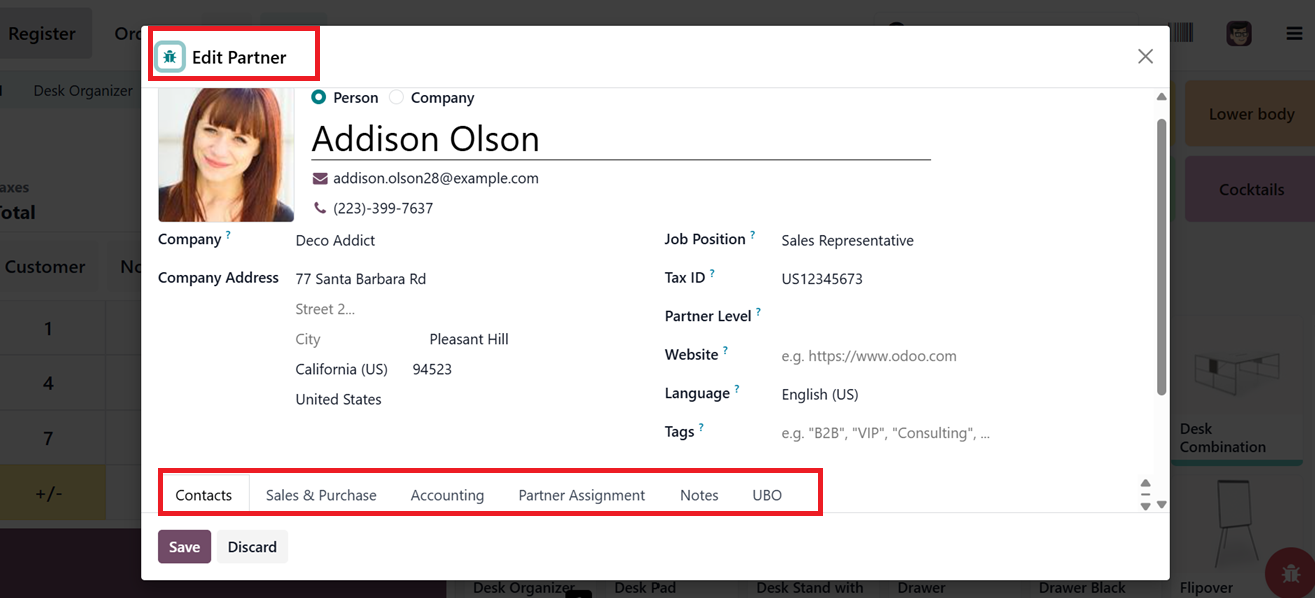
The ‘Edit Details’ button will open the customer form, where you can add all the customer details, as depicted in the screenshot below.
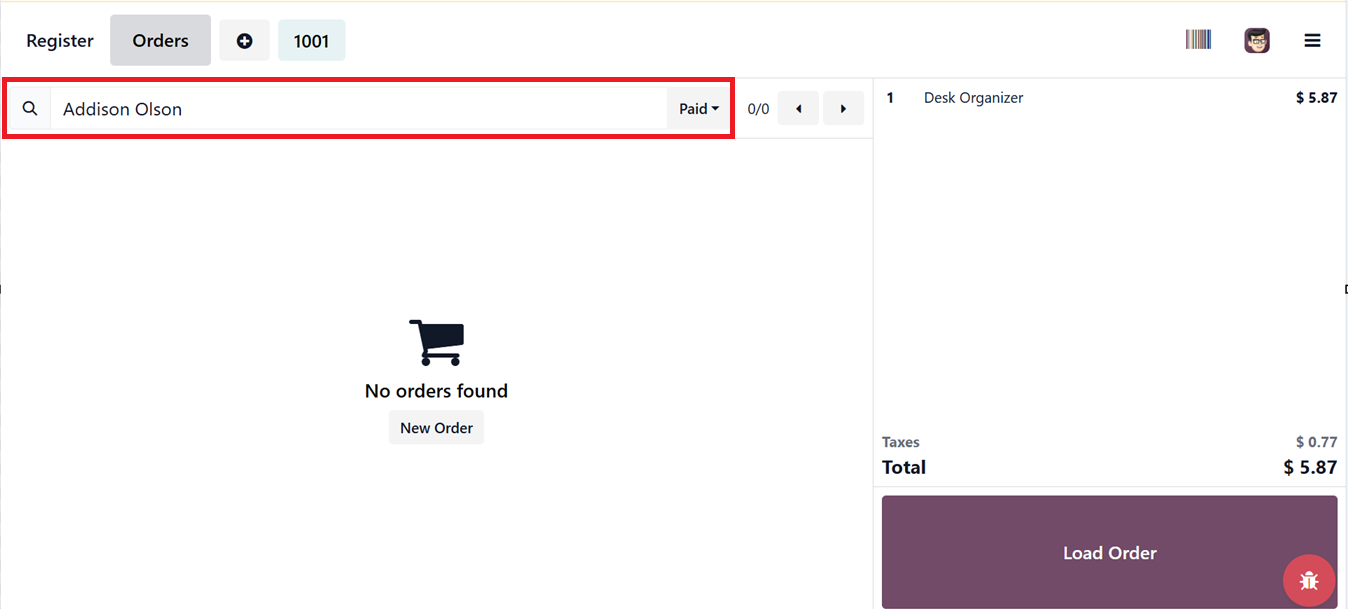
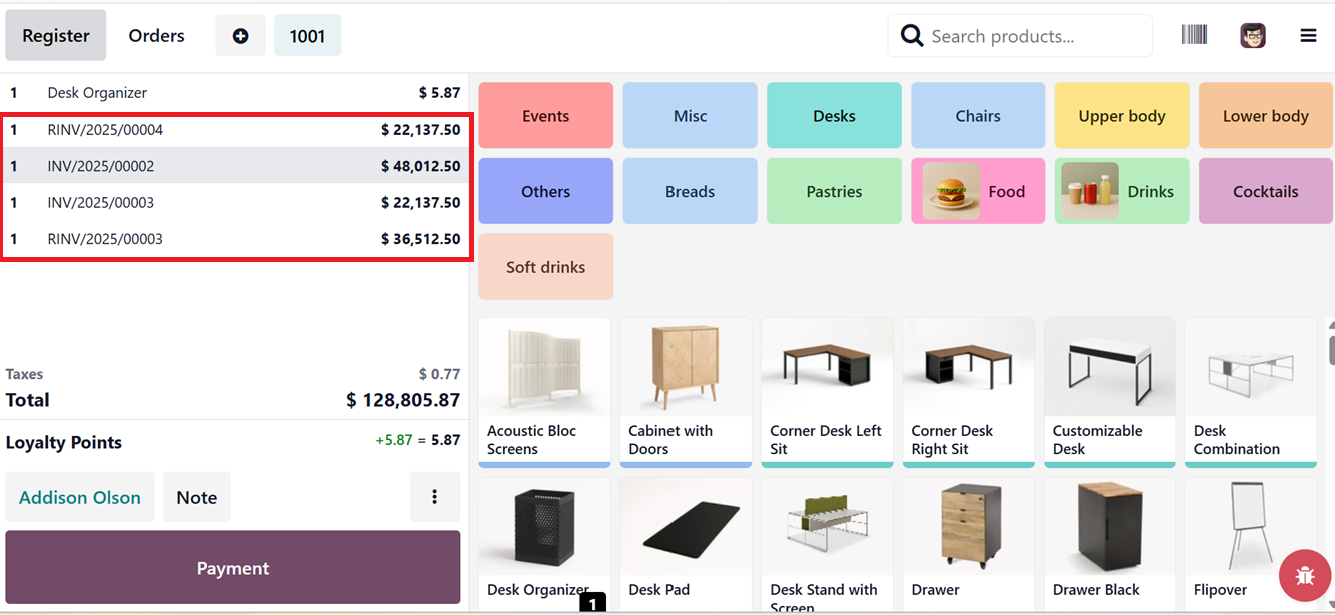
The ‘All Orders’ button opens the Orders window for that specific customer, allowing you to view, manage, and analyze all of their order details, as shown in the screenshot below.
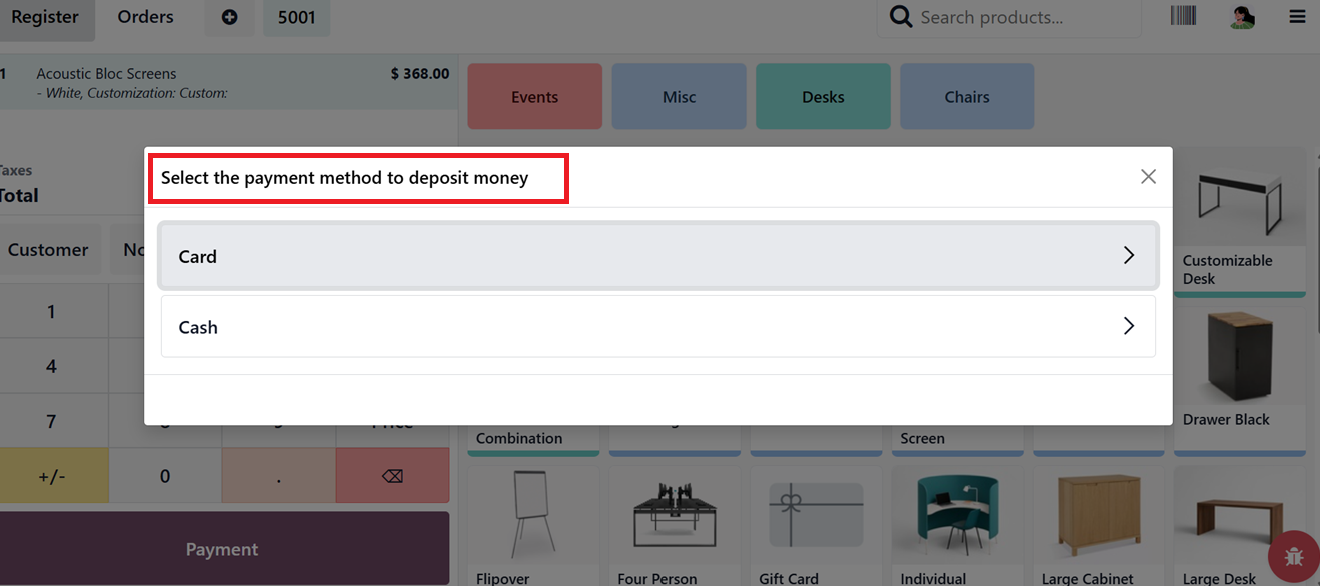
The ‘Deposit Money’ feature allows users to record cash deposits made into the POS cash register. This can include adding starting cash at the beginning of a session or depositing extra funds during operations. It helps maintain accurate cash control by tracking all money added to the register, ensuring transparency and proper cash management throughout the POS session.
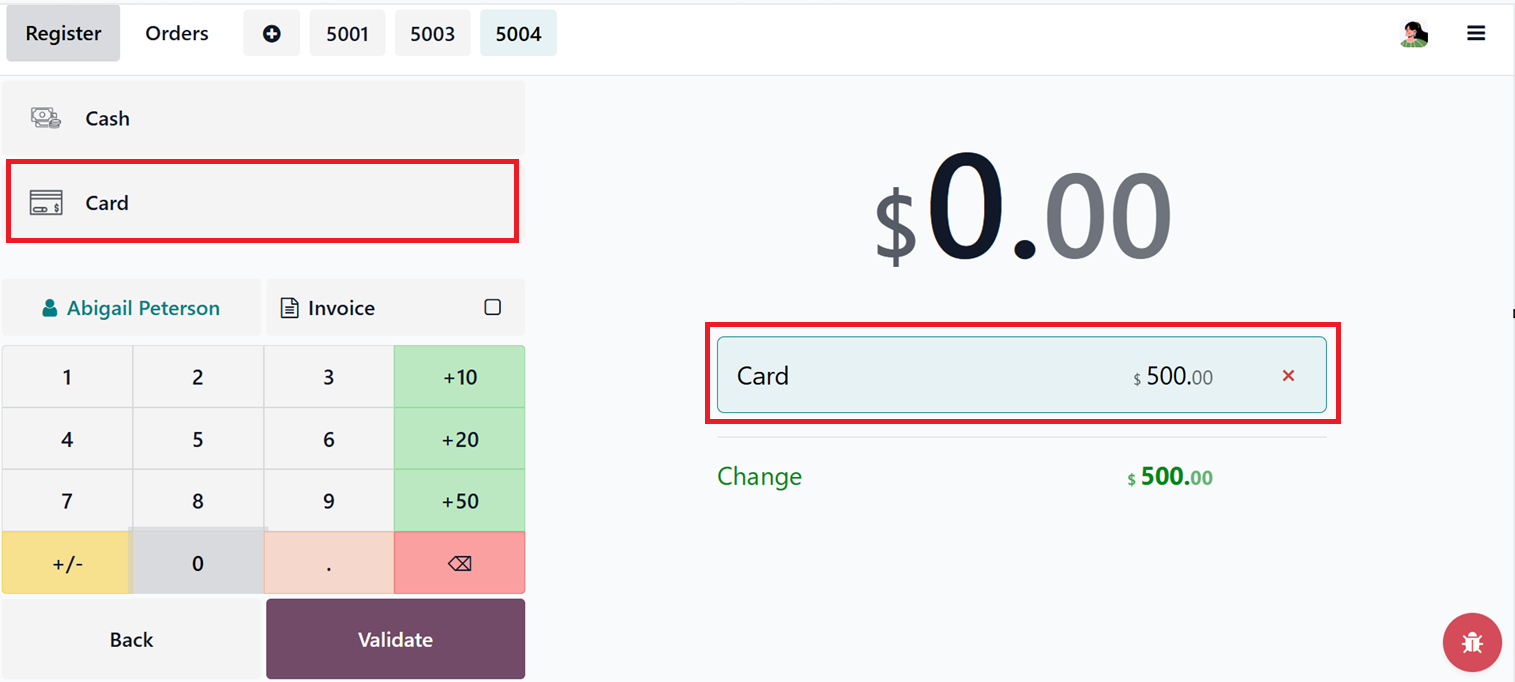
After clicking on the ‘Deposit Money’ button, you have to choose a payment method to deposit money from a pop-up window, as shown in the screenshot below.
After choosing the relevant payment method, enter a required amount with the help of the editor. Then, the amount and payment method will be displayed in the payments window, as shown in the screenshot below.
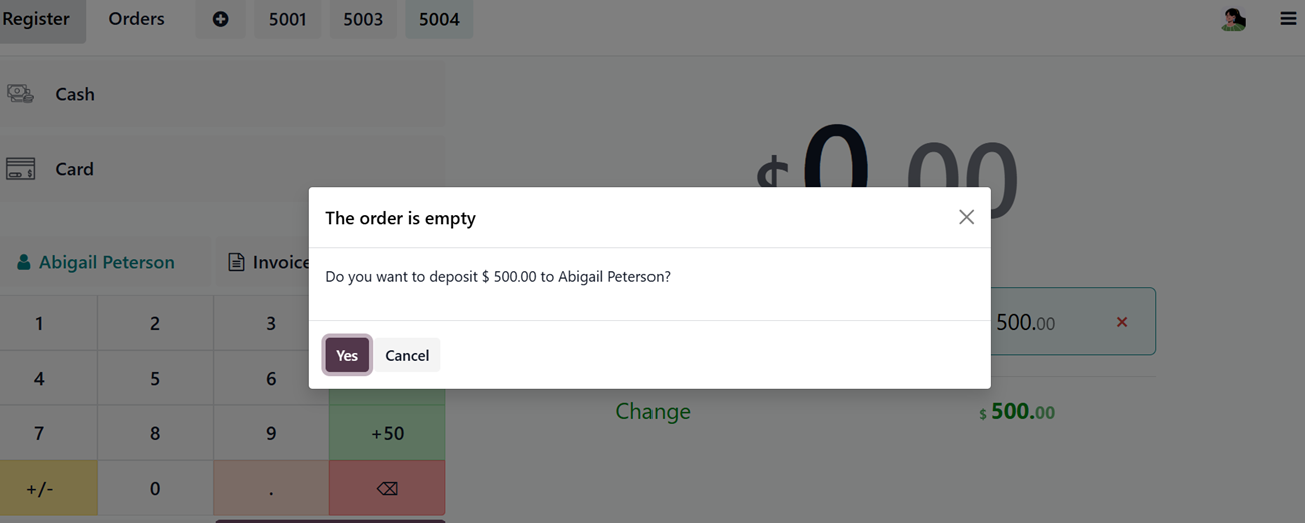
Then, validate the payment using the ‘Validate’ button and confirm the deposit amount using the ‘Yes’ button.
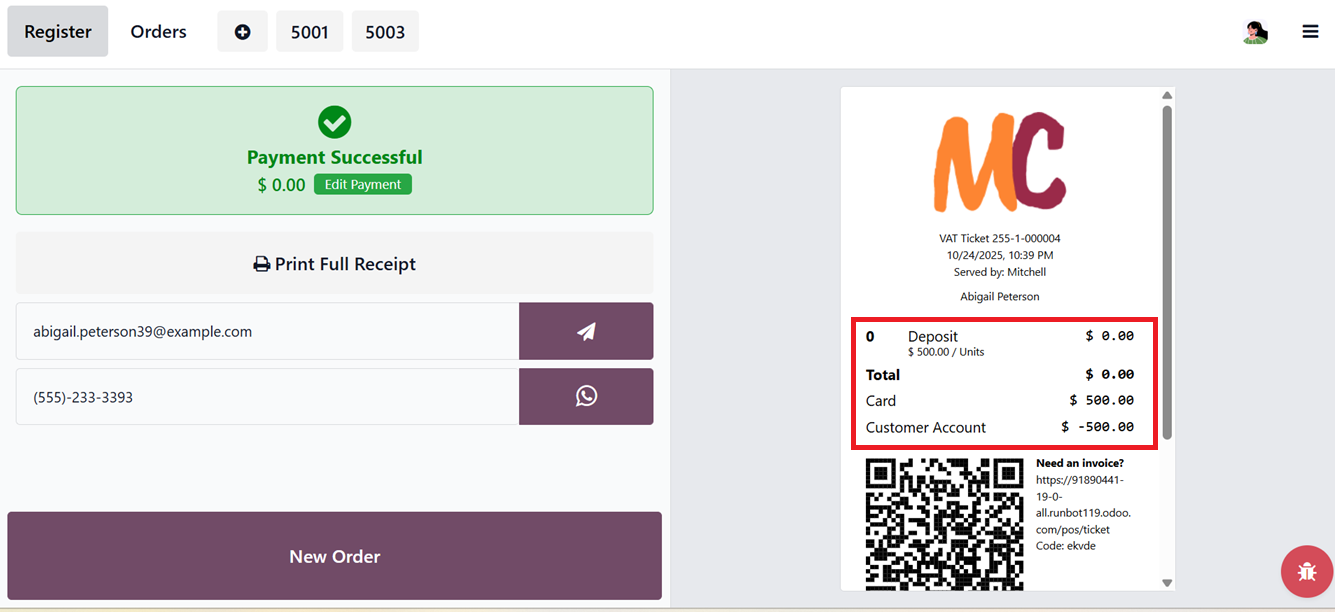
Finally, the transaction will be finalized just like a regular order payment, and the deposited amount will be credited to the customer’s account. You can then view the deposit details on the customer’s receipt, as shown in the highlighted section of the screenshot below.
Finally, the ‘Settle Invoices’ feature allows users to record payments for outstanding customer invoices directly from the POS interface. This appears only if the customer has a due amount. This means that if a customer has pending invoices created through sales orders or other transactions, the cashier can select the invoices from the pop-up window, as shown in the screenshot below.
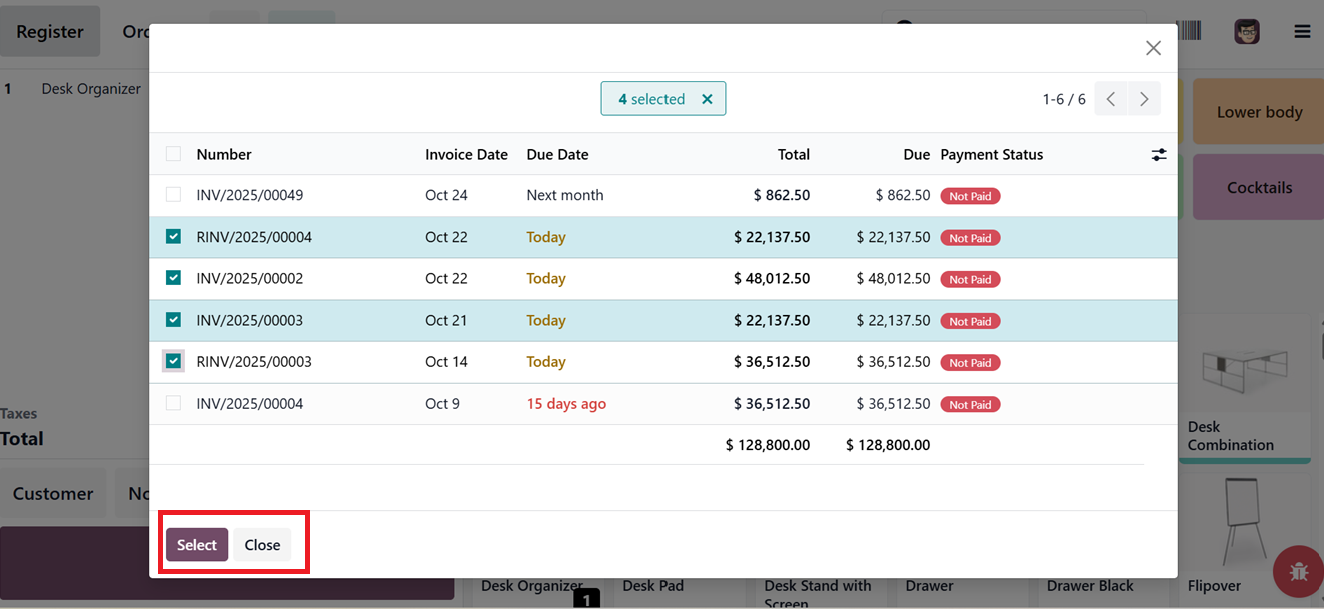
Then, the selected invoices will be added into the POS order lines. So, you can settle those invoices using any available payment method during a POS session as usual, as shown in the screenshot below.
This feature helps streamline payment collection, maintain accurate accounting records, and ensure that all customer balances are up to date without needing to switch between different Odoo modules.
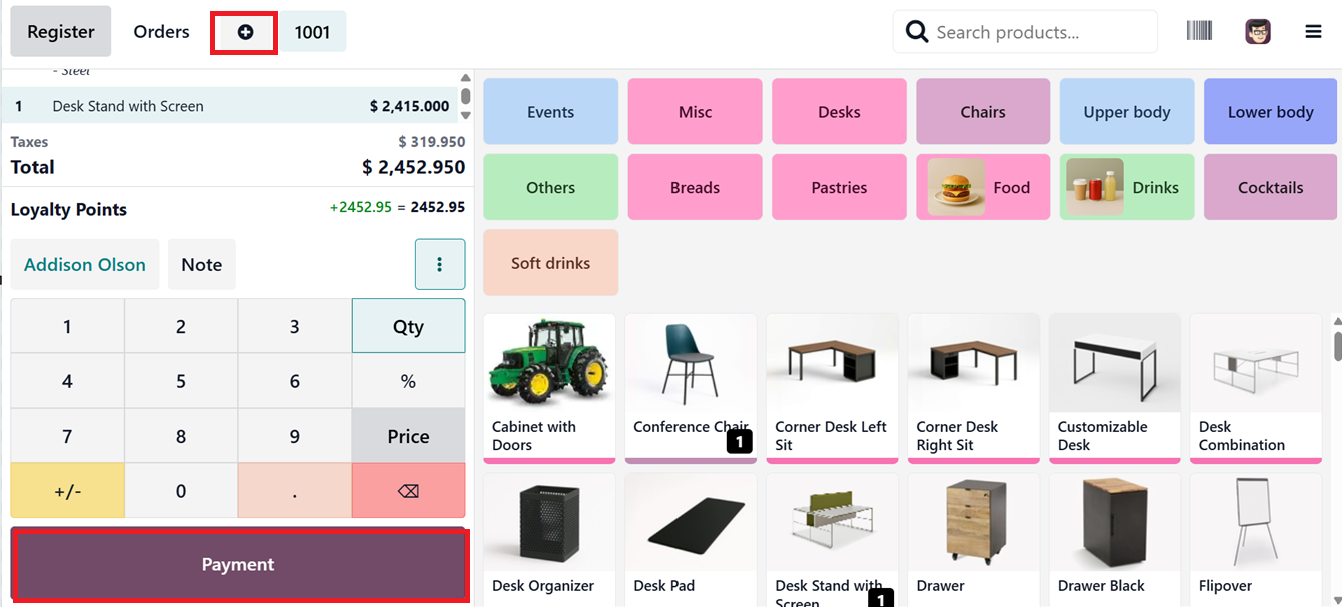
After selecting the customer,you can also add another order to the same Pos section using the ‘+’ icon provided at the top left side of the page. Then, click on the Payment button to continue.
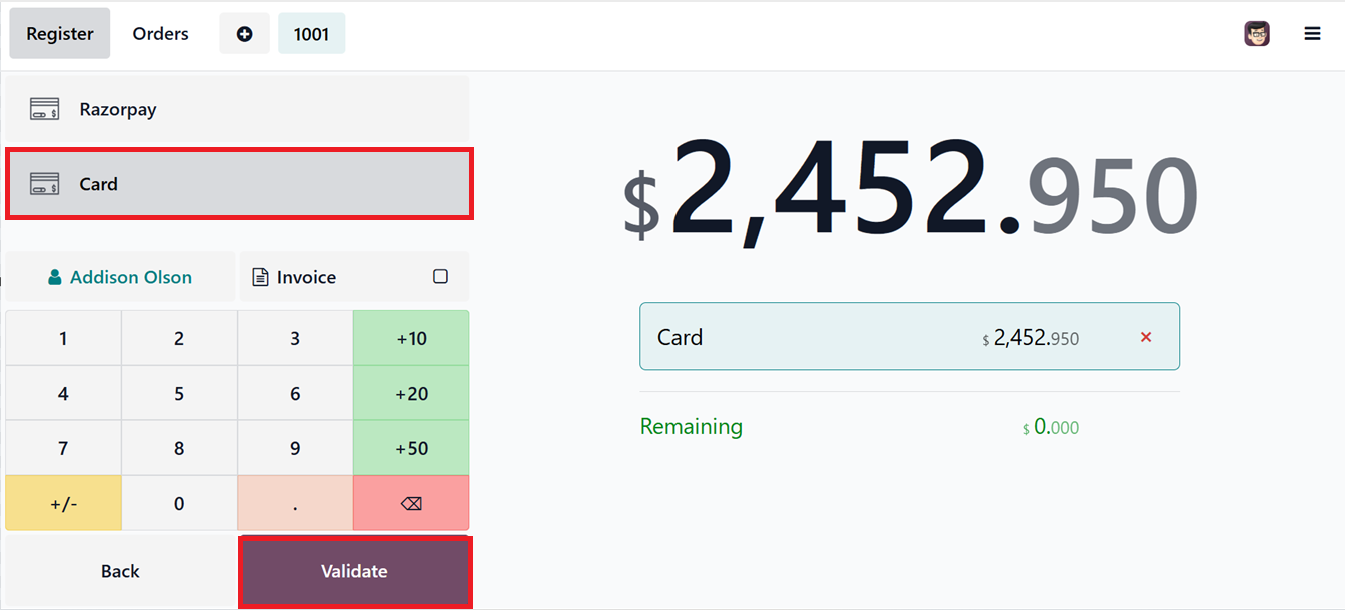
The payment screen will show all the available payment methods. So, you can choose a convenient one and click on the Validate button to complete the transaction.
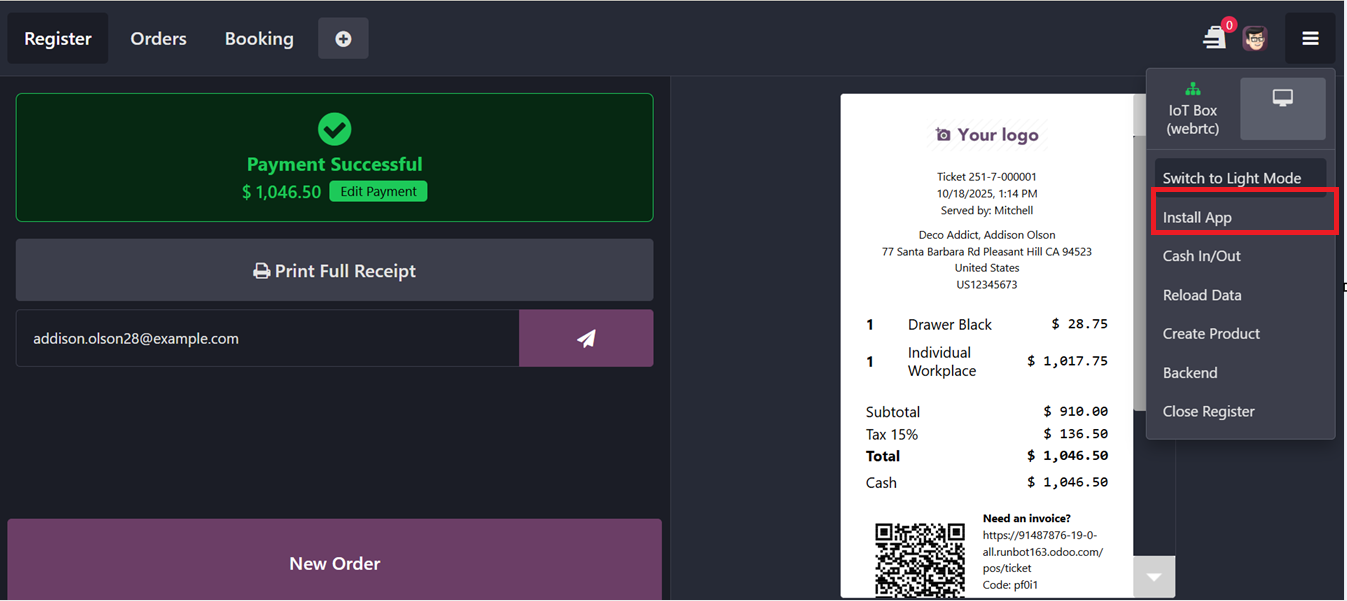
After the payment is processed, a confirmation screen will appear by showing the customer receipt. From this screen, you can choose to Print Full Receipt, email it to the customer, or start a New Order.
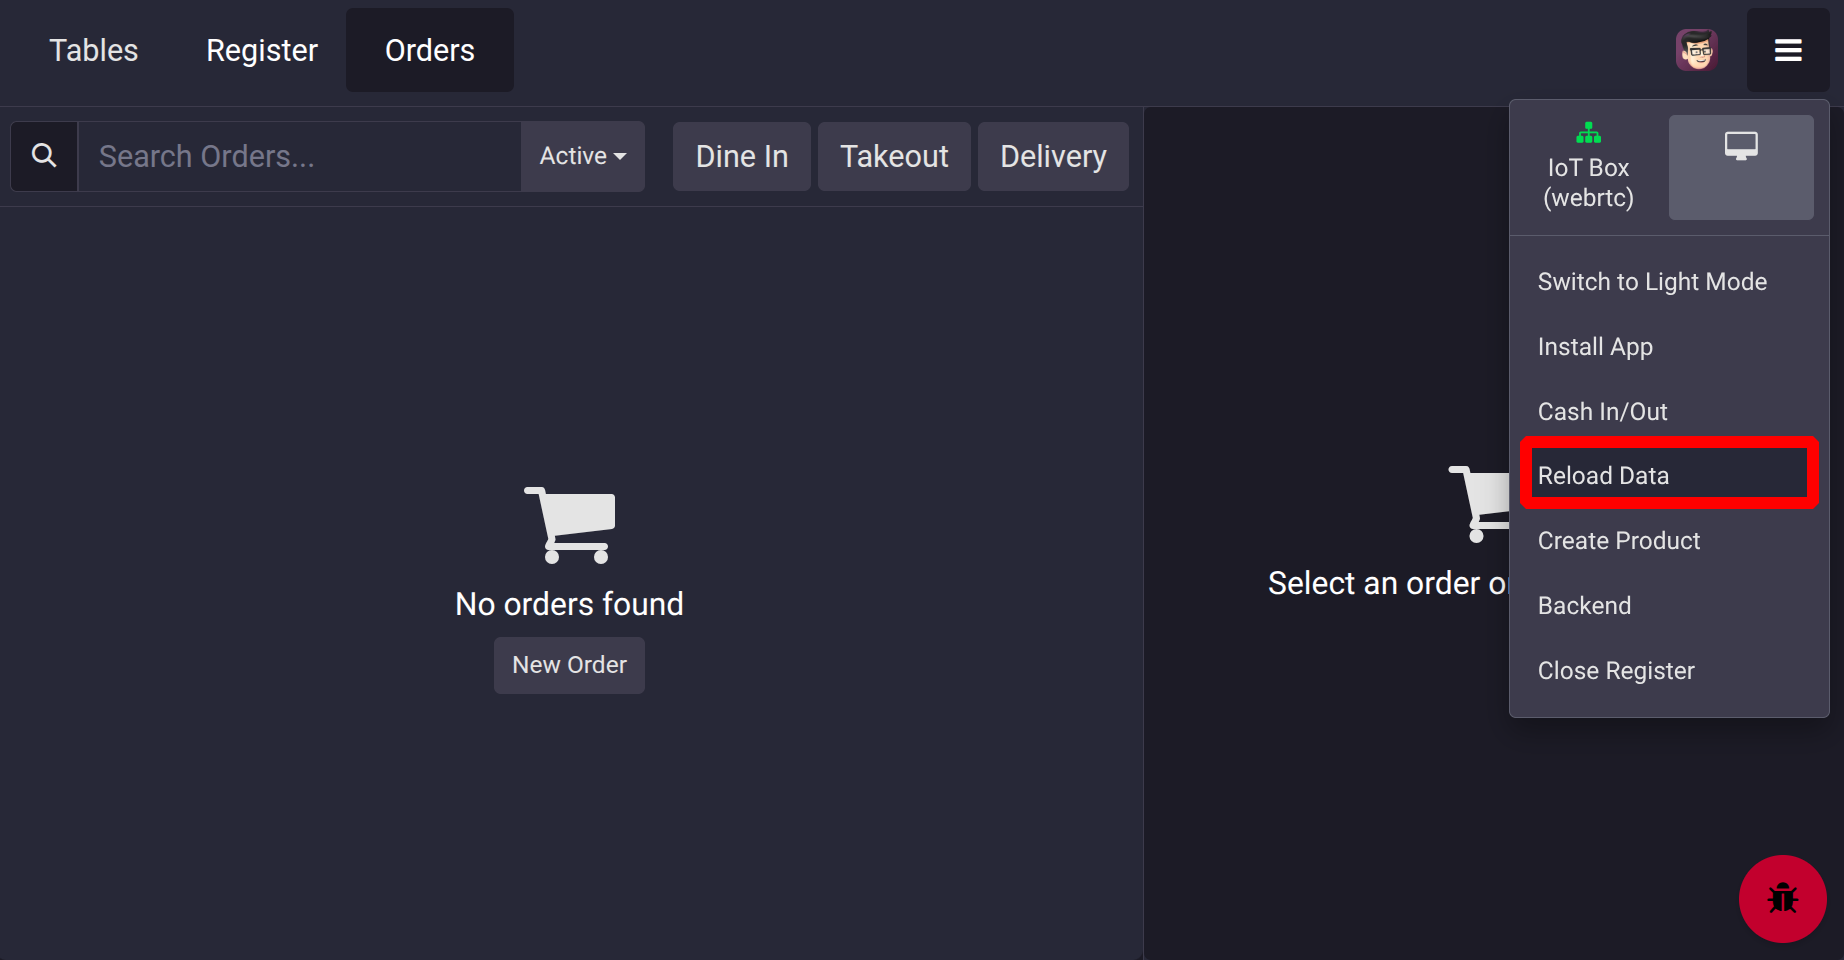
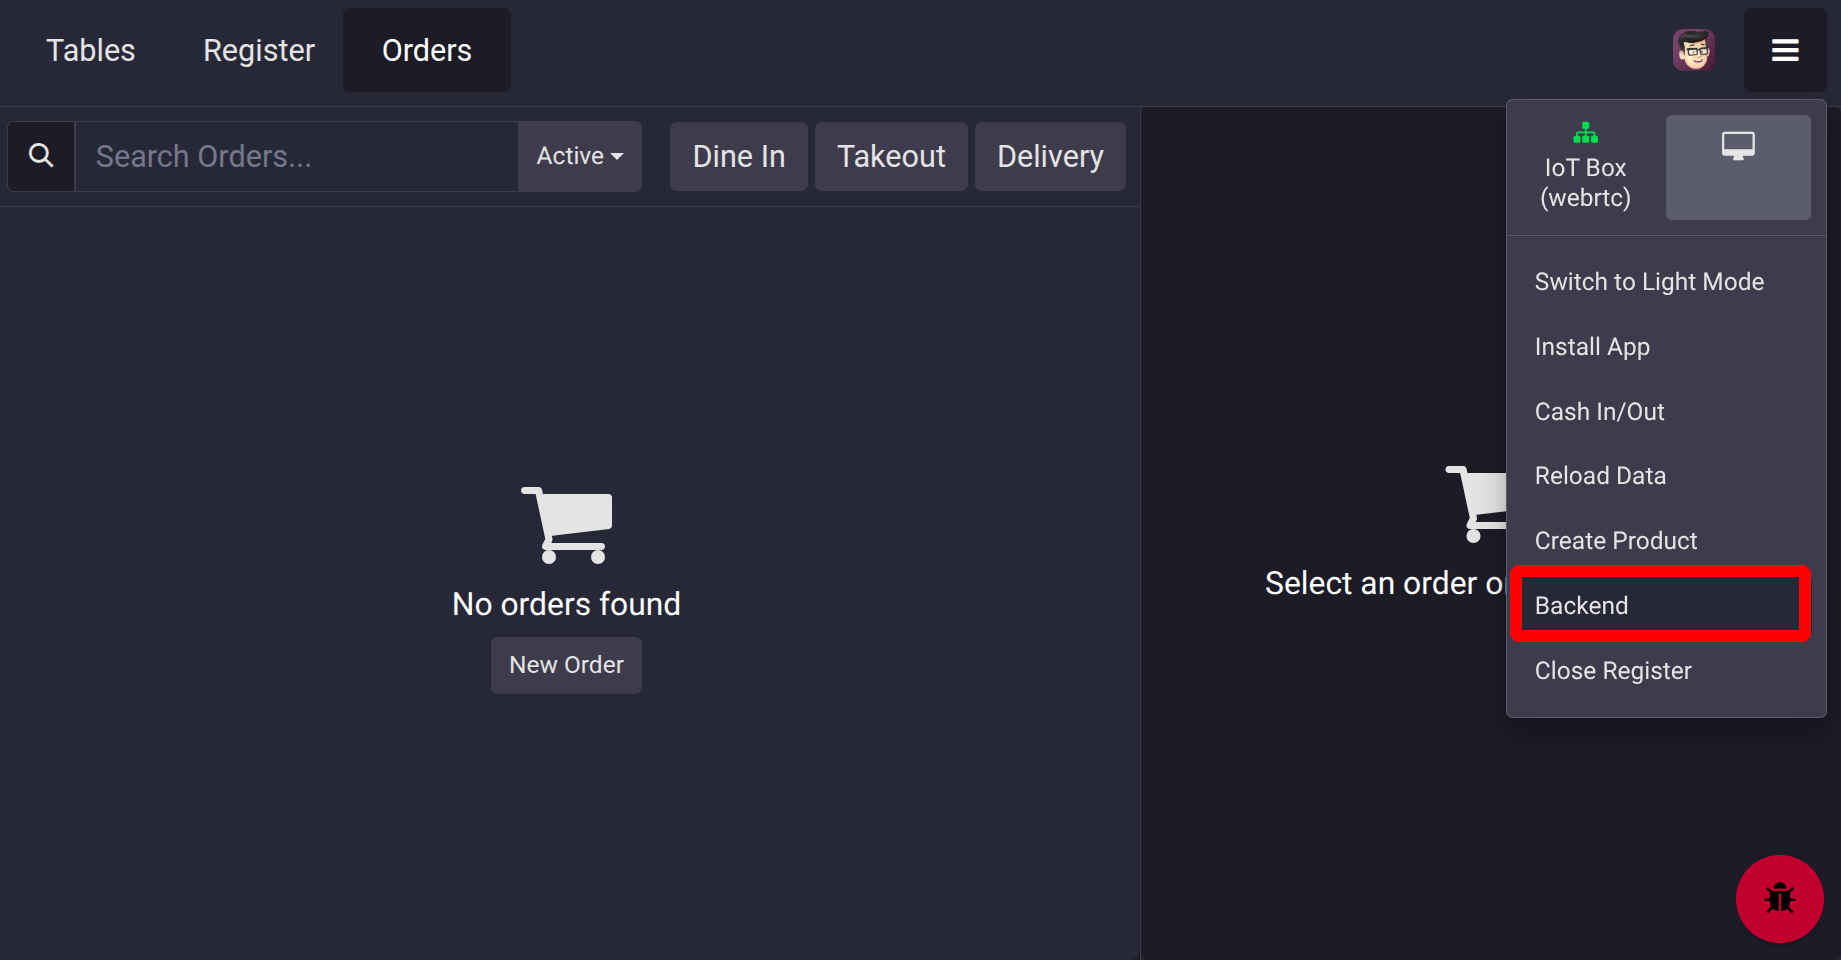
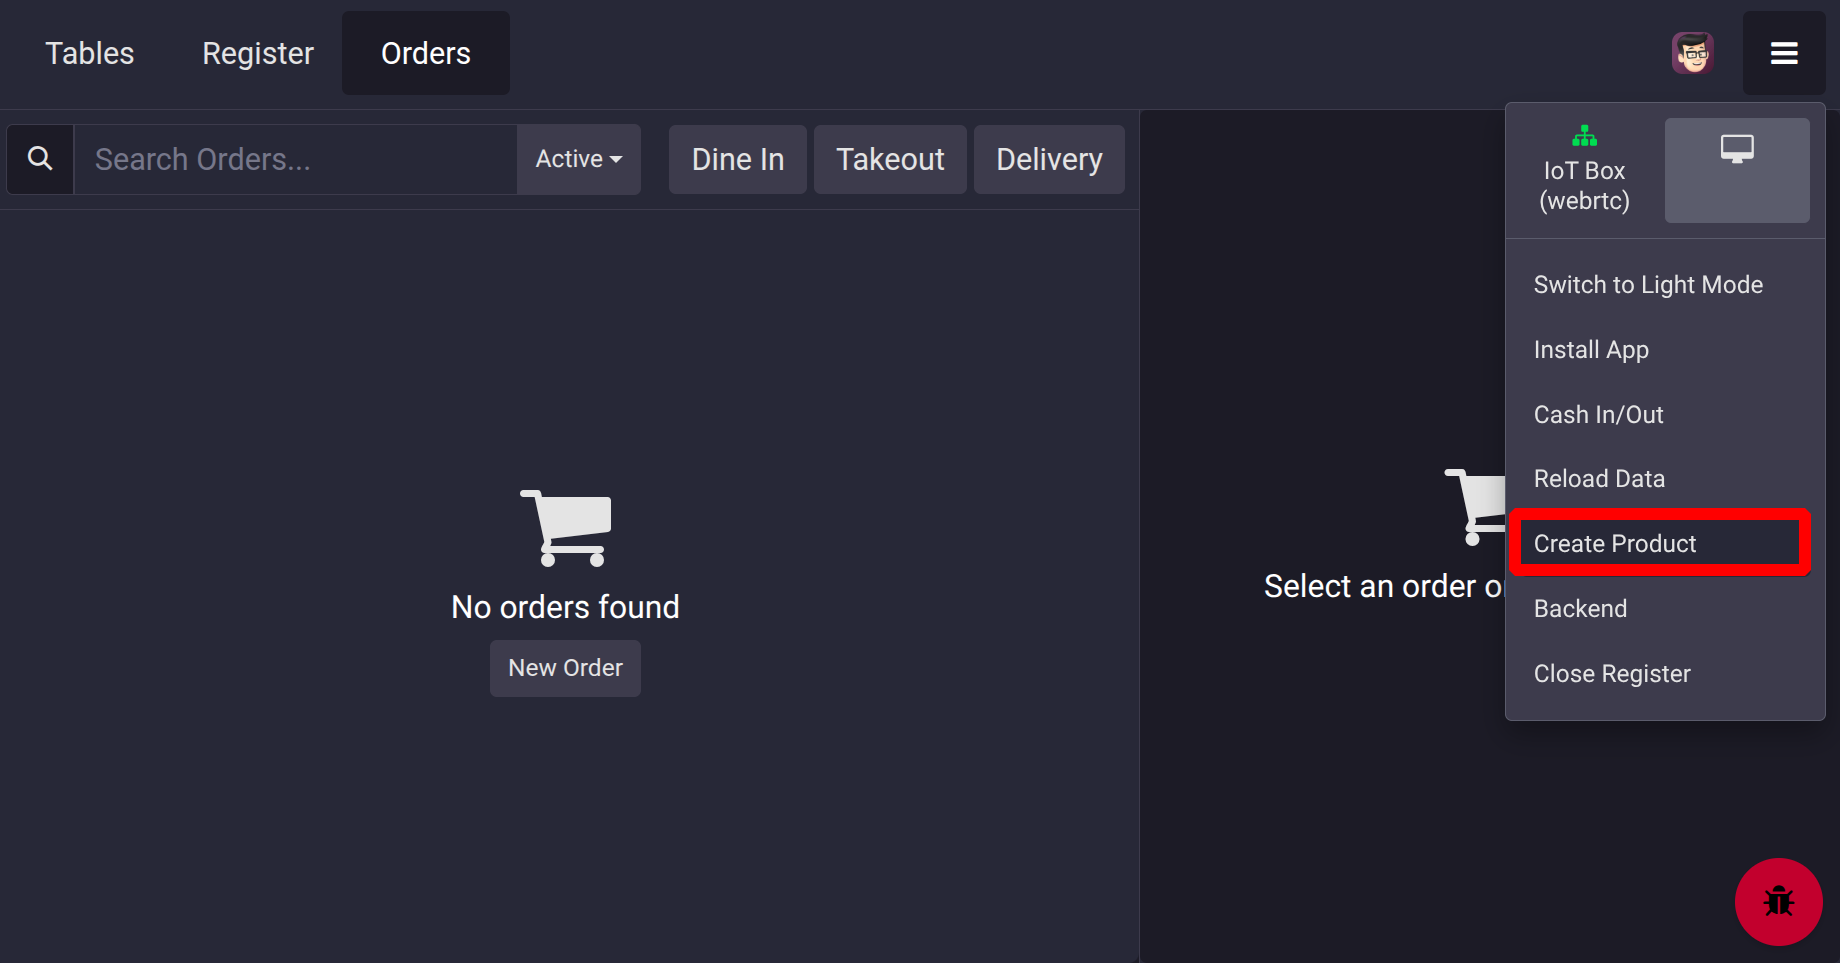
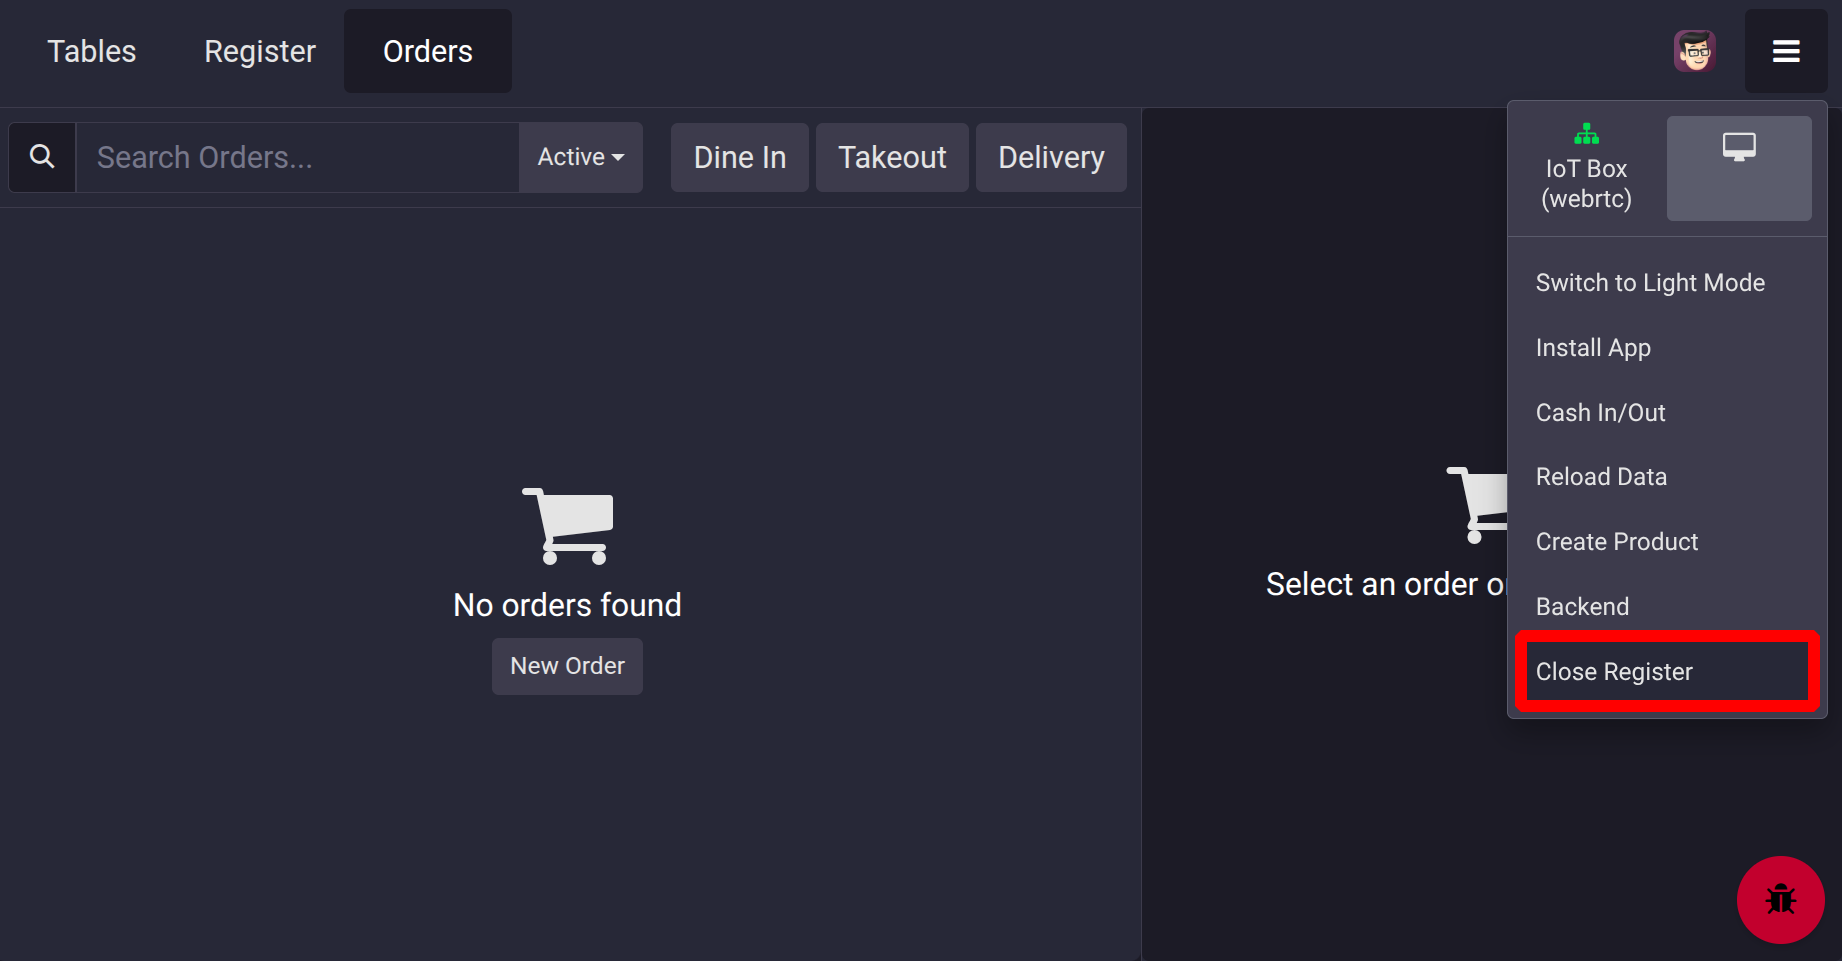
Finally, a small menu icon in the top-right corner gives access to extra features like Switch to dark Mode, Install App, Cash In/Out, Reload Data, Create Product, Backend and Close Register options, as shown in the screenshot below.
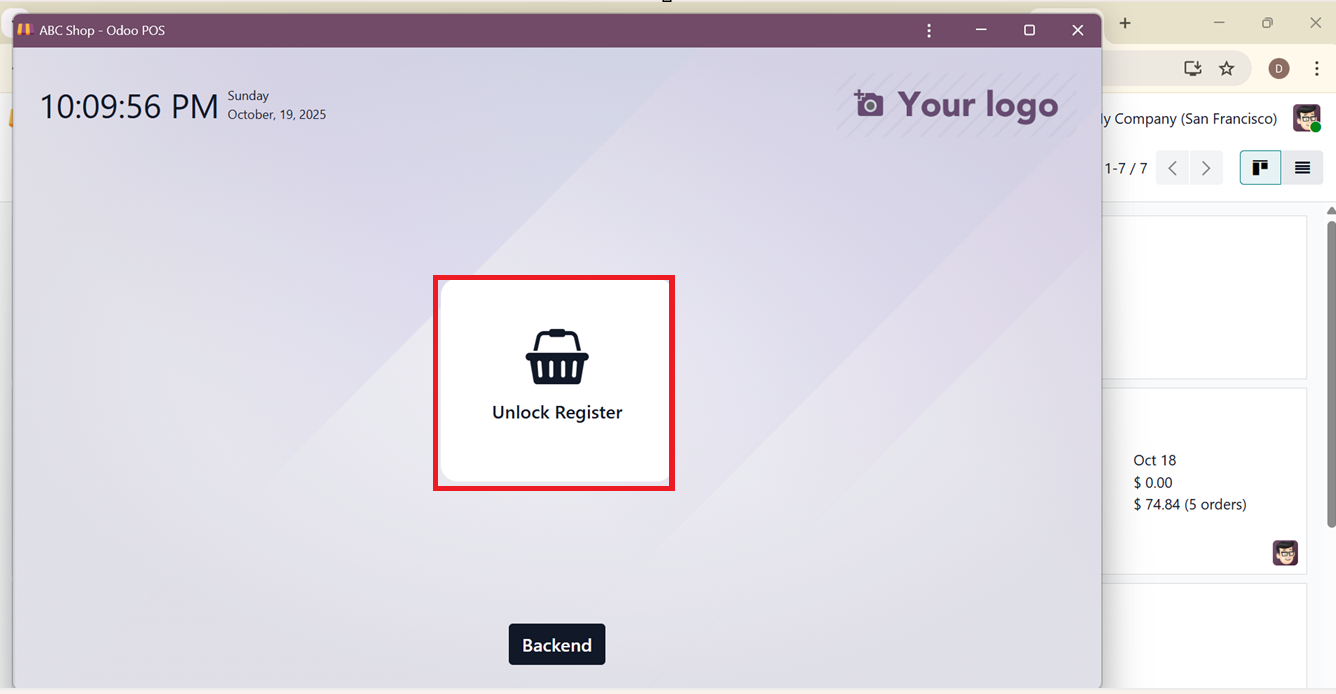
You can install the PoS as a Progressive Web App (PWA) using the Install App button. Clicking on the button will open an app installation window from where you can simply install the POS application using the ‘Install’ button.

To fully install the application, click on the ‘Install’ button and you can login from the interface using the ‘Unlock Register’ button, as shown in the screenshot below.
The 'Reload Data' button refreshes any pending transactions or newly entered data in your POS system.
The ‘Backend’ button from the POS interface menu will take you to the backend editor section of the Odoo POS Module.
Cash In/Out
The ‘Cash In/Out’ feature allows users to document non-sales-related cash transactions such as initial float amounts, deposits, payouts, and refunds. This maintains transparency and ensures proper cash flow tracking.
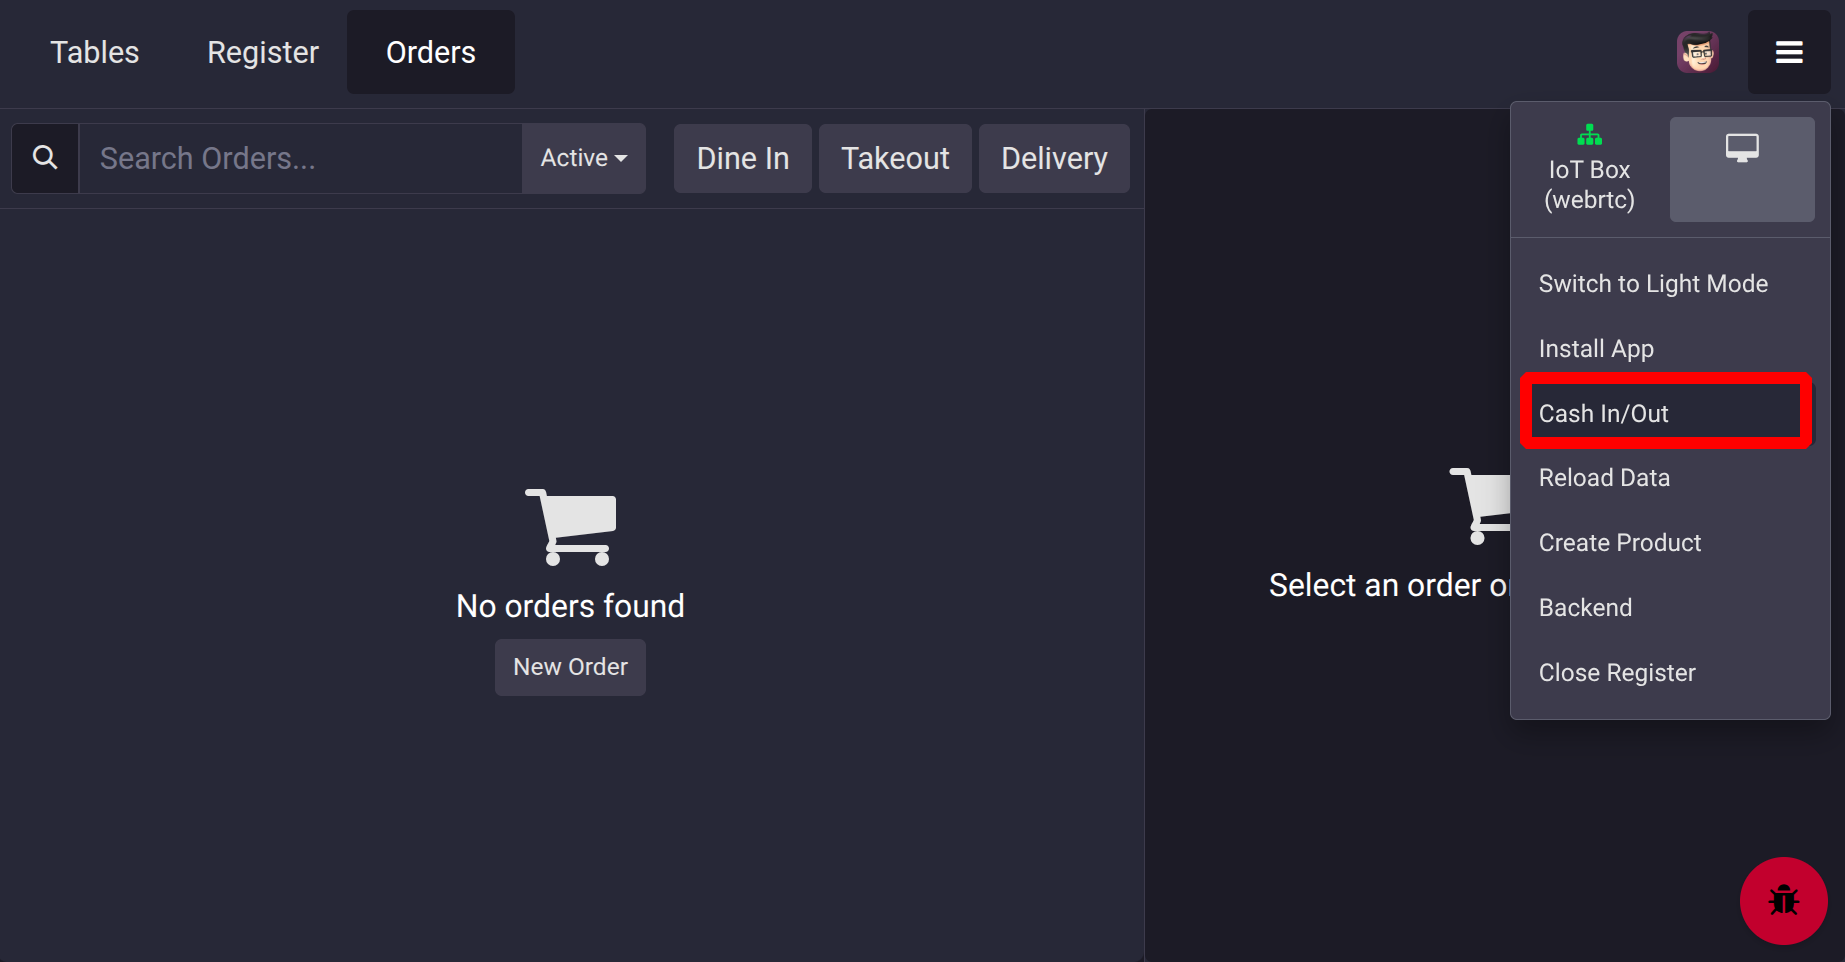
To log a new transaction, click on the ‘Cash In/Out’ button. Select the transaction type (Cash In or Cash Out), and then enter the reason and amount at the top right corner of the form., as depicted in the screenshot below.
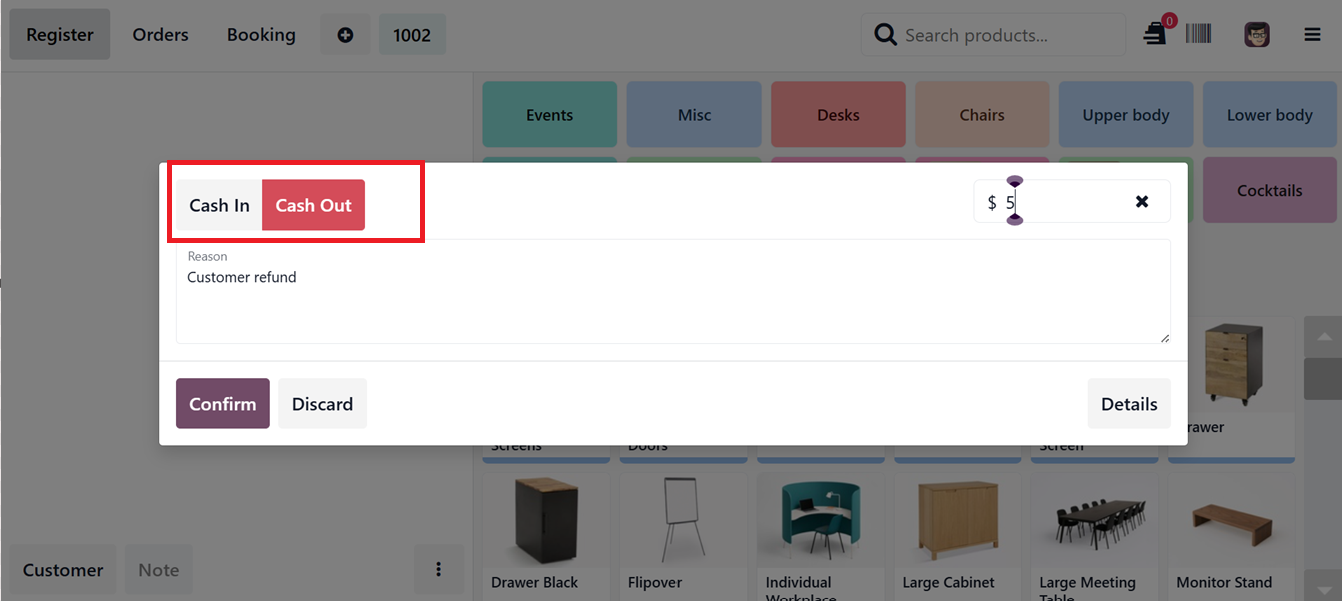
Finally, Confirm the details by clicking on the ‘Confirm’ button. So, you will get a notification confirming the entry, and the record will be stored in the daily cash register log. This data is accessible when closing the register.
Creating Products from the PoS Interface
In Odoo POS Module, you can add a new product directly from the PoS interface. To check this feature, click on the ‘Create Product’ button on the PoS terminal. A product configuration pop-up will appear.
Here, fill in the Product Name, Barcode, Sales Price, and Sales Taxes information. You can also upload an image via the ‘Edit’ image button. Enable the ‘Track Inventory’ if you want to manage stock quantities. Assign the product to a ‘POS Category’ and a highlight ‘Color’ for a proper catalog display, as shown in the screenshot below.
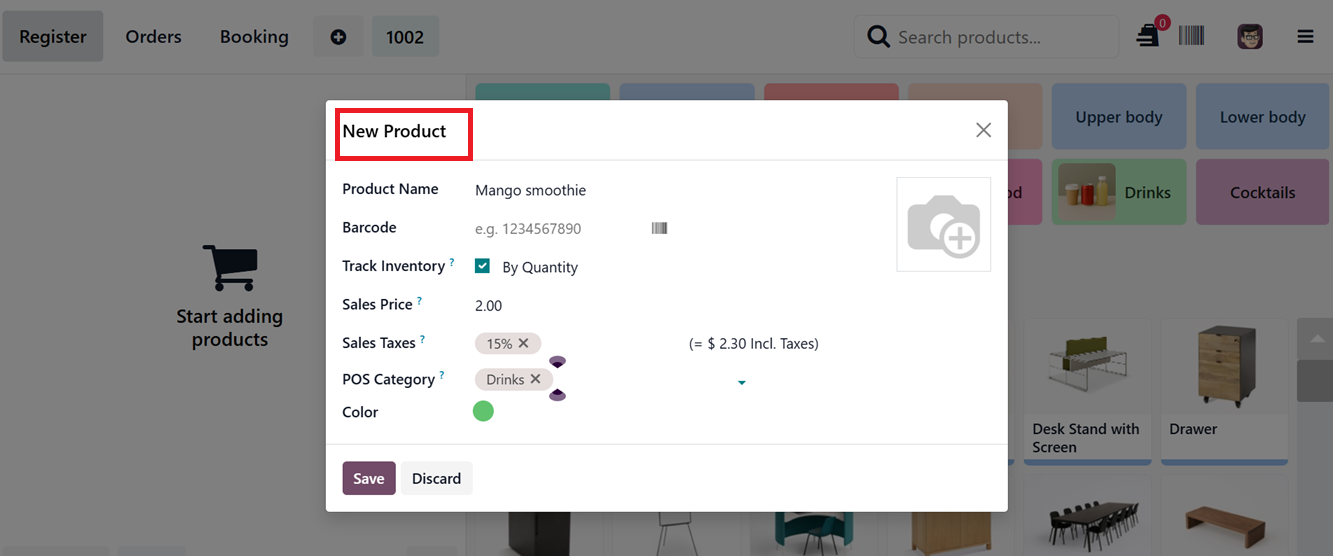
Once all the details are saved, the product is added to the PoS catalog and becomes available for selection within the session, as depicted in the screenshot below.
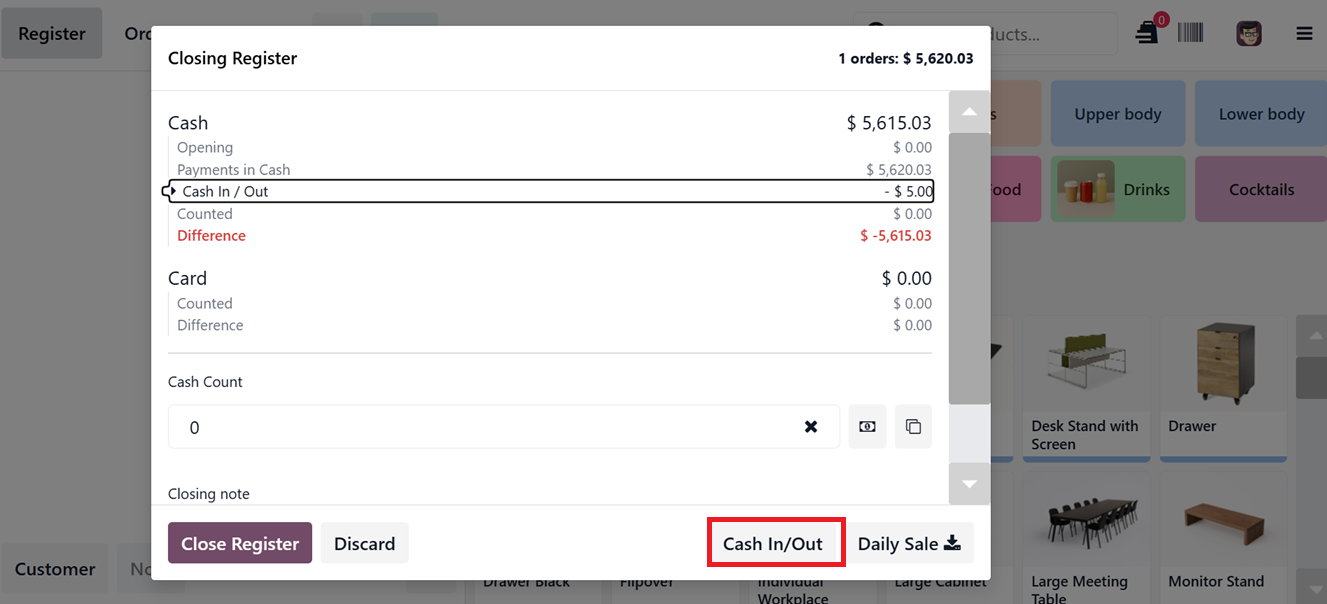
Closing the Register
After completing daily transactions, close the PoS session by clicking ‘Close Register’.
The closing summary will include Total orders, Amounts by payment method, Counted Differences, Cash In/Out details and opening/closing notes, as shown in the screenshot below.
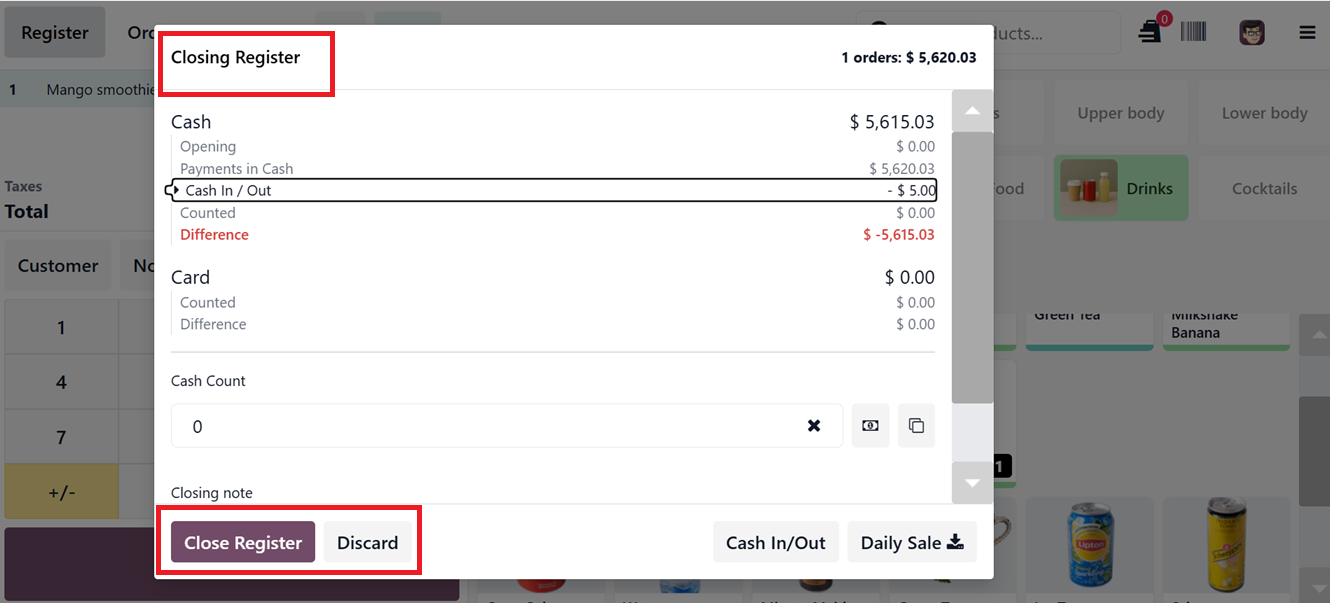
You can click on the ‘Daily Sale’ to download a sales summary report for the day. The ‘Cash In/Out’ button helps to view or manage the cash transaction details. To completely close the sales register of your POS session, select the ‘Close Register’, which may trigger a payment difference dialog box.
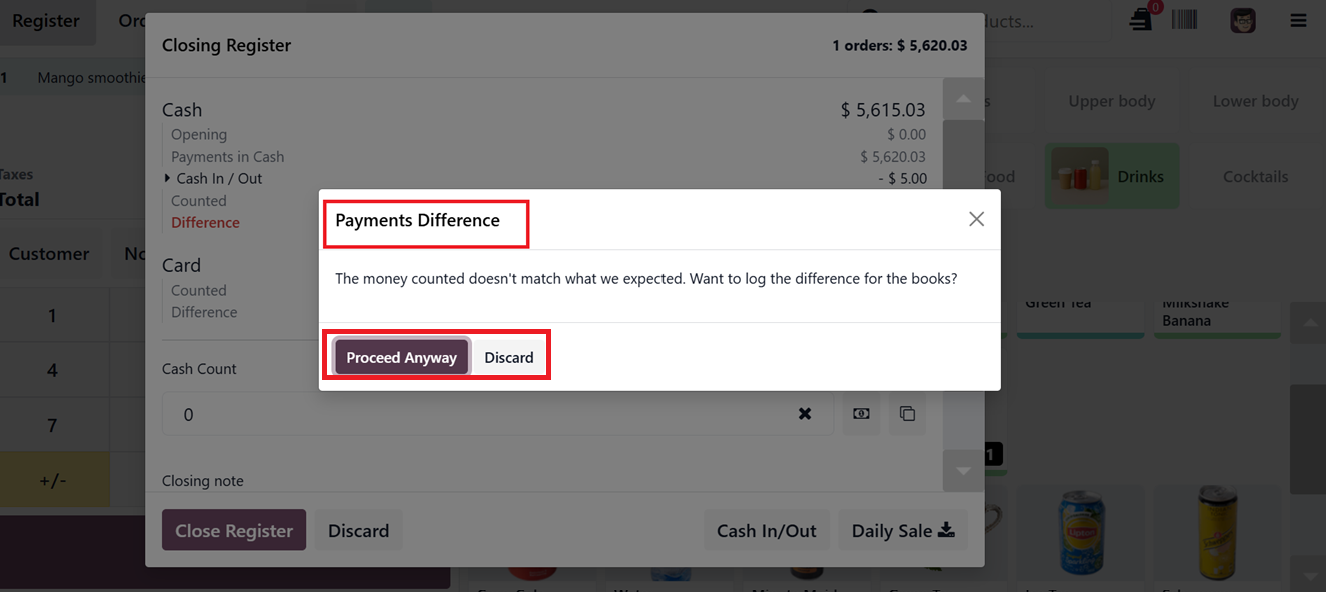
Then, click on the ‘Proceed Anyway’ to finalize the closure. You’ll be returned to the PoS start screen, where you can initiate a new session or go back to the Odoo backend.
Odoo’s PoS interface simplifies store operations including order processing, transaction monitoring, and cash handling. The system also supports extensive customization such as enabling advanced features and integrating with other Odoo modules for added functionality.