Orders Menu
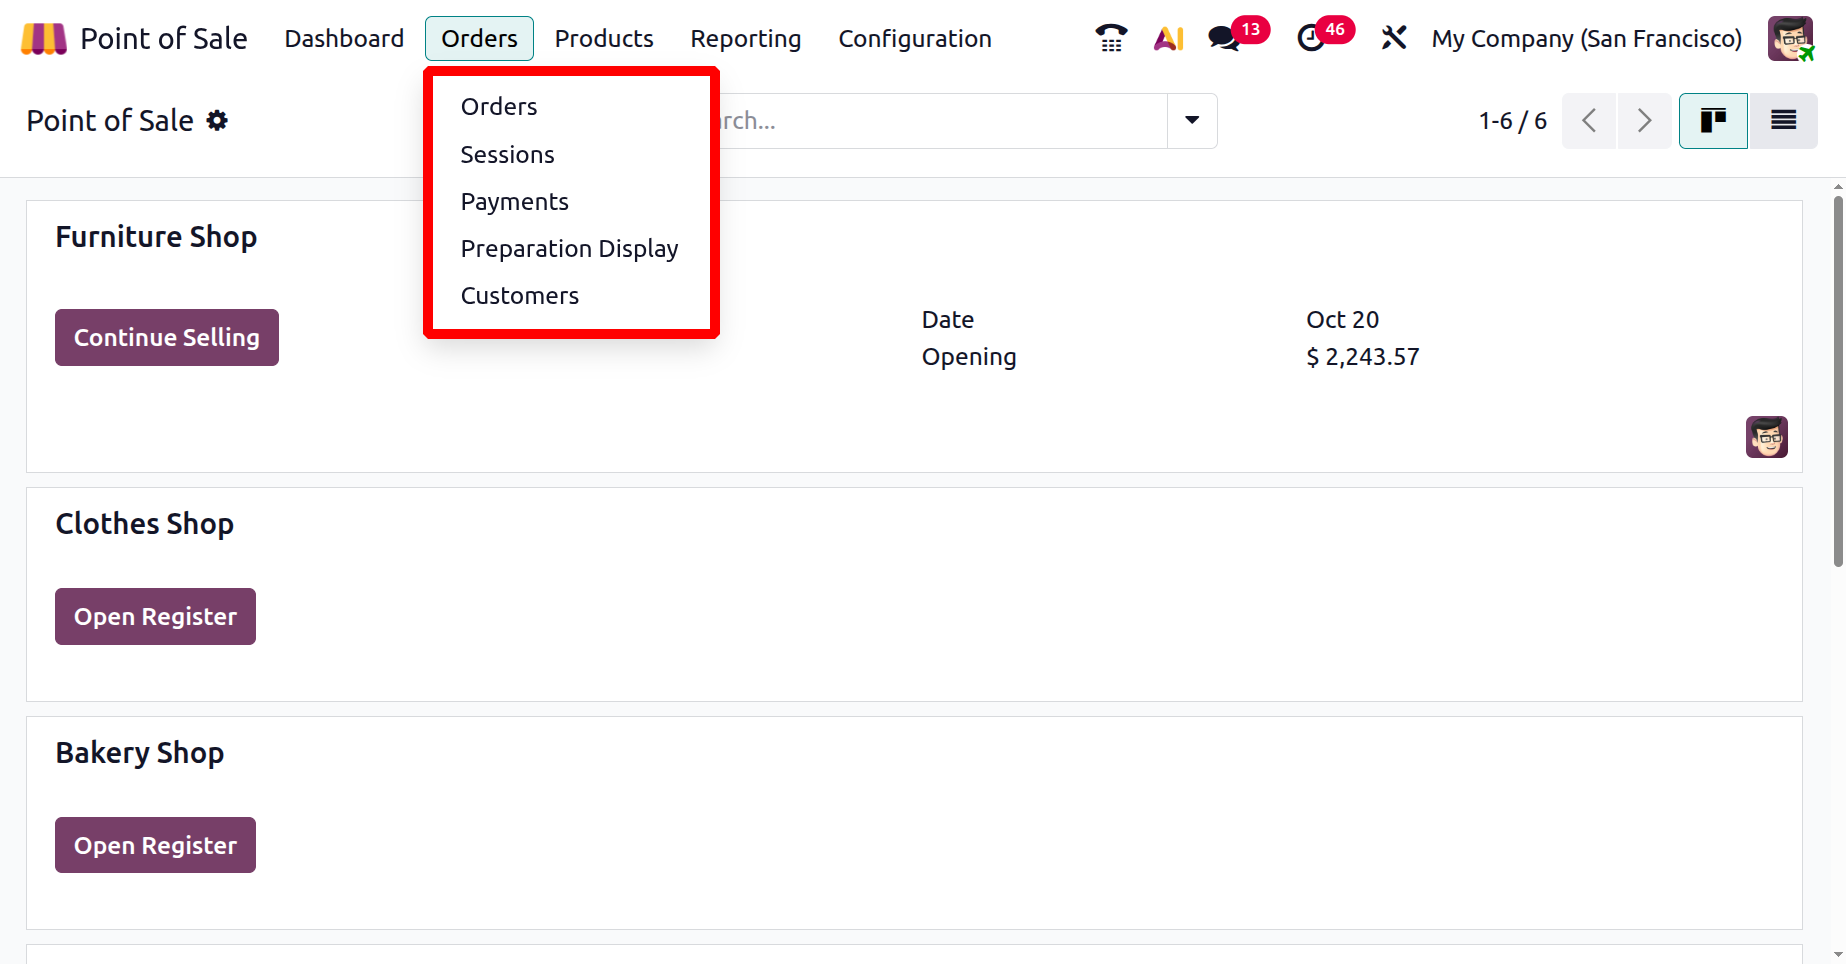
The Orders menu contains Orders, Sessions, payments, Preparation Display and Customers.
1.1 Orders
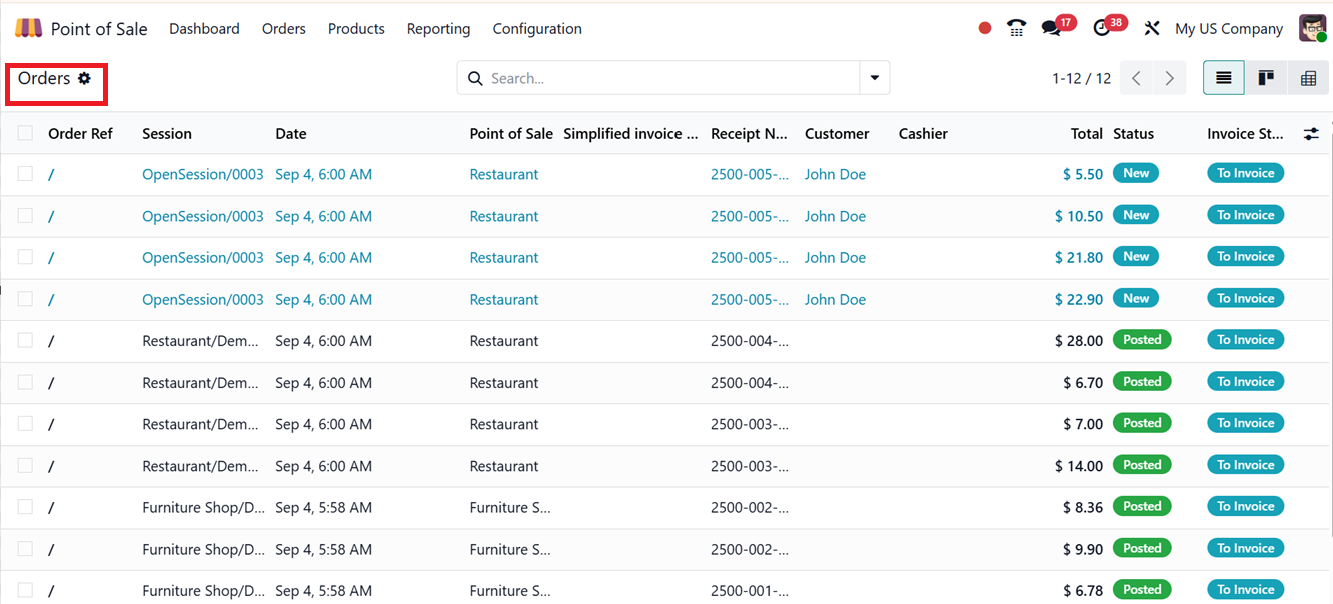
The "Orders" dashboard offers a comprehensive view of every transaction processed through the Point of Sale (POS) system during individual sessions. Each order entry contains vital information such as the Order Reference, Session ID, Date of Sale, POS Location, Receipt Number, Customer Name, Cashier, and Order Status.
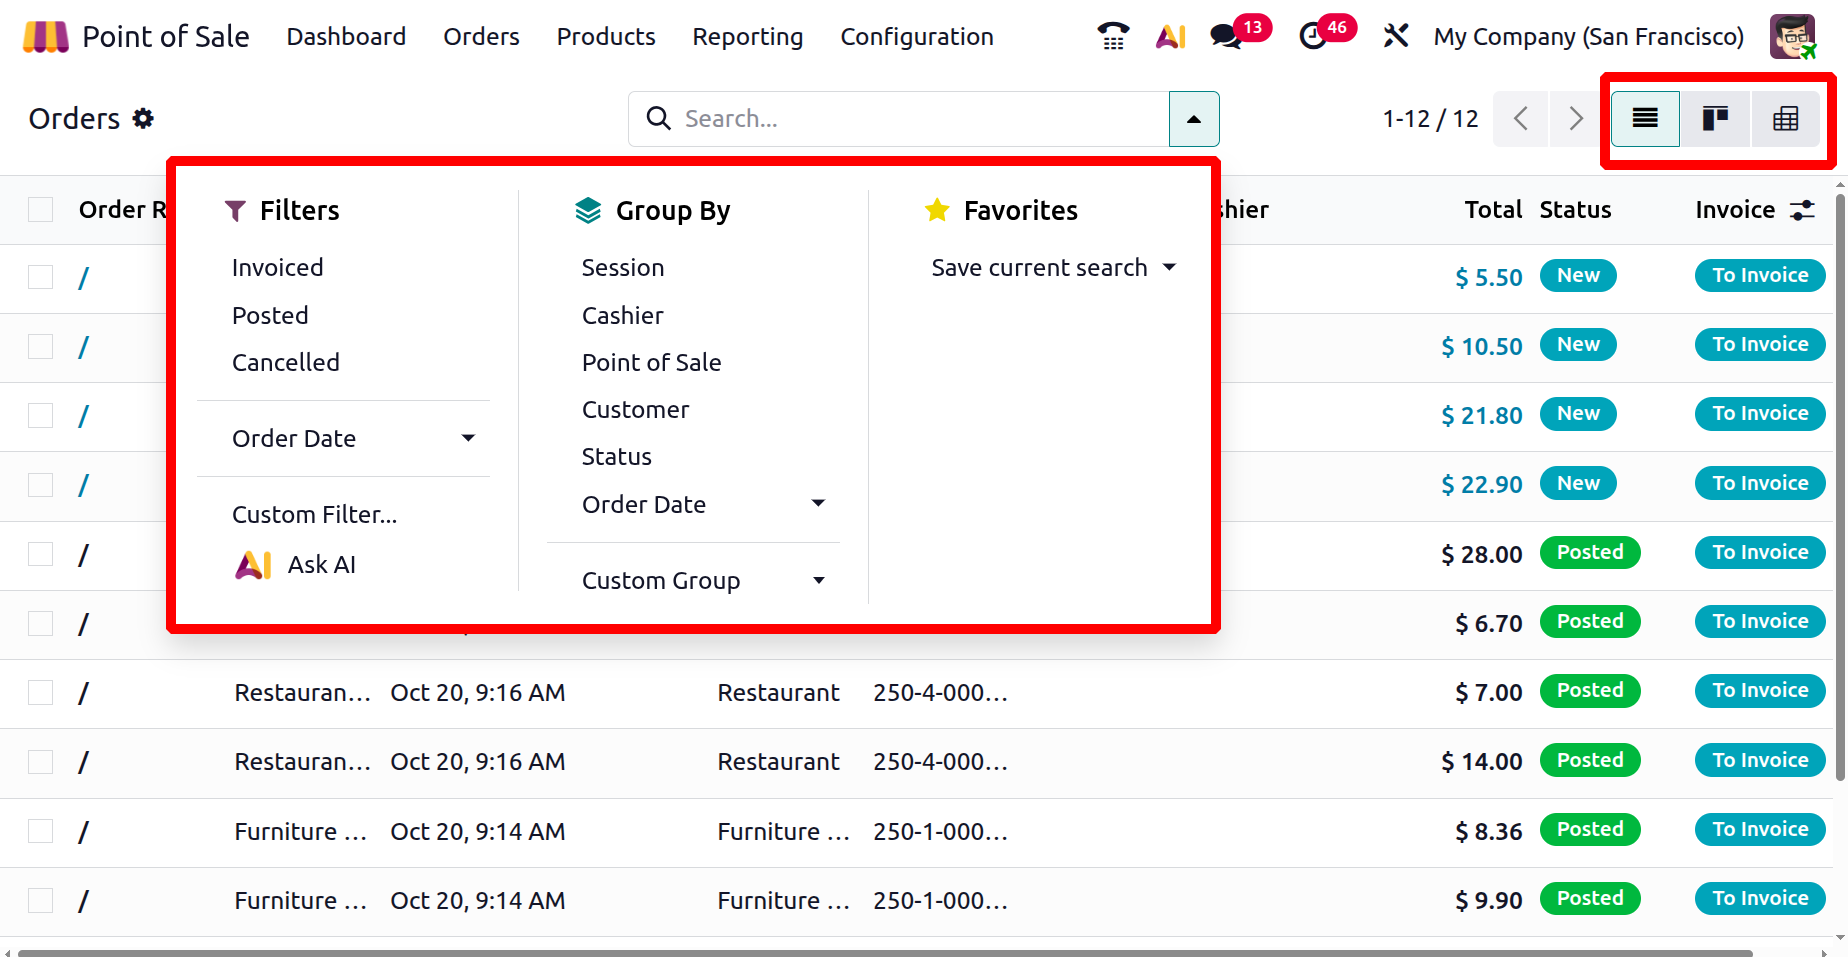
This dashboard can also be switched into Kanban or Pivot views for better understanding and overview of the Order data. Here also you can utilize the filters and group by options to get targeted data.
The ‘Filters’ option from the advanced search bar helps you to filter data based on Invoiced, Posted and Cancelled orders. Also you can filter them based on ‘Order Date’ and create any new filters using the ‘Custom Filter’ option. The ‘Ask AI’ button can be used to get any assistance from AI. The ‘Group By’ filter can be used to group a certain group of data based on various conditions like Session, Cashier, Point of Sale, Customer, Status, Order Date. you can also create customized groups using the ‘Custom Group’ option. Finally you can save the current searches using the ‘Favorites’ filter, as depicted in the screenshot below.
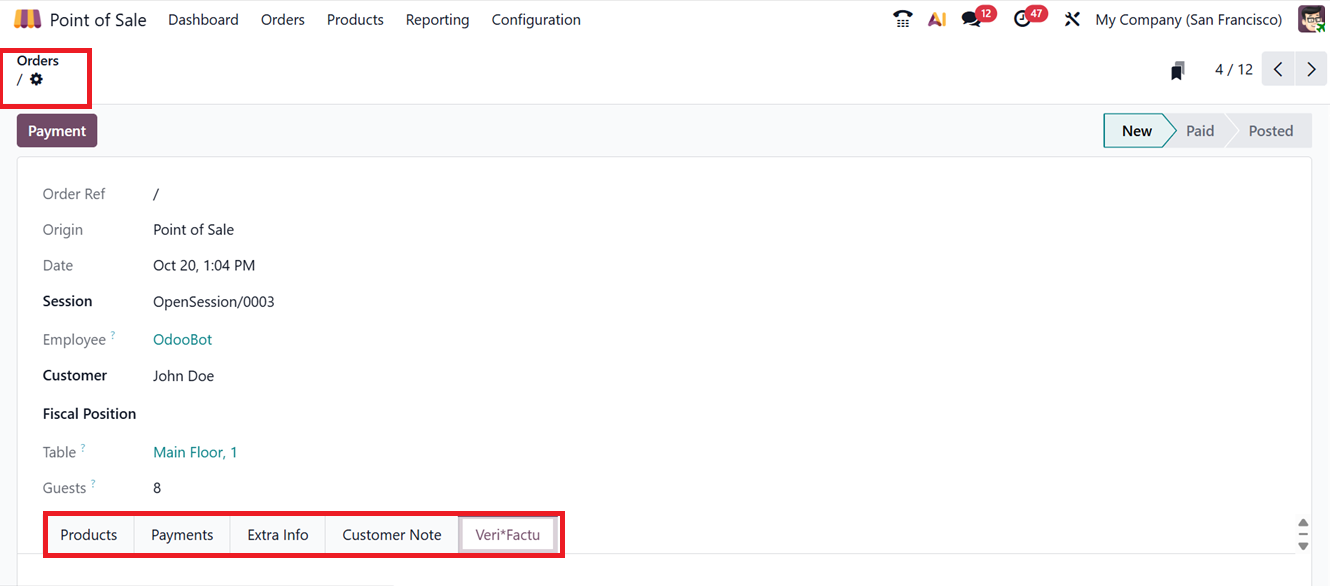
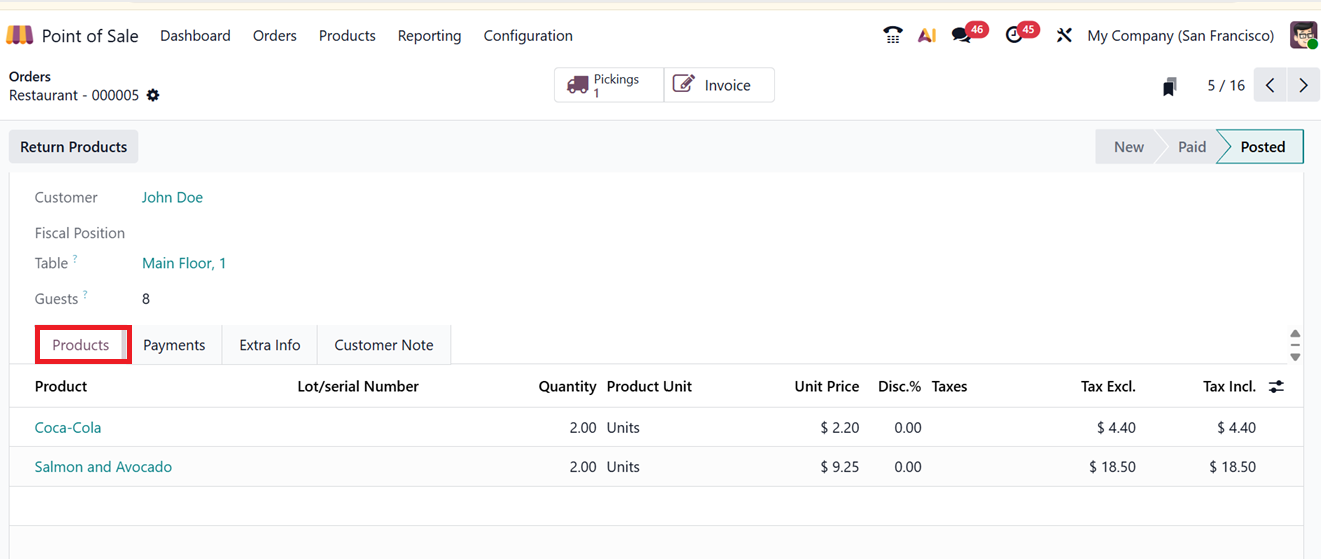
Open one order to view details. This centralized view allows users to efficiently manage and monitor transactions from multiple POS sessions across the platform. Opening an order entry from the dashboard will open its details for view. This contains the details including Order reference, Origin, Date, SessionID, Employee, Customer, Fiscal Position, Table and the number of Guests etc, as shown in the screenshot below.
The ‘Products’ tab will show the products sold in the order along with their Name, Lot/Serial Number, Quantity, Product Unit, Unit Price, Discount, Taxes, Tax Excluded Rate and Tax Included Rate, as shown in the screenshot below.
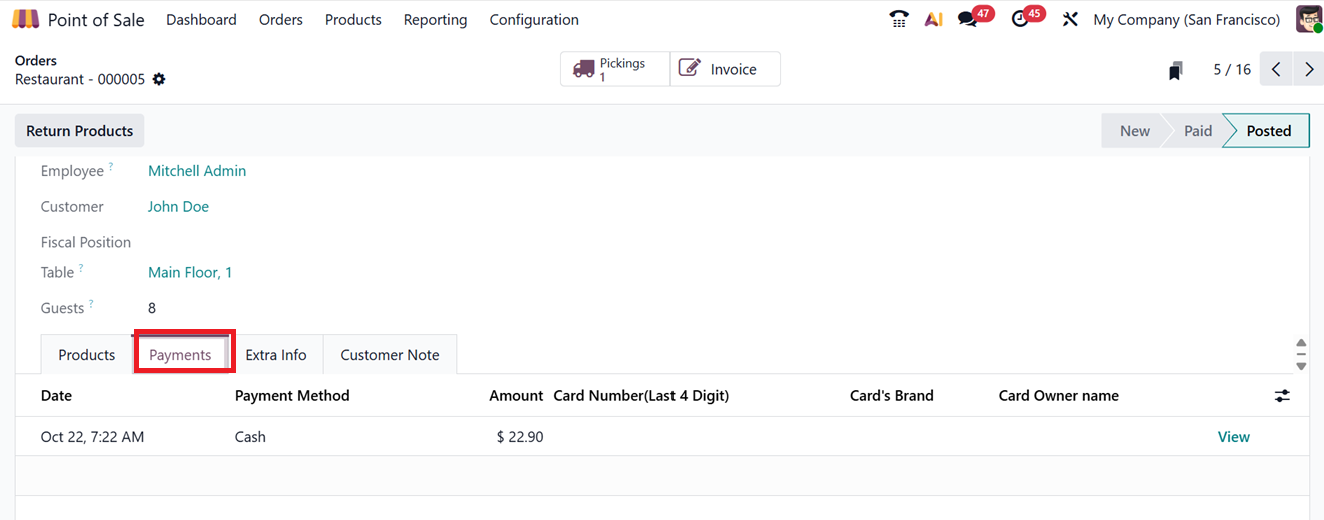
The ‘Payments’ tab displays the payment details such as the payment ‘Date’ and time, the ‘Payment Method’ used (like cash or credit card), and the ‘Amount’ received for the order. For card payments, it records the card number (usually masked for security), the ‘Card’s Brand’ (e.g., Visa or MasterCard), and the ‘Card Owner name’ as entered during the transaction. Together, these fields provide detailed payment information to help track, verify, and manage transactions efficiently, as shown in the screenshot below.
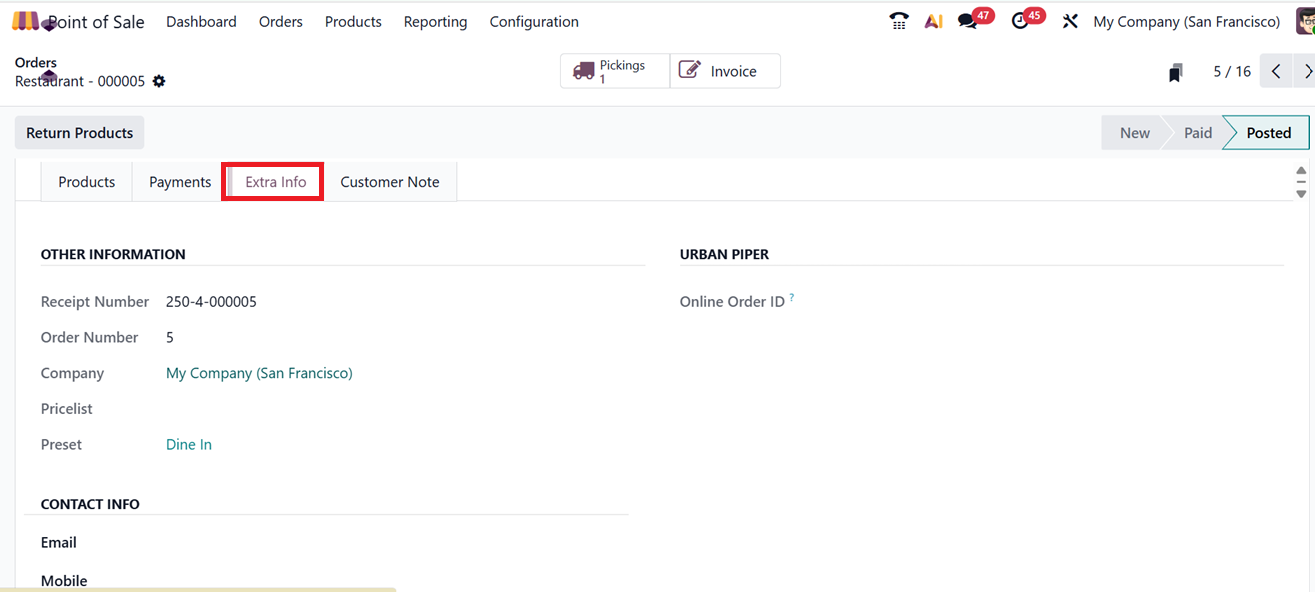
Other information including the ‘Receipt Number’, a unique ID printed on the customer’s receipt for easy tracking, ‘Order Number’ uniquely identifies each sales order in the POS. The ‘Pricelist’ the pricing scheme applied, including discounts or special rates. The ‘Preset’ applies predefined settings like Dine In, Delivery, Takeaway etc. Then, mention the ‘Online Order ID’ links orders from integrated online channels to the POS, and the Email and Mobile fields store the customer’s contact details for sending receipts and notifications will be shown under the ‘Extra Info’ tab, as shown in the screenshot below.
The ‘Customer Note’ tab will display any notes or descriptions from the customer. Finally, Odoo will generate two smart tab options such as;
- Pickings tab shows delivery orders linked to the sales, helping track shipments and manage stock.
- The Invoice tab displays invoices from the sales, allowing users to view billing and payment details.
Both tabs offer quick access to streamline order fulfillment and financial management.
1.2 Sessions
Under the "Orders" menu, the "Sessions" option provides access to both active and completed POS sessions. This section serves as a detailed log of session activities, giving users visibility into ongoing and finalized sessions. Information can be displayed in either List View or Kanban View, depending on preference.
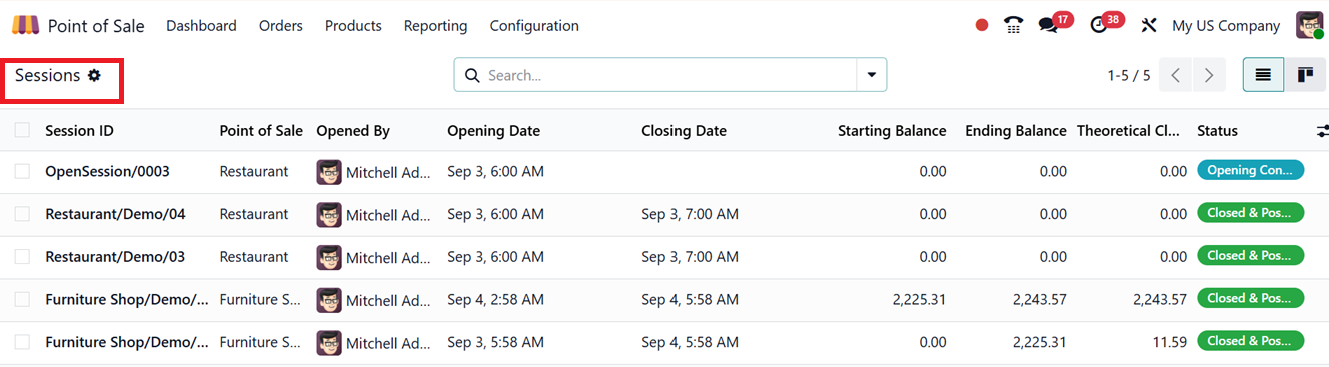
Each session entry includes important data points such as the Session ID, Point of Sale, Opened By, Opening Date Closing Date, Starting Balance, Ending Balance, Theoretical Closing Balance and Status of the session.
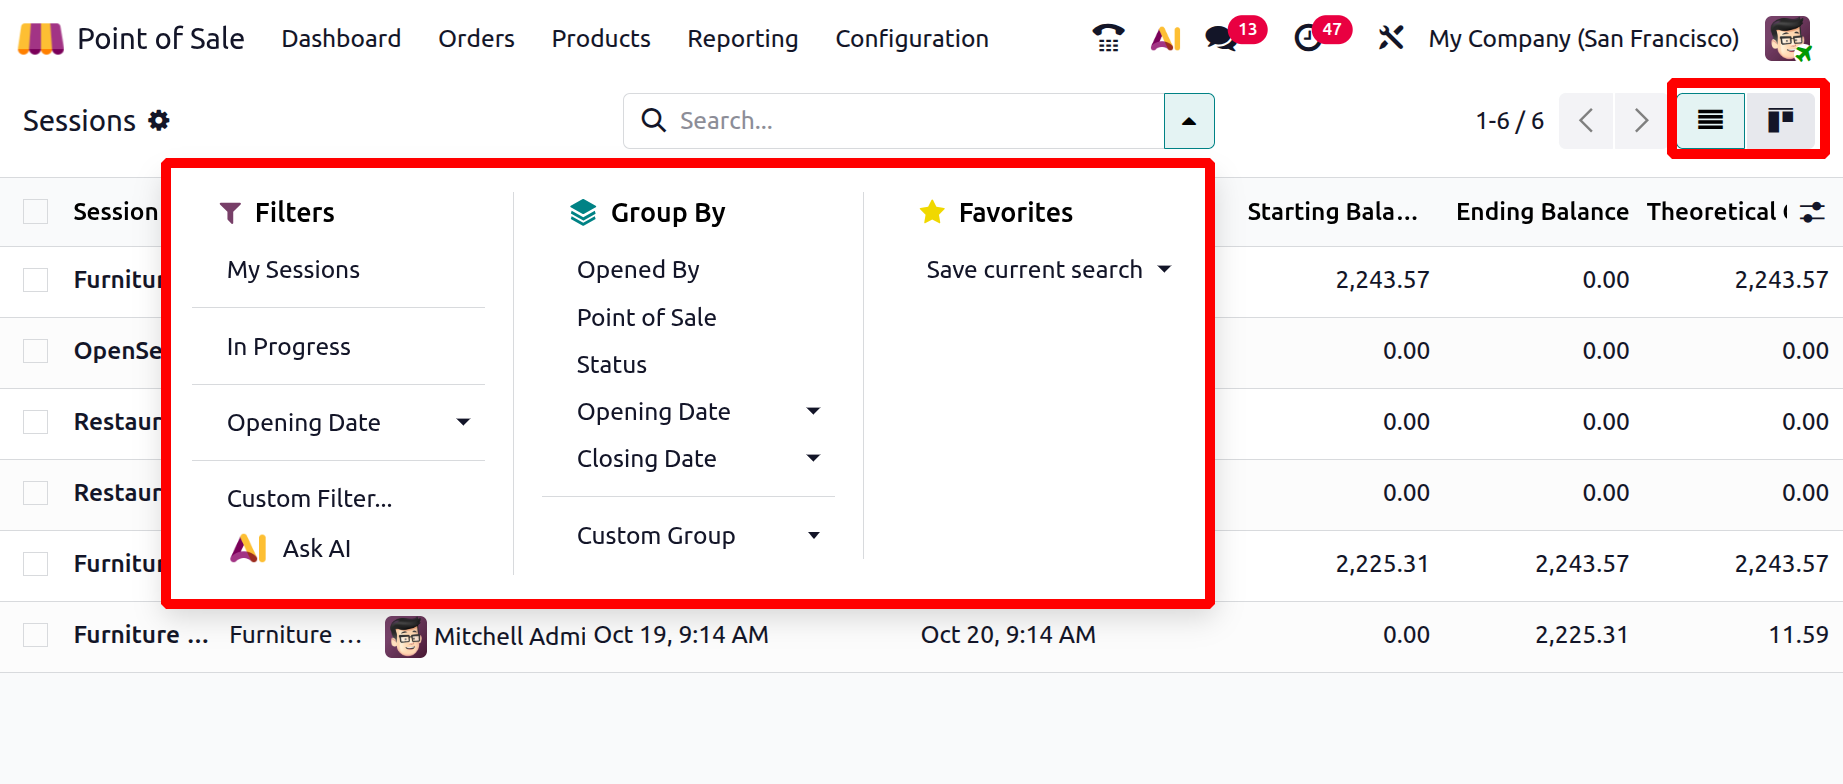
You can also change the list view into a Kanban view and also the interface supports a variety of filtering and grouping options, enabling users to customize the displayed data for better analysis and reporting. The ‘Filters’ section provides various options including My Sessions, In Progress and Opening Date. If required you can create ‘Custom Filters’ and ‘Ask AI’ features to create customized filters. Then, the ‘Group By’ section can be used to create data groups based on Opened By date, Point of Sale, Status, Opening and Closed dates. If required, you can also create customized groups. Finally, the ‘Favorites’ option can be used to save recent searches, as shown in the screenshot below.
Under the "Orders" menu, the "Sessions" option provides access to both active and completed POS sessions. This section serves as a detailed log of session activities, giving users visibility into ongoing and finalized sessions. Information can be displayed in either List View or Kanban View, depending on preference.
Then, you can open a session entry by clicking on it from the column and check its detailed form view to get more information.
The form includes key fields like Session ID, POS name, Opened user name, Point of Sale, Journal Entry, Opening and Closing Dates, Starting Balance and Ending Balances, as shown in the screenshot below.
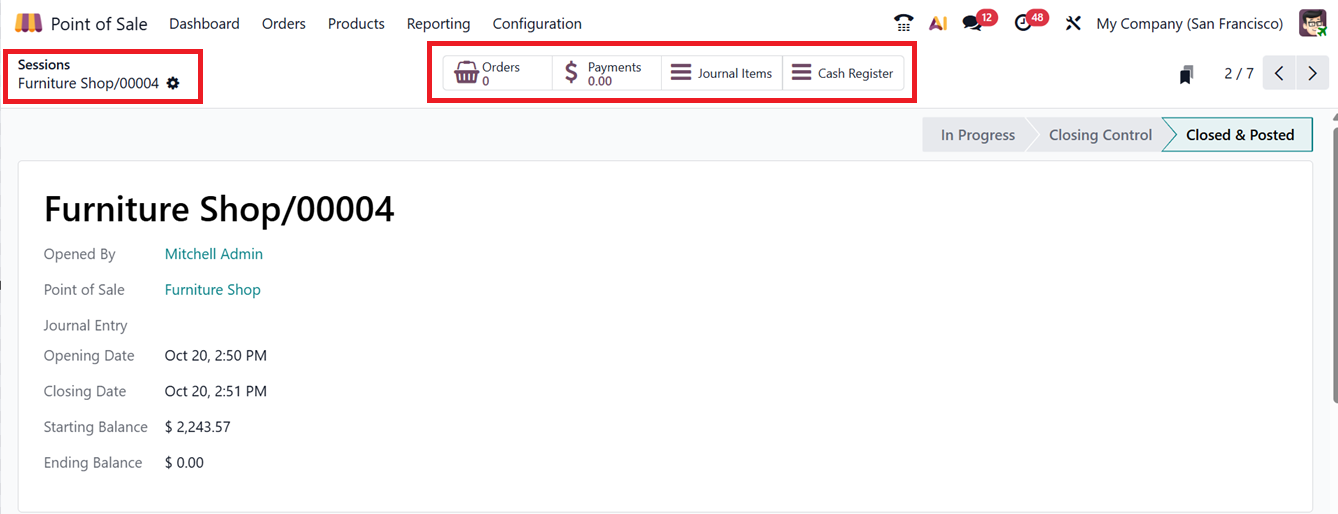
The smart tabs at the top provide quick access to related Orders, Payments, Journal Items and Cash Register.
- The Orders smart button gives quick access to all sales processed through the POS, allowing easy review and management of transactions.
- Payments shows all payment records linked to those sales, helping track and verify cash, card, or other payments.
- Journal Items display the accounting entries generated from sales and payments, connecting transactions to financial records.
- The Cash Register manages cash movements like cash ins, outs, and balances, enabling effective cash flow control. Together, these fields offer a complete view of the sales process, simplifying order, payment, accounting, and cash management directly within the POS.
A session progresses through several stages including In Progress: where sales and transactions are actively recorded, Closing Control: during which users review and verify sales, payments, and cash before finalizing and Closed & Posted, where the session is closed and all transactions are posted to accounting, preventing any further changes..
The Session Form is the central interface for managing each sales session at a POS terminal, whether in a shop or restaurant. It tracks all sales, payments, orders, and cash movements during a shift, helping ensure accurate accounting and smooth closing operations
1.3 Payments
Within the Orders menu, the "Payments" section provides an organized overview of all completed payment transactions. This includes payments made by cash, card, or other configured methods. Each payment record displays relevant details like the Payment Date, Payment Method, Associated Order Number, Cashier, and the Amount Paid.
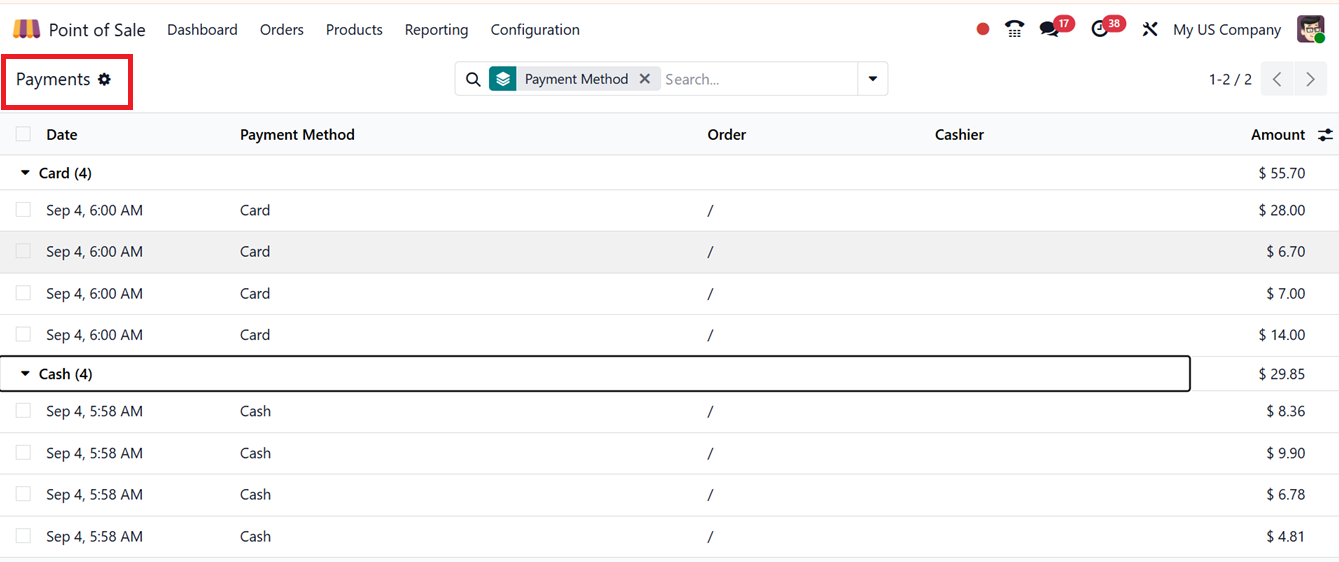
To view or edit any payment method entry, simply click on the desired row to open the form view, where modifications can be made. As with other sections, you can utilize the "Filter" and "Group By" tools to efficiently sort and manage payment data according to specific criteria.
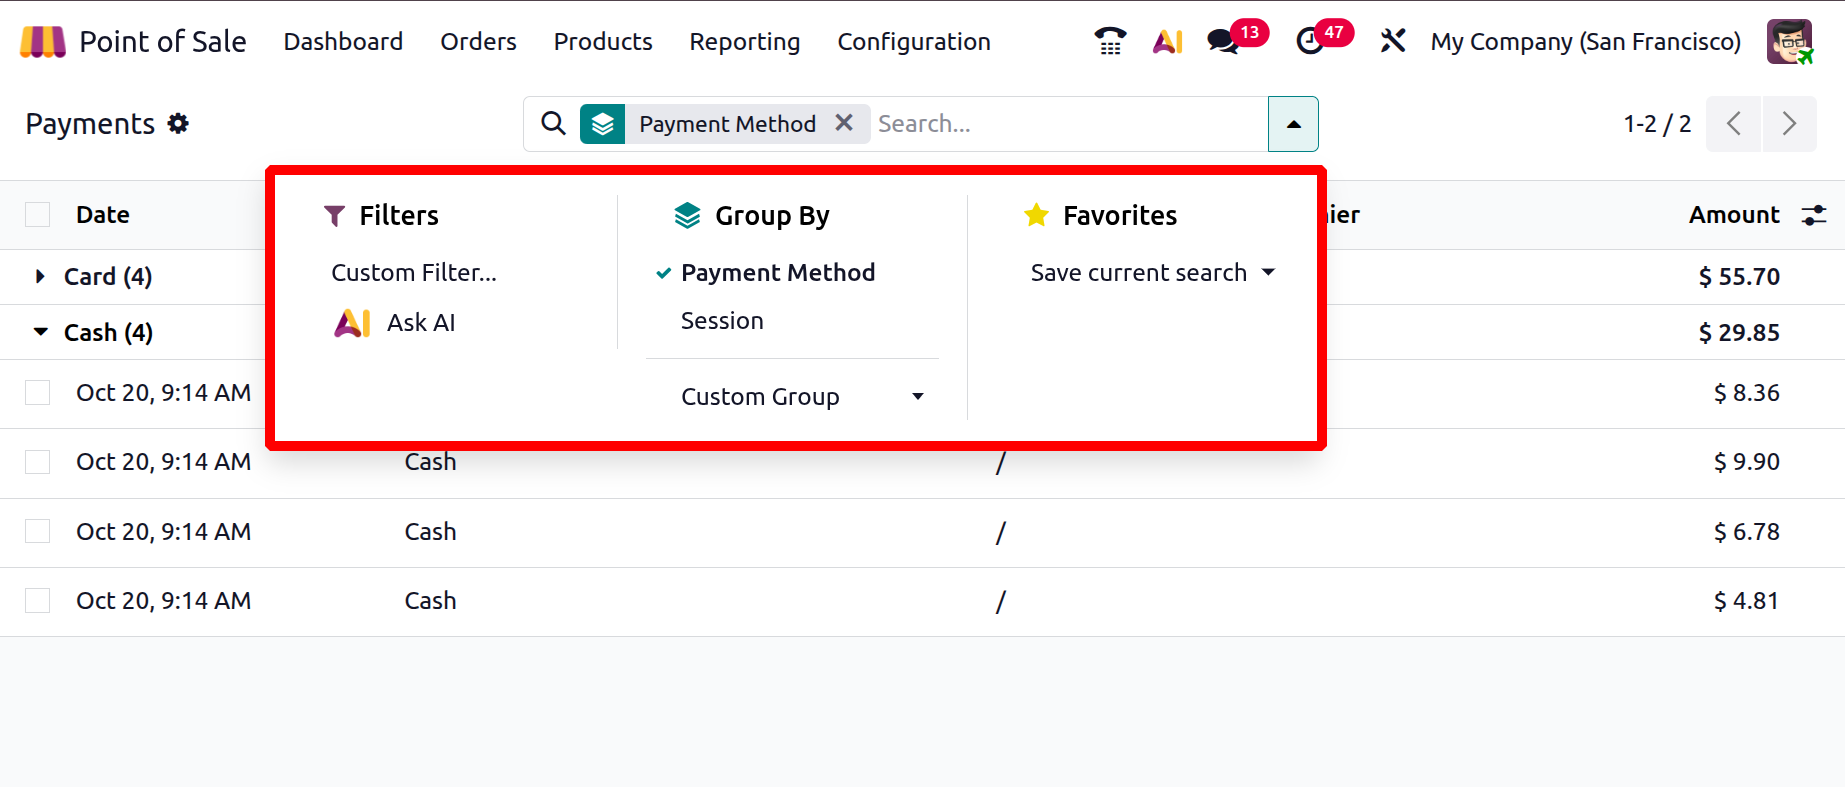
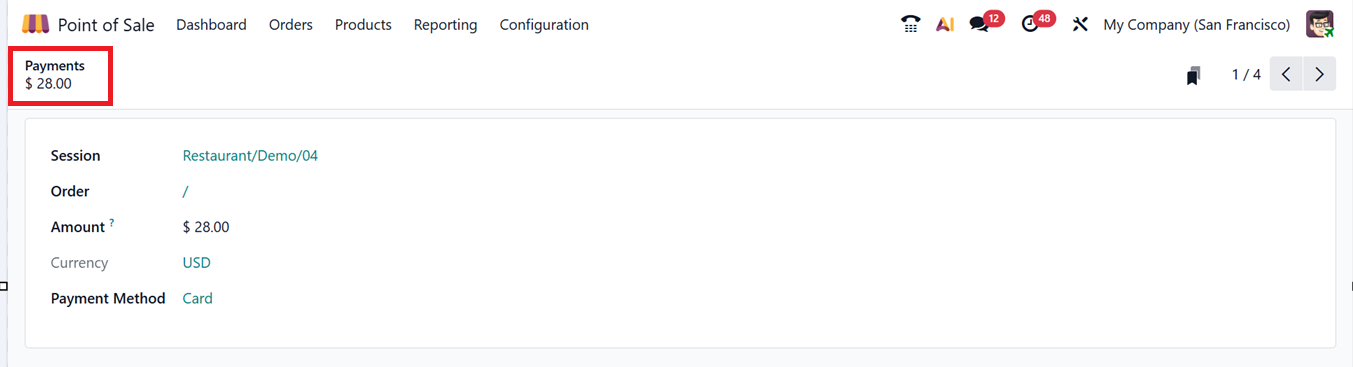
Here, you can click on a payment entry from the column to view detailed payment information, including the session it was generated from, the related order, amount, currency, and payment method, as shown in the screenshot below.
1.4 Preparation Display
The Preparation Display section in Odoo 19’s PoS system is particularly useful for food service businesses such as Restaurants and Cafés, allowing them to link specific printers to product categories. This setup ensures that order receipts are automatically routed to the correct stations like the kitchen, bar, or dessert area based on the items being ordered.
From the Preparation Display dashboard, you can view all configured printers along with their associated IoT device and the product categories they are assigned to.
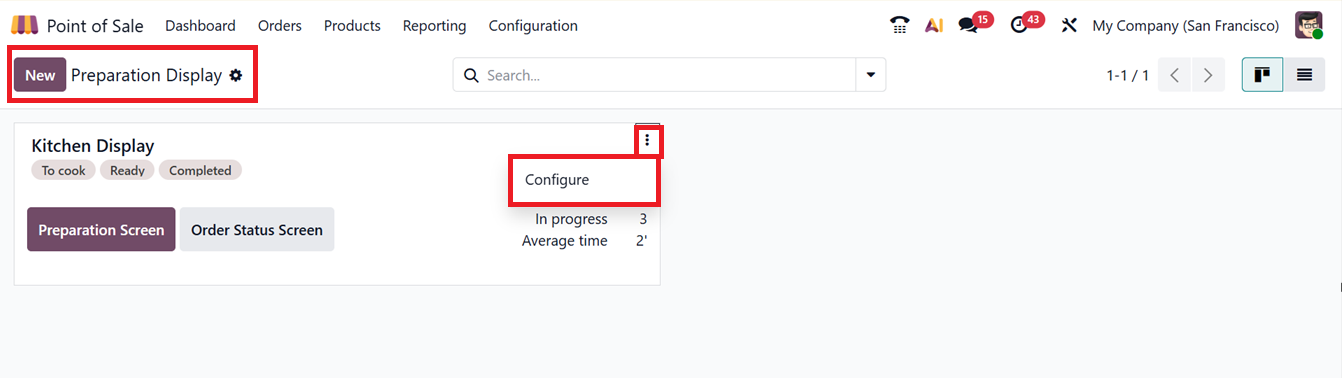
Clicking the ‘Preparation Screen’ button opens a real-time view of current food orders, showing their preparation stages.
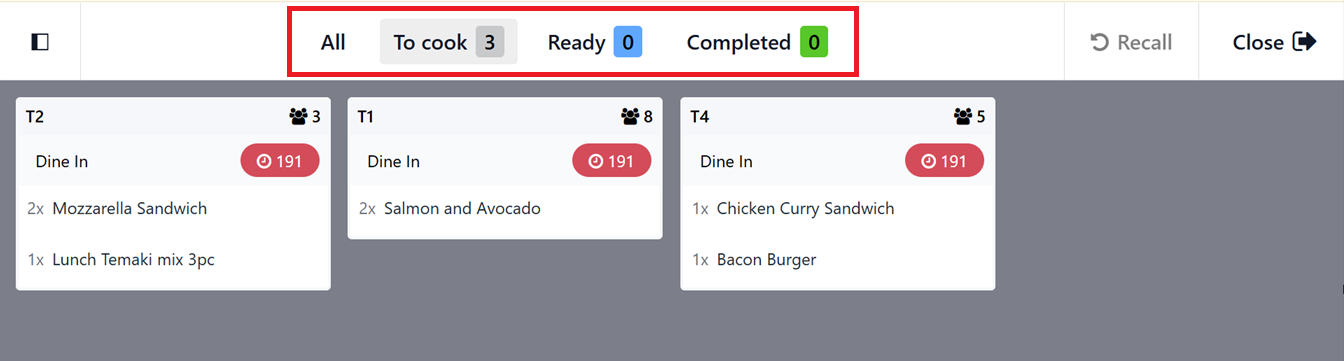
Here, you can see the realtime view of ongoing orders based on their stages such as ‘To Cook,’ ‘Ready’ and ‘Completed.’ Also, you can see the table wise preparation details including their Table Number, Preset, Guest Number, Ordered Items and Timer options, as illustrated in the screenshot below.
In the left side of the preparation screen, you can see the Preparation Screen lists all in-progress products grouped by POS categories like Food, Drinks etc. you can also sort orders by time and easily zoom in or out of the screen using the '+' and '–' icons for better visibility and management, as shown in the screenshot below.
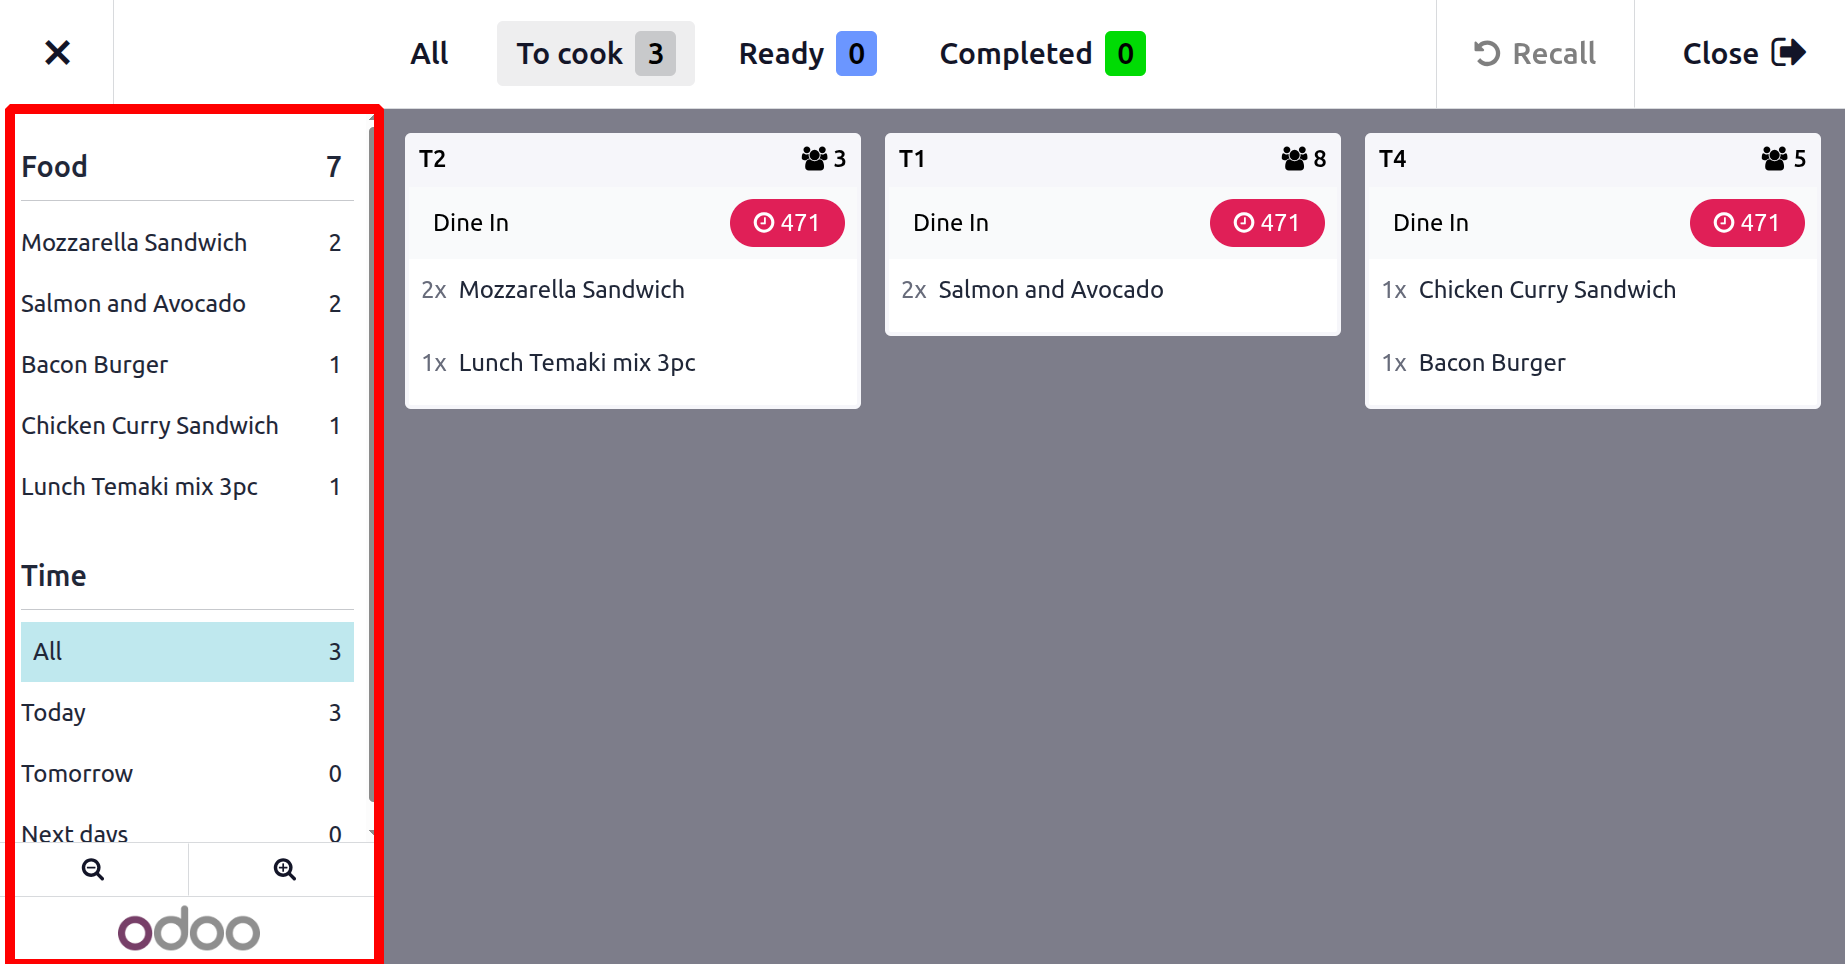
If any orders get canceled, you can restart it using the ‘Recall’ button or close the preparation display using the ‘Close’ button.
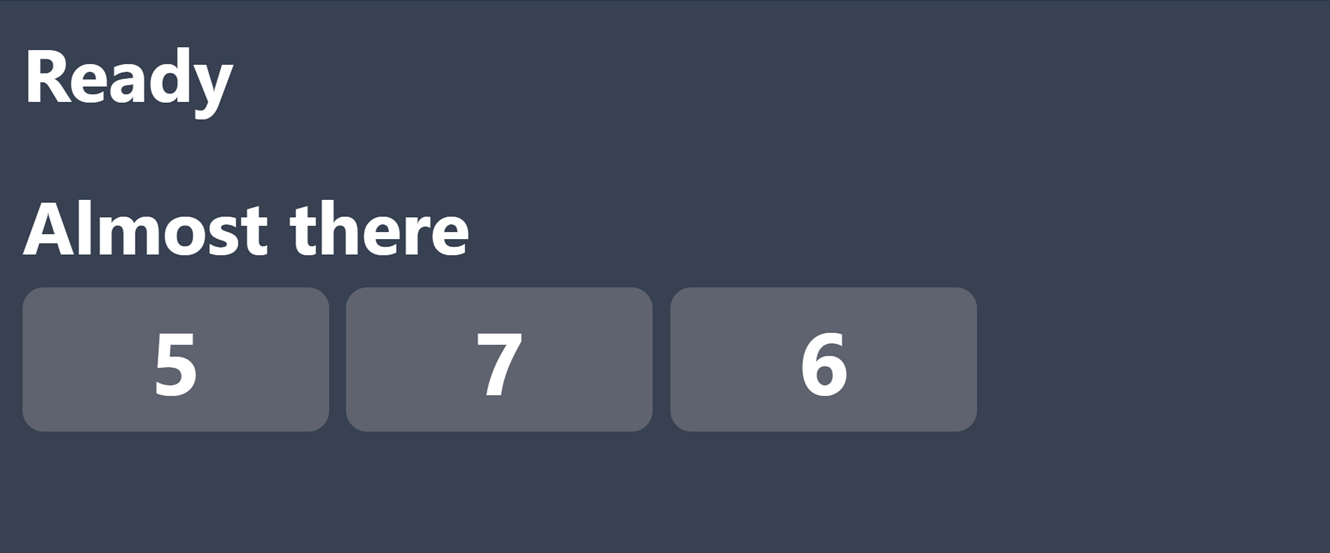
Likewise, the ‘Order Status Screen’ provides a full-screen summary of the status of each order. It is like a real-time, full-screen display designed for restaurants and food service businesses. It shows the live status of customer orders whether they are newly received, being prepared, or ready for delivery helping kitchen and service staff stay coordinated and work more efficiently.
helping staff manage tasks efficiently, as shown in the screenshot below.
To add a new preparation display, click on the ‘New’ button and enter details such as the Display Name, linked Point of Sale, and relevant Product Categories.
To automatically remove an order from the Order Status Screen once it's marked as ready, you can enable the ‘Auto Clear’ option and set a time delay for when the order should be cleared, as shown in the screenshot below.
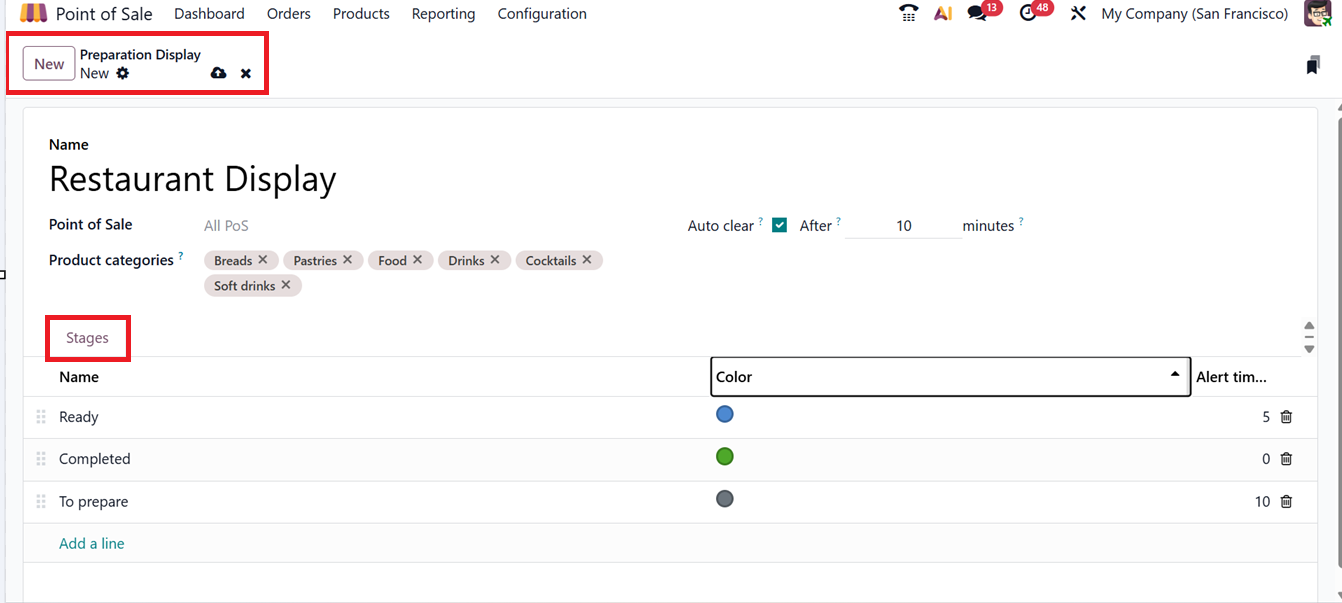
Under the ‘Stages’ tab, you can define custom order stages that reflect your kitchen workflow using the ‘Add a line’ option. You can provide the stages Name, Color and a ‘Alert time,’ an alert timer (in minutes) for each stage to show the expected processing time. Once your configuration is complete, hit ‘Save’ to finalize. This tool improves order accuracy and reduces service delays by automating communication between the PoS and preparation areas.
1.5 Customers
By choosing the ‘Customers’ section under the Orders menu, users gain access to a comprehensive list of customer profiles, complete with details like Name, Email, Phone, Activities, and Country, as shown in the screenshot below.
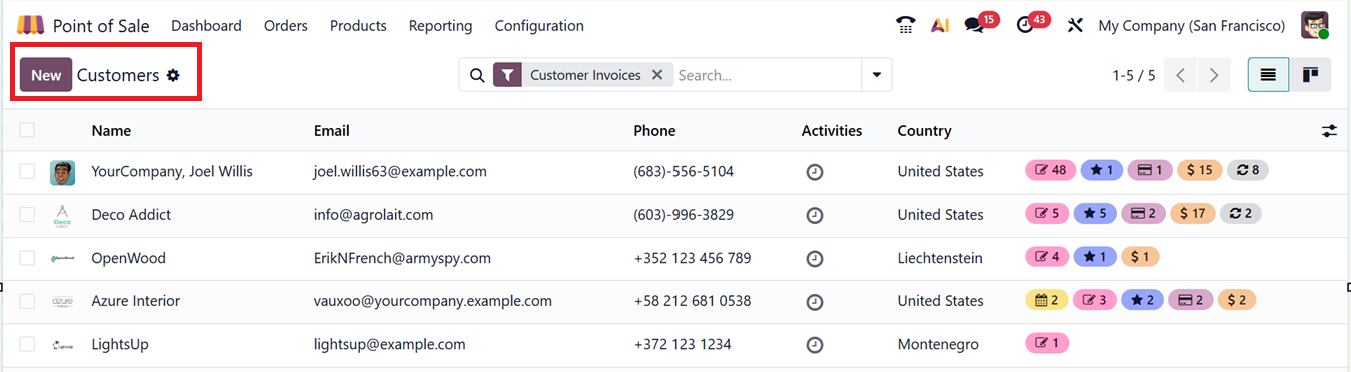
The list is initially presented in a List view for easier scanning but it can be switched to the Kanban view. Each Kanban card shows icons at the bottom for Invoice/Bills/Mandates, Opportunities, Purchases,Sales Orders,Subscriptions icons allowing users to track meeting details at a glance. There's also an Activity icon to schedule follow-ups directly from the Customers dashboard, as depicted in the screenshot below.

To add a new customer, click ‘New’, which opens a customer form similar to those in other Odoo apps. Here, you can enter the customer’s name, contact details, and address, and expand the profile using tabbed sections for Contacts, Sales & Purchase, Accounting, Partner Assignment, Notes, Invoicing, Memberships, and more.
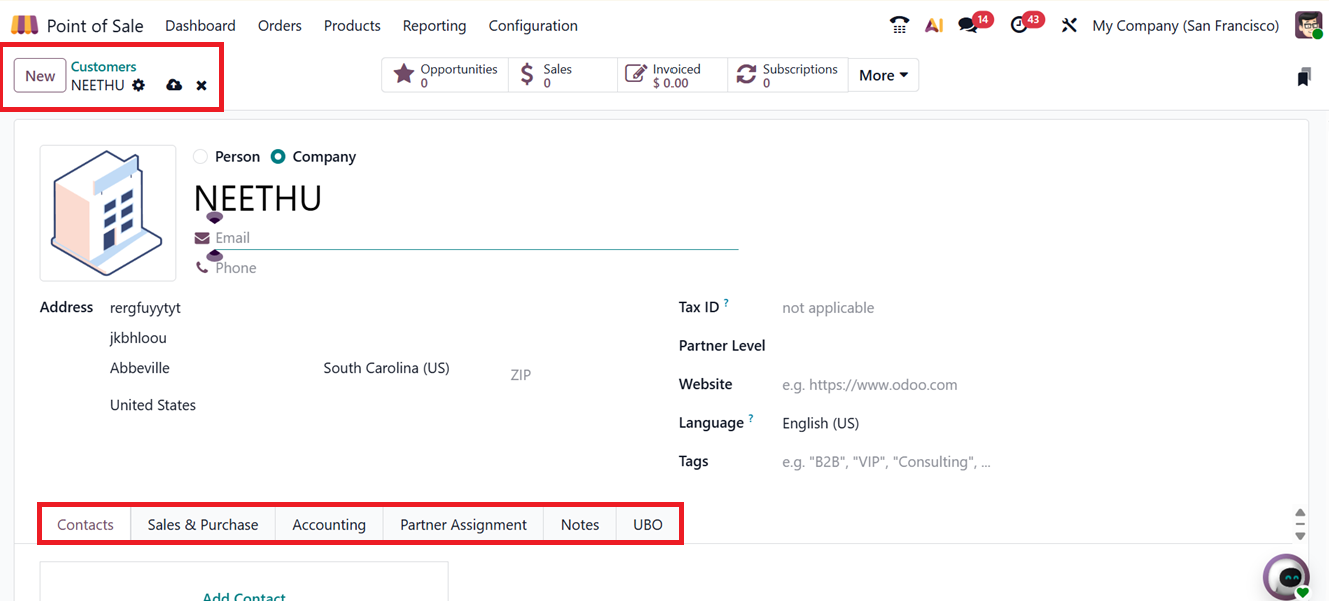
The customer creation form is already discussed on the Sales module, and the configuration is similar in Point of Sale too.