Odoo 19 introduces advanced Shop Floor Control and real-time Work Center Management features designed to enhance manufacturing efficiency and visibility. With an intuitive interface, operators can access work orders, track progress, and report production activities directly from the shop floor. Real-time data synchronization ensures that managers and planners always have up-to-date insights into operations, enabling faster decision-making and reduced downtime. The system integrates seamlessly with other manufacturing modules, allowing for accurate scheduling, resource allocation, and quality control. Visual dashboards, barcode scanning, and automated alerts simplify workflows, helping to minimize errors and limit the need for manual intervention. By digitizing shop floor operations, Odoo 19 helps manufacturers improve productivity, maintain consistency, and respond quickly to changing production demands, making it a powerful solution for modern, data-driven manufacturing environments focused on efficiency and continuous improvement. In this blog, we’ll look at how the Shop Floor module in Odoo 19 helps streamline the management of manufacturing work orders.
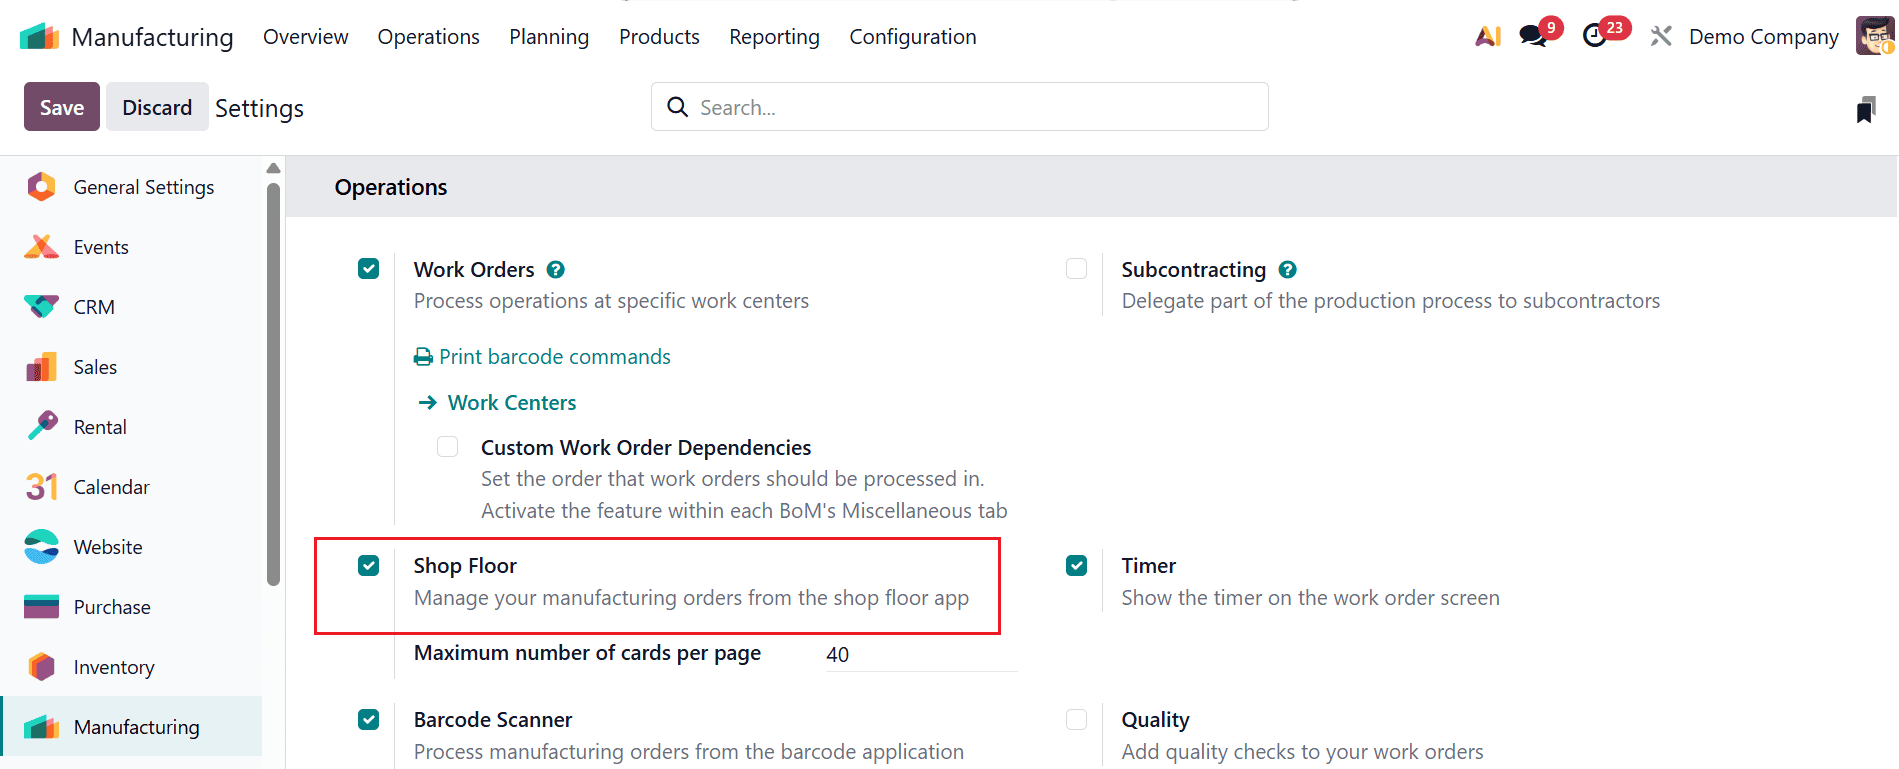
Open the Manufacturing module from the Odoo 19 dashboard, then go to Configuration > Settings and turn on the Shop Floor option under Operations, as shown below.
To set up a new bill of materials for the manufacturing process, go to the Products menu and choose Bill of Materials. A list of existing bills of materials will be displayed. From there, you can pick an existing record or use the New button to create a new entry.
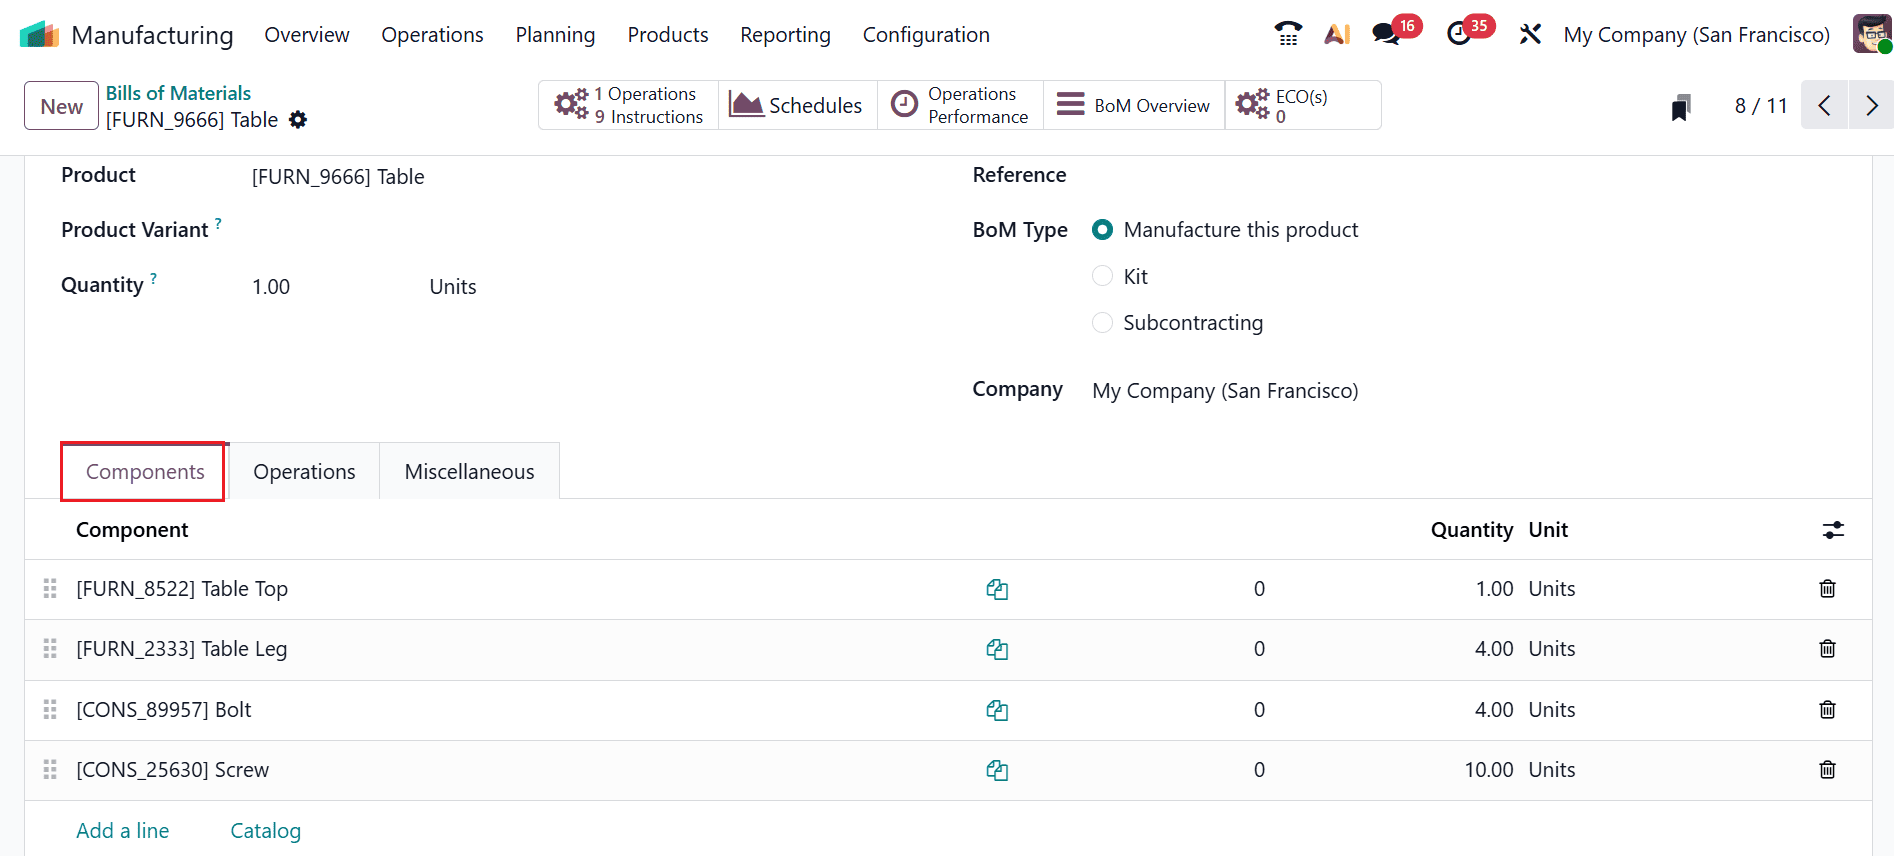
Here, the bill of materials is created for the product Table. You can provide details like Product Variant, Quantity, Reference, BoM Type, and Company. In the Components tab, include items such as Table Top, Table Leg, Bolt, and Screw.
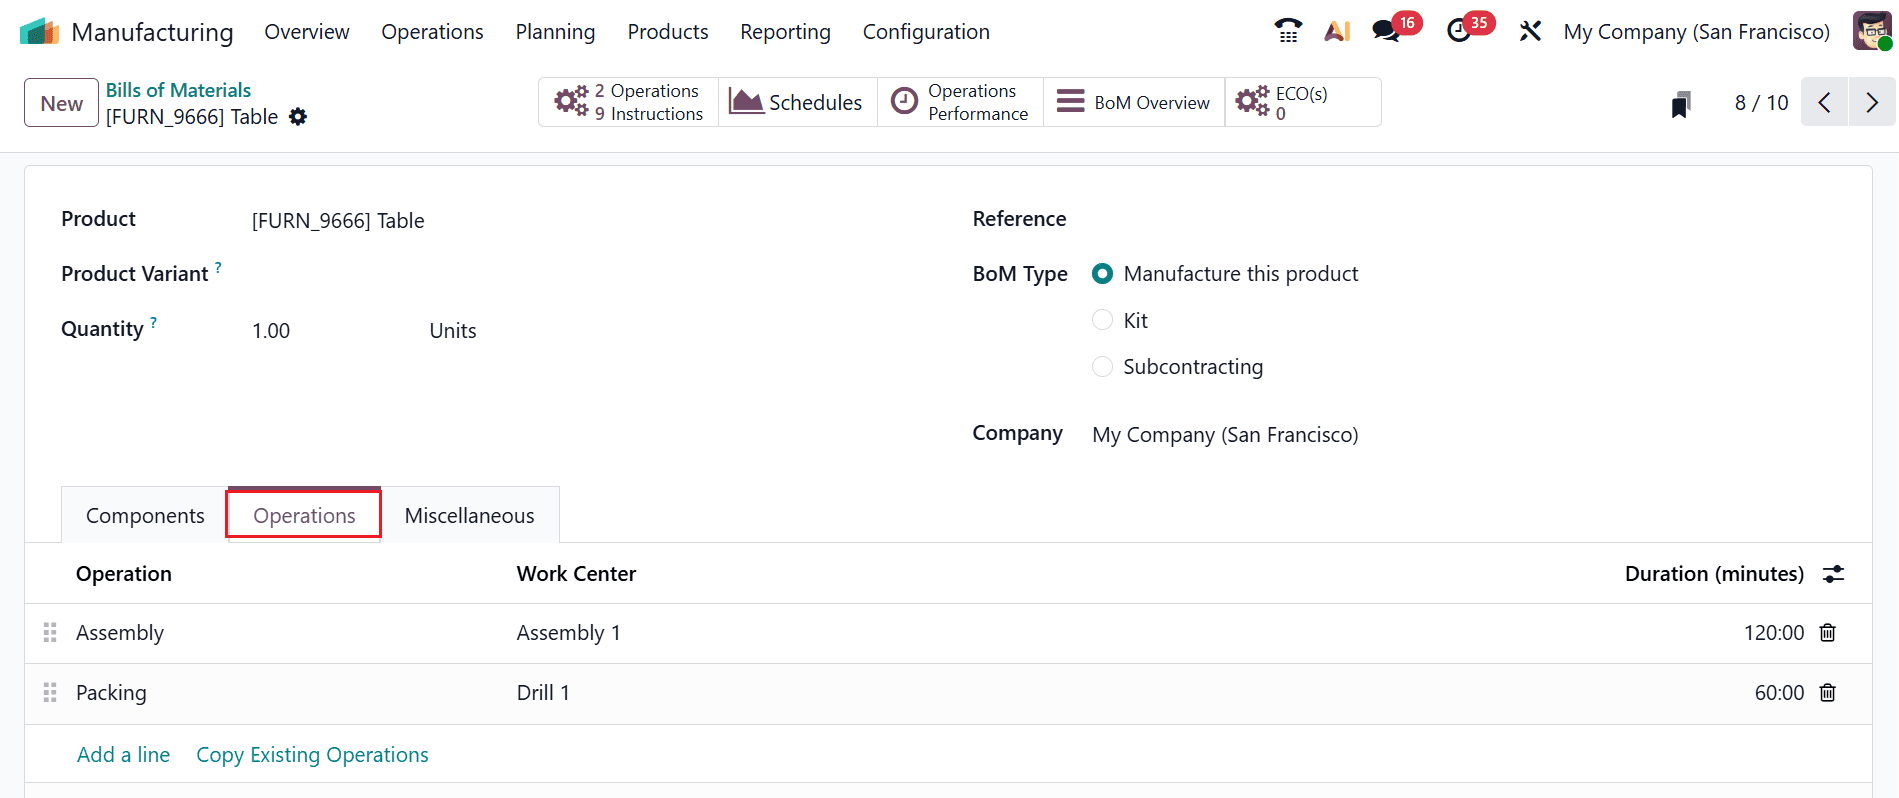
Under the Operations tab, you will find a list of work orders carried out during table production.
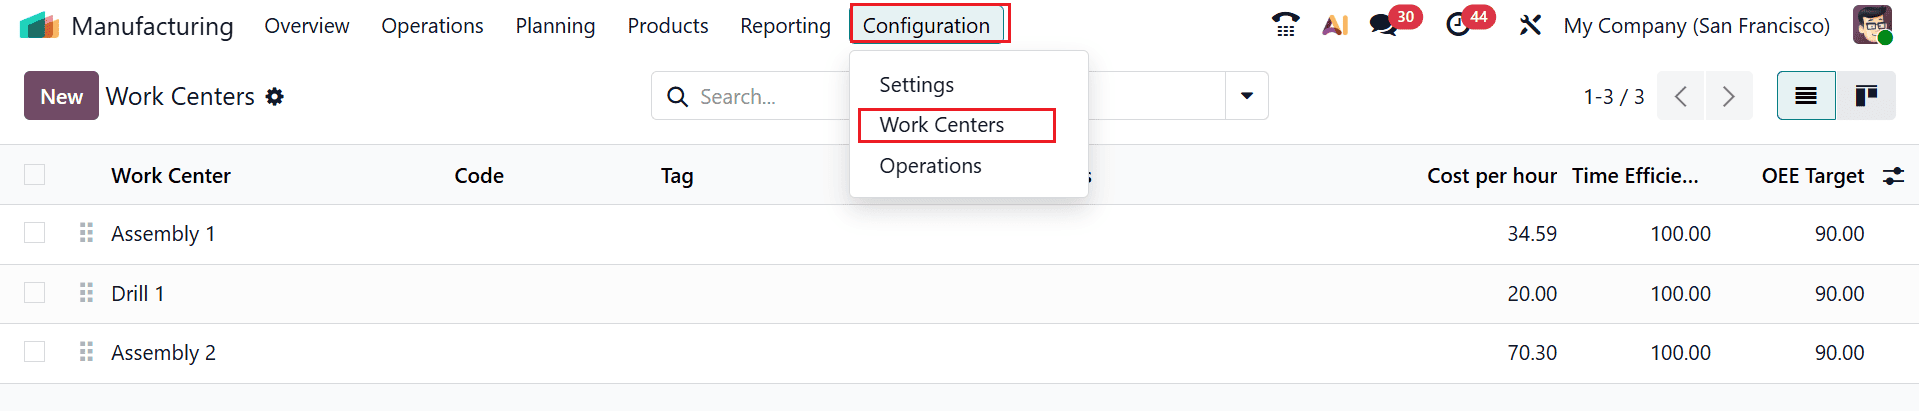
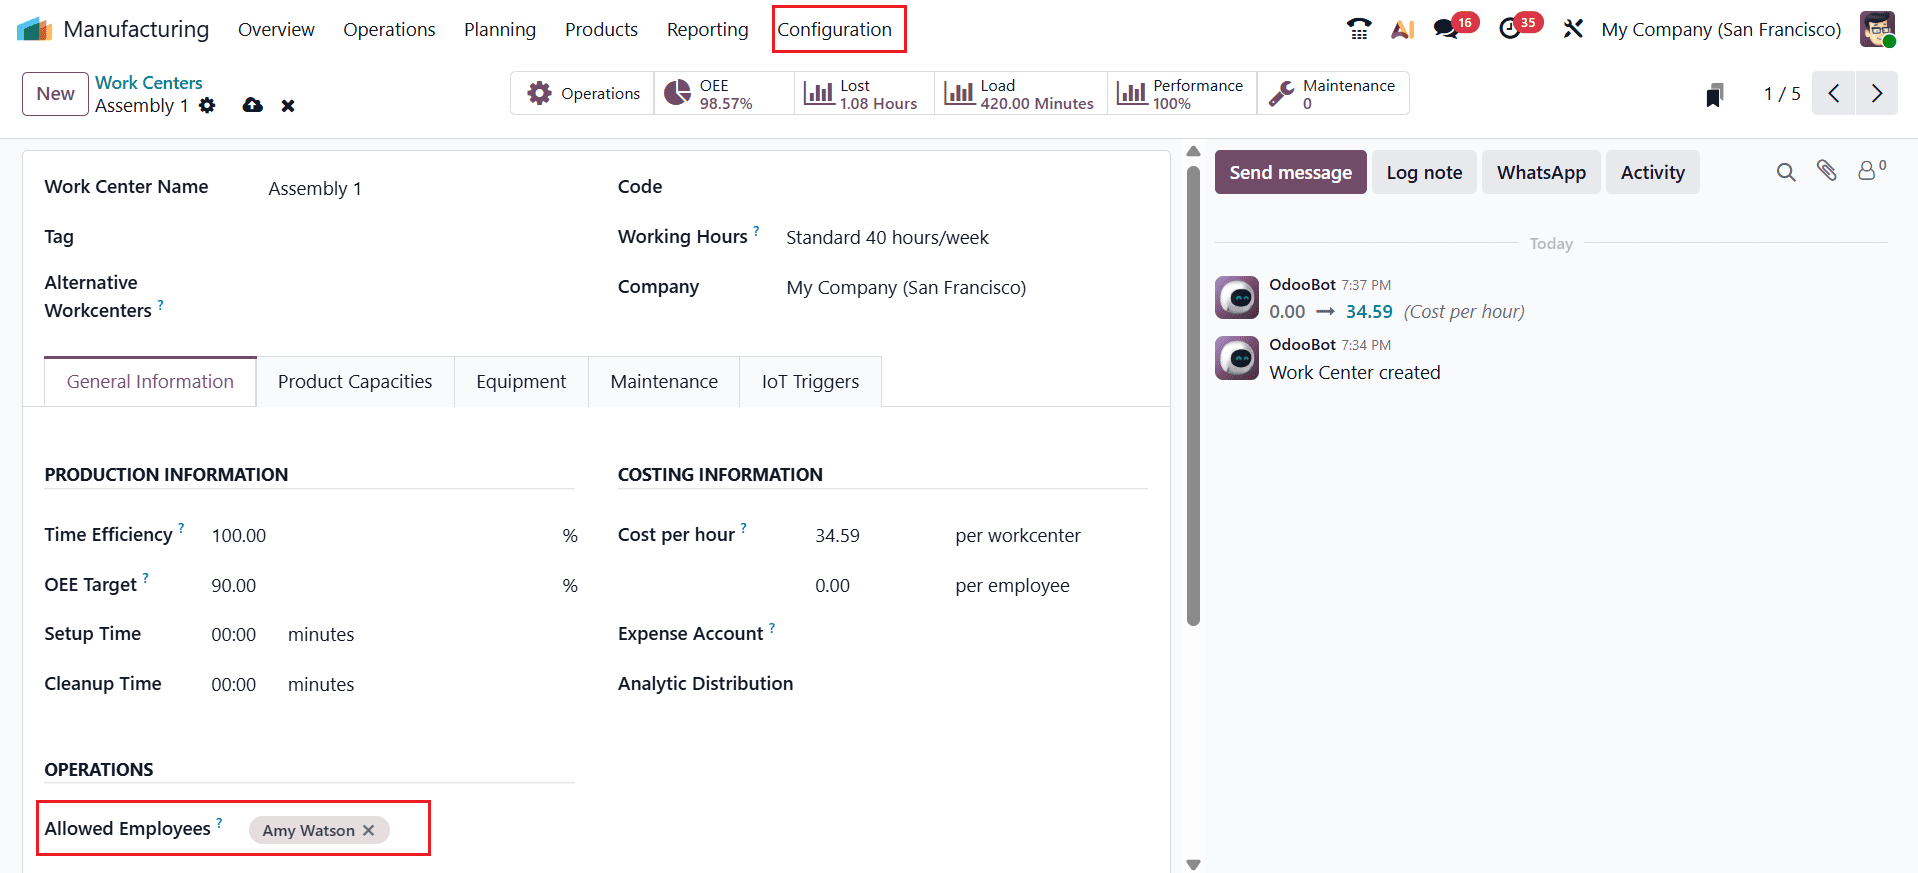
To manage the work centres, navigate to the Configuration > Work Centers. As the process begins with the Assembly operation, which takes place at the Assembly 1 work center. Select the Assembly 1 work center from the list.
Here, Assembly 1 is the work center, operated by Amy Watson, who will handle all operations performed in this work center.
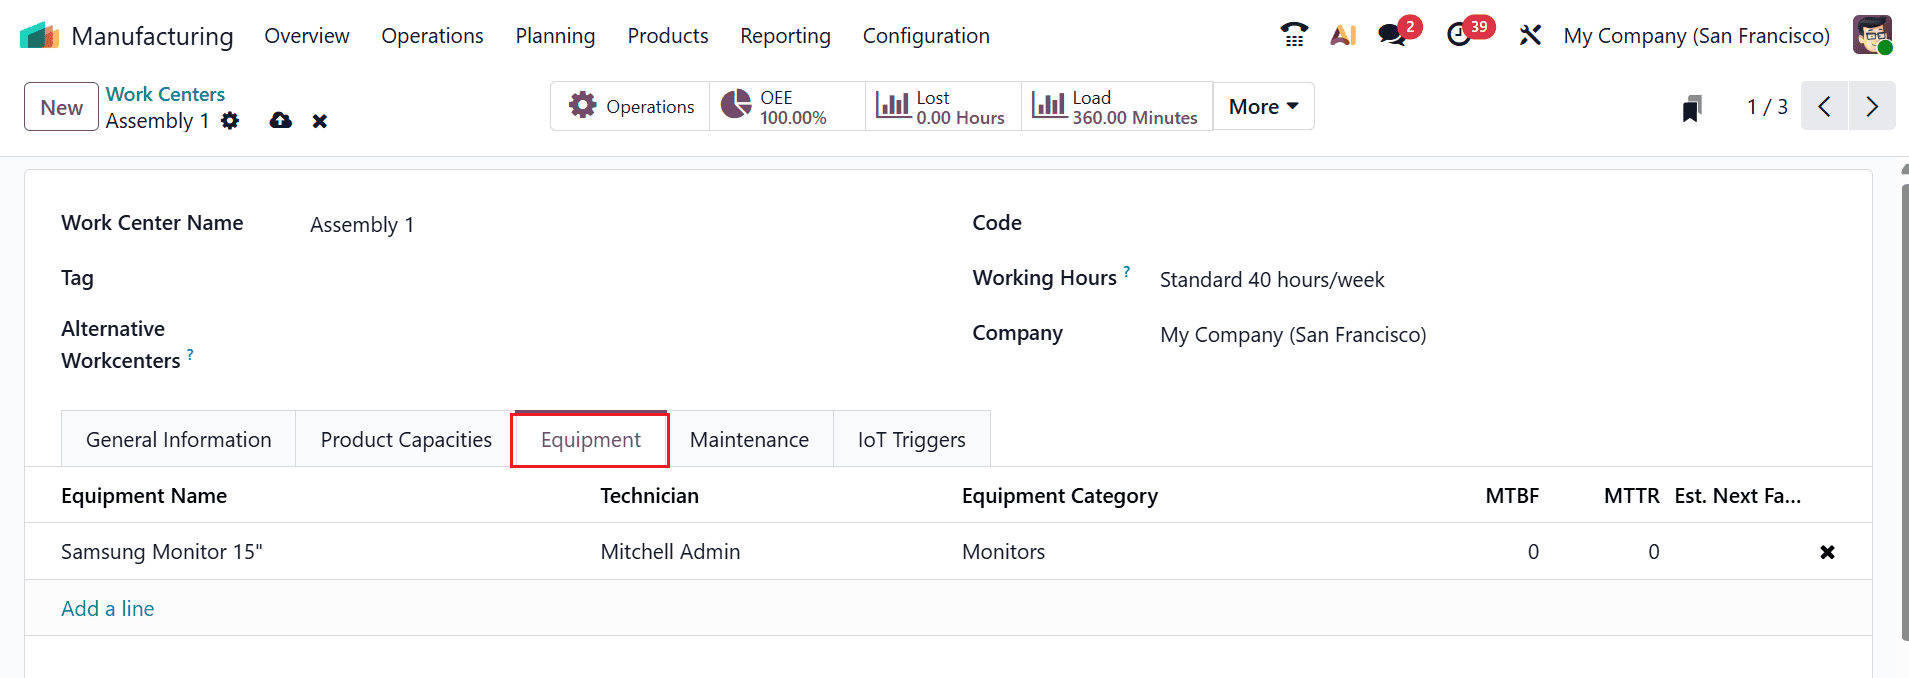
The required equipment for the assembly operation can be configured in the Equipment tab of the Work Center, as shown below:
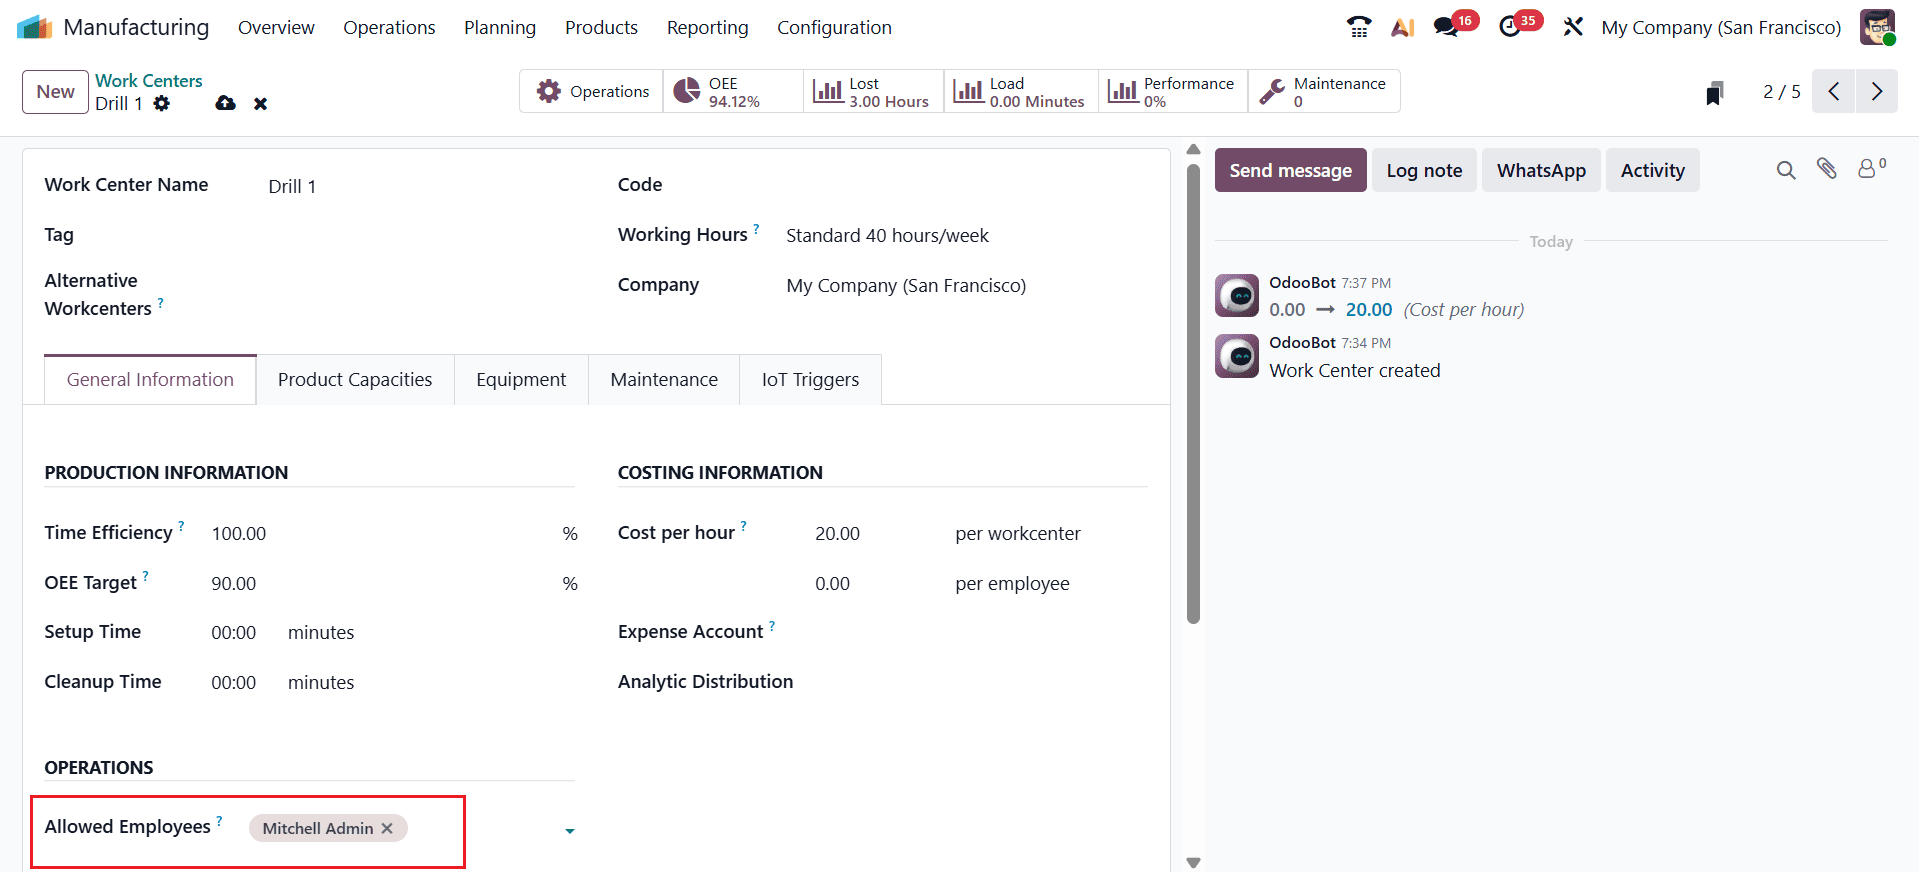
Here, the second operation is Packing, executed at the work center Drill 1, with Mitchell Admin as the operator.
Create a New Manufacturing Order
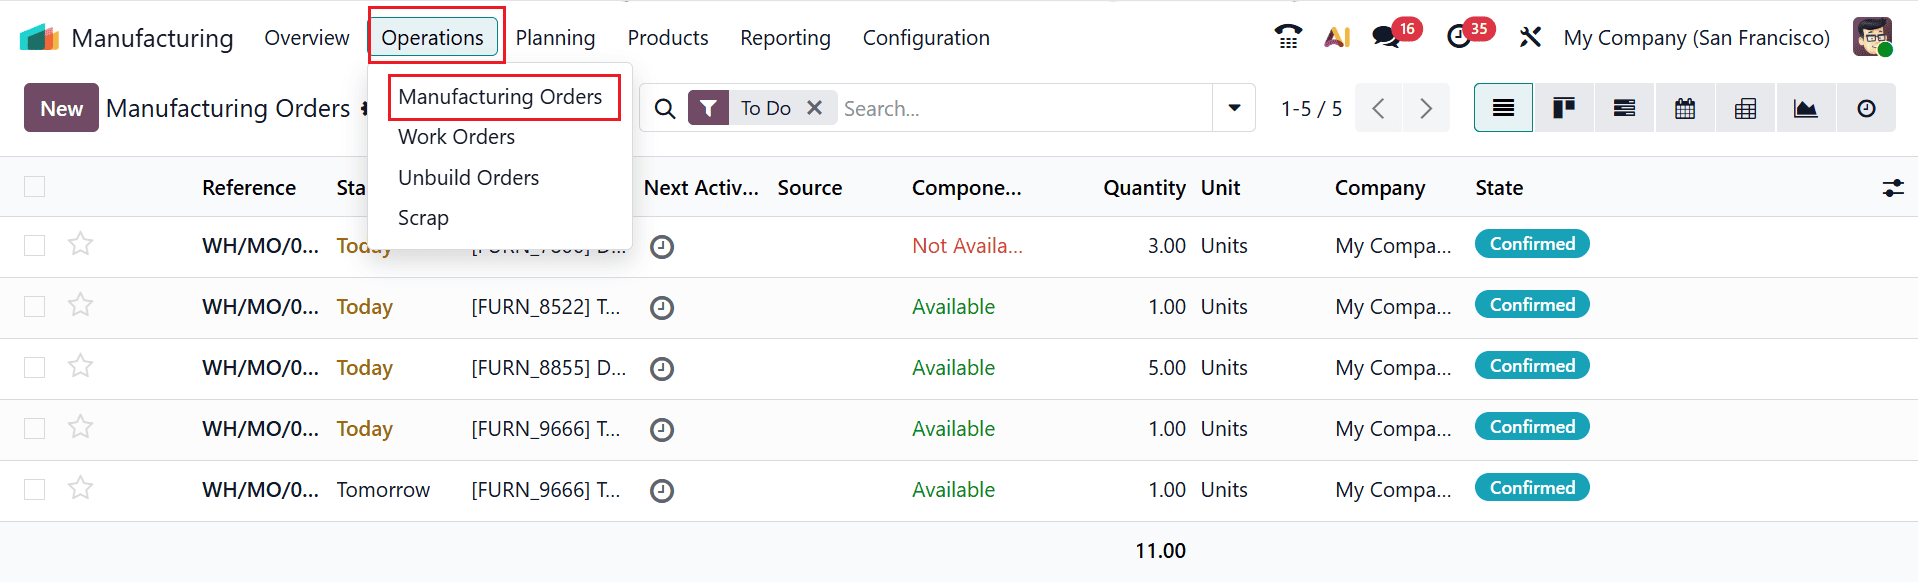
To create a manufacturing order, navigate to Operations > Manufacturing Orders, where you can see a complete list of existing orders.
To proceed, click the New button to create a new manufacturing order.
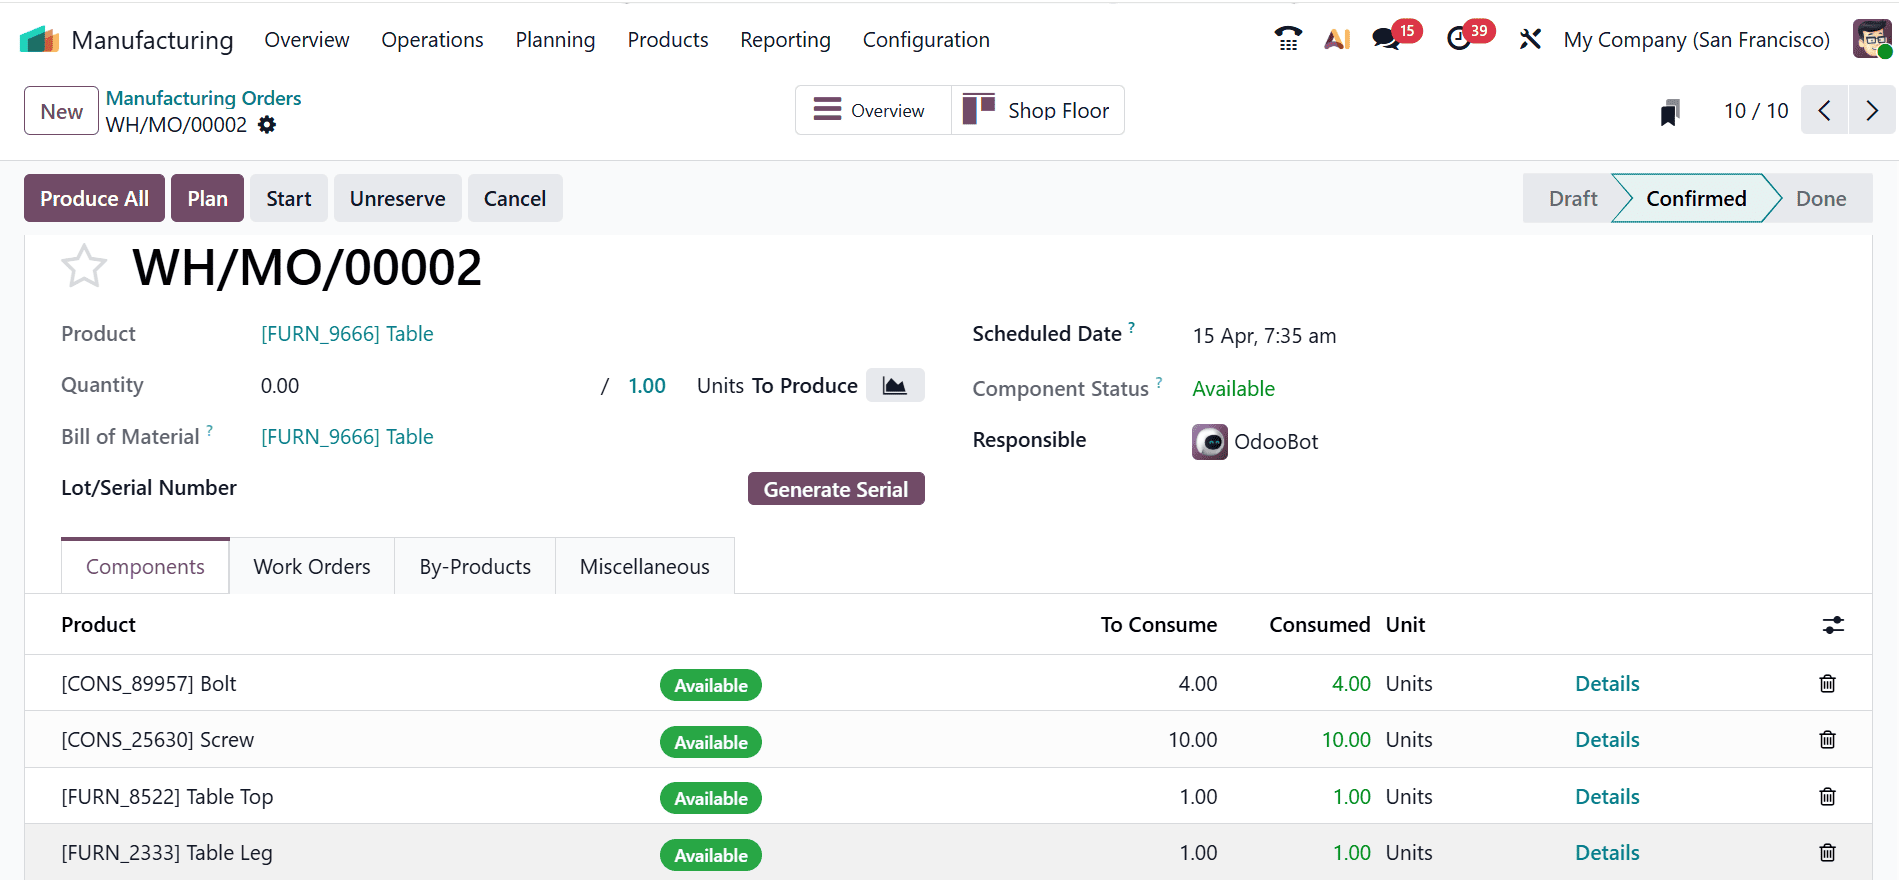
First, add the product and choose the bill of materials. After confirming the order, click Plan to schedule the work orders.
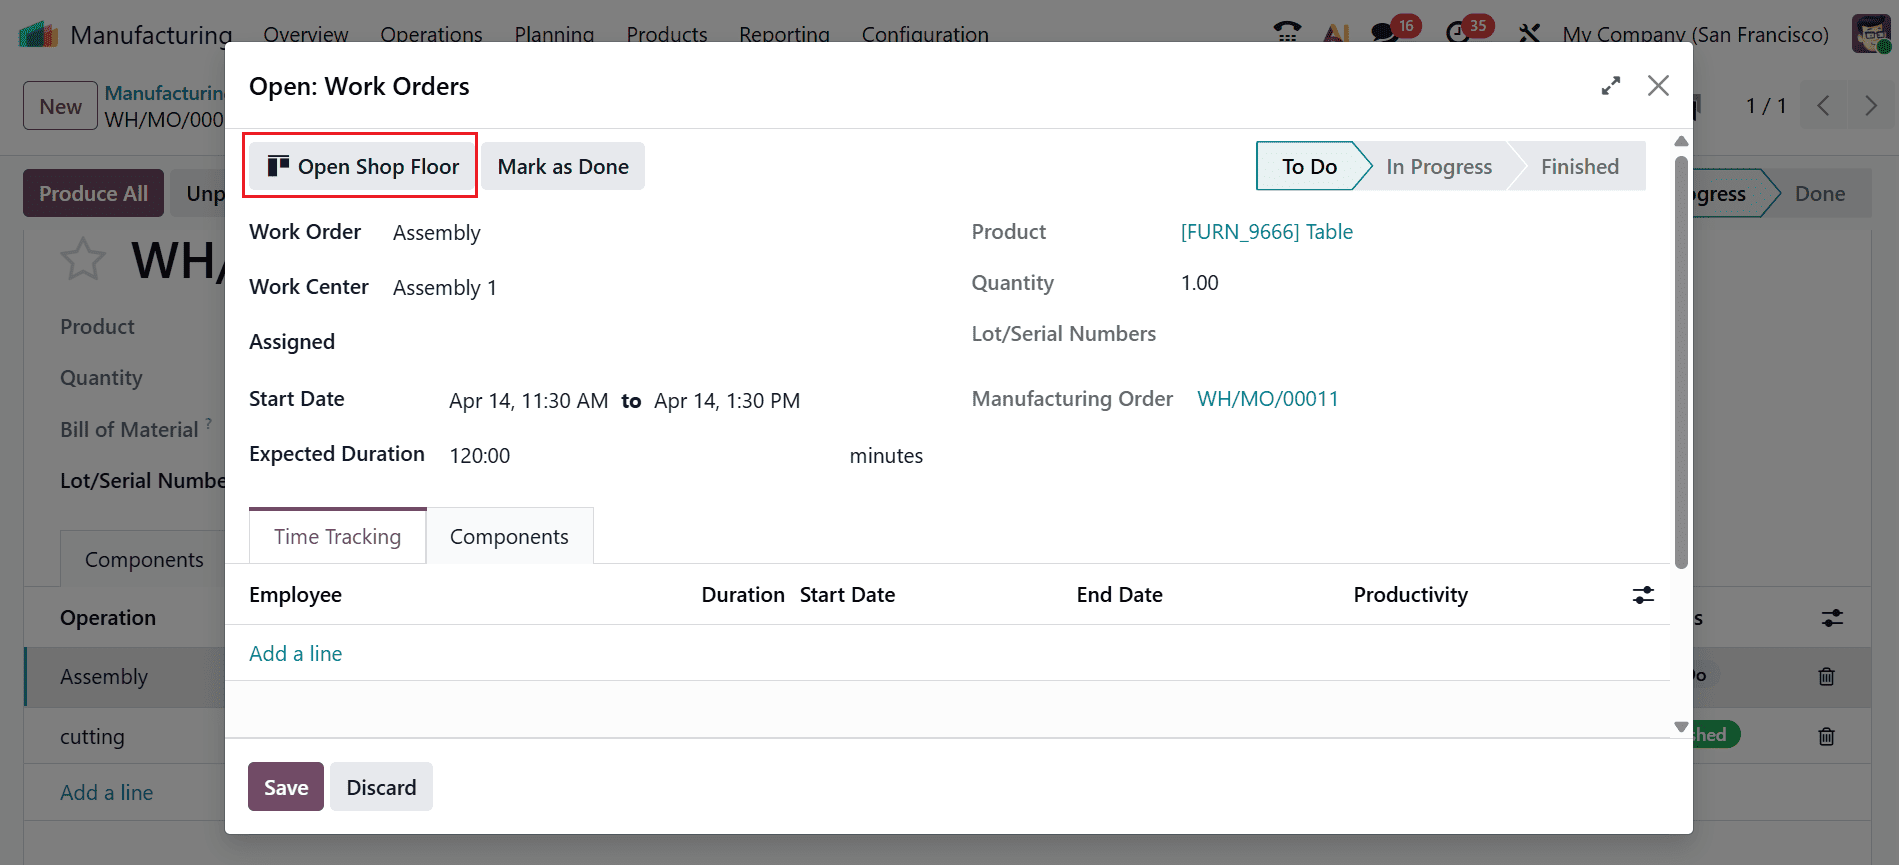
To access the Shop Floor, select an operation, which will open a pop-up window displaying its details. Then click the Open Shop Floor button, as shown below.
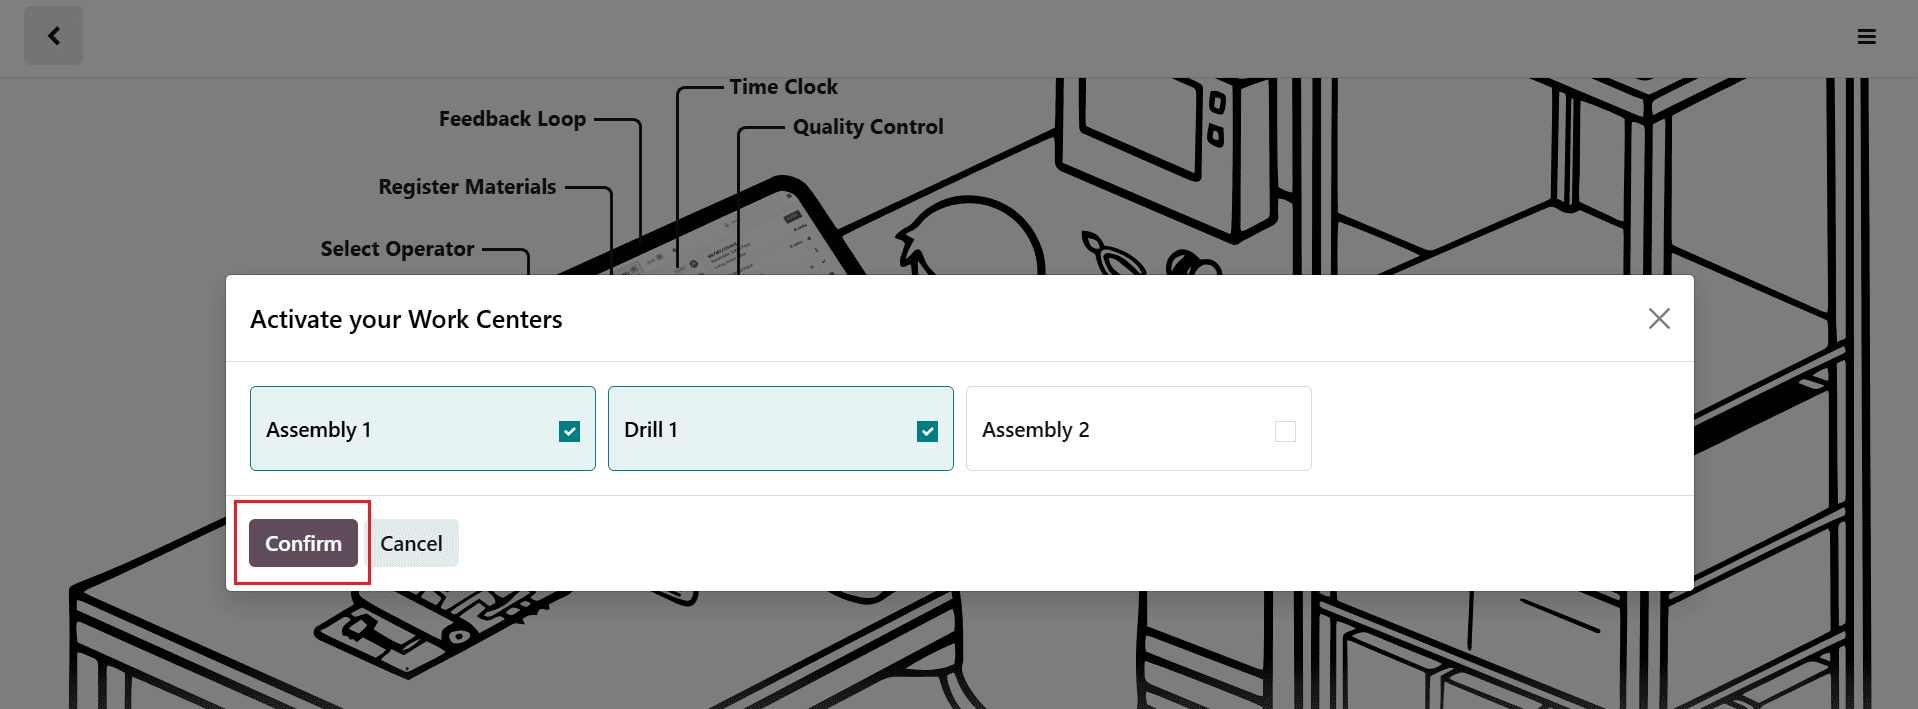
Next, a list of work centers will be displayed. Select the required ones; for producing the table, you will need two work centers: Drill Station 1 and Assembly 1. Select both and click the “Confirm” button.
Work Order Management on the Shop Floor
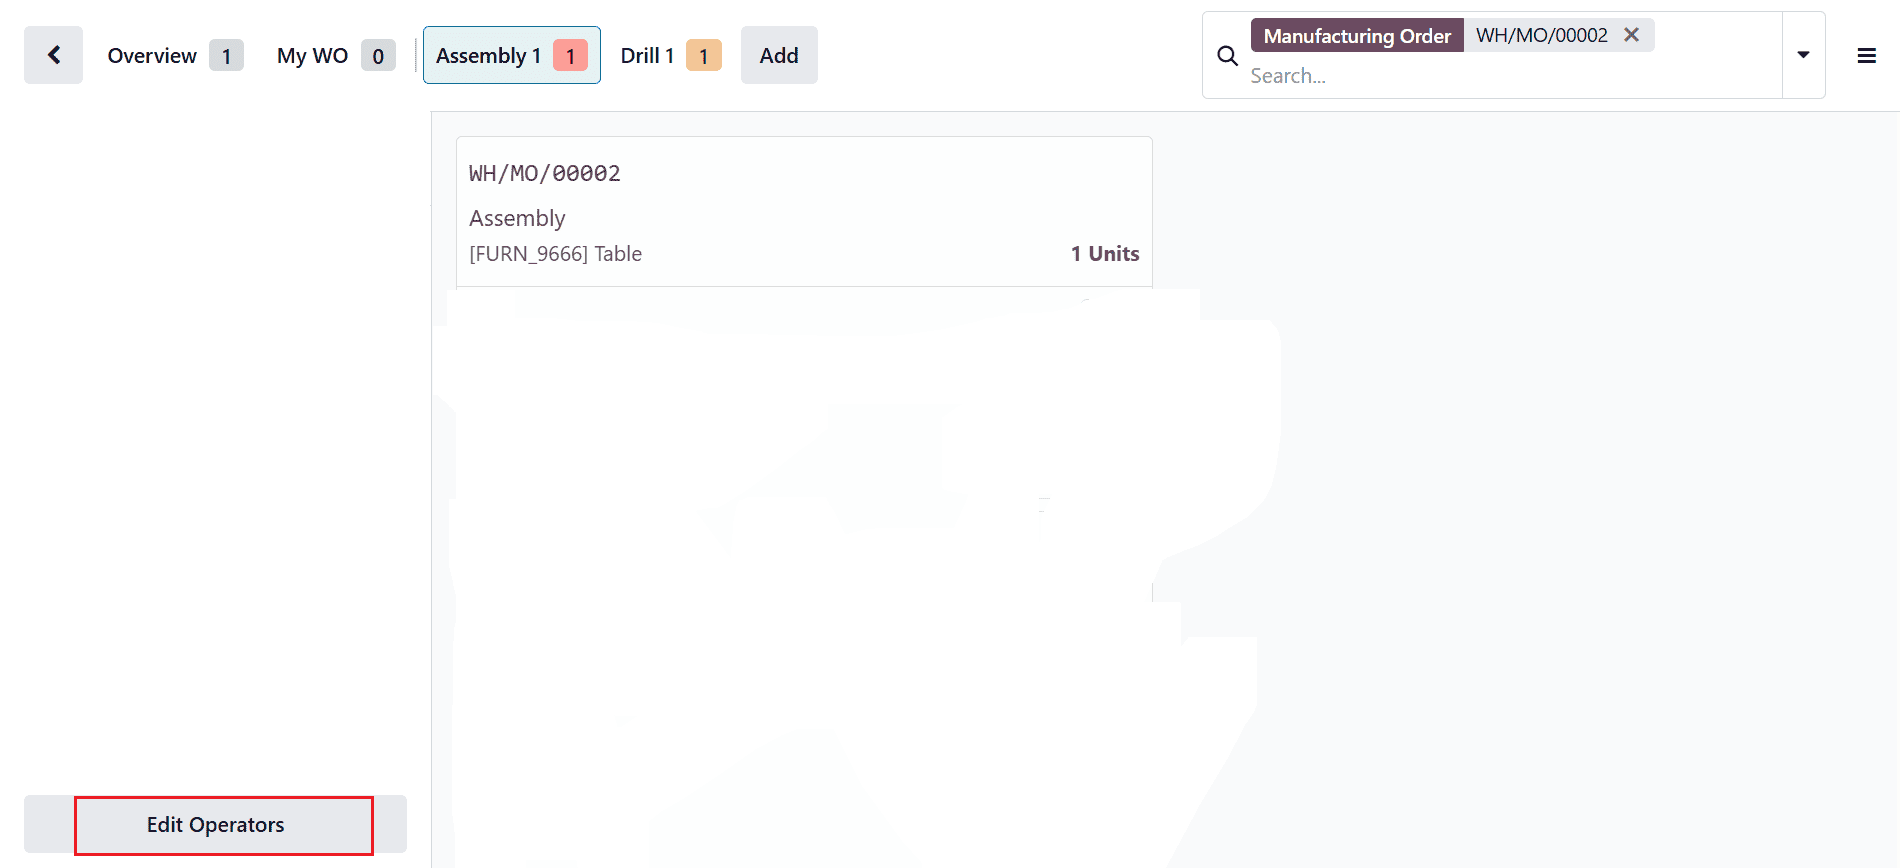
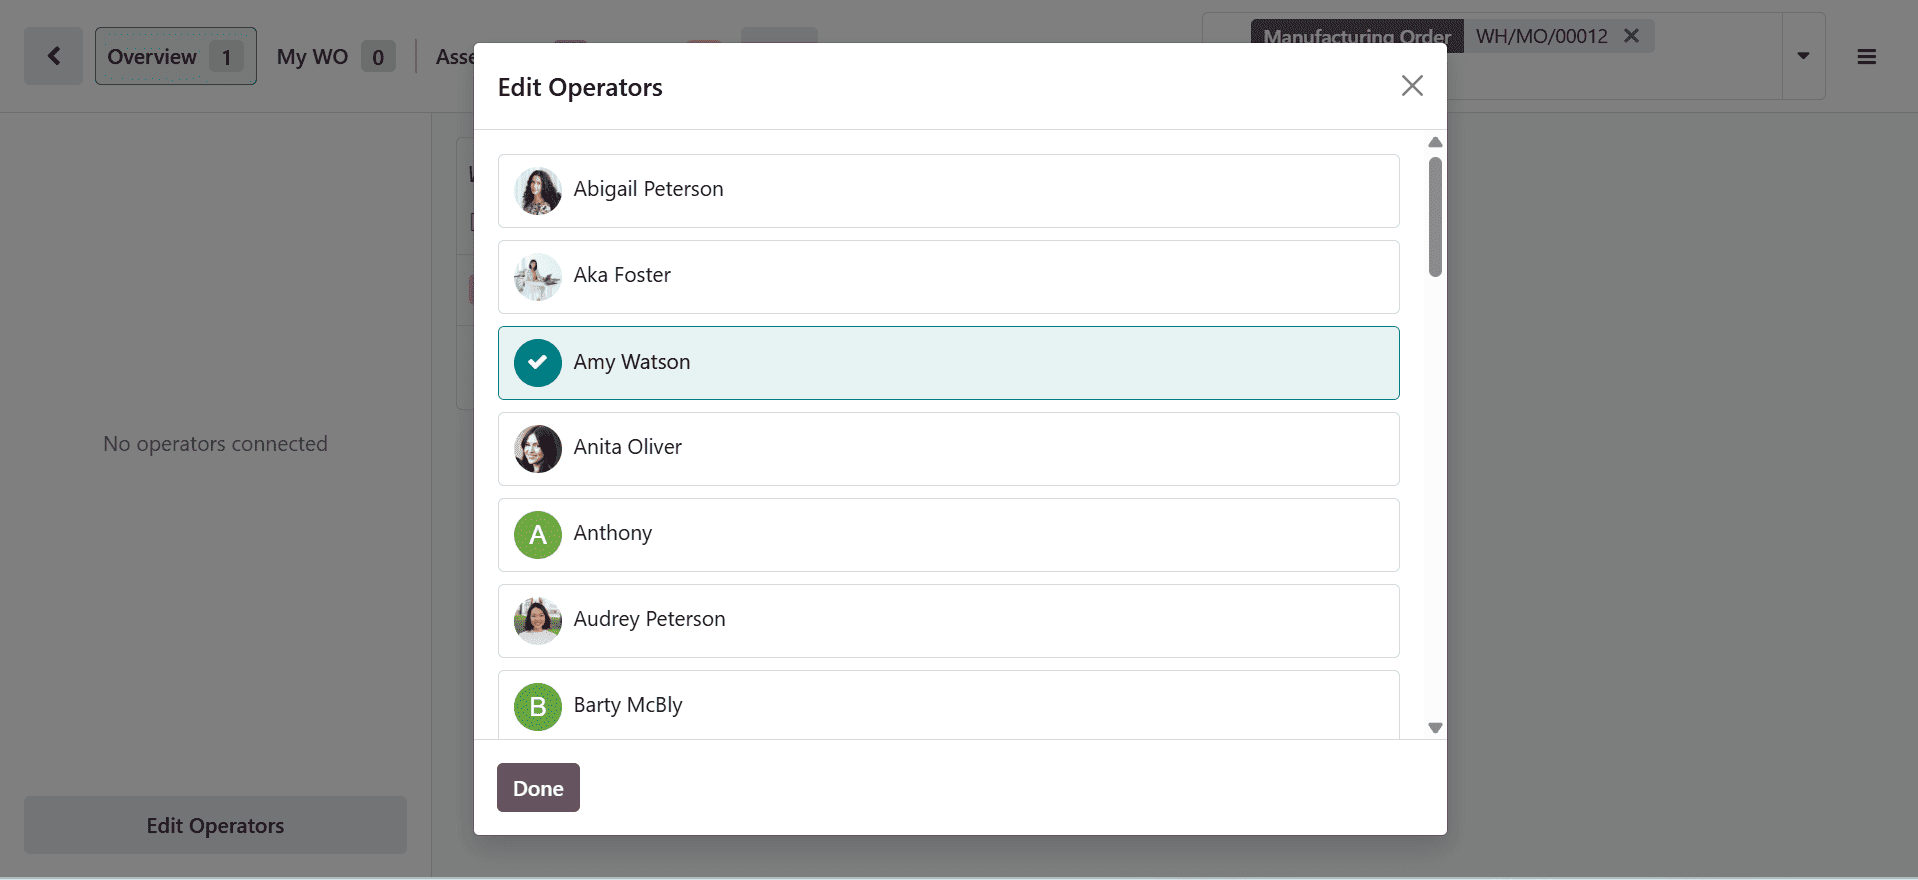
The opening screen of the Shop Floor is displayed below. The operator must log in before proceeding. To add an operator, use the Edit Operators button on the left panel.
A pop-up screen will appear, allowing you to select employees from the list and enter their credentials to log in to the Shop Floor.
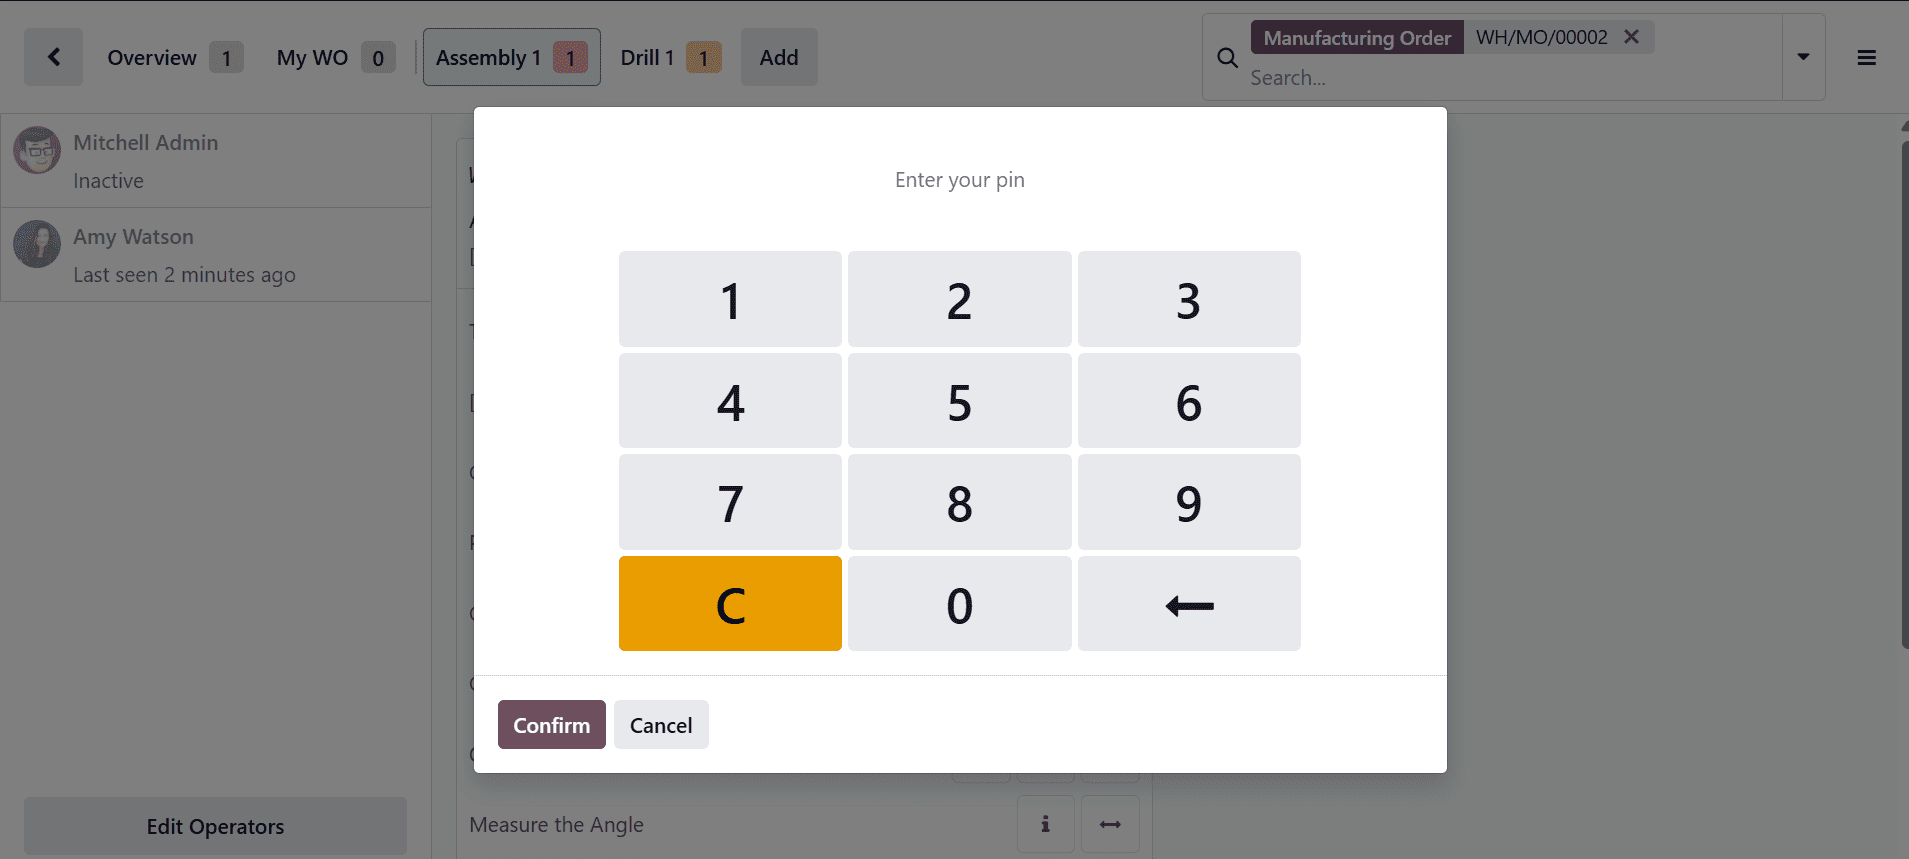
Each employee has unique login credentials. The password is configured in the Settings tab of the Employee form.
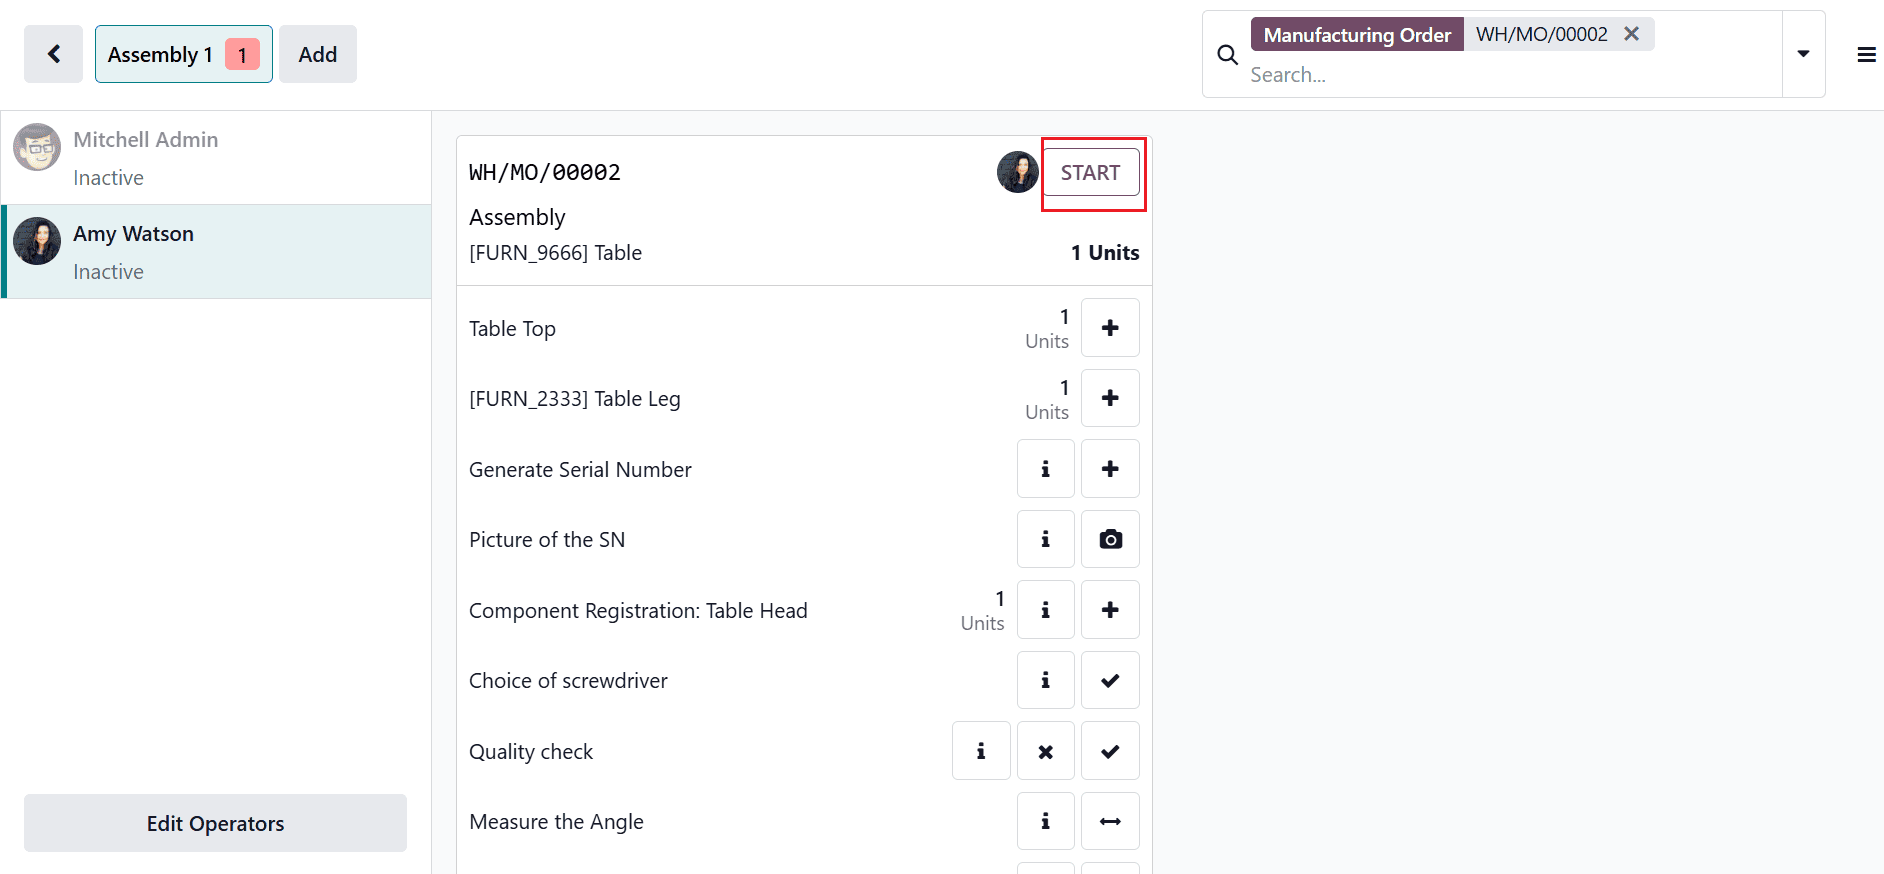
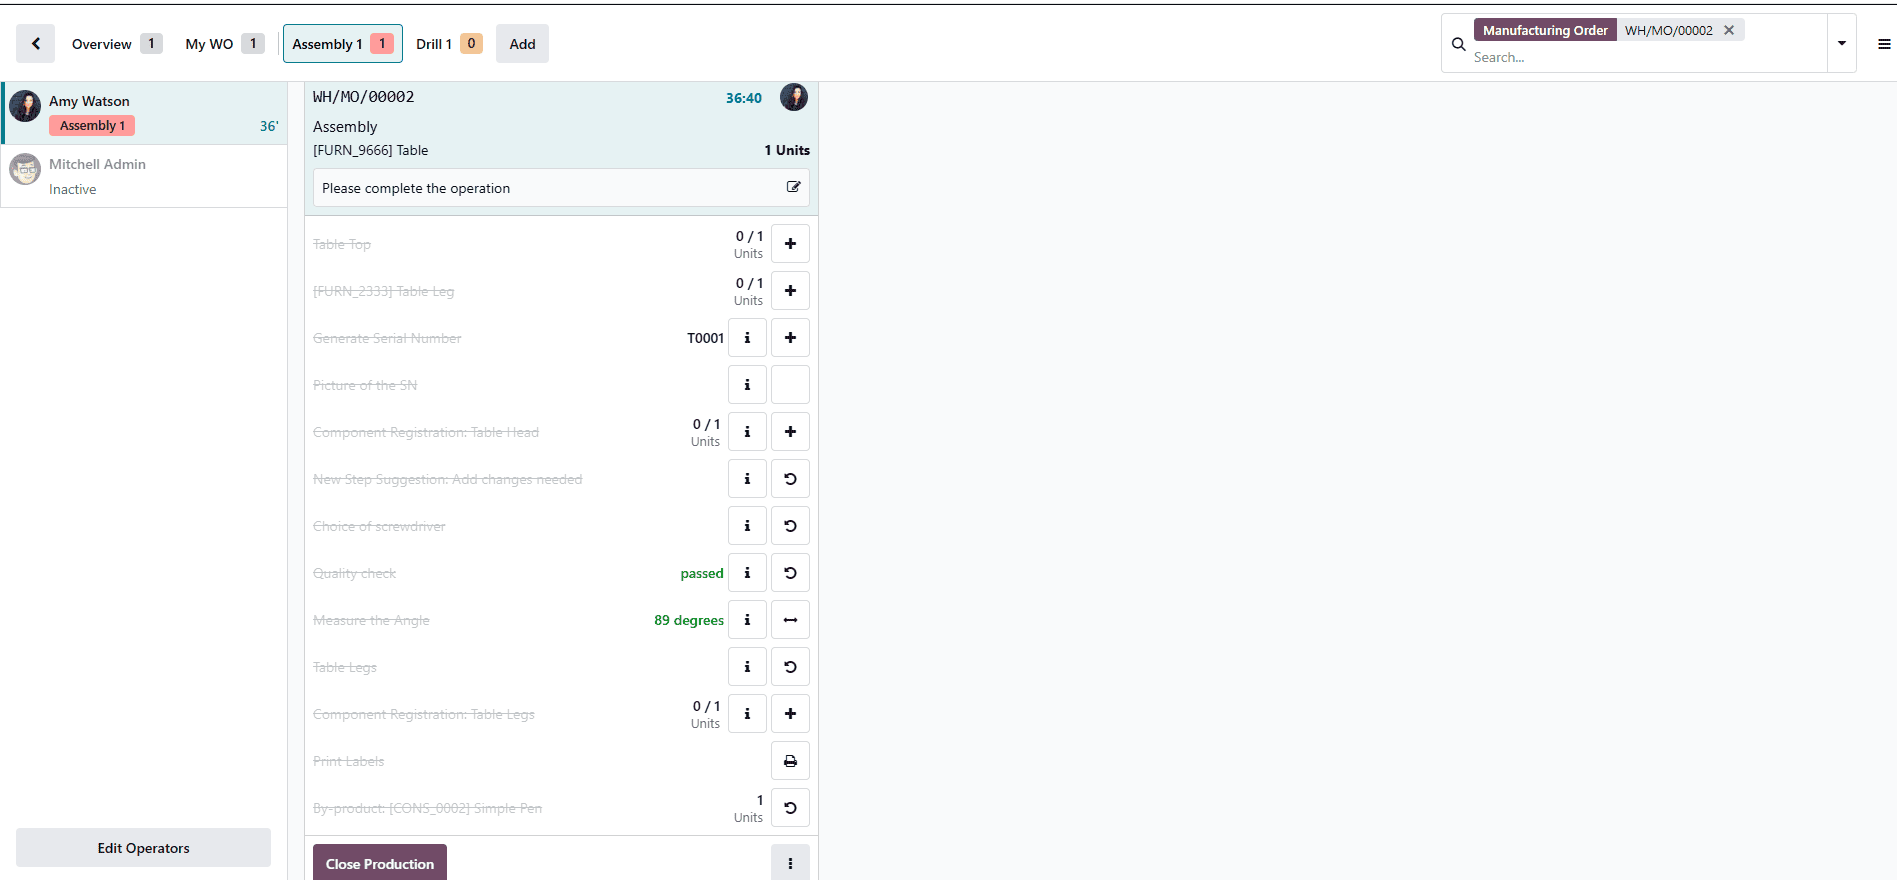
After logging in, the employee can view the operation as shown below. Click the Start button to begin the operation, which will start the timer. Here, you can view the operations of the Assembly 1 workcenter with Operator as Amy Watson.
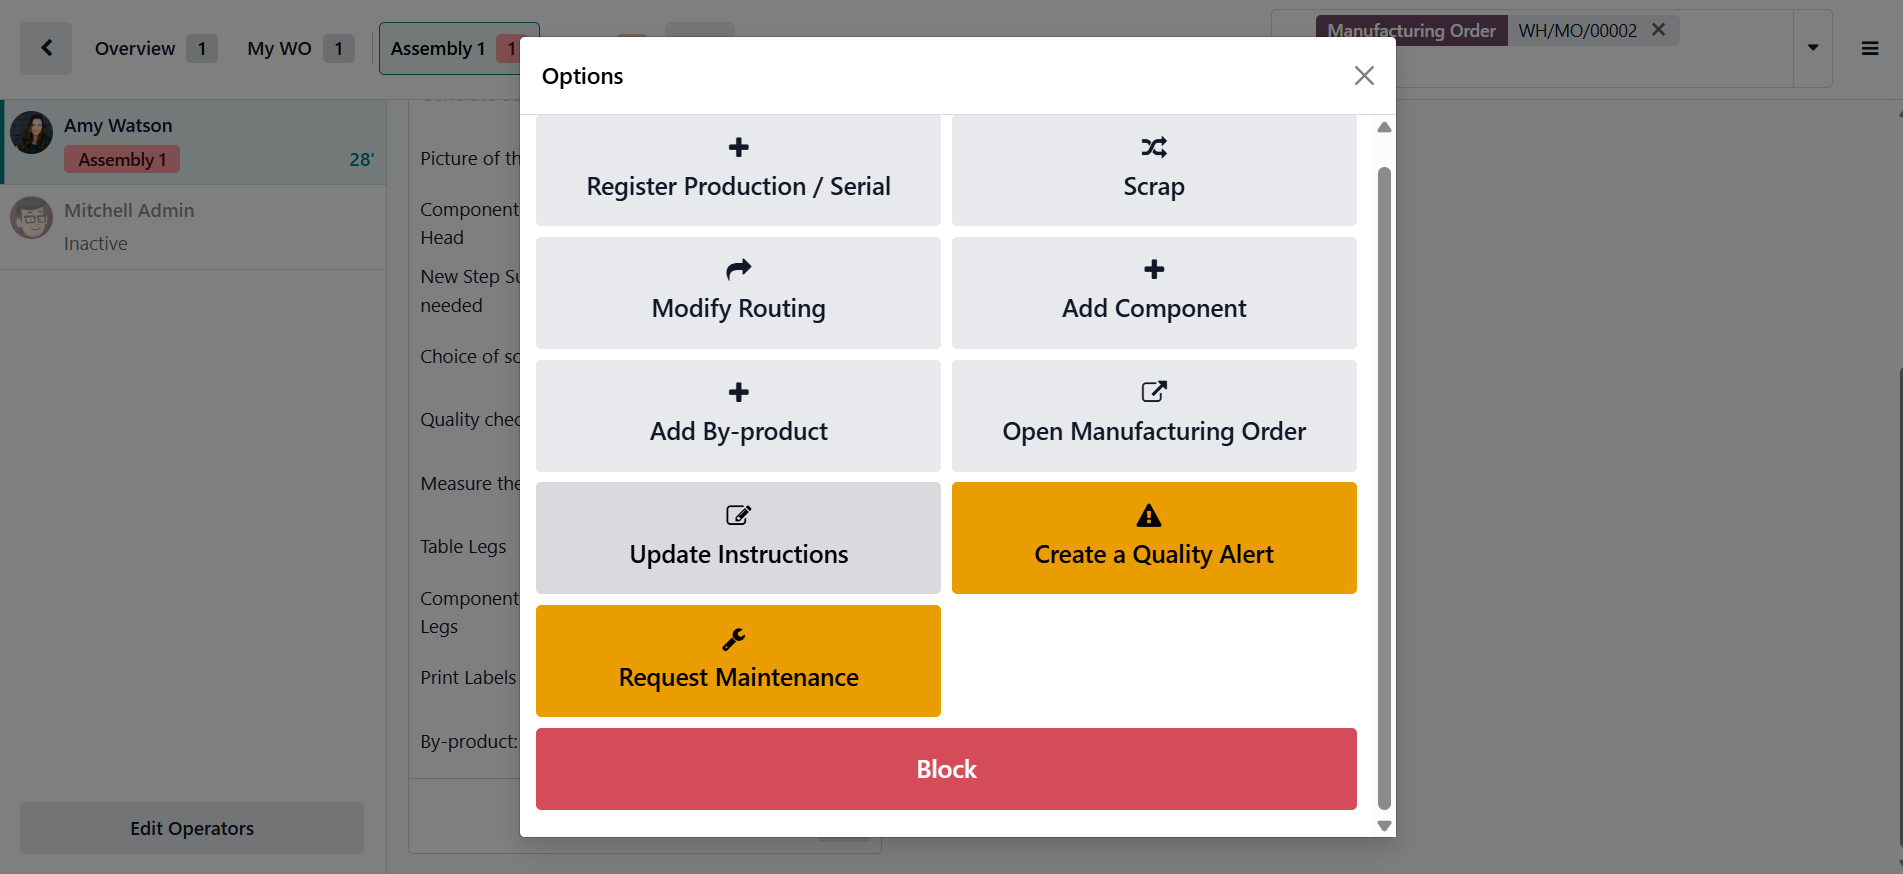
Click on the three-dotted vertical line at the bottom of the screen to view the list of actions an employee can perform while working on an operation in the Shop Floor:
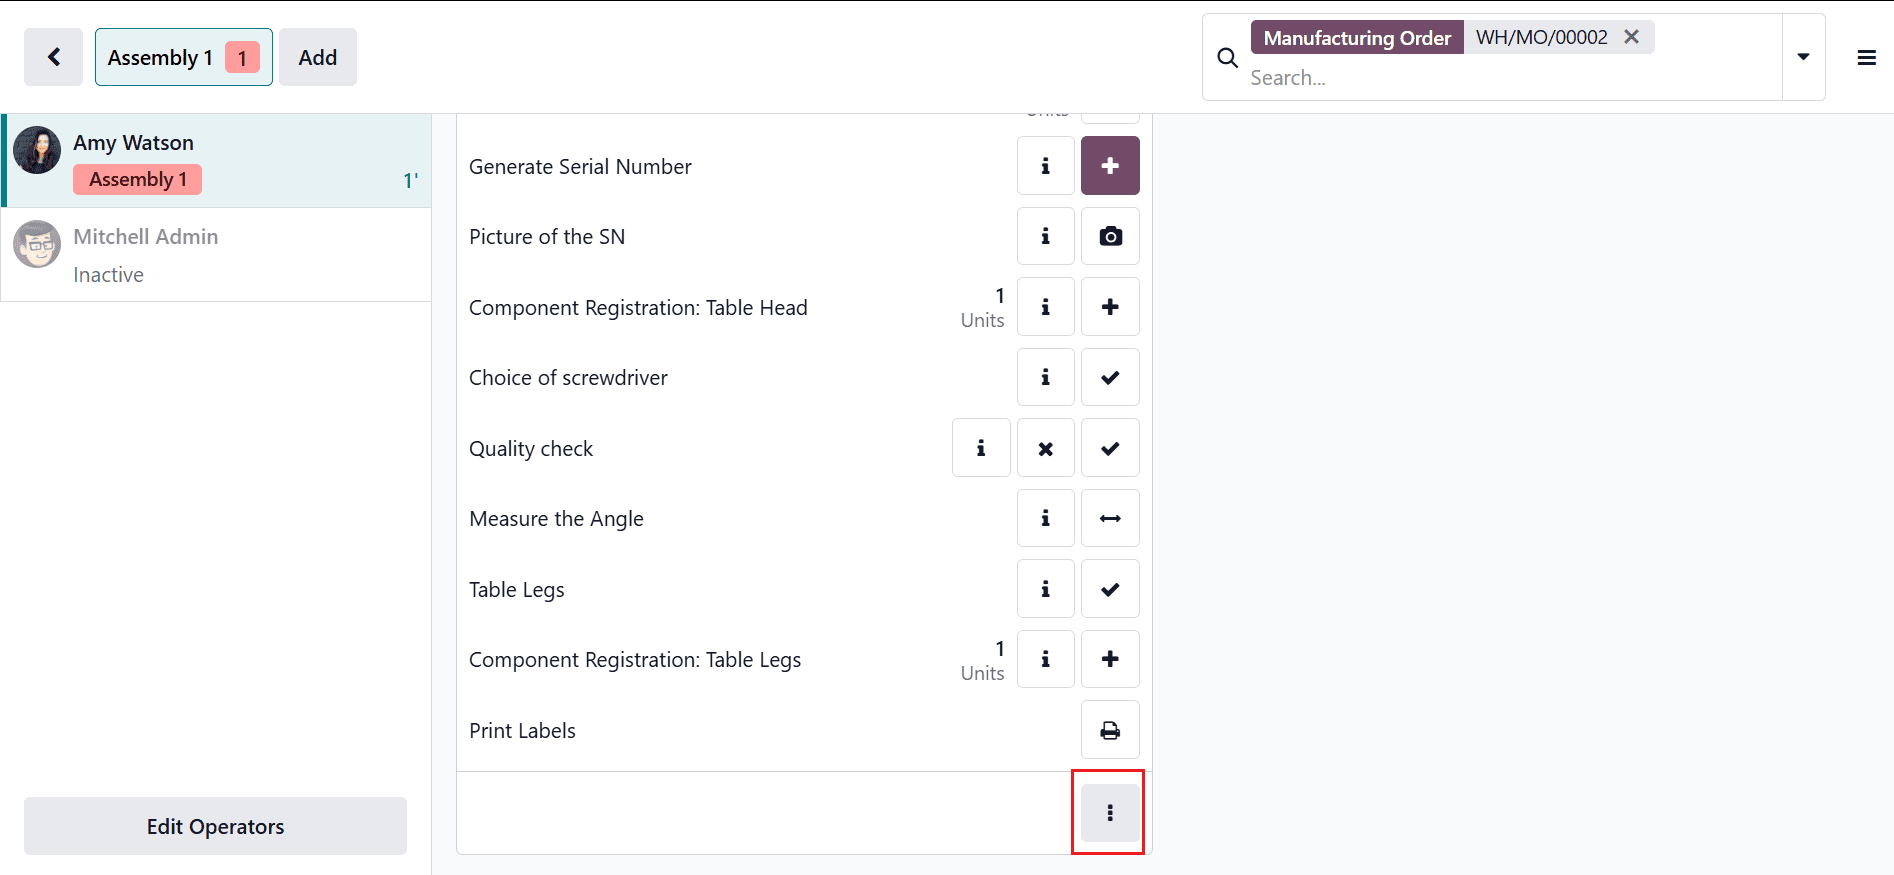
The available options include Register Production / Serial, Add Components, Scrap, Modify Routing, Add By-product, Open Manufacturing Order, Update Instructions, Create a Quality Alert, Request Maintenance, and Block. Let’s go through each one.
1. Register Production / Serial
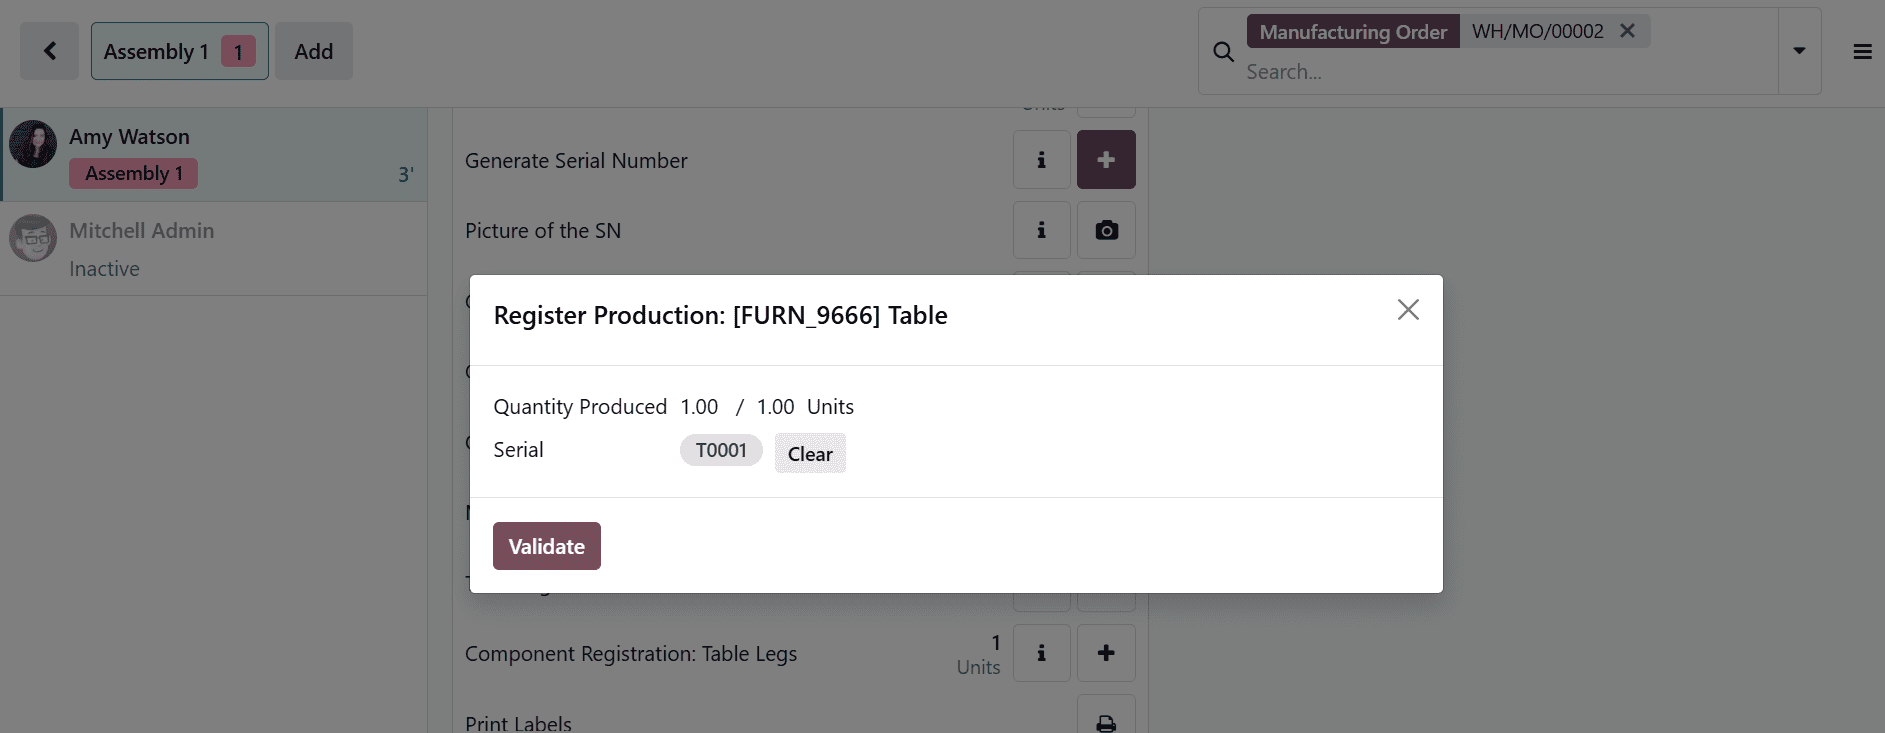
In Odoo 19, Register Production / Serial is an action available during a Shop Floor operation. It enables employees to verify the quantity of finished goods produced and assign serial numbers as applicable. This helps ensure accurate production reporting and end-to-end traceability of manufactured products.
Click the Register Production / Serial button to open a pop-up window. In this window, enter the quantity produced and assign the serial number, if required. Finally, click Validate to confirm and save the entry.
2. Scrap
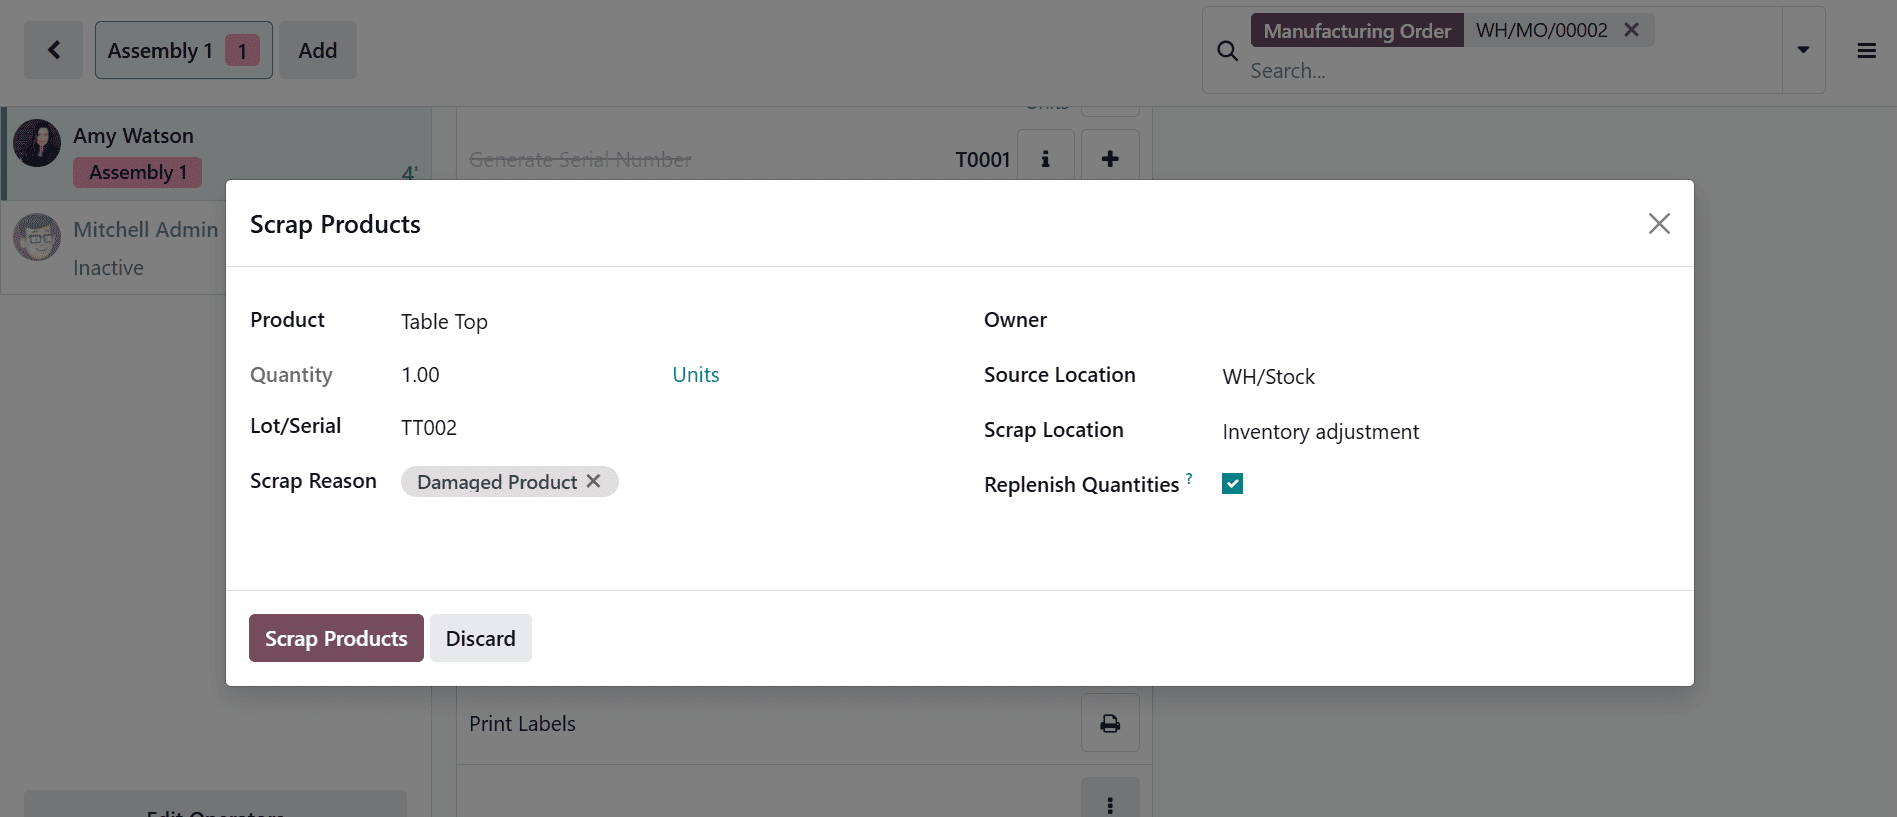
In Odoo 19, Scrap is an action available on the Shop Floor during a manufacturing operation. It is used to record and remove defective or unusable materials from production. This helps maintain accurate inventory levels and improves quality control by tracking production waste.
When you select the Scrap option, a new pop-up window will appear. Then, add the details such as product, quantity, lot/serial, scrap reason, owner, source location, scrap location, and enable the Replenish Quantities checkbox to automatically trigger replenishment for the scrapped product. Next, click on the Scrap Products button to proceed. This ensures the scrap is recorded and the inventory is updated accordingly.
3. Modify Routing
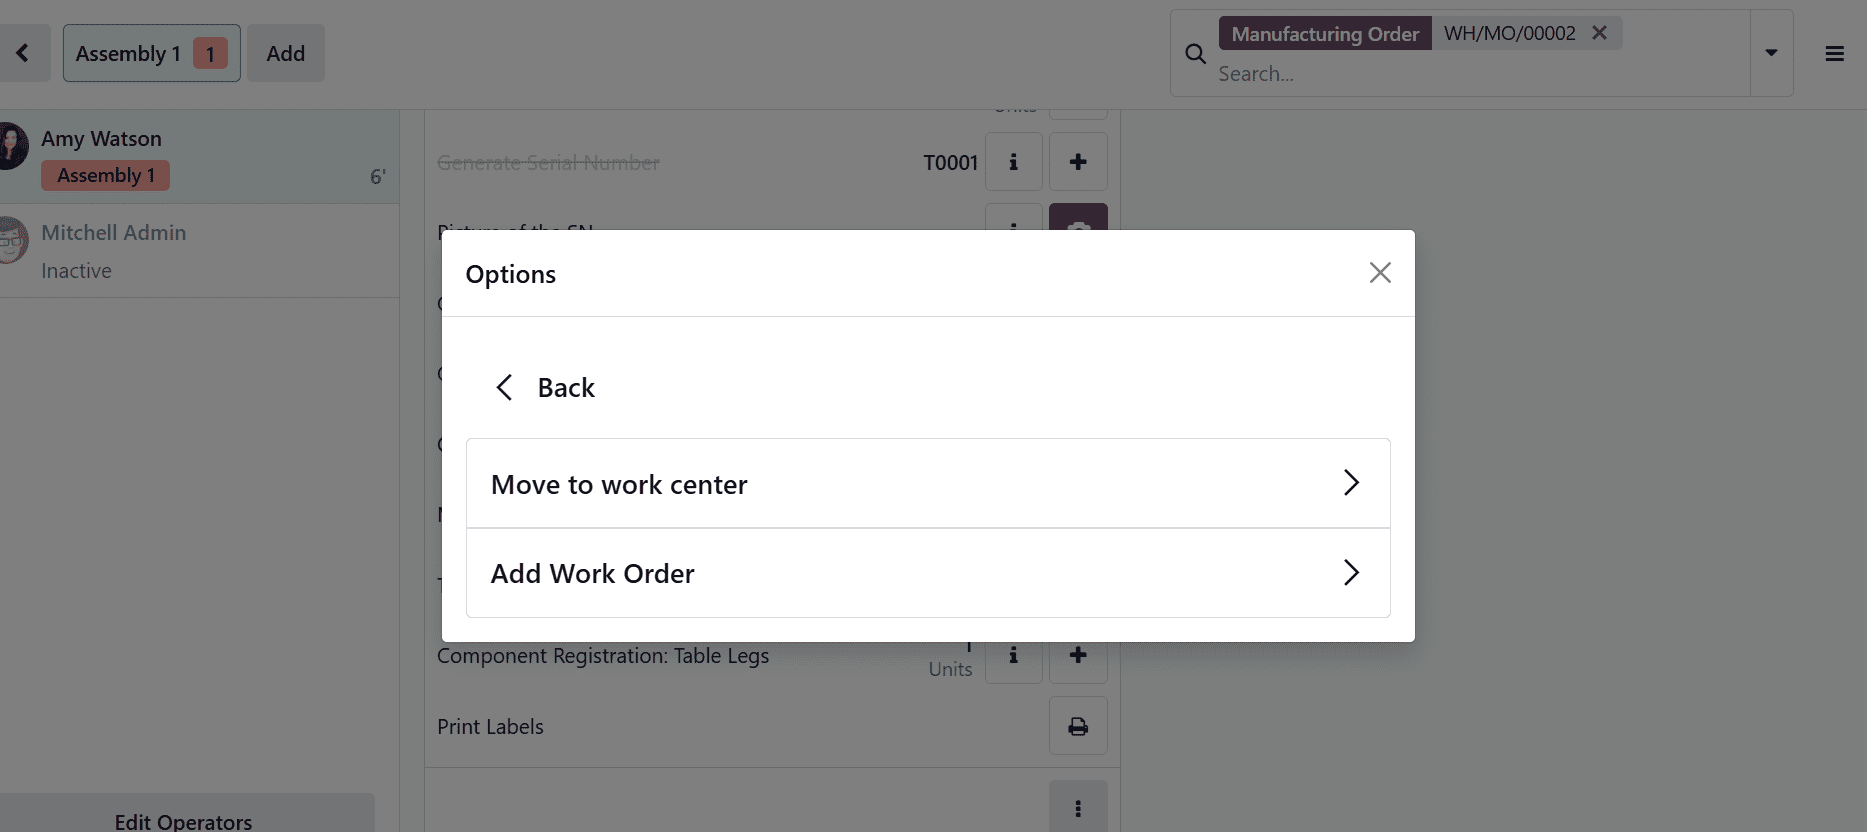
In Odoo 19, Modify Routing is an action available in the Shop Floor during a manufacturing operation. It allows employees to change or adjust the routing steps of a work order if process changes are needed. This helps improve production flexibility and ensures the workflow matches actual shop floor conditions.
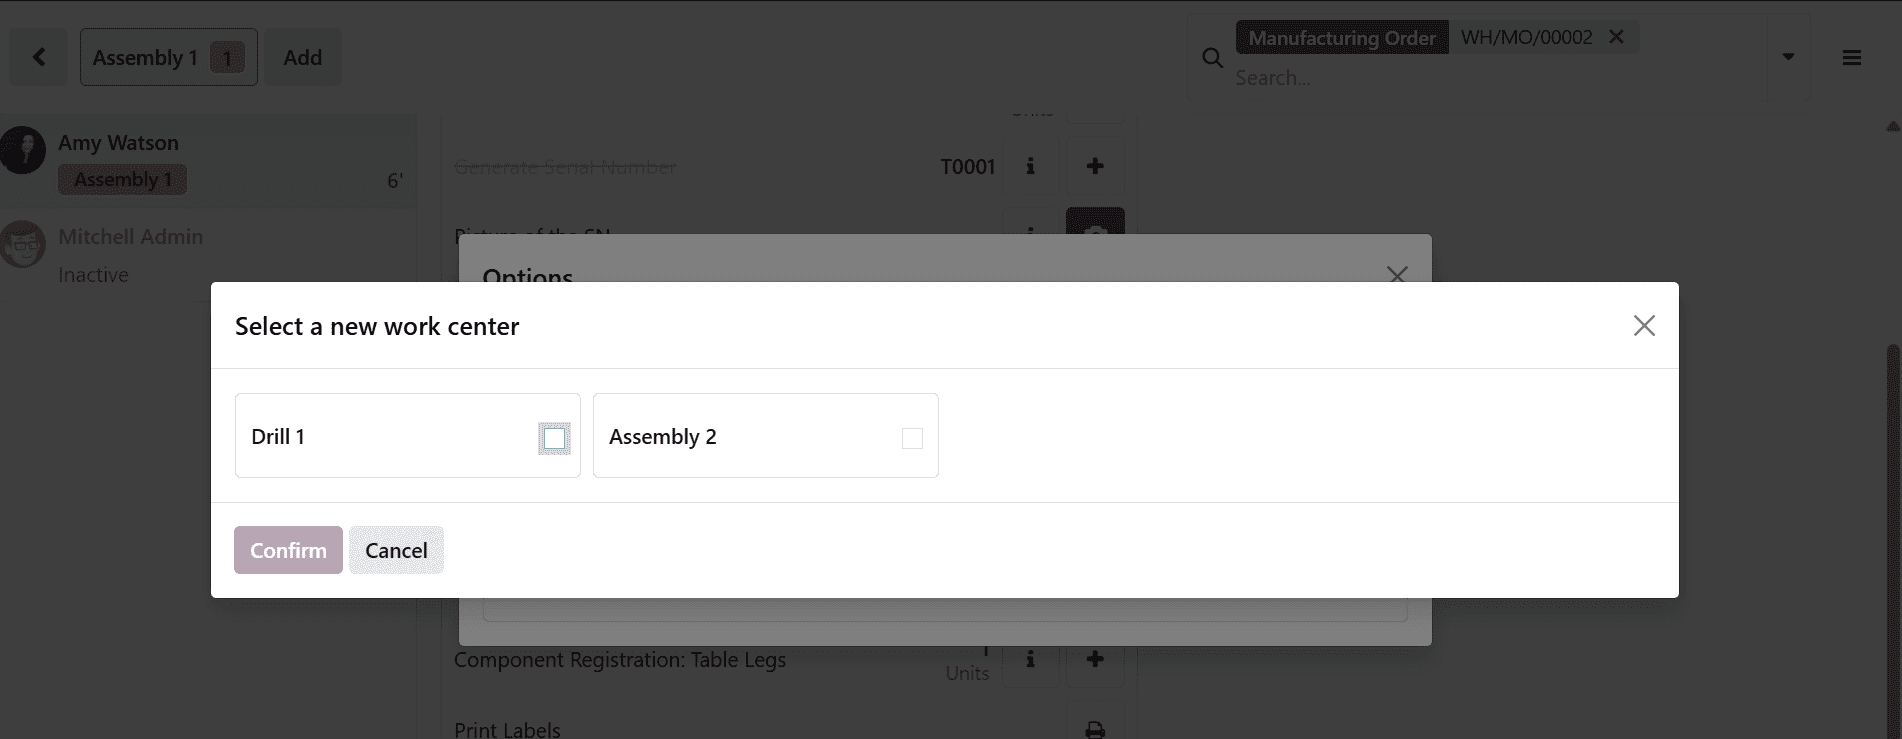
A new pop-up window will appear when you click the Modify Routing option. Here, you can see two options: Move to work center and Add Work Order.
Clicking the Modify Routing option will open a new pop-up window. Here, you can select a new work center for the operation and click on the Confirm button.
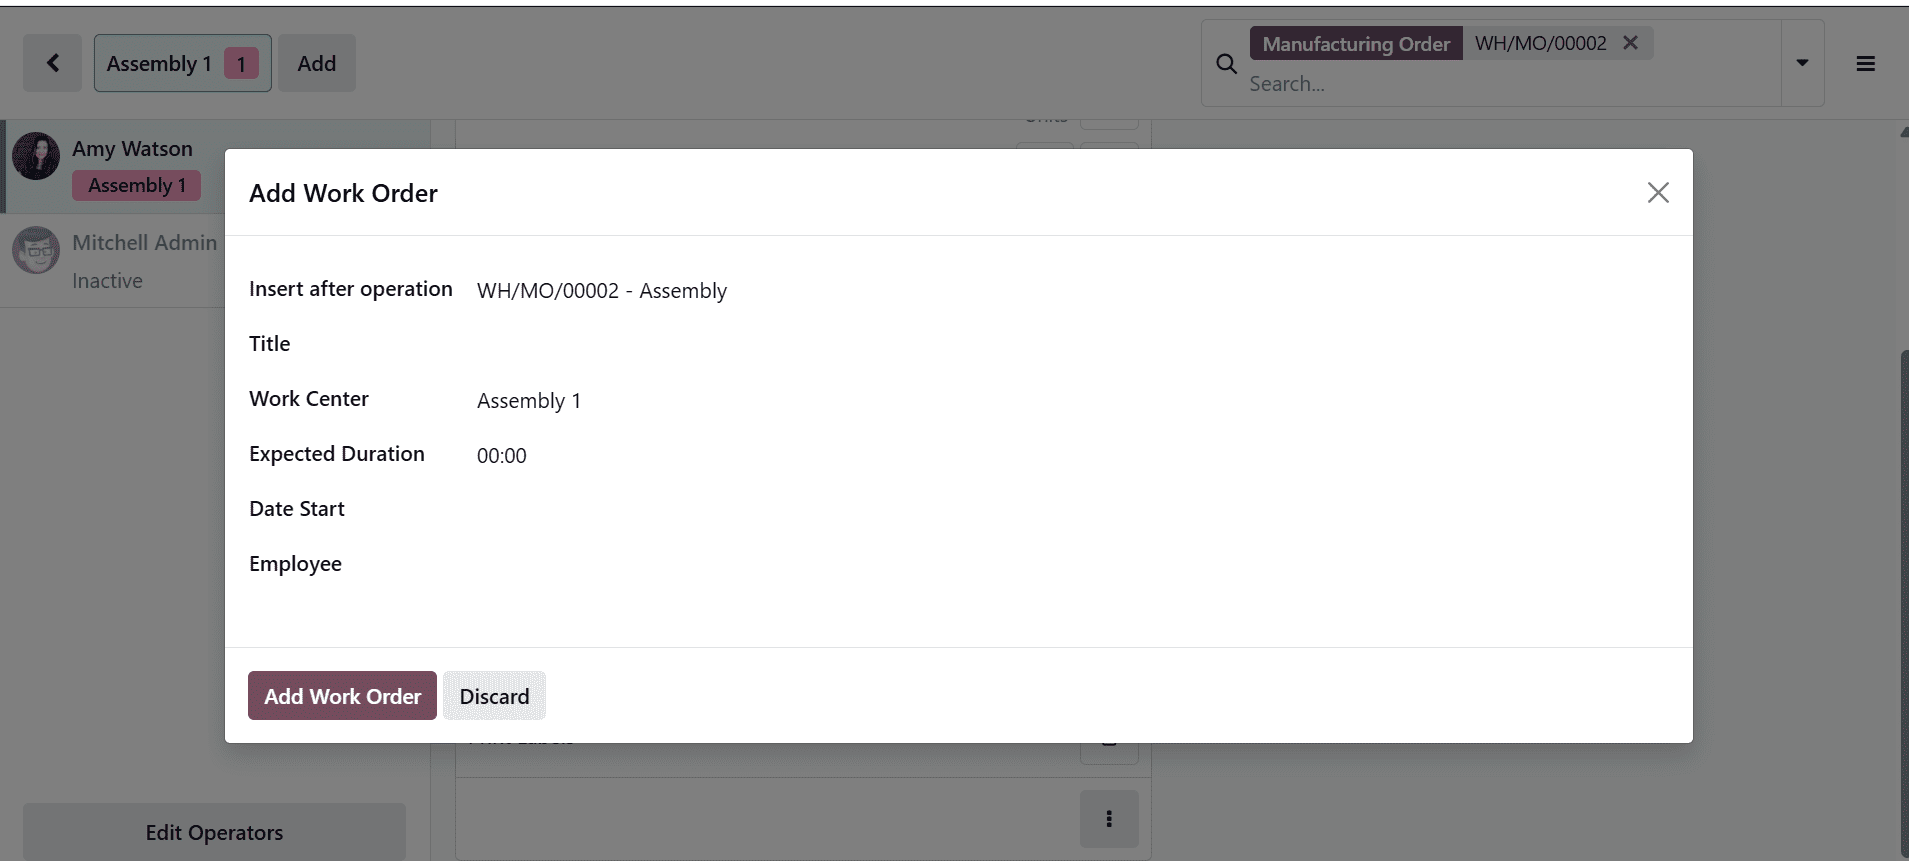
When you choose the Add Work Order option, a pop-up window will open, as shown below. In this window, you can enter the details for the new work order, including Insert After Operation, Title, Work Center, Expected Duration, Start Date, and Employee. After entering all the details, click the Add Work Order button to continue.
4. Add Component
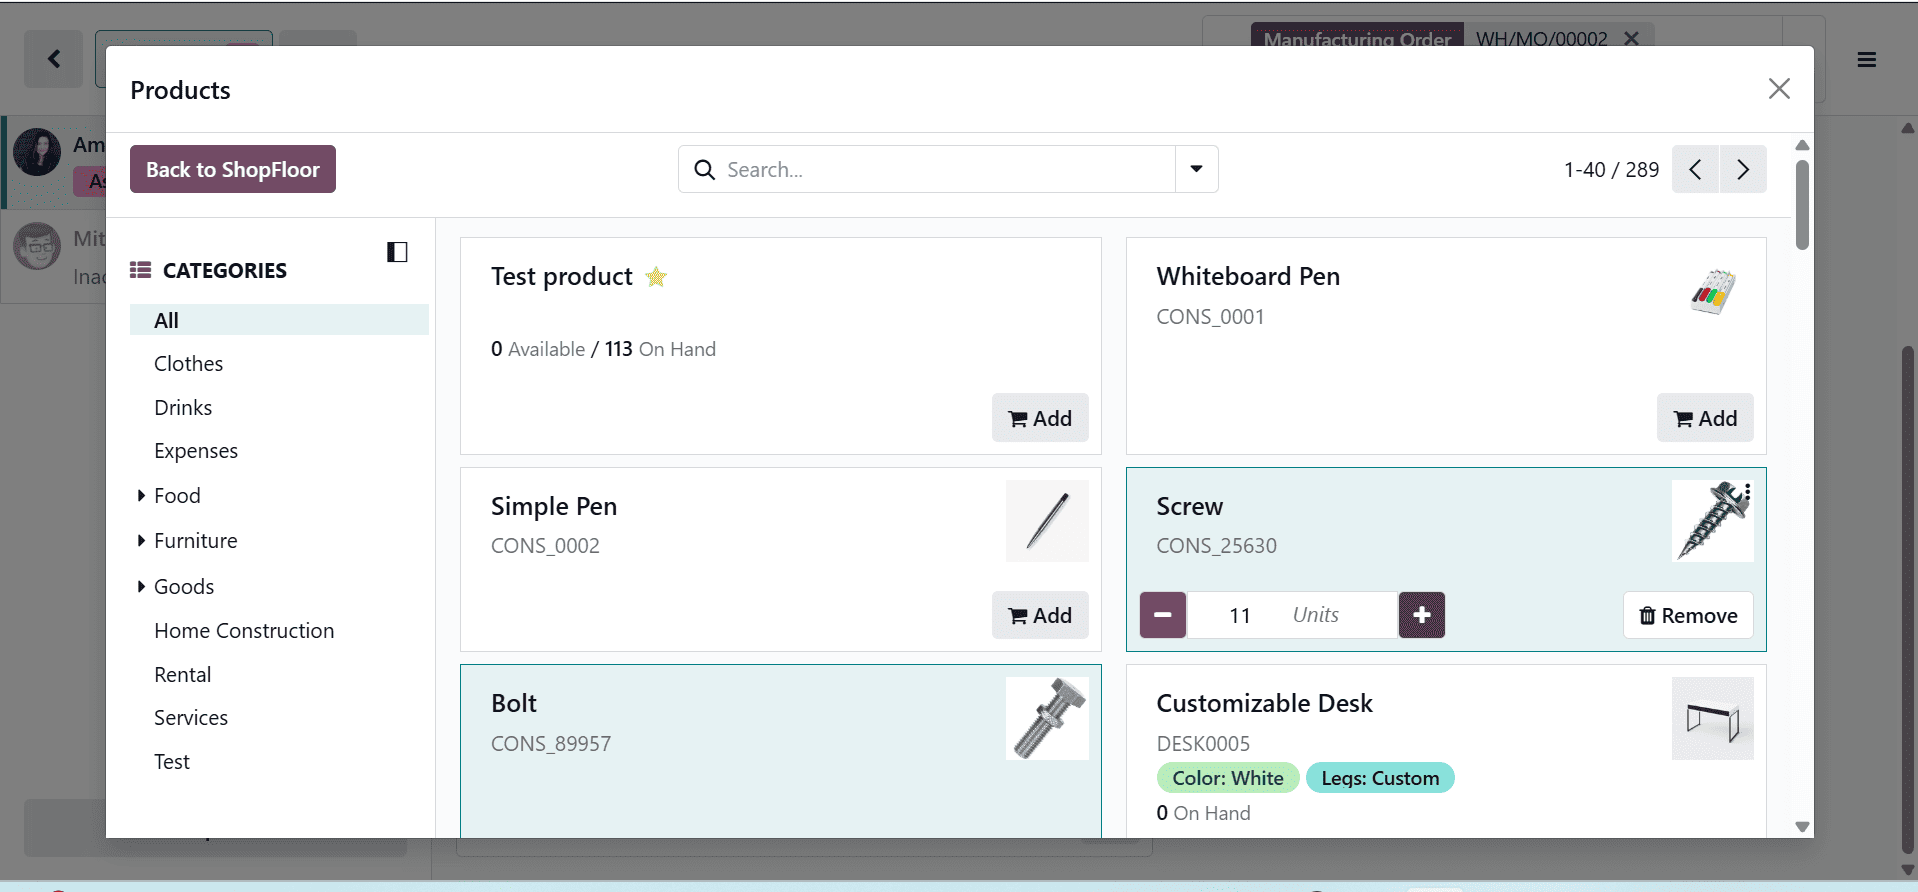
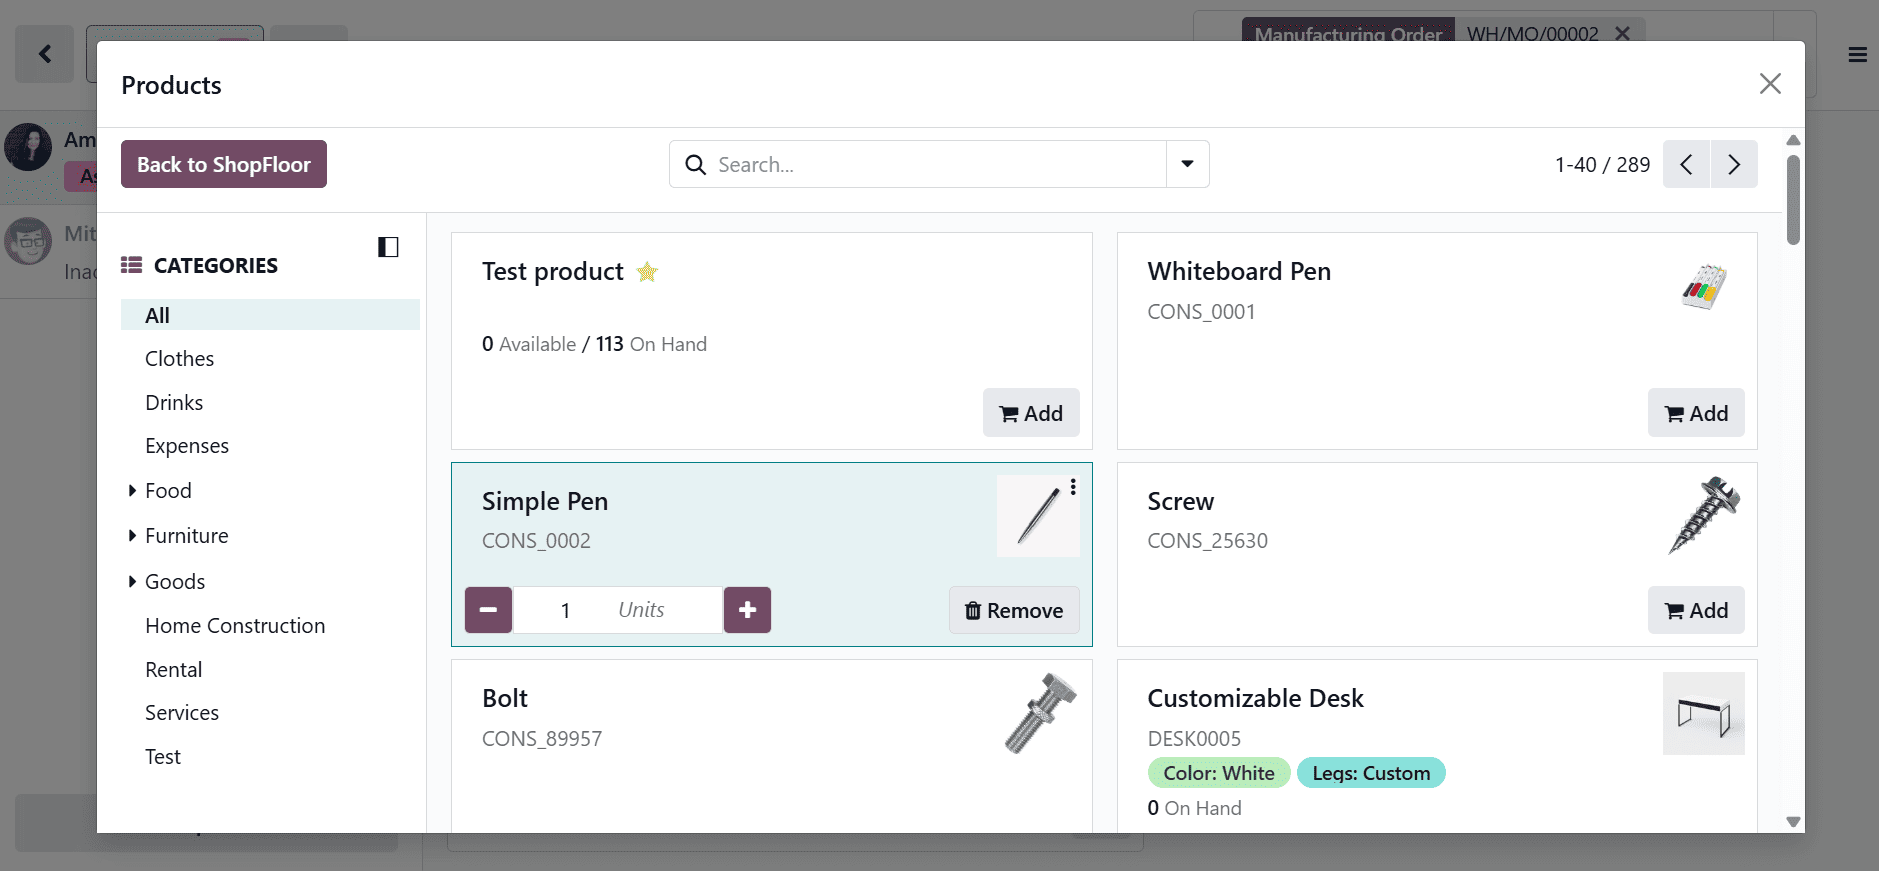
In Odoo 19, users can add components on the Shop Floor while a manufacturing operation is in progress, making it easy to handle unexpected material requirements. This allows operators to quickly include additional or substitute items without interrupting production. As a result, the system maintains accurate records of material consumption, supporting better inventory accuracy and cost control.
A product catalog window will appear, as shown below, allowing users to browse and select products by entering the required quantity. Here, an extra unit of the Screw has been added.
5.Add By-product
In Odoo 19, Add by Product is an action available on the Shop Floor during a manufacturing operation that lets users add additional items that are produced alongside the main product during manufacturing. It allows operators to quickly add items by choosing products and specifying quantities as needed.
6. Open Manufacturing Order
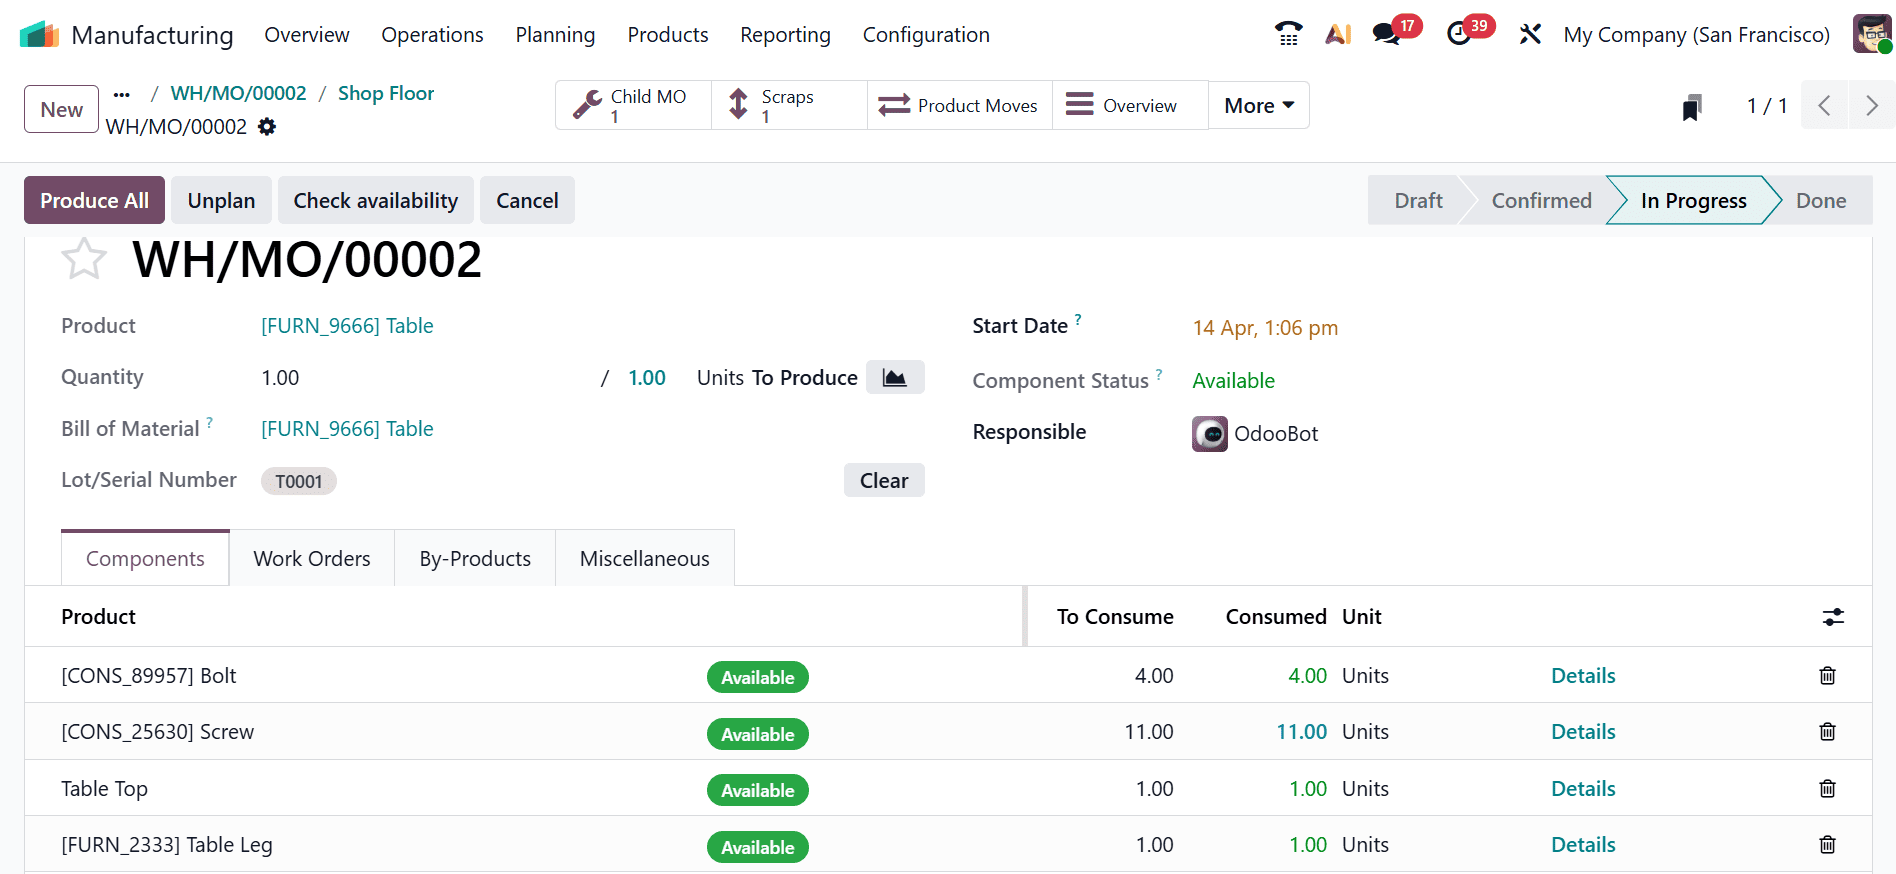
By clicking Open Manufacturing Order, users can quickly navigate back to the Manufacturing order they previously created.
7. Update Instruction
In Odoo 19, the Update Instruction feature in the Shop Floor module allows operators to modify or add work instructions during an ongoing manufacturing operation. This is useful for reflecting real-time changes, clarifying steps, or addressing unexpected issues on the production line.
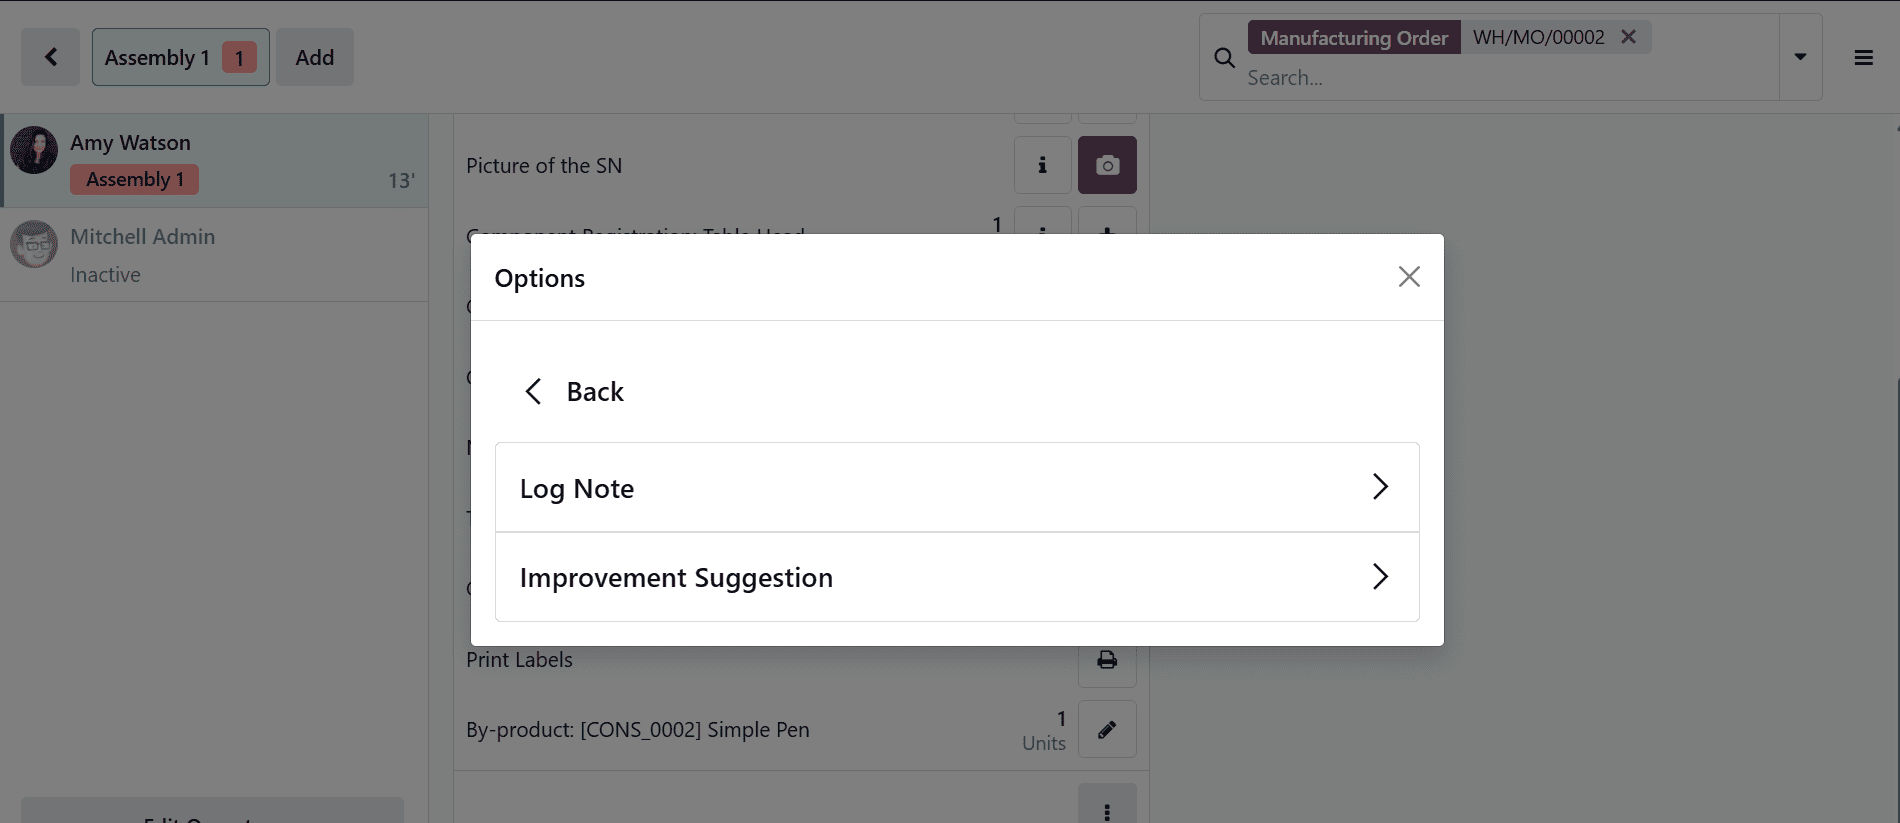
Here, you can see two types of options: Log Note and Improvement Suggestion.
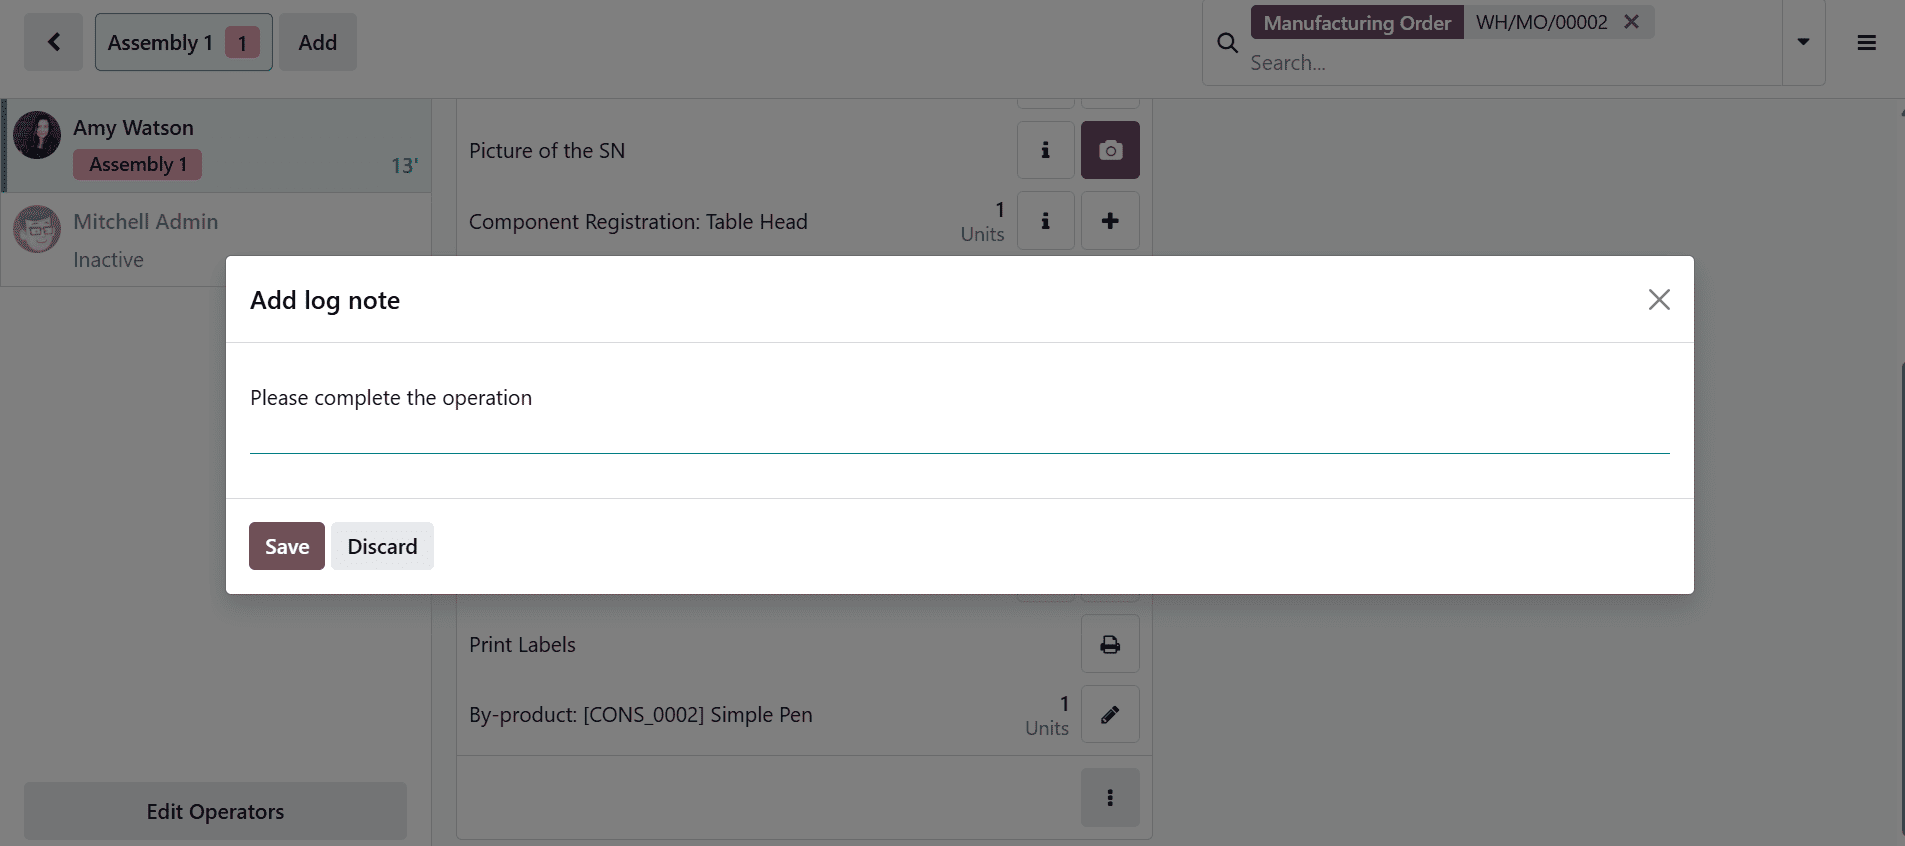
Using the Log Note option, users can add notes to the log and then click the Save button to record them.
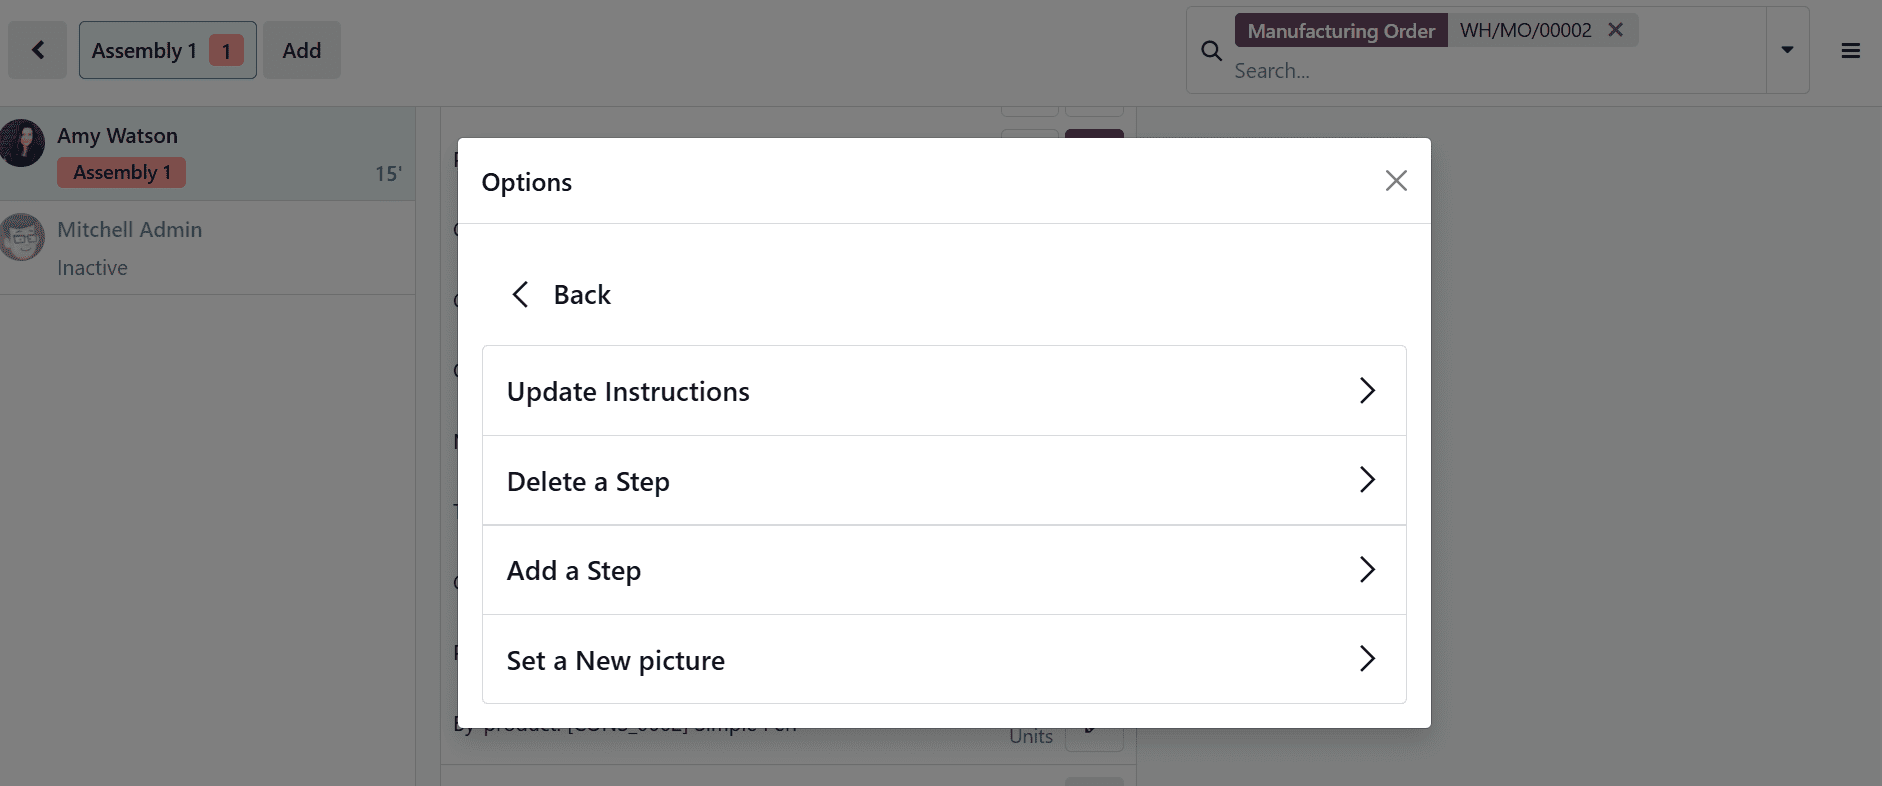
When you click on the Improvement Suggestion option, a new pop-up screen will appear where you can see options such as Update Instructions, Delete a Step, Add a Step, and Set a New picture.
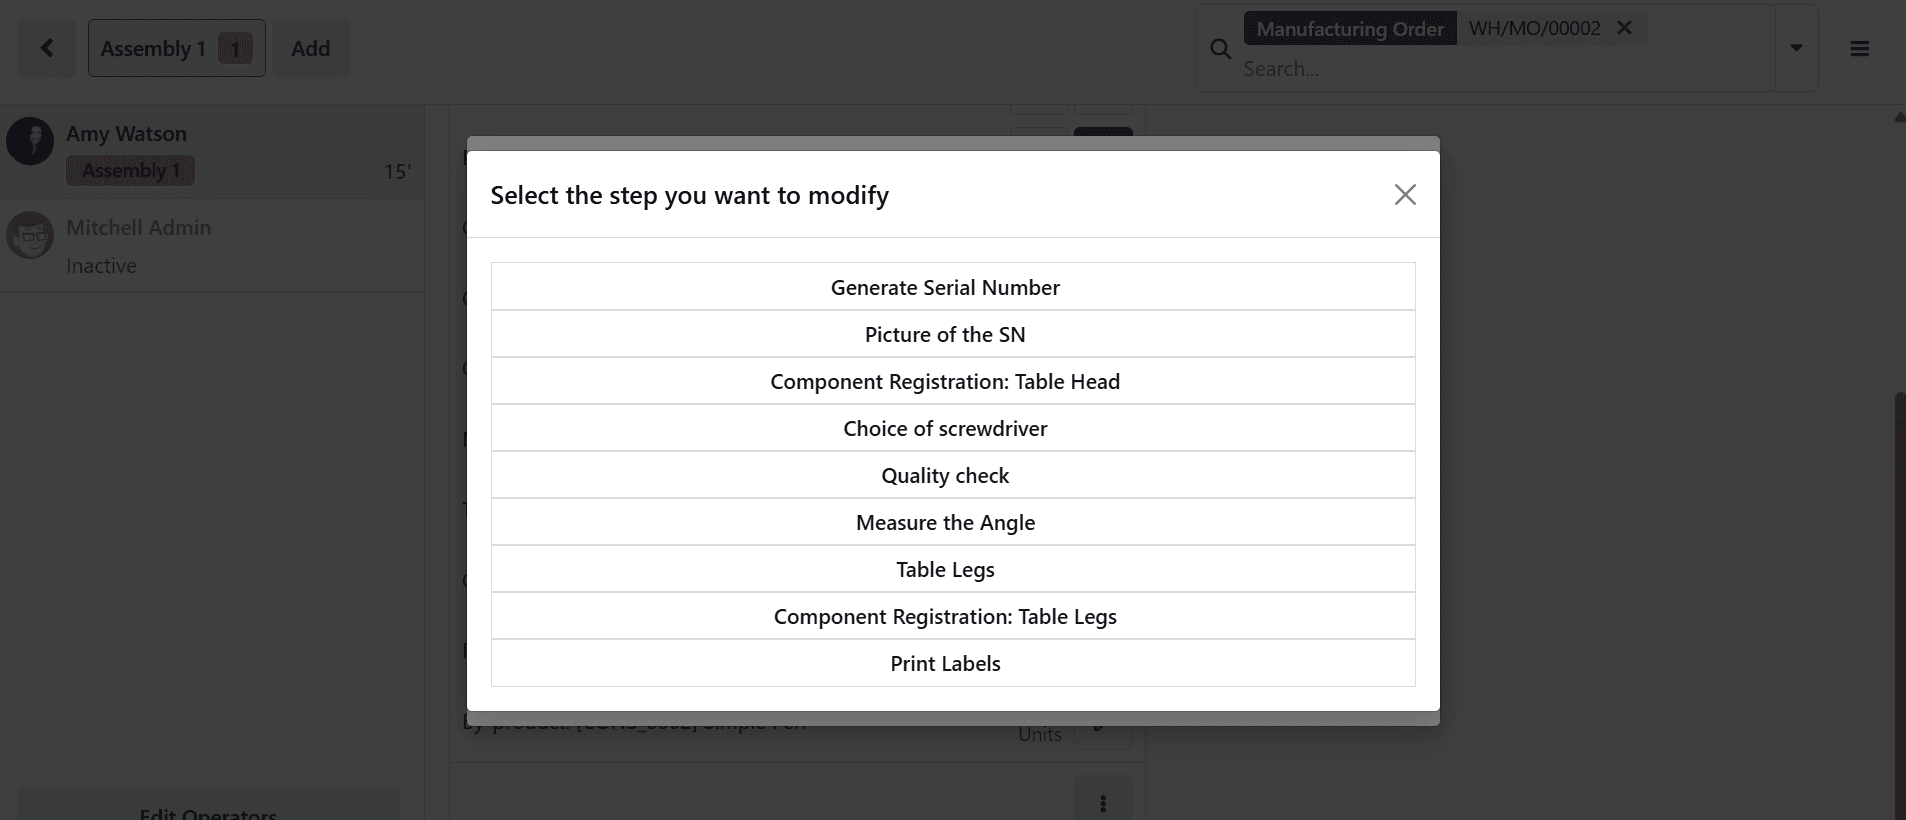
Click on the Update Instructions option, and a new pop-up screen will appear, allowing you to select the step you want to modify.
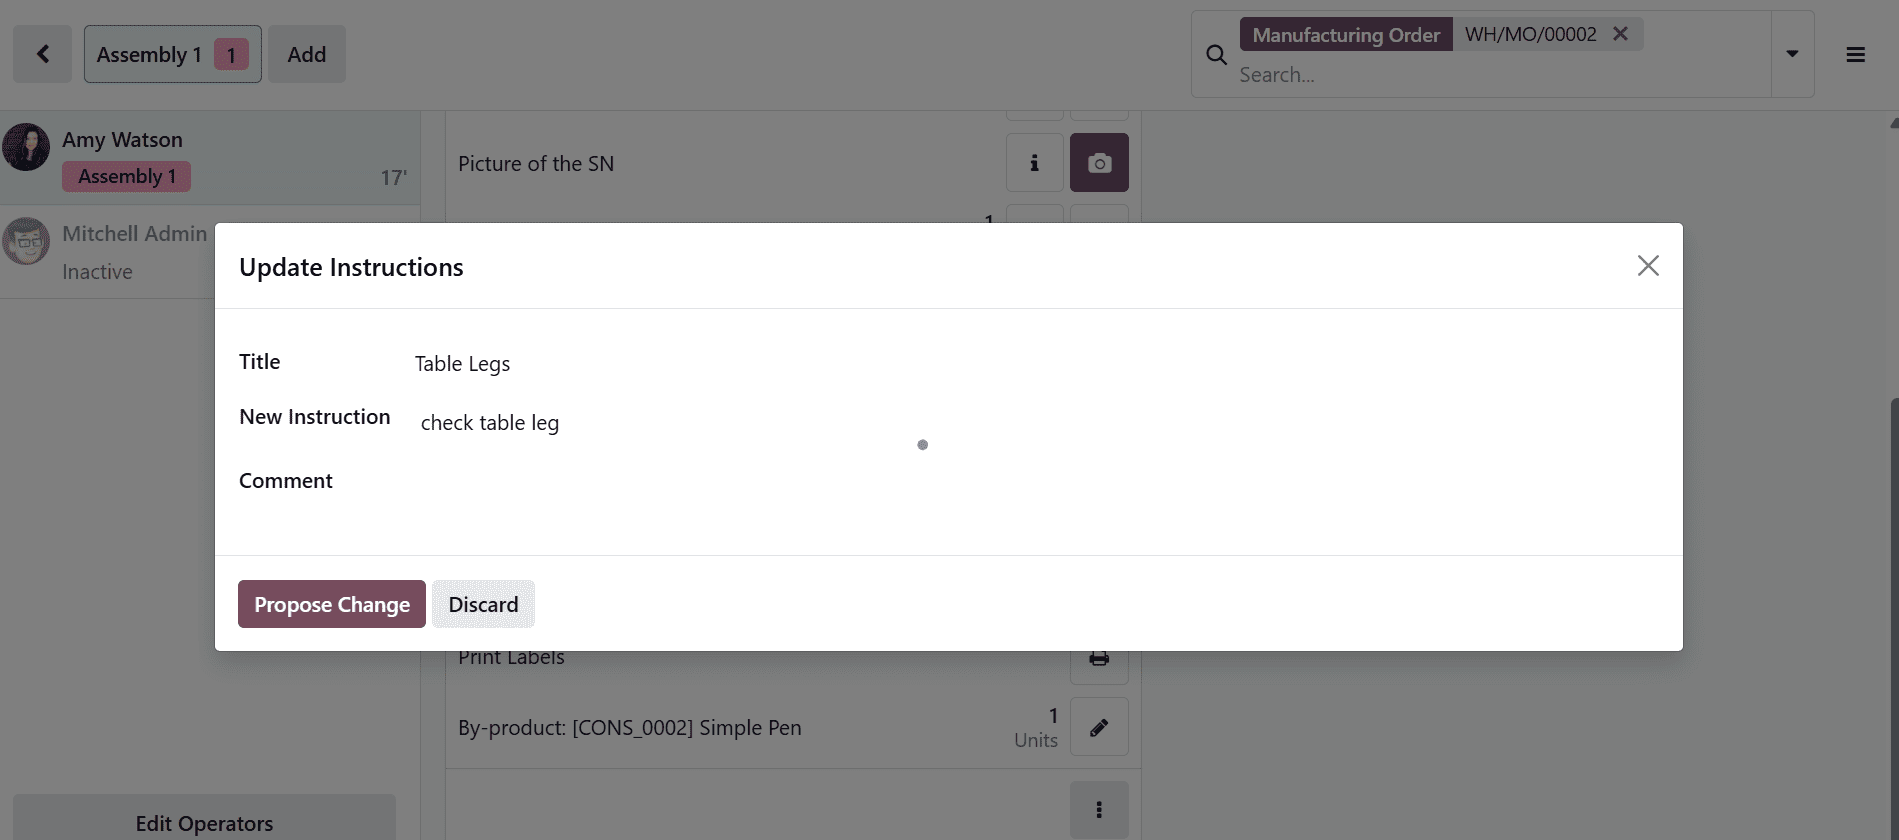
Here, you can view the step title and add details such as a new instruction or comment. Afterward, click the Propose Change button.
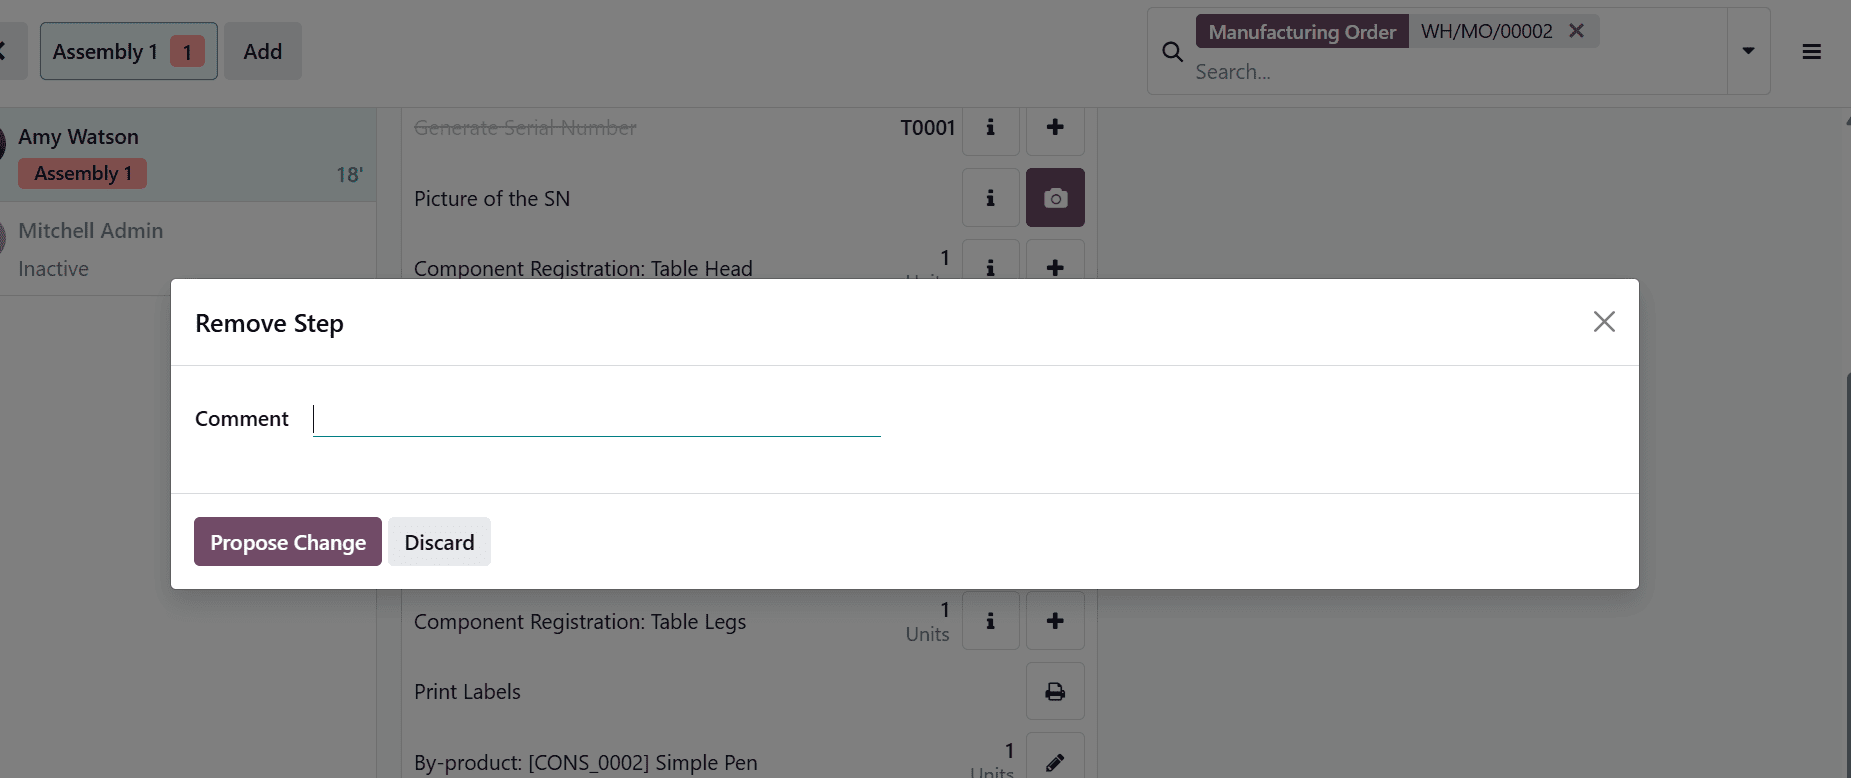
Click the Delete a Step button to open a pop-up window, where you can add a comment to justify removing the step. Then, click the Propose Change button.
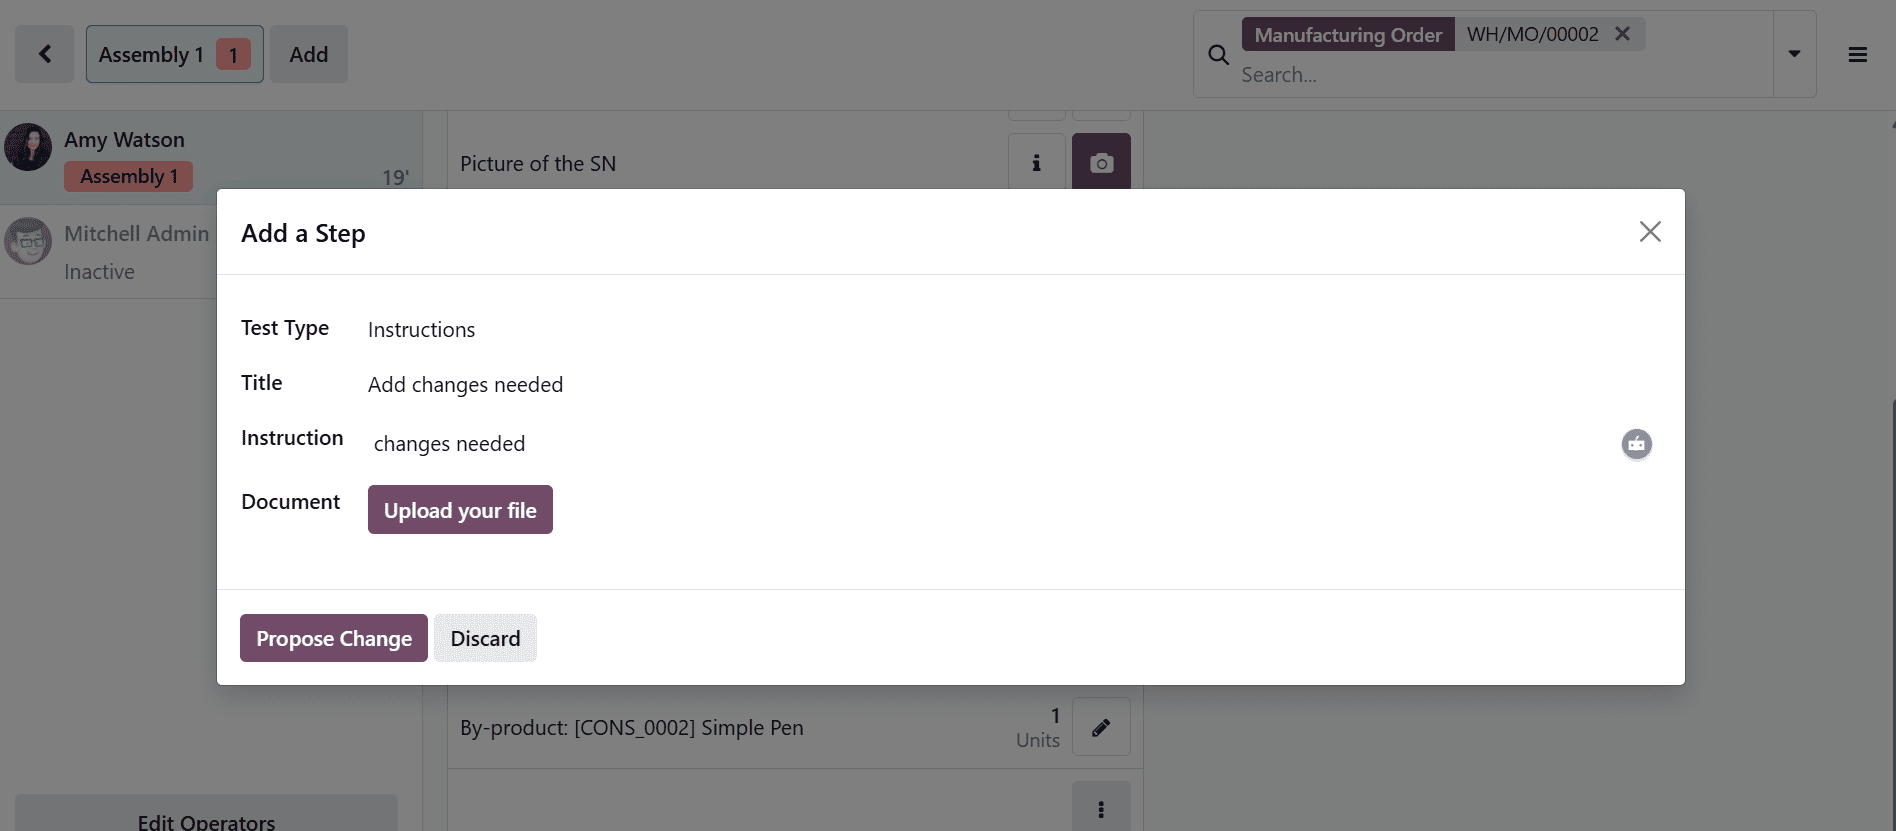
Click the Add a Step button to open a new window, as shown below. Then enter the test type, title, and instructions, and upload files if required. Then, click Propose Change to proceed.
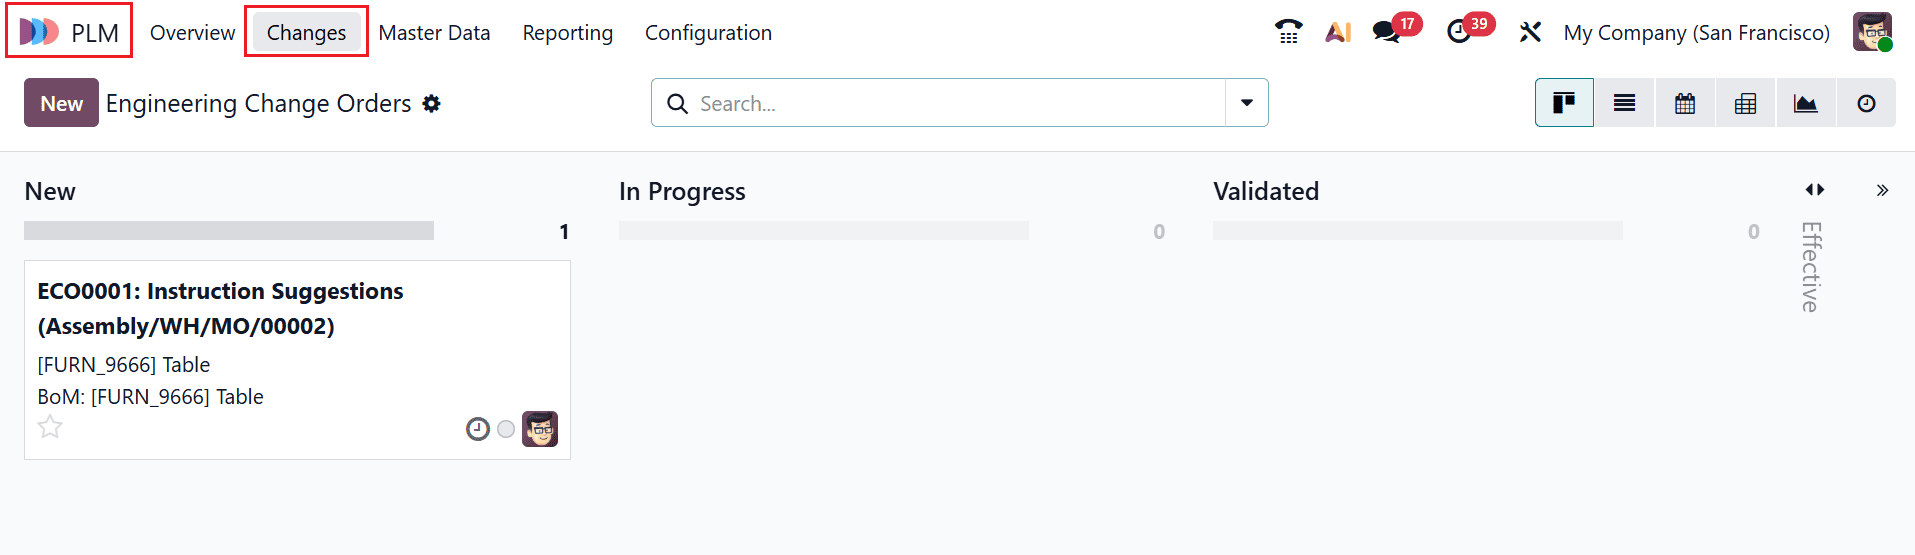
An ECO change order will then be created in the PLM module. Navigate to the PLM module to review the order. Under the Changes menu, you can view the new ECO.
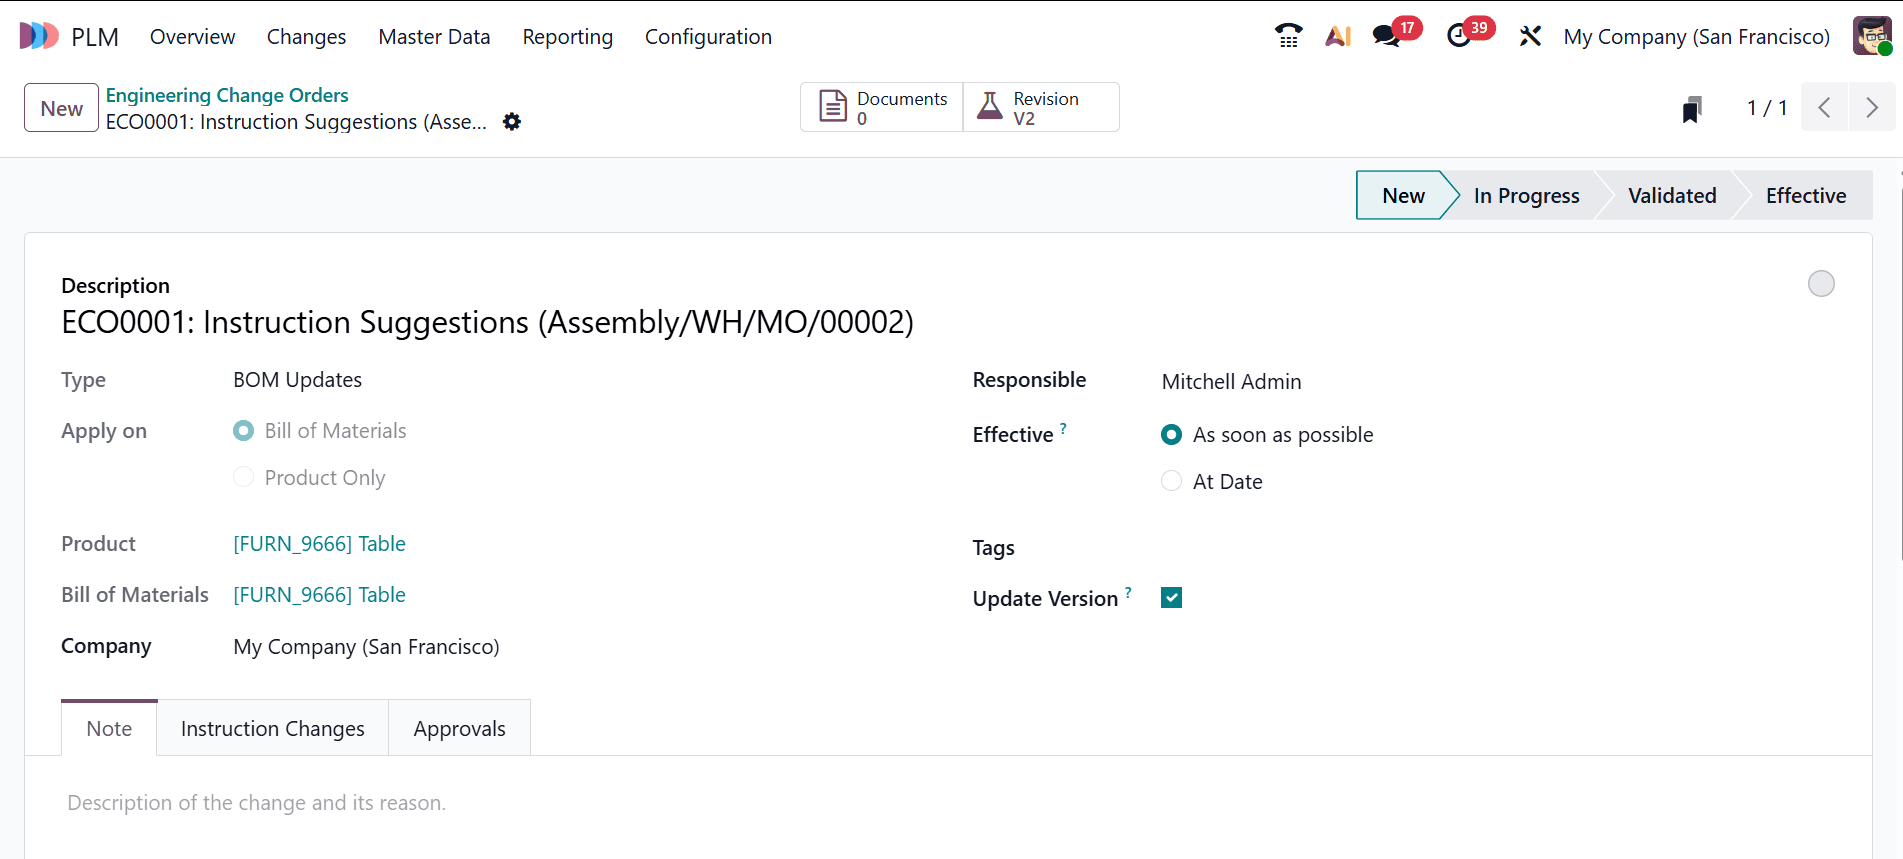
Open the engineering change order, then make the required updates to the bill of materials, which will result in a new BoM version.
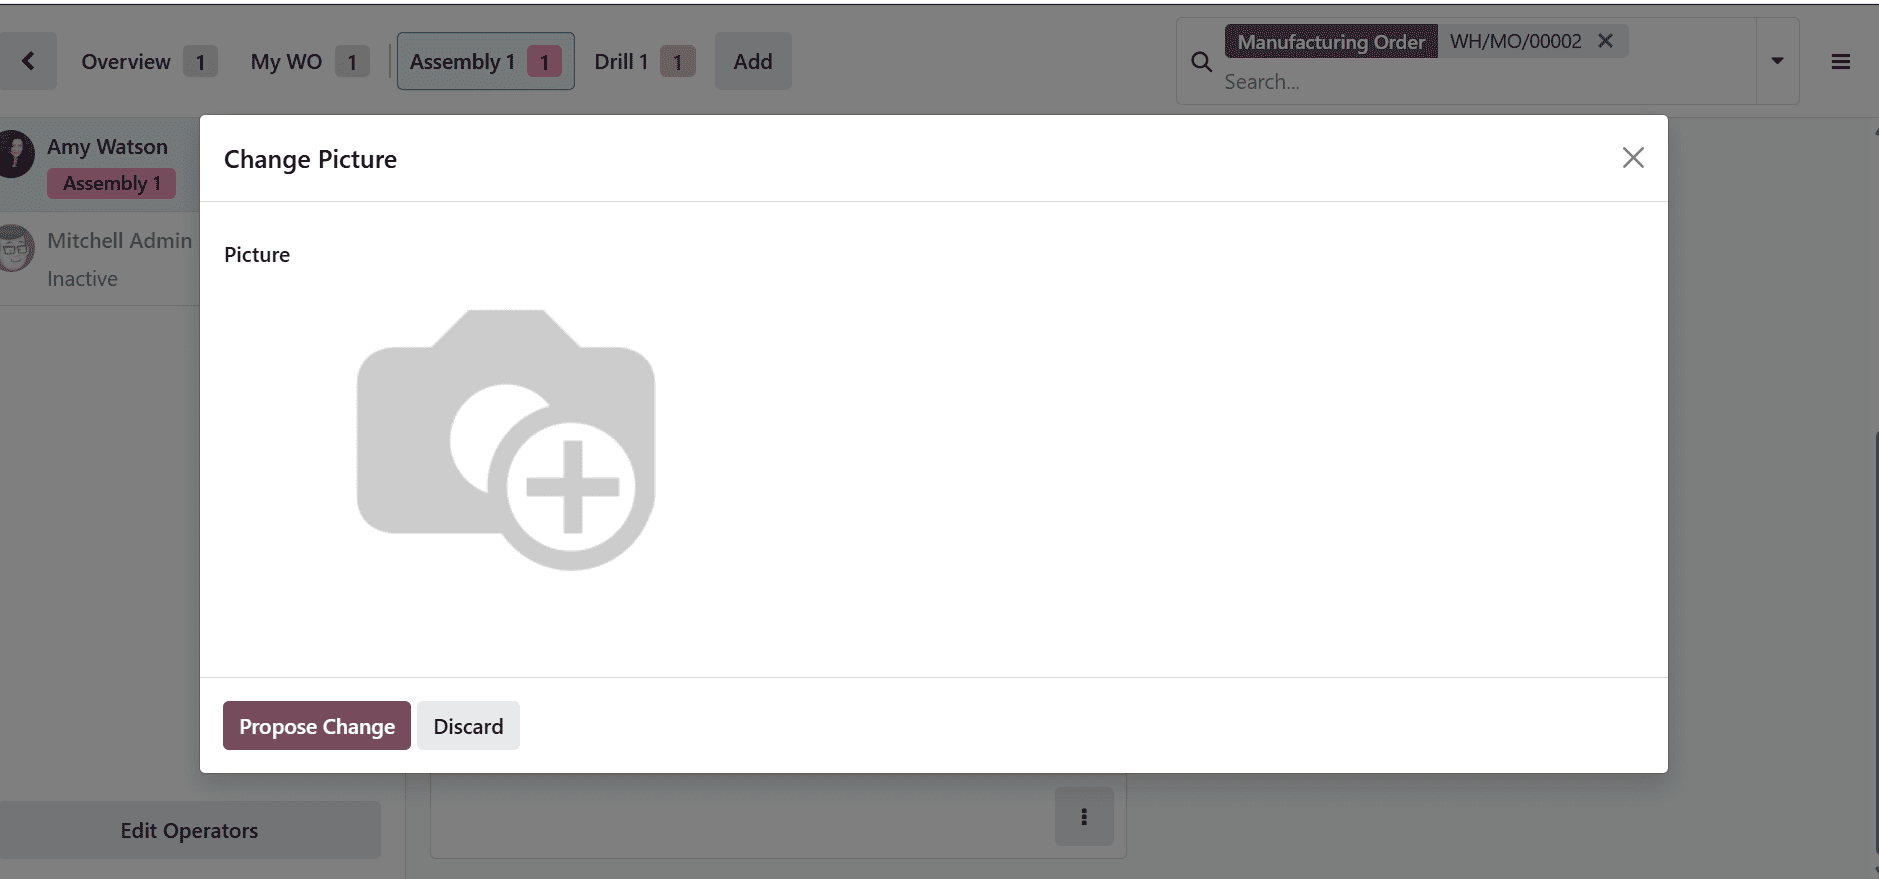
Click the Set a New picture button, and a new window will appear as shown below. Then, add a new picture and click on the Propose Change button.
8. Create Quality Alert
A Quality Alert in Odoo 19 Shop Floor is a record created during manufacturing to report issues or deviations in product quality. It helps track issues, assign responsibility, and ensure corrective actions are implemented in real time. This improves quality control by documenting issues directly within the production process.
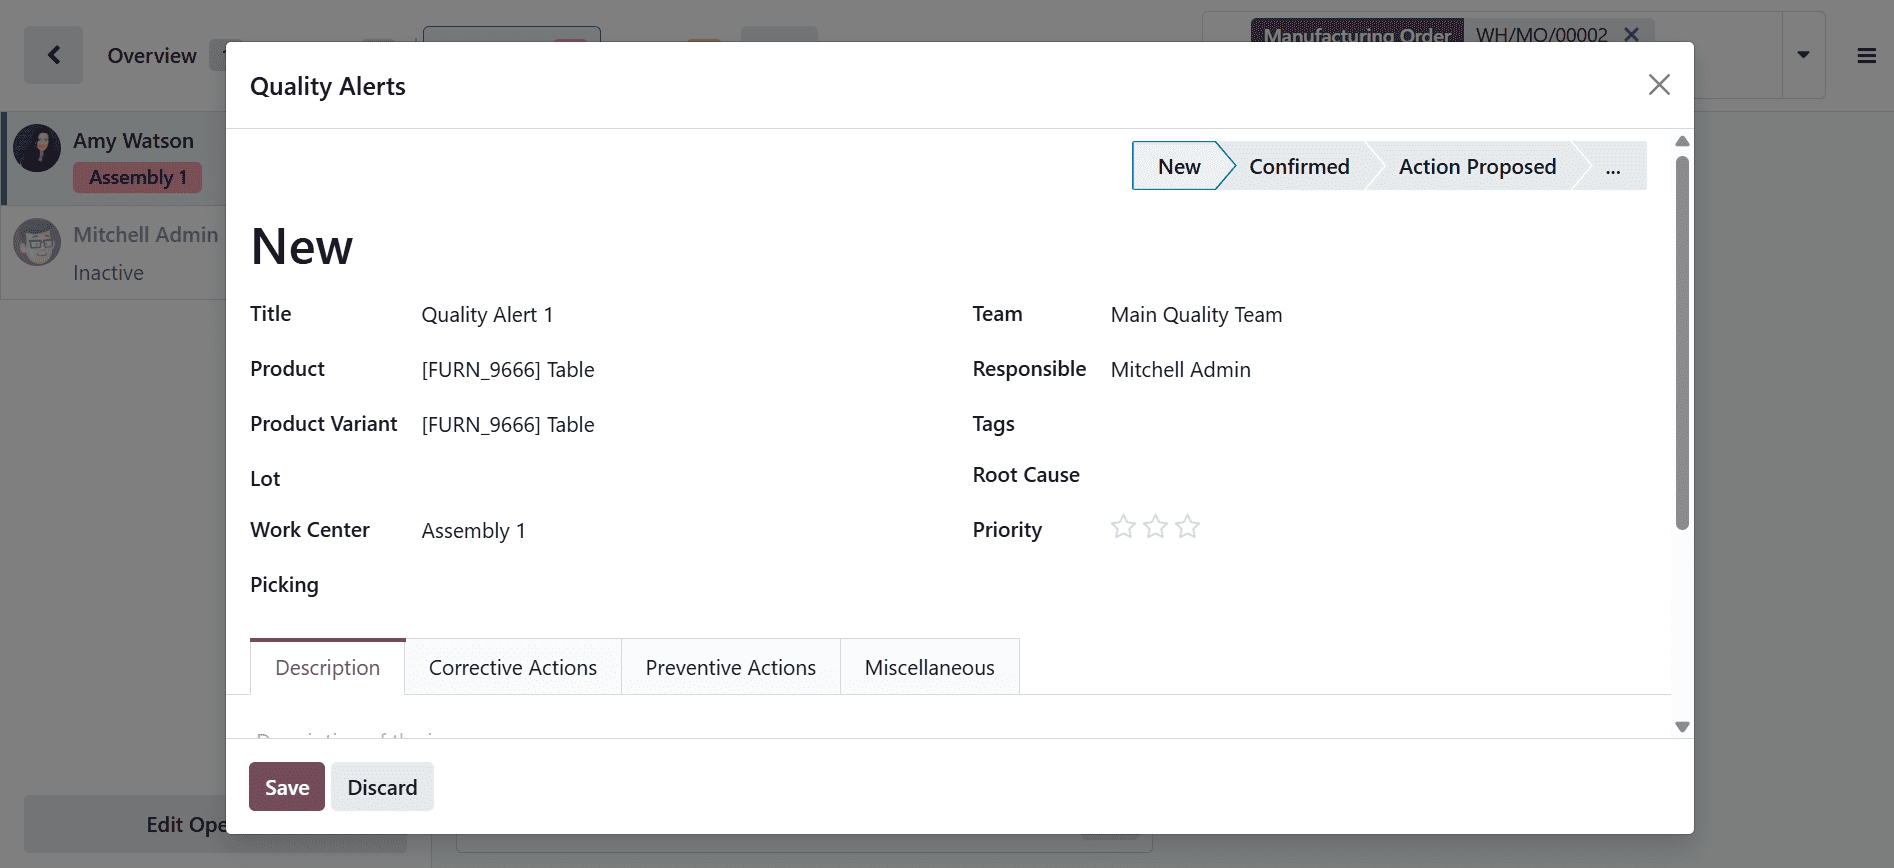
Click the Create Quality Alert button to open the form window. Then enter the required details, such as the title, tags, root cause, and description. Once completed, click Save to record the quality alert.
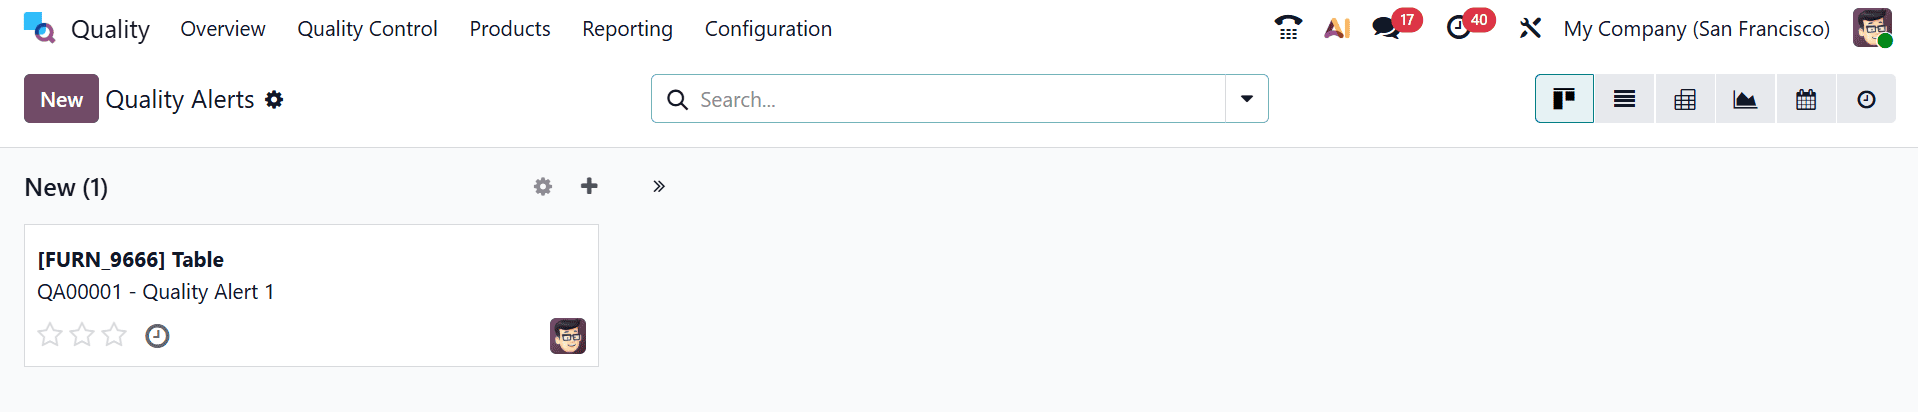
To view the newly created quality alert, navigate to the Quality > Quality Control > Quality Alert. Here, the quality alert is in the New stage. After resolving the issue, update the stage to Done.
9. Request Maintenance
A Maintenance Request in Odoo 19 Shop Floor is created during manufacturing when equipment or machinery requires repair or servicing. It allows operators to quickly report issues and notify the maintenance team in real time. This helps minimize downtime and ensures smooth production by keeping equipment in proper working condition.
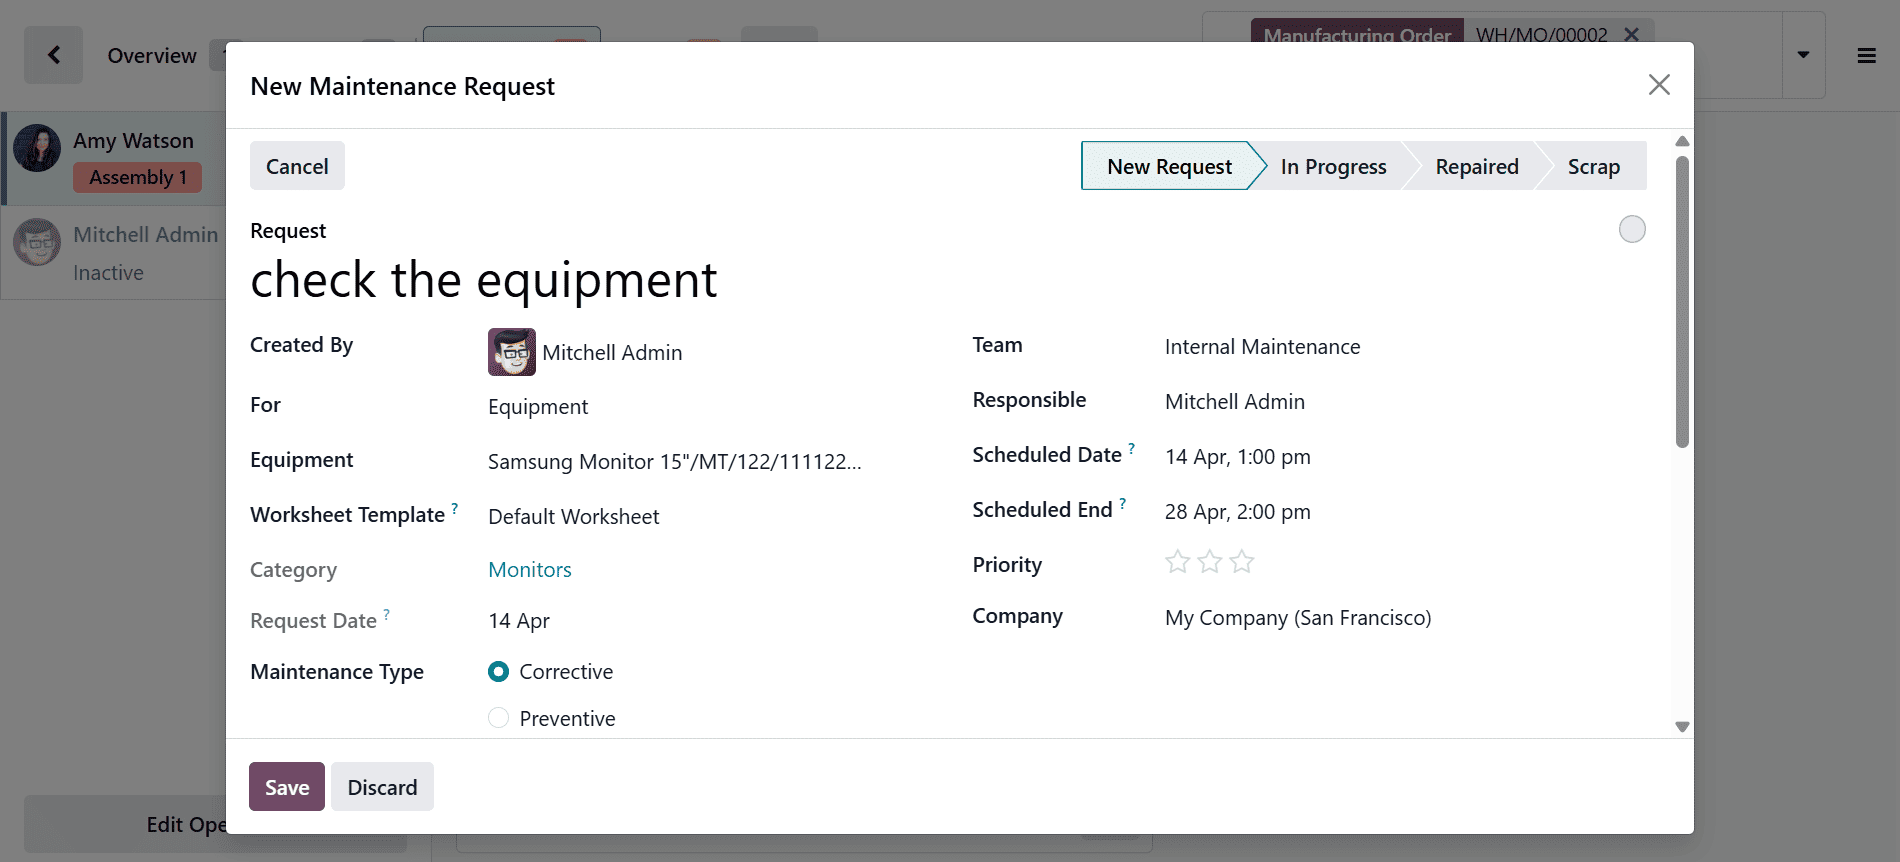
Select the Request Maintenance button to open the form window, then fill in the request details and any other relevant information. Users can create maintenance requests for either equipment or the warehouse; here, a request for equipment is being created. Once you have entered the details, click the Save button to store the request.
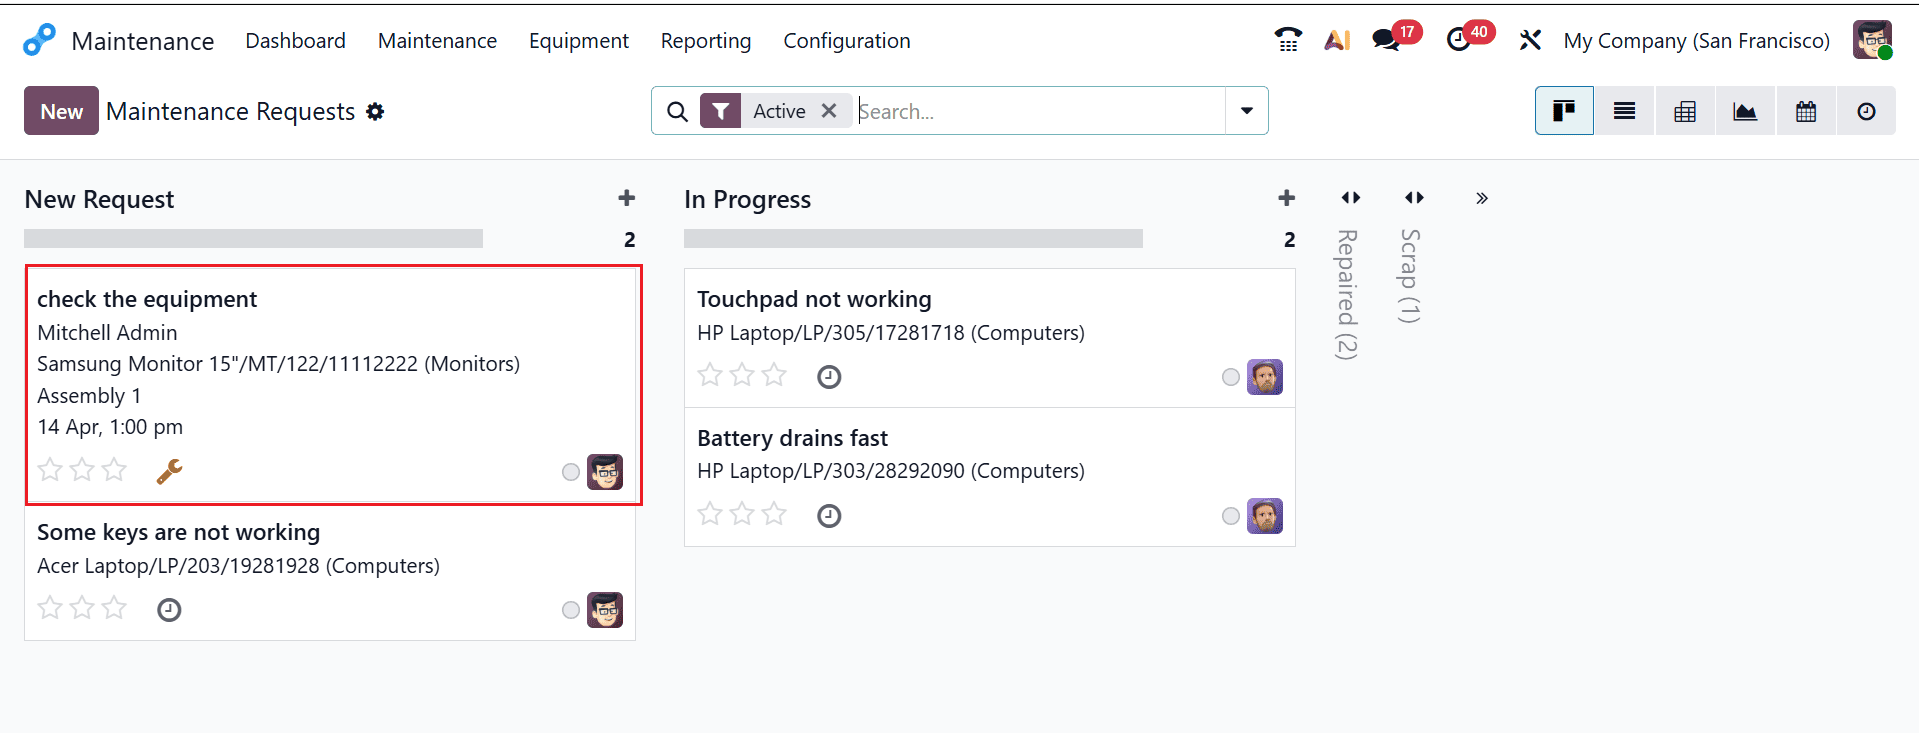
To view the newly created maintenance request, navigate to Maintenance > Maintenance > Maintenance Request. The request is currently at the “New Request” stage. When the issue is fixed, set the status to the “Repaired” stage.
10. Block
A Block in Odoo 19 Shop Floor is used during manufacturing to temporarily stop production when an issue prevents work from continuing. It helps operators flag problems such as missing components, machine failures, or quality concerns. This ensures the issue is addressed before production resumes, preventing further errors or waste.
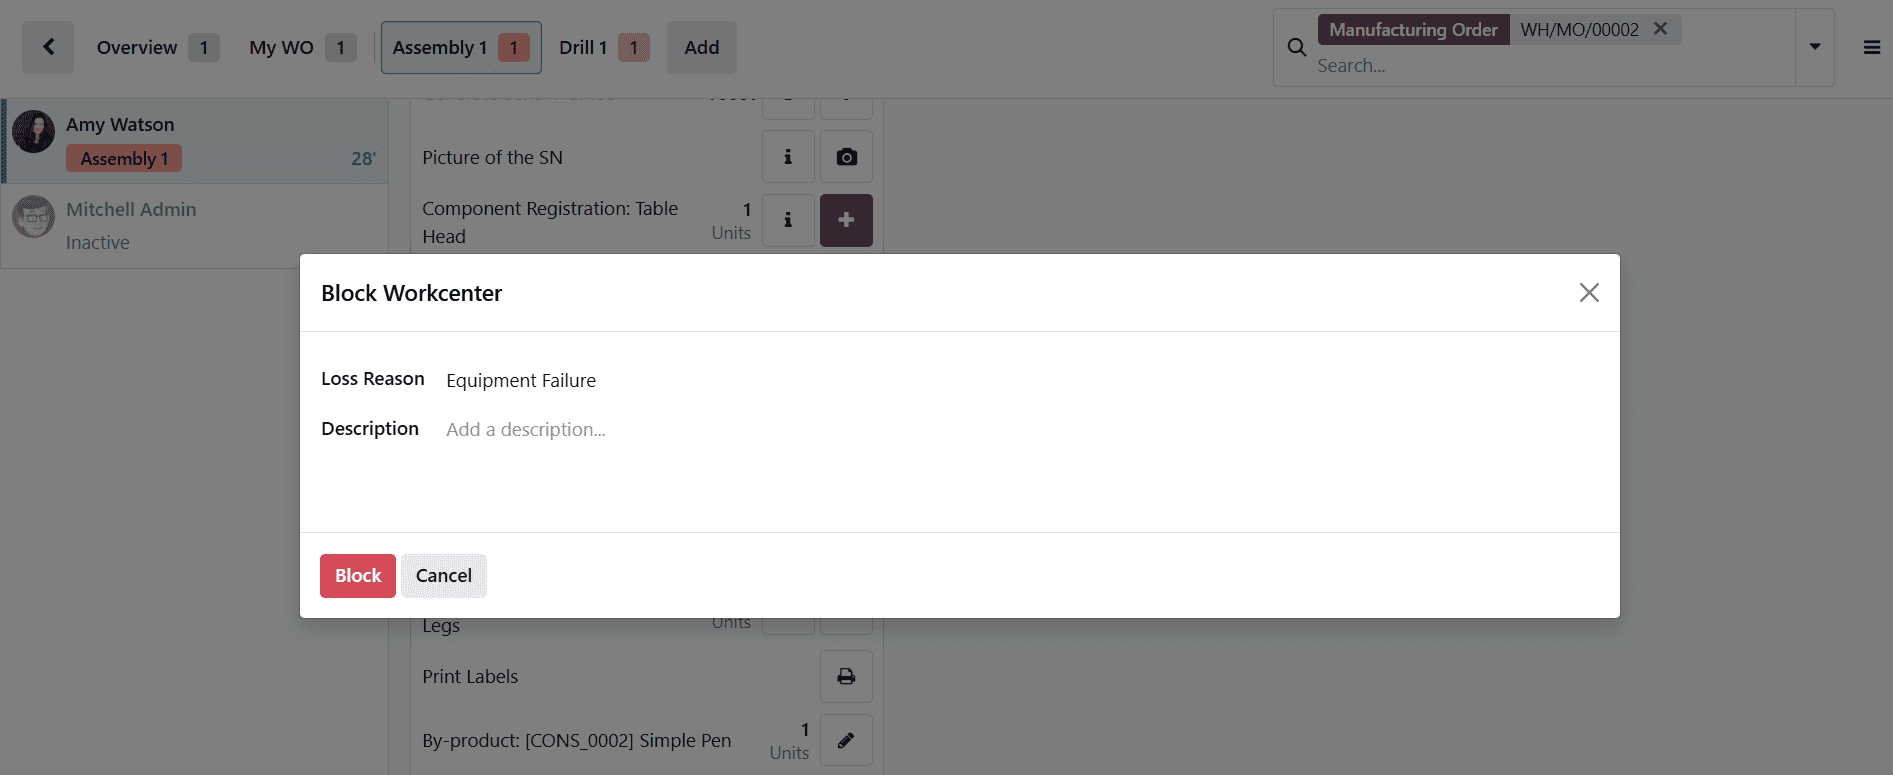
Click the Block button, then enter the reason for blocking the work center. After providing the details, click Block again to confirm.
When a work center is blocked, the work order timing is automatically paused. To proceed with production, the work center must be unblocked. Once unblocked, the workflow resumes from where it stopped.

The work order can then continue from the point where it was paused. Click the Close Production button to finish the process.
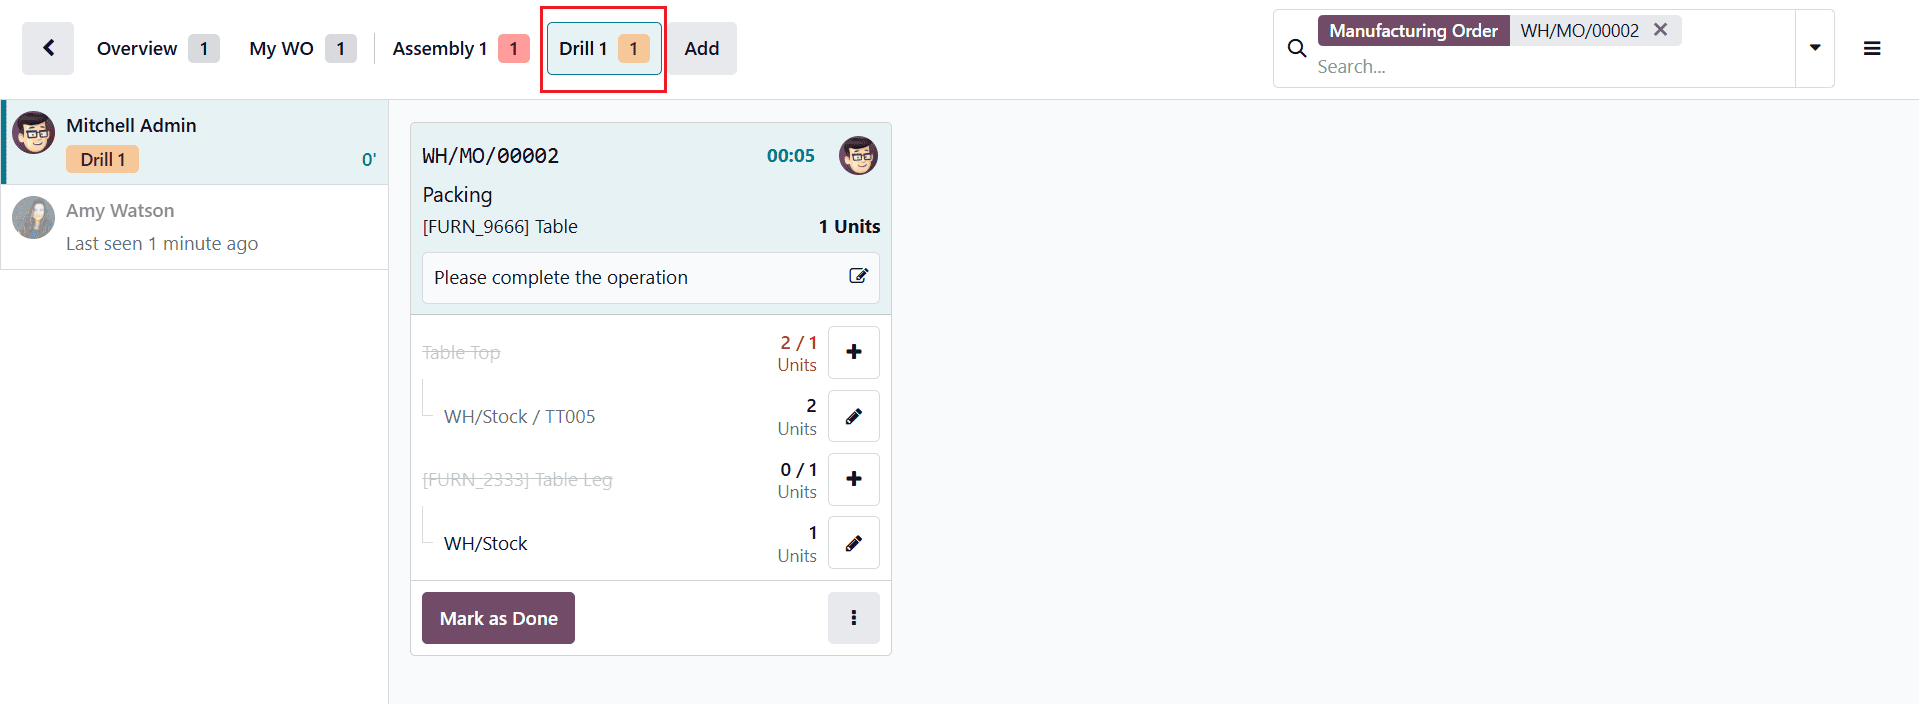
Continue the table manufacturing process by signing in as the next operator, Mitchell Admin. Next, select the “Drill 1” work center from the toolbar to access the operation. Then, start the operation to proceed.
Click Mark as Done to finish the work order.
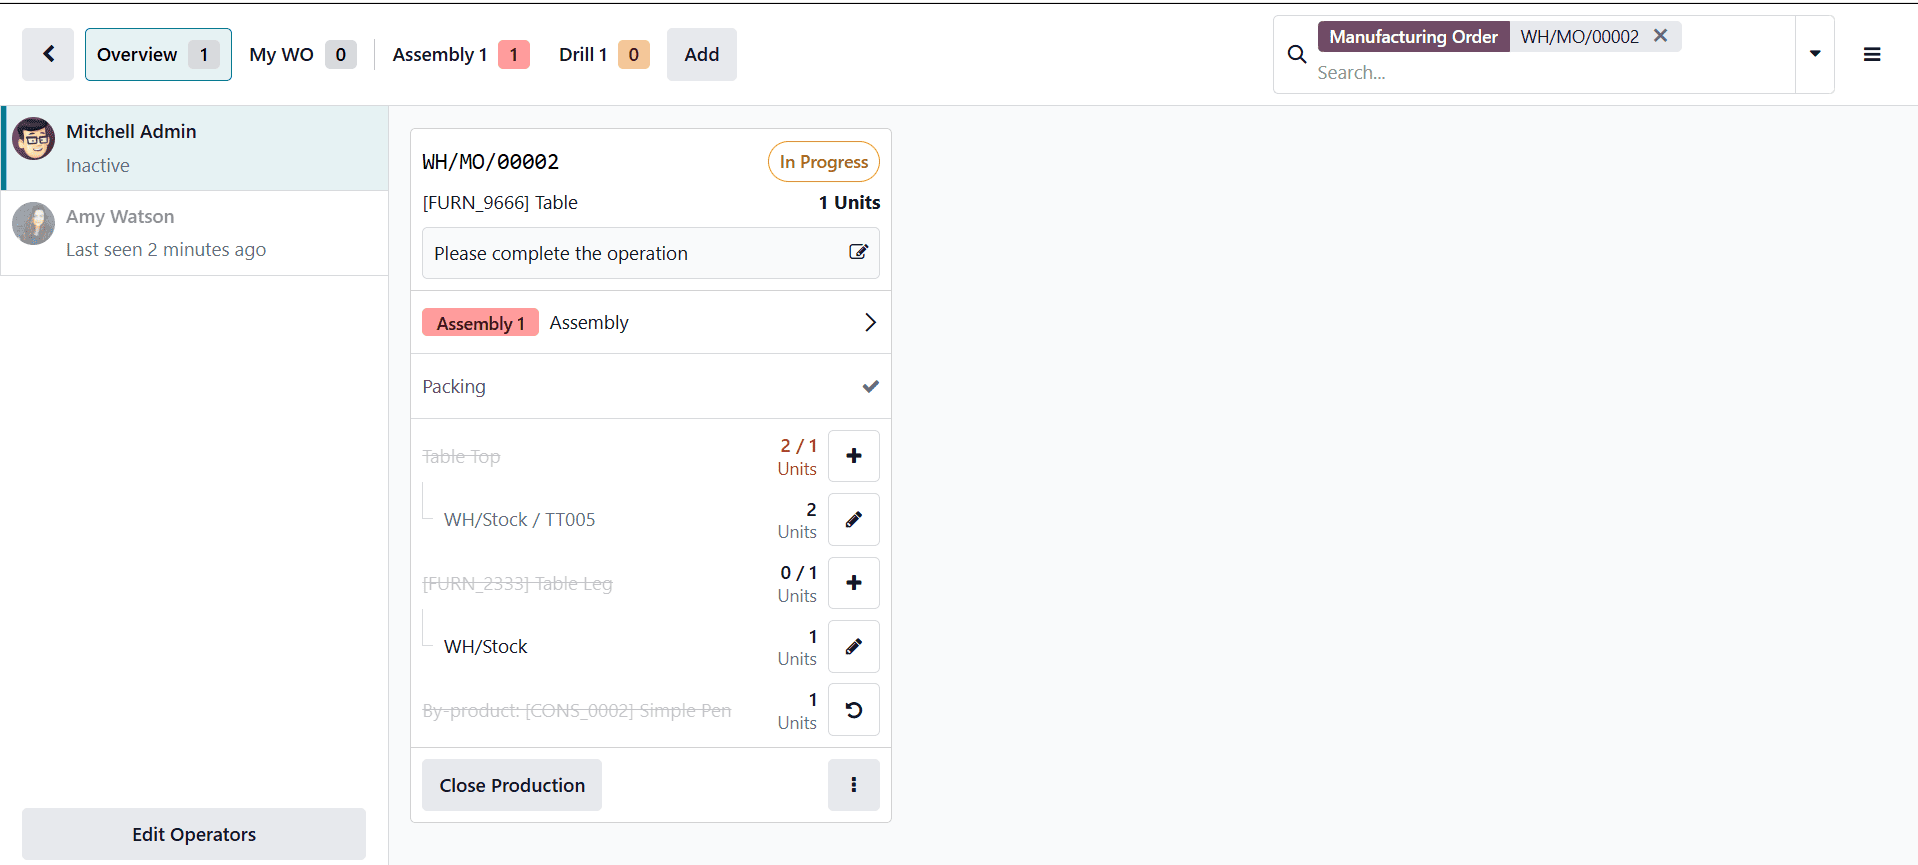
Once all operations are completed, the manufacturing order can be closed directly from the Shop Floor by selecting the “Close Production” button.
The table has now been fully manufactured. To exit the Shop Floor, click the Close button at the bottom right corner of the screen.
In conclusion, Odoo 19’s Shop Floor Control and real-time Work Center Management capabilities offer manufacturers a comprehensive solution to optimize their production processes. By enabling instant communication between shop floor workers and management, the platform reduces delays, improves coordination, and enhances overall operational transparency. Its real-time tracking and reporting features allow businesses to identify bottlenecks, monitor performance, and implement improvements proactively. The seamless integration with inventory, maintenance, and quality modules ensures a unified approach to manufacturing management. Additionally, user-friendly tools such as dashboards and mobile accessibility empower teams to stay informed and productive. As manufacturing environments become increasingly competitive, adopting solutions like Odoo 19 can significantly boost efficiency, accuracy, and scalability. Ultimately, it supports smarter decision-making and helps organizations achieve consistent production excellence while adapting to evolving industry demands.
To read more about Overview of shop floor management in Odoo 18, refer to our blog Overview of shop floor management in Odoo 18.