In the pre-written blogs, I have discussed with you on different yet connecting features such as how to create a new module, defining the views in the created module, adding the search view in the created module, etc. If you missed them or haven’t read about and is interested in knowing about, refer the following blog: How to Create a Module in Odoo 12
In this blog, we will be discussing how to add new fields to an existing model. To explain the blog, we will take the model sales order and see how one can add a custom field to the model and display the same in the sales order form view.
So either you can create a new module or you can try the same in your existing custom modules. So let’s start. Understand that our intention here is to add a new field of type: character to the sale order.
Adding Custom field to the model:
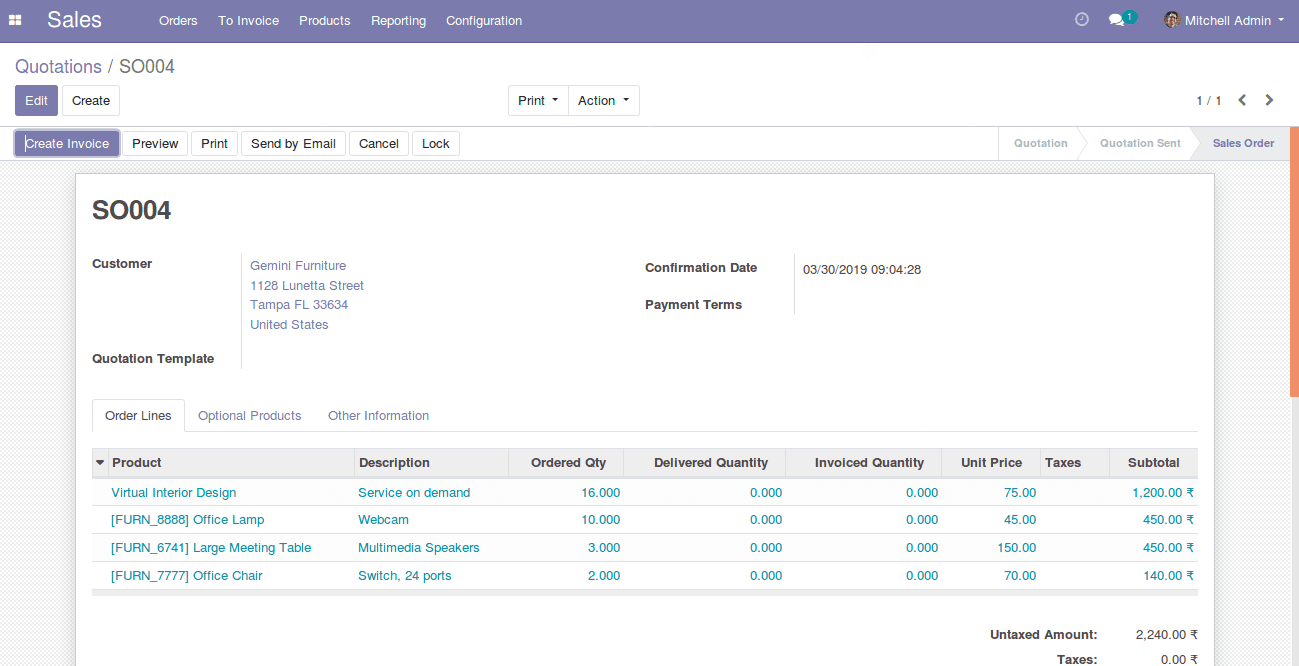
This is the sales order form we are holding presently. Now we will add a char field named additional_note below the field Confirmation date in the above form.
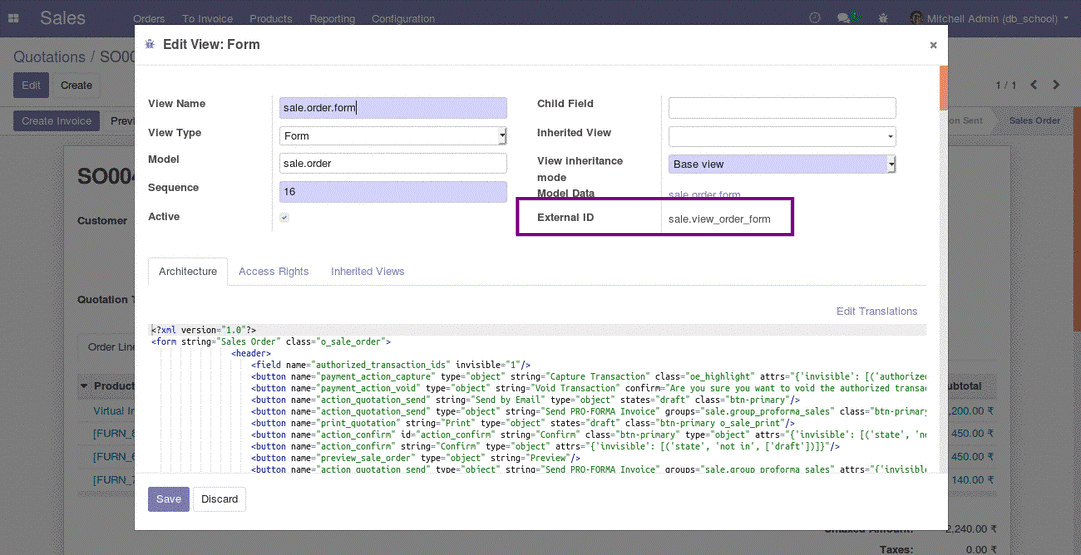
For that, we need to know the name of the corresponding model to which we are adding the fields. For those who don't know about the model displayed in the view, they can go for it and easily be found out by activating the developer mode. After activating the developer mode, click on lady debugger button near the logged in user name in the top menu bar, and click on the Edit form view.
Once you click there, you will get a pop up/wizard, in the pop up you can see the corresponding model name.
So we get the model name ie, sale.order, so in our python file, we have to create a class and inherit this model.
# -*- coding: utf-8 -*-
from odoo import models, fields
class SaleOrder(models.Model):
	_inherit = 'sale.order'
	additional_note = fields.Char(string='Additional Note')
So if you look at the above code, you can see a class named SaleOrder is created. You can inherit the model named sale.order and add a new field.
Now, we are done with the python side, do not forget to call the python file in the init file.
Adding the field to the view:
For adding the field to the view, we have to get the external id of the view to which we have to add the field. To get it, one has to do the same procedure that was done for getting the model name.
So in the XML file, you can inherit this view and add the field we have created.
 <record id="view_order_form_inherit" model="ir.ui.view">
        	<field name="name">Sale Order Custom</field>
        	<field name="model">sale.order</field>
        	<field name="inherit_id" ref="sale.view_order_form"/>
        	<field name="arch" type="xml">
            	<field name="confirmation_date" position="after">
                		<field name="additional_note"/>
            	</field>
        	</field>
</record>
Above code will add the additional_note field to the sale order form view, you can give the id and name for the record as per the wish, keep naming of the record related to what is done in the record so that it will be easier to understand.
In the model and inherit_id field we have to specify the model as sale.order and in the inherit_id, the external id of the form to which we are going to add the field has to be specified.
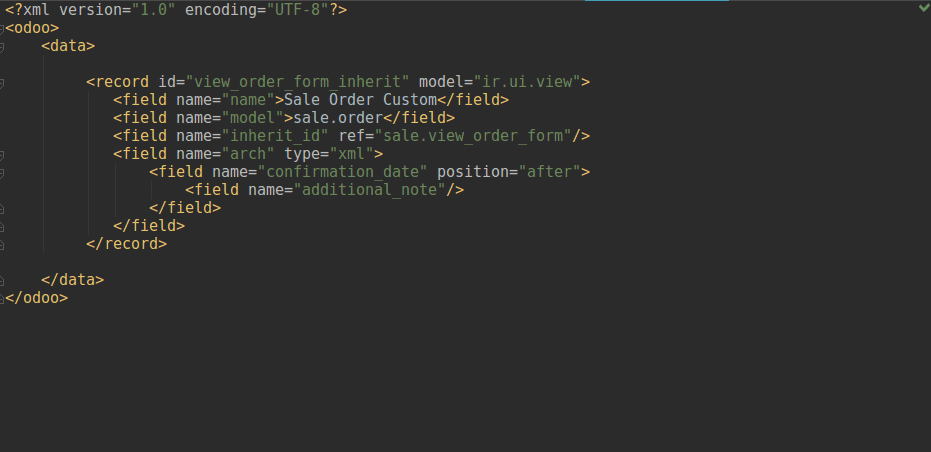
After specifying the model and inherit_id, we have to specify the place where we have to add the new field. If you check the above image you can see that I have placed the new field name additional_note after the field named confirmation_date.
To get the name of the existing field, you can just place the mouse over the field.
So I just placed the mouse over the field named Confirmation date, to get the field name of it.
<field name="arch" type="xml">
            <field name="confirmation_date" position="after">
             	<field name="additional_note"/>
            </field>
</field>
Now, we are done with the XML, make sure that the corresponding XML file is called in the manifest file and upgrade the corresponding module.
Once the custom code is upgraded or installed, one can see the newly added field in the sales order form.
So this is all about adding a custom field to an existing view. You can try one of yours and see how it works, and also refer our previously published blog to learn on How to Create Custom Field Type in Odoo