For businesses and organizations engaged in rental services, the Odoo 18 Rental Module delivers a powerful and streamlined management system. It offers a structured approach to handling both rental products and services, allowing users to oversee each component effectively. The module enhances operational efficiency by reducing data entry workload and accelerating the rental process, while also offering valuable insights for scaling the business.
To avoid scheduling conflicts, Odoo 18 includes advanced planning tools to manage product availability and enforce return policies. Seamless integration with the Inventory module ensures real-time tracking of items through serial numbers. This allows users to quickly locate specific products or arrange replacements when inventory is low.
The system also supports digital transactions, offering customers secure online payment options along with electronic signatures to confirm rental agreements. Rental Module holds features like flexible rental durations, full integration with eCommerce for online rentals, and tools to promote cross-selling and upselling. Administrators can block out unavailability dates for better customer interaction.
Overall, the Rental Module in Odoo 18 is a comprehensive solution tailored to meet the evolving demands of the rental industry, boosting both operational control and customer satisfaction.
Let’s explore how to get started with the Odoo 18 Rental Module—begin by installing the application from your latest Odoo 18 environment.
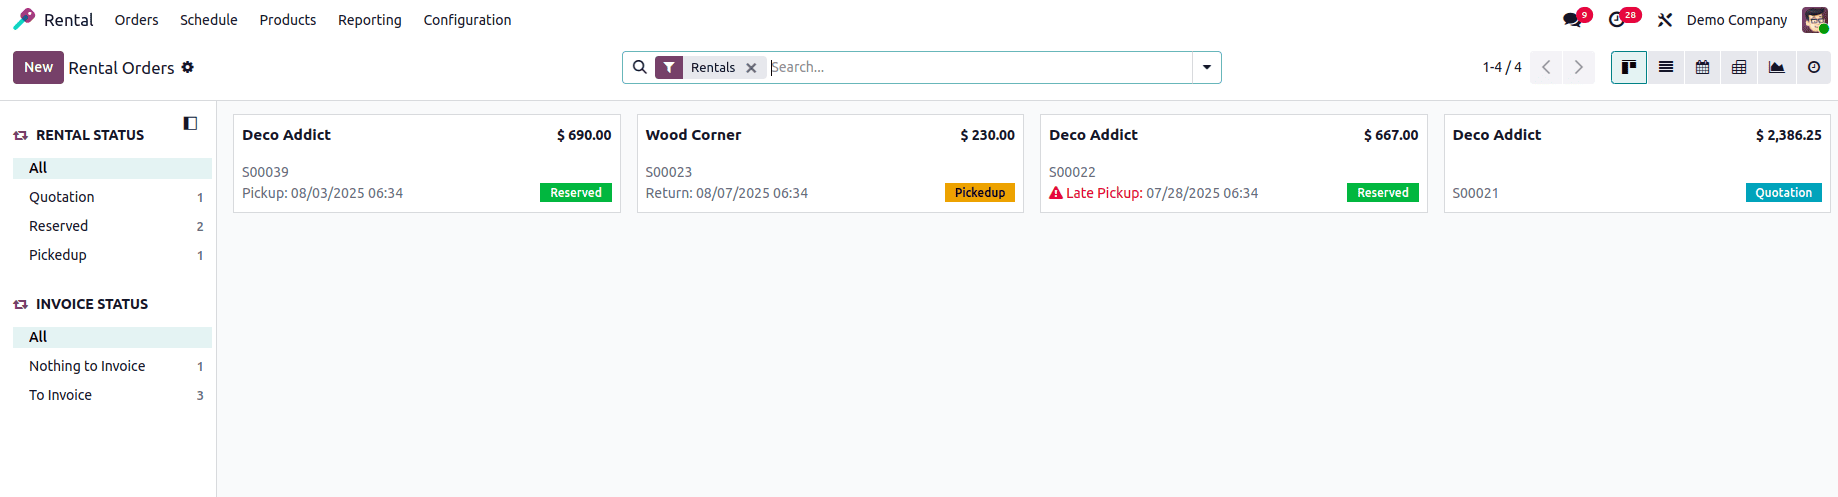
Upon opening the Rental Module, you'll be directed to the main dashboard, which presents an overview of all existing Rental Orders, as illustrated below.
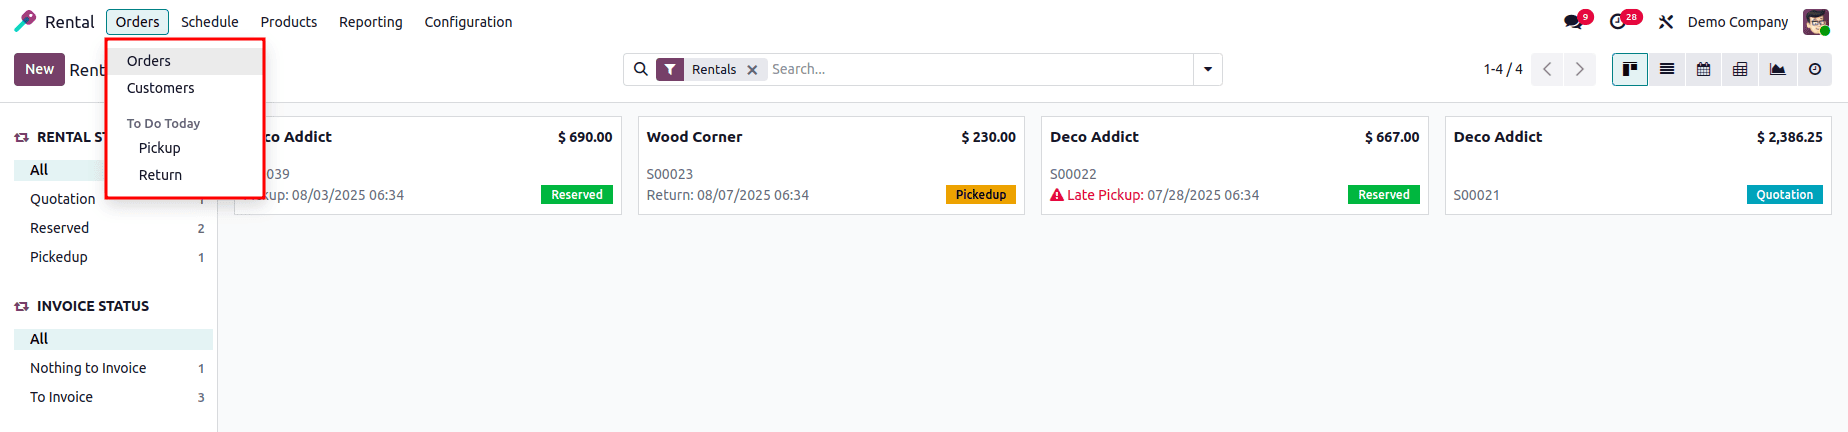
1. Orders Menu
In Odoo 18’s Rental Module, the Orders menu provides access to several key options, including Rental Orders, Customers, Pickup, and Return. These options help to manage the complete rental lifecycle and are conveniently organized in the interface, as shown in the screenshot below.
Rental Orders
This section displays all existing rental orders in a clear and organized Kanban view. Each card in the Kanban board provides key details such as the order name, customer or company name, rental amount, order reference number, rental dates, and more. This visual layout allows users to easily track and manage rental activities at a glance.

Users can easily filter and sort rental orders using the options available on the left-hand side of the screen. These filters include categories like Rental Status and Invoice Status, allowing for quick access to orders based on their current state or billing progress. You can explore different stages of rentals and invoicing by adjusting these filters.
The Rental Orders page also supports multiple viewing modes such as Kanban, List, Calendar, Pivot, Graph, and Activity views—making it easier to analyze and manage data from various perspectives. Additionally, you can duplicate existing orders to create similar ones quickly. To create a brand-new rental order, simply click on the “New” button at the top.

Each Kanban card in the Customers section displays essential information such as the customer’s name, designation, company, address, email, number of purchases, and sales order amount. To efficiently manage and locate specific customer records, you can use the built-in Filters, Group By, and Favorites options. Additionally, new customer records can be easily created by clicking the “New” button.
Pickup
The Pickup section of the Rental Module displays all rental orders that are currently awaiting pickup. This view helps users manage scheduled pickups efficiently by listing the relevant orders that are ready to be collected from the inventory or warehouse.

In this section, you can also view important details such as the customer or vendor name, sales order amount, and other related information. To narrow down the list, you can apply filters like Rental Status and Invoice Status using the available filter options. If you need to create a new rental pickup order, simply click on the “New” button.
Return
The Return section allows you to monitor and manage all rental order returns, making it easier to track returned items and ensure proper handling.

If there are no return pickups currently scheduled or processed, this page will appear empty. Once return activities are recorded, they will be displayed here for easy follow-up and management.
2. Schedule Menu
The Schedule menu in the Rental Module provides an organized view of all scheduled rental activities. This section allows users to manage and track rental tasks and events efficiently over different timeframes—daily, weekly, monthly, or yearly.
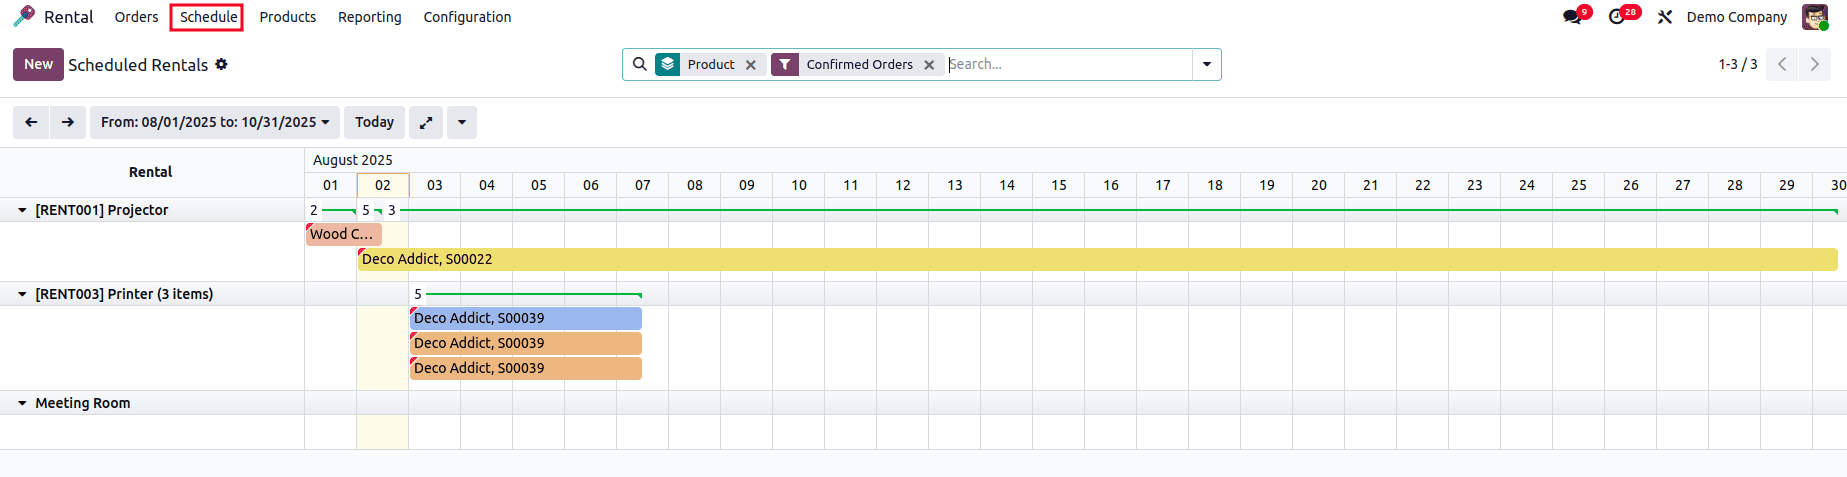
With this view, you can easily analyze rental trends and activity volumes. Each entry displays key information such as order details, pickup and return dates, and the current status of the rental. Selecting a specific rental from the list offers a detailed view of its timeline and progress.
To add a new scheduled rental, simply click the “New” button at the top of the page.
3. Products Menu
When you navigate to the Products option from the menu bar, you’ll see a page displaying all rental products available in the system. Each product is presented in a Kanban card, showcasing essential details such as the product name, rental price, order count, quantity on hand, and more.

Clicking on any product will open its record in form view, where you can access a detailed description and related configurations. Currently, the system displays a few rental products, but you can easily edit existing ones to update fields like quantity or pricing. To add a new rental product, simply click the “New” button.
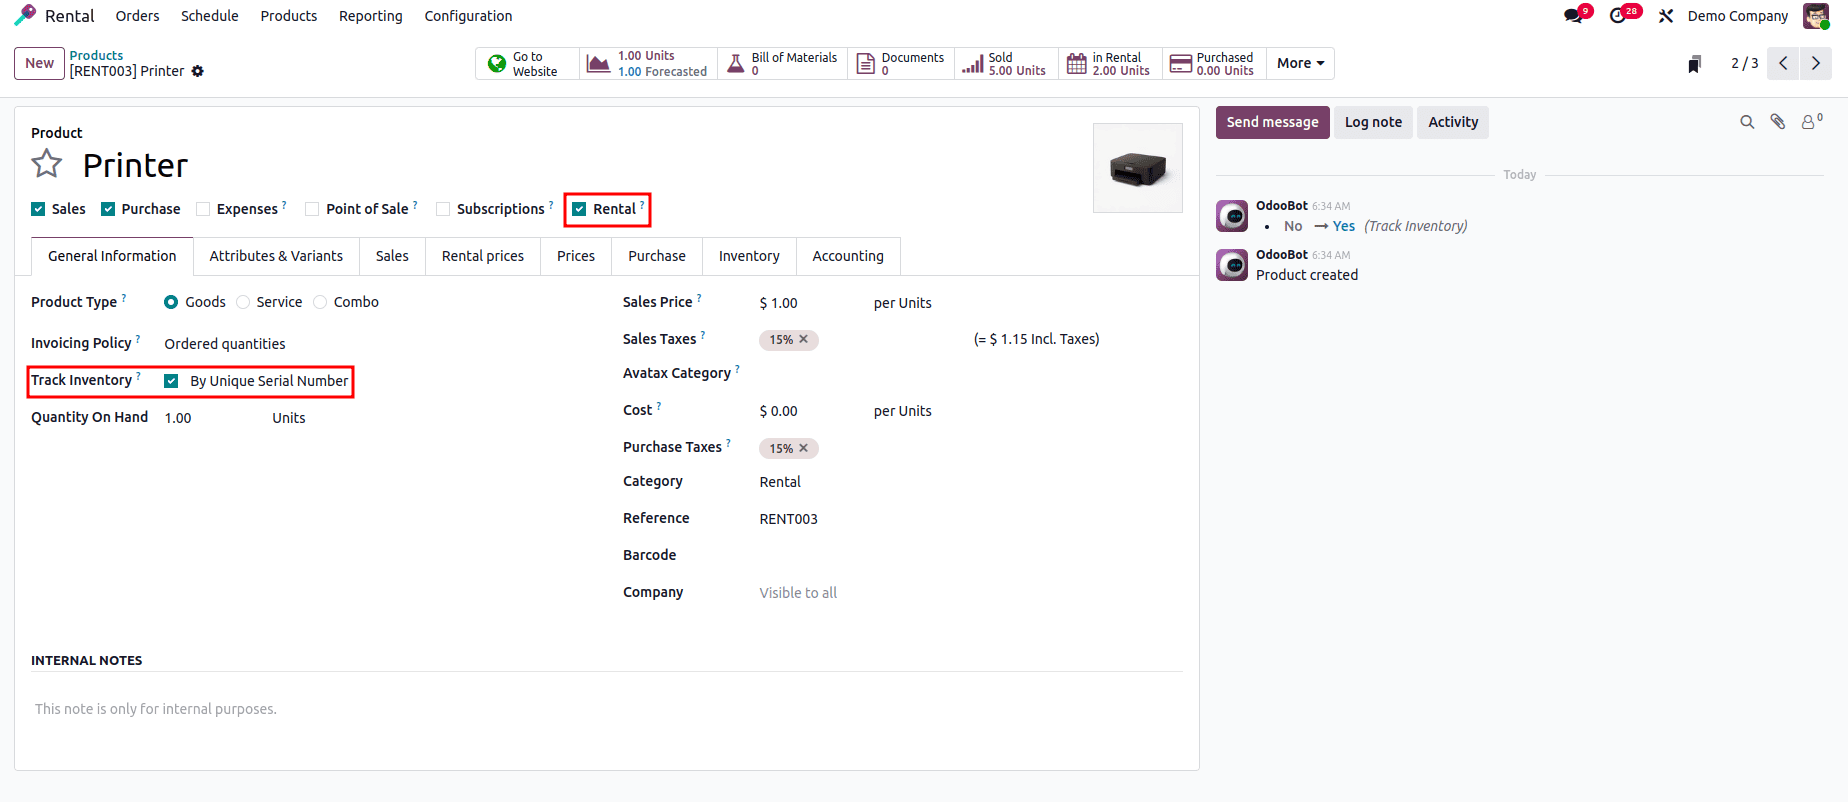
By enabling the "Rental" checkbox in the product configuration, you can designate an item as a rental product. Additionally, inventory for these products can be tracked using unique serial numbers, lots, or quantities, depending on how the product is managed in the inventory settings.
4. Reporting Menu
The Reporting menu, accessible from the Rental Module's main dashboard, allows for in-depth analysis of rental-related data. With this feature, users can generate detailed reports of rental orders over various timeframes—daily, weekly, monthly, or yearly—to monitor performance and trends.
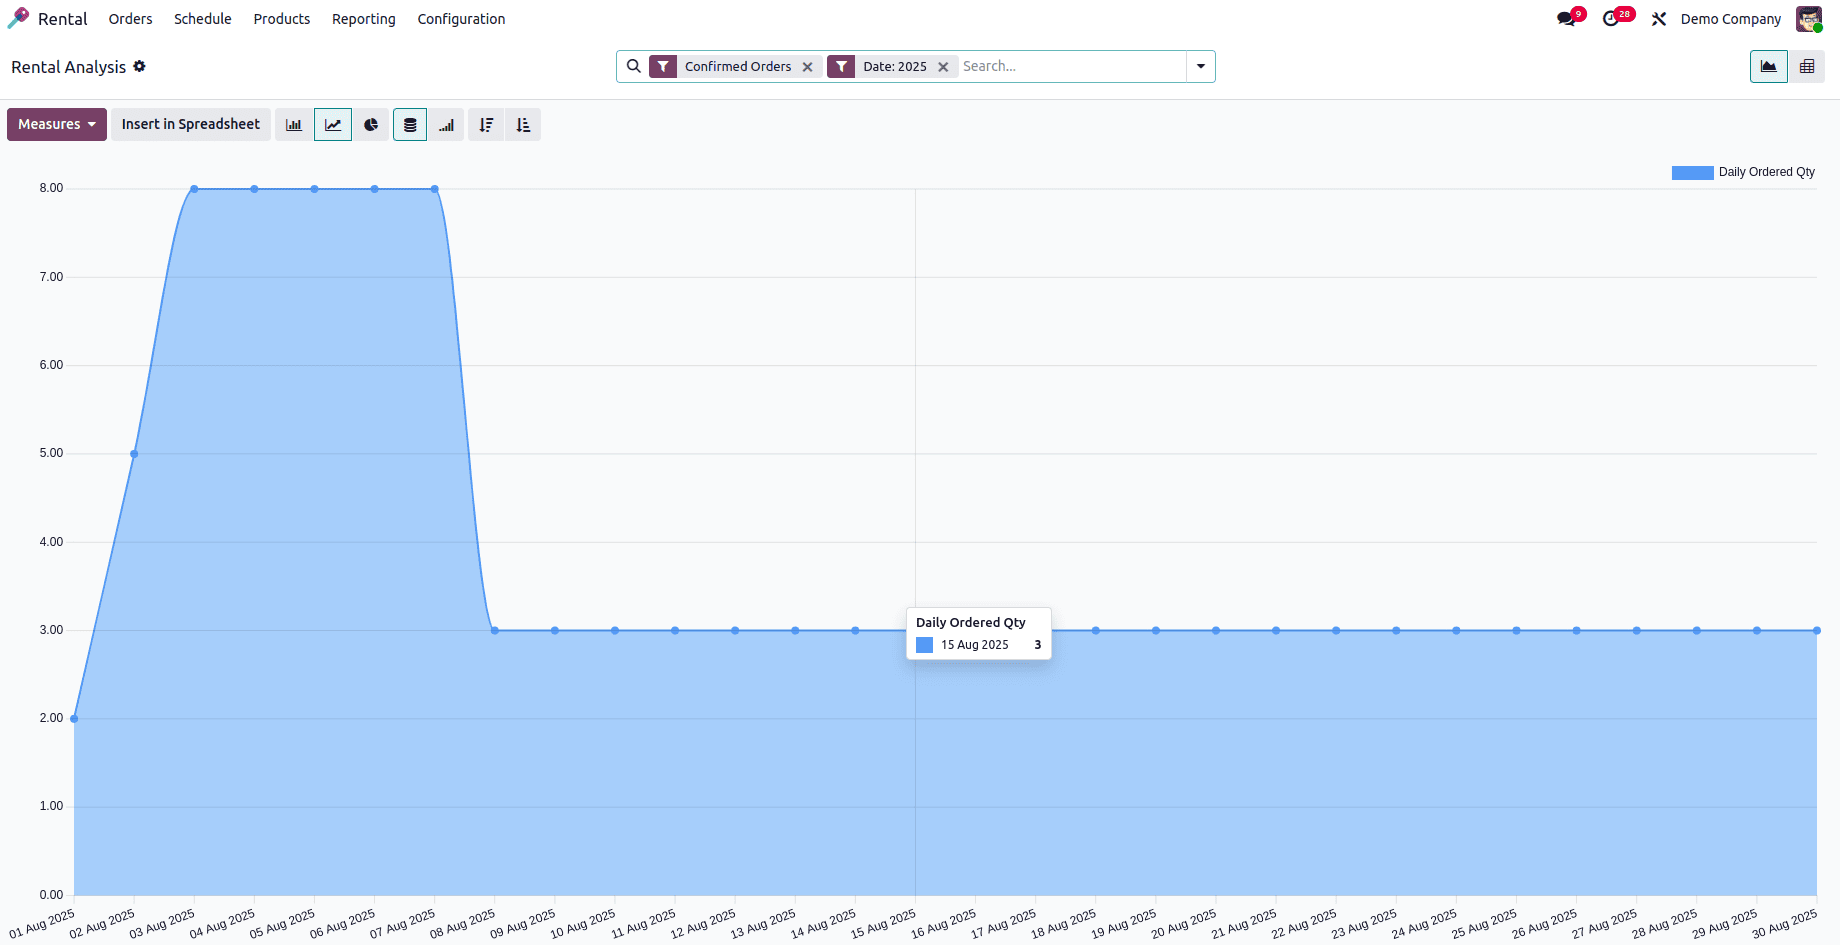
The reporting interface supports both graphical and pivot views, offering flexibility in how data is visualized. In the “Measures” section located at the top left, users can choose key metrics such as Daily Amount, Ordered Quantity, Picked-up Quantity, and Returned Quantity to customize their reports.
Additional tools like Filters and Group By options help refine the data, making it easier to focus on specific segments. Graphs can be visualized based on count or other selected measures. The “Comparison” feature lets users compare current data with previous periods, and frequently used reports can be saved under Favorites for quick access in the future.
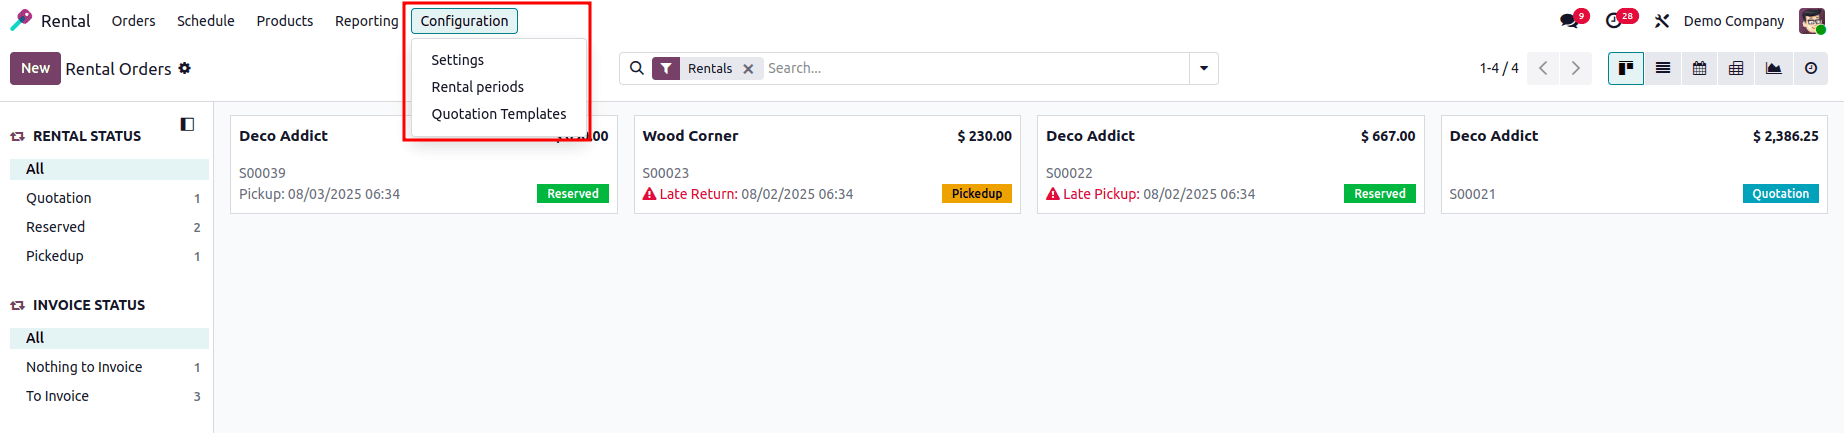
5. Configuration Menu
The Configuration menu in the Odoo 18 Rental Module includes two key options: Settings and Rental Periods. These options allow administrators to customize the rental workflow and define standard rental durations according to business needs.
Settings
Within the Settings page of the Odoo 18 Rental Module, you'll find configuration options grouped under tabs such as “Rental” and “Rent Online.” These settings allow you to fine-tune key aspects of rental management and product handling.
From here, you can enable features like rental order processing, online rental capabilities, product return handling, and more—helping you align the rental workflow with your business requirements.
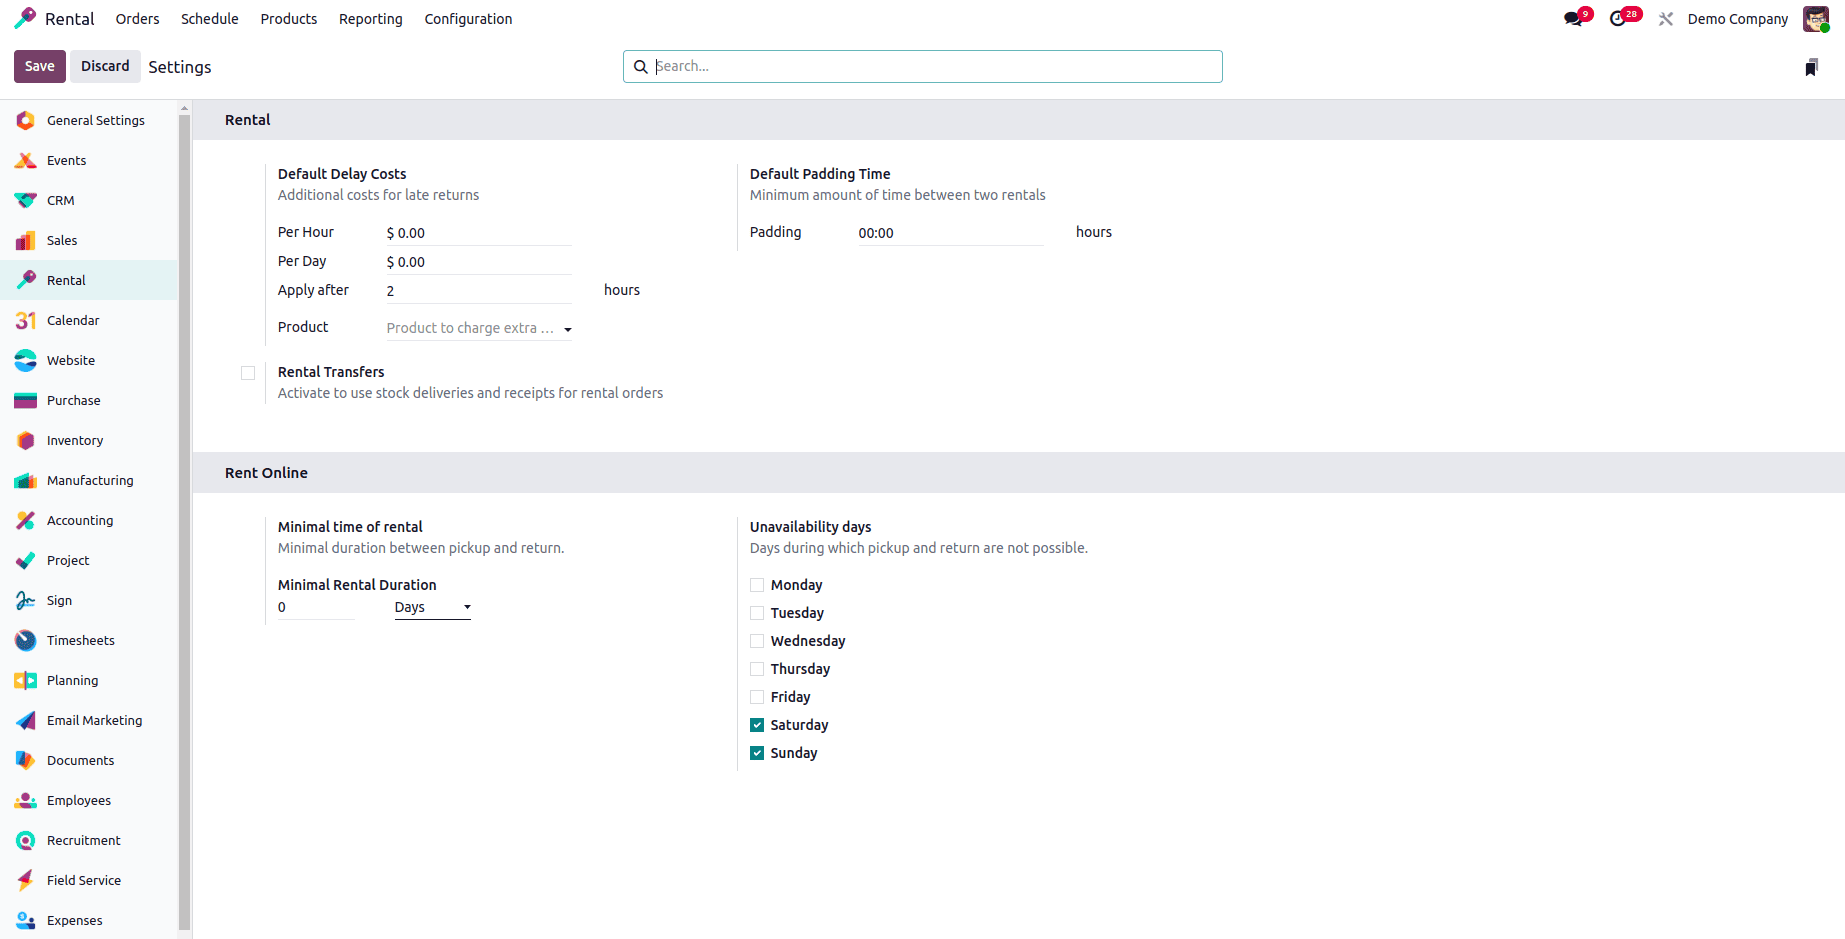
In the “Rental” tab within the Settings menu, users can configure key default values such as Default Padding Time, Default Delay Costs, and the format for Default Documents related to rental operations. These settings help streamline the rental process by allowing you to allocate preparation time between rentals, set standard charges for delays, and manage necessary documentation.
Additionally, rental agreements and related documents can be uploaded directly using the “Upload Template” button. This feature enables customers to electronically sign rental contracts, ensuring a smooth and paperless transaction process.
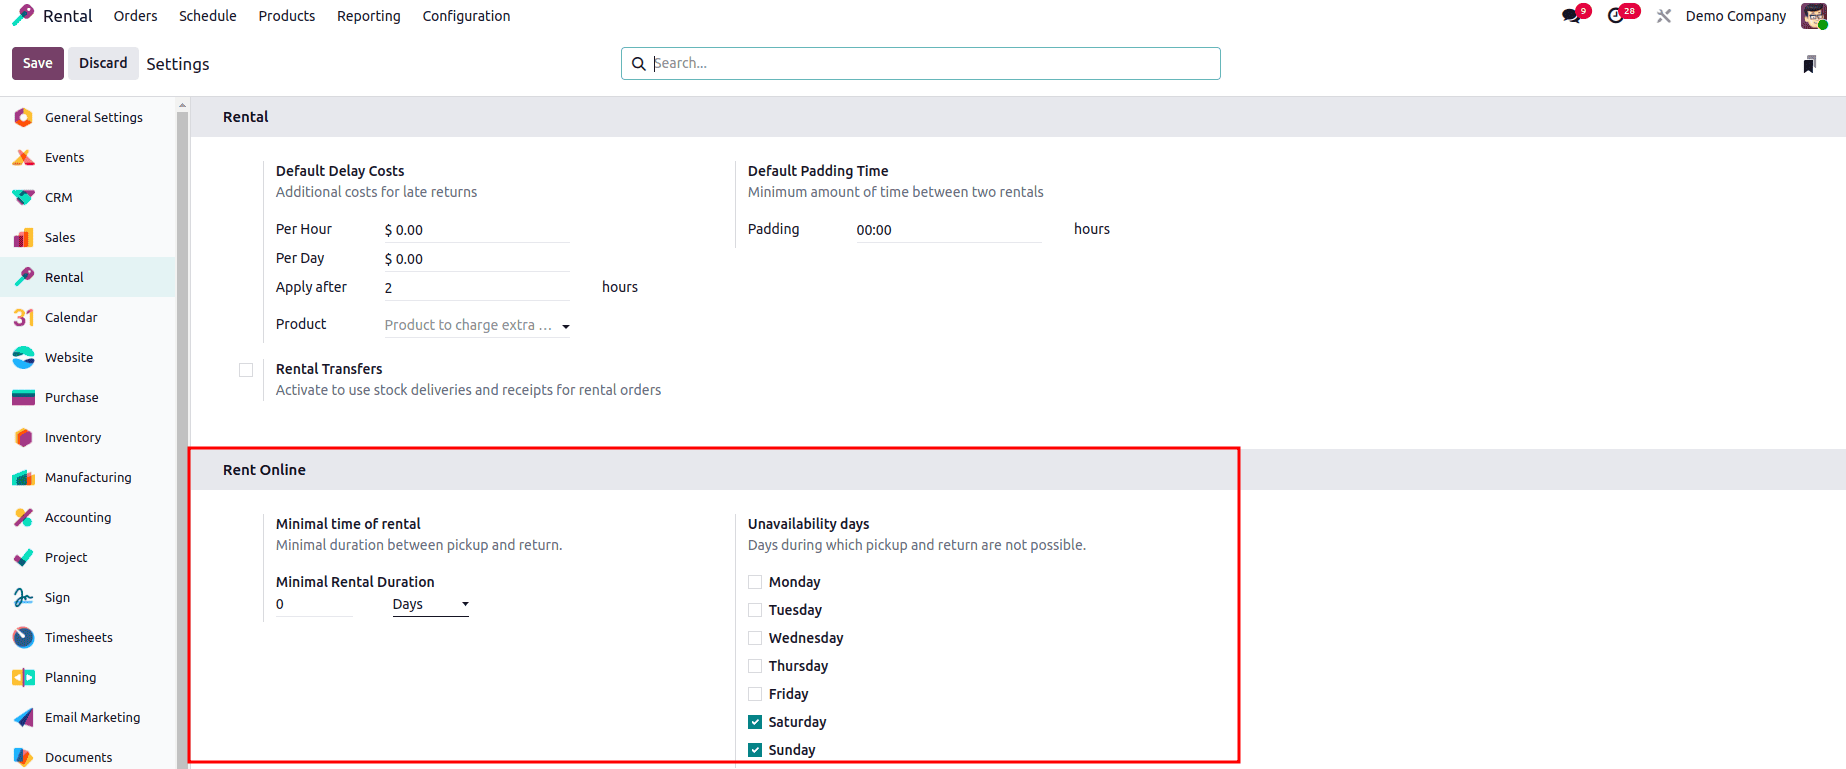
In the “Rent Online” tab, users can configure various settings related to online rental management, including parameters like Minimum Rental Period, Minimum Rental Duration, and Unavailability Days. These options help define rental restrictions and availability for products displayed online.
Additionally, specific products can be assigned directly through the dropdown selection within the product configuration. This allows businesses to easily manage which items are available for online rental, as well as enforce rental term conditions and blackout dates for better scheduling control.
These features enhance the flexibility and precision of online rental operations in the Odoo 18 Rental Module.
To read more about How to Manage Rental Orders in Odoo 18, refer to our blog How to Manage Rental Orders in Odoo 18.