Odoo 19's Search Panel, a potent UI element, enables users to swiftly filter records using pre-established categories that are shown on the left side of list and kanban views. Adding more business-specific fields to this Search Panel can greatly enhance data navigation and usability while working with the HR module. In this blog, we show you how to improve the Employees module by enhancing the current Search Panel with a custom Employee Type filter. To do this, a new hr.employee.type model is created, connected to the employee records via a Many2one field, and added as a filter option to the Search Panel view.
Detailed Steps:
Step 1: Define the Model - Employee Type
In order to store the various employee types (such as intern, contractor, and permanent), we first construct a new model called hr.employee.type.
models/hr_employee_type.py
from odoo import models, fields

class HrEmployeeType(models.Model):
    _name = "hr.employee.type"
    _description = "Employee Type"
    name = fields.Char(
        string="Employee Type Name",
        required=True,
        help="Define a category used to classify employees, such as Permanent, Contract, or Intern."
    )
Step 2: Include a New Field in the Employee Model
The hr.employee model is now inherited, and a new Many2one field pointing to the hr.employee.type model is added.
models/hr_employee.py
from odoo import models, fields
class HrEmployee(models.Model):
    _inherit = "hr.employee"
    employee_type_id = fields.Many2one(
        comodel_name="hr.employee.type",
        string="Employee Type",
        help="Indicates the classification assigned to this employee for reporting and filtering purposes."
    )
Step 3: Permit Access Rights- Security File
To grant access to the new model, create a security file.
security/ir.model.access.csv
id,name,model_id:id,group_id:id,perm_read,perm_write,perm_create,perm_unlink
access_hr_employee_type,access_hr_employee_type,model_hr_employee_type,hr.group_hr_manager,1,1,1,1
Step 4: View Creation for Employee Type Model
To enable users to manage employee kinds via the user interface, define list and form views.
views/hr_employee_type_views.xml
<?xml version="1.0" encoding="utf-8"?>
<odoo>
    <!-- Employee Type List View -->
    <record id="view_hr_employee_type_list" model="ir.ui.view">
        <field name="name">hr.employee.type.list</field>
        <field name="model">hr.employee.type</field>
        <field name="arch" type="xml">
            <list string="Employee Types">
                <field name="name"/>
            </list>
        </field>
    </record>
    <!-- Employee Type Form View -->
    <record id="view_hr_employee_type_form" model="ir.ui.view">
        <field name="name">hr.employee.type.form</field>
        <field name="model">hr.employee.type</field>
        <field name="arch" type="xml">
            <form string="Employee Type">
                <sheet>
                    <group>
                        <field name="name"/>
                    </group>
                </sheet>
            </form>
        </field>
    </record>
    <!-- Action Definition -->
    <record id="action_hr_employee_type" model="ir.actions.act_window">
        <field name="name">Employee Types</field>
        <field name="res_model">hr.employee.type</field>
        <field name="view_mode">list,form</field>
        <field name="help" type="html">
            <p class="o_view_nocontent_smiling_face">
                Define employee classifications such as Permanent, Contract, or Intern.
            </p>
        </field>
    </record>
    <!-- Parent Configuration Menu -->
    <menuitem id="menu_hr_employee_settings"
              name="Employee Settings"
              parent="hr.menu_human_resources_configuration"
              sequence="35"
              groups="hr.group_hr_manager"/>
    <!-- Submenu: Employee Type -->
    <menuitem id="menu_hr_employee_type"
              name="Employee Types"
              parent="menu_hr_employee_settings"
              action="action_hr_employee_type"
              sequence="10"
              groups="hr.group_hr_manager"/>
</odoo>
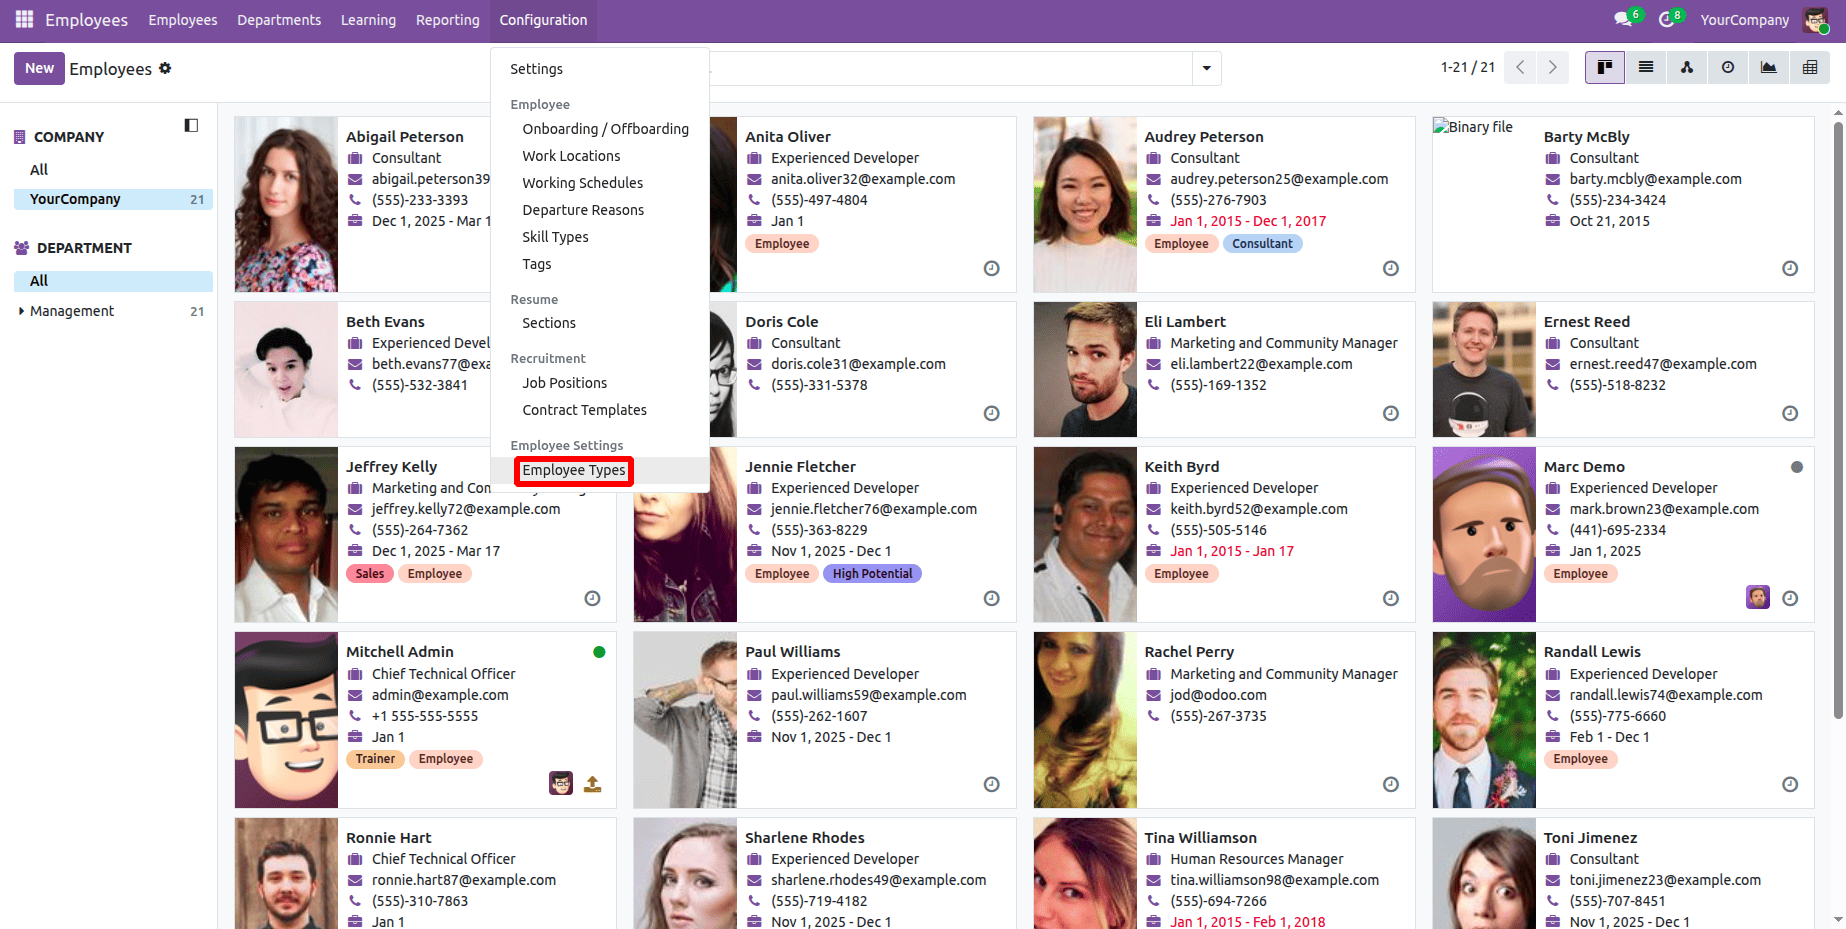
The Employee Type Menu Path is shown in the screenshot below; clicking this will take you to the employee type list view.
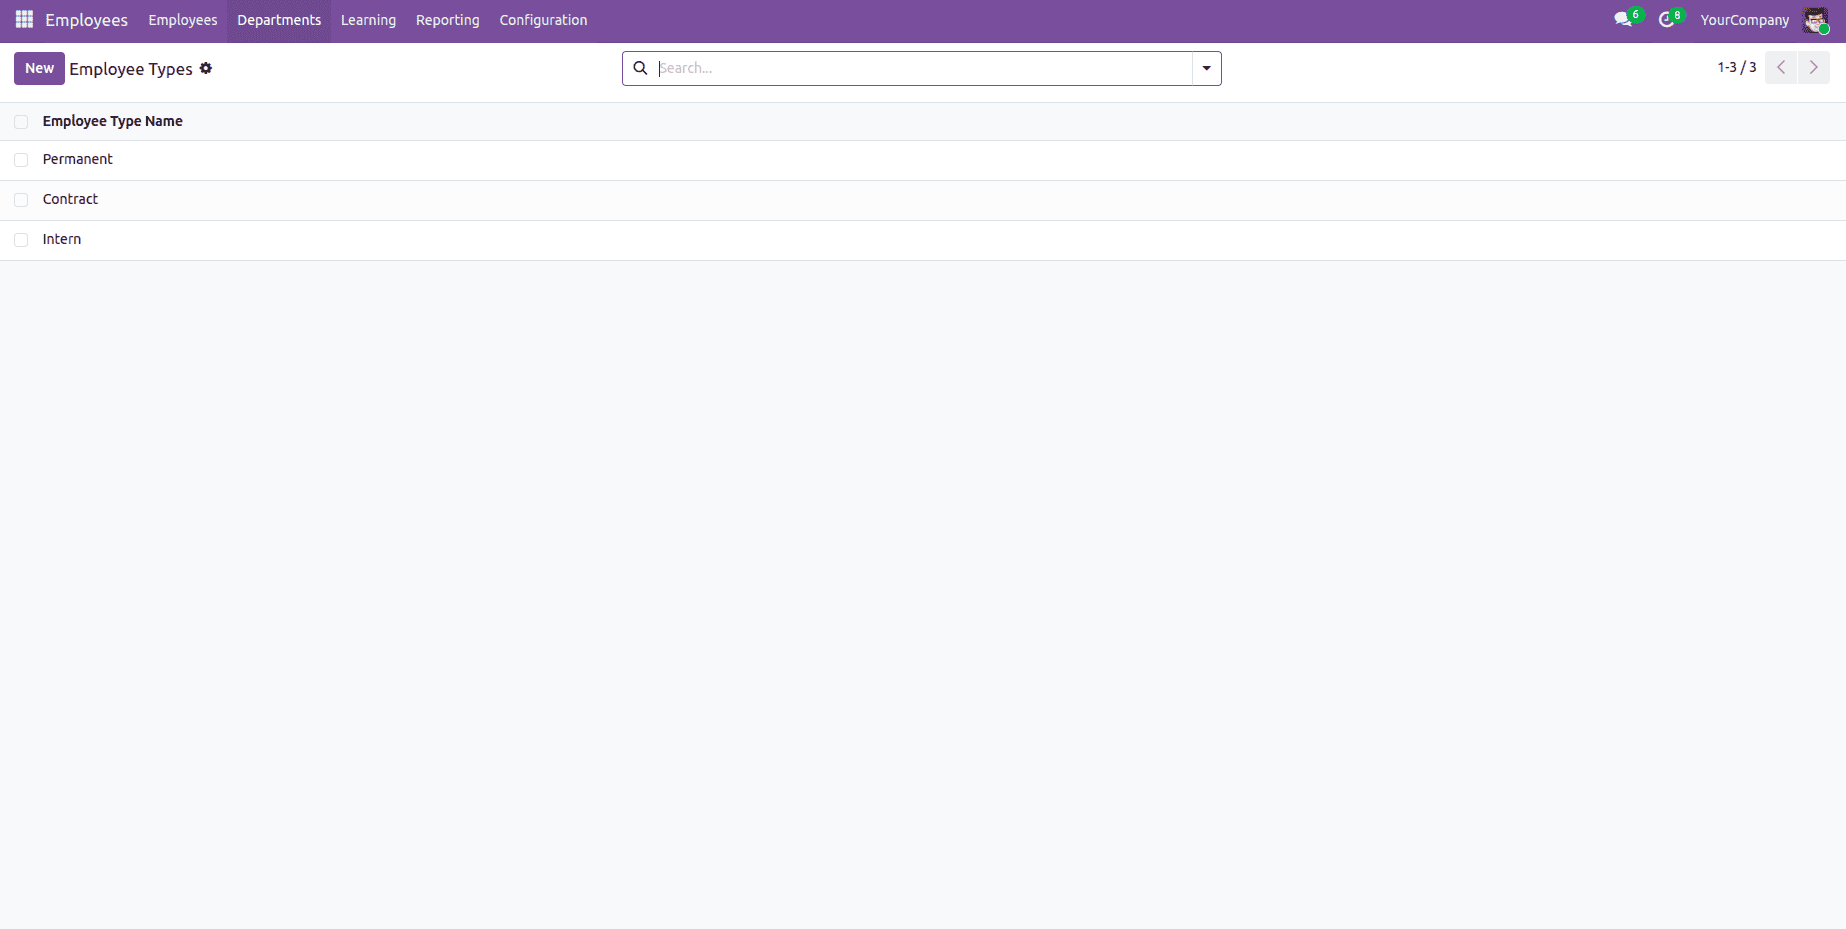
An illustration of an employee list view is shown below.
Step 5: Include a Custom Field in the Search Panel and Employee Form
The new field is now added to the search panel and updated in the employee form view.
<?xml version="1.0" encoding="utf-8"?>
<odoo>
    <!-- Employee Form -->
    <record id="view_employee_form_employee_type" model="ir.ui.view">
        <field name="name">hr.employee.form.employee.type</field>
        <field name="model">hr.employee</field>
        <field name="inherit_id" ref="hr.view_employee_form"/>
        <field name="arch" type="xml">
            <xpath expr="//field[@name='job_title']" position="after">
                <field name="employee_type_id"/>
            </xpath>
        </field>
    </record>
    <!-- Search Panel -->
    <record id="view_employee_search_employee_type" model="ir.ui.view">
        <field name="name">hr.employee.search.employee.type</field>
        <field name="model">hr.employee</field>
        <field name="inherit_id" ref="hr.view_employee_filter"/>
        <field name="arch" type="xml">
            <xpath expr="//searchpanel" position="inside">
                <field name="employee_type_id"
                       icon="fa-tags"
                       enable_counters="1"
                       help="Filter employees based on their assigned employee type"/>
            </xpath>
        </field>
    </record>
</odoo>
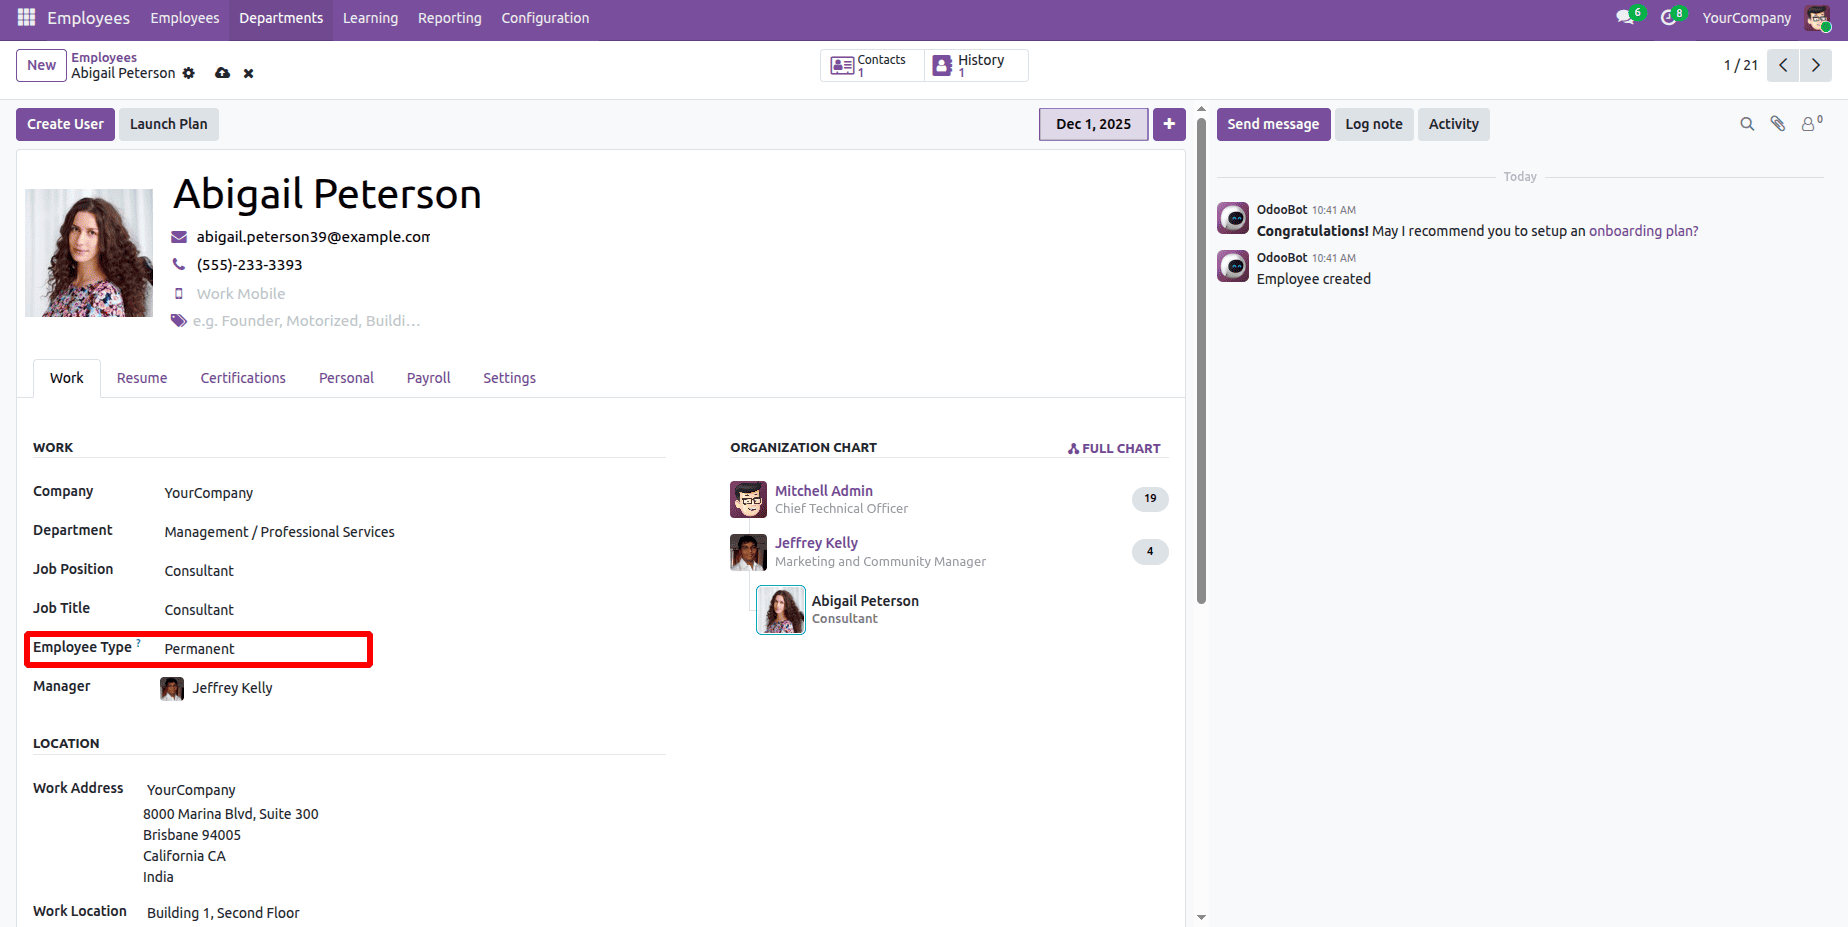
A screenshot of the employee form view is seen below with custom field- Employee Type.
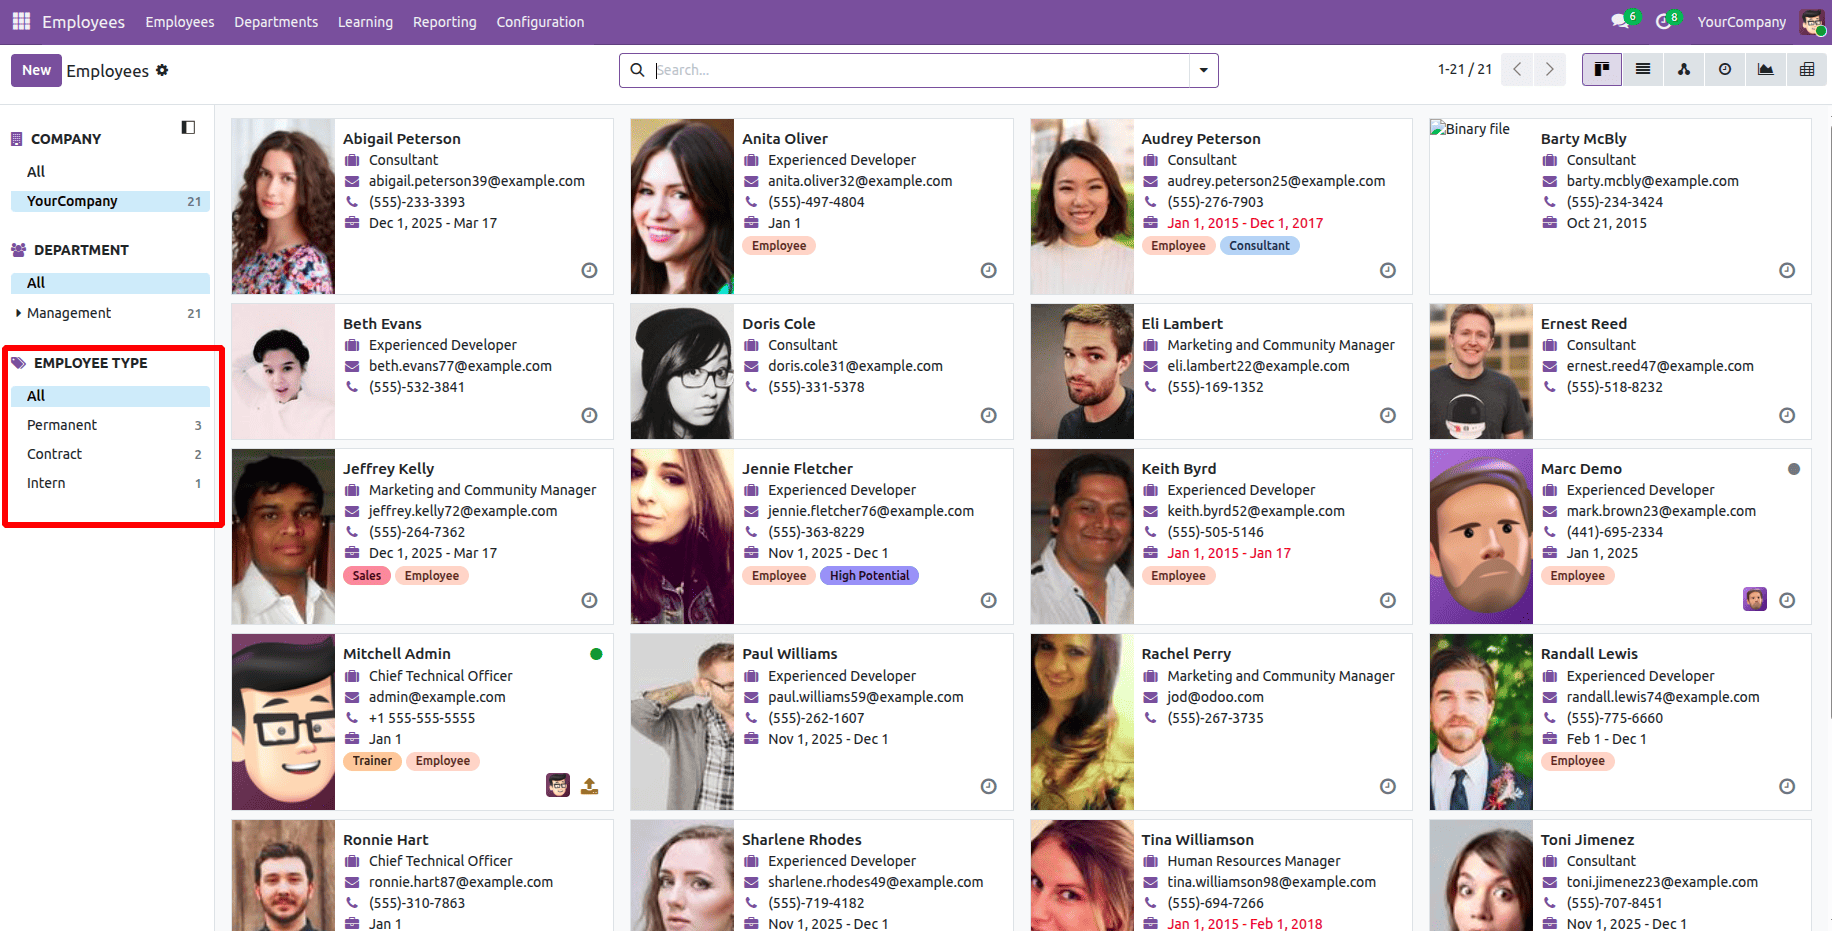
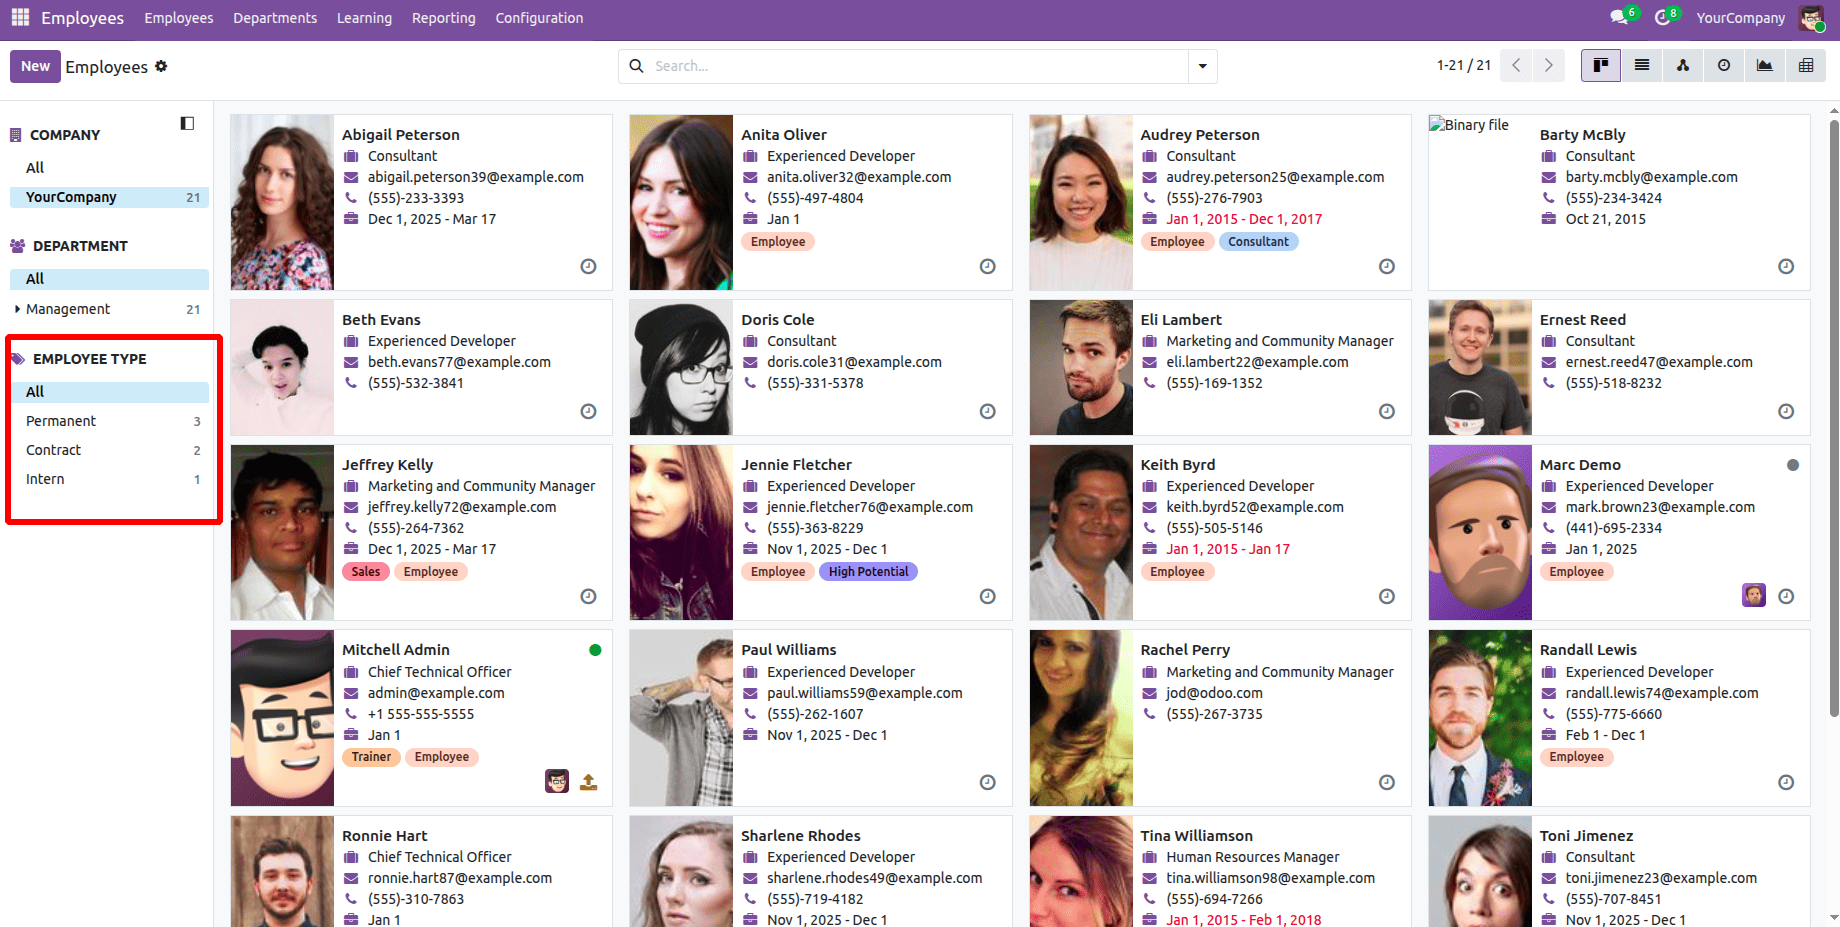
Employee types, including Permanent, Contract, and Intern are displayed in the snapshot of the Employee Kanban view that is displayed below.
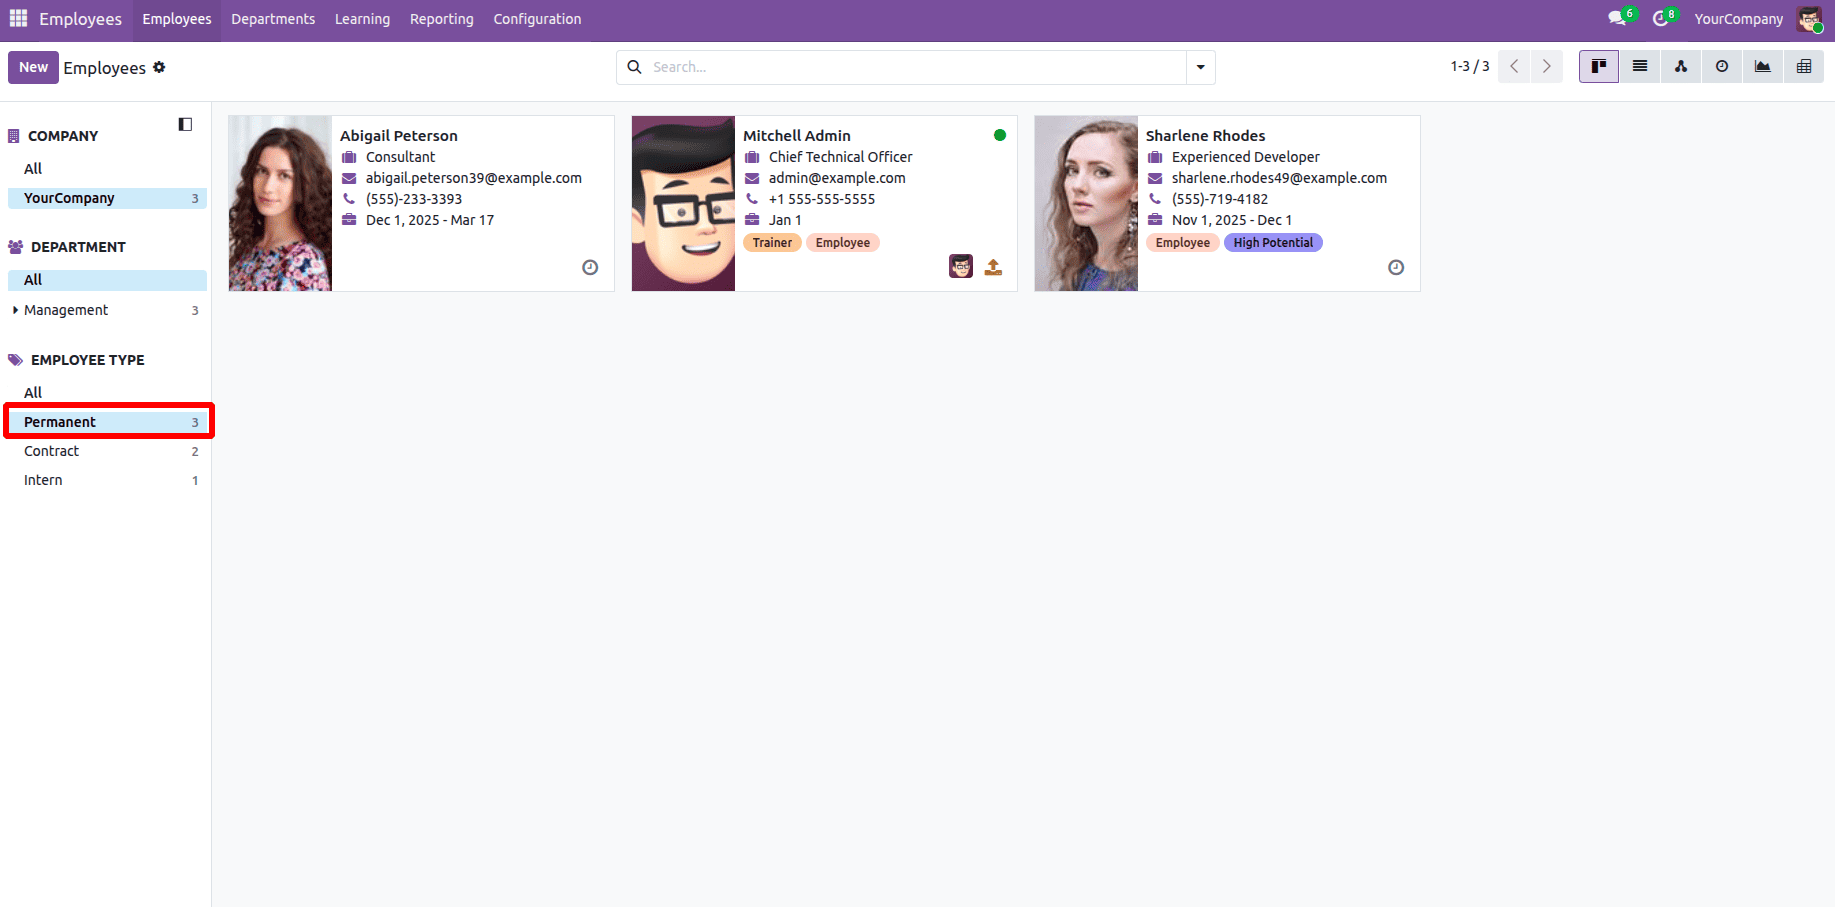
Below is a screenshot of the chosen search window displaying the "Permanent" employee type.
Step 6: Custom module Installation
After installing the custom module, which includes the required Python scripts, XML views, and CSV security settings, a new "Type of Employee" field appears in the Employee form view. Additionally, users may now manage employee kinds using a new options menu called HR > settings > Employee Type. Additionally, the Employee List View search panel allows employees to be filtered based on their assigned employee type. The screenshot below shows the final result after installation.
Adding a new field to the existing Search Panel is a simple yet efficient way to enhance record filtering and user experience in Odoo 19. By creating a custom model, linking it to the relevant business item, and enlarging the Search Panel view, you may provide customers with quick and simple access to important data. Because it follows Odoo's modular design principles and is easily adaptable to other modules and use cases, this approach provides a flexible option to tailor Odoo's interface to match specific business demands.
To read more about How to Add a Field to the Existing Search Panel in Odoo 18, refer to our blog How to Add a Field to the Existing Search Panel in Odoo 18.