Resource planning and allocation are critical to successful project management. They ensure that available resources are used efficiently to meet deadlines, control costs, and maximize team productivity. In a fast-paced business environment, having a structured approach to resource management is essential.
Most organizations function based on pre-established plans. When planning aligns closely with operational goals and company policies, execution becomes more efficient and consistent. Without this alignment, planning loses its purpose and impact.
Odoo simplifies resource management through its Planning module, offering a calendar-based interface that helps users schedule tasks based on team availability. This automation not only streamlines operations but also enhances visibility and coordination across departments. The module integrates seamlessly with other Odoo applications such as Projects, Employees, Payroll, Attendance, and Manufacturing, making it a powerful tool for centralized business planning and execution.
Scheduling
When you select the Planning module from the main dashboard, you’ll be directed to its scheduling interface, designed in a calendar view. This layout makes it easy to schedule activities based on available dates.
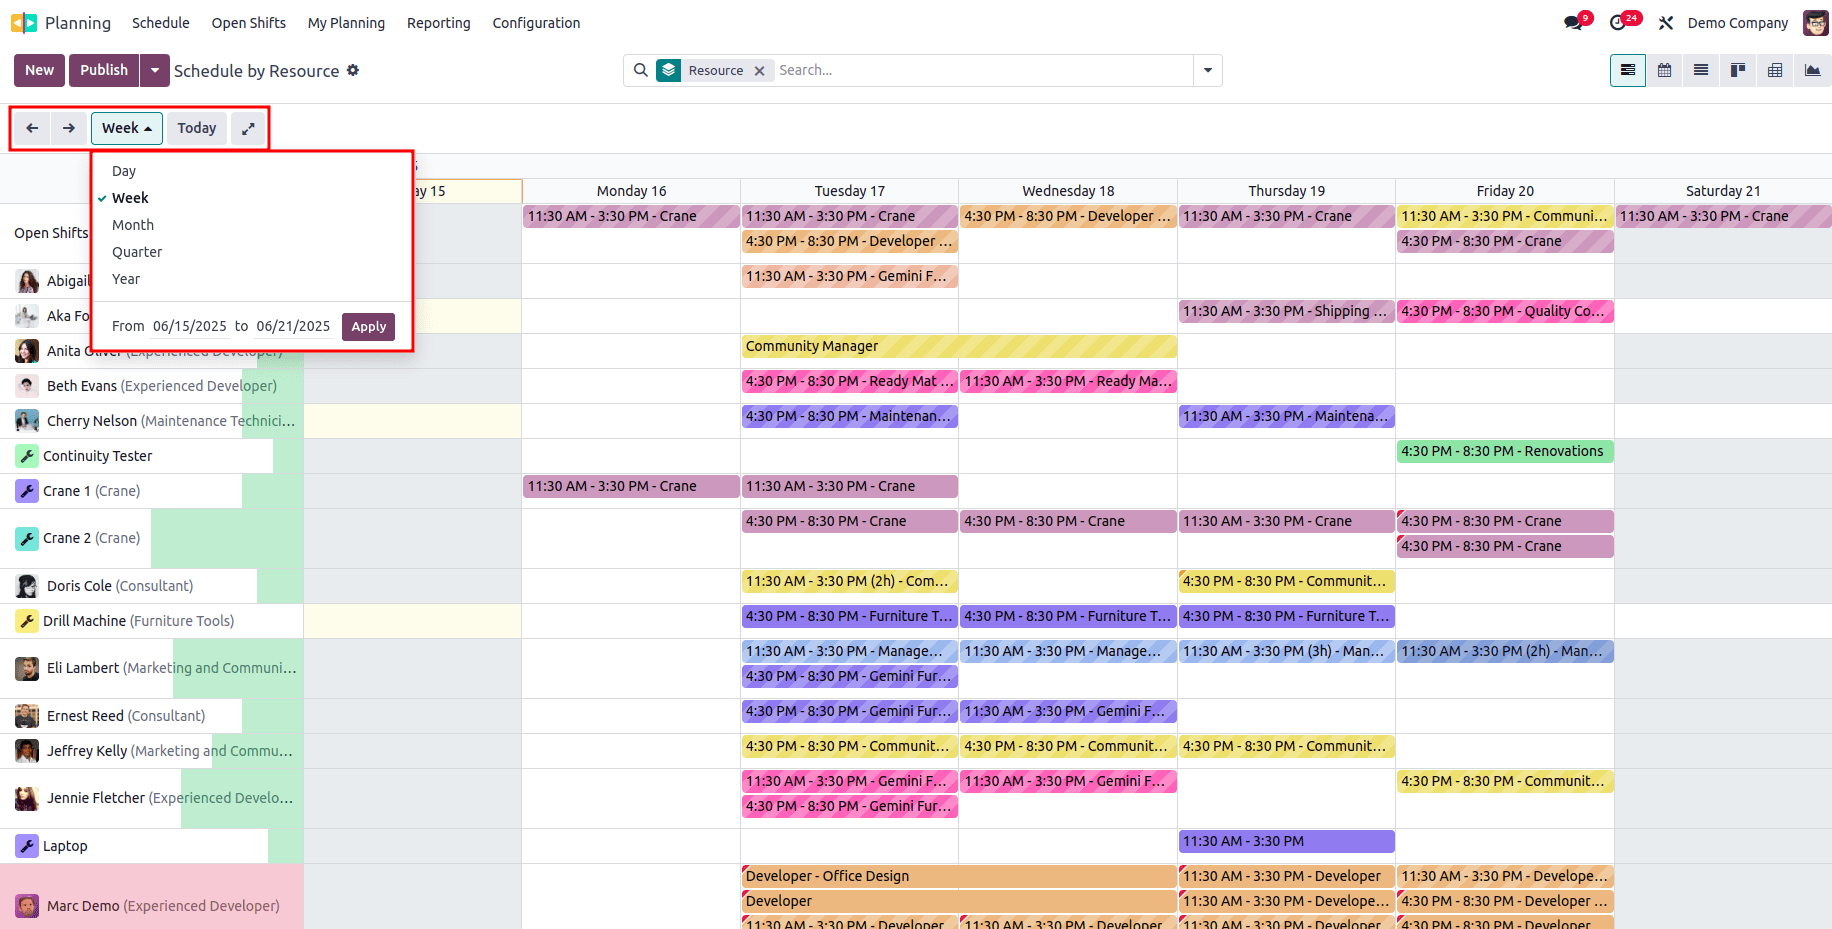
You can organize activities based on various criteria such as resources, roles, projects, or sales orders. The view can be customized to show plans by day, week, month, or year, depending on your preference. This setup offers a clear visual of each team member’s assigned tasks and availability.
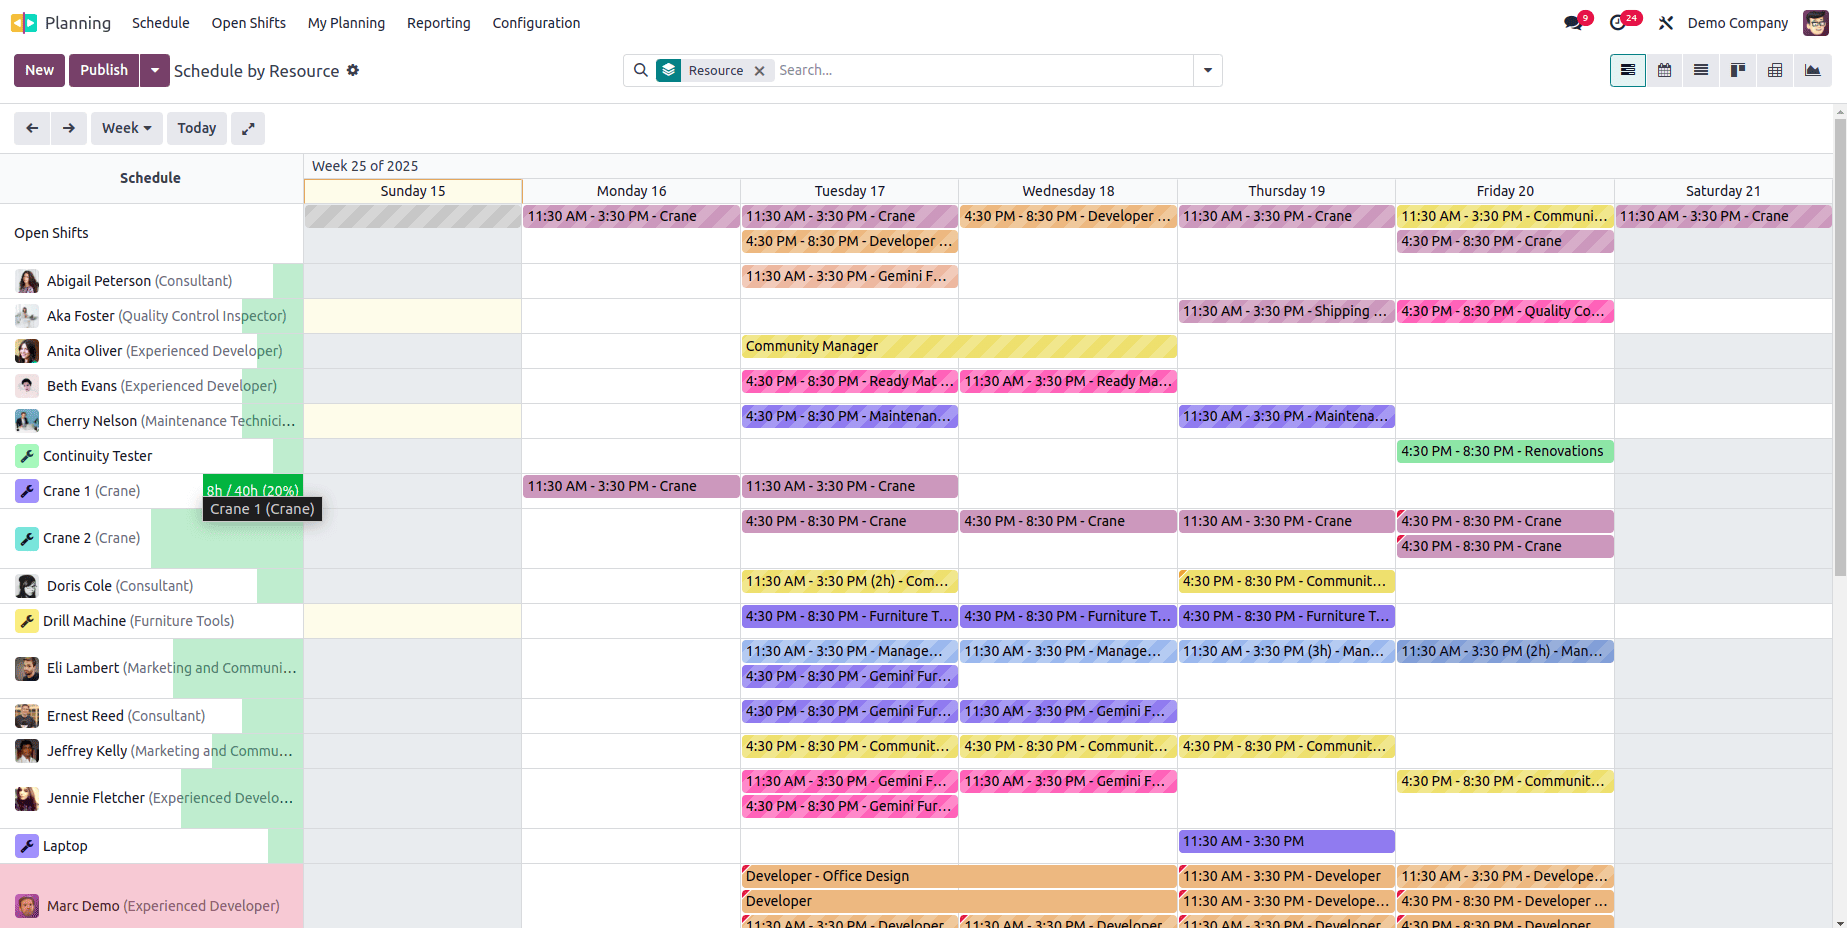
Hovering over a specific timetable will display a preview with detailed information about the scheduled activity, as shown in the screenshot above.

If an employee is assigned to overlapping shifts, a small red indicator will appear on the schedule to highlight the conflict. You can also edit a schedule by simply clicking on any time slot, which allows you to make quick adjustments directly from the view.
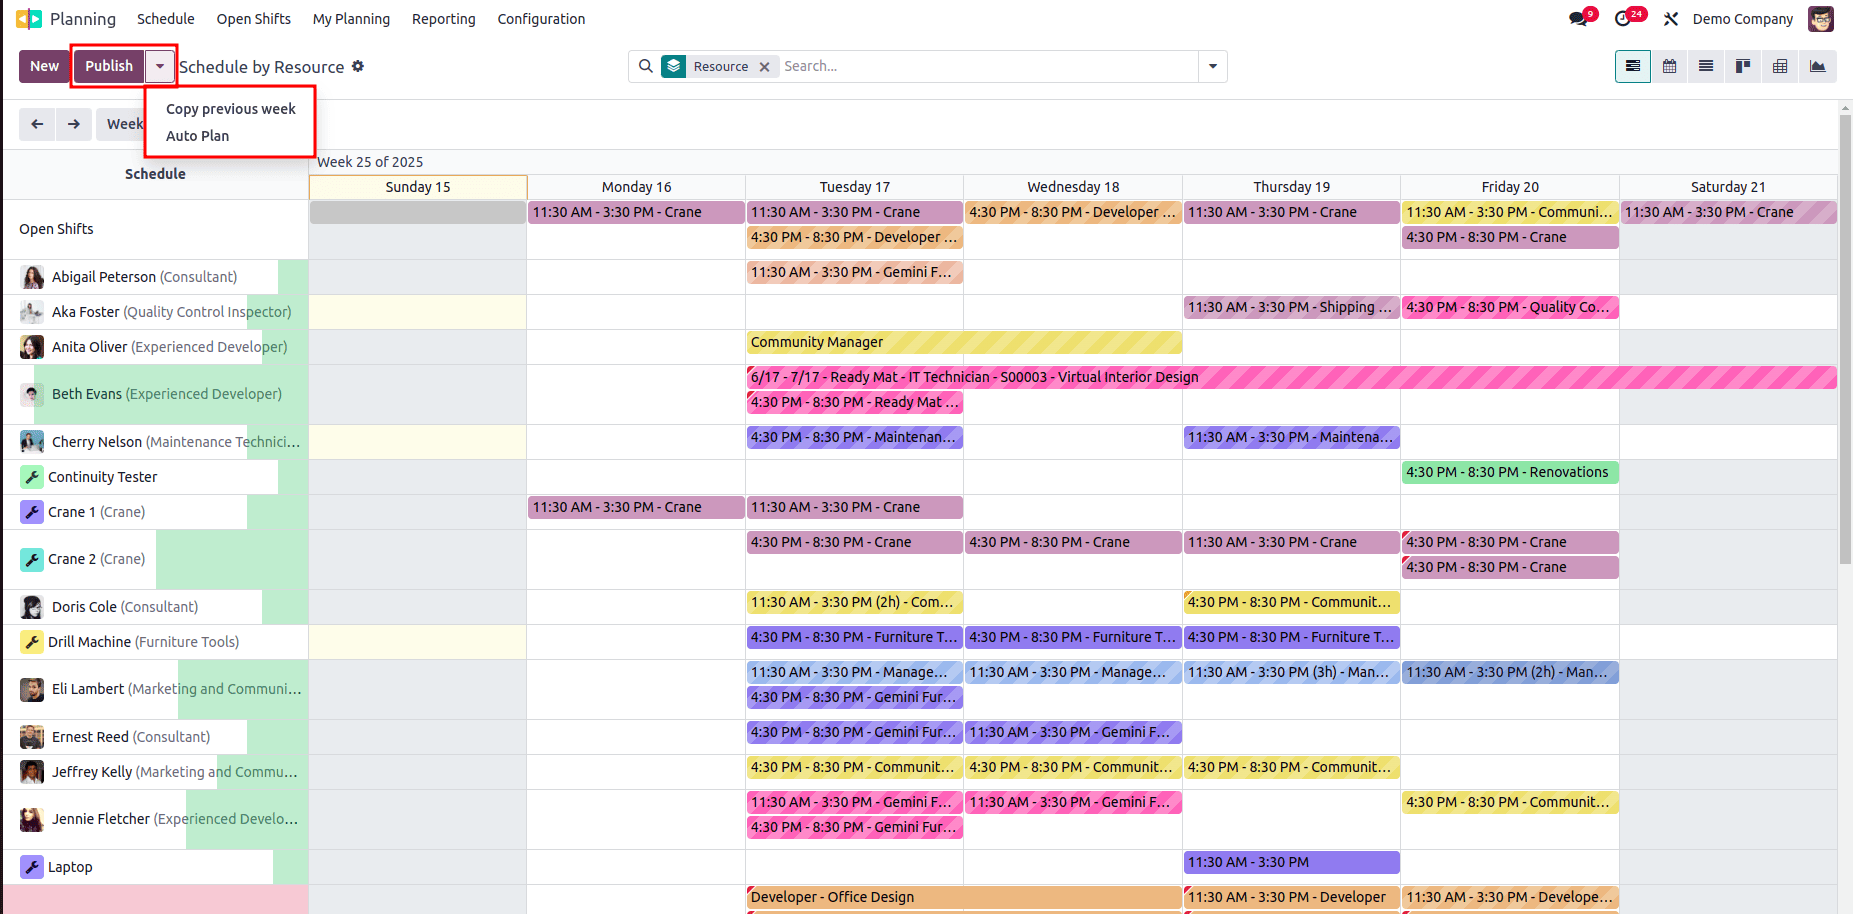
Unassigned sales orders can be allocated to available staff by clicking the Auto Plan button. To replicate the previous week's schedule, you can use the Copy Previous Week option.
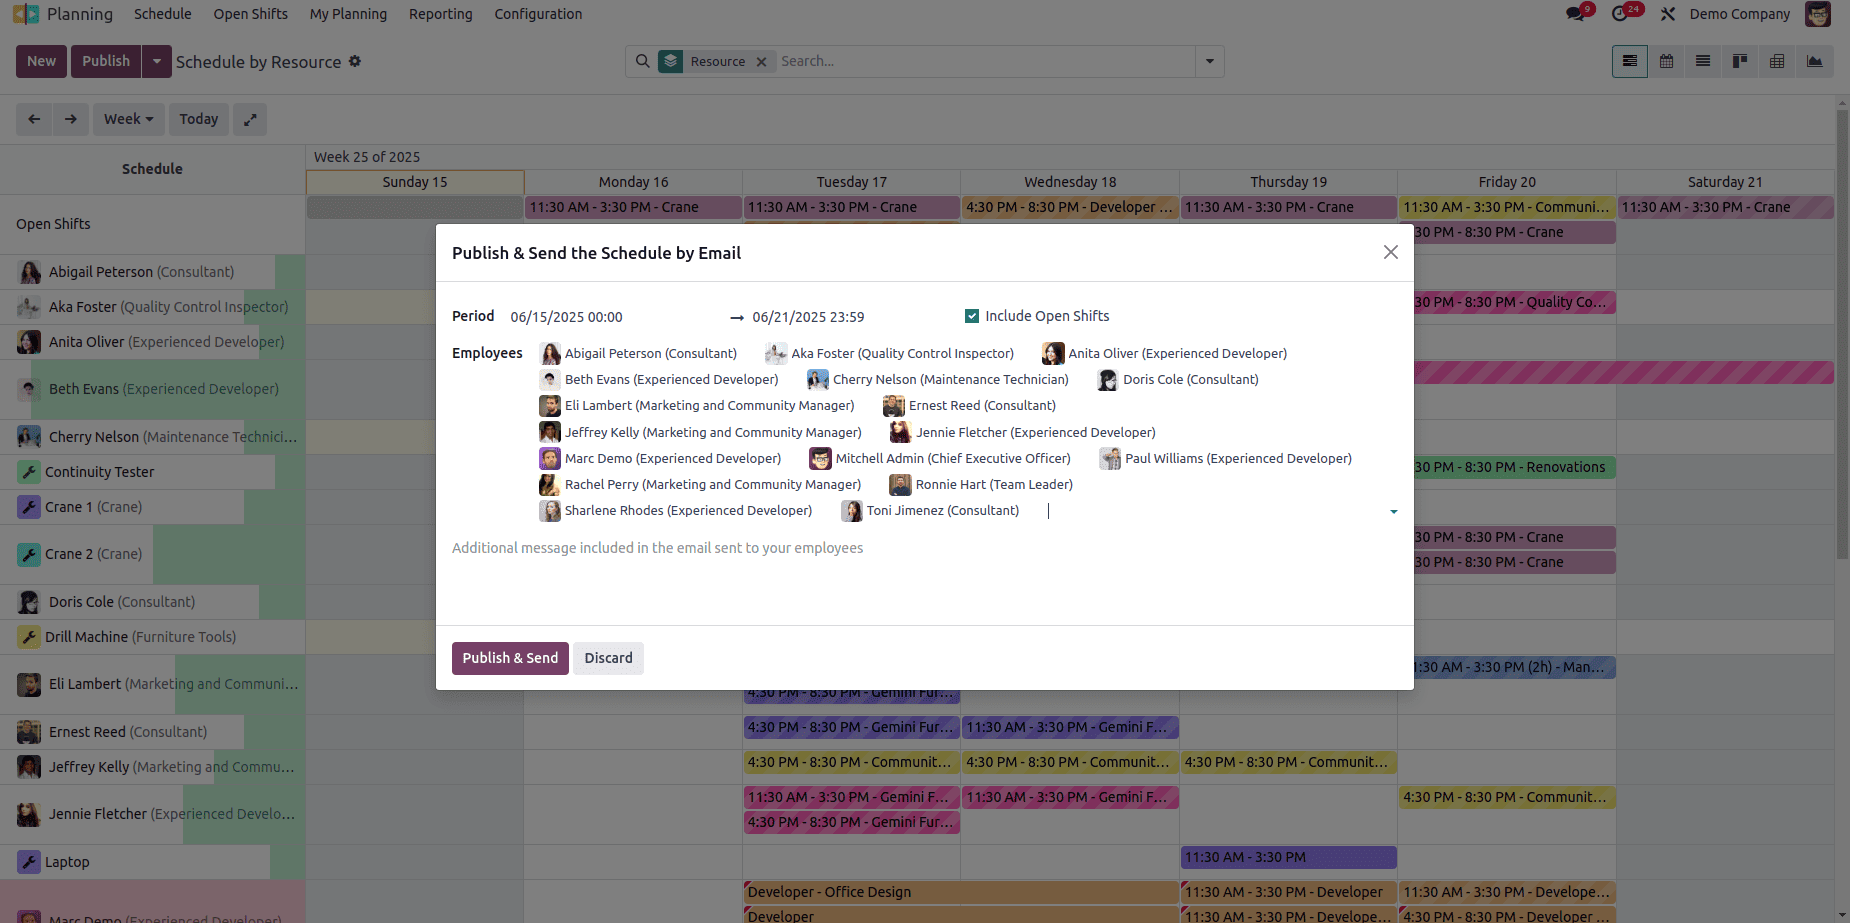
Clicking the Publish button opens a pop-up window, allowing you to email the schedule to the selected resources listed in the window.
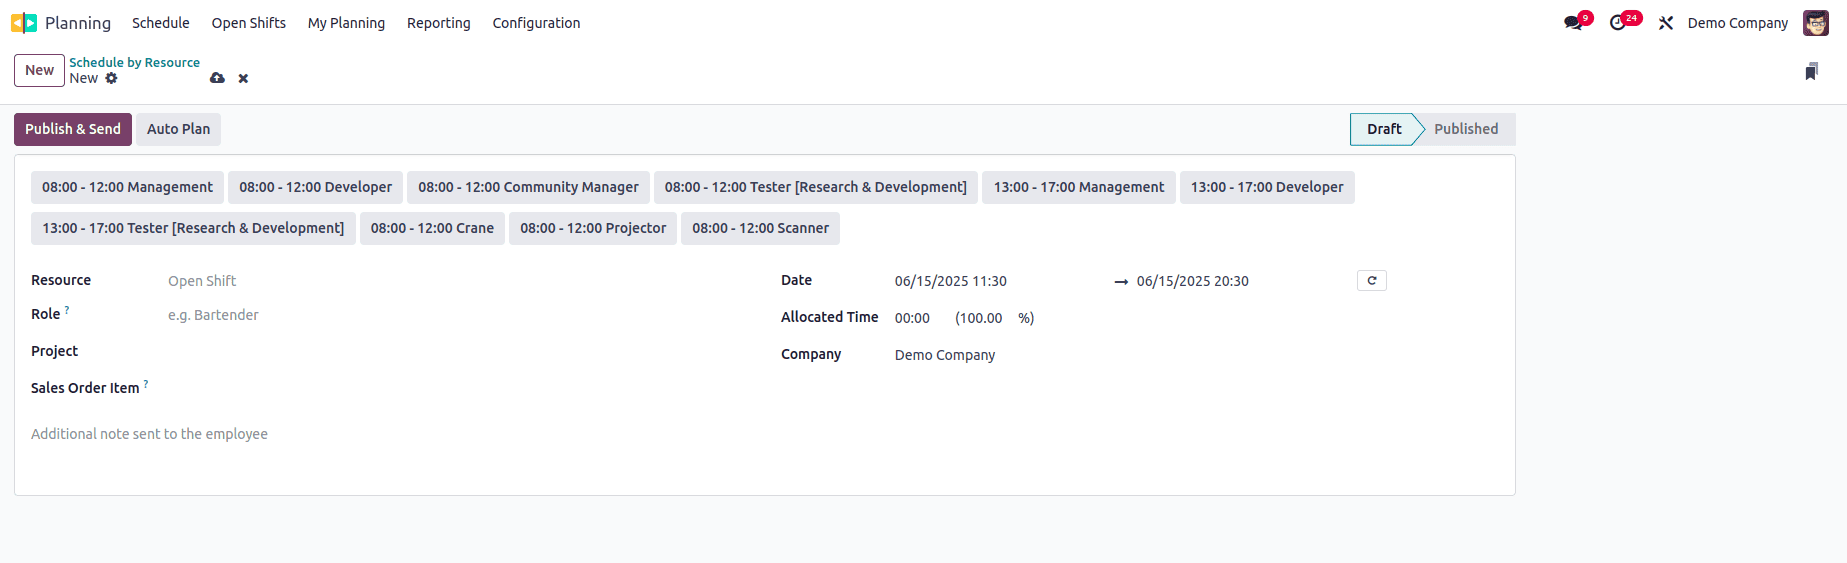
To create a new activity, click the New button. A form will appear displaying the resource and role names. If these fields are not automatically filled, you can manually enter the necessary information. Specify the project and sales order item related to the activity being scheduled.
If the activity needs to repeat, click the Repeat button. Note that any edits made to a single shift will only apply to that instance and will not affect other shifts in the recurring sequence. The same applies when deleting a recurring shift—only the selected instance will be removed unless the repeat option is disabled to stop future occurrences.
Fields such as Date, Allocated Time, and Company will be available for input. You can also add any relevant notes, which will be included in the notification sent to the employee.
To finalize the shift, use the Publish & Send button to distribute the schedule or Save to simply store the information.

The platform provides a wide range of default filters to help you efficiently manage and view schedules. These filters include: Open Shifts, My Shifts, My Team, My Department, My Role, My Project, My Sales Orders, Shifts in Conflict, Employees on Time Off, No Timesheets, Employees, Materials, Billable, Non-Billable, Draft, Published, as well as Start Date and End Date.
Under the Group By option, you can further organize the data based on Department, Manager, Resource, Role, Sales Order, Sales Order Item, Project, Company, Start Date, End Date, and Properties.

As previously mentioned, the scheduling layout will also be available through the corresponding By Role, By Project, and By Sales Order menus, allowing you to view and manage schedules based on those specific criteria.
My Planning
Within the Planning module, users have access to a dedicated My Planning menu where they can view their personal schedules. This interface provides a clear overview of all assigned shifts, helping users manage their time effectively and avoid scheduling conflicts.
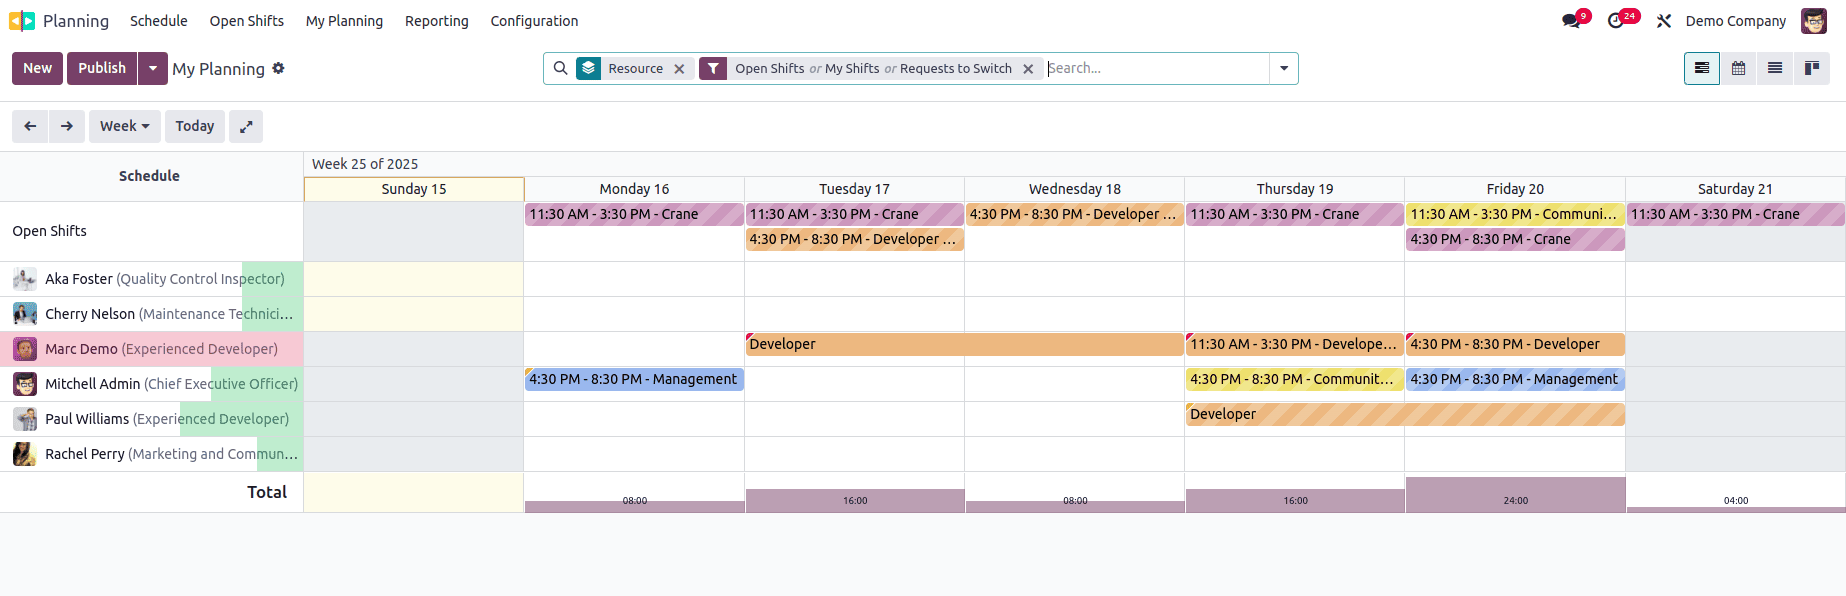
This window displays detailed information about your assigned shifts, organized by scheduled date and time. It clearly highlights published shifts, making it easy for users to track their workload. The structured layout also helps employees quickly identify any overlapping or conflicting shifts.
Open Shifts
There may be situations where an employee is unable to complete an assigned task on time due to personal or technical reasons. However, completing planned activities is essential to meet company goals. In such cases, Odoo 18 offers the Open Shifts feature within the Planning module.
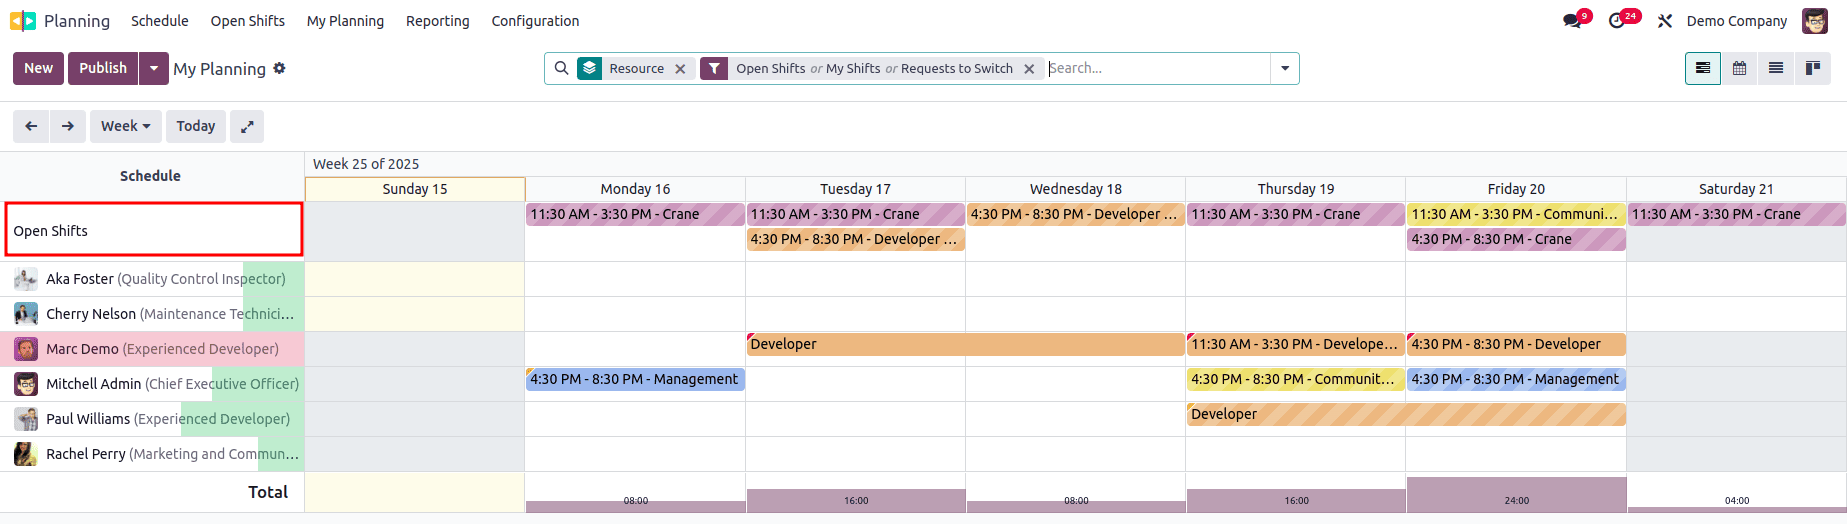
This feature allows pending or unassigned tasks to be made available for others to pick up and complete, ensuring workflow continuity even when the originally assigned resource is unavailable.
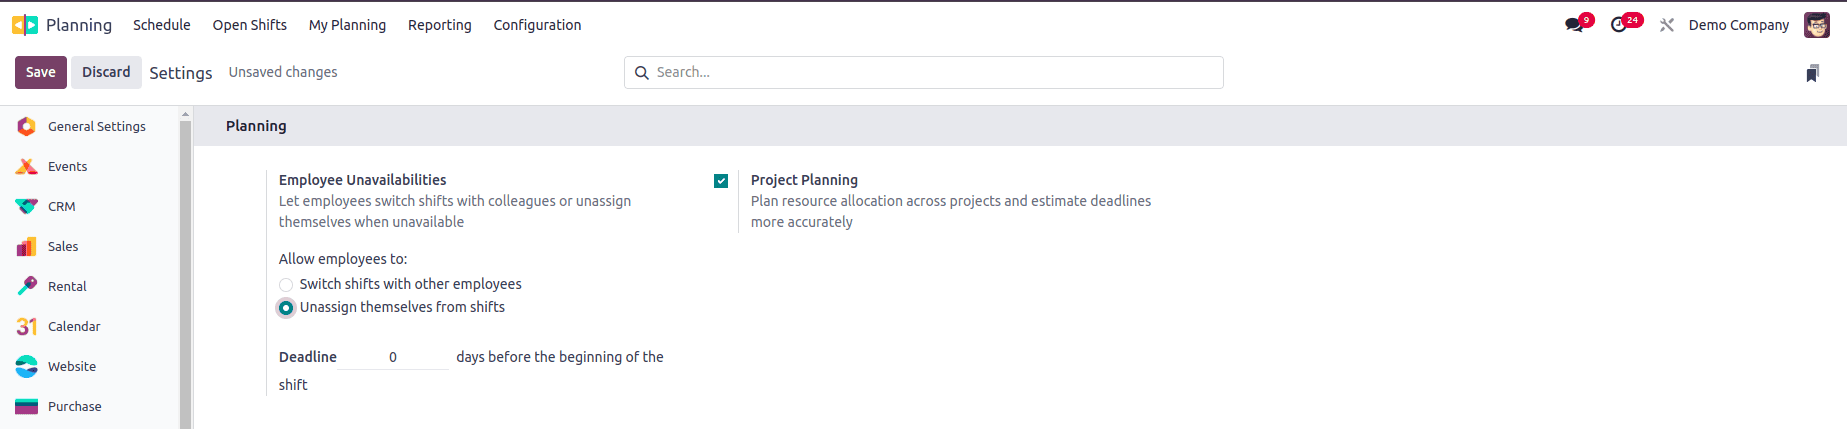
In the Odoo 18 Planning module, employees have the option to switch shifts with others or withdraw from assigned activities. By using this feature, they can unassign themselves from scheduled shifts when necessary. Additionally, administrators can set a deadline for such changes, allowing shift withdrawals only up to the specified date. This ensures flexibility while maintaining control over scheduling adjustments.
Roles
Assigning specific roles to employees helps clarify their responsibilities and expectations within the organization. This allows administrators to efficiently assign tasks based on each employee’s role, ensuring the right person is handling the appropriate work. It also gives employees a clear understanding of their duties while fulfilling that role.
Roles can be configured directly through the Configuration menu in the Planning module. As shown in the figure below, the Roles option is accessible under this menu, allowing users to define and manage role-based assignments effectively. In the list view, the roles are displayed along with their associated Name, Resources, and Services. To create a new role, simply click the New button. This action will add a new entry to the list, where you can enter the role's name in the designated field.

You can assign specific employees to this role through the Resources field, and define the Services they provide while performing this role. Additionally, to make roles more easily identifiable, you can assign distinct colors to each one.
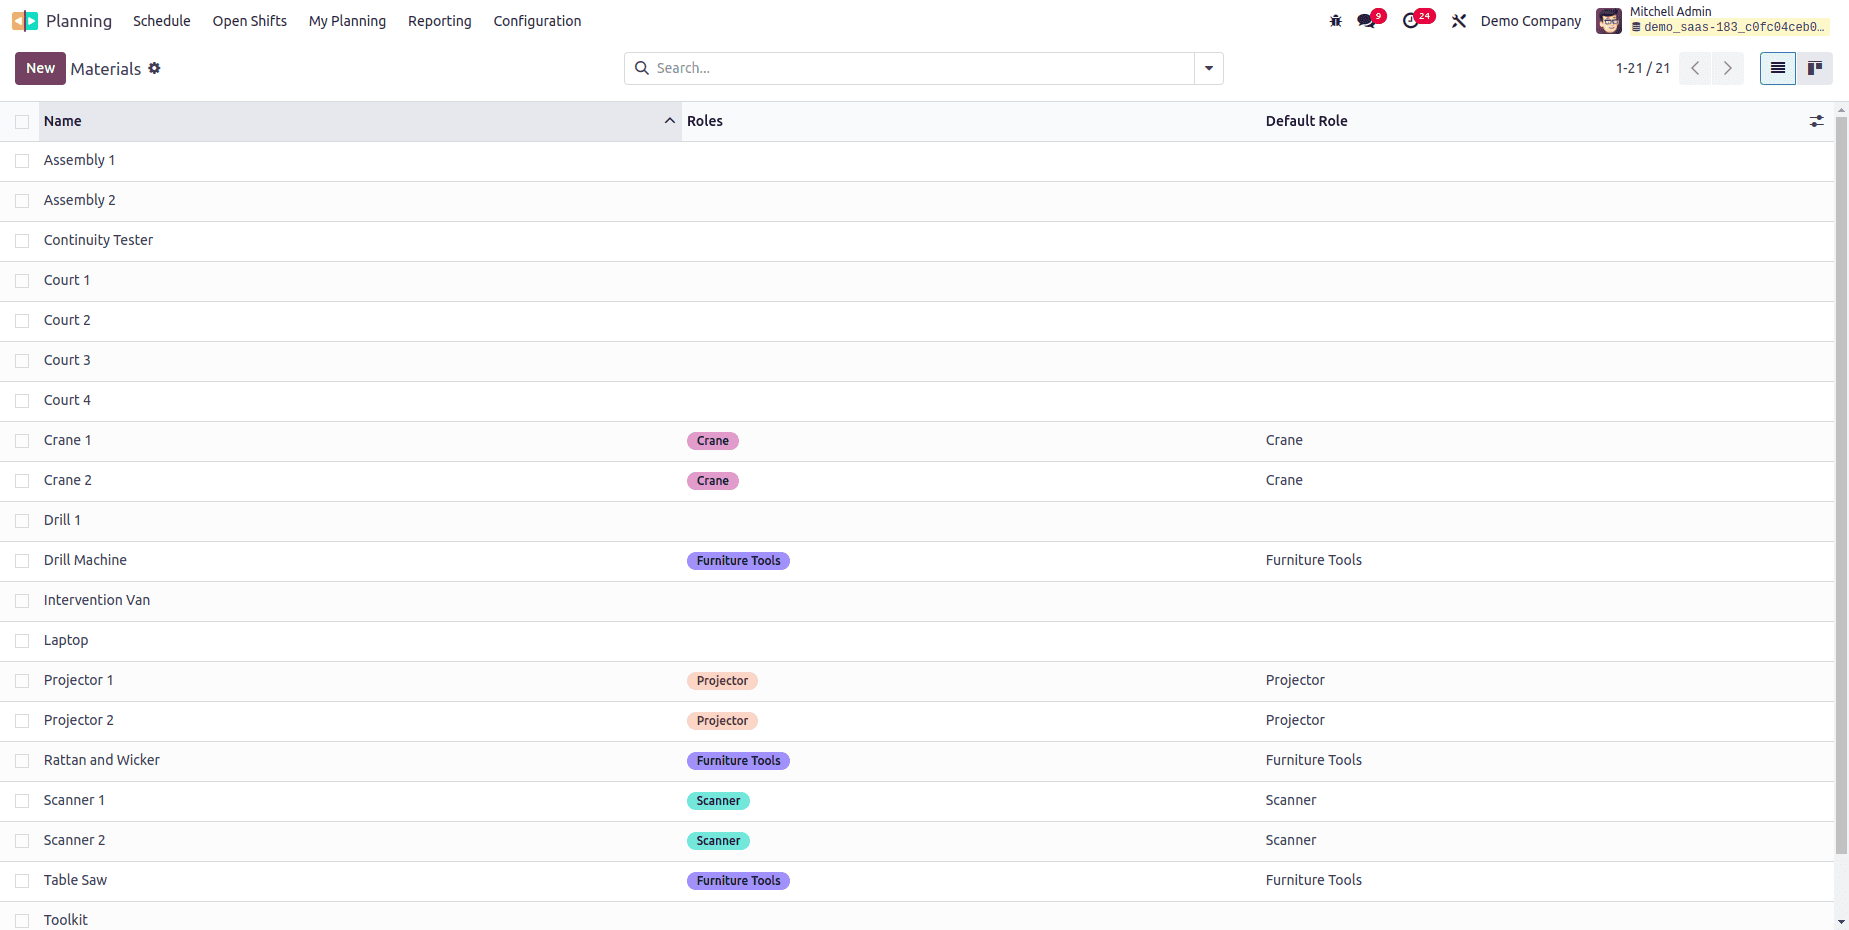
Materials
An option under the Configuration menu for Materials will allow you to define and manage materials required or used during scheduled activities. To configure materials, navigate to the Configuration menu and select Materials.
Here, you'll find a list of existing materials along with details such as Name, Roles, Company, Flexible Hours, and Working Time. To add a new material, click the New button. This will insert a new line in the list where you can enter the material name and fill in the relevant fields for Roles, Company, Flexible Hours, and Working Time as needed.
Shift Templates
The Odoo 18 Planning module allows you to use shift templates when creating new schedules. These templates automatically populate the schedule with predefined details, eliminating the need to enter the same information repeatedly.
You can save a shift as a template during its creation, making it easier to reuse in the future. Alternatively, new templates can be created directly by navigating to the Configuration menu and selecting Shift Templates. This feature helps maintain consistency and speeds up the scheduling process. You can view the existing shift templates along with details such as Planned Hours, Role, and Project.
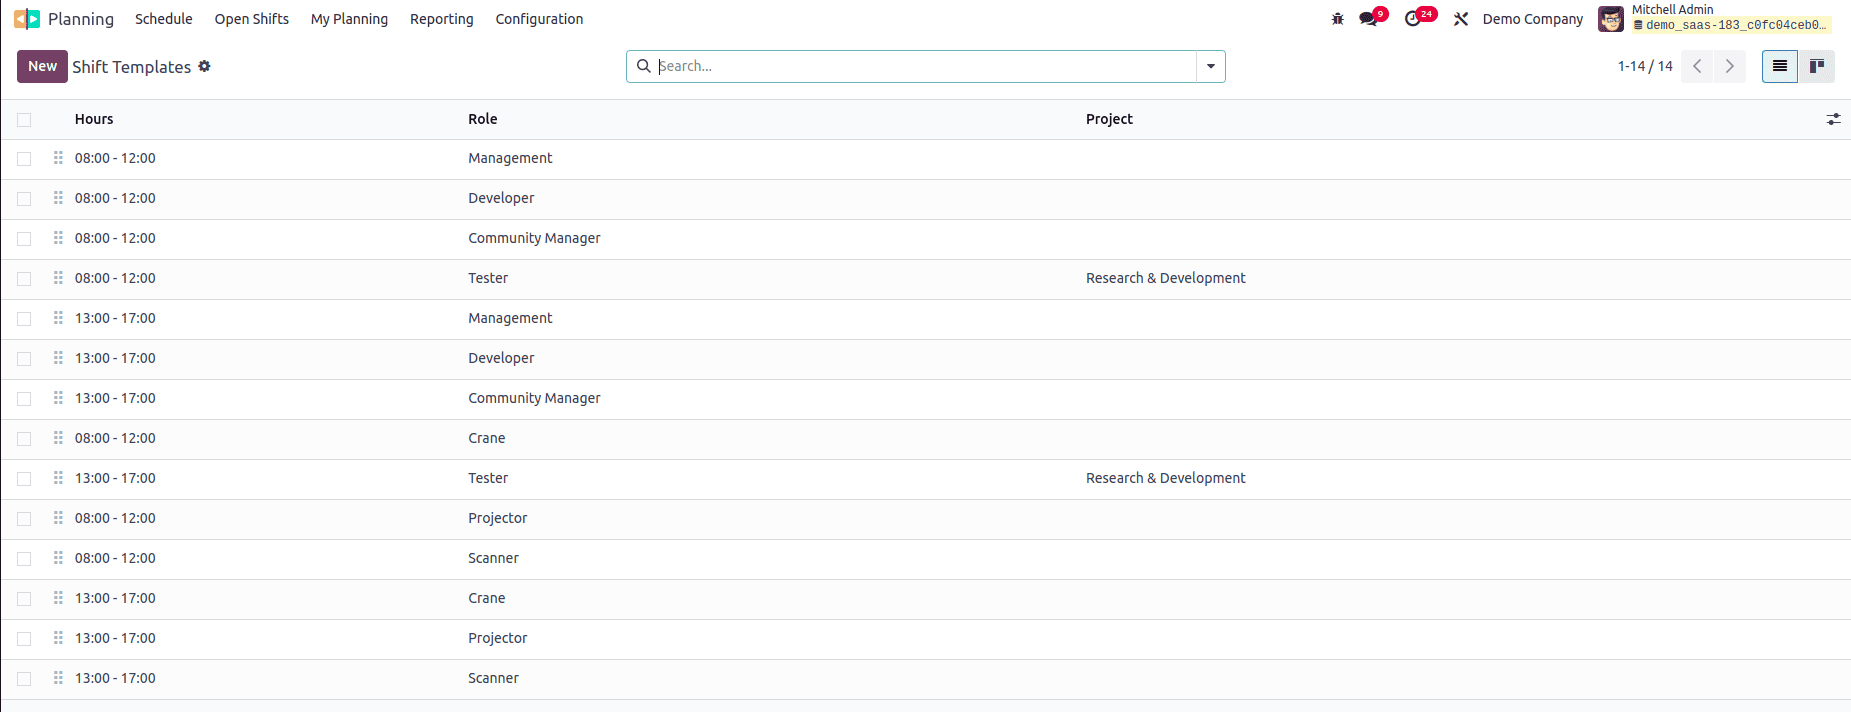
To add a new template, simply click the New button. This opens a form view where you can define the Planned Hours, Duration, assign a Role, and link it to a specific Project.

Reporting
The Planning Analysis feature, found under the Reporting menu, allows you to review and analyze the activities scheduled through the Planning module. The report is presented in a pivot view format, where you can apply various filters and grouping options to generate customized insights. Additionally, the Measures option lets you adjust the metrics displayed in the report for more tailored
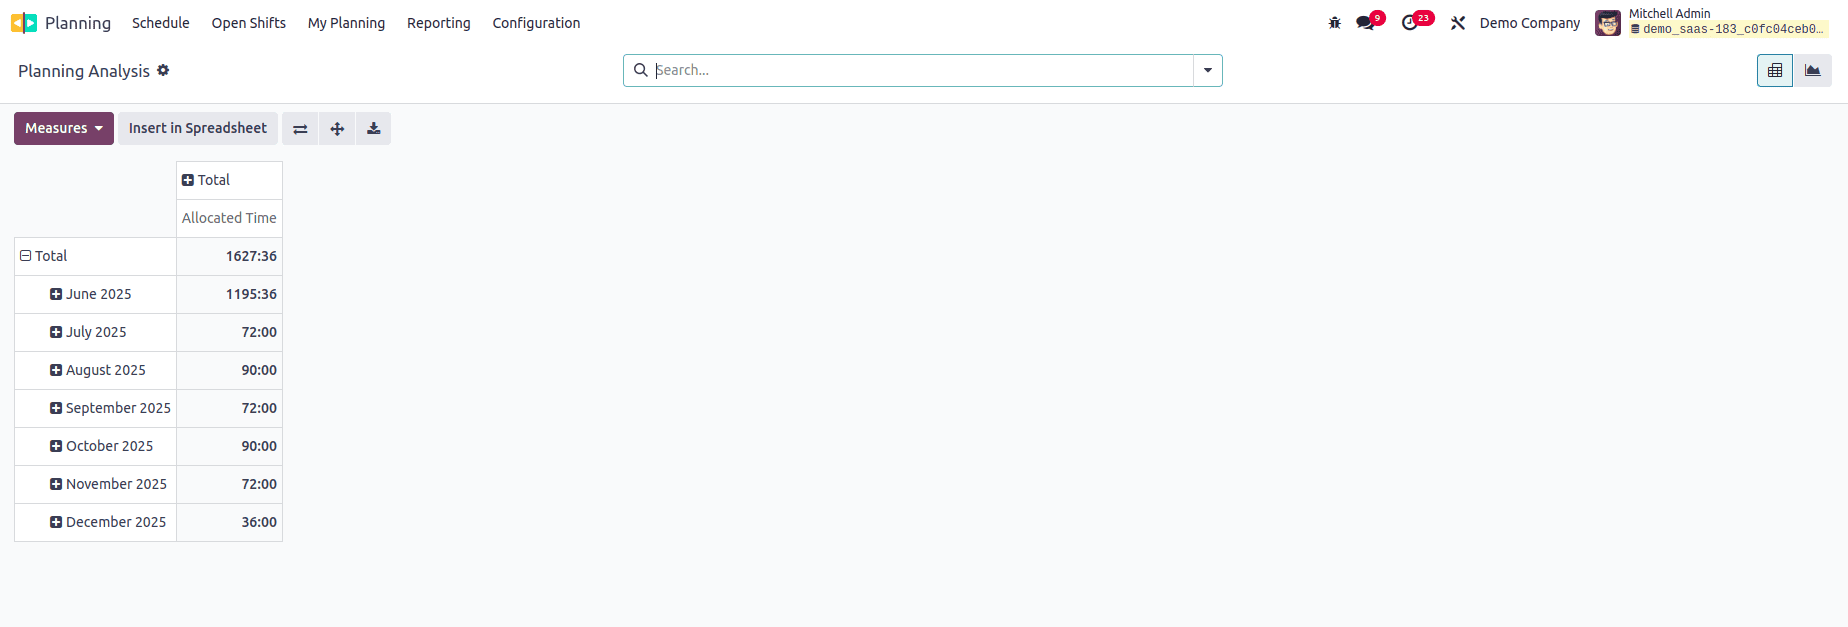
With these tools, the Planning module in Odoo 18 helps streamline and optimize scheduling activities across the organization.
To read more about how to Manage Employee Schedules With Odoo 17 Planning App, refer to our blog How to Manage Employee Schedules With Odoo 17 Planning App.