In the fast-paced customer relationship management (CRM) world, effectively managing your leads is vital for business success. Odoo 17 CRM offers a powerful platform to streamline lead management, helping you convert potential prospects into loyal customers.
In this comprehensive guide, we will walk you through creating a lead in Odoo 17 CRM.
In business, every interaction with a potential customer is like a precious seed. It has the potential to grow into a flourishing relationship and, ultimately, a successful venture. To harness this potential, effective lead management is the key.
In the context of CRM, a lead is born when a prospect directly reaches out of your company. The path from lead to loyal customer is paved with careful nurturing and management. Odoo 17 CRM, a powerful ERP system, stands as a formidable ally in this journey.
The power of Odoo 17 CRM
Odoo 17 CRM simplifies lead management like never before. It is your gateway to creating, tracking, and converting leads into valuable opportunities. But what exactly is a lead within Odoo CRM?
A lead in Odoo 17 CRM is more than just a name; it is a potential partnership waiting to blossom. It is a repository of valuable contact details and insights that your sales team can transform into lifelong customers. With Odoo 17 CRM, you can seamlessly handle leads, quotes, sales teams, and even lead mining requests.
Activating Leads in Odoo 17 CRM
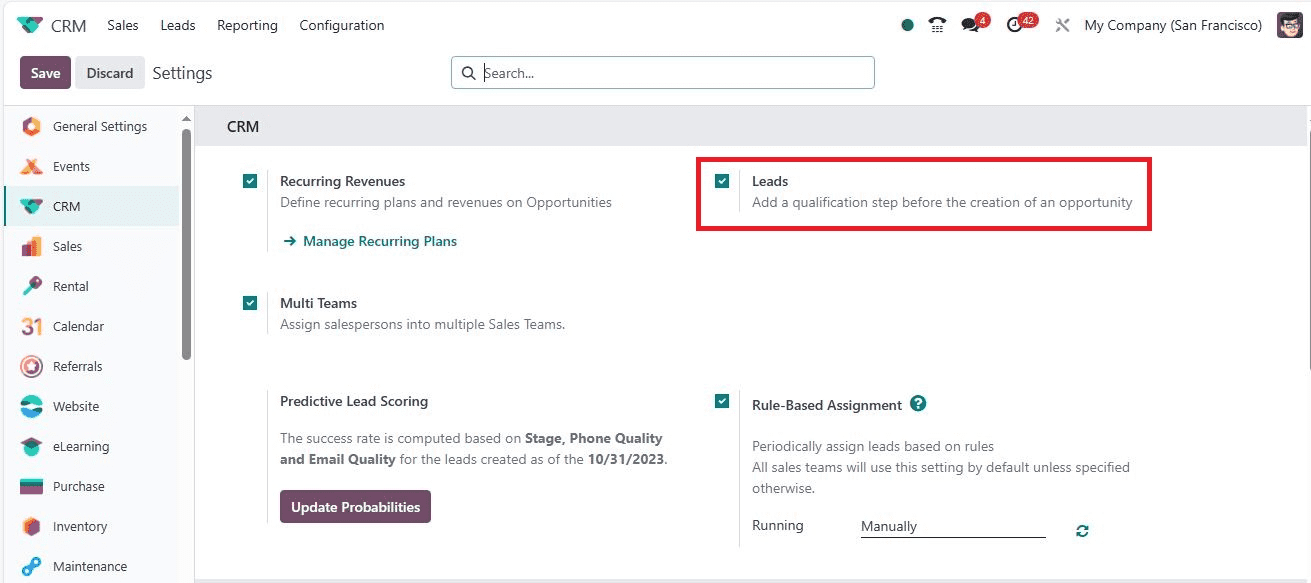
Before you dive into the world of lead management in Odoo 17, you need to activate the leads feature. Odoo makes this process a breeze. Navigate to the Settings window, click on the Configuration tab, and the CRM section reveals itself. Enable the Leads option within the CRM section, and you are one step closer to efficient lead management.
Creating a Lead in Odoo 17 CRM
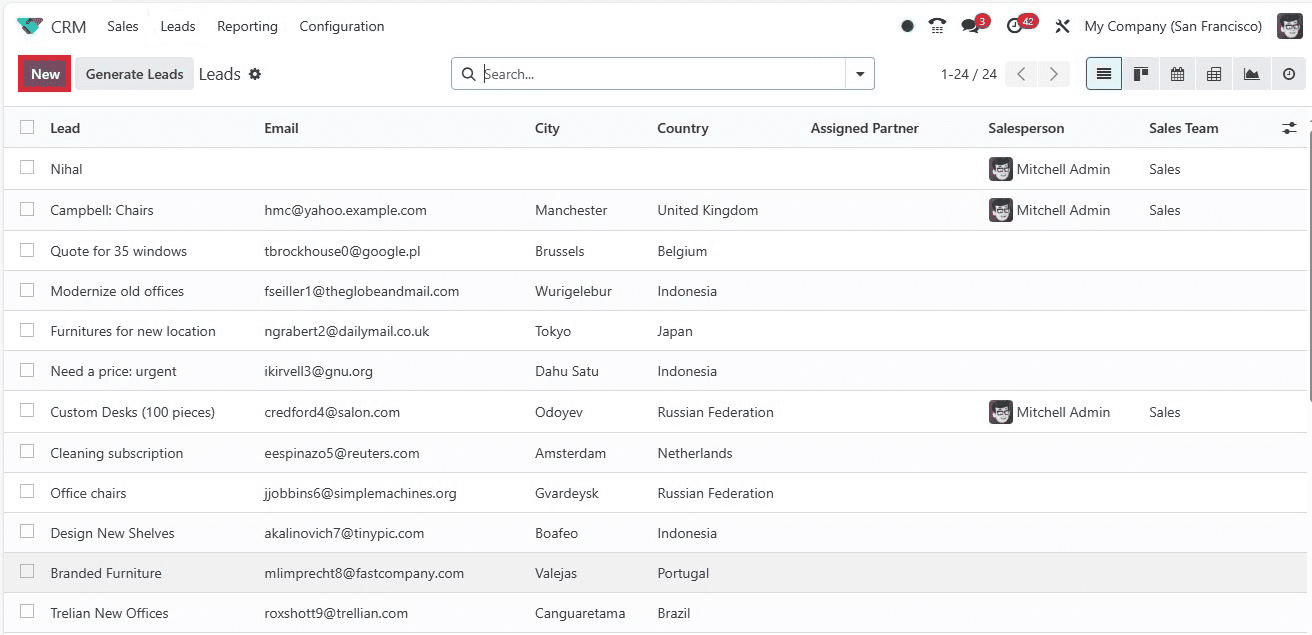
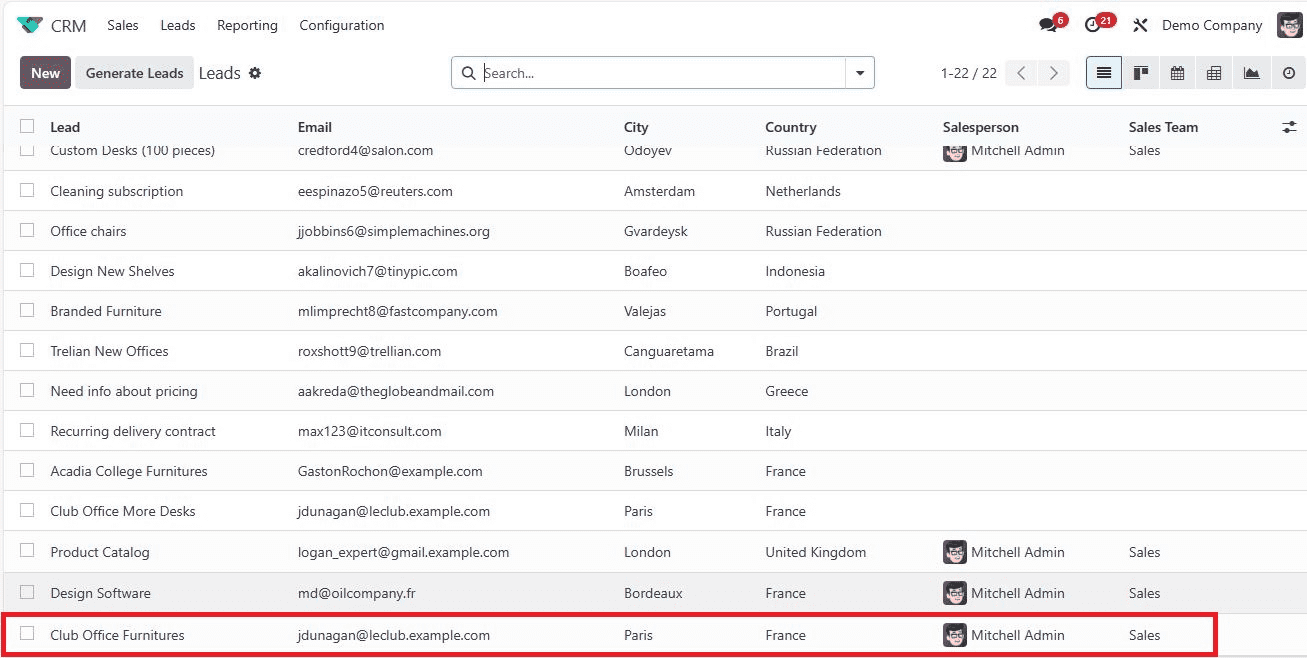
Once the Leads feature is activated, you are all set to create your first lead. You will find the Leads tab; here, you can view a list of all your created leads, complete with details like Company, Email, City, Salesperson, and more.

To add a new lead, simply click the ‘New’ button.
A new window opens, ready for your input.
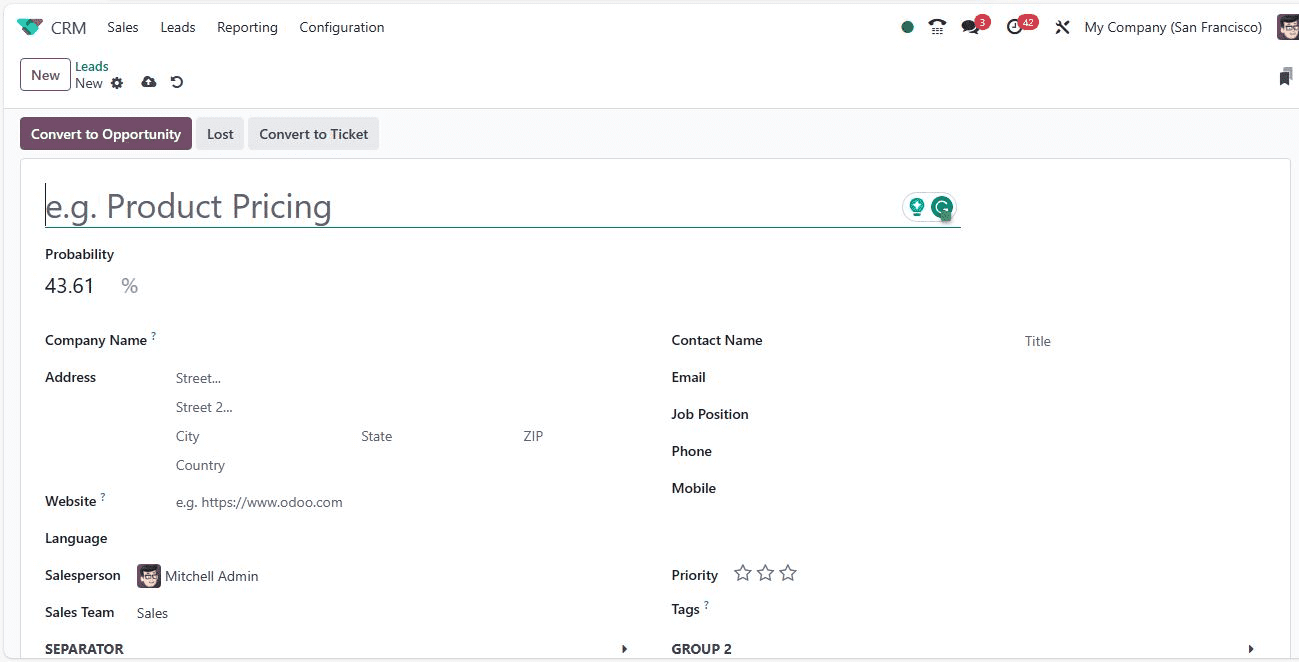
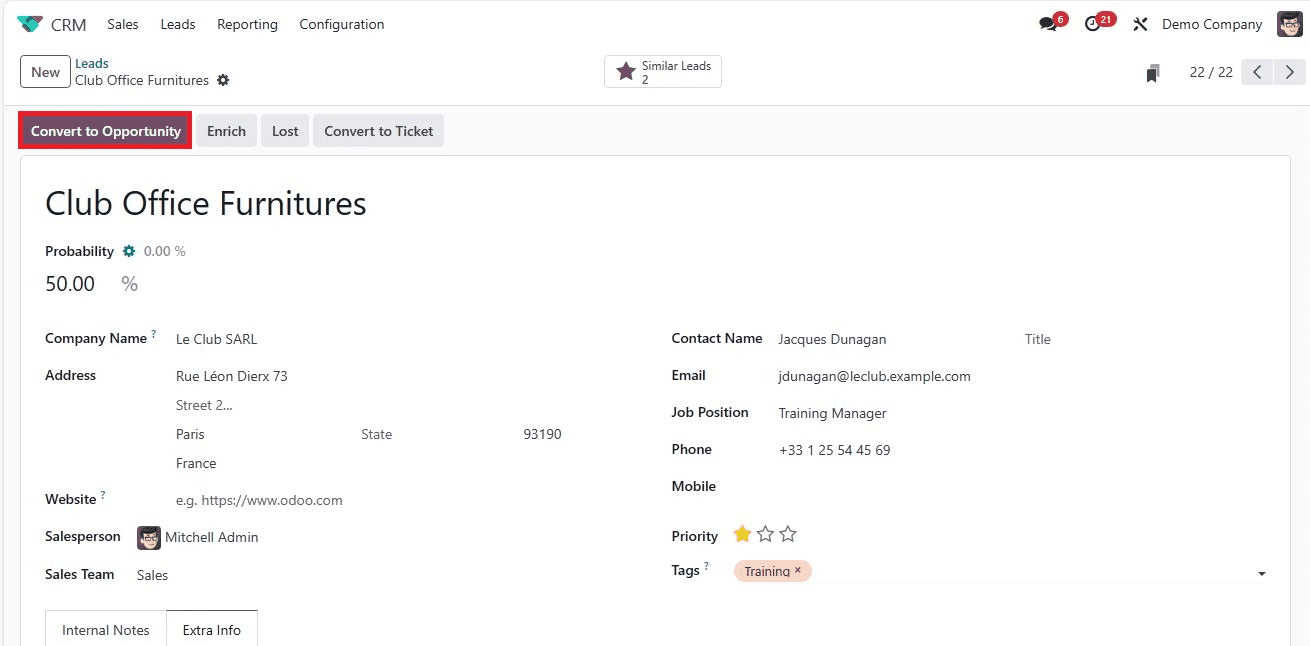
Name your lead - Let’s say ‘Club Office Furniture’ and set the expected success rate in the ‘Probability’ field. Specify the prospective partner company in the Company Name field, and you can fill in their details in the Address field. It is the future partner company that will be created while converting the lead into an opportunity. Further down the form, pick the Website, Language, and the responsible Salesperson. Assign the lead to a specific team using the Sales Team option. Add relevant information about the contact person, including Email, Job position, Phone, and Mobile number.
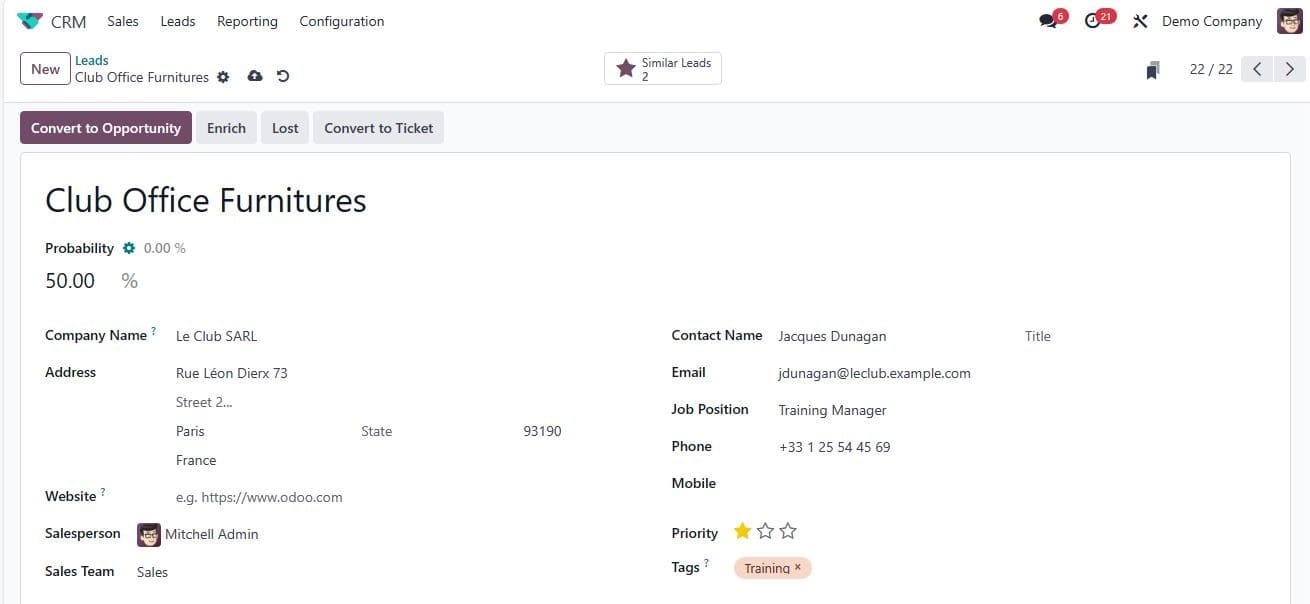
Prioritize your lead by making it ‘Medium, High, or Very High’ using the Priority field. For categorization, use tags to classify your leads effectively. Add tags to match the lead’s characteristics within the Tag field.
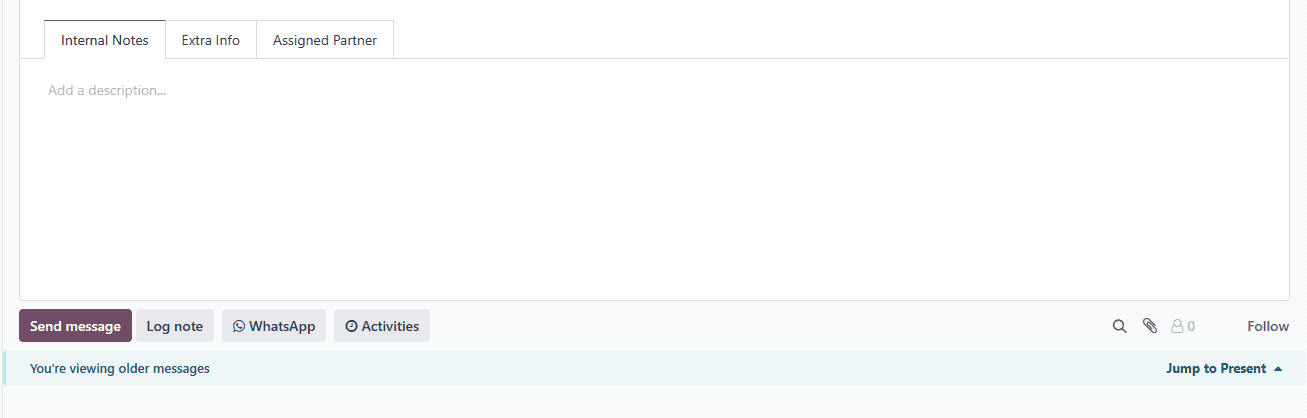
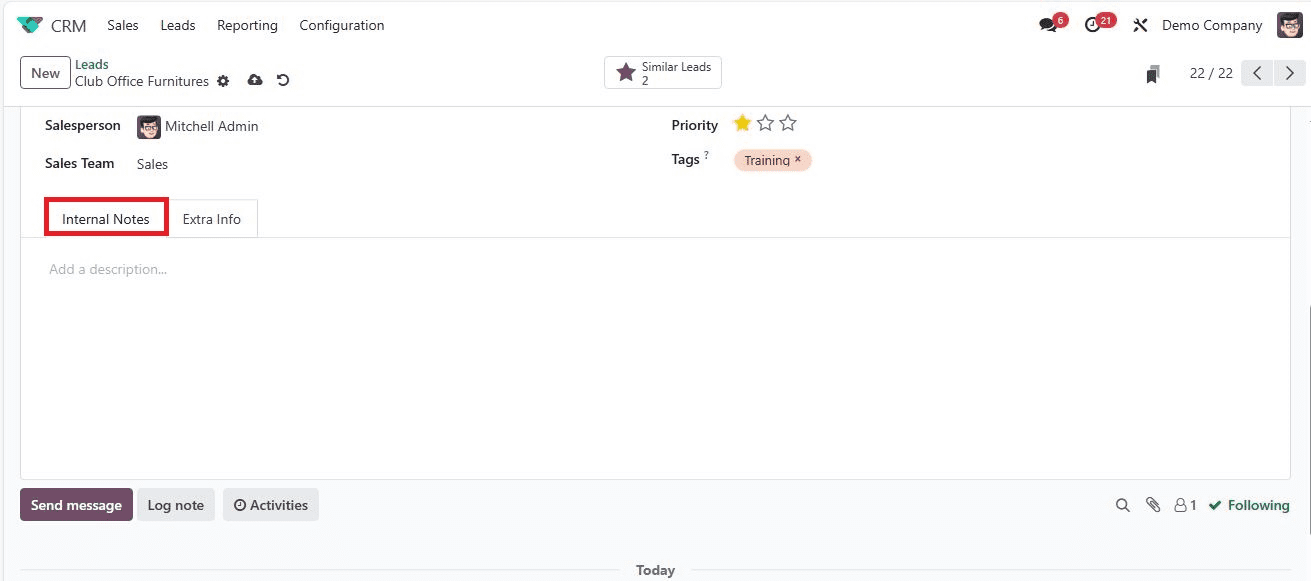
You can infuse additional life into leads by adding detailed descriptions in the Internal Notes tab. These notes serve as a canvas to capture crucial insights and contextual information.
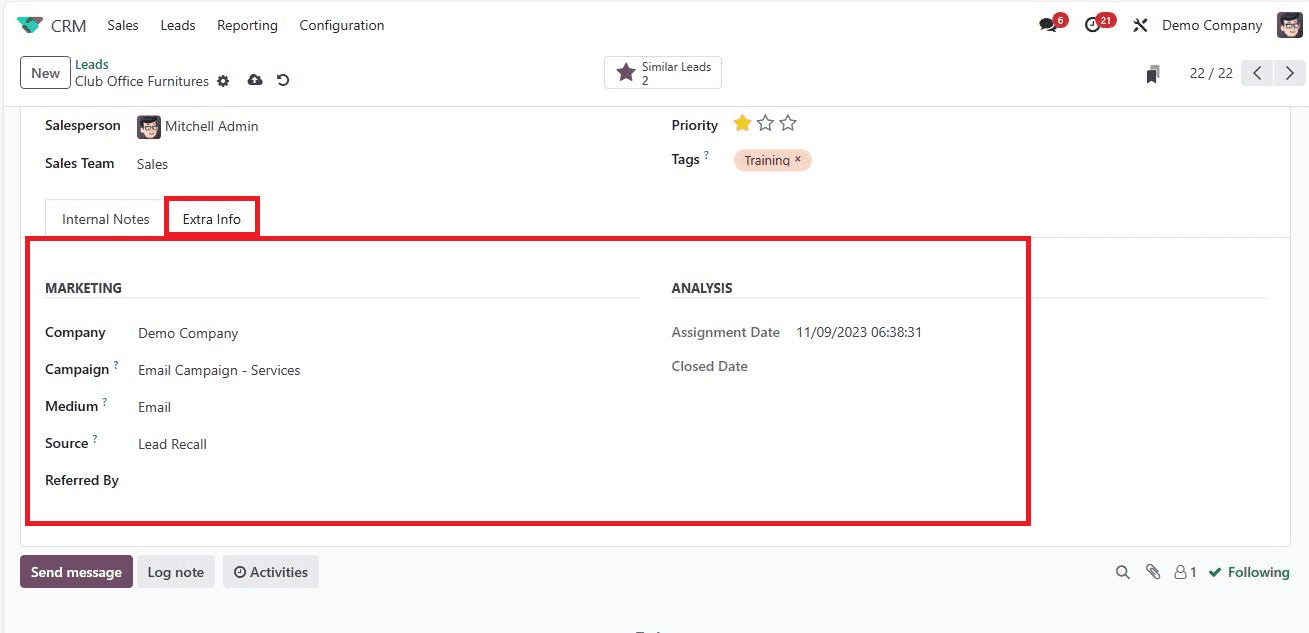
To navigate the marketing realm for leads, head over to the Extra Info tab. Here, you can orchestrate your marketing strategy for the lead. Choose the relevant Company, and from the Campaign field, select the campaign name. Specify the delivery method in the Medium field and identify the source link within the Source option. In addition, add a referrer’s details for marketing purposes in the Referred By field. Also, the ‘Assignment Date field and the Closed Date field in the ANALYSIS section can be allocated.
The security of lead data is of paramount importance. Rest easy, as Odoo 17 CRM automates the process by saving it in the Leads window. Your created lead, let’s say ‘Club Office Furniture,’ now finds its home in the main Leads window.
The Art of Conversions: Turning Leads into Opportunities
In the Odoo 17 CRM landscape, the transformation from a lead to an opportunity is a seamless journey. It starts by selecting your lead in the Leads tab. Within the Leads window, the ‘Convert to Opportunity’ icon awaits.
Upon clicking, a new window unfolds before you.
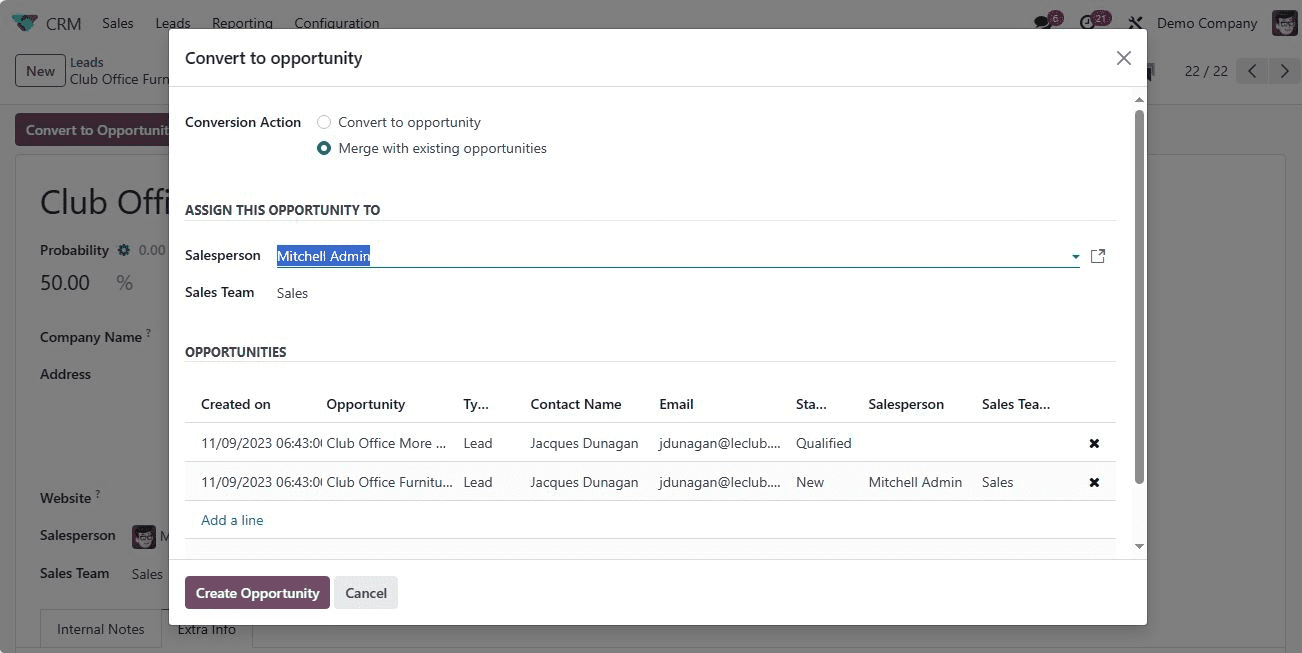
Here, you have choices. Select Convention Action as “Merge with existing Opportunities” or “Convert to Opportunity.”
Assigning the opportunity to a sales team and a dedicated Salesperson is your next task. The canvas is nearly complete. Now, to breathe life into this opportunity, you add customer details if you choose the Conversion Action as ‘Convert to opportunity’.
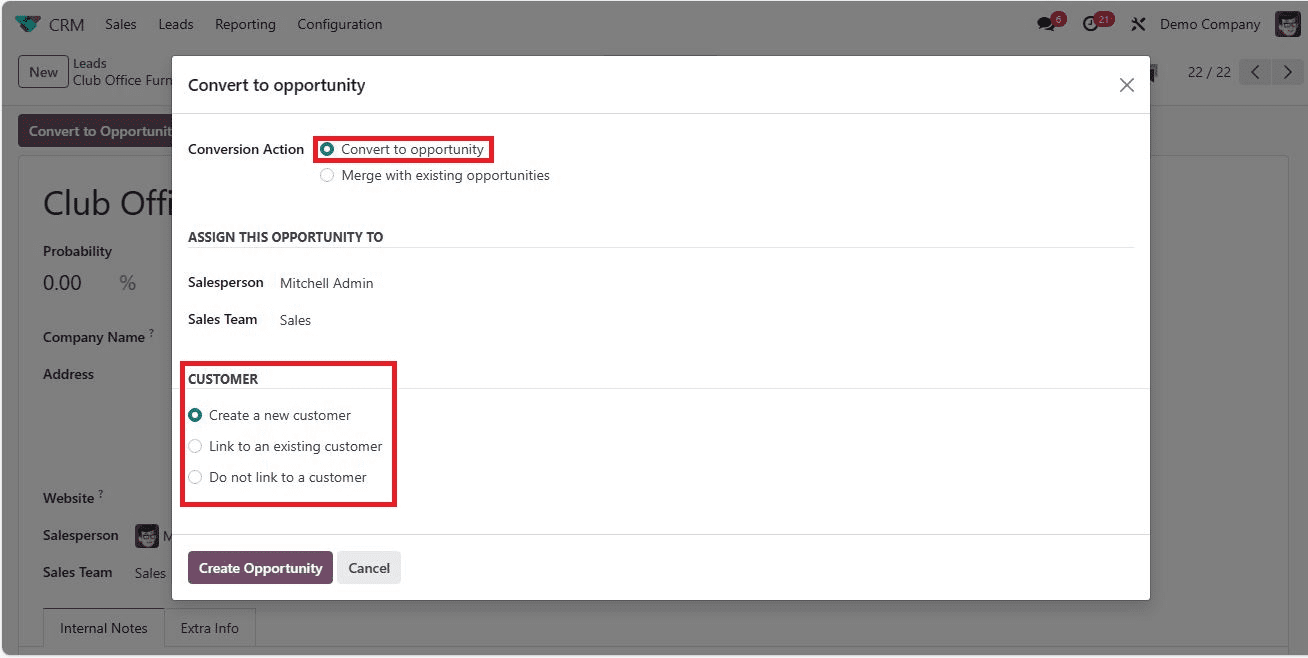
You have three options-“Create a new customer,” “Do not link to a customer,” and “Link to an existing customer.” If you opt for the latter, select “link to an existing customer” and populate the partner's name in the customer field.
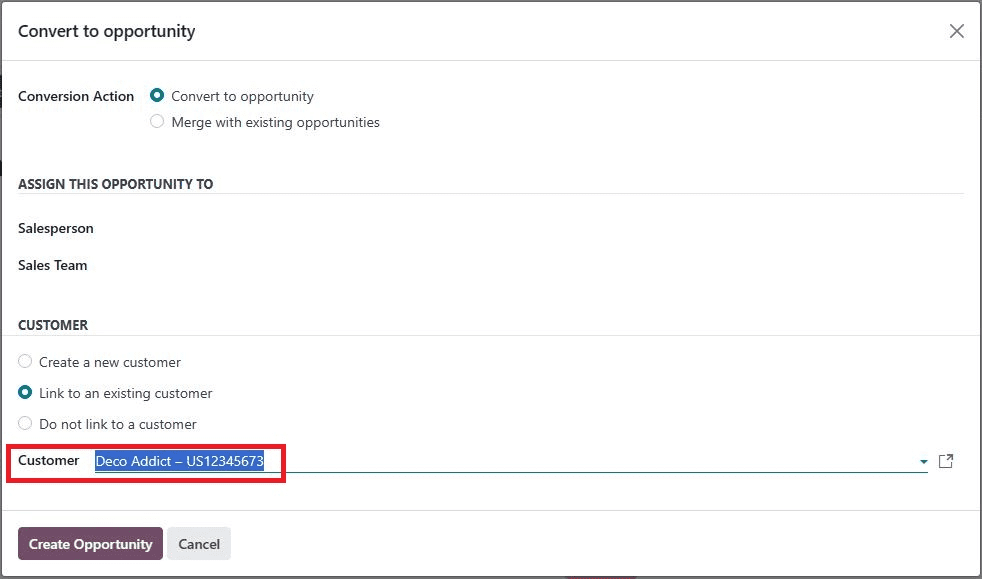
With all the necessary details in place, a simple click on the Create Opportunity icon is the fishing stroke.
In another case, if you select ‘Create a new customer,’ the opportunity will be converted to a new customer with all the details we provided, as shown in the screenshot below.
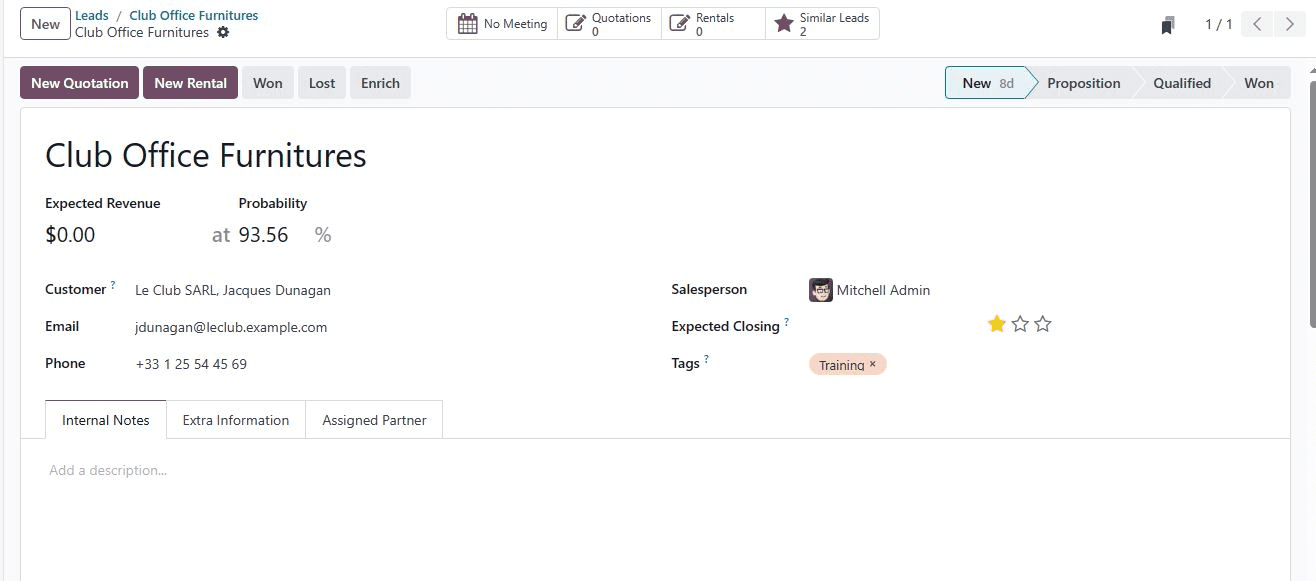
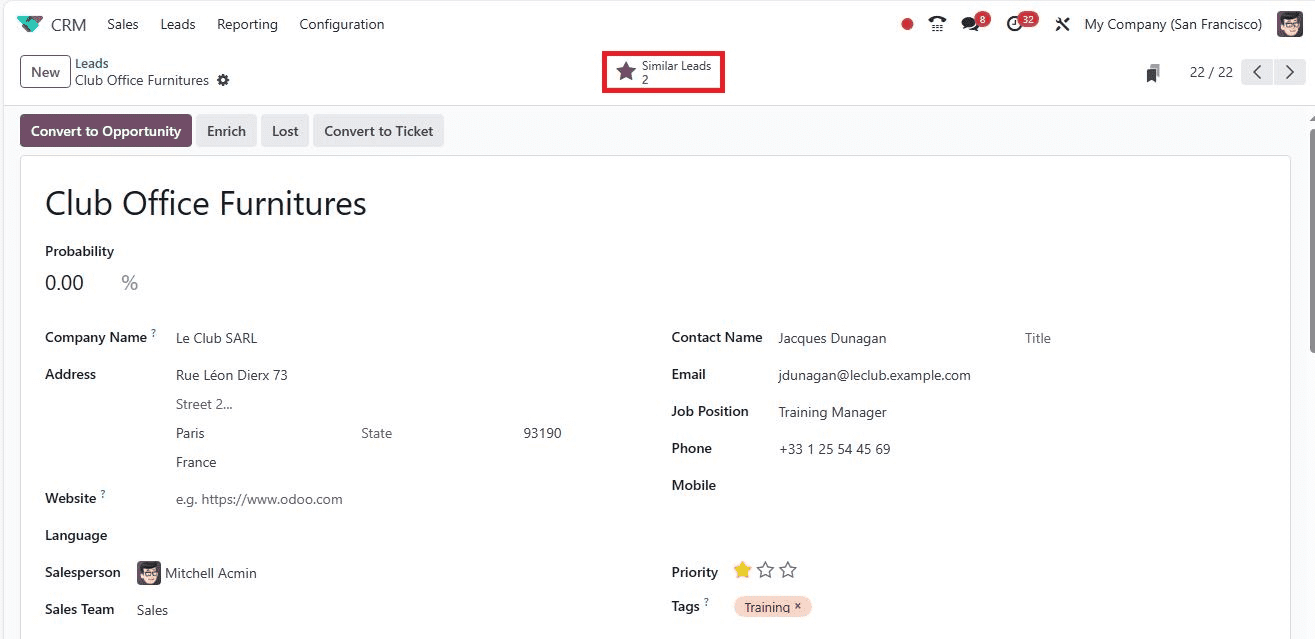
Your lead has gracefully transformed into an opportunity, ready for the next step. If you wish to explore more, the Similar Leads smart buttons in the Lead window provide a gateway to similar opportunities.
Evaluating Leads: The Art of Data Analysis
Odoo 17 CRM offers a powerful reporting feature to access your leads comprehensively. Head to the reporting tab and select the Leads menu. A visual representation unfolds, making data analysis a piece of cake.
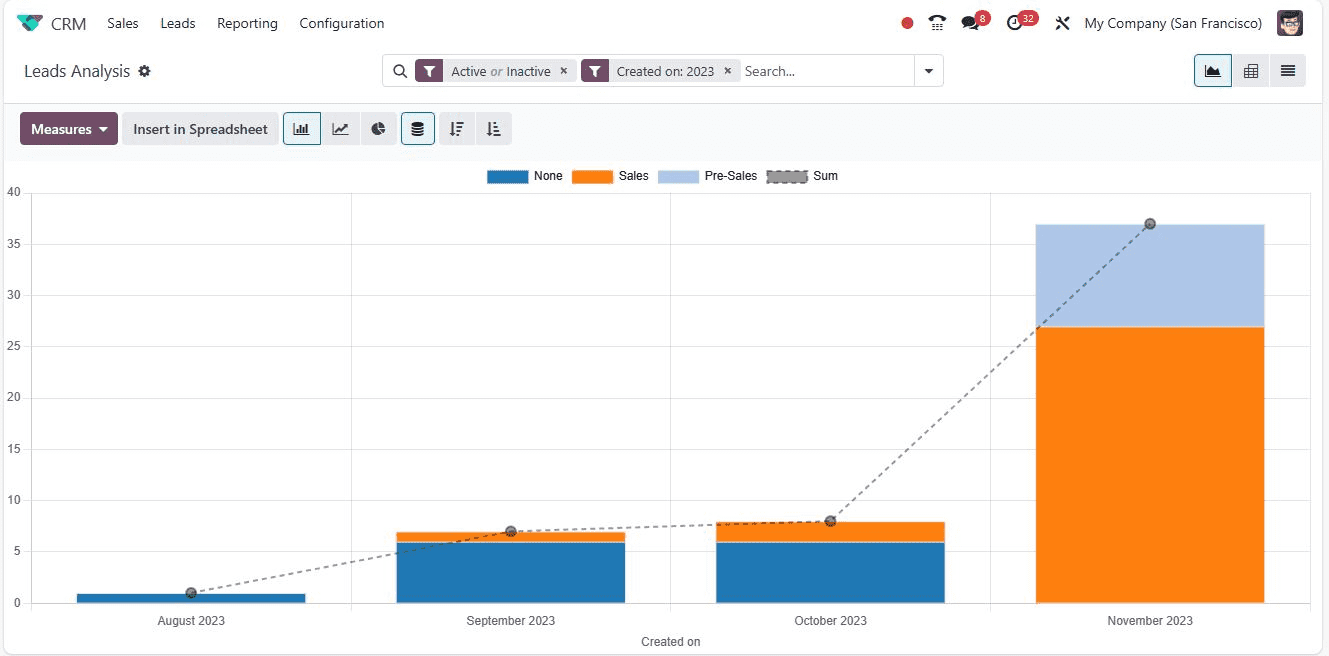
In the graphical format, you can discern the count of each lead separately, whether they belong to sales, pre-sales, or undefined categories. Each category is distinguished by vibrant colors, allowing for quick identification.
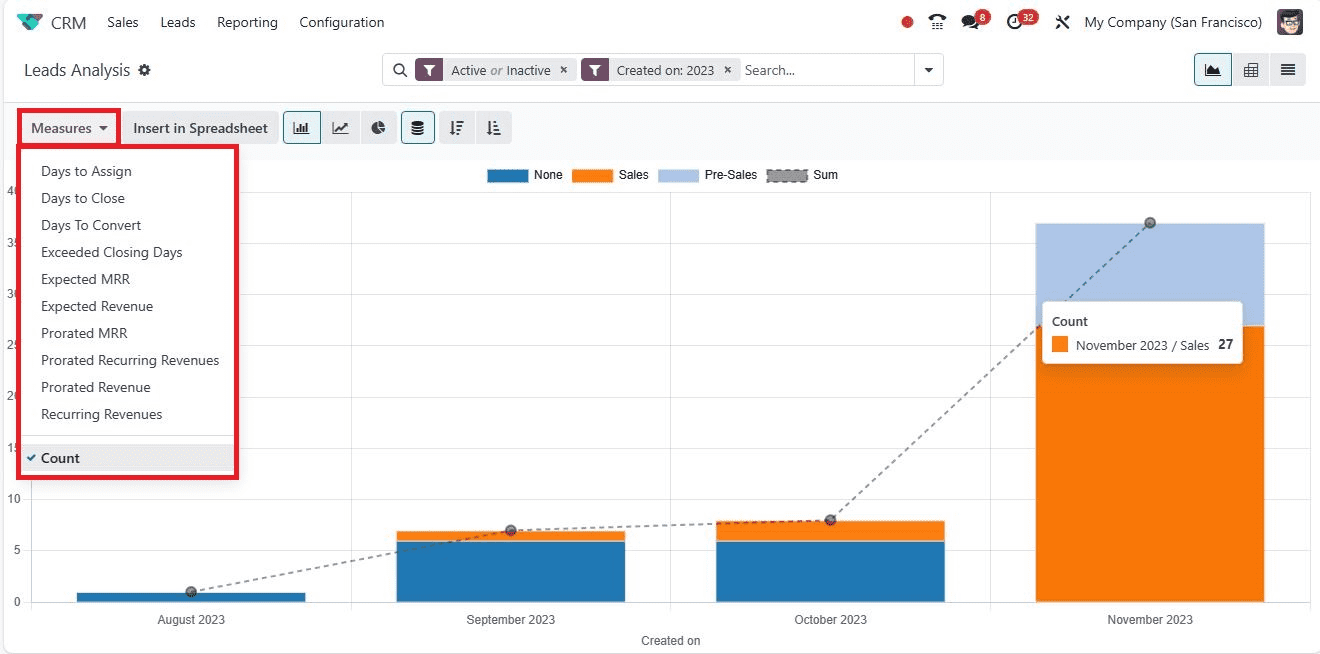
But the true power lies in the Measures icon, where you can apply various metrics to the graph. Whether it’s Days to Assign, Days to Close, “Days to Convert,’’ “Prortated Revenue,” “Expected MRR,” or more, these measures offer invaluable insights for business improvement.
In conclusion, the Odoo 17 CRM module turns lead management into an art form. It provides the tools and the canvas to identify perfect leads, nurture them into potential customers, and evaluate them for continuous improvement. With Odoo 17 CRM, customer relationships flourish and businesses thrive.
To read more about enhance lead generation strategies in Odoo 17 CRM, refer to our blog How to Enhance Lead Generation Strategies in Odoo 17 CRM