Odoo 19 offers various view types to enhance user experience. These views determine how data records are presented and organized, allowing users to filter and arrange information efficiently. Among these, the activity view serves as a powerful tool for overseeing all business processes.
This article focuses on activity views in Odoo 19 and provides a step-by-step guide to implementing a custom activity view.
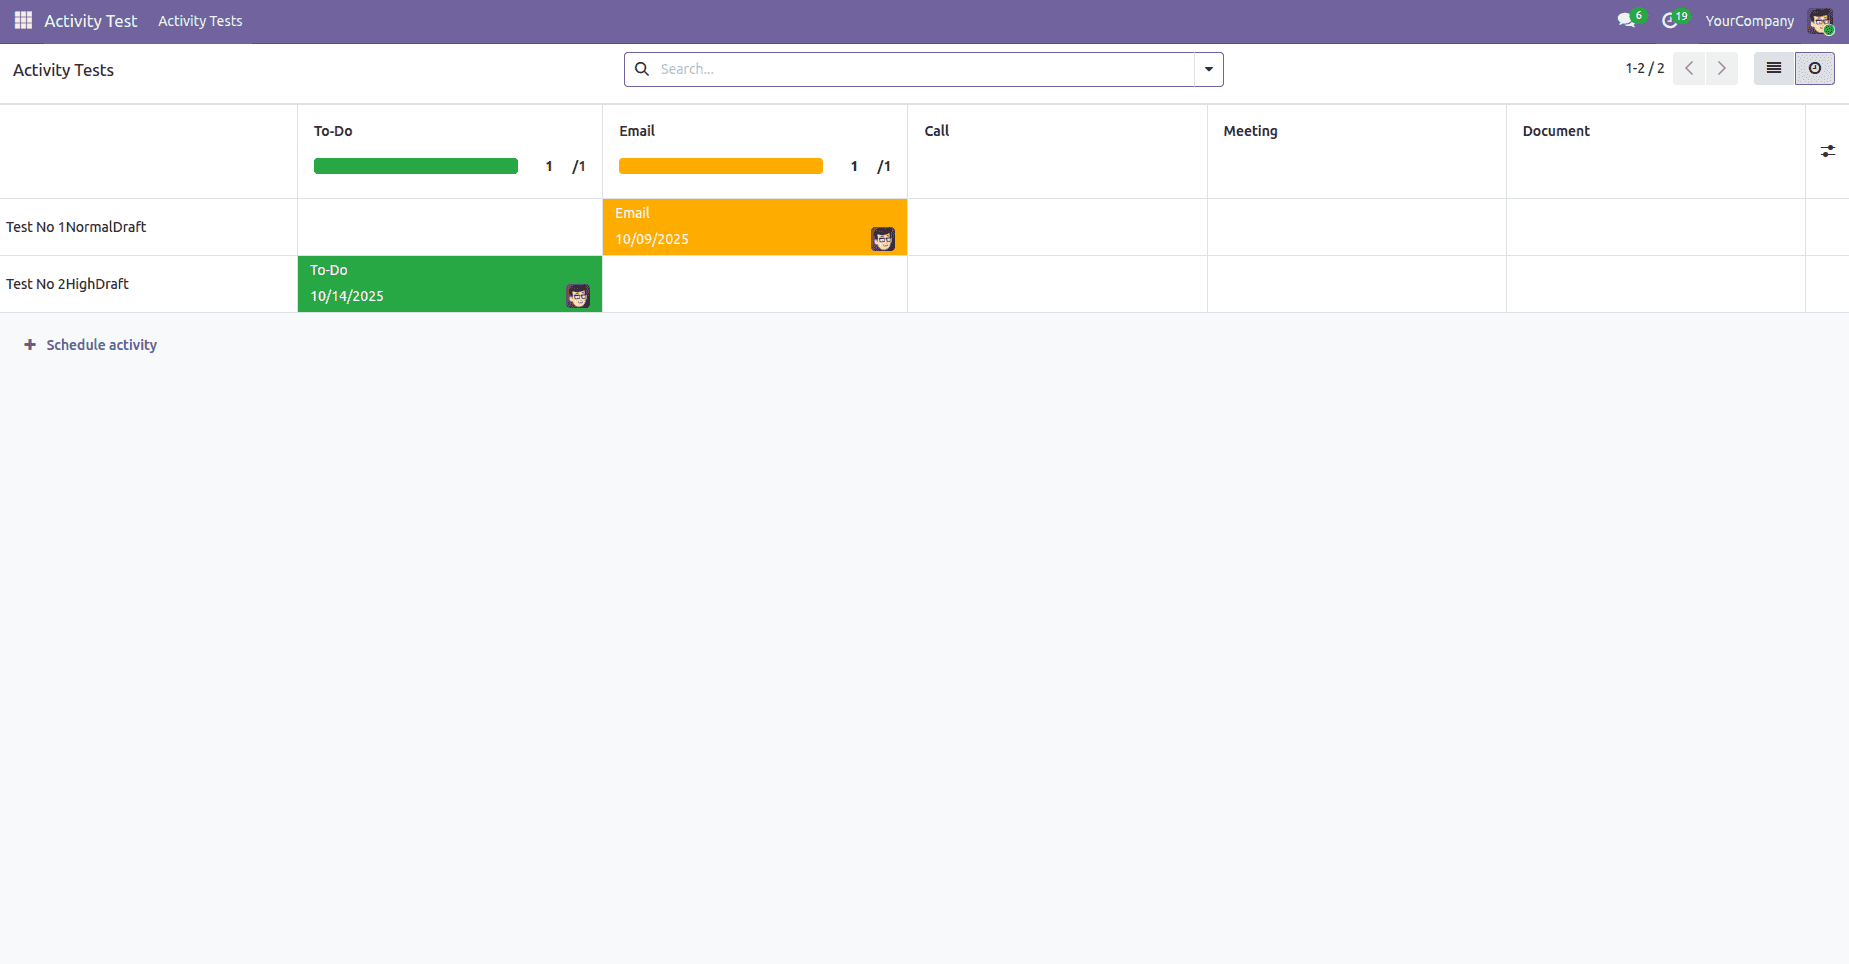
The activity view in Odoo displays all tasks and activities associated with your records in a grid-like format. Records appear as horizontal rows, while activity types are arranged in vertical columns, creating an easy-to-read matrix layout. To create a custom activity view, follow these steps:
Module Structure
activity_test/
+-- __init__.py
+-- __manifest__.py
+-- models/
¦   +-- __init__.py
¦   +-- activity_test.py
+-- views/
¦   +-- activity_test_views.xml
+-- security/
    +-- ir.model.access.csv
Step 1: Configure Module Dependencies
Begin by setting up a new module and configuring its manifest file. Add the 'mail' module as a dependency since it contains the necessary components for activity functionality.
'depends': ['base', 'mail'],
Step 2: Define the Model
Create a new model called activity.test by inheriting from mail.thread and mail.activity.mixin. Since these mixins are part of the mail module, we've included it in our dependencies as demonstrated above:
class ActivityTest(models.Model):
    _name = 'activity.test'
    _inherit = ['mail.thread', 'mail.activity.mixin']
    _description = 'Activity Test Model'

    name = fields.Char(string='Title', required=True, tracking=True)
    description = fields.Text(string='Description', tracking=True)
    priority = fields.Selection([
        ('0', 'Low'),
        ('1', 'Normal'),
        ('2', 'High'),
        ('3', 'Very High')
    ], string='Priority', default='1', tracking=True)
    state = fields.Selection([
        ('draft', 'Draft'),
        ('in_progress', 'In Progress'),
        ('done', 'Done'),
        ('cancelled', 'Cancelled')
    ], string='Status', default='draft', required=True, tracking=True)
Step 3: Create the Activity View
Now let's set up the activity view for the activity.test model. The <activity> tag serves as the root element, and within the templates section, you can specify which fields should be displayed:
<record id="view_activity_test_activity" model="ir.ui.view">
    <field name="name">activity.test.activity</field>
    <field name="model">activity.test</field>
    <field name="arch" type="xml">
        <activity string="Activity Tests">
            <templates>
                <div t-name="activity-box">
                    <div>
                        <field name="name"/>
                        <field name="priority"/>
                        <field name="state"/>
                    </div>
                </div>
            </templates>
        </activity>
    </field>
</record>
Step 4: Define List and Form Views
Let's create the list and form views to enable record creation and modification.
First, here's how to structure the list view:
<record id="view_activity_test_list" model="ir.ui.view">
    <field name="name">activity.test.list</field>
    <field name="model">activity.test</field>
    <field name="arch" type="xml">
        <list string="Activity Tests">
            <field name="name"/>
            <field name="priority"/>
            <field name="state"/>
            <field name="description"/>
        </list>
    </field>
</record>
Next, let's configure the form view:
<record id="view_activity_test_form" model="ir.ui.view">
    <field name="name">activity.test.form</field>
    <field name="model">activity.test</field>
    <field name="arch" type="xml">
        <form string="Activity Test">
            <header>
                <field name="state" widget="statusbar"
                       statusbar_visible="draft,in_progress,done"/>
            </header>
            <sheet>
                <group>
                    <group>
                        <field name="name"/>
                    </group>
                    <group>
                        <field name="priority"/>
                    </group>
                </group>
                <notebook>
                    <page string="Description">
                        <field name="description"/>
                    </page>
                </notebook>
            </sheet>
            <chatter/>
        </form>
    </field>
</record>
Step 5: Configure the Window Action
An action is required to trigger the views when accessing the menu. Here's how to set it up:
<record id="action_activity_test" model="ir.actions.act_window">
    <field name="name">Activity Tests</field>
    <field name="type">ir.actions.act_window</field>
    <field name="res_model">activity.test</field>
    <field name="view_mode">list,form,activity</field>
</record>
Step 6: Add Menu Items
Create menu entries that will appear in the main navigation. Use the following structure:
<menuitem id="menu_activity_test_root" name="Activity Test"/>
<menuitem id="menu_activity_test" name="Activity Tests"
          parent="menu_activity_test_root"
          action="action_activity_test"/>
Step 7: Set Up Access Rights
Finally, configure the security access rules in the CSV file to control user permissions for reading, writing, creating, and deleting records:
id,name,model_id:id,group_id:id,perm_read,perm_write,perm_create,perm_unlink
access_activity_test_user,activity.test.user,model_activity_test,base.group_user,1,1,1,1
Usage
Once the module is installed, the activity view will be available in your Odoo 19 instance.
Conclusion
The activity view in Odoo 19 provides an efficient way to manage business workflows by organizing data in a structured grid format, making it easier for users to track and manage activities associated with their records.
To read more about What are the View Types in Odoo 18, refer to our blog What are the View Types in Odoo 18.