In Odoo, a dashboard refers to a user interface component that provides a summary and visual representation of key information and metrics relevant to a specific user or role within the system. It serves as a centralized hub where users can access and monitor critical data in a consolidated and easily digestible format.
The dashboard in Odoo typically consists of various widgets or modules that display information in the form of charts, graphs, tables, or lists. These widgets are customizable and can be configured to show real-time data from different modules or applications within the Odoo ERP system.
The purpose of a dashboard in Odoo is to provide users with a comprehensive overview of their relevant data and performance indicators at a glance, allowing them to quickly assess the current status of their operations, make informed decisions, and take necessary actions. Dashboards can be personalized and tailored to meet the specific needs of different users or roles within an organization, ensuring that each user has access to the most relevant and meaningful information for their responsibilities.
The client action that renders the dashboard is defined here;
<!--Client action for dashboard-->
<record id="action_dashboard_purchase" model="ir.actions.client">
   <field name="name">Purchase</field>
   <field name="tag">purchase_dashboard</field>
</record>
<menuitem id="menu_purchase_dashboard" name="Dashboard"
         action="action_dashboard_purchase"
         parent="purchase.menu_purchase_root" sequence="-1"/>
Let's define a js file in the path static/src/dashboard/purchase_dashboard.js.
/* @odoo-module */
import { PurchaseCard } from './purchase_card';
import { useBus, useService } from "@web/core/utils/hooks";
import {registry} from '@web/core/registry';
const { Component, useState, onWillStart } = owl;
export class PurchaseDashboard extends Component {
   setup() {
       this.orm = useService("orm");
       onWillStart(async () => {
           await this.loadDashboardData();
       });
   }

   async loadDashboardData() {
       const context = {};
       this.purchase_order_count = await this.orm.call(
           'purchase.order',
           'get_purchase_order_count',
           [],
           {
               context: context
           }
       );
   }
}
registry.category("actions").add("purchase_dashboard", PurchaseDashboard);
PurchaseDashboard.components = { PurchaseCard };
PurchaseDashboard.template = 'purchase_dashboard.PurchaseDashboard';
Also, define another js file in the path static/src/dashboard/purchase_card.js.
/* @odoo-module */
import {registry} from '@web/core/registry';
const { Component } = owl;
export class PurchaseCard extends Component {}
PurchaseCard.template = 'purchase_dashboard.PurchaseCard';
PurchaseCard.props = ['purchase_order_count', 'rfq', 'rfq_sent','to_approve','purchase','done','cancel'];
After defining this client action, next need to create a template in the path static/src/dashboard/purchase_dashboard.xml.
<?xml version="1.0" encoding="UTF-8" ?>
<templates xml:space="preserve">
   <div t-name="purchase_dashboard.PurchaseDashboard" owl="1" class="">
           <PurchaseCard purchase_order_count="purchase_order_count.all_purchase_order"
                           rfq="purchase_order_count.rfq"
                           rfq_sent="purchase_order_count.rfq_sent"
                           to_approve="purchase_order_count.to_approve"
                           purchase="purchase_order_count.purchase"
                           done="purchase_order_count.done"
                           cancel="purchase_order_count.cancel"/>
   </div>
</templates>
Also, define another XML file in the path static/src/dashboard/purchase_card.xml.
<?xml version="1.0" encoding="UTF-8" ?>
<templates xml:space="preserve">
   <div t-name="purchase_dashboard.PurchaseCard" owl="1"
        class="py-3 text-odoo text-center">
       <h1>Dashboard</h1>
       <div>
           <h5>No. of Purchase Orders</h5>
           <table class="table table-hover">
               <thead>
                   <tr>
                       <th>State</th>
                       <th>Count</th>
                   </tr>
               </thead>
               <tbody>
                   <tr>
                       <td>RFQ</td>
                       <td><t t-esc="props.rfq"/></td>
                   </tr>
                   <tr>
                       <td>RFQ Sent</td>
                       <td><t t-esc="props.rfq_sent"/></td>
                   </tr>
                   <tr>
                       <td>To Approve</td>
                       <td><t t-esc="props.to_approve"/></td>
                   </tr>
                   <tr>
                       <td>Purchase</td>
                       <td><t t-esc="props.purchase"/></td>
                   </tr>
                   <tr>
                       <td>Done</td>
                       <td><t t-esc="props.done"/></td>
                   </tr>
                   <tr>
                       <td>Cancel</td>
                       <td><t t-esc="props.cancel"/></td>
                   </tr>
                   <tr>
                       <td>Total</td>
                       <td><t t-esc="props.purchase_order_count"/></td>
                   </tr>
               </tbody>
           </table>
       </div>
   </div>
</templates>
From model ‘purchase. order’ using the function get_purchase_order_count(), data is fetched from the backend.
Its Python code will be like this;
class PurchaseOrder(models.Model):
   _inherit = 'purchase.order'
   @api.model
   def get_purchase_order_count(self):
       purchase_order_count = {
           'all_purchase_order': len(self.env['purchase.order'].search([])),
           'rfq': len(self.env['purchase.order'].search([("state", "=", "draft")])),
           'rfq_sent': len(self.env['purchase.order'].search([("state", "=", "sent")])),
           'to_approve': len(self.env['purchase.order'].search([("state", "=", "to approve")])),
           'purchase': len(self.env['purchase.order'].search([("state", "=", "purchase")])),
           'done': len(self.env['purchase.order'].search([("state", "=", "done")])),
           'cancel': len(self.env['purchase.order'].search([("state", "=", "cancel")])),
       }
       return purchase_order_count
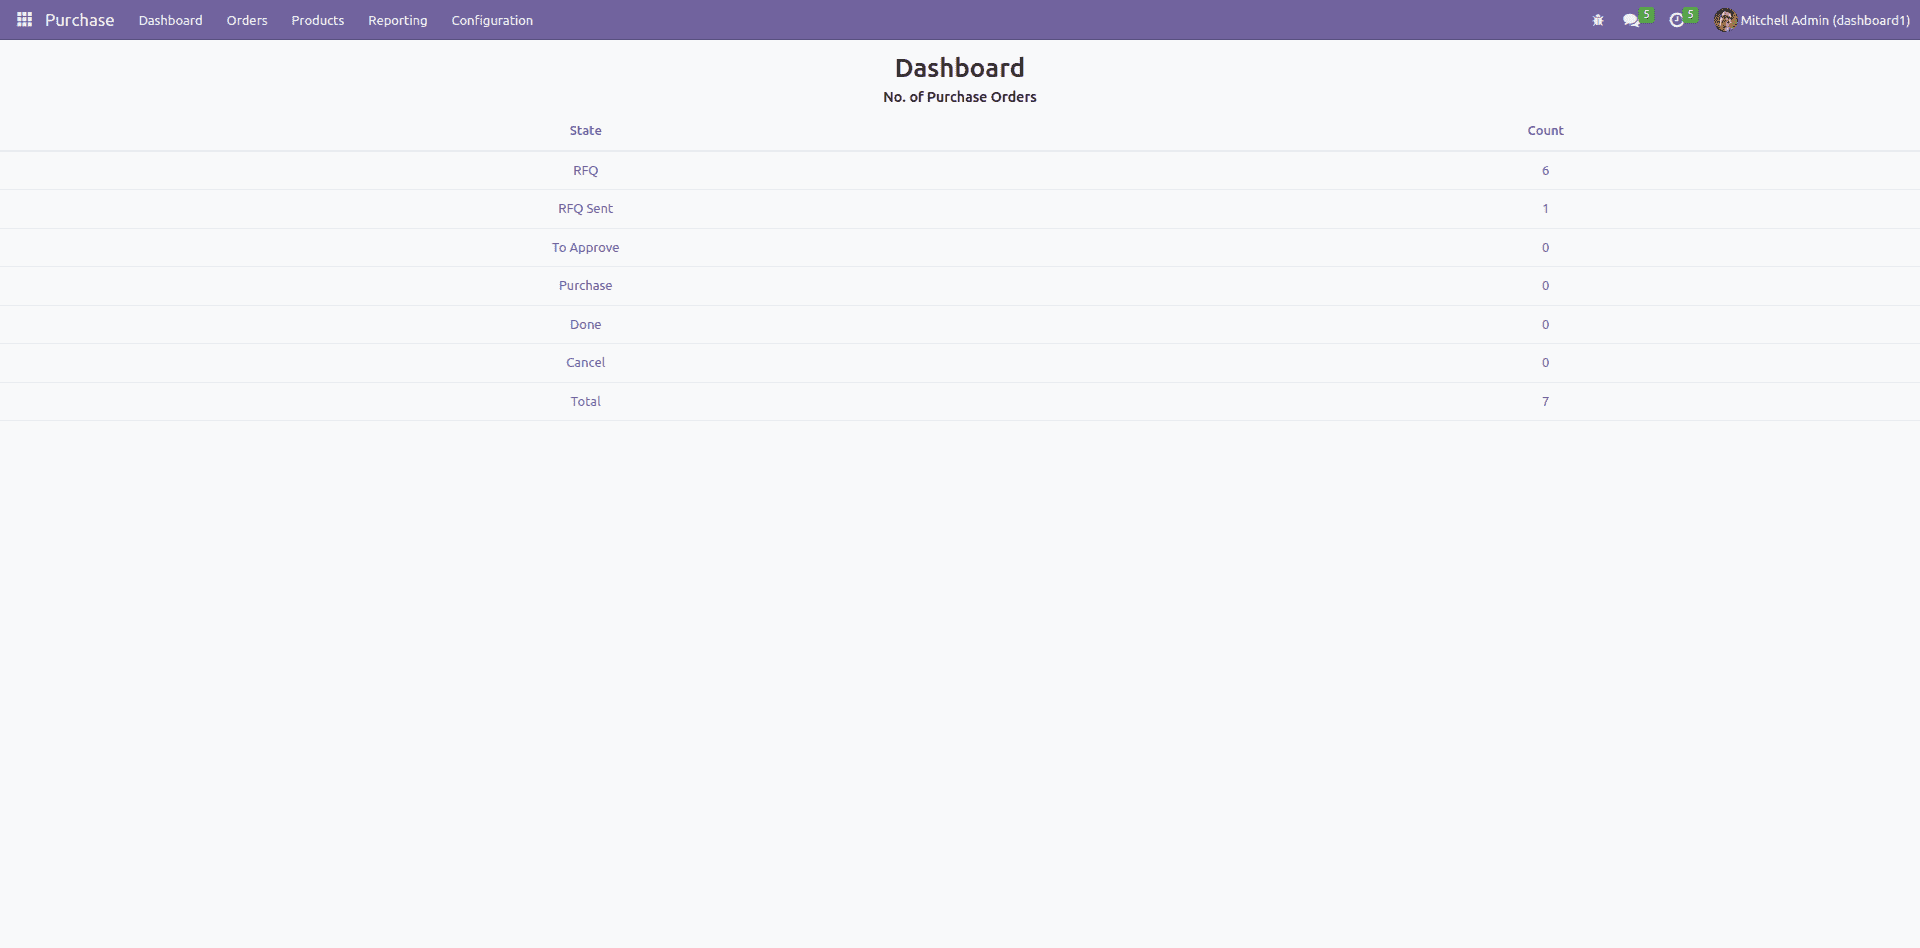
Once all the files are loaded, the output will be like this.