The inventory word "cross-docking" refers to a company's goods movement. When it comes to moving or transferring products for immediate customers, the cross-docking functionality is useful. To put it simply, a product is required to be given to customers instantly upon demand, so there is no need for it to be retained after purchase or production. A designated lotting region within the warehouse or business facility has been assigned in this inventory operating process. These grounds are used for all operations, and for convenience, the location is near the truckload area. Additional elements of the cross-docking methodology's operation include the fact that products operating in this way are dispatched out for delivery quickly rather than being added to the inventory.
The shipping sector exemplifies the successful application of cross-docking terminology in a business process. In some parts of the process, cranes are used to load the cargo ships' containers straight onto trucks while the ships are docked. These containers are transported straight to clients from the point of purchase rather than being added to the inventory.
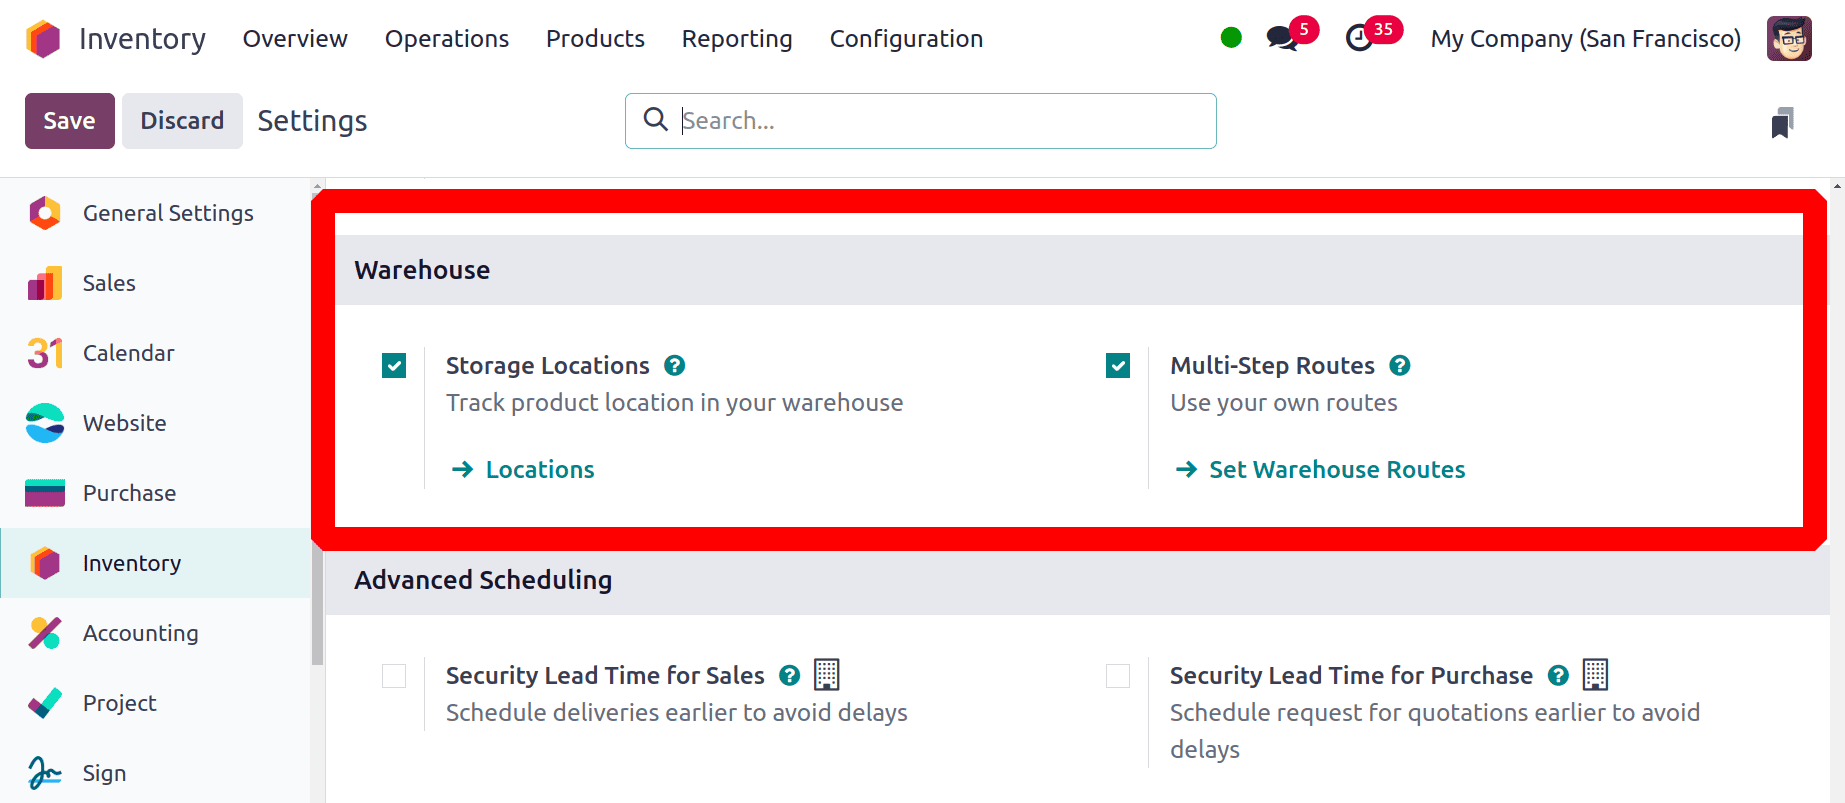
With Odoo 18, it is possible to efficiently perform the cross-docking feature of a business inventory. Let's examine the process on an example Odoo platform to better understand how it operates. First, the user should activate the Multi-step Routes that are accessible through the inventory module's Settings menu. Scroll down to the warehouse menu in the settings menu, then choose the multi-step routes icon to activate the feature.
: Configuration > Settings > Multi-steps Routes > Save
To enable the cross-docking feature, the user should save the settings menu and return to the company's warehouse to adjust a few more parameters. If the company has more than one warehouse, the warehouse menu chosen from the inventory module's configuration window chooses the appropriate warehouse.
As seen in the picture below, the Shipments modifies the input and output shipment parameters. The Incoming and Outgoing Shipments should be in 2 steps.
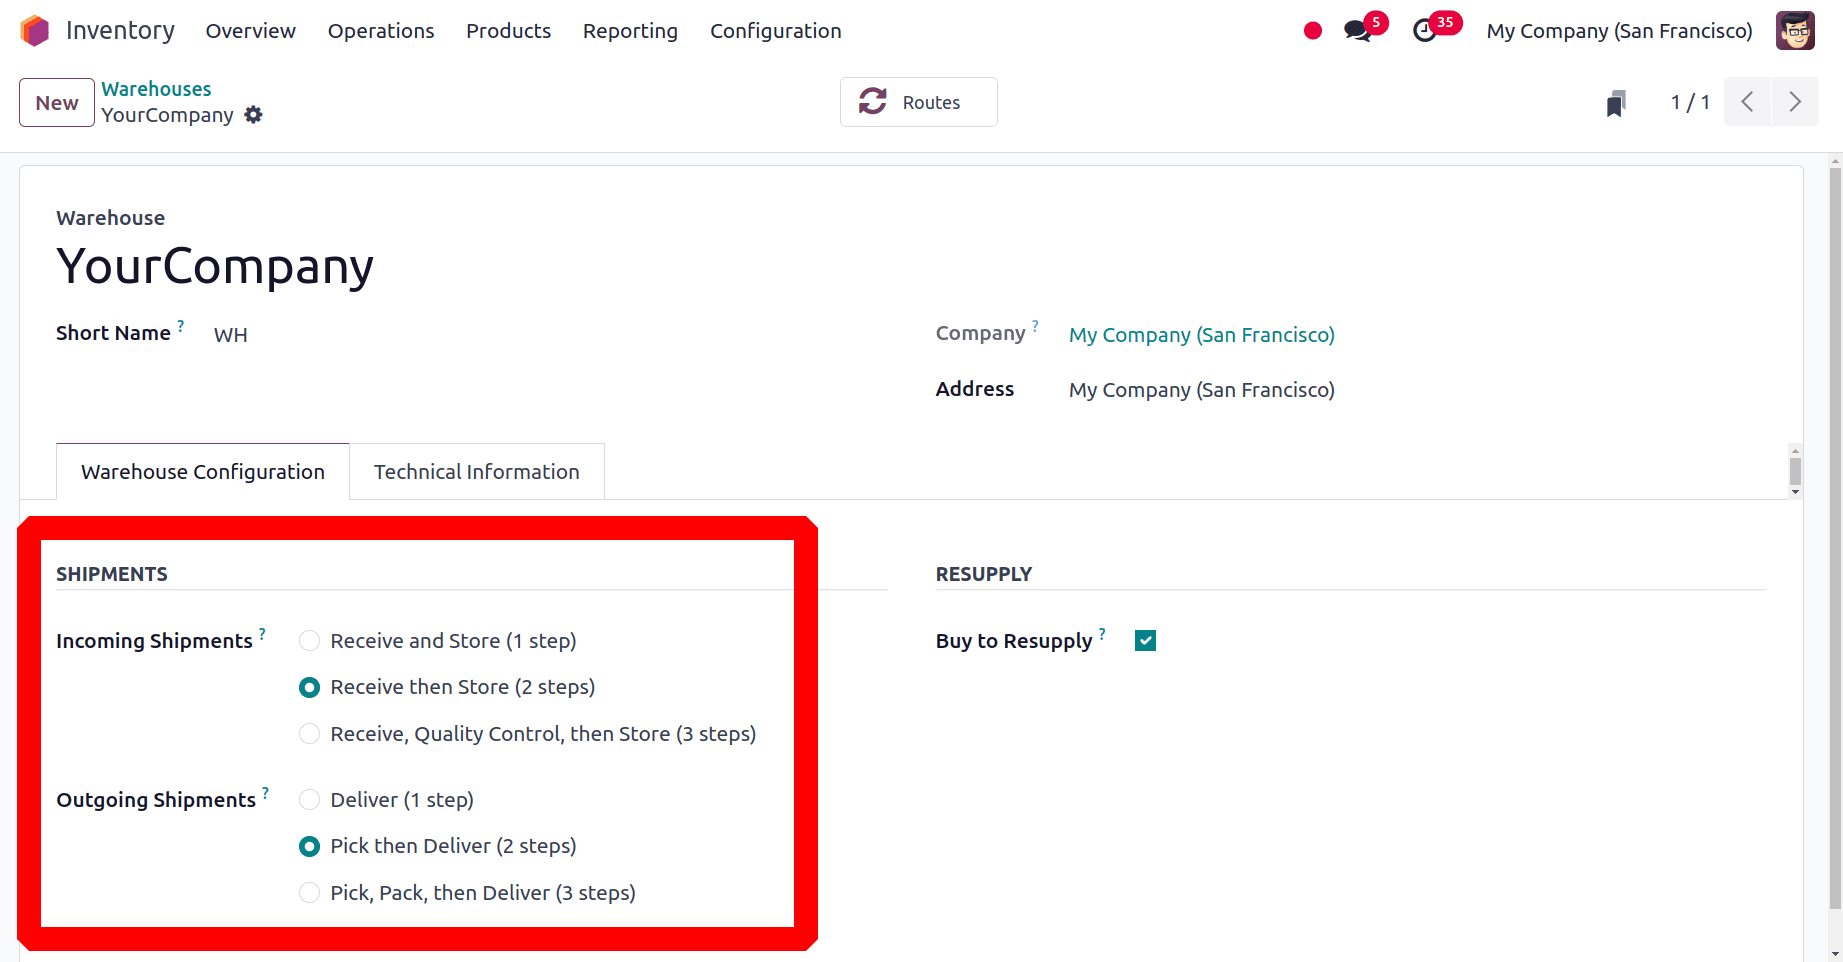
Note: Up to Version 18.1, a cross-docking route has already been set up. However, starting with version 18.2, users must design a new cross-docking path.
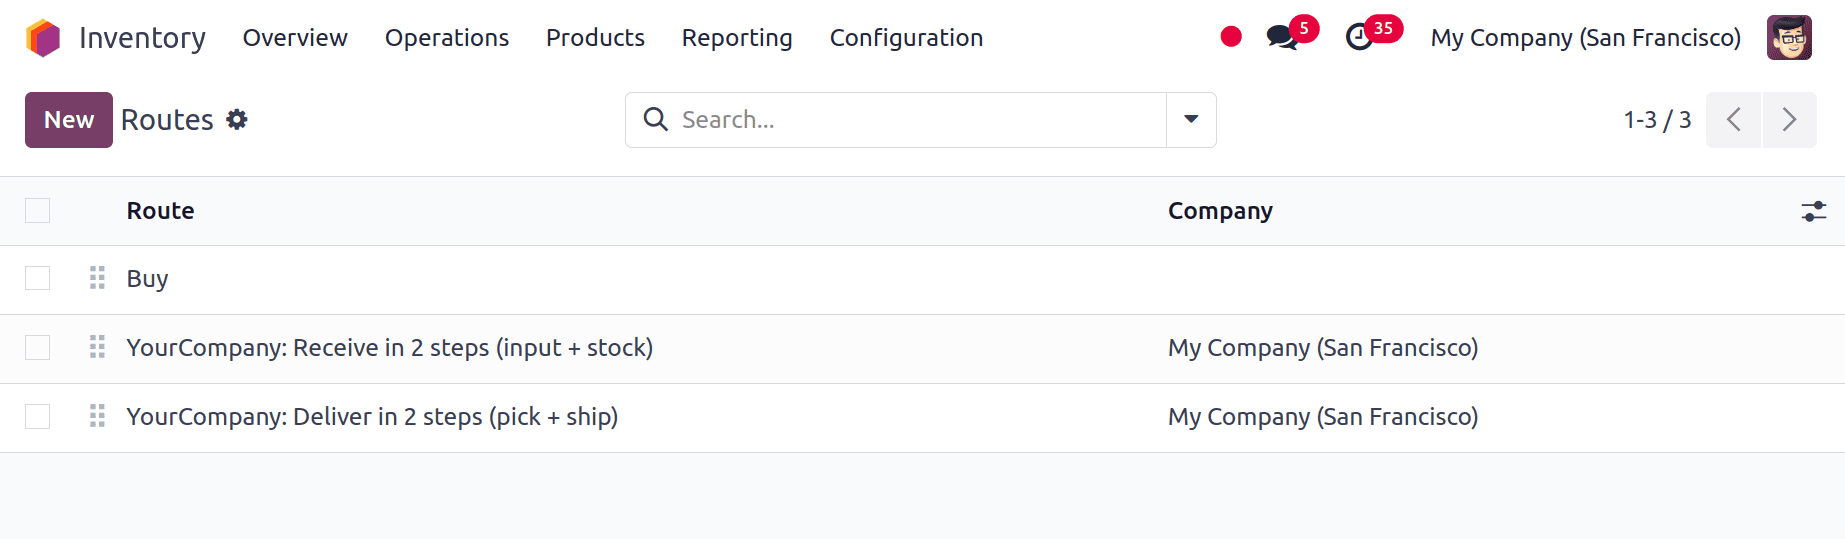
After making changes to the menu, the user should save the warehouse menu. This will allow them to add another corporate route for cross-docking to the firm's operational routes. To view, click the New button after selecting the appropriate route from the inventory module's routes option in the Configuration menu.
: Configuration > Routes
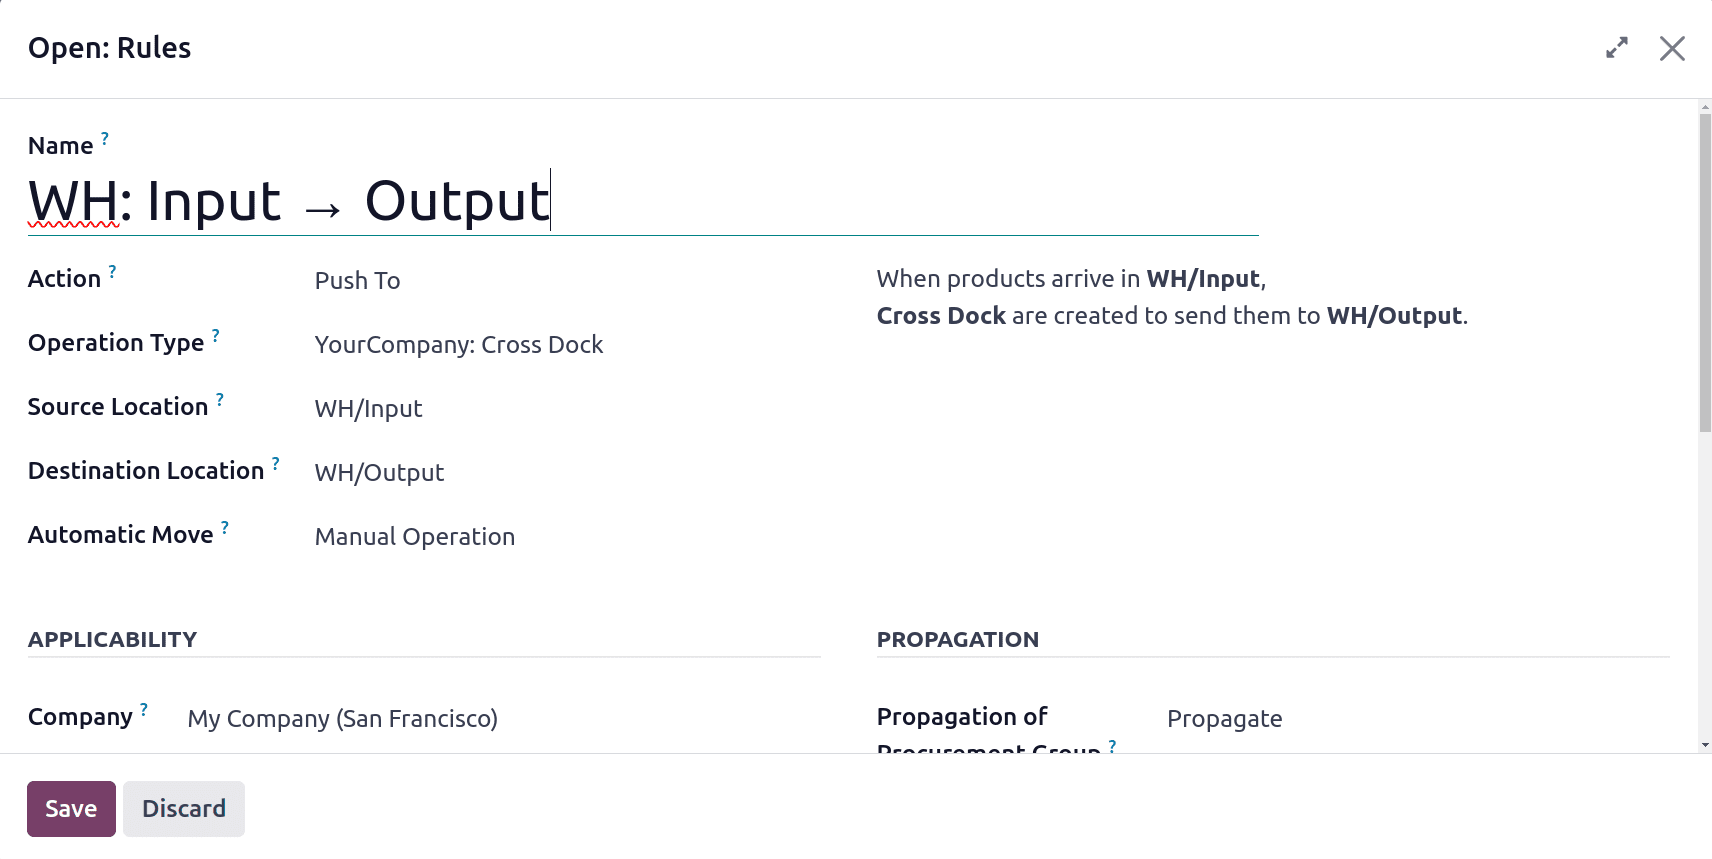
The route name is set as “YourCompany: Cross-Dock”. Click on the Add a line to add new rules to the route.
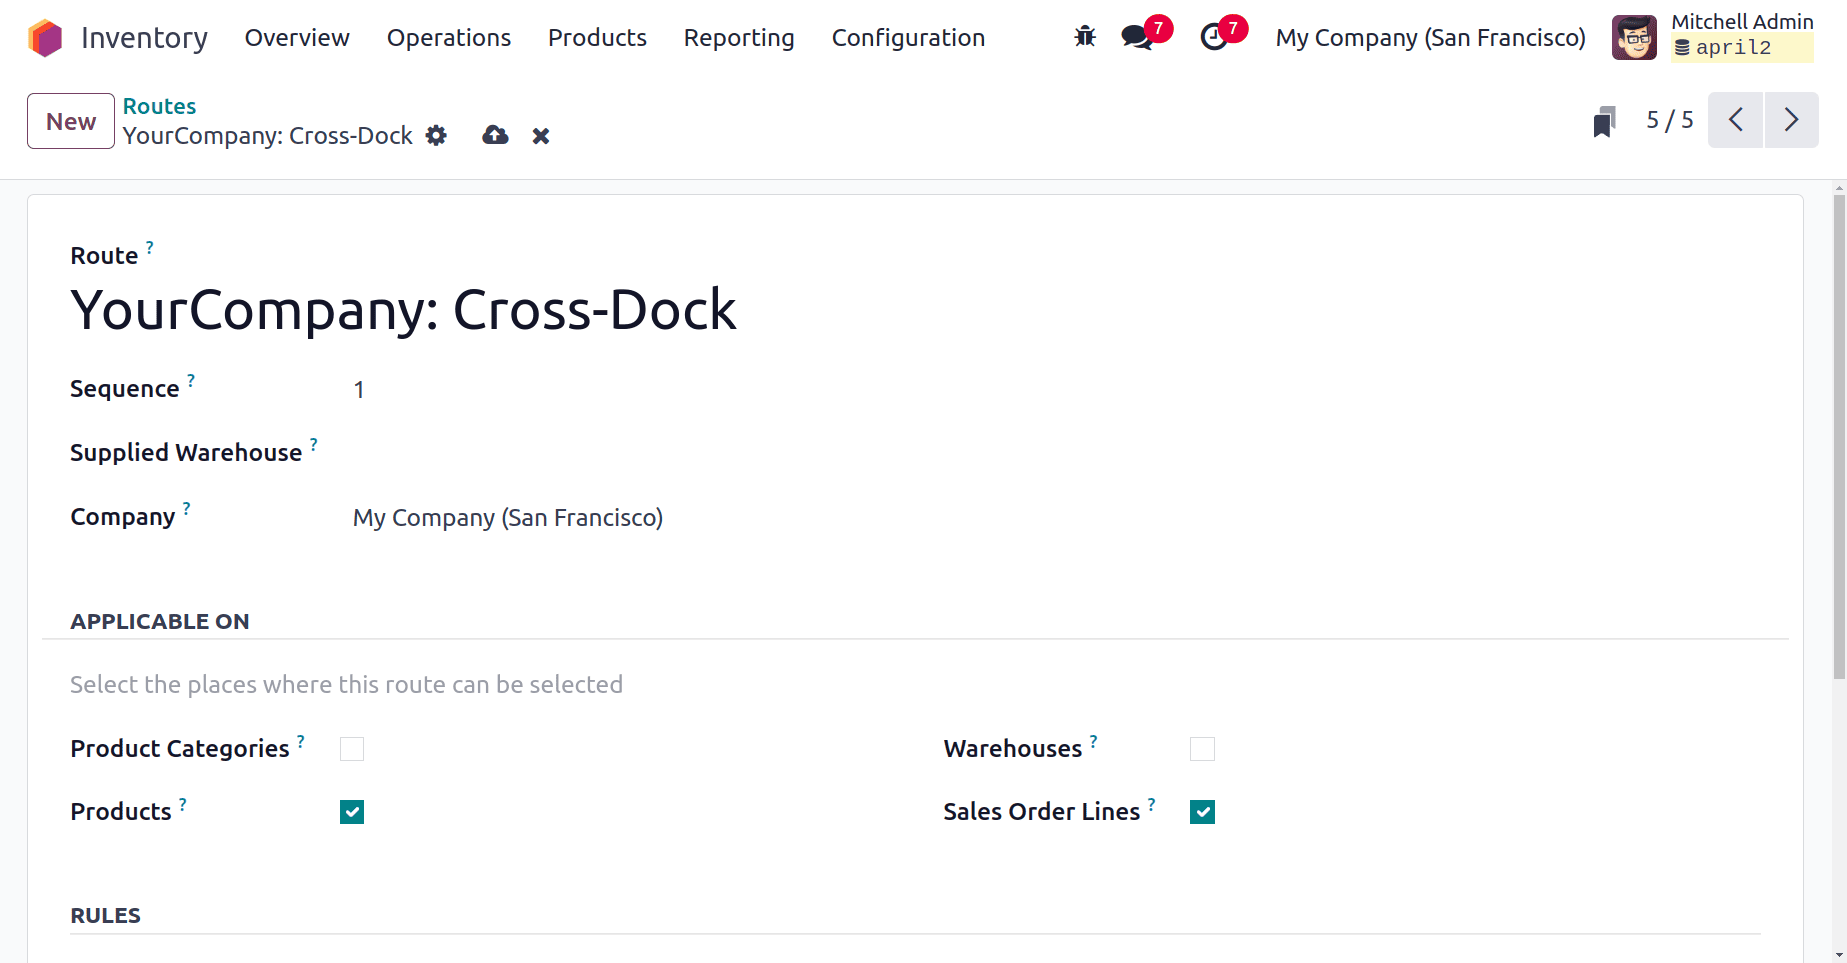
Here, the first rule is named as “WH: Input ? Output”. As shown in the screenshot below, the Action is set as ‘Push To’ and the Operation Type is set as Your Company: Cross Dock. The source location is WH/Input and Destination Location is WH/Output. So when the products arrive in the WH/Input, Cross Dock are created to send them to the WH/Output.
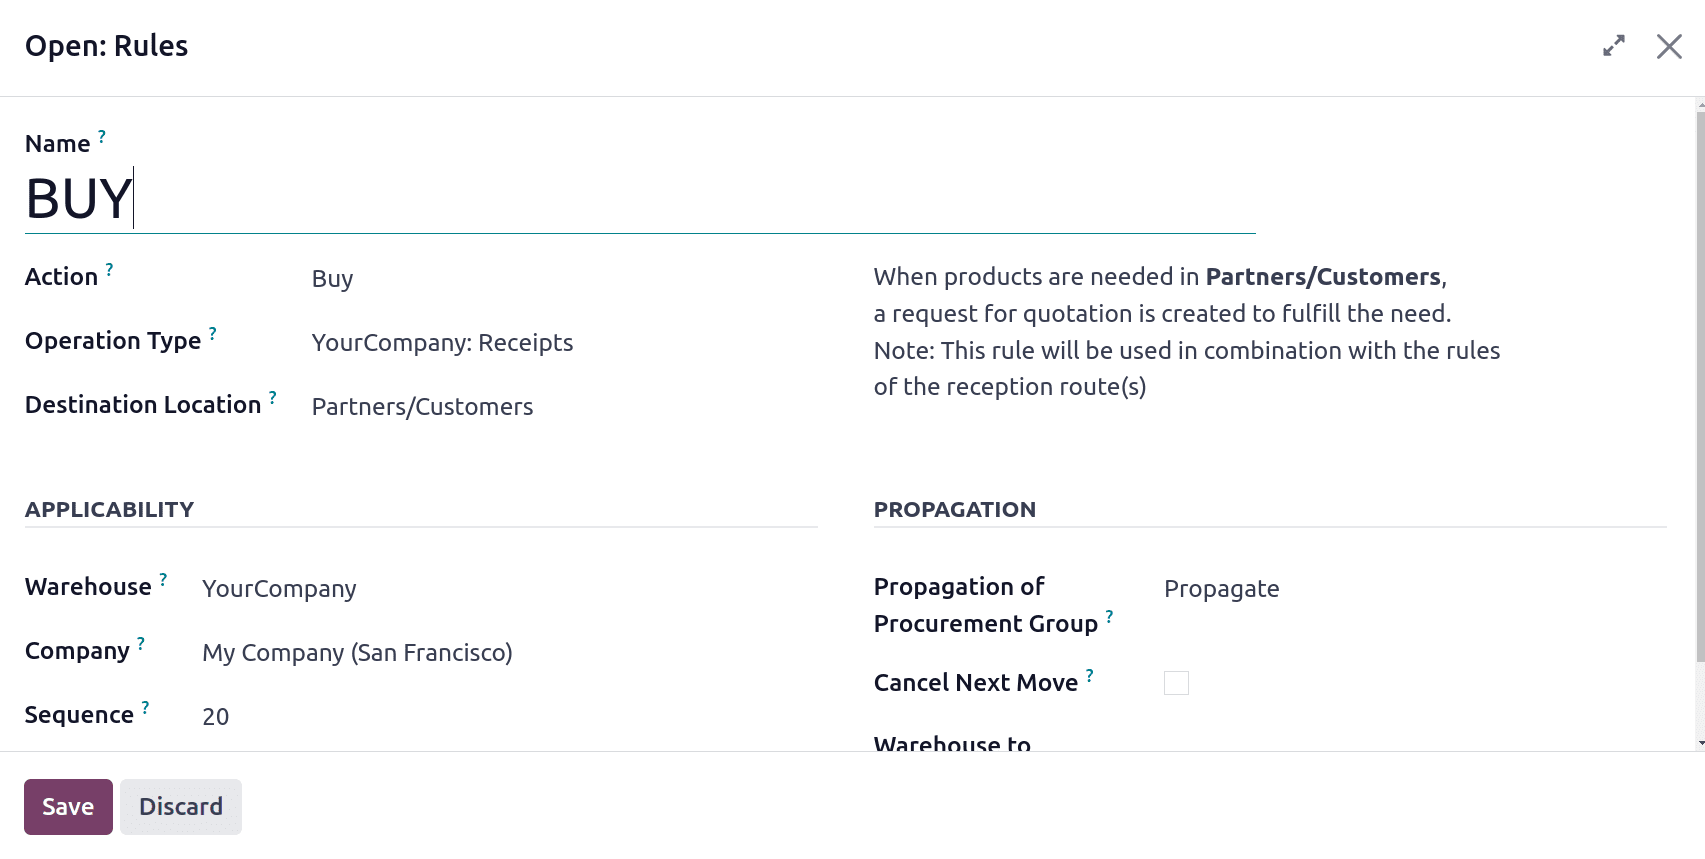
The second rule is “Buy”. The action is set as Buy and Operation Type is YourCompany: Receipt. So when products are needed in Partner/Customer, a request for quotation is created to fulfill the need.
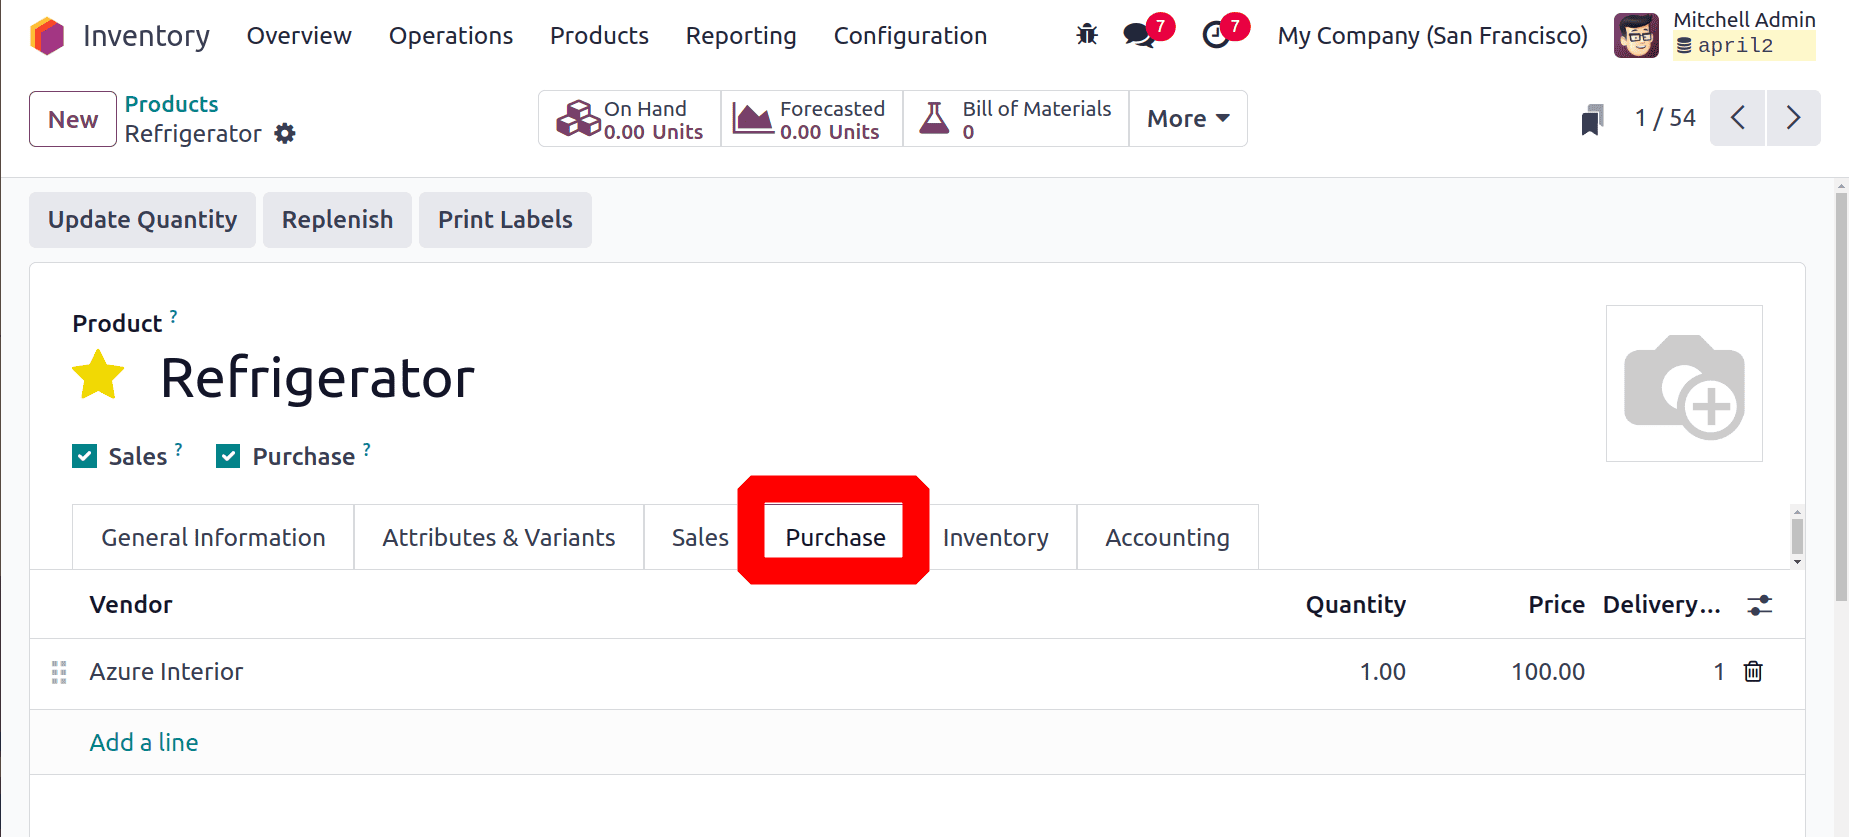
Then let's save the Route. Let's attach the cross-docking capabilities to an inventory product now that the cross-docking routes of operations have been set up to demonstrate how the operation operates. From the product menu in the master data, choose the appropriate product. Choose which routes to use for cross-docking and purchasing from the product's inventory menu. The window should be saved after making changes before closing.

Inside the Purchase tab, add the Vendor name. Here, the vendor is Azure Interior.
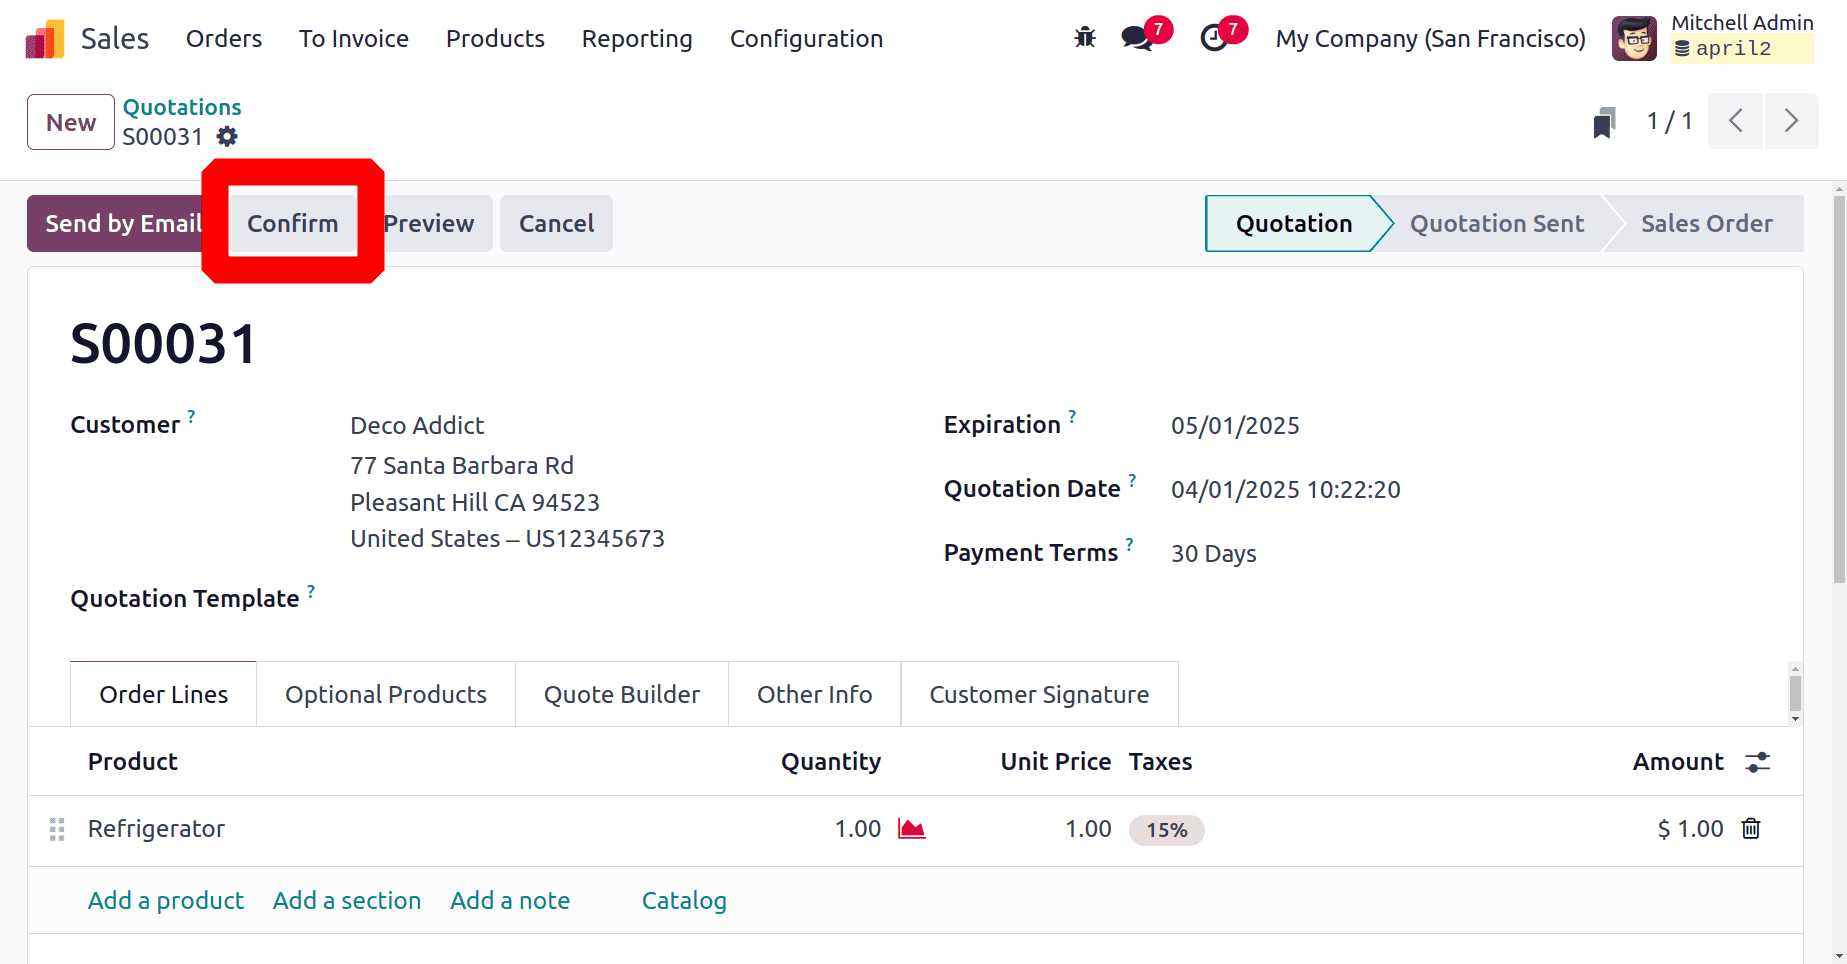
Create a new sales quotation. Add the customer name first, then choose the same product inside the Orderline with quantity. Verify the quotation, and it seems that it is awaiting some internal action to finish the process.
A smart tab is shown there. Which is named as Purchase.
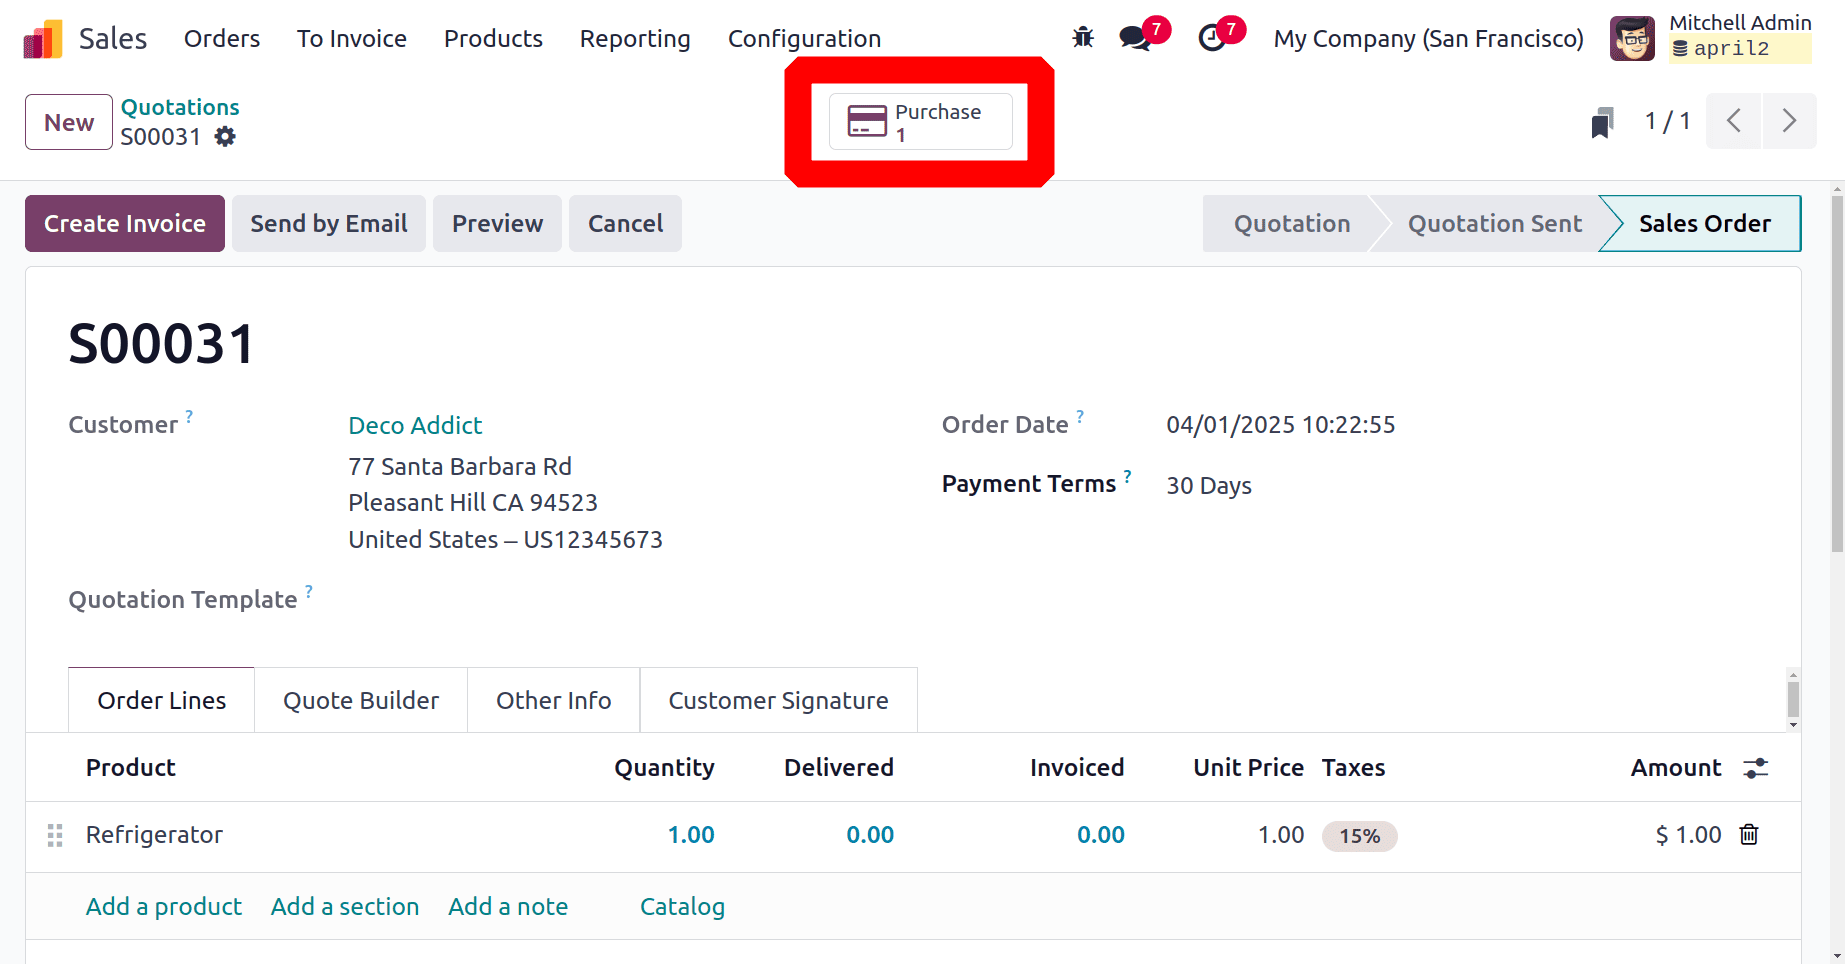
Now, by selecting the purchase smart tab, the user can see the corresponding purchase order that is automatically generated based on the requirements from the source document, which is the corresponding sales quotation that was previously made. After choosing the quote, the user can see the order details and validate it by checking them.
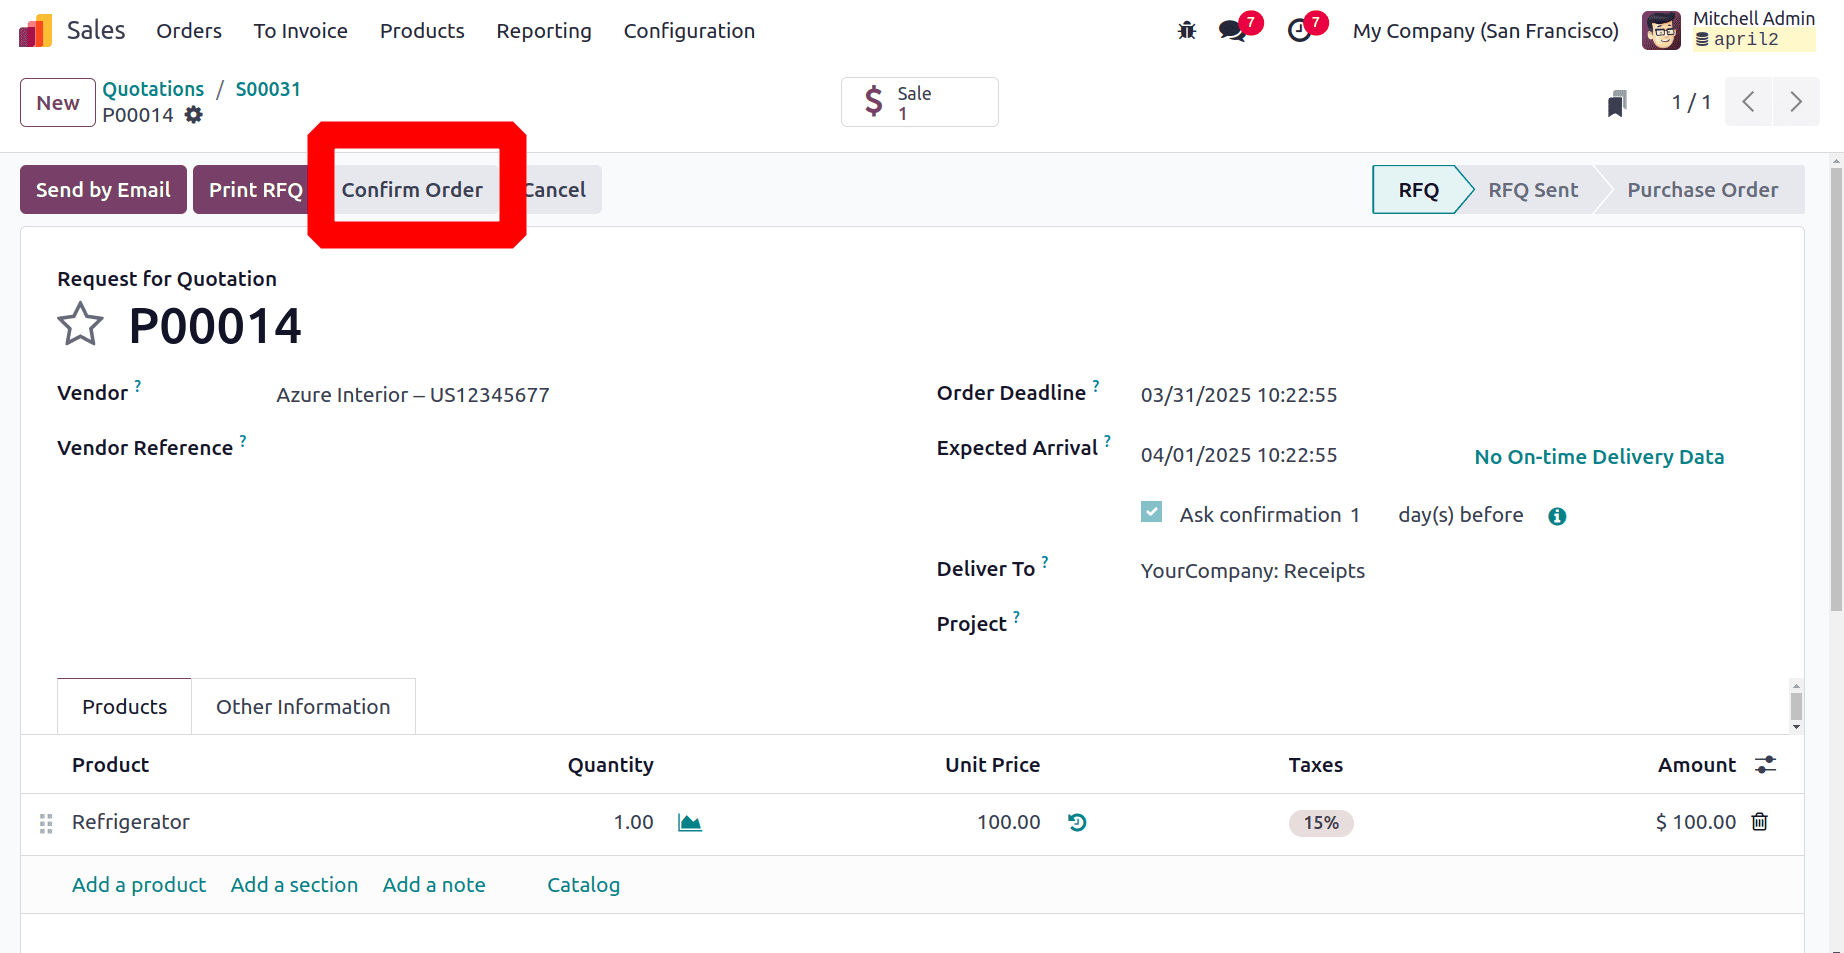
Validate the Receipt to get the product. Here, the Vendor is Azure Interior. Here the Destination Location is WH/Input. Click on the Next Transfer tab to get the next transfer of the cross docking.
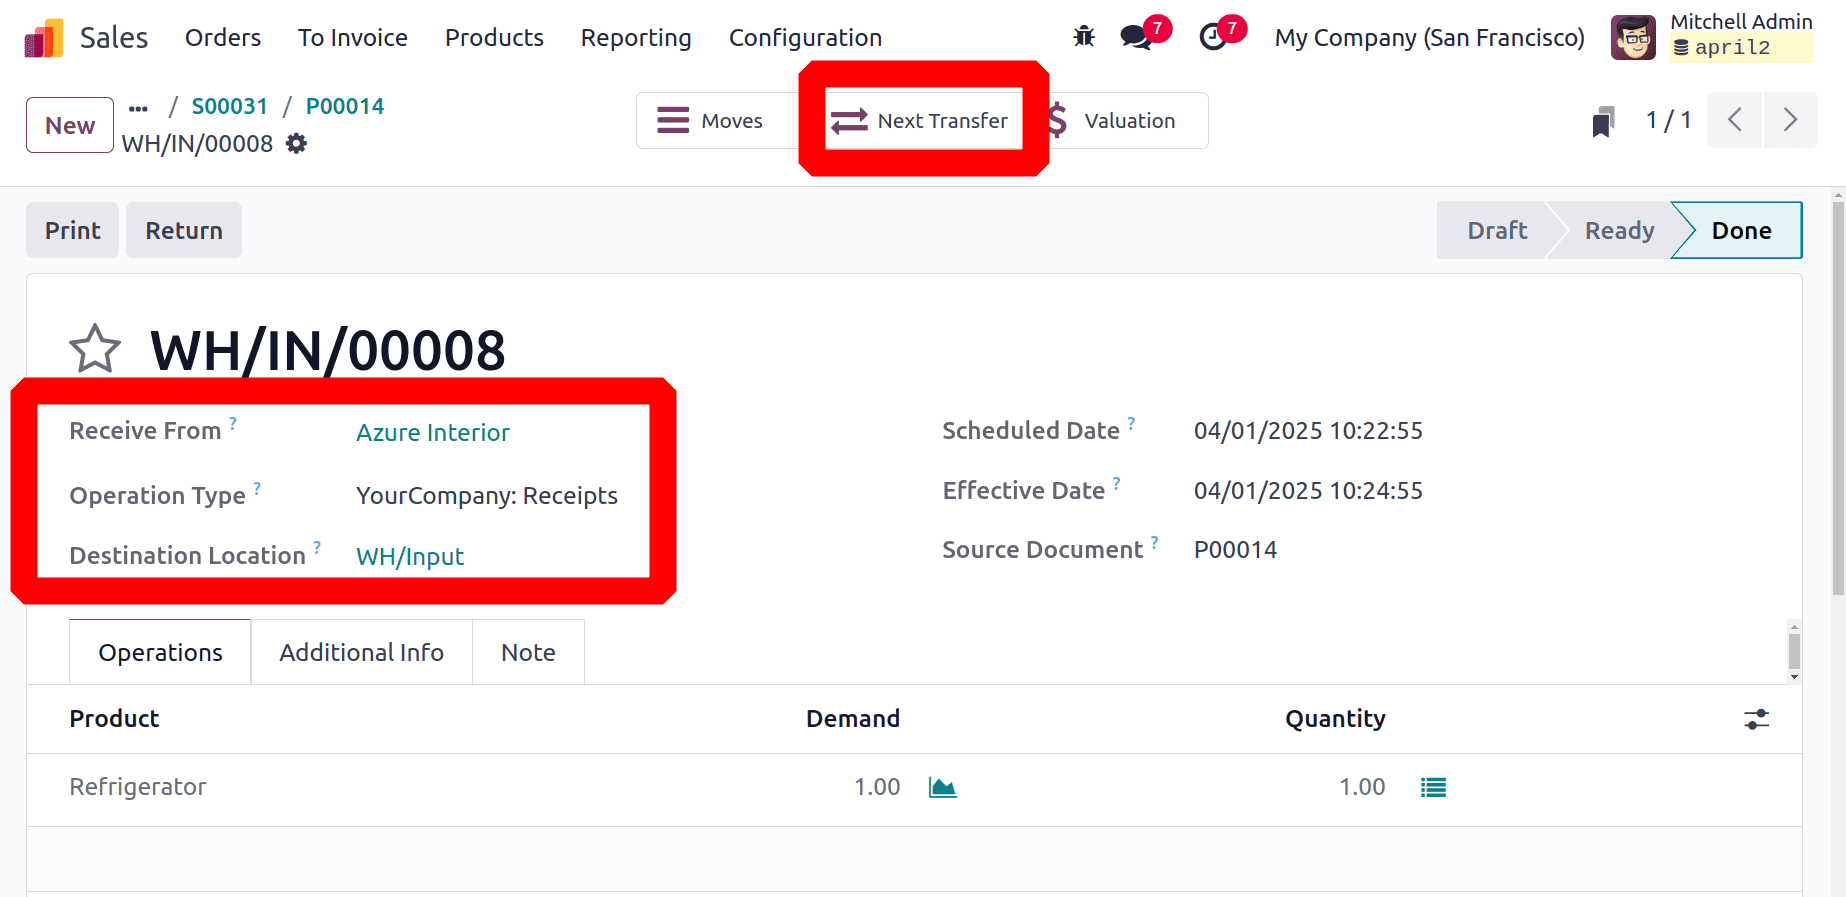
Then the next transfer is shown below. While checking the transfer, the Source Location is WH/Input and the destination location is WH/Output. By validating this transfer, the product will move from WH/Input to WH/Output location.
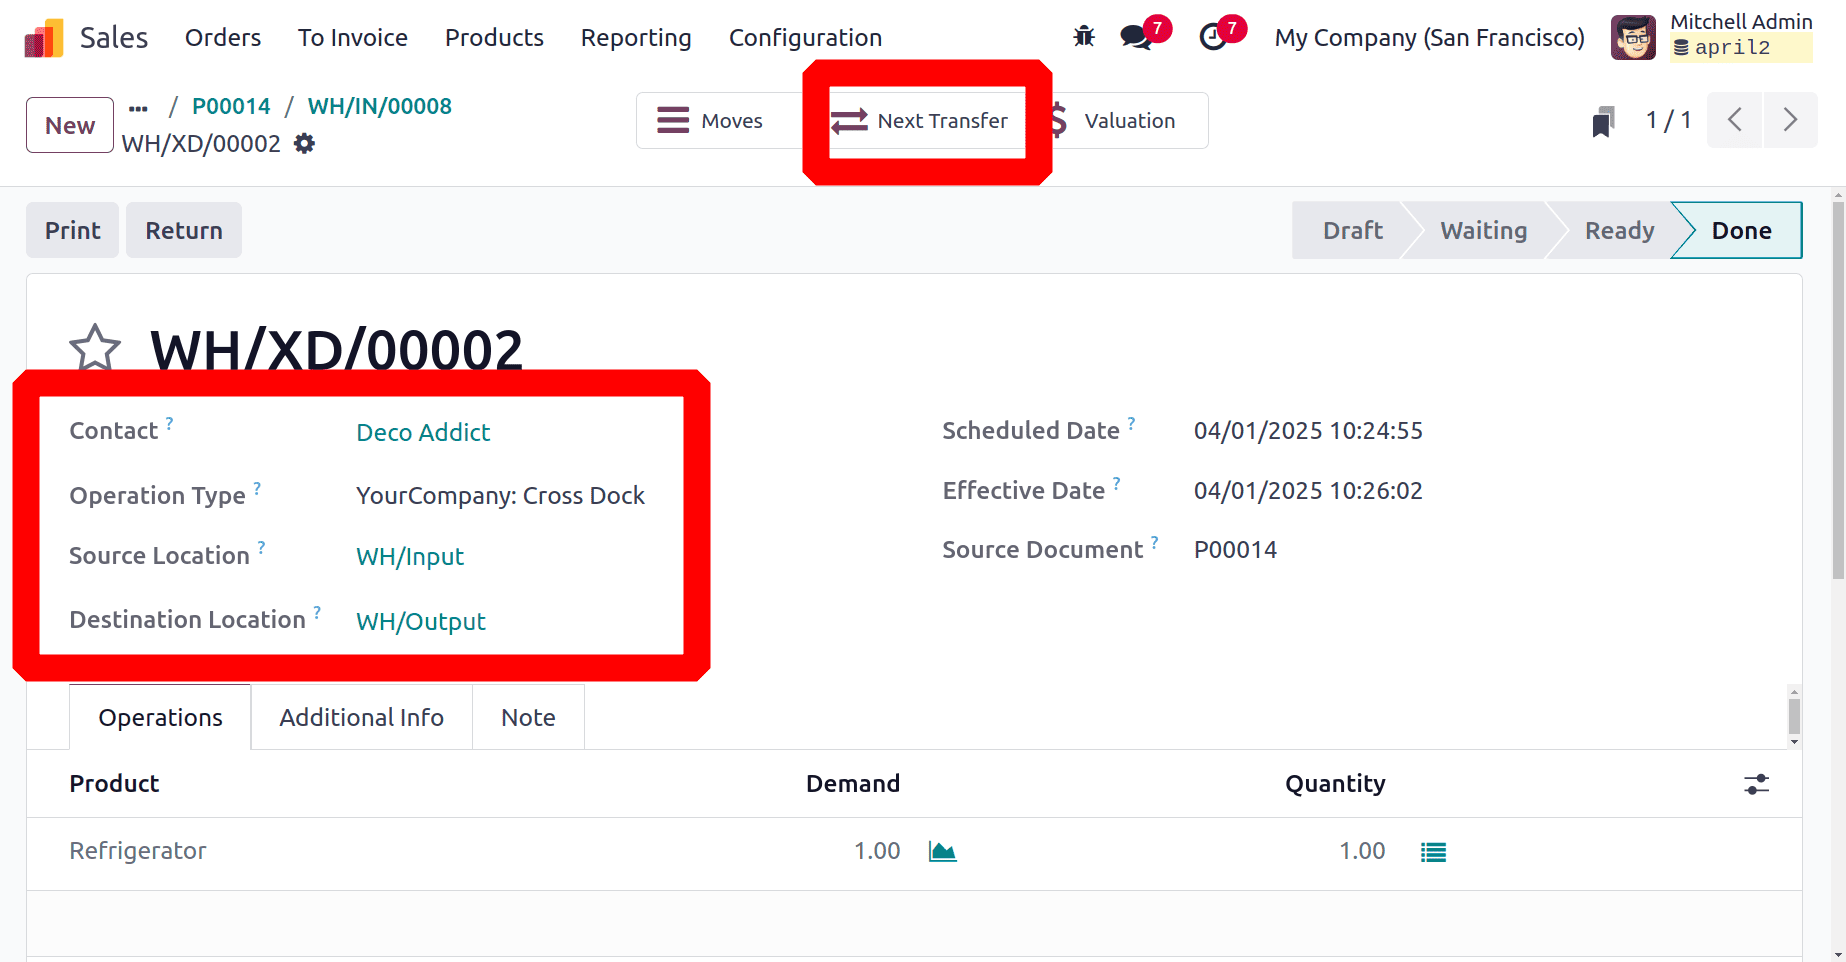
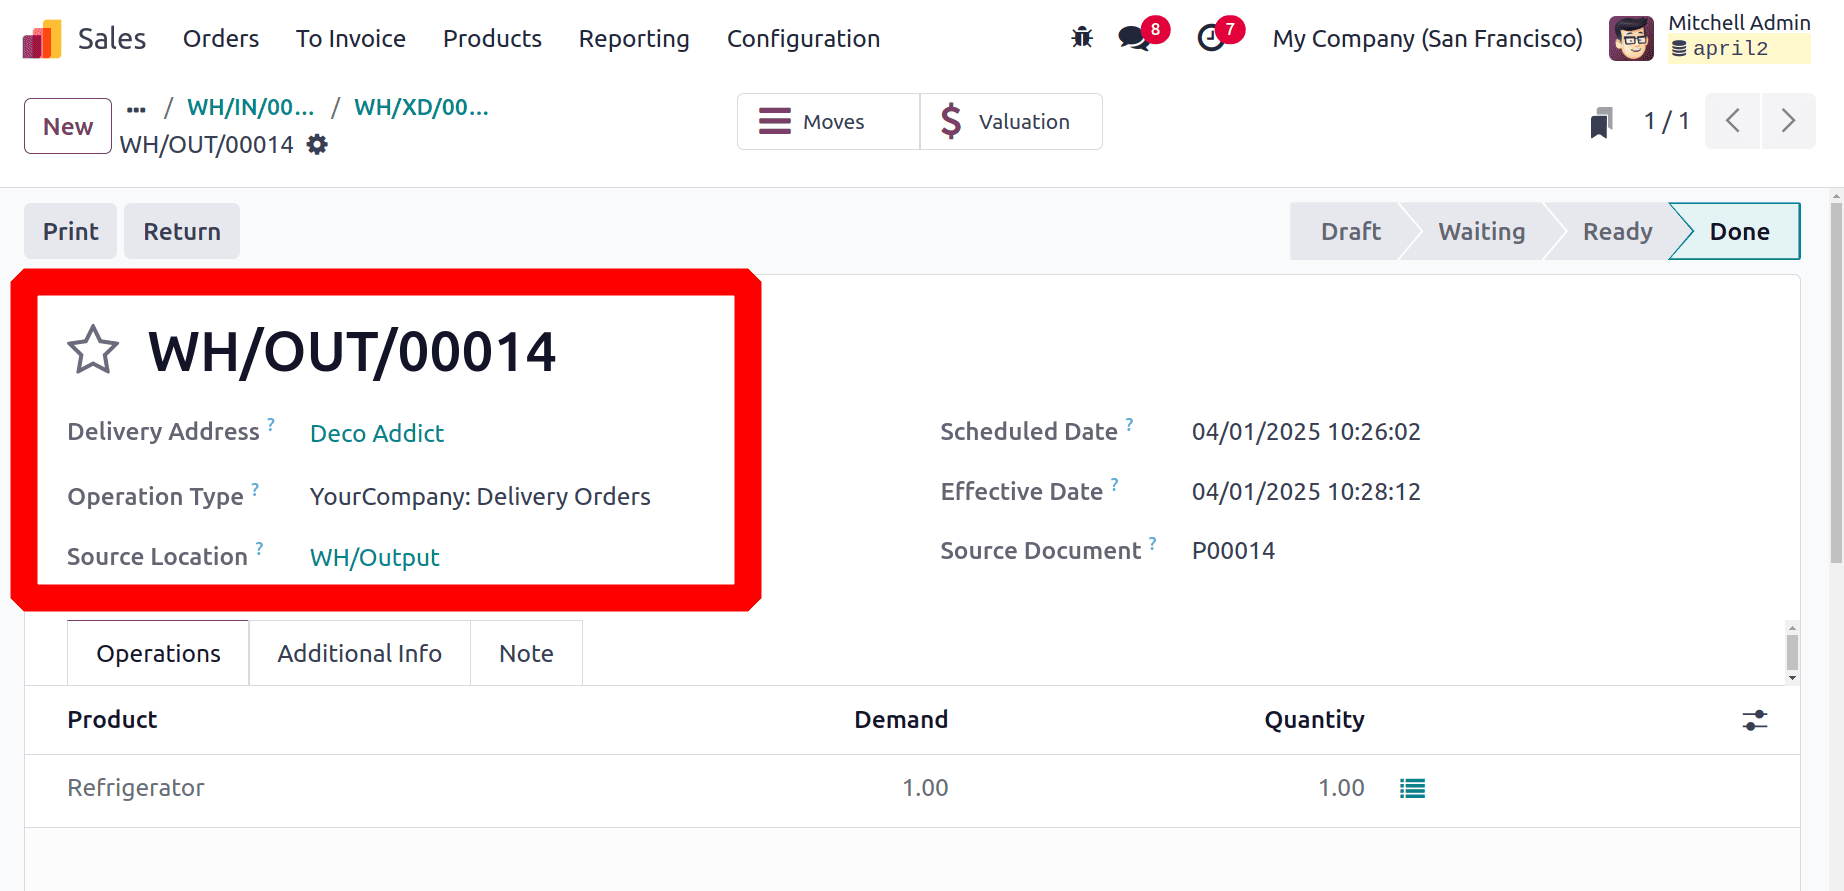
And the last transfer is shown below. Which is a Delivery transfer. The source location is WH/Output.
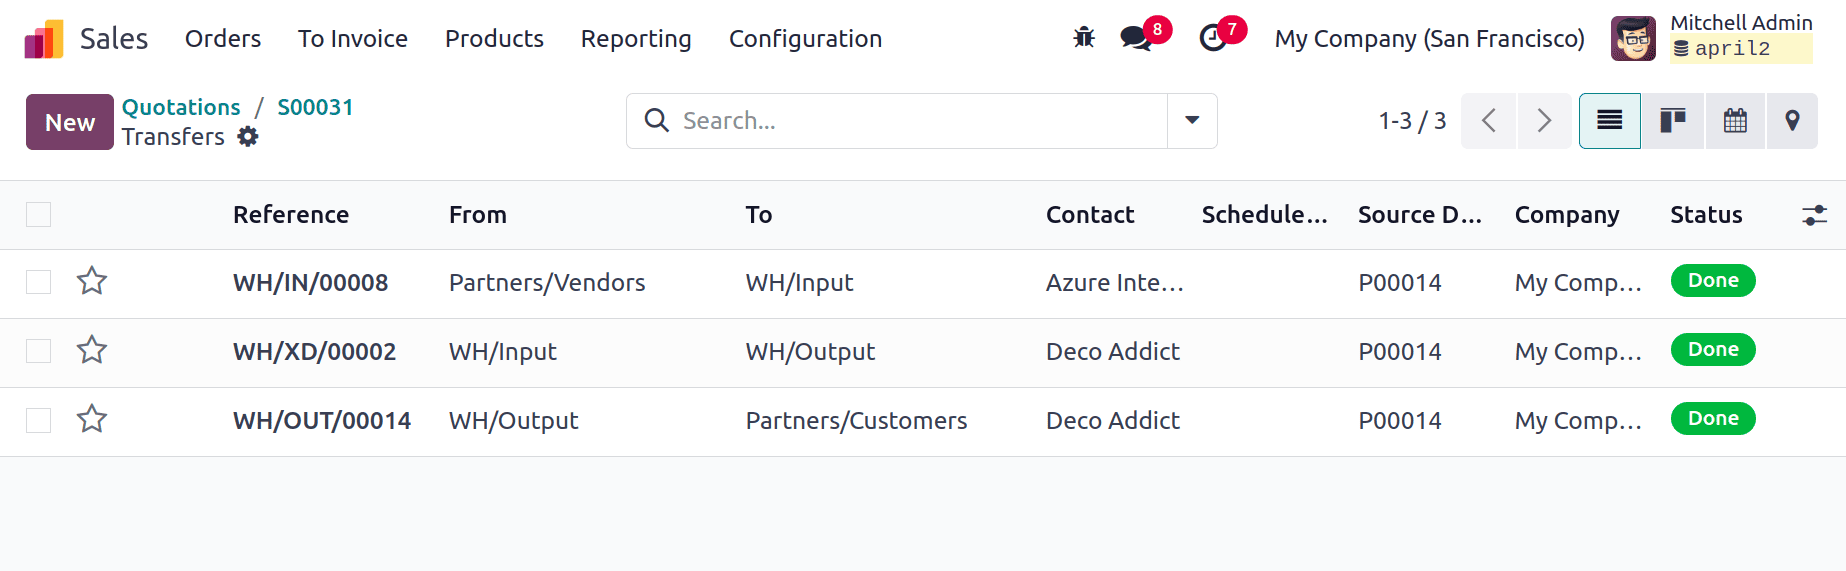
The transfers can be viewed there. In the first transfer, the product is moved from the Partner/Vendor location to WH/Input. Then the second transfer is from WH/Output to WH/Output. The last transfer is from WH/Output to Partner/Customers.
Odoo 18's cross-docking feature, which enables the user to move products straight from shipment to delivery, is a useful tool for inventory management and product mobility.
To read more about An Overview of Inventory Valuation in Odoo 18, refer to our blog An Overview of Inventory Valuation in Odoo 18.