QR codes and barcodes are now indispensable tools for easily encoding and sharing data in today's fast-paced digital world, from product packaging and payments to event tickets and web links. Including a barcode and QR scanner is a wise choice whether you're creating a retail app, an inventory management system, or just want to improve user experience with contactless interaction.
This integration runs smoothly and effectively thanks to Flutter's speed and cross-platform capabilities. We'll show you how to use the robust mobile_scanner package to create a fully functional barcode and QR scanner in this blog post.
Firstly, you need to import mobile_scanner as below:
import 'package:mobile_scanner/mobile_scanner.dart';
Now, let's implement a page that includes the MobileScanner view using the code provided below:
import 'package:flutter/material.dart';
import 'package:mobile_scanner/mobile_scanner.dart';
class ScanBarcodePage extends StatefulWidget {
  const ScanBarcodePage({Key? key}) : super(key: key);
  @override
  State<ScanBarcodePage> createState() => _ScanBarcodeState();
}
class _ScanBarcodeState extends State<ScanBarcodePage> {

  @override
  Widget build(BuildContext context) {

    return Scaffold(
      appBar: AppBar(
        title: Text(_isQrMode ? "Scan QR Code" : "Scan Barcode"),
      ),
      body: Stack(
        children: [
          MobileScanner(
          ),
        ],
      ),
    );
  }
}
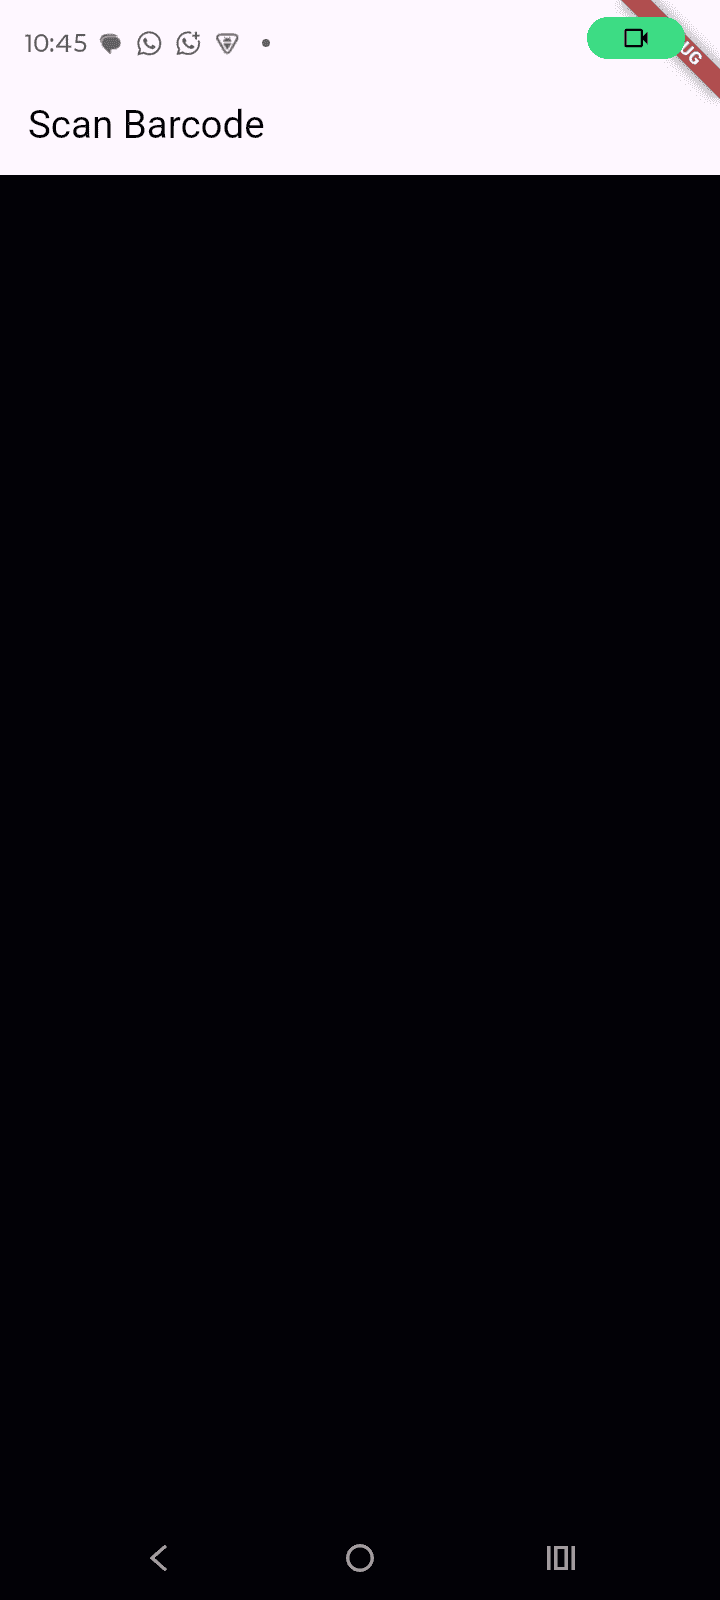
The output of the above code is as below:

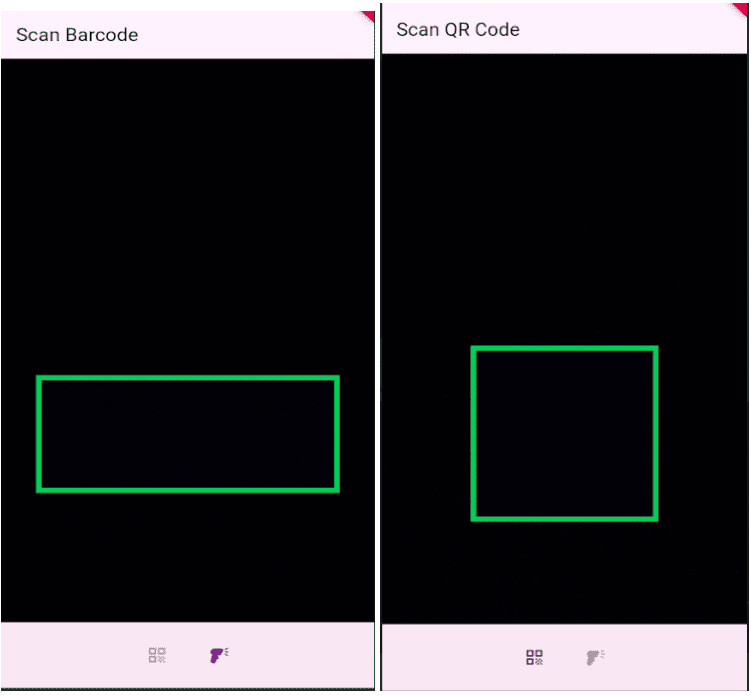
Now customize the barcode or QR code indicating window by adding a separate class like below:
class ScanWindowPainter extends CustomPainter {
  final Rect scanWindow;
  ScanWindowPainter({required this.scanWindow});
  @override
  void paint(Canvas canvas, Size size) {
    final paint = Paint()
      ..color = Colors.black.withOpacity(0.5)
      ..style = PaintingStyle.fill;
    final outerPath = Path()
      ..addRect(Rect.fromLTWH(0, 0, size.width, size.height))
      ..addRect(scanWindow)
      ..fillType = PathFillType.evenOdd;
    canvas.drawPath(outerPath, paint);
    final borderPaint = Paint()
      ..color = Colors.green
      ..style = PaintingStyle.stroke
      ..strokeWidth = 6.0;
    canvas.drawRect(scanWindow, borderPaint);
  }
  @override
  bool shouldRepaint(covariant CustomPainter oldDelegate) => true;
}
Let's break down the ScanWindowPainter class step-by-step. This class is a custom painter used to visually render a highlighted scanning area (scan window) on the screen — with a transparent hole over the camera preview and a green border around the scan window.
final Rect scanWindow;
ScanWindowPainter({required this.scanWindow});
- ScanWindow: This is the rectangular area (usually in the center of the screen) where the user should align the QR code or barcode for scanning
- It is passed as a parameter when creating the painter.
paint(Canvas canvas, Size size)
final paint = Paint() ..color = Colors.black.withOpacity(0.5) ..style = PaintingStyle.fill;
Paints a semi-transparent black overlay to dim the camera view outside the scan window.
- Create Outer + Inner Paths
final outerPath = Path() ..addRect(Rect.fromLTWH(0, 0, size.width, size.height)) ..addRect(scanWindow) ..fillType = PathFillType.evenOdd;
outerPath defines:
A large rectangle over the whole screen.
Then subtracts (cuts out) the scan window rectangle from the center using PathFillType.evenOdd.
This results in a transparent “hole” in the dark overlay.
- Draw the Dark Overlay with Transparent Hole
canvas.drawPath(outerPath, paint);
This draws the semi-transparent background with the scan window cut out in the middle.
- Draw the Green Border Around the Scan Window
final borderPaint = Paint() ..color = Colors.green ..style = PaintingStyle.stroke ..strokeWidth = 6.0;
canvas.drawRect(scanWindow, borderPaint);
Draws a green border around the scan window rectangle with a 6-pixel stroke.
@overridebool shouldRepaint(covariant CustomPainter oldDelegate) => true;
This tells Flutter that the painter should repaint every time. You could optimize this by returning false when the scanWindow hasn’t changed.
Declare qrScanWindow and barcodeScanWindow using Rect.fromCenter, with the screen size retrieved via MediaQuery.
final size = MediaQuery.of(context).size;
    final qrScanWindow = Rect.fromCenter(
      center: Offset(size.width / 2, size.height / 2),
      width: size.width * 0.5,
      height: size.width * 0.5,
    );
    final barcodeScanWindow = Rect.fromCenter(
      center: Offset(size.width / 2, size.height / 2),
      width: size.width * 0.8,
      height: size.height * 0.15,
    );
In the widget tree, place the CustomPaint widget immediately below the MobileScanner widget within the body of the screen. Use the ScanWindowPainter class as the painter, and conditionally pass either qrScanWindow or barcodeScanWindow to it based on the _isQrMode flag, which determines whether the QR code or barcode button was selected
  MobileScanner(
  ),
  CustomPaint(
   size: size,
   painter: ScanWindowPainter(
   scanWindow: _isQrMode ? qrScanWindow: barcodeScanWindow,
   ),
  ),
Result as:

Now add a function to scan QR codes or barcodes and store the scanned data in a variable:
void _handleBarcode(BarcodeCapture capture) {
    if (!mounted || capture.barcodes.isEmpty) return;
    final scanned = capture.barcodes.first;
    if (_isQrMode && scanned.format != BarcodeFormat.qrCode) return;
    if (!_isQrMode && scanned.format == BarcodeFormat.qrCode) return;
    setState(() {
      _barcode = scanned;
    });
} - if (!mounted || capture.barcodes.isEmpty) return;
- !mounted: Ensures the widget is still part of the widget tree (to avoid calling setState on a disposed widget).
- capture.barcodes.isEmpty: Checks if any barcode/QR code was actually captured.
- If either condition fails, it exits early.
- final scanned = capture.barcodes.first;
- Retrieves the first scanned result from the list of barcodes.
- Barcodes can include multiple results, but we handle only the first one here.
- if (_isQrMode && scanned.format != BarcodeFormat.qrCode) return;
- If the app is in QR mode (_isQrMode == true) and the scanned item is not a QR code, the function exits.
- Filters out barcodes when in QR scan mode.
- if (!_isQrMode && scanned.format == BarcodeFormat.qrCode) return;
- If the app is in Barcode mode and the scanned item is a QR code, exit the function.
- Filters out QR codes when in Barcode scan mode.
- setState(() { _barcode = scanned; });
- Updates the _barcode variable with the scanned result.
- setState triggers a rebuild so the UI can show the scanned data (e.g., displaying it on the screen).
So need to call this function on the MobileScanner widget as below:
  MobileScanner(
      onDetect: _handleBarcode,
      scanWindow: _isQrMode ? qrScanWindow : barcodeScanWindow,
   ),
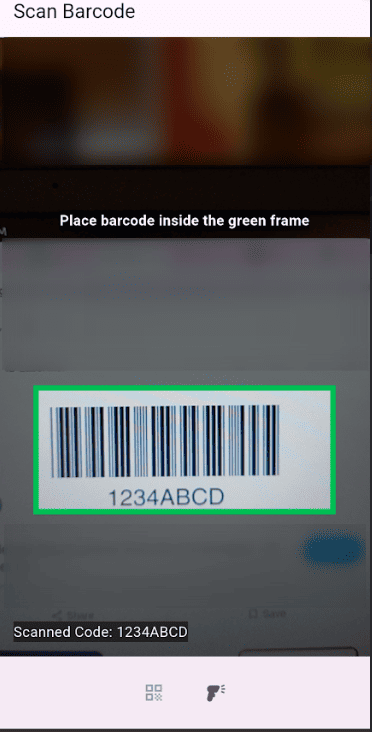
Also, add a Text widget to display the scanned result as shown below.
 Positioned(
   top: size.height / 2 - (size.width * 0.5) - 60,
   left: 0,
   right: 0,
   child: Center(
      child: Text(
        'Place ${_isQrMode ? 'QR code': 'barcode'} inside the green frame',
        style: const TextStyle(
           fontSize: 16,
           color: Colors.white,
           fontWeight: FontWeight.bold,
           backgroundColor: Colors.black54,
         ),
      ),
   ),
),
The output will appear as follows, with complete code of the output:

import 'package:flutter/material.dart';
import 'package:mobile_scanner/mobile_scanner.dart';
class ScanBarcodePage extends StatefulWidget {
  const ScanBarcodePage({Key? key}) : super(key: key);
  @override
  State<ScanBarcodePage> createState() => _ScanBarcodeState();
}
class _ScanBarcodeState extends State<ScanBarcodePage> {
  Barcode? _barcode;
  bool _isQrMode = false;
  void _handleBarcode(BarcodeCapture capture) {
    if (!mounted || capture.barcodes.isEmpty) return;
    final scanned = capture.barcodes.first;
    if (_isQrMode && scanned.format != BarcodeFormat.qrCode) return;
    if (!_isQrMode && scanned.format == BarcodeFormat.qrCode) return;
    setState(() {
      _barcode = scanned;
    });
  }
  @override
  Widget build(BuildContext context) {
    final size = MediaQuery.of(context).size;
    final qrScanWindow = Rect.fromCenter(
      center: Offset(size.width / 2, size.height / 2),
      width: size.width * 0.5,
      height: size.width * 0.5,
    );
    final barcodeScanWindow = Rect.fromCenter(
      center: Offset(size.width / 2, size.height / 2),
      width: size.width * 0.8,
      height: size.height * 0.15,
    );
    return Scaffold(
      appBar: AppBar(
        title: Text(_isQrMode ? "Scan QR Code" : "Scan Barcode"),
      ),
      body: Stack(
        children: [
          MobileScanner(
            onDetect: _handleBarcode,
            scanWindow: _isQrMode ? qrScanWindow : barcodeScanWindow,
          ),
          CustomPaint(
            size: size,
            painter: ScanWindowPainter(
              scanWindow: _isQrMode ? qrScanWindow : barcodeScanWindow,
            ),
          ),
          Positioned(
            top: size.height / 2 - (size.width * 0.5) - 60,
            left: 0,
            right: 0,
            child: Center(
              child: Text(
                'Place ${_isQrMode ? 'QR code' : 'barcode'} inside the green frame',
                style: const TextStyle(
                  fontSize: 16,
                  color: Colors.white,
                  fontWeight: FontWeight.bold,
                  backgroundColor: Colors.black54,
                ),
              ),
            ),
          ),
          Column(
            mainAxisAlignment: MainAxisAlignment.end,
            children: [
              if (_barcode != null)
                Padding(
                  padding: const EdgeInsets.all(16.0),
                  child: Text(
                    'Scanned Code: ${_barcode!.rawValue ?? "Unknown"}',
                    style: const TextStyle(
                      fontSize: 16,
                      color: Colors.white,
                      backgroundColor: Colors.black54,
                    ),
                  ),
                ),
            ],
          ),
        ],
      ),
      bottomNavigationBar: BottomAppBar(
        child: Row(
          mainAxisAlignment: MainAxisAlignment.center,
          children: [
            IconButton(
              onPressed: () {
                setState(() {
                  _isQrMode = true;
                  _barcode = null;
                });
              },
              icon: Icon(
                Icons.qr_code,
                color: _isQrMode ? Theme.of(context).primaryColor : Colors.grey,
              ),
            ),
            const SizedBox(width: 20),
            IconButton(
              onPressed: () {
                setState(() {
                  _isQrMode = false;
                  _barcode = null;
                });
              },
              icon: Icon(
                Icons.barcode_reader,
                color: !_isQrMode ? Theme.of(context).primaryColor : Colors.grey,
              ),
            ),
          ],
        ),
      ),
    );
  }
}
class ScanWindowPainter extends CustomPainter {
  final Rect scanWindow;
  ScanWindowPainter({required this.scanWindow});
  @override
  void paint(Canvas canvas, Size size) {
    final paint = Paint()
      ..color = Colors.black.withOpacity(0.5)
      ..style = PaintingStyle.fill;
    final outerPath = Path()
      ..addRect(Rect.fromLTWH(0, 0, size.width, size.height))
      ..addRect(scanWindow)
      ..fillType = PathFillType.evenOdd;
    canvas.drawPath(outerPath, paint);
    final borderPaint = Paint()
      ..color = Colors.green
      ..style = PaintingStyle.stroke
      ..strokeWidth = 6.0;
    canvas.drawRect(scanWindow, borderPaint);
  }
  @override
  bool shouldRepaint(covariant CustomPainter oldDelegate) => true;
}
Integrating a barcode and QR code scanner in your Flutter application has never been easier thanks to the powerful mobile_scanner package. Whether you're building an e-commerce platform, inventory system, or just looking to add seamless scanning capabilities for user interaction, this approach provides a responsive and intuitive solution.
By using custom scan windows, dynamic scan modes, and real-time detection, your app not only becomes more functional but also offers a polished user experience. With Flutter’s cross-platform capabilities and efficient performance, you can deploy this scanner across both Android and iOS with minimal effort. So go ahead, add scanning to your app and empower your users with quick and contactless access to information. Happy coding!