Step-by-Step Installation Guide:
- Install pycharm-community.
- Python installation.
- PostgreSQL Installation
- Configure a Database User Role.
- Set up Odoo 19.
Step 1: Install Pycharm-community
You may install Pycharm by downloading the Debian installation file Alternatively, you may install Pycharm by using the instructions.
To do so, launch Terminal and run the following commands:
/bin/bash-c"$(curl-fsSLhttps://raw.githubusercontent.com/Homebrew/install/HEAD/install.sh)"
echo 'eval "$(/opt/homebrew/bin/brew shellenv)"' >> ~/.zprofile
eval "$(/opt/homebrew/bin/brew shellenv)"
brew update
brew install --cask pycharm-ce
Step 2: Installing Python for Odoo 19 on macOS
First, check if Python is already installed on your Mac. Open the Terminal and enter the command:
python3 --version
If Python is installed, you’ll see a version number, such as “Python 3.12.x.” If it’s not installed, or if the version is older than 3.12, an error message like “command not found” may appear. Odoo 19 requires Python 3.12 or the latest version, so if your current version is older or Python is not installed, you can download the python with this command.
- Update Homebrew to make sure you have the latest list of available packages:
brew update
brew install python@3.12<
- Verify the installation: After the installation, you can check the Python 3.12 version:
python3.12 --version
- This command sets up the essential libraries needed to support Python 3 development on macOS by installing Python headers, SSL, image handling, database connectors, XML parsing, and compression libraries, among others.
brew install python@3.12 openssl libjpeg postgresql libxml2 libffi mysql-client libxslt zlib sasl openldap liblcms2 brew install --cask prusaslicer
- Install web dependencies: The next step is to install the necessary web dependencies.
brew install npmbrew link --overwrite nodesudo npm install -g less less-plugin-clean-cssbrew install less
- Install the wkhtmltopdf: You can install wkhtmltopdf by running the following command, which is required for publishing reports in Odoo 16
brew install wkhtmltopdf
Step 3 : PostgreSQL Installation
- For a smooth PostgreSQL installation on your MacBook, install PostgreSQL with the command
brew install postgresql@17
- After installation, initialize the database by running command below
brew services start postgresql@17
- To set PostgreSQL as a background service. Verify the installation by typing the command below
echo 'export PATH="/opt/homebrew/opt/postgresql@17/bin:$PATH"' >> ~/.zshrcsource ~/.zshrcpsql --version
- which should display the installed version. To access the PostgreSQL command line, use
psql postgres
- This process makes PostgreSQL installation on macOS quick and reliable.
Step 4 : Configure a Database User Role for Odoo 19 Databases.
Set up a Database User Role for Odoo 19 Databases. Create a new database user following these steps, and make sure to set a password for the user as it will be needed when configuring the conf file. Be sure to save this password securely.
CREATE USER your_username WITH PASSWORD 'your_password';ALTER USER your_username WITH SUPERUSER;
After that, exit from PostgreSQL by using the following command:
\q
Step 5 : Get odoo 19 Source Code
The odoo 19 Community source code can be directly accessed from odoo’s GitHub repository. Alternatively, you can clone it using git. To do so, first install git, then execute the following commands:
brew install git
The command below will clone the odoo 19 code into the odoo directory within your home directory.
git clone https://www.github.com/odoo/odoo --depth 1 --branch 19.0 --single-branch odoo19
Step 6 : Open the odoo 19 project in PyCharm
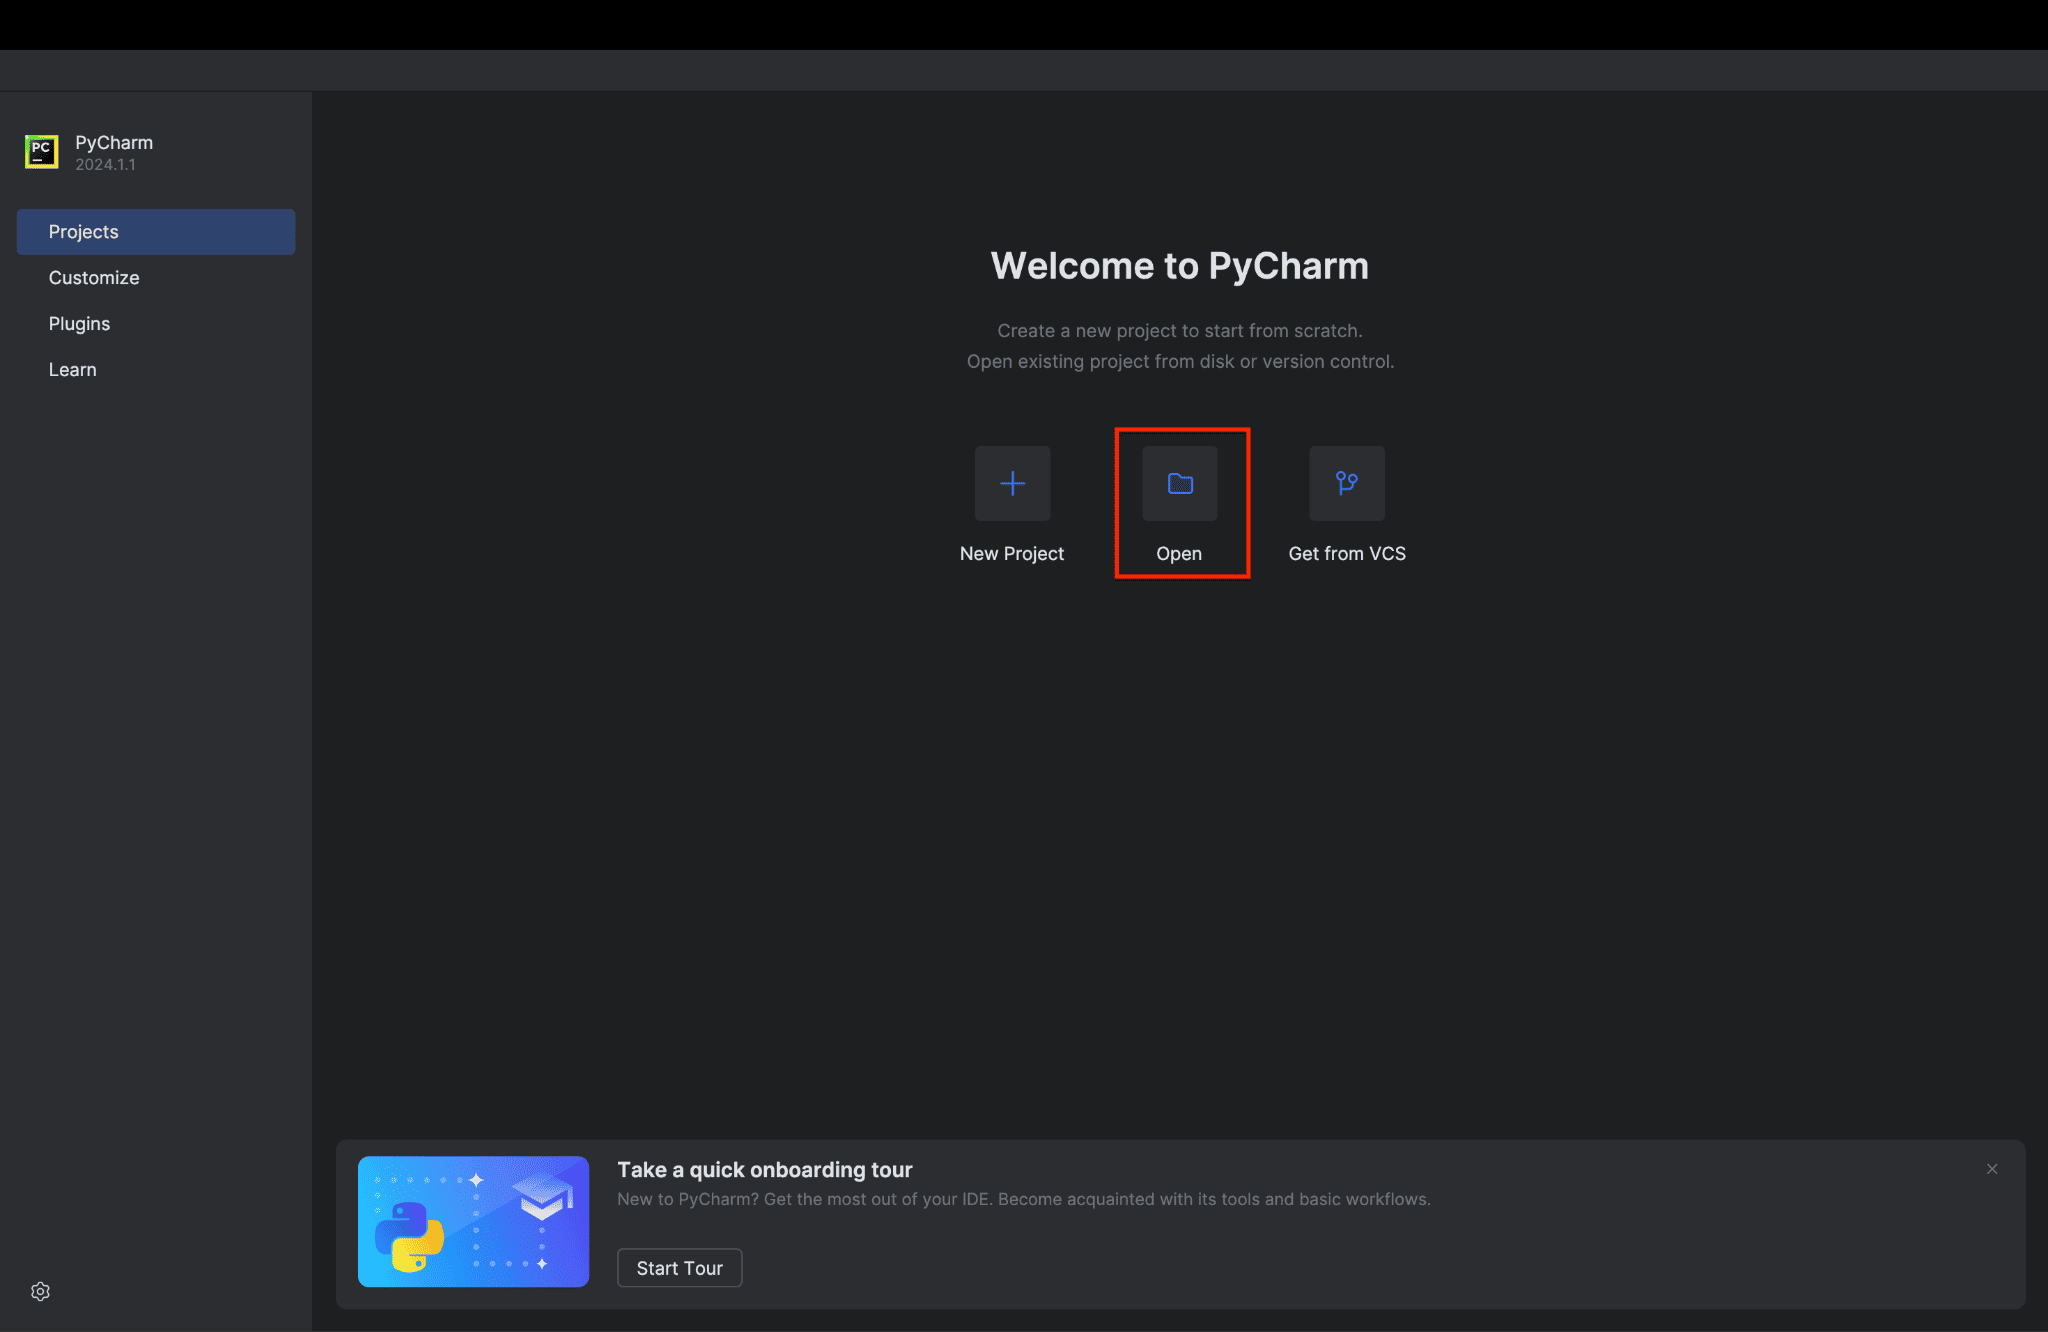
Launch PyCharm Community Edition and open the directory containing Odoo 19. Then, create an 'Open' button (or use the 'Open' option) to select and open the cloned Odoo directory from your file system
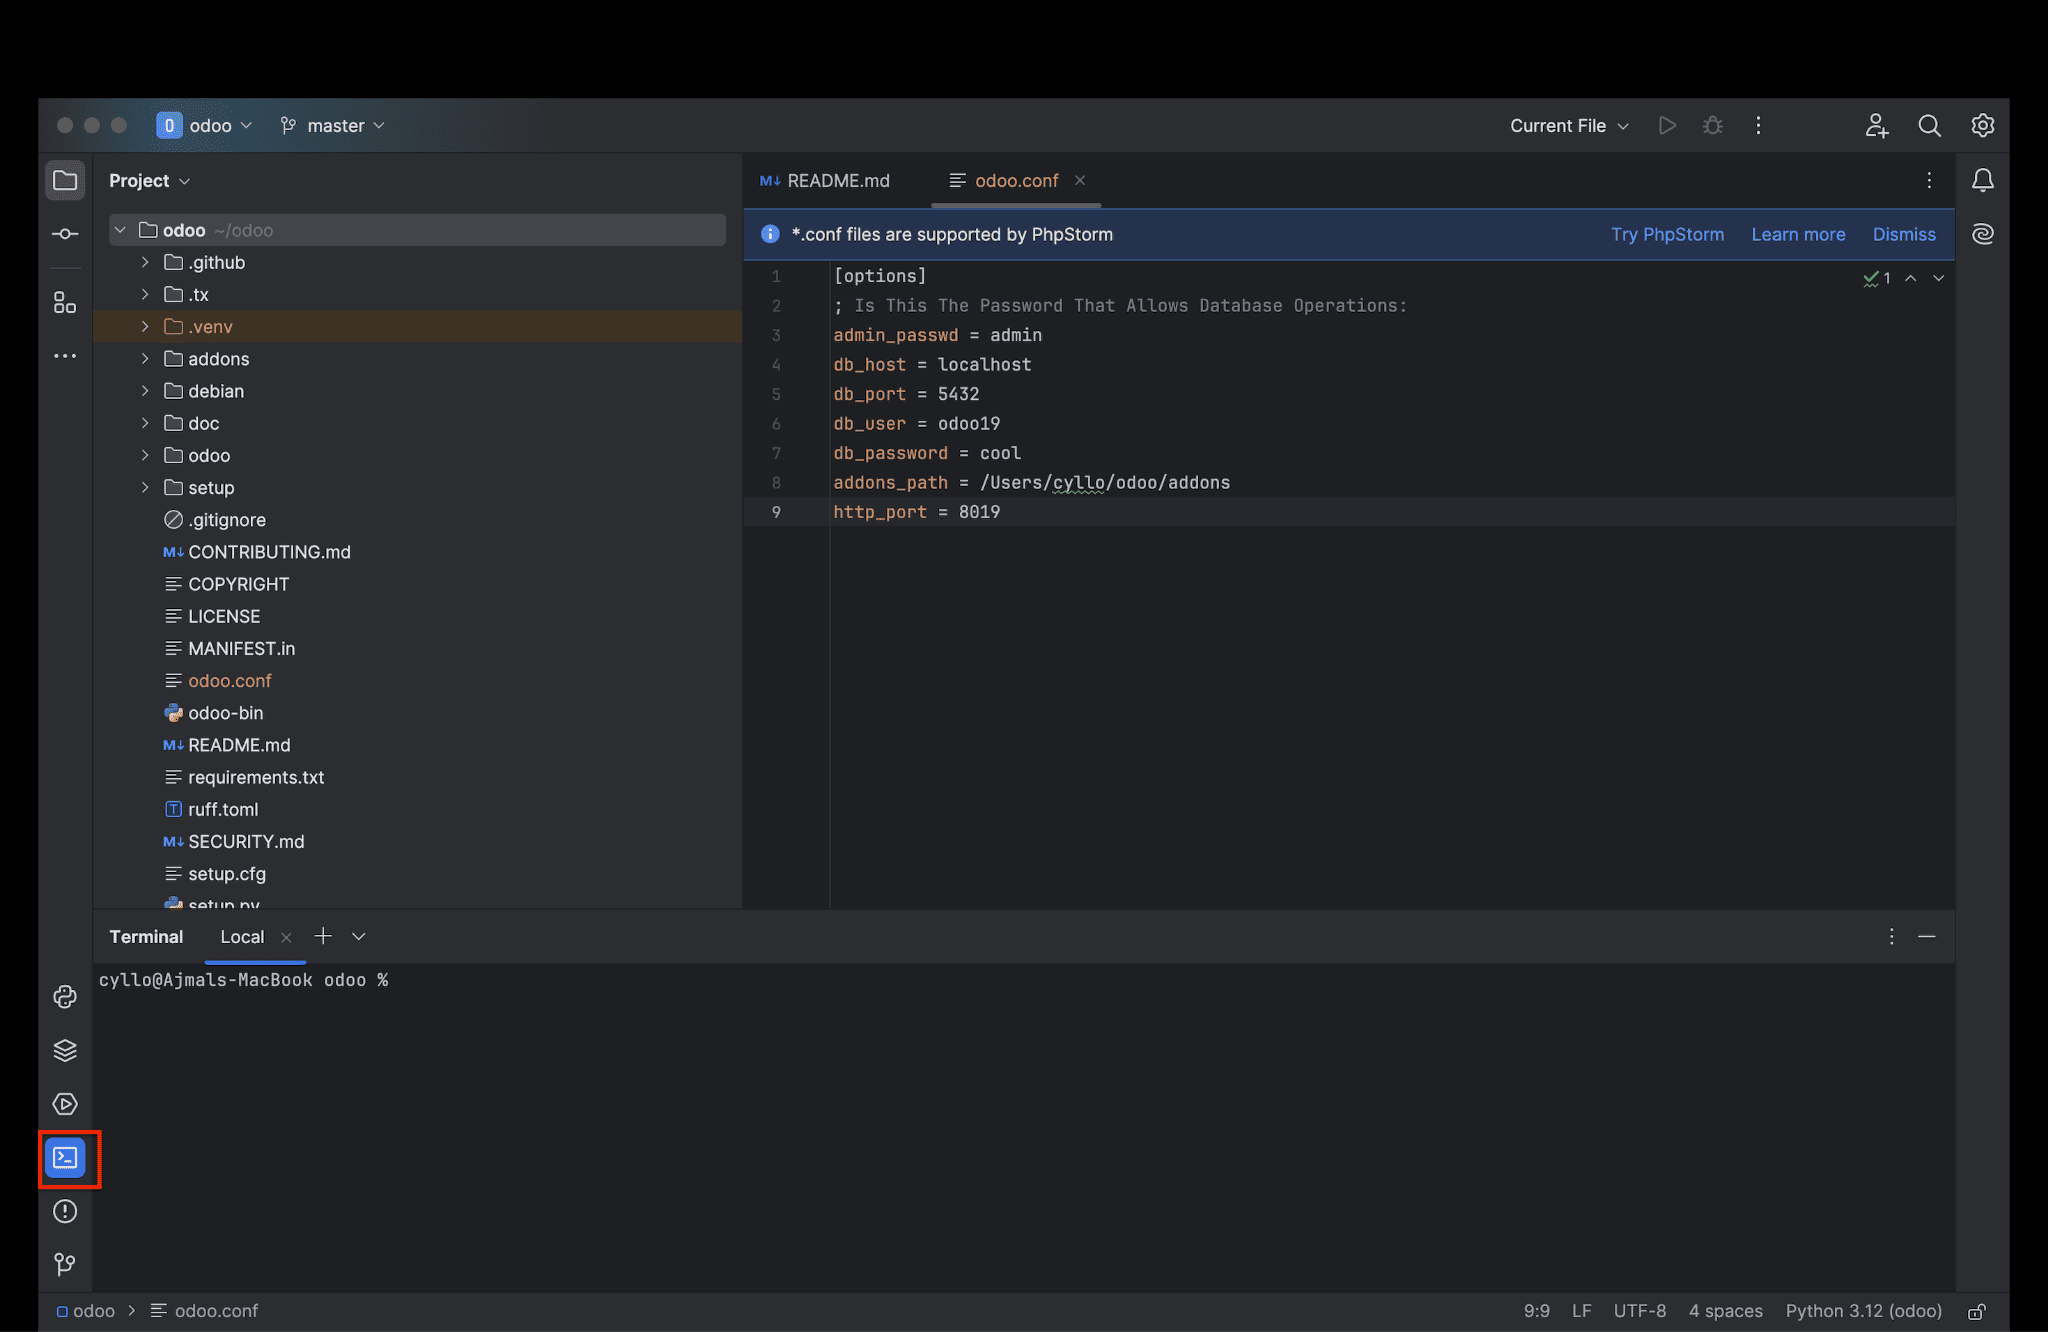
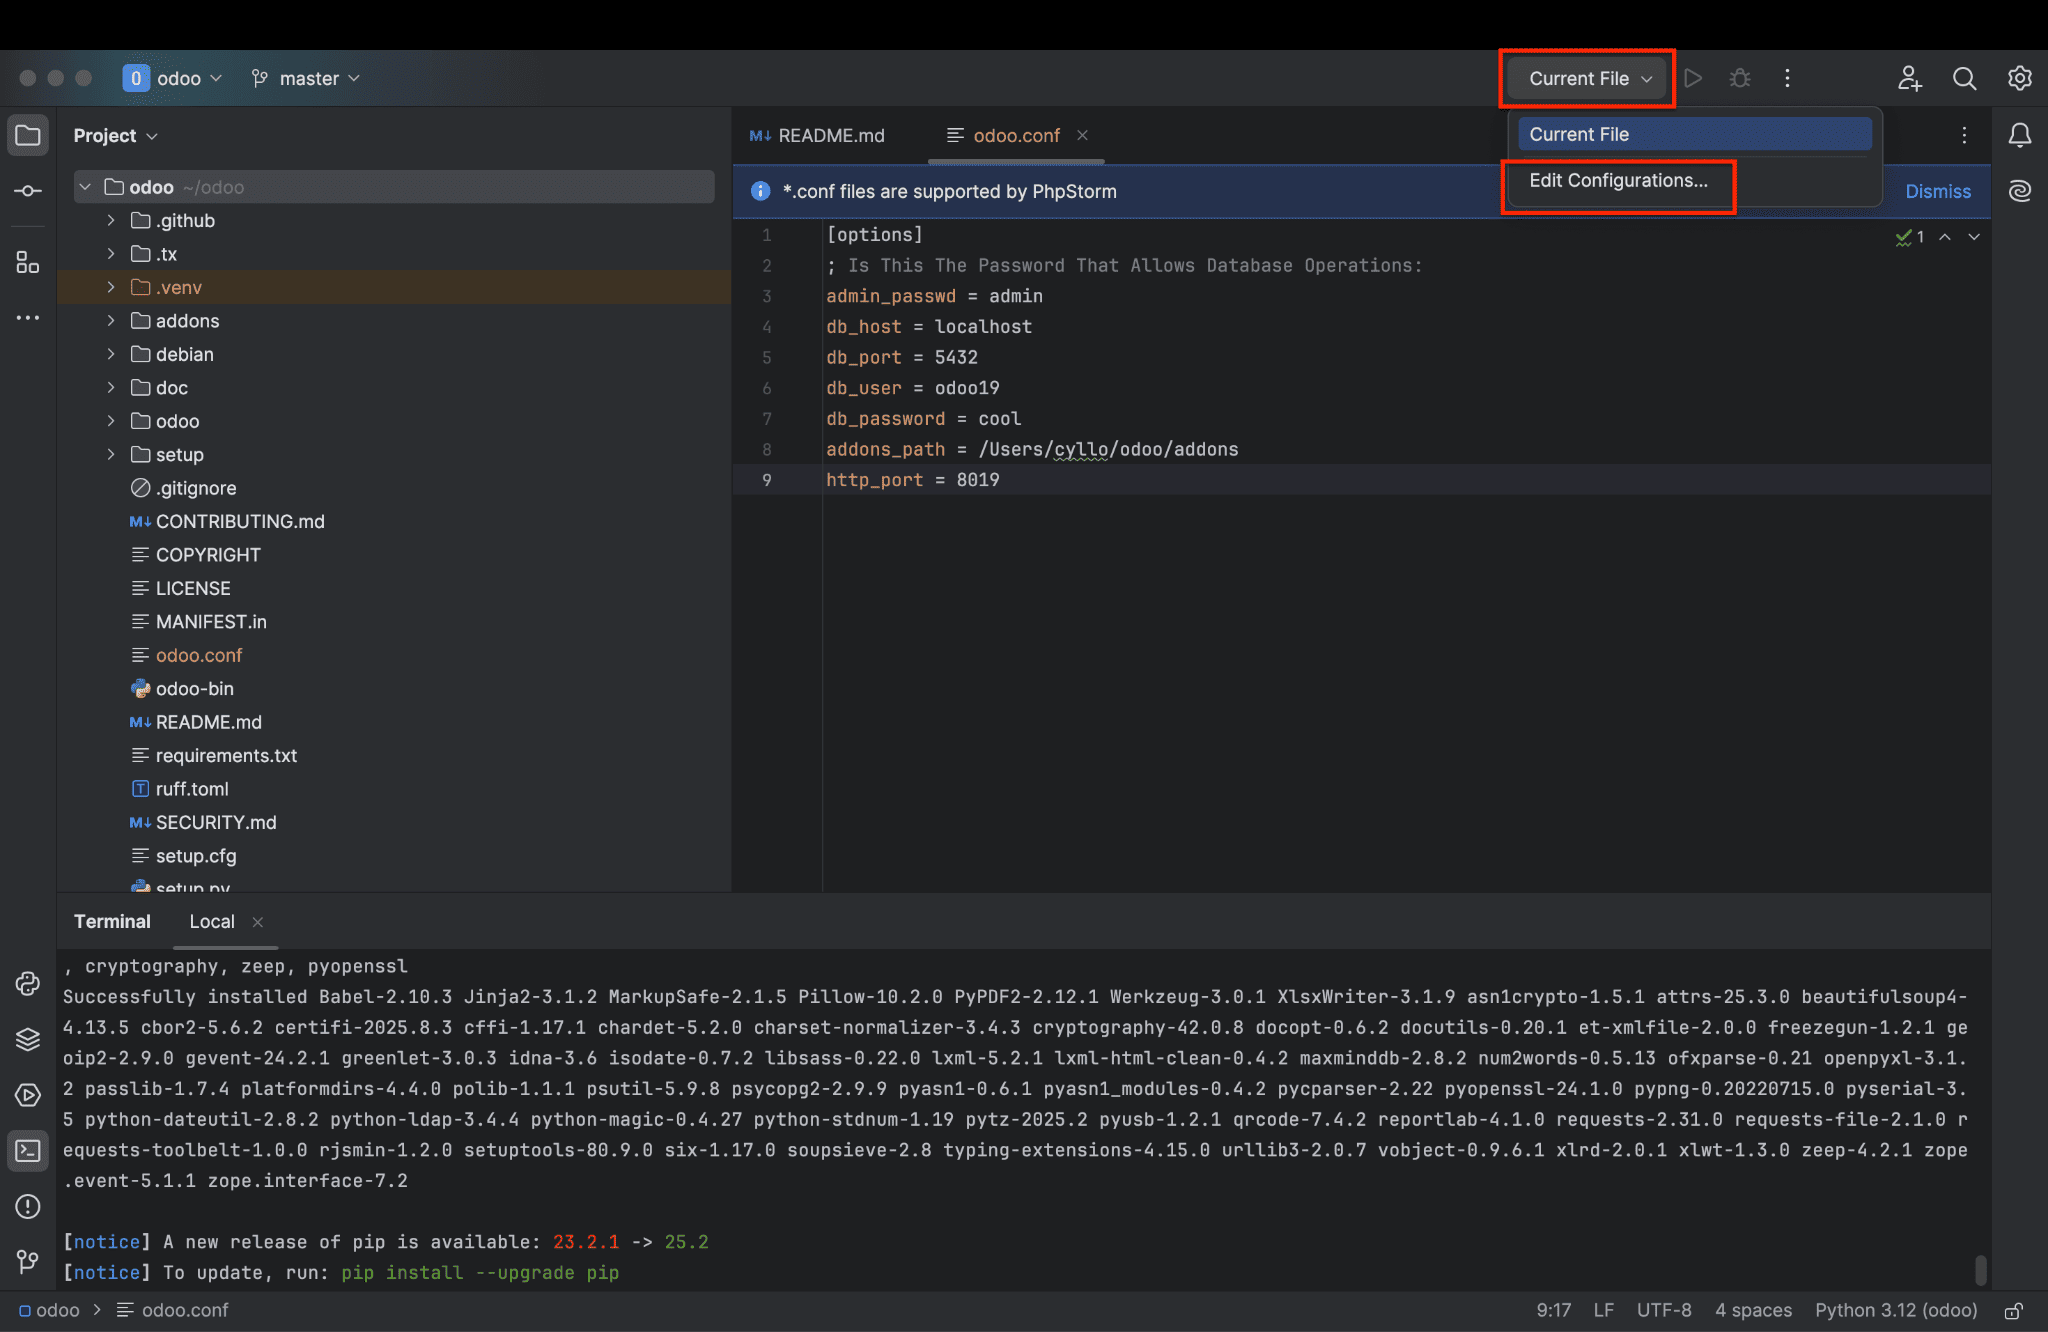
To create a configuration file, right-click on the project directory in PyCharm, then select New > File, and name it odoo.conf. After creating the file, add the following configuration block. Make sure to update the db_password field with the password you set for the odoo database user in the previous step.

[options]
; Is This The Password That Allows Database Operations:
admin_passwd = admin
db_host = localhost
db_port = 5432
db_user = odoo19
db_password = cool
addons_path = /Users/cyllo/odoo/addons
http_port = 8019
Also, update the addons_path value with the actual path You can do this by navigating to the addons directory, pressing Ctrl + Shift + C, and copying the displayed path. Replace the current value of addons_path with this path.
Open the terminal by clicking the Terminal icon located at the bottom-left corner of the window.
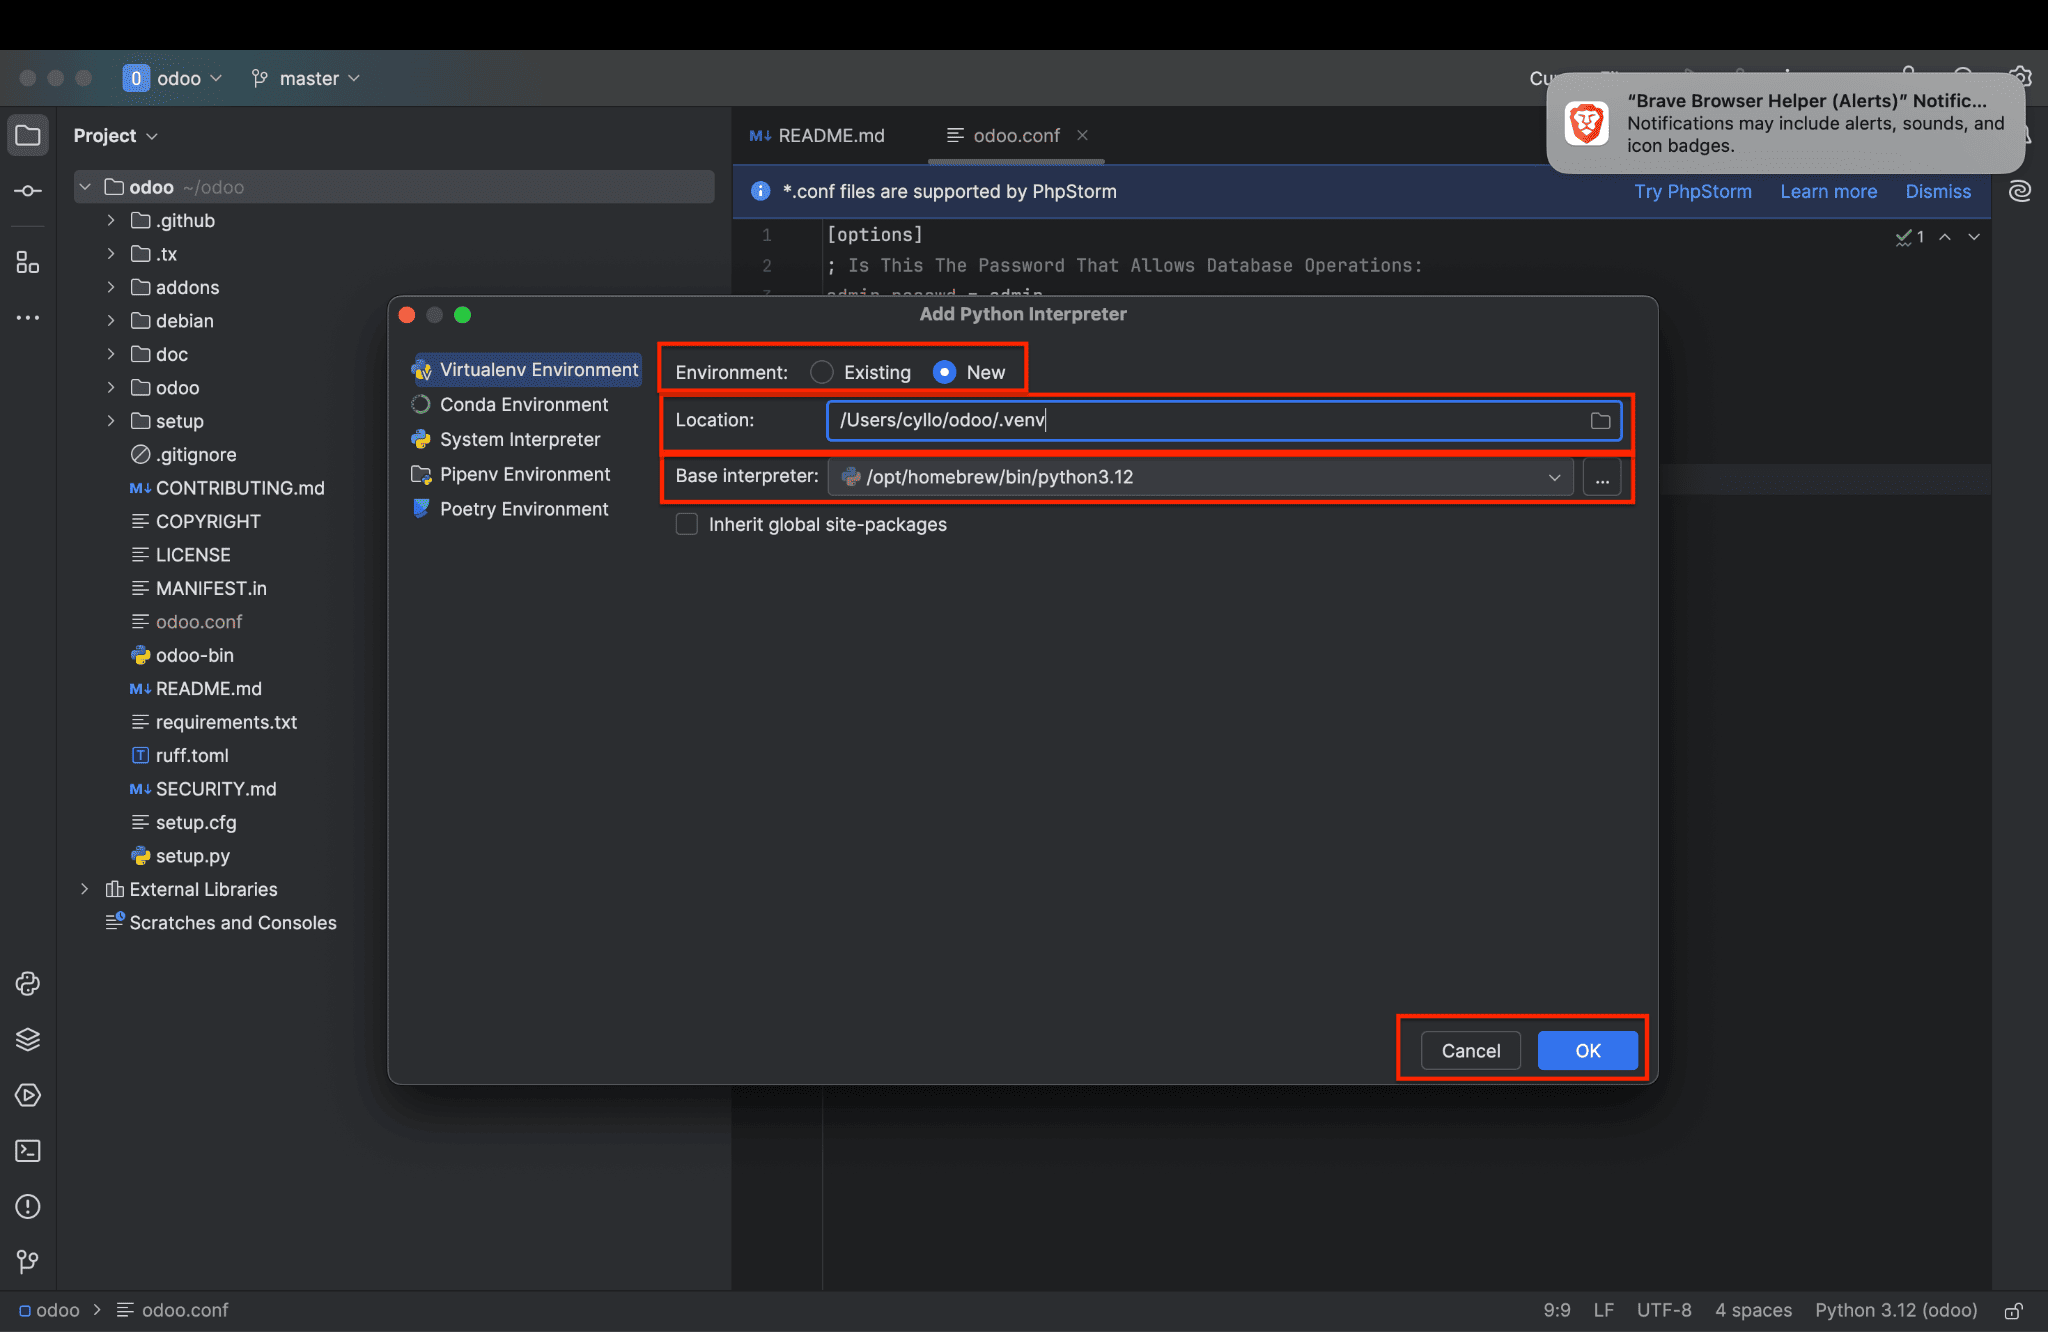
To create and activate a virtual environment (venv) using Python 3.12, run the following commands
python3.12 -m venv venv
source .venv/bin/activate

If no errors are encountered, you can verify that all the dependencies listed in requirements.txt have been installed by running the following command in the terminal
pip install -r requirements.txt
To add a Python interpreter in PyCharm, click on <No interpreter> in the bottom right or from the settings. Then click Add Interpreter > Add Local Interpreter. A popup window will appear where you can configure and create the interpreter.
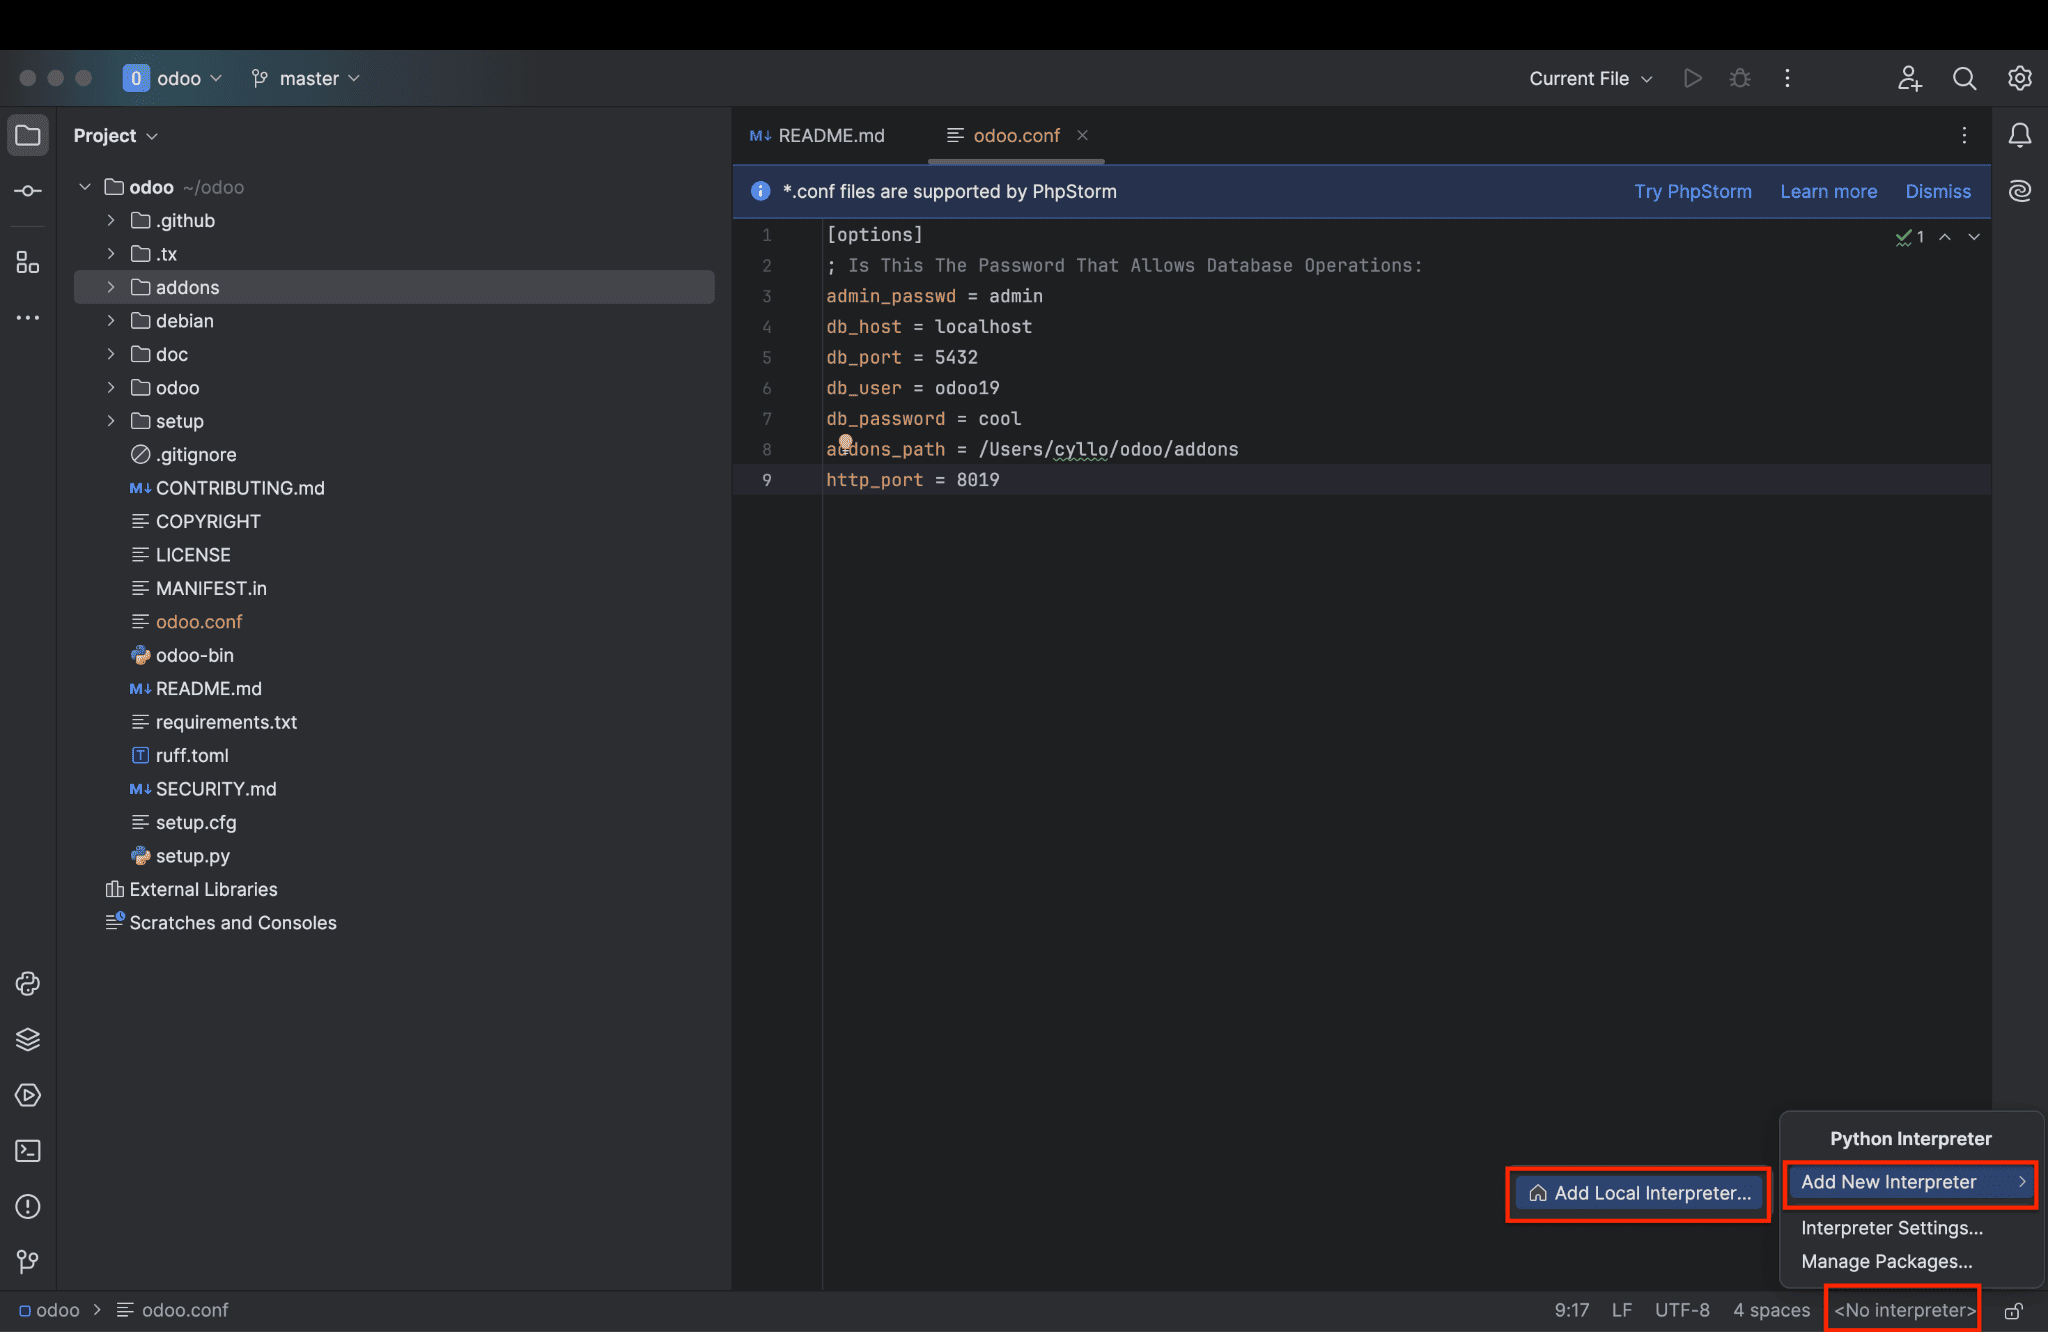
In the popup window, select "New Environment", then choose the location where you want to create it. Next, select the interpreter from your installed Python path. Once you’ve configured everything, click "OK" and then close the window.

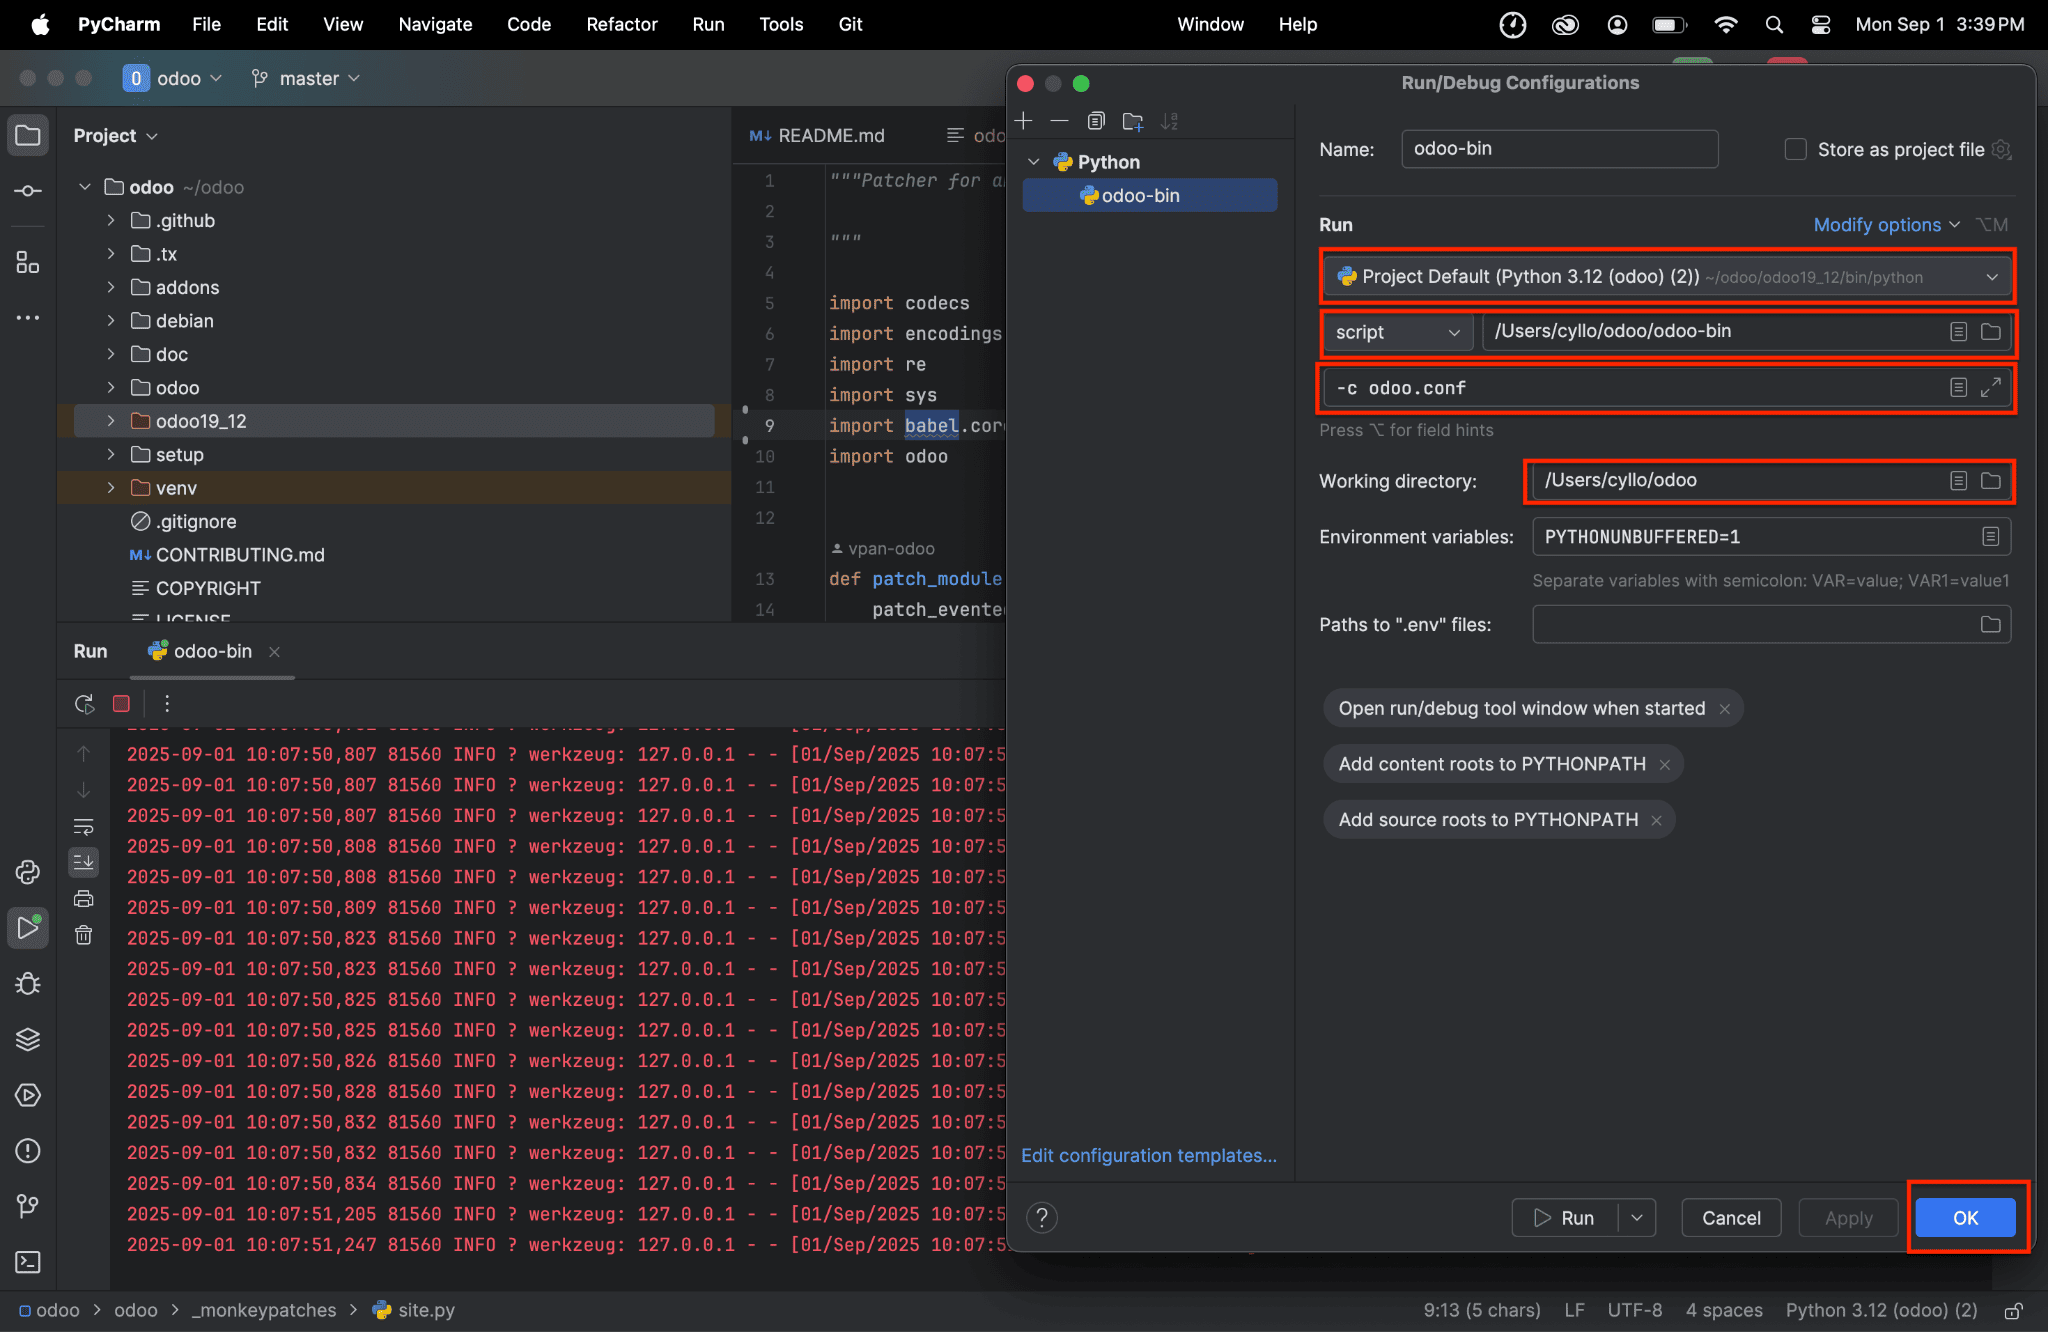
To configure the project, navigate to Run > Edit Configurations under Current File.
When the Run/Debug Configuration dialog box appears, click the "+" button located at the top-left corner of the window. From the dropdown list of available configuration types, select "Python" to create a new Python run configuration.
Next, you'll need to fill in several fields to properly set up the configuration:
- Name: You can assign any name you like to this configuration. This name is just for your reference and helps distinguish this configuration from others.
- Python Interpreter: This field should be automatically filled with the interpreter that was set up for your project in a previous step. This interpreter points to the Python environment (e.g., a virtual environment or system-wide interpreter) that will be used to run your code.
- Script Path: In this field, specify the path to the odoo-bin script. This file is located in the root of the Odoo source directory and is the main entry point for running Odoo.
- Parameters: Here, you will enter the command-line arguments that will be passed to the odoo-bin script when it runs. The -c parameter is mandatory; it specifies the path to the Odoo configuration file (e.g., -c odoo.conf). You can also add additional parameters as needed for your setup, such as enabling debug mode or specifying database information.
- Working Directory: Set this to the root folder of your Odoo project. This ensures that any relative paths used by Odoo (like log files or module directories) are resolved correctly.
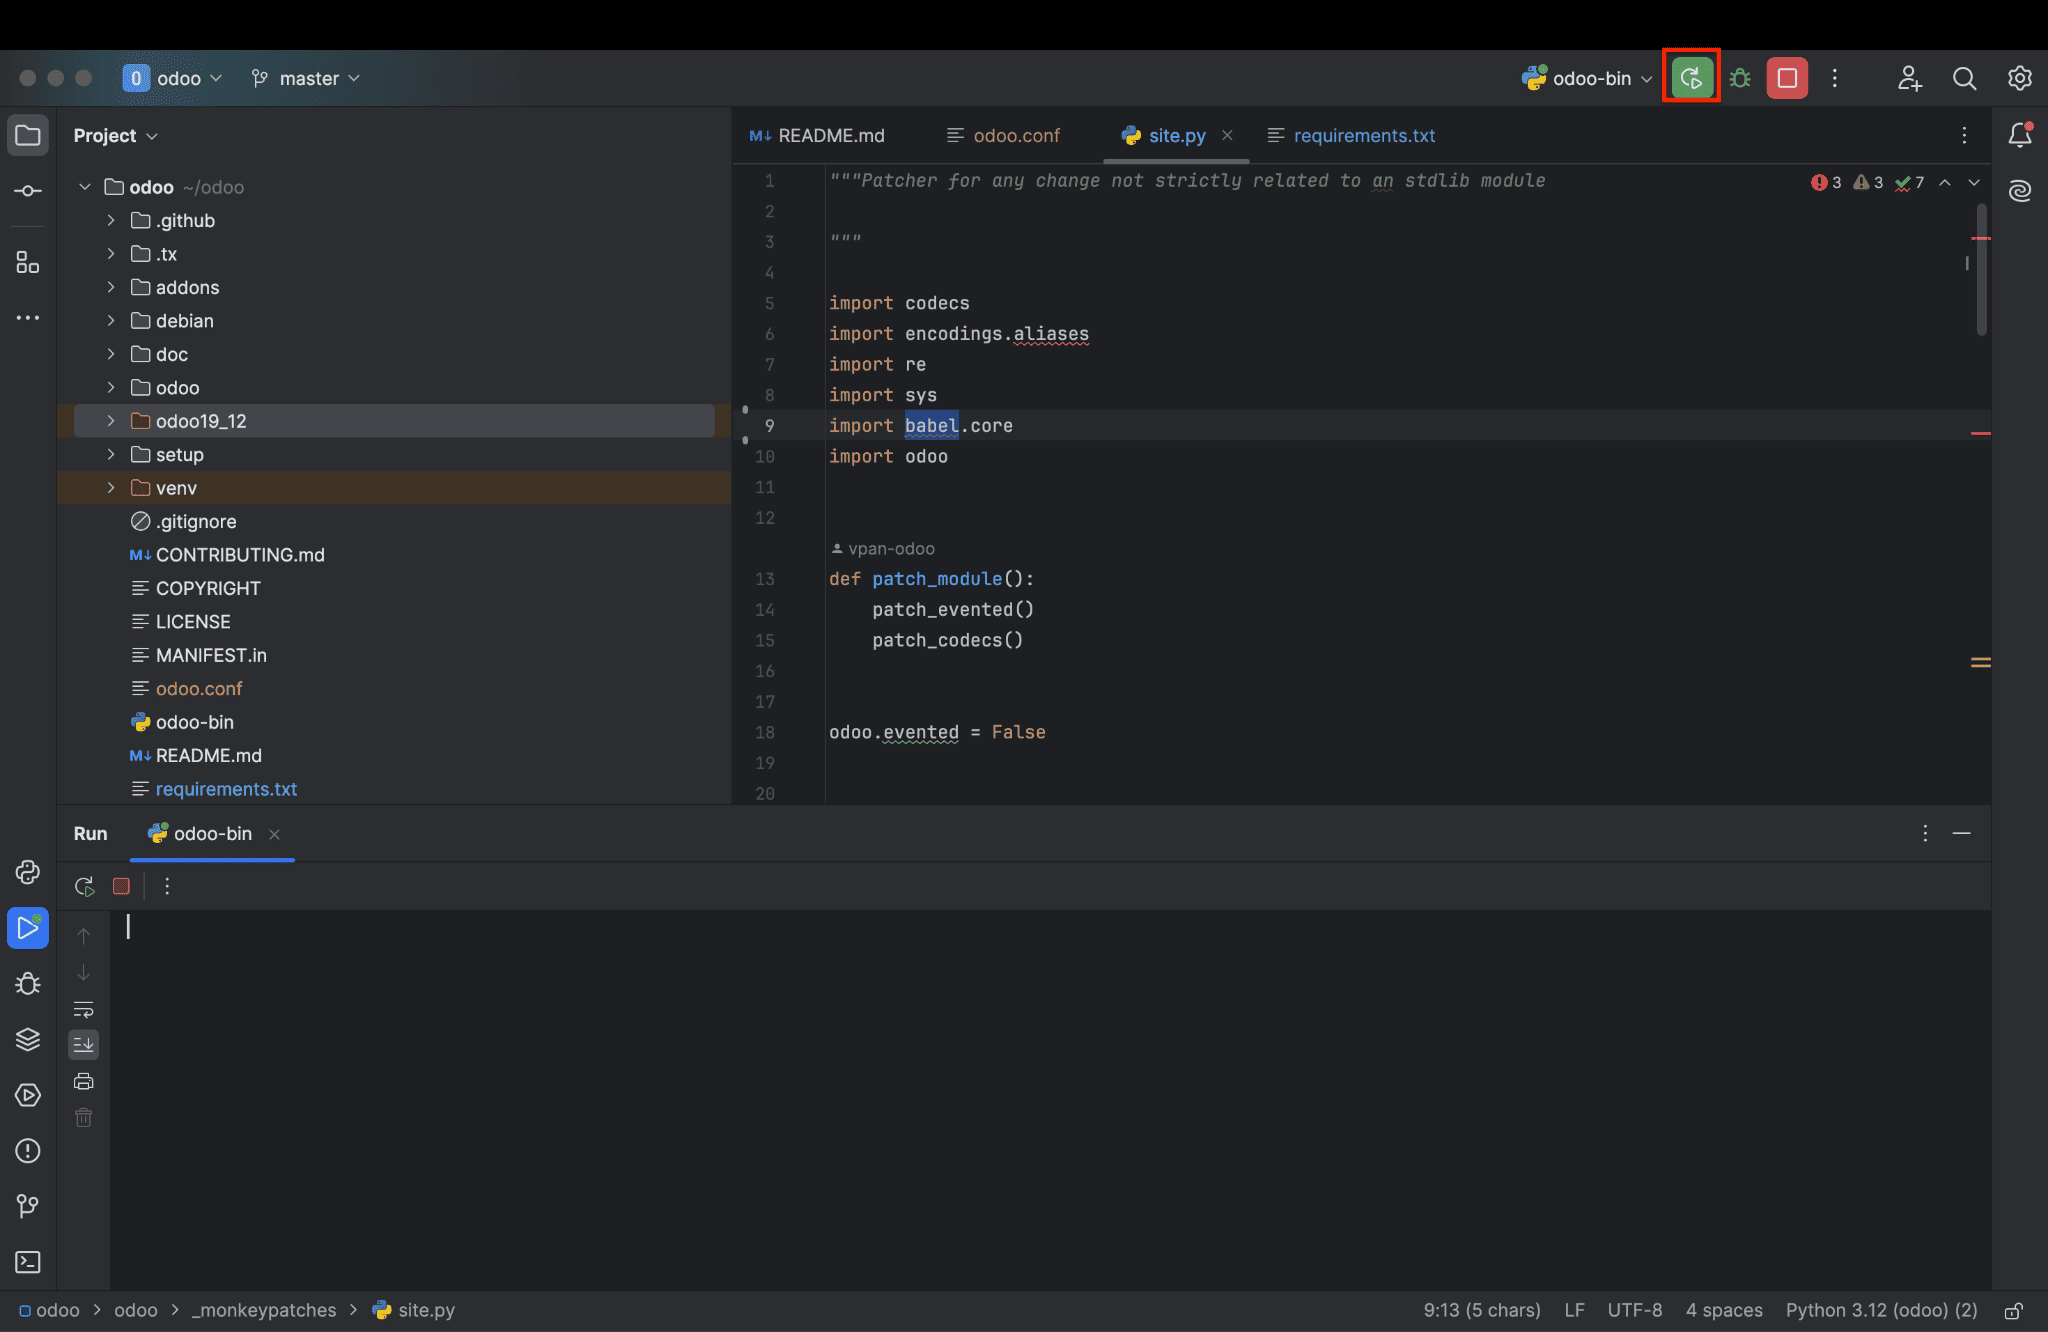
Odoo setup is complete. To begin, click the button highlighted in the image below to launch your project.
You can now access localhost:8019 (your- http_port) in your browser. If all your configurations are correct, the browser will open the odoo database management interface, as shown below.
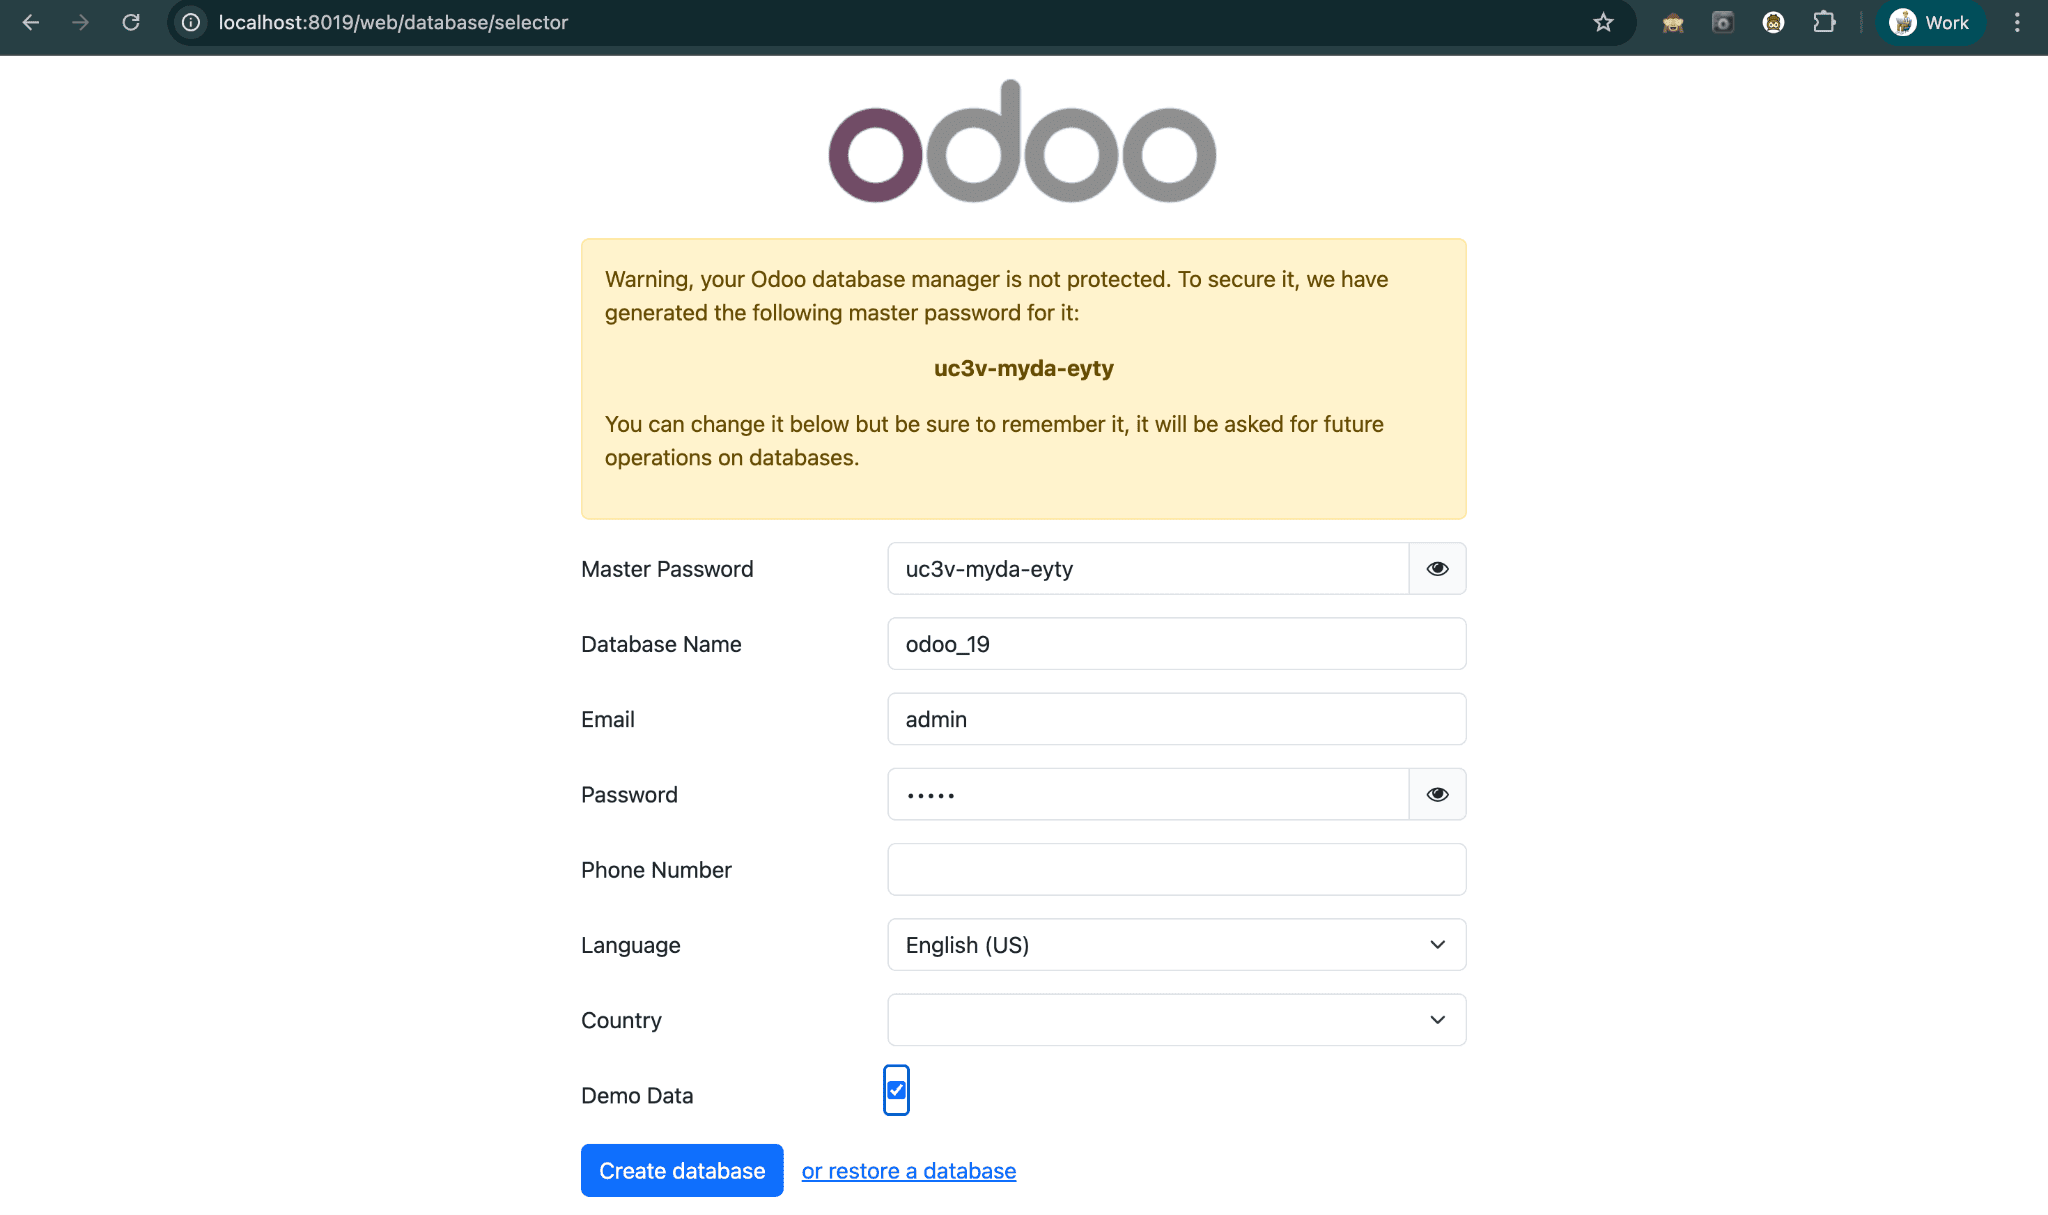
Create your new database and start exploring Odoo modules.
To read more about How to Setup Odoo 19 Development Environment Using Pycharm in Windows, refer to our blog How to Setup Odoo 19 Development Environment Using Pycharm in Windows.