Accounting of the company is an aspect that should be managed and monitored properly in order to avoid cash shortages and regulate cash flow smoothly. The amount of money received and paid should be having a clear mode of monitoring in different levels of the management. The management of the receivable and the payable accounts is done in separate accounts for each customer and vendor. This is the conventional way of managing the business but Odoo platform enables the user to have only one payable and receivable accounts for all its customers and vendors. Some might say this is an unorthodox way of dealing with the accounts but the Odoo platform has the advantage of keeping track of all the customers and vendors in odoo accounts with proper details. While generating reports the Odoo platform will enable the users to modify their searches and the details of each vendor and the customer are clearly mentioned separately. This eliminated the need to have separate reports for each customer and vendor. Also, a single report would depict all the information about all the customers and vendors which is available to the user.
Generally in the case of a business organization in case of a customer buying a product and paying towards it, from the companies point of view it would be credited to the companies bank account and allocated to the receivable ledger. On the other hand when the company buys a product from the vendor and pays towards it, from the company's point of view the amount would be dedicated from the company's bank account and allocated with the payment ledger.
This blog will discuss on
1. Odoo account receivable for customers
2. Accounts payable for vendors in the Odoo platform.
Accounts receivable from customers
Let's discuss the payable and receivable accounts of the company with the help of an example.
Step 1: create a customer and provide the details along with the address and contact details. In the accounting menu of the product, the accounts for payable and receivable are displayed. These are default settings of Odoo allowing the user to generate transactions in the customer account.

Since the accounts are to be directed to a designated one the user should assign a new account to the customers by creating a chart of account for the specified customer
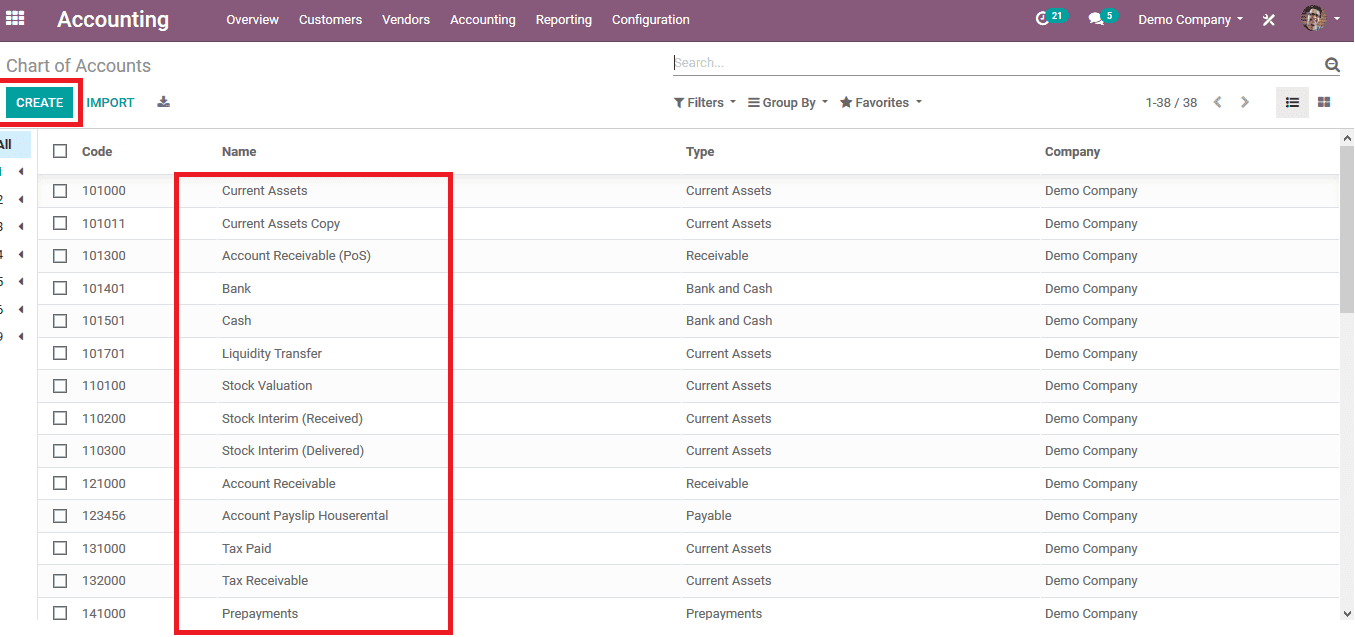
Step 2: To create a specified chart of accounts from the configuration menu select the chart of accounts option which will guide the user to the chart of the accounts menu. The user can view various charts of accounts present in the company and create one as per the need in the create option.
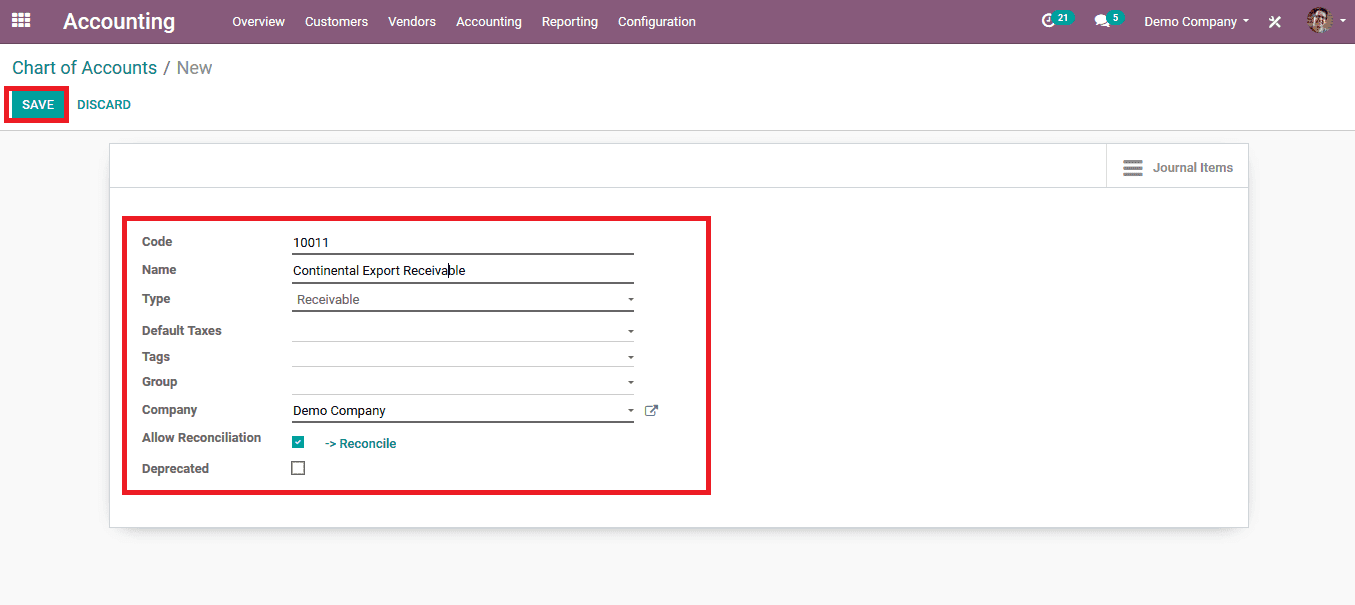
Step 3: Upon selecting to create an account the user can select the code upon which the account will be known along with the name.
Since the customer is liable to pay towards the company the account type should be receivable. Since the payment is received by the company from the customer.
Enable the reconcile icon and save the details.
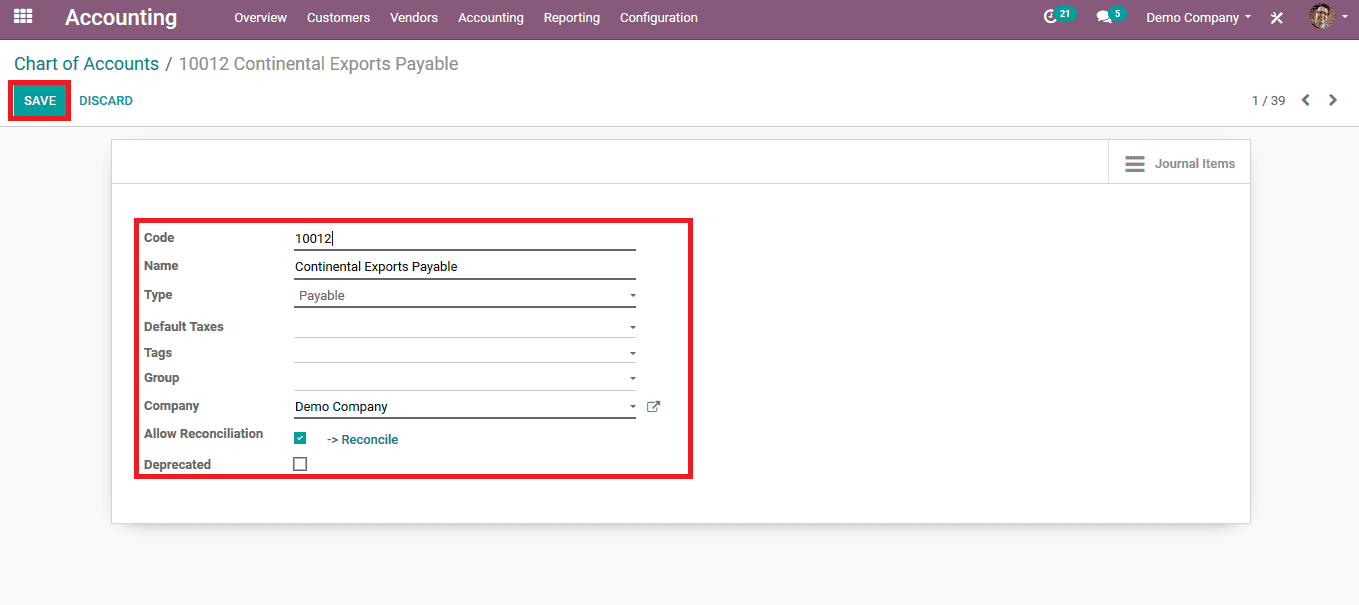
At Instances where the chart of accounts is to be created for the payable account i.e. for the company to pay the liable money to the vendors. The company has collected certain products and is liable to pay toward the vendor those payment details would be allocated in the accounts payable section.
Fill up the details upon creation of a payable account, provide the code along with the name, and the type of account should be payable.
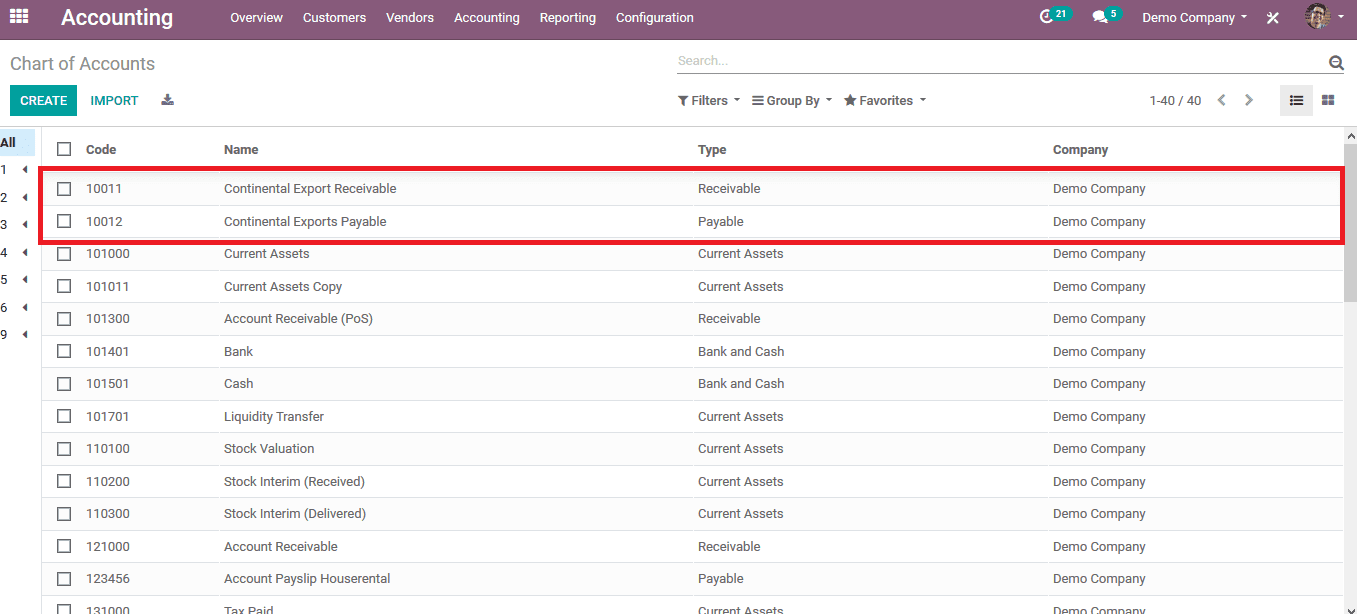
In the chart of accounts menu, there would be the listing of the accounts created along with its type and the company name if the user has multiple company domains.
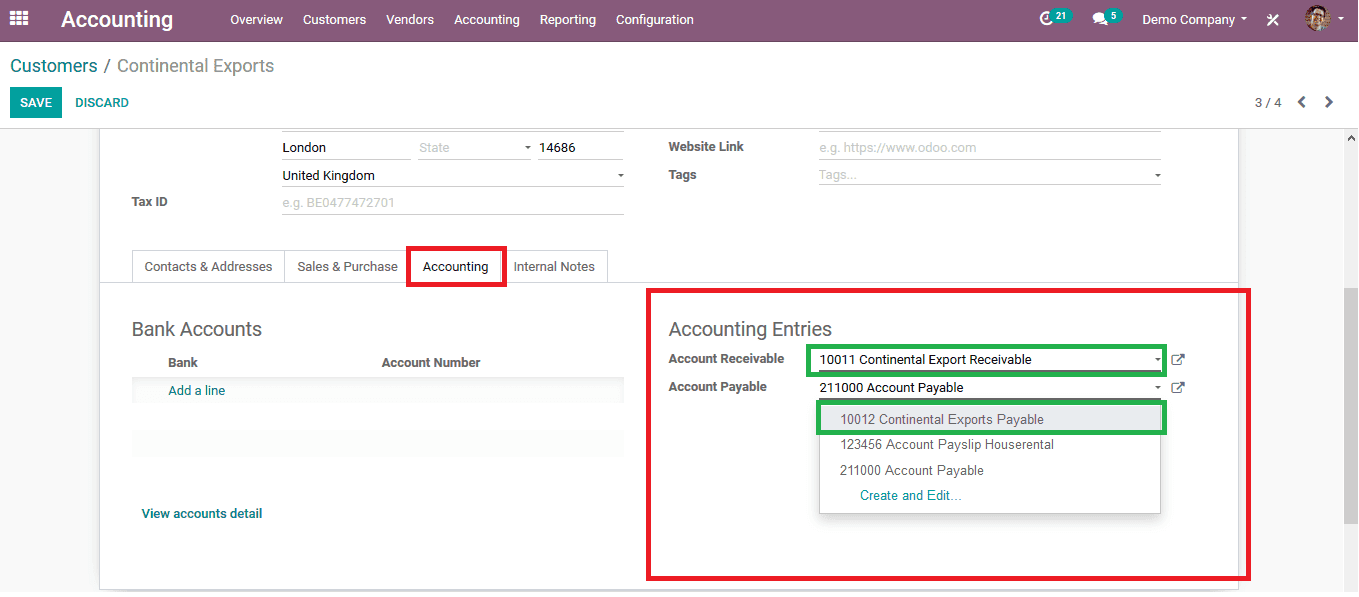
To use the created accounts with the representative customers the user should enable them by allocating the accounts in the customer menu.
Step 4: Choose the required customer in the accounting menu of the customer and allocate the respective chart of accounts for both payable and receivable modes.
To demonstrate how the process works the user should create an invoice and check.
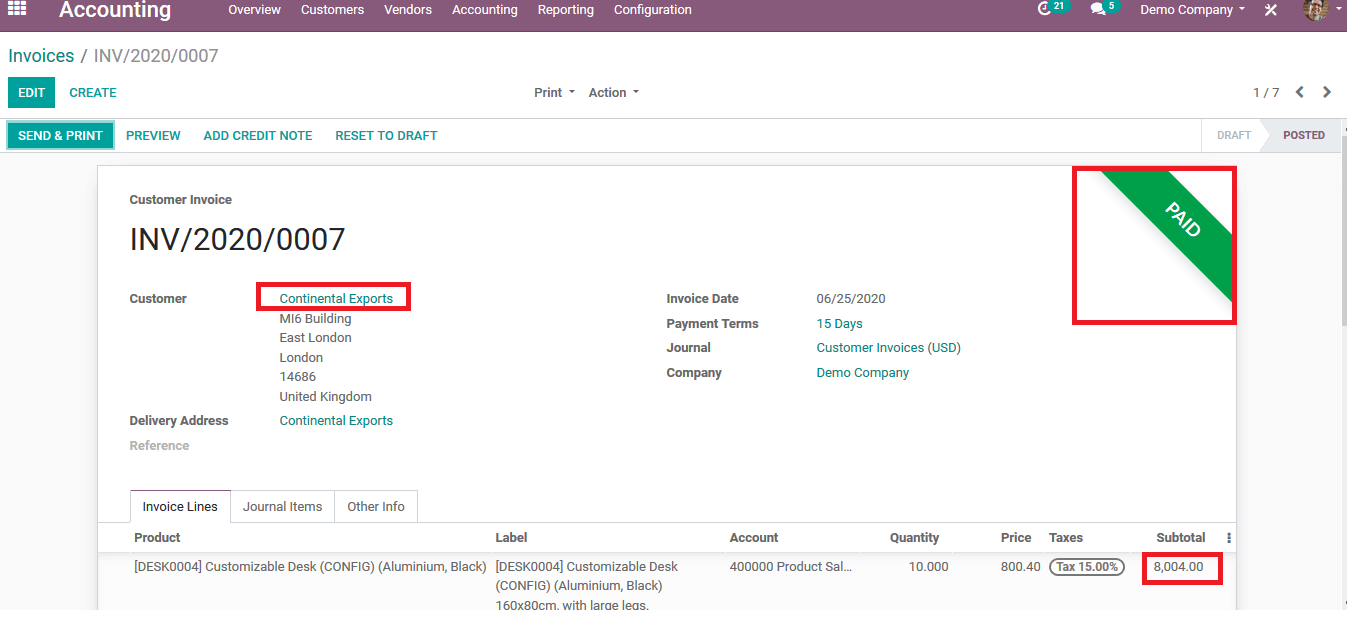
Step 5: Create an invoice from the customer menu of the accounting module upon the selected customer and post the invoice for the customer to be paid by them.
If the customer validates the delivery and pays the invoice at the instance of payment upon receiving products the invoice would depict the payment sign in the invoice tab. The user should also check for the payment amount.
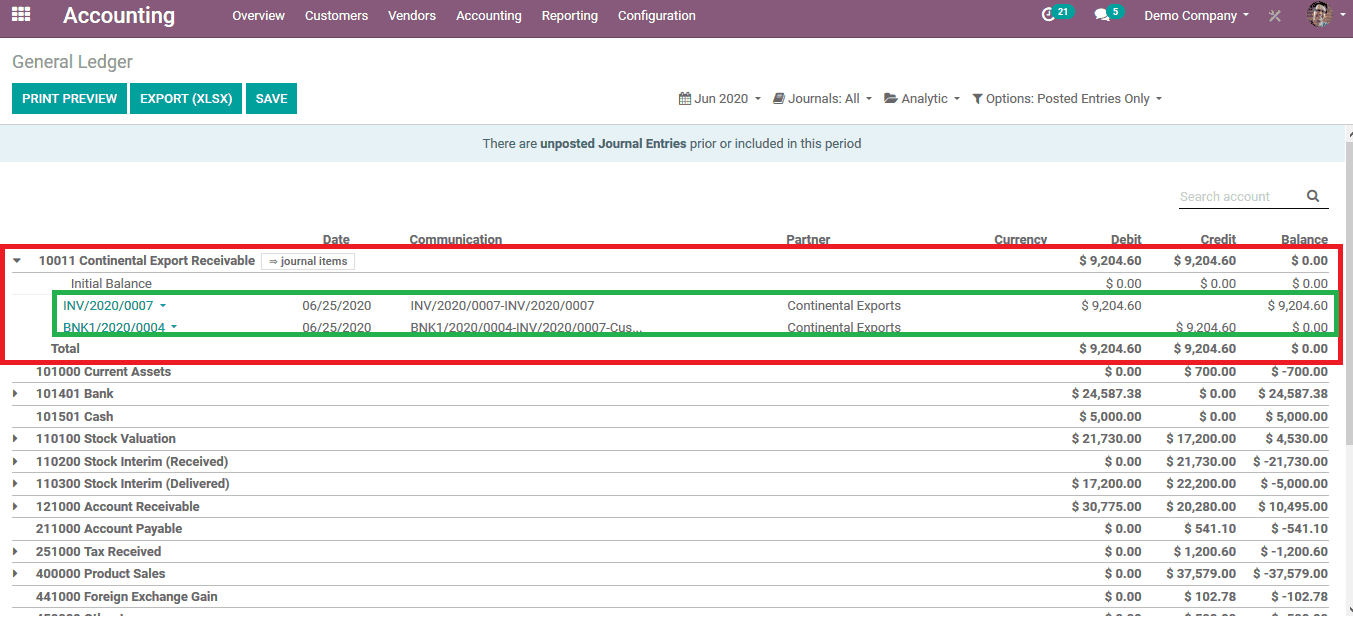
The user can check for the payment details in the general ledger of the company where all chart of account transactions are listed out.
Step 6: Select the general ledger from the reporting menu of the Odoo accounting dashboard.
Upon selecting the receivable account the user can view the invoice and the bank statements allocated with the account
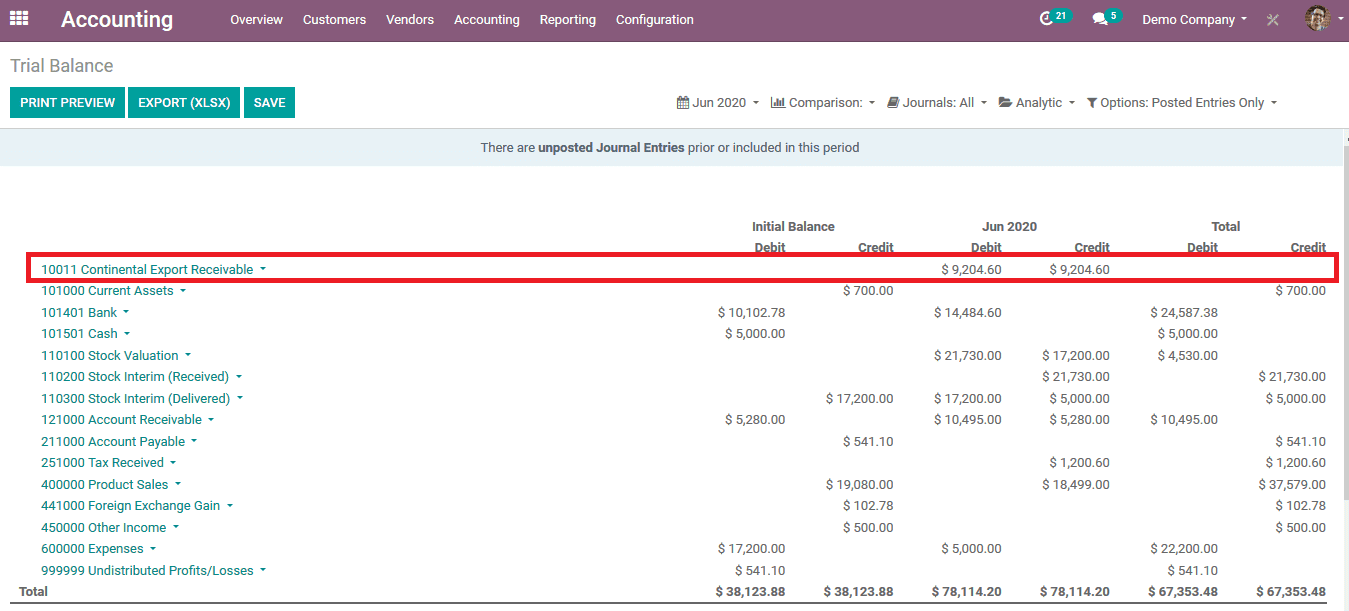
The user can also view the trial balance of the company's various charts of accounts by selecting the trial balance report from the reporting menu . The image below depicts the trial balance report of the company's various accounts.
Accounts payable for vendors
As described earlier the company has the liability to pay for the vendors upon purchasing the products. The financial statements and information of the same can be depicted on the accounts payable of the company.
To create a payable Odoo account and see how it works on a vendor let's look at an example.
Step 1: Create a vendor from the vendor menu of the accounting module or the user can choose one from the same.
As in the account menu of the vendor, the accounts payable and receivable are depicted as the default ones from the odoo the user can change this by creating a chart of the account and allocating the vendor with it.
Step 2: Create a chart of accounts at the chart of the accounts menu in the configuration tab. While creating the account the type of the account should be a payable one as mentioned earlier in the customer section. Follow the same steps of the customer and a payable account will be created.
Step 3: Allocate the vendor with the created payable account.
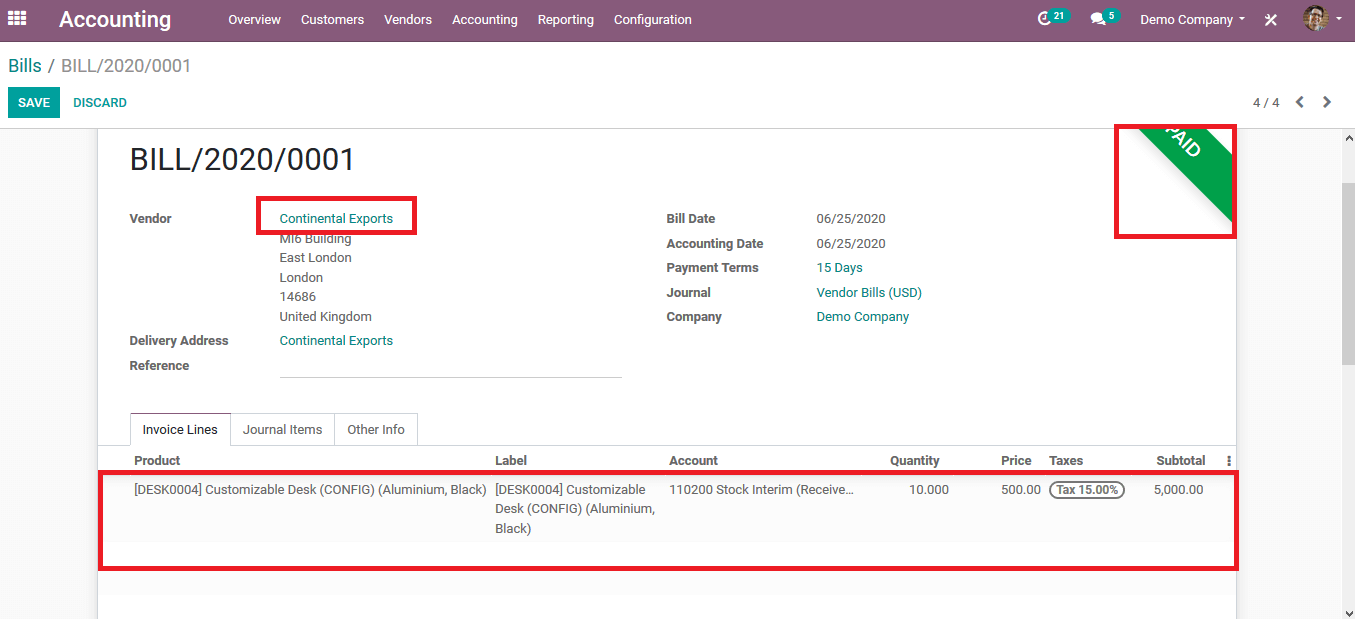
Step 4:Create a bill from the vendor menu of the accounting module and fill in the details. Upon validating the bill the payment should be made by the company via manual or online transfer. The user should check the due amount while doing the payment.
If the payment is successful the bill is depicted with a paid mark.
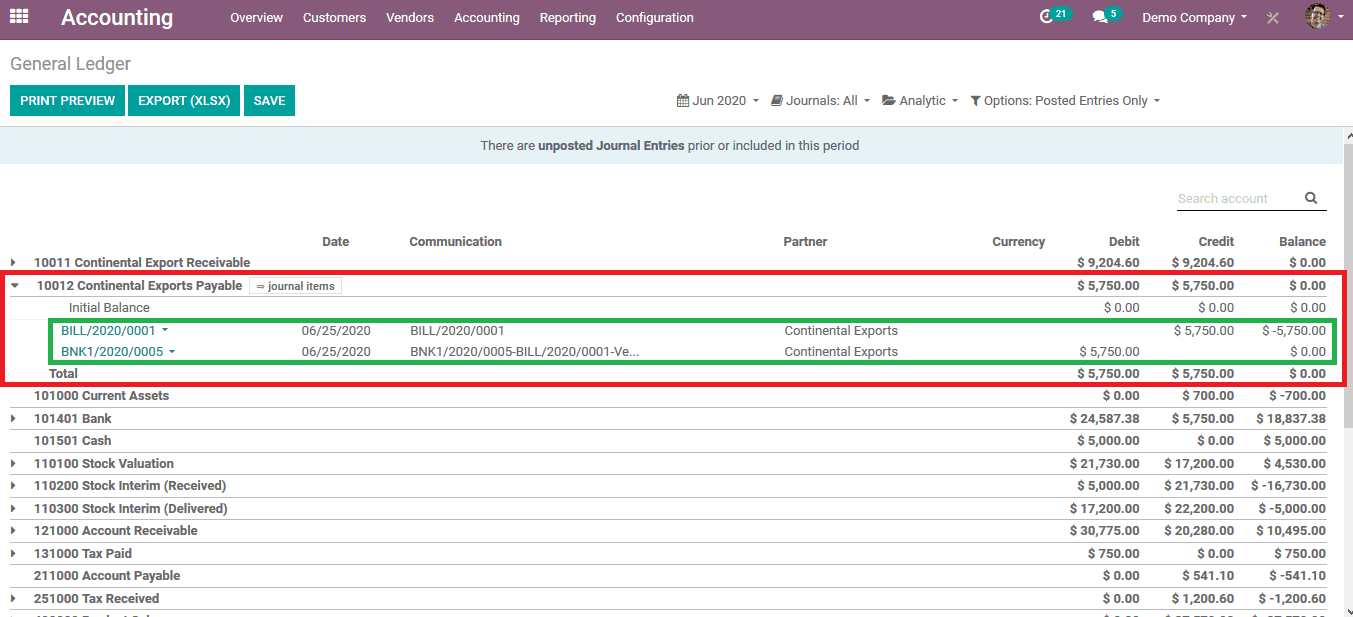
The user can check for the payment details in the general ledger of the company where all chart of account transactions are listed out.
Step 5: Select the general ledger from the reporting menu of the accounting dashboard.
Upon selecting the payable account the user can view the invoice and the bank statements allocated with the account.
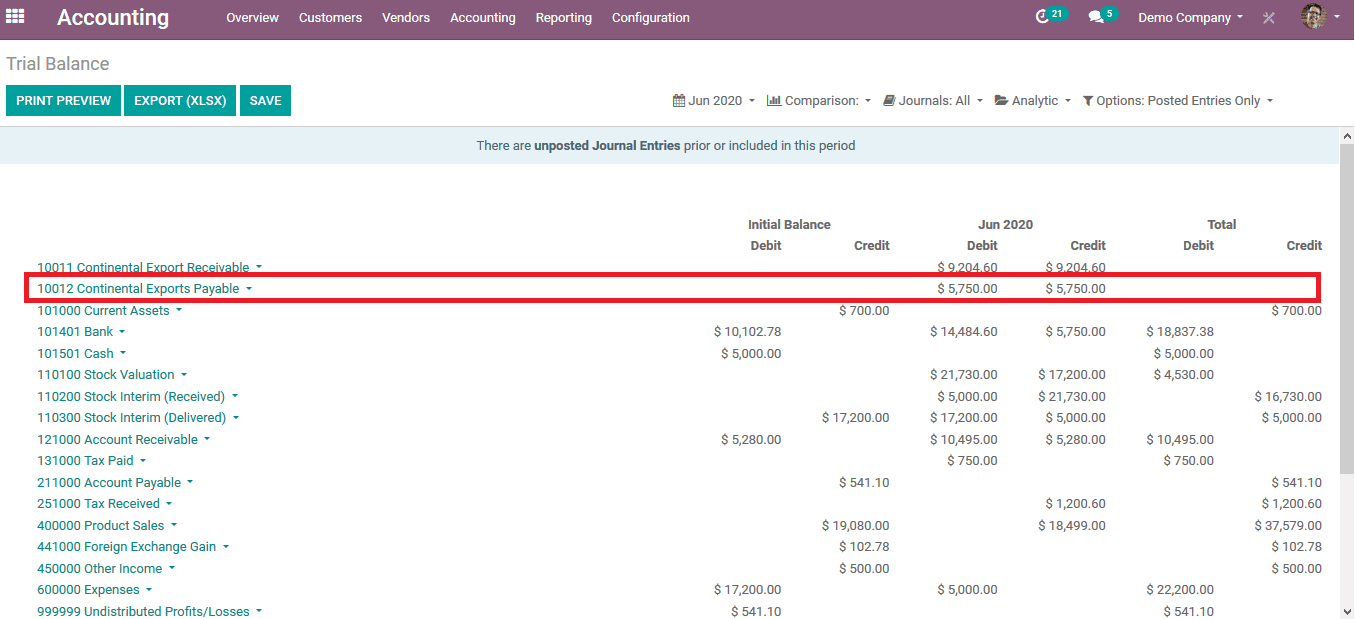
The user can also view the trial balance of the company's various charts of accounts by selecting the trial balance report from the reporting menu. The image above depicts the trial balance report of the company's various accounts.
Since the Odoo accounting modules transactions are confined to a common general ledger from which the user can derive the ongoings of the company with its customers and vendors there is no option to showcase them individually. The partner ledger option in the reporting menu of the accounting module helps the user to filter and search the list of customers and the vendors individually.
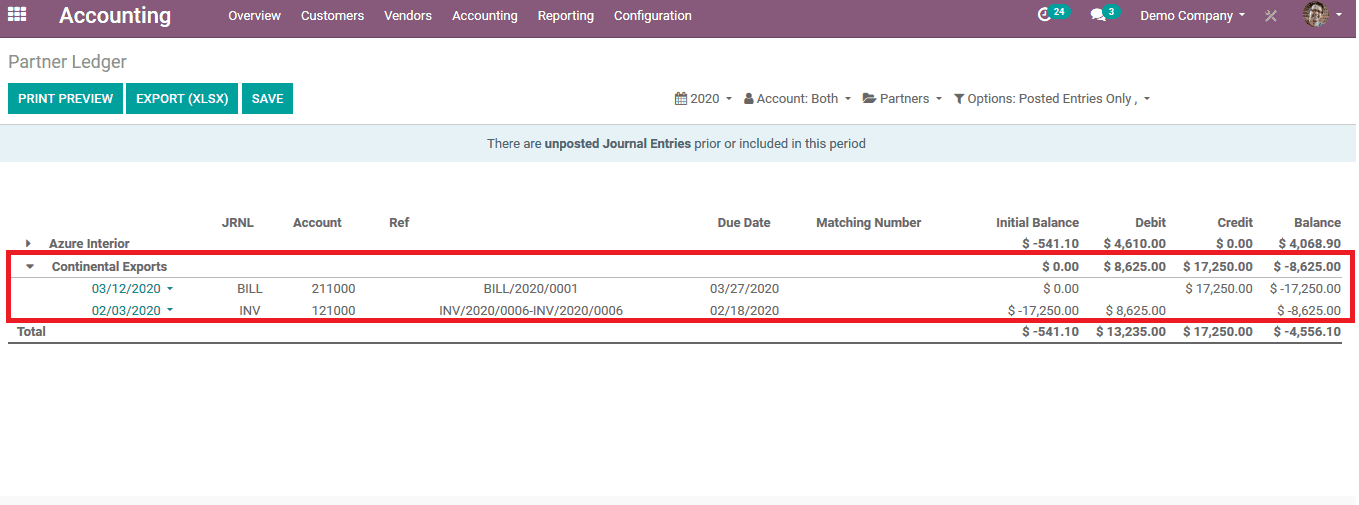
The above image depicts the partner ledger information of the same customer and the vendor described above. As the user can deduct the amount of money should be paid or received by looking at the total amount. Here the company is liable to pay 8625$ since its indicated by a negative sign. By using their reporting function the user can deduce the total transactions due on each customer or vendor.
To know more about the features and functioning of Odoo Accounting, refer to Odoo Accounting and Finance and If you are looking for a makeshift in your accounting system, write to us at odoo@cybrosys.com. We have a decade of experience in implementing accounting solutions in Odoo.