In inventory and supply chain management, cross-docking refers to a streamlined goods movement strategy designed to minimize storage time and accelerate order fulfillment. Instead of holding products in inventory, goods received from suppliers are immediately transferred to outbound shipments for customers. This approach is especially useful when products are required to be delivered on demand, eliminating the need for long-term storage after purchase or production.
In a cross-docking operation, a dedicated staging or lotting area is assigned within the warehouse or business facility. This area is typically located close to the loading docks to ensure quick and efficient handling of goods. All inbound and outbound activities are coordinated in this zone, allowing products to be dispatched rapidly for delivery rather than being stocked in warehouse shelves. As a result, cross-docking helps reduce inventory holding costs, improve delivery speed, and optimize warehouse space utilization.
The shipping and logistics industry provides a clear example of cross-docking in practice. In many ports, containers are unloaded from cargo ships using cranes and placed directly onto trucks while the ships are still docked. These containers are then transported straight to customers or distribution points without ever being stored in a warehouse. This direct transfer model highlights the efficiency and time-saving advantages of cross-docking in real-world business operations.
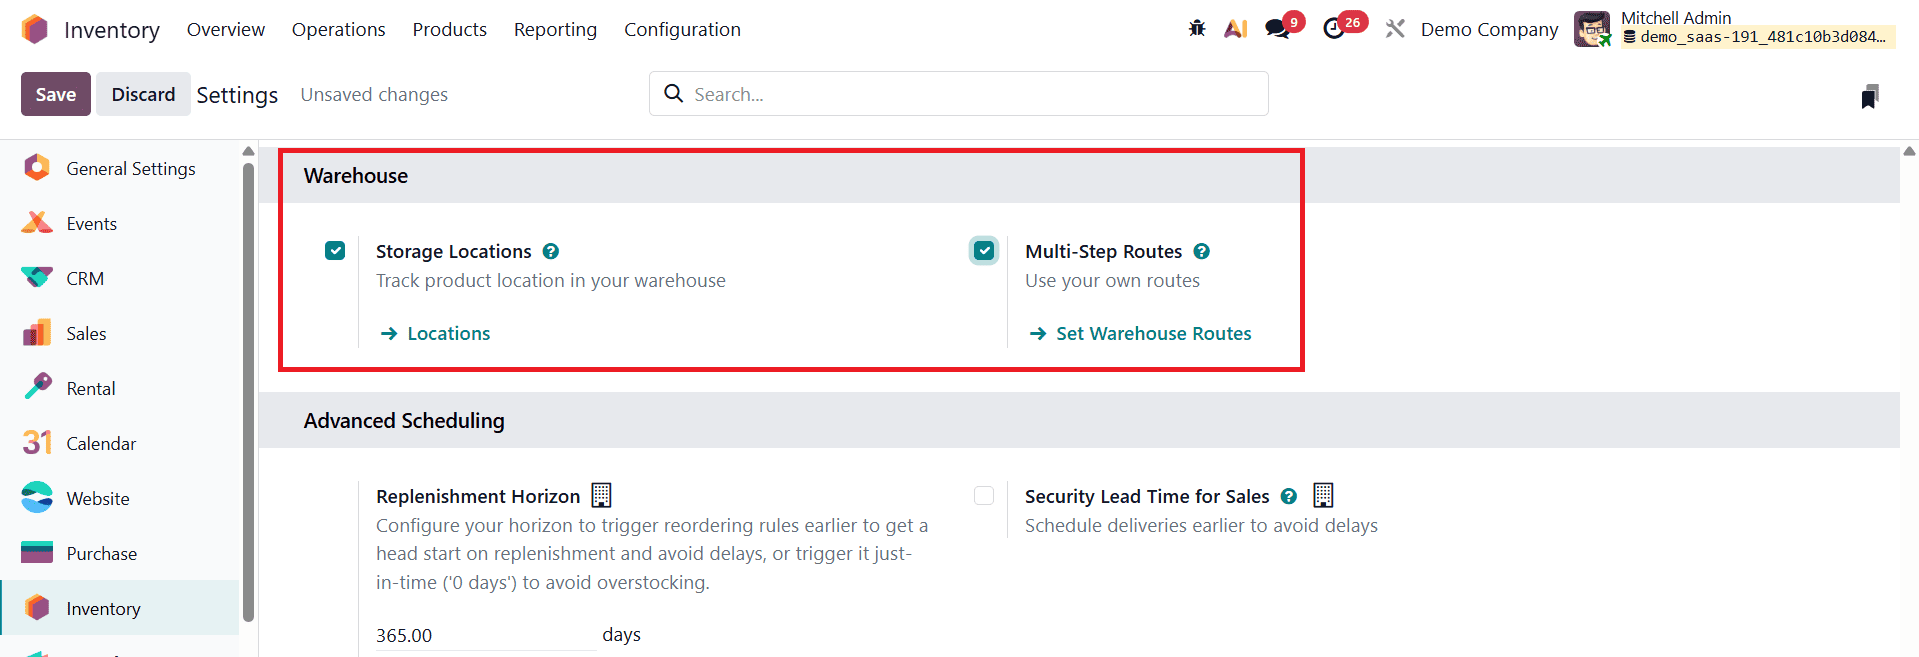
With Odoo 19, businesses can efficiently implement and manage cross-docking within their inventory workflows. Odoo’s flexible warehouse configuration and routing capabilities allow organizations to automate the movement of products from receiving locations to delivery locations with minimal manual intervention. To begin implementing cross-docking in Odoo 19, users must first enable the Multi-Step Routes option in the Inventory module. This setting can be activated from the Settings menu under the Warehouse section, laying the foundation for configuring advanced routing and cross-docking processes in the system.
If the organization operates multiple warehouses, the appropriate warehouse should be selected from the Inventory > Configuration > Warehouses menu. This ensures that the cross-docking workflow is applied to the correct operational unit.
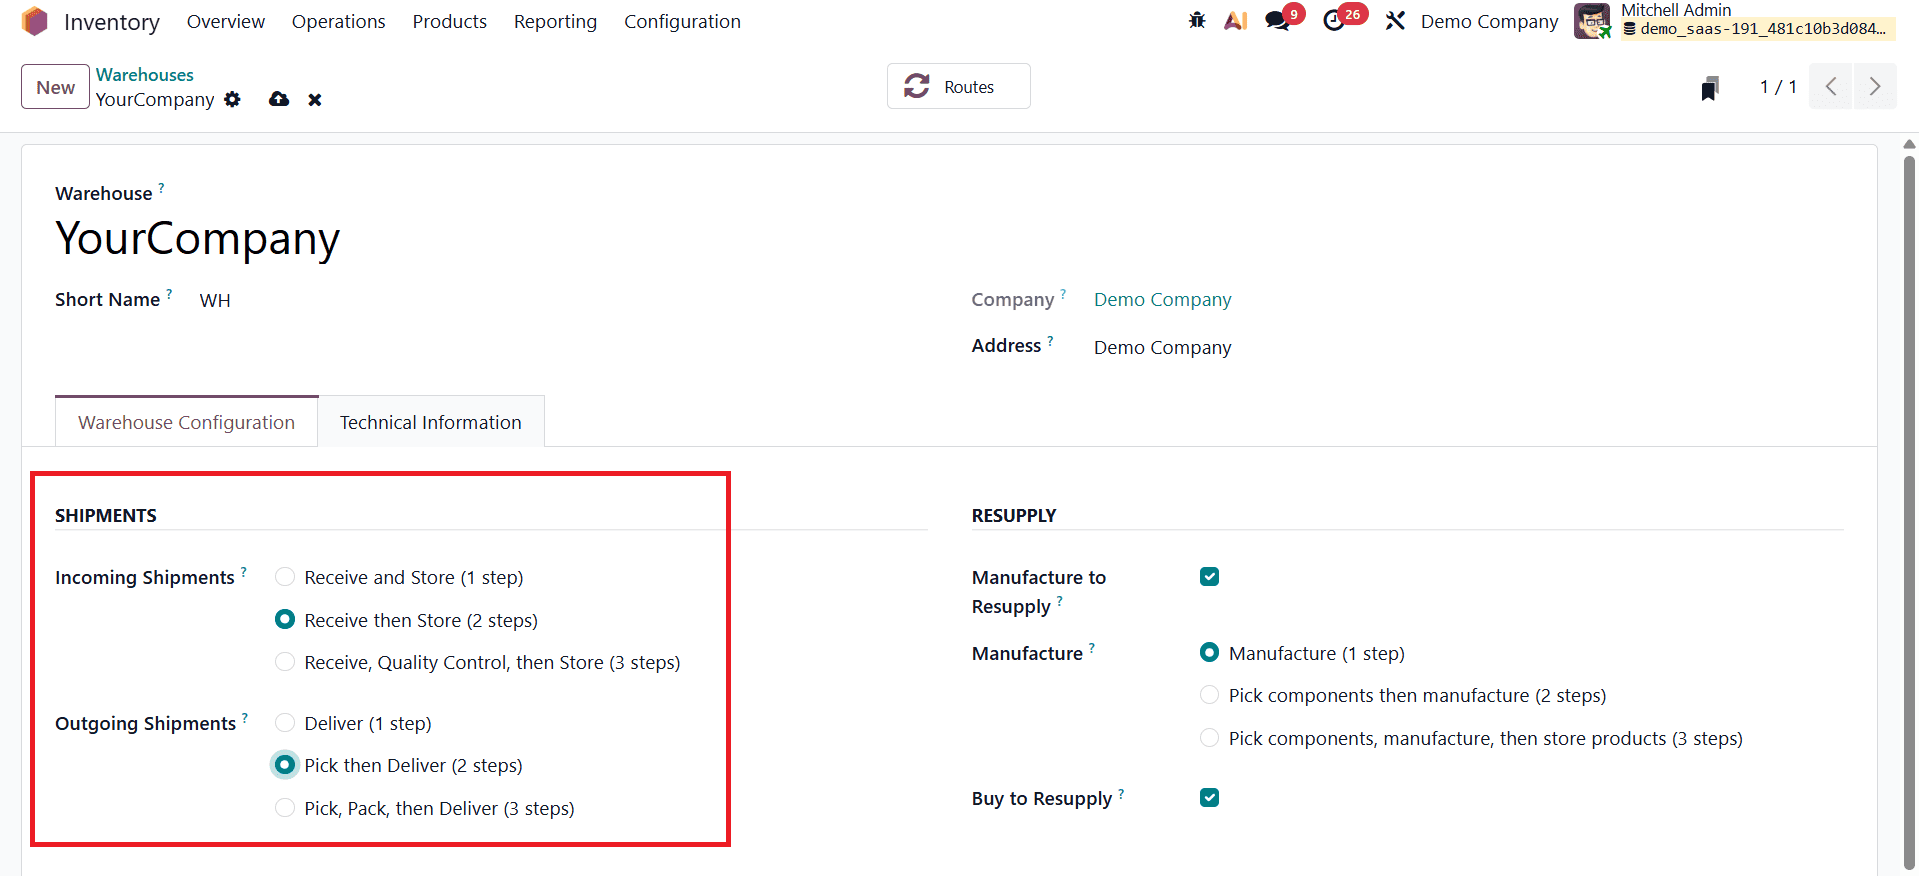
Within the selected warehouse configuration, the Shipments section must be updated to modify both incoming and outgoing shipment behaviors. For cross-docking to function correctly, Incoming Shipments and Outgoing Shipments should be configured as two-step operations. This setup allows products to move through an intermediate location rather than being directly stored, enabling smooth transitions between receipt and delivery points.
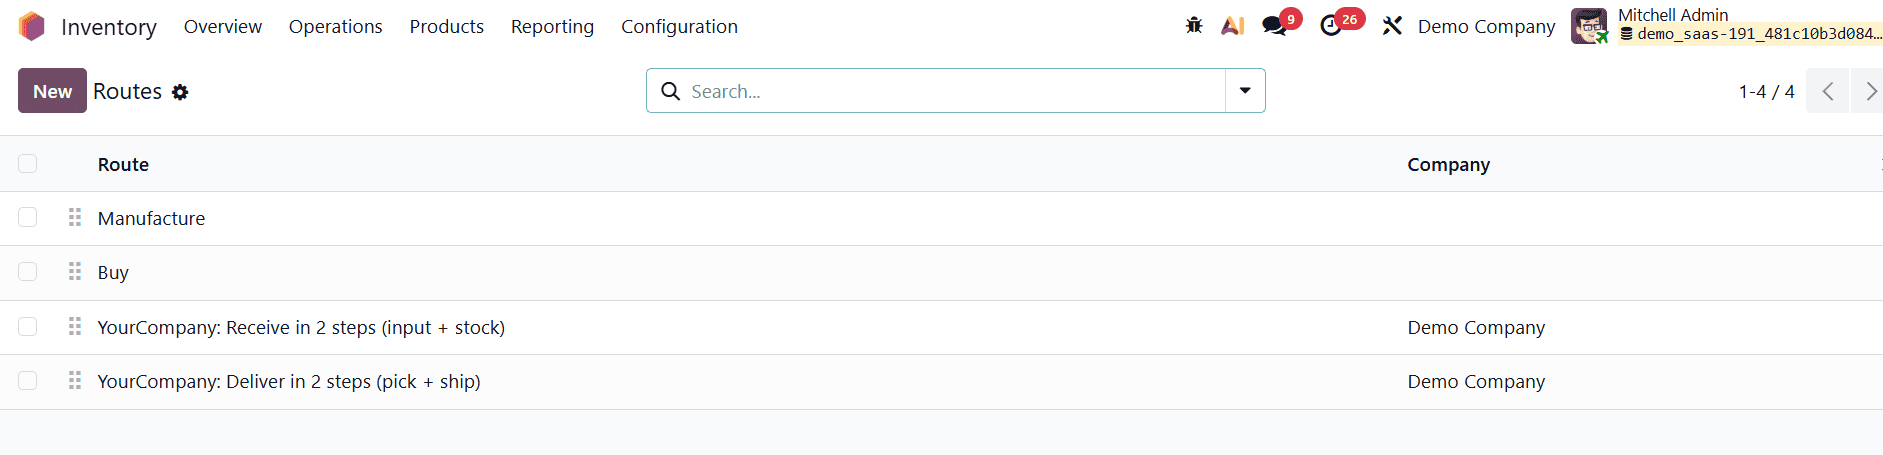
After saving the warehouse configuration, users can proceed to define a custom route by navigating to Inventory > Configuration > Routes and clicking the New button.
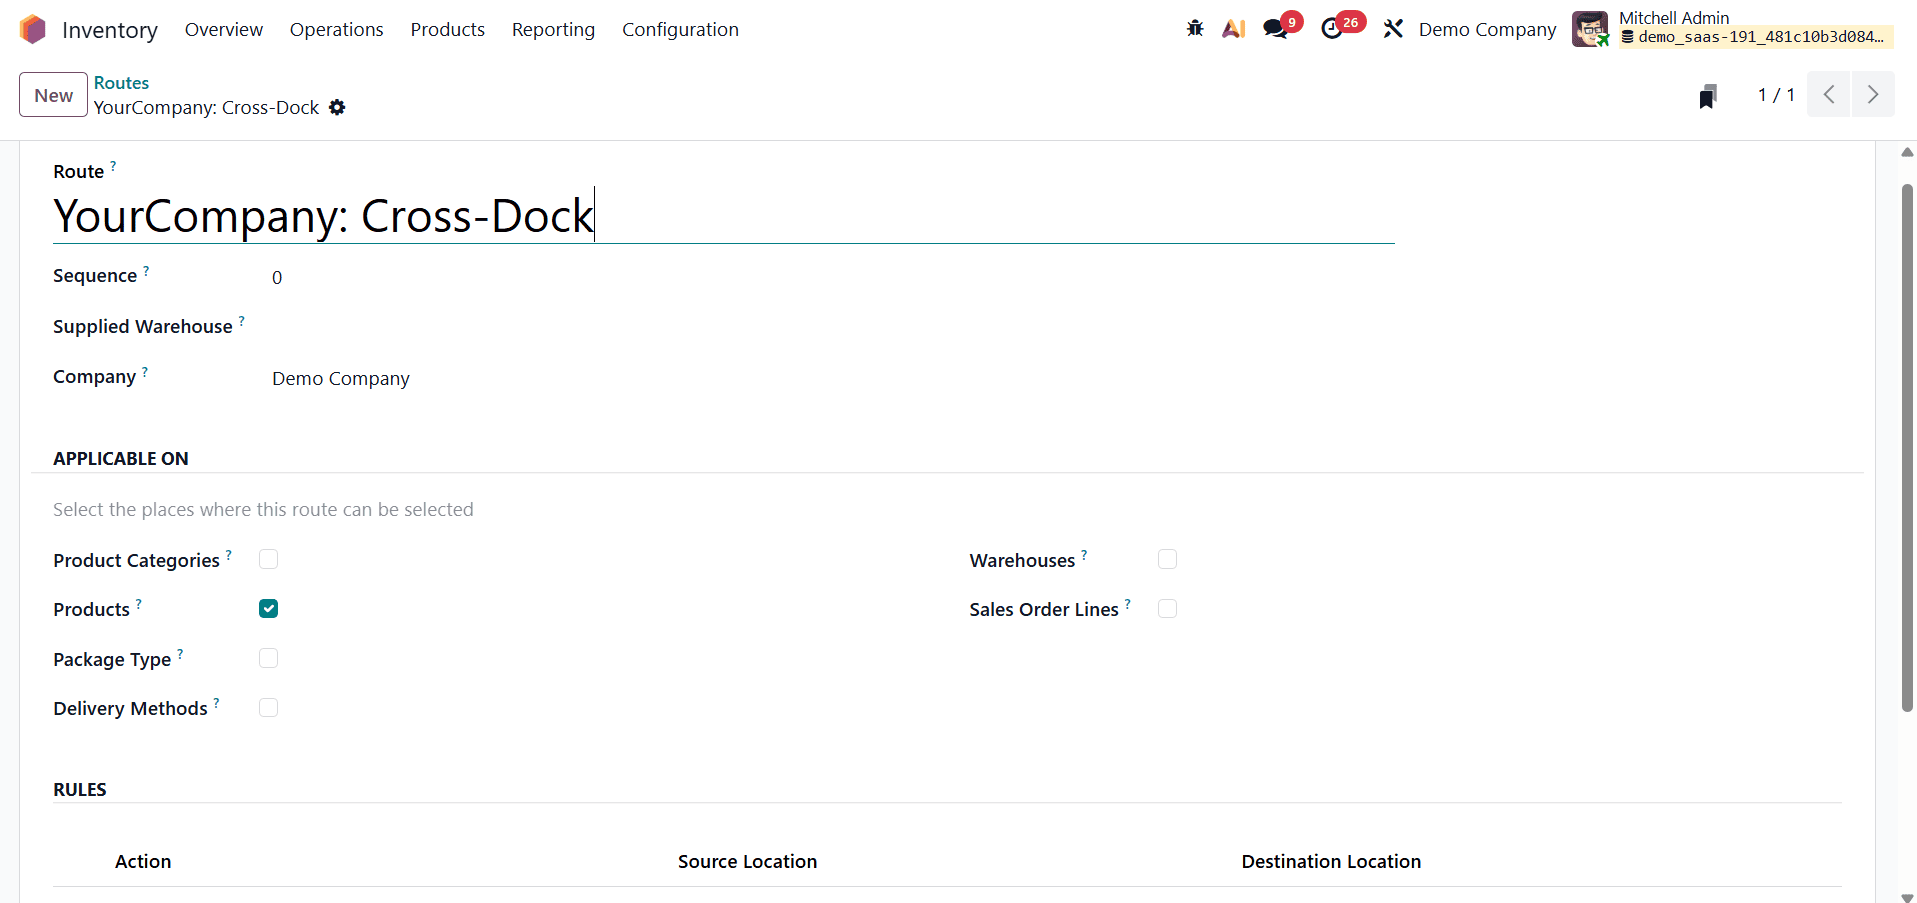
In the route configuration, the route name can be defined as “YourCompany: Cross-Dock”. Once created, rules must be added to control how products move through the warehouse.
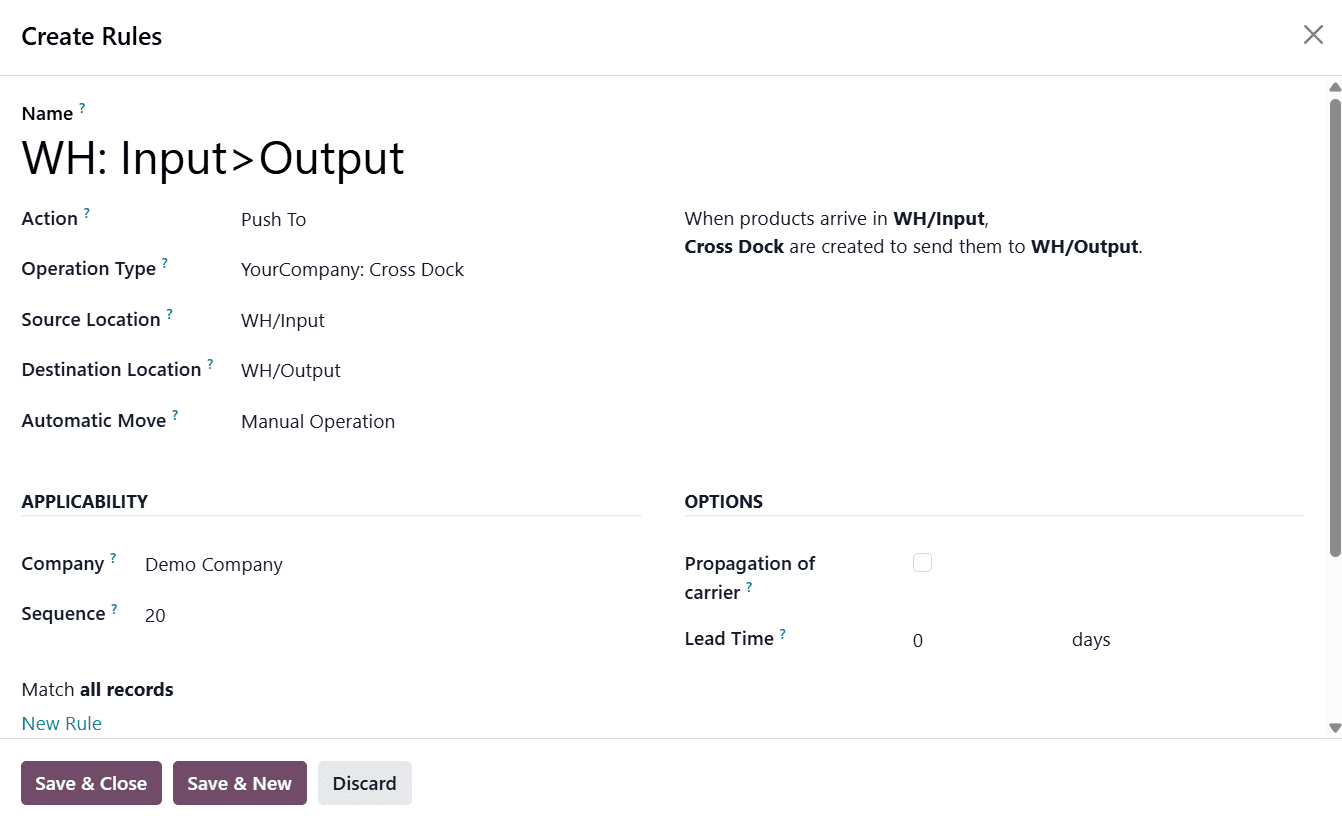
The first rule is typically named “WH: Input > Output”. For this rule, the Action is set to Push To, and the Operation Type is selected as YourCompany: Cross Dock. The Source Location is configured as WH/Input, and the Destination Location as WH/Output. This rule ensures that when products arrive at the WH/Input location, a cross-docking transfer is automatically created to move them directly to WH/Output.
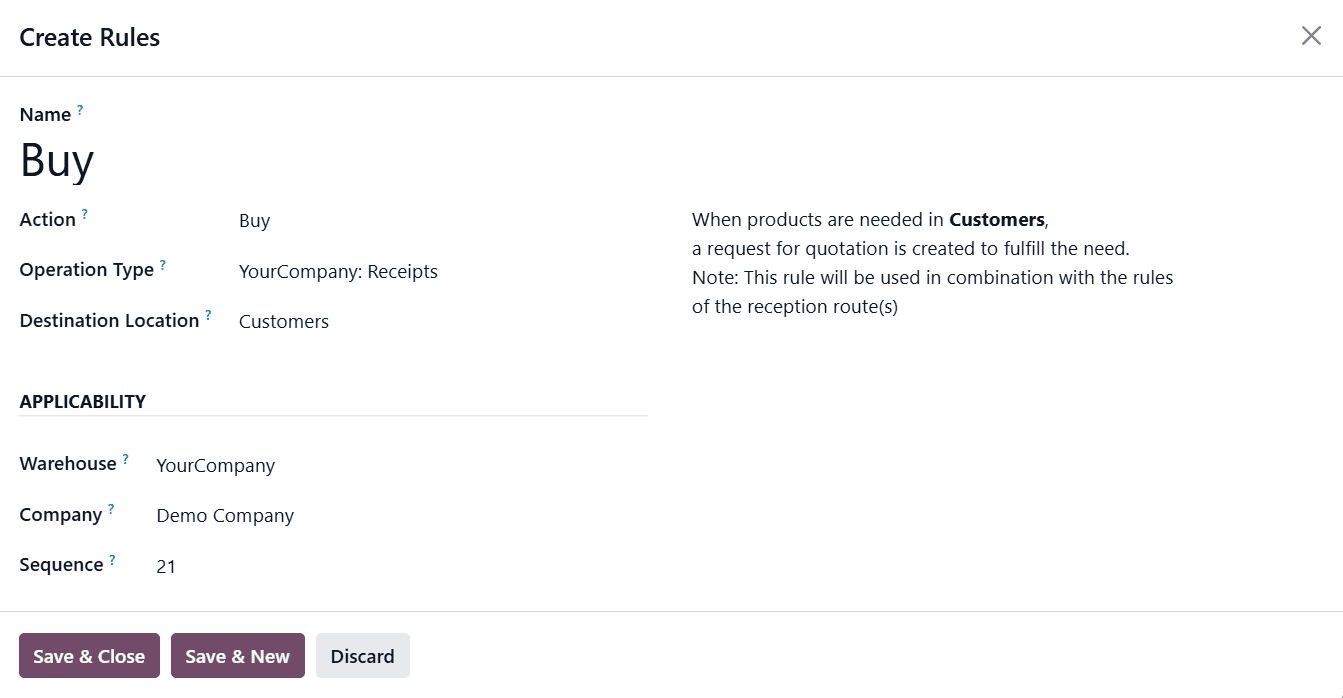
The second rule in the route is “Buy”, where the Action is set to Buy and the Operation Type is configured as YourCompany: Receipt. This rule triggers a Request for Quotation (RFQ) whenever products are required to fulfill customer demand, ensuring that purchasing is automatically aligned with sales requirements. After defining both rules, the route configuration should be saved.
Once the cross-docking route is successfully created, it must be assigned to the relevant products. From the Inventory > Products menu, the desired product should be selected.
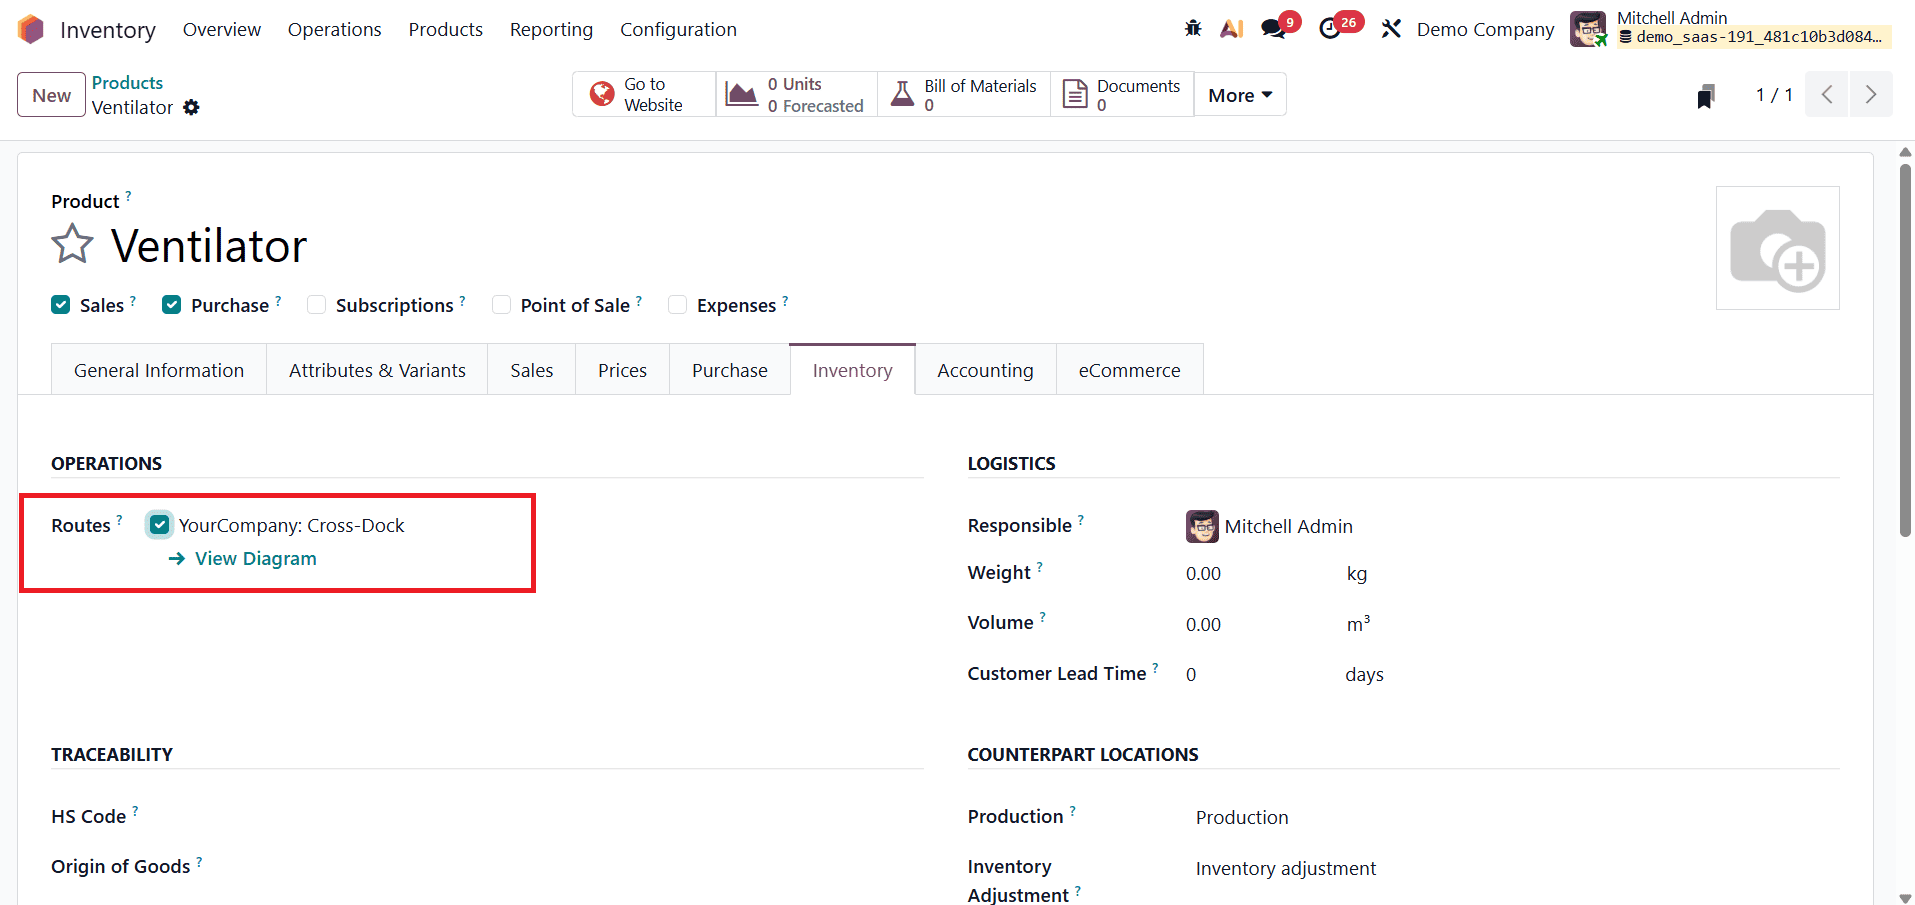
Under the product’s Inventory tab, the routes for Cross-Docking and Buy must be enabled. These settings ensure that the product follows the defined cross-docking workflow. The changes should be saved before exiting the product form.
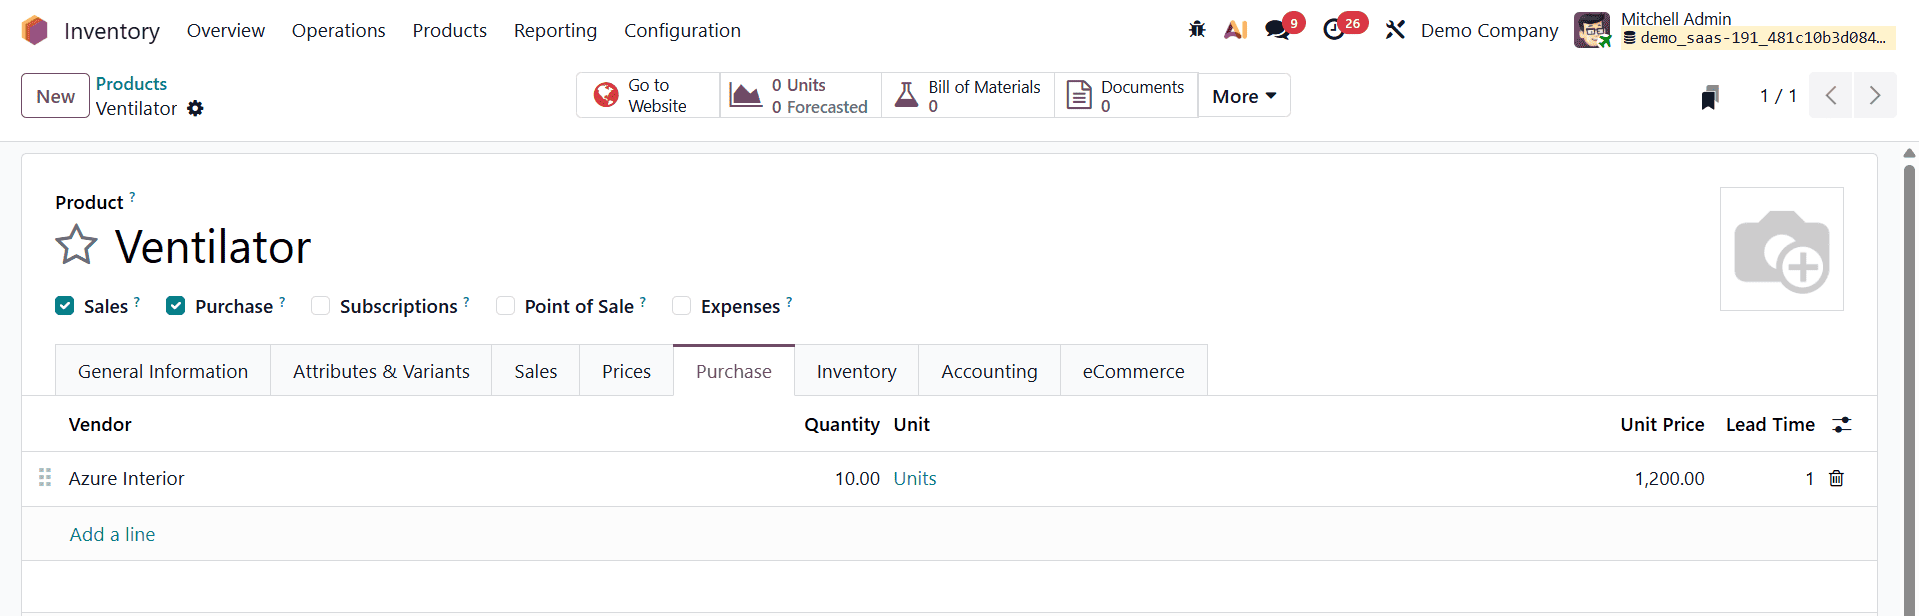
Next, under the product’s Purchase tab, a vendor must be assigned. In this example, the vendor is Azure Interior. This step is essential, as the Buy rule relies on vendor information to generate purchase orders automatically.
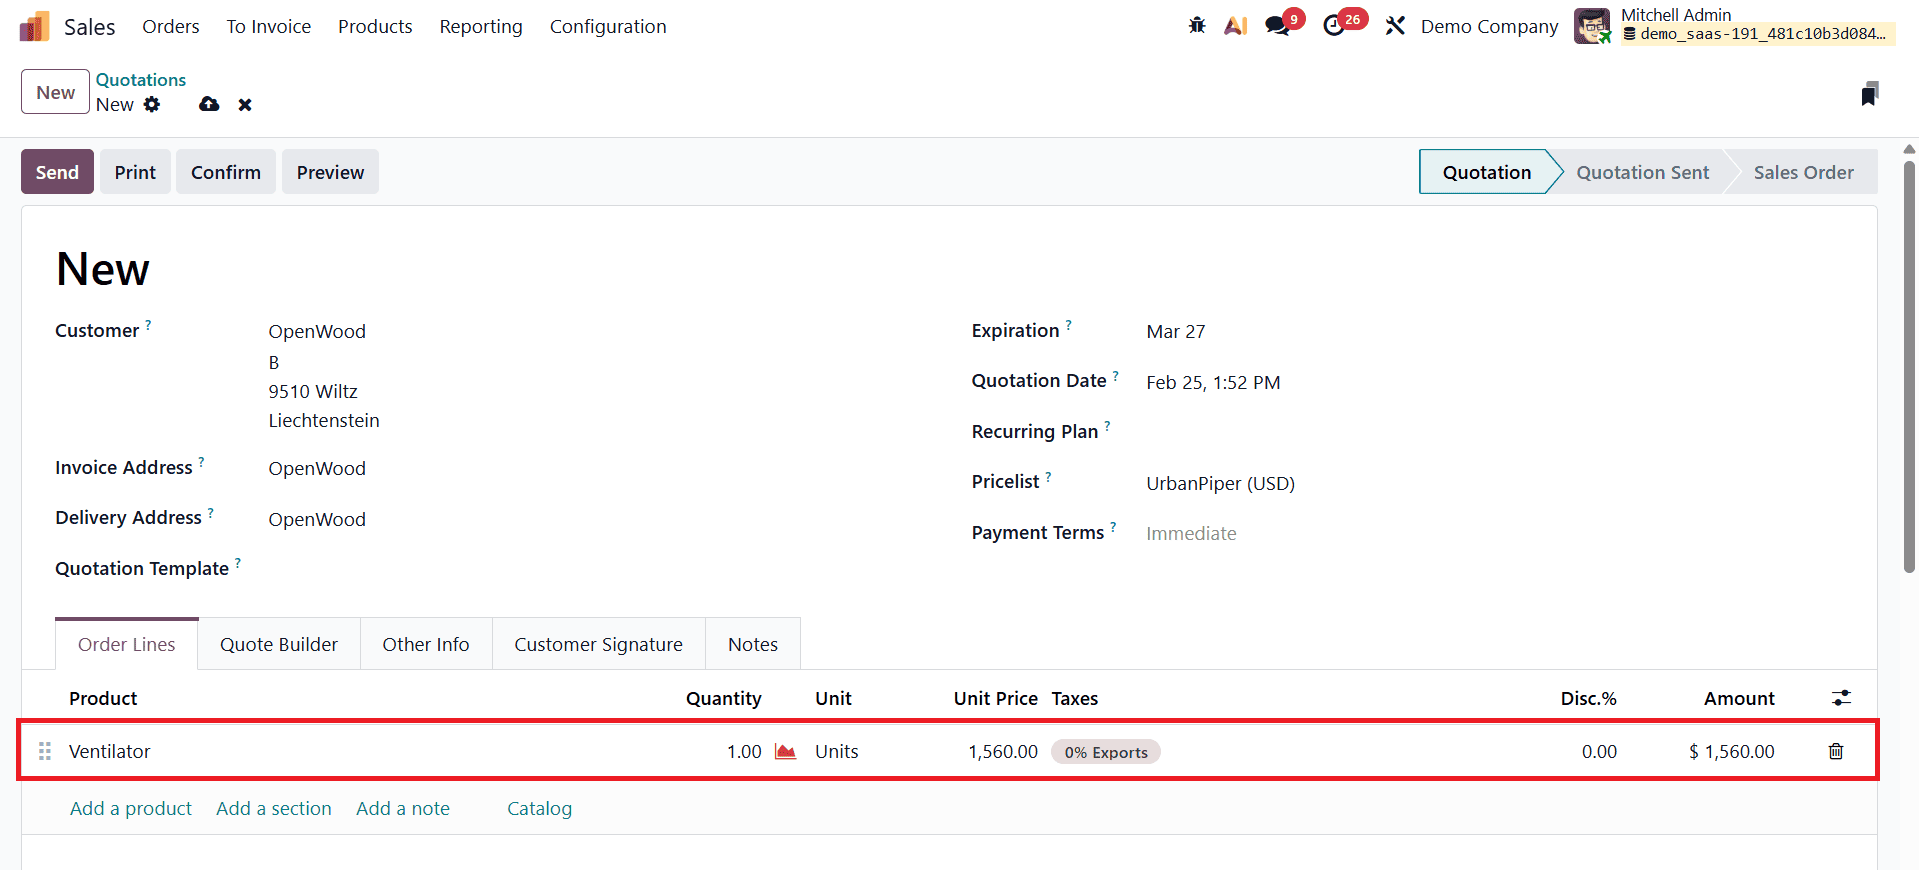
To demonstrate the complete flow, a Sales Quotation is created by selecting a customer and adding the same product to the order line with the required quantity.
After confirming the quotation, the system indicates that internal actions are required to complete the process. At this stage, a Purchase smart tab appears on the sales order, signaling that a purchase order has been generated automatically.
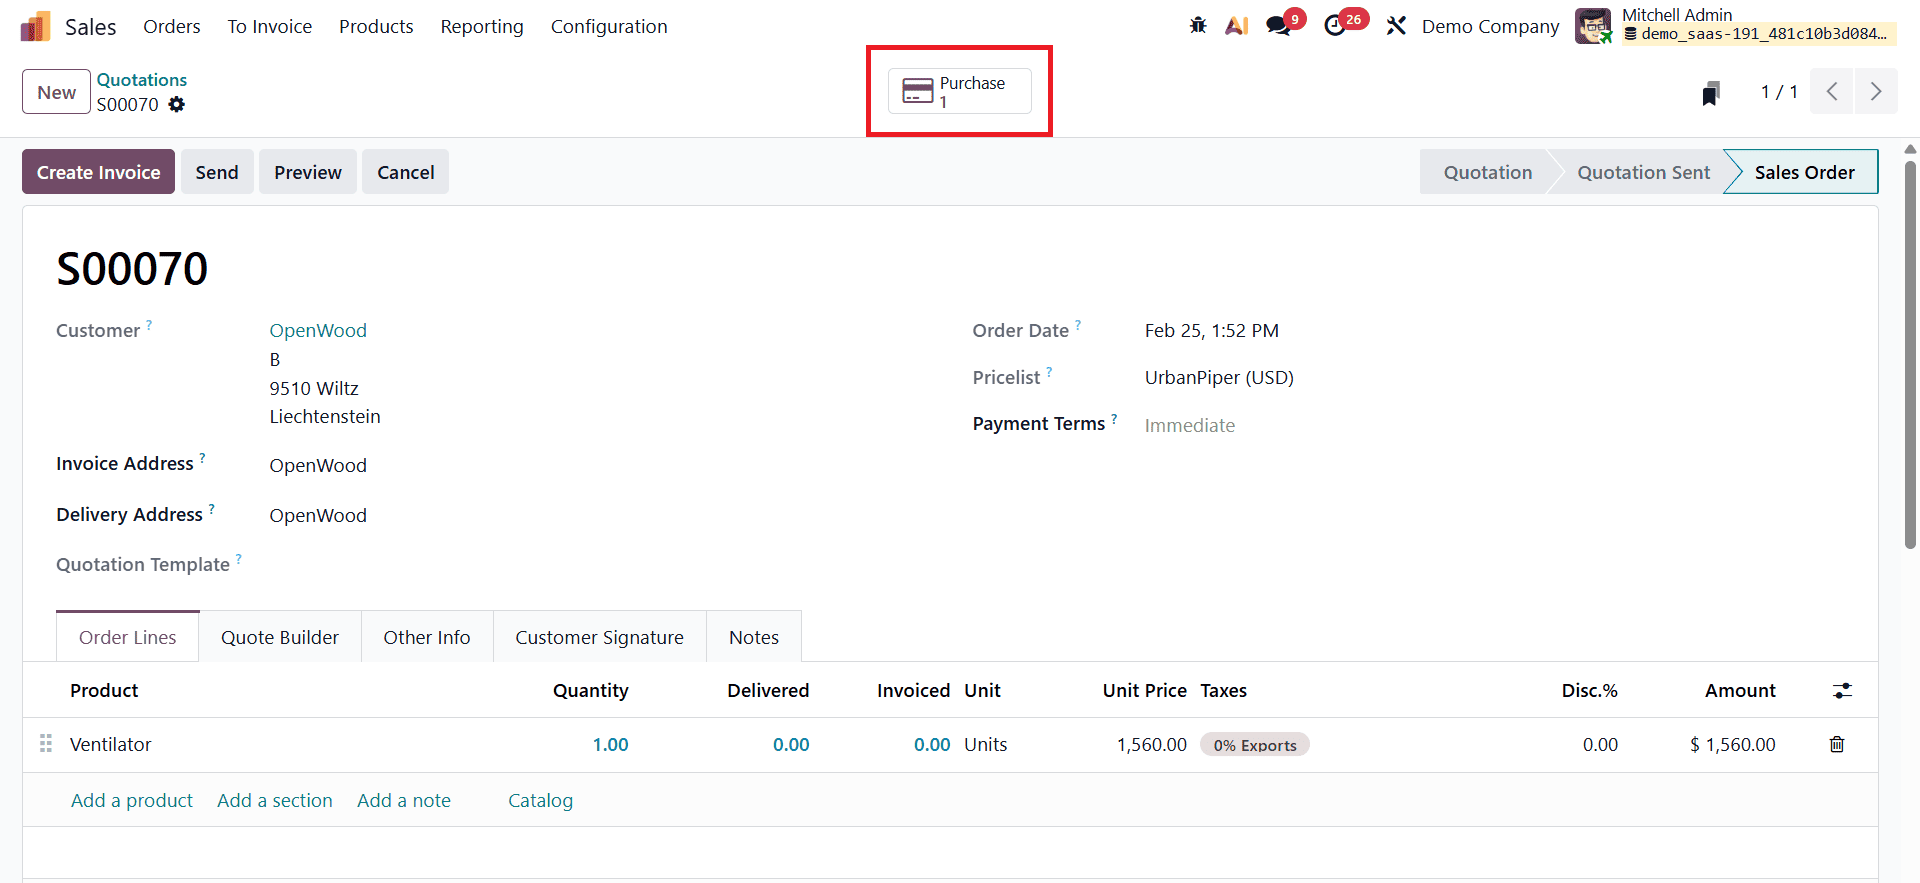
By clicking the Purchase smart tab, the user can view the corresponding purchase order created based on the sales quotation.
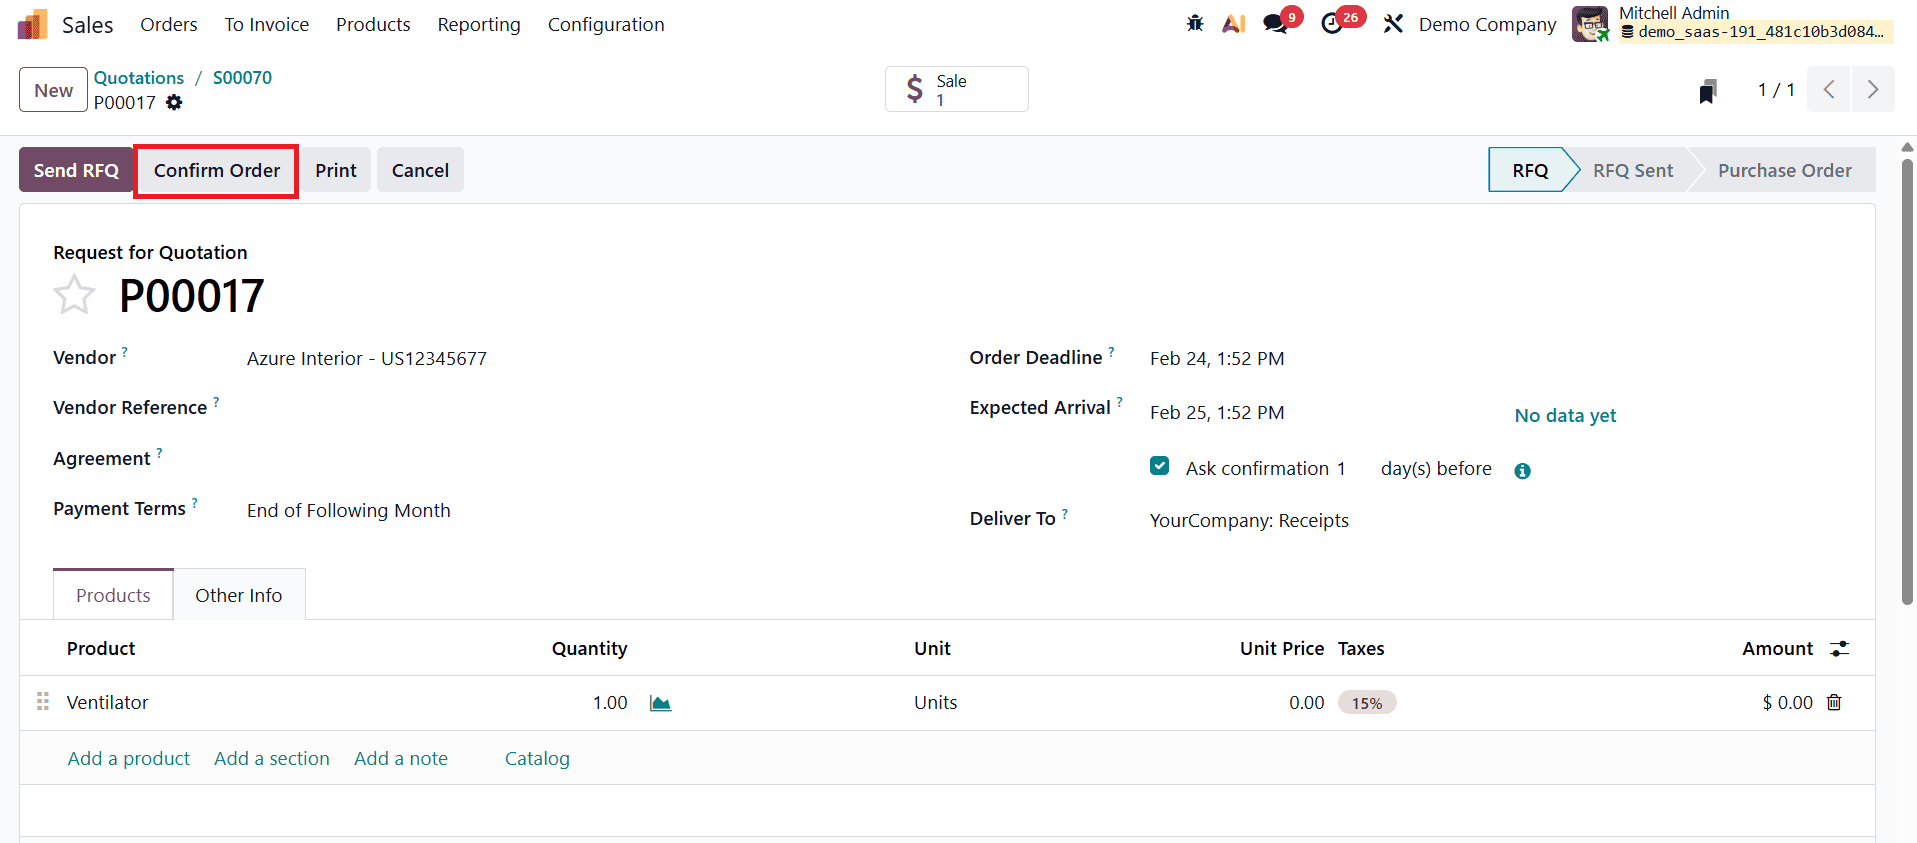
The purchase order details can be reviewed and validated. Once confirmed, the receipt operation becomes available.
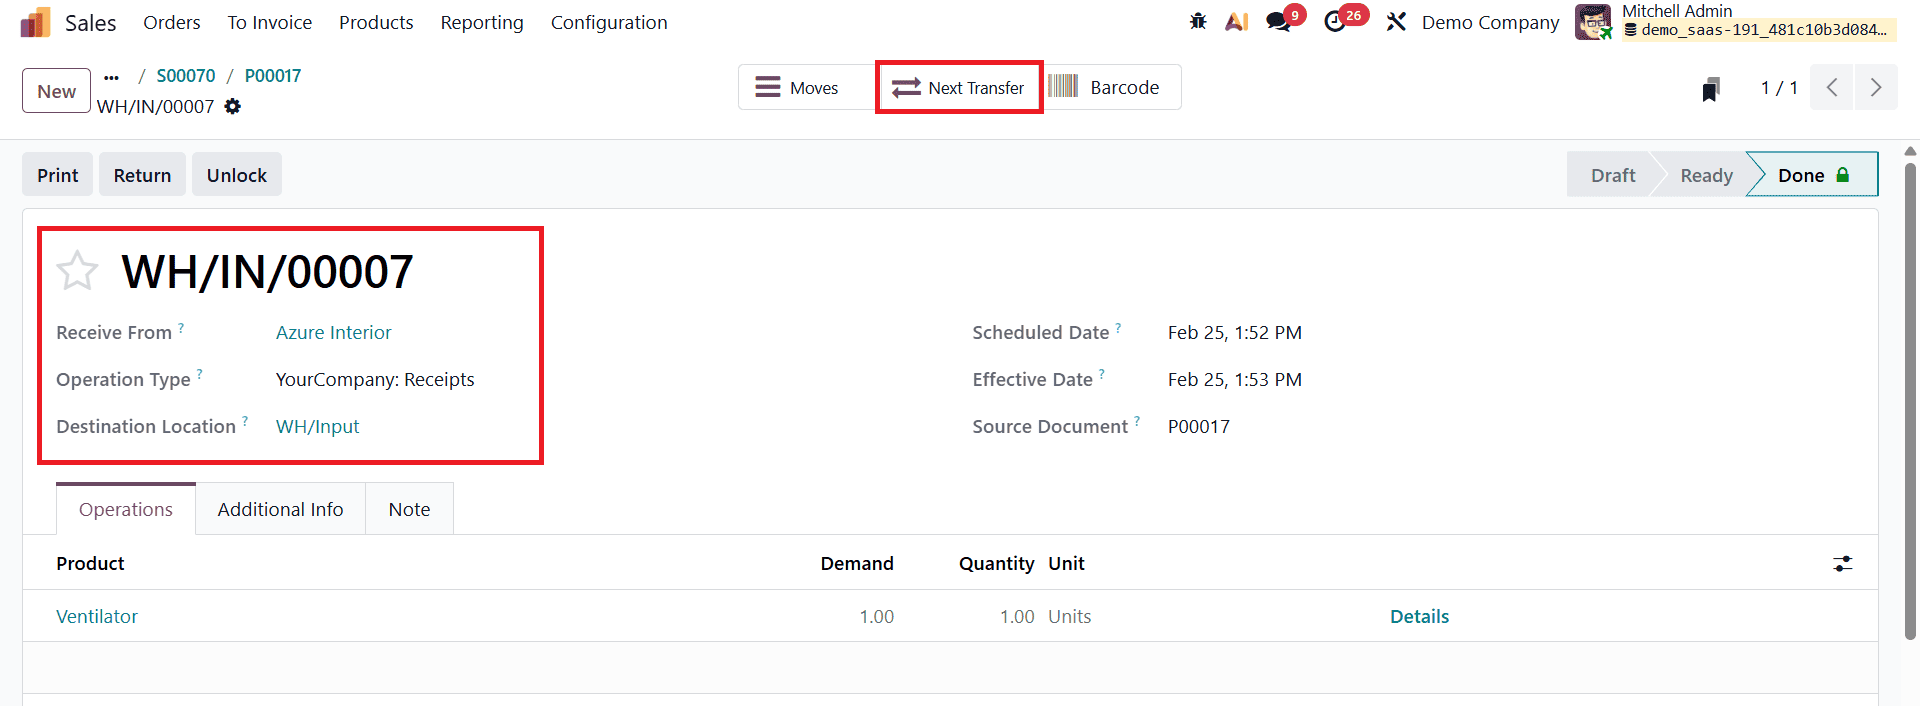
Validating the Receipt records the arrival of the product from the vendor, Azure Interior. The Destination Location for this receipt is WH/Input. After validating the receipt, the user can click the Next Transfer button to proceed with the cross-docking operation.
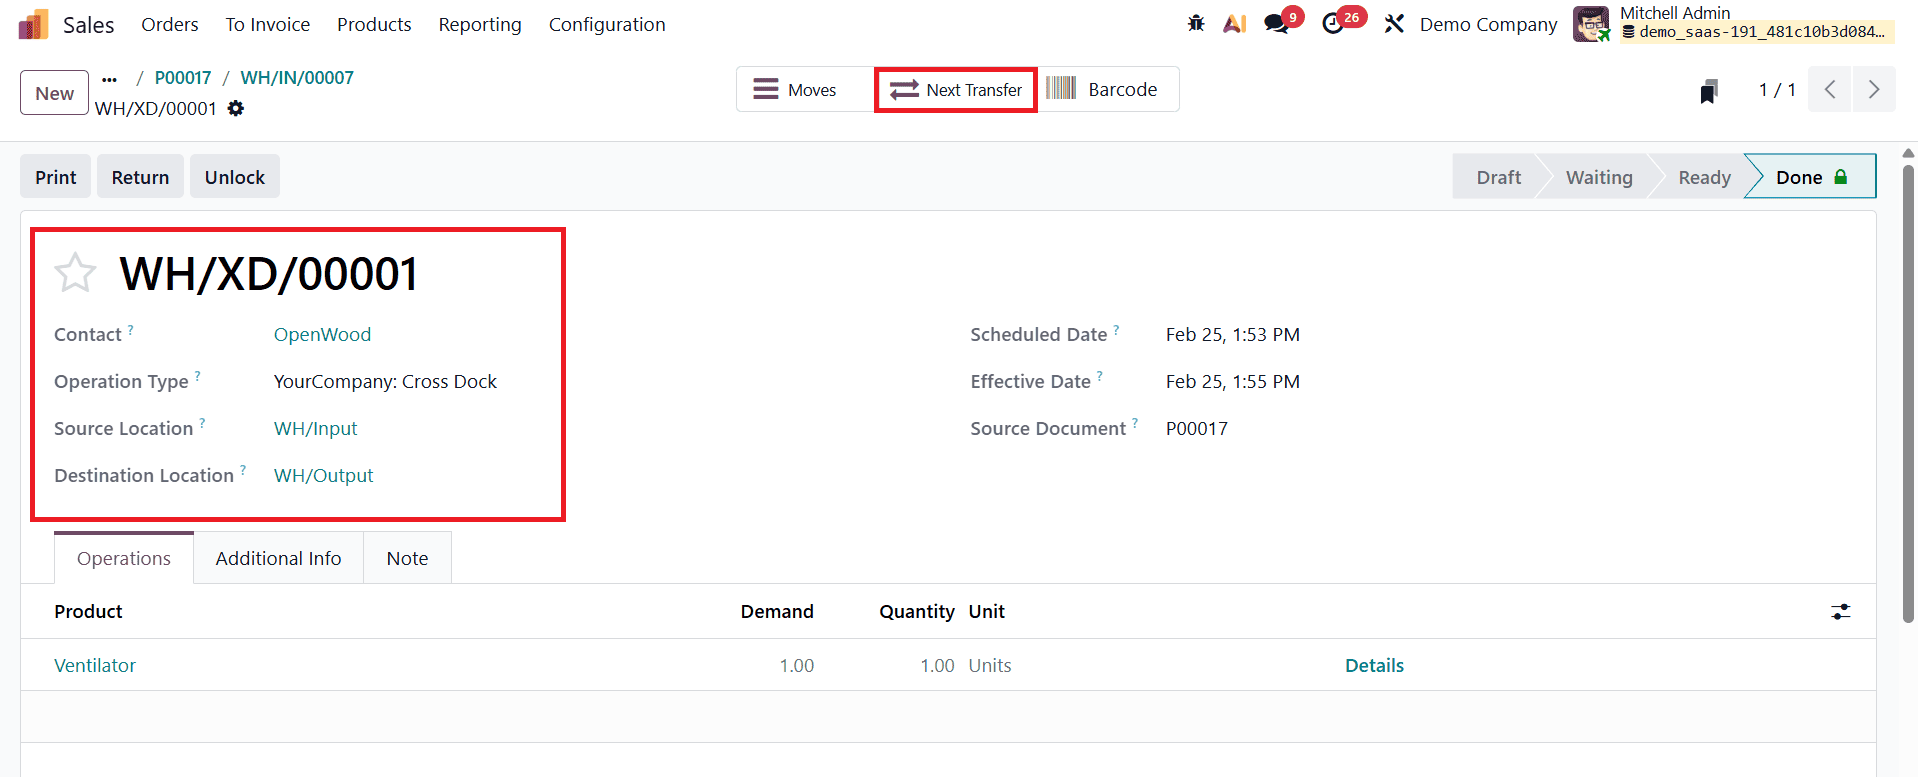
The next transfer represents the internal cross-docking movement, where the Source Location is WH/Input and the Destination Location is WH/Output. Validating this transfer moves the product directly to the outbound staging area without placing it into storage.
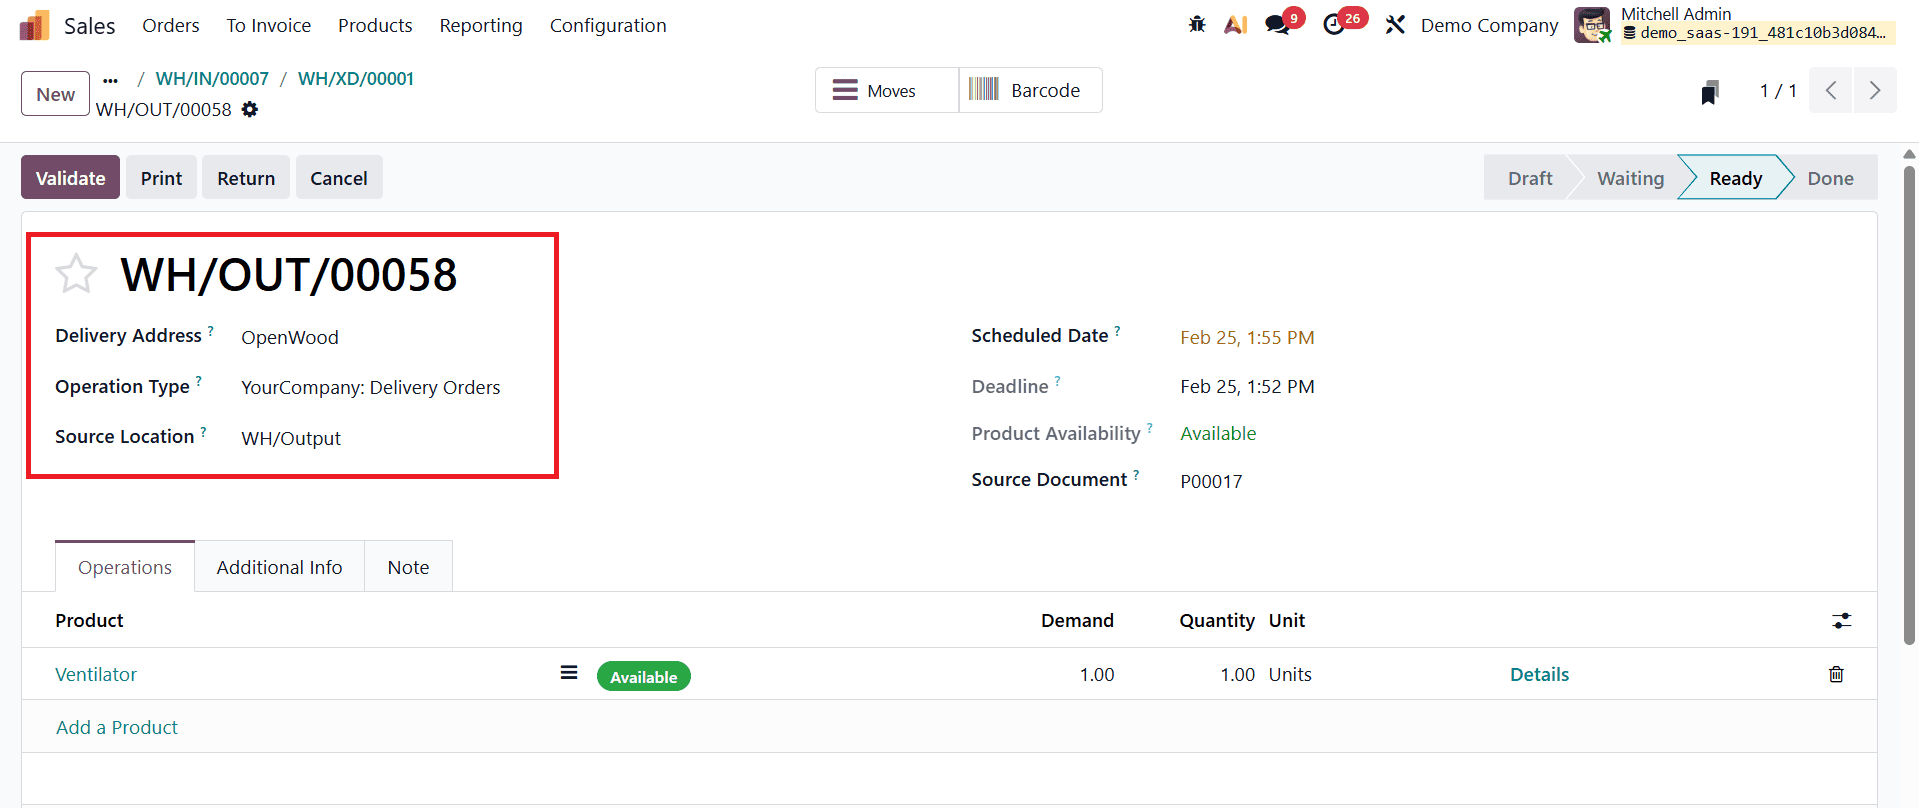
The final transfer is the Delivery Order, where the Source Location is WH/Output and the destination is Customer. Validating this delivery completes the cross-docking workflow by sending the product directly to the customer.
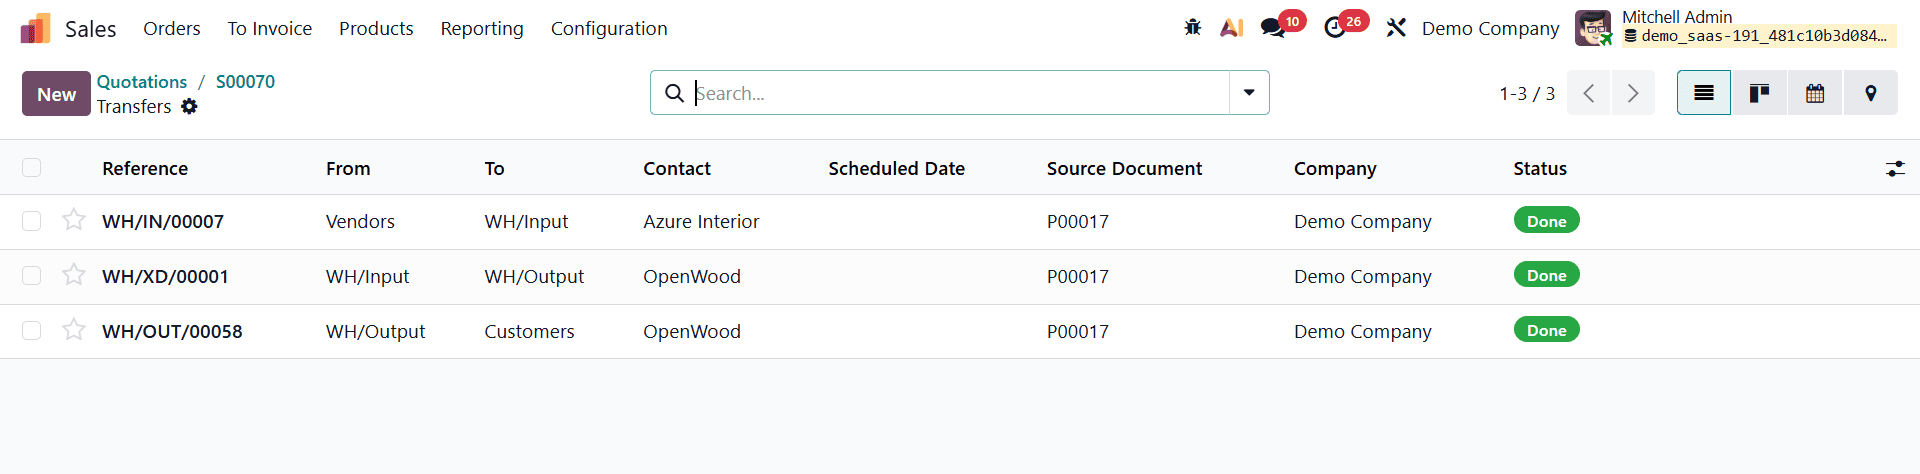
Overall, the transfer sequence includes three stages: first, the product moves from Vendor to WH/Input; second, it is transferred internally from WH/Input to WH/Output; and finally, it is delivered from WH/Output to Customer.
Cross-docking in Odoo 19 provides a powerful and efficient approach to managing inventory by enabling products to move directly from receipt to delivery with minimal storage involvement. By configuring multi-step routes, defining custom cross-docking rules, and linking them to relevant products, businesses can automate purchase, receipt, internal transfer, and delivery operations in a seamless workflow. This structured process not only reduces manual handling but also ensures faster order fulfillment and better coordination between sales, purchasing, and inventory teams.
Implementing cross-docking in Odoo 19 helps organizations optimize warehouse operations, lower inventory holding costs, and improve customer satisfaction through quicker deliveries. With its flexible routing system and automated document generation, Odoo 19 allows businesses to adapt cross-docking strategies to their specific operational needs, making it an ideal solution for companies aiming to streamline inventory flow and enhance supply chain efficiency.
To read more about How to Optimize Inventory Flow with Cross-Docking in Odoo 18, refer to our blog How to Optimize Inventory Flow with Cross-Docking in Odoo 18.