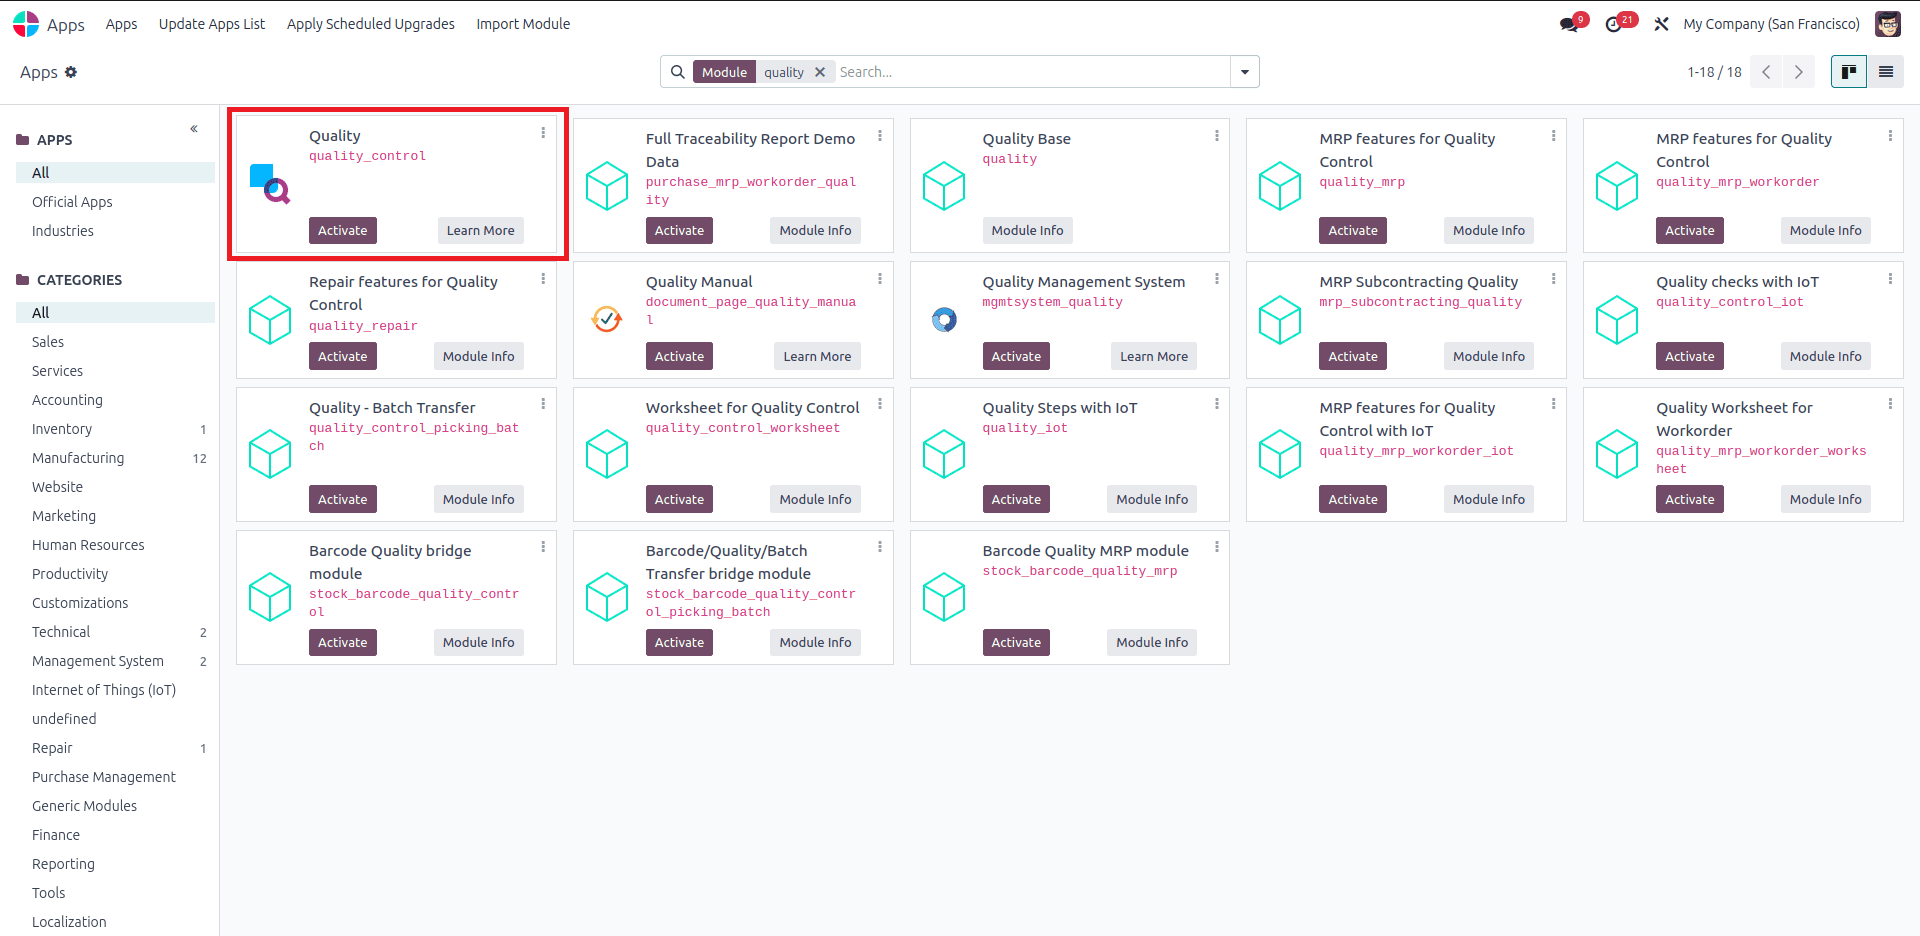
Quality management involves overseeing all tasks and operations to ensure a desired level of quality is maintained. This process includes establishing quality assurance, control measures, policies, and continuous improvement. Before launching a product to the market, a company must carry out several quality-check procedures on the item. With the Odoo 18 Quality module, you can manage all these activities within a single system. The first step is to install the Quality module from the Odoo 18 Apps.
Quality Overview
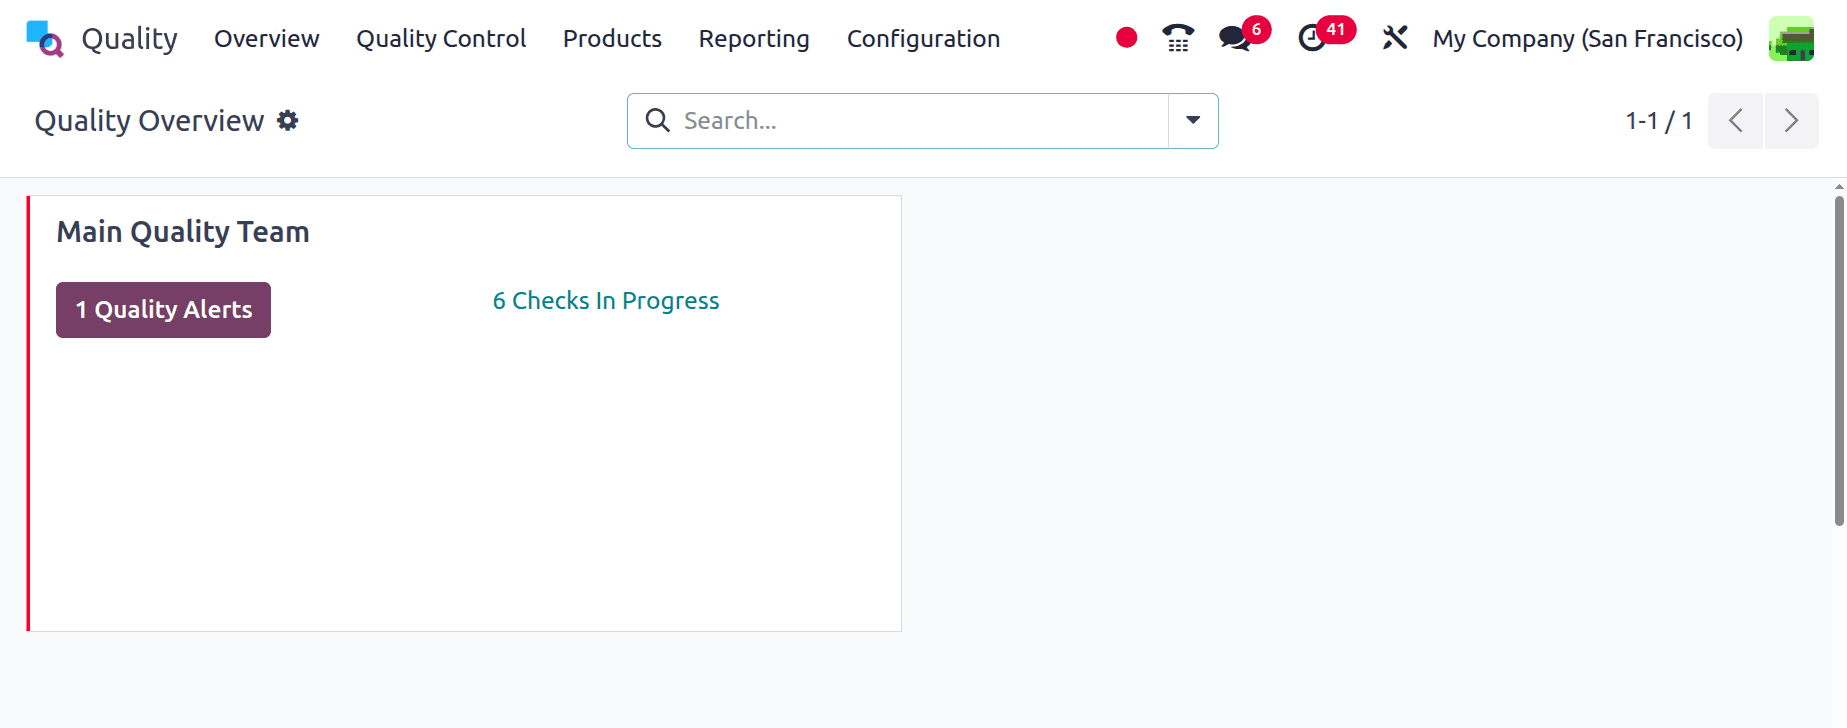
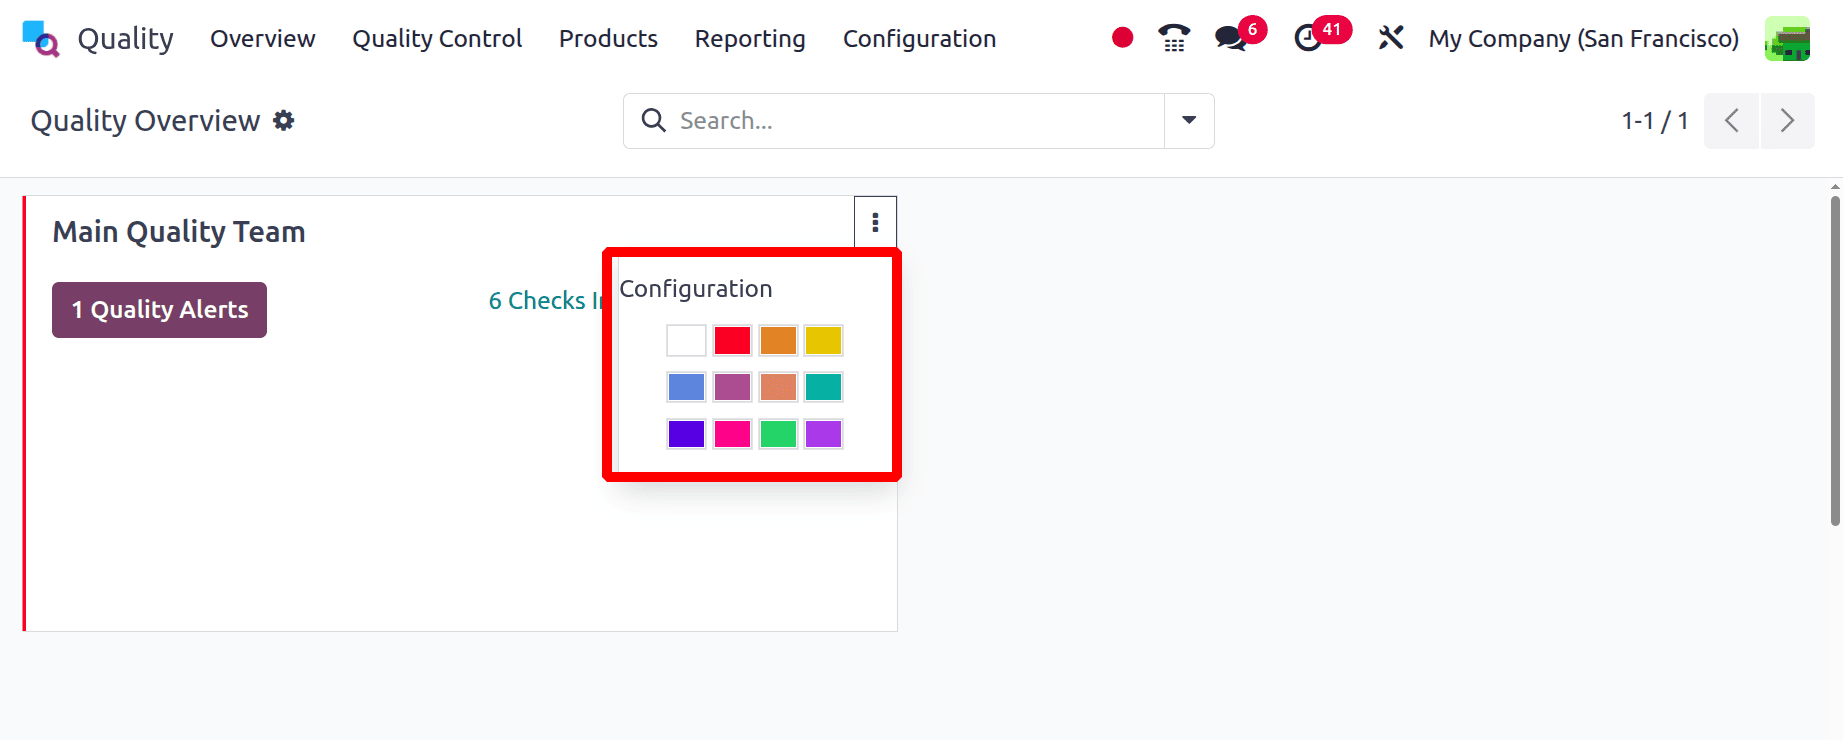
When you open the Quality module, you’ll see an overview of the main quality team. The Quality Overview panel displays the number of ongoing quality inspections and active quality alerts.
A user can view details of each quality alert by clicking the Quality Alerts icon. Likewise, the Checks in Progress option provides access to ongoing quality checks. To access the configuration, click the three-dot icon on the right side of the Main Quality Team.
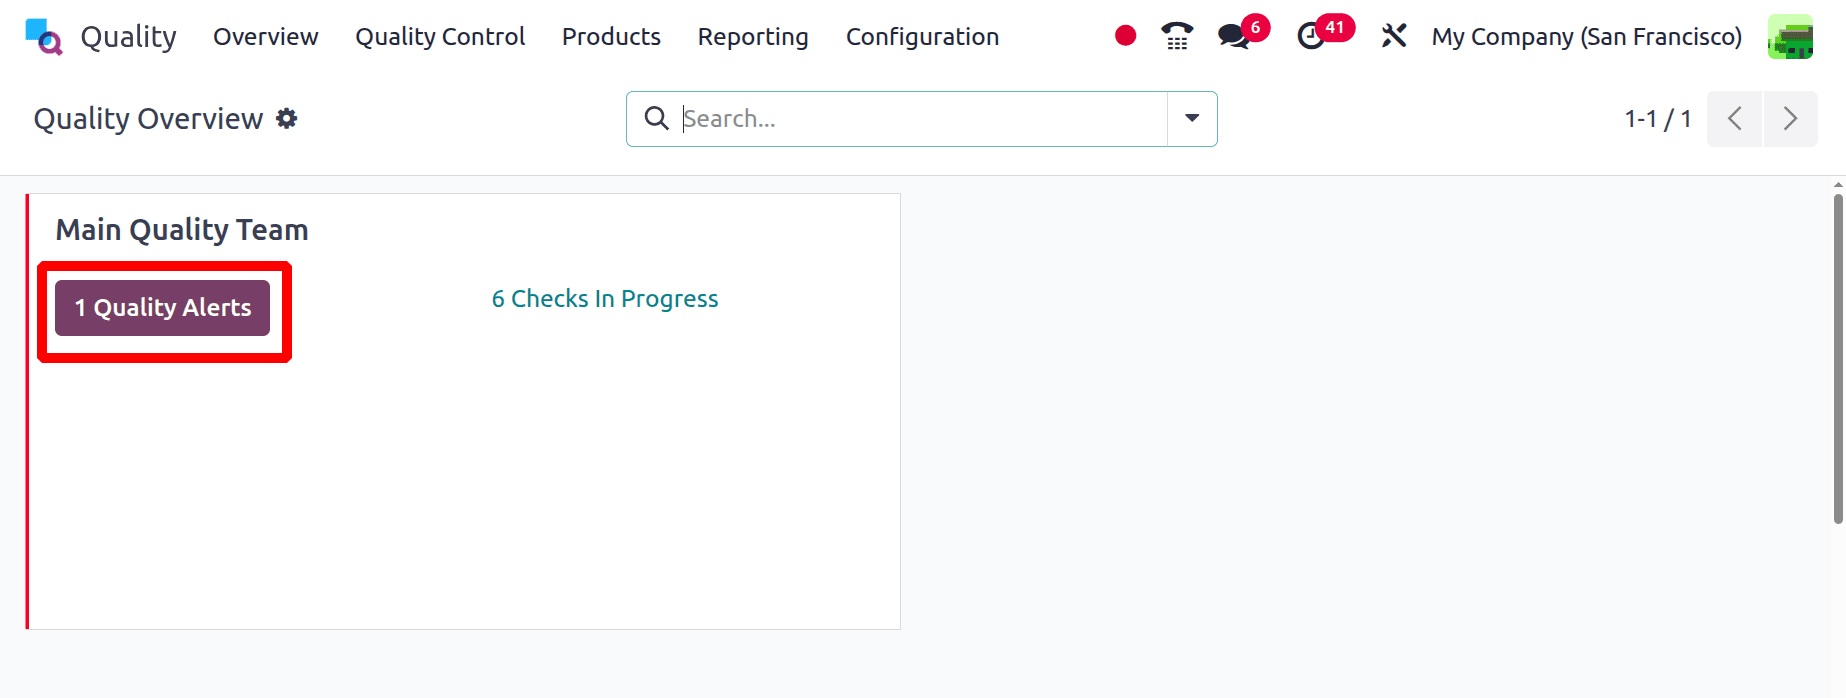
There is a button named Quality Alerts, which shows the number of alerts created. While clicking on it, the users can view the created quality alerts.
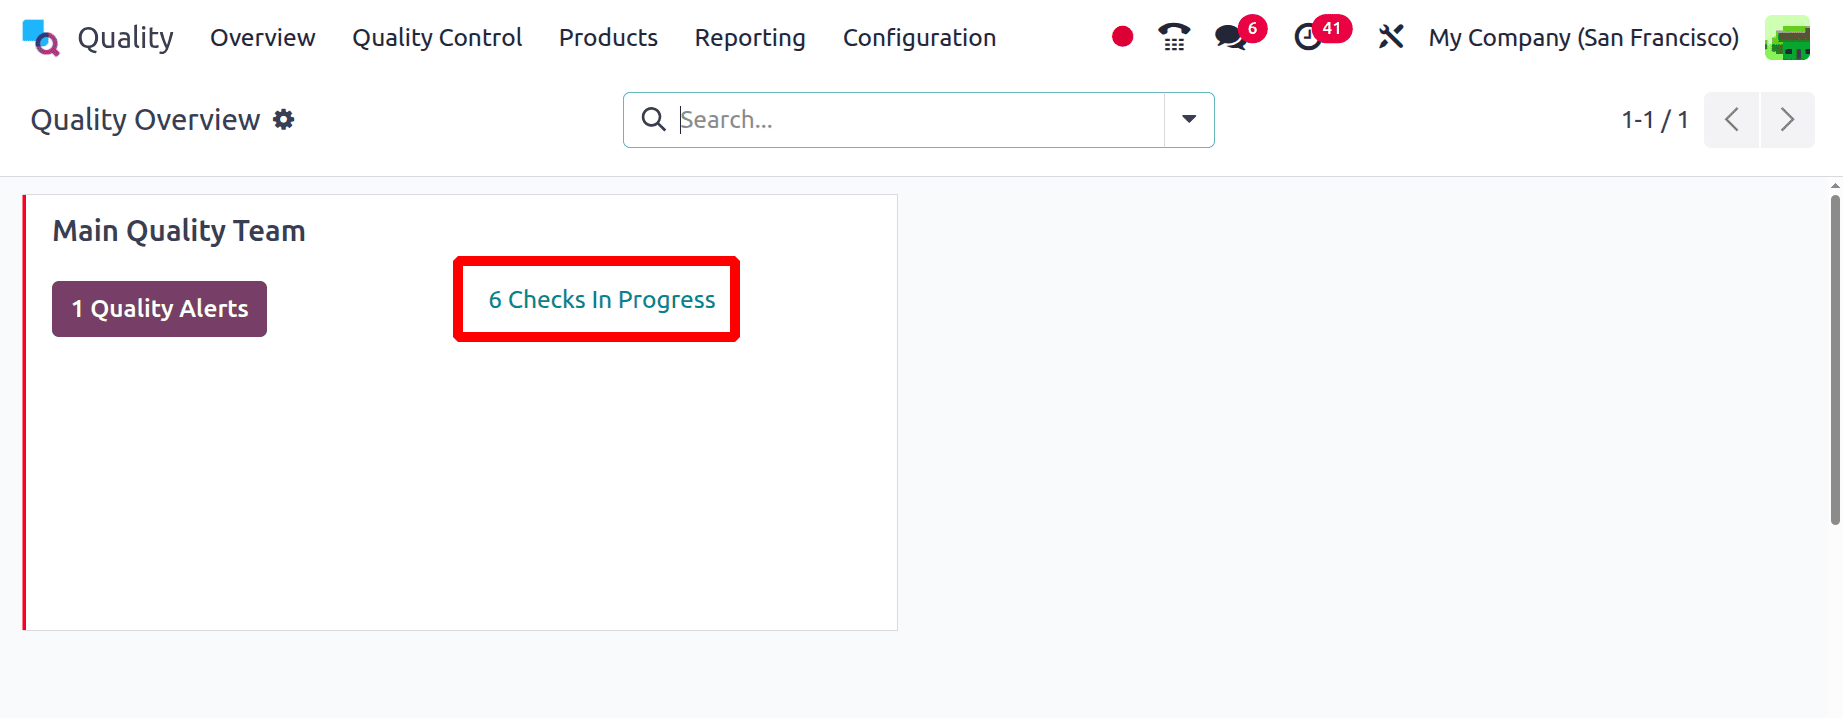
Then the number of quality checks in progress are visible from the dashboard itself. While clicking on it, which will redirect to the quality checks.
Then the 3 dots show a Configuration option, which leads to the creation form of this Quality Team. Then users can customize the view by choosing any color.
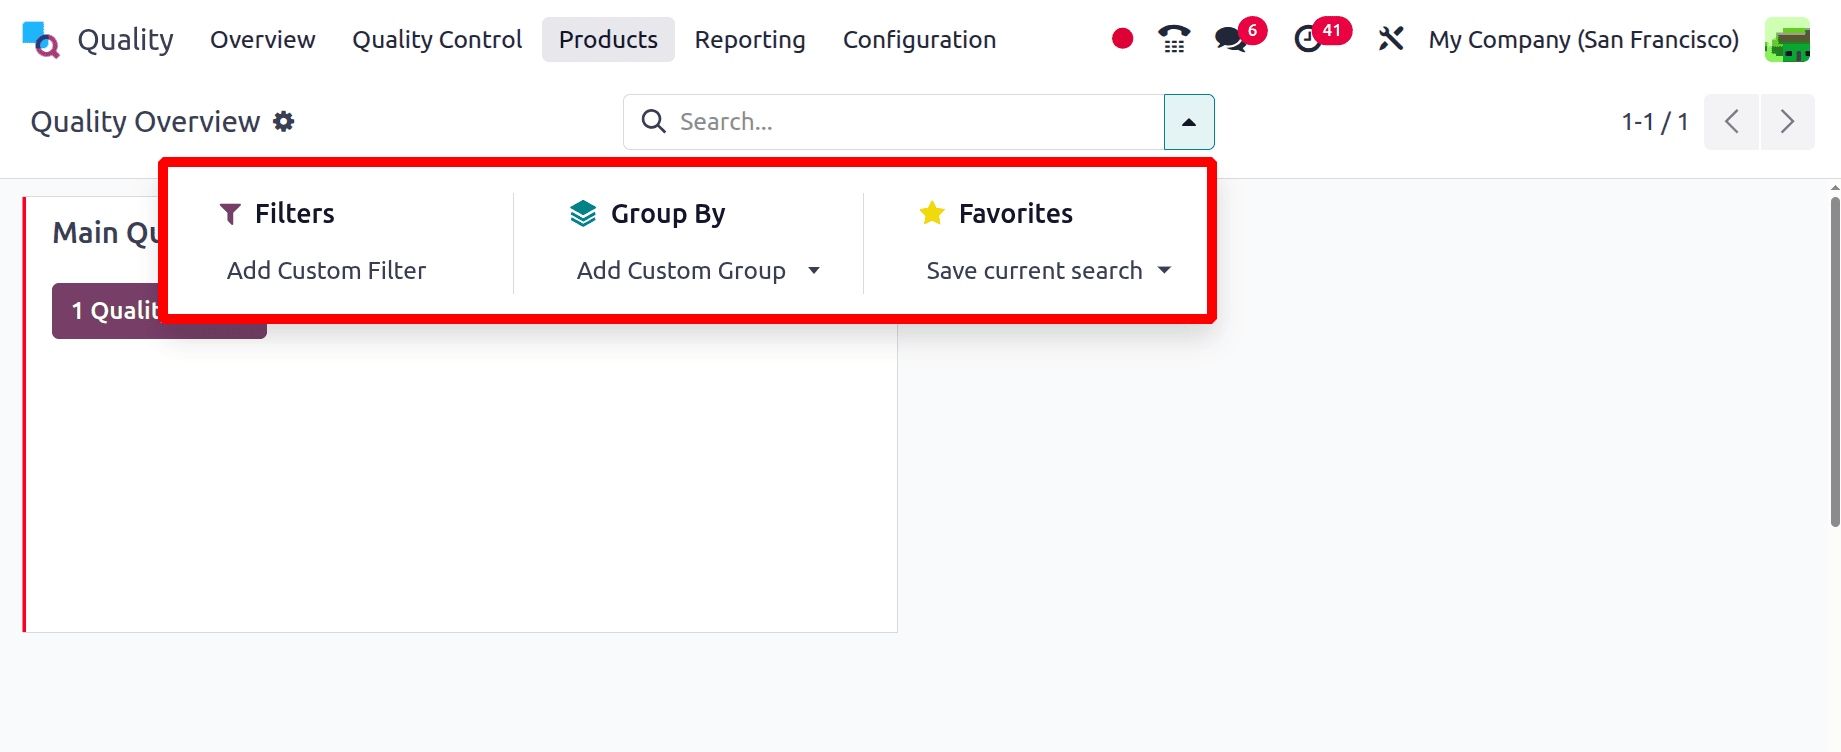
Users can add Custom Filters, Custom Group By and also possible to save the search as favorite, as shown below.
Quality Teams
In Odoo 18, quality teams play a key role in supporting maintenance job management within a business. You can form different teams based on your requirements and assign maintenance tasks accordingly. Once these teams are set up and take charge of maintenance activities, managing the work becomes easier.

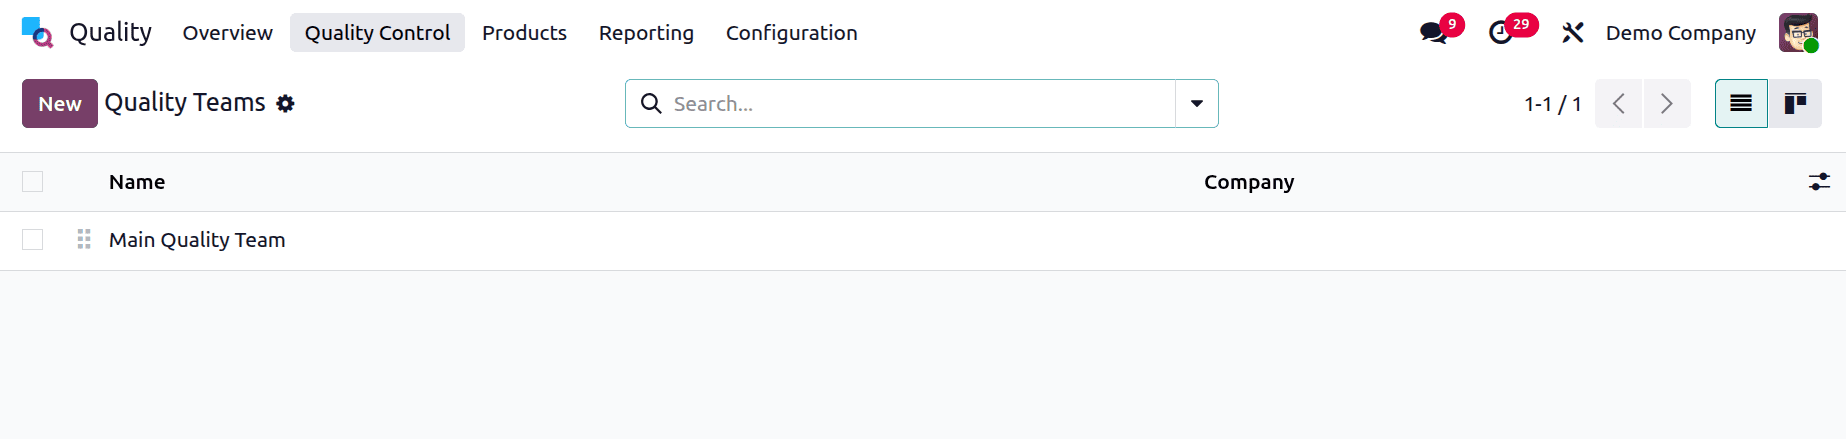
Within the Configuration tab, you can create new quality teams. When the Quality Teams menu is selected from the Configuration section, a list of all preconfigured teams appears. In the List view of the Quality Teams window, the company details and team names are displayed separately. You can click on any team from the list to view more information. To create a new team, click the New button on the Quality Teams screen.
Enter the name of your quality team in the Team Name field on the open page. Next, in the Email Alias field, provide the backup email address that an administrator links to the user’s primary email address. All emails sent using the Email Alias will be directed to the primary email address.
In the Accept Emails option, specify the rule that allows posting a message on a document via a mail gateway. You can choose to accept messages from followers, verified partners, or employees. After setting the email accessibility, enter your company name in the Company field.
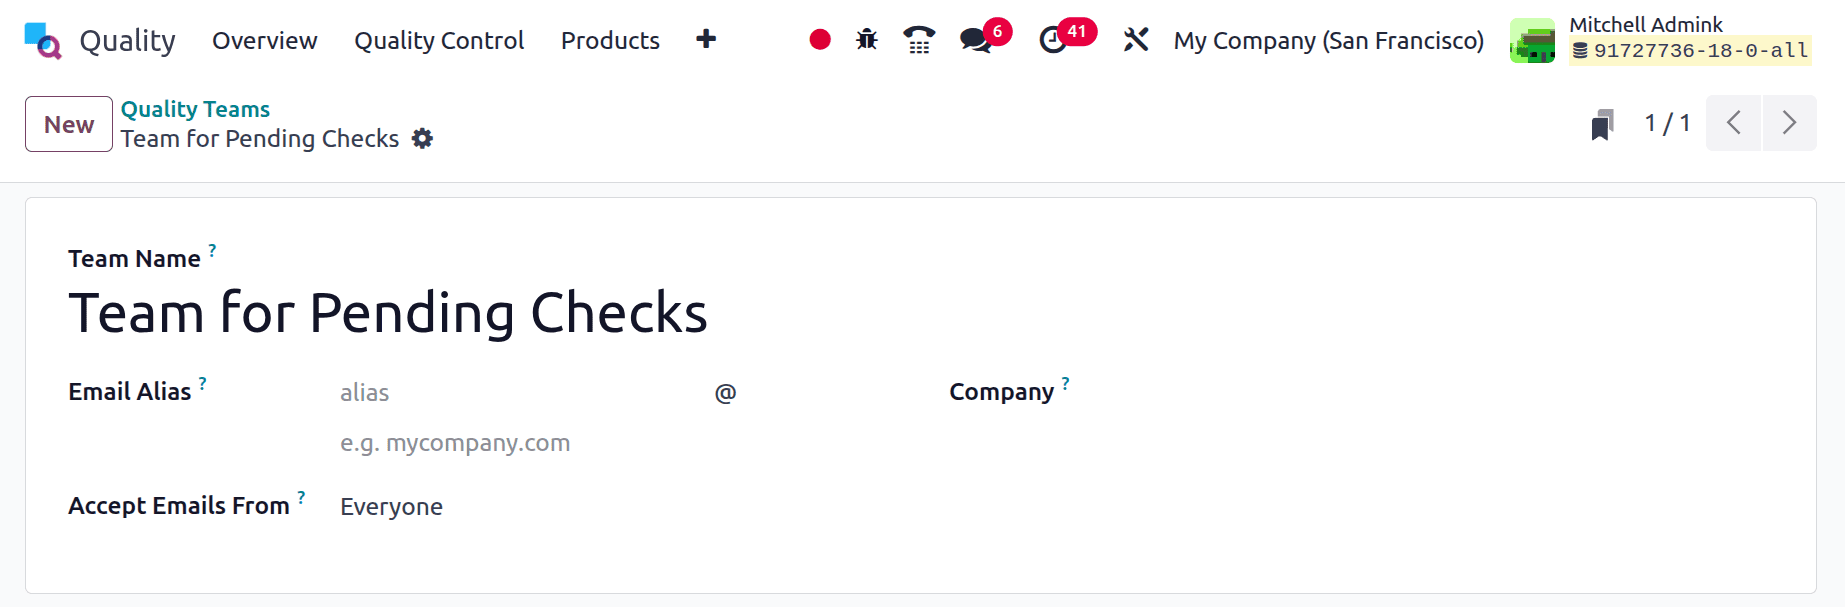
Here created a new team, named as Team for Pending Checks. Save the team.
In Odoo 18, all entered details are saved automatically. To revert any changes, click the Discard Changes option in the Quality Teams window. Additionally, by clicking the New button at the right end of the window, you can create a new team directly from within the current one.
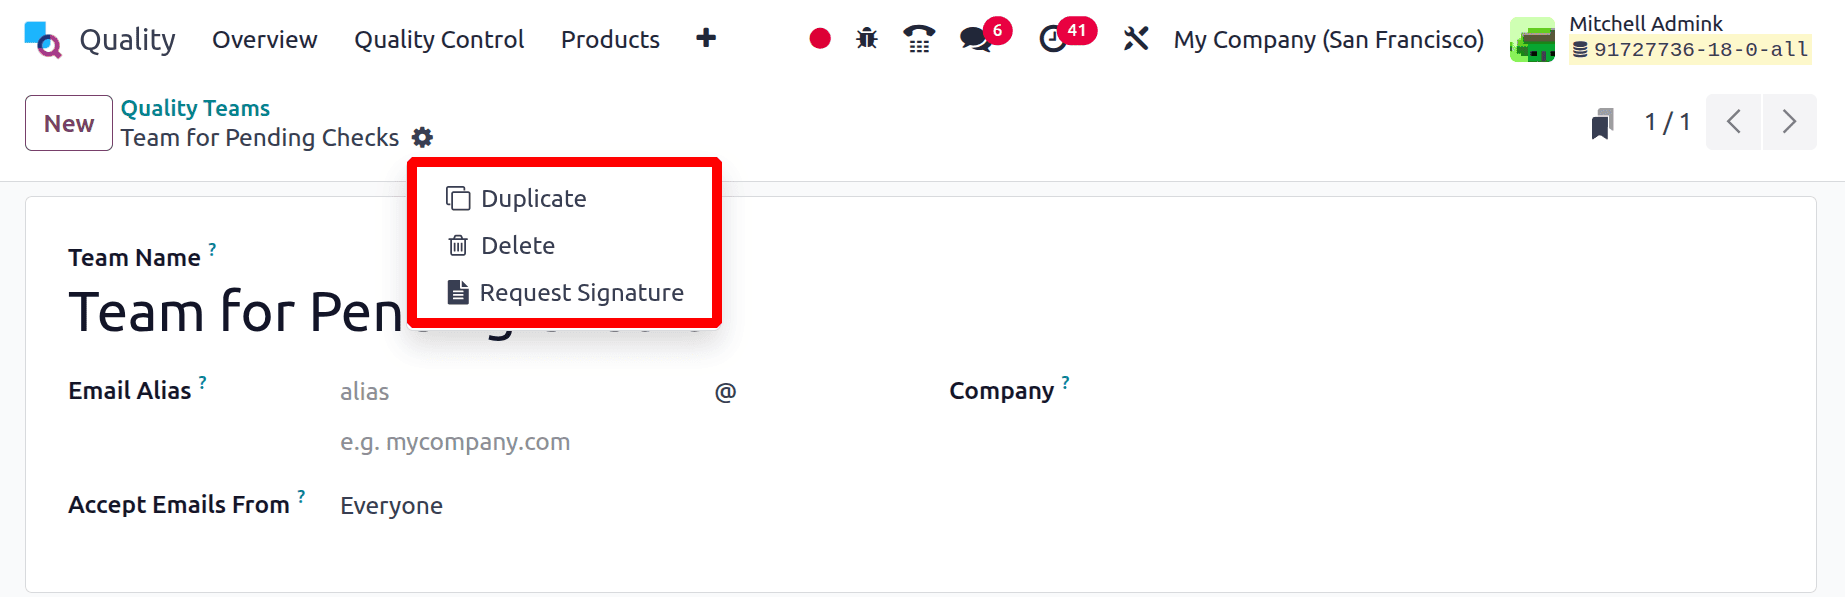
By clicking the Action menu on the right side, users can delete or duplicate a quality team. Selecting the Duplicate option creates a copy of the current quality team. Choosing the Delete option from the Action menu will permanently remove the selected team.
After completing all the necessary details, you can view the information for your newly created team in the main Quality Teams window.
Quality Alert Stages
In the Odoo 18 Quality module, a Quality Alert is a record or notification made to track and report quality problems or non-conformities found during production, inspections, or other processes. In order to guarantee ongoing quality improvement, it enables users to look into issues, assign remedial measures, and track the status of resolution.
Each quality alert can be progressed through multiple stages. This allows users to easily track improvements made to the alerts. The Quality Alert Stages can be found in the Configuration menu, where all created stages are listed. If the dashboard tick indicates that a stage is folded, it can be marked as Alert Processed. You can also assign specific teams to handle each stage.
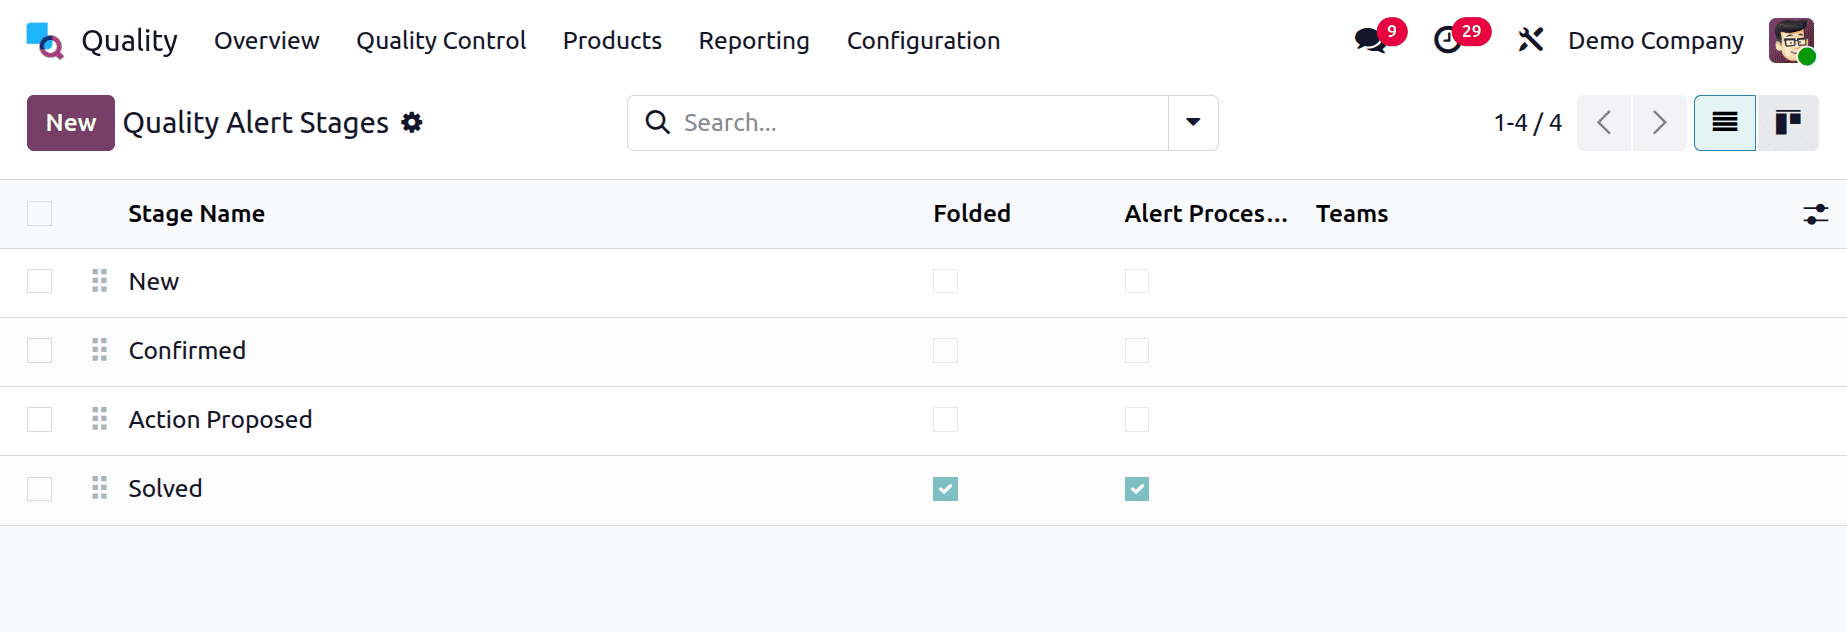
Click the New button to create a new stage. A new line will appear below the last stage in the list. Enter the stage name and use Folded if it should be folded in the Kanban view. Check the Alert Processed field to mark this stage as done. You can also assign a specific team using the Teams field.
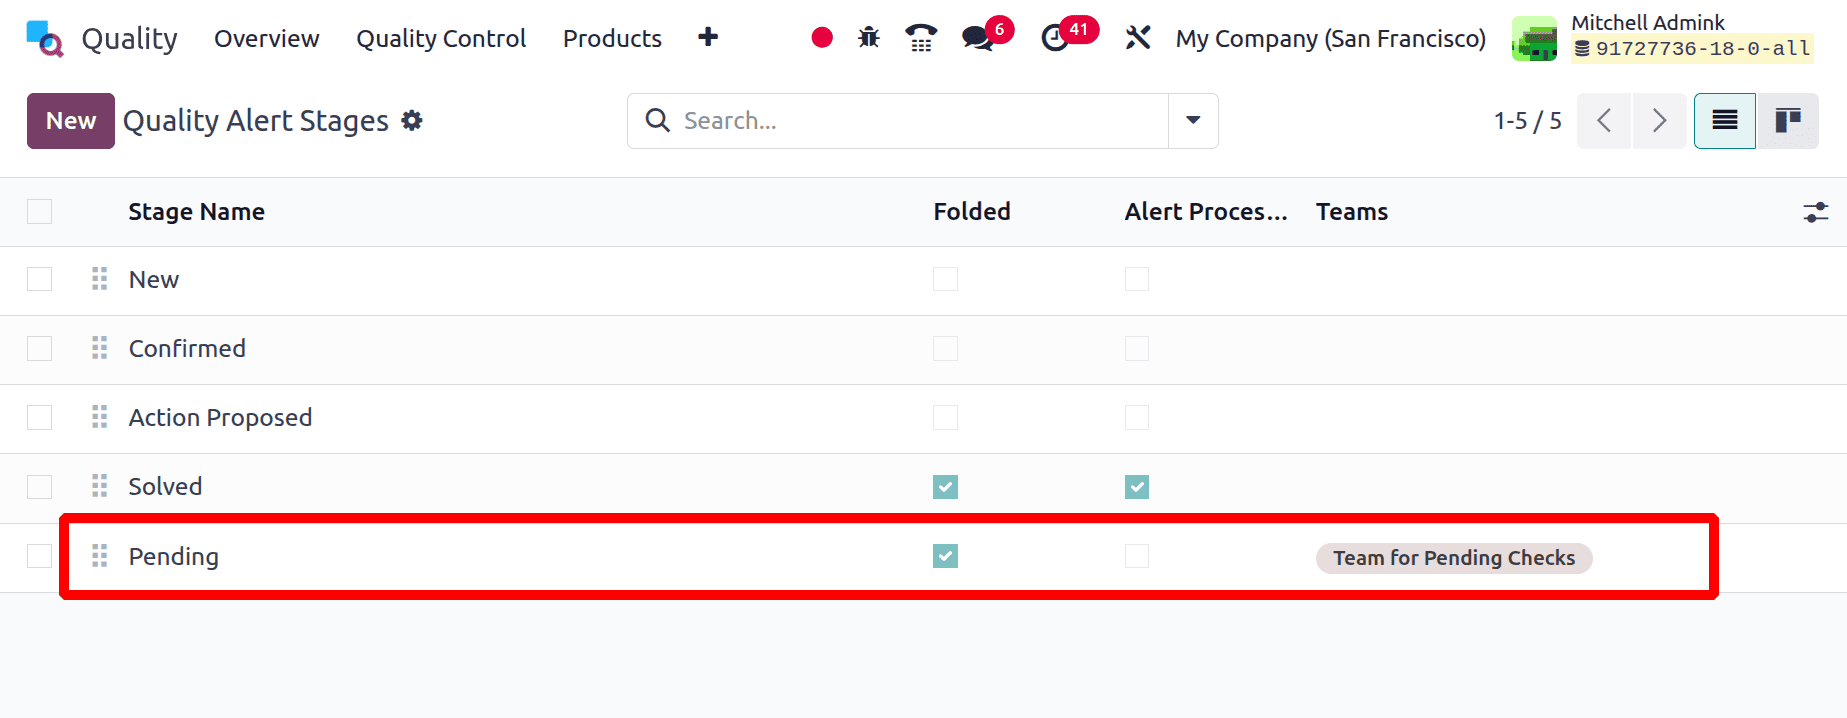
A new stage is created and named as Pending. The Folded option is enabled, so the stage appears as folded inside the kanban view. The team assigned for this stage was previously created “Team for Pending Checks”.
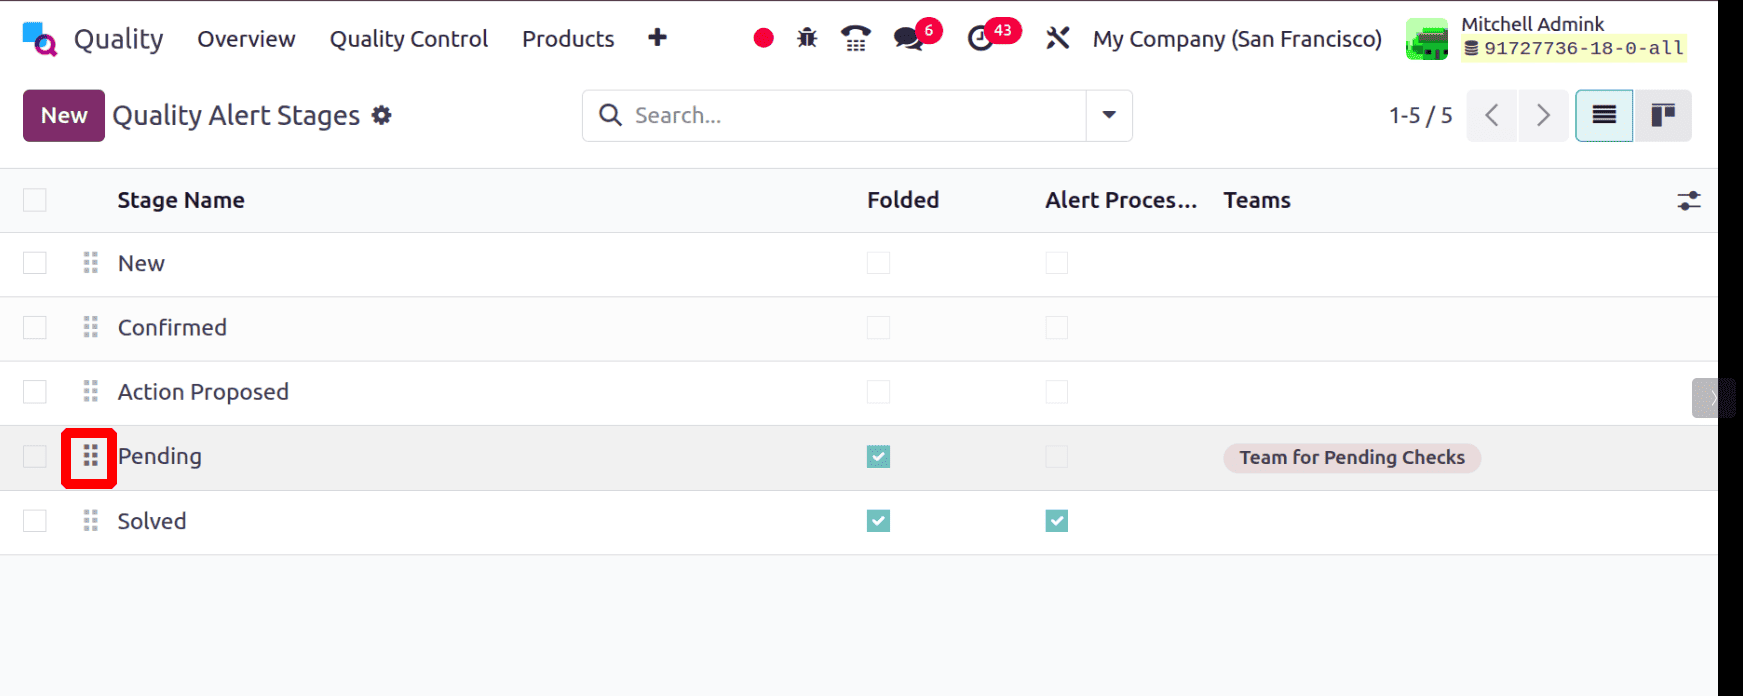
Users can simply change the stage position by dragging, as shown below. So the stages will be shown inside the kanban view in this order.
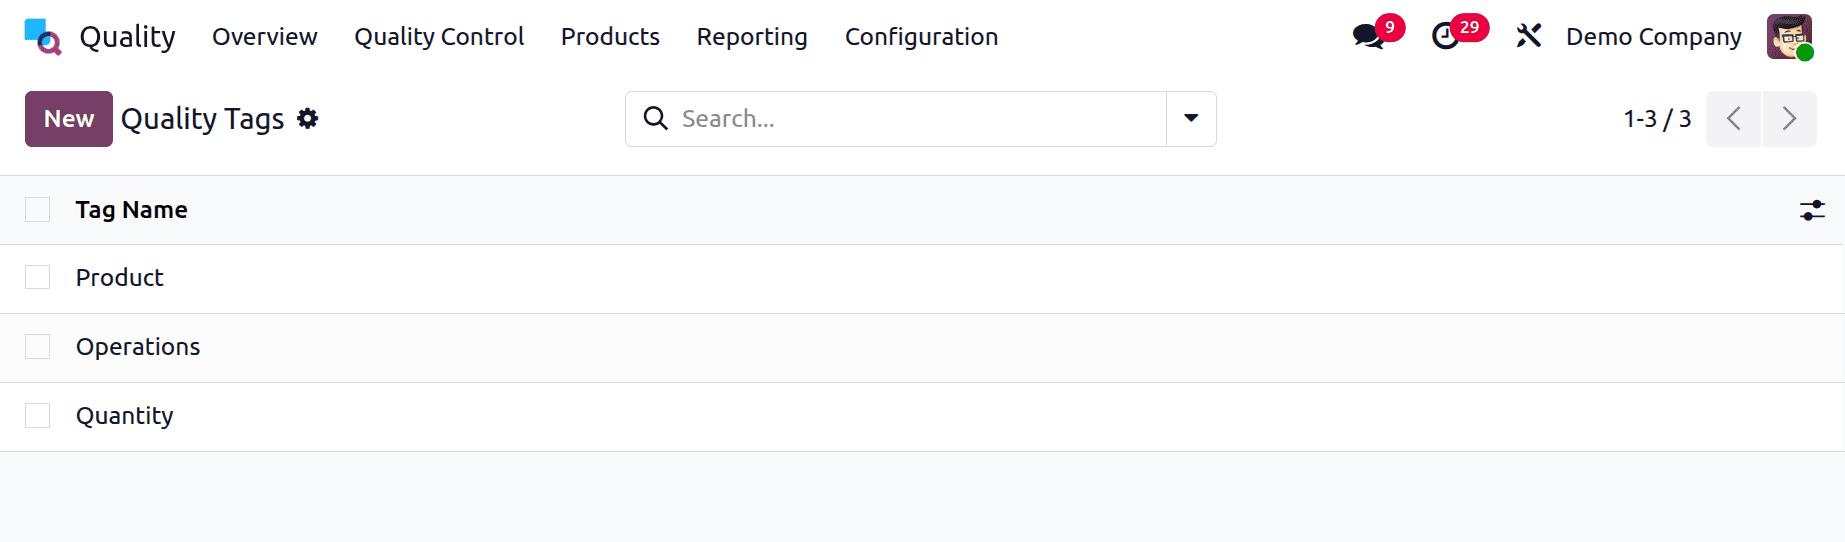
Quality Tags
Tags are a useful tool for identifying opportunities during a search, and they can also be valuable within the Quality module. You can create or review Quality Tags directly in this section. To add a new tag, click the New button, then add the tag name.
Lets check how these configurations are used in the Odoo 18 quality module.
Quality Checks in Odoo 18 with Quality Control Points
Odoo 18 makes it simple to enforce quality standards during your operations. In this guide, we will walk through the complete process:
Step-by-Step Guide to Configuring Quality Control Points (QCPs)
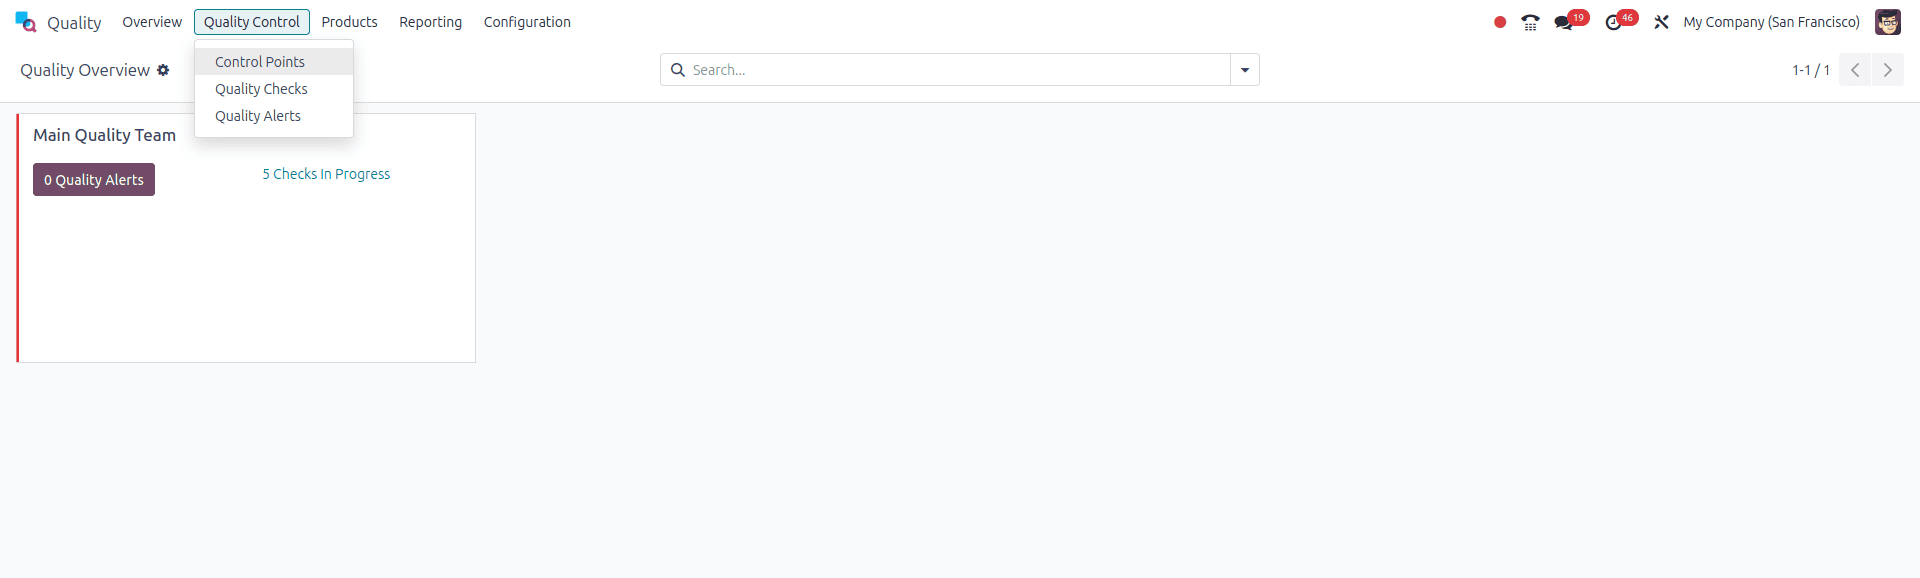
1. Accessing Quality Control Points
Under the Quality Control menu, select Control Points.
Click the New button to create a new Quality Control Point.
2. Defining the Scope (Products & Operations)
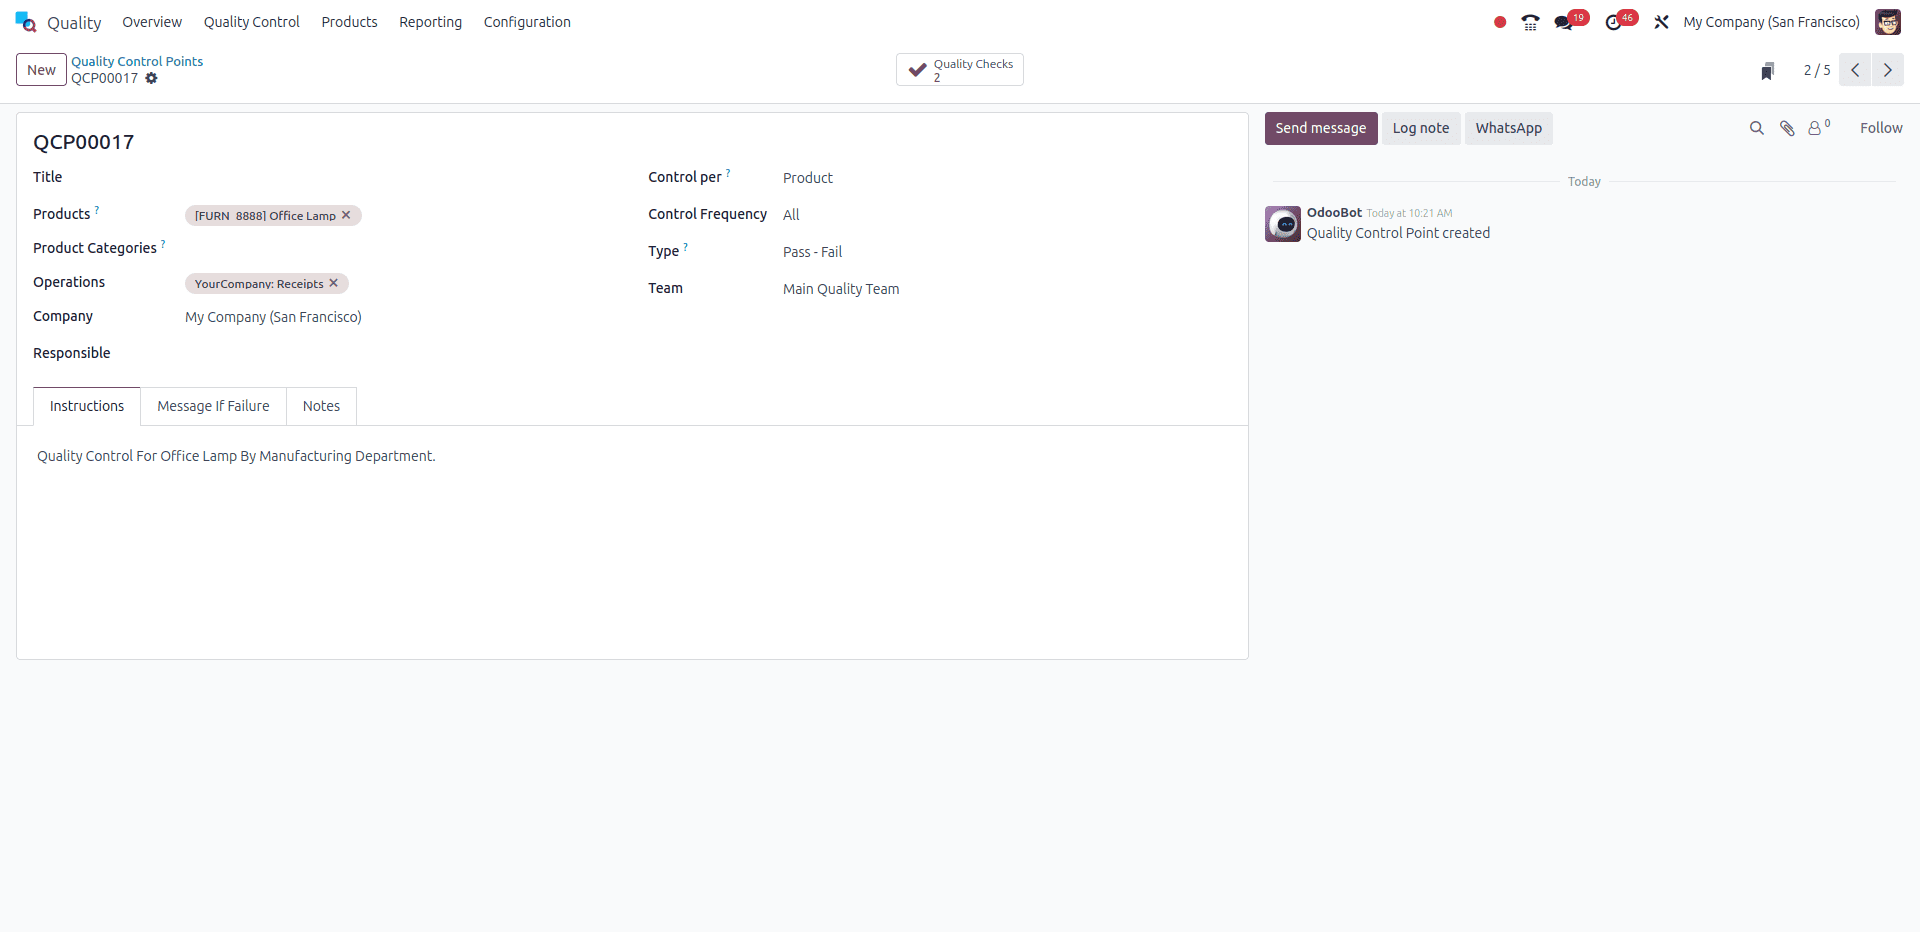
On the new QCP form, you'll define the specific conditions that trigger the check.
Title: Give your QCP a clear and unique title for easy identification.
Products: Select the specific products this QCP should apply to (multiple products can be added).
Product Category: Alternatively, you can select a relevant category to apply the QCP to an entire group of products.
You can leave both Products and Product Category blank to apply the QCP to all products for the selected operation.
Operations: Select the operation that will trigger the quality check. Examples include Delivery Order, Receipt, or Manufacturing. Note: You must select at least one operation.
Work Order Operation: If you select Manufacturing, a new field will appear. Here, you can specify a precise work order operation, such as Assembly, Testing, or Packing, to trigger the check at a more granular stage.
3. Setting Control Parameters (Frequency and Scope)
These fields determine the quantity and timing of the checks.
Control Per: This defines how many quality checks are created when the QCP is triggered:
- Product: One check for each unique product in the operation.
- Operation: One check for the entire selected operation.
- Quantity: A check is triggered for a sample of the items. Choosing this allows you to:
Enable Partial Transfer Test, enter a Percentage of Products to define the sample size.
Control Frequency: This specifies how often the checks are created:
- All: A check is created every time the QCP conditions are met.
- Randomly: A check is created randomly for a specified percentage of operations. You will need to enter the probability percentage.
- Periodically: A check is created once every set time interval (e.g., 5 days, weeks, or months).
- On Demand: Checks are triggered manually by the user.
4. Defining the Quality Check Type
In the Type field, select the kind of quality check that will be performed when the QCP is triggered.
A common option is Pass/Fail.
If you select a type like Spreadsheet, a Spreadsheet Template field will appear, requiring you to select a predefined quality worksheet template.
5. Assigning Responsibility and Instructions
Finally, specify the team and instructions for the check.
Team: Choose the Quality Team responsible for managing this QCP and the checks it creates.
Message If Failure: In this tab, provide clear instructions on what employees should do if the quality check fails (e.g., instructing the employee to create a Quality Alert).
Notes: This tab is for internal information about the QCP and is not shown to the employees performing the check .
Once all configurations are complete, simply click Save.
Perform the Quality Check
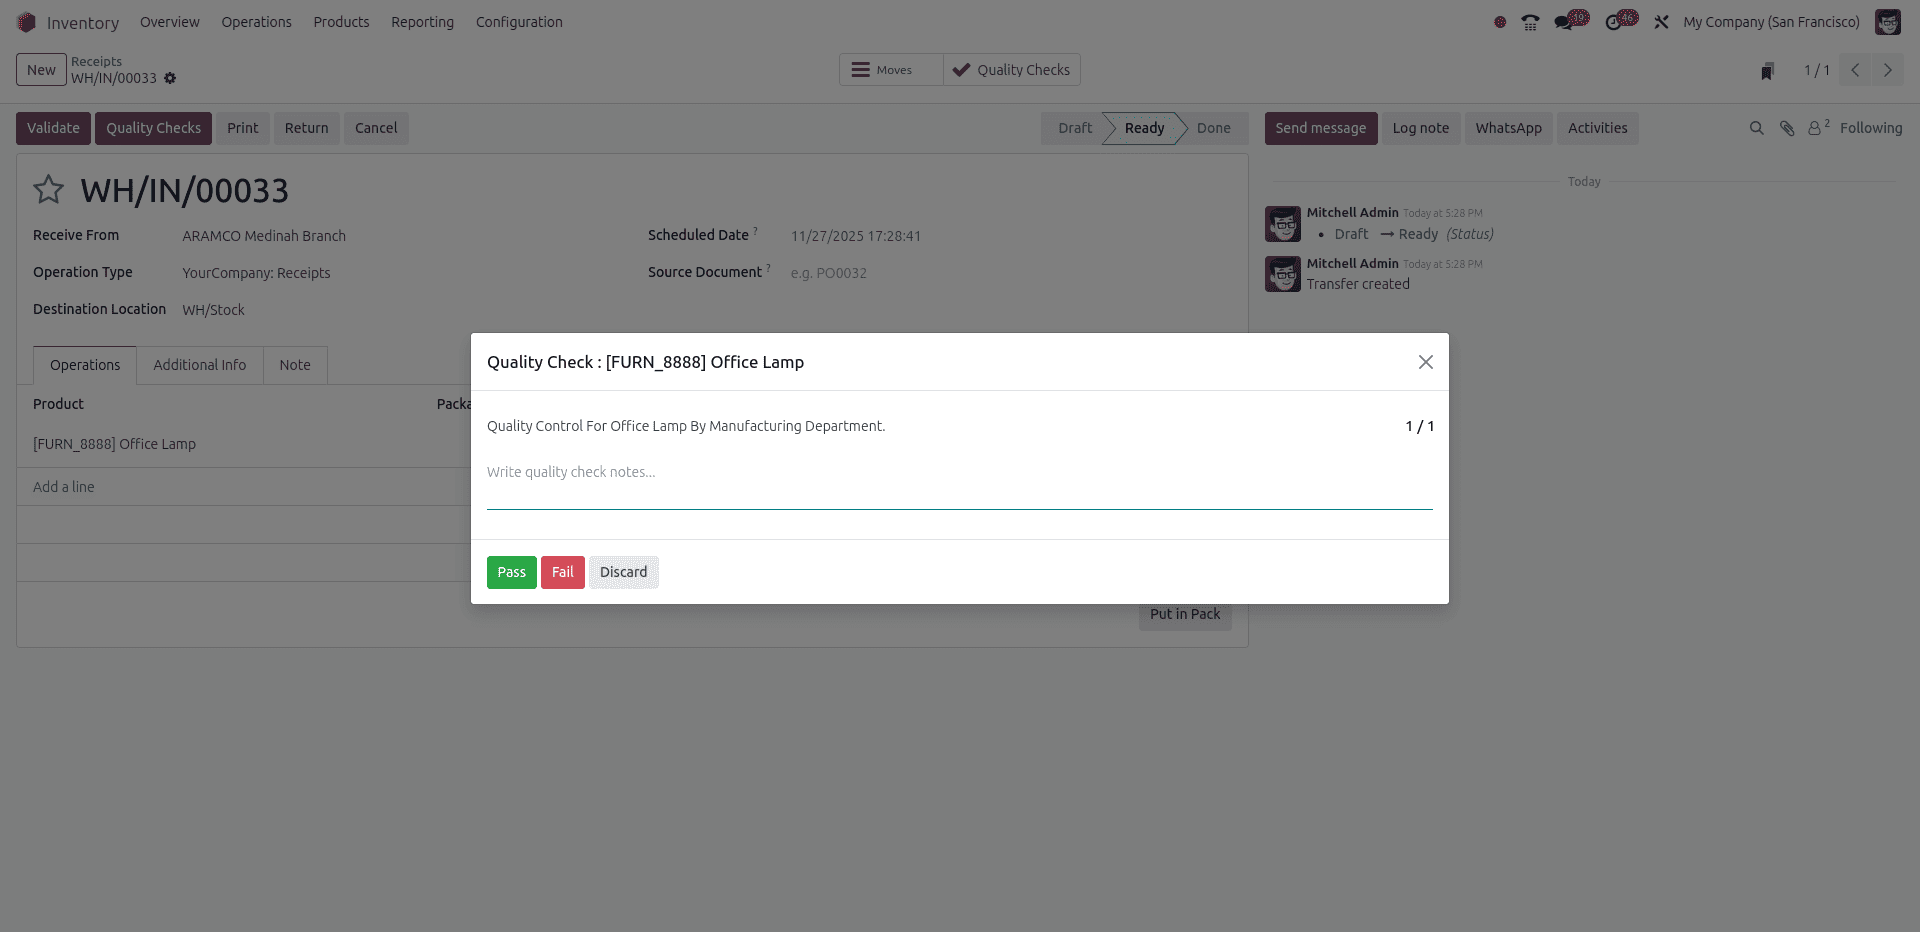
Once the control point is created, perform the operation that triggers the check.
Step A: Trigger the Operation
Example:
- Validate an incoming receipt
- Complete a manufacturing step
- Confirm a delivery order
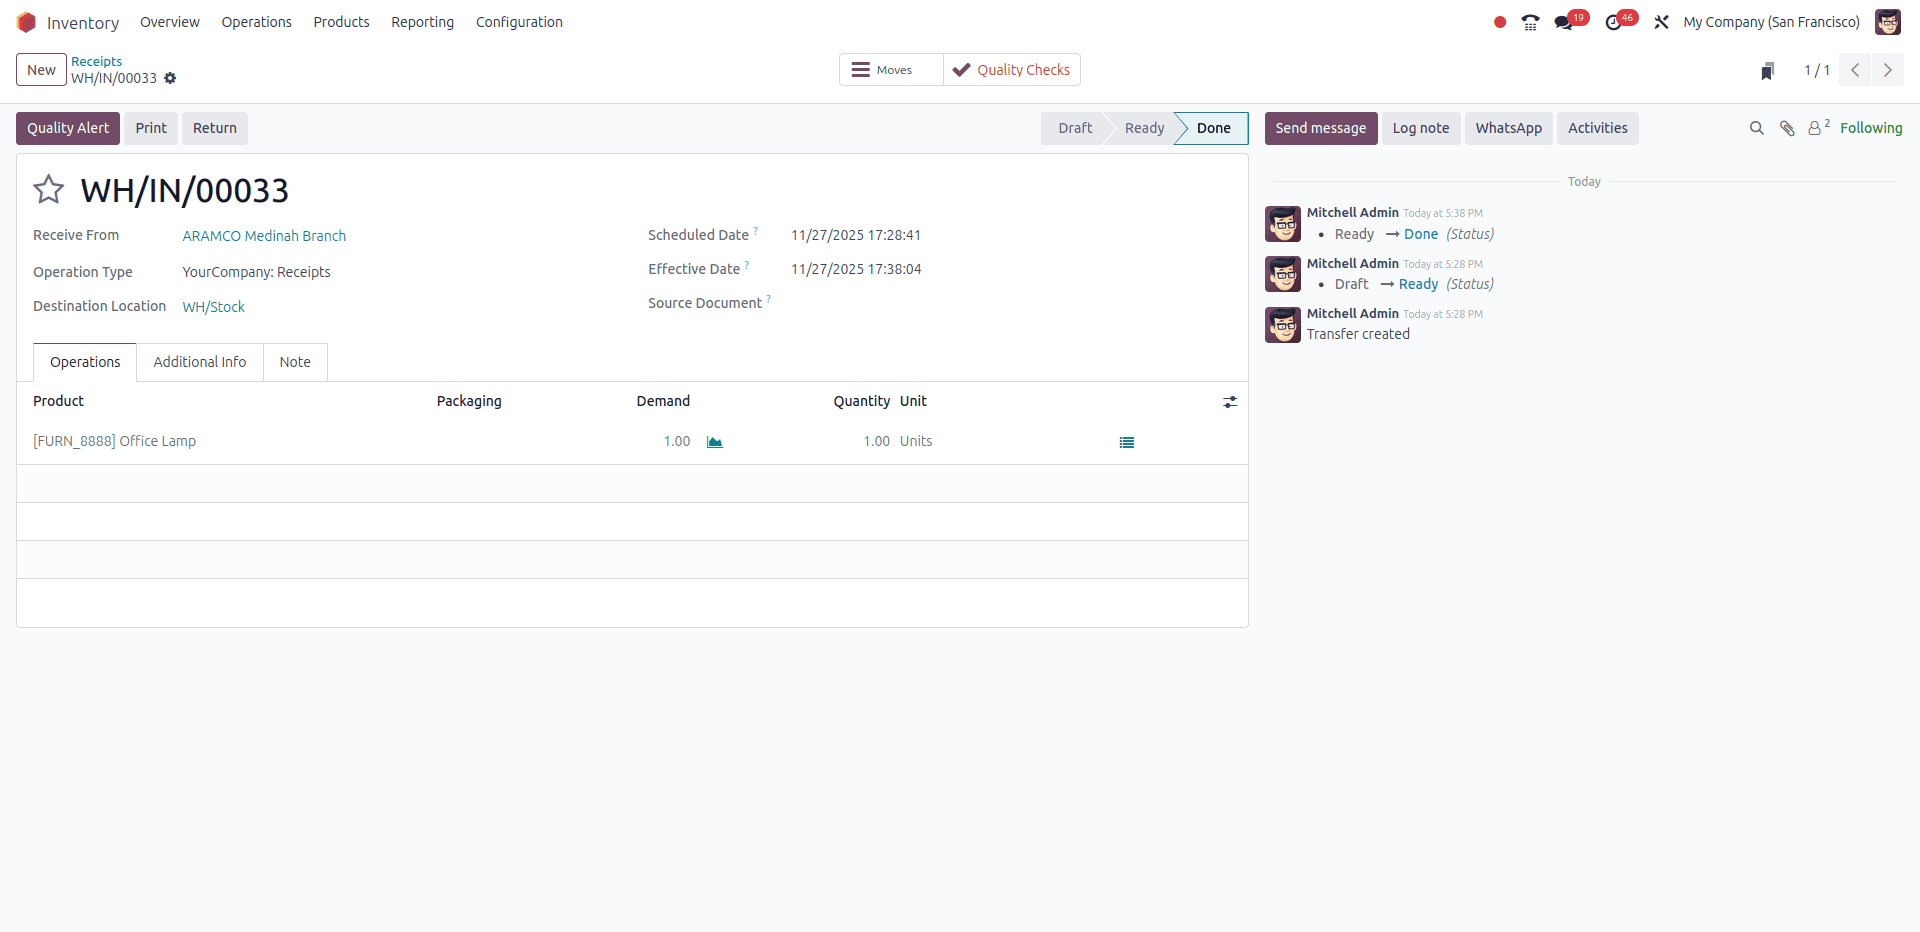
Follow the instructions that appear on the Quality Check pop-up window. When handling a Pass–Fail check, finish the process by selecting Pass or Fail at the bottom of the pop-up. For other quality checks, use the Validate button to complete the action.
Fail the Check
To add a Quality alert, click on the Quality Alert button. Which will open a new window, then add the details.
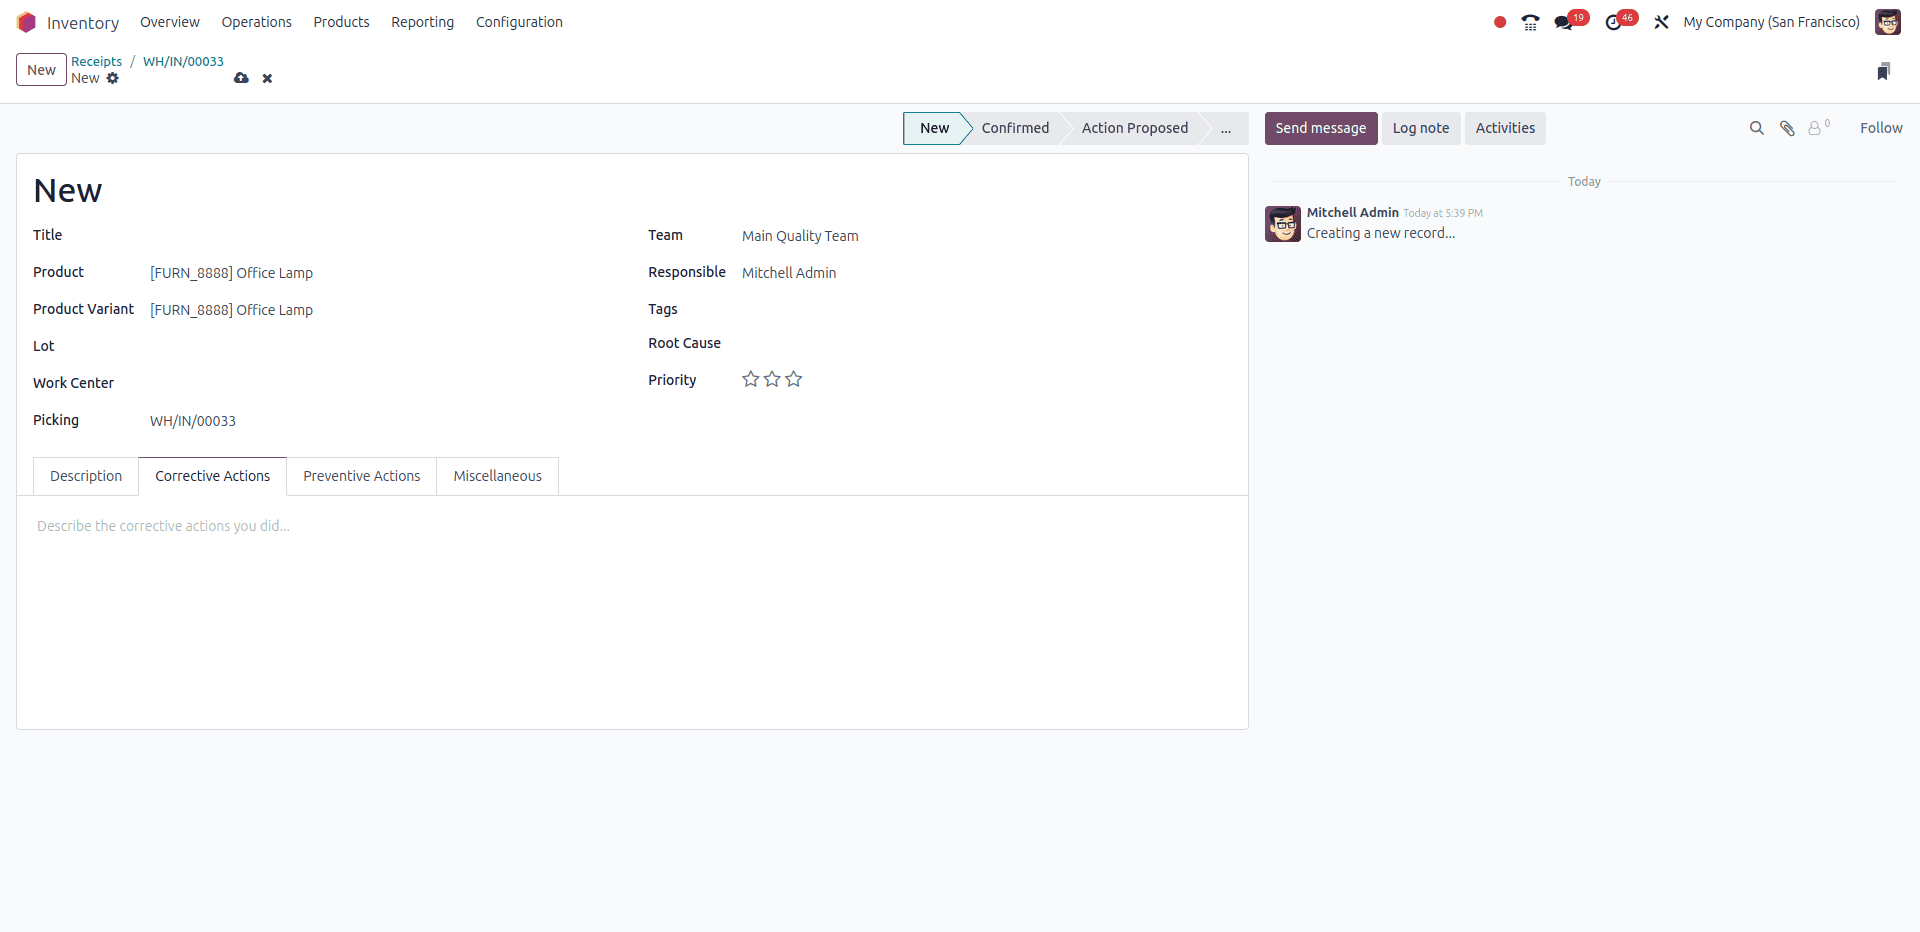
Create the Quality Alert
Click Create Alert.
When creating a new quality alert, start by entering a brief Title that clearly describes the product issue.
If the alert relates to a specific reference, select the appropriate option:
- Choose the relevant Product or Product Variant from the corresponding drop-down list.
- Select the applicable Work Center if the issue is linked to one.
- If the problem concerns a picking operation, choose the correct Picking record.
In the Team field, assign the quality team responsible for handling the alert. If the alert should be handled by a particular employee, select them in the Responsible field.
Add any applicable labels in the Tags field. If the cause of the issue is known, specify it in the Root Cause field.
Set the alert’s importance by choosing a Priority level using one to three stars. Alerts with higher priority are displayed more prominently on the Quality Alerts Kanban board.
At the bottom of the form, four tabs are available to include additional details and actions:
- Use the Description tab to explain the quality issue.
- In Corrective Actions, outline the steps required to resolve the problem.
- In Preventive Actions, describe measures to avoid similar issues in the future.
- Under Miscellaneous, select the product’s Vendor. If multiple companies are managed in the database, choose the appropriate Company, and record the assignment date in the Date Assigned field.
Manage quality alerts
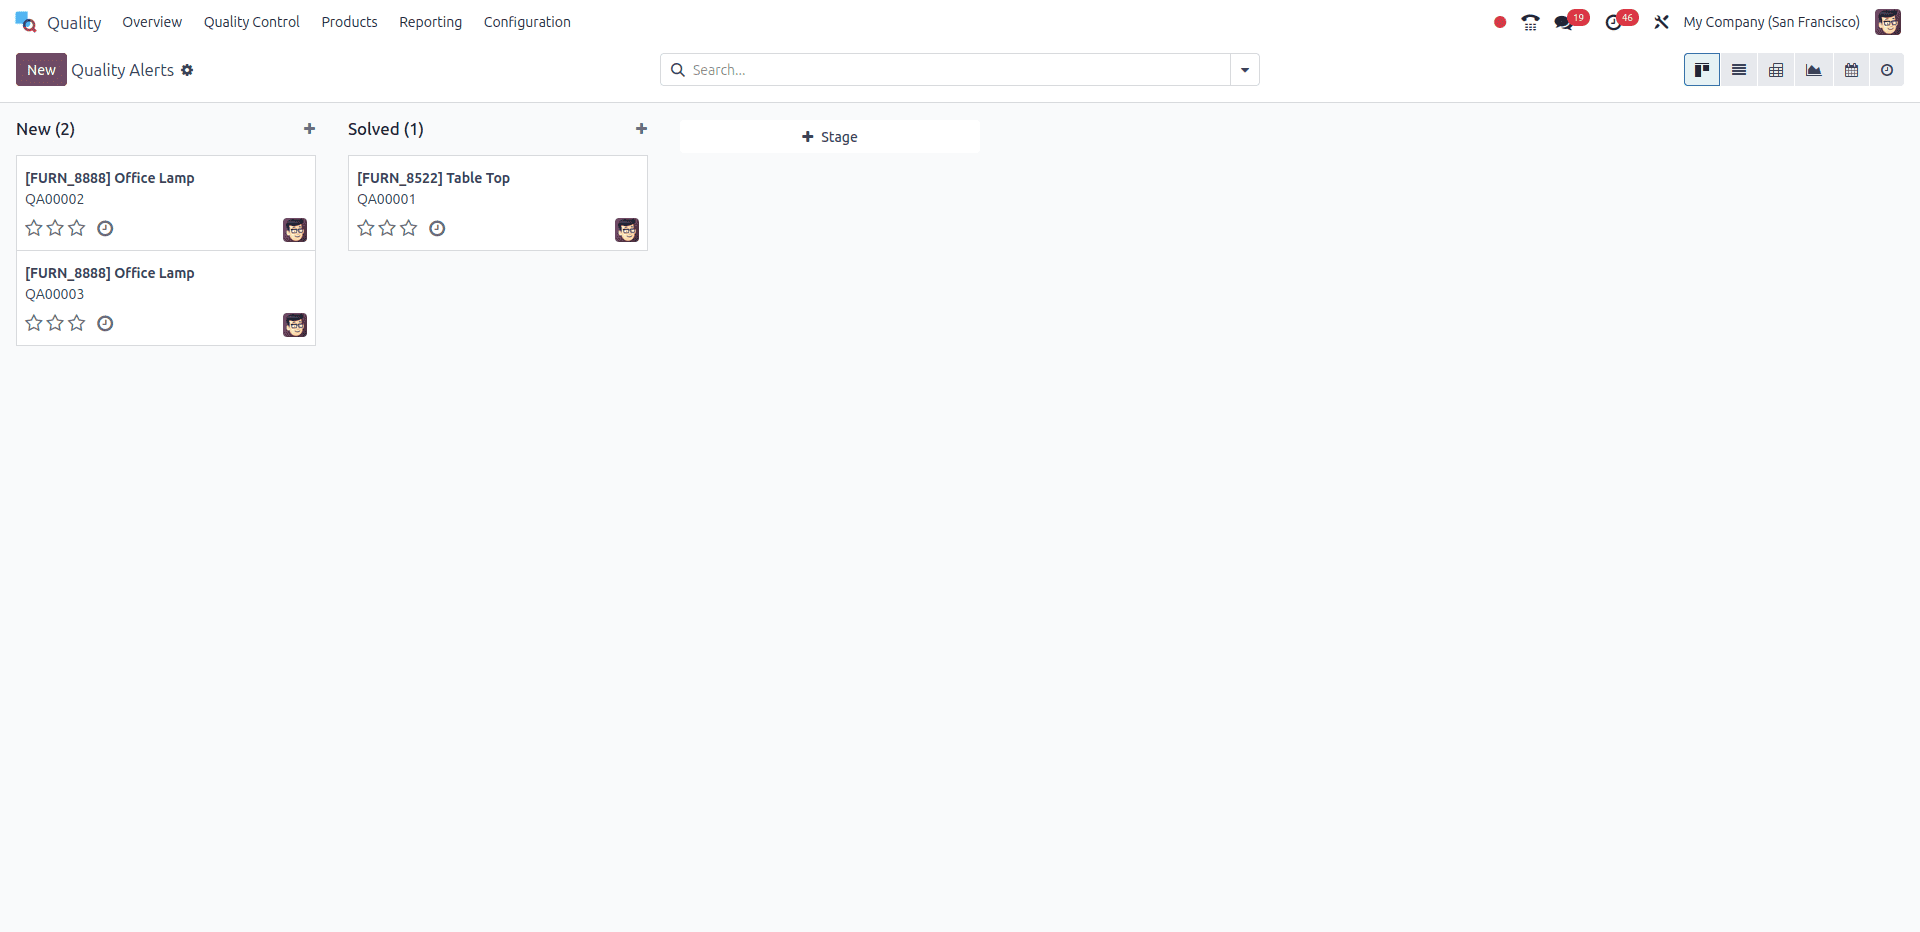
To see all existing quality alerts, go to Quality > Quality Control > Quality Alerts. Alerts are shown in a Kanban view by default, grouped into stages that reflect their current review status.
You can change an alert’s stage by dragging and dropping it into another column. Alternatively, open the alert and select the appropriate stage from the options displayed in the upper-right area of the form.
To add a new alert directly within a specific stage, click the + (plus) icon next to the stage name. Enter the alert Title in the card that appears, then click Add. To complete the remaining details, open the alert by selecting the newly created card.
While resolving the quality alert, simply update the quality alerts.
Odoo 18’s Quality module simplifies the entire quality management process by centralizing teams, control points, alerts, and checks in one place. Its seamless integration with other Odoo apps helps businesses maintain standards, reduce errors, and ensure consistent product quality.
To read more about An Overview of Quality Module Reporting in Odoo 18, refer to our blog An Overview of Quality Module Reporting in Odoo 18.