Odoo offers a valuable feature in the form of email configuration, making it convenient to manage your email communication directly within the Odoo platform. By setting up the outgoing mail server, you can send and receive emails seamlessly without the need for external email services. In this blog post, we will explore the process of configuring both outgoing and incoming mail servers within Odoo 17 for effective email management.
Configuring Outgoing Mail Server
To Configuring Outgoing Mail Server, start by accessing the Settings menu. Keep in mind that the Settings menu is accessible only to administrators, so it's essential to log in with administrative privileges to set up the mail server.
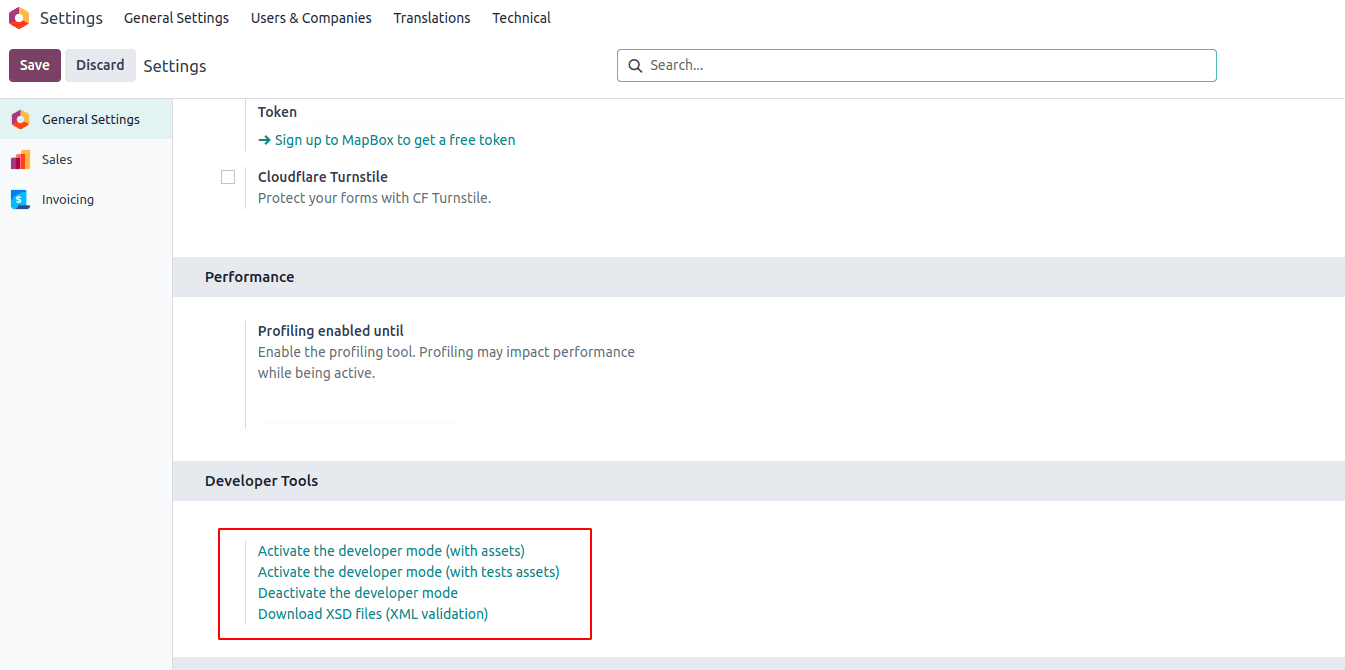
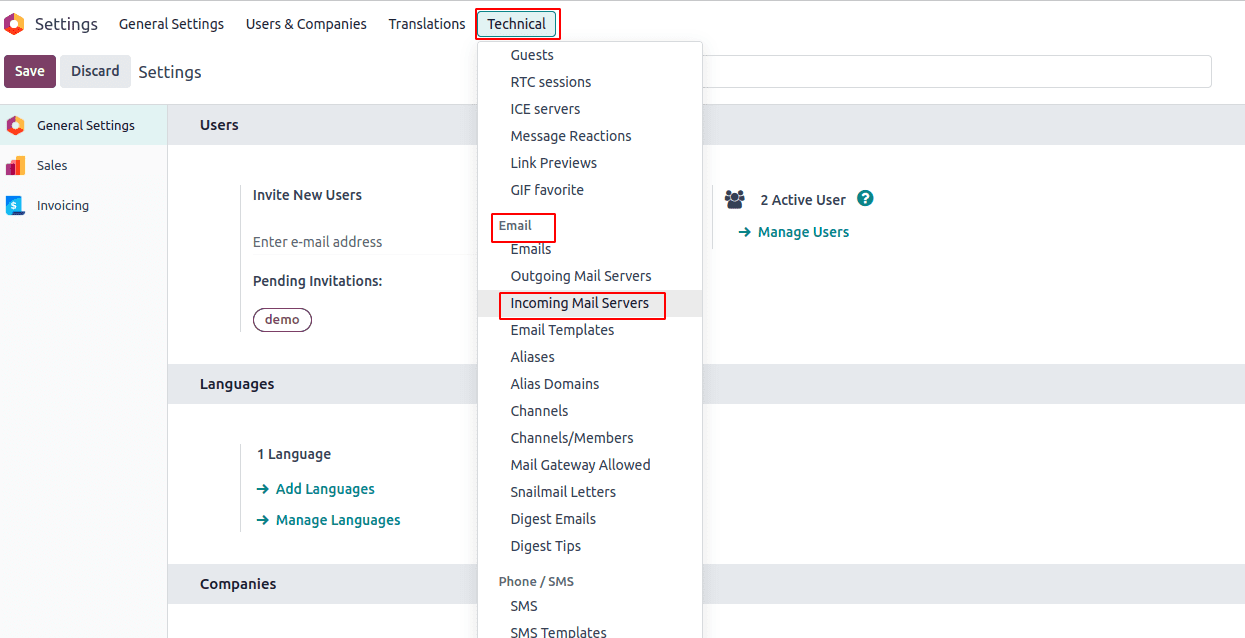
To view the Technical menu under Settings, you'll need to enable developer mode, as illustrated in the screenshot below.
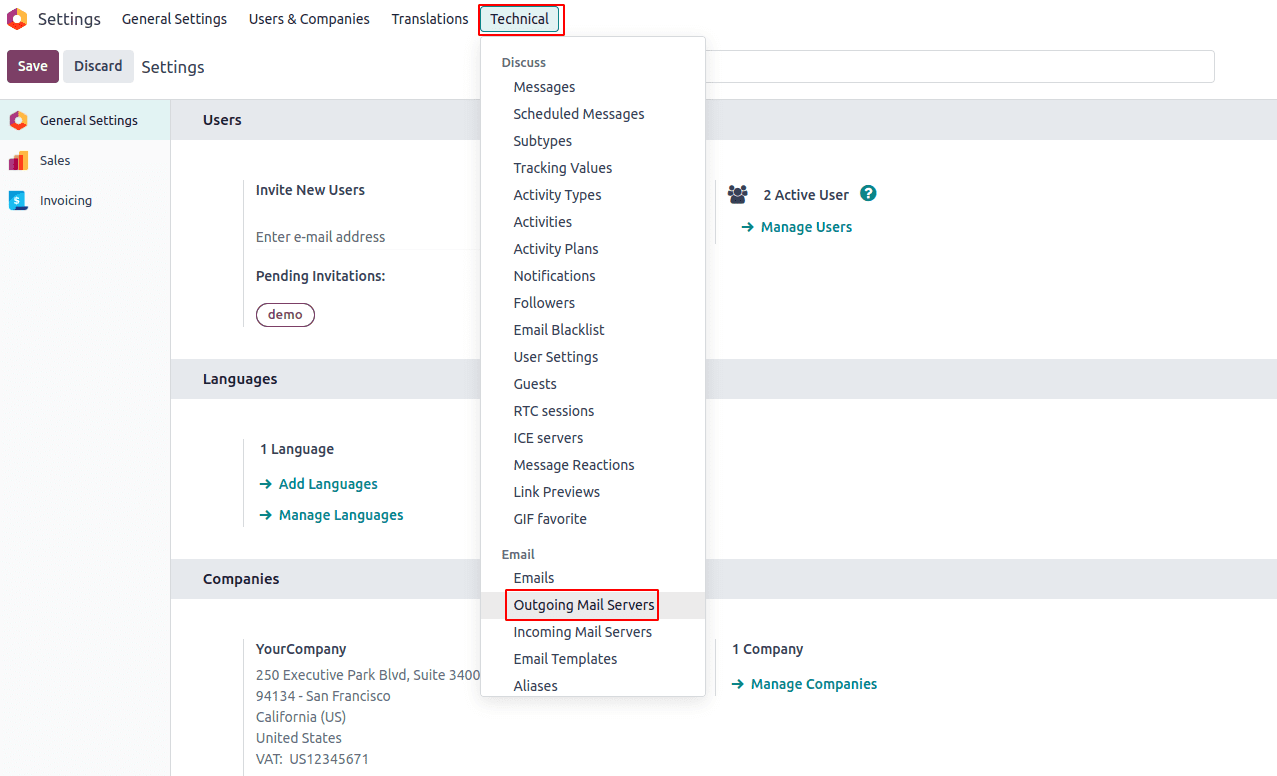
After enabling developer mode, We can access the Technical menu. In the Technical menu Under the "Email" section, you will find the "Outgoing Mail Server" option. Click on it to configure your Outgoing mail server.
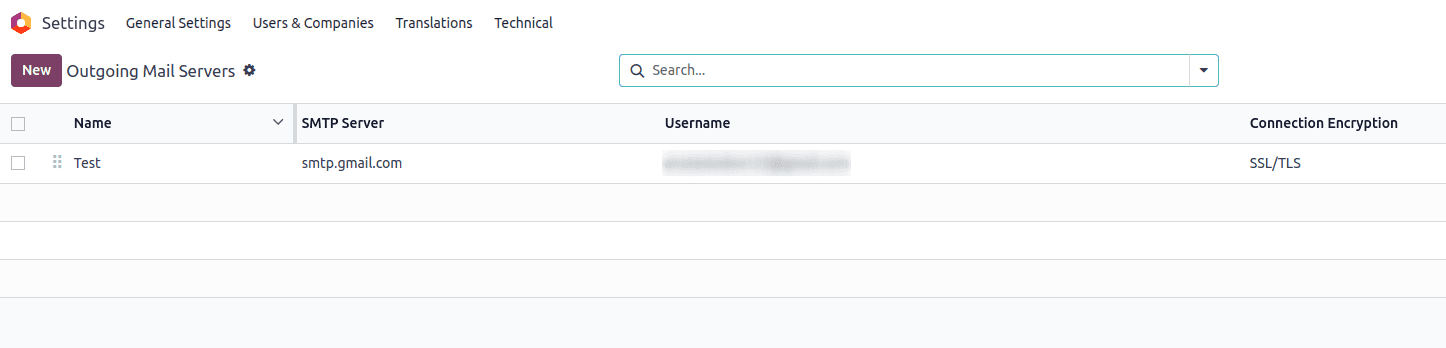
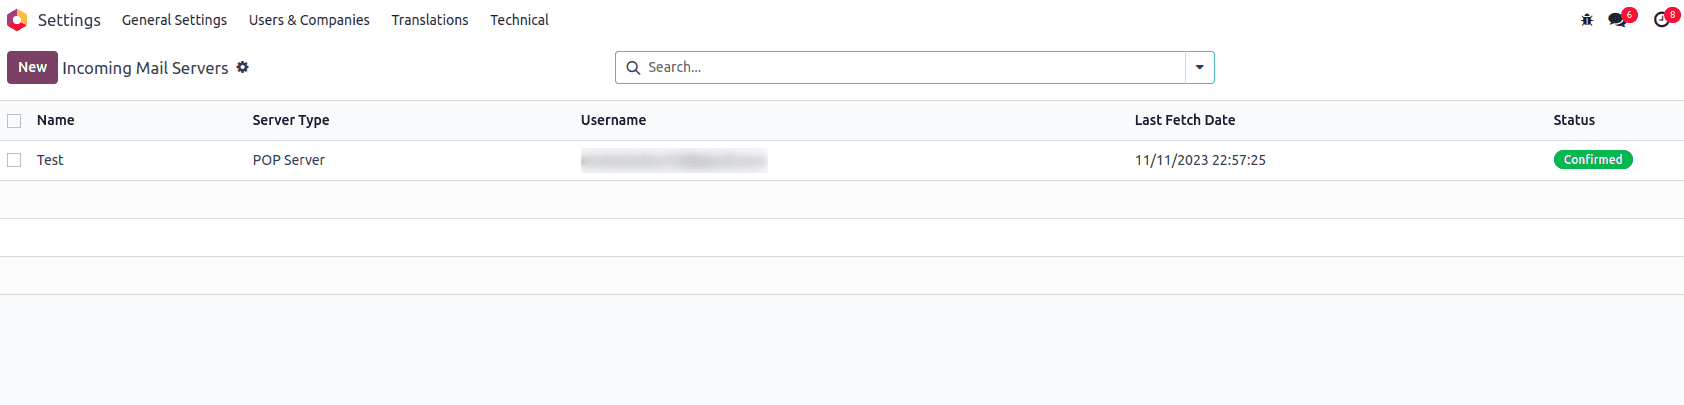
Then, the List view of the Outgoing Mail Server will be displayed, as shown below.
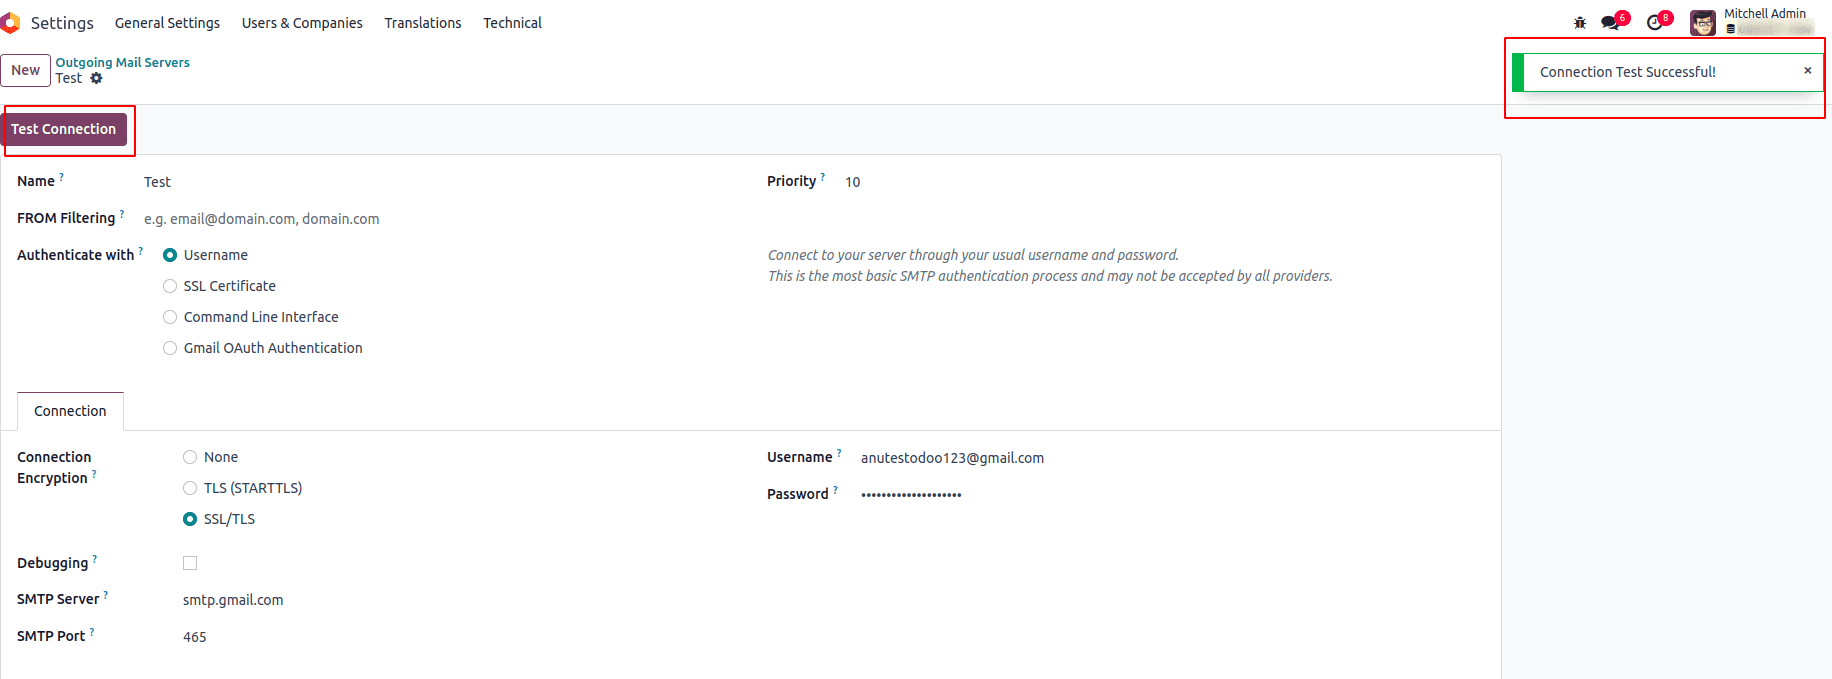
When clicking the ‘New’ button, the form view will open, allowing input of the necessary information for configuring an outgoing mail server, as depicted in the image below.
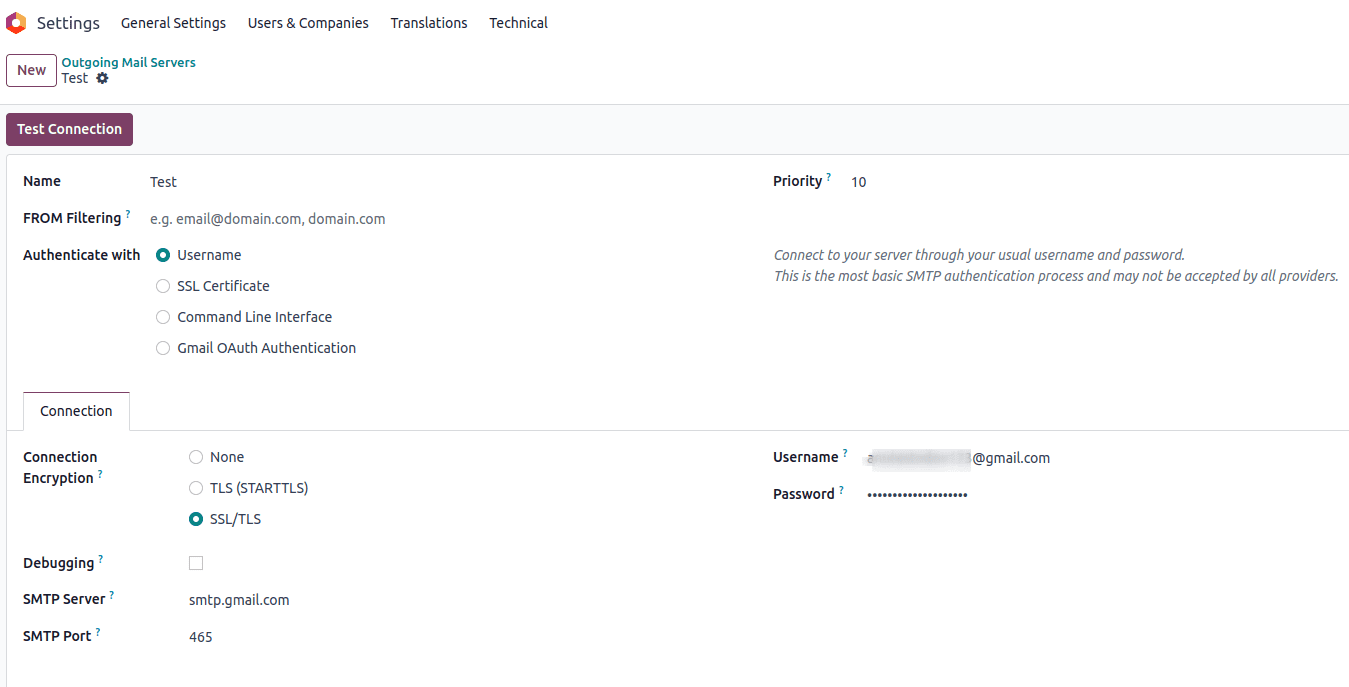
In the configuration form, you need to provide the following information:
* Name: Give your outgoing mail server a descriptive name.
* Authenticate With: User Name
* SMTP Server: smtp.gmail.com
* SMTP Port: The port of your SMTP server, here it is 465
* Connection Encryption: SSL/TLS
* Username: Your Email Id
* Password: Provide the password of your Email ID
* Priority: A lower numerical value indicates a higher priority.
After entering all the necessary information in the outgoing mail server form view, click the 'Test Connection' button located at the top left. If the entered details are accurate, a confirmation message indicating a successful connection will appear in the upper right corner, as shown in the image below.
Configuring Incoming Mail Server
Now, let's explore the process of setting up an incoming mail server in Odoo 17. To do this, navigate to Settings -> Technical -> Email -> Incoming Mail Servers.
Upon clicking the ‘New’ button, you'll be directed to the form view of the Incoming Mail Server.
Fill in the required information, just like the example in the image, to set up the Incoming Mail Server.
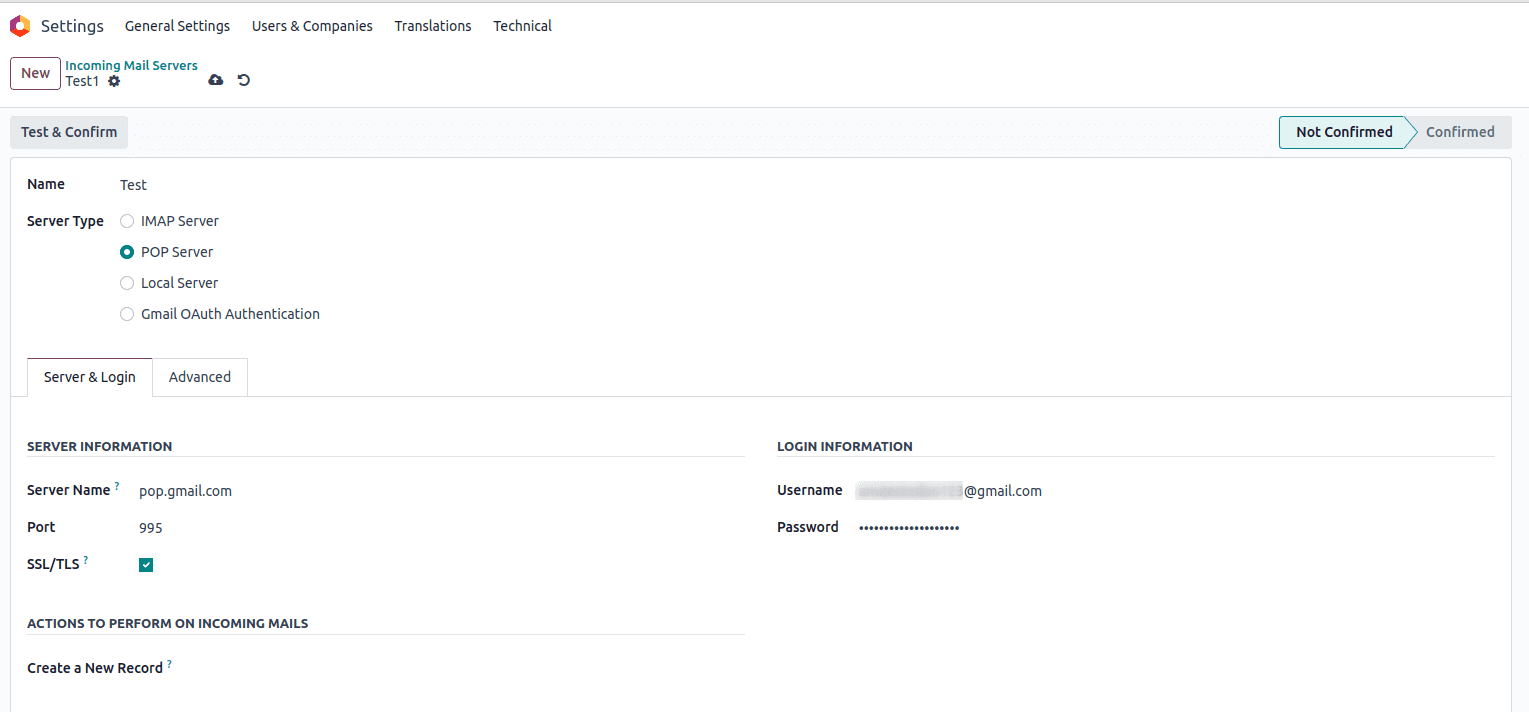
In the form, provide the following information:
* Server Name: Indicate the server's name, which, in this instance, is the Gmail server. Specify "pop.gmail.com" to align with the Gmail server configuration.
* Port: Enter the server's port, which, in this case, is set at 995.
* SSL/TLS: To enhance message security, make sure to enable this option for encrypting the messages.
* Username: Provide your email address as the username.
* Password: Input the password associated with your email address.
In the "ACTIONS TO PERFORM ON INCOMING MAILS" section, choose the model you want to create new records when an email arrives.
After filling in all the needed details, click the ‘Test & Confirm’ button at the top left. If the connection works, you'll see the status change from NOT CONFIRMED to CONFIRMED at the top right. Check the screenshot for reference.

By correctly configuring your outgoing and incoming mail servers in Odoo 17, you'll be able to seamlessly integrate email communication into your business processes, improving the efficiency and effectiveness of your operations.
To read more about configuring a mail server in Odoo 16, refer to our blog How to Configure a Mail Server in Odoo 16