In any organization, reports play a vital role in tracking performance, monitoring progress, and making informed decisions. However, generating these reports manually again and again can quickly become time-consuming and repetitive. This is where Scheduled Reports in Odoo 19 make a real difference. They allow the system to automatically generate and deliver reports at predefined intervals, ensuring the right people receive the right information at the right time — without manual effort.
Whether it’s weekly student performance reports in a school, monthly sales summaries in a business, or periodic inventory updates in a warehouse, scheduled reports help maintain consistency and improve efficiency. With Odoo 19’s powerful automation framework, setting up these recurring reports is straightforward, flexible, and highly customizable. In this blog, we’ll explore how scheduled reports in Odoo 19 work, how to configure them, and how they can simplify regular reporting tasks in real-world applications.
Use Case: Weekly Student Performance Reports for Teachers
In a school environment, teachers need regular updates on how their students are performing, but manually generating reports every week can be time-consuming. With Scheduled Reports in Odoo 19, this process can be fully automated. The system can be configured to generate a student performance report every week and automatically send it to all teachers by email. This ensures that teachers always have the latest performance data at their fingertips, helping them track progress, identify students who need extra attention, and make better academic decisions — all without any manual reporting work.
For this setup, the res.partner model is extended with a field called education_role with two values: student and teacher. This helps the system easily distinguish between students and teachers, allowing student records to be used for generating performance reports and teacher records to receive the scheduled report emails.
# -*- coding: utf-8 -*-
from odoo import _,api, fields, models
class ResPartner(models.Model):
   _inherit = 'res.partner'
   education_role = fields.Selection(
       [
           ('teacher','Teacher'),
           ('student','Student'),
       ]
   )
View:

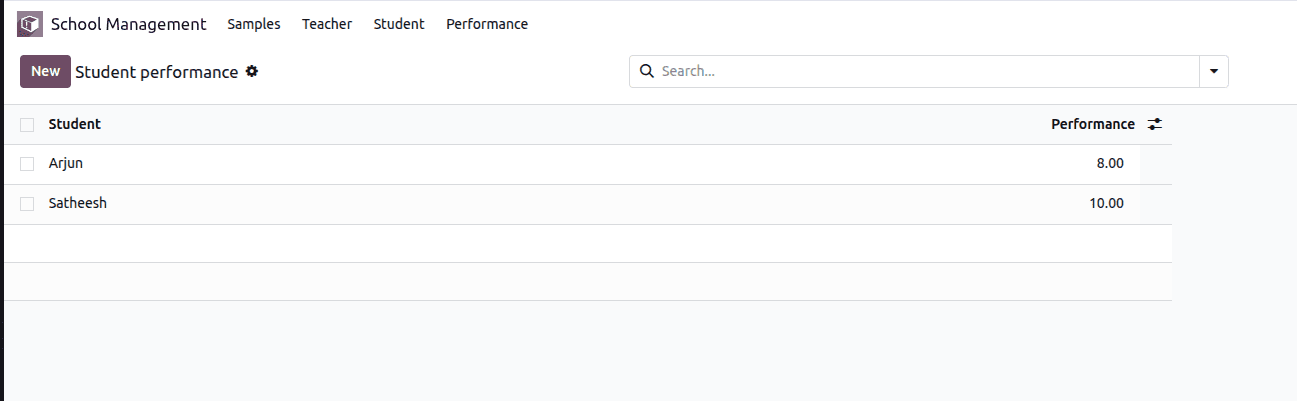
Here we have 2 students already created
We also created a Student Performance model to record and store each student’s performance data. This model links performance records to student partners and serves as the data source for generating the weekly performance reports.
# -*- coding: utf-8 -*-
from odoo import _,api, fields, models
class StudentPerformance(models.Model):
   _name = 'student.performance'
   student_id = fields.Many2one('res.partner', 'Student', domain='[("education_role", "=", "student")]')
   performance = fields.Float(string="Performance")
View:
Creating an Email Template for Sending Reports to Teachers
To send the weekly student performance report to teachers automatically, we first create an email template. This template defines how the email should look, who it should be sent to, and what message it should contain. Once created, this template will later be used by the scheduled action to deliver the report without manual effort.
<?xml version="1.0" encoding="UTF-8"?>
<odoo>
   <record id="email_template_teacher_performance_report" model="mail.template">
       <field name="name">Weekly Student Performance Report</field>
       <field name="model_id" ref="base.model_res_partner"/>
       <field name="subject">Weekly Student Performance Report</field>
       <field name="email_from">noreply@example.com</field>
       <field name="email_to">{{object.email}}</field>
       <field name="body_html" type="html">
           <p>Hi <t t-out="object.name"/>,</p>
           <p>Please find attached the weekly student performance report.</p>
           <p>This report provides an overview of student progress for the past week.</p>
           <br/>
           <p>Regards,<br/>School Management System</p>
       </field>
   </record>
</odoo>
- The name field provides an internal label for the template, making it easy to identify in the Odoo interface.
- The model_id is set to res.partner because teachers are stored as partner records, allowing access to their names and email addresses.
- The subject defines the text that appears in the recipient’s inbox and clearly states the purpose of the email.
- The email_from field specifies the sender’s address, usually a no-reply email for automated communication.
- The email_to field dynamically uses object.email to ensure the message is sent to the correct teacher.
- The body_html section contains the actual email message, where HTML formatting improves readability and dynamic fields personalize the content with the recipient’s name.
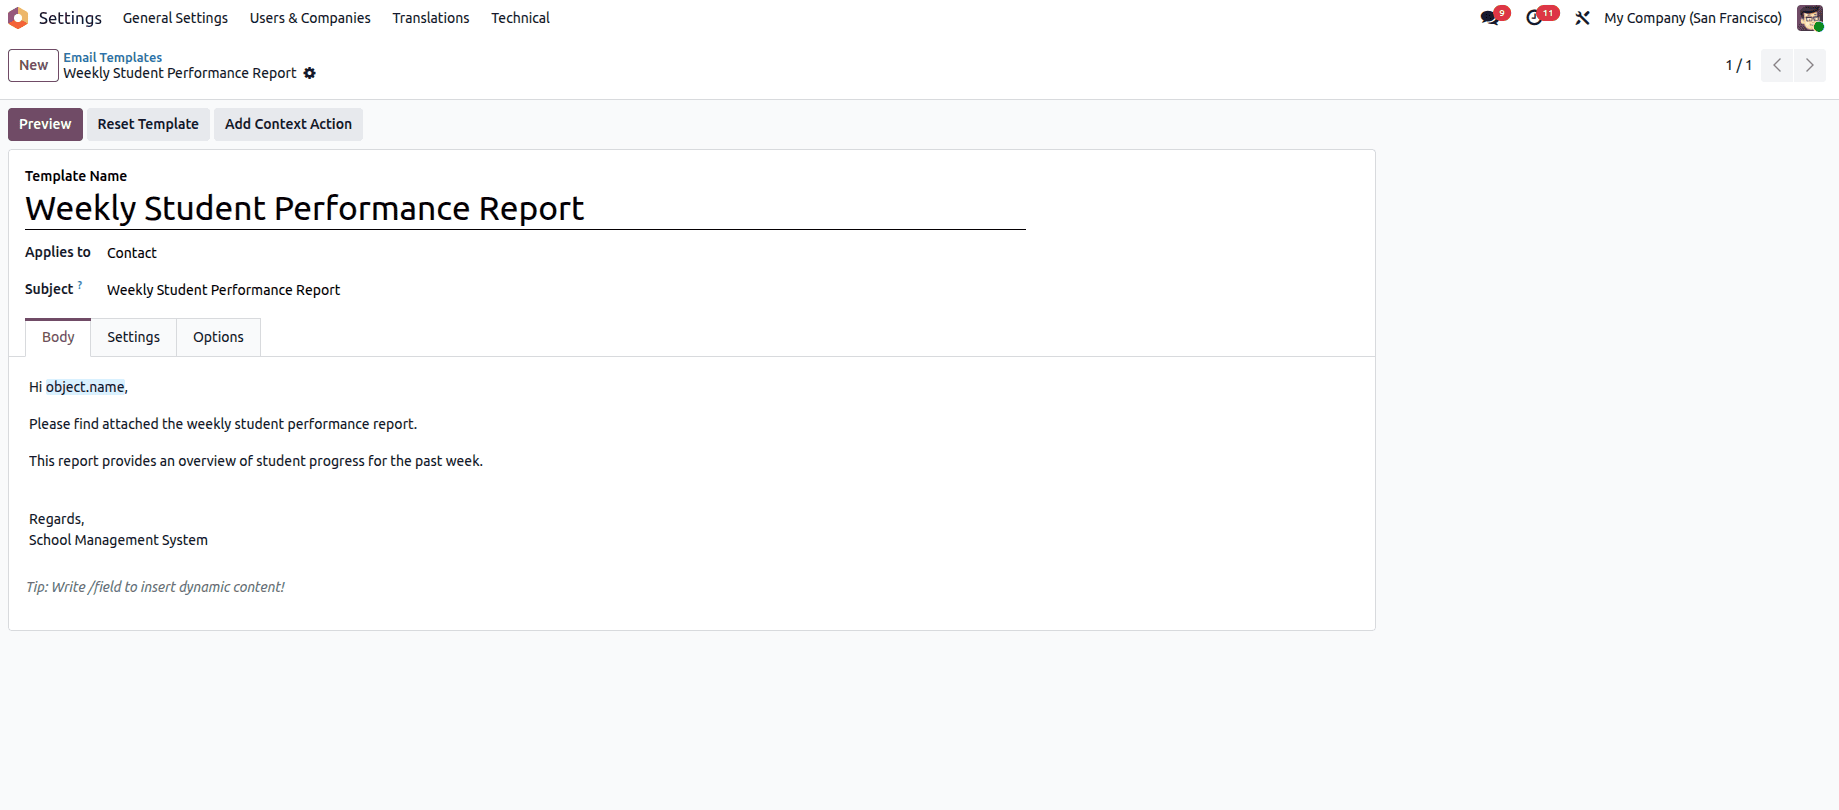
We can see the template created in Settings – Technical – Email Templates
By defining this template once, it can be reused by scheduled actions to automatically send weekly student performance reports to all teachers at a fixed time, without any manual effort.
Creating a Scheduled Action for Weekly Report Delivery
After setting up the email template, the next step is to automate when the report is sent. This is done using a Scheduled Action (cron job) in Odoo 19. The scheduled action ensures that the system runs a background process at fixed time intervals without requiring any user interaction.
<?xml version="1.0" encoding="UTF-8"?>
<odoo>
   <record id="cron_weekly_teacher_performance_report" model="ir.cron">
       <field name="name">Weekly Teacher Performance Report</field>
       <field name="model_id" ref="base.model_res_partner"/>
       <field name="state">code</field>
       <field name="code">model.send_weekly_student_performance_report()</field>
       <field name="interval_number">1</field>
       <field name="interval_type">weeks</field>
       <field name="active" eval="True"/>
       <field name="nextcall">2026-01-18 17:00:00</field>
   </record>
</odoo>
- The name field gives the scheduled action a clear label, making it easy to recognize in Odoo’s Scheduled Actions list.
- The model_id is set to res.partner because the Python method that sends the report emails is defined on the partner model.
- The state is set to code, which tells Odoo that this scheduled action will execute a custom Python method.
- The code field contains the method call send_weekly_student_performance_report(), which generates the report and sends it to all teachers.
- The interval_number and interval_type together define how often the action runs — in this case, once every week.
- The active field enables the scheduled action so it starts running automatically after module installation or update.
- The nextcall field sets the first execution time, ensuring the report is sent at a fixed and predictable hour.
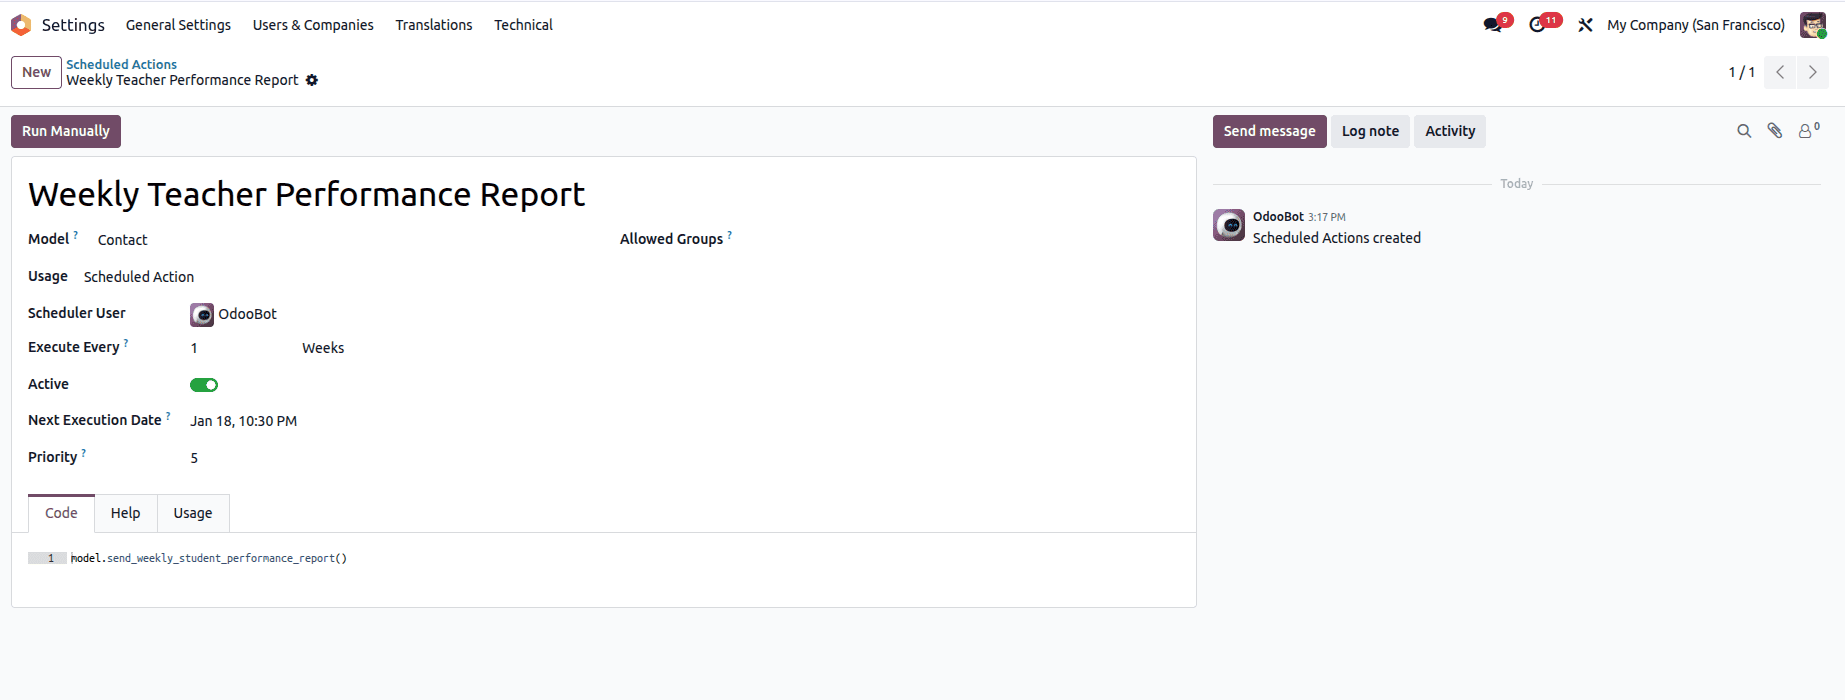
We can see the scheduled action created in Settings > Technical > Scheduled Actions
With this scheduled action in place, Odoo 19 automatically handles the timing and execution of the report delivery process, ensuring weekly student performance reports are sent to teachers consistently and without any manual effort.
Creating the PDF Report Template
To generate the student performance report as a PDF, we use Odoo’s QWeb reporting engine. This template defines the structure and layout of the report, including the heading and a table that displays each student’s name along with their performance score. The template is wrapped inside Odoo’s standard external layout, which automatically adds the default header and footer. By looping through the performance records, the report dynamically fills the table with real data, producing a clean and printable PDF report that can be downloaded or attached to scheduled emails.
<?xml version="1.0" encoding="UTF-8"?>
<odoo>
   <template id="report_student_performance_pdf">
       <t t-call="web.external_layout">
           <main>
           <div class="page">
               <h2 style="text-align:center;">
                   Student Performance Report
               </h2>
               <table class="table table-bordered" style="width:100%; margin-top:20px;">
                   <thead>
                       <tr>
                           <th>Student Name</th>
                           <th>Performance</th>
                       </tr>
                   </thead>
                   <tbody>
                       <t t-foreach="docs" t-as="rec">
                           <tr>
                               <td>
                                   <t t-out="rec.student_id.name"/>
                               </td>
                               <td>
                                   <t t-out="rec.performance"/>
                               </td>
                           </tr>
                       </t>
                   </tbody>
               </table>
           </div>
           </main>
       </t>
   </template>
</odoo>
Creating the Report Action
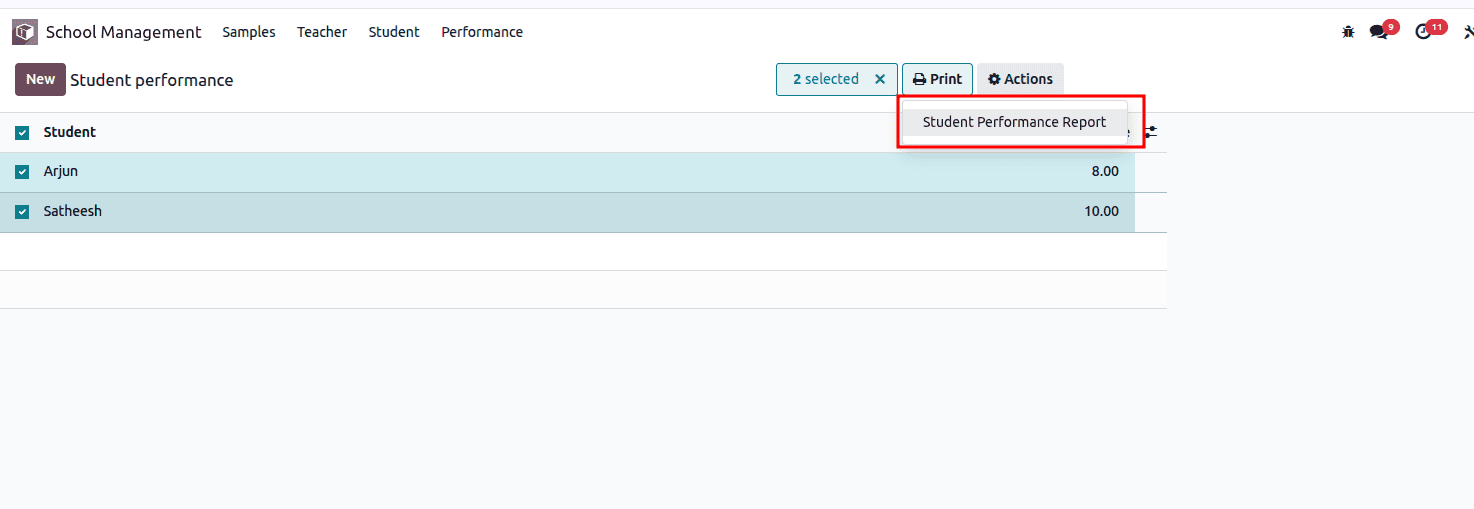
After defining the QWeb template, we need to register it as a report inside Odoo. This is done by creating a report action. The report action links the QWeb template with the student.performance model and tells Odoo that this template should be rendered as a PDF report. By binding the report action to the model, Odoo automatically adds a print option in the Action (gear) menu of the Student Performance records. This allows users to generate and download the performance report with a single click.
<?xml version="1.0" encoding="utf-8" ?>
<odoo>
       <record id="action_student_performance_report" model="ir.actions.report">
           <field name="name">Student Performance Report</field>
           <field name="model">student.performance</field>
           <field name="report_type">qweb-pdf</field>
           <field name="report_name">school_management.report_student_performance_pdf</field>
           <field name="report_file">school_management.report_student_performance_pdf</field>
           <field name="binding_model_id" ref="model_student_performance"/>
           <field name="binding_type">report</field>
       </record>
</odoo>
- The name field gives the report a clear title, which appears in the Action (gear) menu when printing.
- The model field specifies that this report is linked to the student.performance model, meaning it will use student performance records as its data source.
- The report_type is set to qweb-pdf, telling Odoo to generate the report in PDF format using the QWeb template.
- The report_name points to the QWeb template that defines the layout and content of the report.
- The report_file defines the technical file reference used by Odoo when rendering the PDF.
- The binding_model_id connects the report to the Student Performance model, which automatically adds the report option to the Action menu.
- The binding_type is set to report, indicating that this action is a printable report linked to the model.
Once the report action is configured, the student performance report can be generated directly from the model’s Print option in the Action menu, allowing users to download the PDF report with a single click.
Python Method for Generating and Sending the Scheduled Report
@api.model
def send_weekly_student_performance_report(self):
   # Get all teachers with email
   teachers = self.search([
       ('education_role', '=', 'teacher'),
       ('email', '!=', False)
   ])
   if not teachers:
       return
   # Get email template
   template = self.env.ref(
       'school_management.email_template_teacher_performance_report',
       raise_if_not_found=False
   )
   if not template:
       return
   # Get report action
   report_action = self.env.ref(
       'school_management.action_student_performance_report',
       raise_if_not_found=False
   )
   if not report_action:
       return
   # Get all student.performance records
   performance_records = self.env['student.performance'].search([])
   # Generate PDF once
   pdf_content, _ = report_action._render_qweb_pdf(report_action.id, performance_records.ids)
   pdf_base64 = base64.b64encode(pdf_content)
   # Create attachment
   attachment = self.env['ir.attachment'].create({
       'name': 'Student_Performance_Report.pdf',
       'type': 'binary',
       'datas': pdf_base64,
       'res_model': 'res.partner',
   })
   # Send email to each teacher
   for teacher in teachers:
       template.send_mail(
           teacher.id,
           email_values={'attachment_ids': [(4, attachment.id)]},
           force_send=True
       )
The scheduled action triggers a Python method that handles the complete report delivery process. When the cron job runs, the method first collects all teacher records that have a valid email address. If no teachers are found, the process safely stops to avoid unnecessary execution.
Next, the method fetches the predefined email template that will be used to send the report. It also retrieves the report action linked to the student performance PDF template. These references allow the system to generate the report and prepare the email content dynamically.
The method then gathers all student performance records and uses the report action to render them into a PDF file. This generated PDF is converted into a binary attachment and stored temporarily in the system.
Finally, the method loops through each teacher record and sends an email using the template, attaching the generated performance report. As a result, every teacher automatically receives the weekly student performance report in their inbox, without any manual involvement.
This method acts as the bridge between scheduled actions, report generation, and email delivery, completing the automation of weekly academic reporting in Odoo 19.
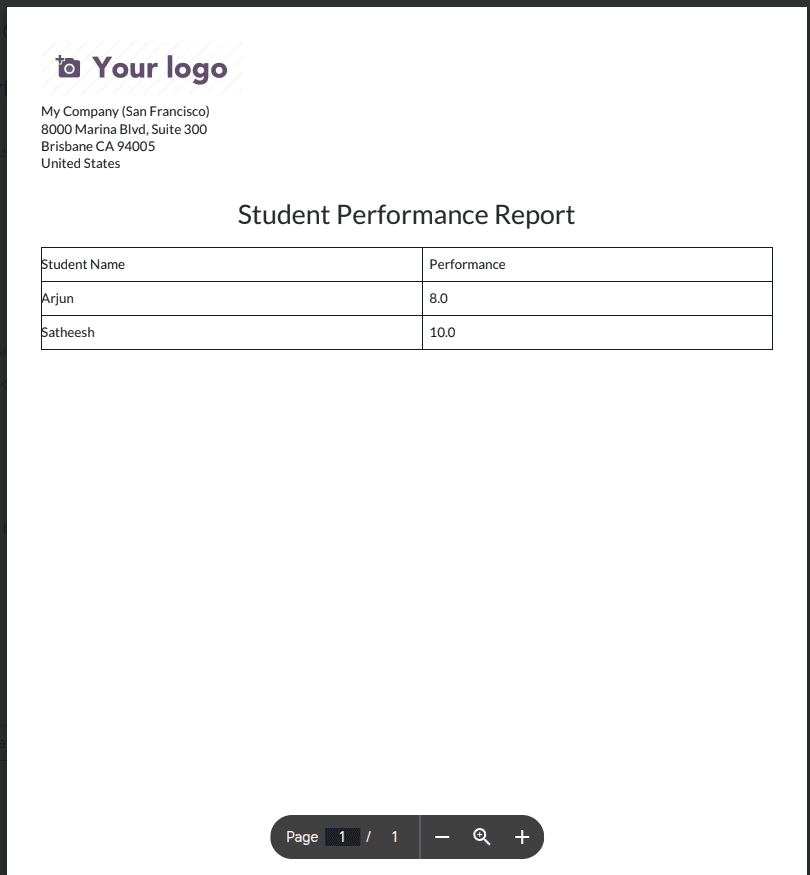
Now, once the scheduled action is in place, the system automatically sends the student performance report to all teachers every week. The email arrives in the teacher’s inbox with the performance report attached as a PDF, looking like this:
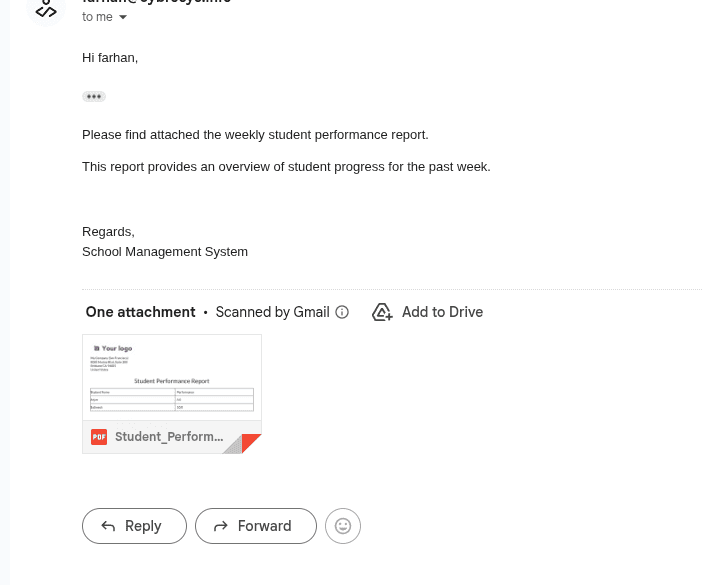
Report:
Scheduled reports in Odoo 19 make routine reporting simple, consistent, and fully automated. By combining a QWeb PDF report, an email template, and a scheduled action, we created a system that generates student performance reports and delivers them to teachers every week without manual effort. This approach not only saves time for administrators and teachers but also ensures that important academic insights are always delivered on time. With small adjustments, the same pattern can be extended to automate many other reports, making Odoo a powerful tool for smart and efficient reporting workflows.
To read more about How to Configure Scheduled Actions in Odoo 18, refer to our blog How to Configure Scheduled Actions in Odoo 18.