Odoo is a powerful and flexible ERP system that provides various ways to display and interact with data. Odoo 18’s Payroll module serves as a robust and integrated solution for efficiently managing employee compensation. It streamlines the entire payroll process from salary computation and deductions to journal entry generation and payment processing, ensuring accuracy, compliance, and transparency. Whether you're managing monthly pay cycles for a small team or handling complex compensation structures across multiple departments, Odoo 18 offers the tools and scalability needed to simplify payroll operations.
In this blog post, we'll explore how to manage payroll payment entries in Odoo 18. Before managing payroll payments, the first essential step is to create an employee record and set the working time.
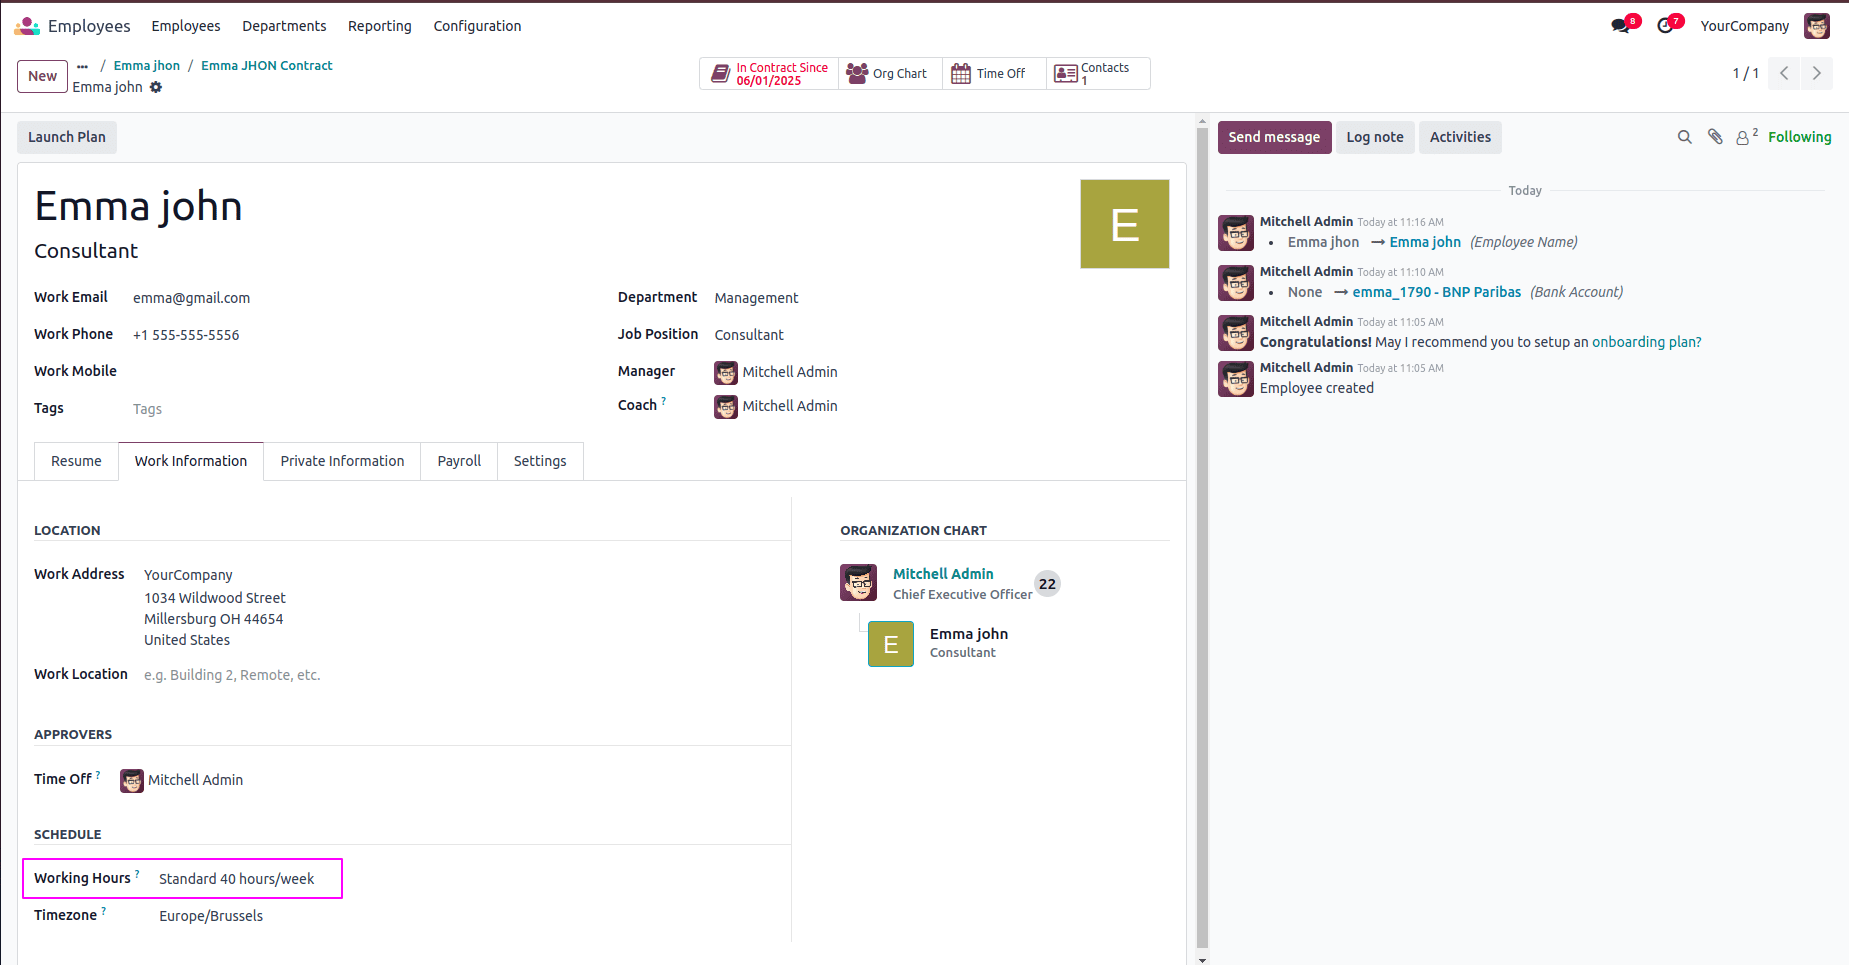
Once an employee is created, the next critical step is to create an employee contract. In Odoo 18, a contract is essential for defining the terms of employment, such as the employee’s job role, working schedule, salary structure, and duration of employment. Without a valid contract, the payroll system cannot compute salaries or generate payslips.
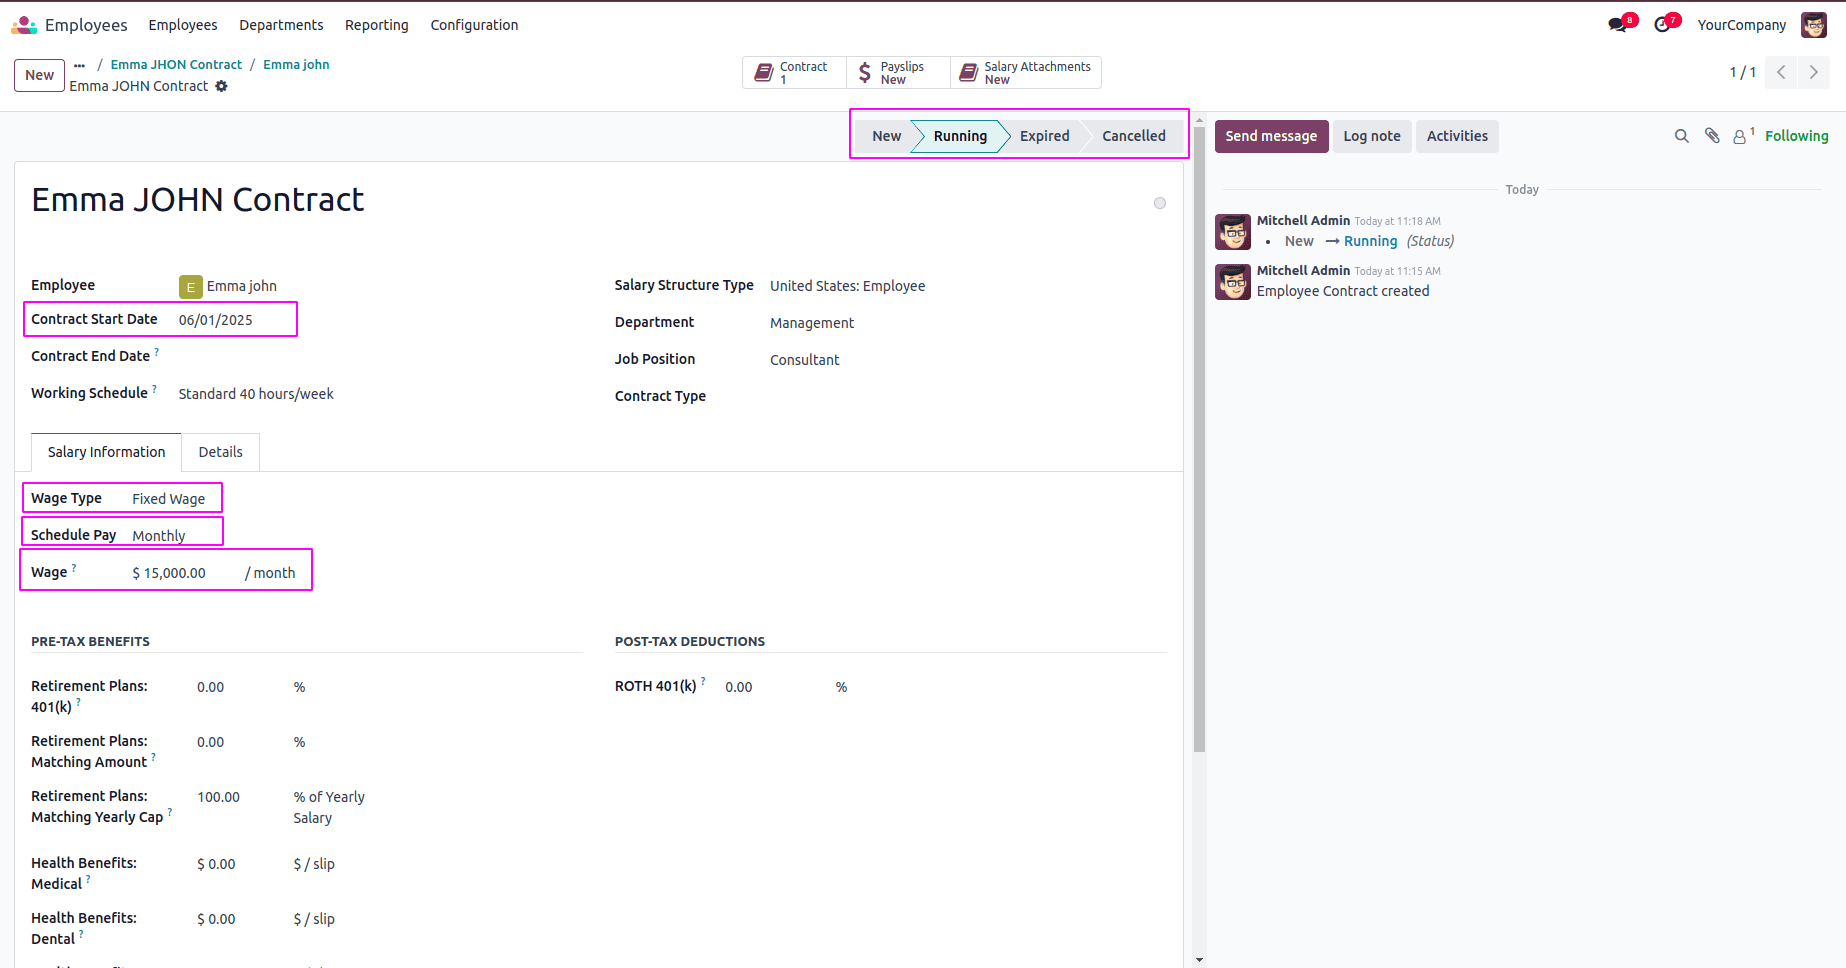
In Odoo 18, an employee contract defines working conditions and salary structure. Set the contract start date, choose wage type (fixed or hourly), and specify scheduled pay monthly, yearly, or semi-annually.
- ? Wage type: It refers to how the employee's wage is calculated or structured. It determines the basis for payroll computation. The wage type will be Fixed wage or Hourly wage.
- ? Schedule Pay: It determines how often the employee is paid. It sets the frequency of salary payment for payroll processing.
- ? Wage: represents the amount of salary the employee is entitled to receive, based on the Wage Type and Scheduled Pay settings.
Enter the wage amount based on your company’s policy. Once all details are filled, activate the contract by setting it to the Running state to enable payroll processing.
Next, we need to configure the debit and credit account fields on the salary rule to ensure accurate journal entries during payroll processing and accounting integration.
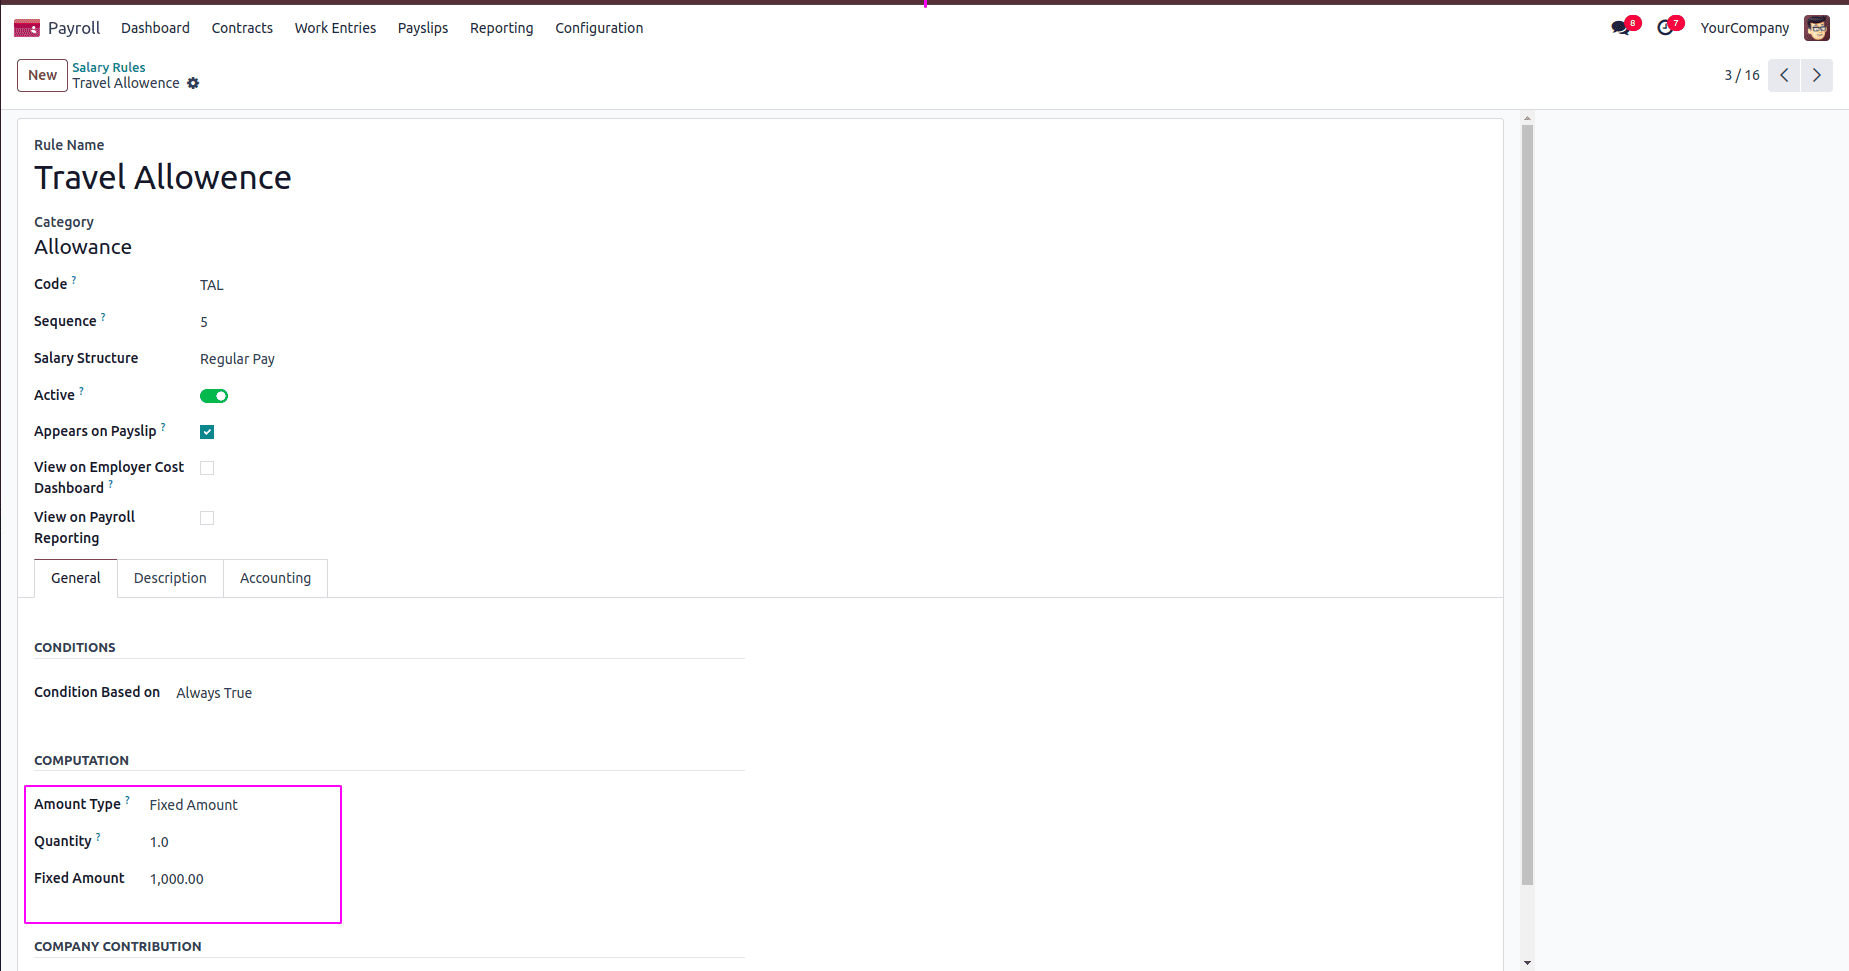
You can now access the newly generated salary rule, where the amount type can be set as either a fixed amount or a percentage. Depending on the selected type, you have the option to enter a specific fixed value or a percentage. Additionally, you can define the quantity, which will be used in the salary calculation accordingly.
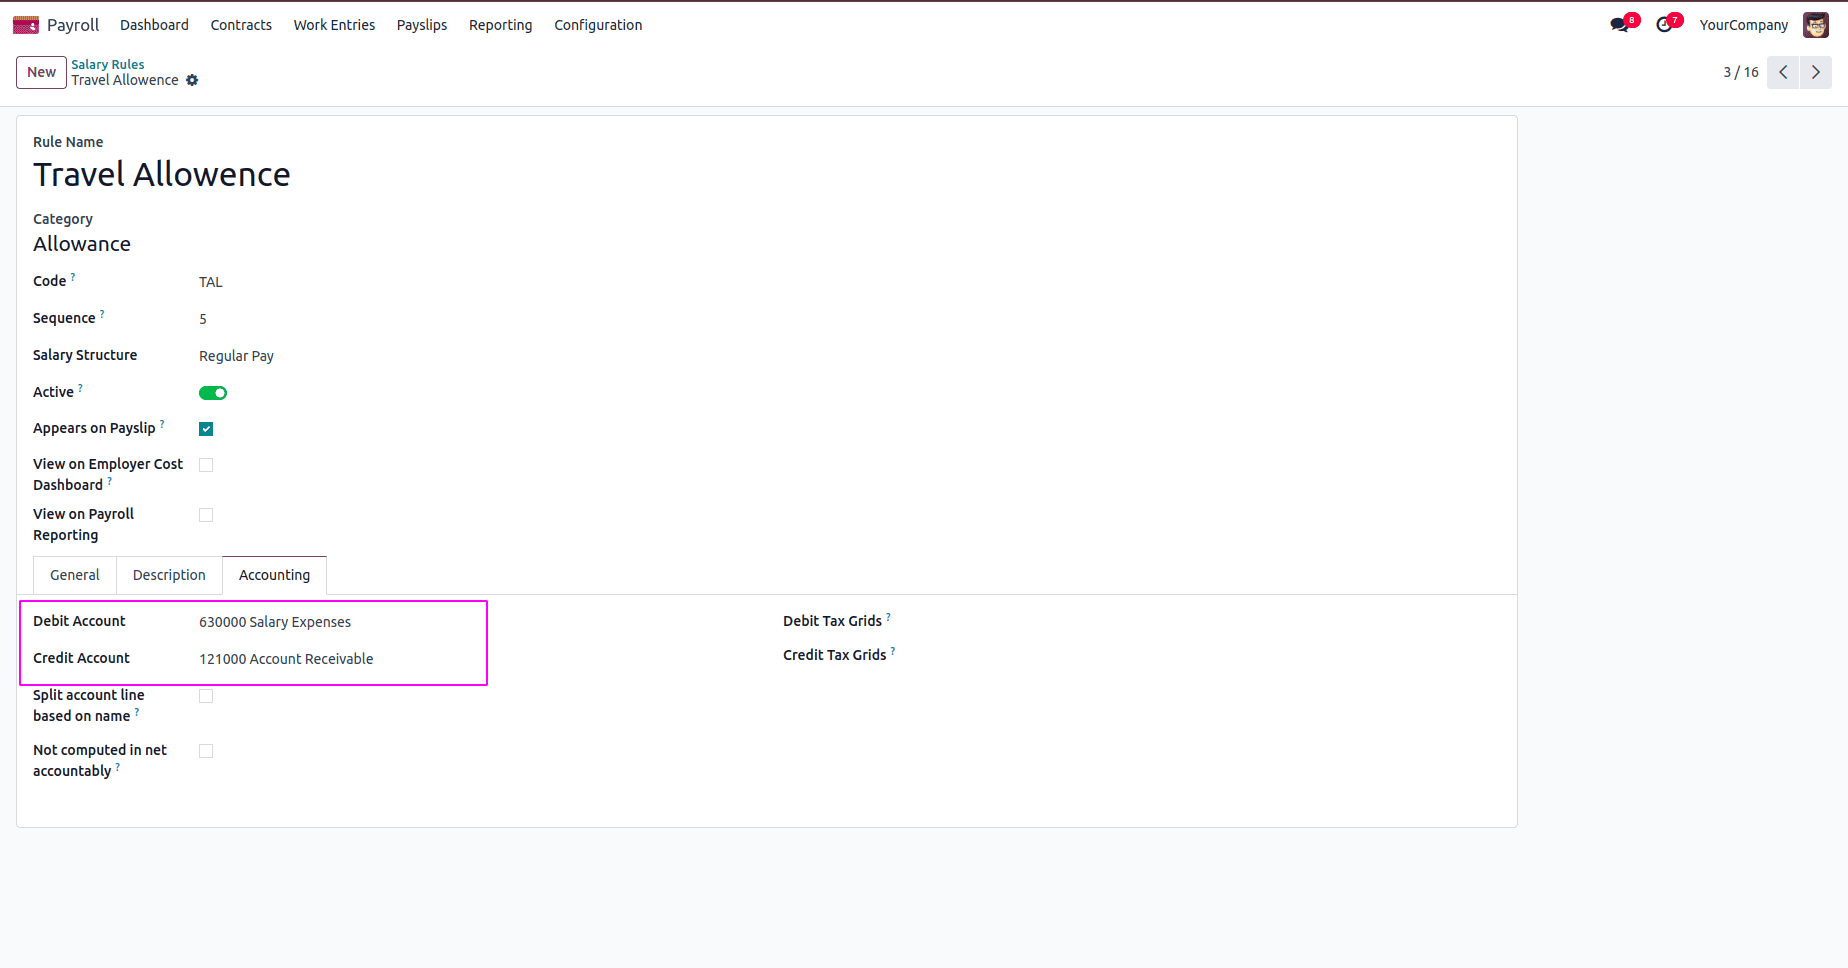
You can also set the credit and debit accounts under the designated tab. Once you select the appropriate accounts from this section, the corresponding journal entries will be automatically generated based on the selected credit and debit accounts during payroll processing.
Now, we are processing the payslip for employees. This involves calculating salaries based on configured rules, including fixed or percentage-based amounts, applying necessary deductions or allowances, and generating the corresponding journal entries using the selected debit and credit accounts.
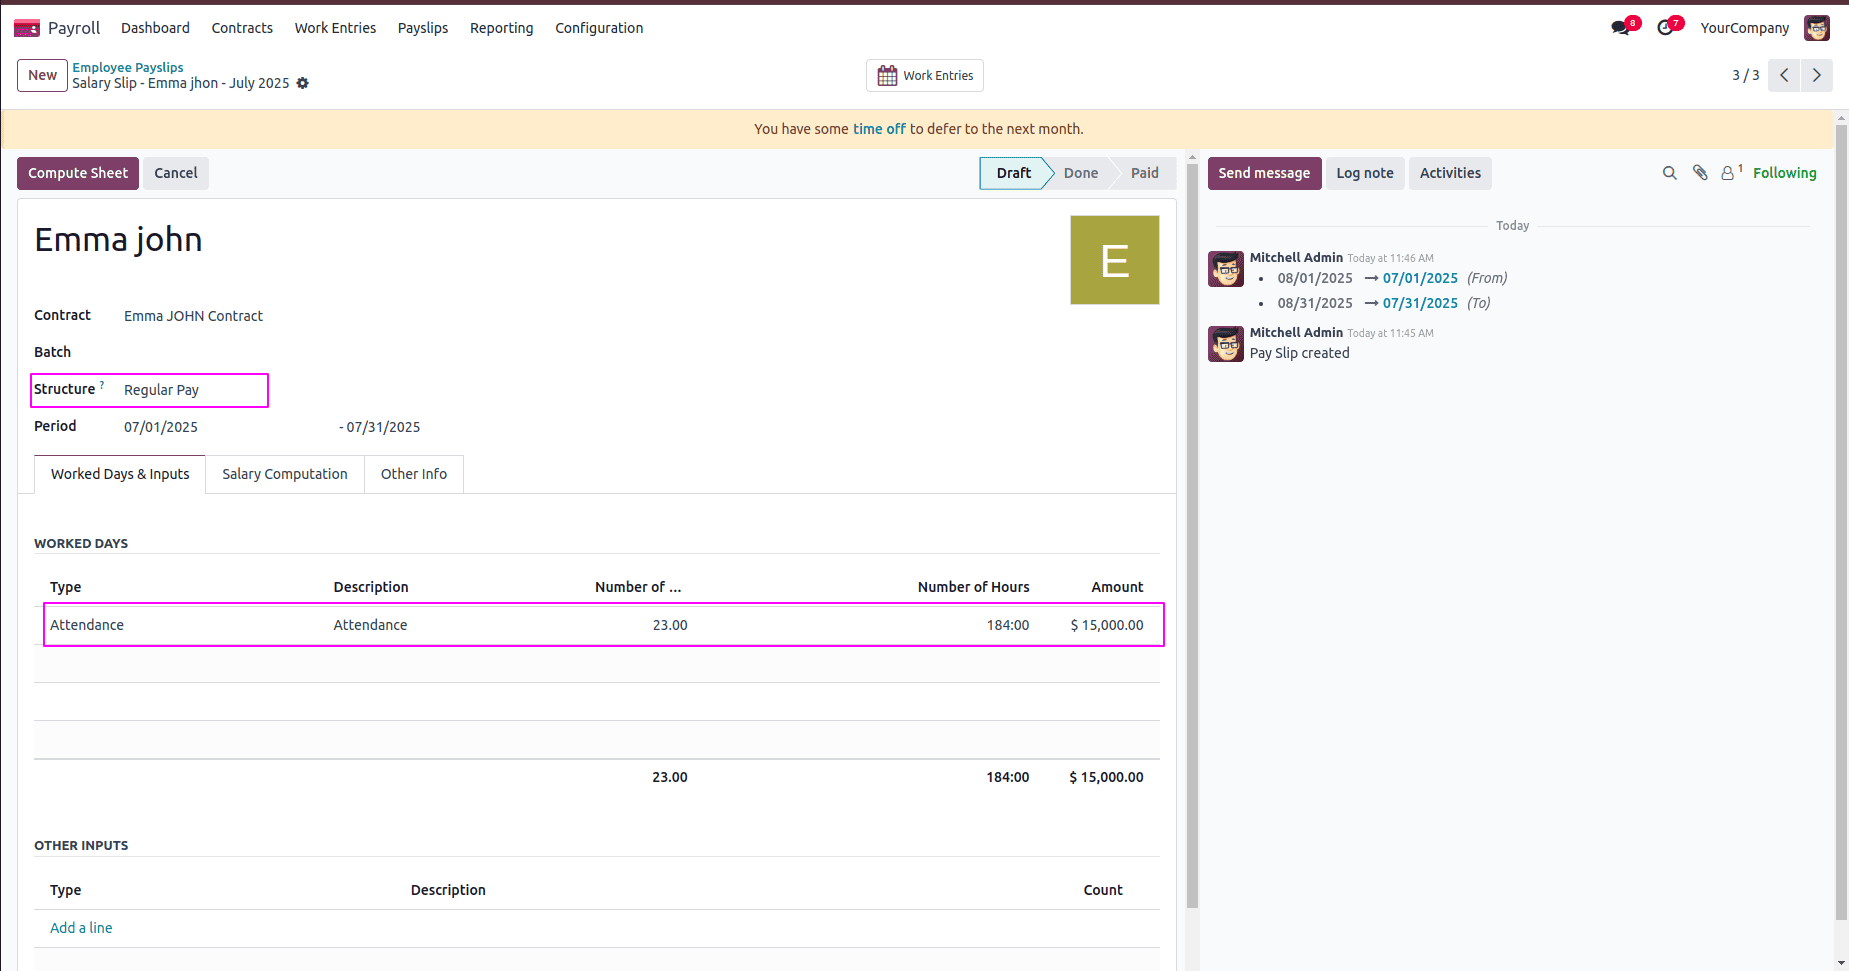
While processing the payslip, after selecting the employee, the related contract will be updated automatically. You can then choose the appropriate salary structure and specify the month for which the salary needs to be paid. In the salary lines, if the type is set to "Attendance," the system will automatically deduct pay for any leave days taken by the employee after clicking the "Compute Sheet" button.
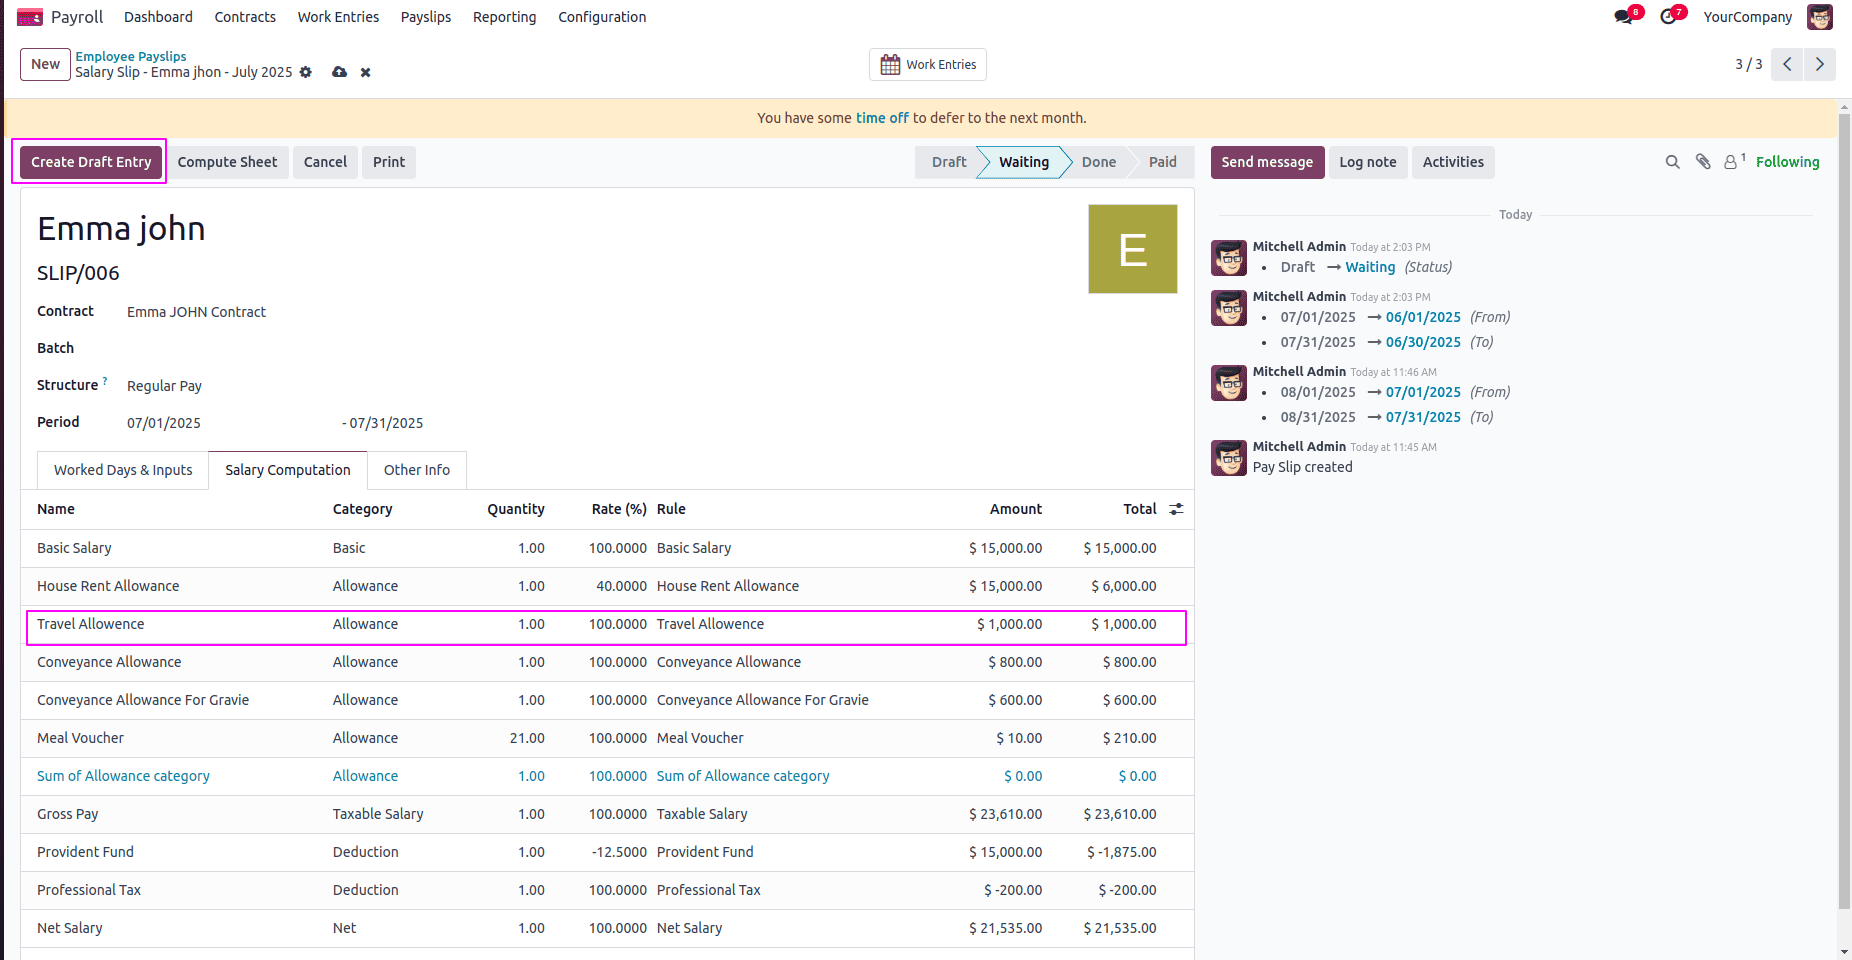
You can also see that the custom rule we added, such as the Travel Allowance, appears in the salary computation lines. This confirms that the rule has been applied correctly and is now part of the payslip calculation.
After that, by clicking the "Create Draft Entry" button, the payslip will move to the "Done" state. You can view the draft journal entry that was generated based on the salary computation and configured accounts.
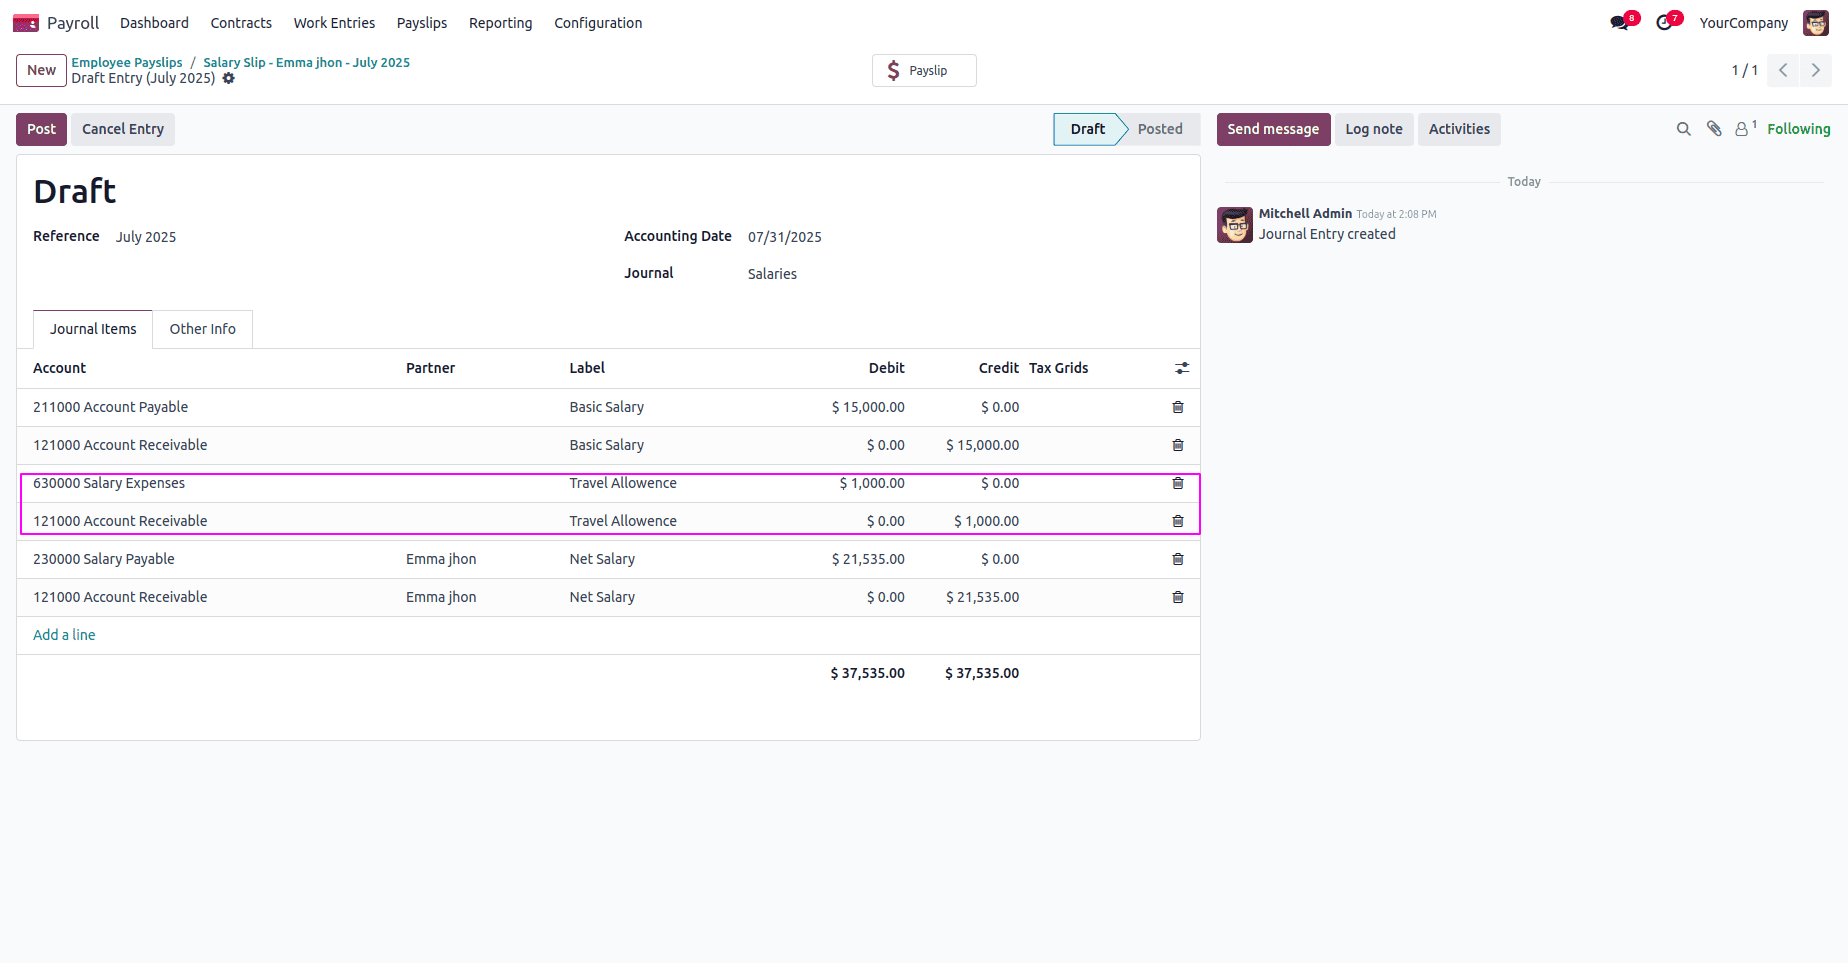
You can now view the generated journal entry, which includes the credit and debit accounts for the Travel Allowance, along with the corresponding amount. Once you post the entry, these accounts will be updated accordingly, reflecting the salary transaction in your accounting records.
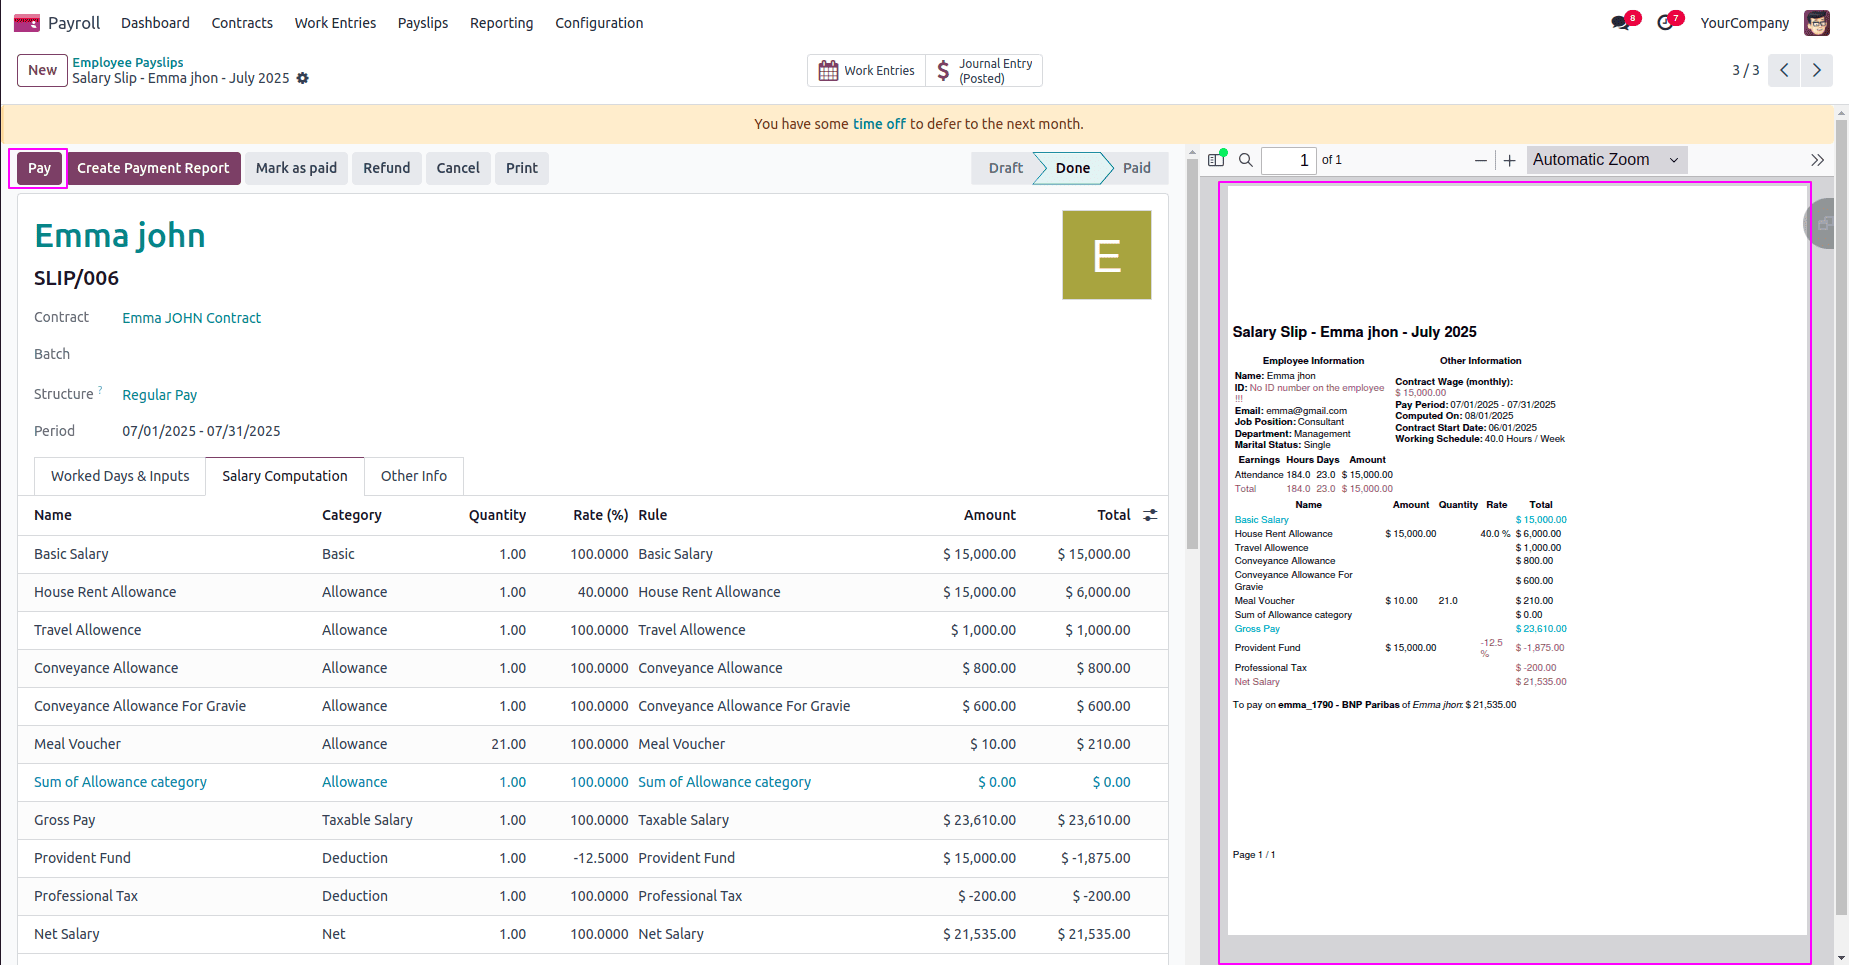
After posting the journal entries, you can view the finalized payslip with all related details. To complete the process, simply click the "Pay" button to register the payment and mark the payslip as paid.
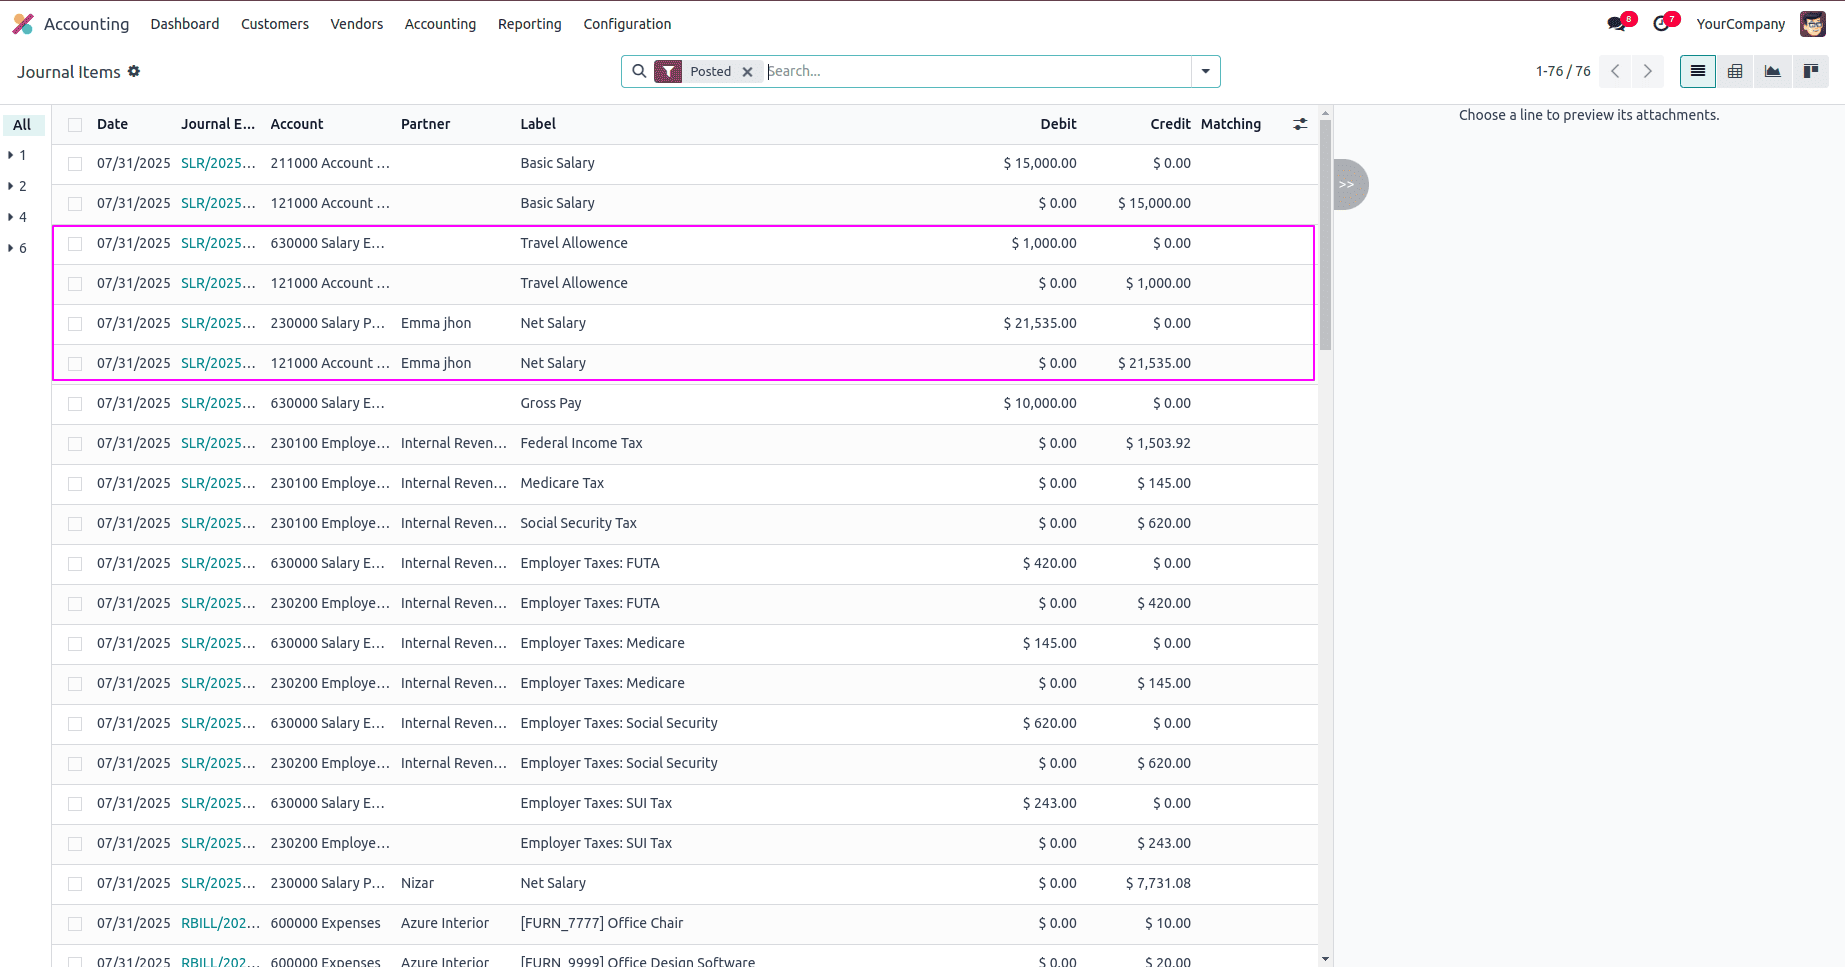
You can also view all the related entries under the Journal Entries tab in the Accounting module. This includes the salary, allowances, deductions, and other components recorded during payslip processing, giving you a complete financial overview of the transaction.
To read more about An Overview of Odoo 18 Payroll Module, refer to our blog An Overview of Odoo 18 Payroll Module