On the Odoo 18 platform, selling eLearning courses is a seamless process that blends learning and business. Instructors and companies can build, publish, and sell courses with Odoo 18’s robust eLearning module, which is connected with its website, sales, and payment features. Course developers can use this platform to create lectures, include tests, and award certificates to students who pass. Additionally, the system facilitates payment gateway integration, making it simple for students to buy courses online. Selling eLearning is made easy, effective, and scalable with Odoo 18, an all-in-one platform, which makes it perfect for educational institutions, training facilities, and individual instructors. This blog helps you understand how users purchase and complete the course.
From the Odoo 18 dashboard, select the eLearning module.

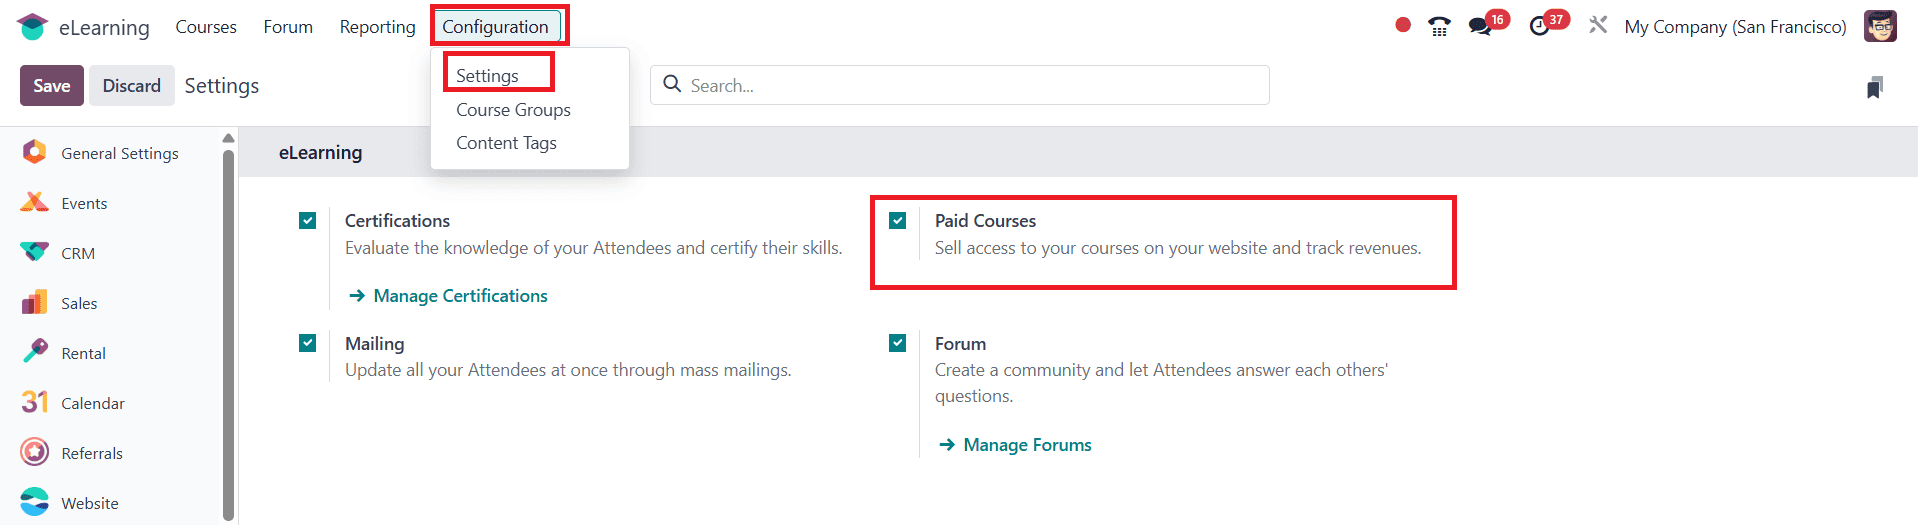
To enable Paid Courses, navigate to the Configuration > Settings. Then allow the Paid Courses option as shown below:
Create a New Course and Content
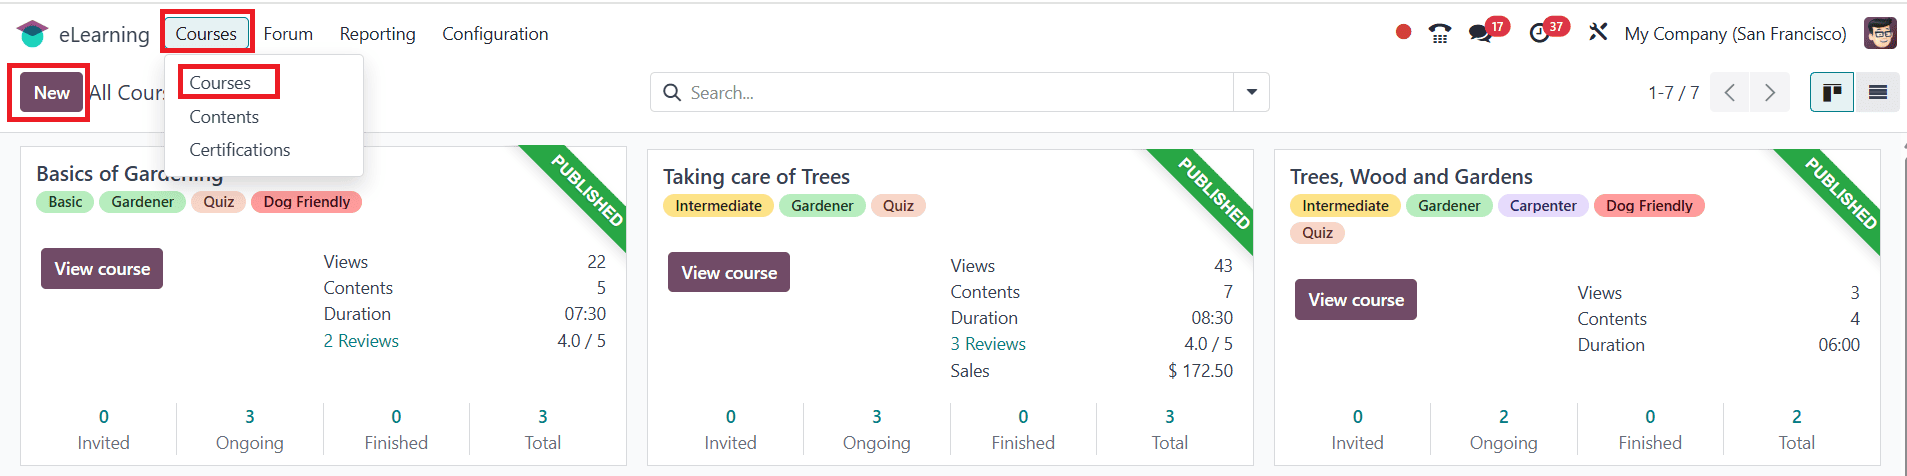
Navigate to Courses > Courses and click the New button as shown below:
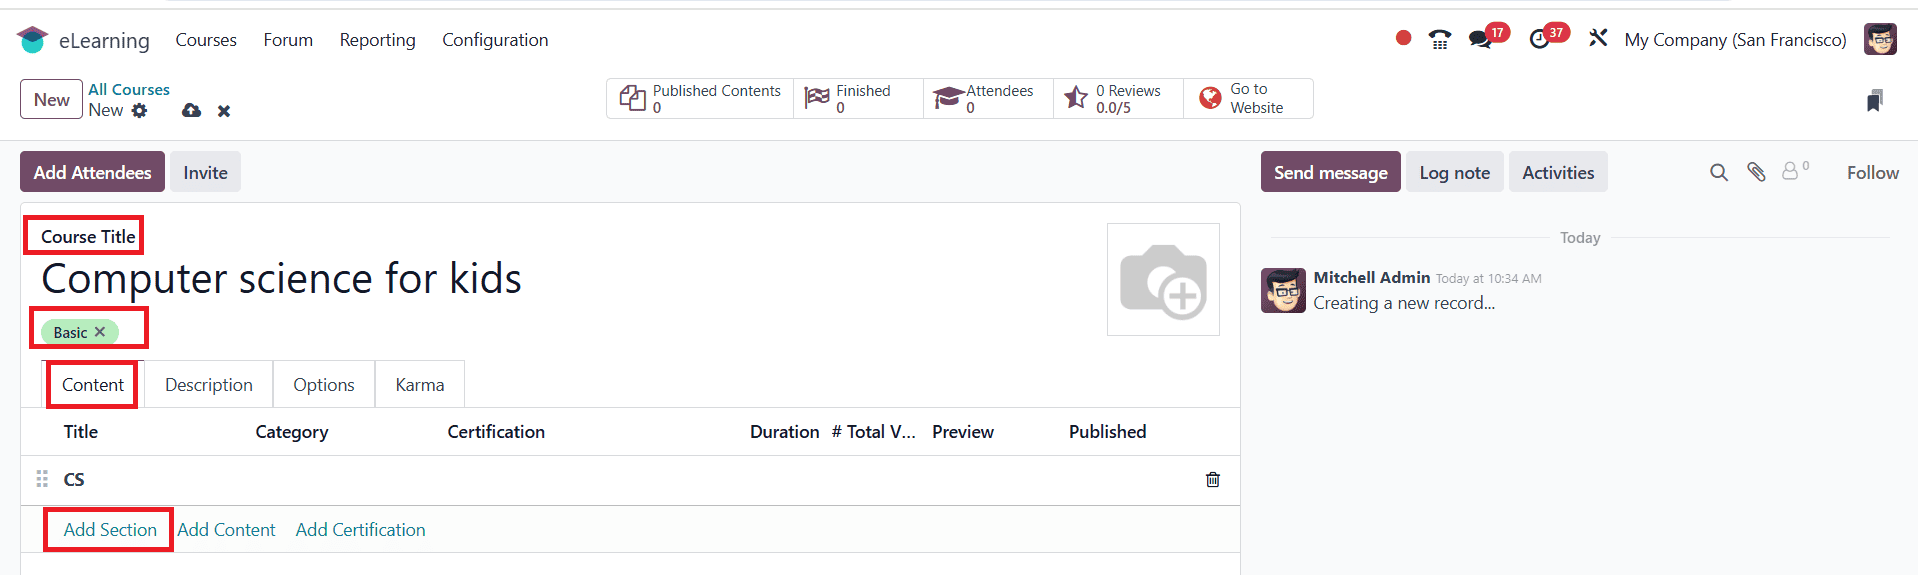
Enter a suitable course title under Course Title. Add relevant tags to describe your course. Under the Content tab, click Add Section to create a new section as shown below:
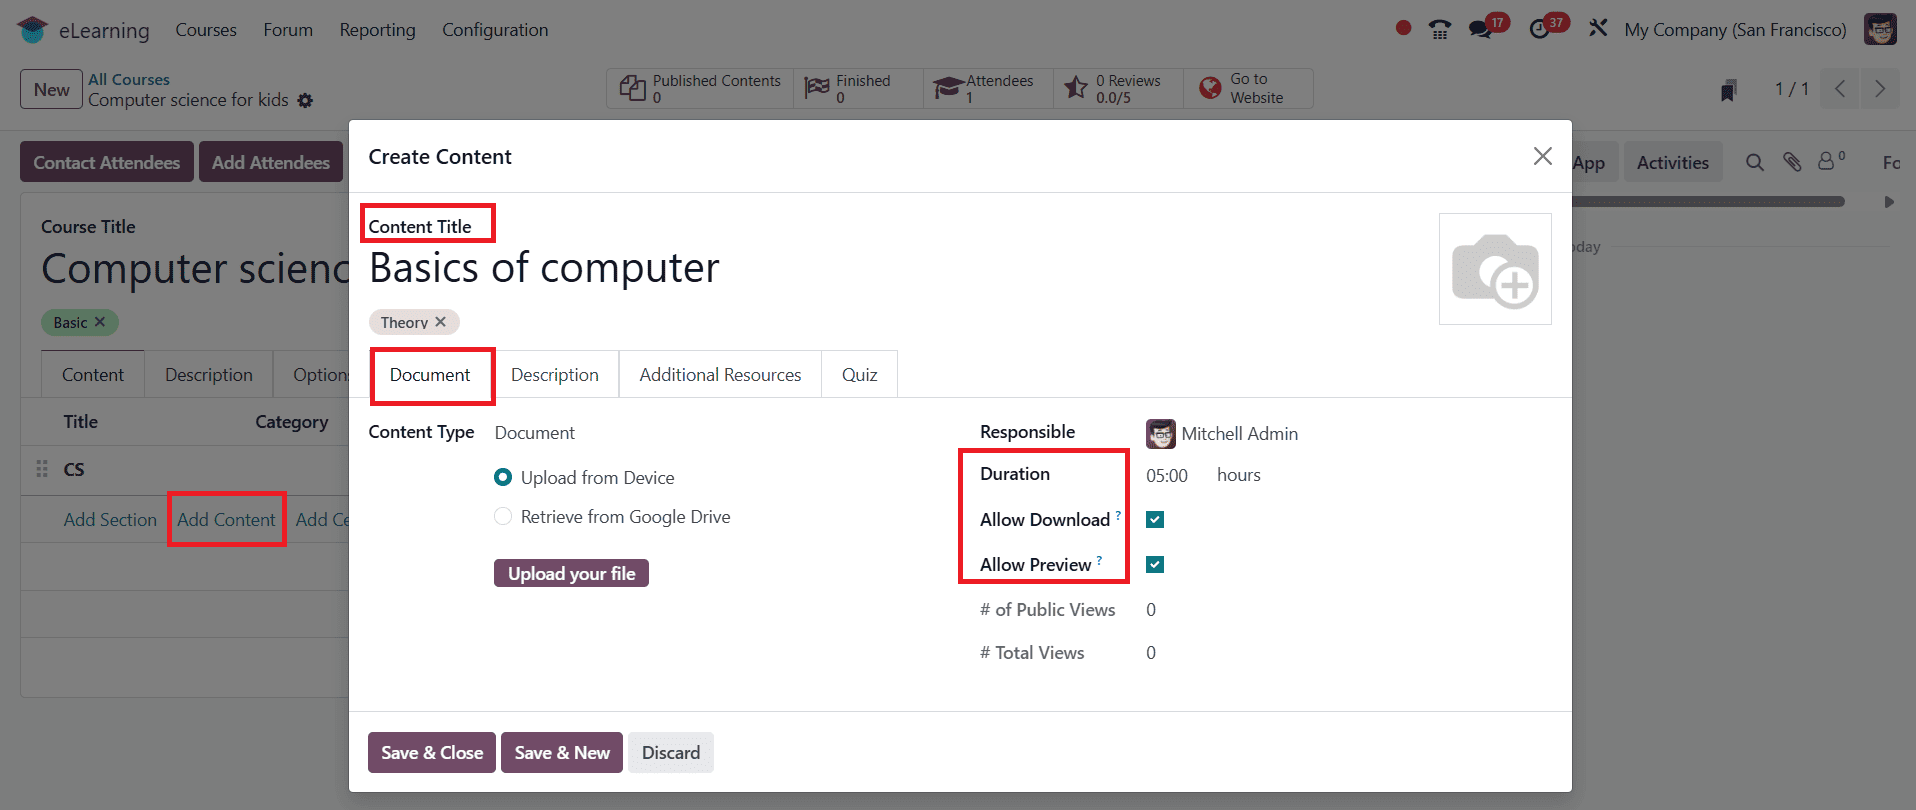
Inside the section, click on the "Add Content option. A pop-up screen appears where you can enter a title for your content under Content Title. You can also add tags for your content in this window. Under the Document tab, select the Content Type as Image, Article, Document, Video, Quiz, and Certification. Select a person who is responsible for your content under the Responsible option. You can set a Duration for your content. Then enable the Allow Download (anyone can download the content) and Allow Preview (anyone can access the content) options. # of Public Views option shows the total number of views from non-participants, and # Total Views option shows the total number of views from the non-participants and the participants.
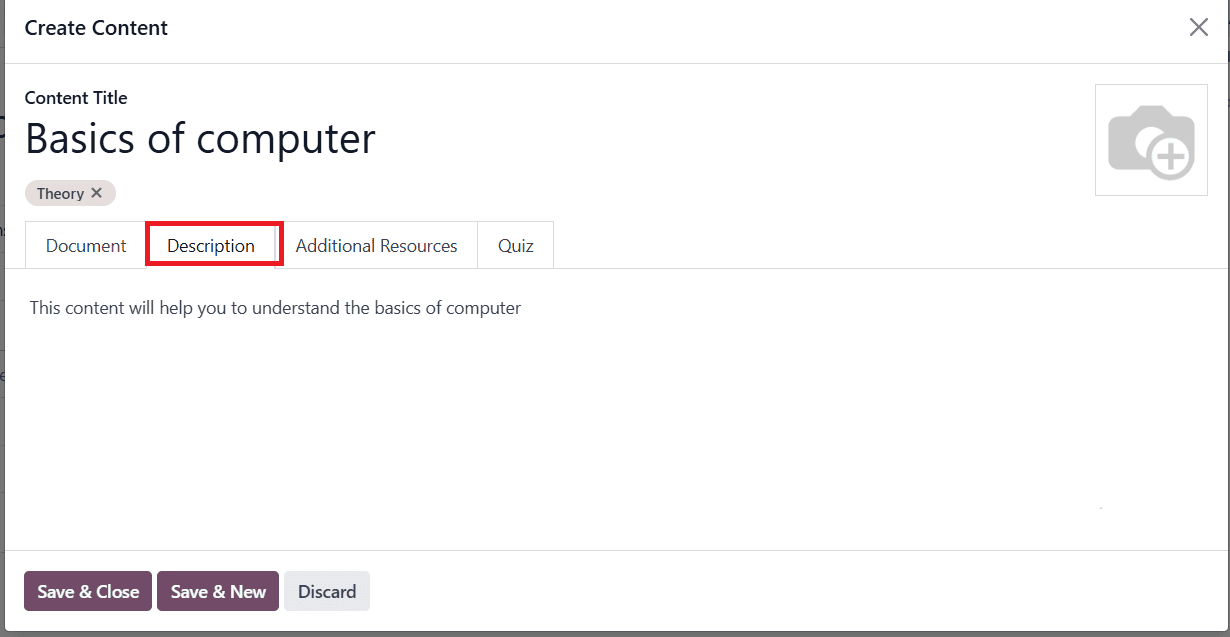
Go to the Description tab to provide additional information about the content.
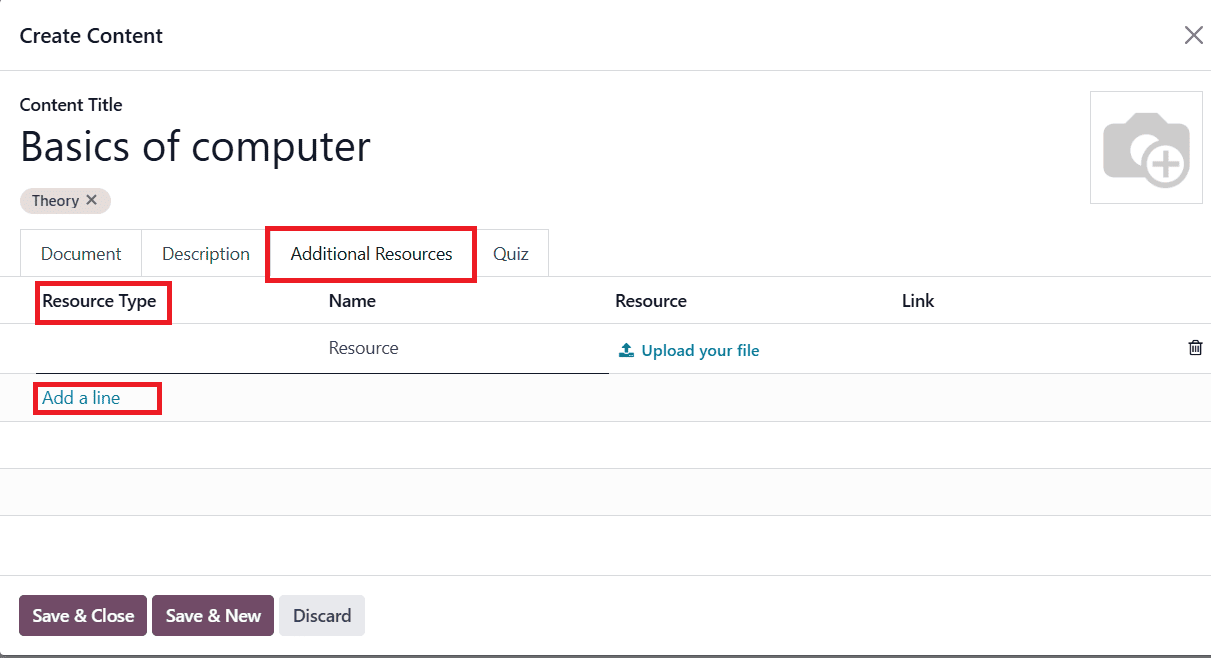
Under the Additional Resources tab, you can add an extra resource as a Link or File by clicking Add a line under the Resource Type. You can also add Name, Resource, and Link of the selected Resource Type.
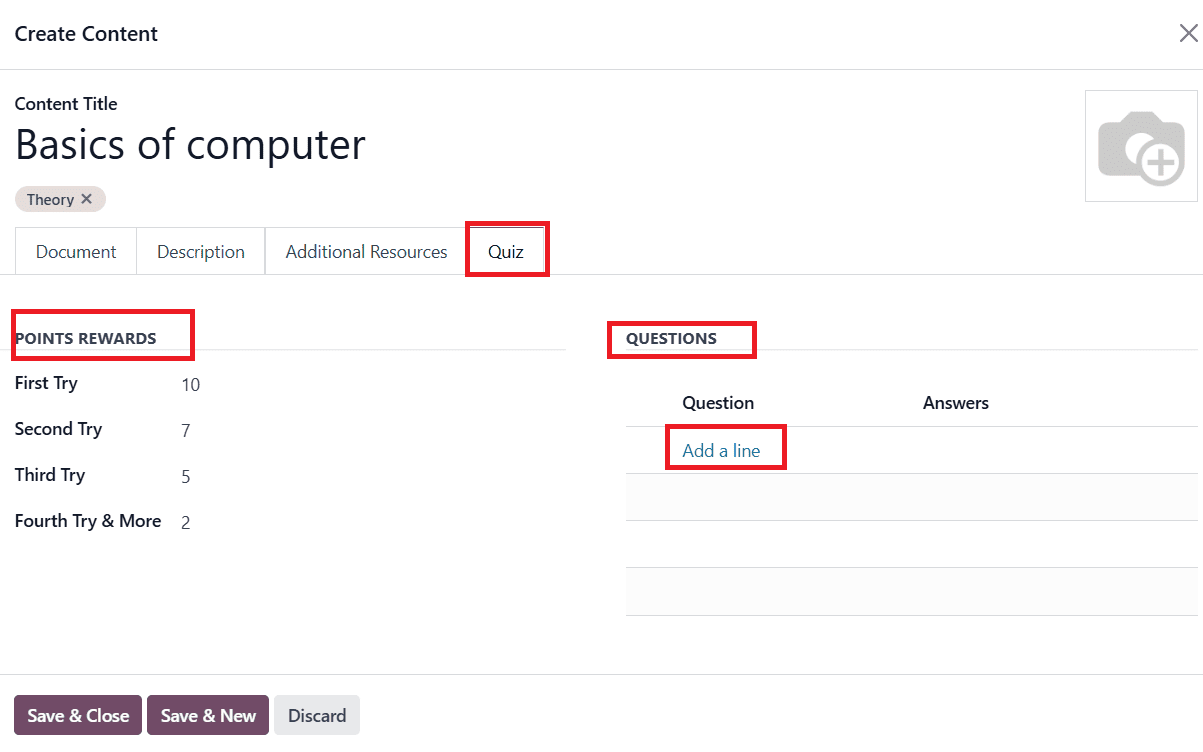
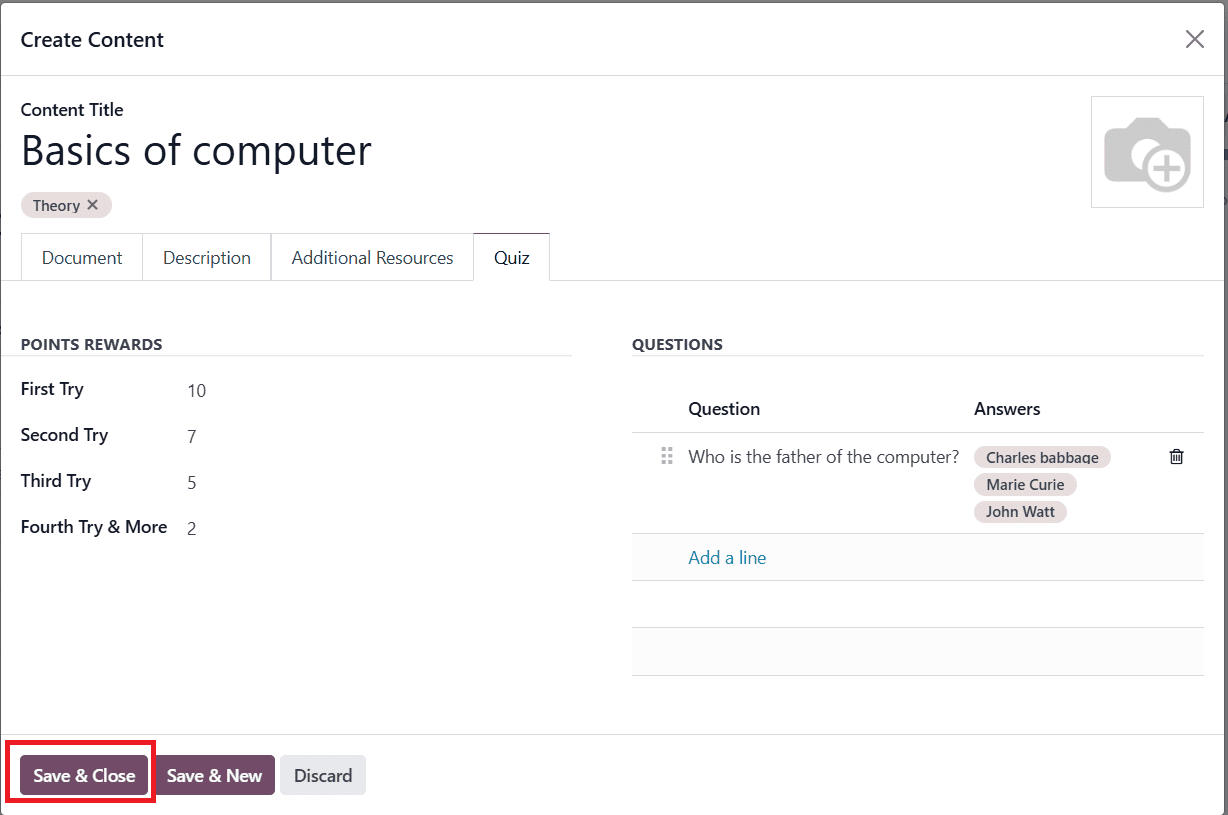
Under the Quiz tab, you can see points rewarded for each attempt under the Points Rewards option. Next, click on the Add a line under Questions option to create a quiz for the content.
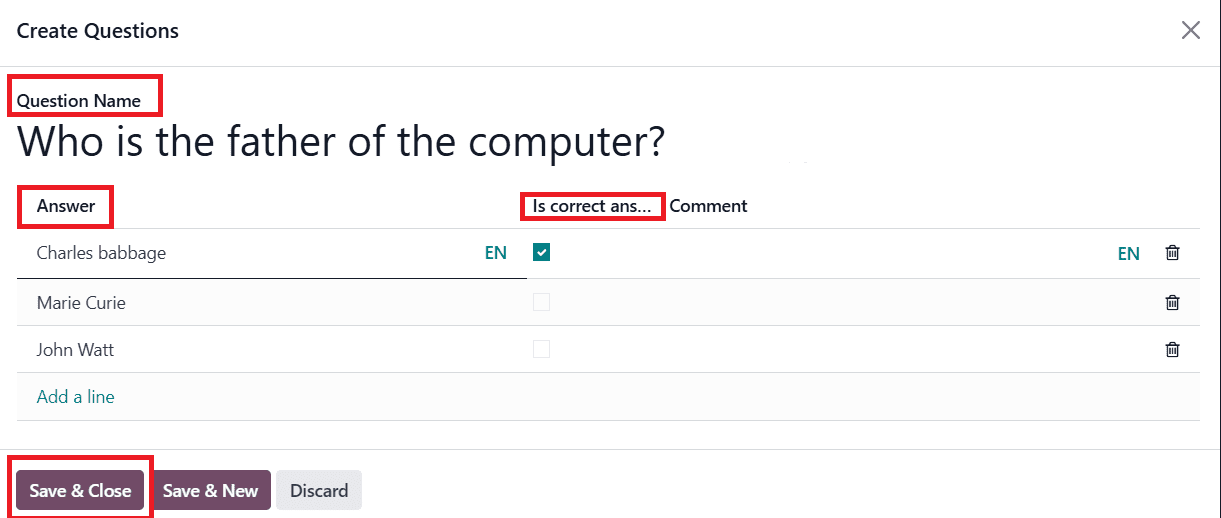
Here, you can add the question under the Question Name option. By clicking Add a line, you can add the list of answers under the Answer option and mark the correct answer under the Is correct answer option. If needed, you can also add comments under the Comment option. To create another question, click on the Save & New button. Or close the section by clicking the Save & Close button, as shown below:
Here, your new content is ready. As shown, click on the Save & Close button.
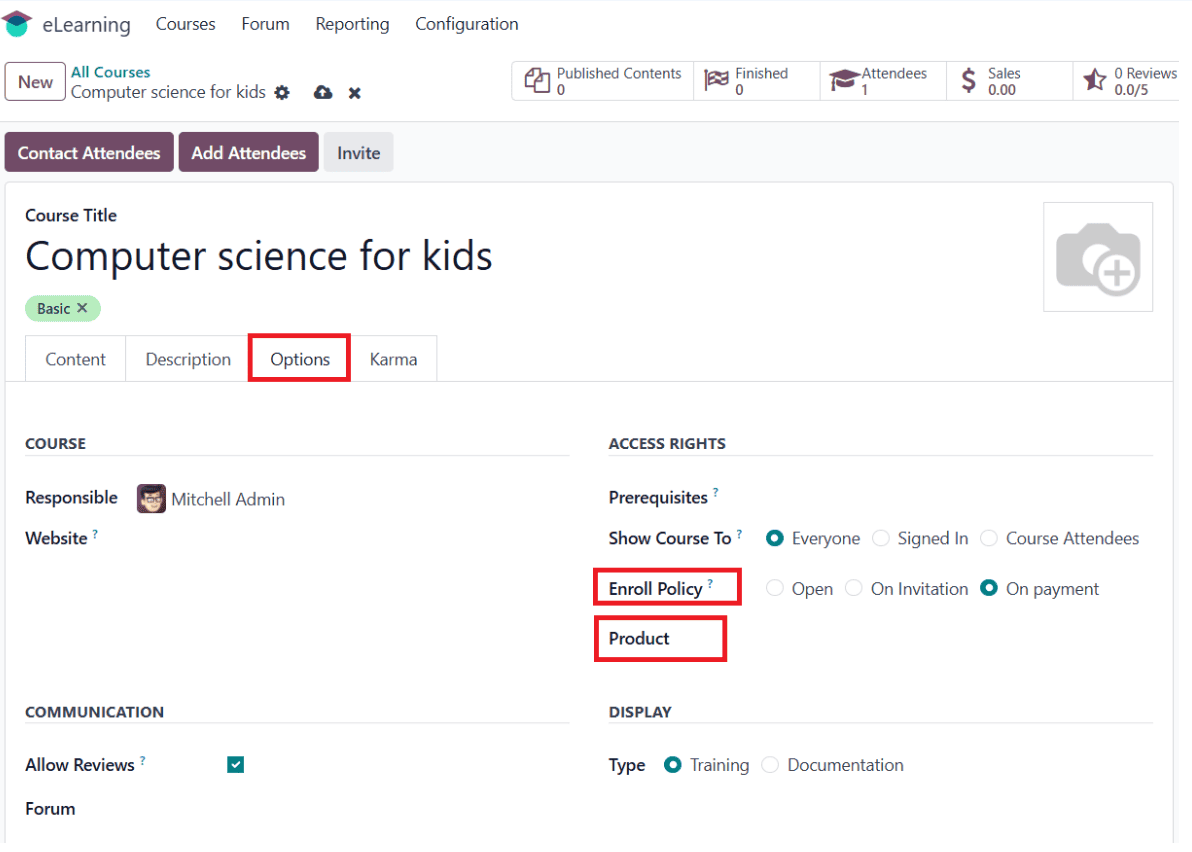
In the Options tab, you can assign a Responsible person and a Website for the course. Under the Access Rights section, you can add a course to complete before accessing this current course under the Prerequisites option. Set Show Course To as Everyone to make the course viewable to everyone. Then, enable Allow Reviews to allow attendees to like, review, and comment on the course. If needed, you can add a forum to your course under the Forum option. Go to the Display section, choose Training as the course Type. Then, you can set a notification to receive whenever you upload new content or complete content, under New Content Notification and Completion Notification. Under the Enroll Policy option, select the On Payment method to enroll in your course. Then, create a new course product under the Product option.
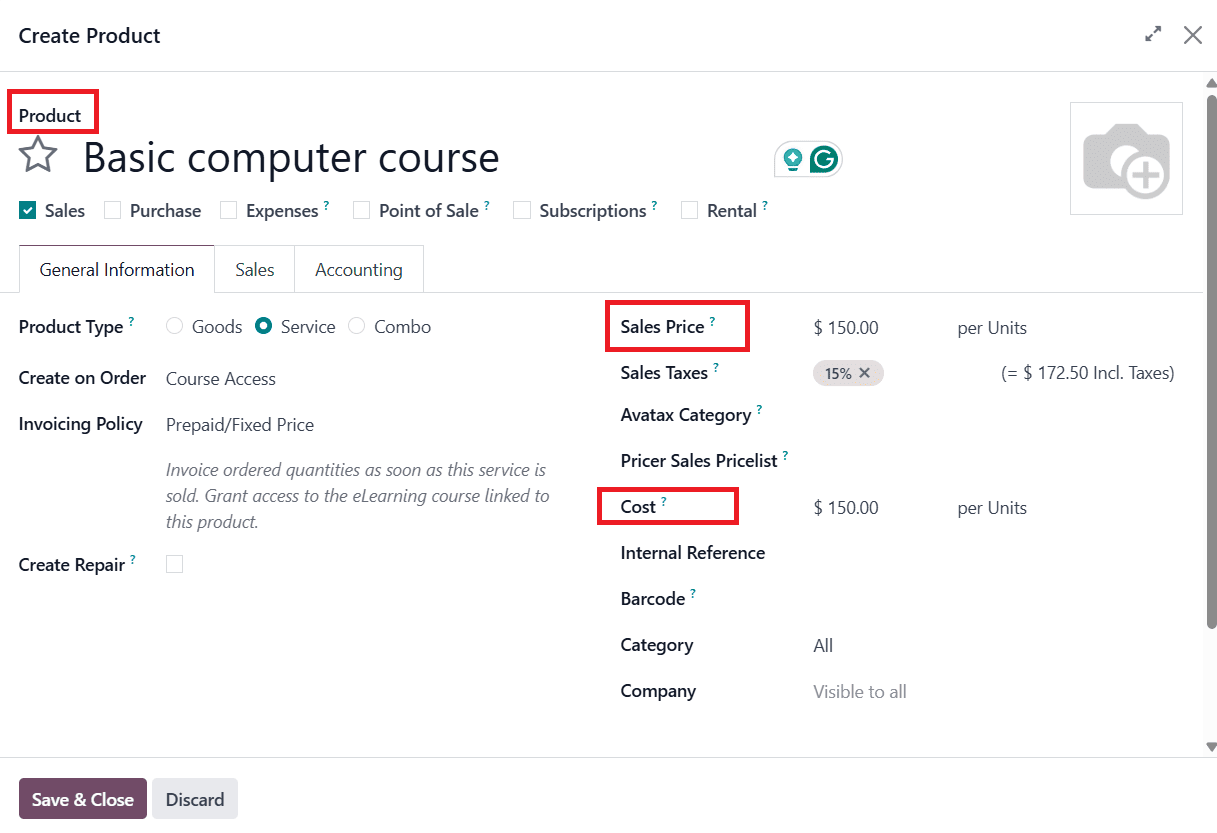
A new pop-up window will open, where you can create a new course product. Add a name for your product under the Product option. Then, add a price for your product under the Sales Price and Cost option. Then, click on the Save & Close button as shown below:
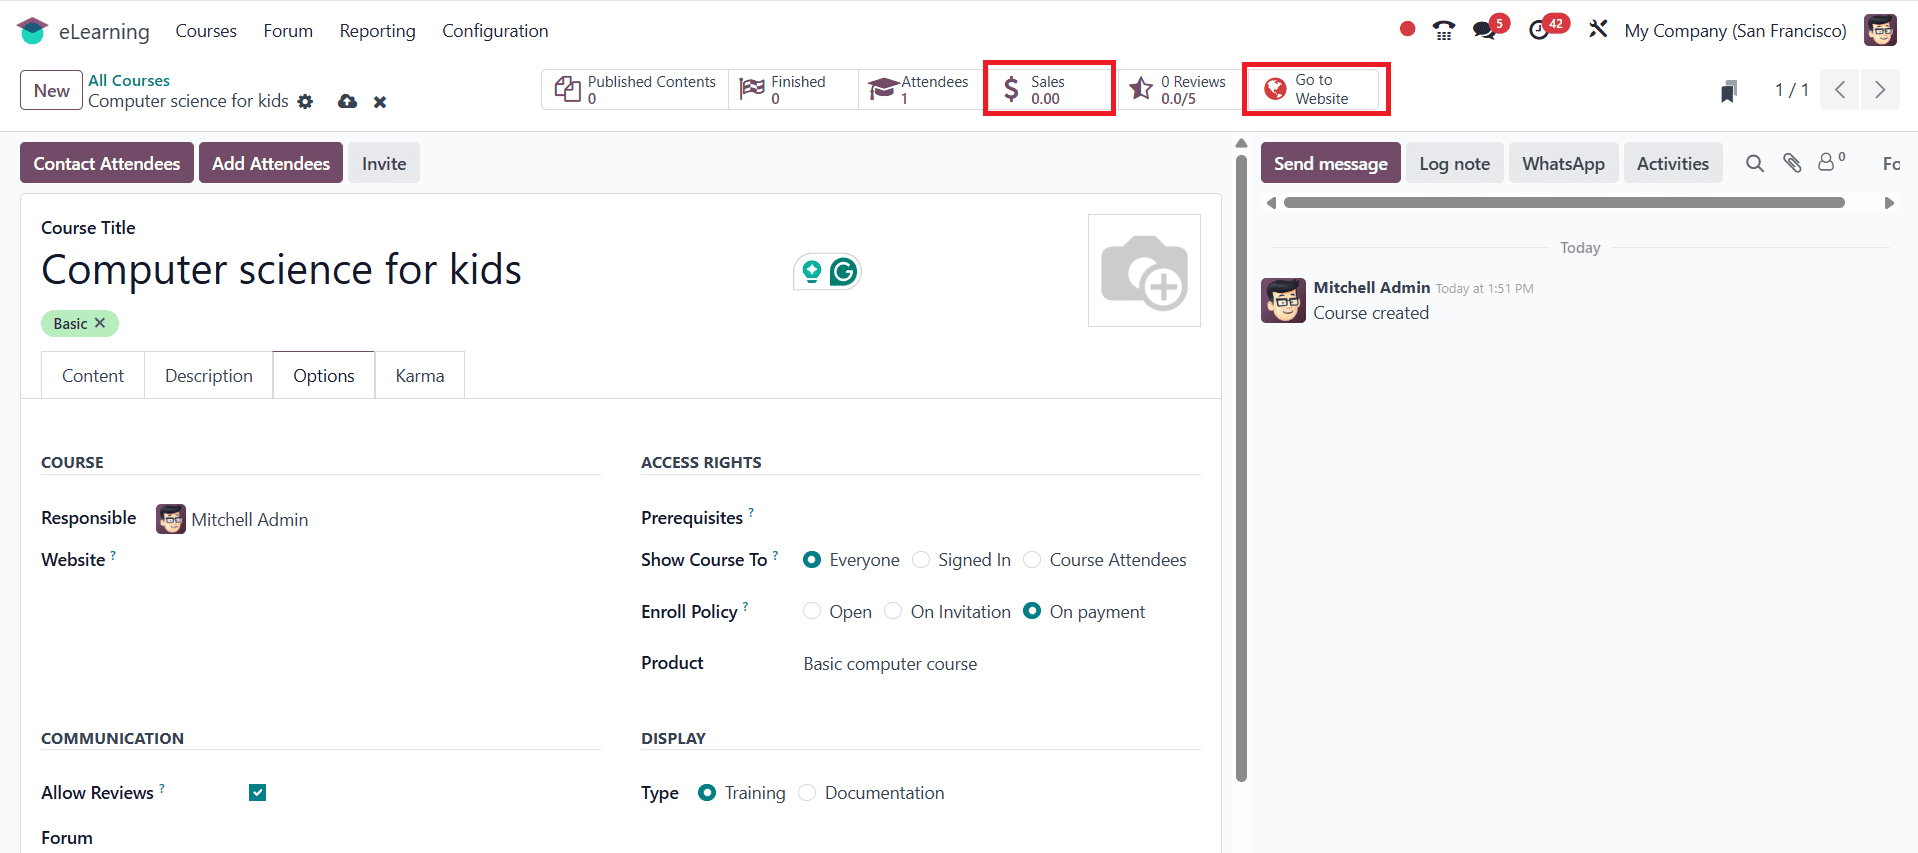
Here, a new Sales tab will appear. Then, click on the Go to Website button to publish the course as shown below:
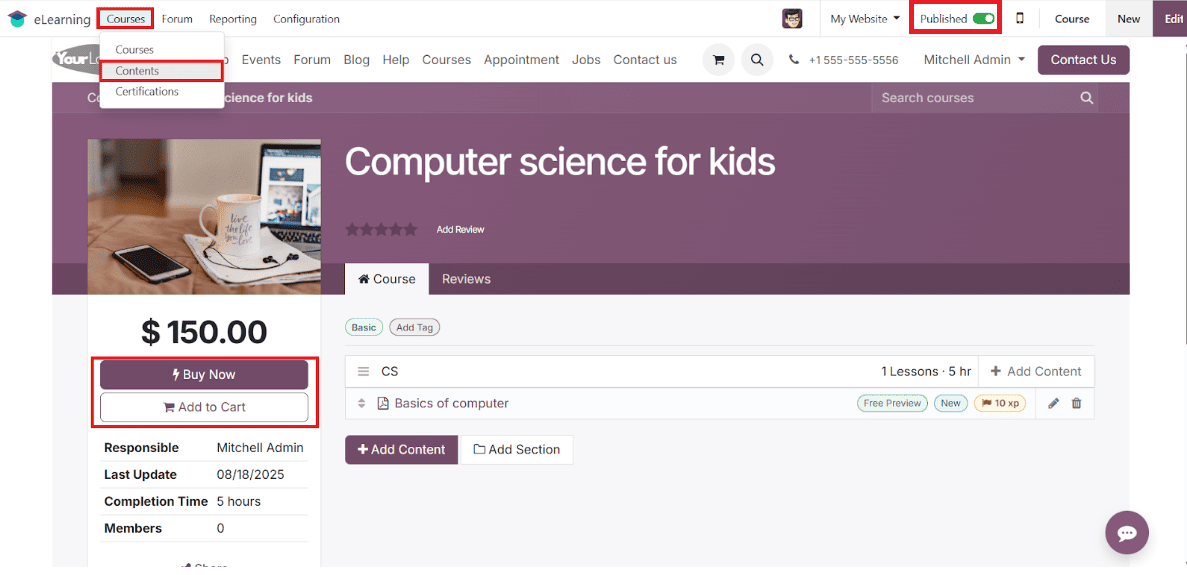
Here, you can see two options: Buy Now and Add to Cart. Then, enable Published as shown below. To publish the content, go to the Courses > Contents.
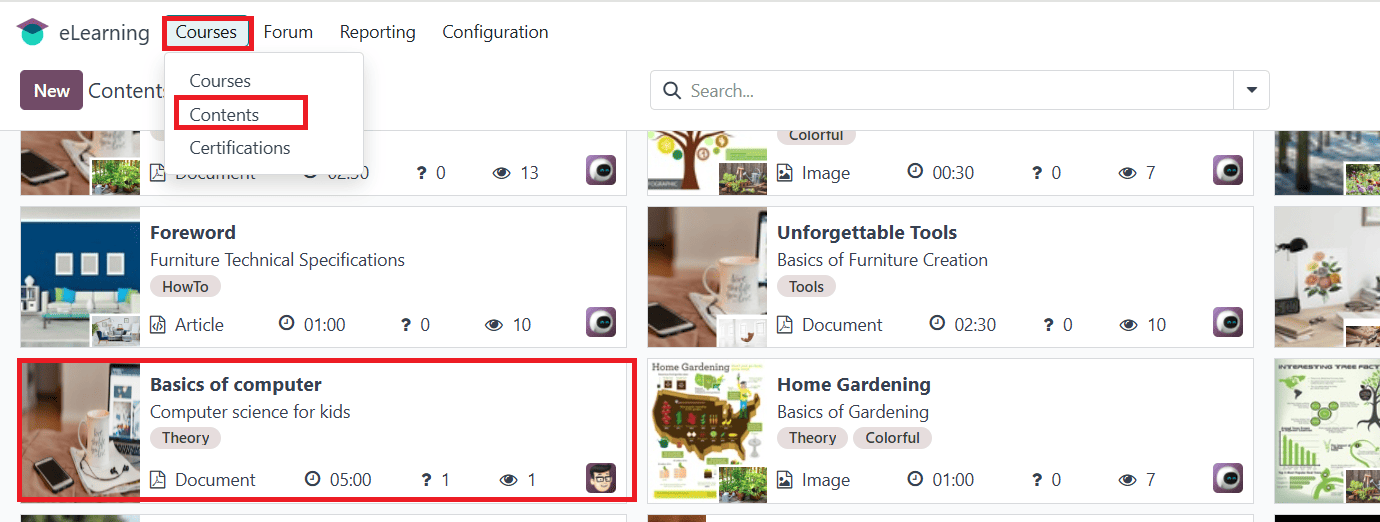
Here, select the newly created content from the list as shown below:
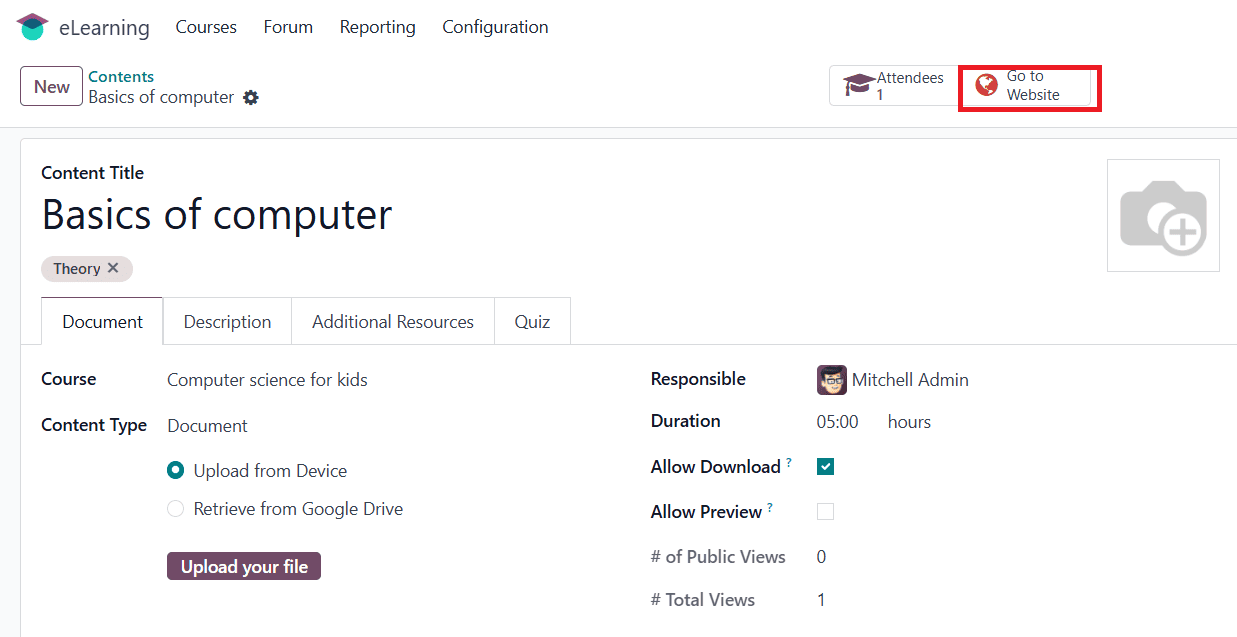
To publish the content, click on the Go to Website button as shown below:
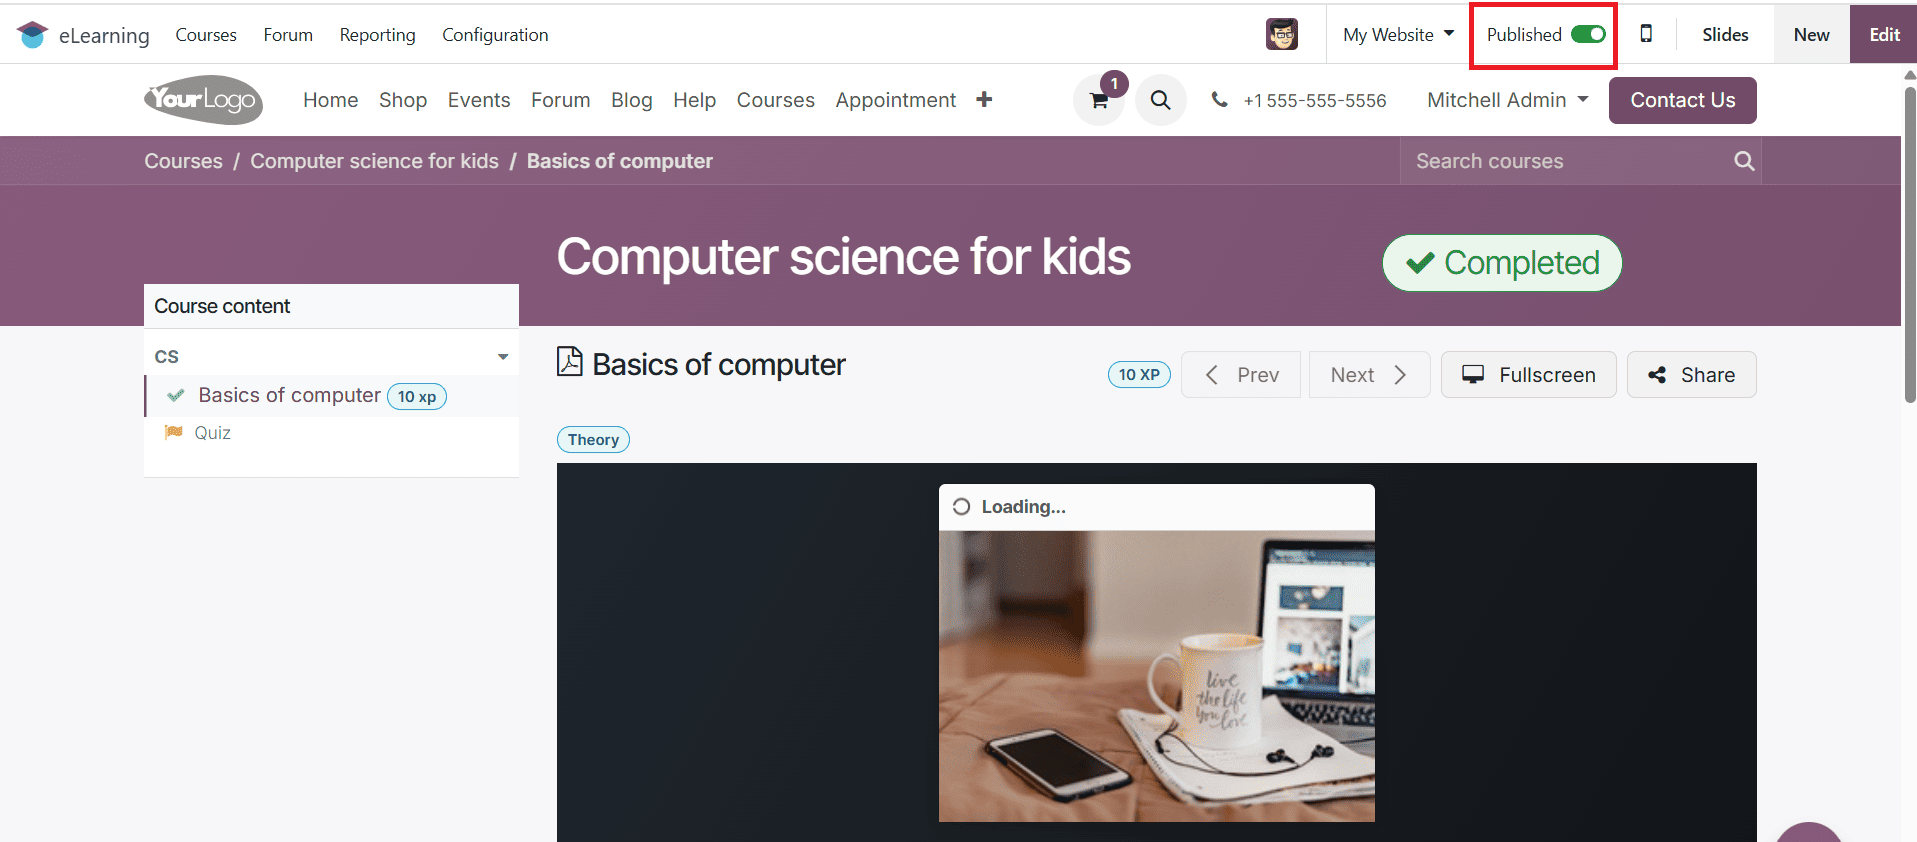
Then, enable Published as shown below:
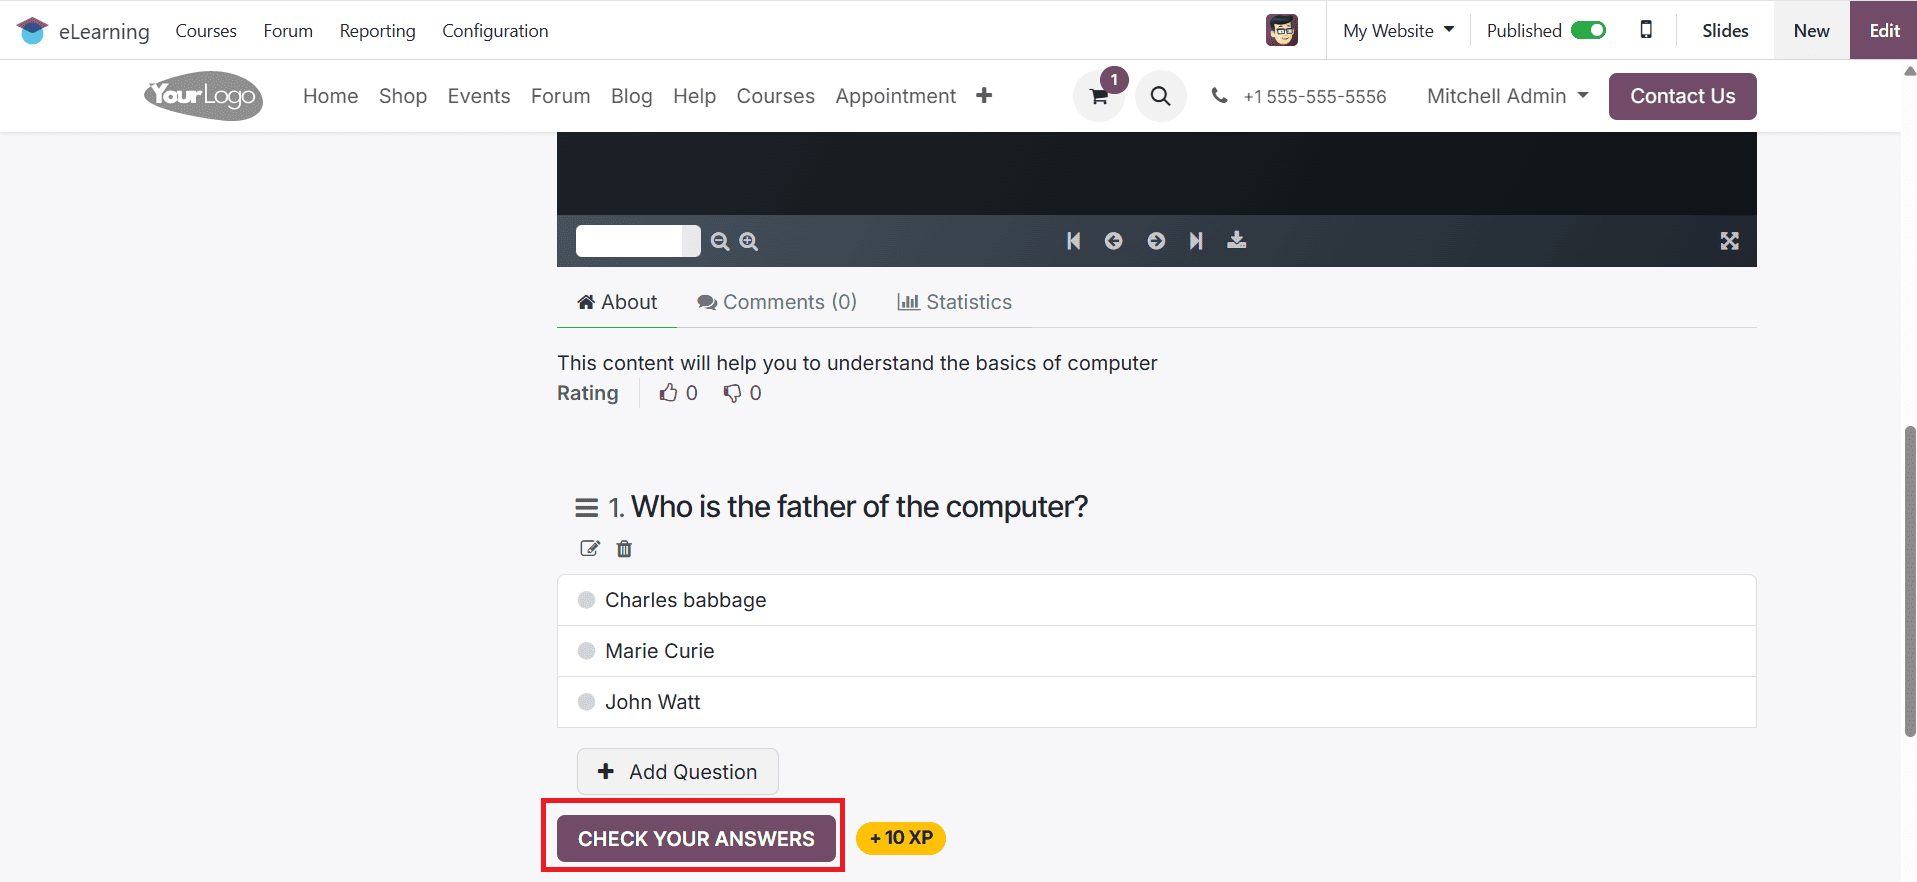
Here, you can see the created question. To complete the content of the course, answer the question and click on the Check Your Answer button to check the answer.
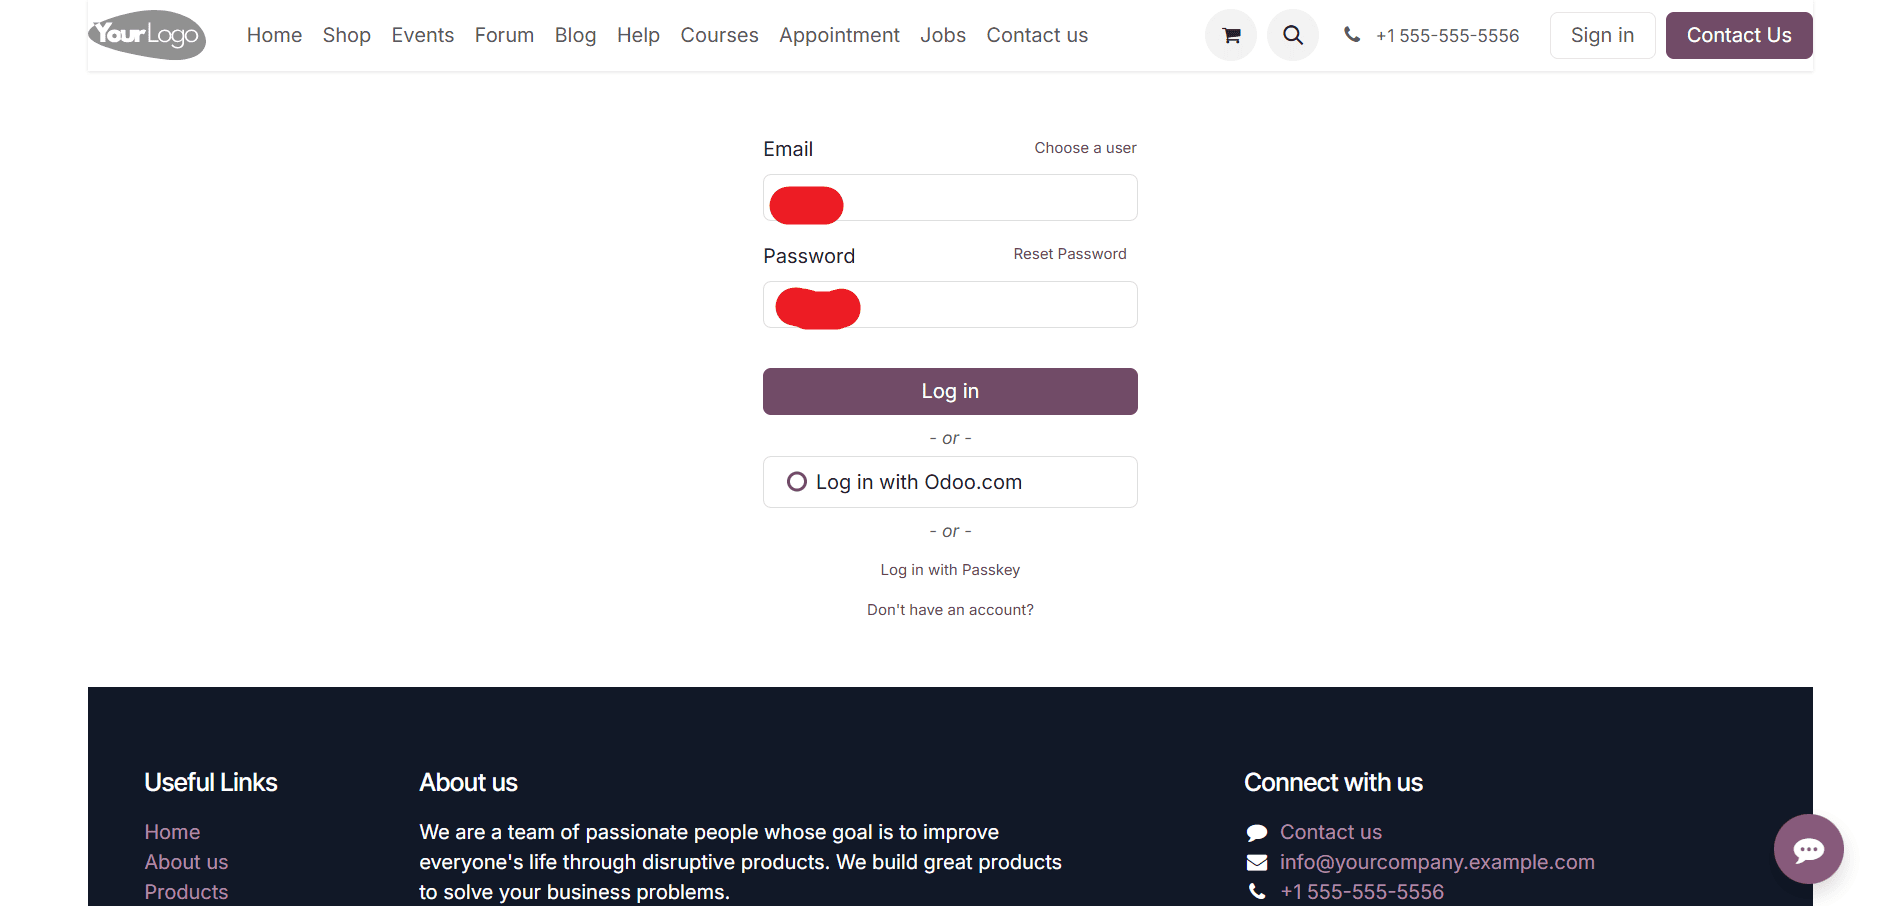
To purchase the course by a user, add the Email and Password of the user and click on the Log in button as shown below:
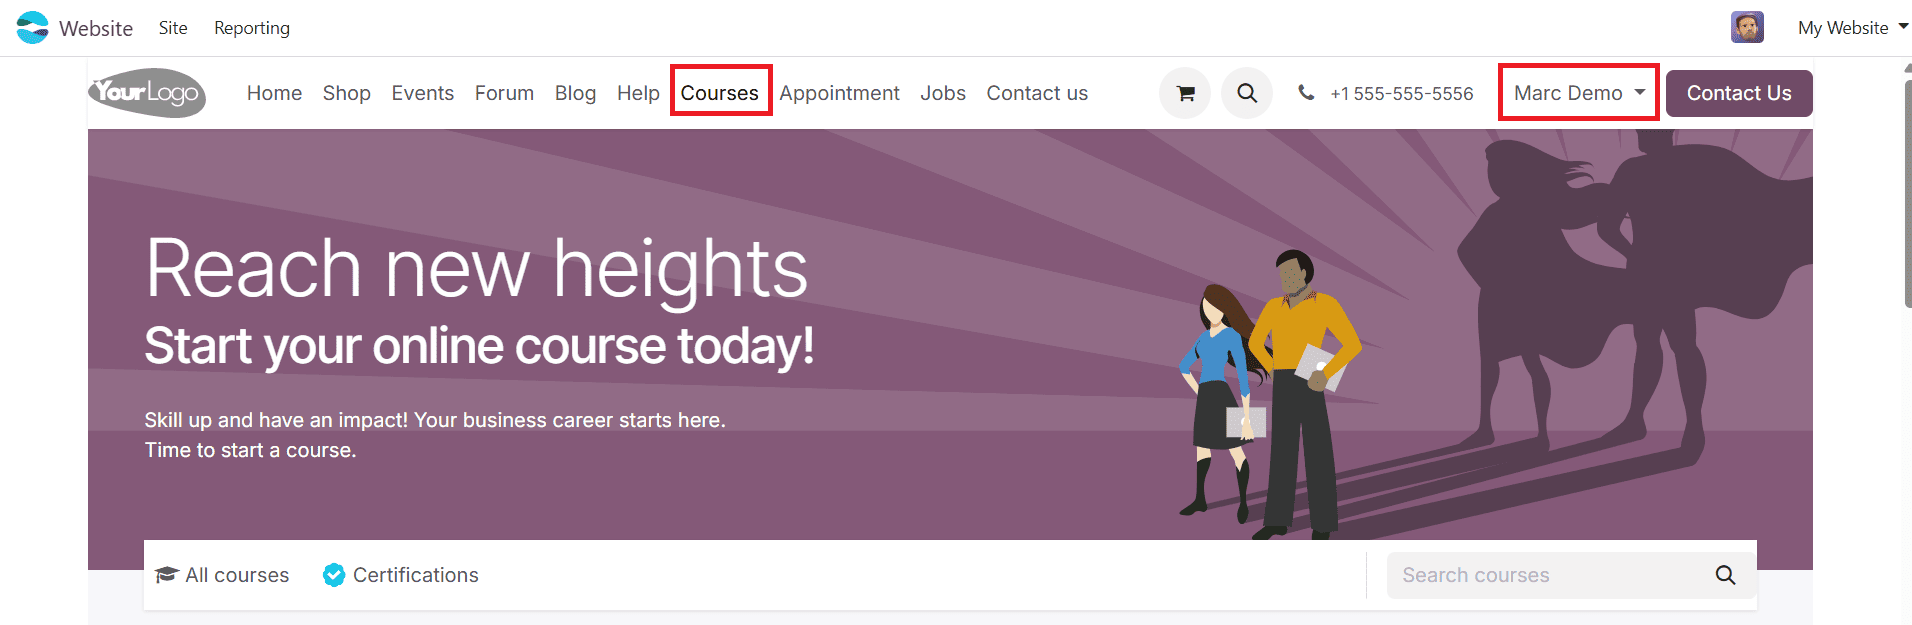
Then, select the Website module from the Odoo 18 dashboard and click on the Courses option as shown below:
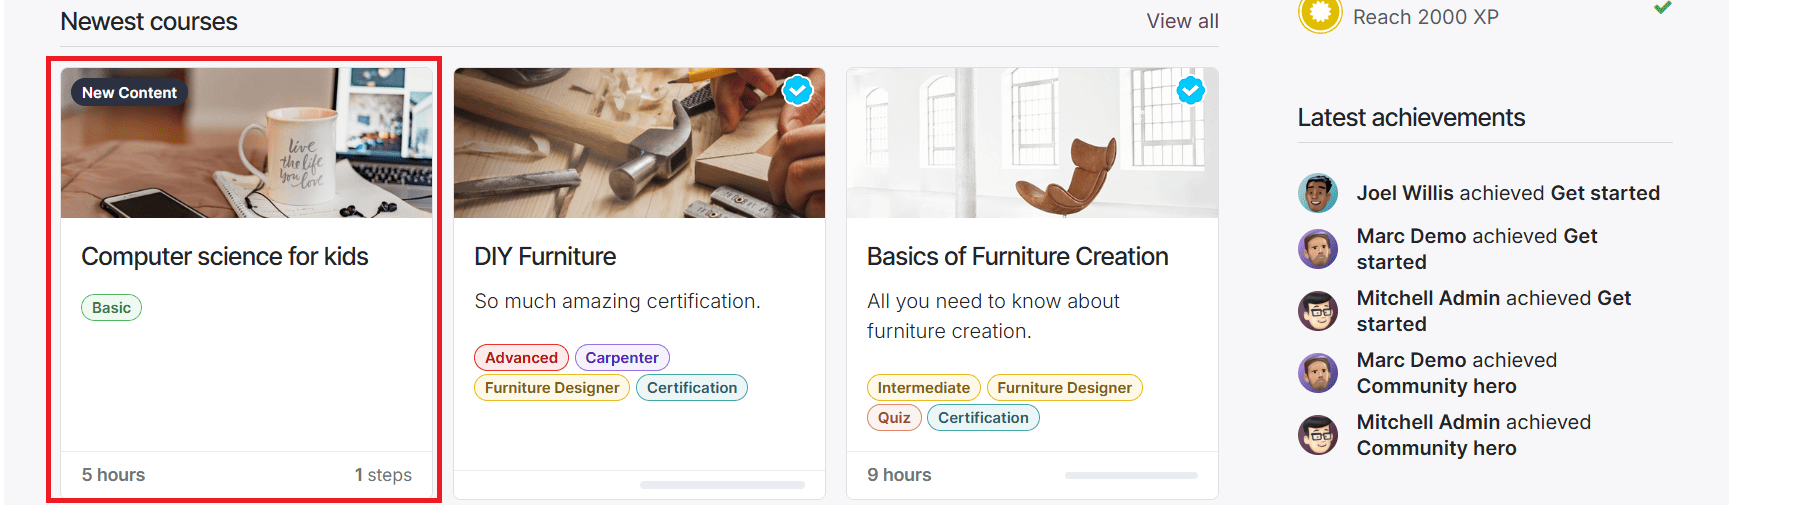
Under the Newest Courses section, select the newly created course as shown below:
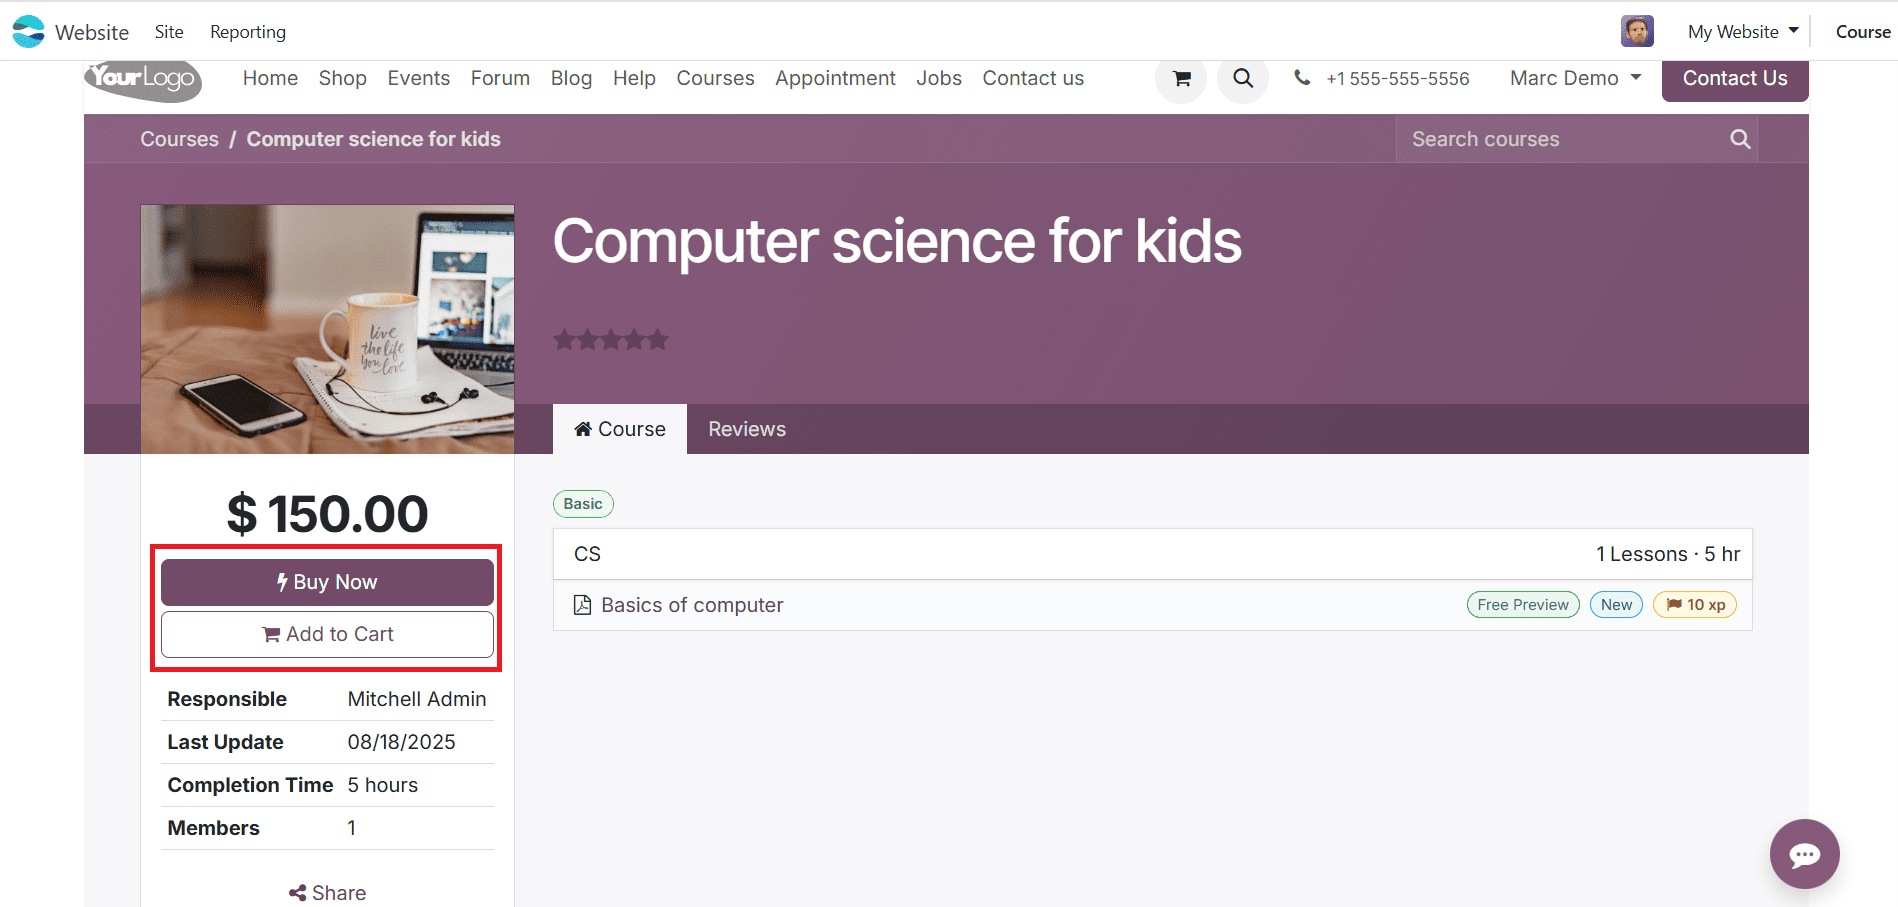
To purchase the course from the Responsible, click on the Buy Now button as shown below:
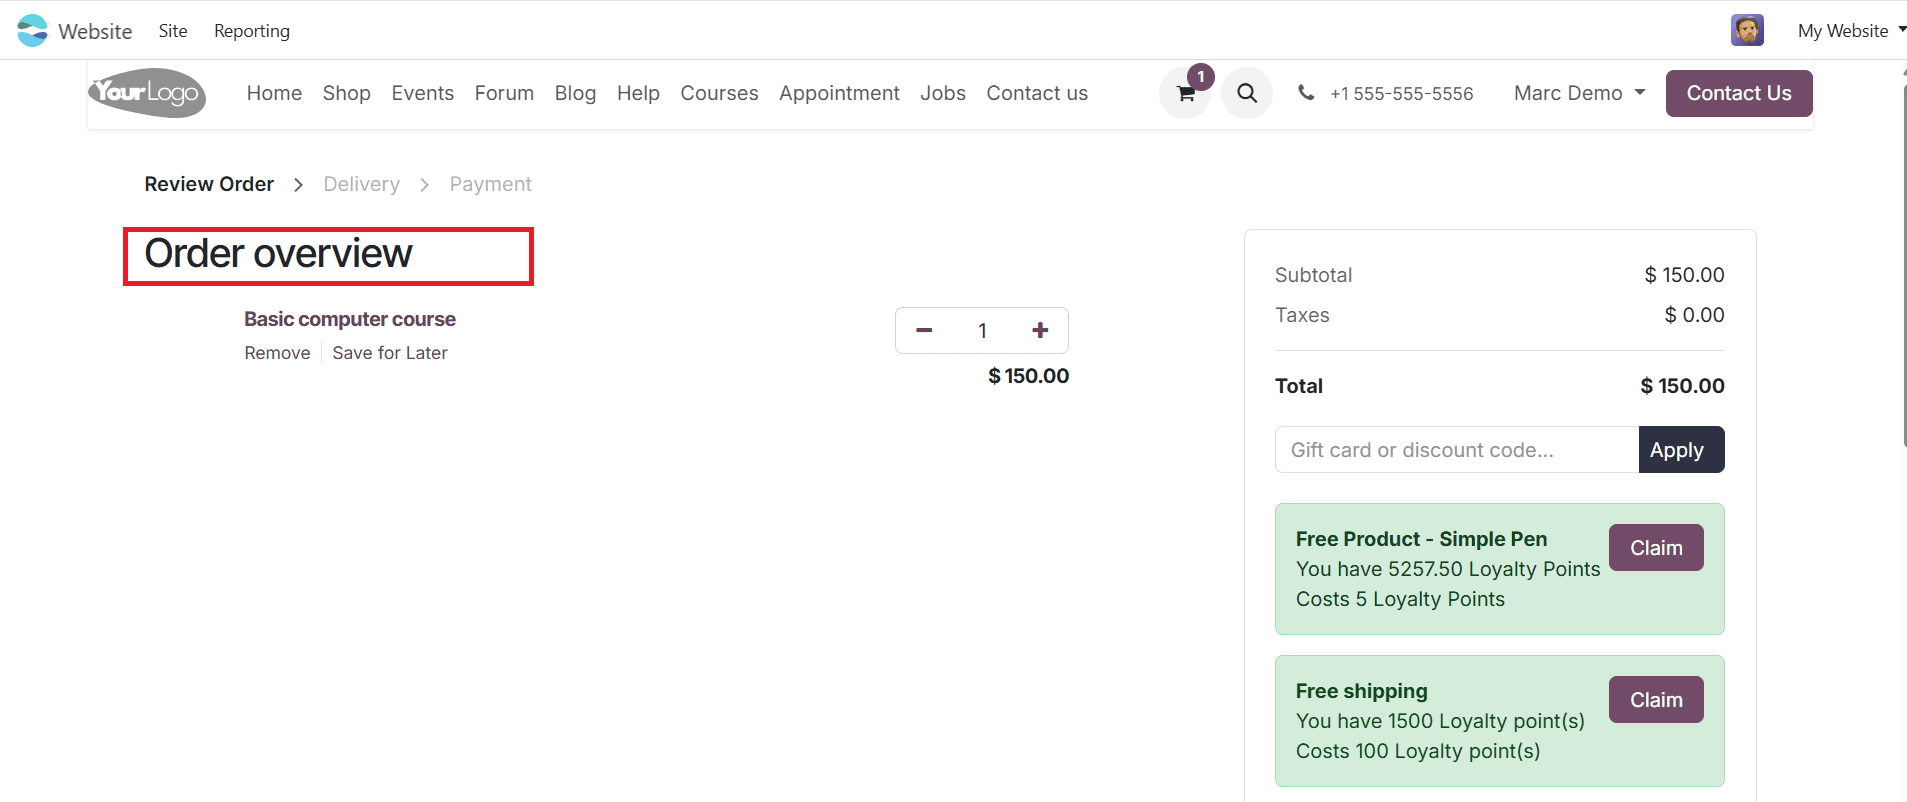
Here, you can see the payment details of the order and the Order overview. To purchase the course, select the payment gateways. Here, click on the Pay with Demo button as shown below:
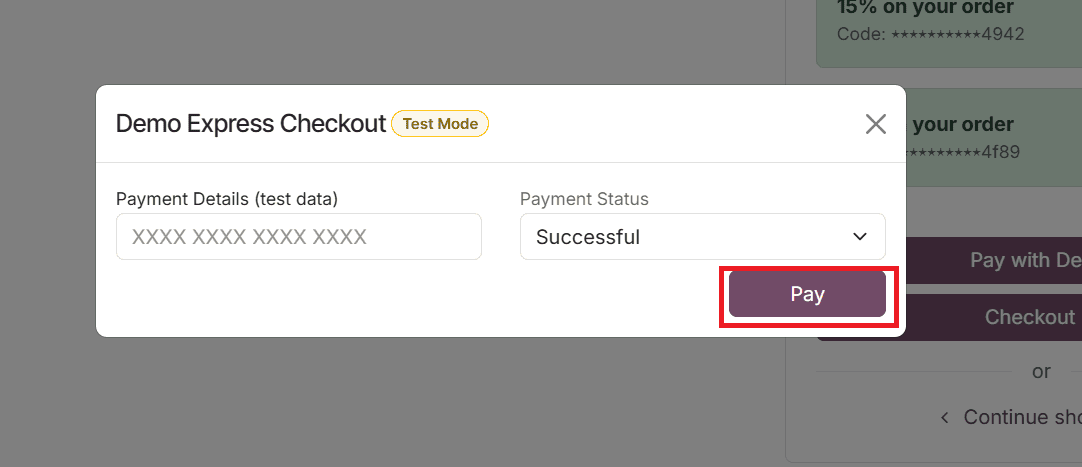
A pop-up screen will appear, where you can check the payment details and confirm the payment by clicking on the Pay button, as shown below:
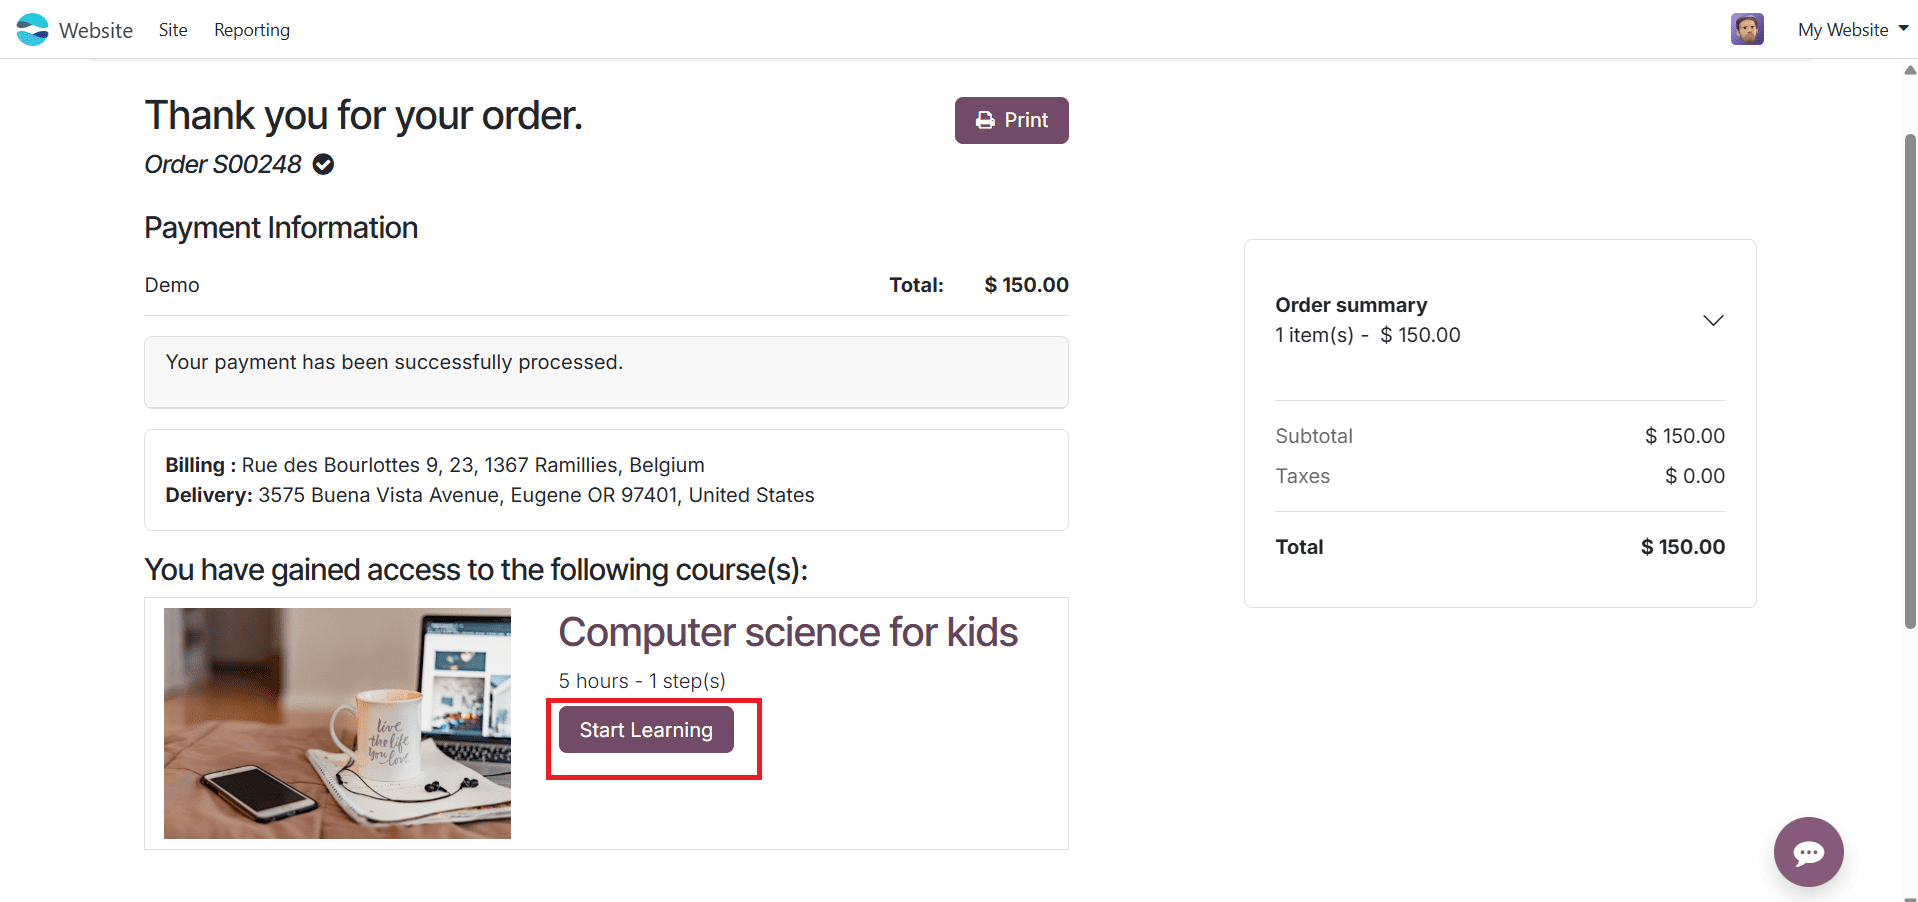
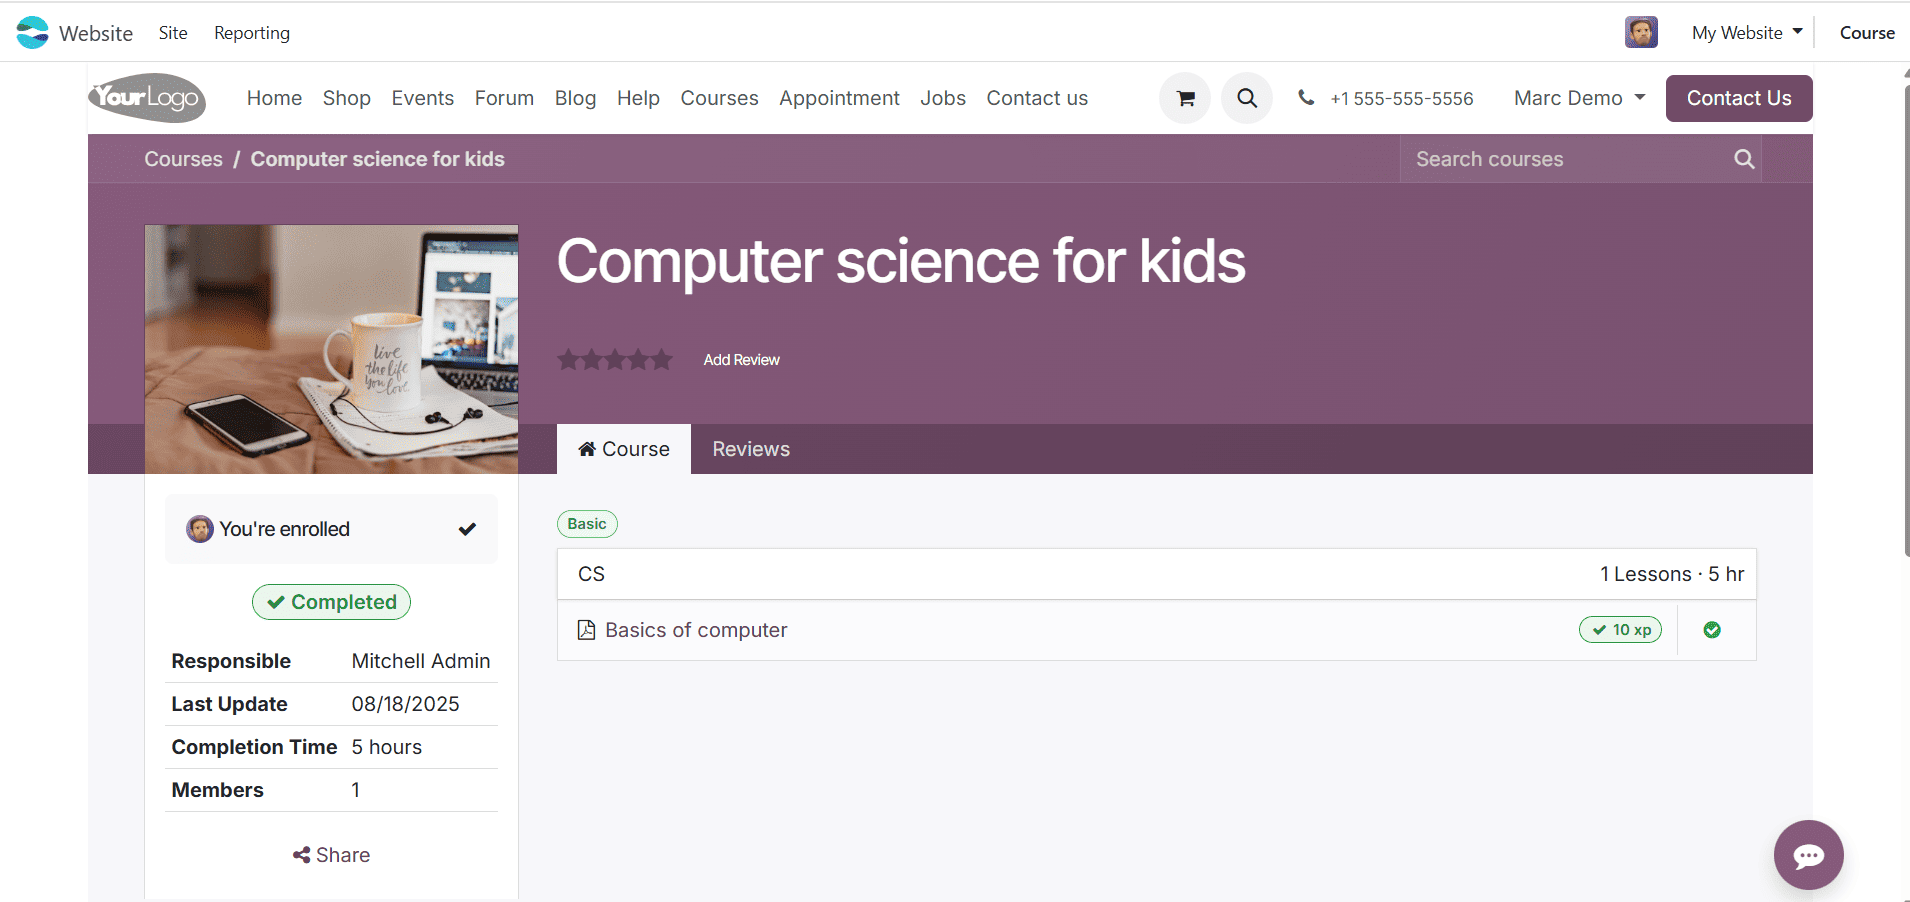
Here, you can see the details and confirmation of the order. To start the course, click on the Start Learning button as shown below:
Here, you can see the question for the course and mark your answer.
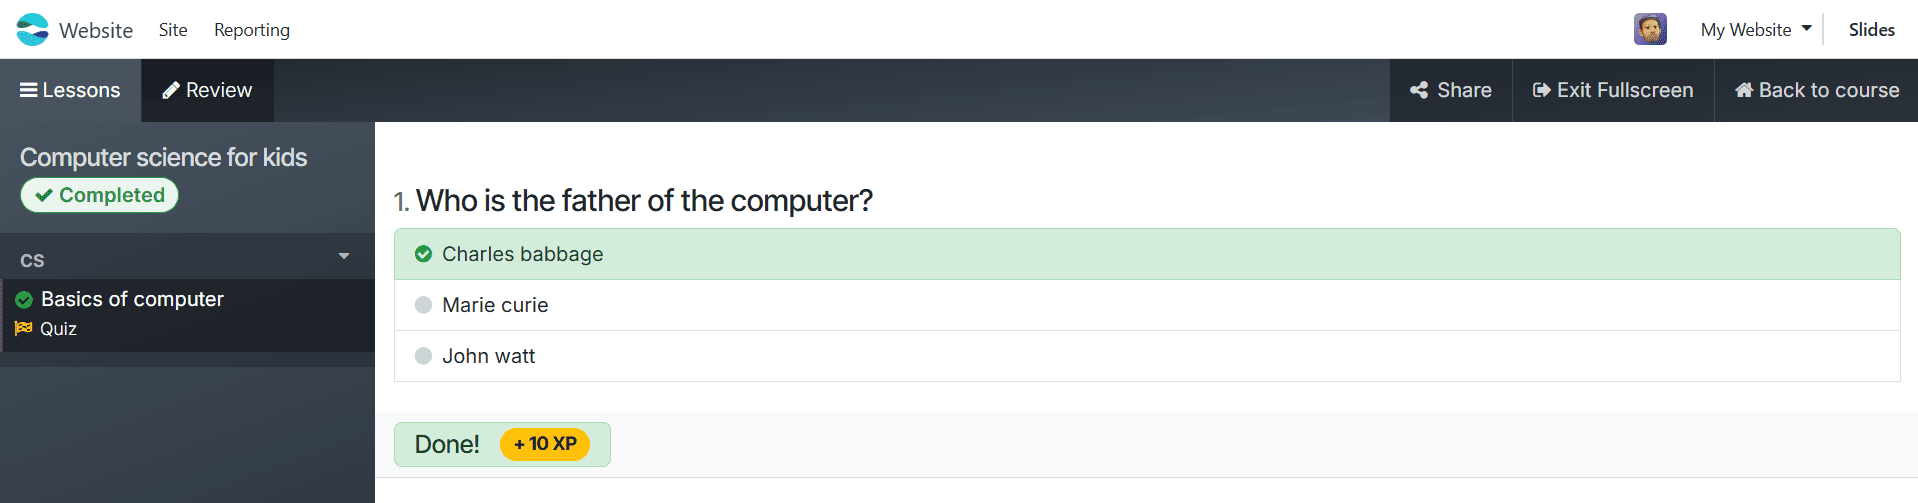
The course is considered complete once the user has attempted the course question.
Odoo 18 revolutionizes online learning by simplifying and making the sale of courses extremely flexible. The platform integrates learning materials, sales channels, and safe payment methods into a single system, reducing the gap between knowledge and business. Teachers can create learning paths, monitor student progress, and boost engagement while earning money with its easy-to-use tools. By leveraging its extensive capabilities, companies and instructors can easily create a successful online education, enhance learning outcomes, and expand their reach.
To read more about How to Configure an e-Learning Course in Odoo 18, refer to our blog How to Configure an e-Learning Course in Odoo 18.