The Rental module in Odoo 19 helps companies streamline the entire rental workflow, from product configuration to order processing and invoicing. By properly setting up rental products and defining rental time periods, businesses can ensure accurate pricing and improved resource utilization. In Odoo 19, rental management is integrated with sales, inventory, and accounting modules, making it easier to track rented items and monitor their availability in real time. Users can configure rental products with flexible pricing based on different time units such as hours, days, weeks, or months. This flexibility allows companies to meet different customer requirements while maintaining consistent pricing structures. This blog explains how to set up rental products and configure rental time periods in Odoo 19, helping businesses automate rental operations, reduce manual errors, and deliver a smoother customer experience.
Firstly, open the Rental module from the Odoo 19 dashboard.

Configure a new Rental Period
Navigate to the Configuration > Rental periods in the Odoo 19 Rental module to create a new rental period as shown below:
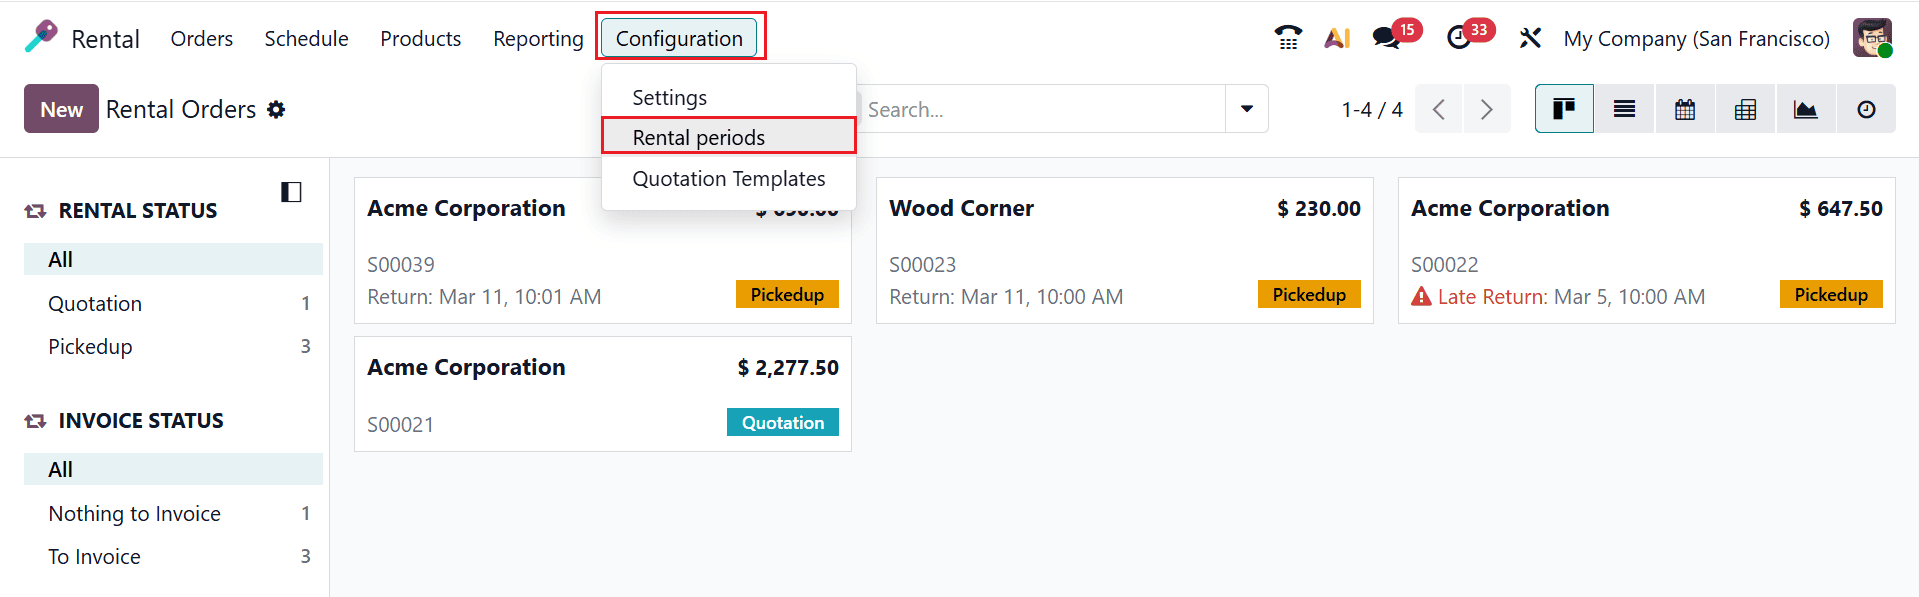
Here, you can see a list of periods with details, such as Name, Duration, and Unit. To create a new period, click on the New button as shown below:
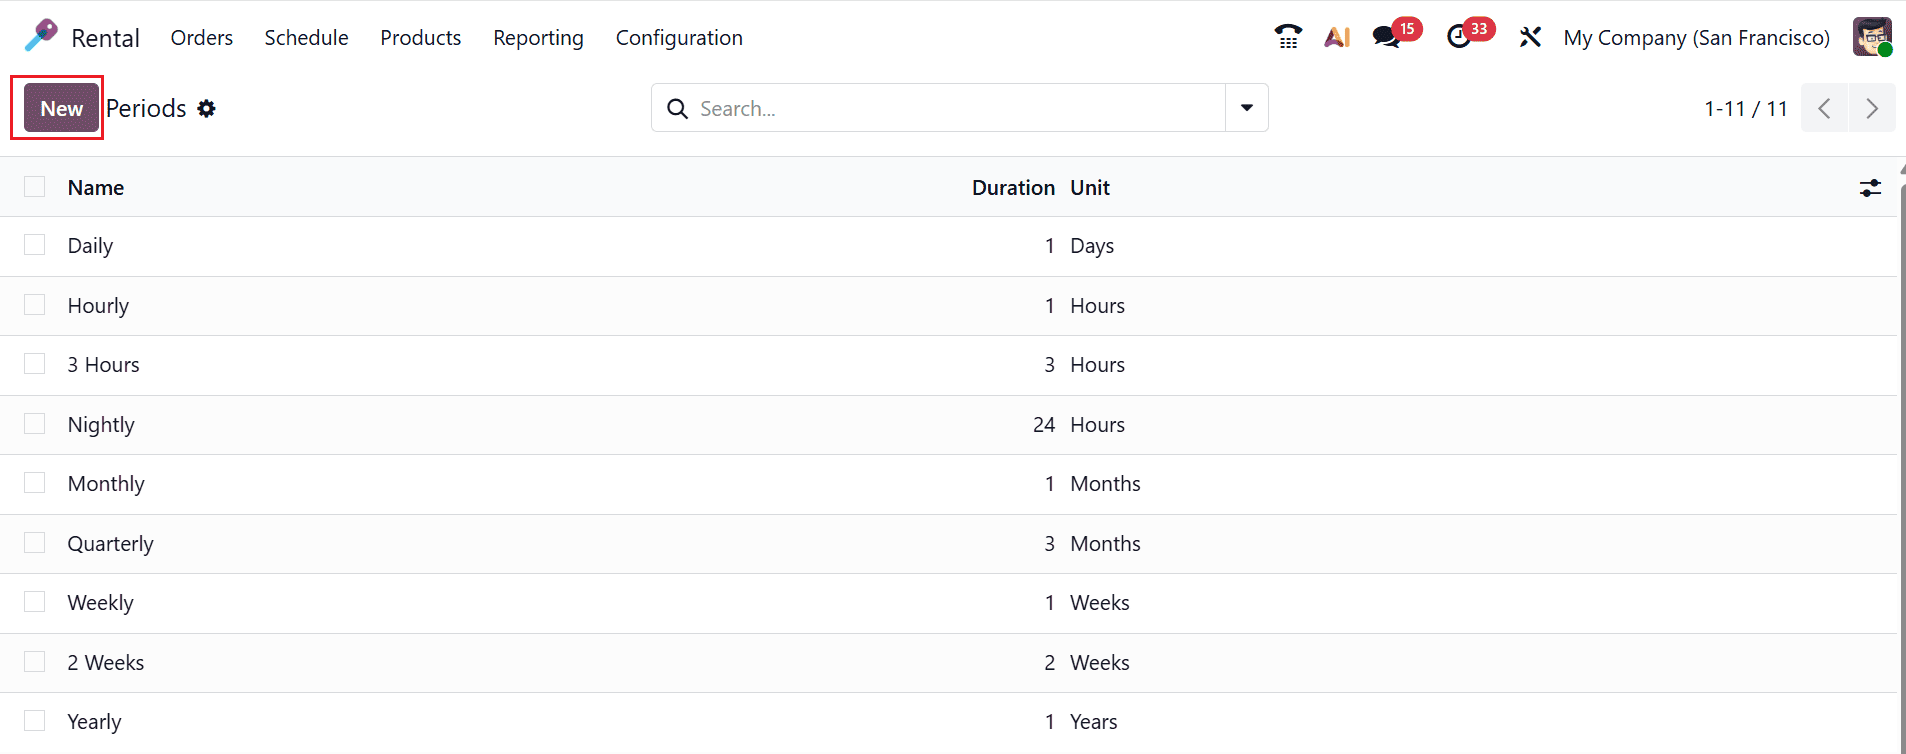
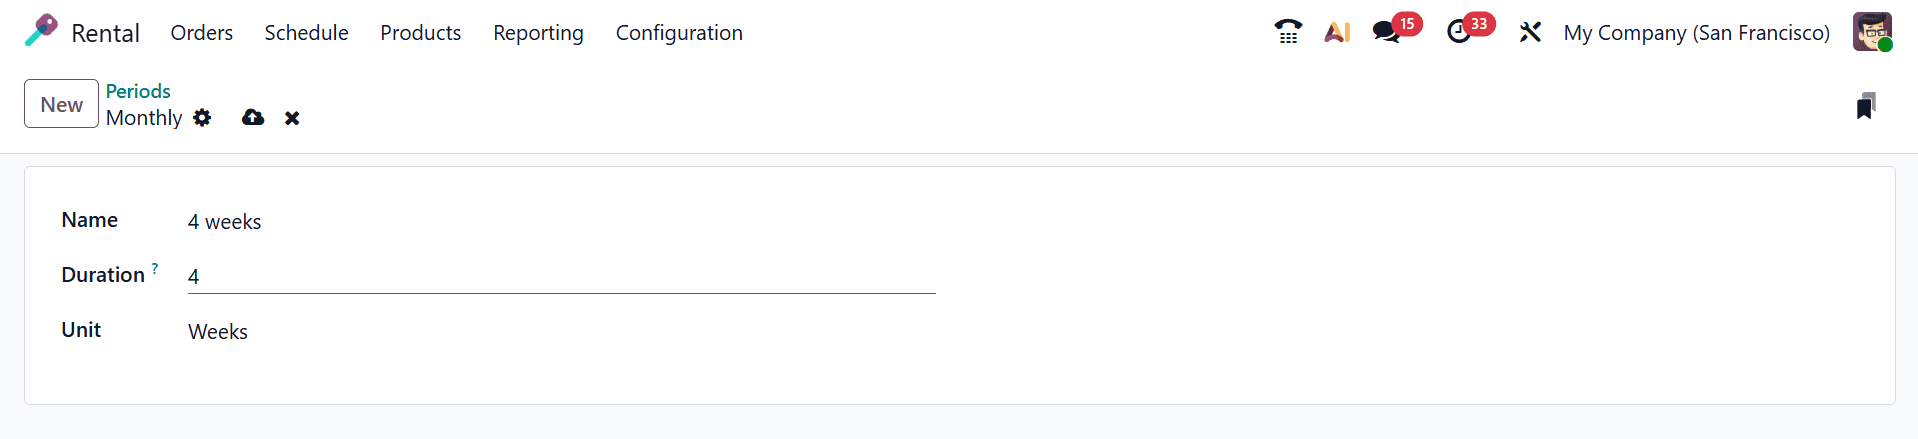
A new window will appear where you can add the details of the rental periods, such as Name, Duration, and Unit, and save them, as shown below:
Create a New Rental Product
To create a new rental product, navigate to the Products menu in the Odoo 19 Rental module as shown below. Here, you can see each product is arranged as a kanban card with its key details in short form. By selecting New, you can add a new rental product.

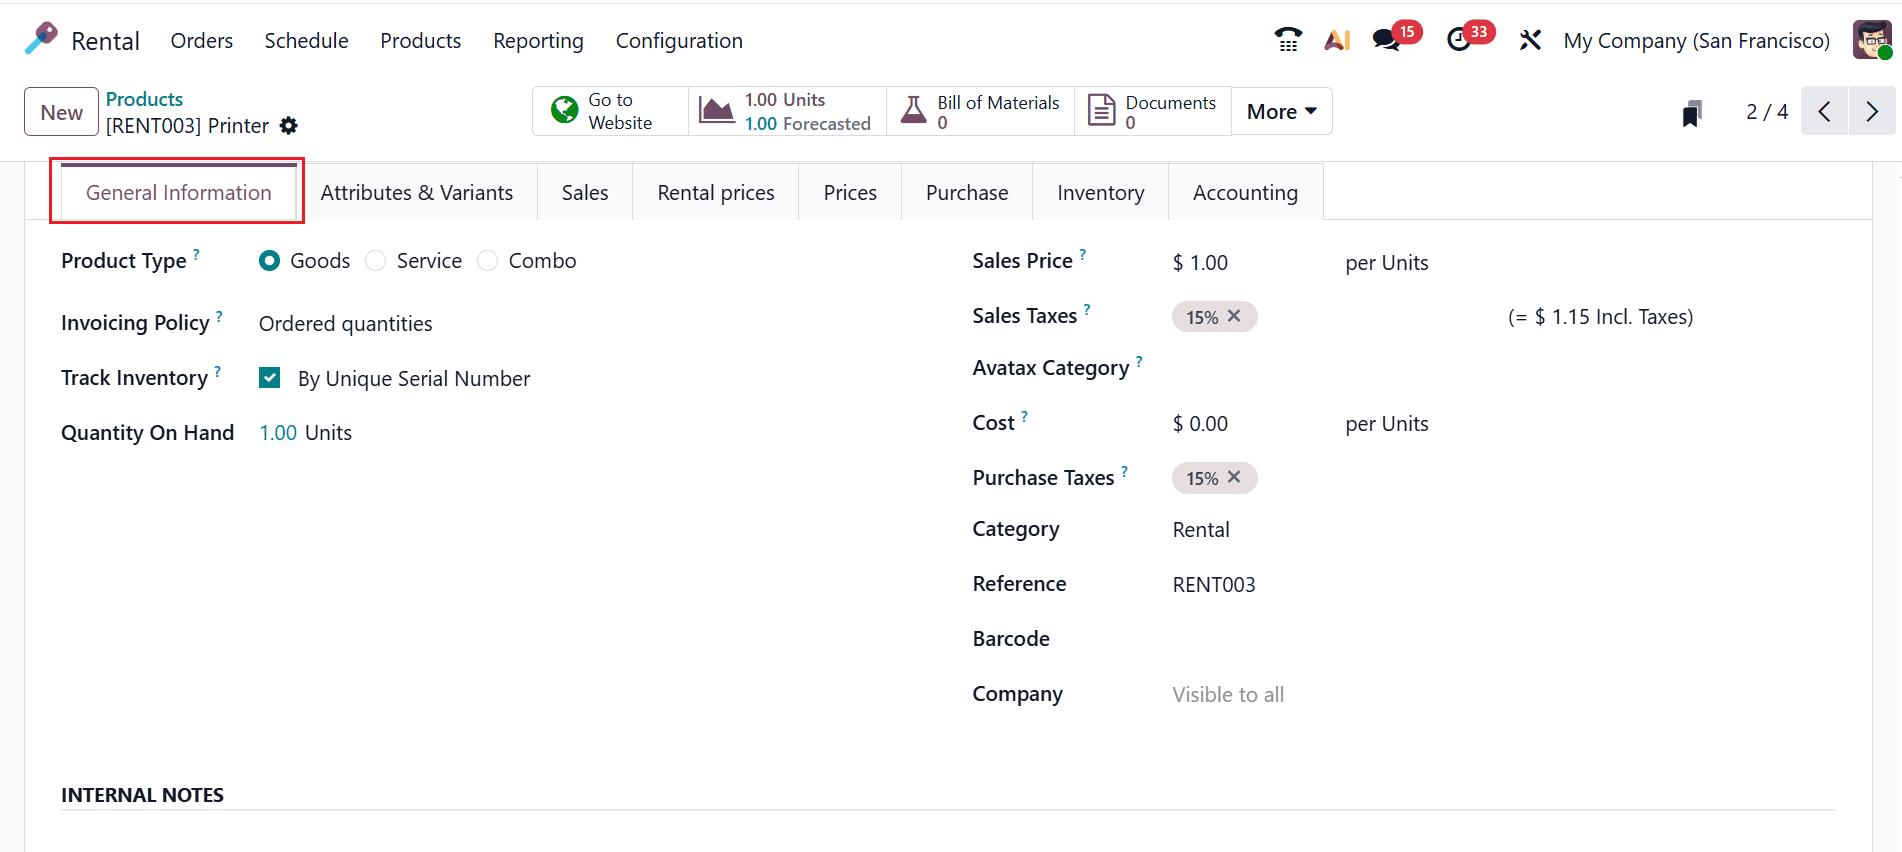
The system will open a window for you to provide the product details. Under the Product field, add the name of the product and mark the star if the product has a high priority. You can see six options, such as Sales, Rental, Subscriptions, Point of Sale, Expenses, and Purchase, where you can select the appropriate option for your product, as shown below. This section contains eight tabs: General Information, Attributes & Variants, Sales, Rental Prices, Prices, Purchase, Inventory, and Accounting.

In the General Information tab, select whether the Product Type is Goods, Service, or Combo. Select the Invoicing Policy as either Ordered quantities (invoice quantities ordered by the customer) or Delivered quantities (invoice quantities delivered to the customer). Enable the Track Inventory field to manage storable products based on By Unique Serial Number, By Lots, or By Quantity. In the Quantity On Hand field, add the number of available product units. You can also add the details of the products, such as Sales Price, Sales Taxes, Avatax Category, Cost, Purchase Taxes, Category, Reference, Barcode, and Company.
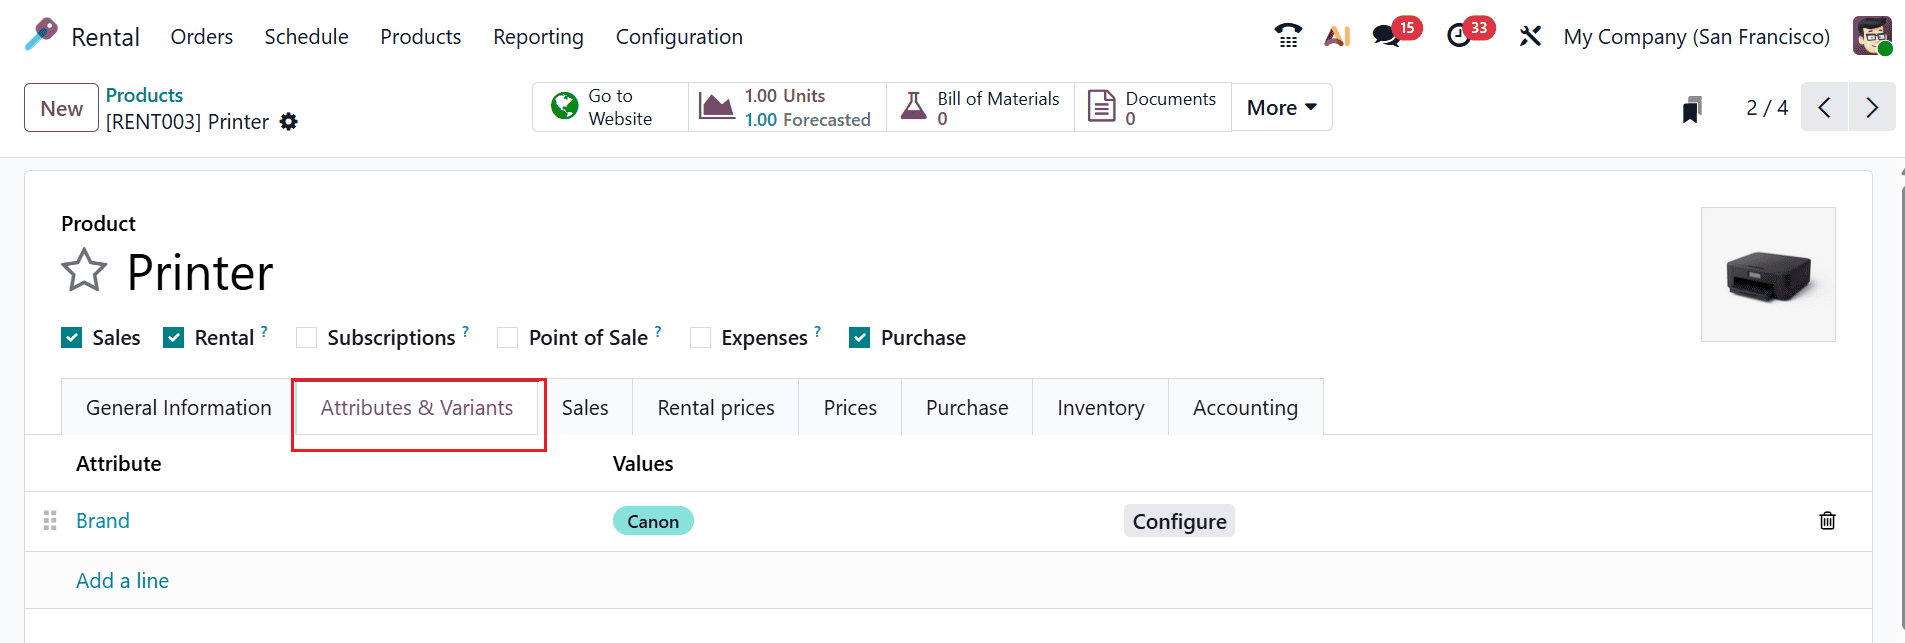
In the Attributes & Variants tab, use the Add a Line button to add attributes and variants that distinguish different versions of a product.
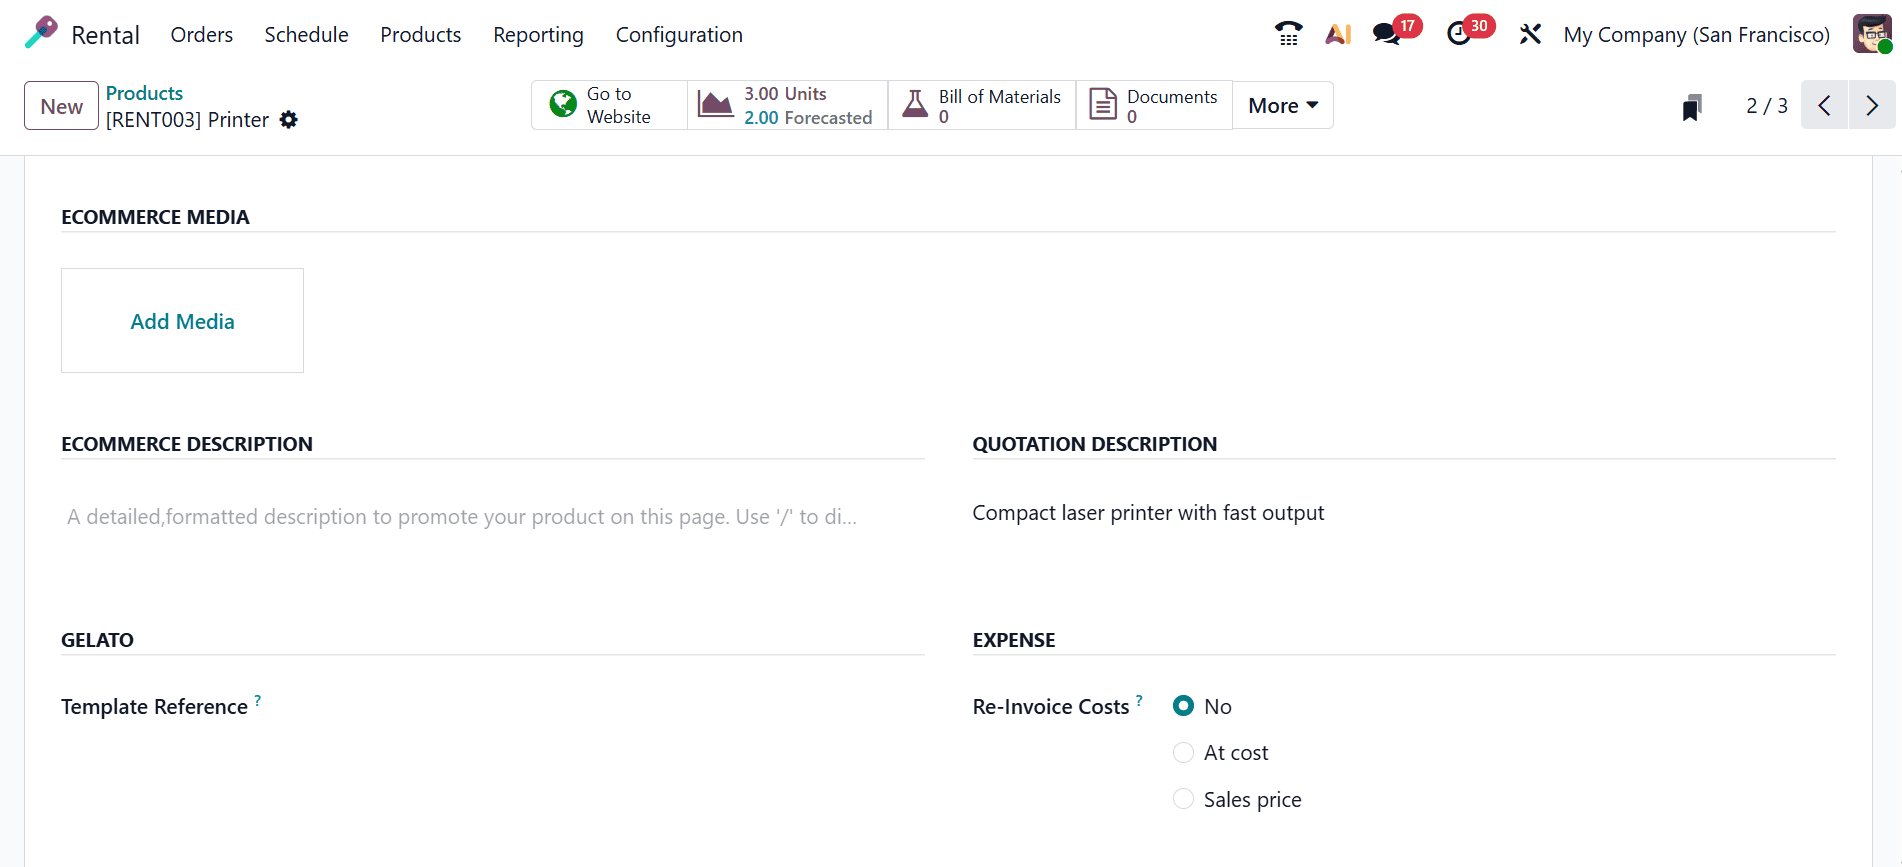
The Sales tab is divided into six sections: Upsell & Cross-Sell, Ecommerce Shop, Ecommerce Media, Ecommerce Description, Quotation Description, Gelato, and Expense.
Under the Upsell & Cross Sell section, you can add additional packaging details in the Packagings field. When a user selects “Add to Cart,” related items are suggested through the Optional Products field. The Accessory Products field displays accessory suggestions when the customer reviews their cart. In the Alternative Products field, suggest an alternative product to the customer at the bottom of the product page.The E-Commerce Shop section enables businesses to provide a better shopping experience. In the Website field, you can restrict the product to a specific website. You can add appropriate Tags and eCommerce Categories. If the product is published in the eCommerce shop, enable the Is Published field. If needed, you can enable the Sell when Out-of-Stock and Show Available Qty fields. You can select a Ribbon id as New, Sale Stock Out, etc. In the Out-of-Stock Message field, enter a brief message that displays when the product is out of stock.

Under the E-commerce Media section, click the Add Media button to upload product media like videos and images. In the E-commerce Description section, you can add detailed information to promote the product among customers. You can add a short note in the Quotation Description section, which will be displayed on sales orders and invoices. The Template Reference field under the Gelato section allows you to synchronize to fetch variants from Gelato. Under the Expense section, select Re-Invoice Costs as No, At cost, or Sales price.
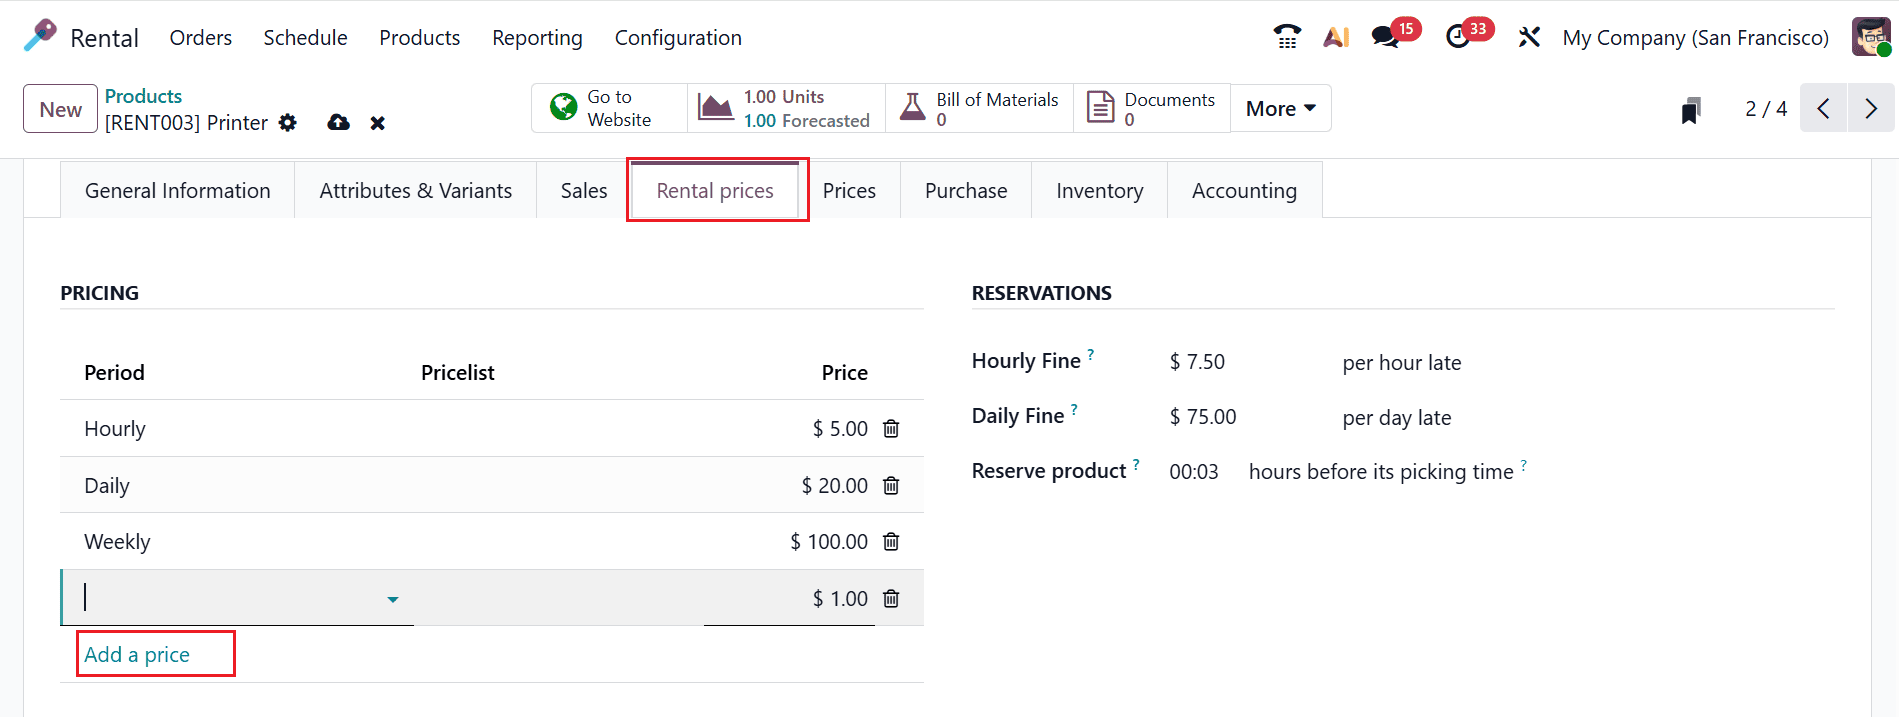
The Rental Prices tab contains two sections: Pricing and Reservations. In the Reservations section, you can configure details like Hourly Fine, Daily Fine, and Reserve Product. The Reserve Product field allows you to temporarily make the product unavailable before pickup.
Under the Pricing section, you can specify the rental price by adding details such as Period, Pricelist, and Price. To add a new rental price, click the Add a price button as shown below:
A new pop-up screen will appear where you can select the newly created rental period, as shown below:

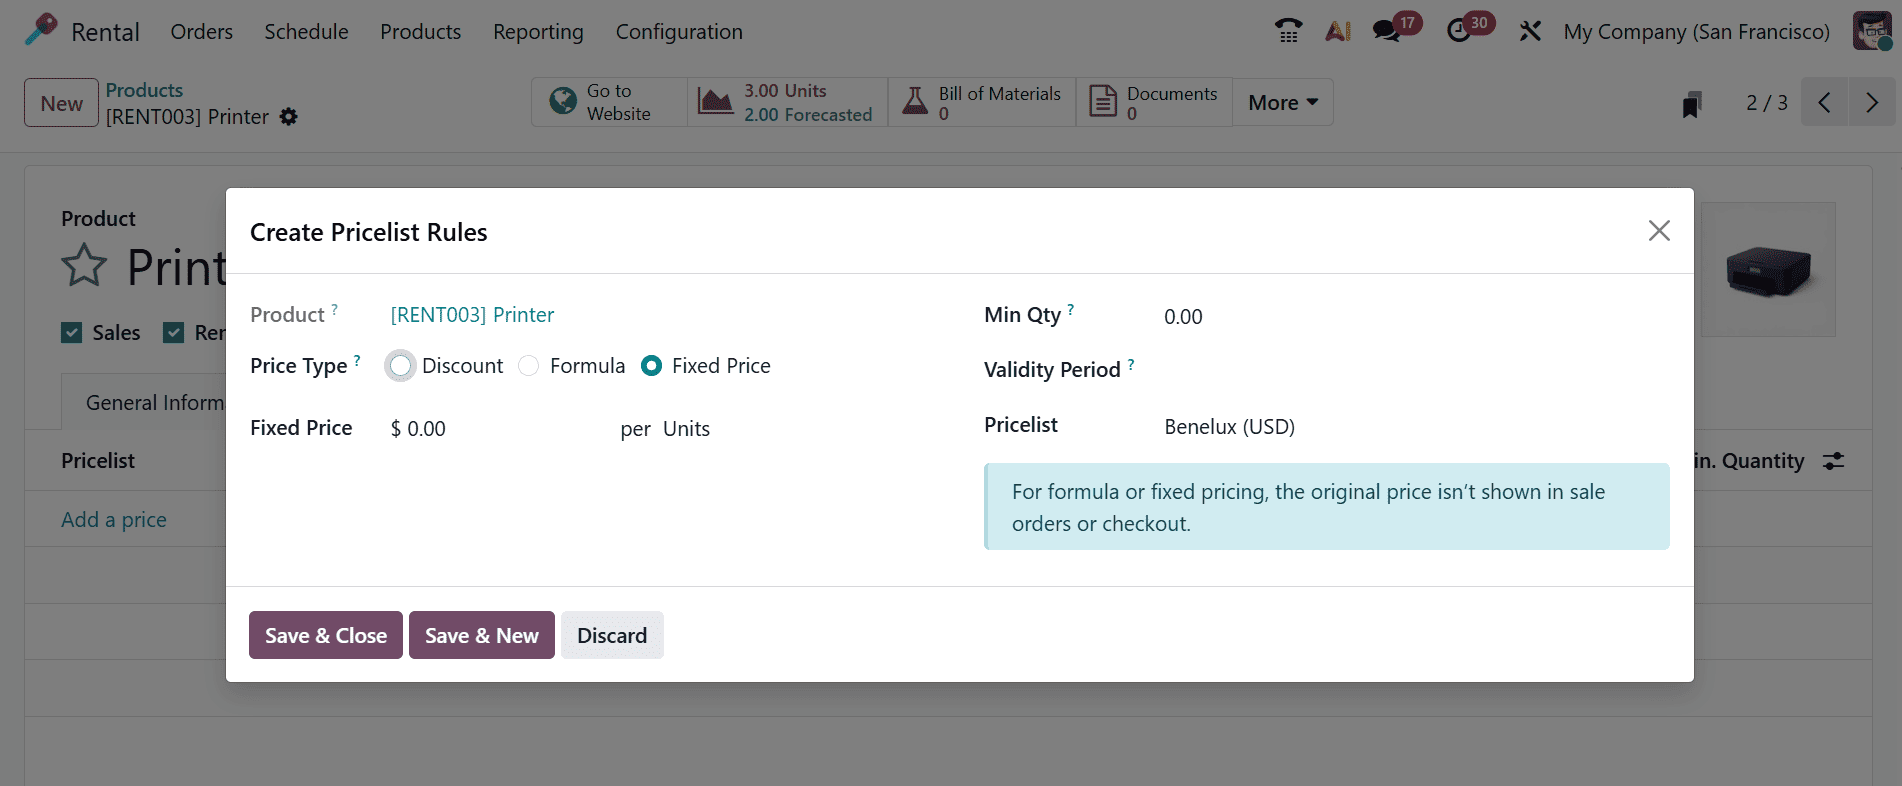
Under the Prices tab, you can add pricelist details of the product by clicking the Add a price button.

A new pop-up screen will appear where you can create a pricelist rules for the product. In this section, choose the Price Type from Discount, Formula, or Fixed Price. Then, you can add the details such as Fixed Price, Min Qty, Validity Period, and Pricelist.
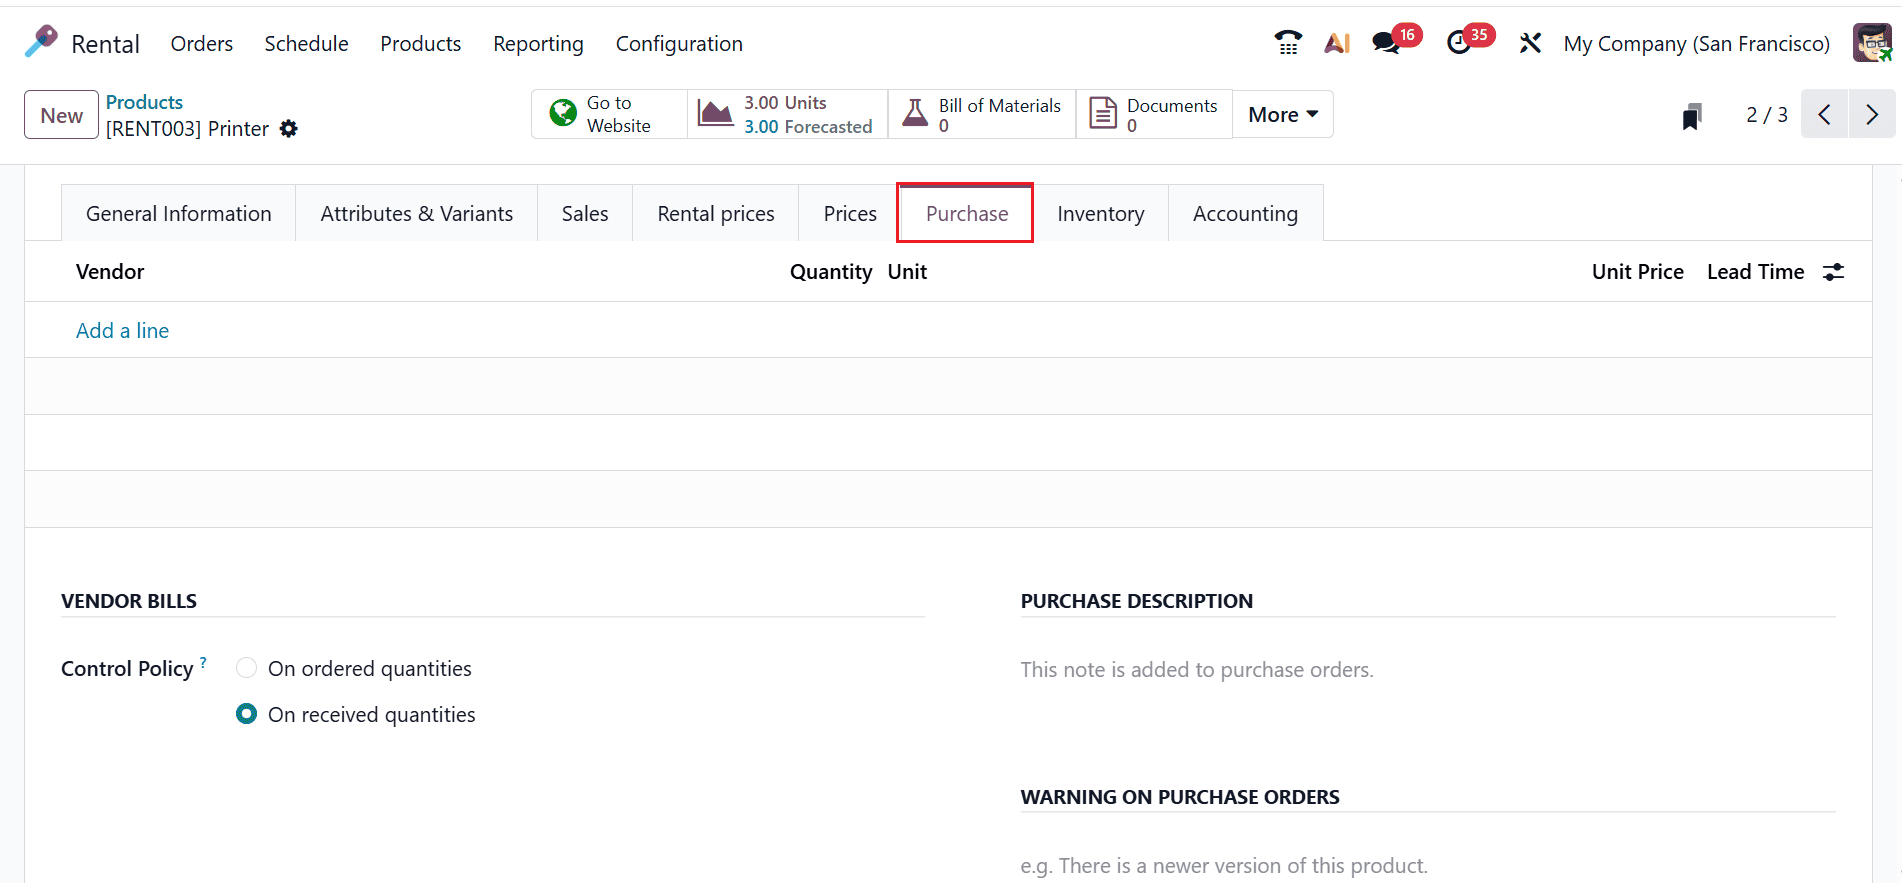
Under the Purchase tab, click the Add a line button to add the purchasing details of the product, such as Vendor, Quantity, Unit, Unit Price, Currency, and Lead Time. The Lead Time refers to the number of days a vendor needs to deliver the product after the purchase order is confirmed.
Under Vendor Bills, you can set the Control Policy to On Ordered Quantities or On Received Quantities. In the Purchase Description section, include a short note to display on the purchase order. Under the Warning on Purchase Orders section, you can notifies rental product has configuration or vendor issues that may affect the purchase process.
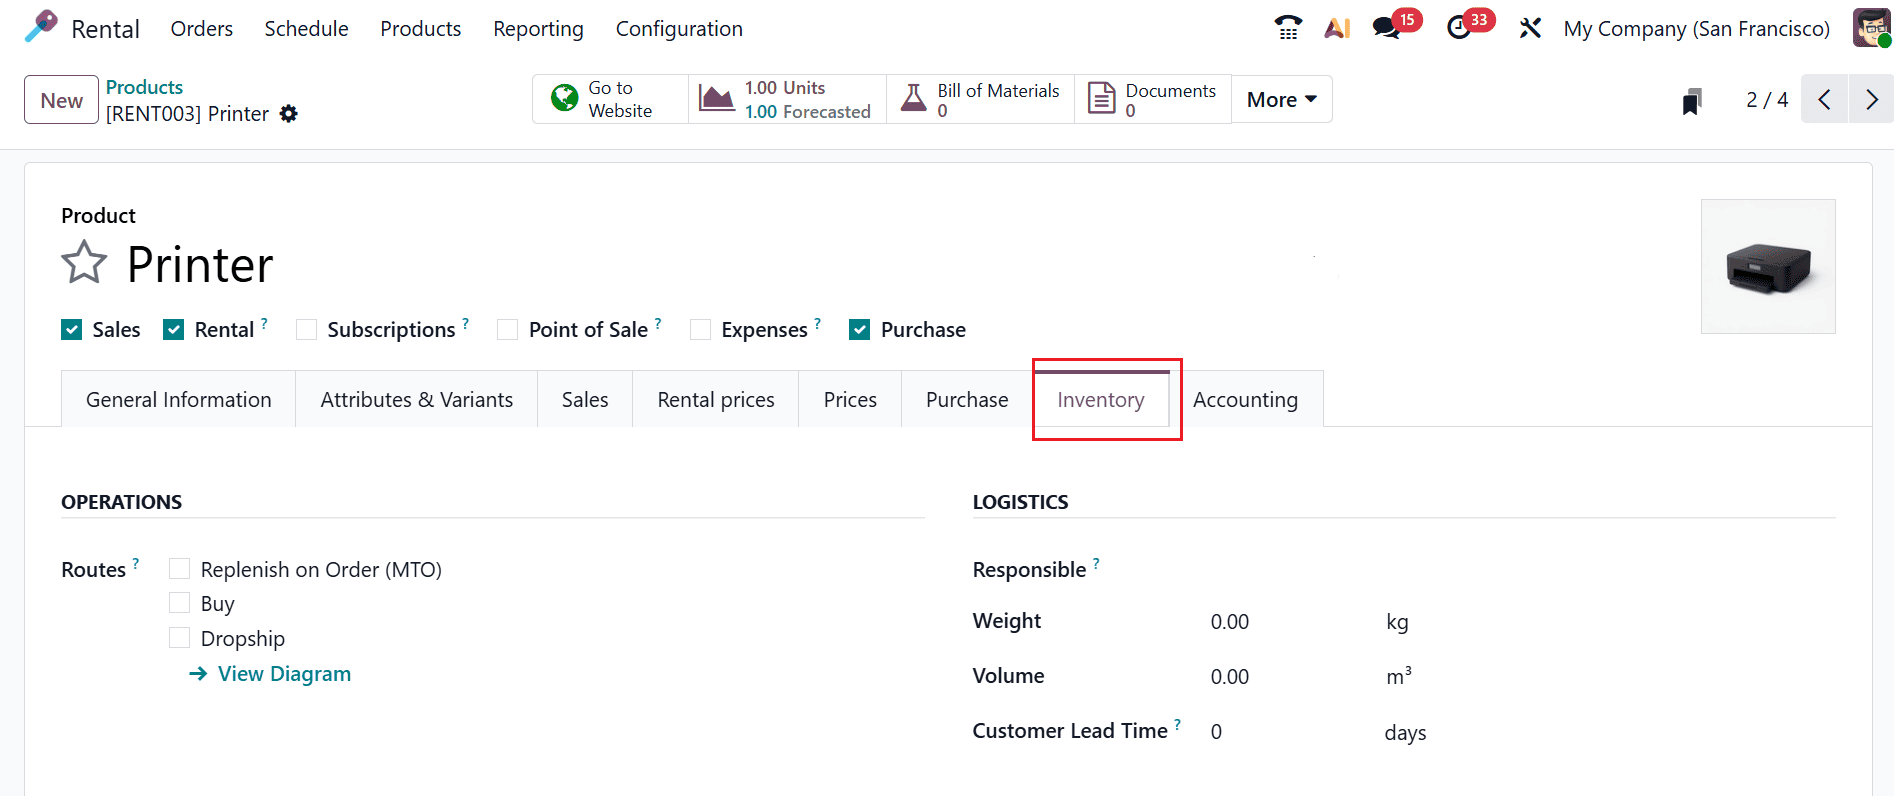
Under the Inventory tab, you can see six sections: Operations, Logistics, Traceability, Description for Receipts, Description for Delivery Orders, and Delivery for Internal Transfers.
In the Routes field, you can define the route of the product: whether it will be bought, manufactured, replenished an order, etc.
The Logistics section allows you to specify details including Responsible, Weight, Volume, and Customer Lead Time. You can use Customer Lead Time to set the number of days from sales order confirmation to delivery.
Under the Traceability section, if the Valuation by Lot/Serial field is enabled, the valuation will be specific to the Lot/Serial number. In the HS Code field, you can specify the standardized code used for classifying goods in international shipping. Then, you can also add the details such as Origin of Goods, Custom Lot/Serial, Expiration Date, and Version.
You can add a note to receipt orders with details of manufacturing or where to store the product in the warehouse under the Description For Receipts section. Under the Description For Delivery Orders field, you can add notes to delivery orders. You can also add notes to internal transfers under the Description for Internal Transfers section.

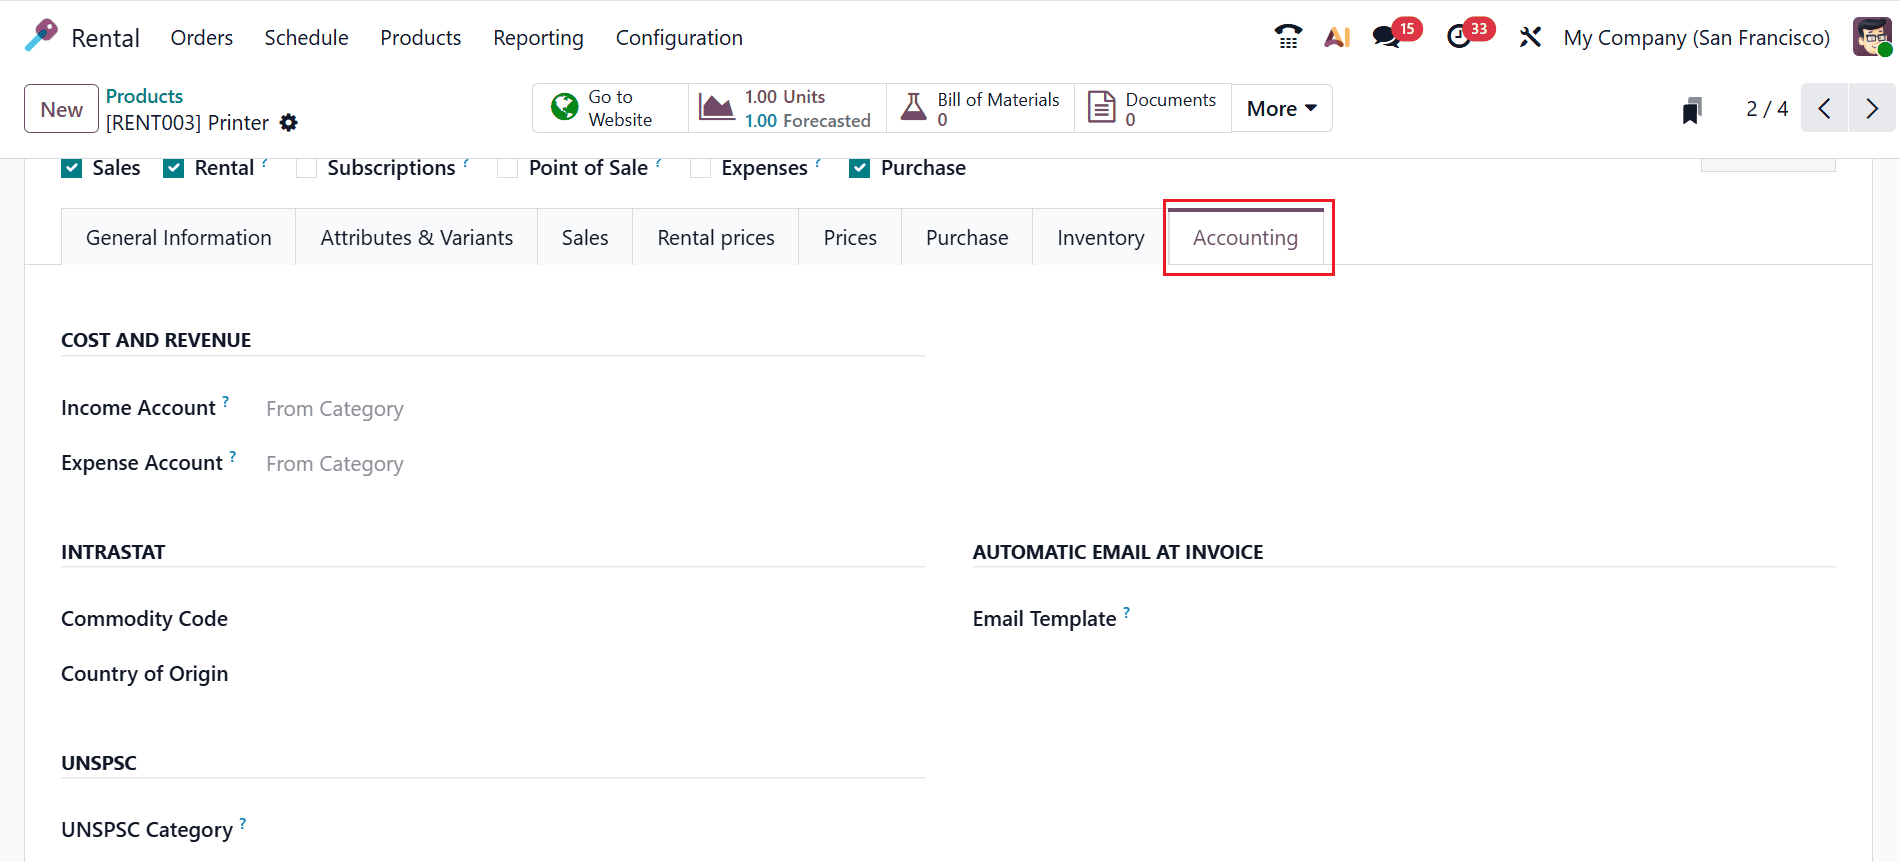
You can use the Accounting tab to handle the financial accounts associated with the product. The Cost and Revenue section lets you set up the Income and Expense accounts for the product. Under the Intrastat section add the Commodity Code and Country of Origin of the product. Add an Email Template under the Automatic Email at Invoice section to send a product-specific email once the invoice is validated. In the UNSPSC Category field, add the UNSPSC code related to the product.
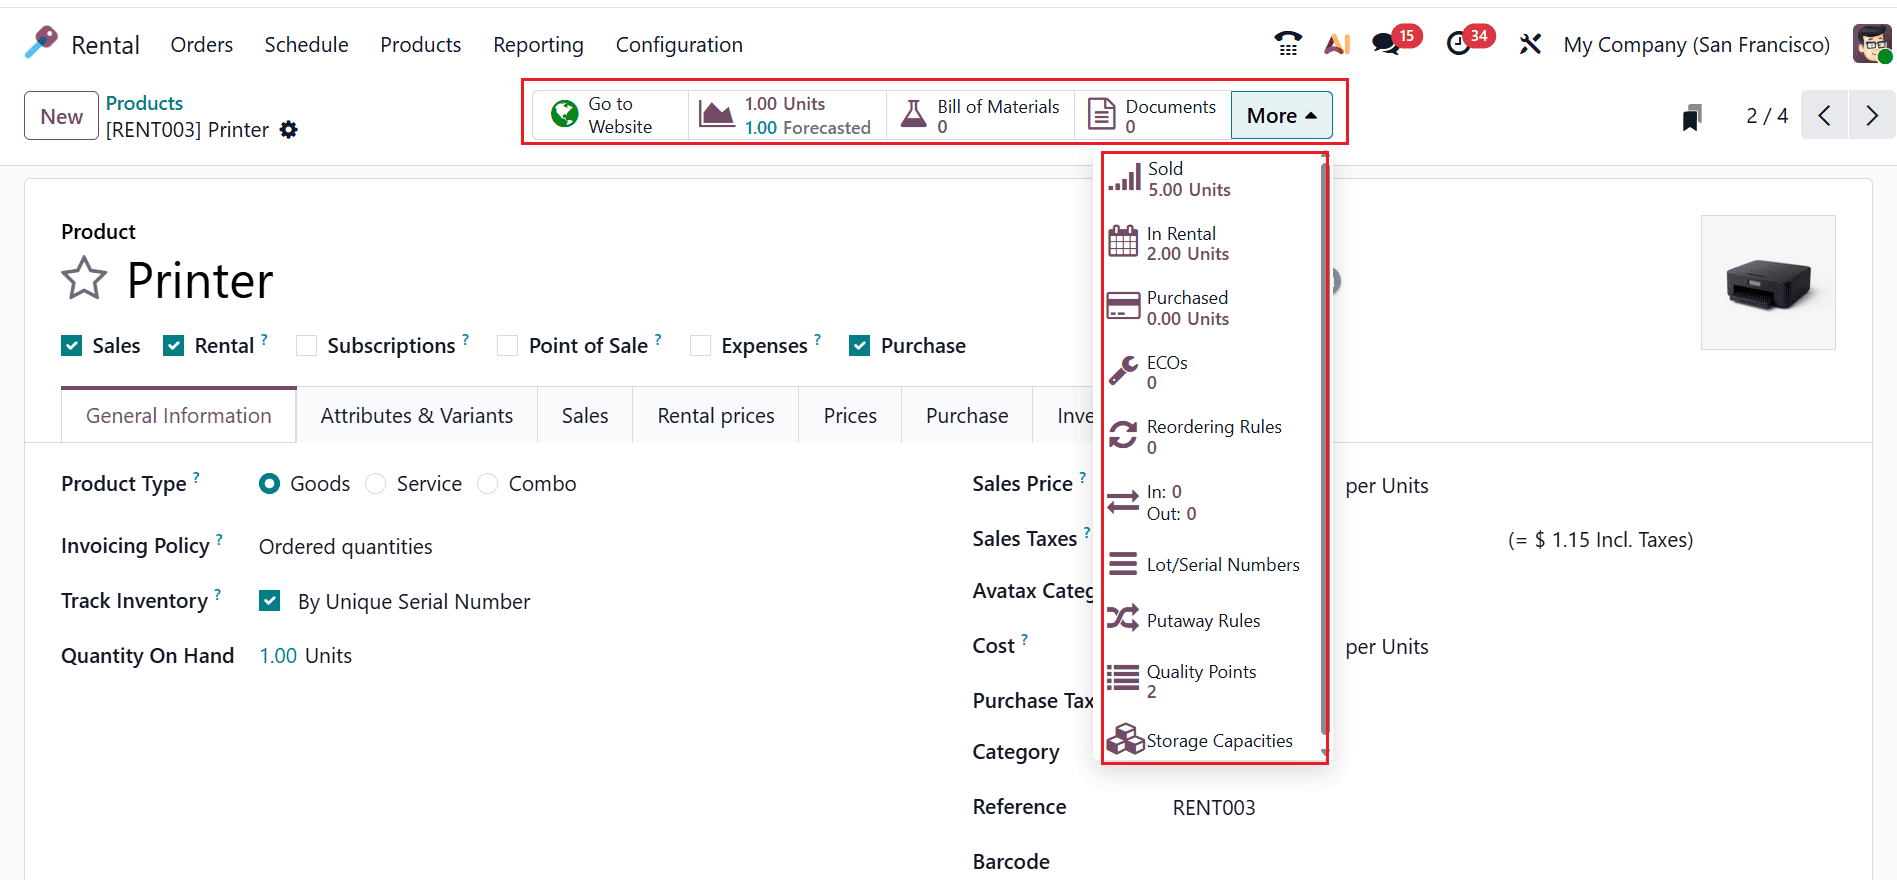
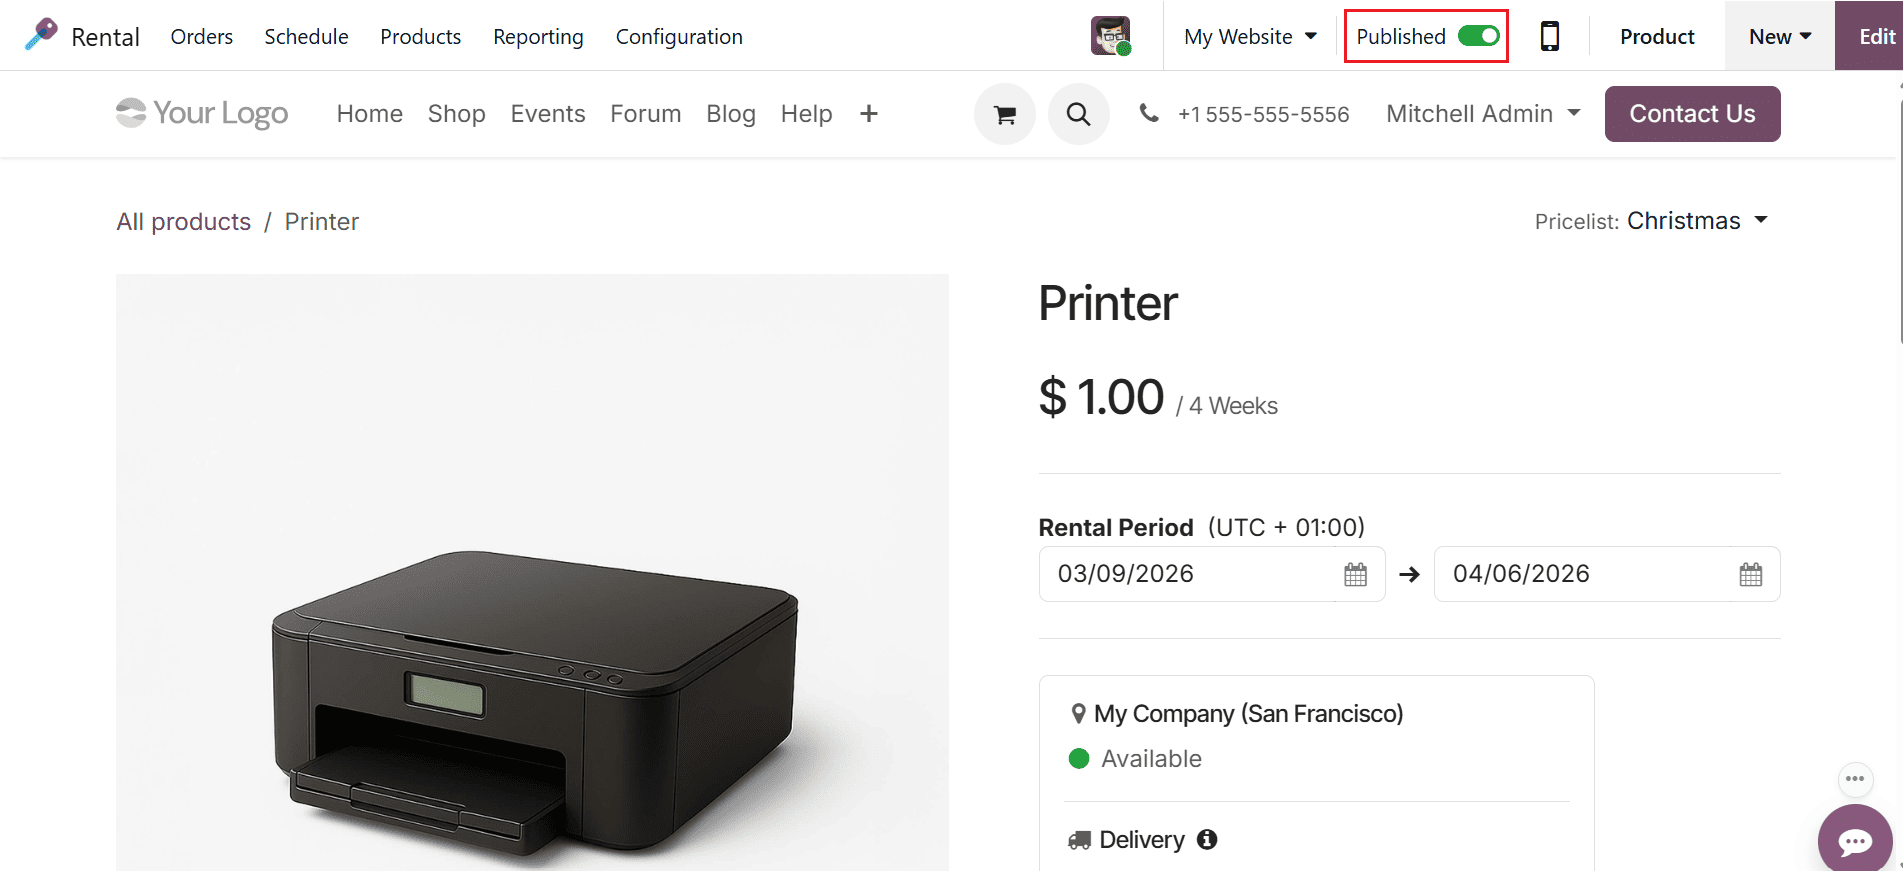
You can manage and view options such as Go to Website, Units Forecasted, Bill of Materials, Documents, and More. Click on the drop-down menu in the More options, where you can view additional options such as Sold, In Rental, Purchased, ECOs, Reordering Rules, In/Out, Lot/Serial Numbers, Putaway Rules, Quality Points, and Storage Capacities. Use the Go to Website button to access and manage the product on the website.
Here, enable the toggle button to publish the product on website. Then, you can view the detailed information of the product as shown below:
Setting up rental products and defining rental time periods in Odoo 19 is essential for businesses that rely on rental-based services. By configuring products as rentable items and establishing flexible rental pricing rules, companies can efficiently manage product availability, billing, and returns. The Rental module simplifies complex rental operations by integrating them with inventory, sales, and accounting processes. With proper configuration, businesses can offer multiple rental duration options, automate price calculations, and avoid scheduling conflicts. By providing clear rental terms and accurate pricing, the system improves operational efficiency and increases customer satisfaction. Odoo 19’s rental features enable organizations to maintain better control over assets while optimizing revenue opportunities. Whether renting tools, vehicles, or event equipment, implementing a structured rental setup ensures smooth operations and scalable rental management as the business grows.
To read more about How to Configure Rental Products & Periods in Odoo 18, refer to our blog How to Configure Rental Products & Periods in Odoo 18.