The Odoo Marketing Automation14 is the suitable Marketing automation software to automate the marketing campaigns and sales activities of your organization. The cost-effective module will help you to handle all the sophisticated marketing tasks effortlessly. The module also includes a well-organized reporting section which will allow us to view and analyze the various reports on each operation conducted.
This blog will describe the various options available under the Reporting tab of the Odoo 14 Marketing Automation module.
In the reporting section of the Odoo Marketing module, you can view three menus Link Tracker, Tracer, Participants respectively. This blog will discuss each of these menus in detail. Let us have a view of the screenshot of the menu first.
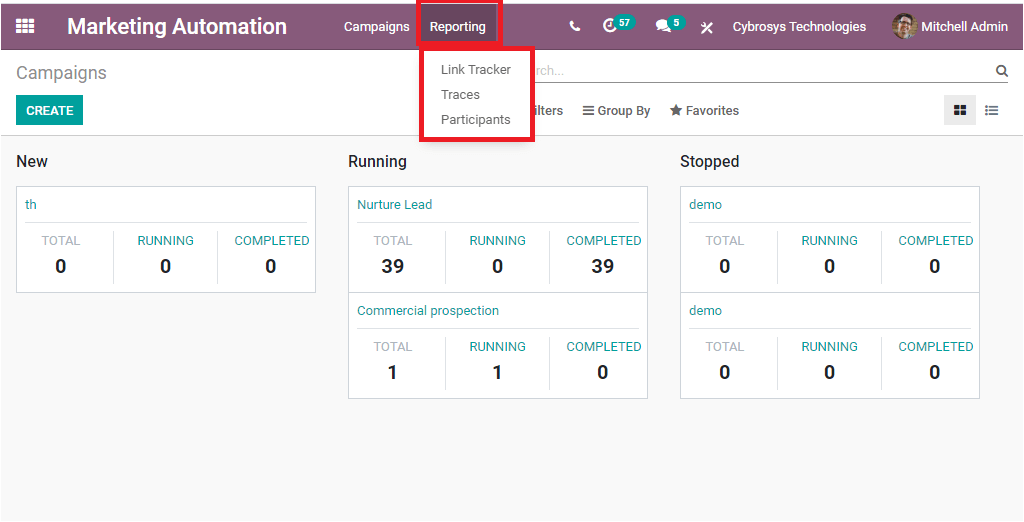
Let us discuss each of these menus in detail. First of all, we can discuss the Participants’ window available.
Participants
The Participants window of the Odoo Marketing Automation will help you to keep all the Participants’ data. The window can be accessed in various views such as Graph, Pivot, and List view. The List view representation of the data is depicted below.
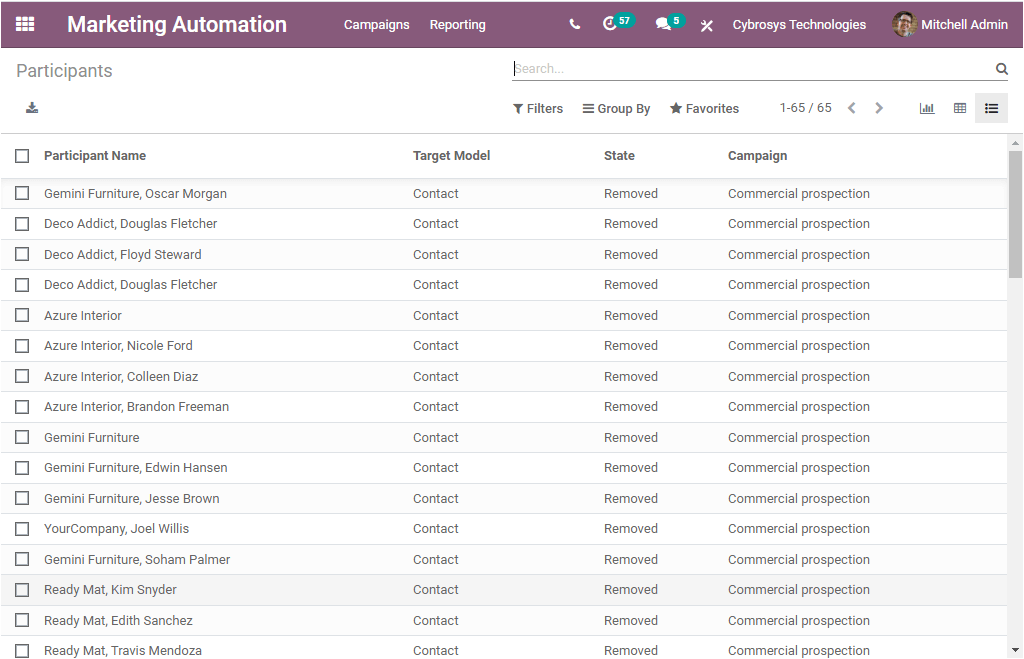
In the window, you can view the Participants Name, along with the Target Model, State, and the respective Campaign name. You can click on each of the records to view the workflow. Let us click on the record Deco Addict, Douglas Fletcher for viewing the details.
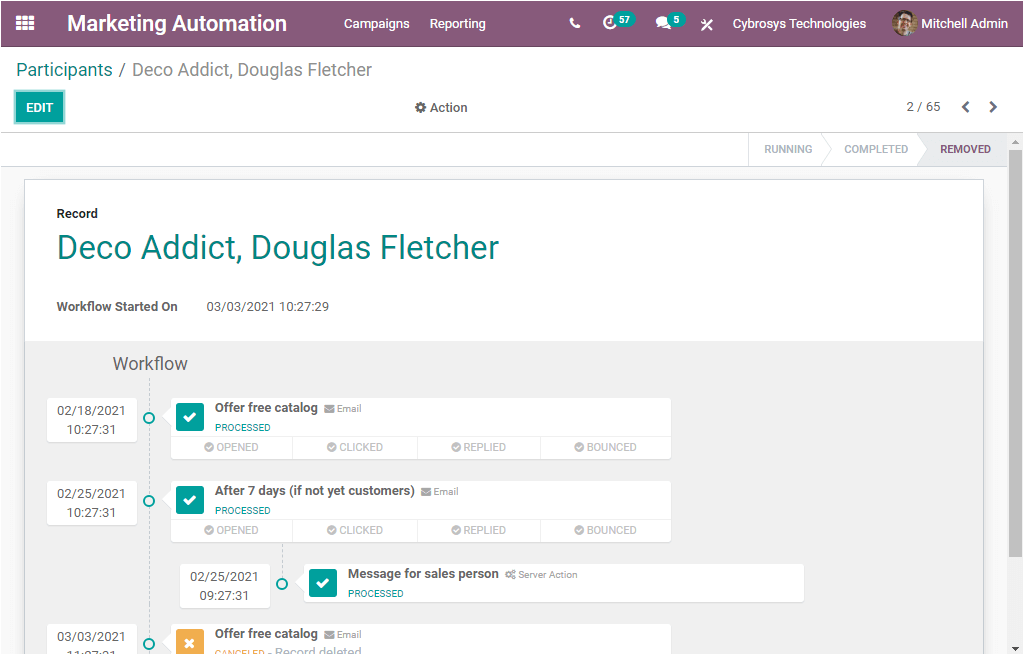
In the right upper portion of the window, you can view the status of the record. Here the status of the record shows Removed. Removed means that the related record does not exist anymore. Then you can view the record name and the workflow started to date and time. Then you can view the workflow. In the top left corner of the window, you can view the EDIT menu which will allow you to make modifications to the data if required.
Back to the Participants window, here in the window, Odoo offers you the various customizable and default options. You can view these options on the top right side of the window as marked in the given screenshot

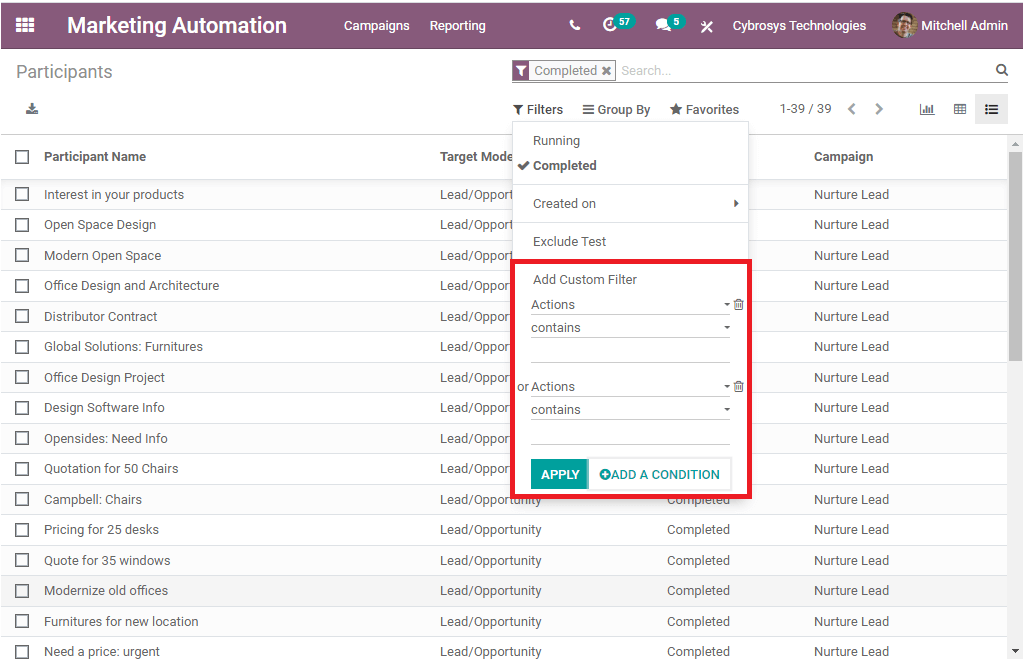
The Search option will permit you to search your required record. The Filters option available under the search option will allow you to sort the data in different aspects. On selecting the option you will be depicted with a dropdown menu as shown in the figure below.
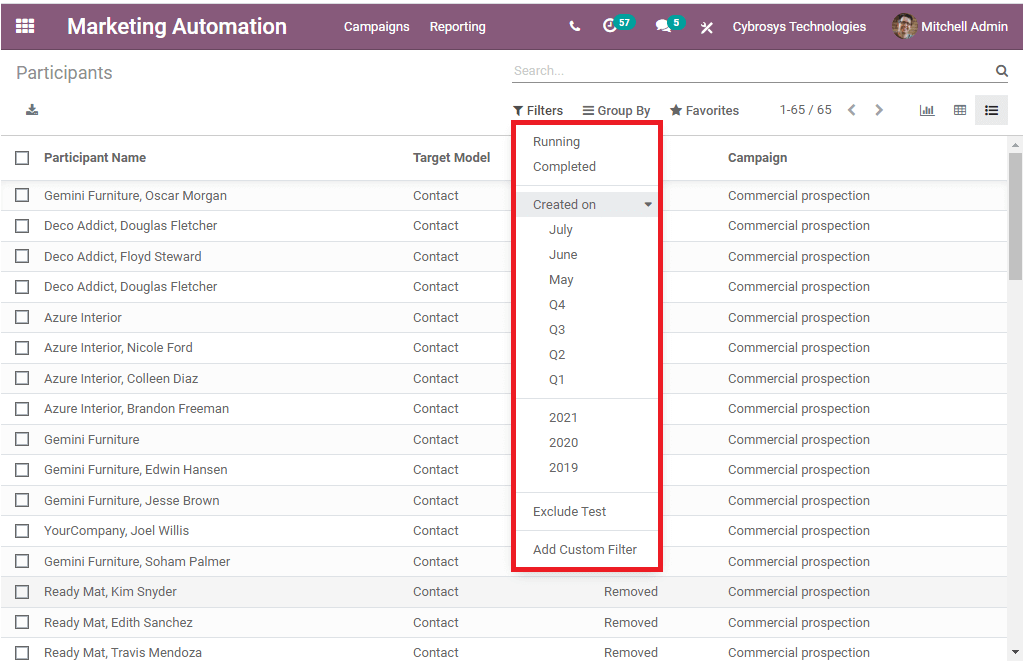
This pop-up window includes the following options.
> Running
> Completed
> Created on
> Exclude Test
> Add Custom Filter
If you select the Running option, you can view the participant’s record available in the Running status. In the same way, you can select the Completed option for sorting the data to the records with Completed the campaign. Moreover, you can view the participant’s window month-wise and year-wise by selecting the Created on option. Additionally, you also have the provision to add custom-made filters using the option Add Custom Filter. You can make use of this option based on your requirements. The custom filter option also allows you to add a condition. It will be very helpful for filtering the data on the basis of various aspects.
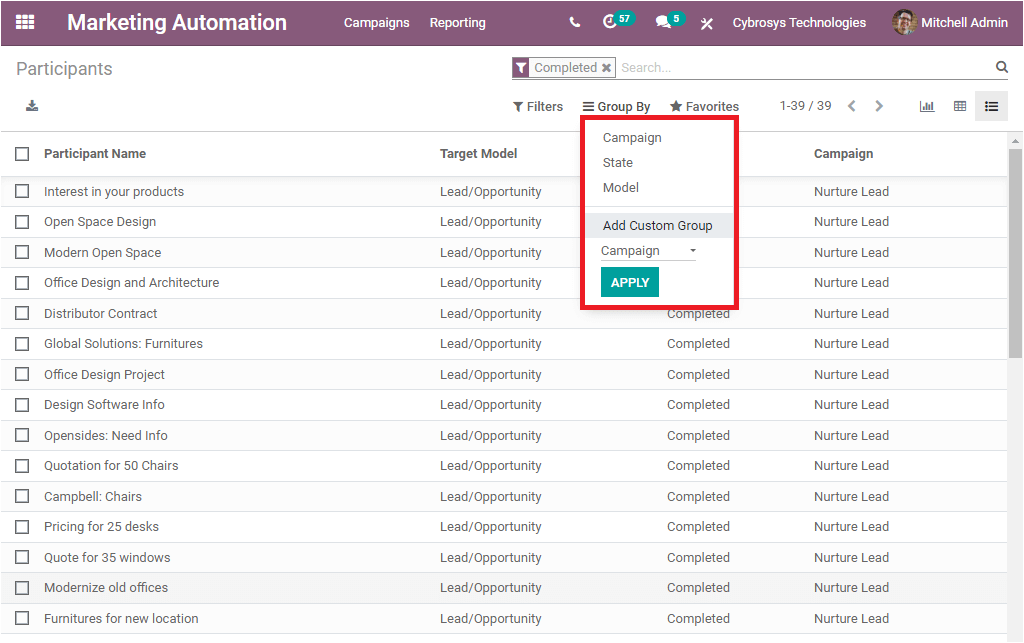
On the other hand, the Group By option allows you to categorize the available data into various groups. This option is very helpful when the platform has a large amount of data.
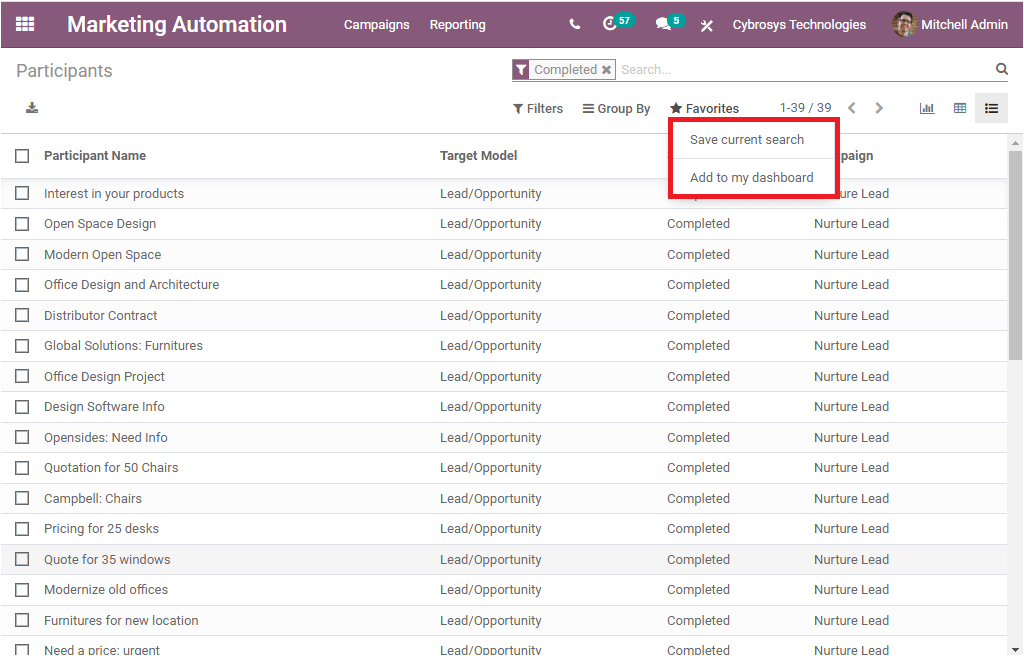
Here also you have the default and customizable option for shortlisting the data. The Favourite is the default option available in the window which will assist you in the searching of the data. This option helps to save the current searches. So it will be very helpful for future reference.
The Pivot view of the Participants window will look like in the below image.
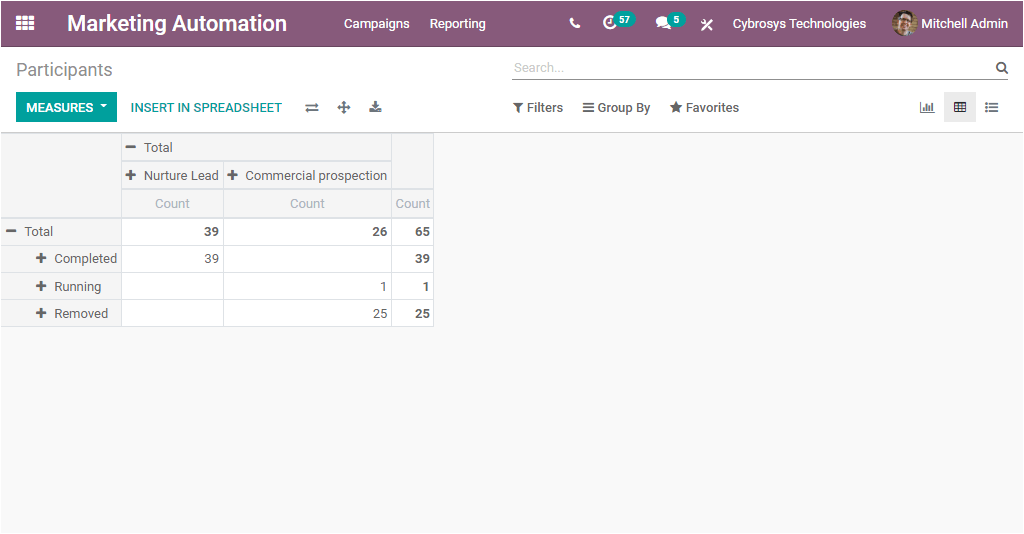
In the Pivot view, we can view the data in tabular format. We can generate reports in various formats such as Campaign, Created by, Created on, Last updated by, Last updated on, Model, Record ID, Record model, State, and Test record.
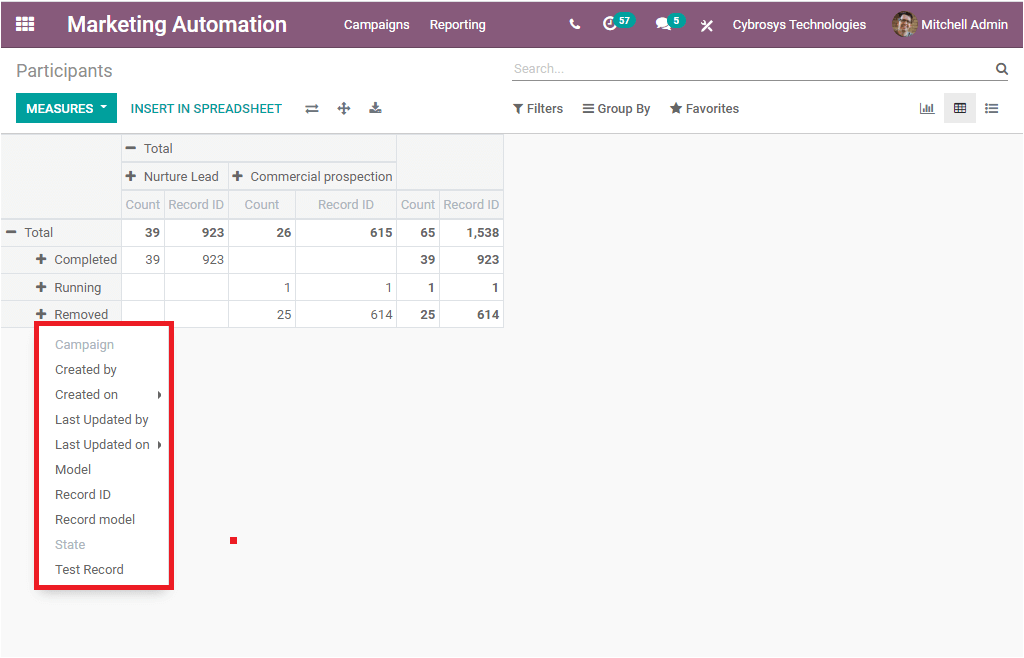
You might be able to place the data into a spreadsheet by accessing the INSERT IN SPREADSHEET option available. In addition, you may also view the options such as Flip axis, Expand all, and download XLSX, MEASURES on the top left side of the window.
Now we can discuss the graphical representation of the Participants window. In the graph view, you can view the data in various graphical representations such as Bar chart, Line Chart, and Pie Chart. You can generate the reports on the basis of Record ID and Count. You can access this option from the MEASURES tab.
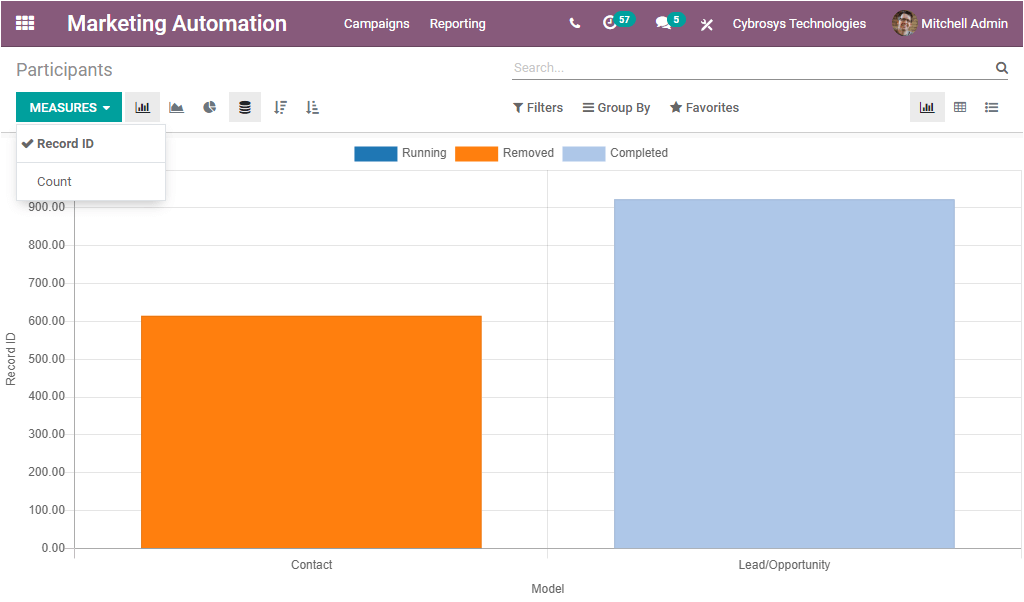
In the given graph, the X-axis displays the Model and the Y-axis shows the Record ID.
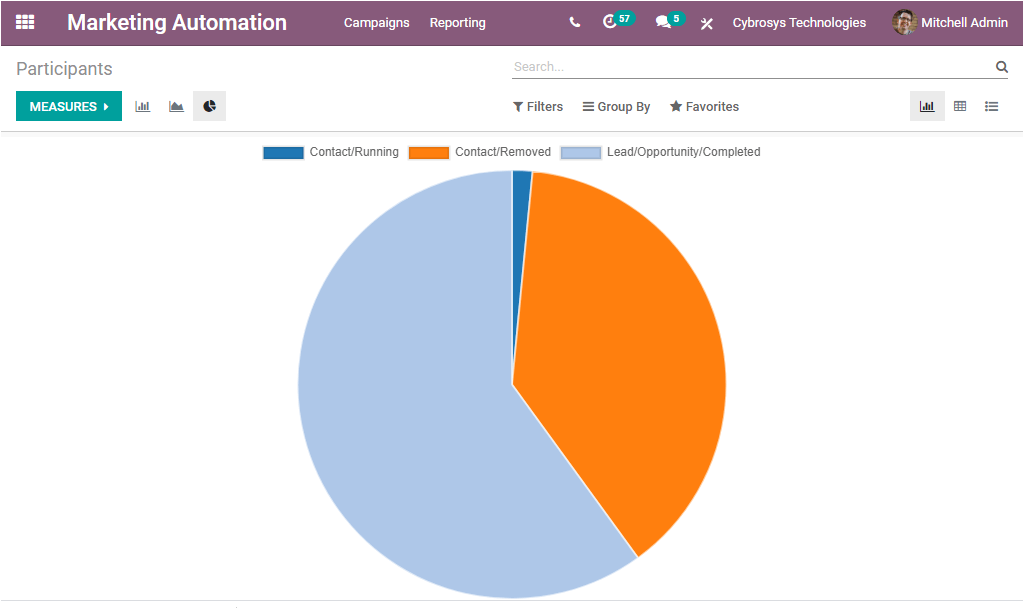
The Pie chart view of the window is displayed below.
Link Tracker
The Link Tracker menu available under the reporting tab of the Odoo Marketing Automation will allow you to enter the Link Statistics window as shown below.
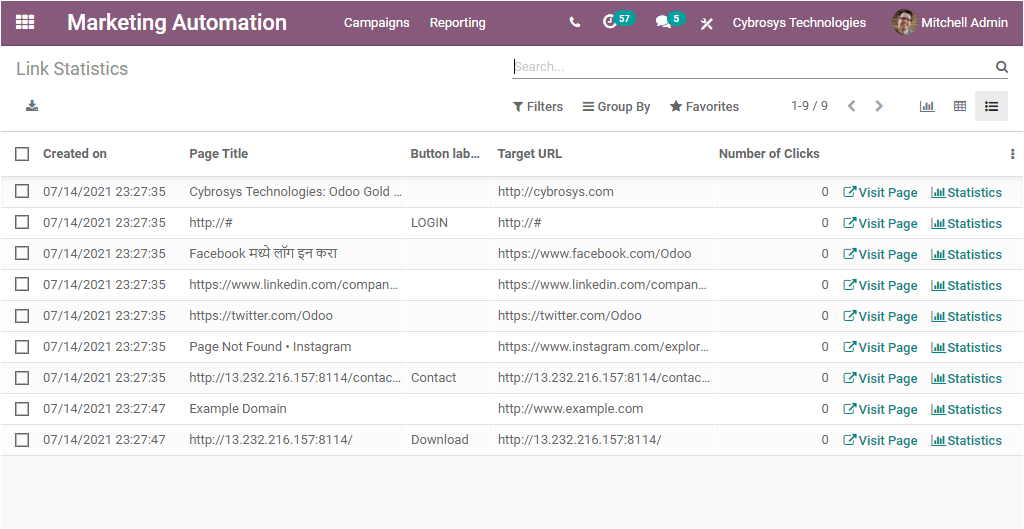
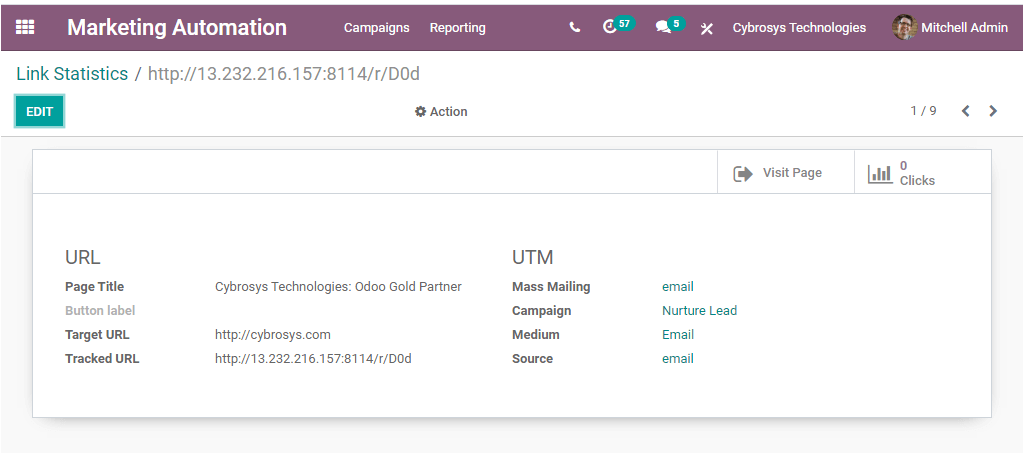
The above picture represents the Link Statistics window in List view. Here in the window, you can view all the Link statistics reports with the details such as Created on, Page Title, Button label, Target URL, and the Number of Clicks. It is also allowed to export each of the data to an excel sheet. For doing this, you can press on the Export All option available. In addition, you can view each of the records separately by clicking on them.
Odoo gives you the choice to make desirable changes by entering the EDIT button available. The graphical display of the window is also available. You can click on the View graph button available on the upper right portion of the window. The image of the window is given below.

This is the Bar Chart representation and the X-Axis represents the Target URL and the Y-axis denotes the Count. You can also bring reports on the basis of the Number of Clicks. For representing this measure, you can click on the MEASURES tab and select the option Number of Clicks.
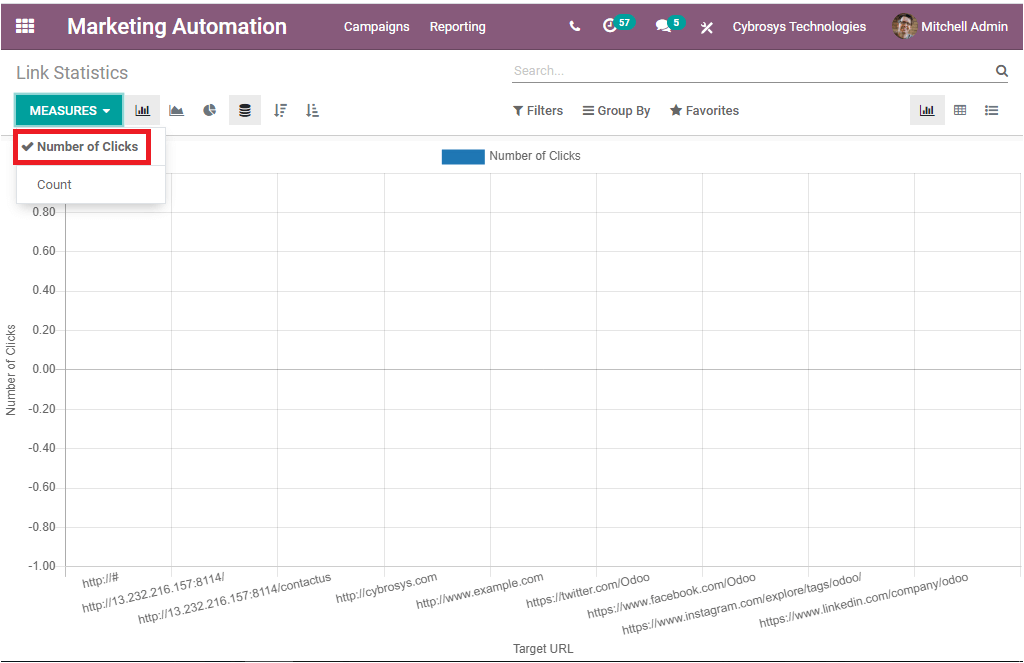
Here also you can view data in various views such as Bar Chart, Line Chart, and Pie Chart.
Traces
The Traces option available in the Reporting tab of the Odoo Marketing Automation will allow you to create and view various traces. This window can also be viewed in different views such as List view, Pivot view, and Graph view. First, let us discuss the List view option.
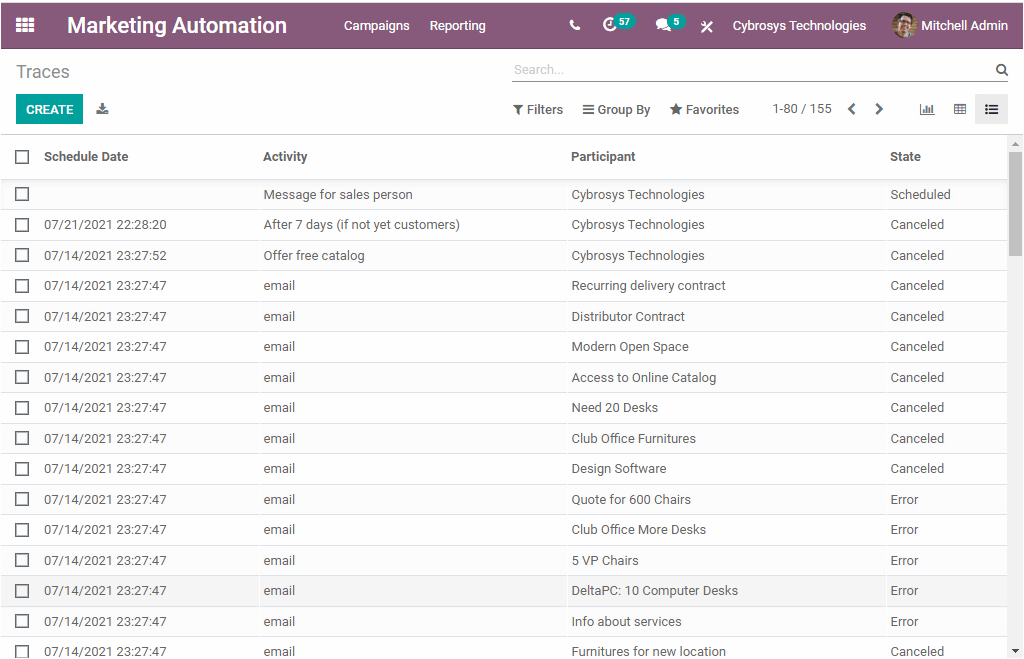
In the Traces window, you can view various Traces created in the platform along with the details of Schedule date, Activity, Participants, and the State. You can create new Traces by pressing the CREATE option available. The creation window is given below.
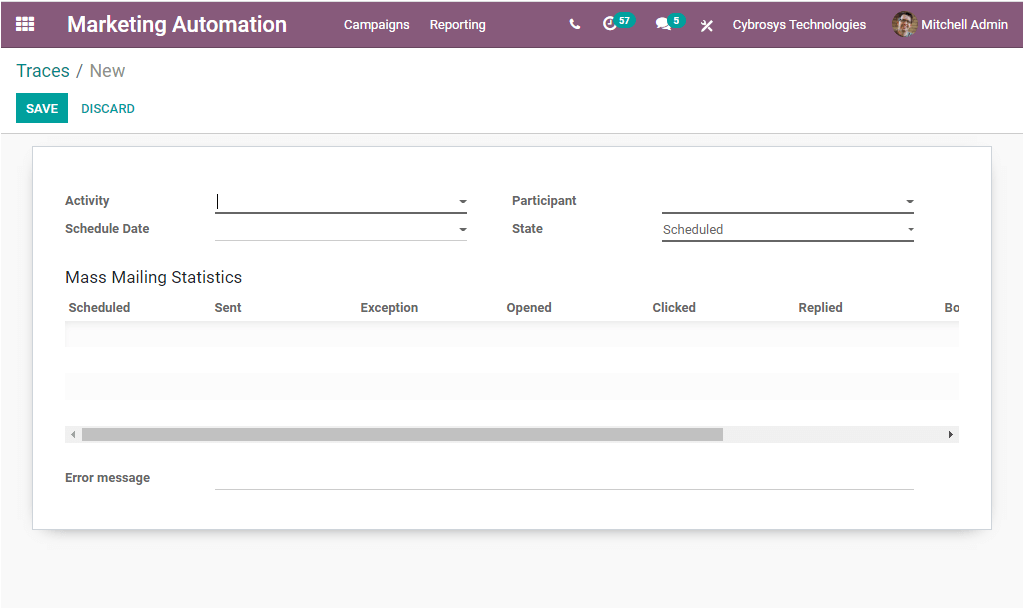
In the Traces creation window, you can assign an activity by selecting the dropdown menu available. After that, you can provide the Schedule Date using the calendar view. Also, the Participant’s name can be allocated along with the State. This can be selected from the dropdown menu where you can view different options such as Scheduled, Processed, Rejected, Cancelled, and Error. Moreover, you can also view the Mass Mailing Statistics and Error message options. After giving the required information, you can press the SAVE button to save the details.
Now let us have a view at the Pivot representation of the Traces window. The image of the pivot view is given below.
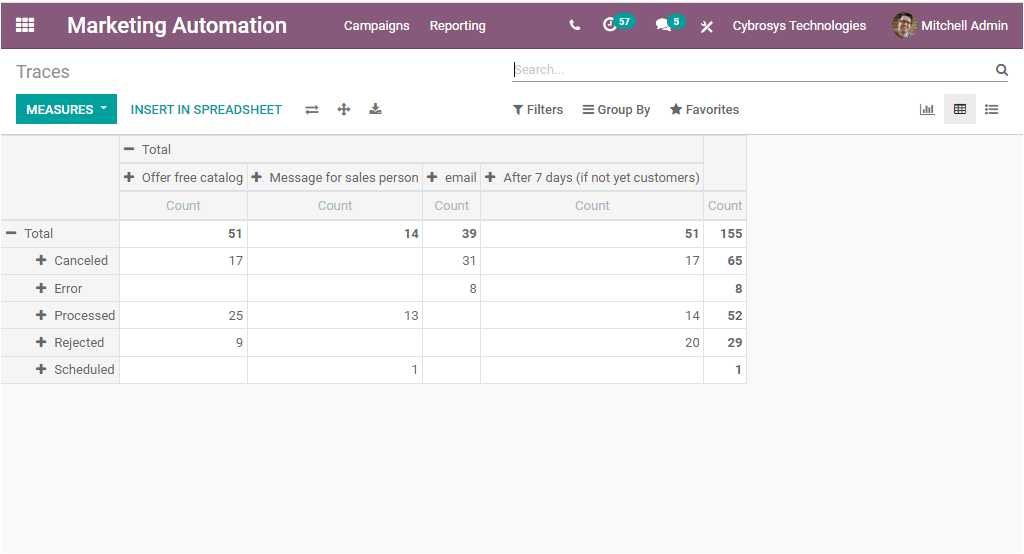
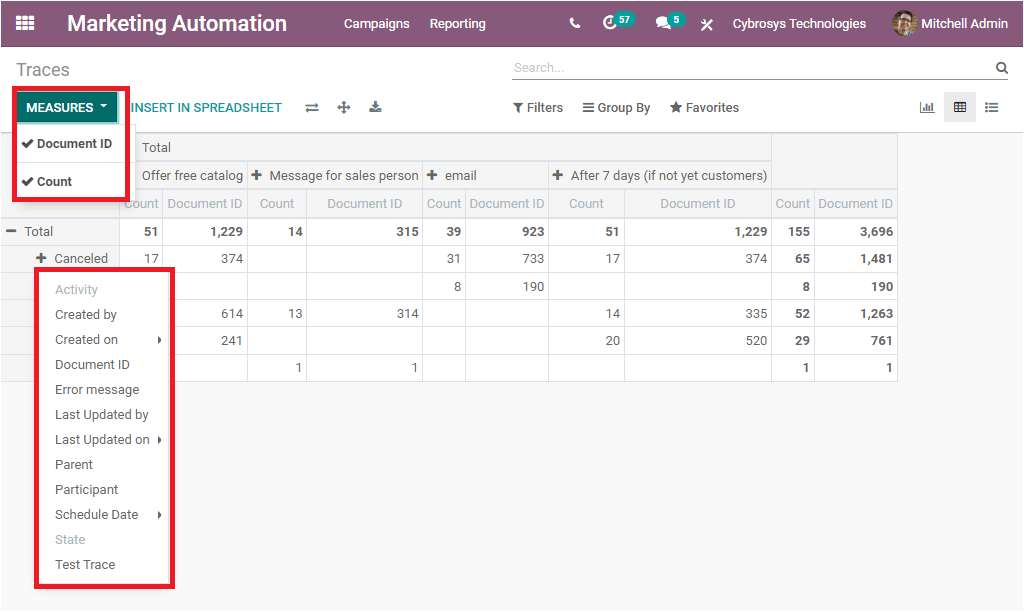
With the Pivot view, Odoo lets you represent the data in tabular format. You can view the window in different measures such as the Count, Document ID, and in terms of both as depicted in the below image.
The Odoo Marketing Automation module automates all your marketing tasks and also helps for evaluating all your workflows in an exclusive manner. You can also read the below-given blog for knowing more about Odoo Marketing Automation