The Calendar module of Odoo19 ERP makes it simple to schedule online appointments based on the presence of clients and staff in the business. You may simply manage and handle the appointments after installing the Odoo19 Appointment module, which is accessible through the Odoo19 Software app store. When you meet with coworkers and other people, their role helps you lower the hazards.
Appointment
The Calendar module's main page has the option. The specific information on the page is displayed below.
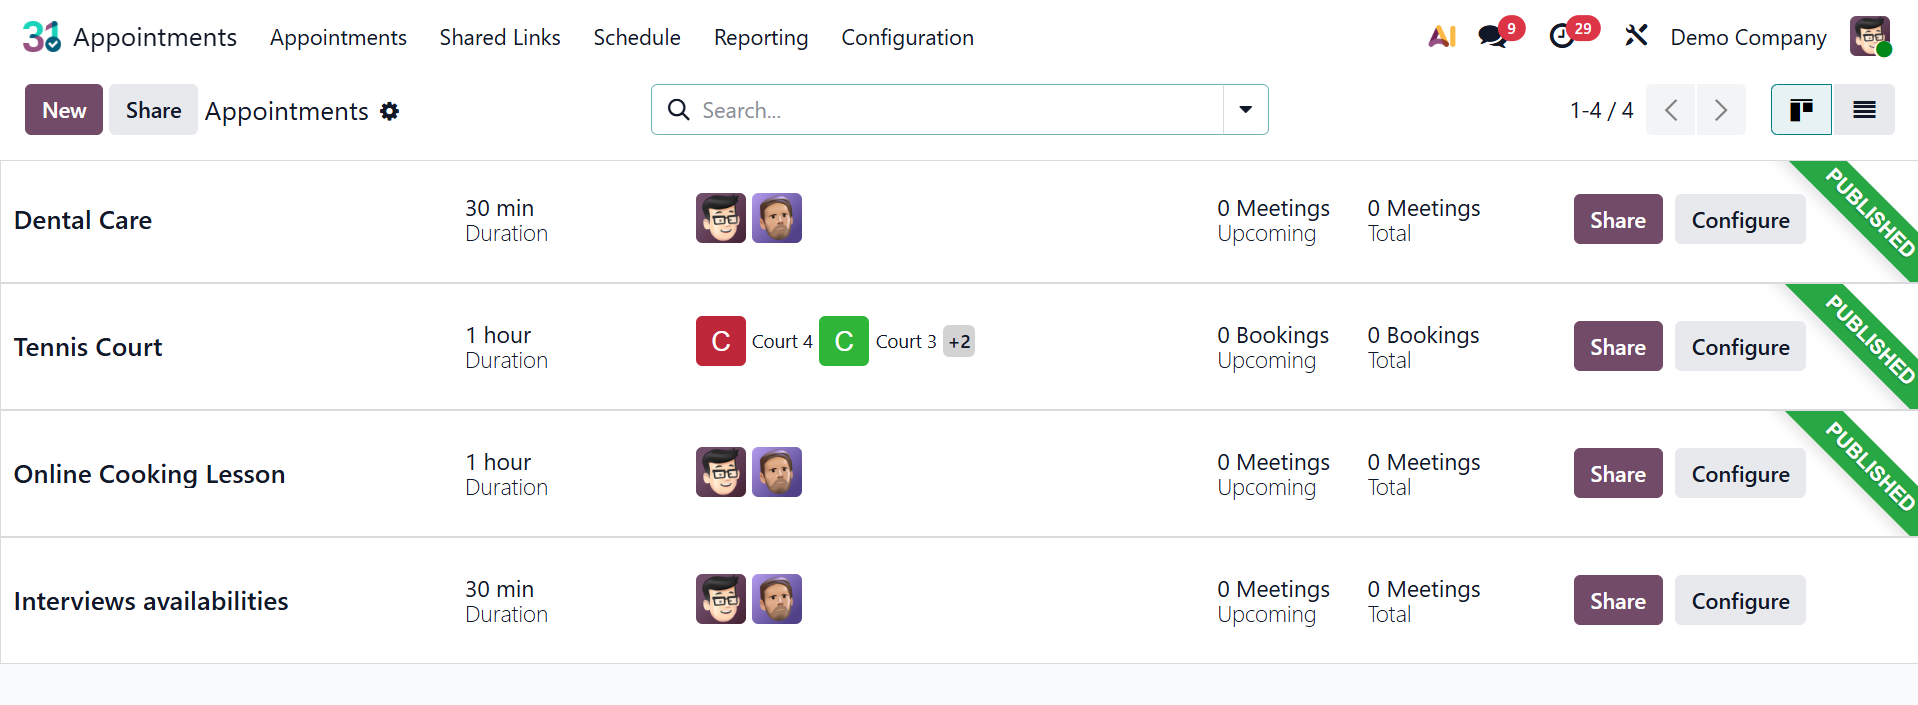
You will see a list of previously scheduled online appointments, as seen in the screenshot above. Options such as appointment title, duration, user, scheduling window, and action are available there.
- Share: The Share icon enables users to copy or distribute the appointment type's public booking link, enabling clients to make online reservations.
- Configure:This icon offers rapid access to change the appointment's advanced parameters, including availability, questions, reminders, and communication choices.
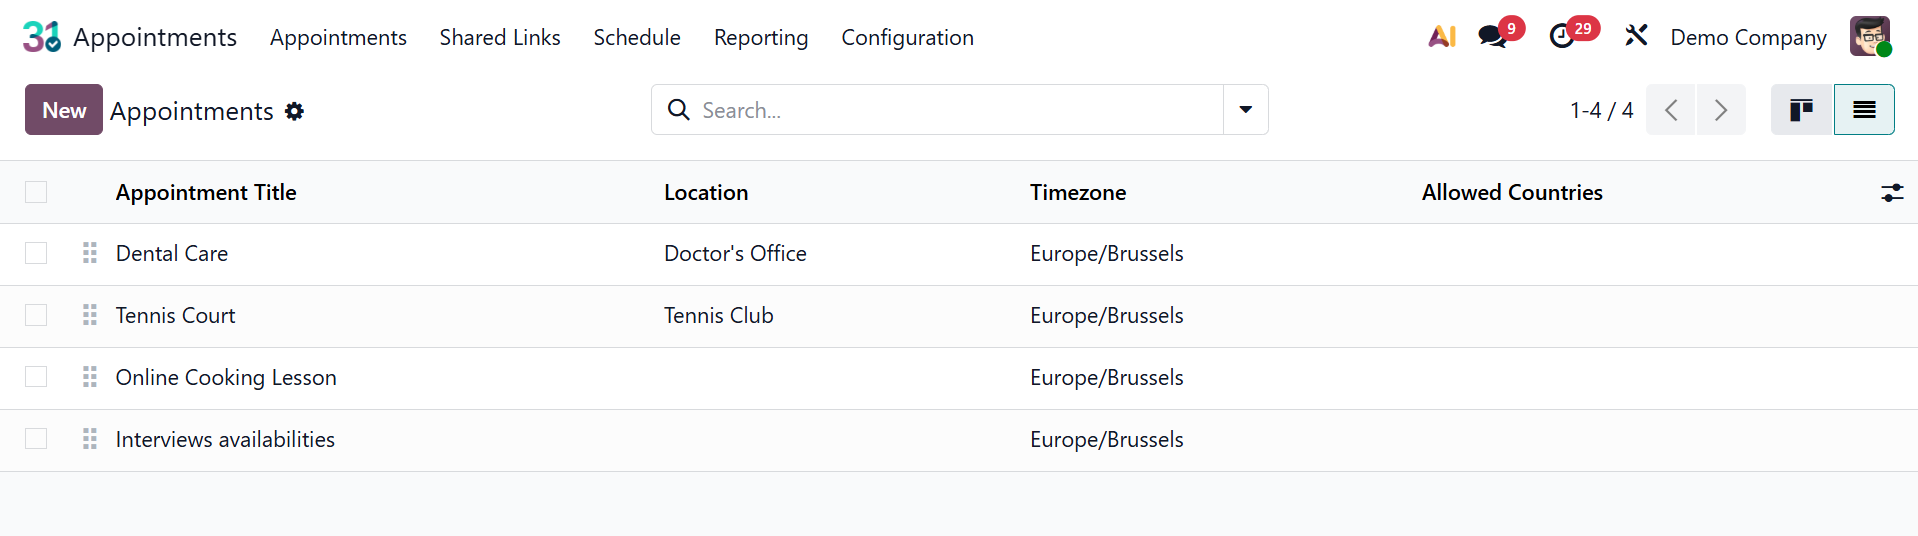
The page can also be viewed in list view.
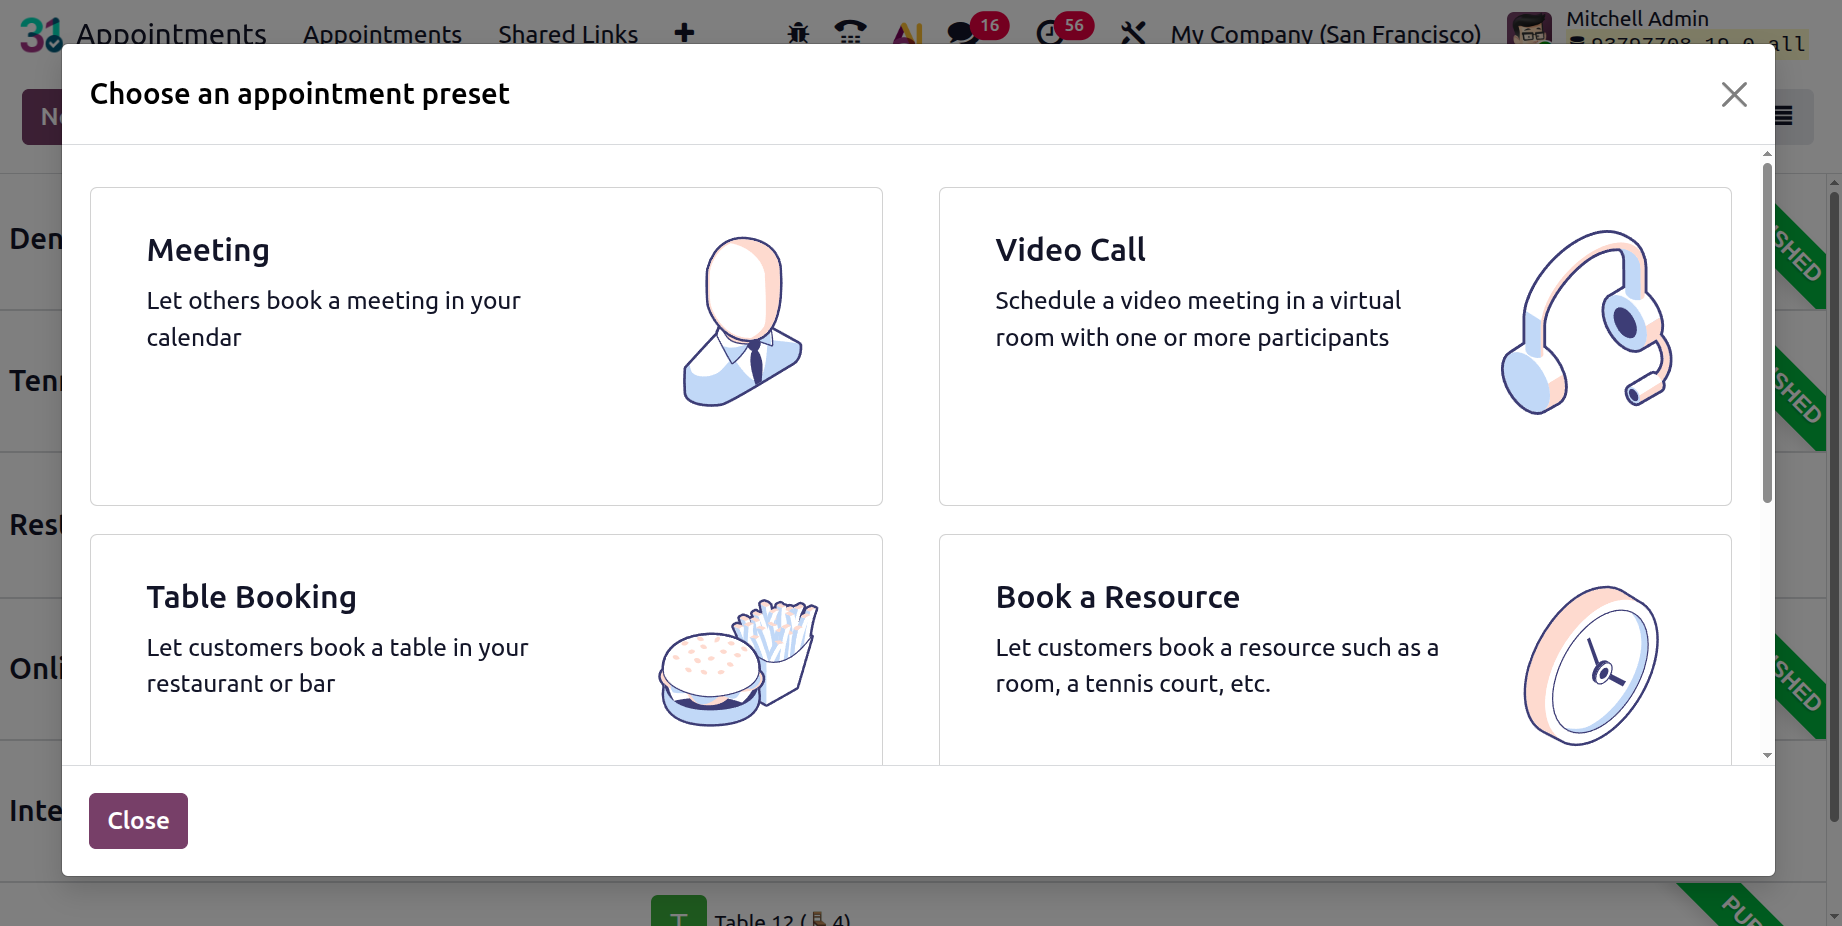
To schedule a similar appointment, simply click the New button shown in the image above. A new window to select appointment presets will emerge when you click this New button. The preset icon allows you to choose and use a pre-made appointment template that, for faster creation, automatically fills in parameters like availability, duration, and configuration.
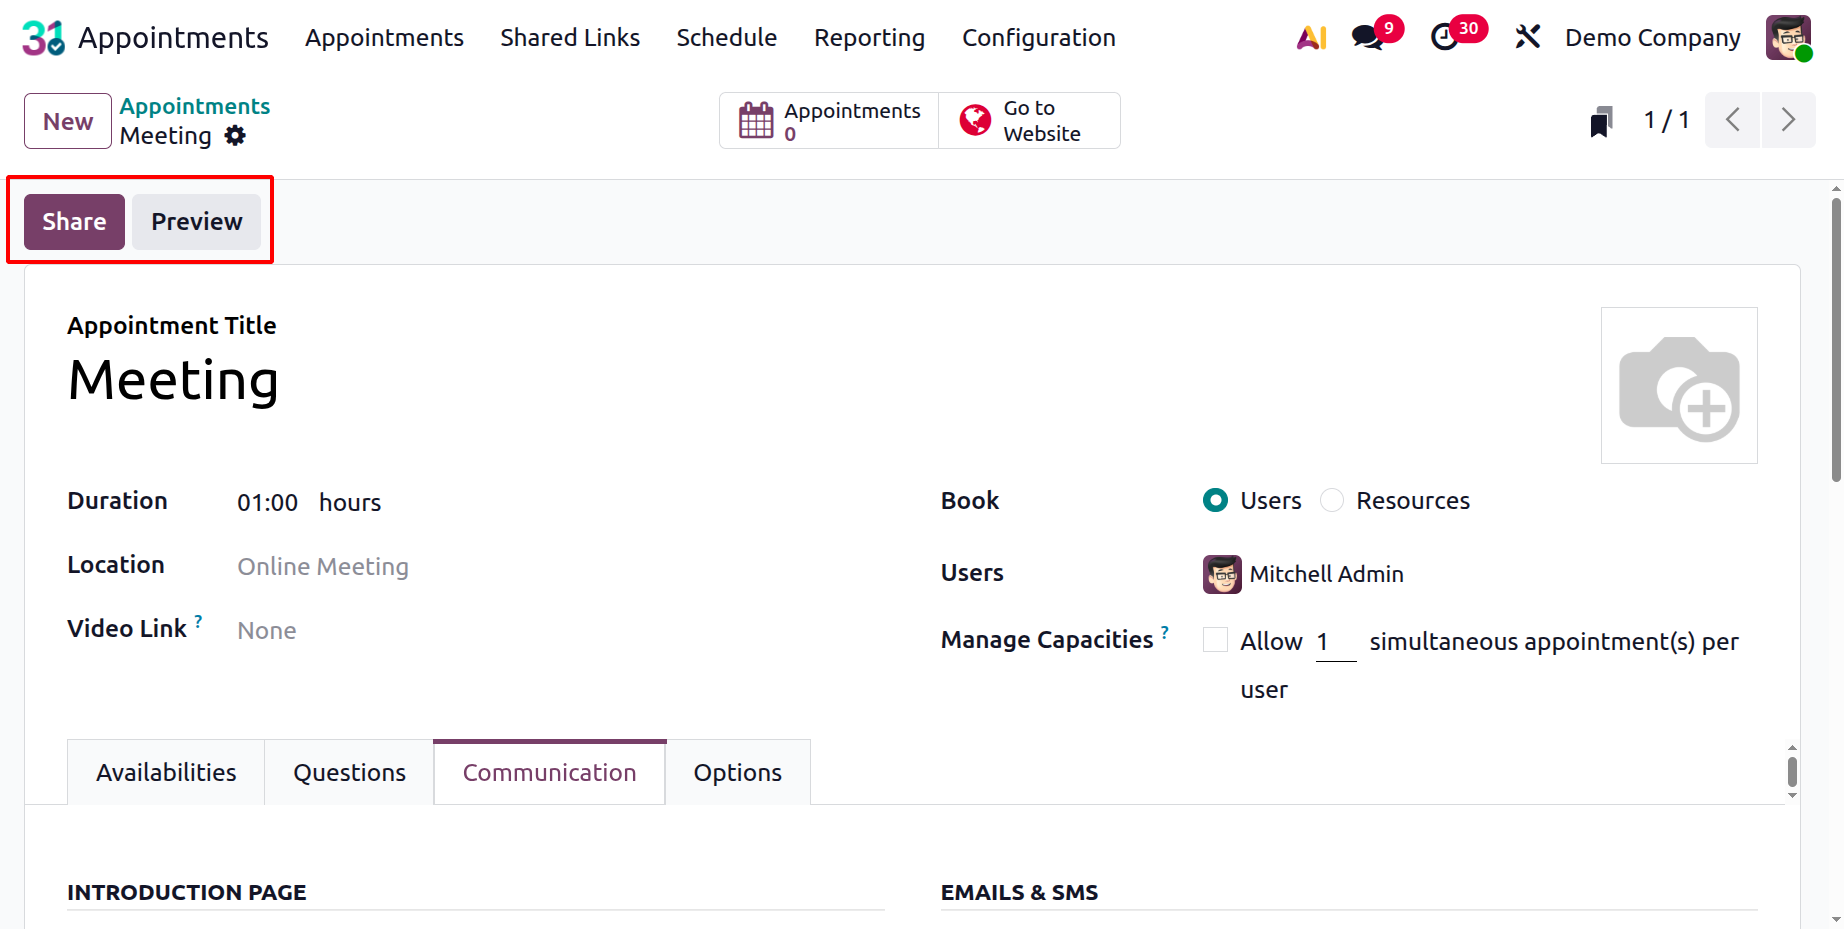
There is a section on the creation page where you can enter special information about scheduling online appointments. The Appointment Title option requires the appointment name to be entered. The Duration option allows you to specify how long the meeting will last. You can schedule the meeting at the designated location, depending on how long the appointment takes.
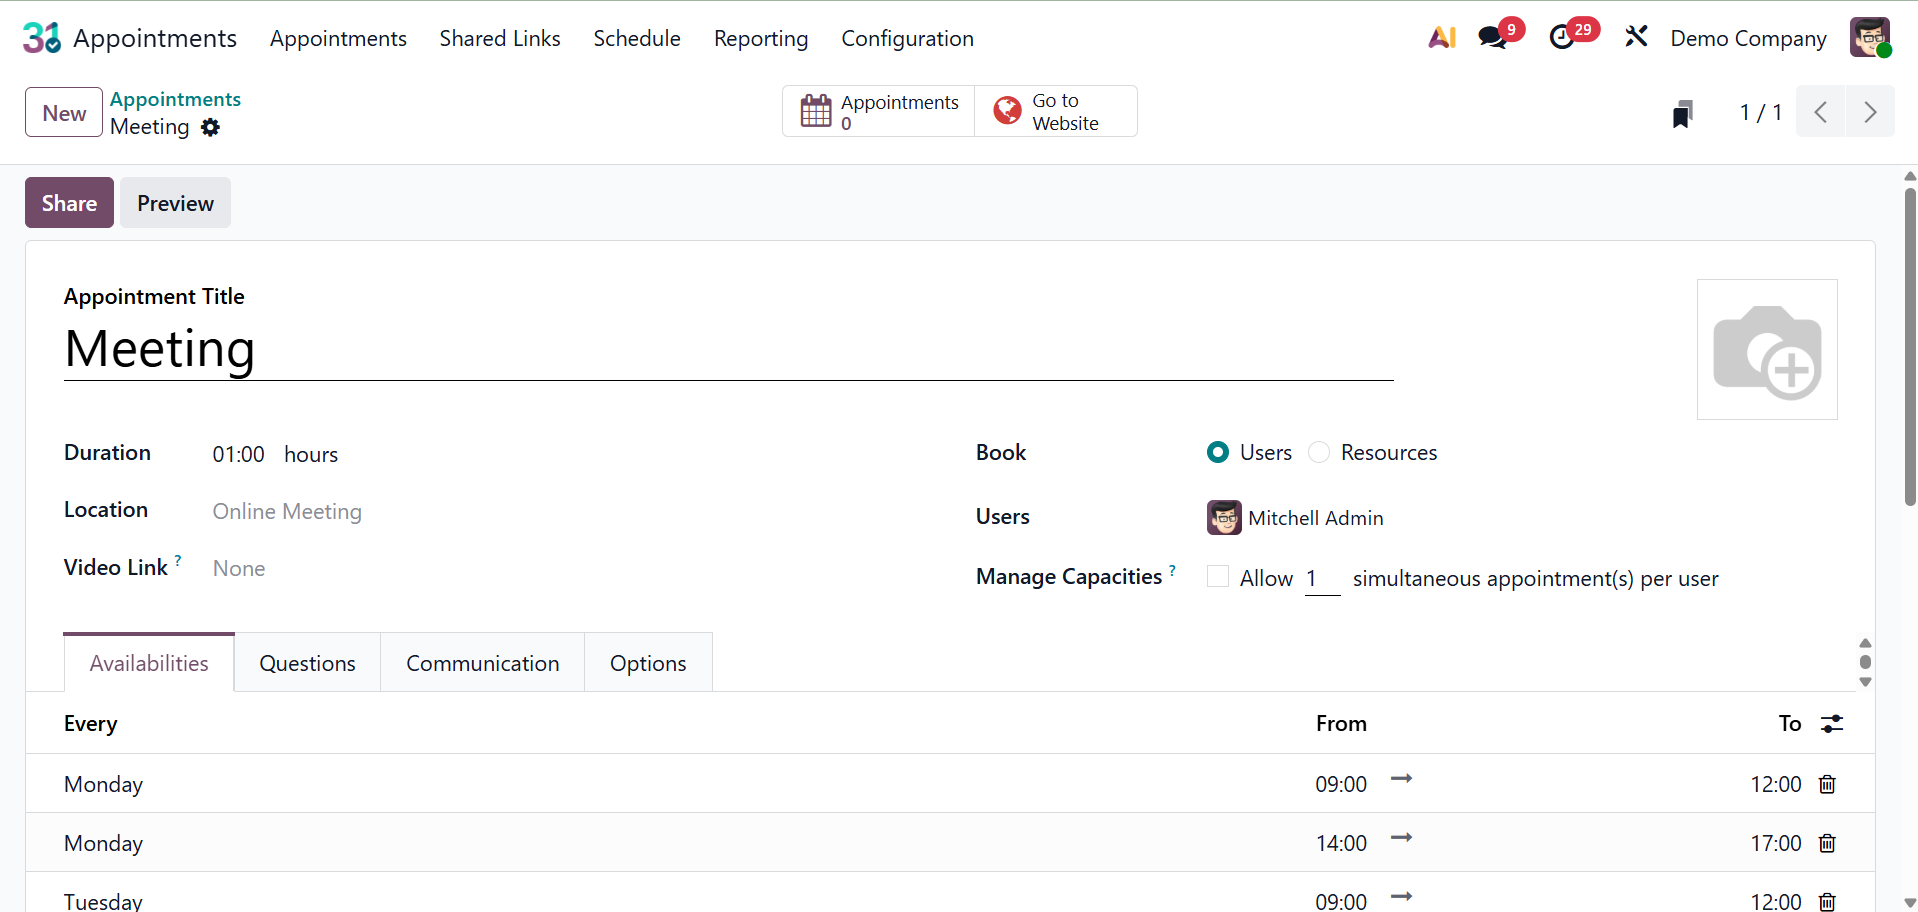
- Video Link: Enables clients to participate virtually by adding an online meeting link to the appointment.
- Book: Choose the relevant radio button to indicate whether this appointment type is based on Users or Resources.
- User: Recruiting interviews, sales meetings, and demos can all be scheduled using user-based appointment types.
- Resources: Time in particular rooms or places can be scheduled using resource-based appointment types.
- Manage capacities: Prevents overload by limiting the number of appointments or persons who can be scheduled at once.
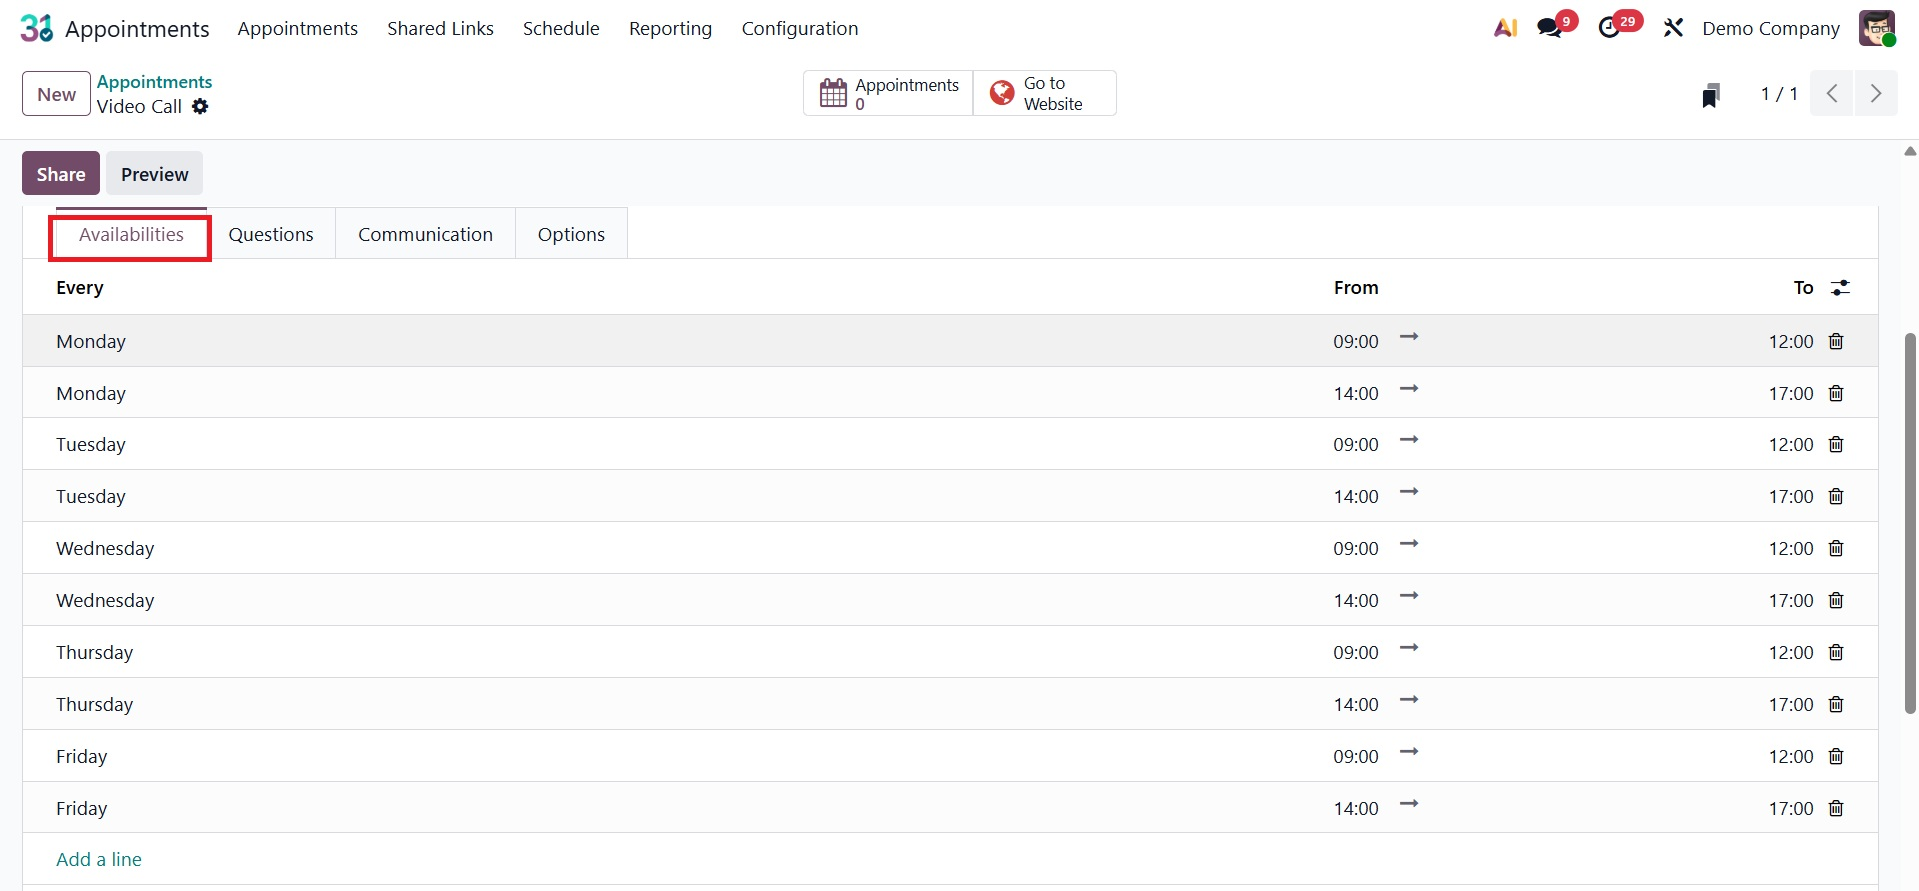
The "Add a Line" option under the Availabilities Tab allows you to specify which days of the week the appointment is available. The starting time of availability, or the earliest time of day that clients can schedule an appointment, is determined by the "From" option. The "To" choice determines the last time in a day that appointments can be made, or the finishing time of availability.
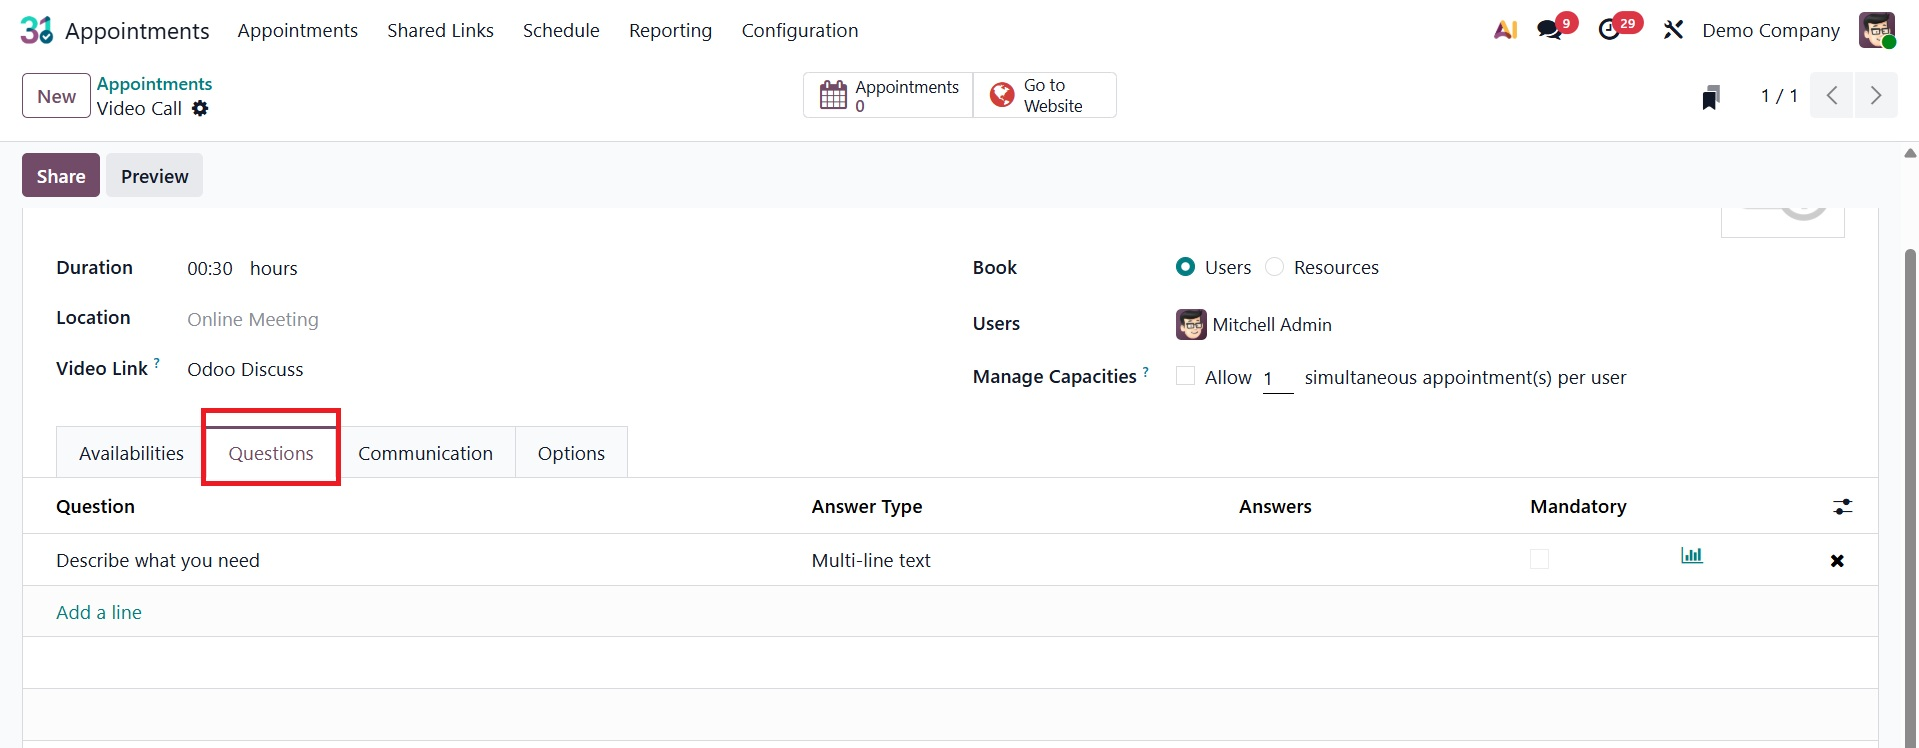
As you can see in the image above, you will notice the Questions Tab, where you can enter questions regarding the next visit. To add the questions, choose the Add a Line option, which will lead you to a new page as seen below.
On selecting the Add a Line option, you will get a pop-up, as shown below.
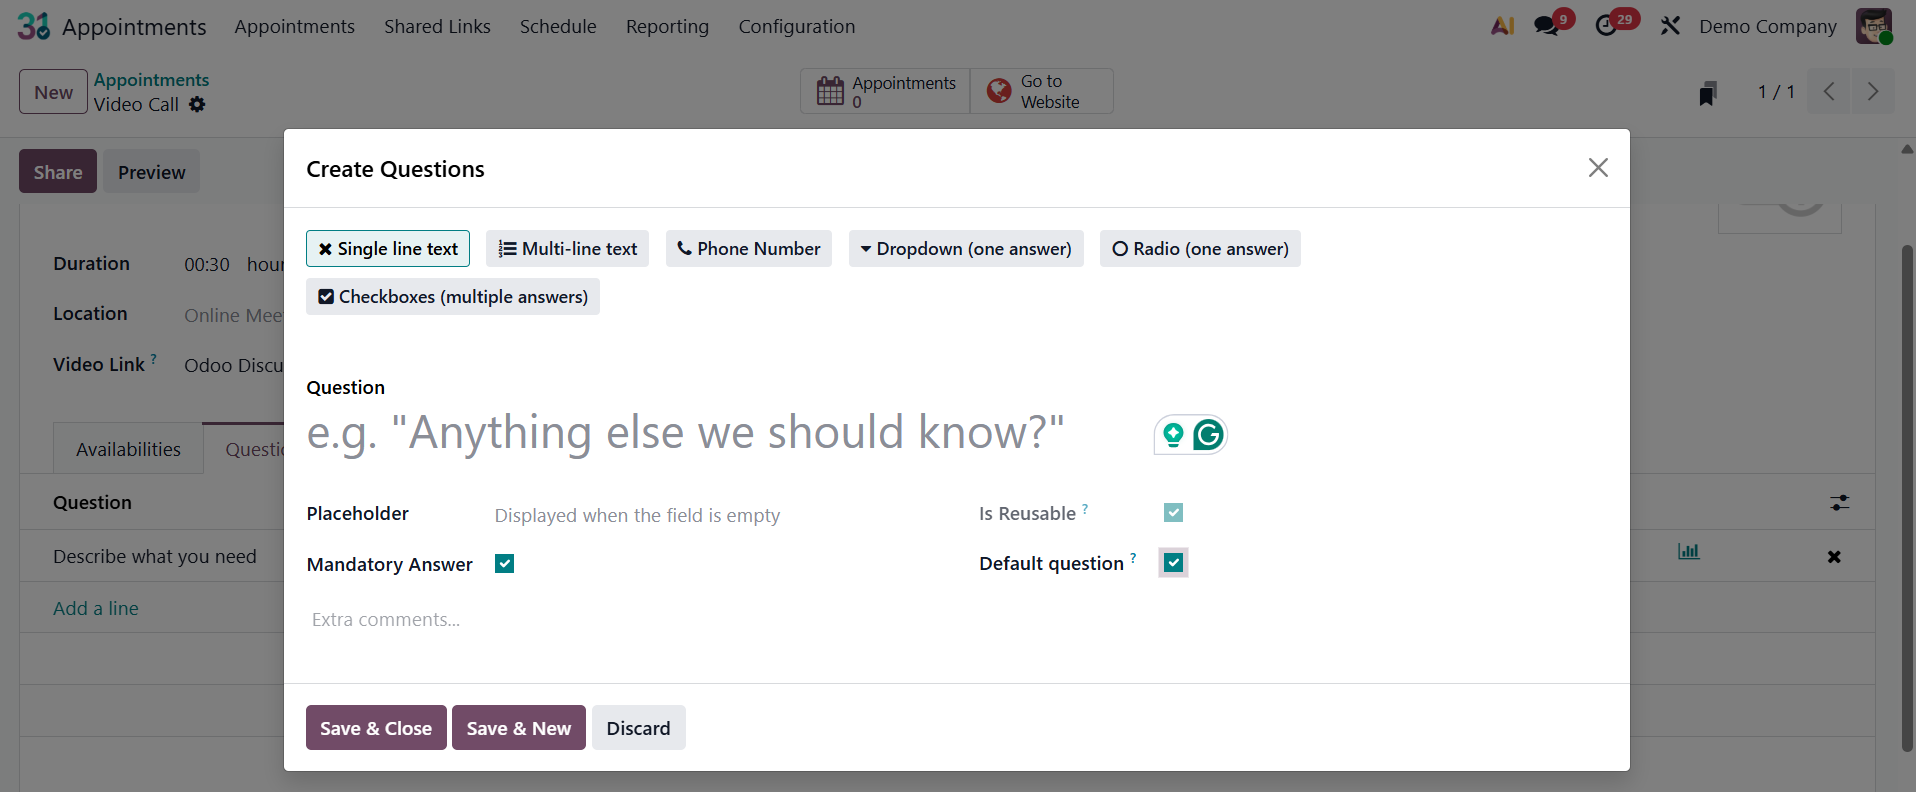
On the questions creation page, you can make reference to the questions in the space provided. The question type can be adjusted to radio, dropdown, checkboxes, single-line text, or multi-line text. You can respond to the question and choose the mandatory answer choice if it calls for one. You can activate the default question option as well.
Under the Communication tab, you have the options, as follows.
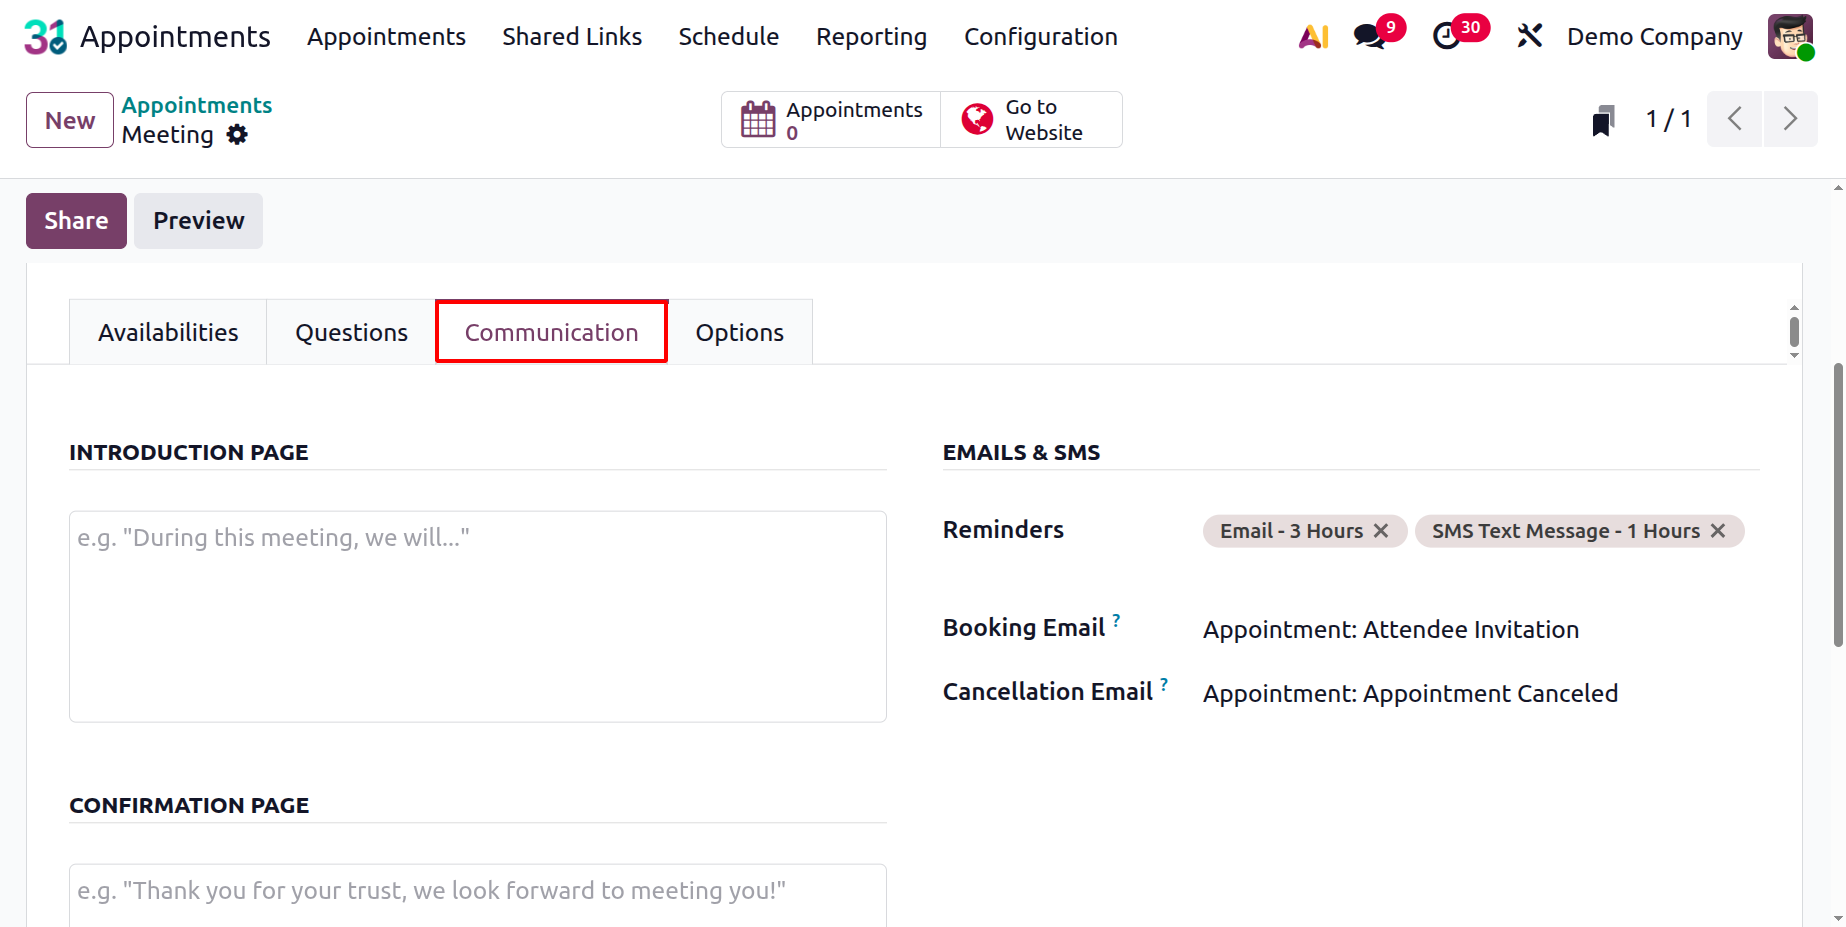
- Introduction Page: This page displays an introductory message or description to customers before they book an appointment.
- Confirmation Page: This page appears after a customer completes a booking, showing a confirmation message and appointment details.
- Email and SMS: This section allows configuration of the email content, subject, and template used for appointment bookings, reminders, and cancellations.
The Front-End Display field regulates how clients view the appointment on the website in the relevant locations under the Options Tab
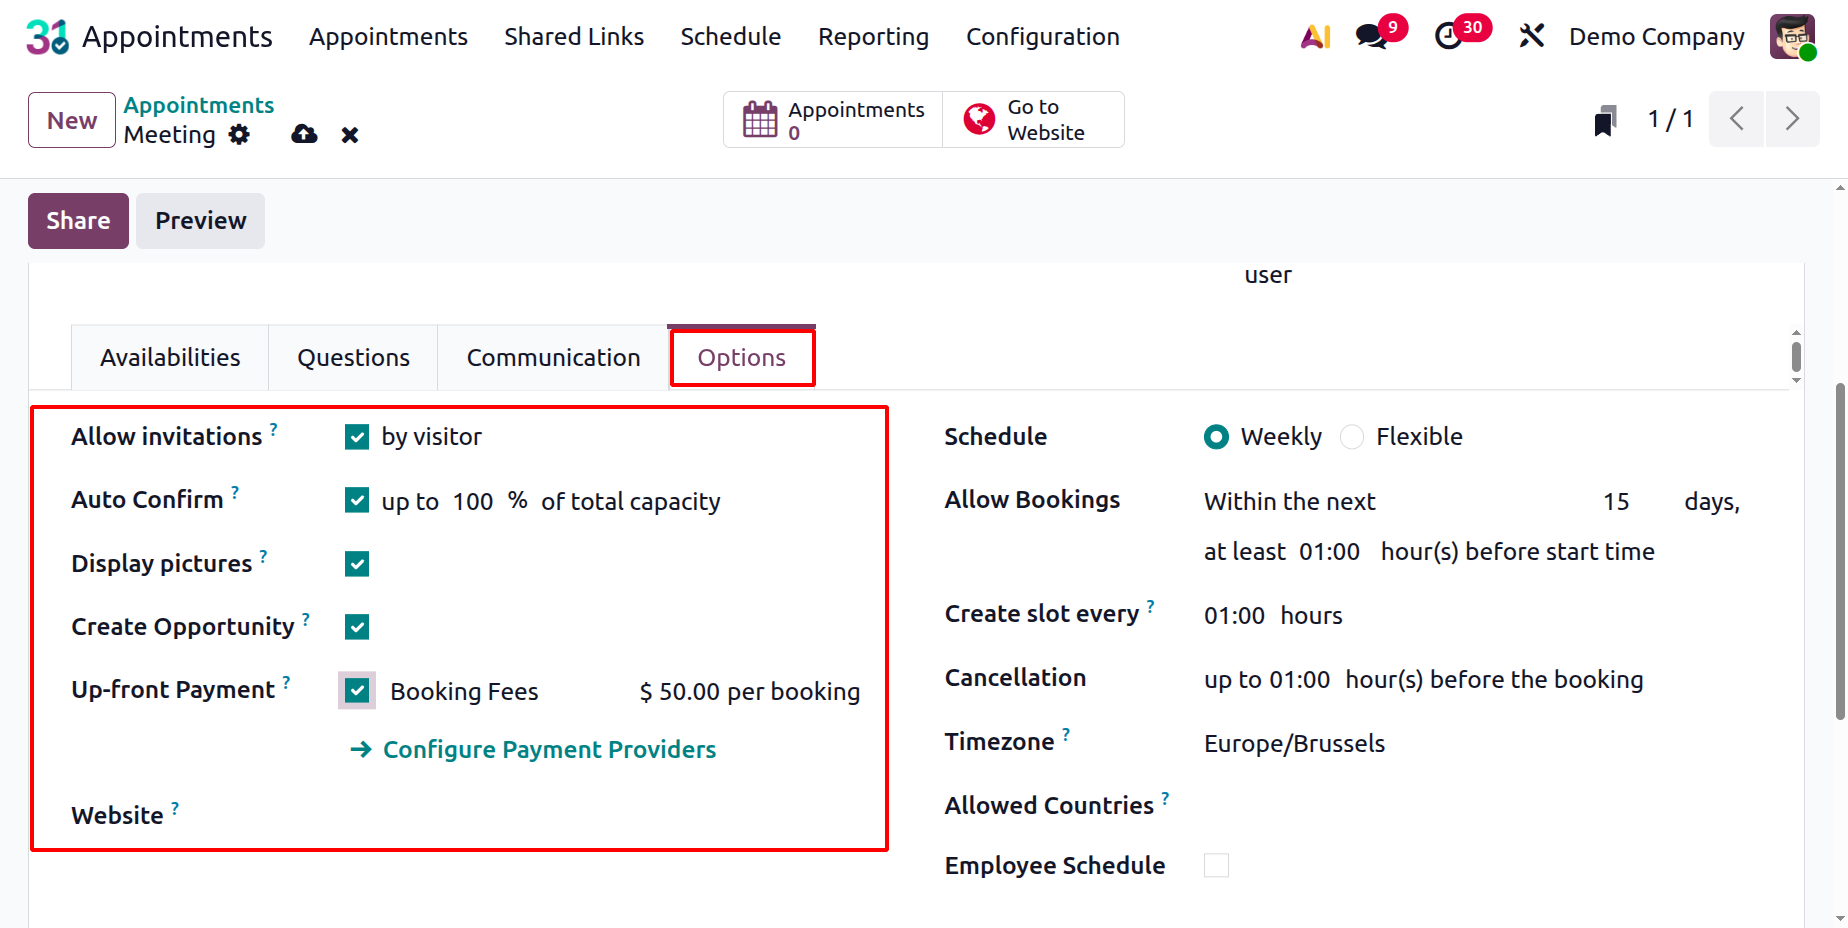
- Allow Invitation:Enables invited users or employees to share or invite others to the same appointment.
- Auto Confirm:Automatically confirms an appointment booking without requiring manual approval.
- Display Picture:Shows the organizer’s or employee’s profile picture on the appointment booking page.
- Create Opportunity:Automatically creates a CRM opportunity in Odoo when a visitor books the appointment.
- Up Front Payment:Requires customers to make a payment in advance to confirm their booking. When this option is activated, the consumer is sent to a payment page to finish the transaction using one of the configured online payment providers (such as Stripe, PayPal, or Adyen) during the online booking process for a certain appointment type. Only after the payment has been successfully processed is the appointment deemed confirmed.
- Website:Specifies on which website the appointment type will be available for online booking.
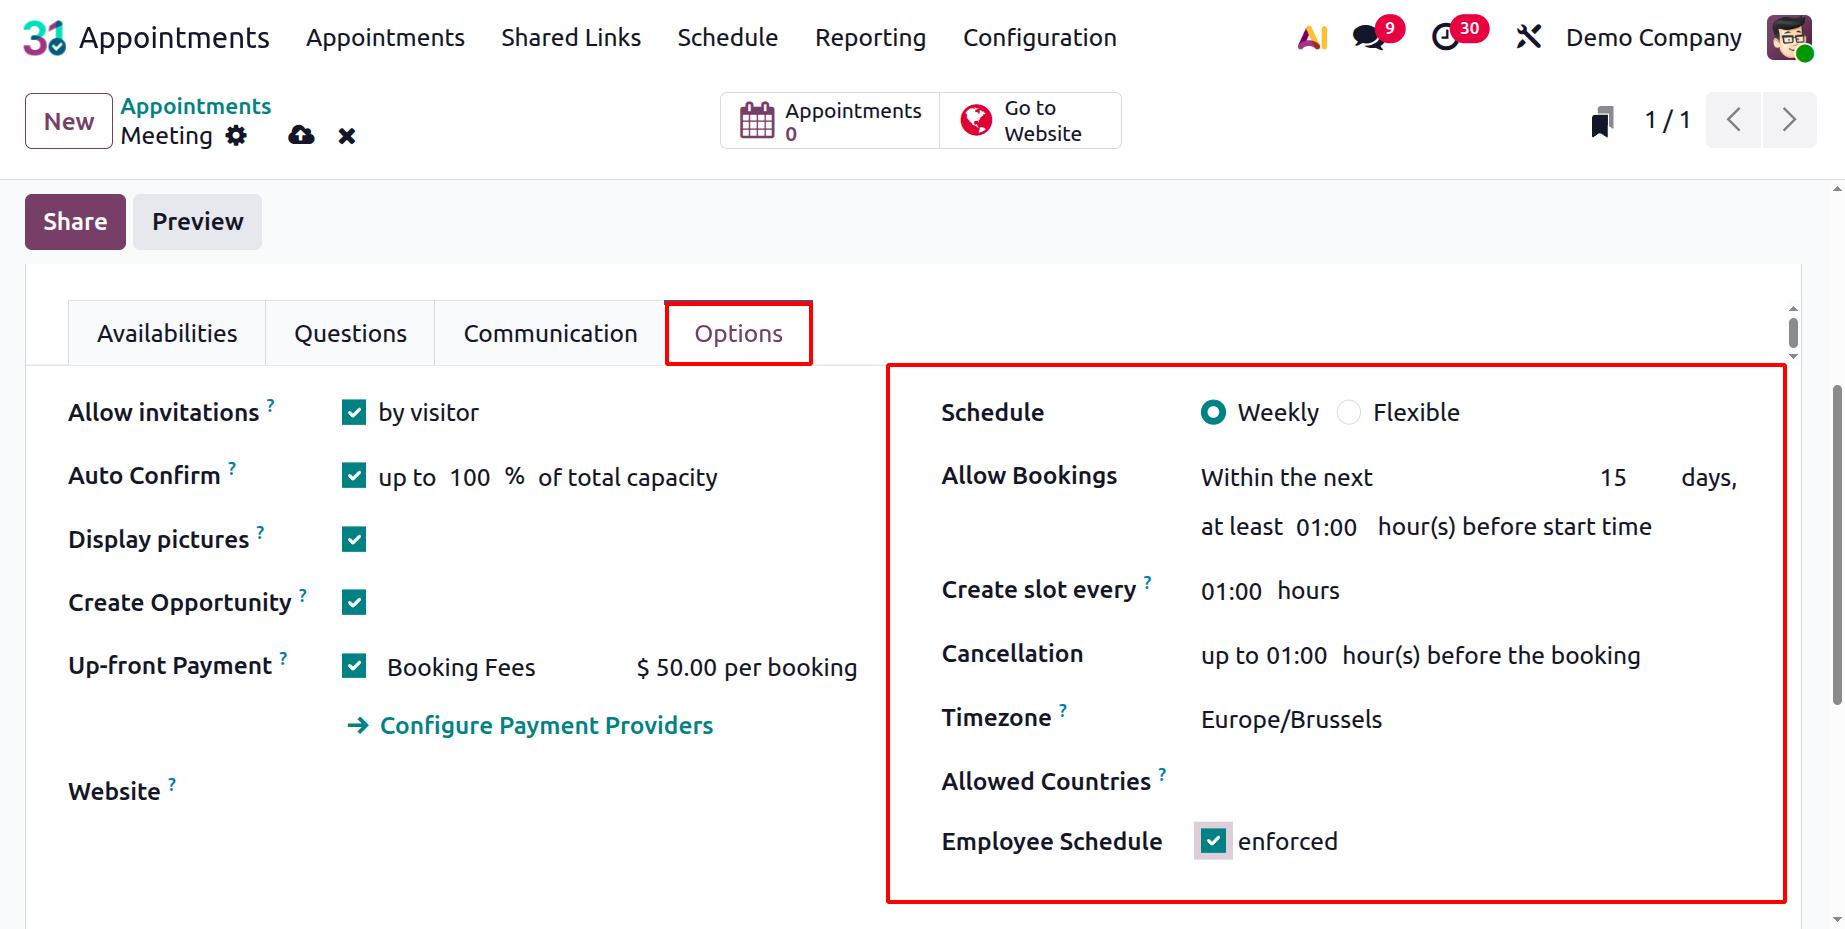
- Schedule: Defines the working hours and availability time slots for the appointment.
- Allow Booking:Allows customers or users to book appointments online for the selected type.
- Create Slot Every: Sets the time interval (e.g., 15 or 30 minutes) between available booking slots.
- Cancellation: Defines the rules or time limits within which customers can cancel their appointments.
- Timezone: Determines the time zone used for displaying and scheduling the appointment times.
- Allowed Countries: Restricts appointment bookings to customers from selected countries only.
- Employee Schedule:Allows configuration of employee-specific working hours and availability for appointments.
After the creation process is finished, you can select the Save icon. There, you can have a Preview icon. The Odoo appointment creation page's Preview icon, which frequently appears as a "Preview" button, enables the user to examine the appointment booking page from the viewpoint of a client or attendce.
Simply select the Go To Website option, as seen in the image below, to have this appointment listed on the website.
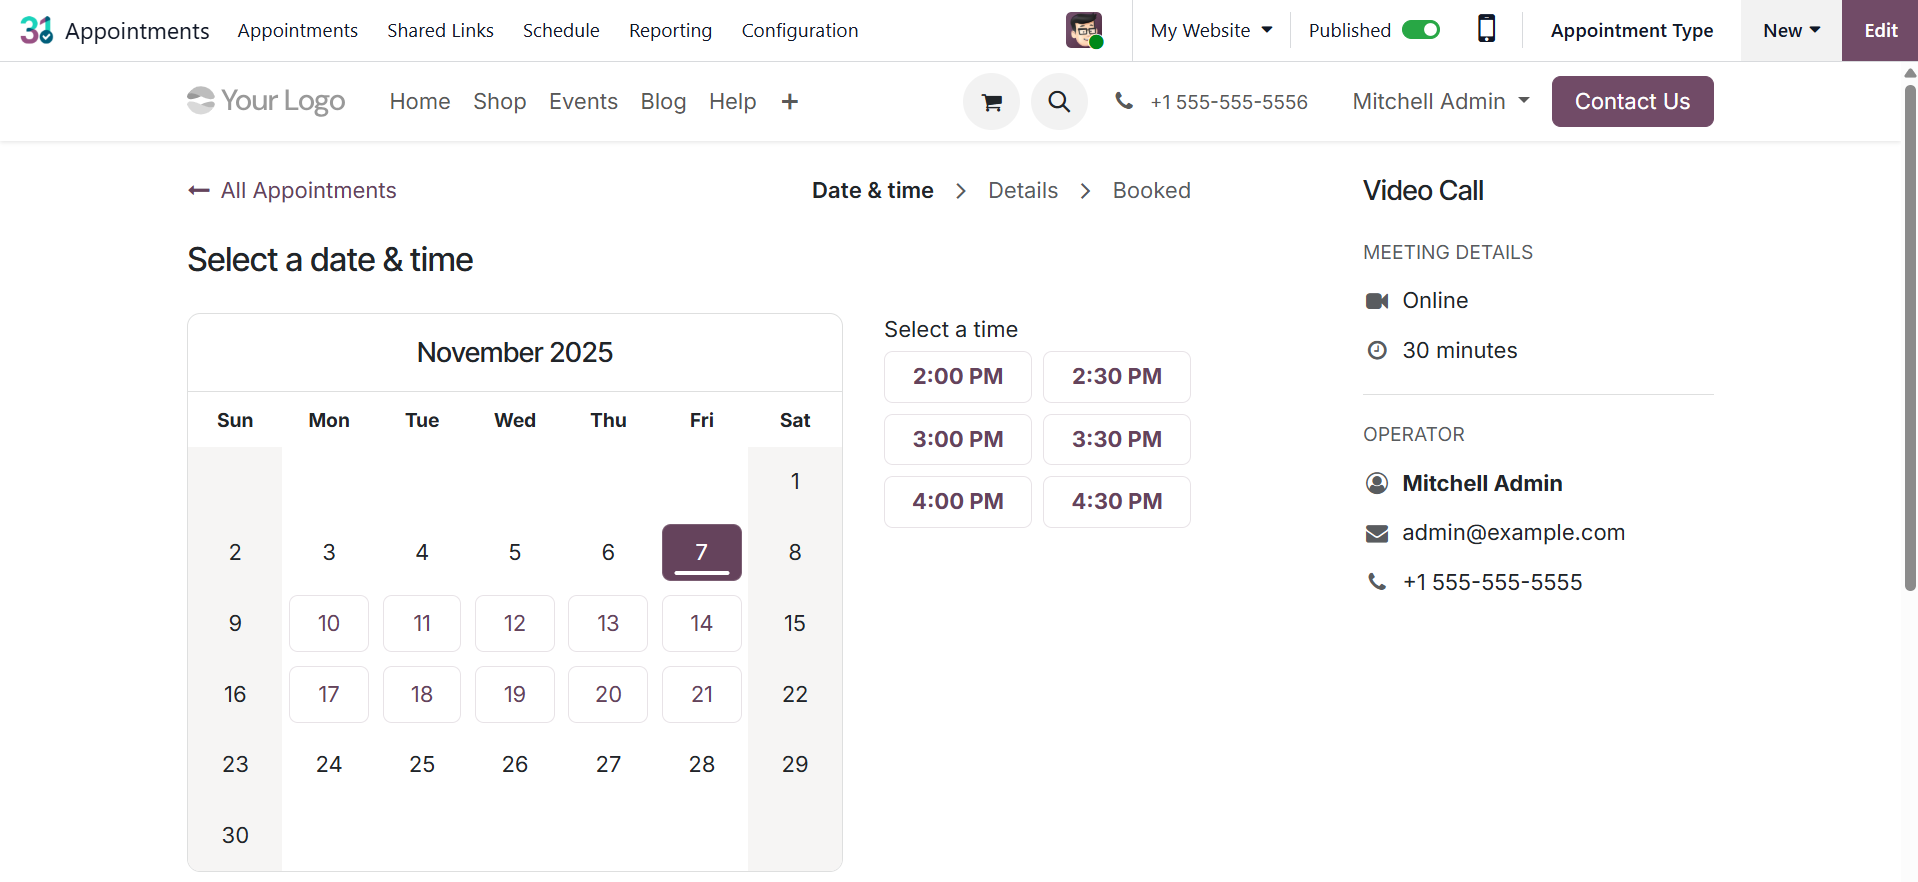
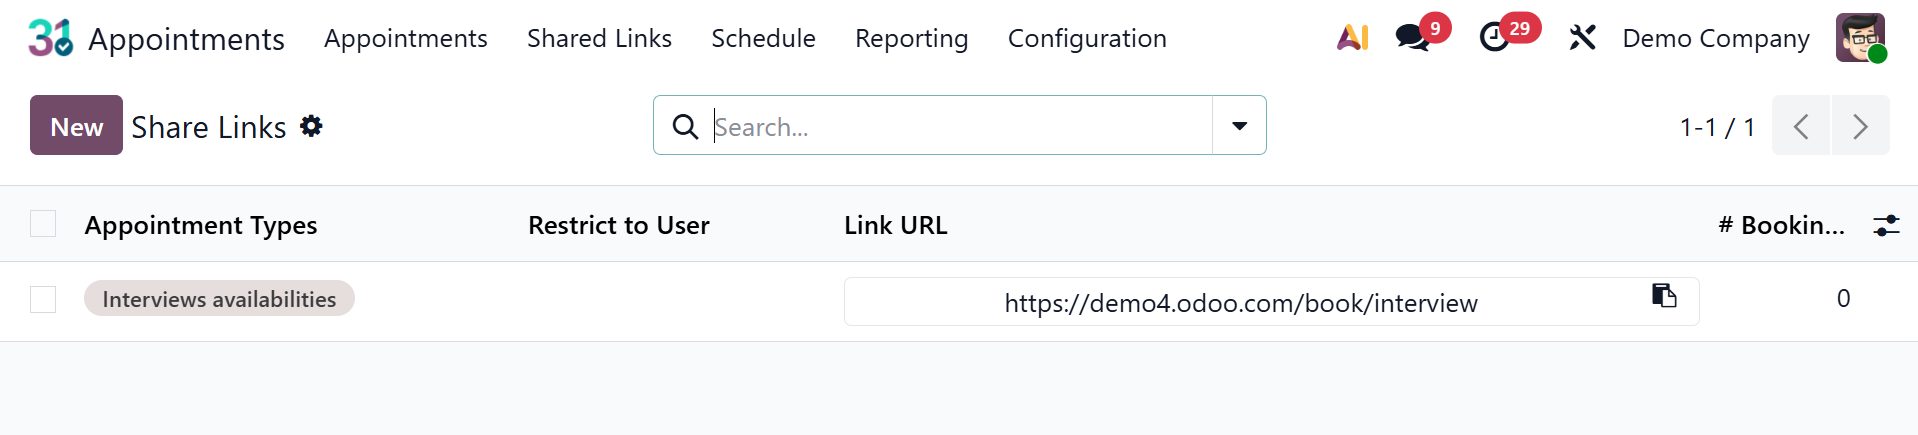
You will have the chance to share after the online appointments are published.
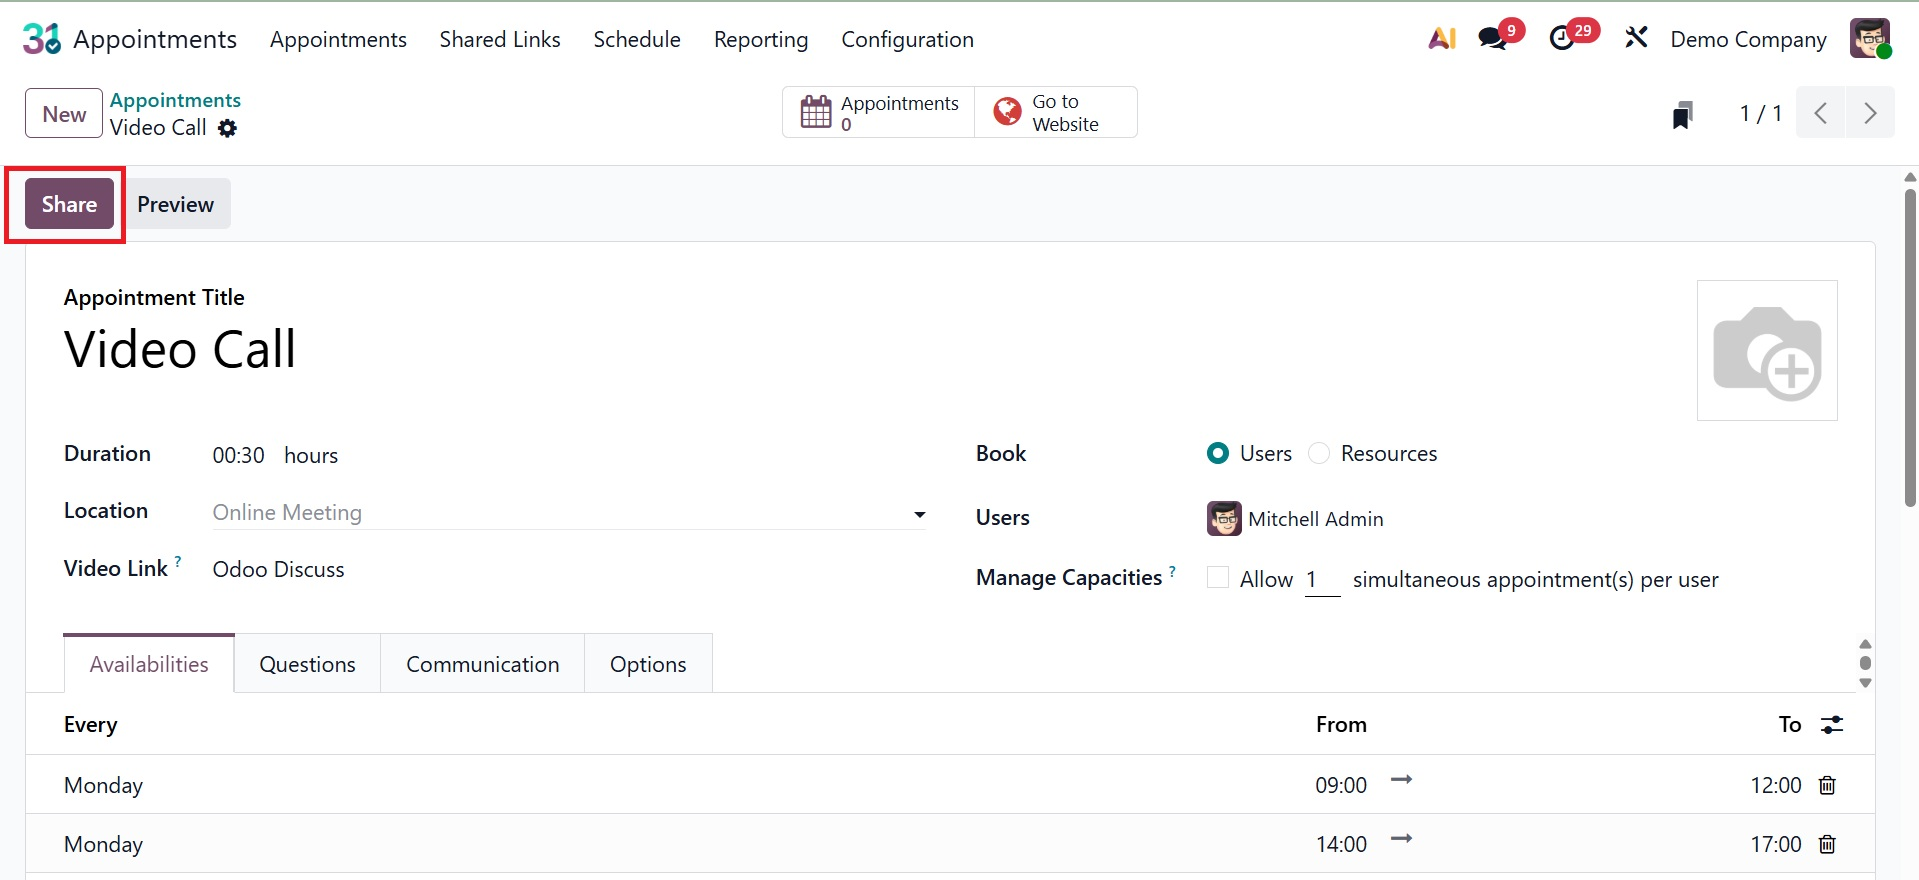
You can share the URL of your online appointment with other members of your team by using the share option.
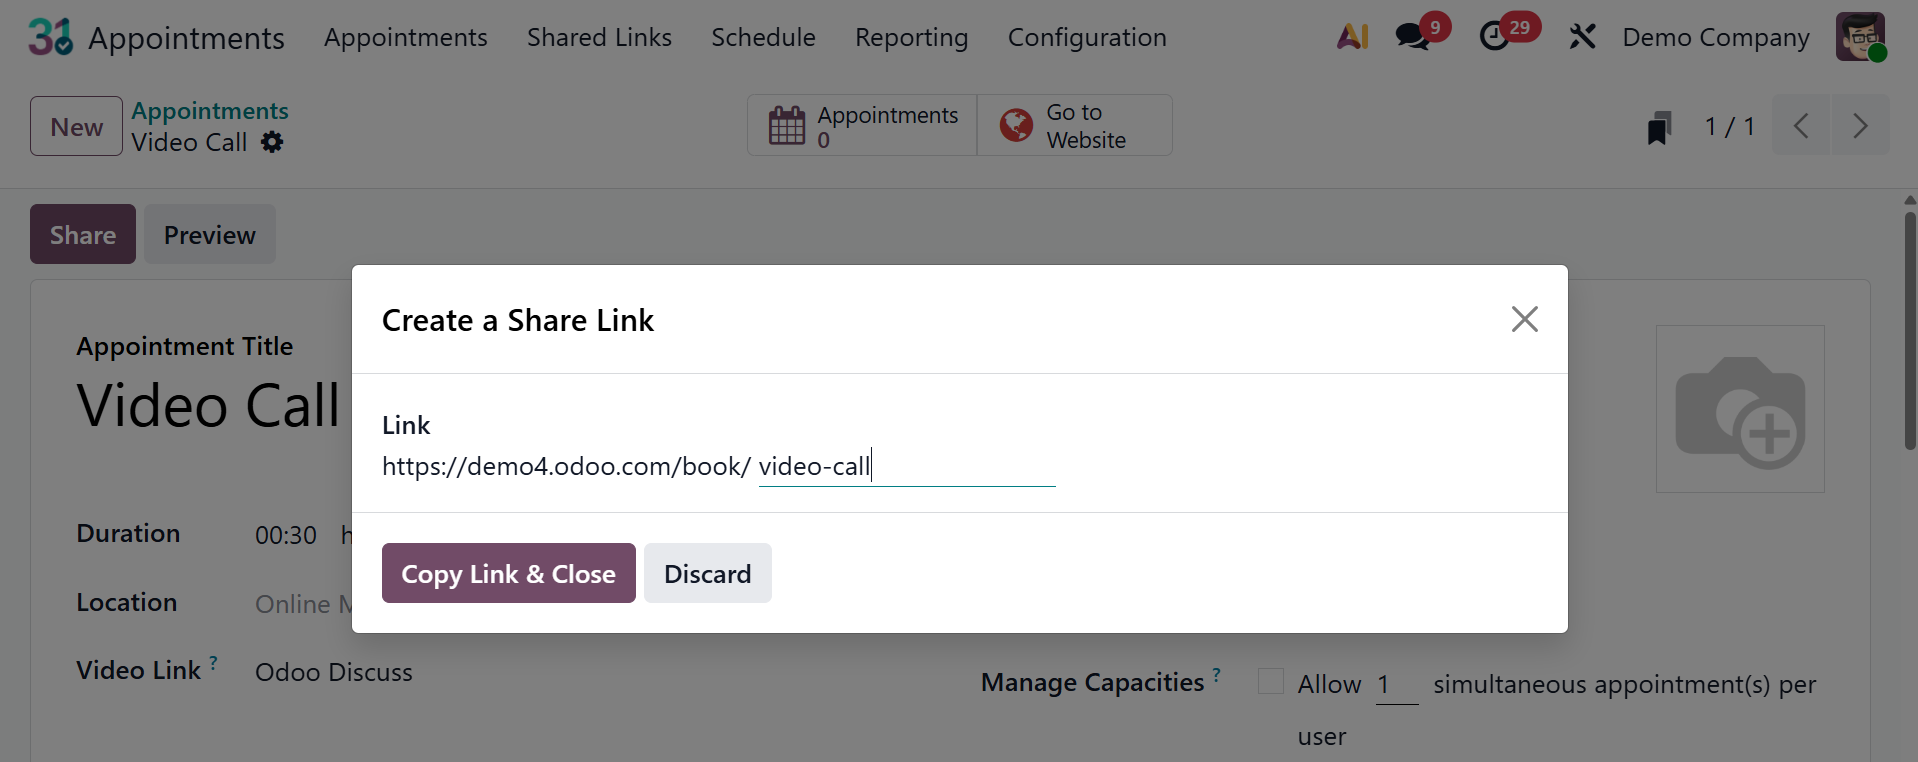
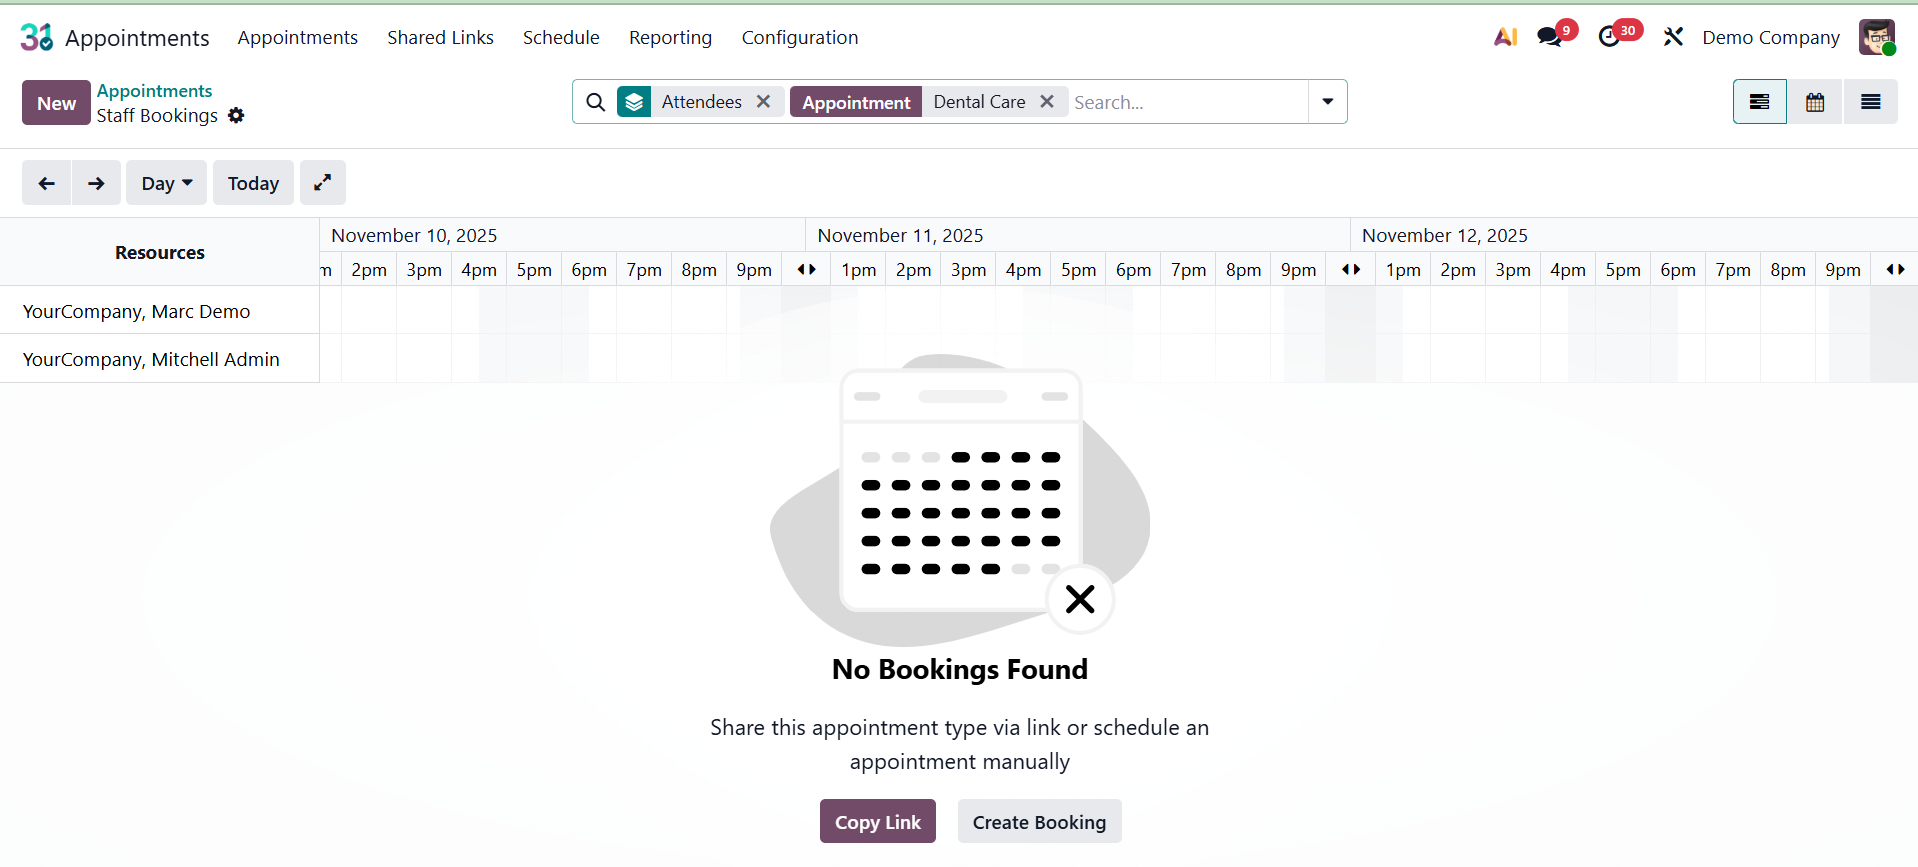
The given URL can be copied and shared with others, just like the image. The Appointment smart tab provides a brief description and easy access to every appointment booking associated with that particular appointment type.
Shared Link
This site will display all of those shared appointment URLs, much like in the picture below.