Managing a business entails not only handling products and services, but also establishing and keeping solid connections. Every company interacts with different people, such as customers, suppliers, partners, and contractors. Keeping information about all these contacts organized can be challenging if done manually, as it takes a lot of time and effort.
The Contacts module in Odoo 19 offers an intelligent and efficient solution to this problem. It serves as a central place where you can store and manage all contact details in an organized way. With this module, businesses can easily access information, improve communication, and strengthen professional relationships, ensuring smoother operations and better collaboration.

1. Contacts Management
The Contacts module in the Odoo 19 ERP system helps you keep all your contacts organized in a single place. This module is an essential tool for effective business management, as it allows you to manage customers, vendors, partners, and other professional connections with ease. You can access the Contacts module directly from the main Odoo dashboard, and once opened, it provides a clear and user-friendly interface.
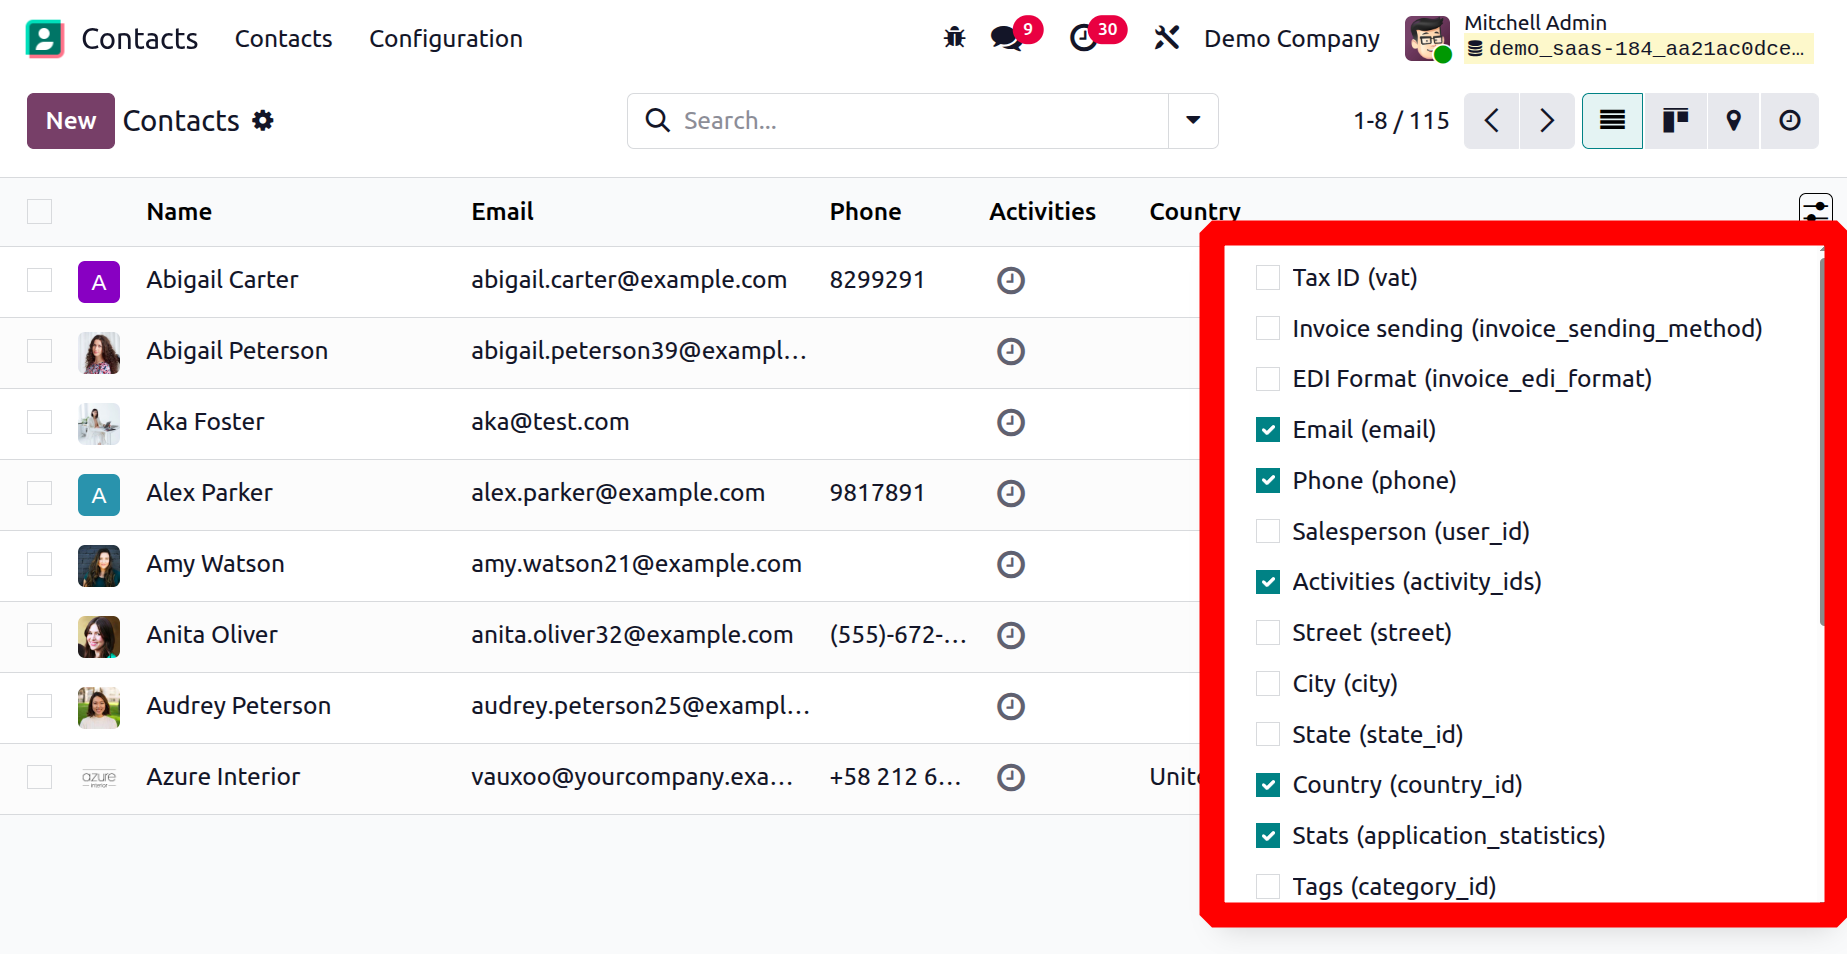
The List view of the Contacts dashboard in Odoo 19 displays all contacts in a structured table format. This view makes it easier to quickly scan and filter information. The main fields shown in the list include Name, Email, Phone, Activities, and Country.
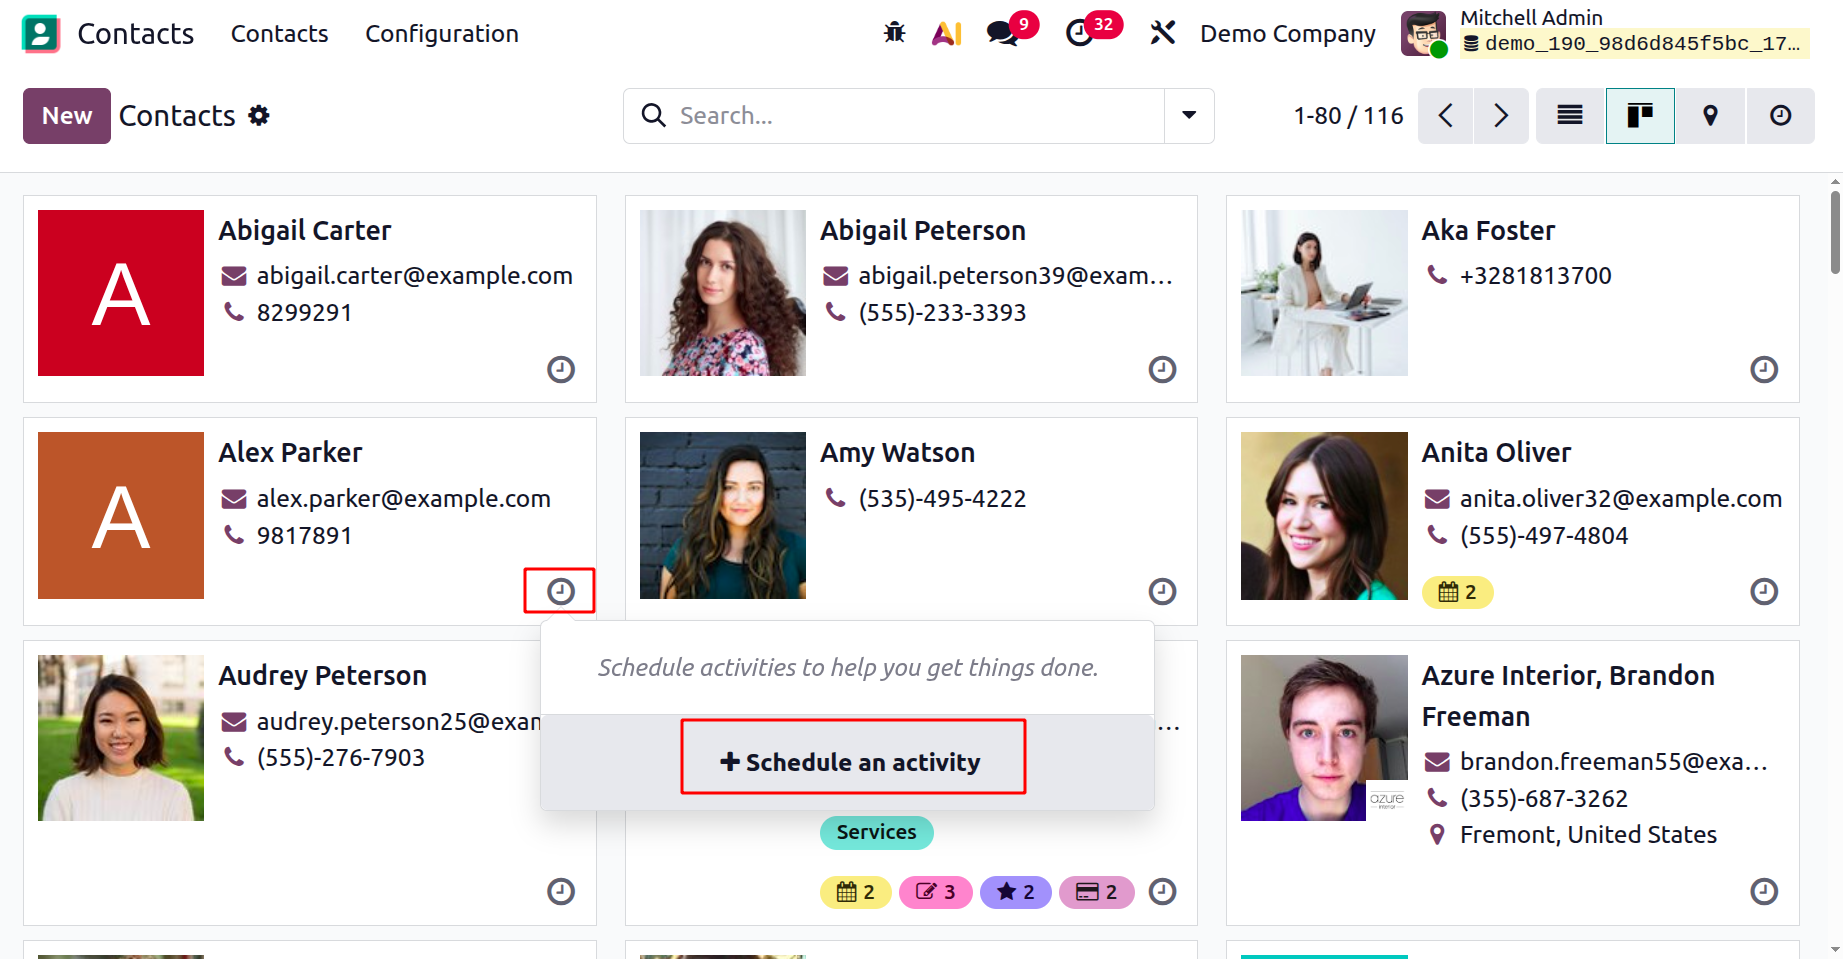
In Odoo 19, the Contacts dashboard can be viewed in Kanban format, offering a quick preview of the stored contacts. As shown in the image, each contact card displays important details, including the contact’s picture and basic information. The number of Opportunities, Planned Activities, Sales Orders, Shopping Carts, and Purchases on each tab may be indicated by little icons. By clicking on the small clock icon, you can arrange a meeting with the chosen contact, as in the image below.
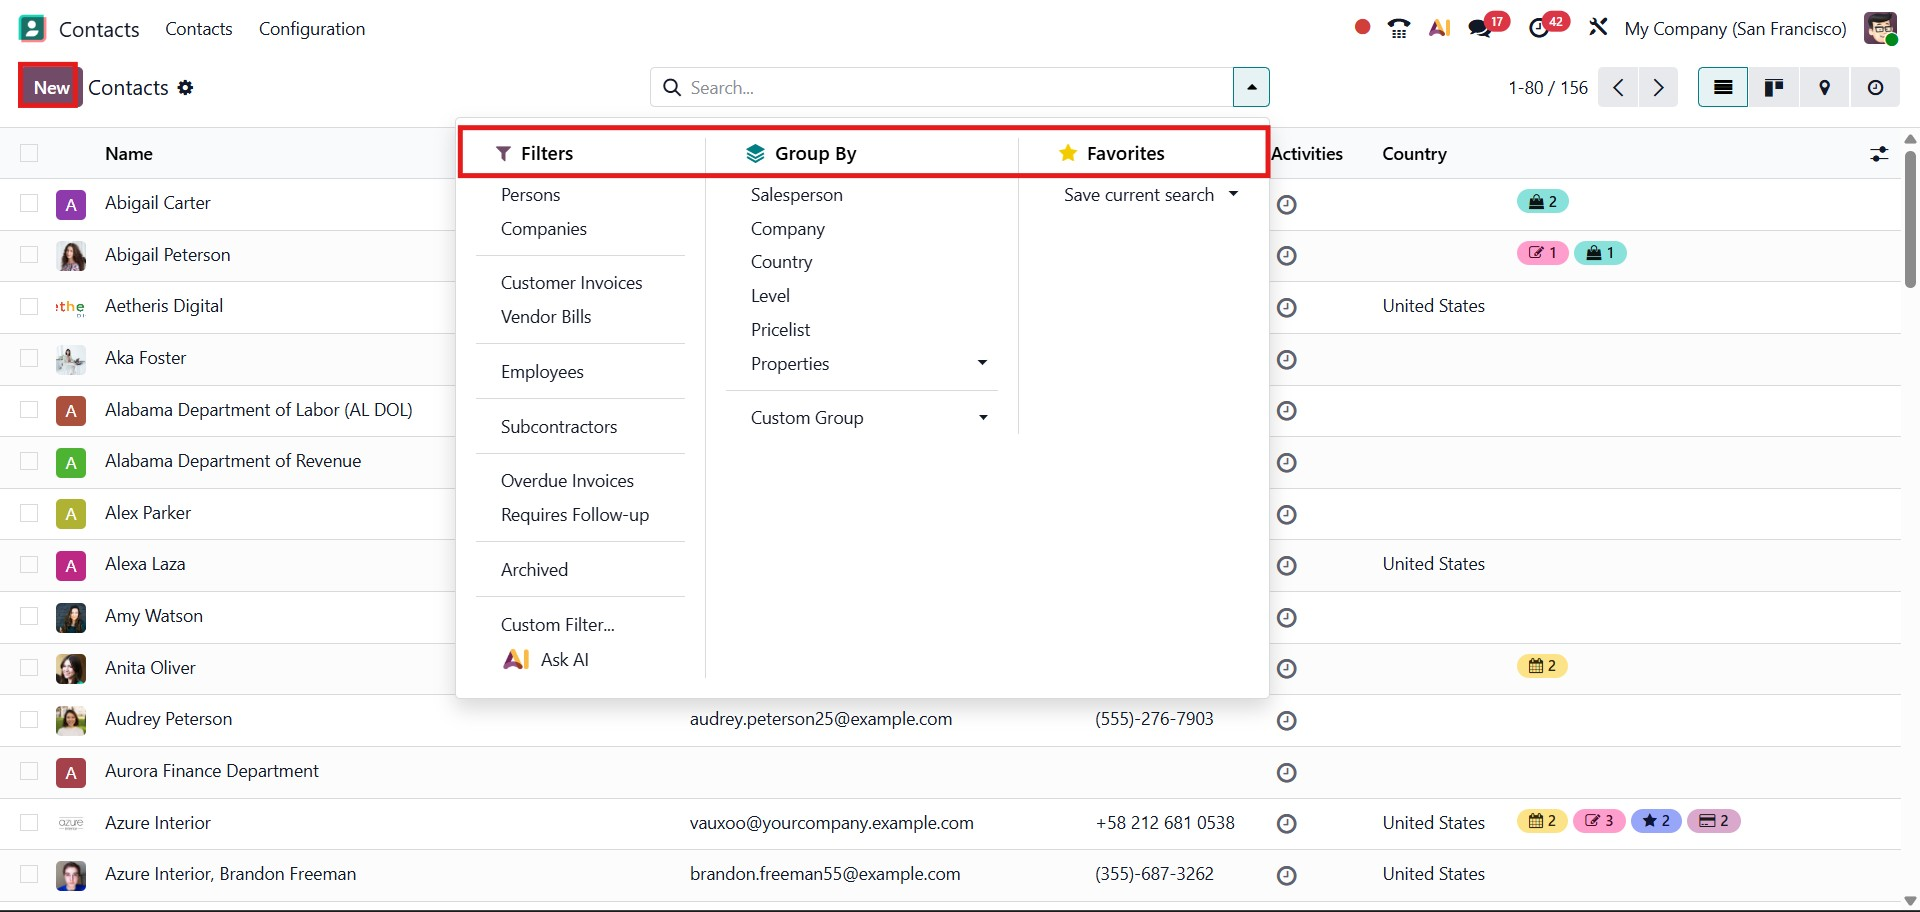
The Filters option in the Contacts module provides several choices to refine your search results. You can filter contacts as Persons, Companies, Customer Invoices, Vendor Bills, Employees, Subcontractors, Overdue Invoices, Requires Follow-up, Archived, Custom filter, or Ask AI. These filters make it simple to locate specific records without manually browsing through the entire list.
Additionally, the Group By option helps organize contacts by categories such as Salesperson, Company, Country, Level, Pricelist, or Properties. This feature is especially useful when analyzing data or managing large volumes of contacts, as it allows you to group and review information in a more structured way.
The Favorites feature allows you to save commonly used search terms for easy access whenever needed.
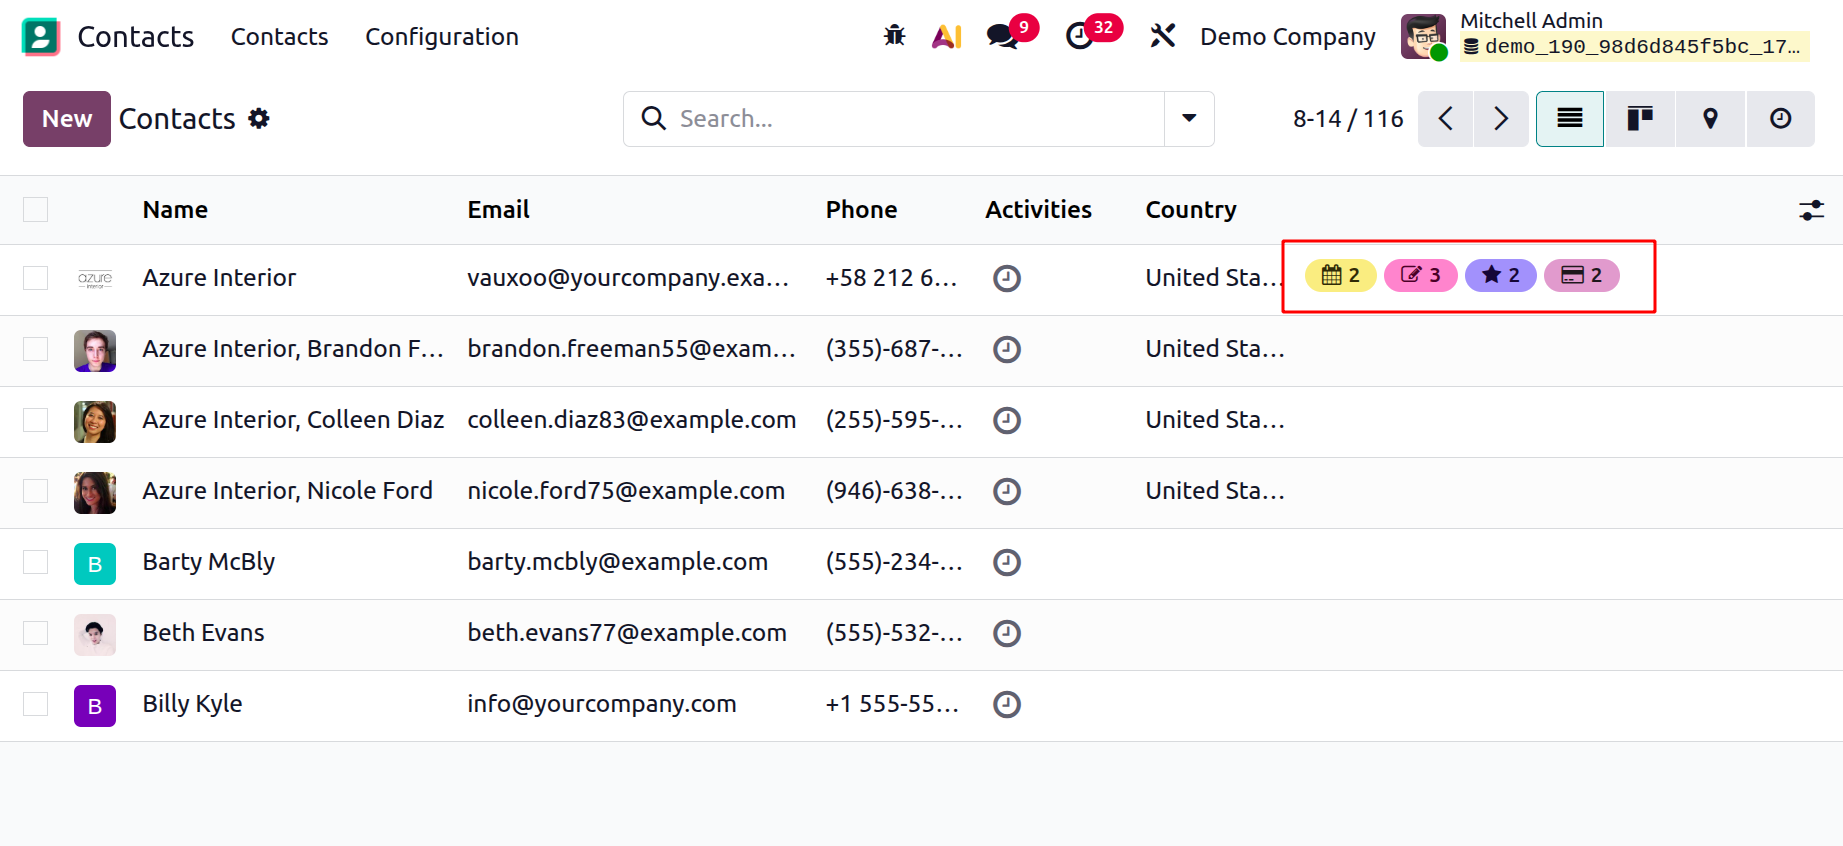
In Odoo 19, the Contacts list view introduces new activity indicators displayed as colored icons beside each contact. These icons provide a quick overview of related records without needing to open the contact profile. For example, the calendar icon displays the number of scheduled meetings, the note icon represents invoices, bills, and mandates, the star icon indicates linked opportunities, and the card icon highlights purchases. This enhancement enhances cross-app visibility, allowing users to instantly assess engagement levels with each contact directly from the dashboard.
To add a new contact, simply click the New button, which opens a form where you can enter all necessary details and save the record to the system.
Clicking the New button will bring up a form view, as illustrated in the screenshot below. This form allows you to provide all pertinent information about the contact. In Odoo 19, the process of creating a new contact is similar to adding a new customer, with fields provided for entering both personal and company-related information.
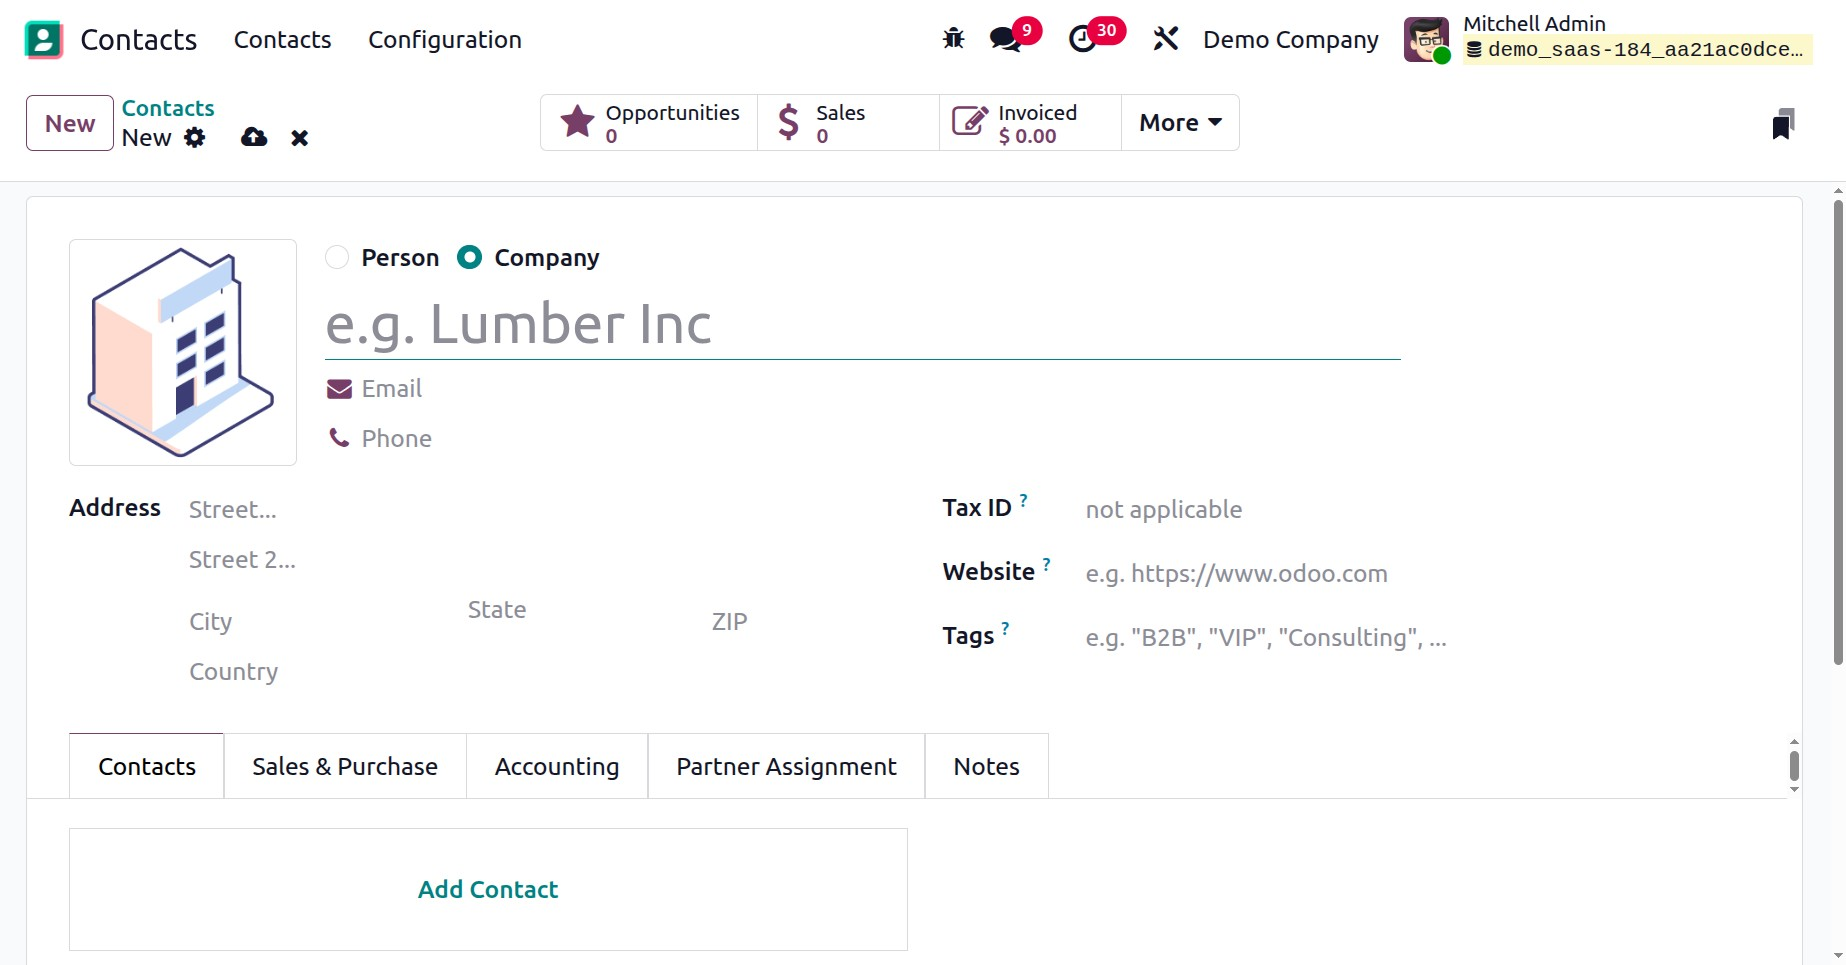
To begin creating a new contact, enter the Name into the designated field. Before saving, Odoo 19 lets you choose whether to save the record as a Person or a Company by selecting an appropriate option. The form also provides fields to enter important details such as Email Address, Phone Number, Address, Tax ID (Tax Identification Number), Website, and Tags. These characteristics serve to ensure that the contact record is full and easily available for business operations.
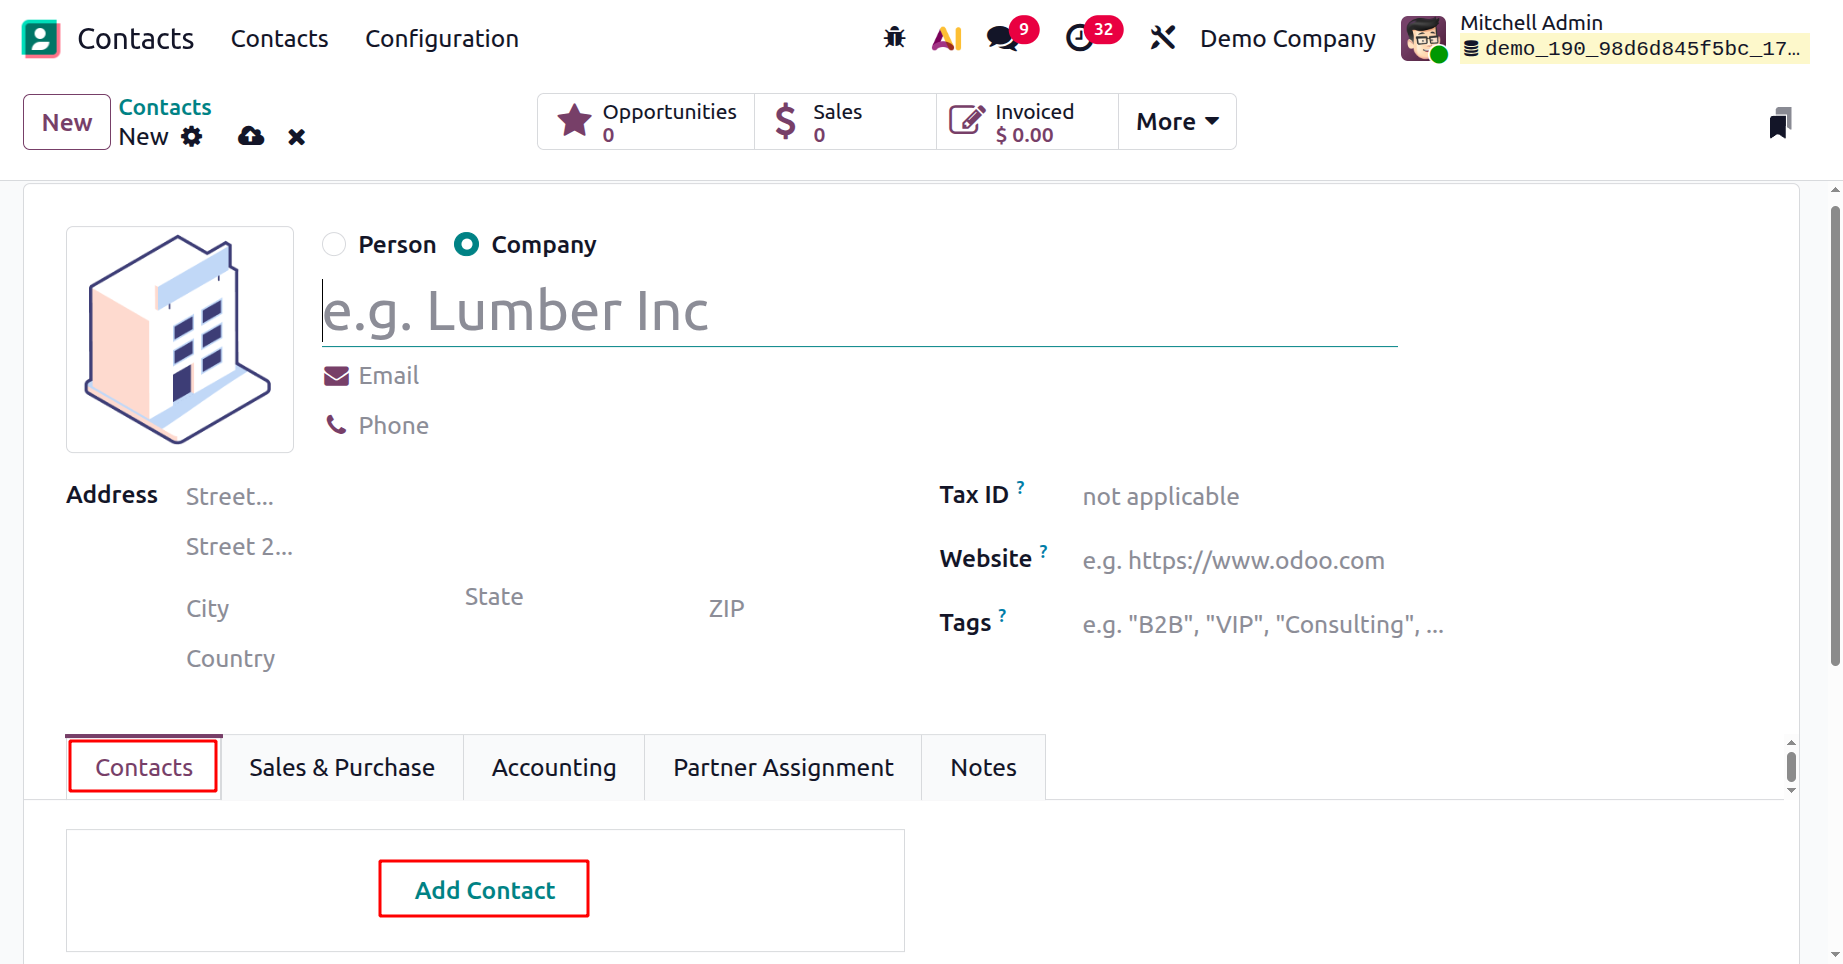
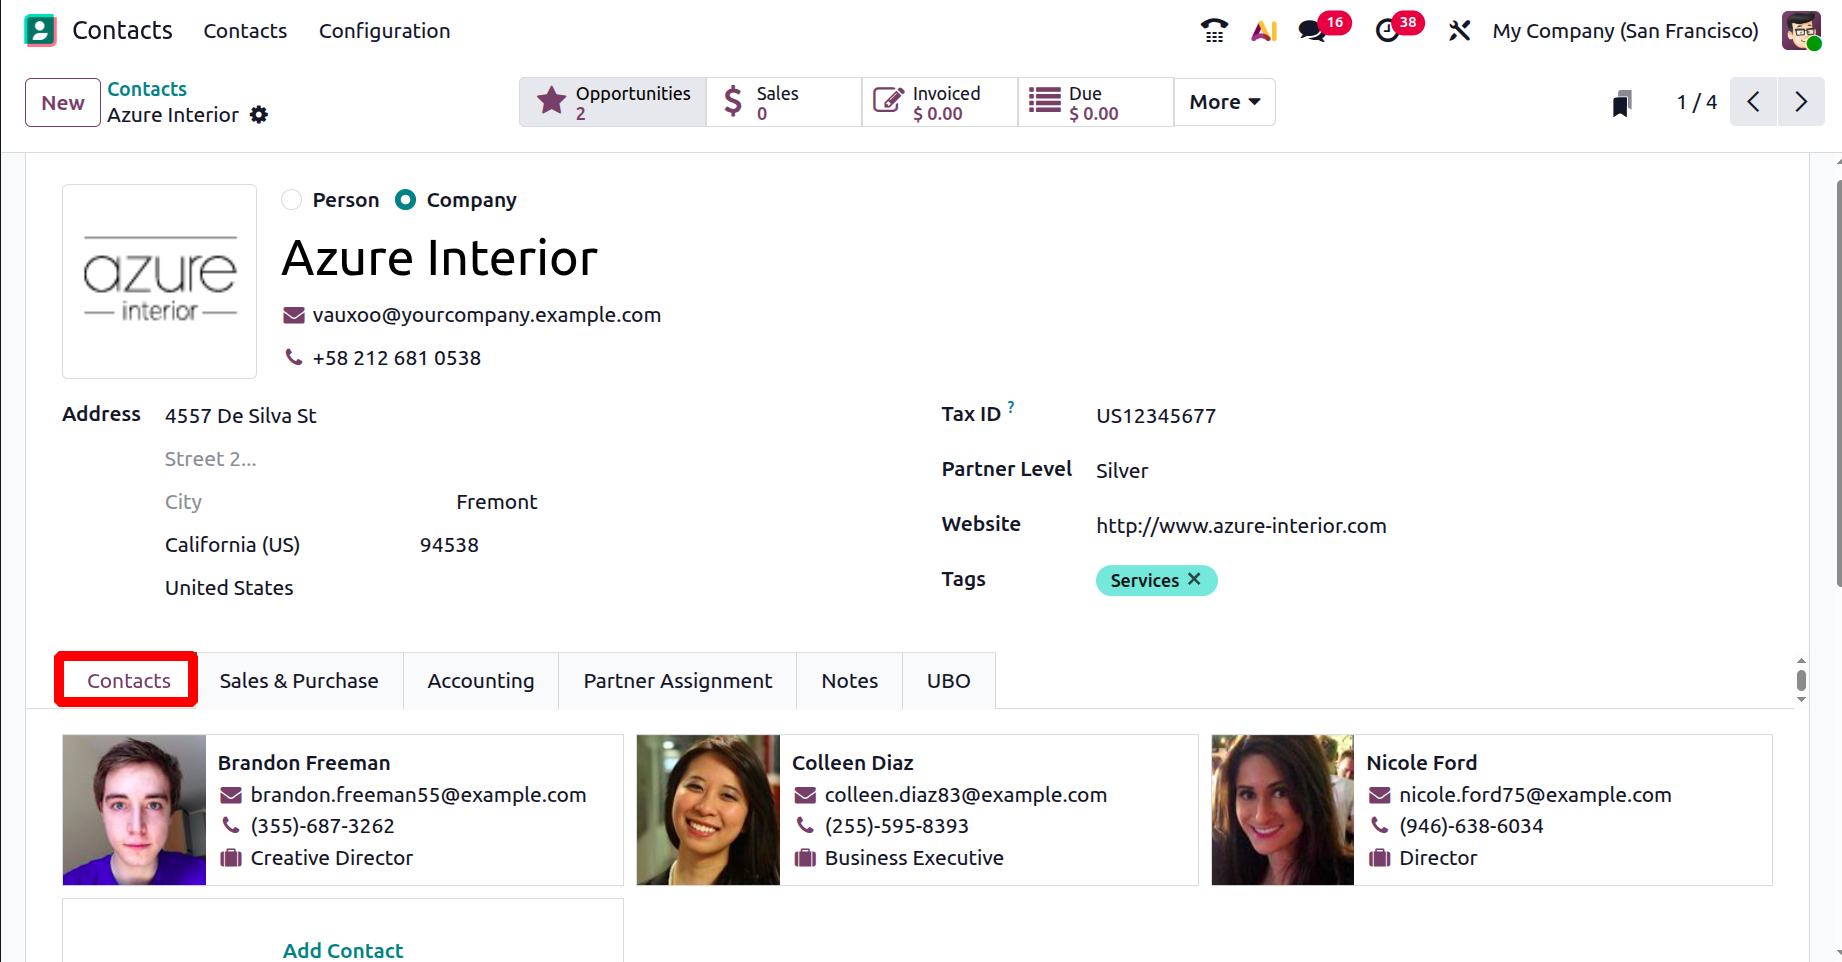
Additionally, you can add more related Contacts linked to the main record by clicking the Add Contact button. When this option is selected, a pop-up window will appear (as shown in the screenshot below), allowing you to enter the details of the associated contacts. This feature is especially useful for managing company structures where multiple addresses or contact persons are connected to the same organization.
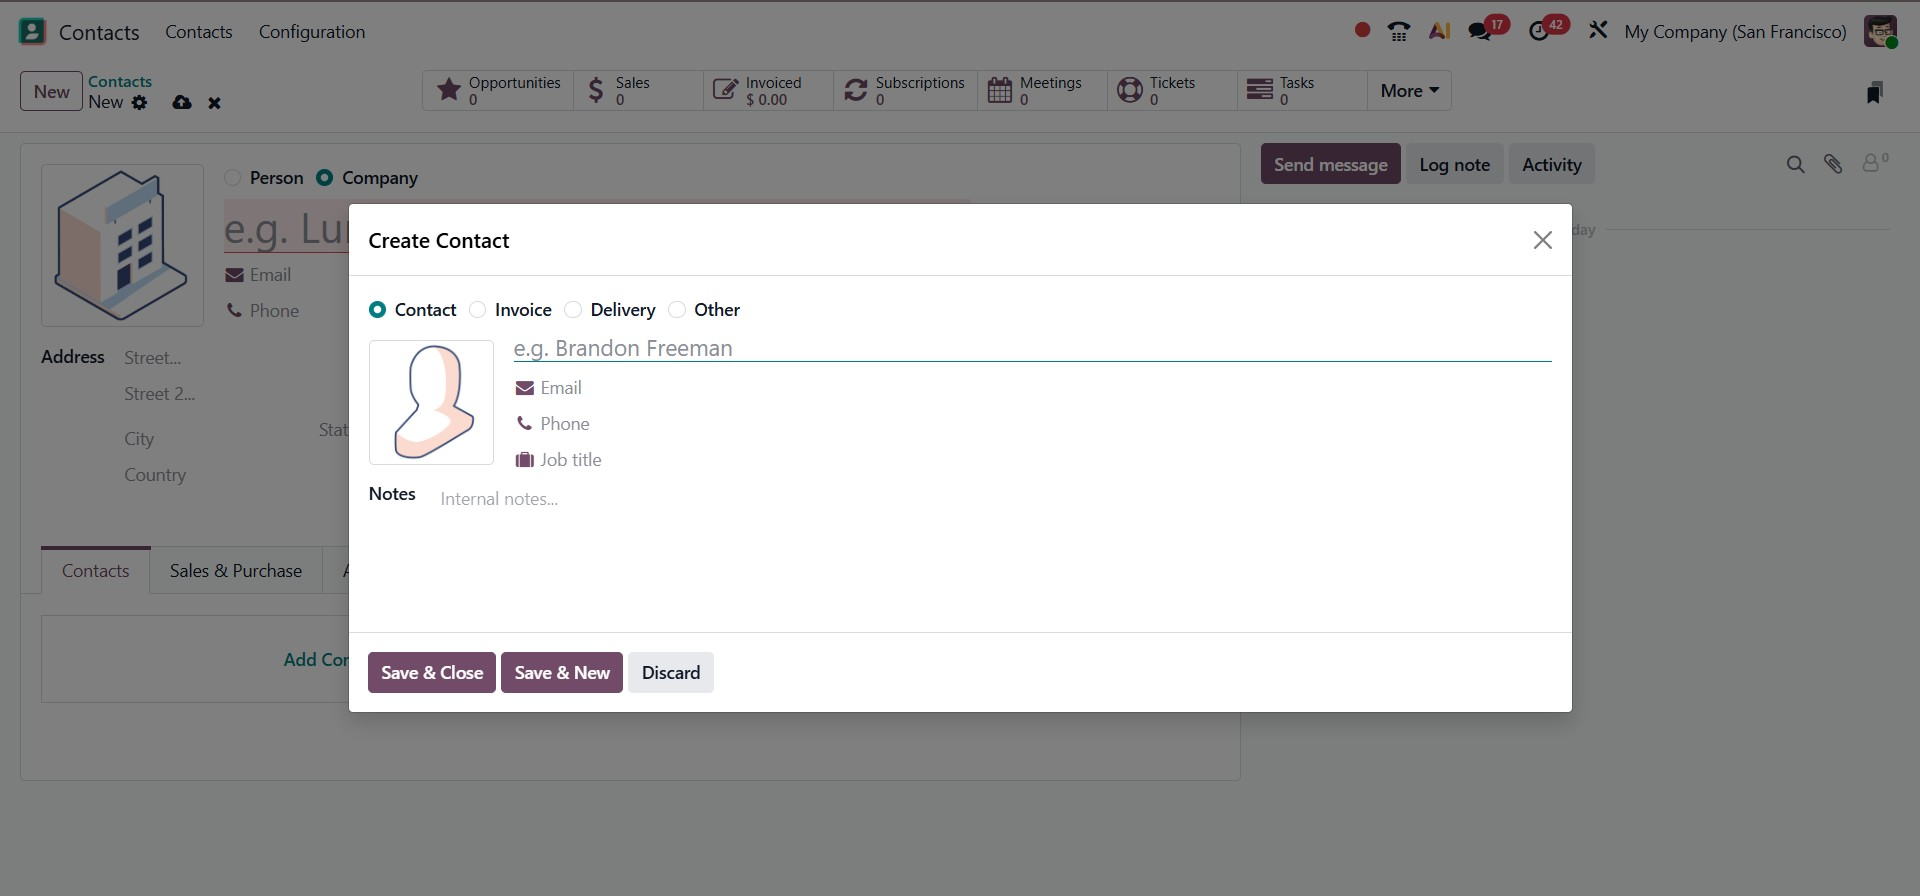
The pop-up window provides options to add different types of addresses or related contacts linked to the main record. You can choose from Contact, Invoice, Delivery, or Other according to your business needs.
- Contact: This option extends the current contact form by adding a new person or entity associated with the primary contact. It is useful for recording multiple representatives or branches under the same organization.
- Invoice: This creates a specific invoice address for the contact. The address given here will serve as the billing address for any invoices generated.
- Delivery: This option sets up a delivery address for the contact. It determines the location where products or services will be shipped.
These options enable businesses to manage multiple addresses and roles for a single contact without confusion, keeping all details organized in one place.
Now, let us configure each address type separately. To begin, you can create a Contact Address by selecting the Contact option from the pop-up window. This feature makes it easy to organize the details of employees or representatives associated with an organization. Once the Contact option is chosen, a new form will appear. In this form, you can enter the Contact Name in the provided field, as shown in the screenshot below. Additional information, such as job title, phone number, email address, and other relevant details, can also be included. And then go to the menu and choose "Save & Close".
This setup allows you to manage multiple individuals under the same company record, ensuring that all employee or branch-level contacts are neatly structured and accessible.

Next, you can configure an Invoice, which will serve as the default billing address for all invoices related to the contact. To do so, pick the Invoice Address option in the Create Contact box and enter the Contact Name into the specified field.
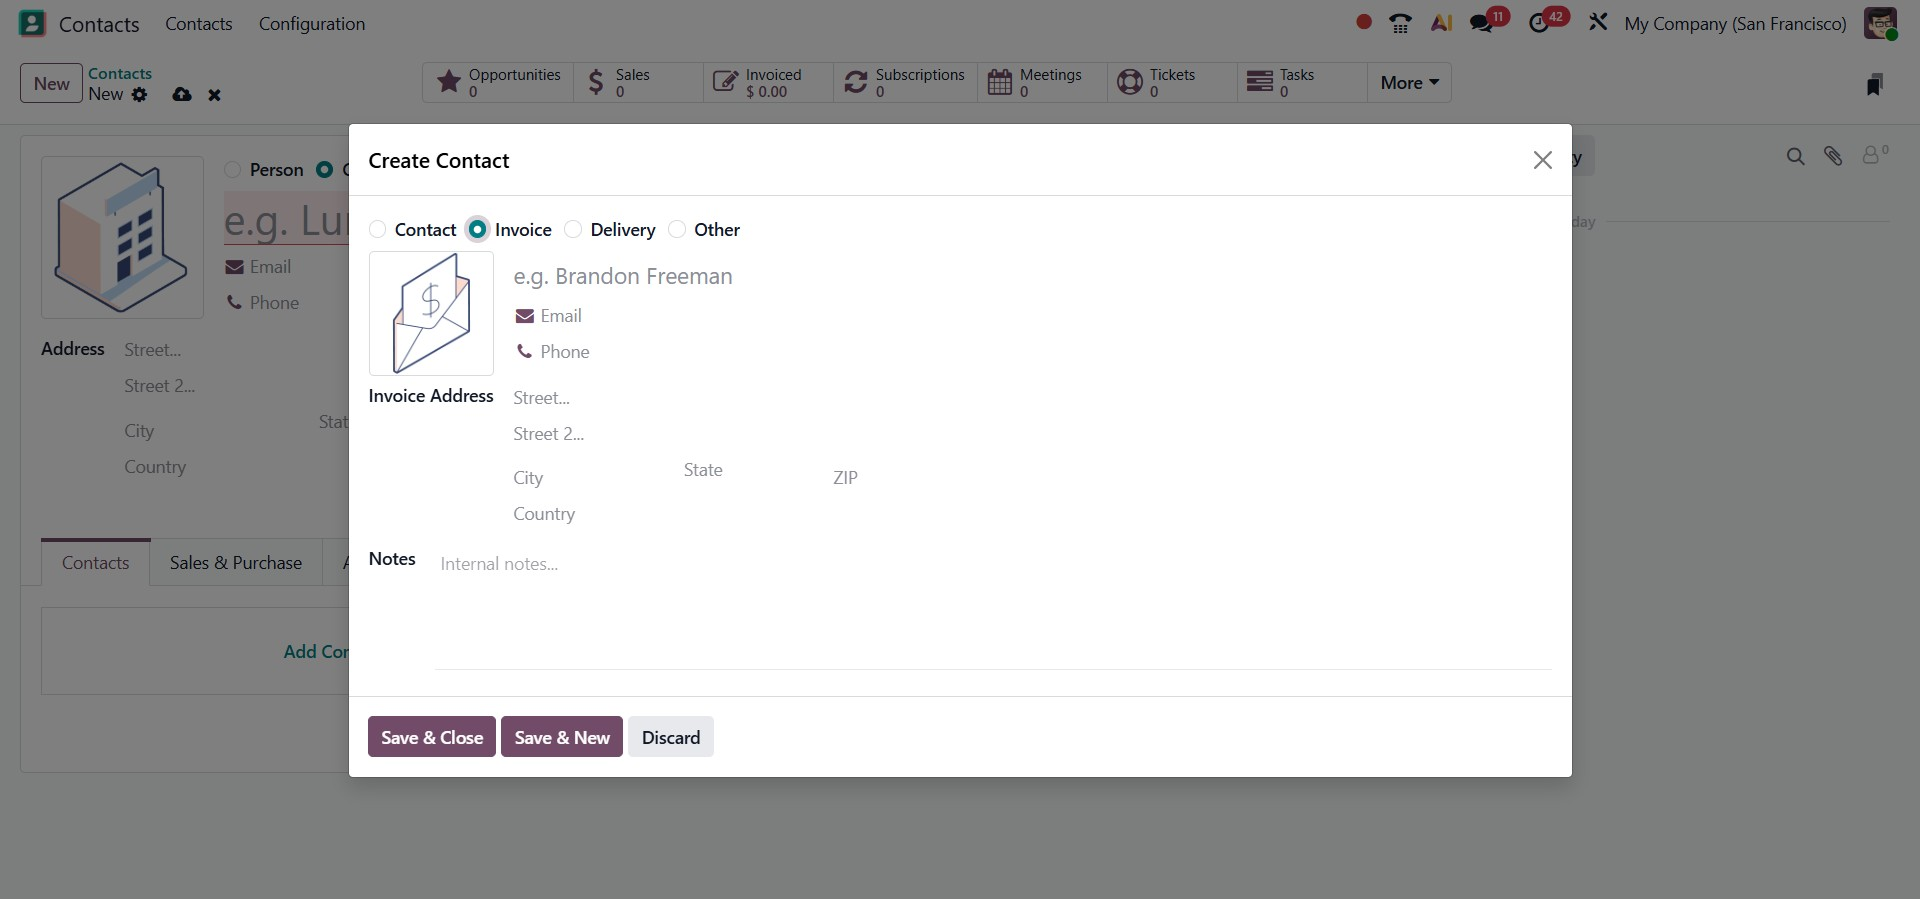
When a company order is invoiced, this address will automatically appear as the billing location. After providing the contact name, you can enter the Invoice Address details, email address, and phone number of the responsible person. Once all invoice address information has been filled in, click the Save & New button to store the record and proceed with creating another address if needed.
You can then configure a Delivery Address for the same contact. This address will be set as the default delivery location whenever an order is processed for the business.
To set it up, choose the Delivery option, enter the Contact Name, and complete the form with the necessary address details. This ensures that goods and services are always delivered to the correct location without requiring manual changes each time.
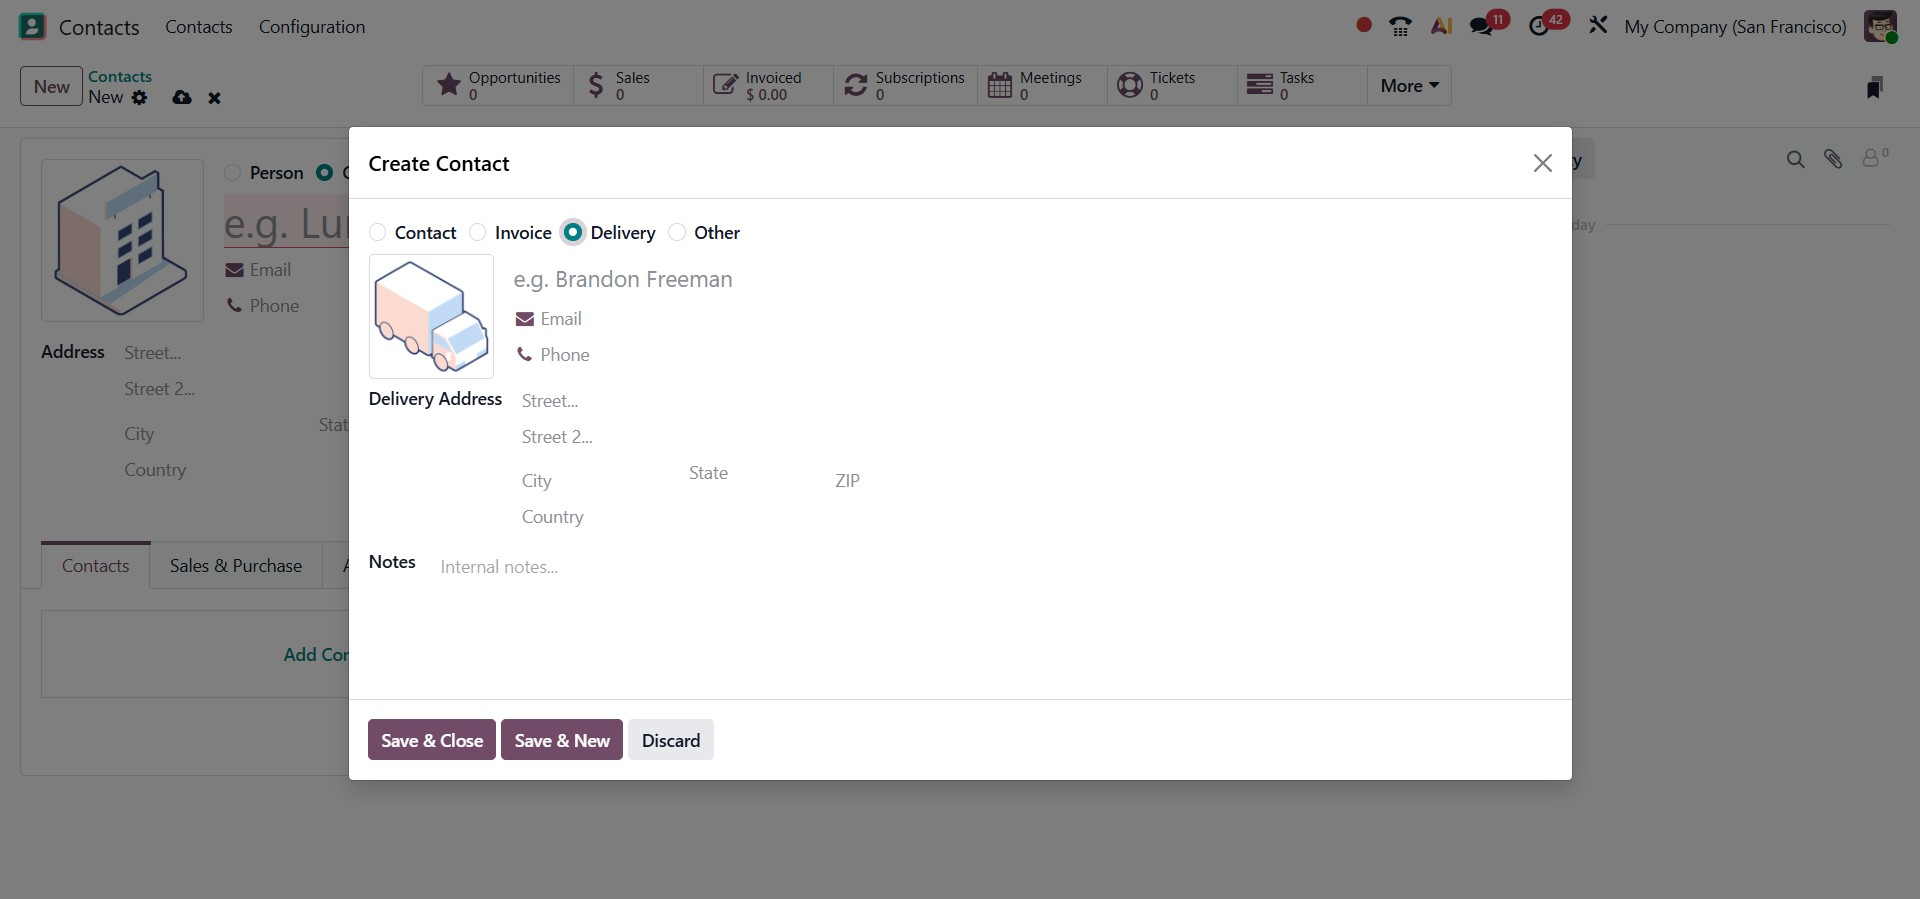
As shown in the screenshot above, users can also input their delivery address in the Address field. After entering other information like your phone number, email address, and mobile number, click the Save & New option.
We can add another address by selecting the Other Address option. The user can apply a different address associated with a business or person by choosing the Other Address option. In the Create Contact window, choose Other and enter your Contact Name.
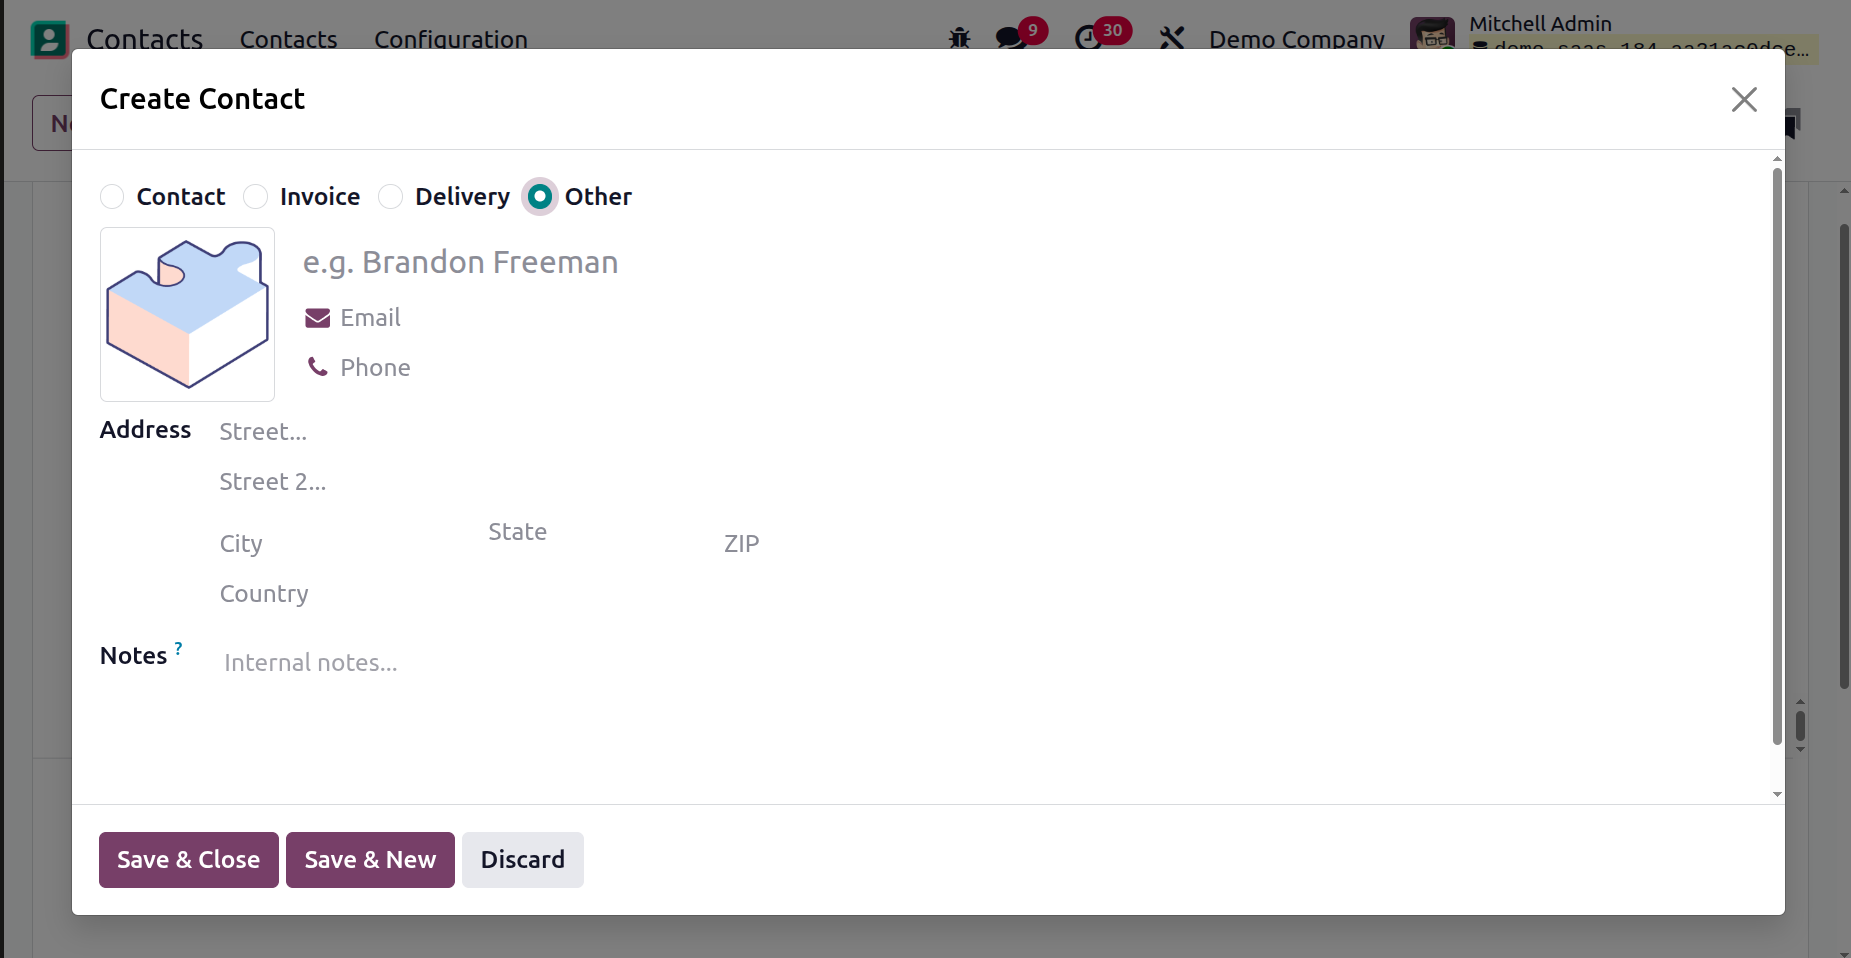
Enter the Contact person's address, email, phone, and mobile number after choosing the Other Address option. After adding all details, click the Save & Close button, as indicated in the screenshot above.
We can now access all of the addresses we've made from the Contacts & Addresses tab in the Contacts window.
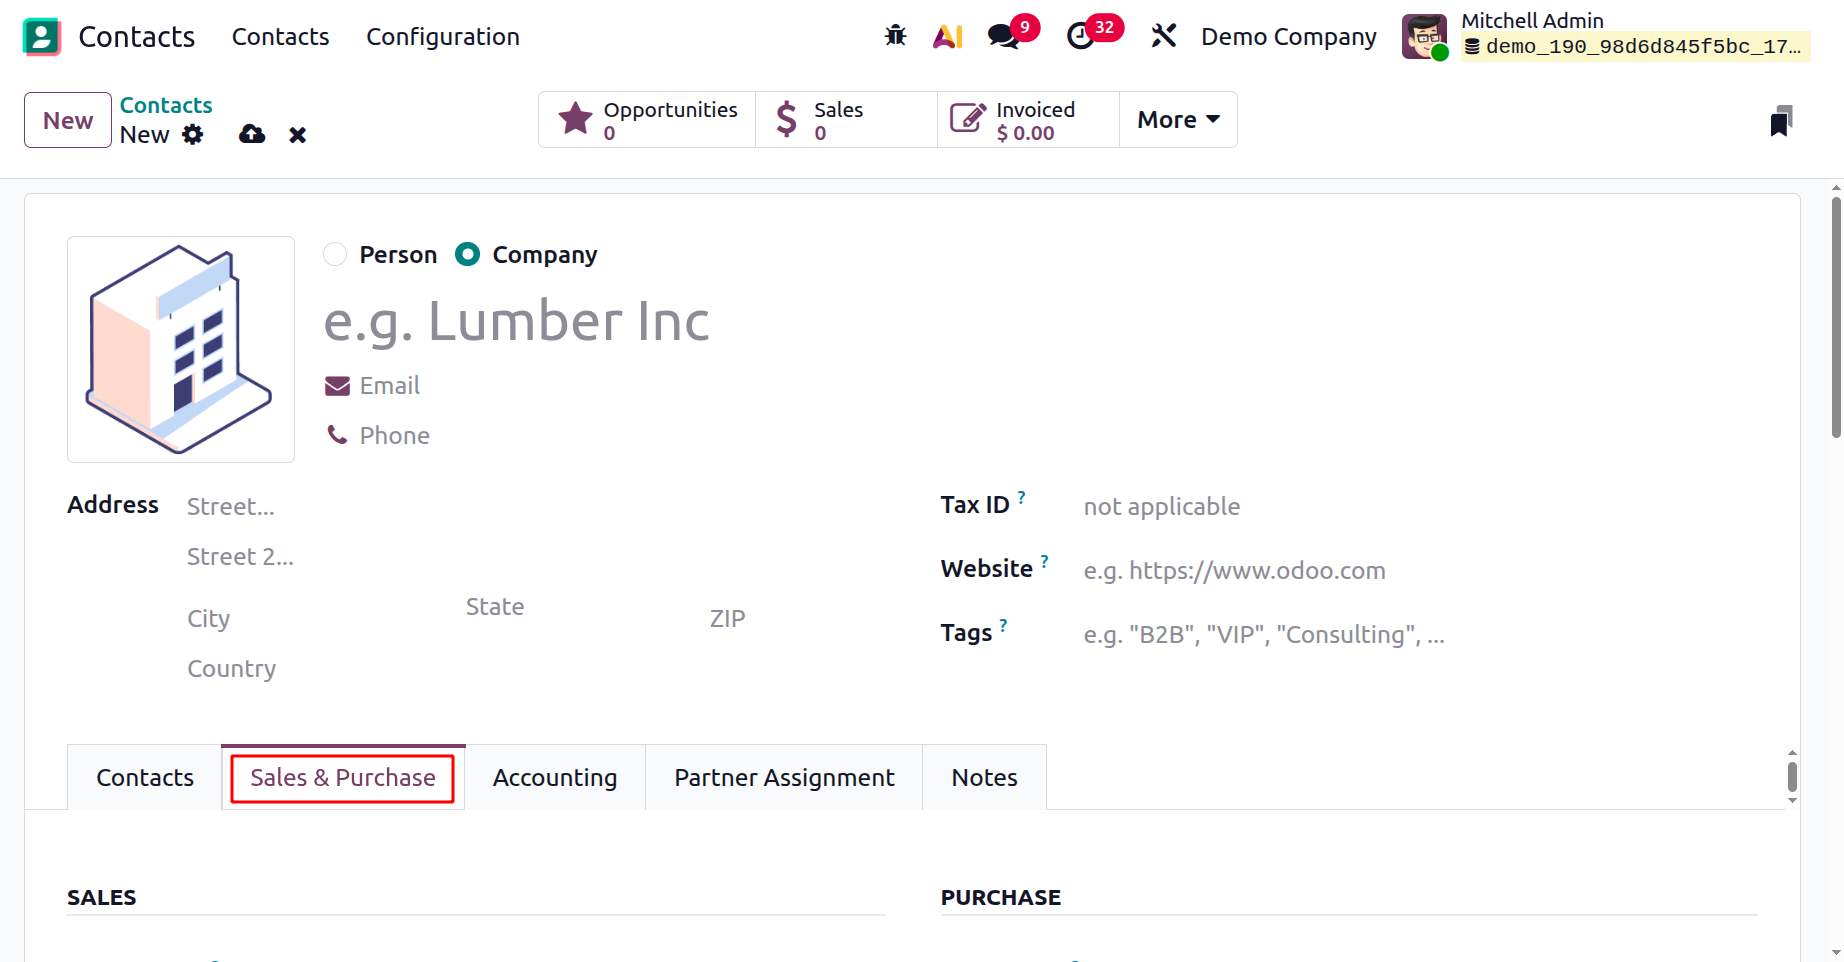
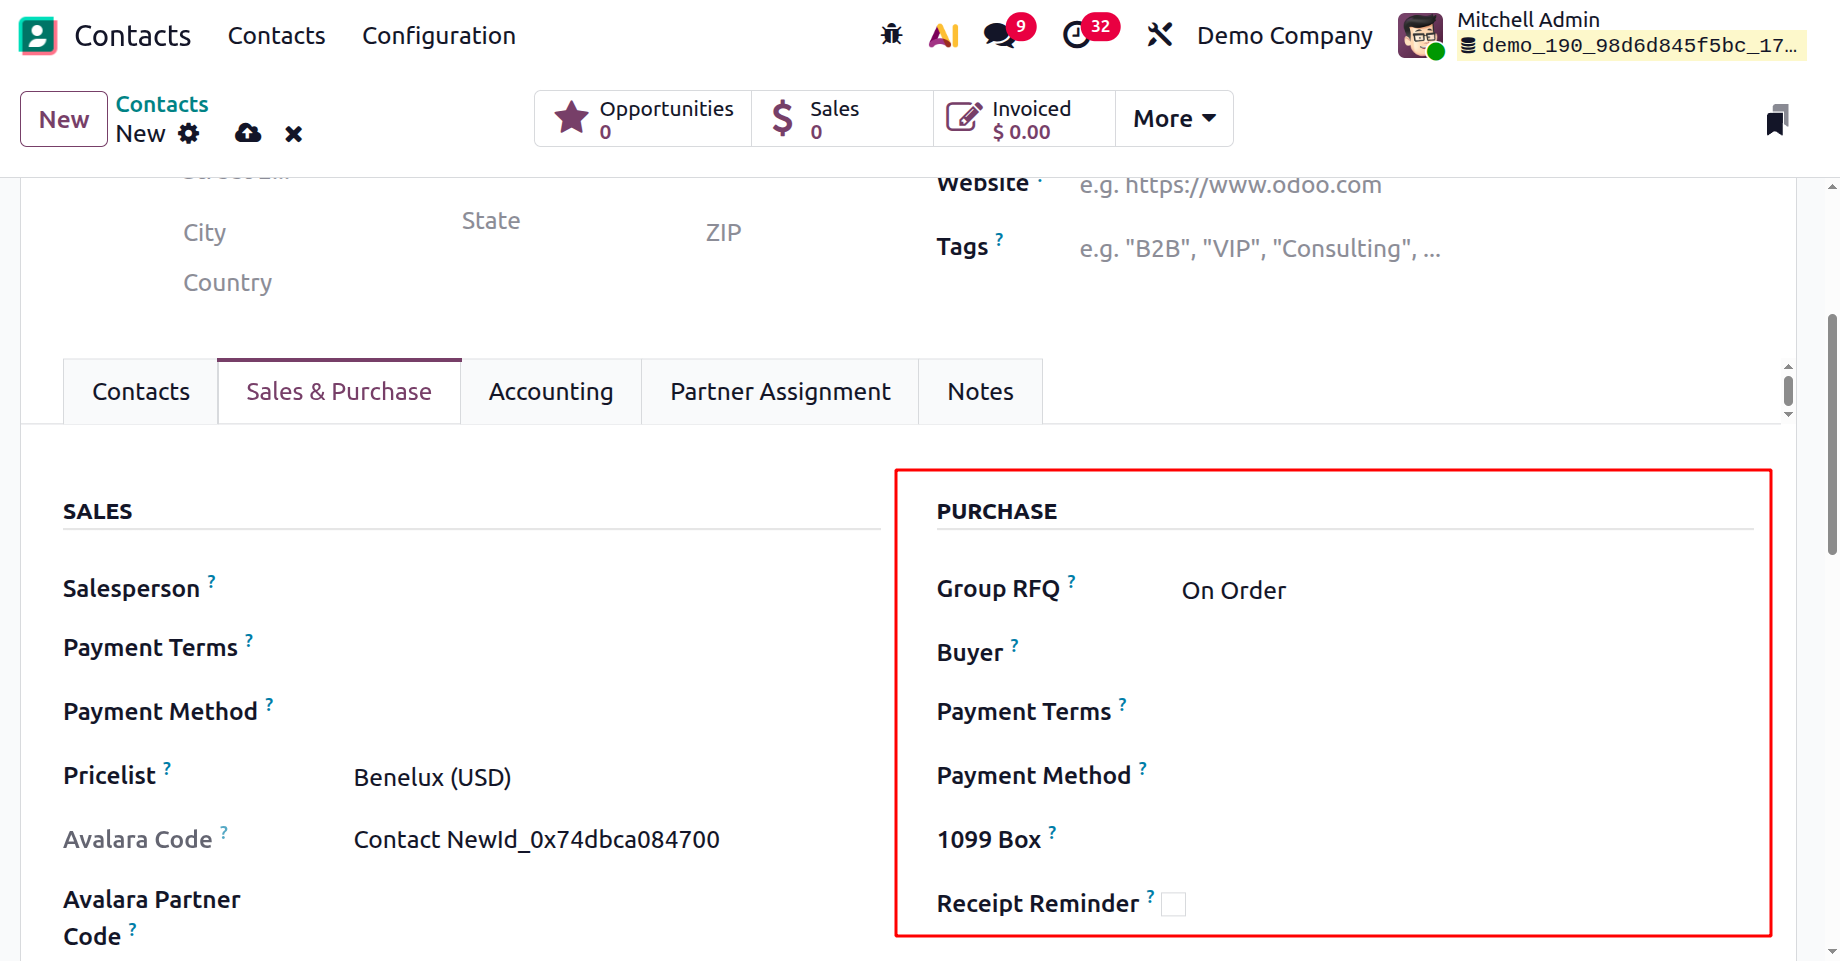
Now, you have the next field, Sales & Purchases, as shown in the screenshot below. This tab provides advanced configuration options to manage how sales and purchase transactions are handled for the selected contact.
In the Sales & Purchases tab, you can configure various options that define how sales and purchase transactions are managed for the selected contact.
You may begin by assigning a Salesperson responsible for overseeing all sales activities related to the contact. This ensures accountability and helps track performance. For invoicing, instead of applying the default Payment Terms, you can specify custom terms that will automatically be used for this contact’s sales orders and invoices.
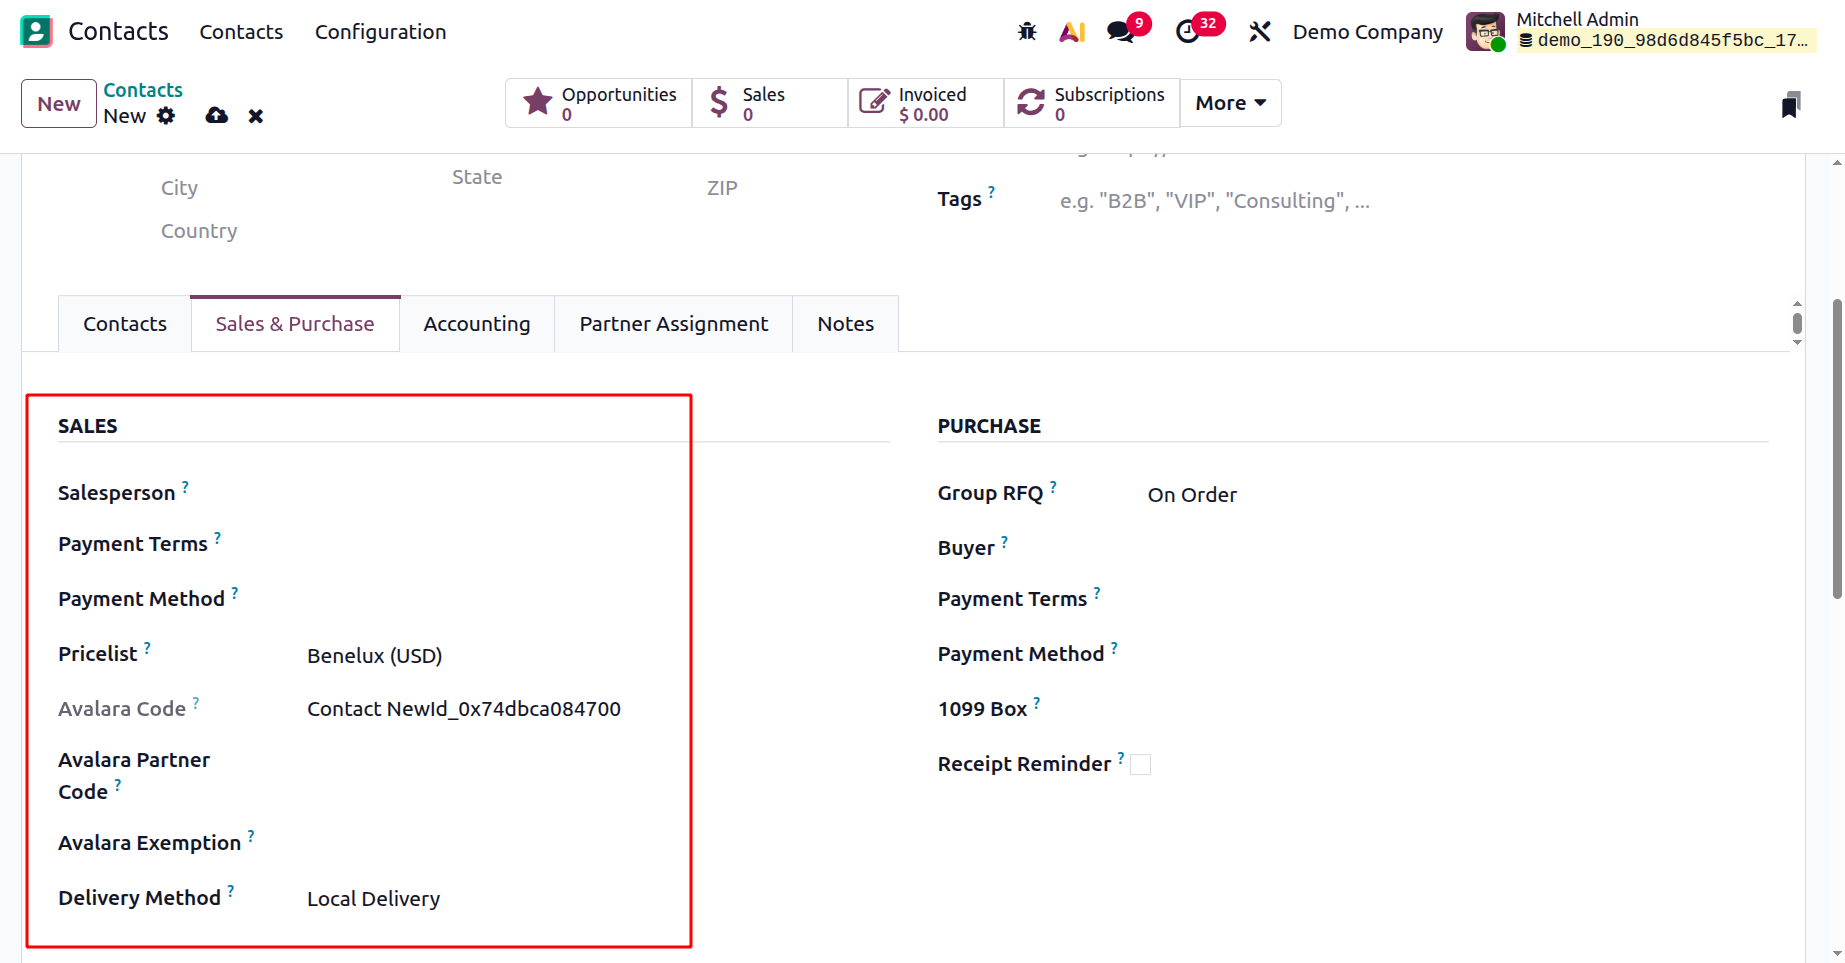
The tab also allows you to choose a Price List that will apply to sales transactions with the contact. If your company uses Avalara for tax management, you can link the contact by entering the Avalara Partner Code and Avalara Exemption. These fields ensure that the customer’s tax codes align with Avalara’s system, and they can be cross-referenced through the Avalara gateway for accurate tax handling. Additionally, a Delivery Method can be set in this tab to define the preferred shipping or delivery process for all of the contact’s sales orders. By configuring these fields, businesses can streamline sales operations and ensure that every order is processed according to customer-specific requirements.
Next, you will find several fields that help manage financial transactions related to the contact. The 1099 Box option allows you to specify where the journal entries for this contact should be reported in the 1099 report. You can also define the Supplier Currency to be used for purchases, select Payment Terms for purchase orders and vendor bills, and set the preferred Payment Method for paying this contact. By enabling the Receipt Reminder option, the system will automatically send an email to the contact asking them to confirm the exact receipt time before the expected delivery date.
In the Point of Sale (POS) section, you can assign a Barcode to identify the contact during sales transactions. The Fiscal Information section allows you to configure the Fiscal Position, ensuring that the correct taxes and accounts are applied to the contact’s transactions.
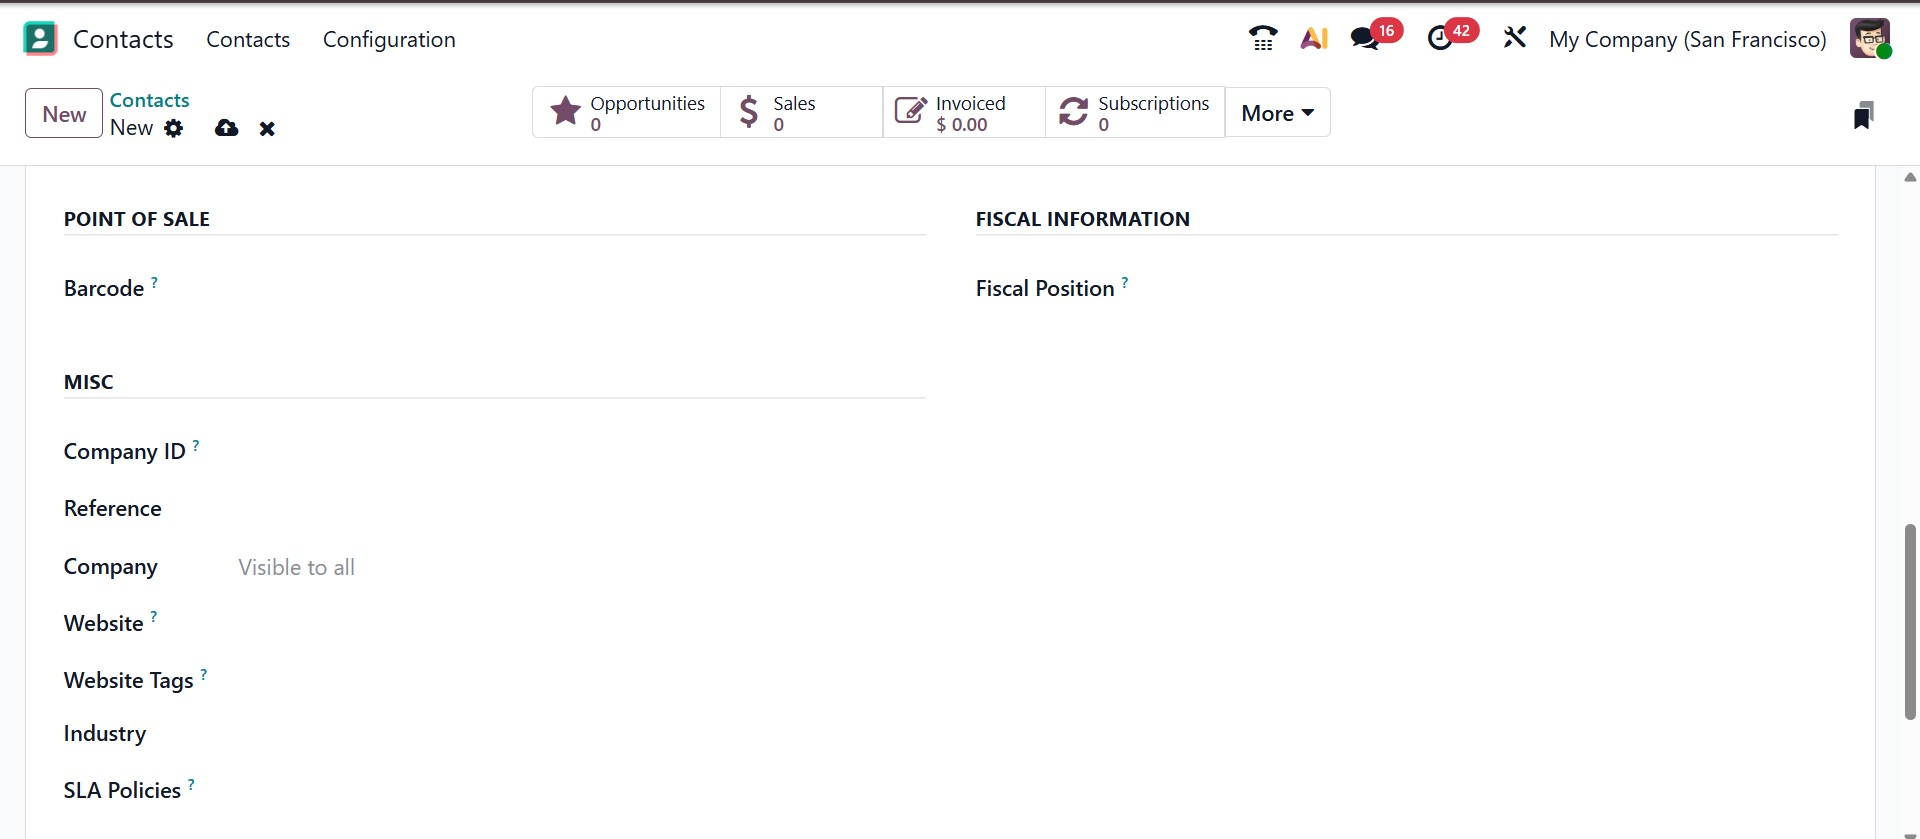
The Miscellaneous section provides fields for additional details. Here, you can enter the Company ID, Reference, Company, Website, Website Tags, Industry, and SLA Policies. For example, you can use the Reference field to add internal notes or unique identifiers for the contact. In multi-company environments, the Company field lets you restrict the contact to a specific company. Similarly, in a multi-website setup, you can use the Website field to publish the contact on a particular website only. Website Tags make it easier to filter customers on the /customers page, while the Industry field allows you to classify the contact’s business sector. Finally, you can assign a Helpdesk SLA Policy to the contact to define service level agreements for support operations.
You can configure all the details required for the contact’s accounting procedures under the Accounting tab.
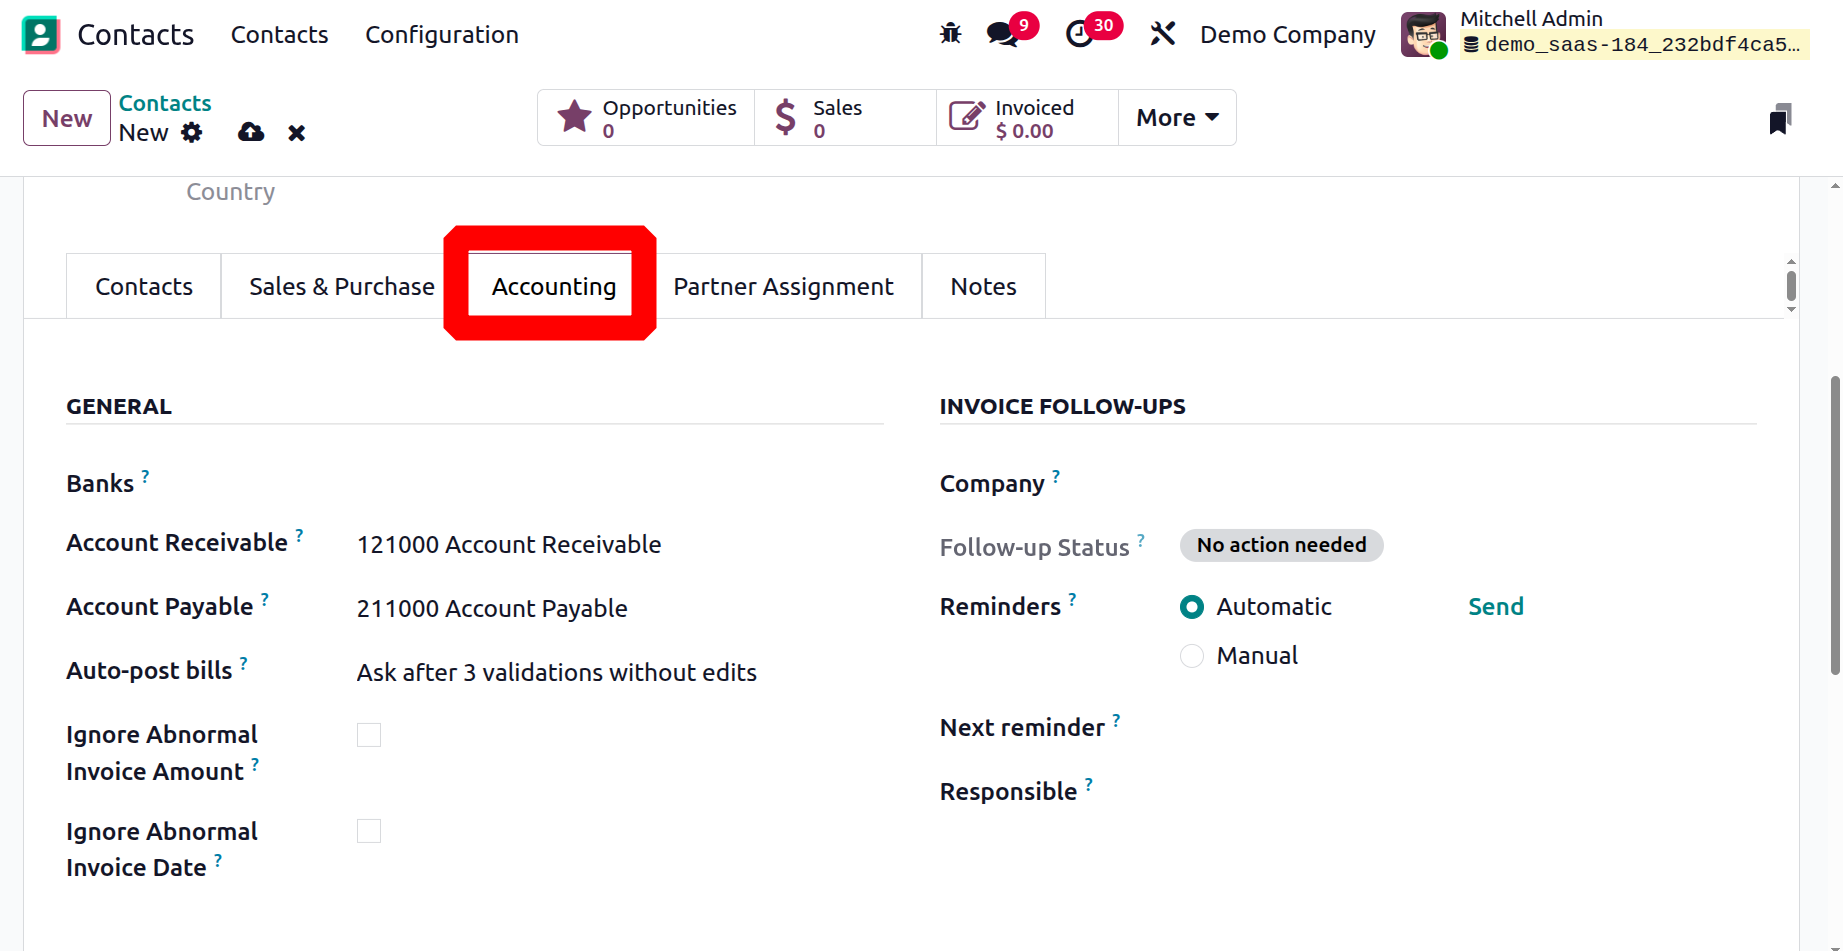
The Accounts Receivable and Account Payable fields allow you to specify the accounts used for managing outstanding balances. The Account Receivable tracks the amounts owed by customers to your company, while the Account Payable tracks the amounts your business owes to vendors or suppliers.
The tab further includes an Invoice Follow-up section. Within this section, you can configure:
- Follow-up Status: Displays the current status of invoice follow-ups for the customer.
- Reminders:Shows the number of follow-up reminders sent for overdue invoices.
- Next Reminders:Indicates the date of the next planned follow-up action.
- Responsible:Specifies the user or team responsible for handling the customer’s follow-ups.
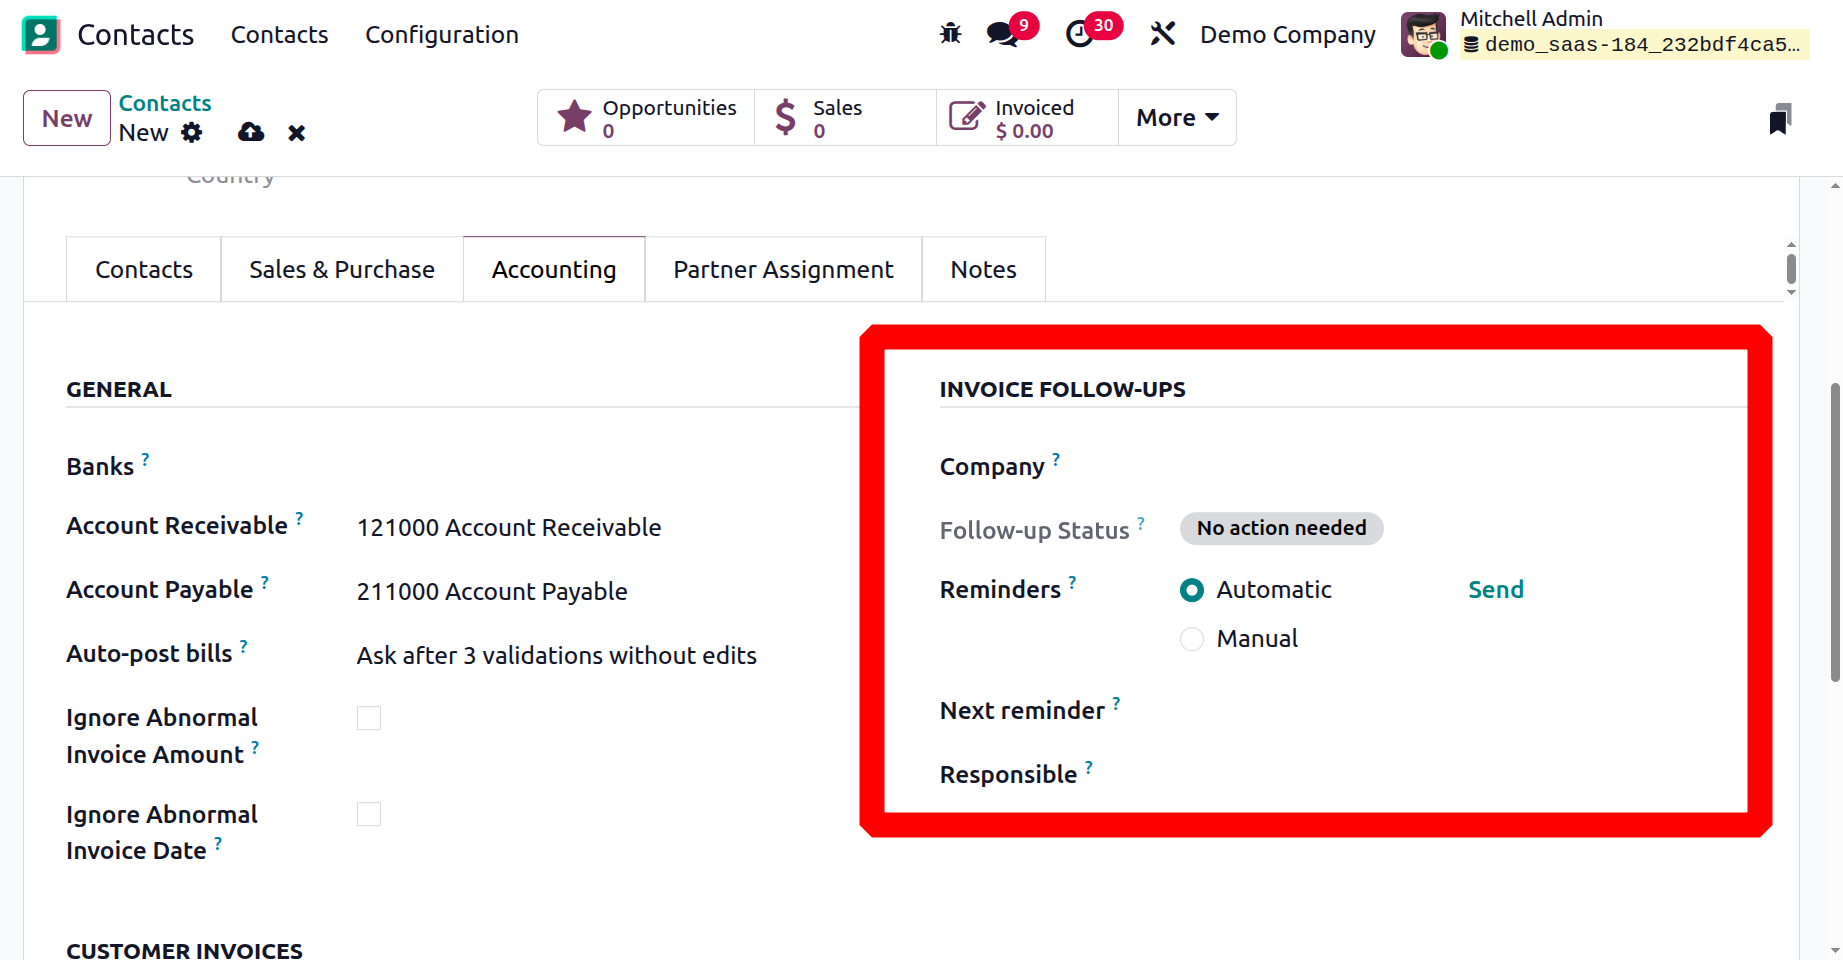
Another useful option is Auto Post Bill, which you can enable or disable based on your business preference. When activated, this feature automates the posting of bills or the creation of invoices directly from sales or delivery orders, reducing manual effort.
Finally, the tab also supports different communication options for sending invoices or payment reminders. Depending on the requirement, you can deliver them by Print, Email, SMS, or even Post, ensuring flexibility in how you interact with your contacts.
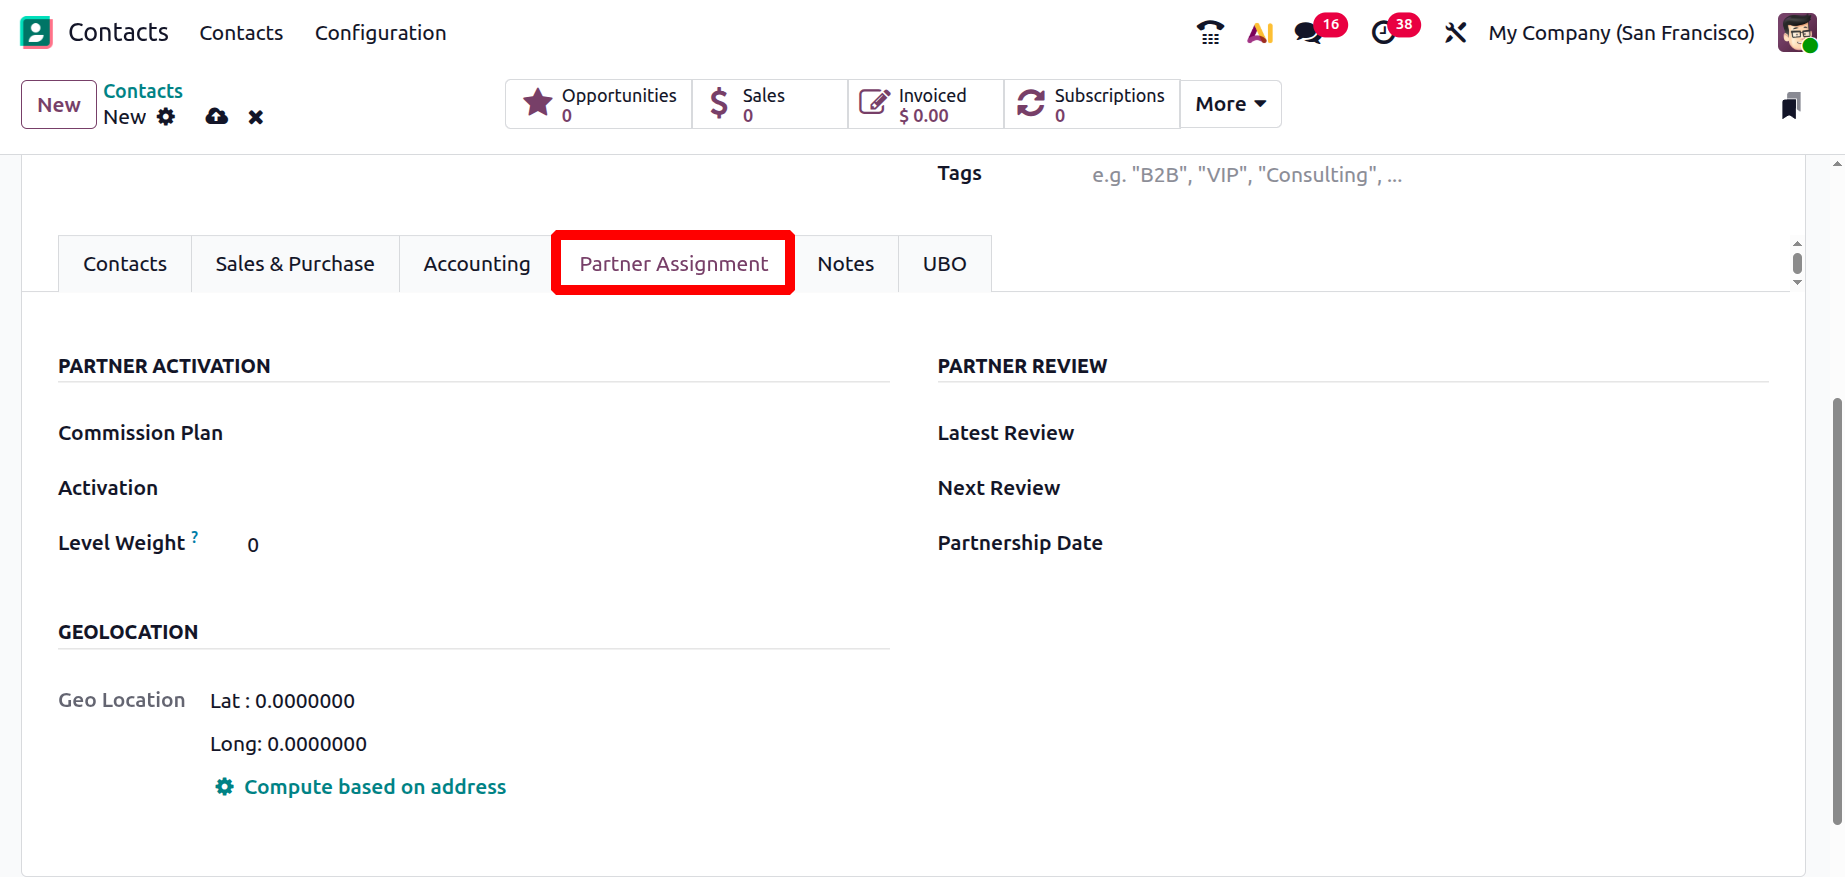
Under the Partner Assignment tab, you can configure partnership-related details. Here, you may enter the Partner Level, Commission Plan, Activation, Level Weight, Most Recent Partner Review, Most Upcoming Partner Review, and Partnership Date. These fields make it possible to evaluate and manage the business relationship with the contact more effectively, especially in long-term partnerships or reseller agreements.
Finally, you can also define the contact's geolocation in the designated field. This feature is helpful for mapping, territory management, and region-based reporting, ensuring that your contacts are accurately linked to their physical locations.
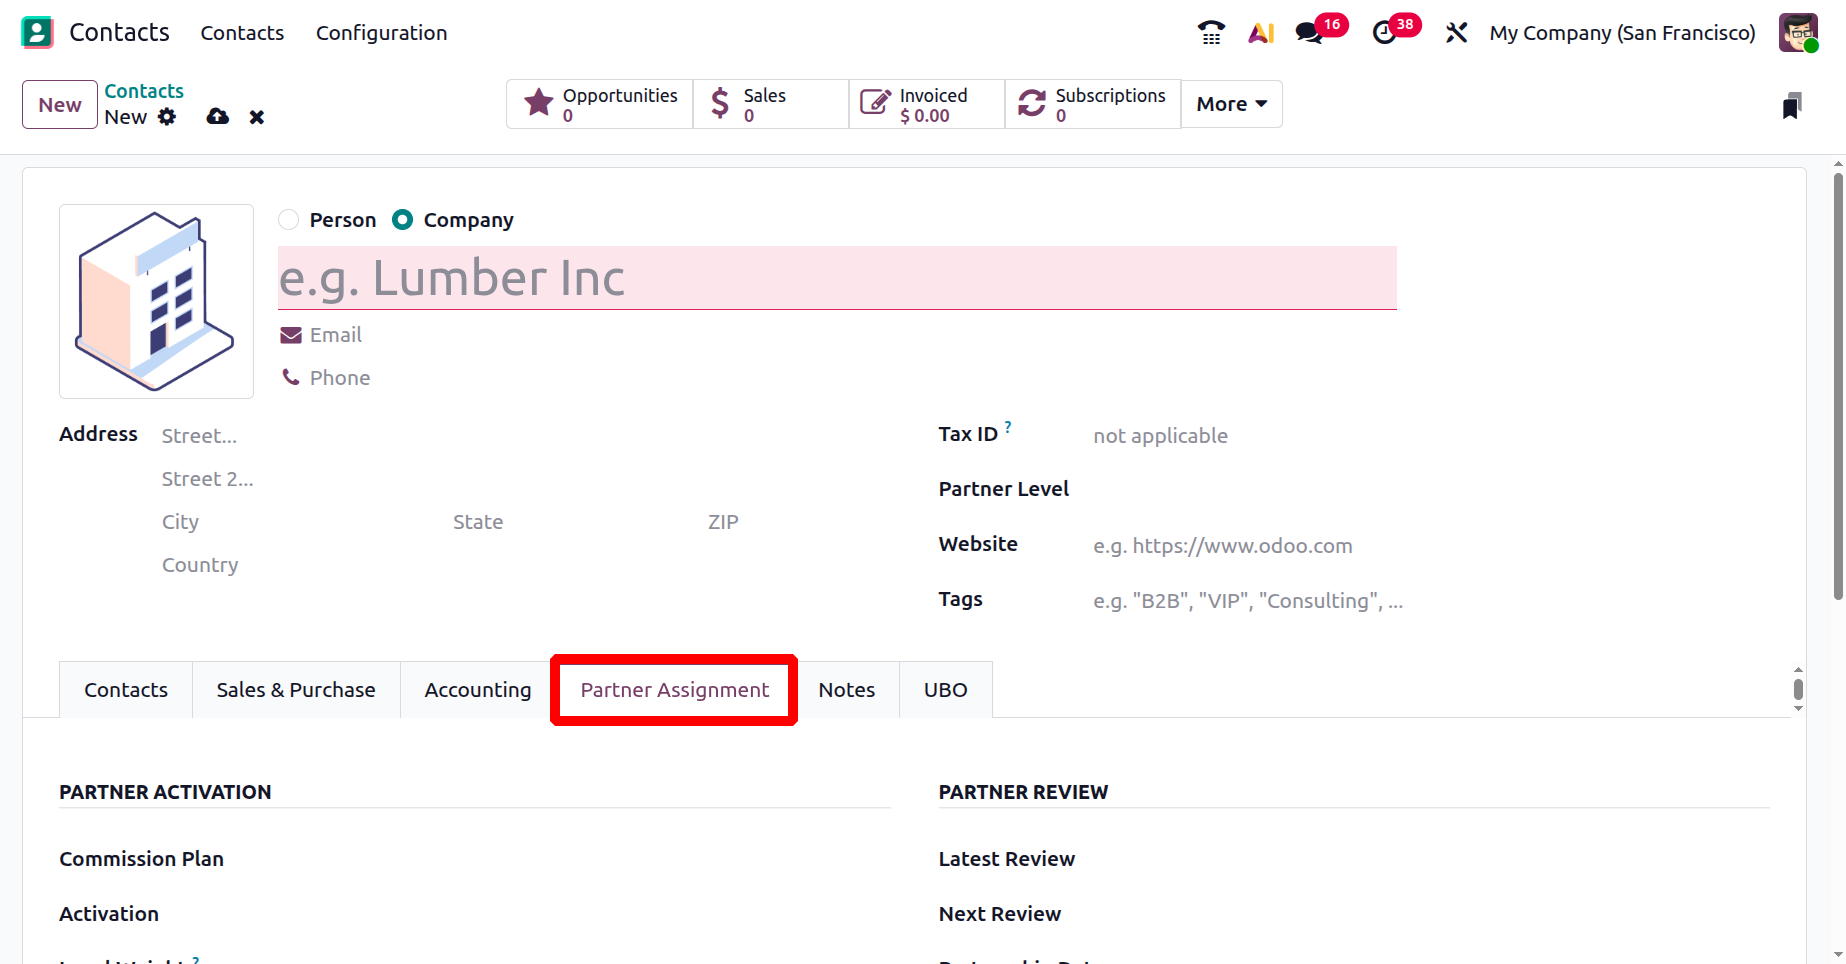
The Partner Assignment page follows, which includes additional partner-related configurations. By default, this page contains a Geolocation section, where you can define the exact location of the contact. Along with this, you will also find options for Partner Review and Partner Activation setups.
It is important to note that these options are only visible when the Resellers module is installed in the database. When enabled, these fields allow you to manage reseller relationships more effectively by tracking partnership levels, commission plans, review schedules, and activation details.
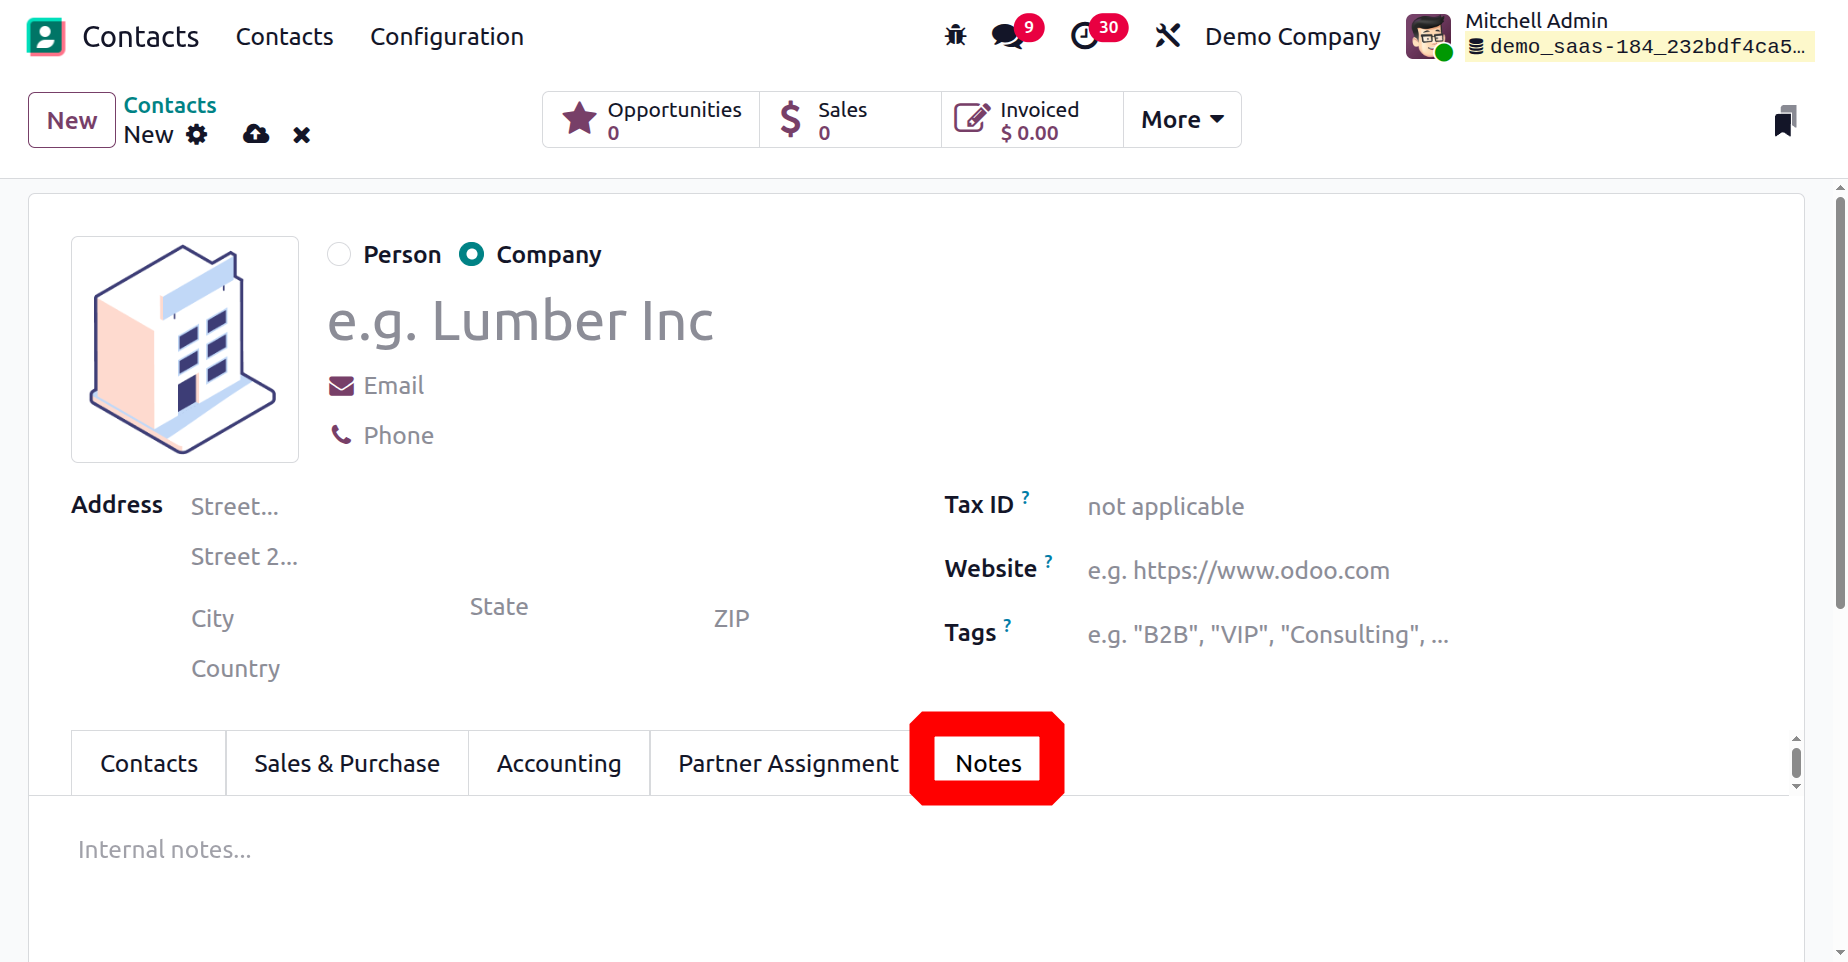
You can record any additional notes or observations about the contact in the Notes area. These notes are visible only to internal users and help teams share useful background information related to the contact.
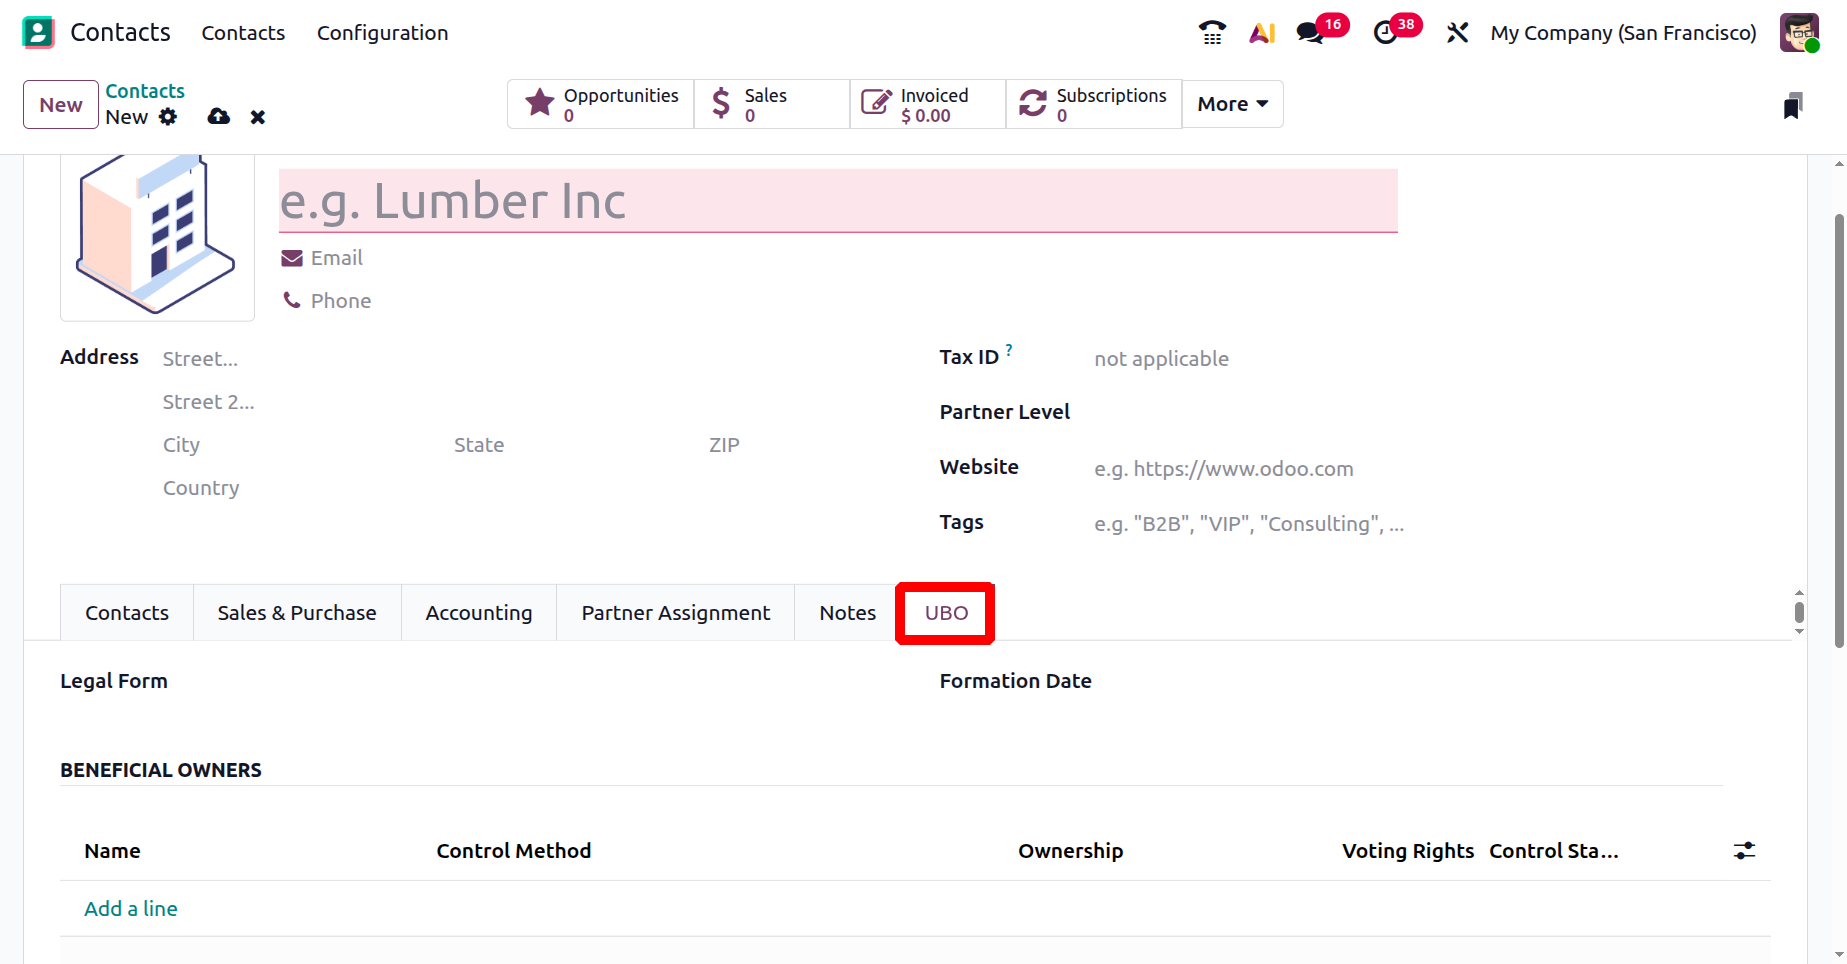
Lastly, the UBO tab in the contact form is designed to record details of the Ultimate Beneficial Owners of a company or organization. This section allows users to define the company’s legal form, formation date, and list out all beneficial owners along with their respective details. Each owner entry can include the Name, Control Method, Ownership, Voting Rights, and Control Status, ensuring compliance with ownership transparency requirements. This feature is particularly useful for businesses that need to meet regulatory standards and maintain a clear record of individuals holding significant control or interest in the company.
At the top of the contact form, smart buttons provide quick access to various activities and records linked to the partner. These include Opportunities, Sales, Invoices, Subscriptions, Meetings, Tickets, and Tasks, giving users an immediate overview of ongoing interactions. The More smart button expands into a drop-down menu with additional options, including Purchases, Documents, Lots/ Serial Numbers, Direct Debit Mandatory, Go to Website, and Shareholders. Among these, the Partner Ledger is especially valuable, as it offers a detailed statement of all financial transactions associated with the partner.
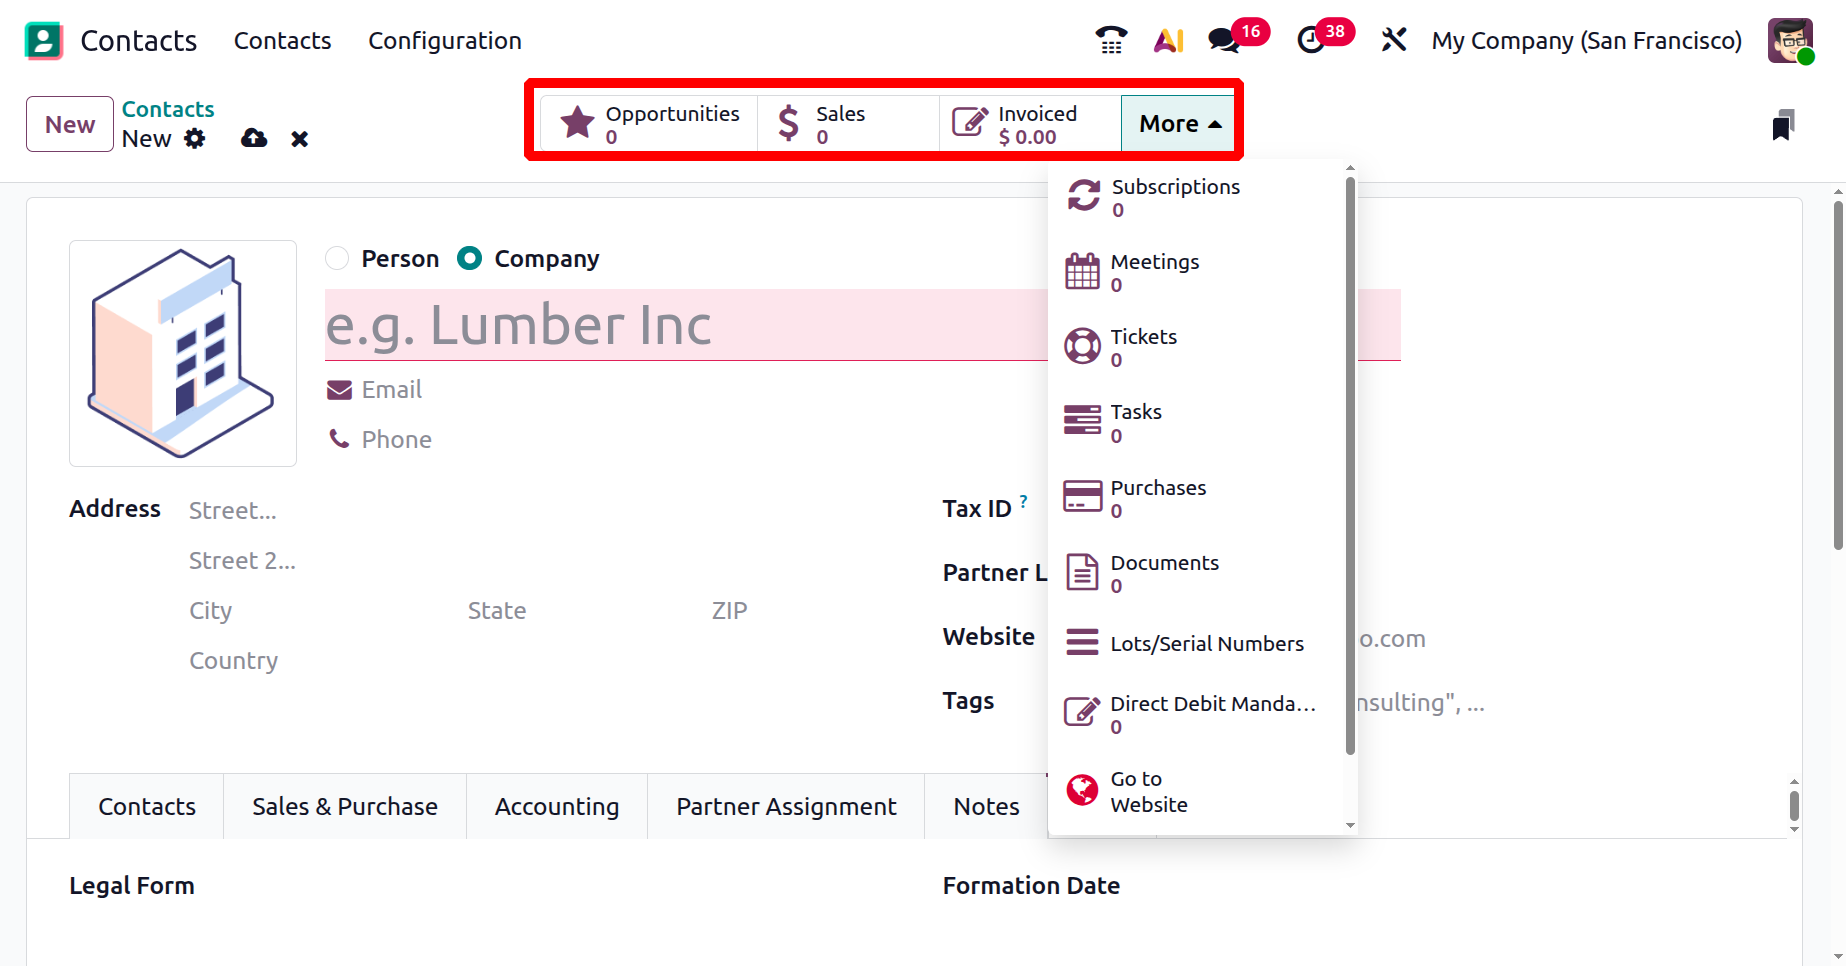
The Opportunities button displays all CRM opportunities associated with the contact, enabling sales teams to track leads and deals. The Sales button provides access to related sales orders and their current status. The Invoiced smart tab displays all invoices generated for the partner, allowing for easy monitoring of payments and outstanding amounts. For businesses managing recurring services, the Subscriptions button highlights active subscription plans, ensuring smooth contract management. The Meetings tab brings together all scheduled appointments from the Calendar, while the Tickets button connects to the Helpdesk, listing customer support issues for quick follow-up. Similarly, the Tasks tab displays project tasks linked to the contact, aiding service and project tracking.
If a contact has any overdue or on-file payments, the system provides dedicated smart buttons for direct access. Similar shortcuts are also available for Deliveries, Documents, Loyalty Cards, and Direct Debits, ensuring that all contact-related activities can be tracked and managed from a single interface.
2. Configuration
The Configuration menu in the Contacts module offers several settings that can be customized to improve the module’s functionality. In this section, we will explore each option in detail and explain how they enhance the overall use of the Contacts module.
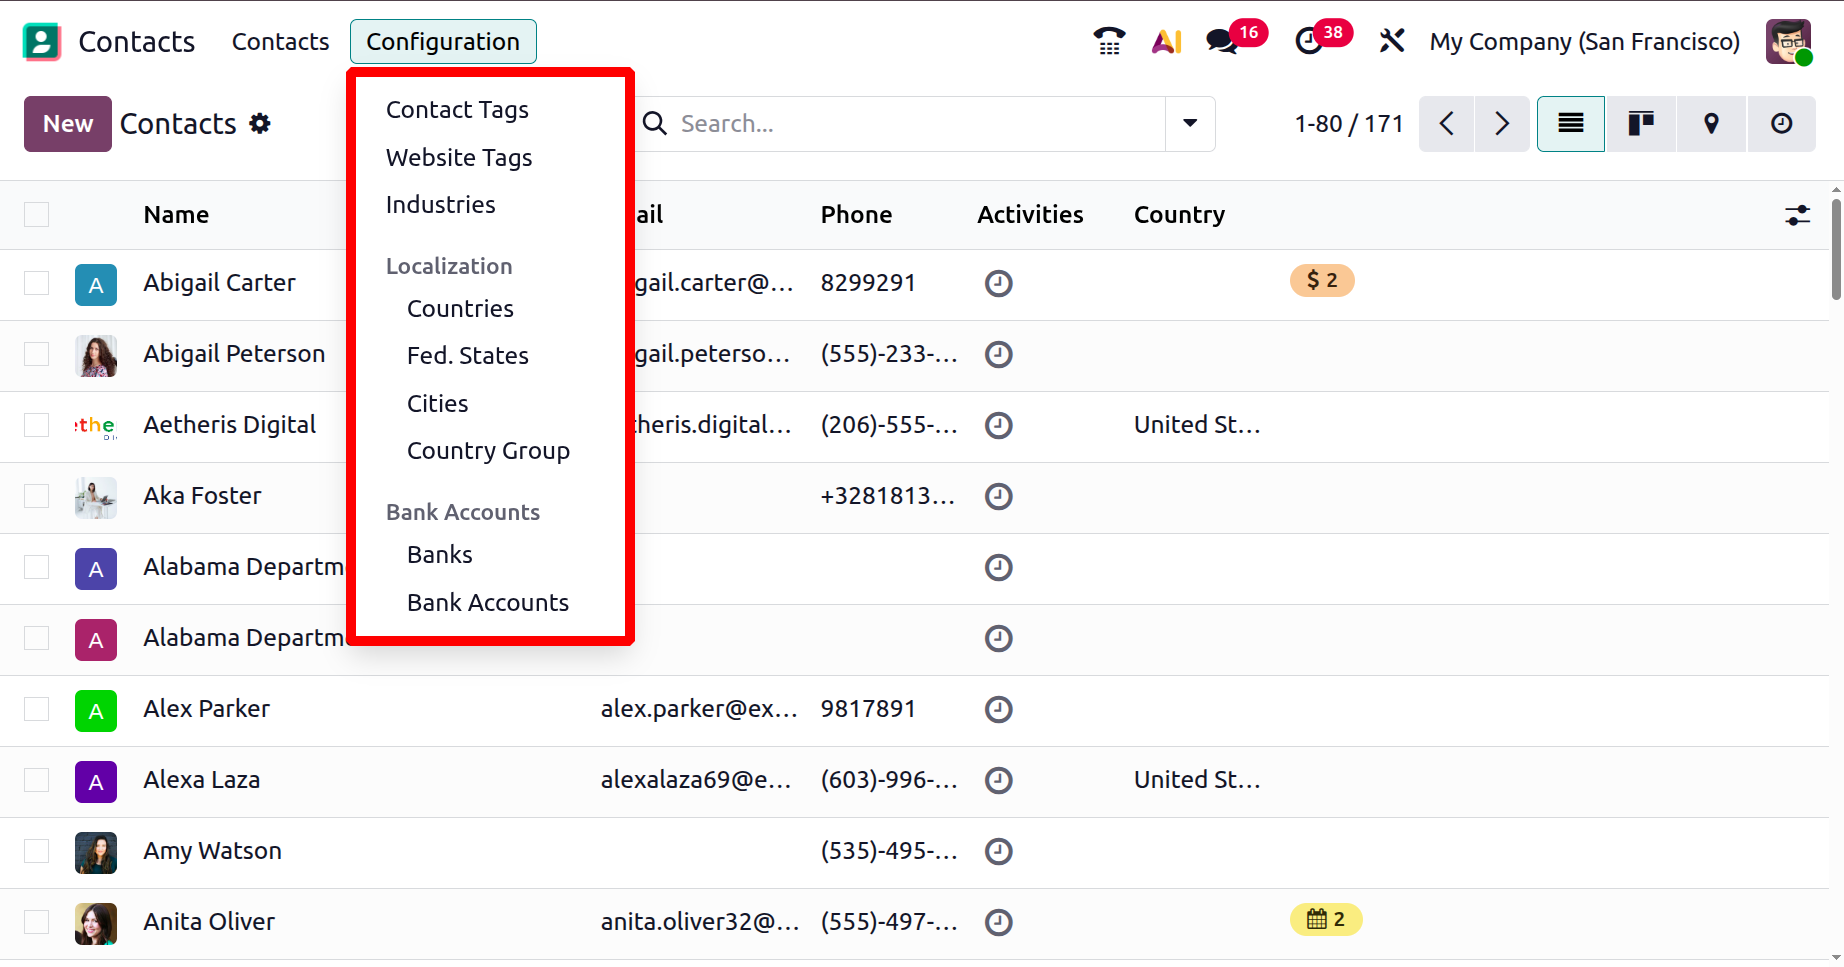
2.1 Contacts Tag
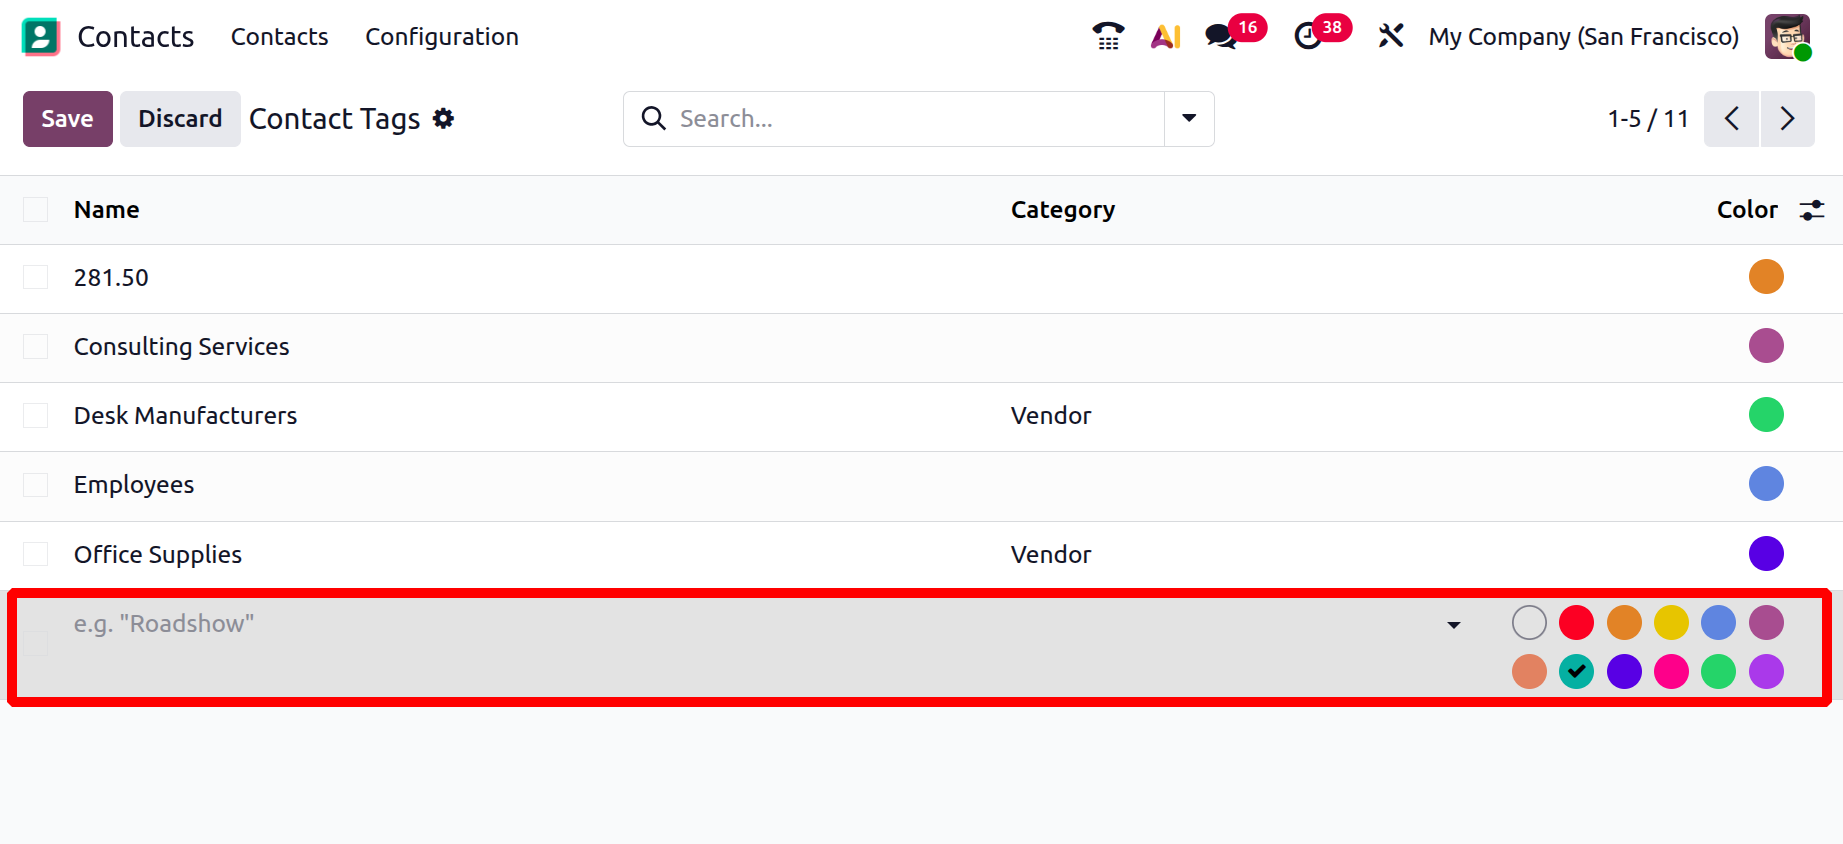
You can easily add tags to contacts from the Configuration menu. By selecting the Contact Tags option, you can view all the tags that have already been created. The list will display details such as the Display Name and the assigned Color for each tag.
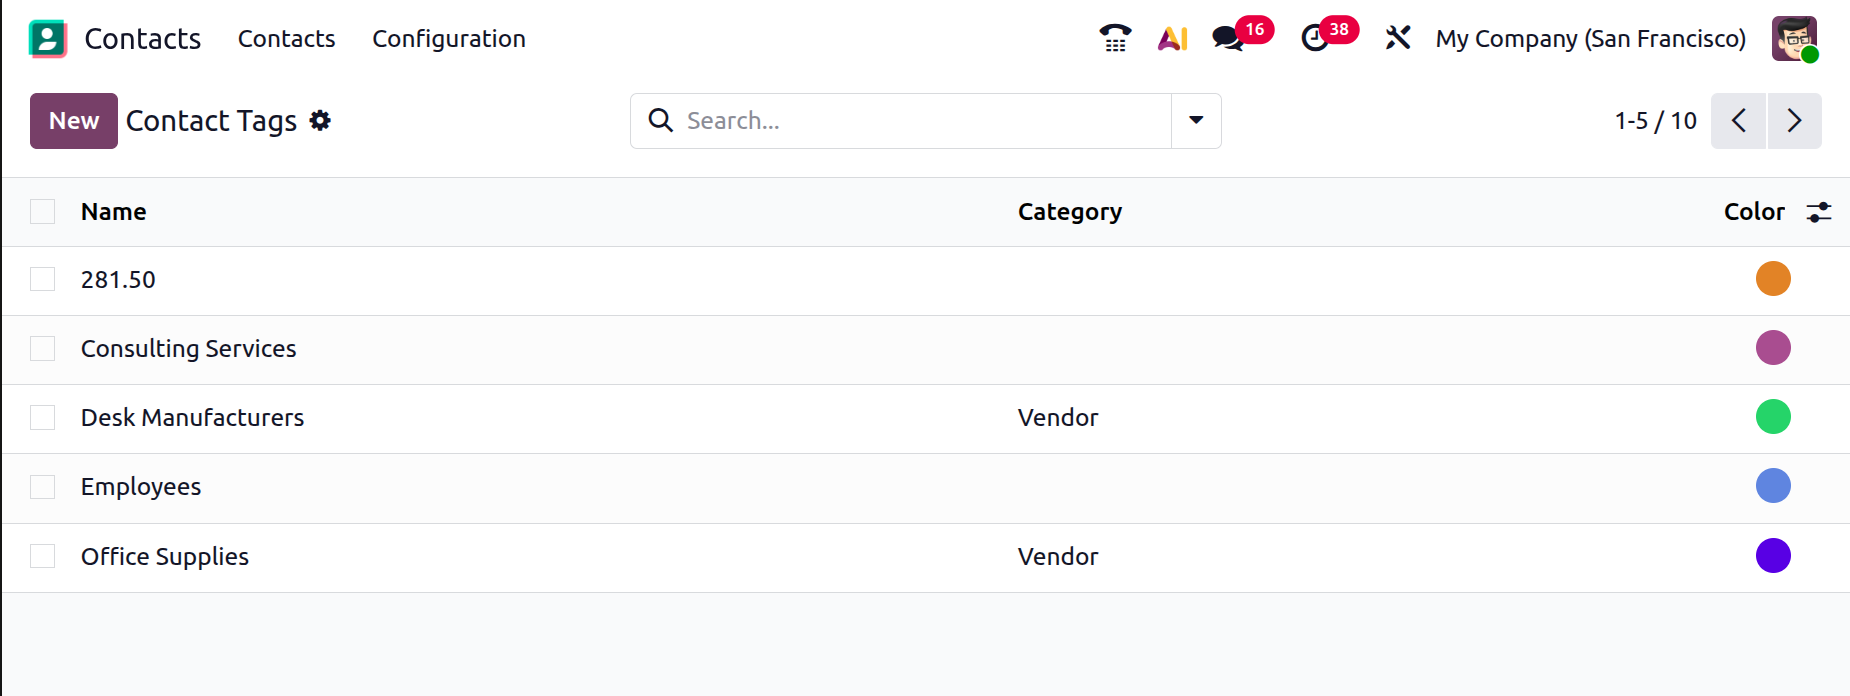
To create a new tag, click the New button. A form will appear where you can easily add the tag by entering its name in the corresponding field, as shown in the image below.
2.2 Website Tag
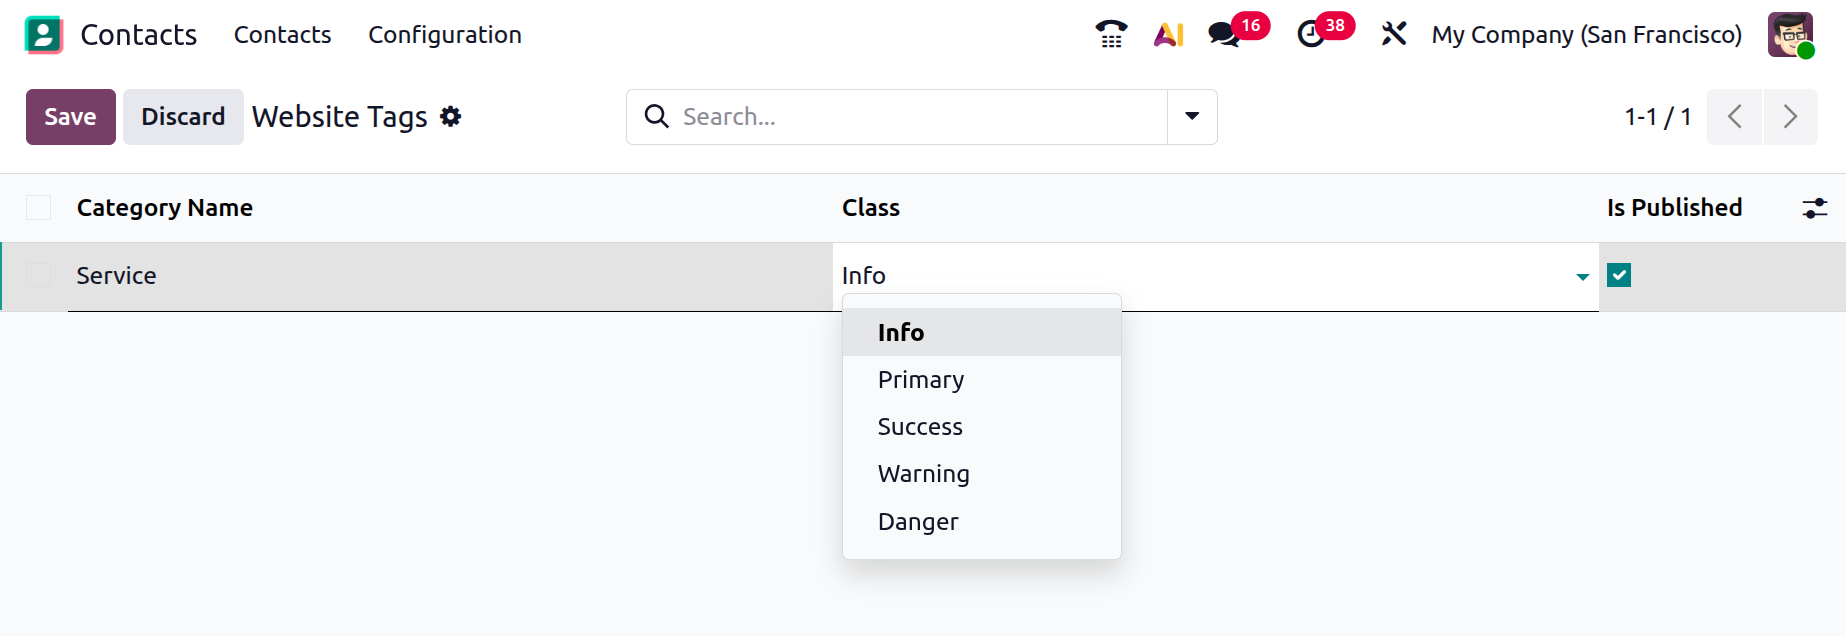
Similar to Contact Tags, you can configure Website Tags to categorize contacts for tracking and analysis. This option is available under the Configuration menu. In the Website Tags window, you will see all previously created tags. If none exist, you can create new ones by clicking the New button.

When creating a new website tag, you can enter the Category Name in the new line added to the window. From the drop-down menu, select the appropriate Class, which includes options such as Default, Primary, Success, Warning, and Danger. Once you have made your selection, click the Save button to finalize the tag.
2.3 Industries
When creating a new contact in the Contacts module, you may sometimes need to assign an industry. In such cases, you can easily manage this by selecting the Industries option from the Configuration menu. This will open a window displaying a list of industries that have already been pre-configured in the system.
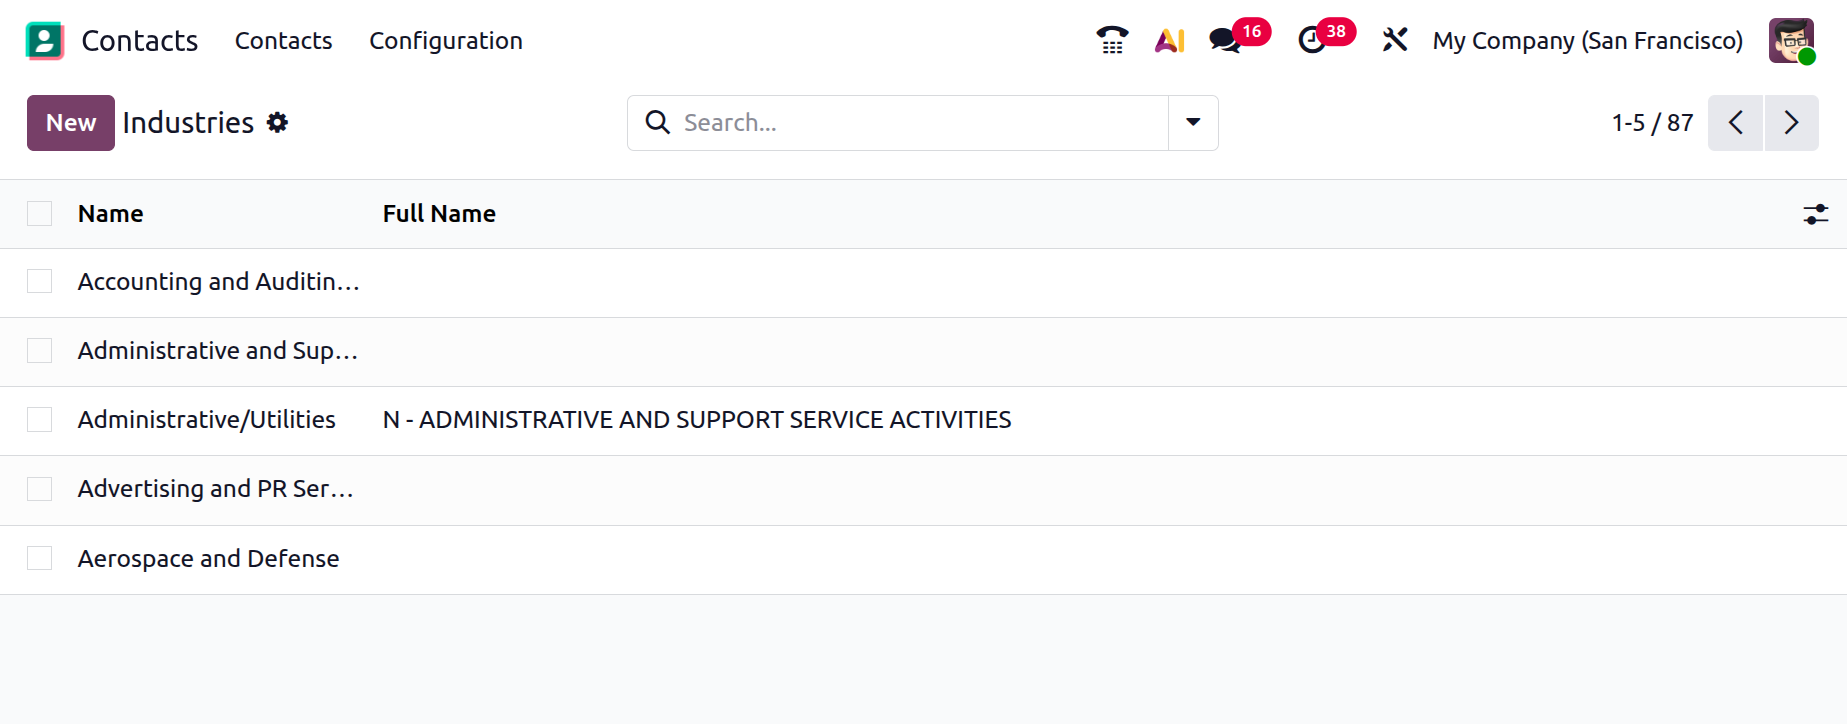
To add a new industry, click the New button. A new line will appear below the existing list, where you can enter the Industry Name and the Full Name. Once the details are added, the new industry will be saved and available for use when creating contacts.
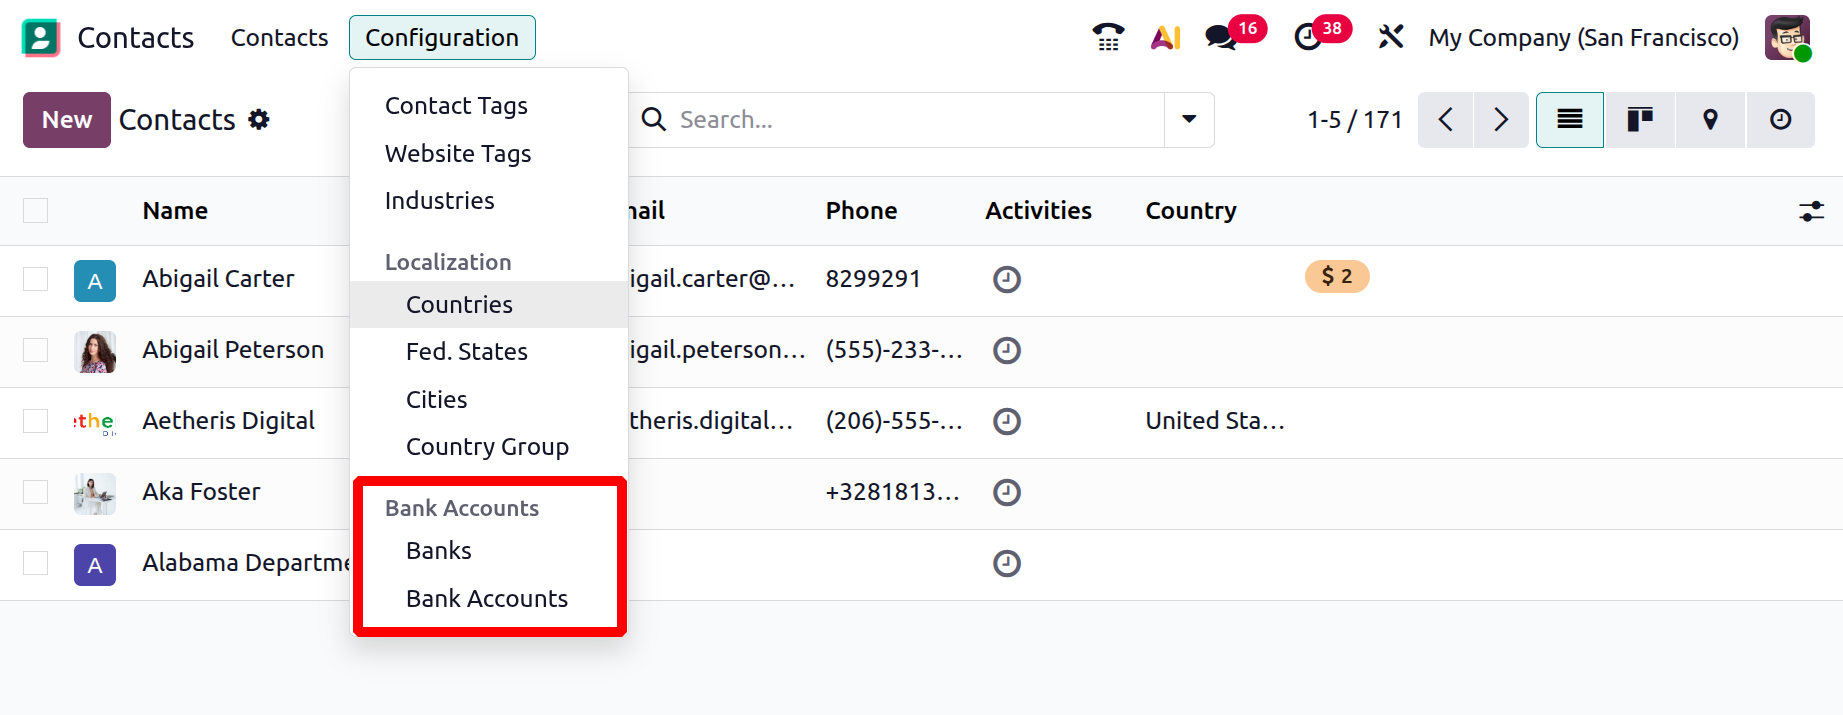
2.4 Localization
In the Configuration menu, under the Localization tab, you can find options to view the configured countries, States, cities, and country groups.
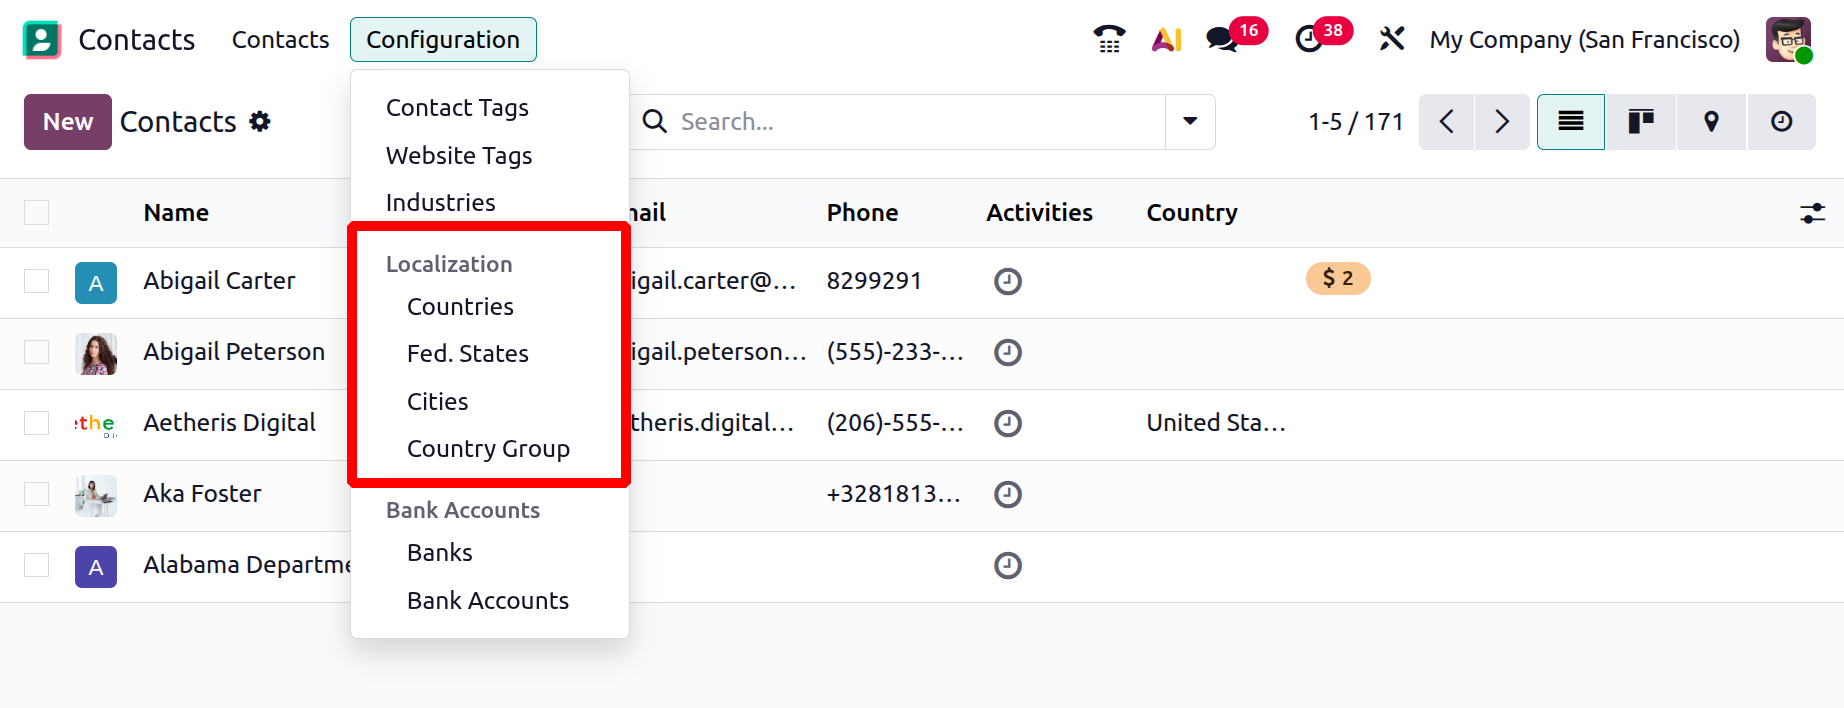
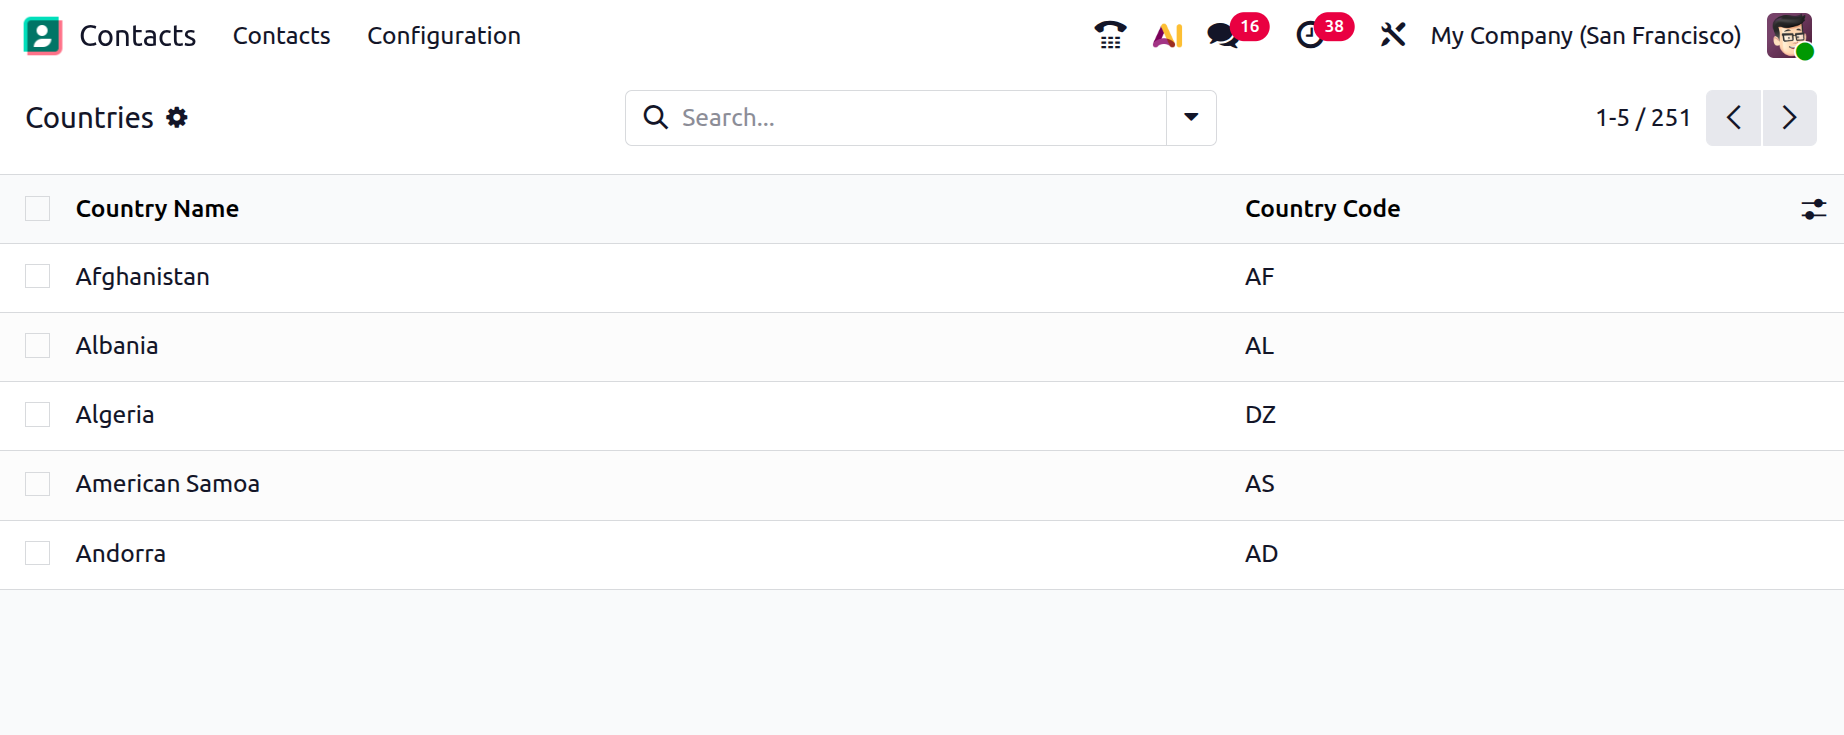
2.5 Countries
The list of countries includes details such as Country Name and Country Code.
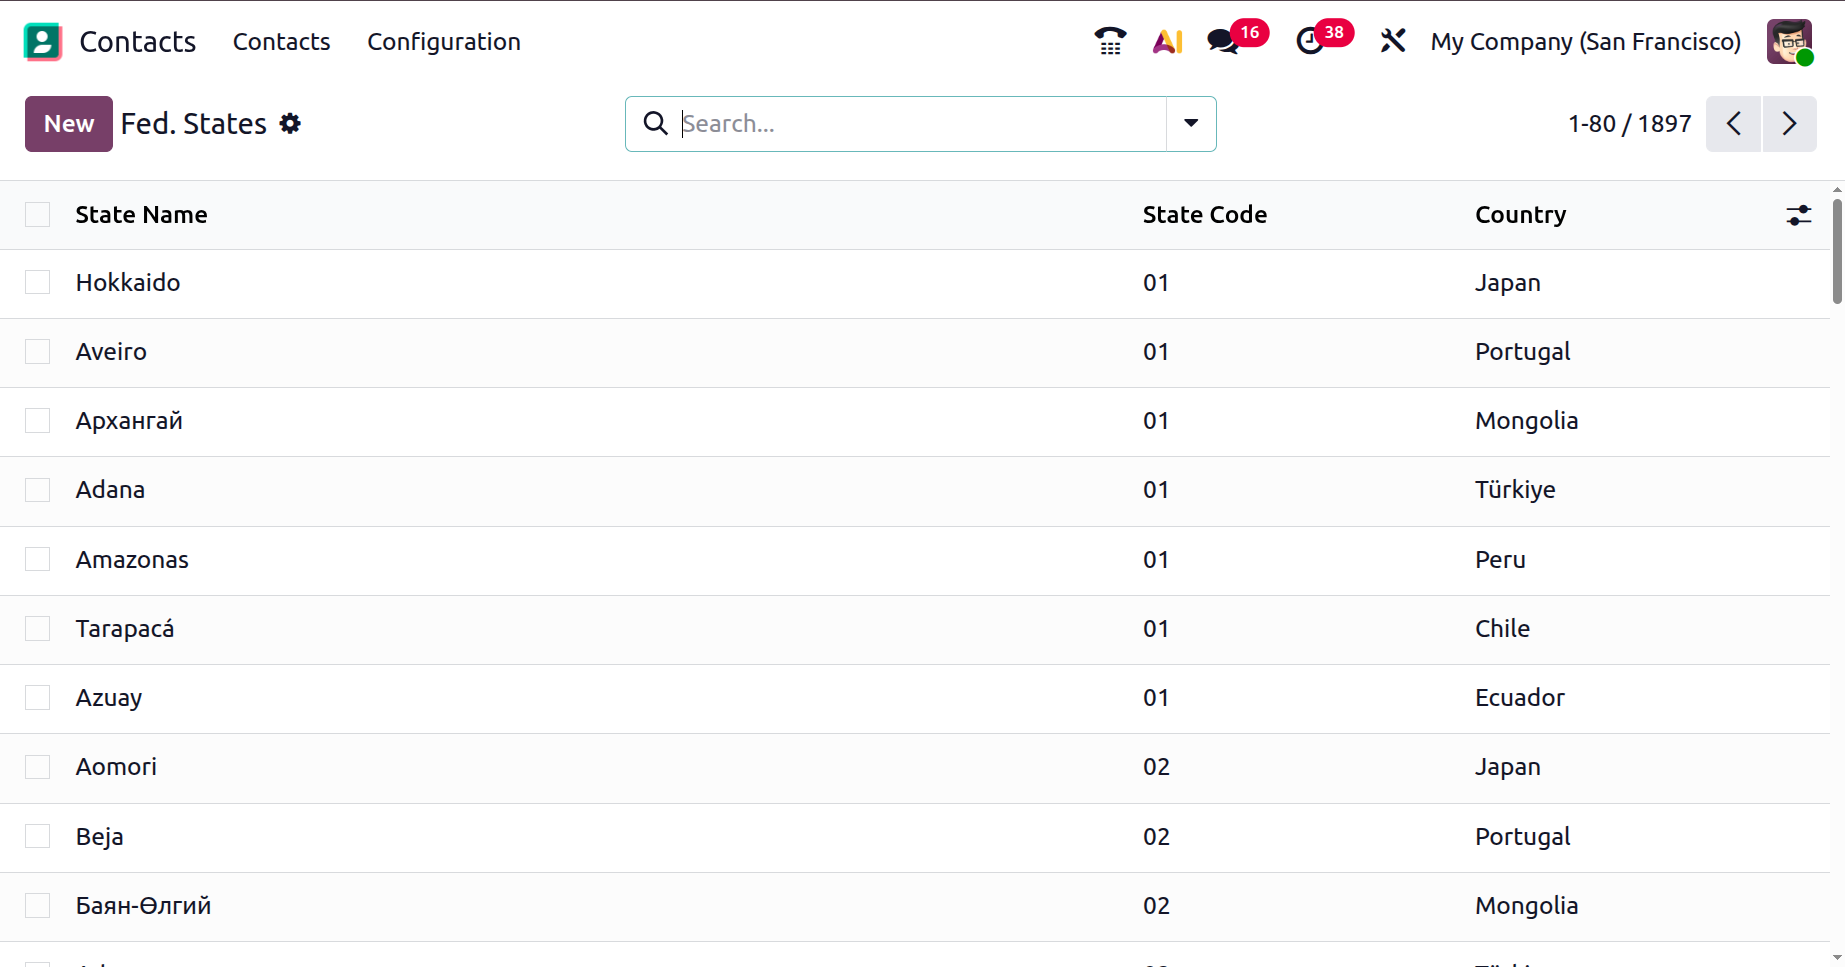
2.6 Fed State
The Fed States list shows the State Name, State Code, and Country. You can add more states to this list by clicking the New button.
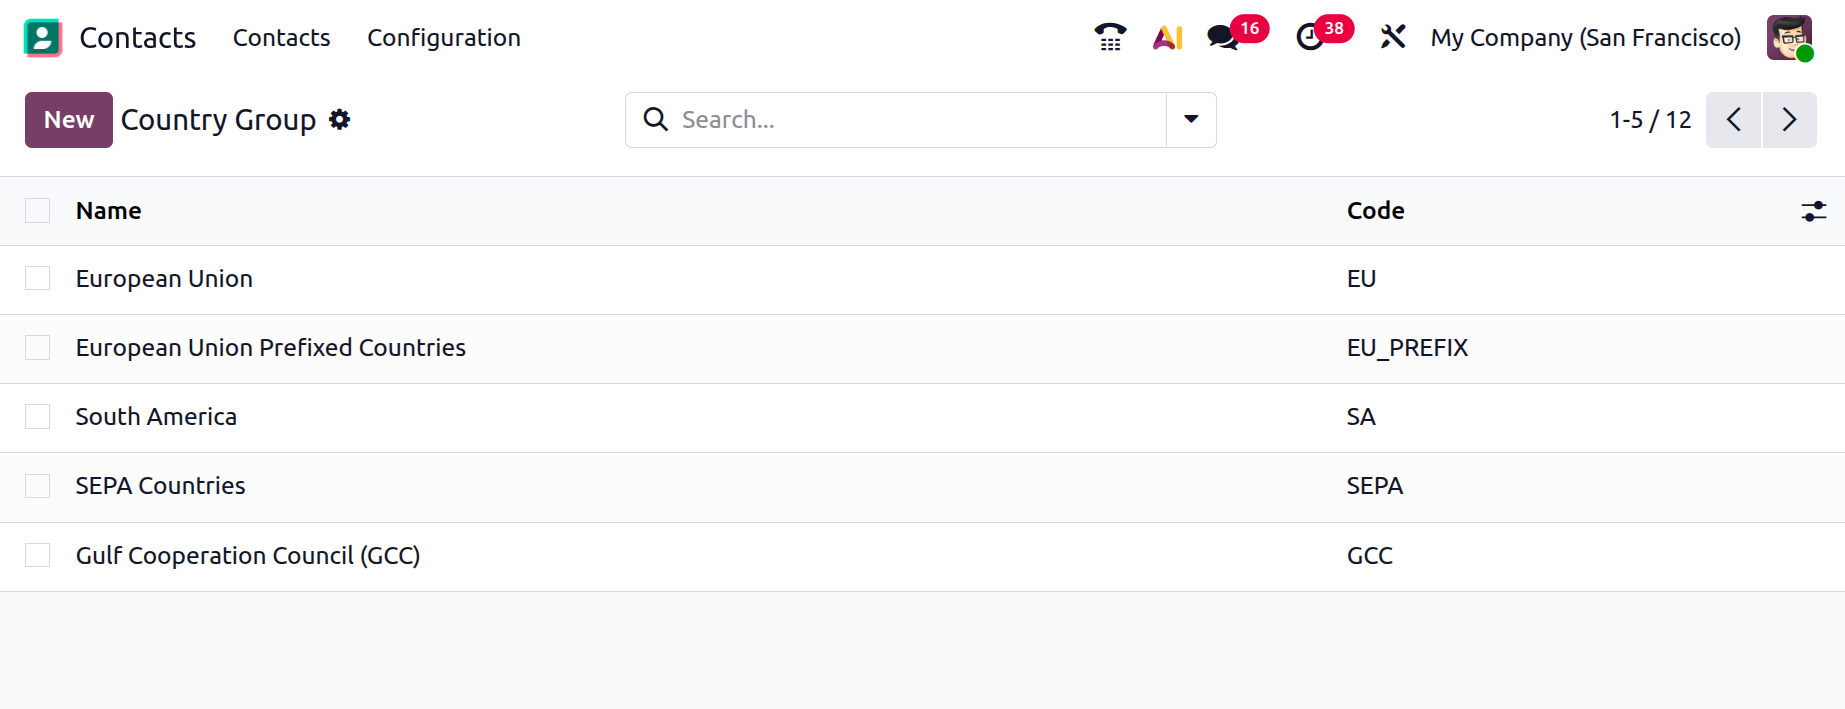
2.7 Country Group
In the Contact module, the corresponding menu displays the names of the Country Groups. You can add a new country group to the list by clicking the New button.
When you select the New option, a creation page will open, as shown in the screenshot below.
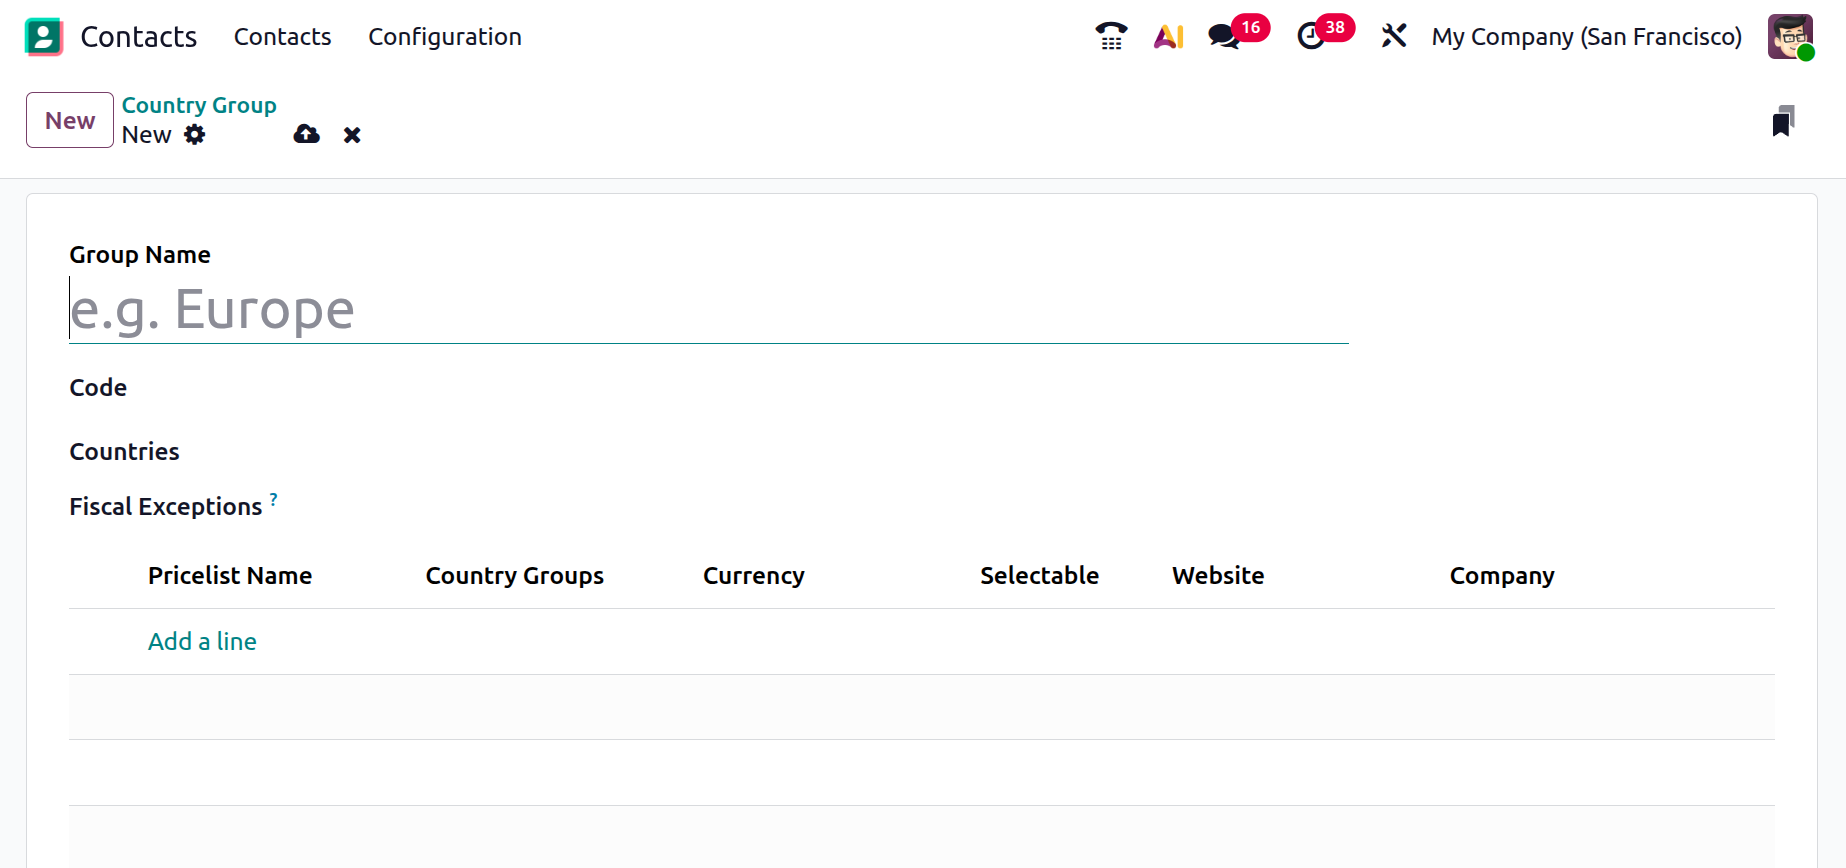
Here, you can enter the group name and then select the countries. Using the Add a Line option, you can include details such as pricelist name, country groups, currency, selectable, website, and company.
When you click Add a Line, a pop-up window will appear, as shown in the image below.
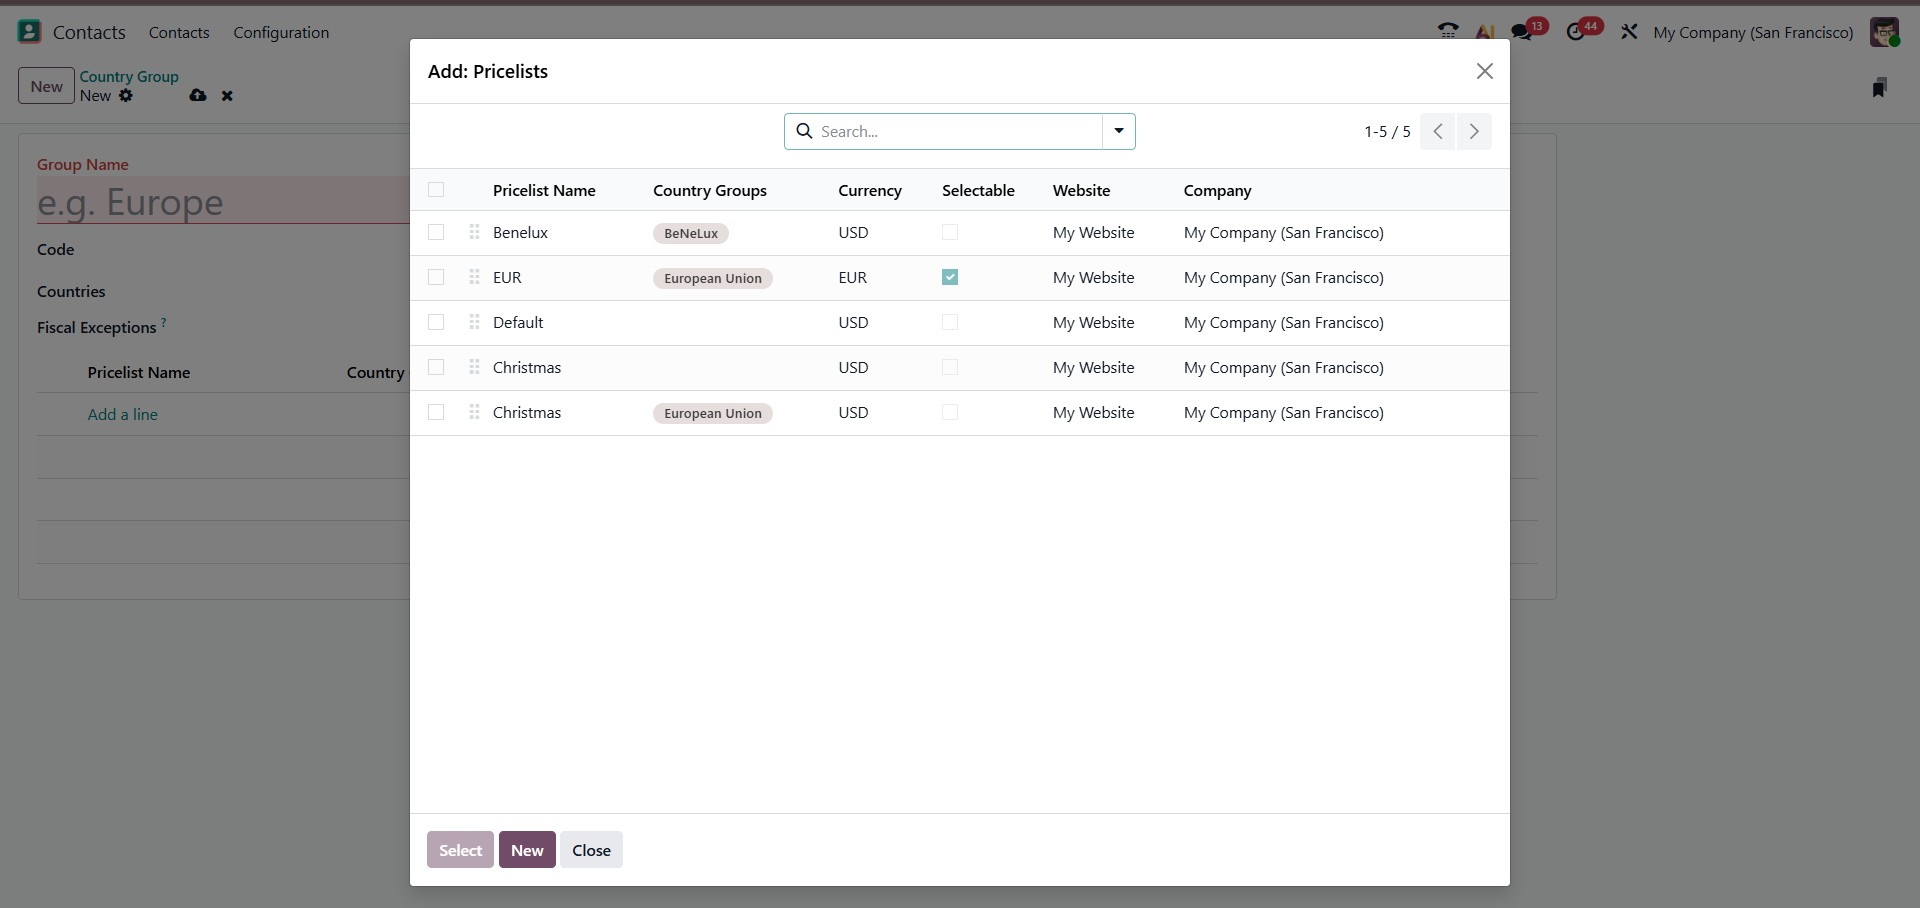
Here, you can either select an existing option or use the New button to enter the pricelist details, and then save the information.
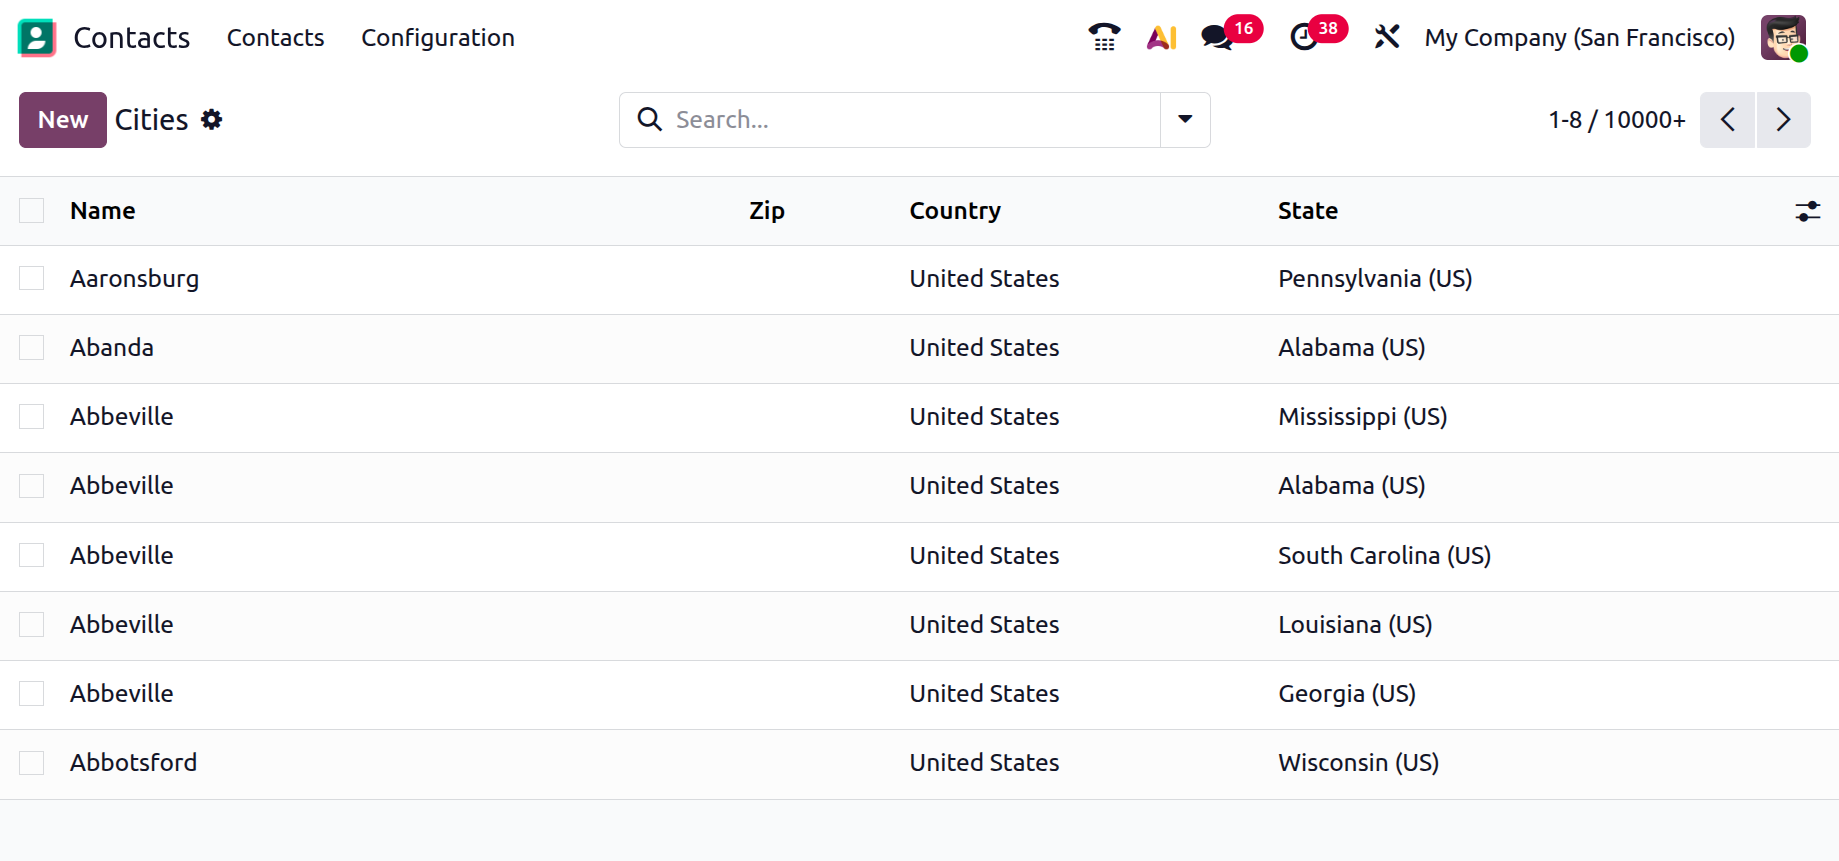
2.8 Cities
Here, you will see a list of city names. To add a new city, click the New icon.
2.9 Bank Accounts
This platform allows you to store contacts’ accounts and financial details. By selecting the Bank option from the Configuration menu, you can view all the banks listed in the module.
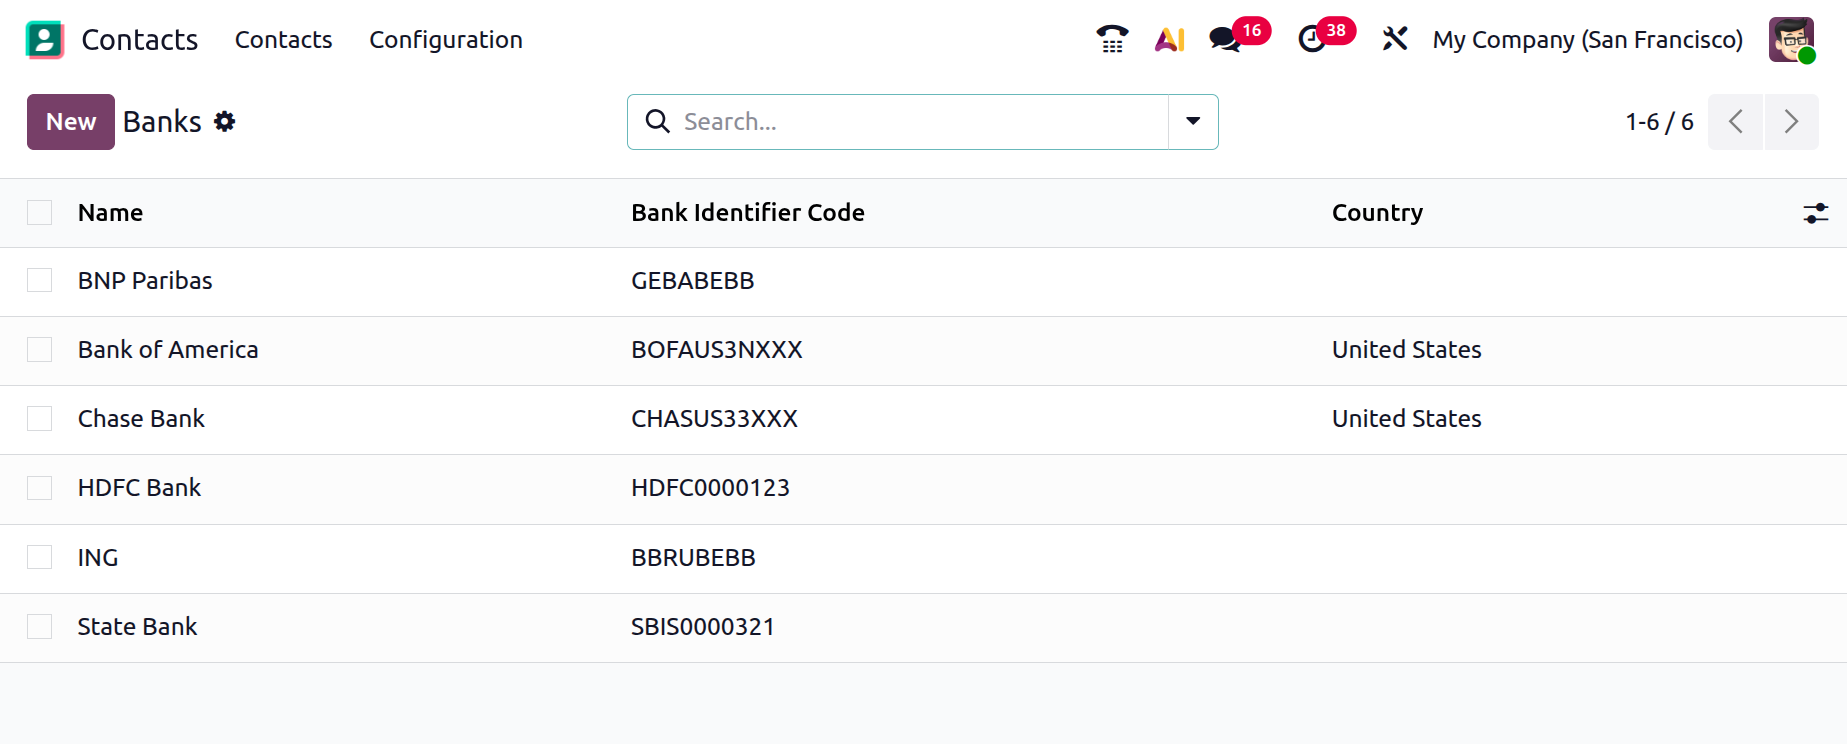
2.10 Bank
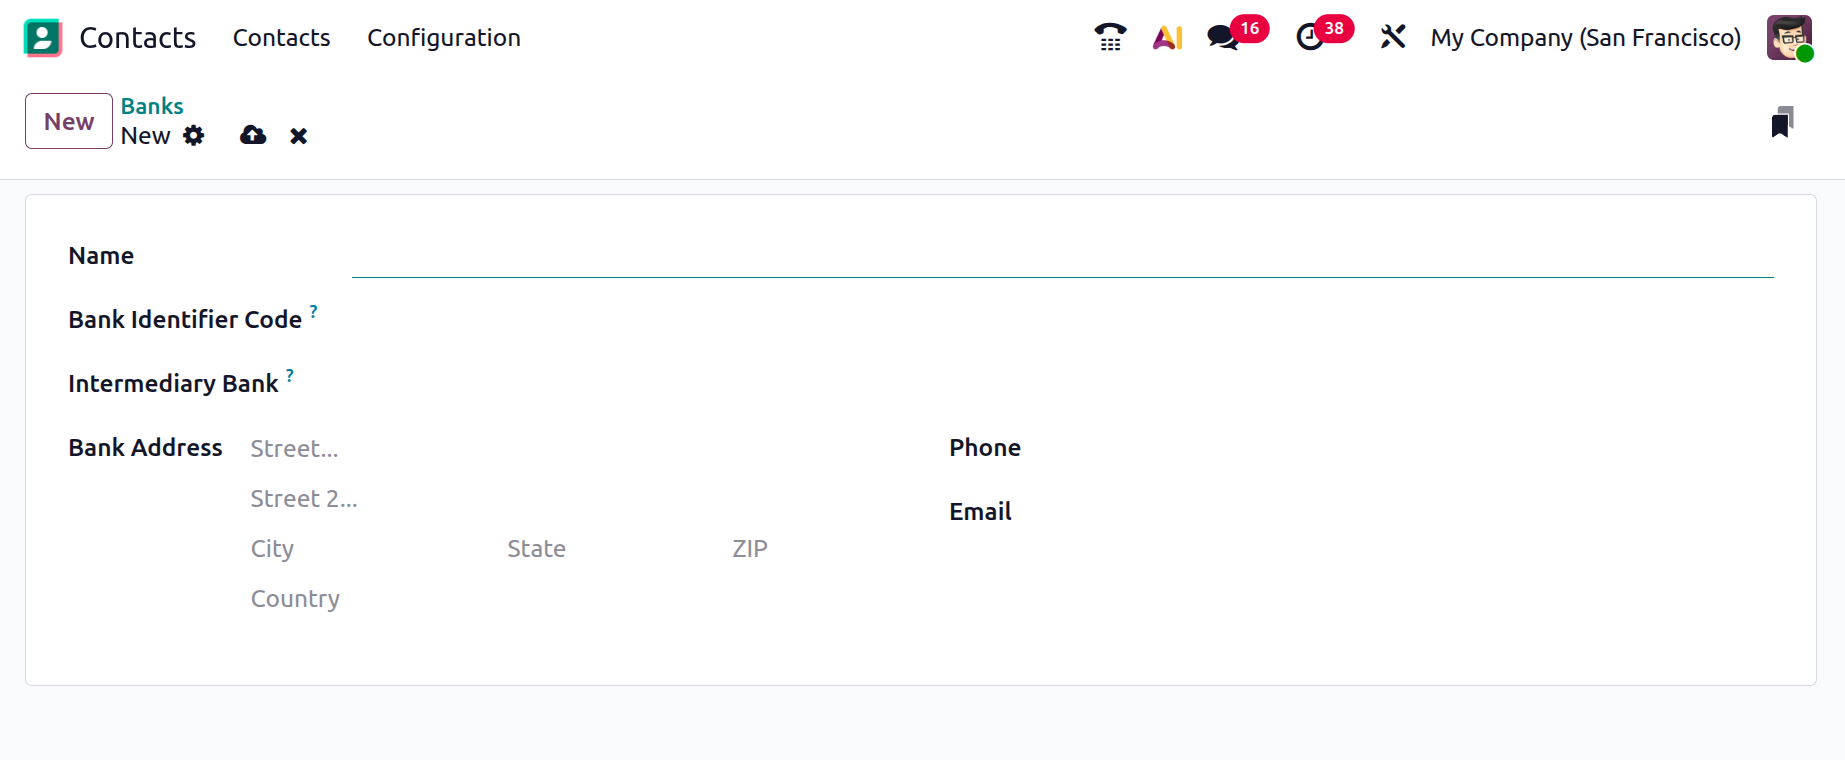
The list view displays the Country, Bank Identifier Code, Name, and Code. To add a new bank, click the New button.
When you enter details such as your name, bank identity code, bank address, phone number, and email, a new form window will open.
2.11 Bank Accounts
The Bank Accounts pane displays the bank account details of the contacts saved in your system.
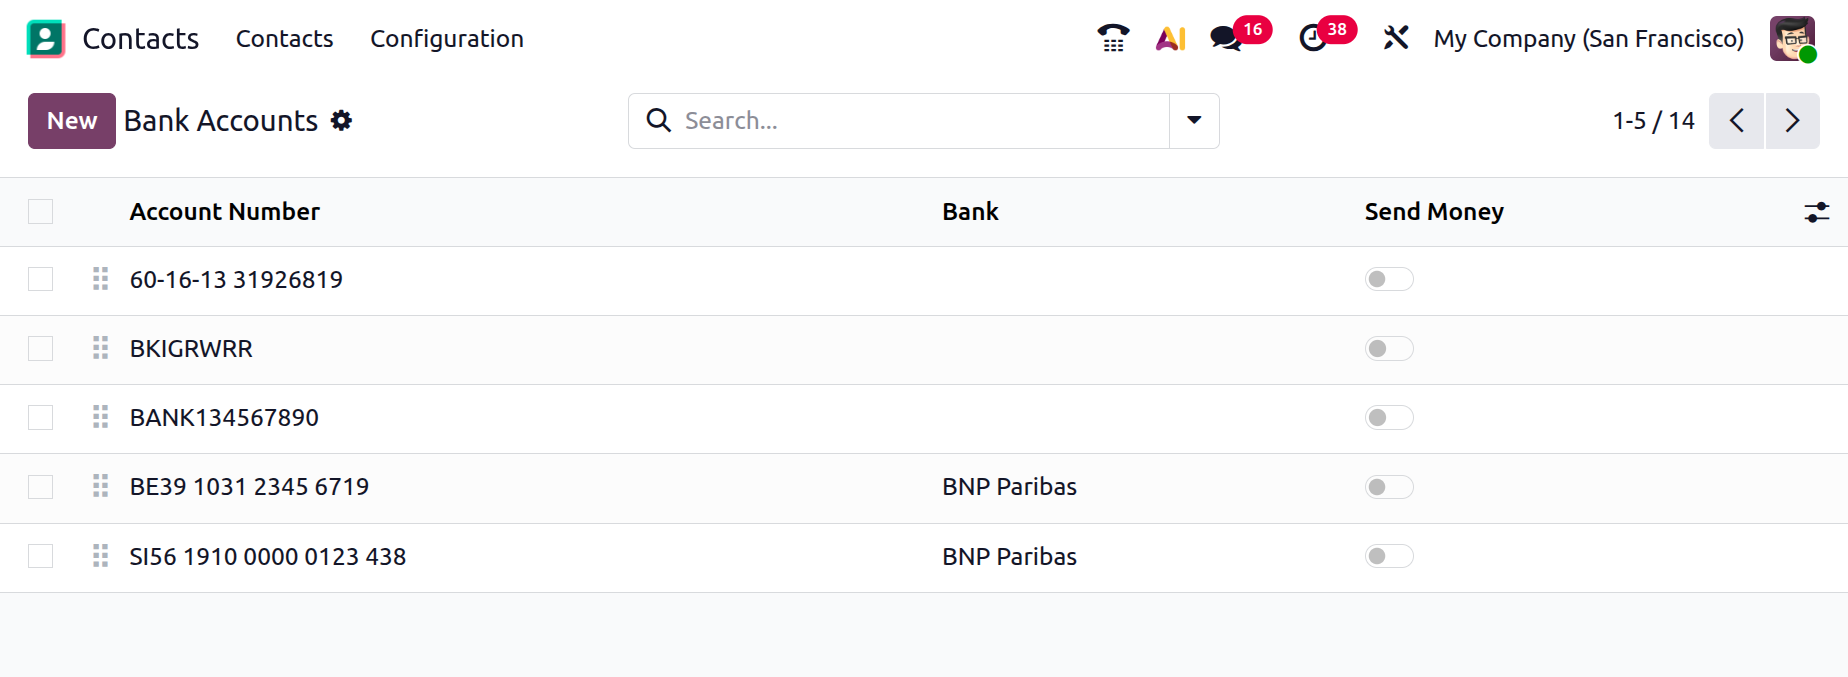
In the list view, bank accounts are displayed with details such as Account Number, Name, Company, Account Holder, and Send Money status. To add another bank account for a contact, click the New button, which will open a new form view.
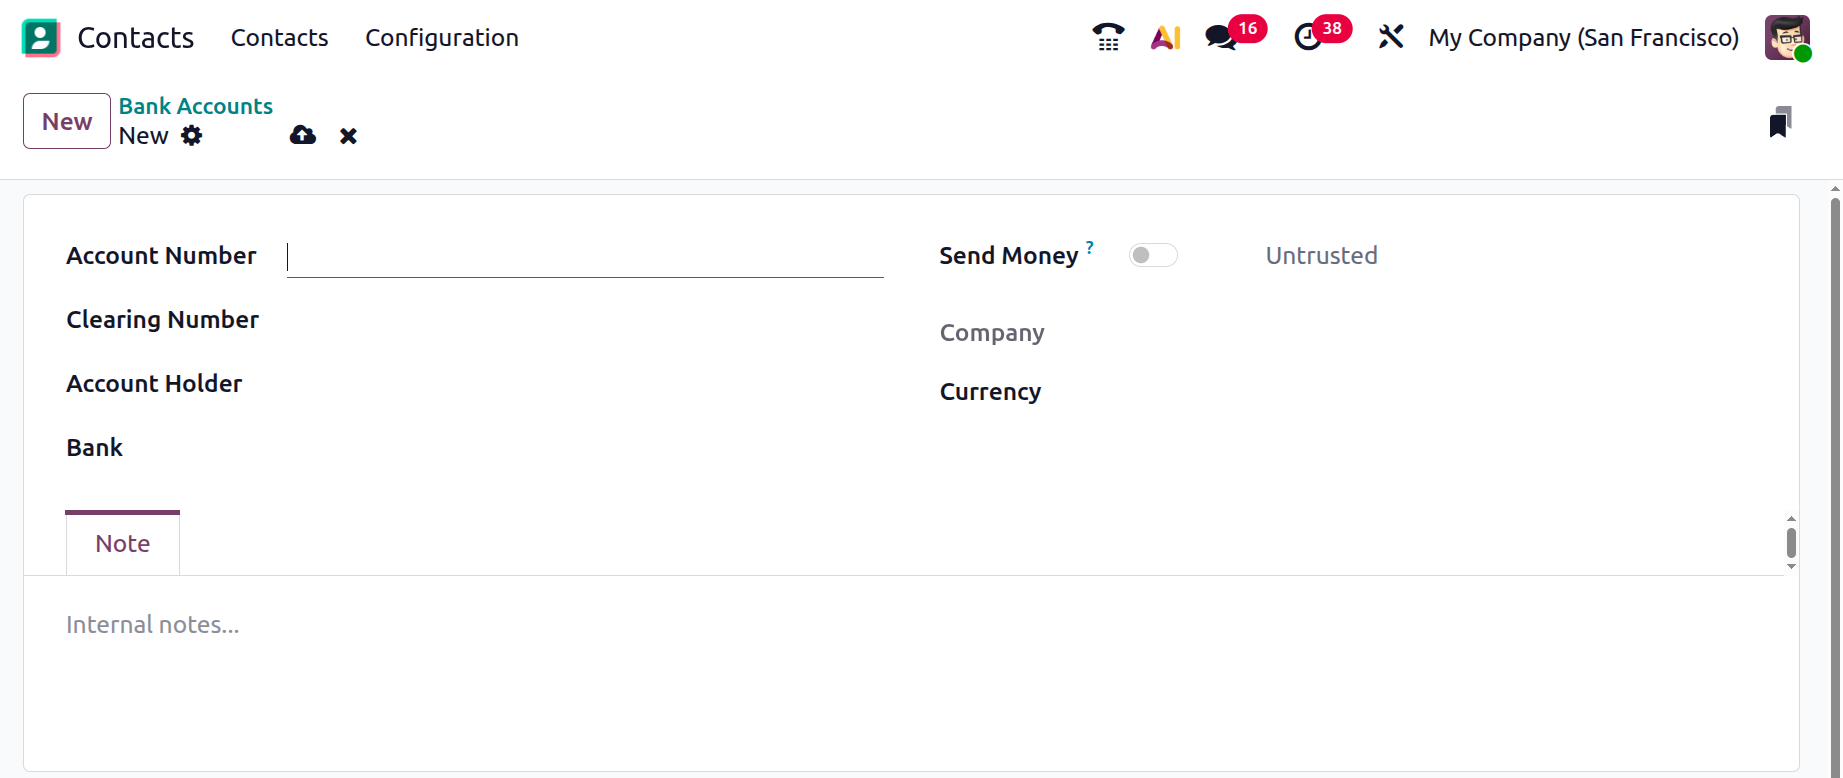
You can enter the Account Number, Clearing Number, Account Holder, Bank, and Currency in the appropriate boxes. If you are able to send money using this account, you can activate the Send Money feature.
The Odoo 19 Contacts module simplifies contact management by bringing all details into a single, organized platform. It is the best option for your company's real-time contact management requirements.