Leads
A lead in Odoo 19 CRM is the initial phase of a customer’s desire before it develops into a qualified sales opportunity. It gets sources from emails, marketing campaigns, internet forms, or manual data entry by the sales team. Leads assist companies in gathering unfiltered queries and preserving crucial information, such as contact data, details, and the source of interest. To determine whether to turn these leads into possibilities for additional follow-up, sales teams might evaluate and qualify them. This procedure prevents prospective clients from leaving and ensures a more organized sales management process.
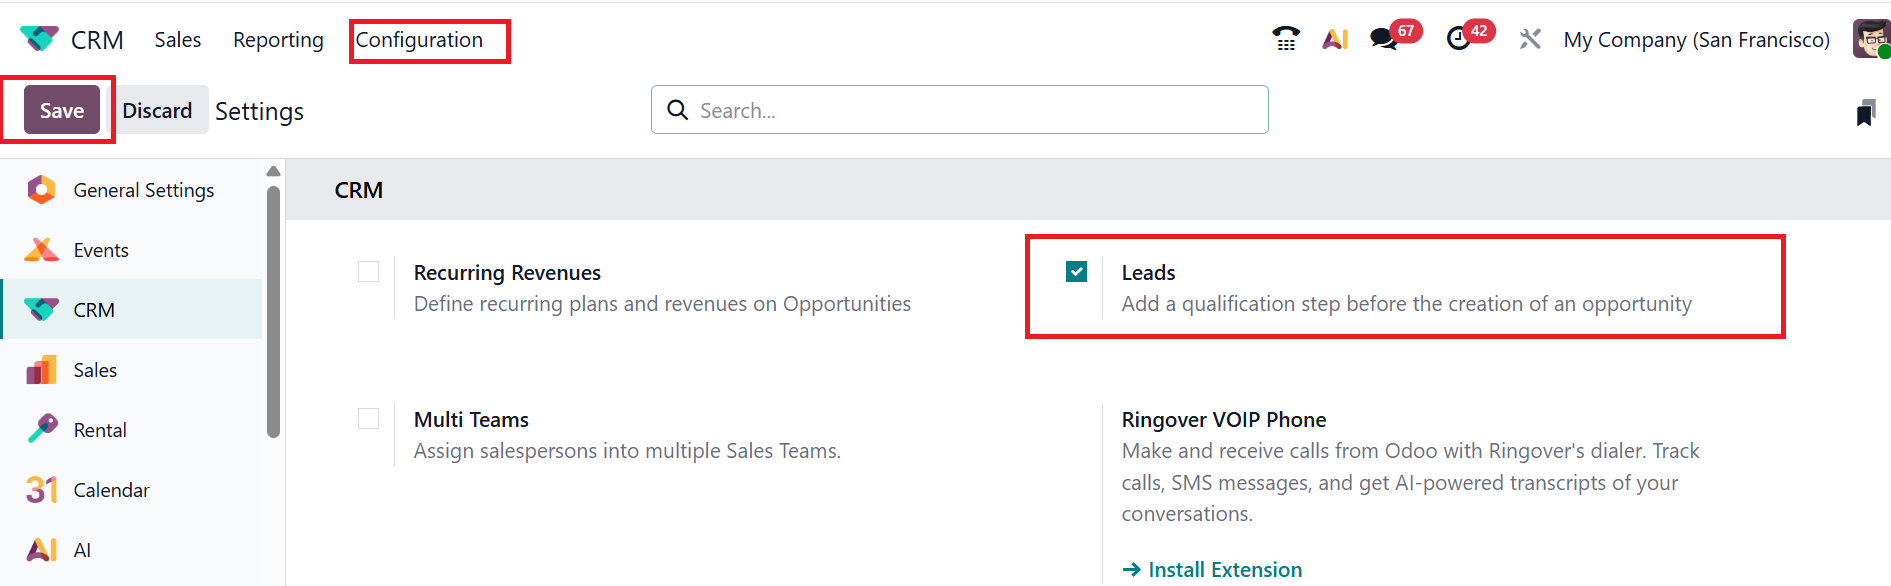
To enable the Lead option, navigate to Configuration > Settings. Then, enable Leads under the CRM section and click on the Save button to save the changes as shown below:
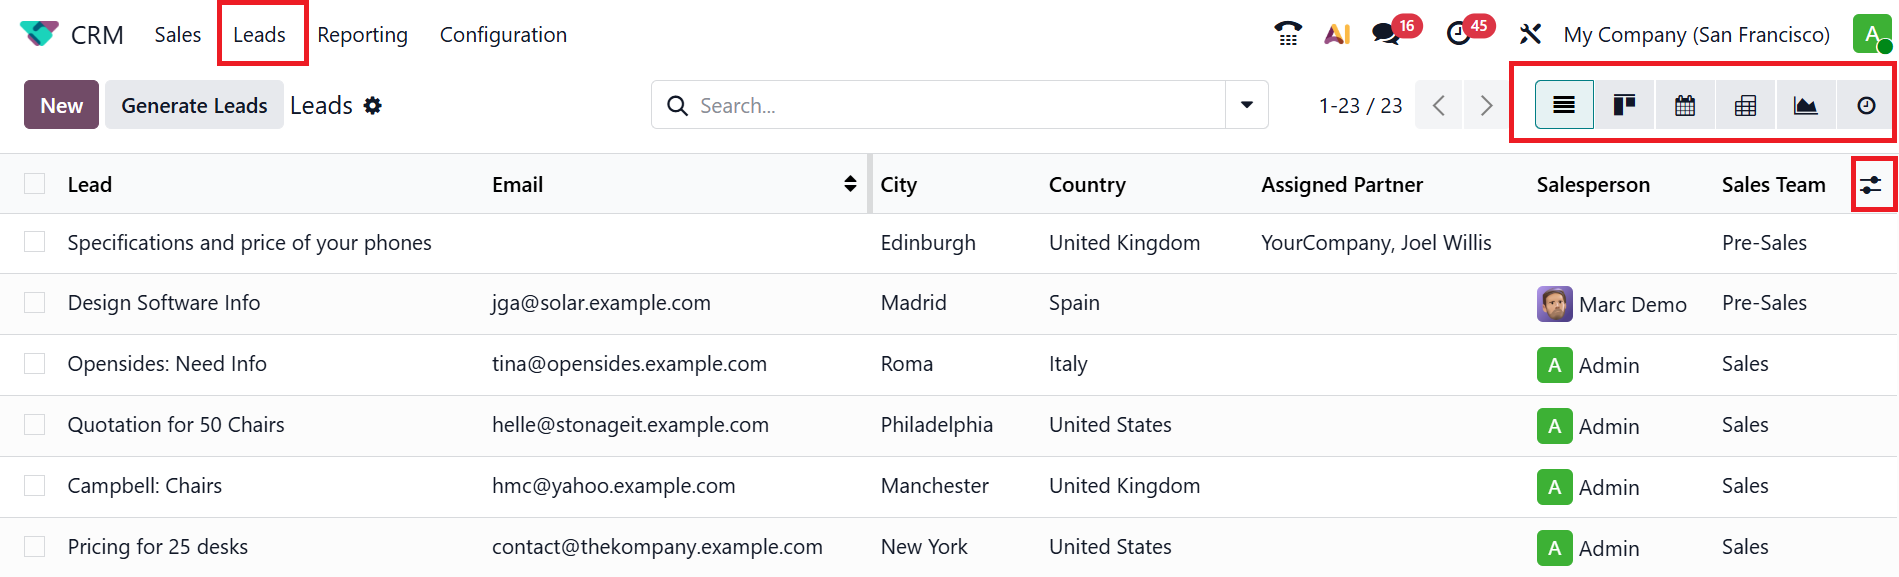
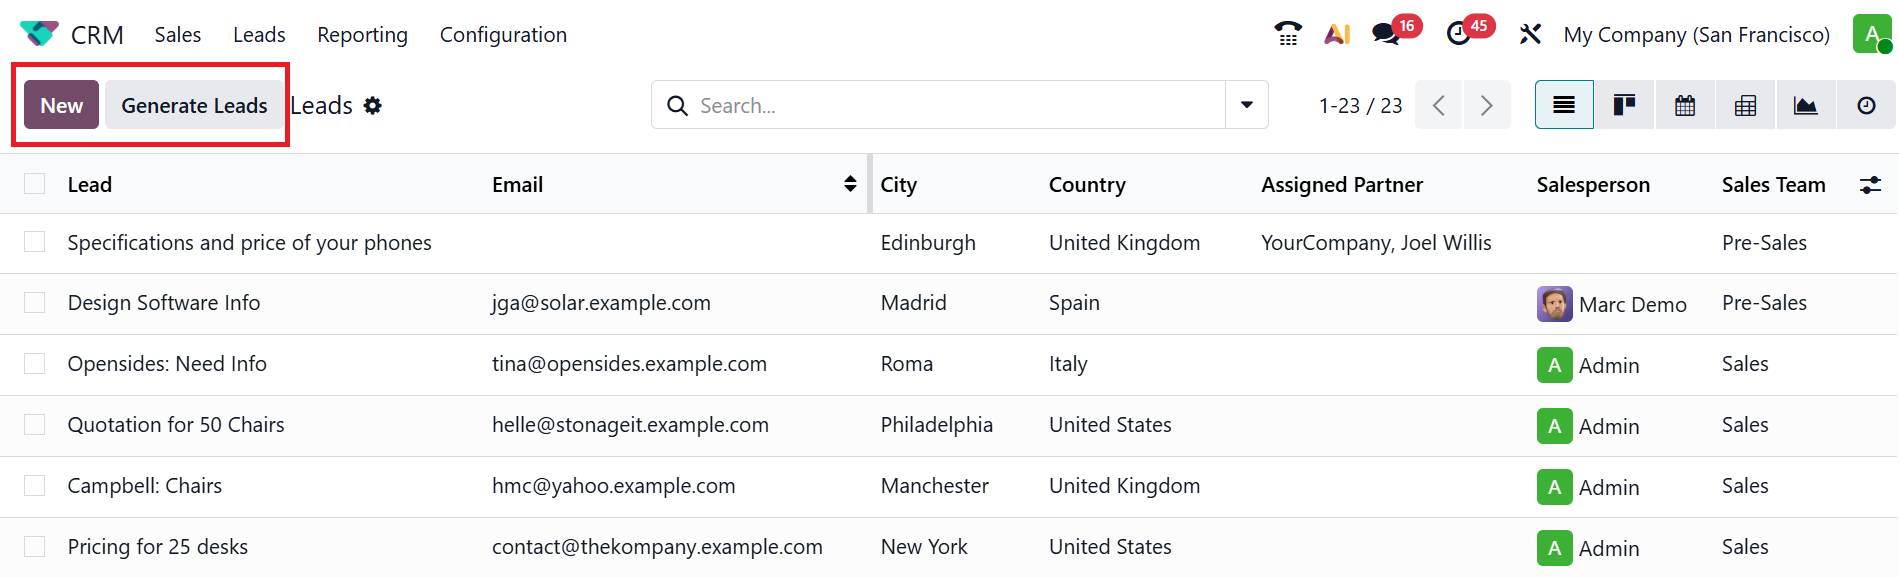
When you enable the Leads option, a new menu named Leads will appear in the menu bar, as shown below. By default, you can see the lead dashboard in List view. You can also customize the dashboard view to be Kanban, Calendar, Pivot, Graph, or Activity.
The lead details displayed by default include Email, City, Country, Assigned Partner, Salesperson, and Sales Team. Click on the toggle button to add more information about the lead, such as Created On, Contact Name, Company Name, Phone, Company, State, Campaign, Medium, Source, Probability(%), Tags, Priority, and Add Custom Field.
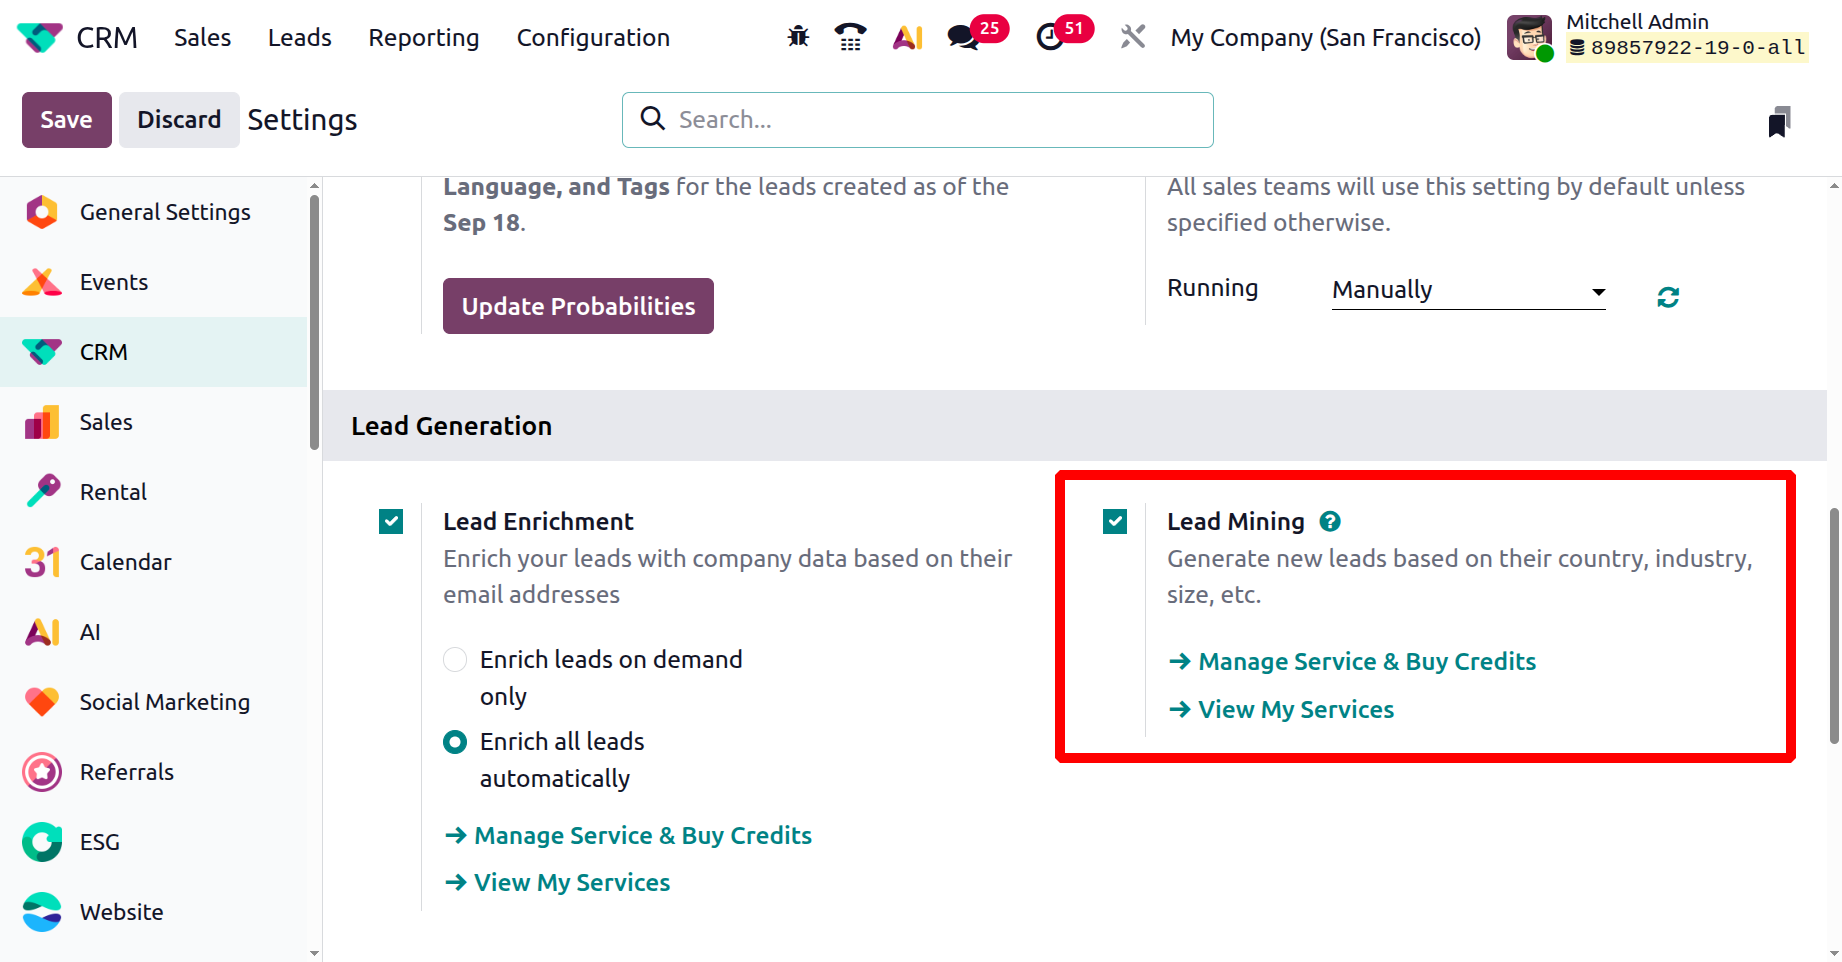
You can automatically generate leads based on the parameters by clicking on the Generate Leads button. For that, you need to enable the Lead Mining option from the Settings to get the Generate Leads button. Navigate to Configuration > Settings and enable the Lead Mining option under the Lead Generation section.
To automatically generate leads in lead management, click the Generate Leads button. A pop-up window will open, where you can enter the number of leads you want to generate, as shown in the image below. Then, select the target as Companies or Companies and their Contacts. You can provide details such as Countries, States, and Industries. To filter leads by size, enable the Filter on Size option. Next, to manage the leads, choose a Sales Team and assign a Salesperson. You can also add appropriate tags in the Default Tags field. Finally, click the Generate Leads button.
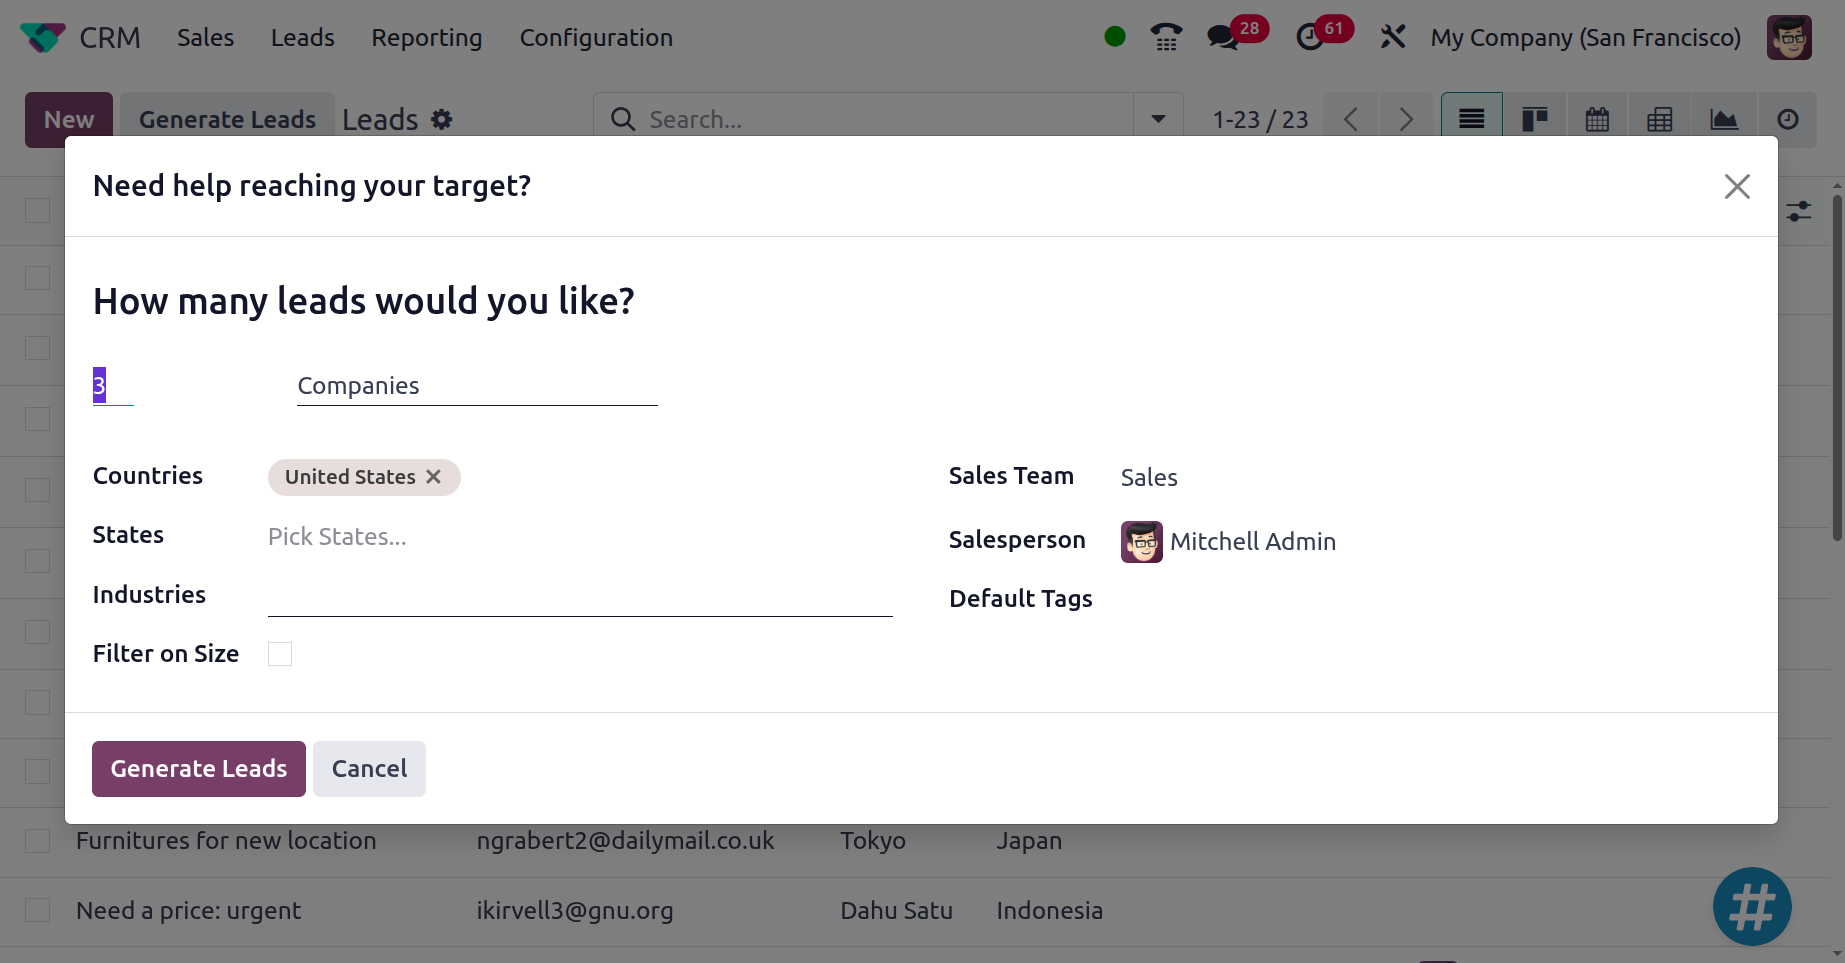
Creating a lead in the CRM module uses credits and is offered as a paid service.
To manually create a new lead record, click the New button, as shown below.
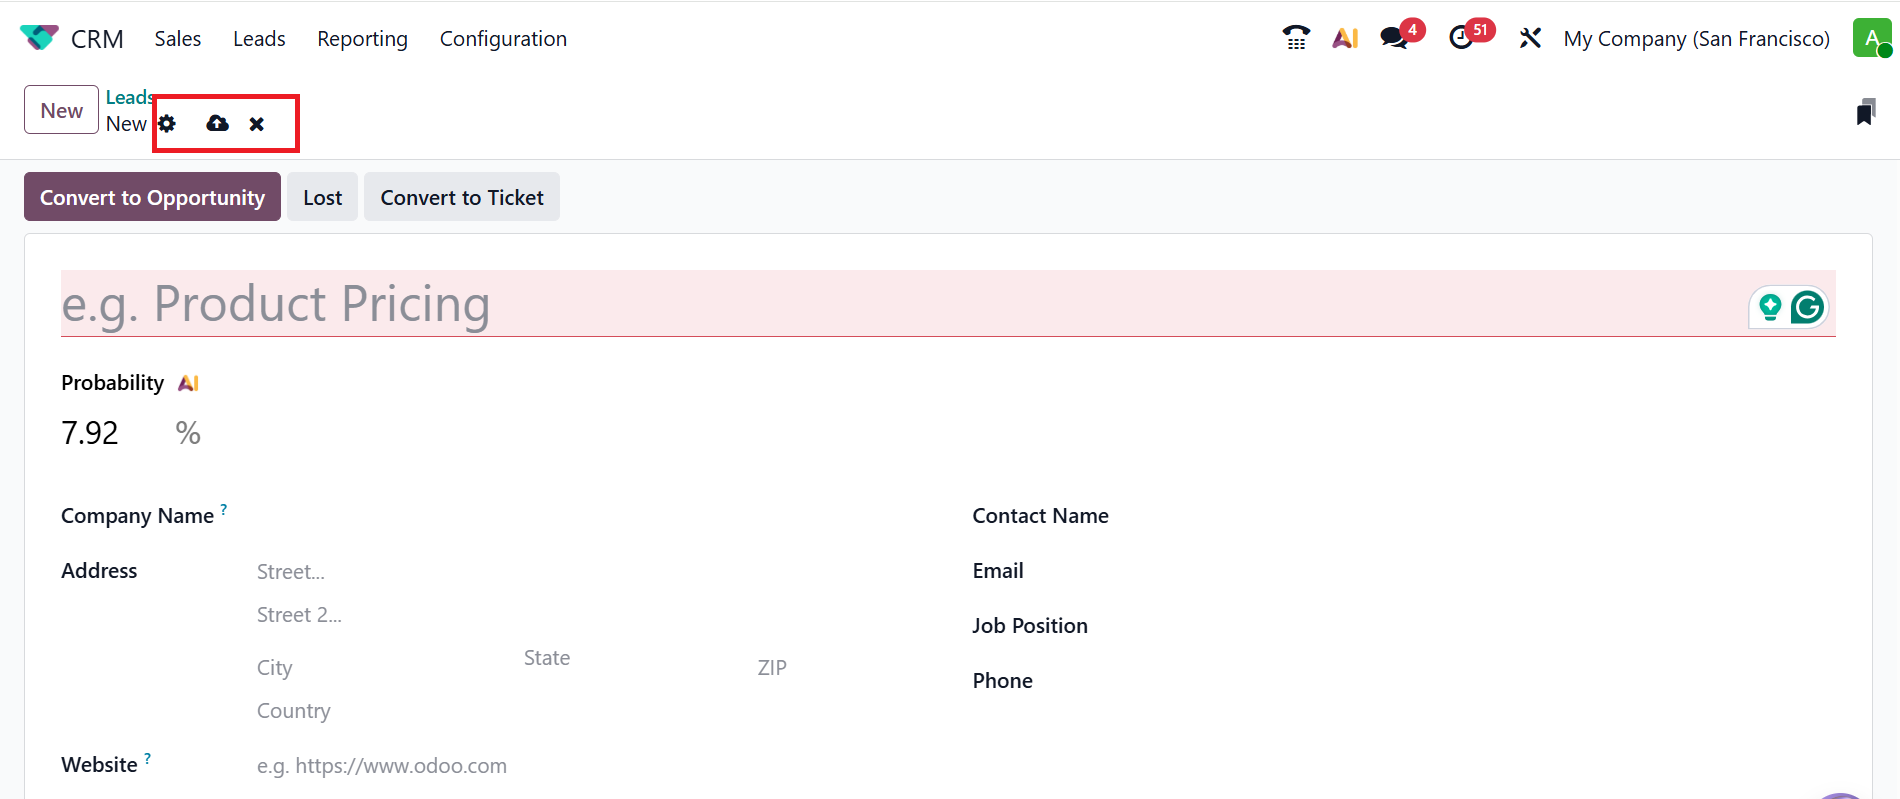
Near the New button in the upper-left corner of the window, you can see three options: Actions, Save manually, and Discard all changes. You can save the data manually by clicking the Save manually button. Clicking the Discard all changes button will undo and remove all your changes.
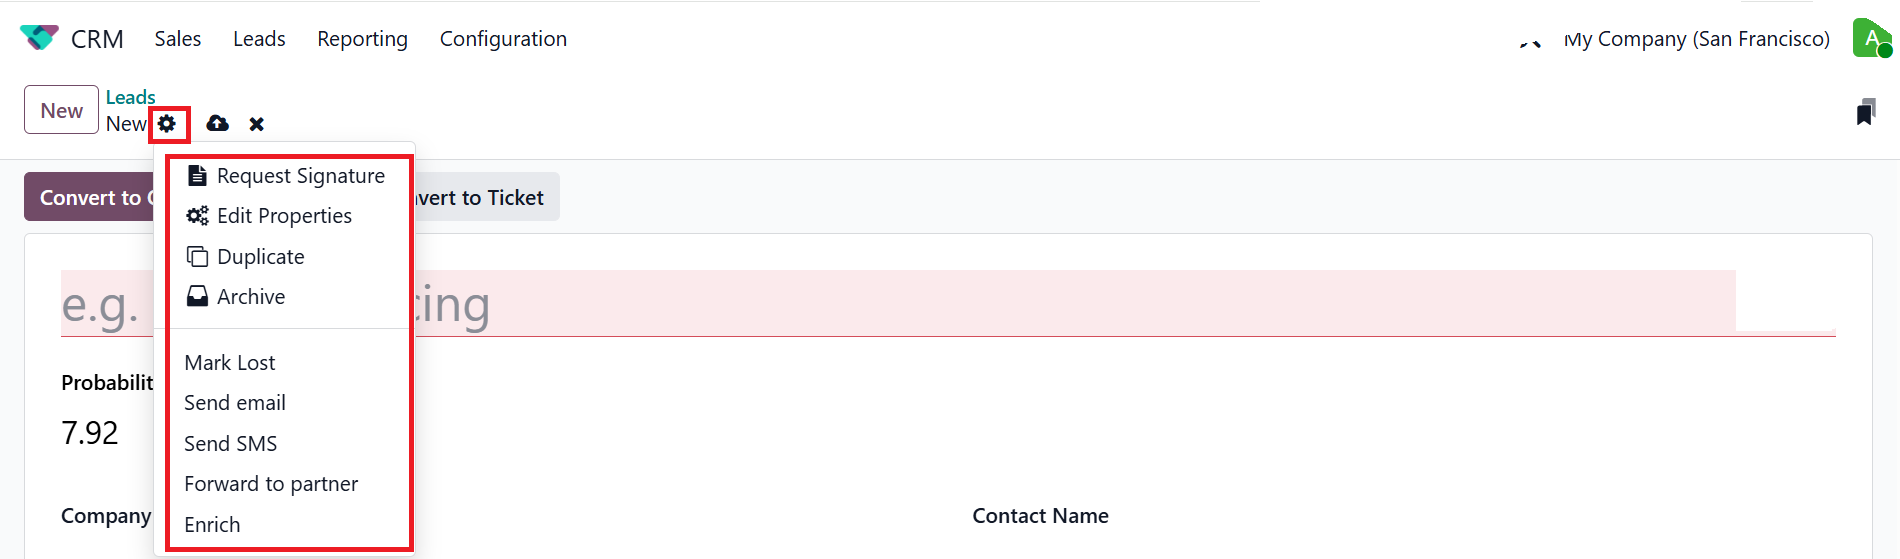
When you click on the Actions button, you can see the following features: Request, Signature, Edit Properties, Duplicate, Archive, Mark Lost, Send email, Send SMS, Forward to partner, and Enrich.
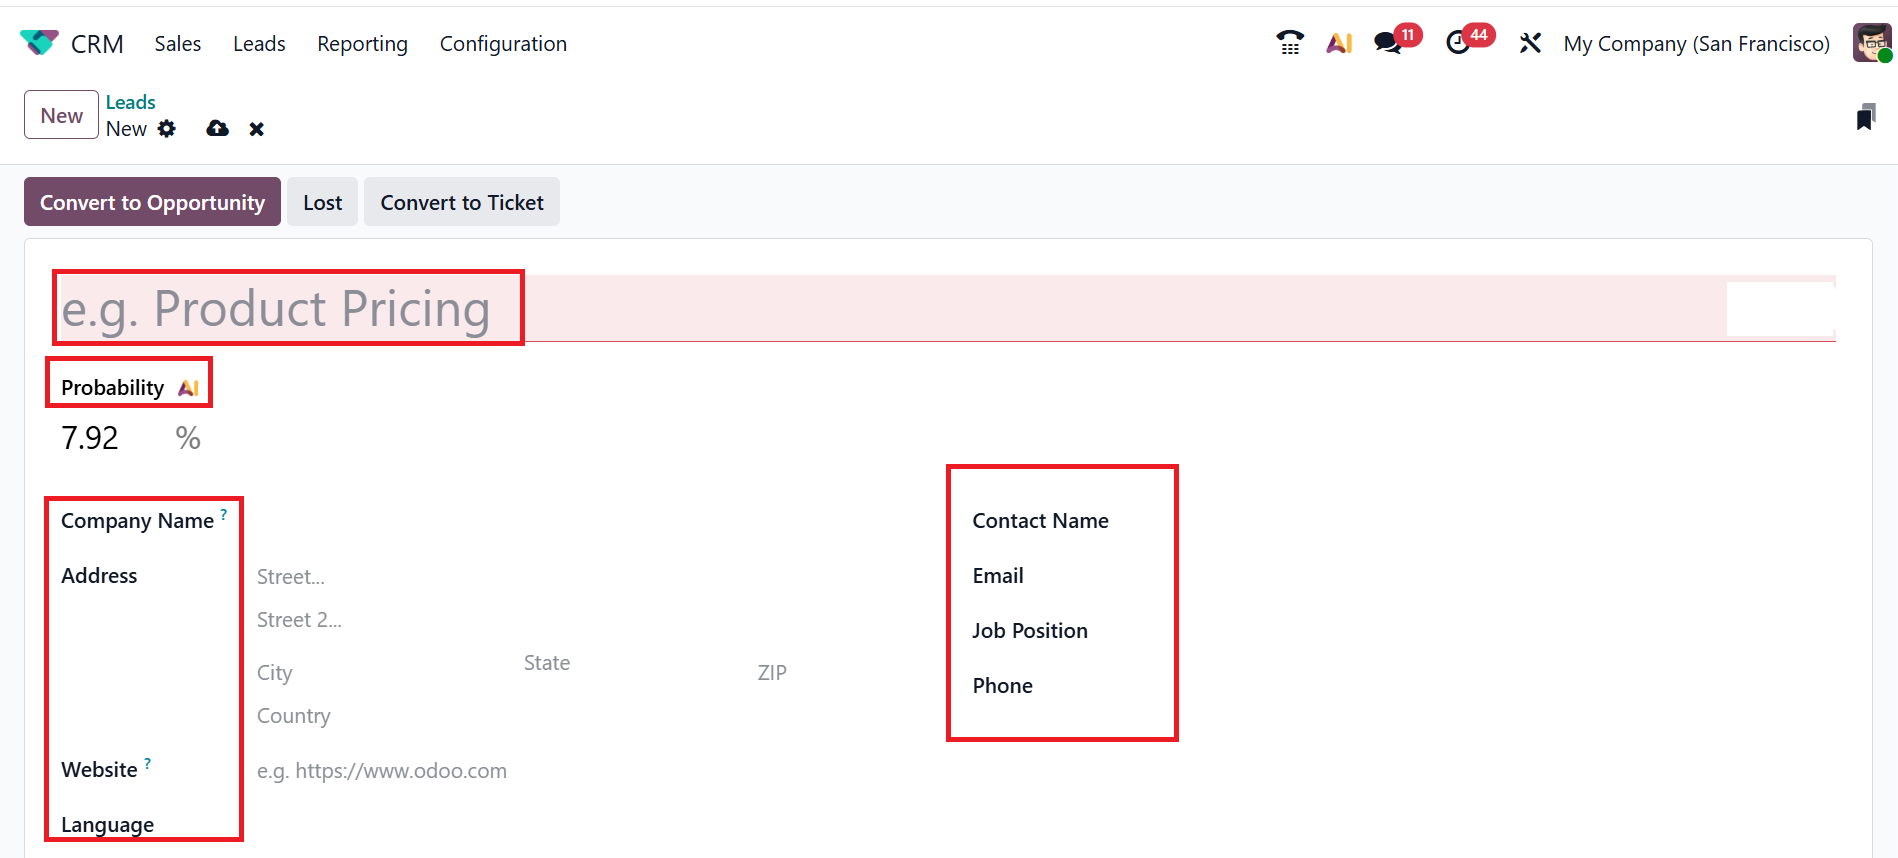
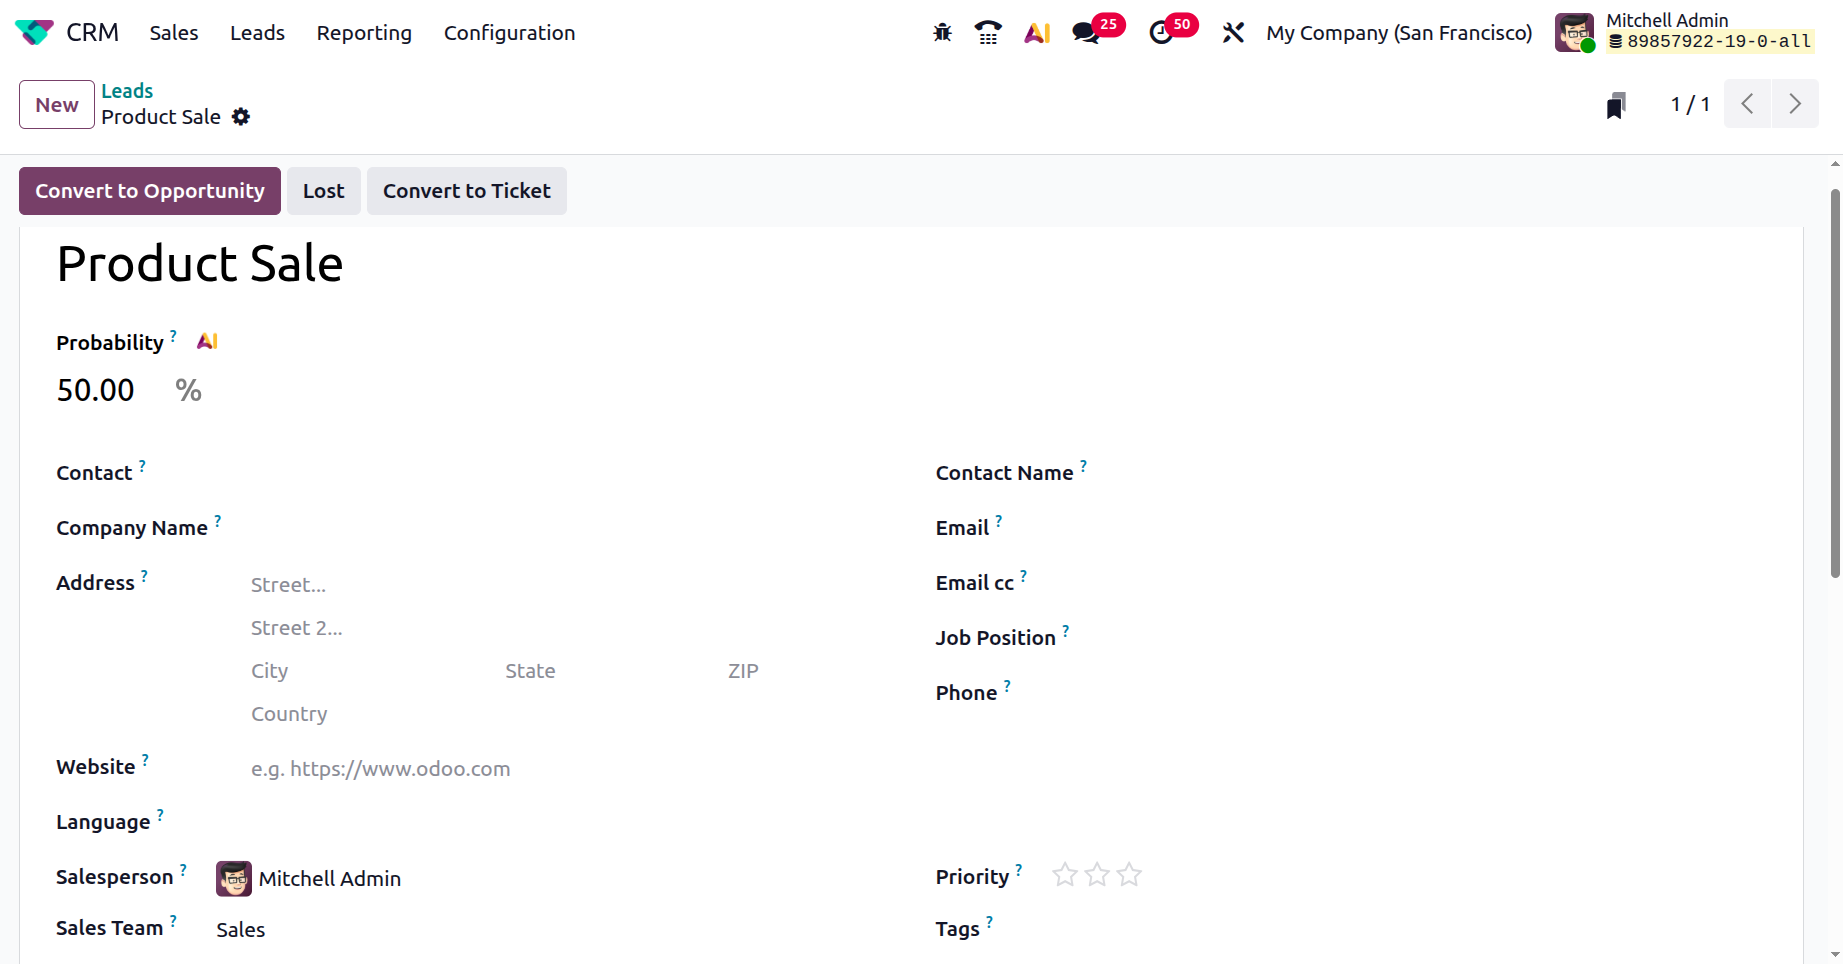
Here, add an appropriate name for your newly created lead. The Probability AI represents the chance of successfully closing a lead or opportunity by using AI (artificial intelligence). Advanced Win-Rate Analysis is a new feature in the Odoo 19 CRM module. Here is a detailed analysis of lead performance and conversion rates.

Enter the name of the future partner company in the Company Name field. In the Address field, enter the firm’s address. In the Website field, add the contact’s website. Then, add the details such as Contact Name, Email, Job Position, Phone, and Language.
Select a team to manage the lead in the Sales Team field. Then, choose an employee to lead the management in the Salesperson field. Mark the stars based on the lead’s priority in the Priority field. In the Tags field, add appropriate tags to classify and analyze the lead.
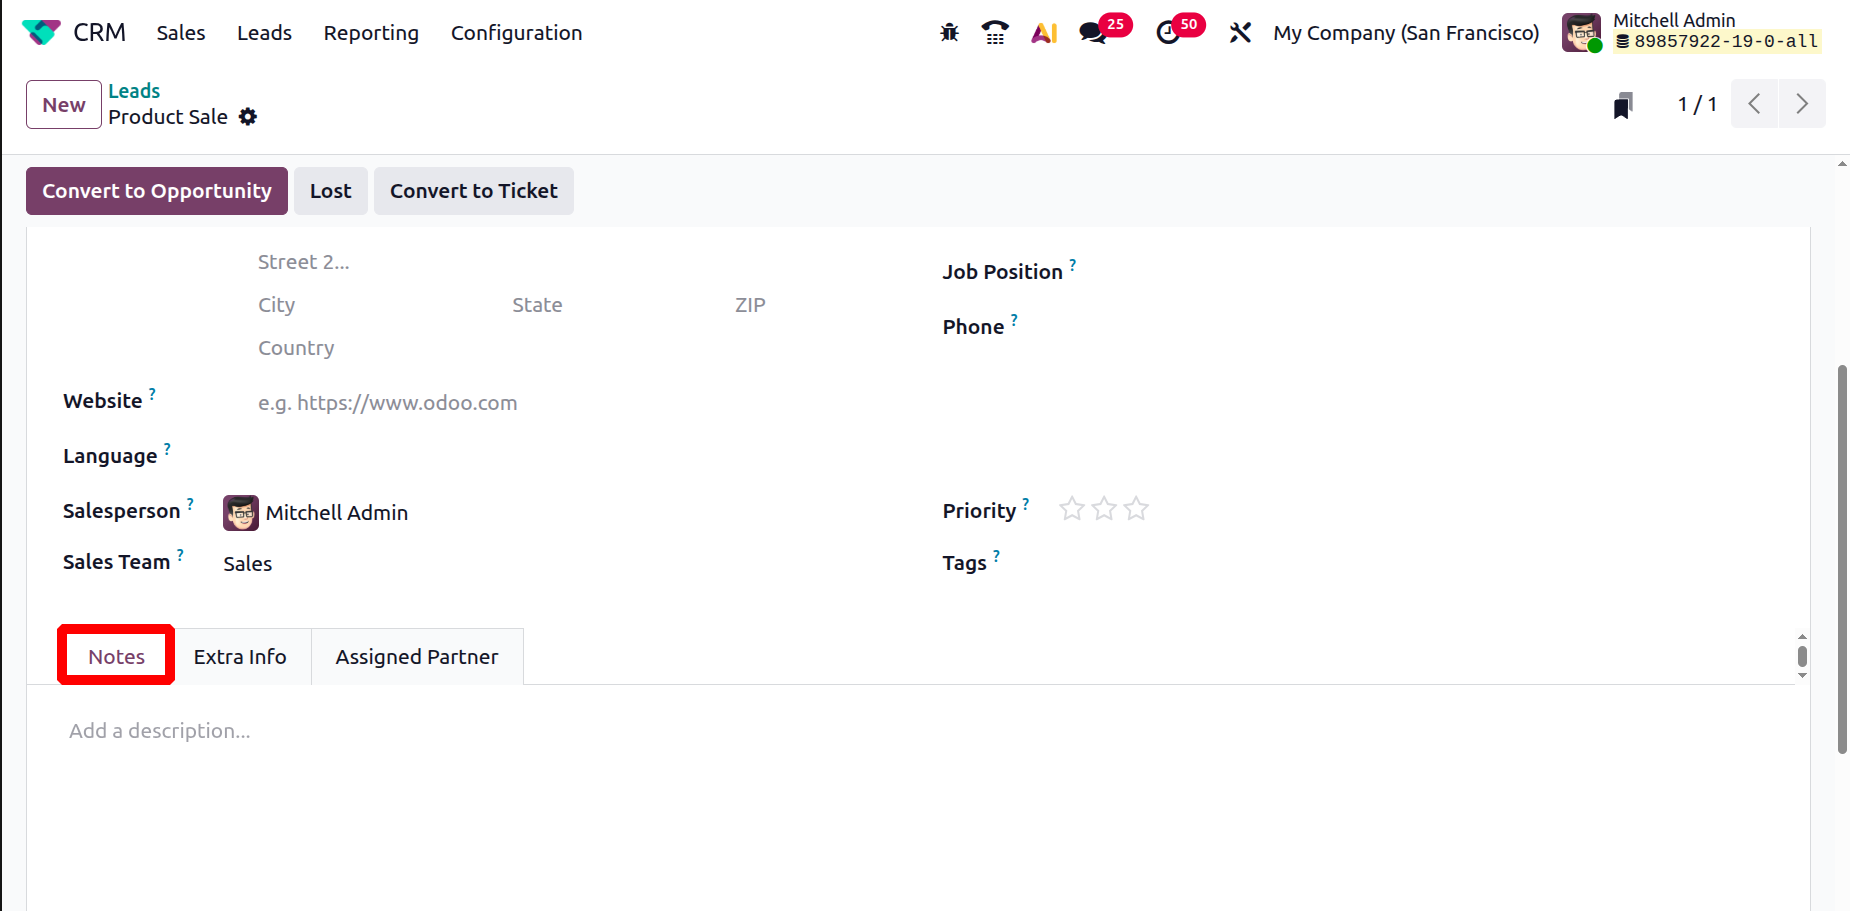
Here, you can see three tabs: Notes, Extra Info, and Assigned Partners. Under the Notes tab, add a description about the lead.
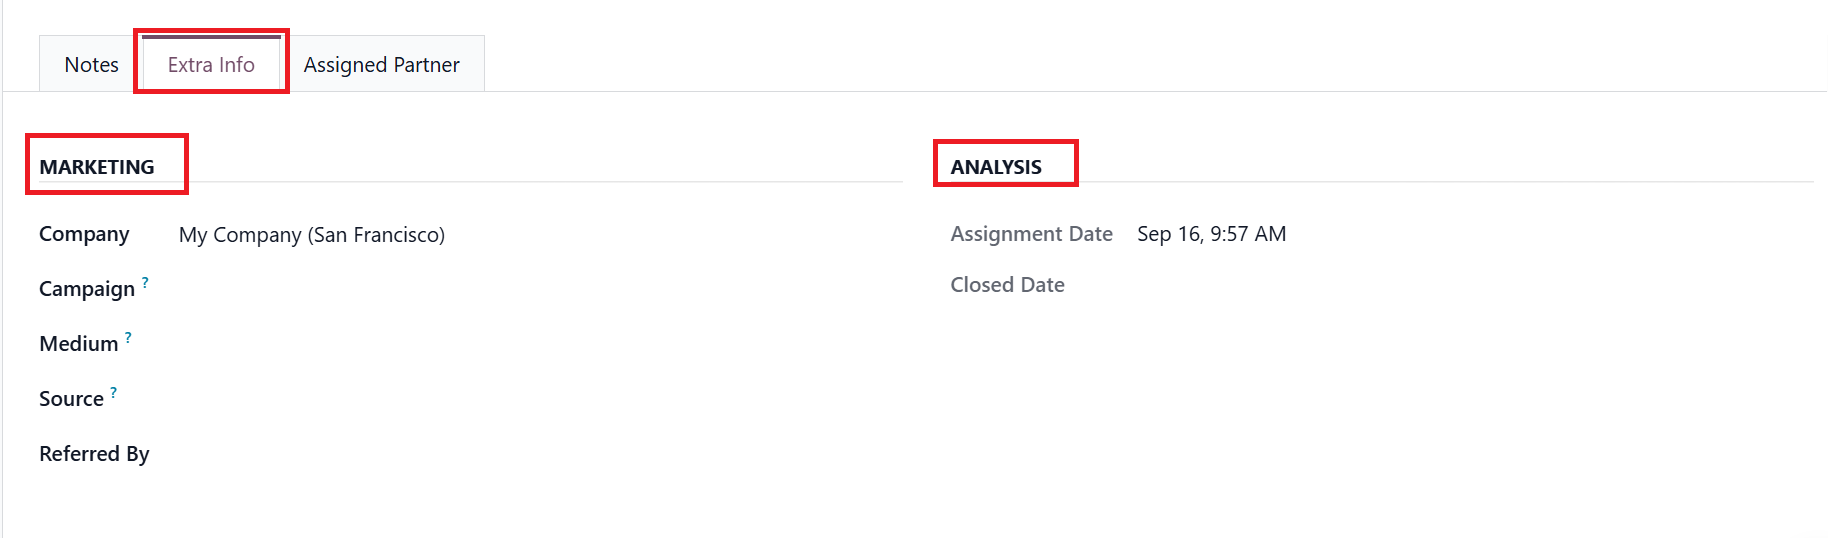
Under the Extra Info tab, there are two sections: Marketing and Analysis. Within the Marketing section, the Company field allows you to select a company. In the Campaign field, select a campaign effort from the list. In the Medium field, select a method of delivery for the lead from the list. Select a source link from the list in the Source field. You can also add a person who referred to the lead in the Referred By field. Under the Analysis section, the Assignment Date will be automatically filled. Next, enter the lead’s Closed Date.
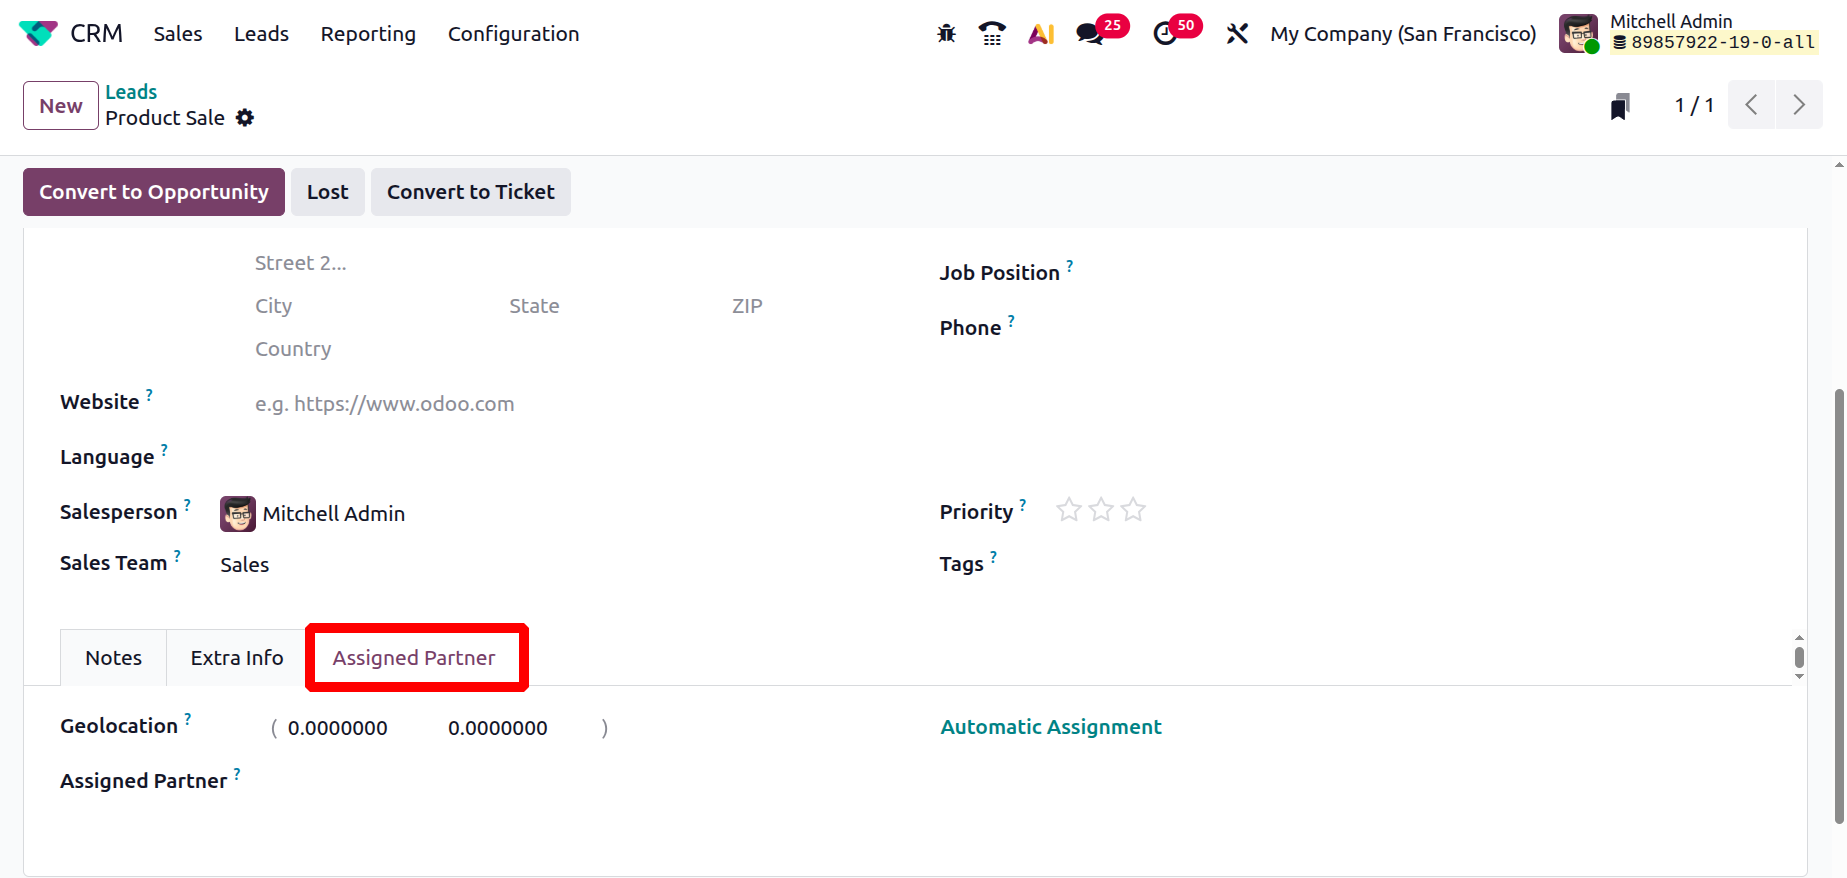
Under the Assigned Partner section, add the lead's location in the Geolocation field. You can also add a partner in the Assigned Partner field.
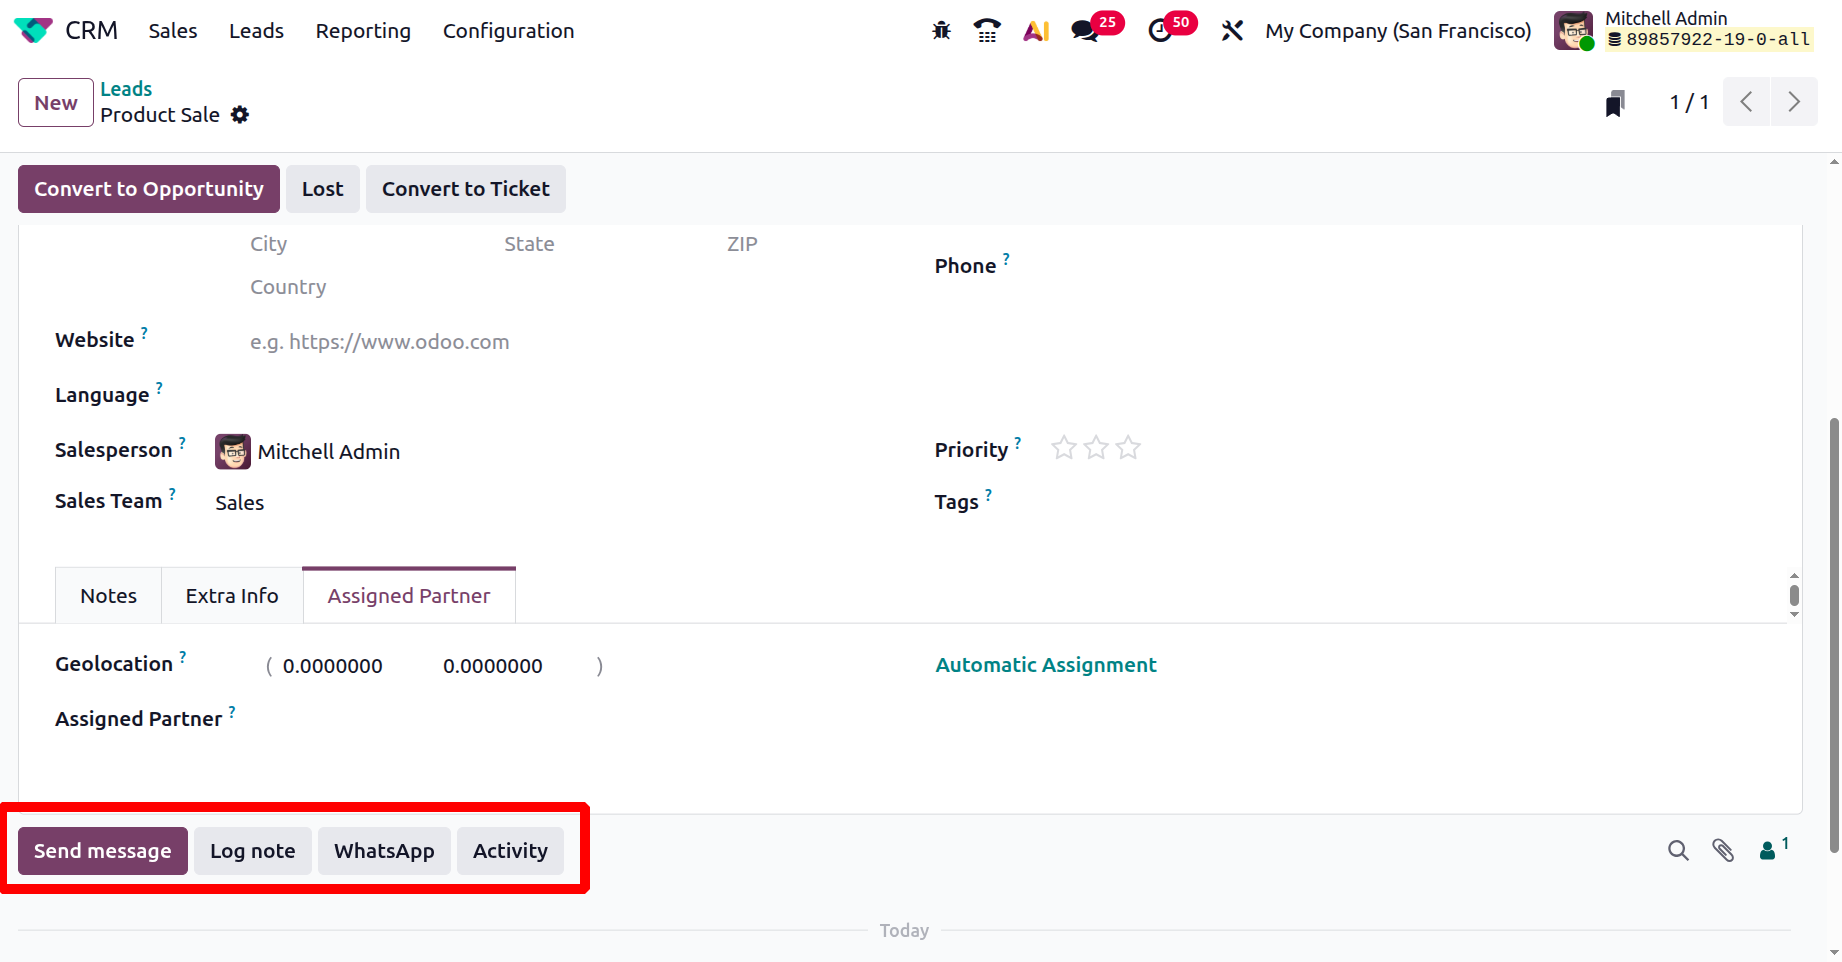
At the bottom of the window, you can see four options: Send message, Log note, WhatsApp, and Activity. Click the Send message button, and a new section will appear.
You can enter messages for the followers there and click the Send button. CC Replies in Chatter is a new feature in the Odoo 19 CRM module. In Odoo 19, the chatter feature supports CC replies, enhancing team collaboration by keeping everyone in the loop and allowing CC members to engage directly in discussions.

Click the search icon to find messages. To see your followers, click the Show Followers icon. You can add emojis to your message by selecting the smiley emoji, and if necessary, attach documents or files to the message.. You can also hide or close all the conversations by clicking the arrow button.

Under the Log note option, you can add an internal note that helps with user-to-user communication.

The WhatsApp option integrates Odoo with the WhatsApp app, enabling you to communicate directly with customers.

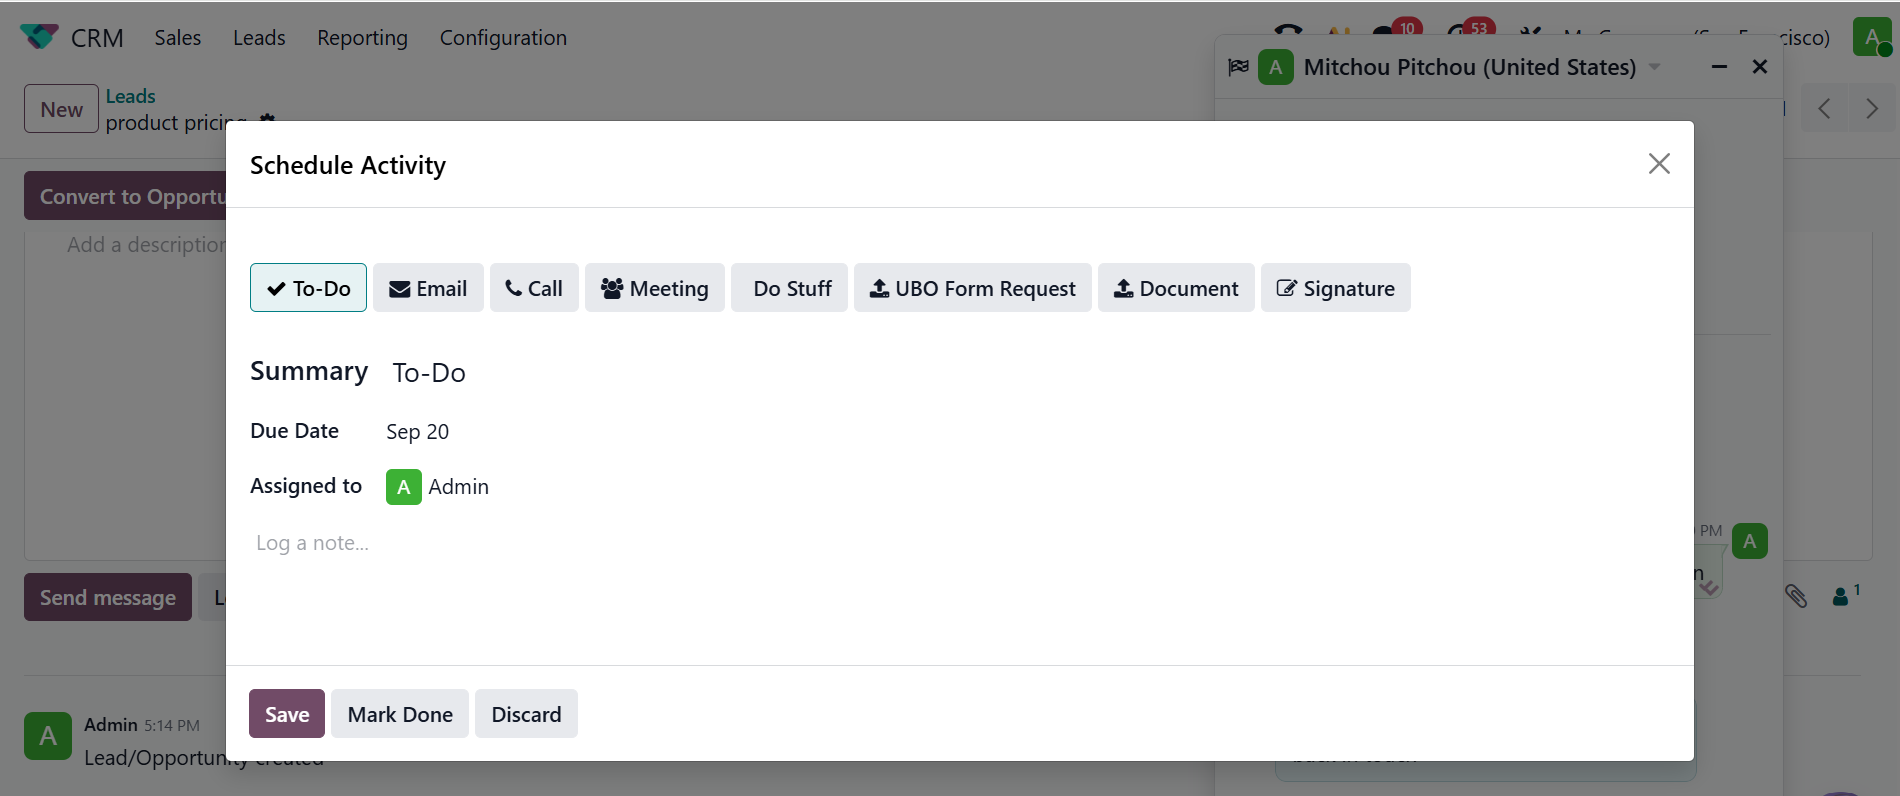
When you click the Activity button, a pop-up window will appear, as shown in the image below. This option is the same as the Schedule Activity option, which is explained above.
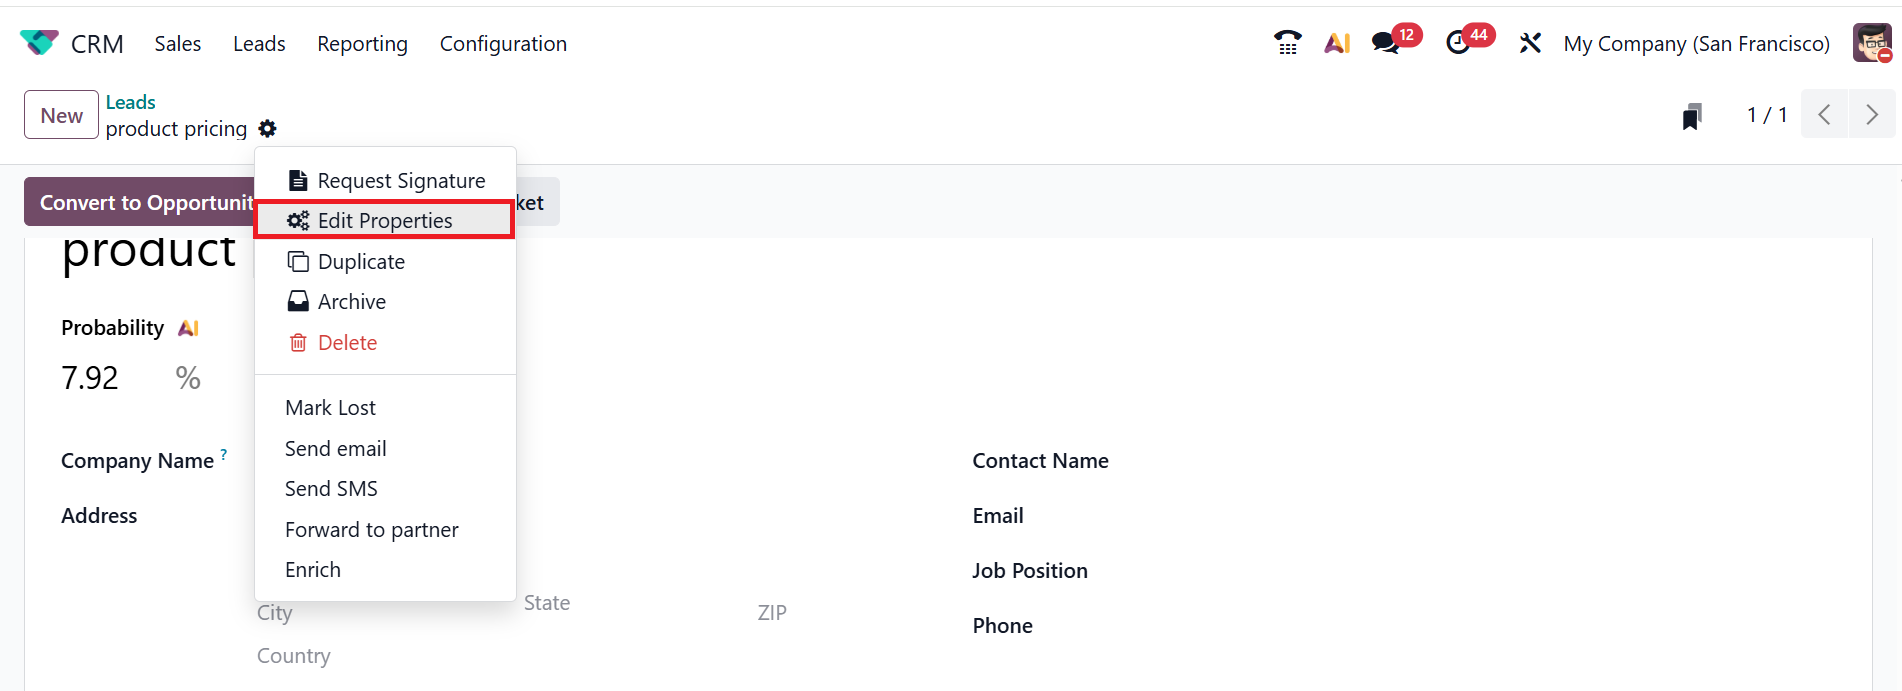
To add custom fields to the form, click the Actions button and select Edit Properties. The Add Properties option in Odoo 18 is renamed to Edit Properties in Odoo 19.
Clicking the Edit Properties button will open a new pop-up window. Add a title for the property in the Label option as shown below.
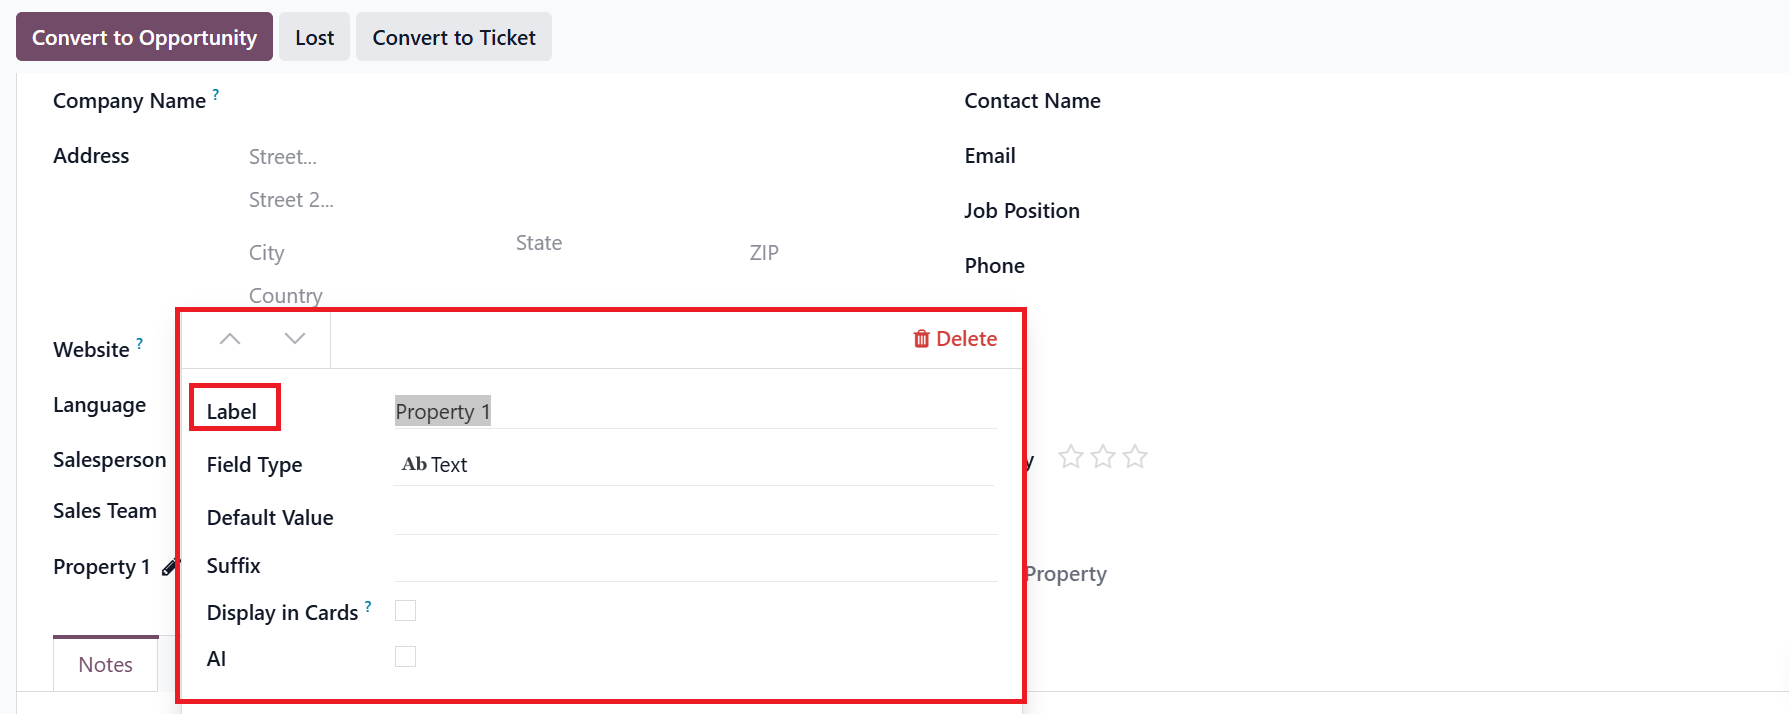
Choose a new field type from the drop-down menu in the Field Type field. The field type includes Text, Multiline Text, HTML, Checkbox, Integer, Decimal, Monetary, Date, Date & Time, Selection, Tags, Many2one, Many2many, or Separator. Add a value for the field in the Default Value field. In the Suffix field, you can enter a text or unit that appears next to the field value. Enable the Display in Cards option to show fields in Calendar, Cards, or Kanban views.
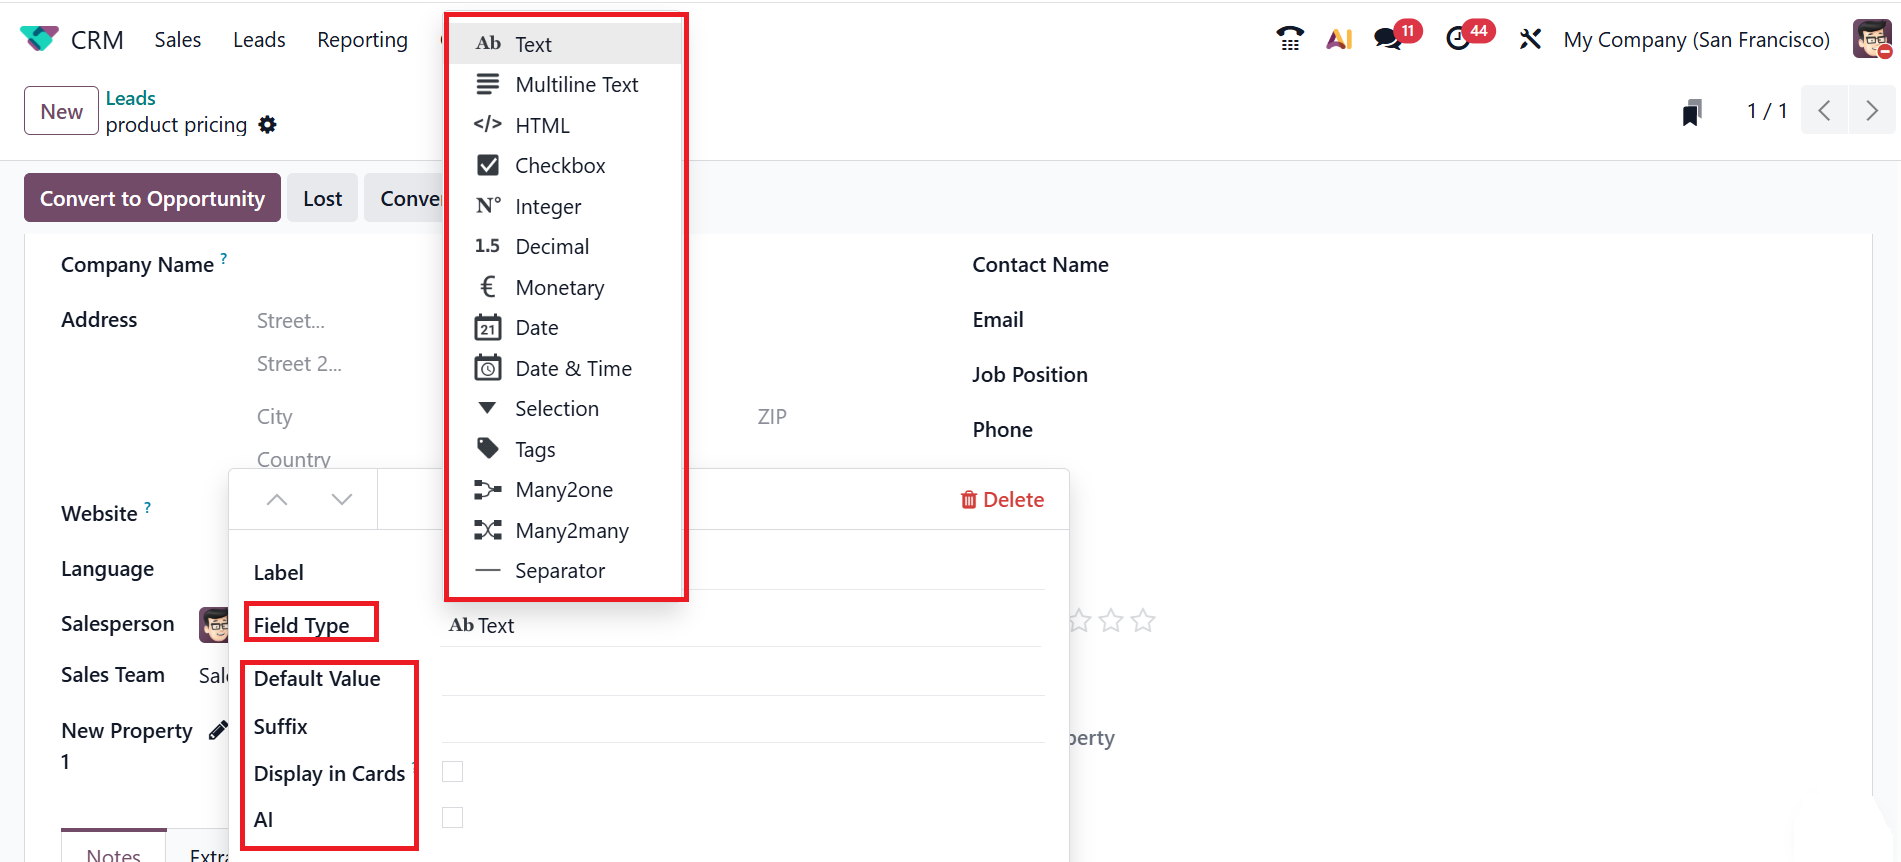
You can also enable AI support by activating the AI option for the field. When you allow the AI option, a new option called Prompt will appear. In the Prompt option, you can add an AI instruction to generate the value. Additionally, you can access three options: Convert to Opportunity, Lost, and Convert to Ticket, which will be detailed in the following sections.
*Convert leads into Opportunities:
In the sections mentioned above, it is evident that creating new leads is significantly easier within the CRM module. Now, let’s go over how to convert leads into opportunities. In some situations, you can also convert leads directly into a sales quotation.
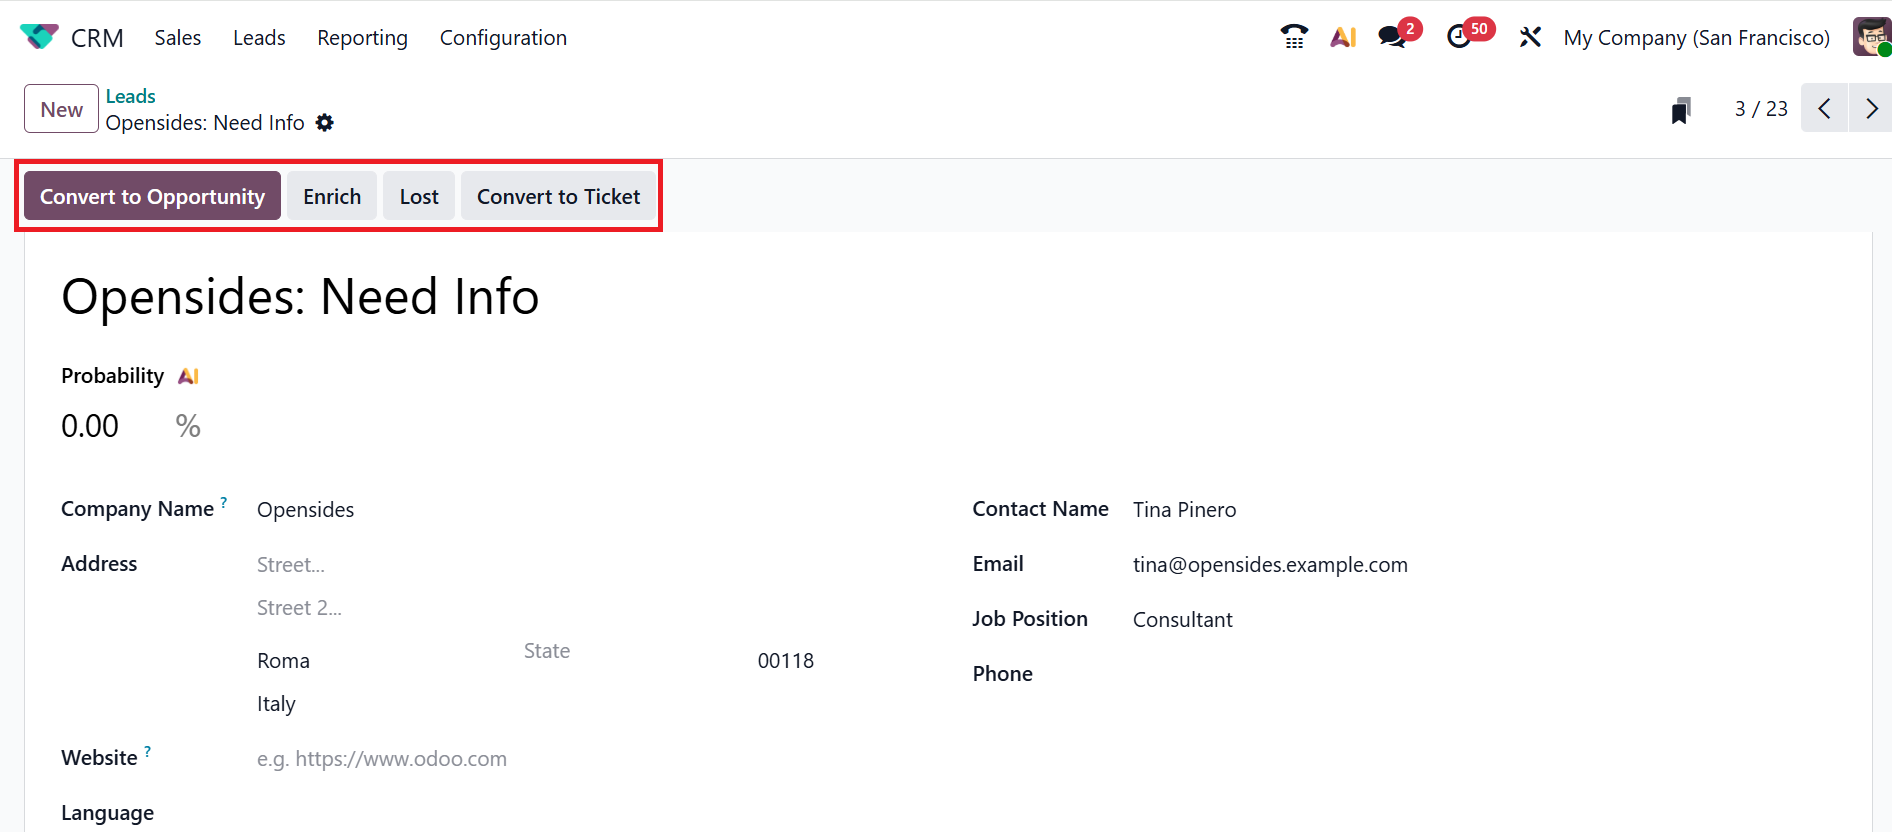
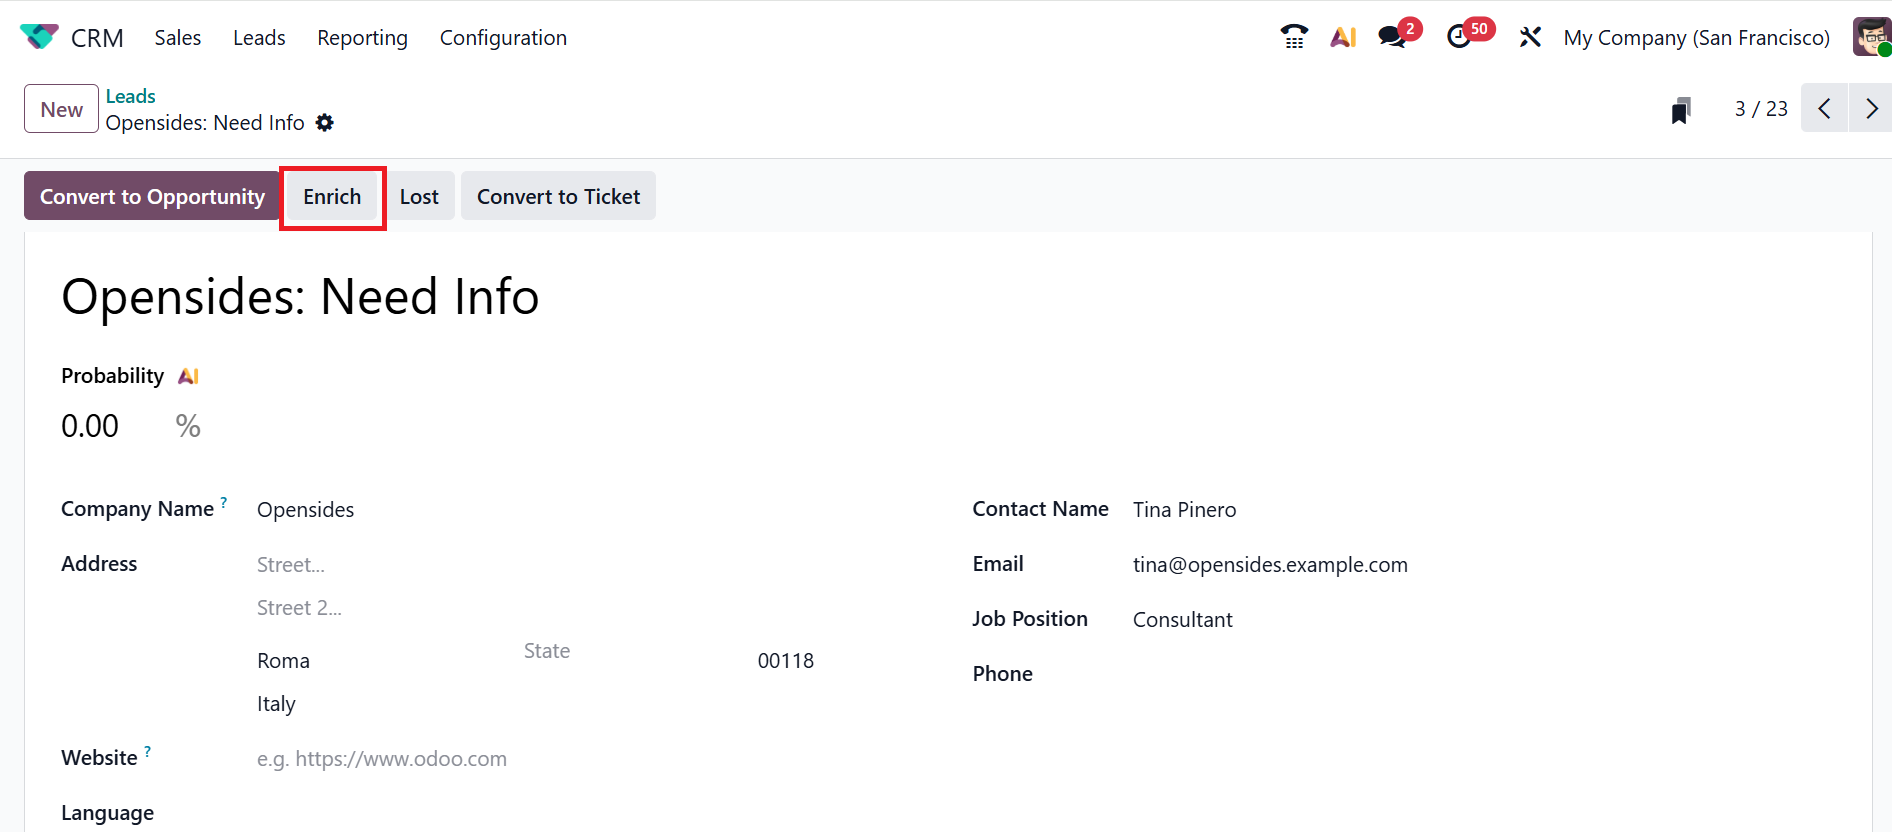
Select an already generated lead from the list, as shown below. This section offers options, including Convert to Opportunity, Enrich, Lost, and Convert to Ticket.
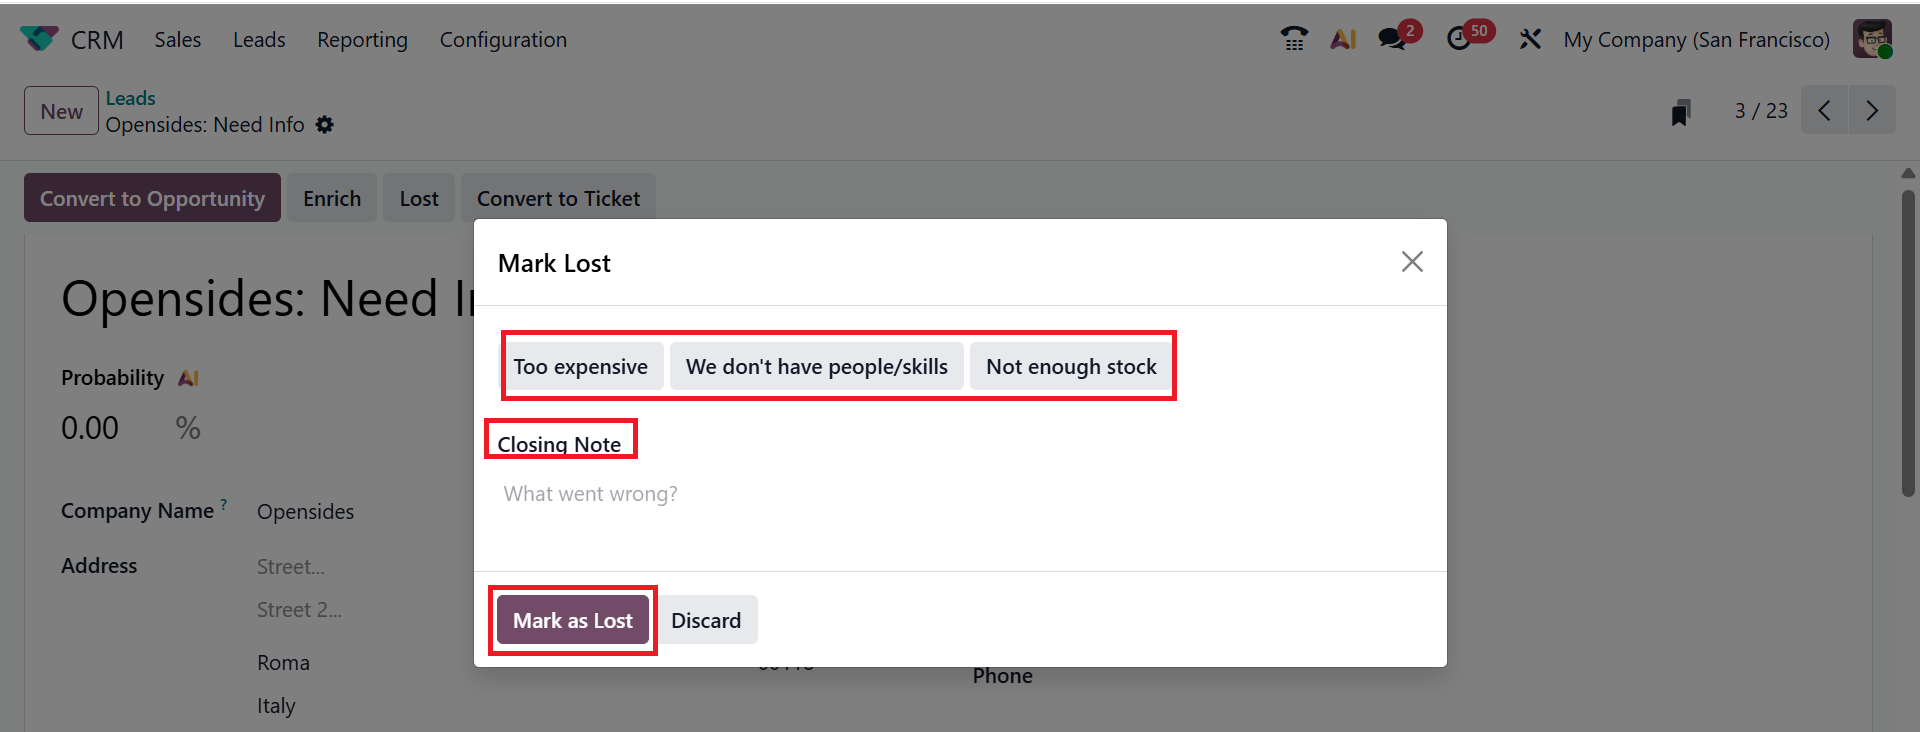
To indicate that the lead is lost, click on the Lost button. A new pop-up screen will appear, where you can select a pre-configured Lost Reason from the list arranged in a new pattern, which is a new pattern arrangement in Odoo 19. Under the Closing Note option, add a note about the lost reason and then click on the Mark as Lost button, as shown below:
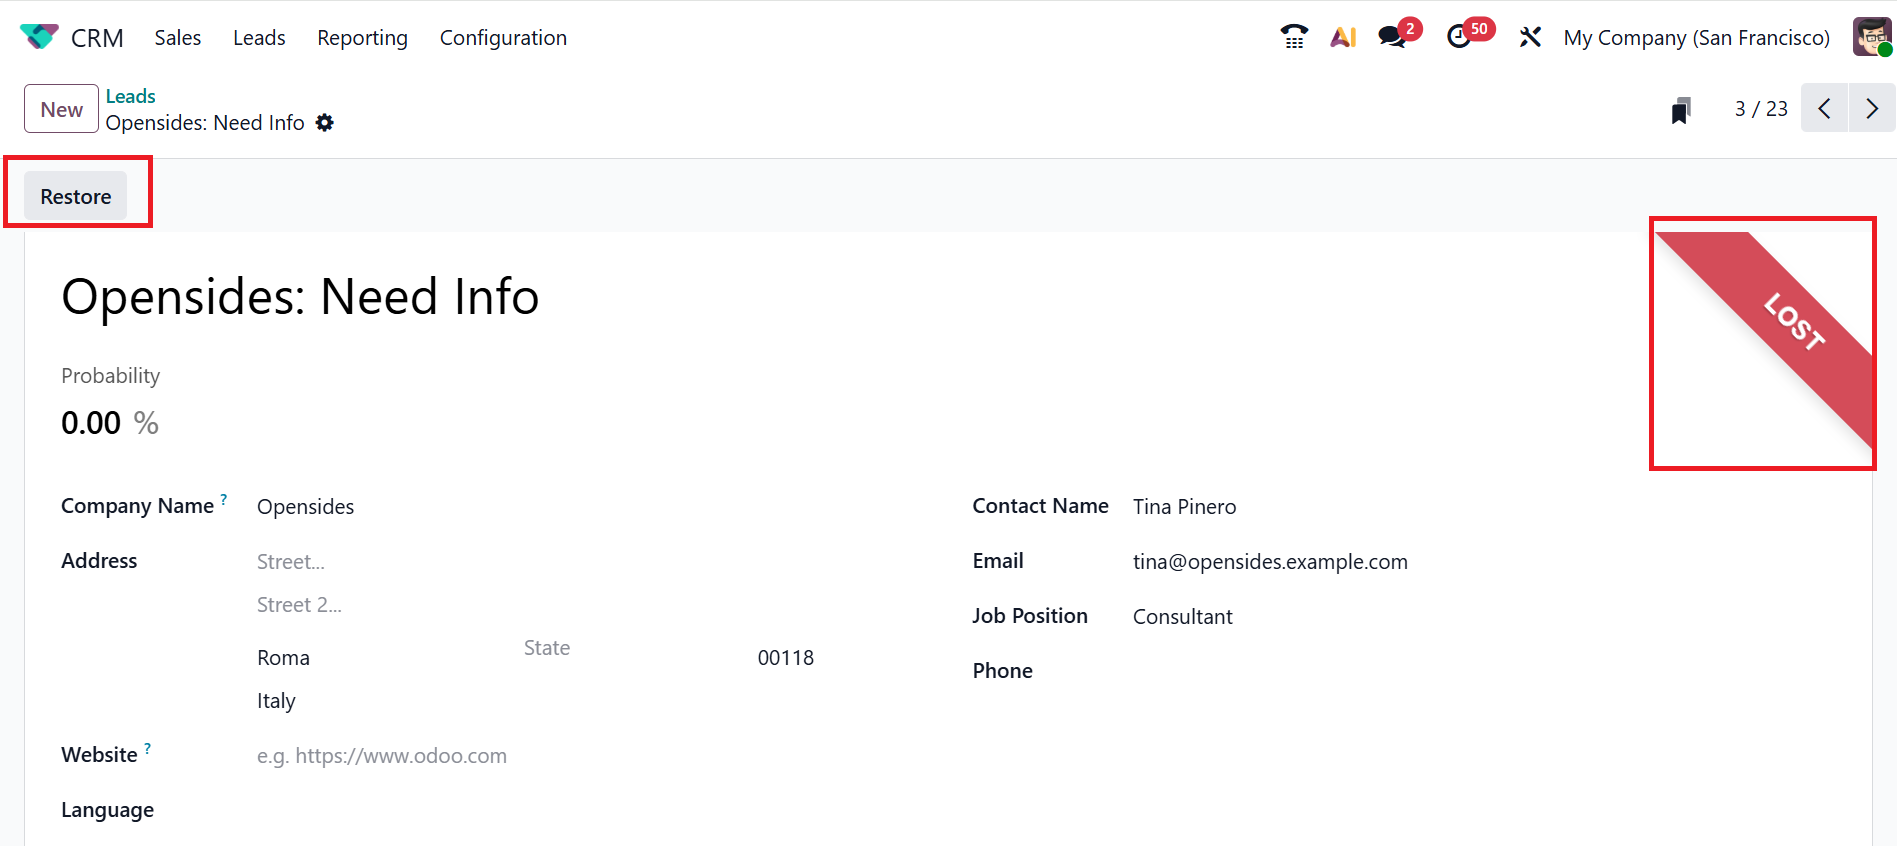
Here, you can see the lead is in the Lost stage. Press the Restore button to go back to the earlier lead stage.
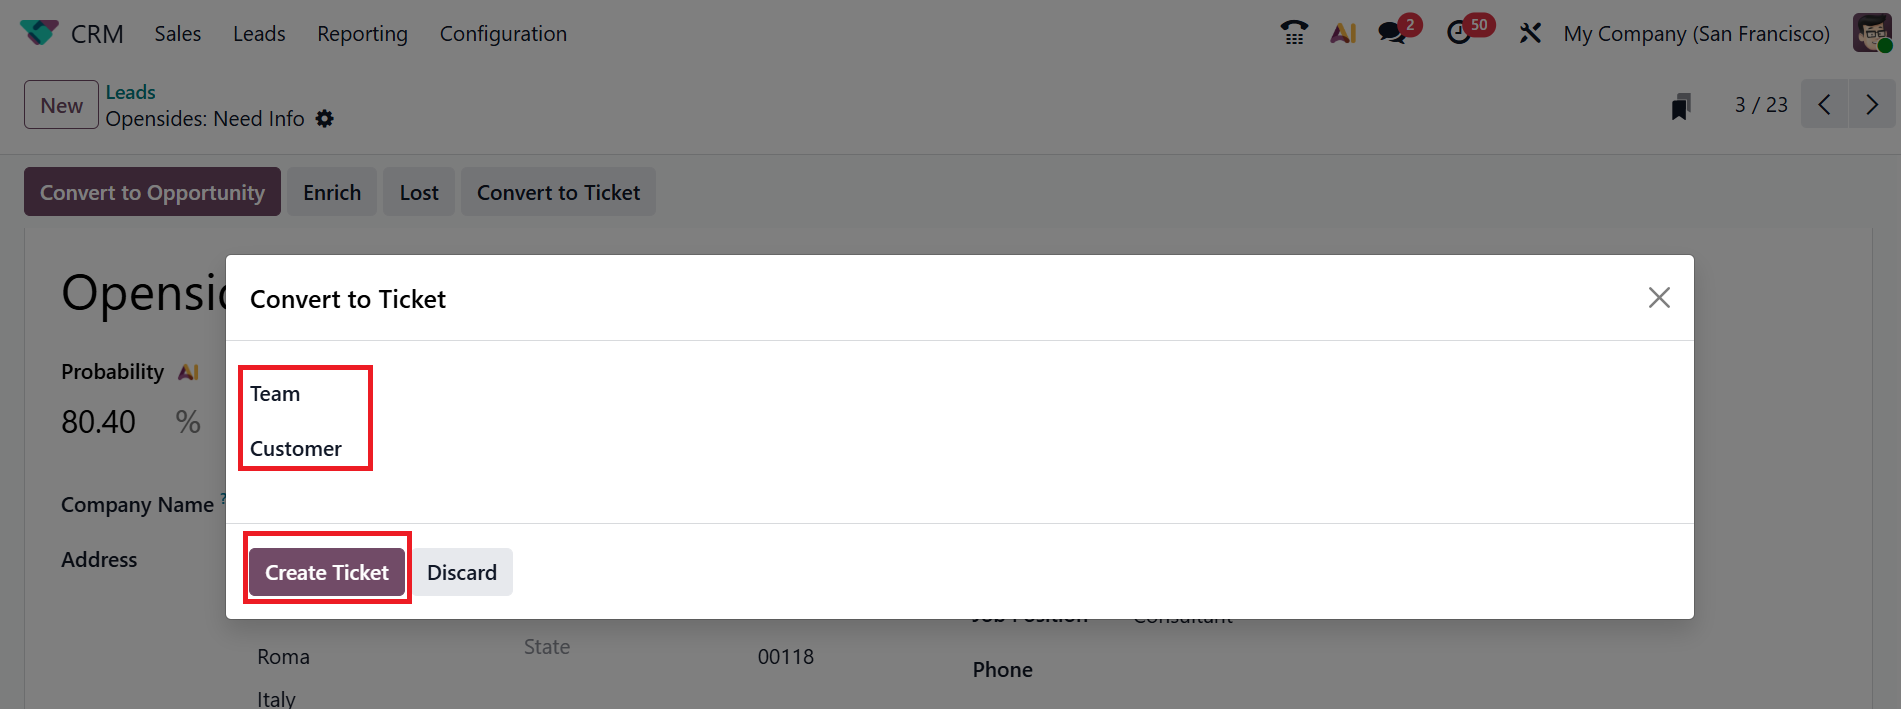
Click the Convert to Ticket button to transform the lead into a ticket. Next, a pop-up window will appear, as illustrated below. Then, choose a Team and Customer and click on the Create Ticket button as shown below.
Click on the Enrich button to enrich the lead with company information.
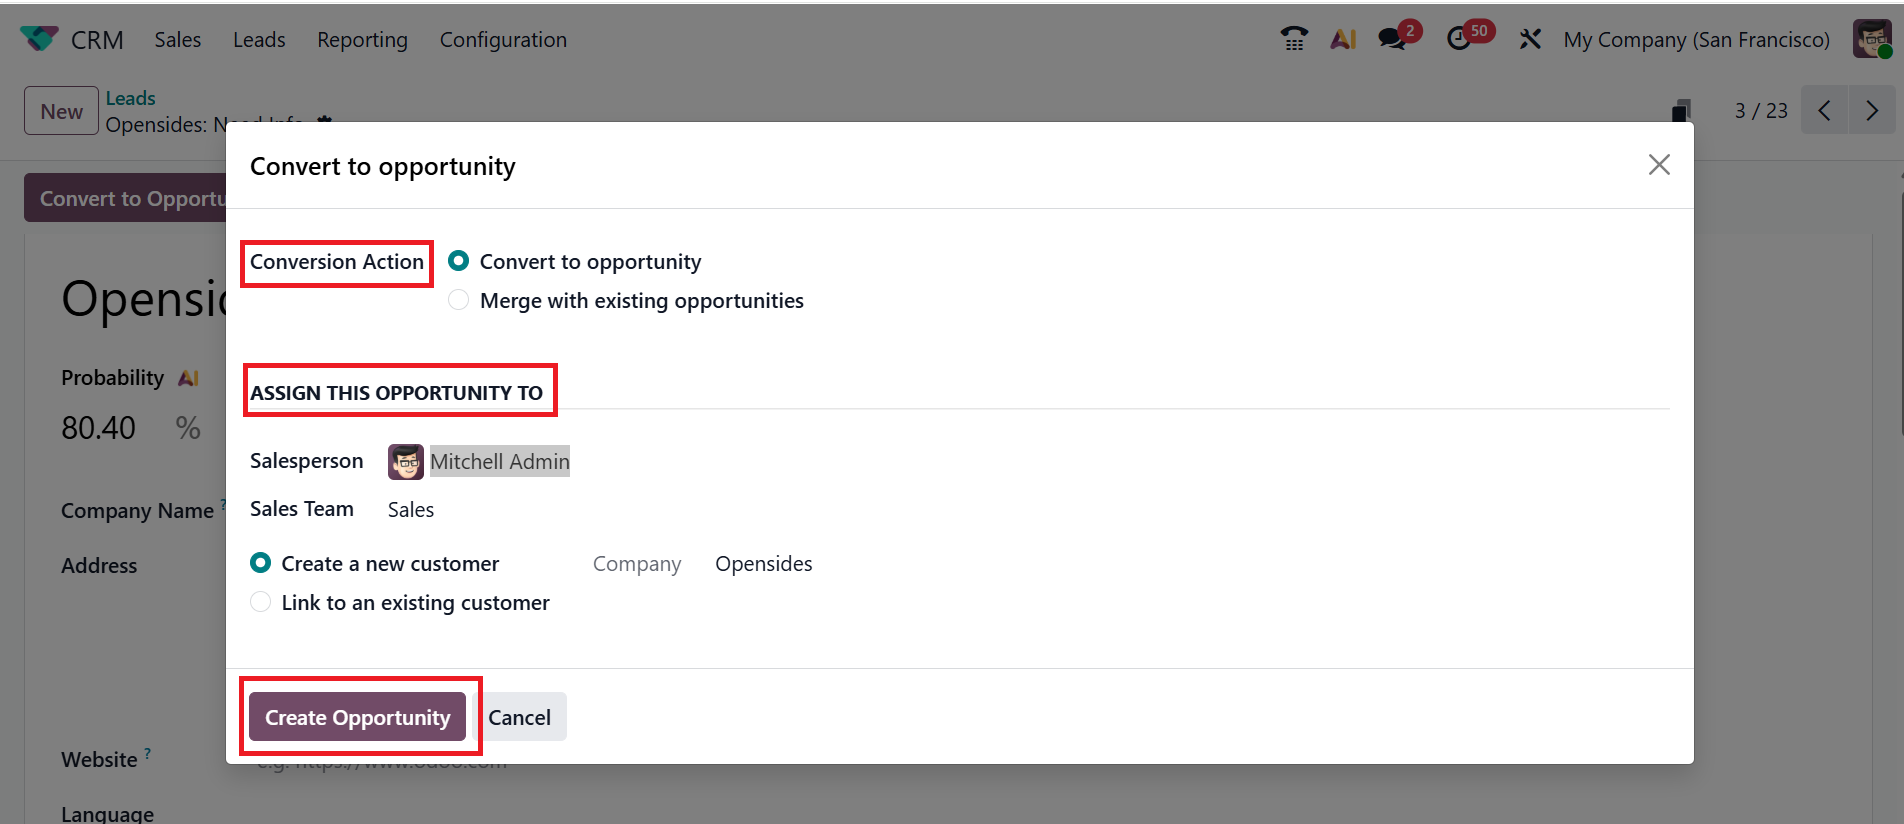
When you click the Create an Opportunity button, a pop-up screen appears to convert the lead into an opportunity, as shown below.
From the Conversion Action field, pick either Convert to Opportunity or Merge with Existing Opportunities. Then, under the Assign This Opportunity To section, choose a Sales Team and Salesperson. Then, select whether to create a new customer record or link to an existing one. After that, click the Create Opportunity button shown below.
This will convert the lead into an opportunity.
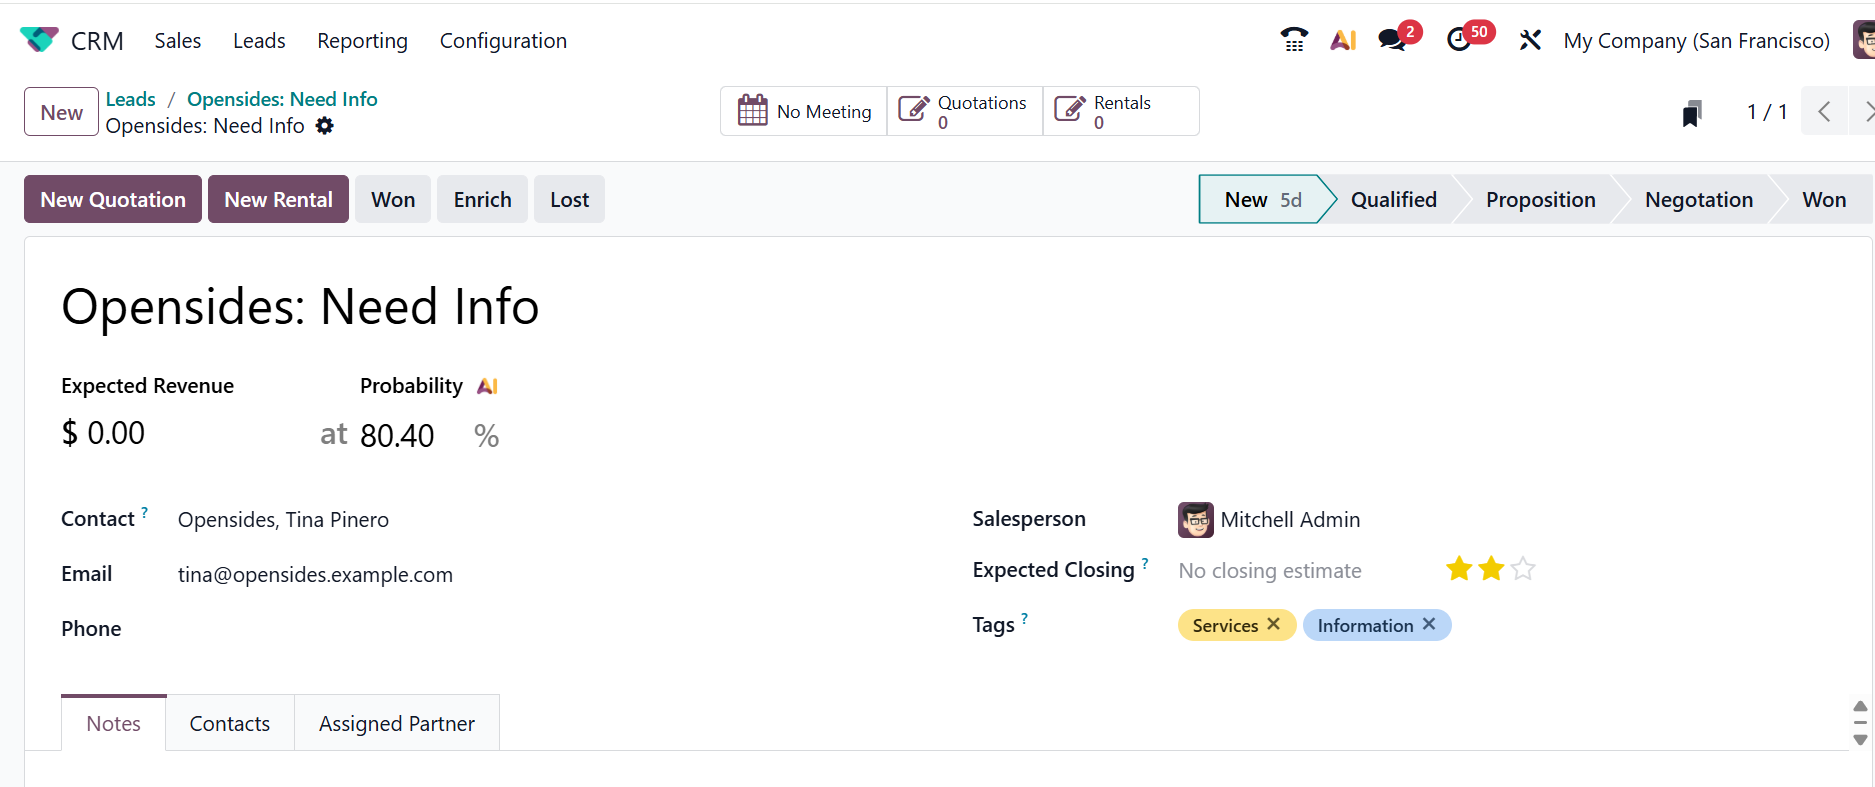
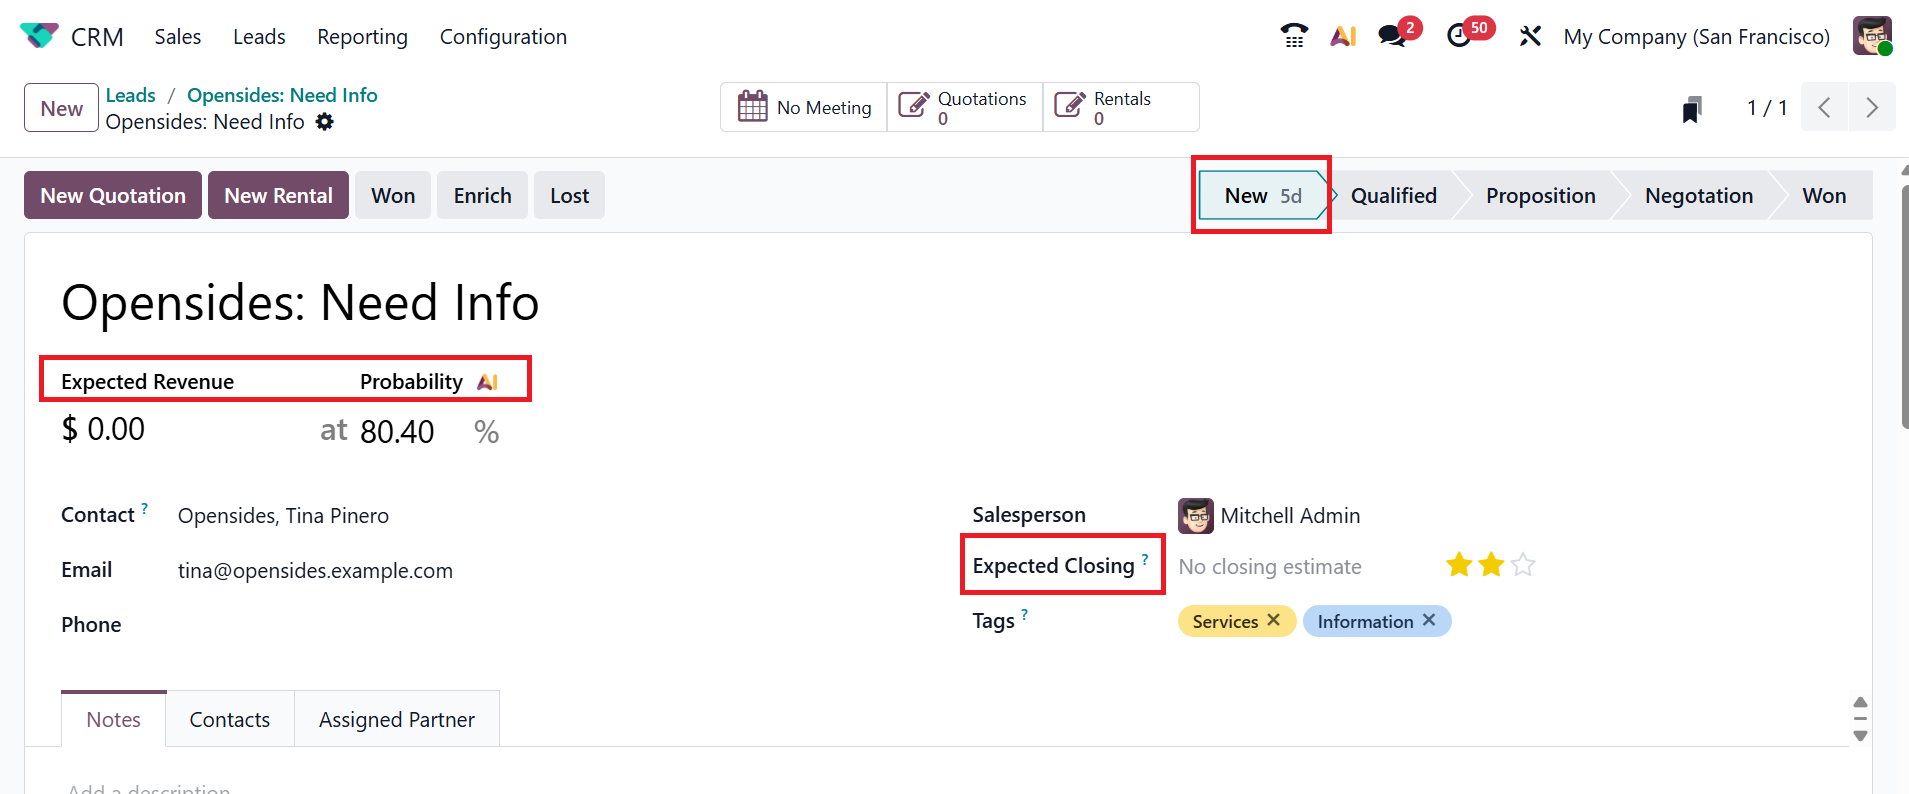
Under the Expected Revenue field, you can mention the expected company revenue for future purposes. Under the Probability field, the success rate of the opportunity is computed using AI, expressed as a percentage. Set the expected closing date for the opportunity by selecting it in the Expected Closing field. In each stage, you can view how long the lead remains in that particular stage.
*Opportunities for Sales Quotation:
The Odoo 19 CRM module helps convert an opportunity into a sales quotation. Once a lead is converted into an opportunity, you can further convert that opportunity into a sales quotation tailored to the customer’s interests.
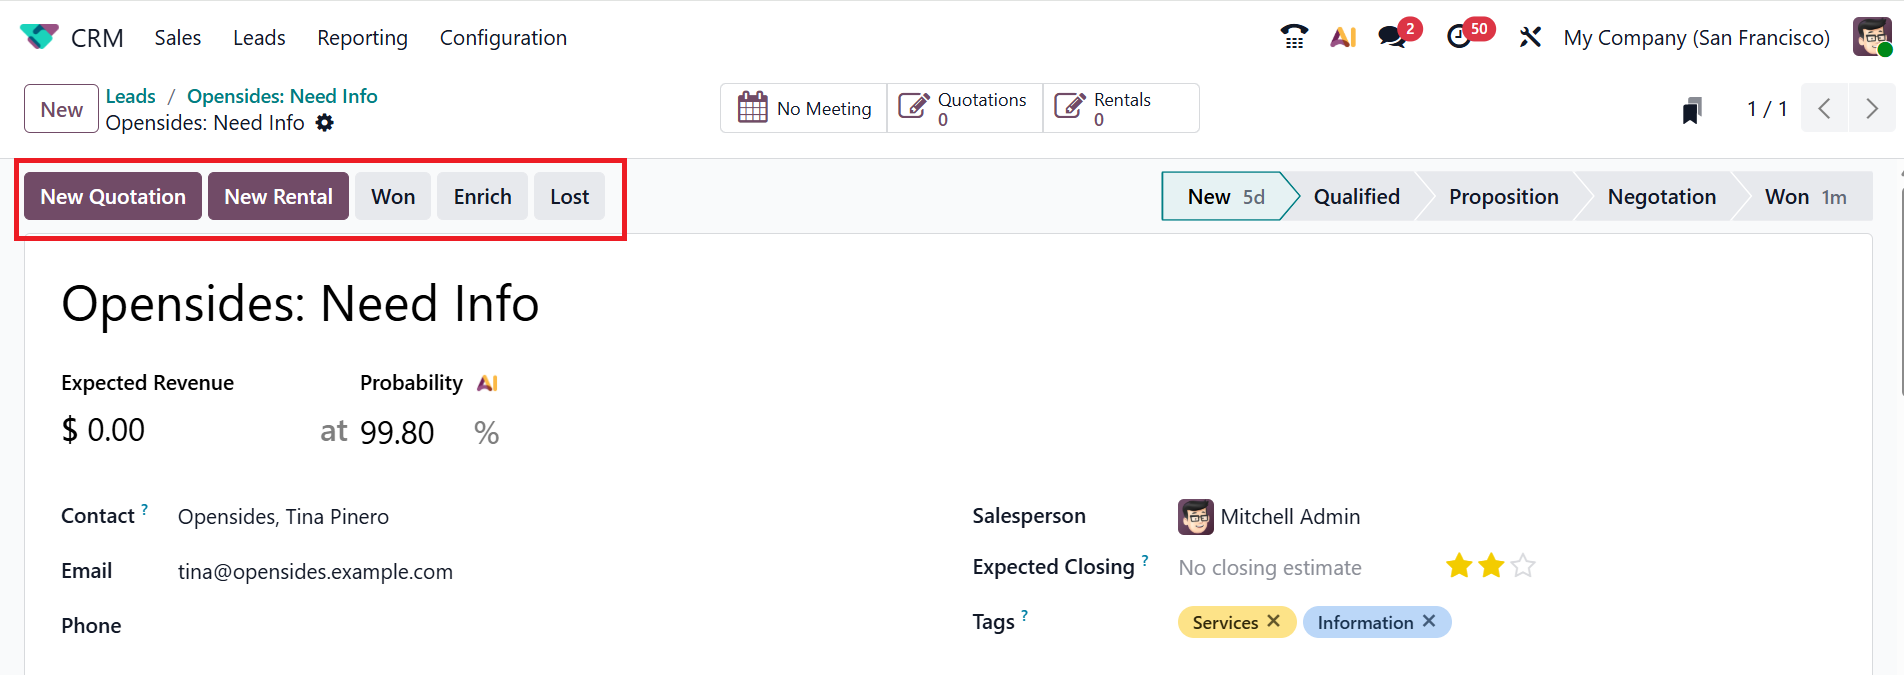
The screenshot below shows the opportunity to convert a sales quotation. Here, you can see five options: New Quotation, New Rental, Won, Enrich, and Lost.
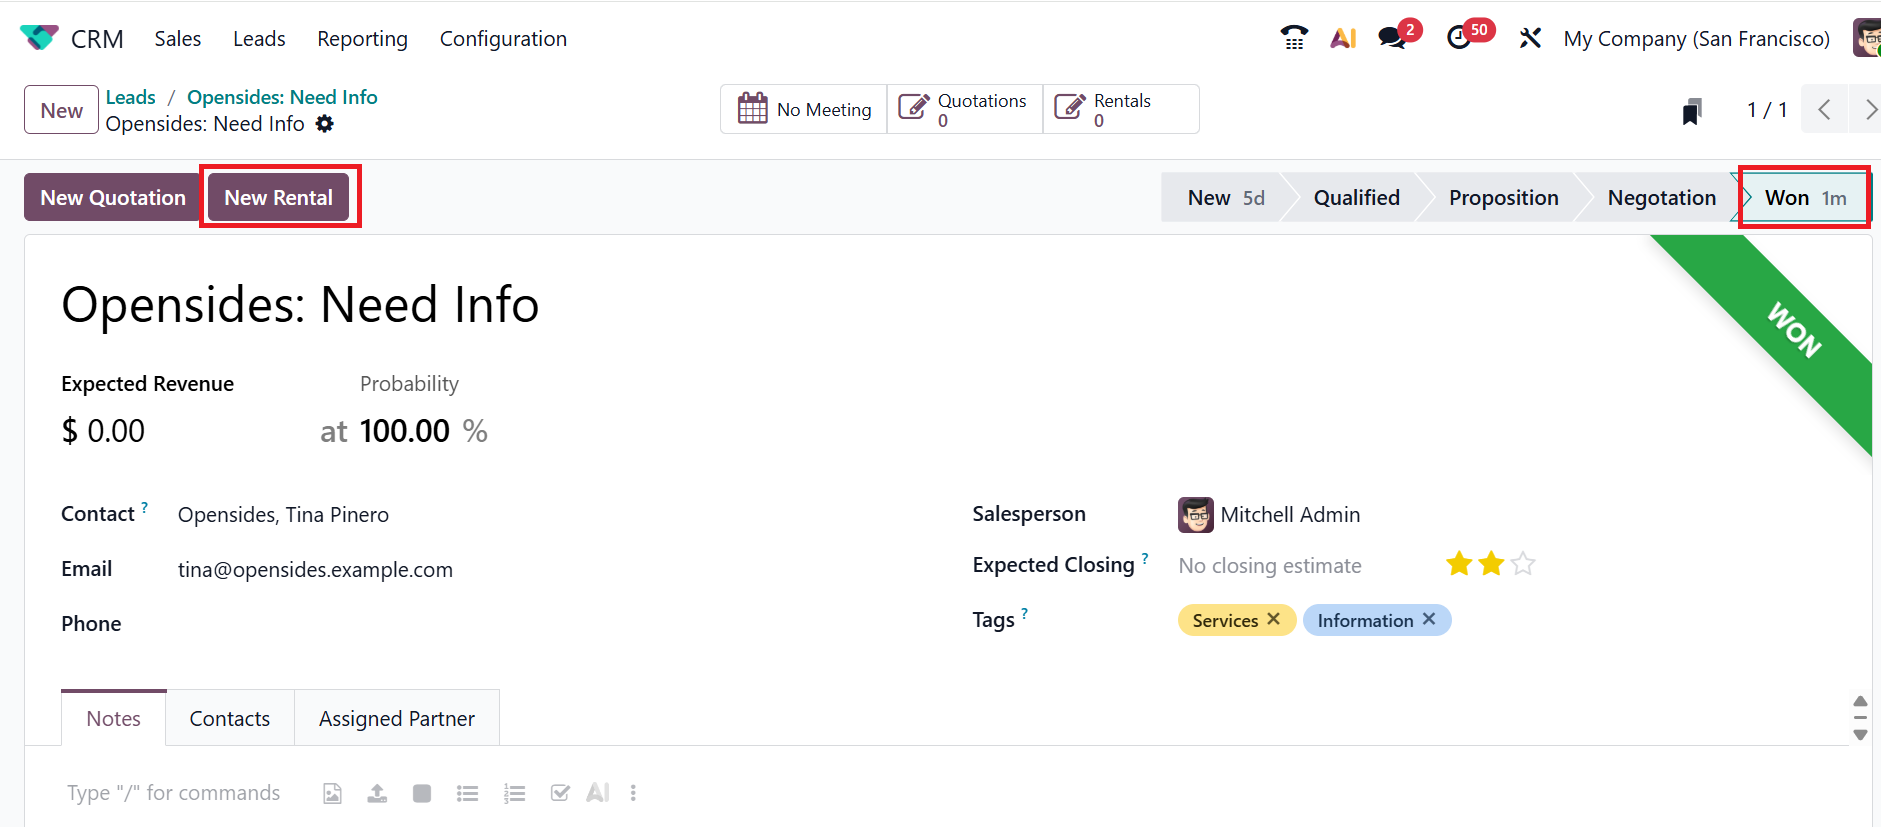
If the user clicks the Won button, the Opportunity will be directly changed to the Won stage. A Won ribbon will be added, as shown in the screenshot below. Click the New Rental button to create a new rental quotation.
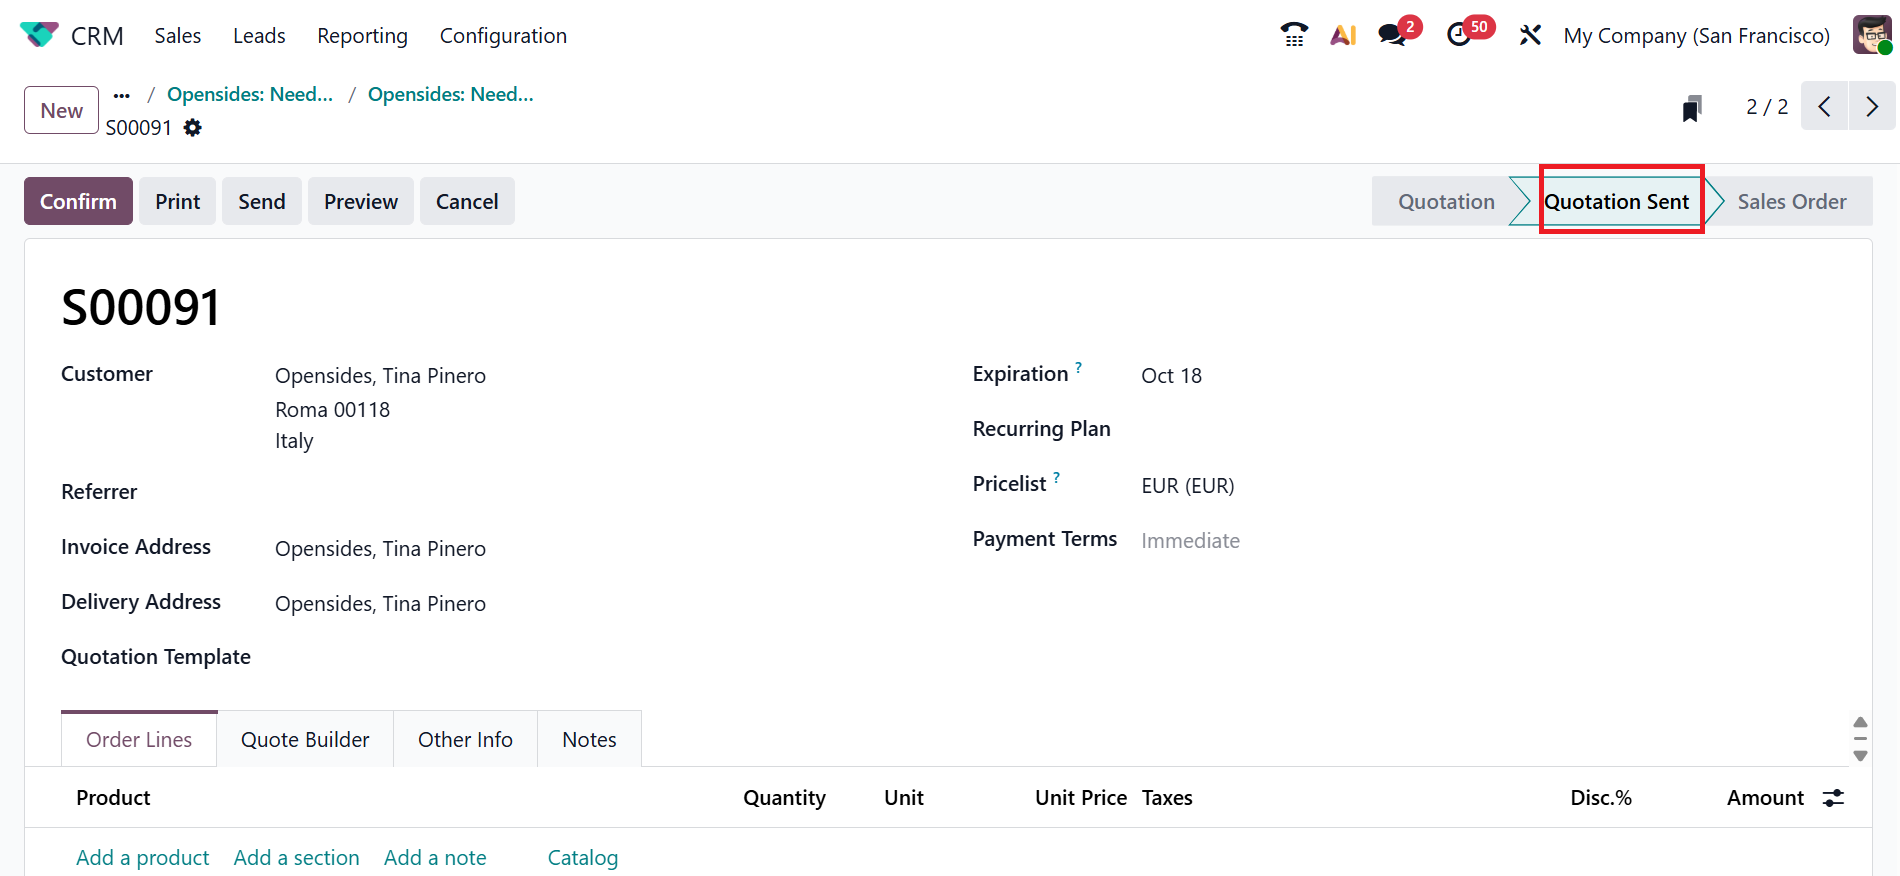
Click the New Quotation button to create a sales quotation from an opportunity. Based on the details from the chance, the quotation details will be filled automatically. You can add more information about the quotation in the tabs, such as Order Lines, Quote Builder, Other Info, and Notes. Next, click the Send button to forward the quotation to the customer via email.
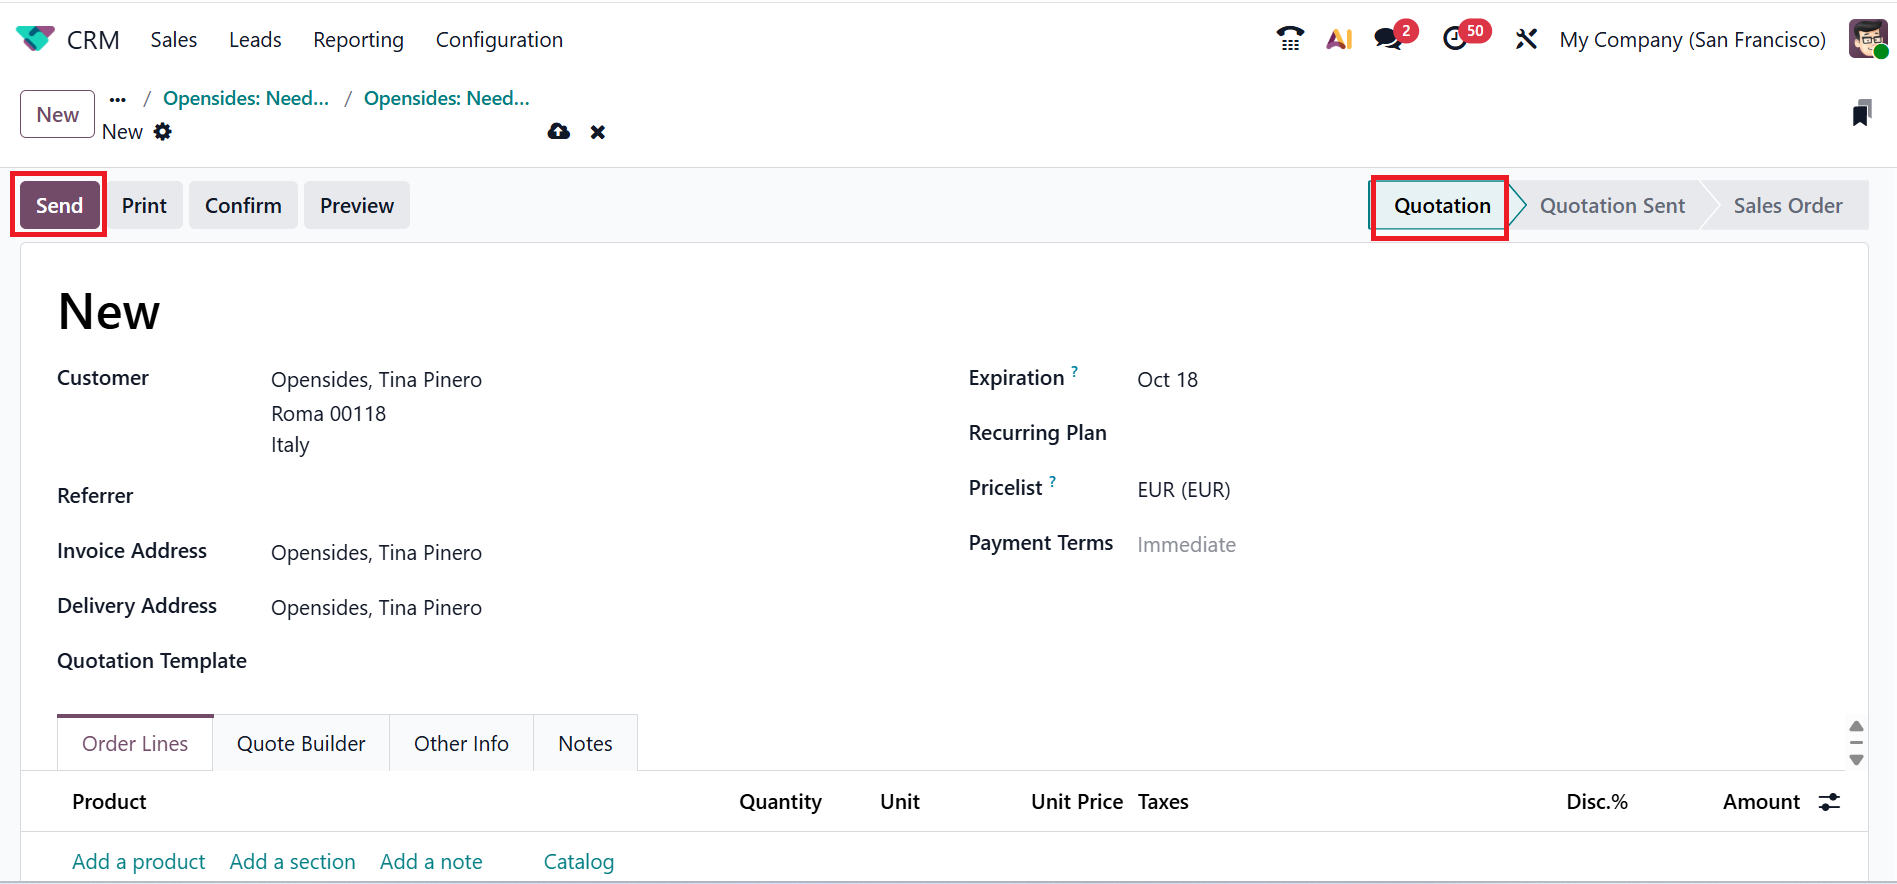
The quotation will then be marked as in the Quotation Sent stage.
Then, navigate to the Sales menu and select My Quotations. There, you can view all quotations generated from leads and opportunities. The details shown by default are Number, Creation Date, Customer, Website, Salesperson, Activities, Company, Total, and Status.