Sales
Discover how Odoo 19 CRM simplifies sales management! Learn features, tips, and expert insights from the Odoo v19 Enterprise Edition Book.
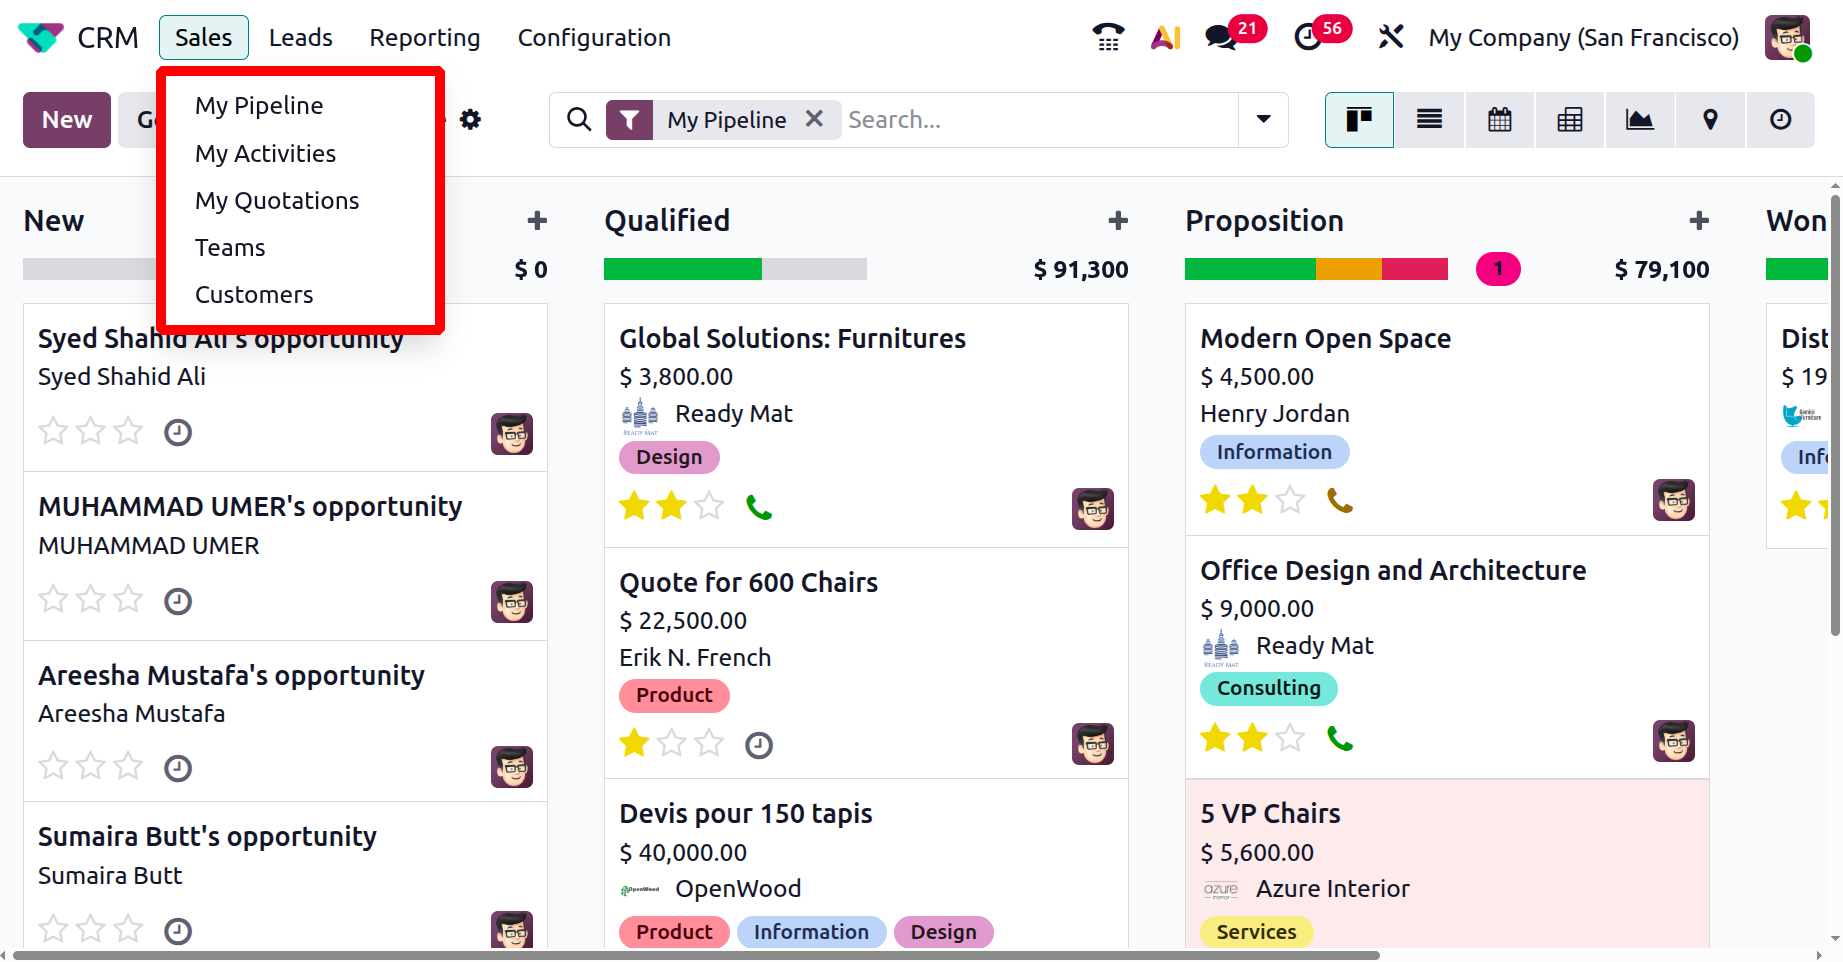
1.1 MY PIPELINE:
The screenshot below shows the My Pipeline view from the Sales menu. In the My Pipeline window, you can view a diverse range of opportunities available for tracking and management. When you log in and open your pipeline, it displays all the opportunities assigned to you by default.
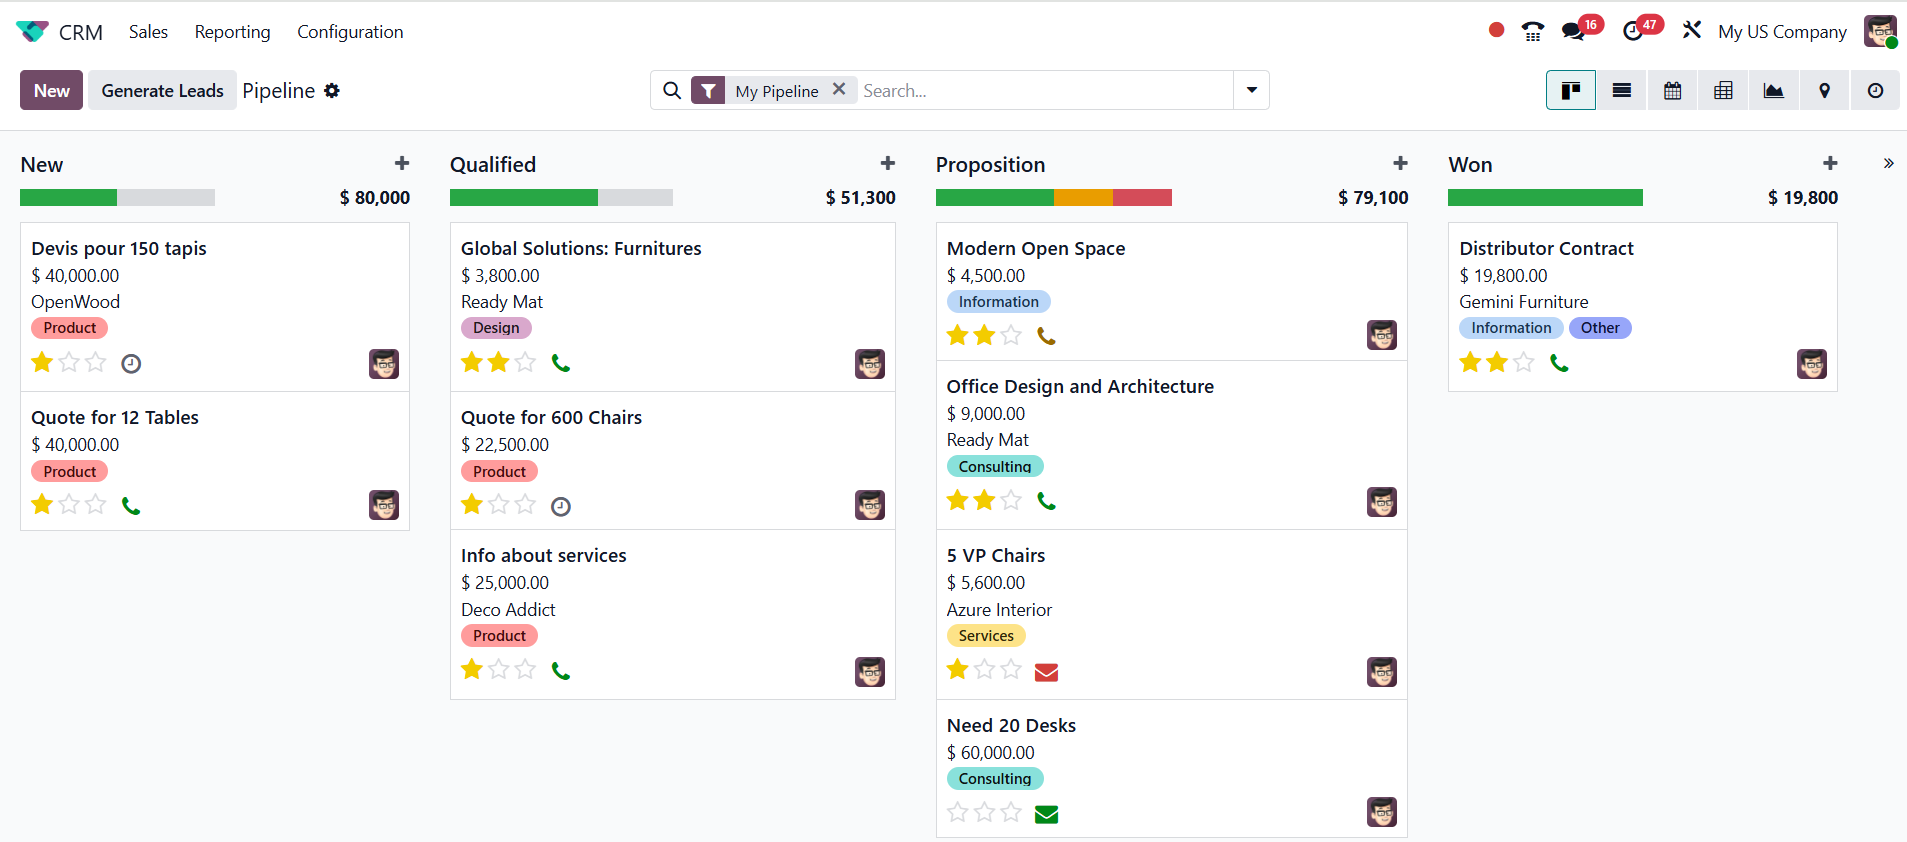
Here, you can customize the Odoo 19 CRM dashboard view as Kanban, List, Calendar, Pivot, Graph, Map, or Activity.
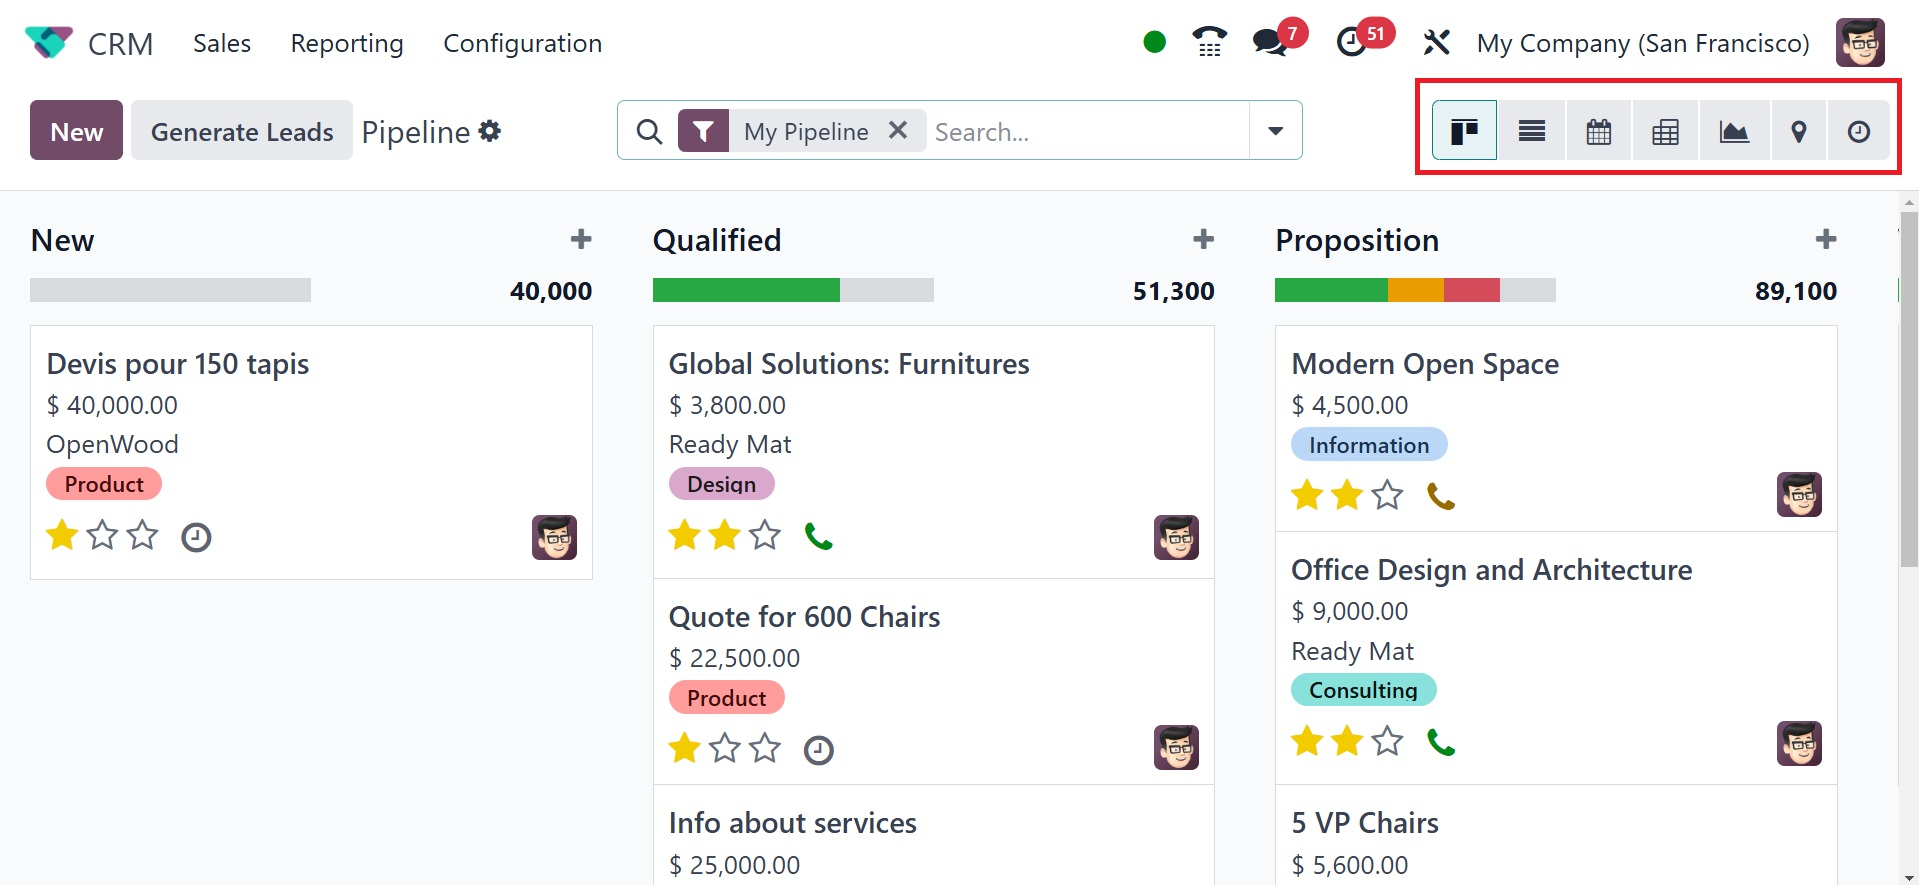
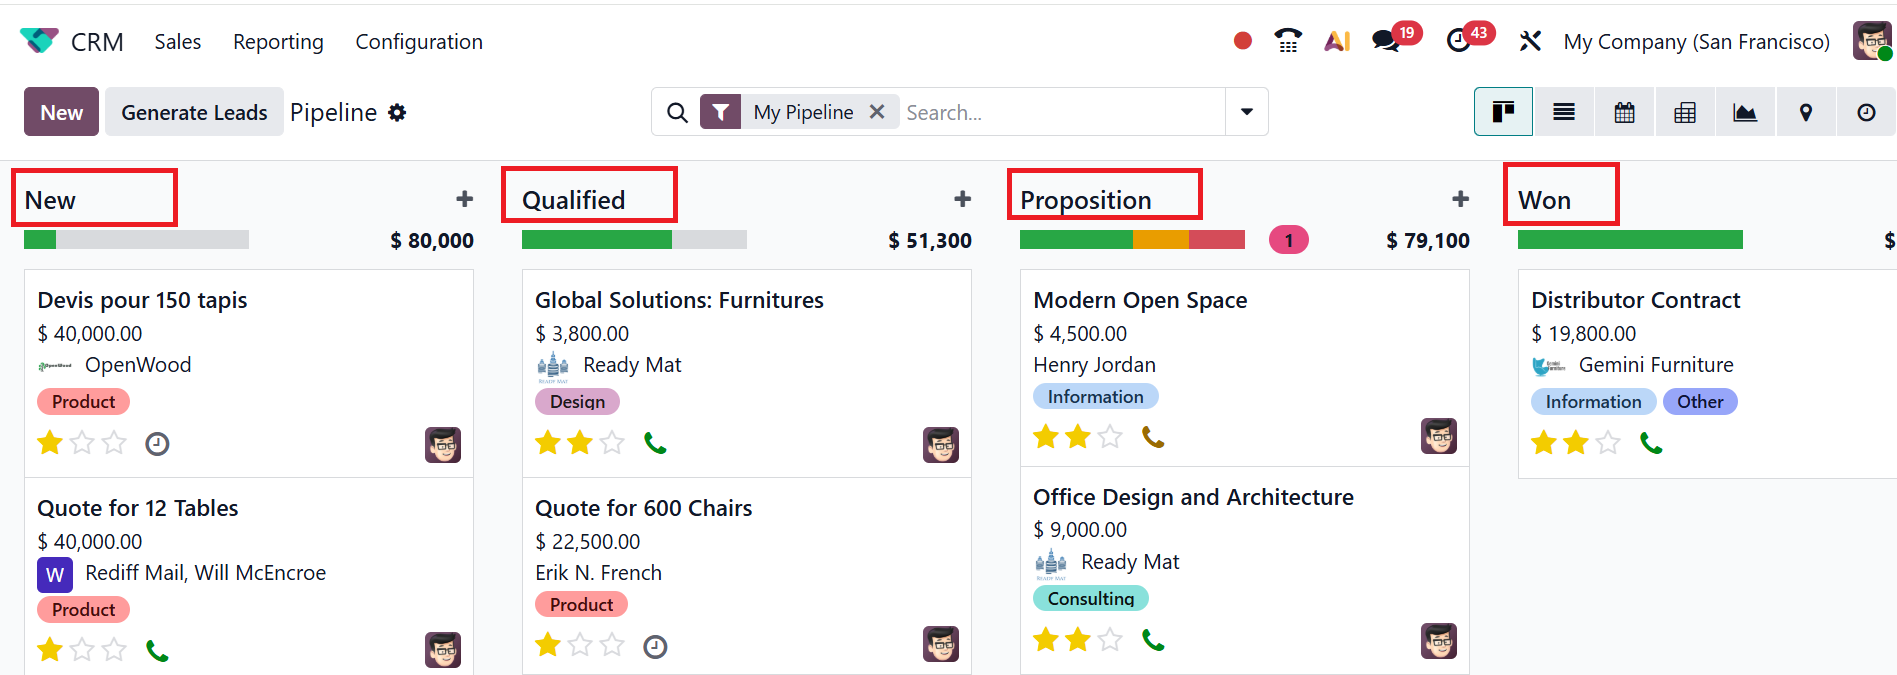
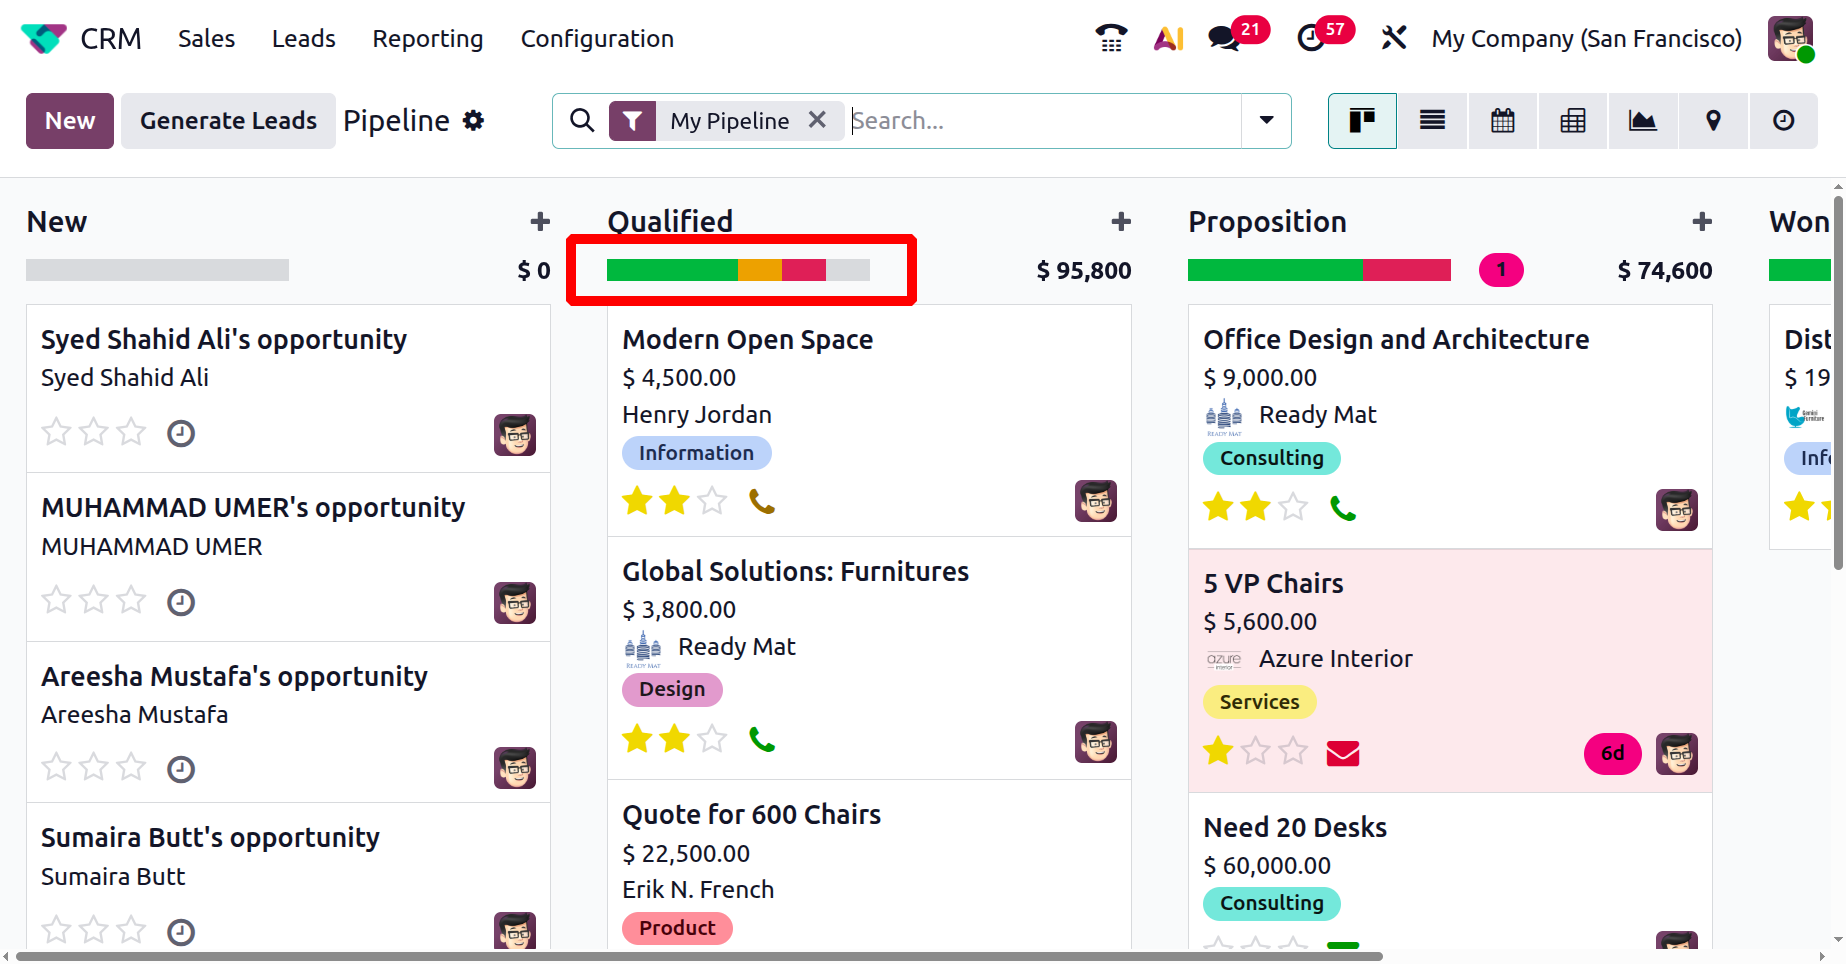
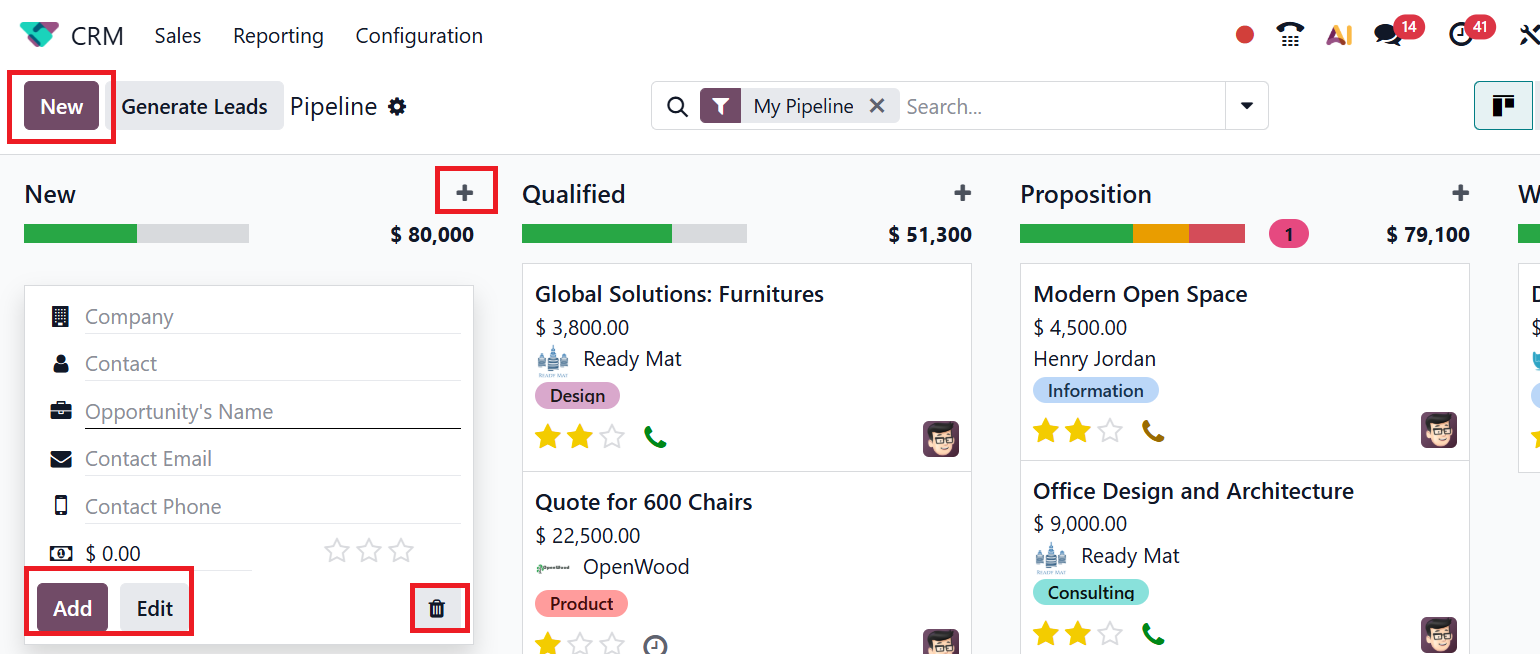
In the Kanban view of the CRM pipeline, all records are grouped by their process stage, making it easy for you to track the development of each lead. The CRM feature simplifies the allocation of leads to different stages, providing you with a clear overview and reassurance. In this view, the leads are categorized into four stages: New, Qualified, Proposition, and Won.
All the new opportunities will come under the New stage. From the New stage, the qualified leads move to the Qualified stage and then to the Proposition stage. After the customer verifies the leads, they move to the Won stage.
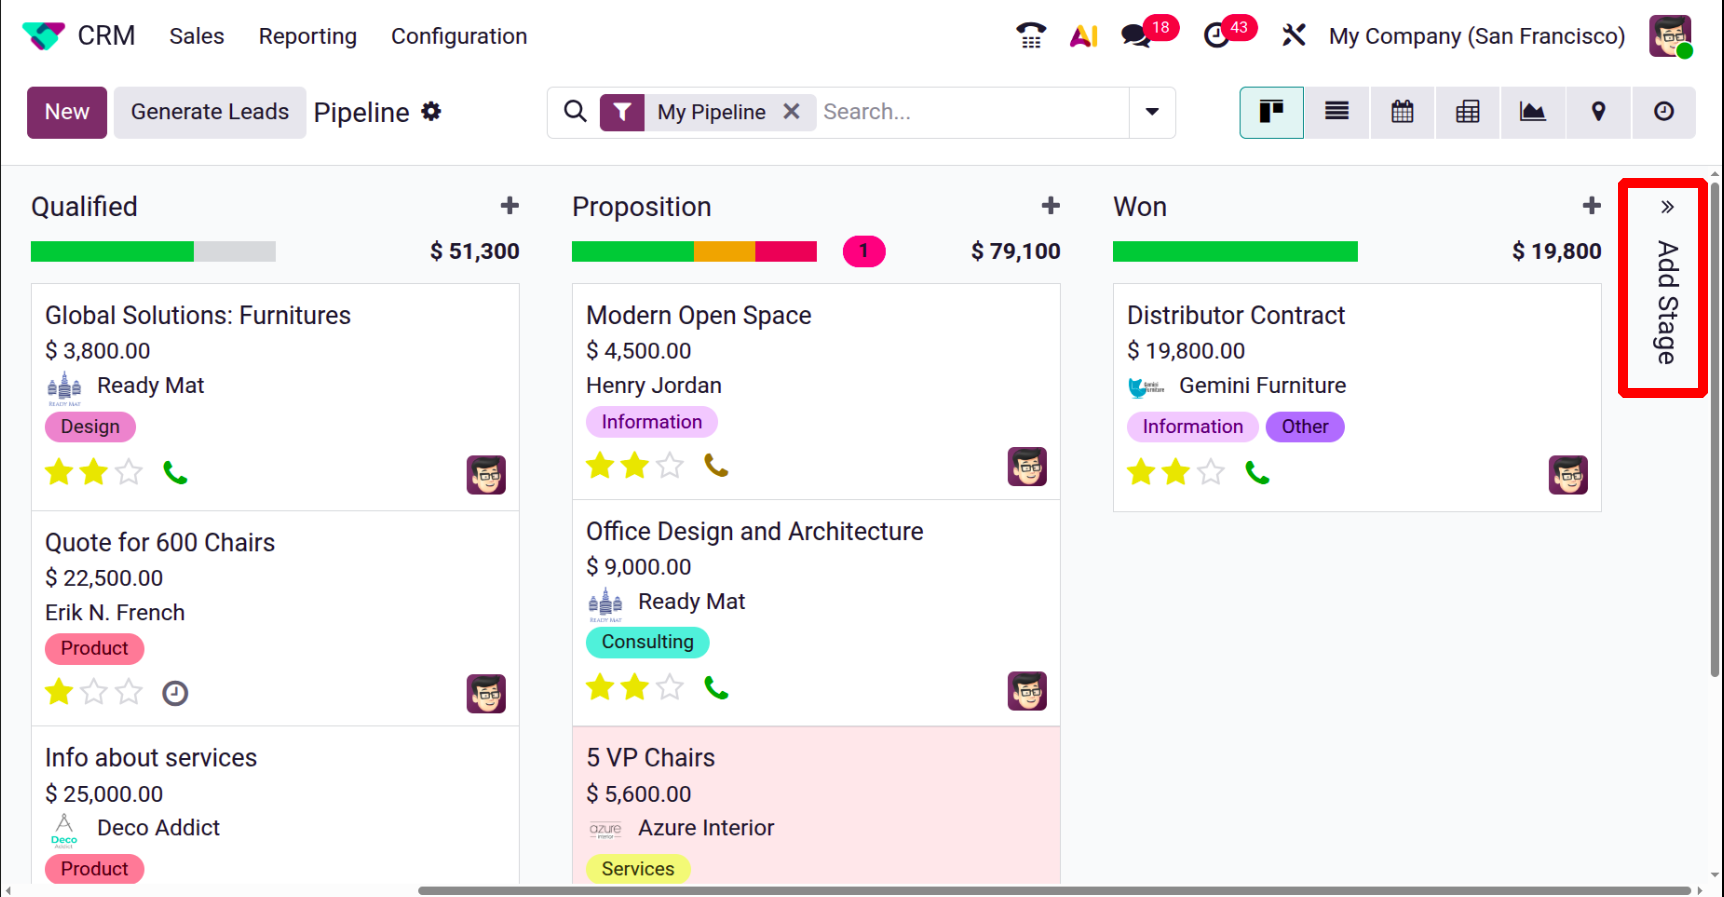
To create a new stage for the leads, click on the >> Add Stage button as shown below:
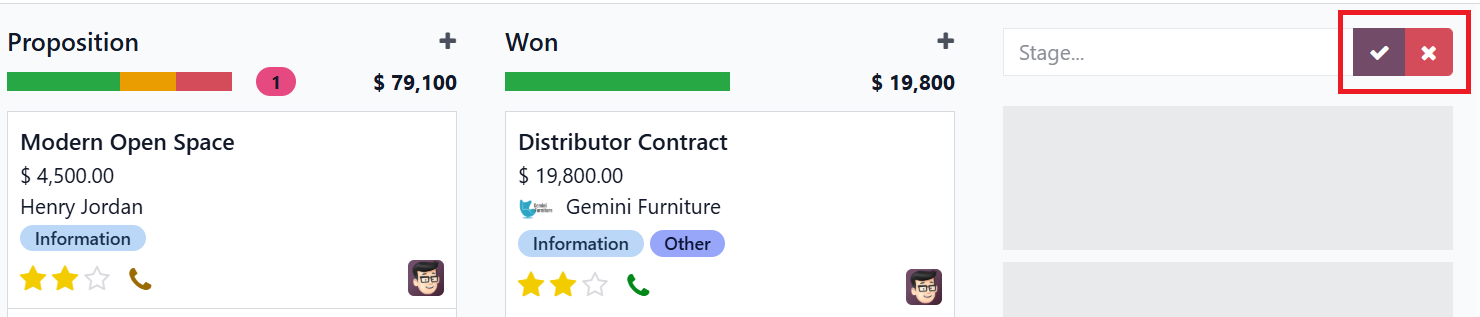
Then, add an appropriate title for your stage and press the tick button to save it. You can also press the wrong button to discard the creation of the new stage.
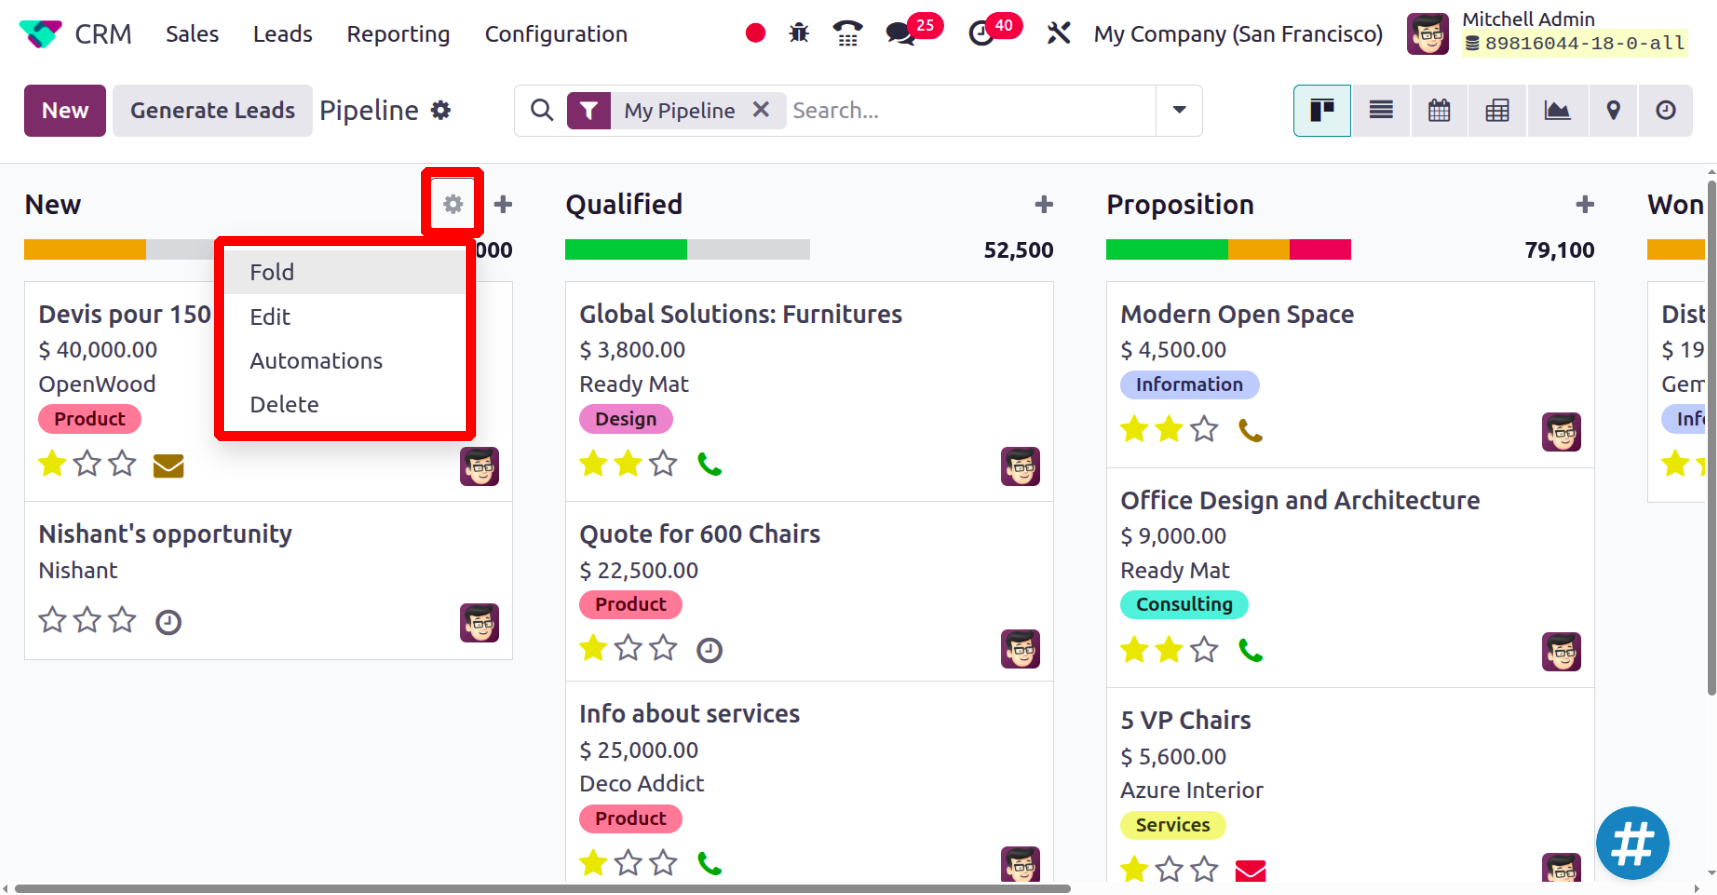
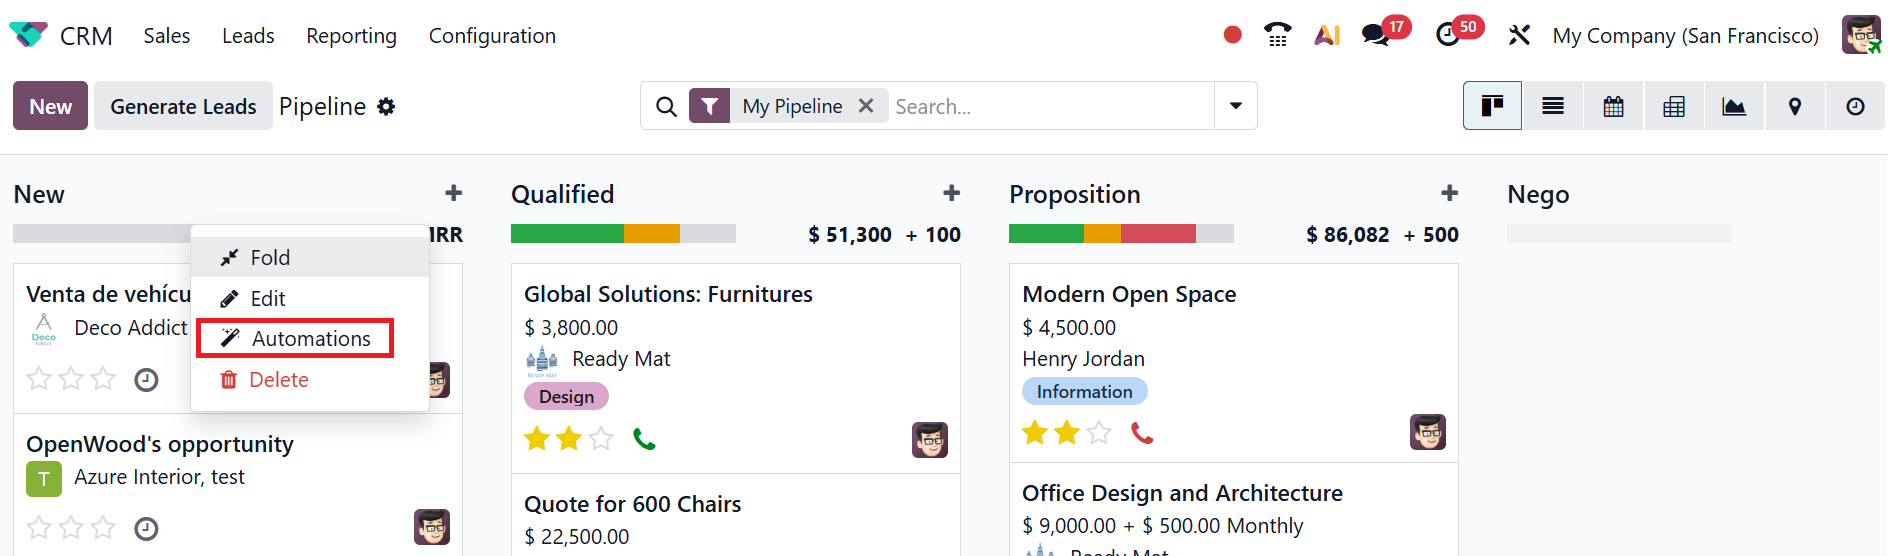
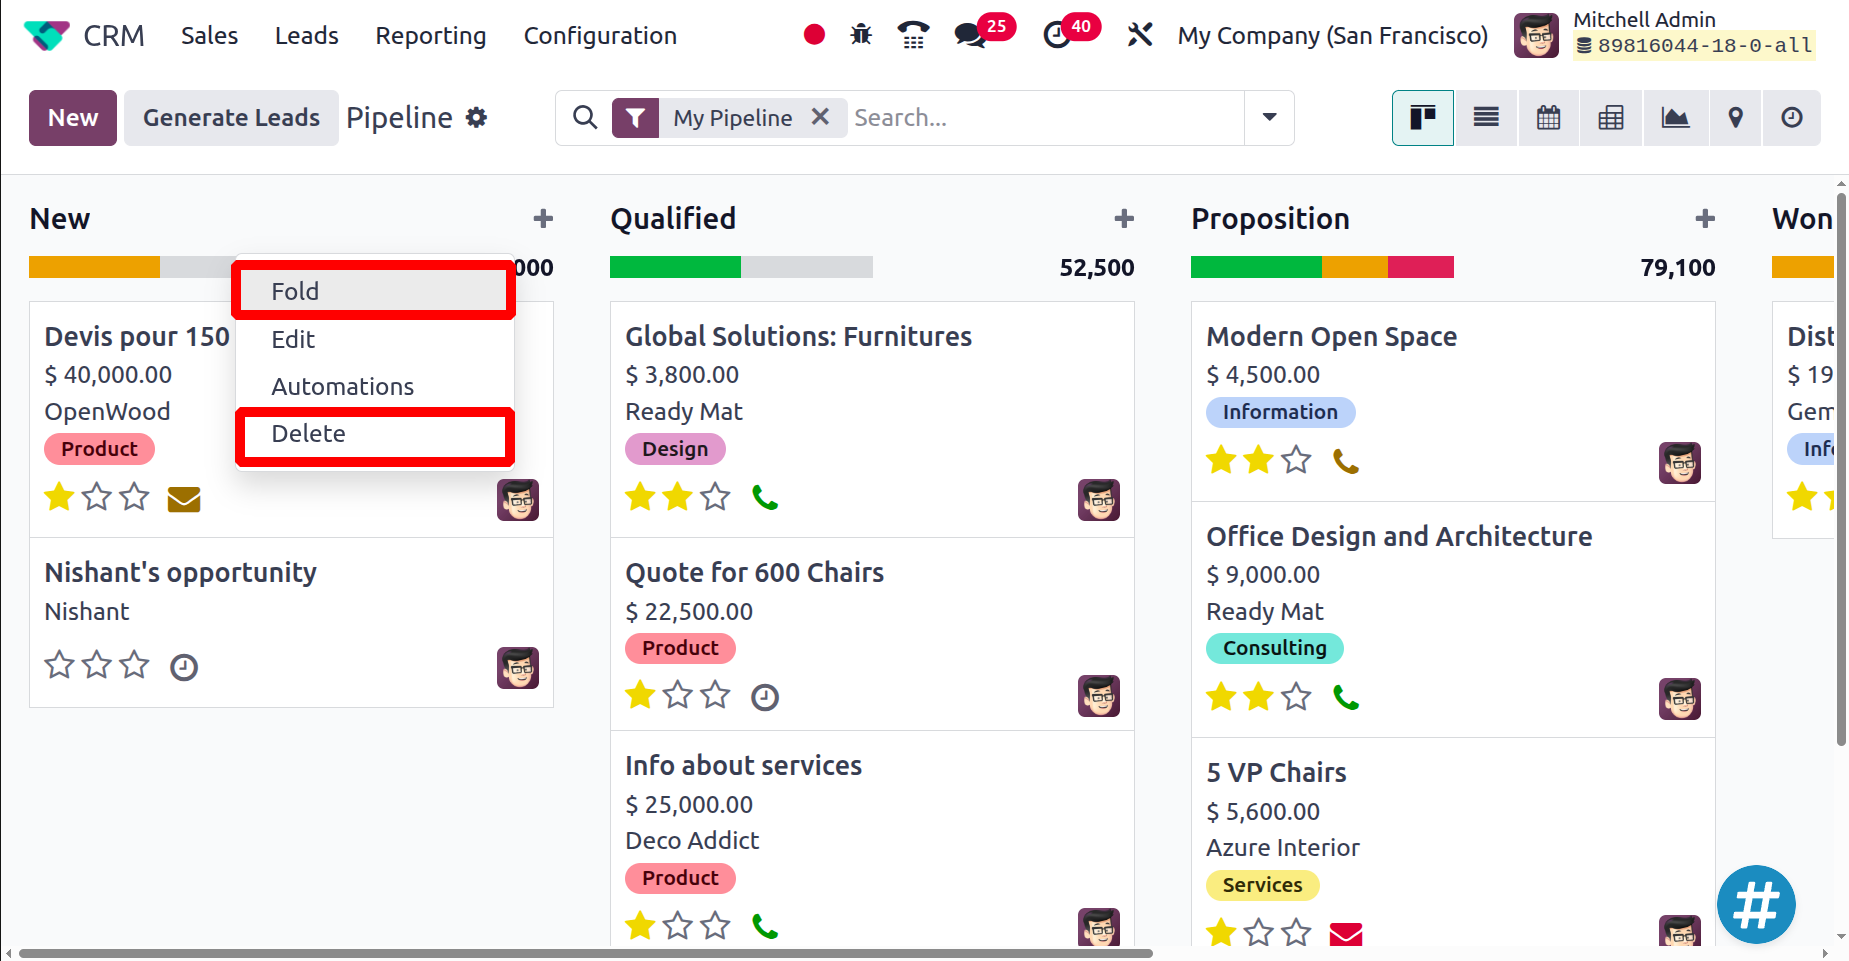
By selecting the gear icon beside the stage title, you can adjust various settings for each stage, such as Fold, Edit, Automations, and Delete, as illustrated below:
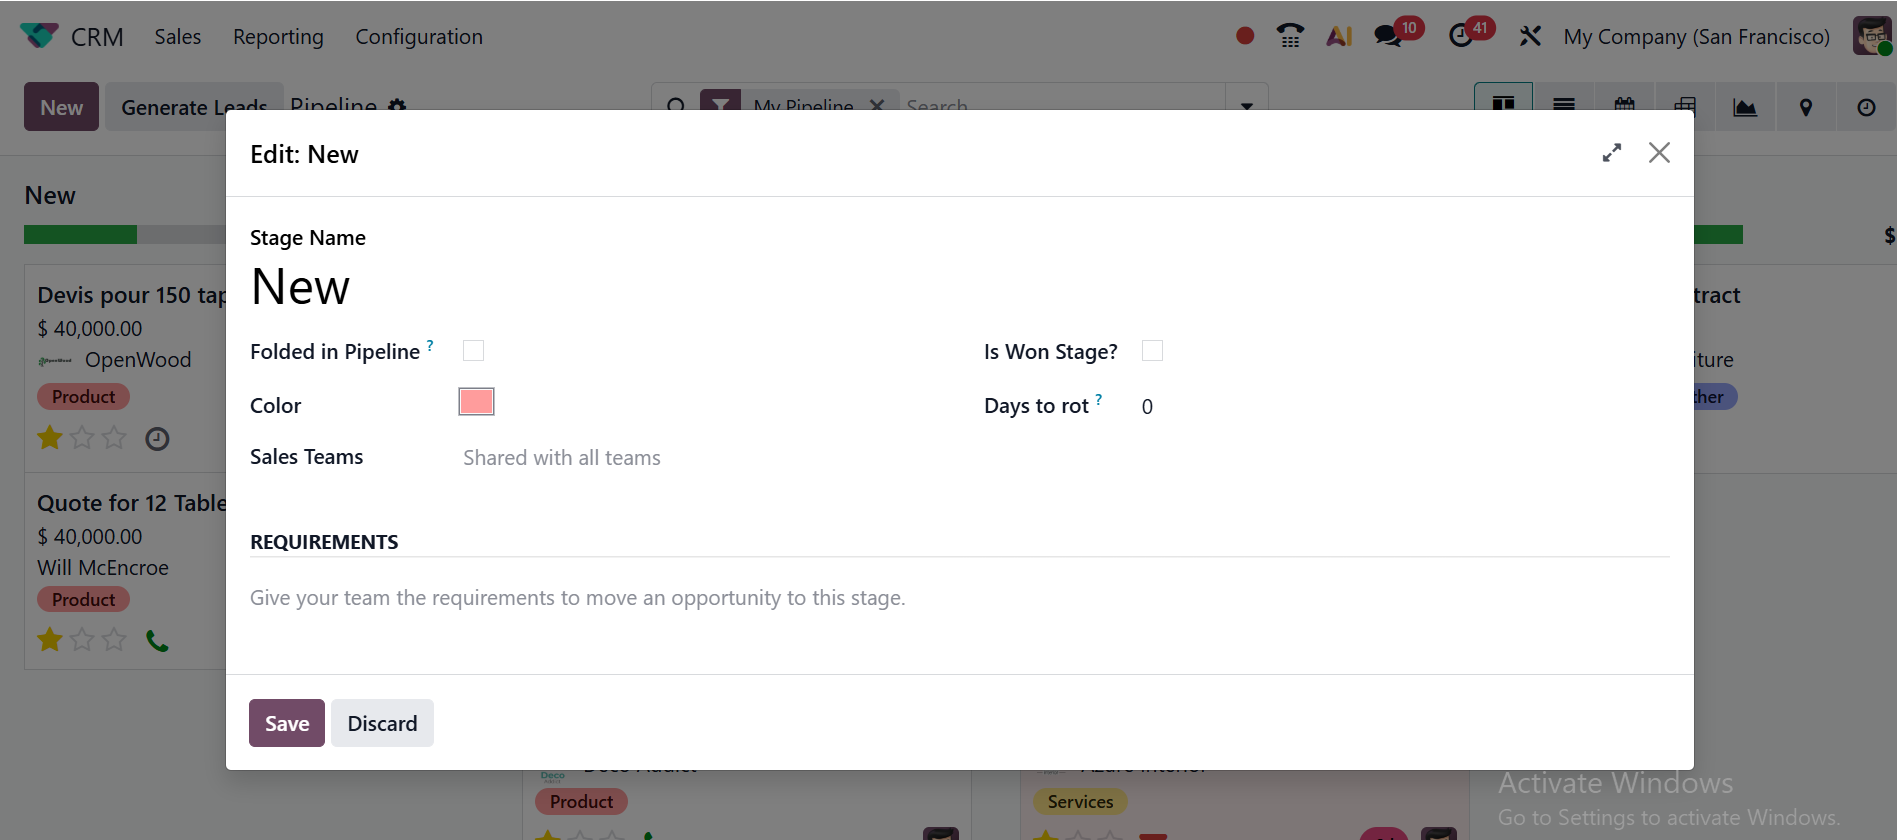
Click the Edit button to modify the stage. A pop-up window will appear, allowing you to update the stage name in the Stage Name field. You can enable the Folded in Pipeline option to fold this stage into a pipeline. You can enable the Is Won Stage option to allow this stage to be set as the Won stage. In the Sales Teams field, you can select teams to use this stage. In the Days to rot field, you can mention how long a lead or opportunity can stay in this stage. In the Requirements section, you can provide instructions for the team on what needs to be done to move an opportunity to this stage.
To create a new automation in the Odoo 19 CRM module, click on the Automations option under the gear icon, as shown below. To perform tasks automatically, users can design rules.
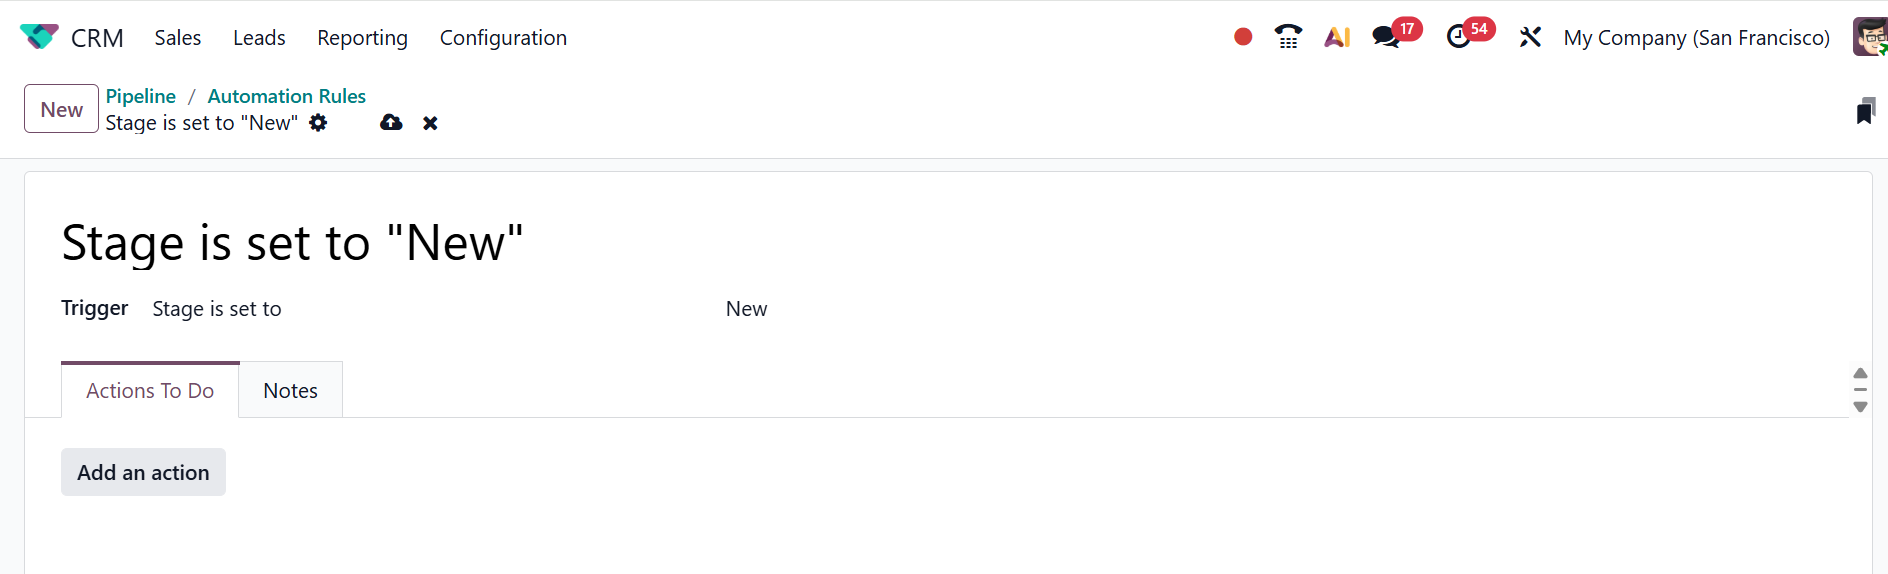
Select the New button to set up a new automation rule.
Add an explicit name for the new automation rule. Select a Trigger action from the drop-down menu and add a value for the selected Trigger action. Then, under the Actions To Do tab, click on the Add an action button to specify what the system should do when the rule is triggered.
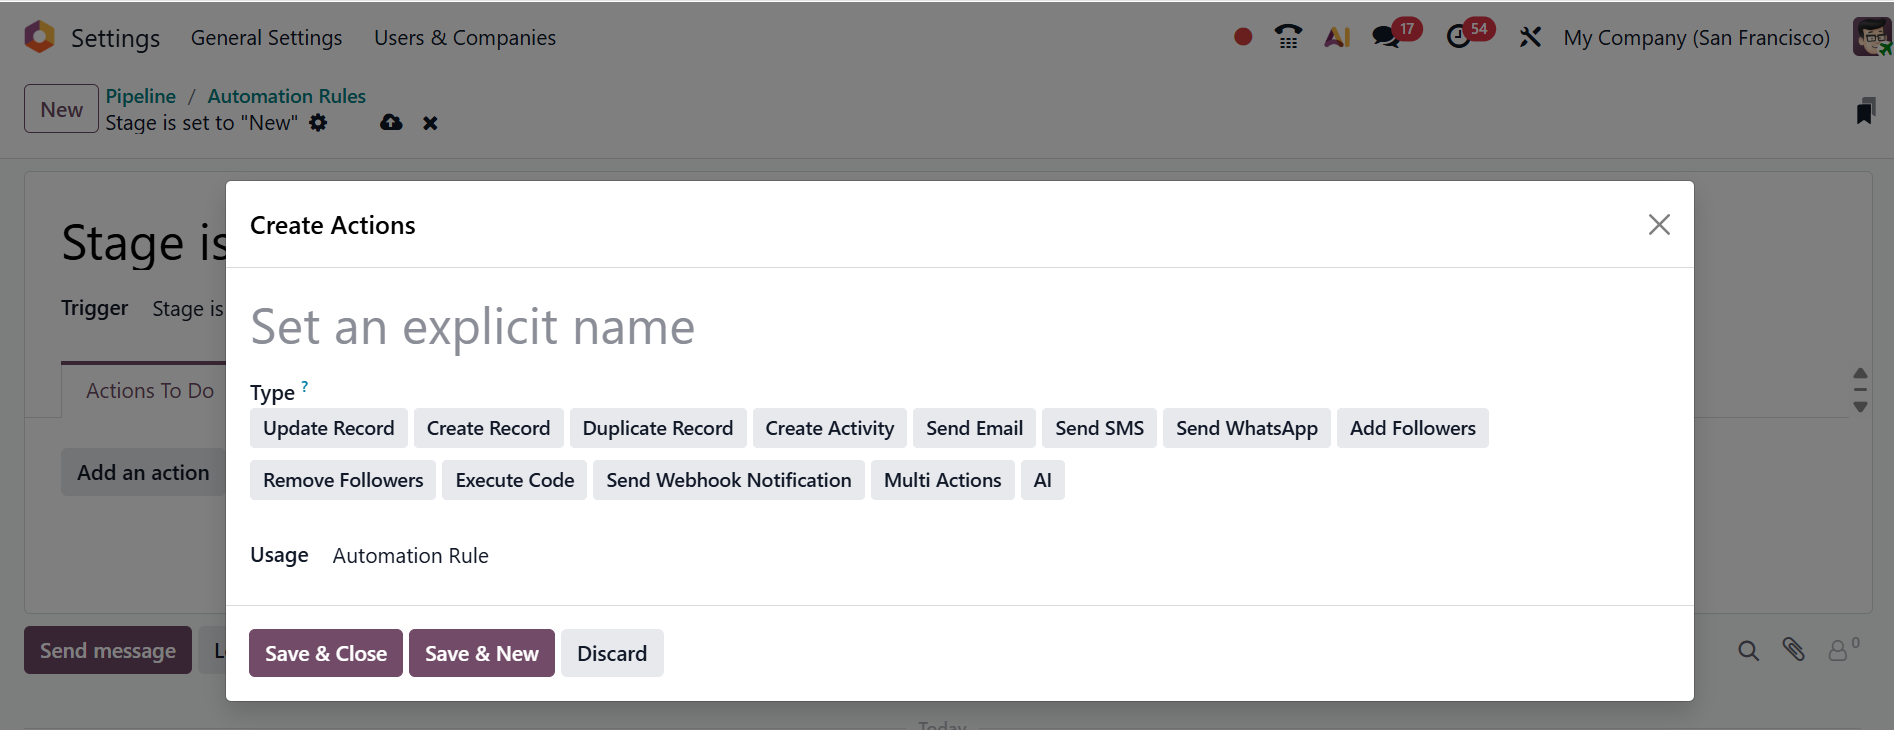
A new pop-up window will appear, where you can add a name for the new action and select a server action from the list under the Type field. You can choose the Usage option as Server Action, Scheduled Action, Automation rule, or Documents. Afterwards, click Save & Close to save your changes, or select Save & New if you want to create an additional action.
When you click on the Fold option, you can minimize or hide all the opportunities of that particular stage in the pipeline view. You can easily unfold the folded stage when you want to review it again. When you click on the Delete option, you can permanently delete the selected stage from the CRM database.
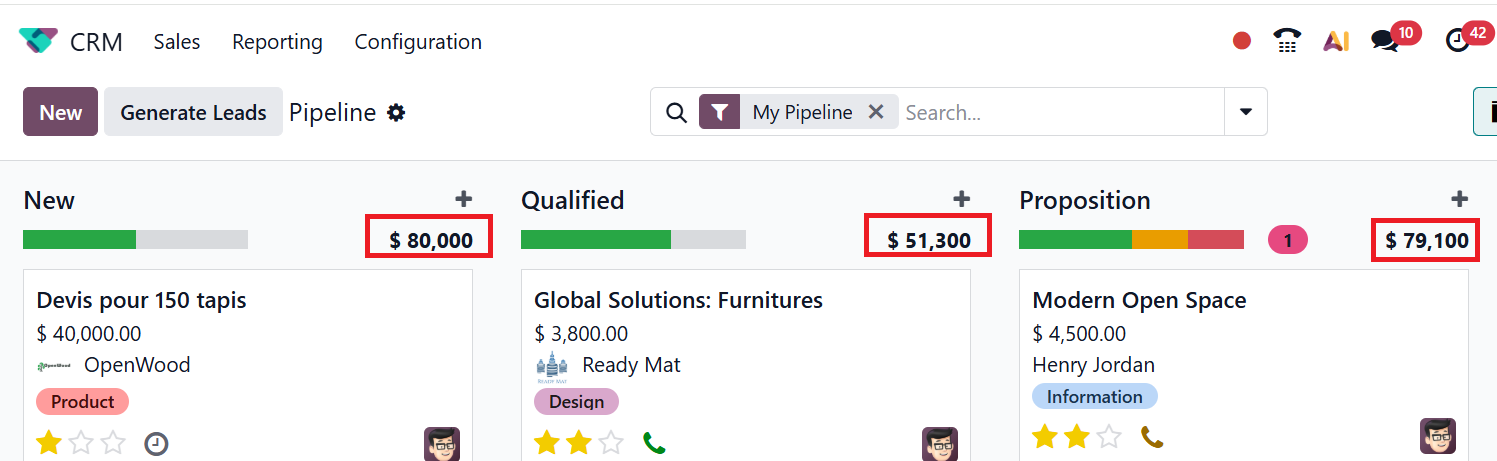
In the top-right corner of each stage, you’ll find the Expected Revenue displayed. You can move a lead between stages easily using the drag-and-drop feature. After that, the expected revenue will be automatically modified according to the new record.
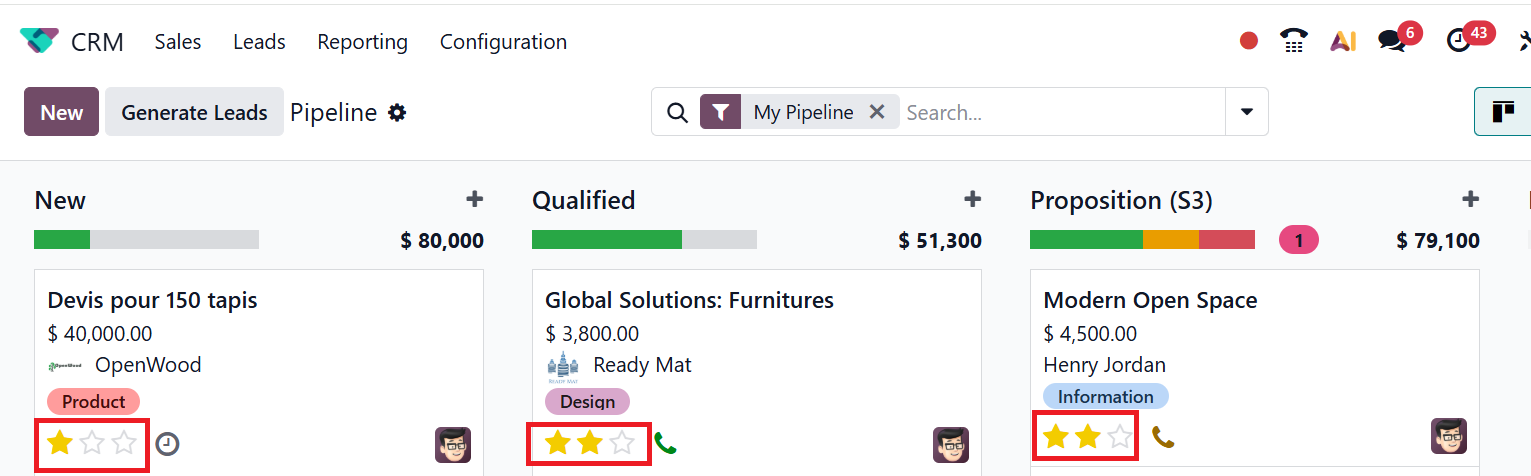
On each lead record, you can see three stars, which show the lead’s Priority as shown below. According to the lead’s priority, you can mark the star as Medium, High, or Very High. This feature enables you to easily identify the most valuable leads.
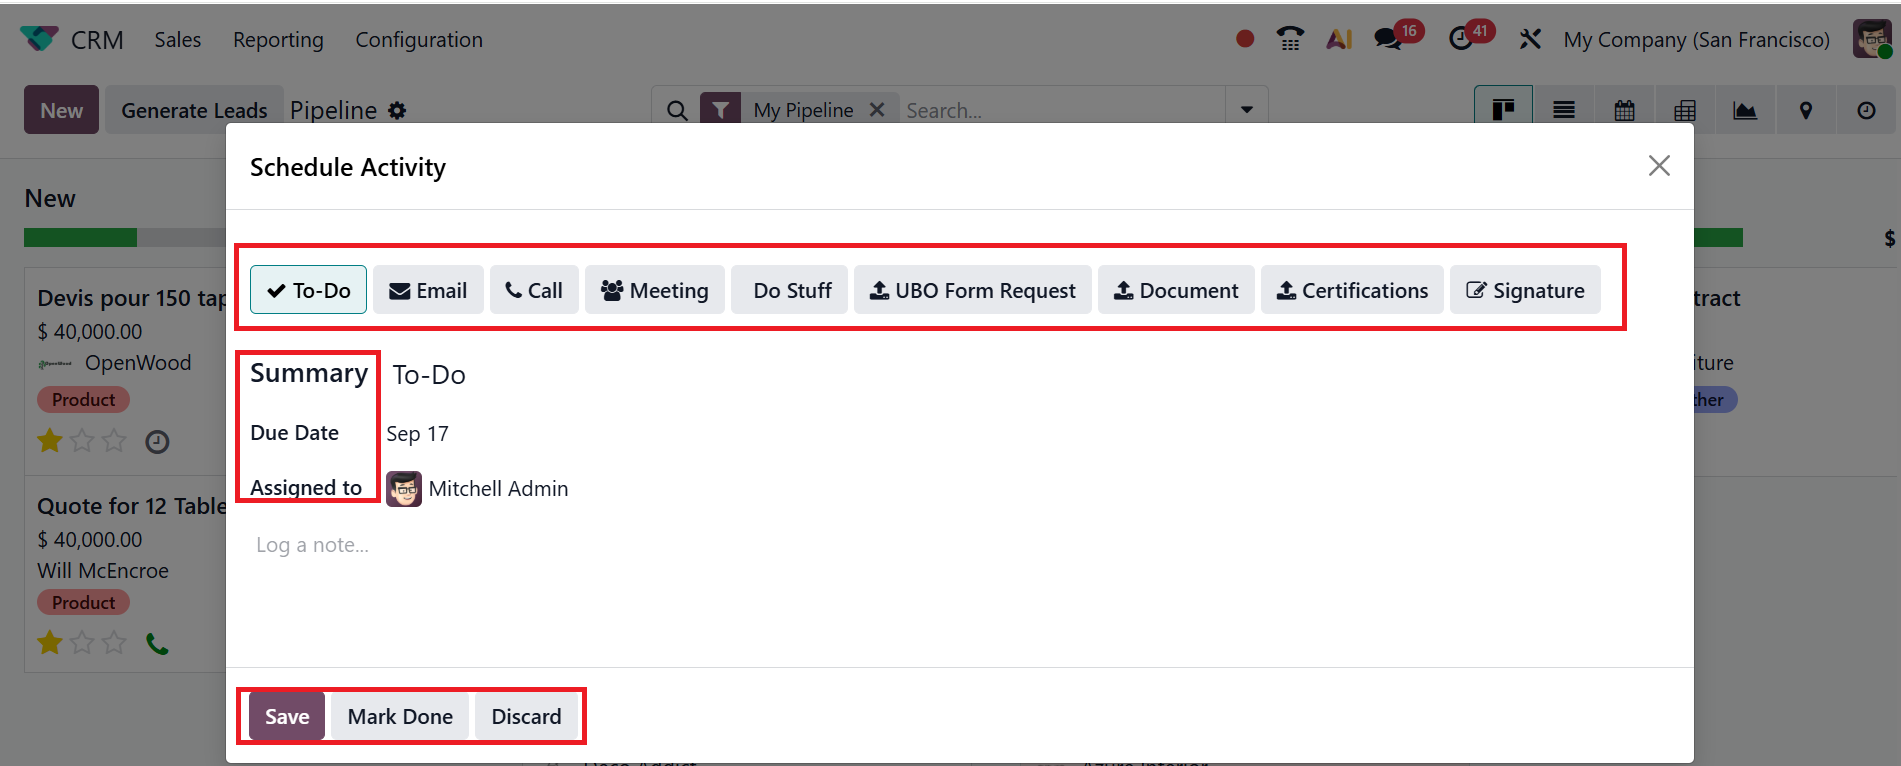
From the dashboard itself, you can schedule lead activities by clicking the clock icon, as shown in the image below. Next, click the +Schedule an activity button to create a new schedule.
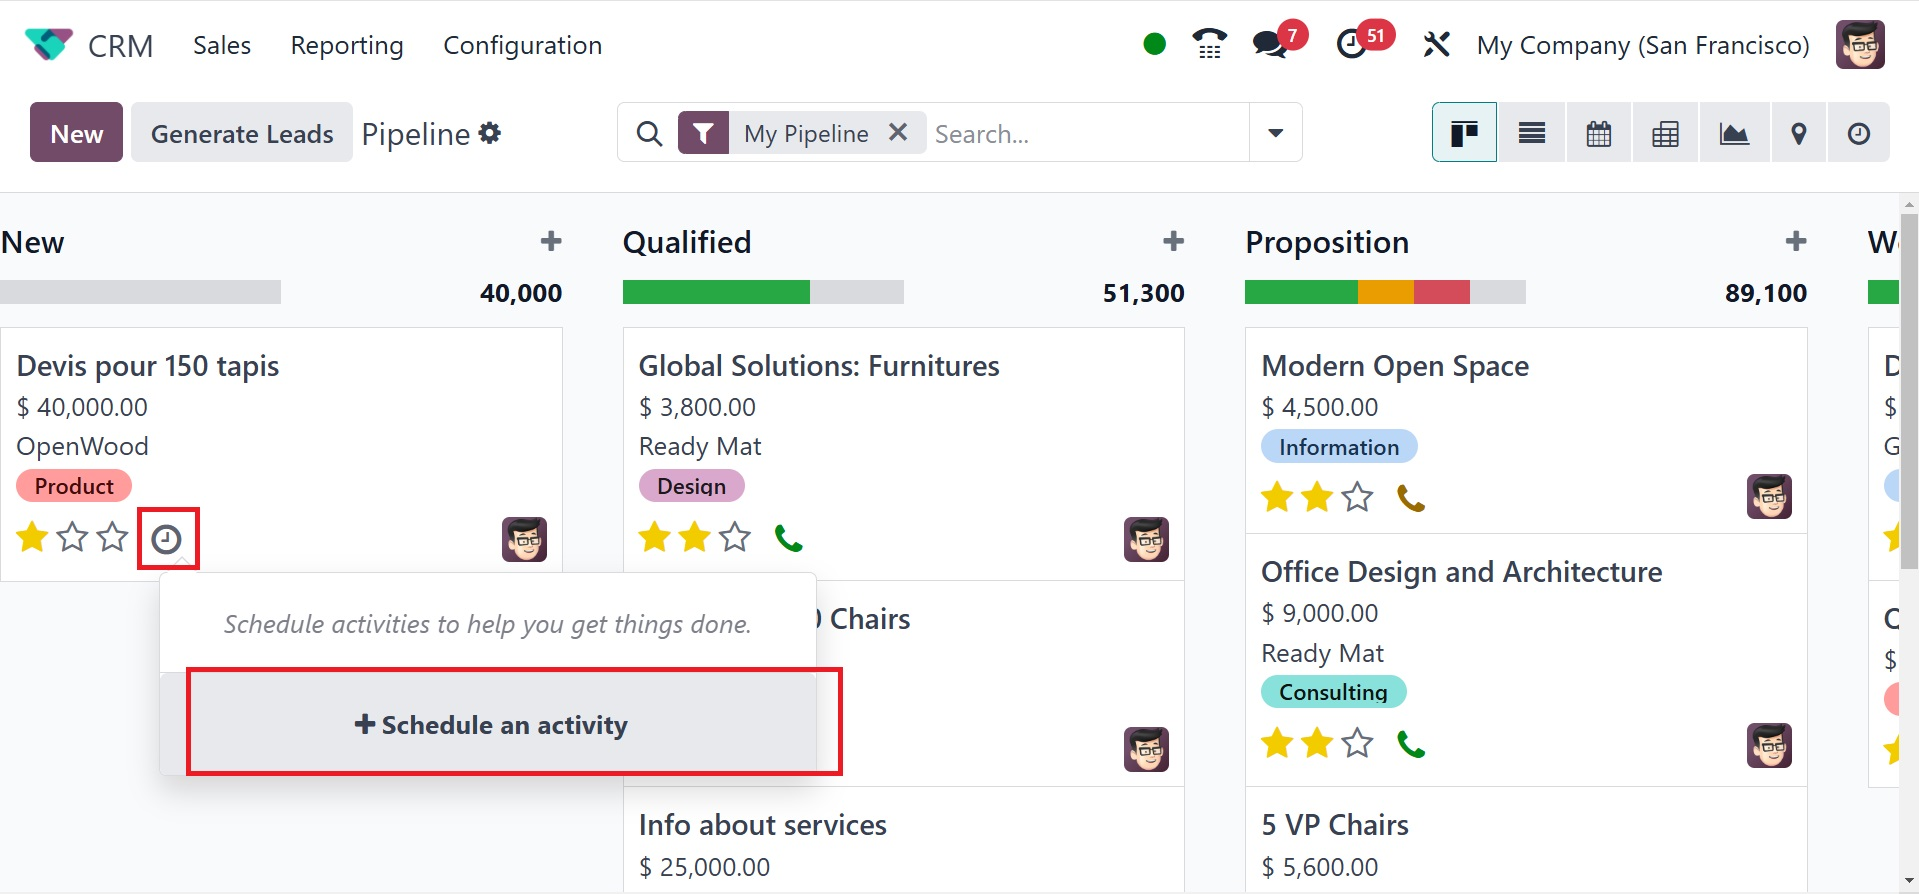
A pop-up window will appear, giving you the option to select an activity to schedule from the list. In the Summary field, add a note about your chosen activity. Then, set a Due Date for the activity and add a person to monitor it under the Assigned To option. After selecting the activity, click the Save button to finalize and store it. After completing the activity, click the Mark Done button. Click the Discard button to end the activity.
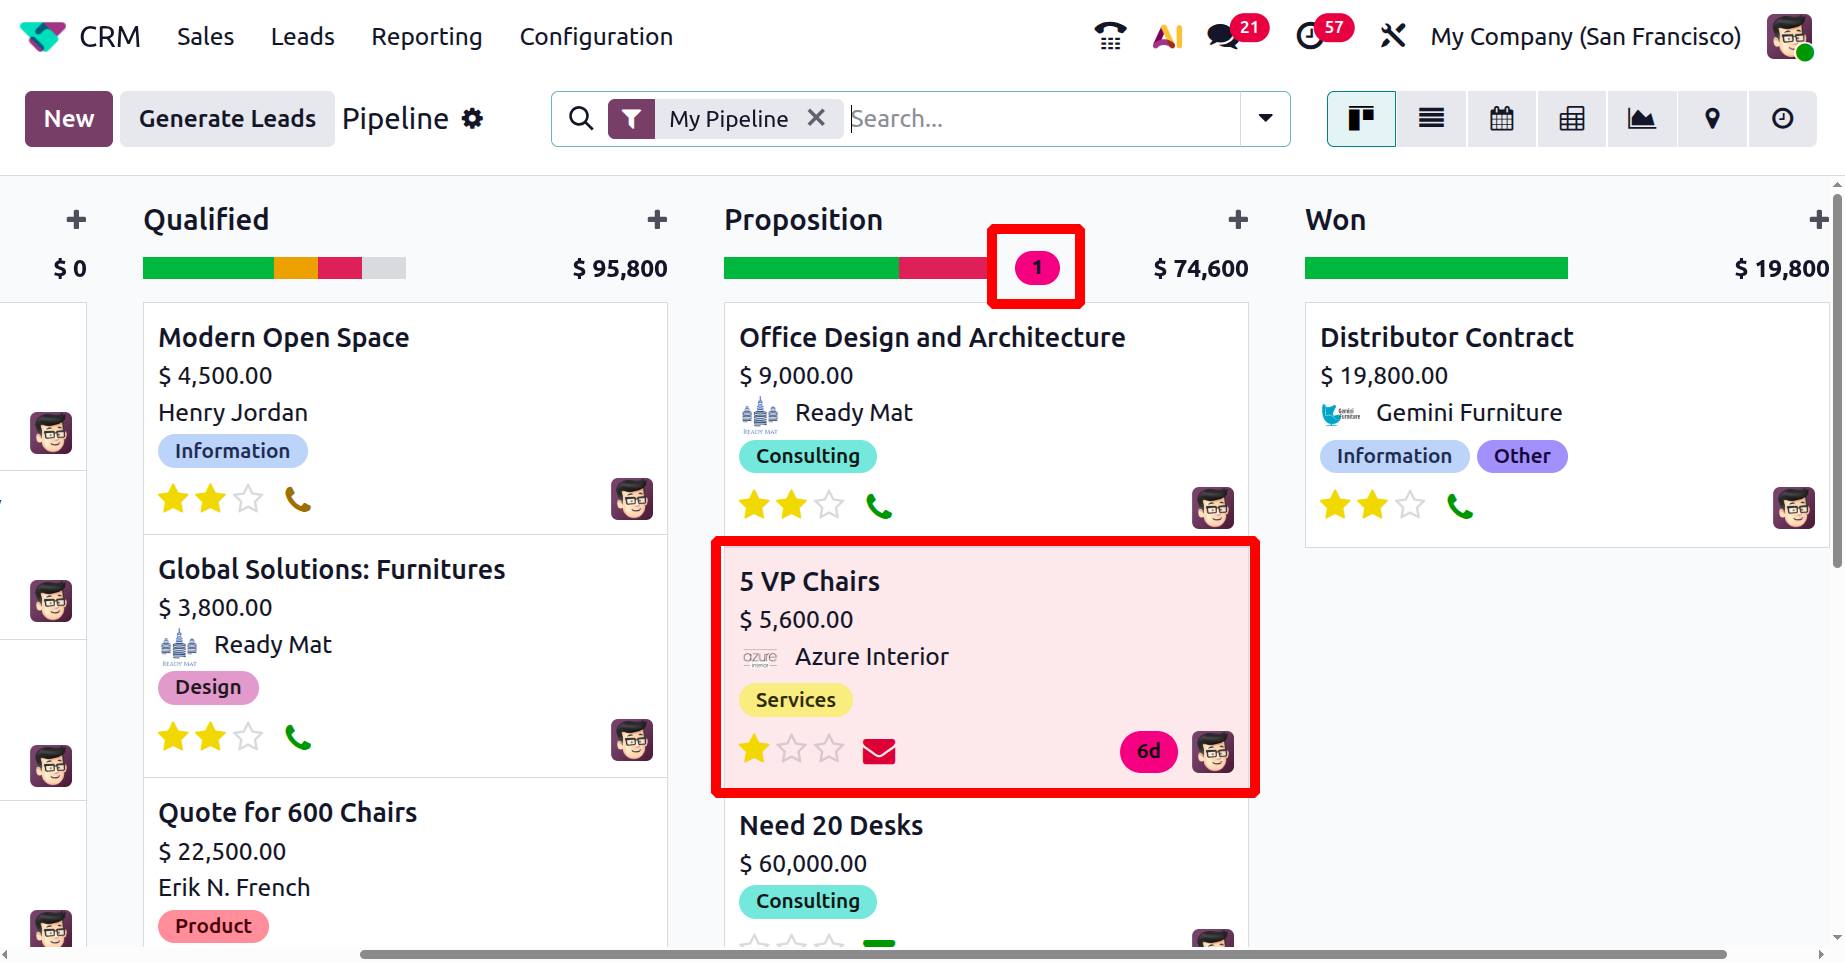
On each lead record, the Green color indicates the planned activities of each stage. Orange highlights activities scheduled for today, whereas red signifies activities that are overdue.
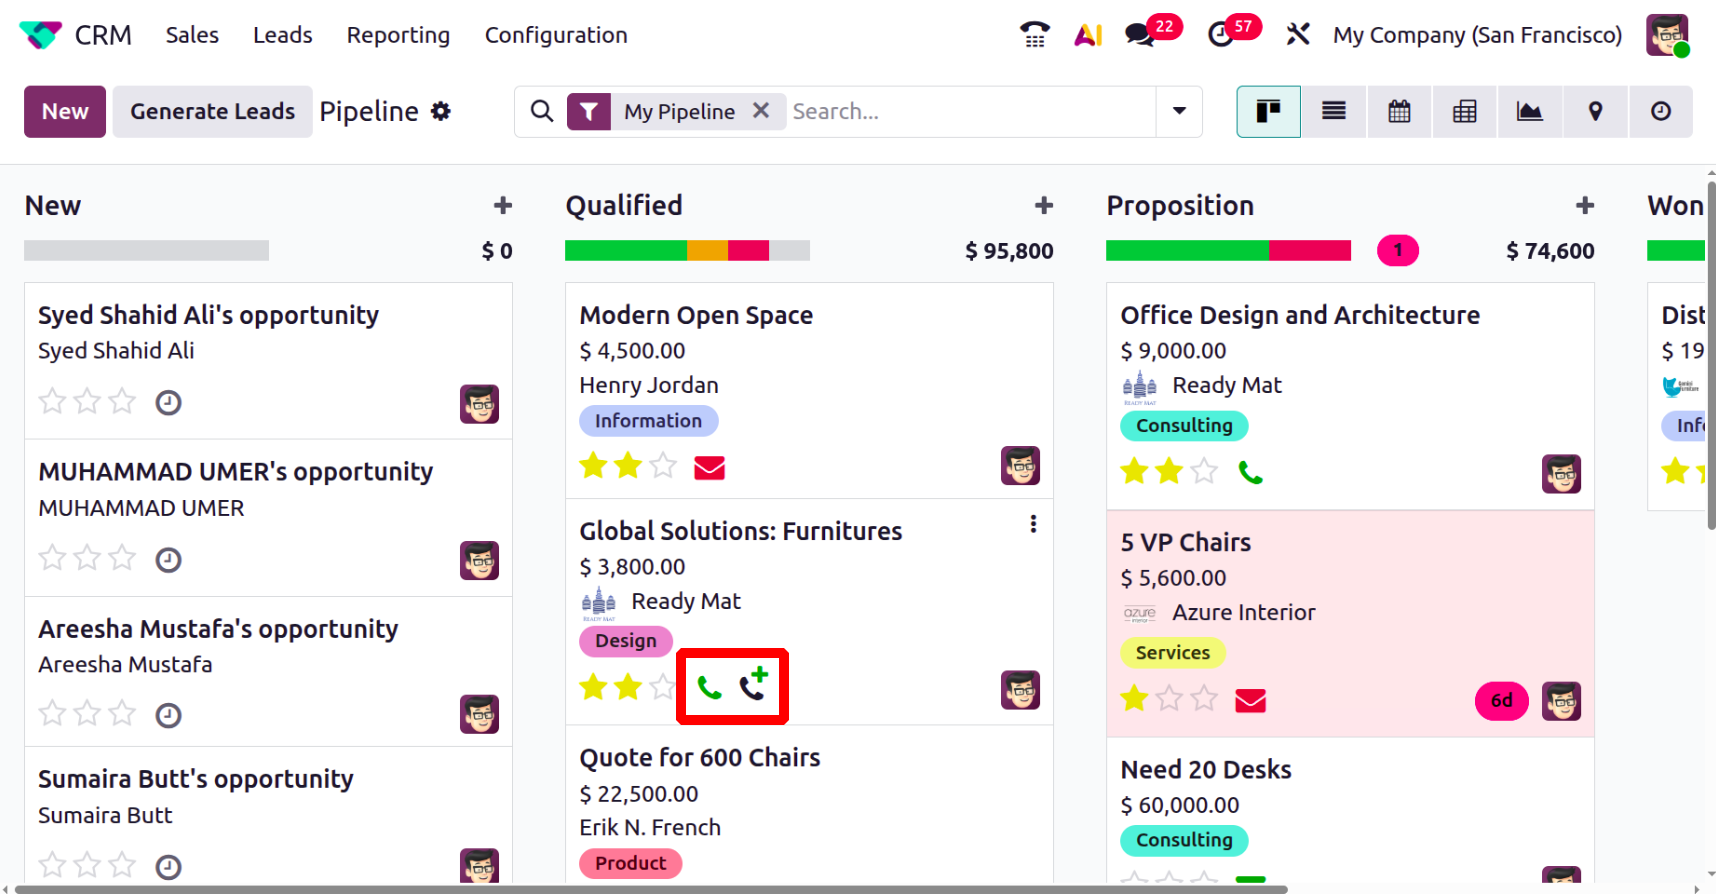
Similar to the clock icon option for planning activities, you can add a call queue for clients by clicking the call icon and then clicking the +Schedule on activity button to schedule calls. This feature becomes available once the VoIP module is installed and set up correctly.
The email icon indicates the scheduled emails of the planned activities.
The Rotting status, which is a new feature in Odoo 19, helps to analyze how long the opportunities are in the pipeline without any progress or activity, which can be seen as shown below:
When you click on the drop-down menu near the search bar, you can see three options: Filters, Group By, and Favorites. Under the Filters, you can see a list of options, including My Pipeline, Unassigned, My Assigned Partners, Open Opportunities, Creation Date, Closed Date, Won, Ongoing, Rotting, Lost, Custom Filter, and Ask AI. The Group By section provides multiple options such as Salesperson, Sales Team, Stage, Assigned Partner, City, Country, Lost Reason, Company, Campaign, Medium, Source, Creation Date, Expected Closing, Closed Date, Properties, and Custom Group.
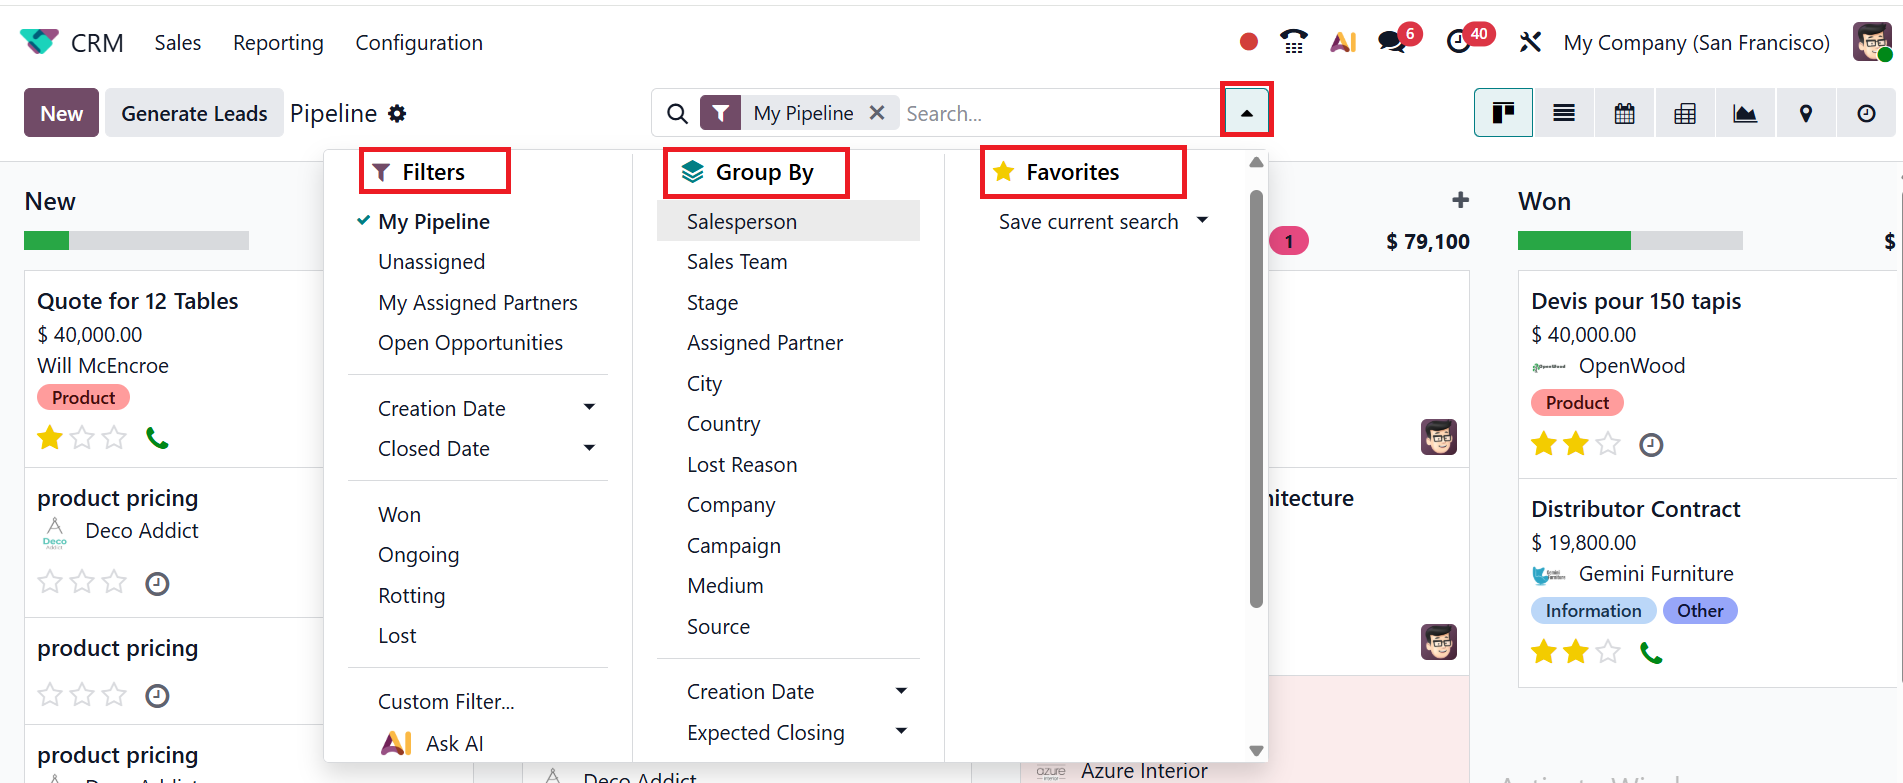
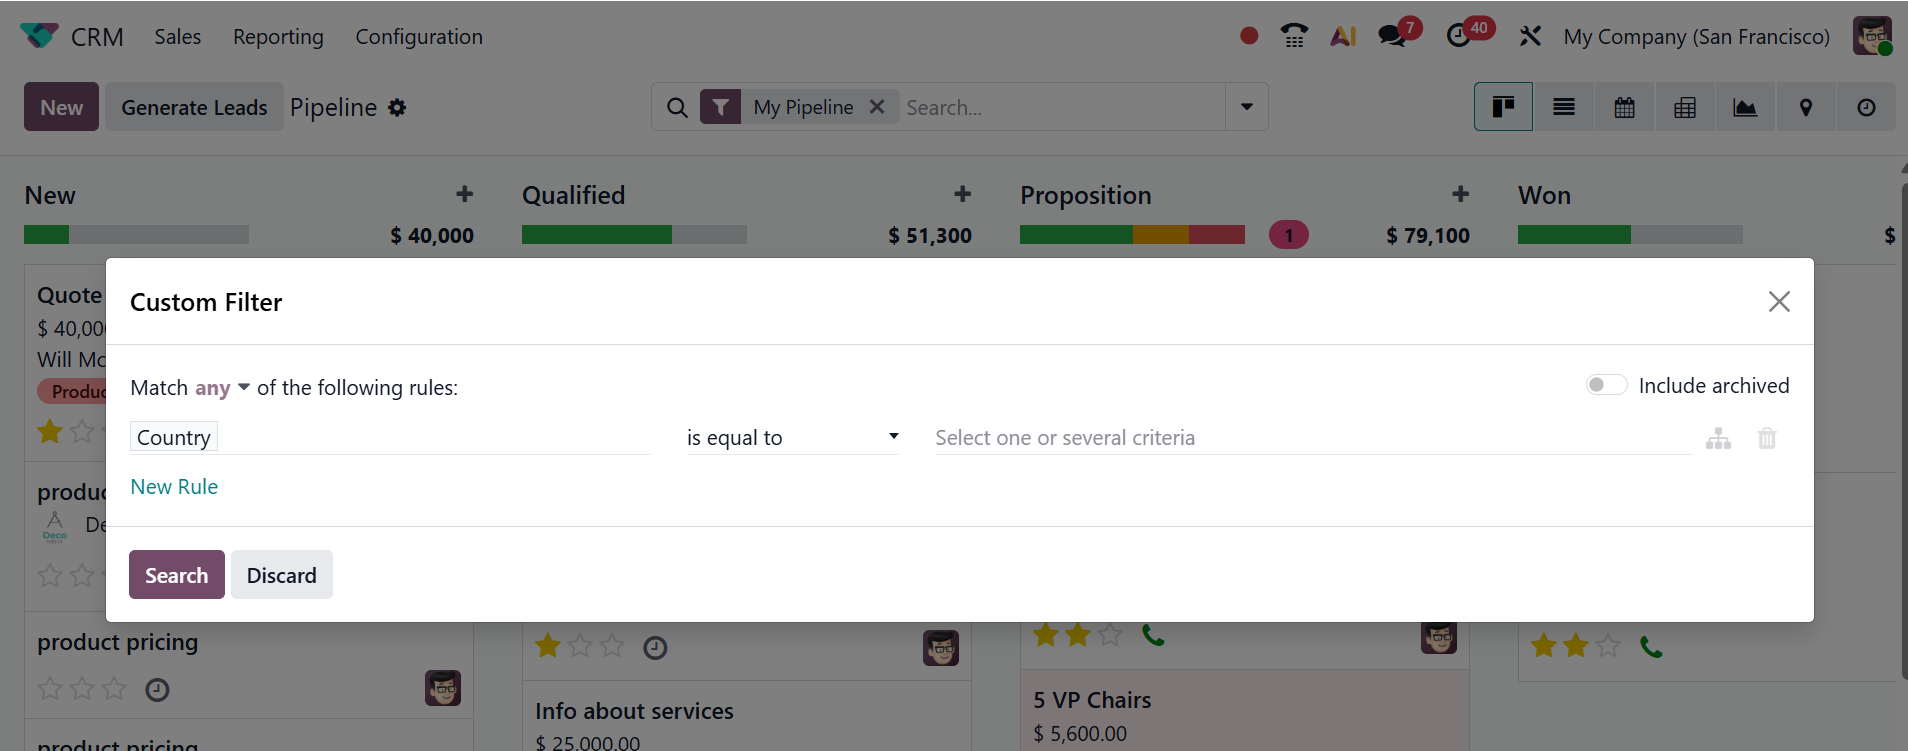
Selecting the Custom Filter option opens a pop-up window where you can create a personalized filter. You can choose a condition from the list and then click the Search button to apply the filter.
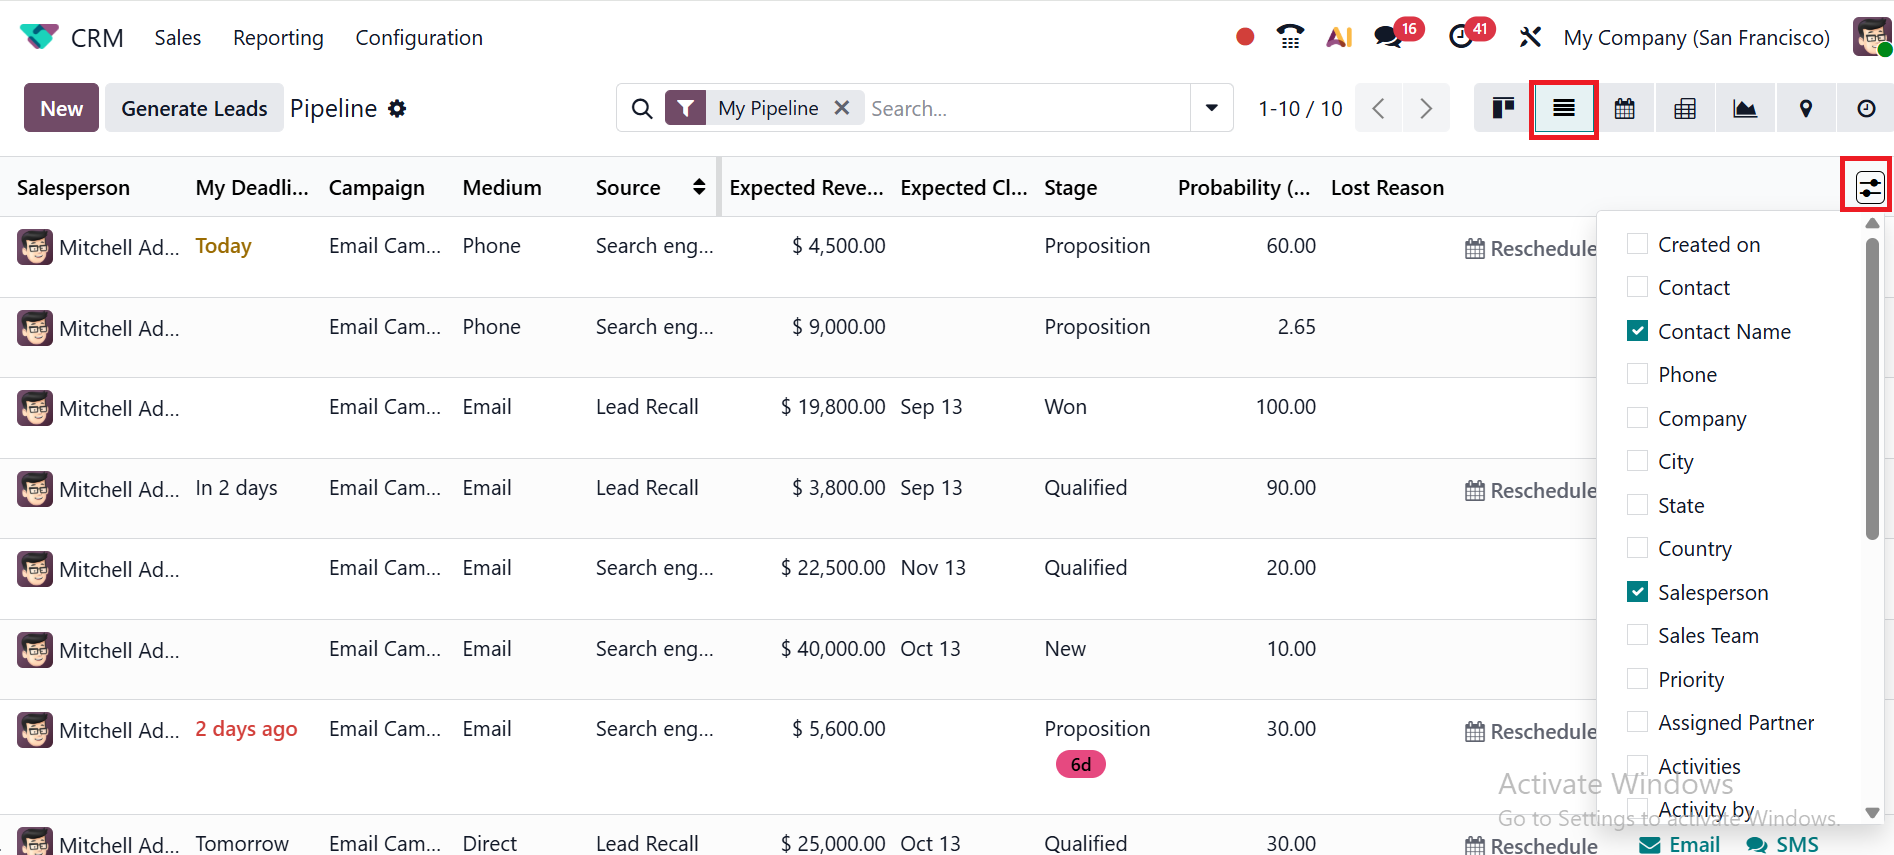
In the List view of CRM Pipeline, click on the toggle button to add more details of the lead, such as Created On, Contact, Contact Name, Phone, Company, City, State, Country, Salesperson, Sales Team, Priority, Assigned Partner, Activities, Activity by, My Deadline, Campaign, Medium, Source, Expected Revenue, Expected Closing, Stage, Probability(%), Lost Reason, Tags, and Add Custom Filed.
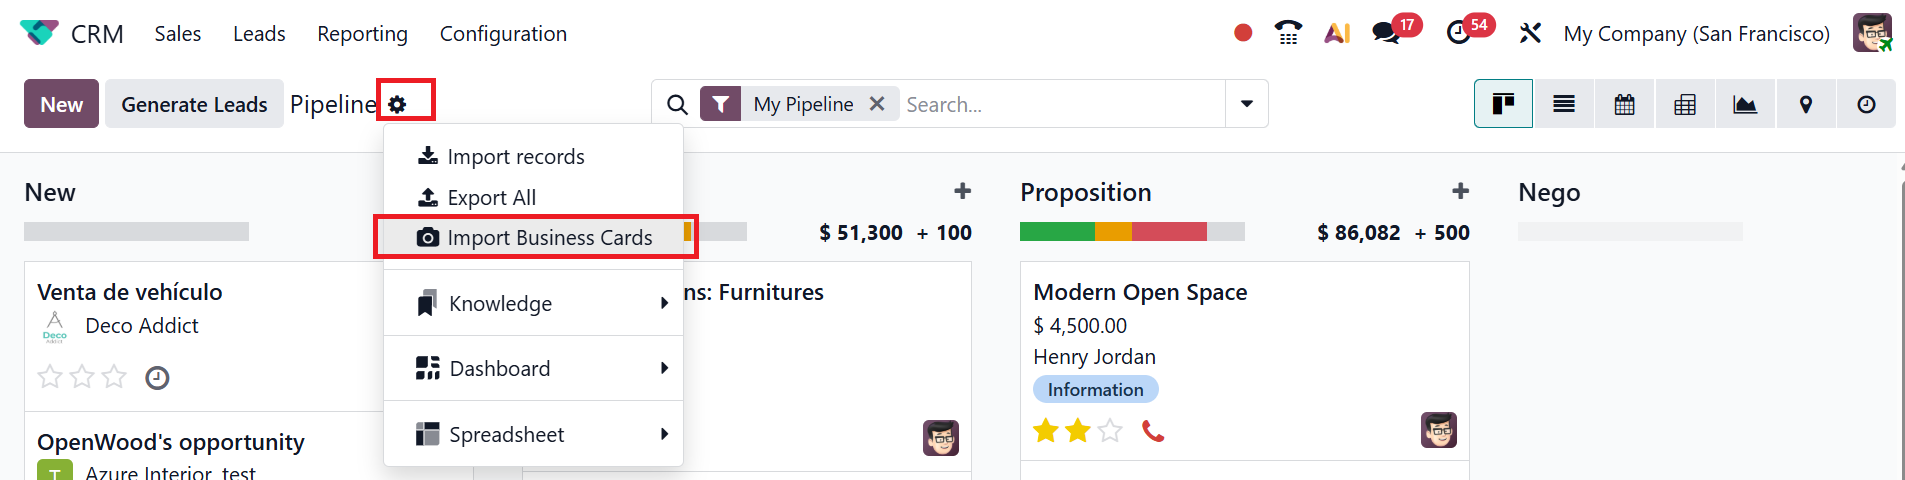
Business Card Scanning:
Business card scanning is a new feature in the Odoo 19 CRM module, allowing you to scan any business card instead of manually typing it to create a new lead. The contact information—such as name, email, phone number, and company details—will be automatically populated in the new lead. This helps minimize errors and save time.
To add a new lead to any stage, click the + button next to the stage title or click the New button, as shown below. There, you can add the details such as Company, Contact, Opportunity’s Name, Contact Email, Contact Phone, and Expected Revenue. Click the Add button to include the new lead in the stage. If needed, you can also Edit and Delete the new lead.
Clicking the Edit button will redirect you to a new window, as shown below.
Here, you can add the details of the opportunities, such as Expected Revenue, Contact, Email, Phone, Salesperson, Expected Closing, Tags, and Probability. In the Expected Revenue field, you can add the expected amount of money to earn if the opportunity is successfully closed. In the Contact field, you can add a linked partner to the opportunity. In the Email field, you can add the email address of the linked partner. In the Phone field, you can add the phone number of the linked partner for quick follow-ups. In the Salesperson field, you can add a person to handle the opportunity. In the Expected Closing field, add an estimated date when the opportunity will be won. In the Tags field, add the relevant tags to classify and analyze the opportunity. You can also prioritize the opportunity by assigning star ratings.
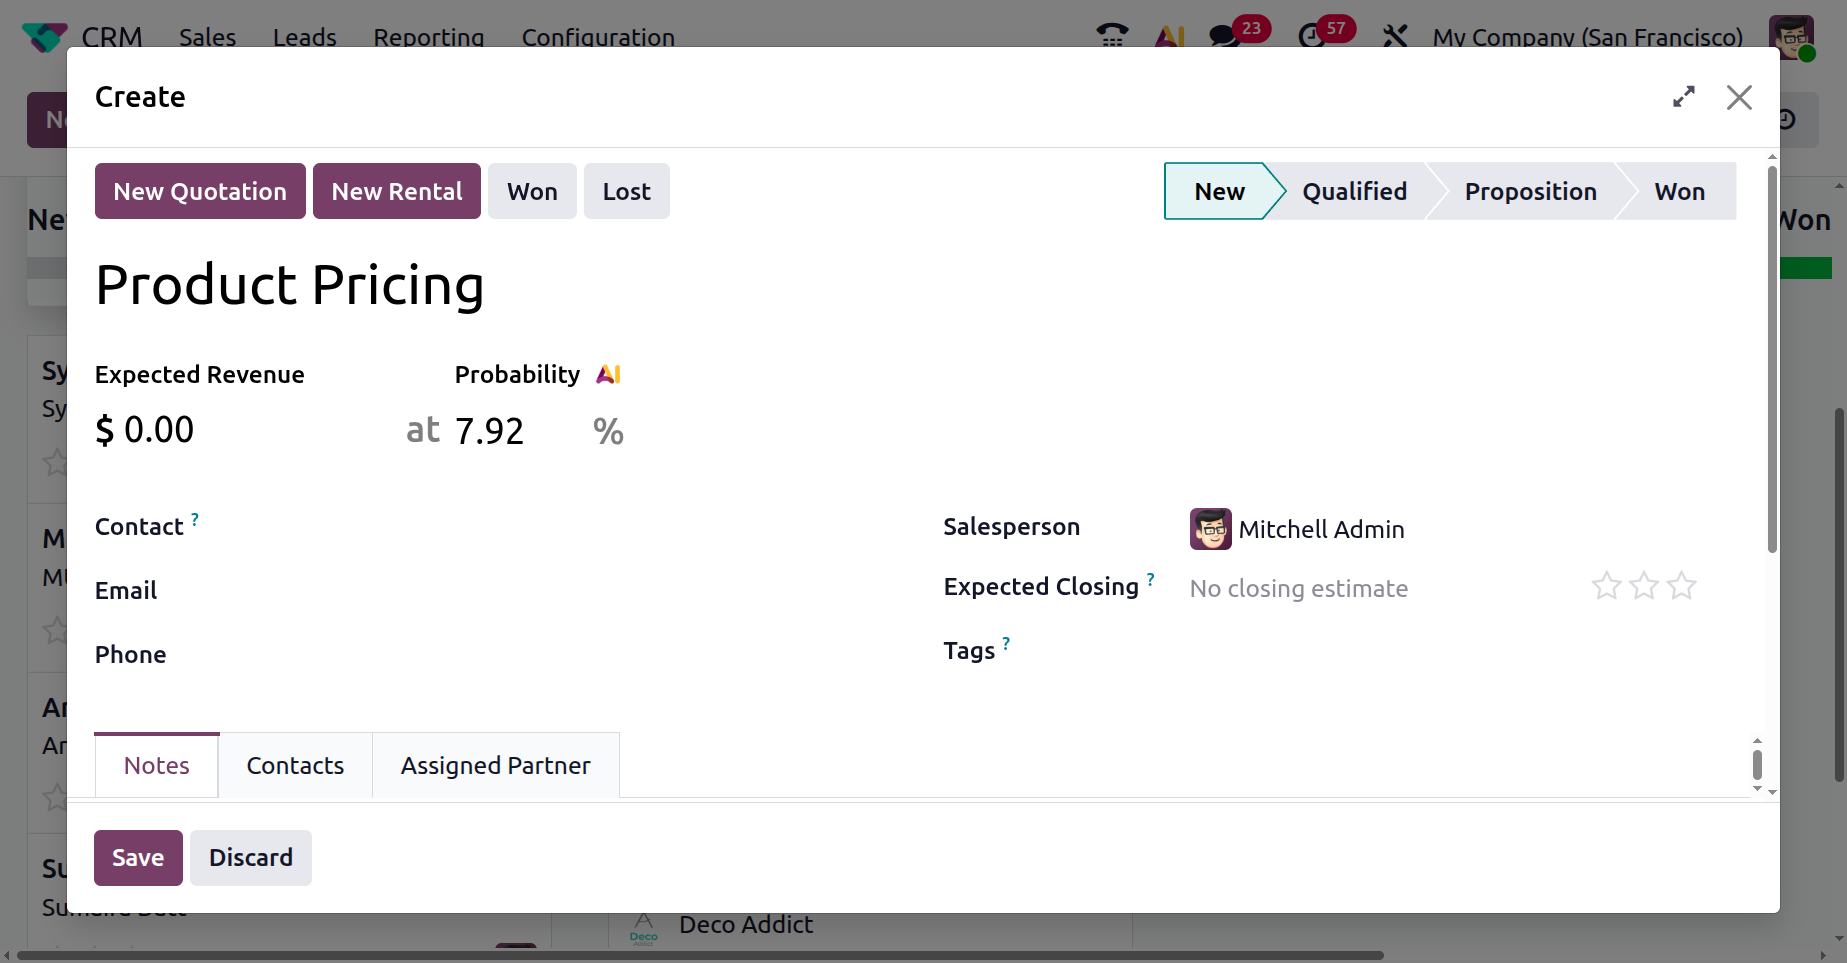
Here, you can also view three tabs: Notes, Extra Info, and Assigned Partner, which are explained in the sections below.
1.2 MY ACTIVITIES:
In the My Activities window, you can view the details of the lead, including the Opportunity, as shown in the screenshot below. The other information about leads is the same as in the My Pipeline window. When a user sets any scheduled activities for an opportunity in Odoo CRM, the My Activity section will automatically show the user's opportunities.
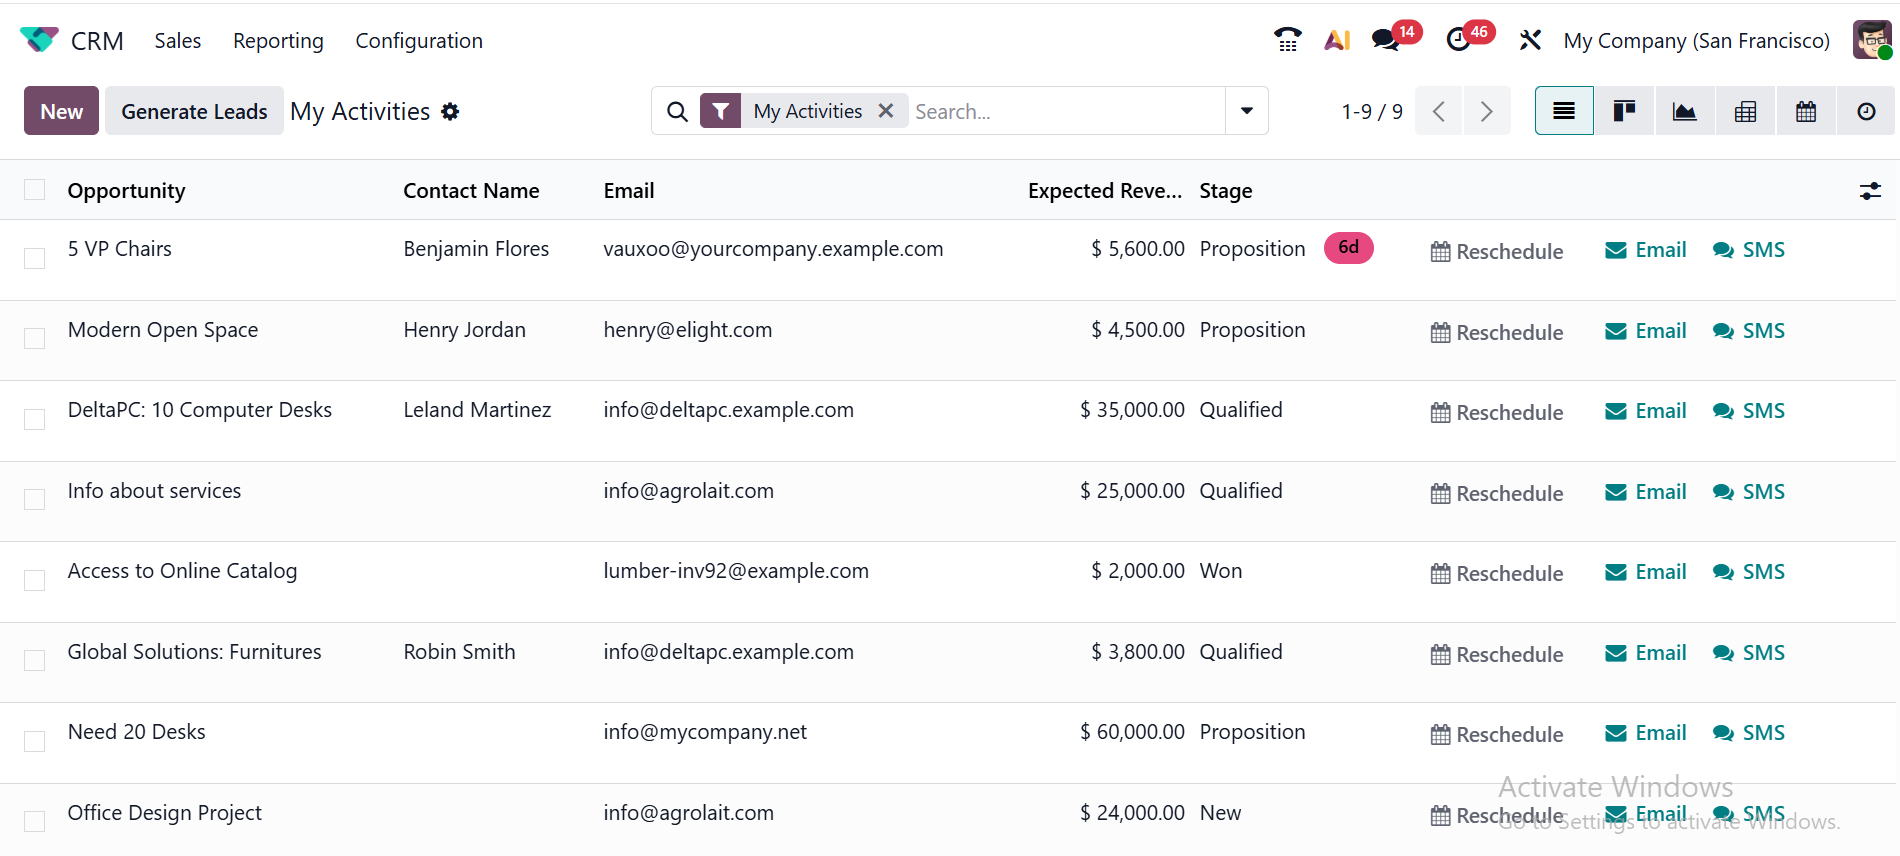
Therefore, the system collects all opportunities with planned actions and lists them under My Activities for convenient tracking, eliminating the need for manual searching.
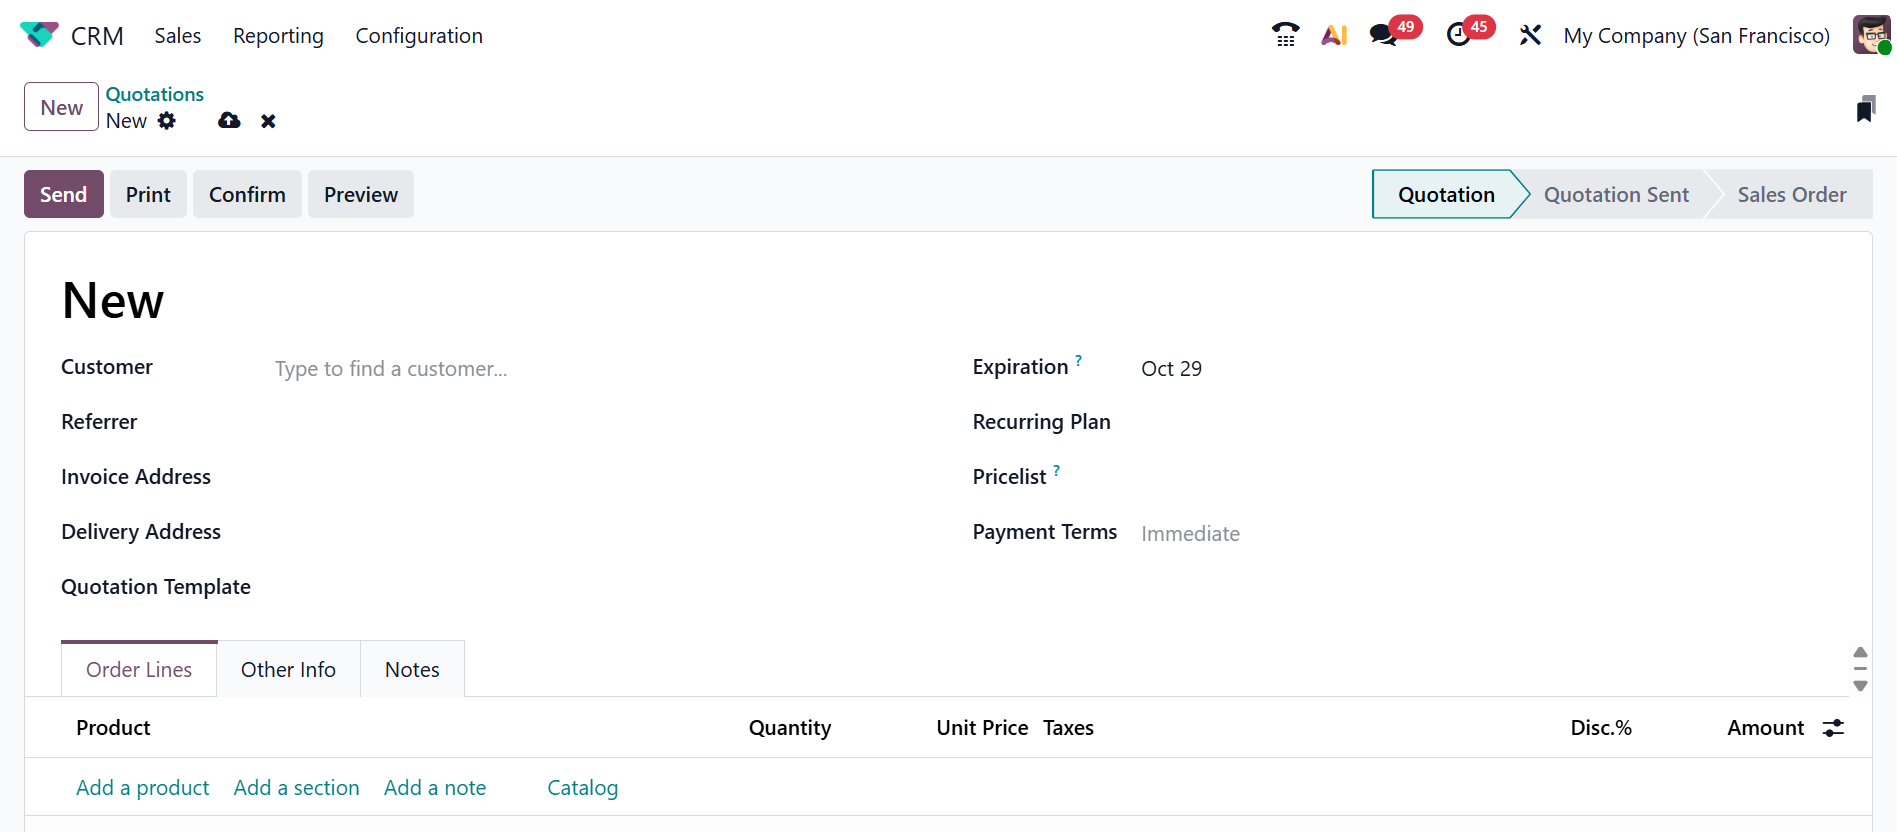
1.3 MY QUOTATIONS:
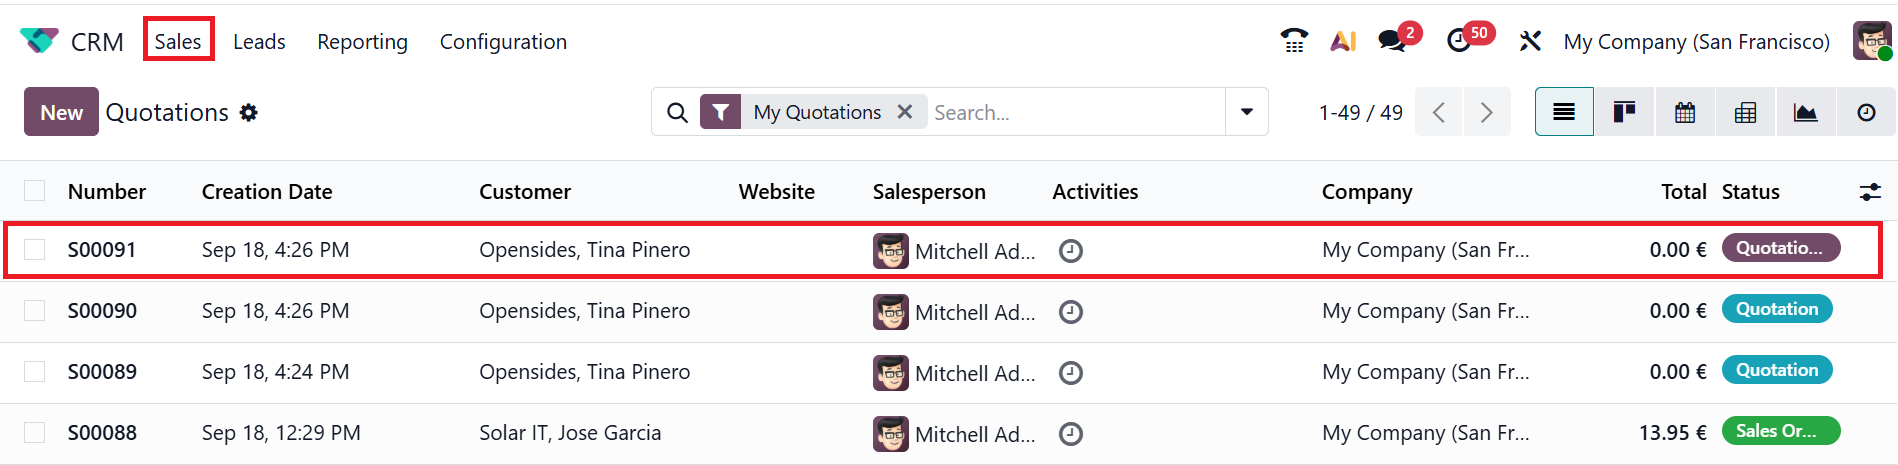
The My Quotation window presents important information for each sales quotation, such as Number, Creation Date, Customer, Website, Salesperson, Activities, Company, Total, and Status. To generate a new quotation in the CRM module, click the New button.
Here, you can begin by selecting a Customer for your new quotation. Then, provide further information, including Referrer, Invoice Address, Delivery Address, Quotation Template, Expiration Date, Recurring Plan, Pricelist, and Payment Terms. Under the Order Lines tab, add products with their quantities and prices by clicking the Add a product button. Then click on the Send button to send the quotation and click the Confirm button to confirm the sales order.
In the next chapter of the book, we will provide a detailed explanation of how to develop sales quotations and sales orders.
1.4 TEAMS:
To manage the team, navigate to Sales > Teams as shown below. The teams help to manage the leads, opportunities, and CRM-related processes.

Here, separate tabs are displayed for each team, as shown in the screenshot below. When you click on the three-dotted vertical line in the right corner of each tab, you can see three sections: View, New, and Reporting.
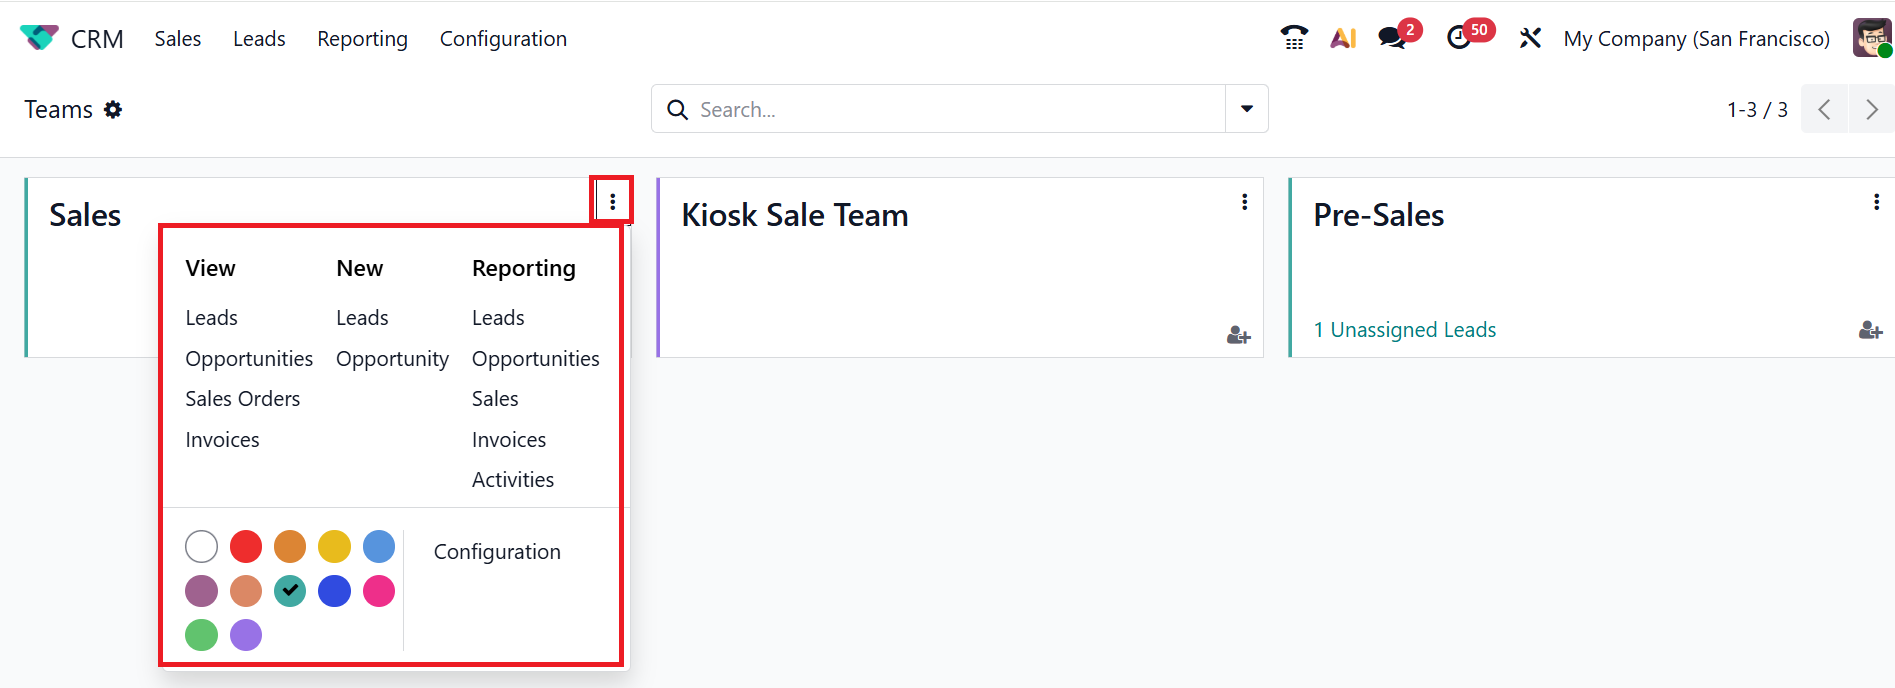
The View section allows you to access Leads, Opportunities, Sales Orders, and Invoices related to the sales team. Under the New section, the sales teams can create new Leads and opportunity. Under the Reporting section, sales teams can access reports on Leads, Opportunities, Sales, Invoices, and Activities directly. To change the sales team’s configurations, click on the Configuration button. You can also select an appropriate color from the color palette for the border of each tab.
Here, you can assign each team to a person by clicking the Assign User icon. You can also check the details of the user assigned to each team.
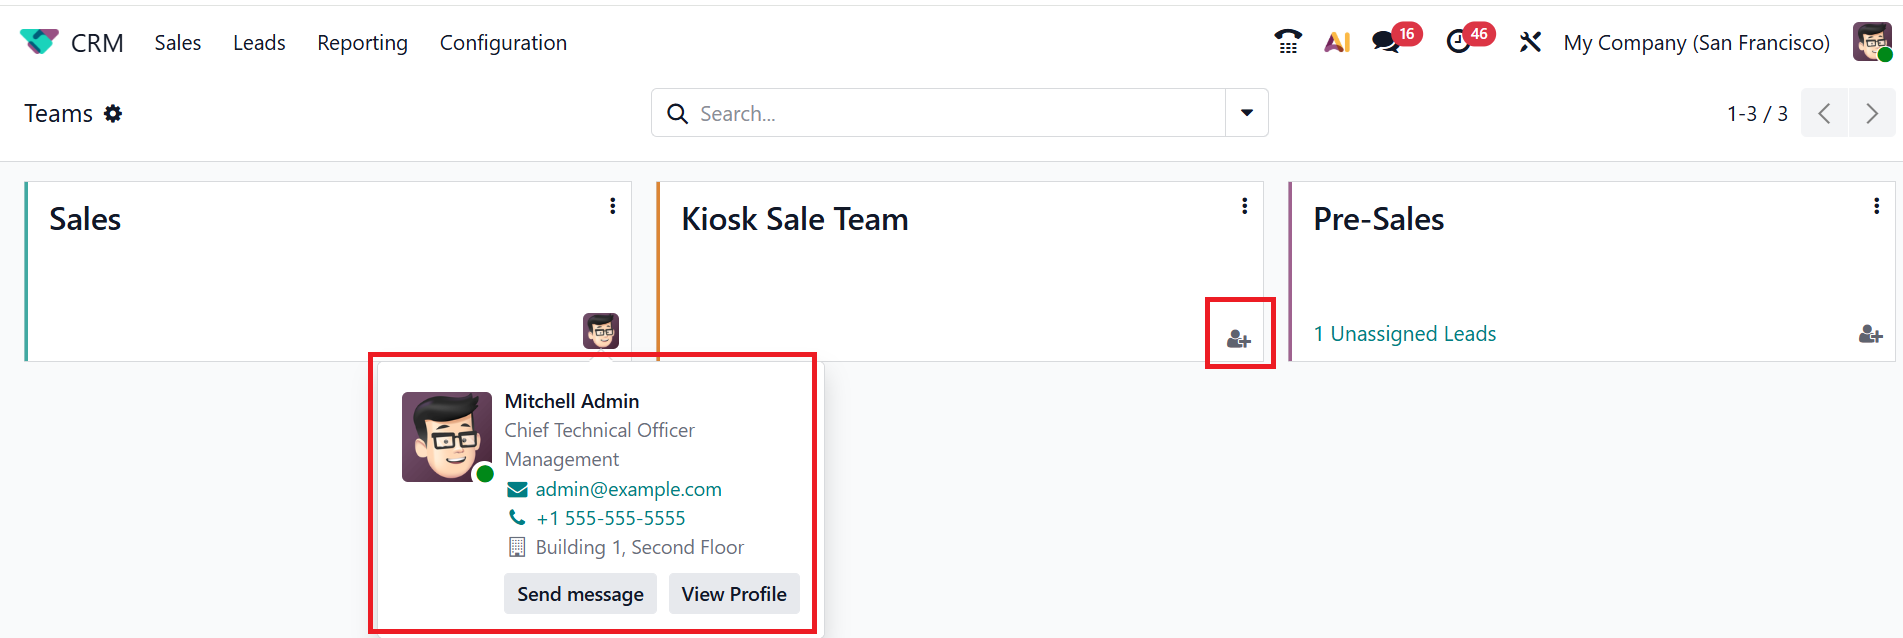
Clicking the Send Message button lets you contact the assigned user directly.
To view a user's profile, click the View Profile button.
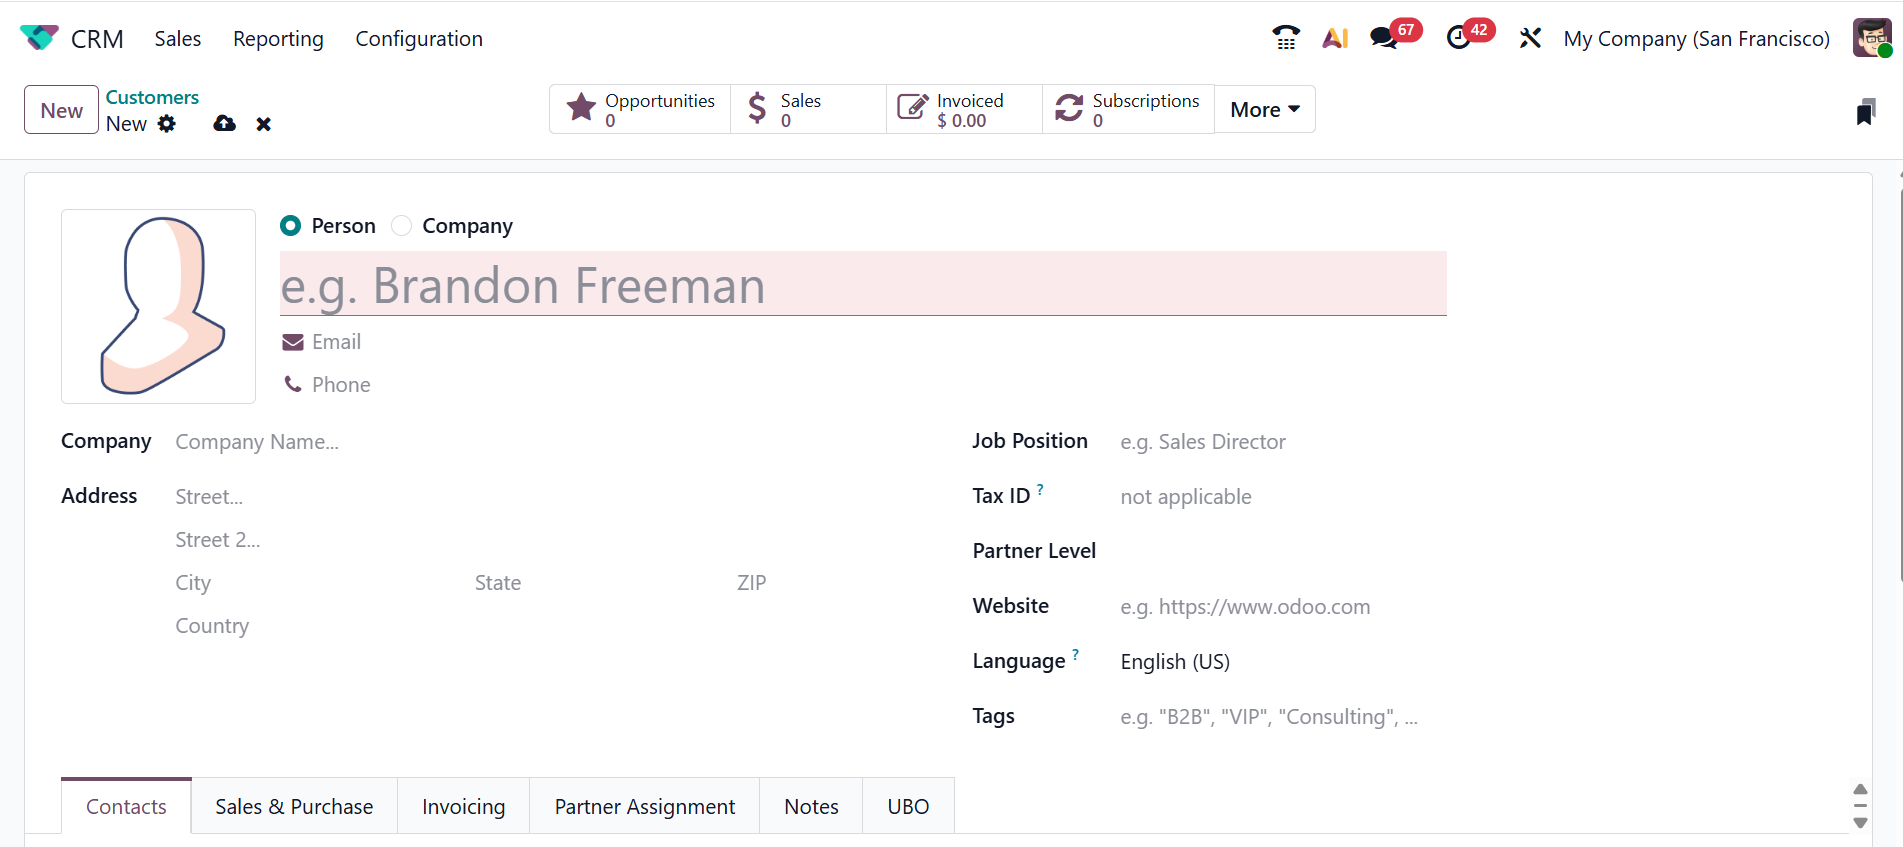
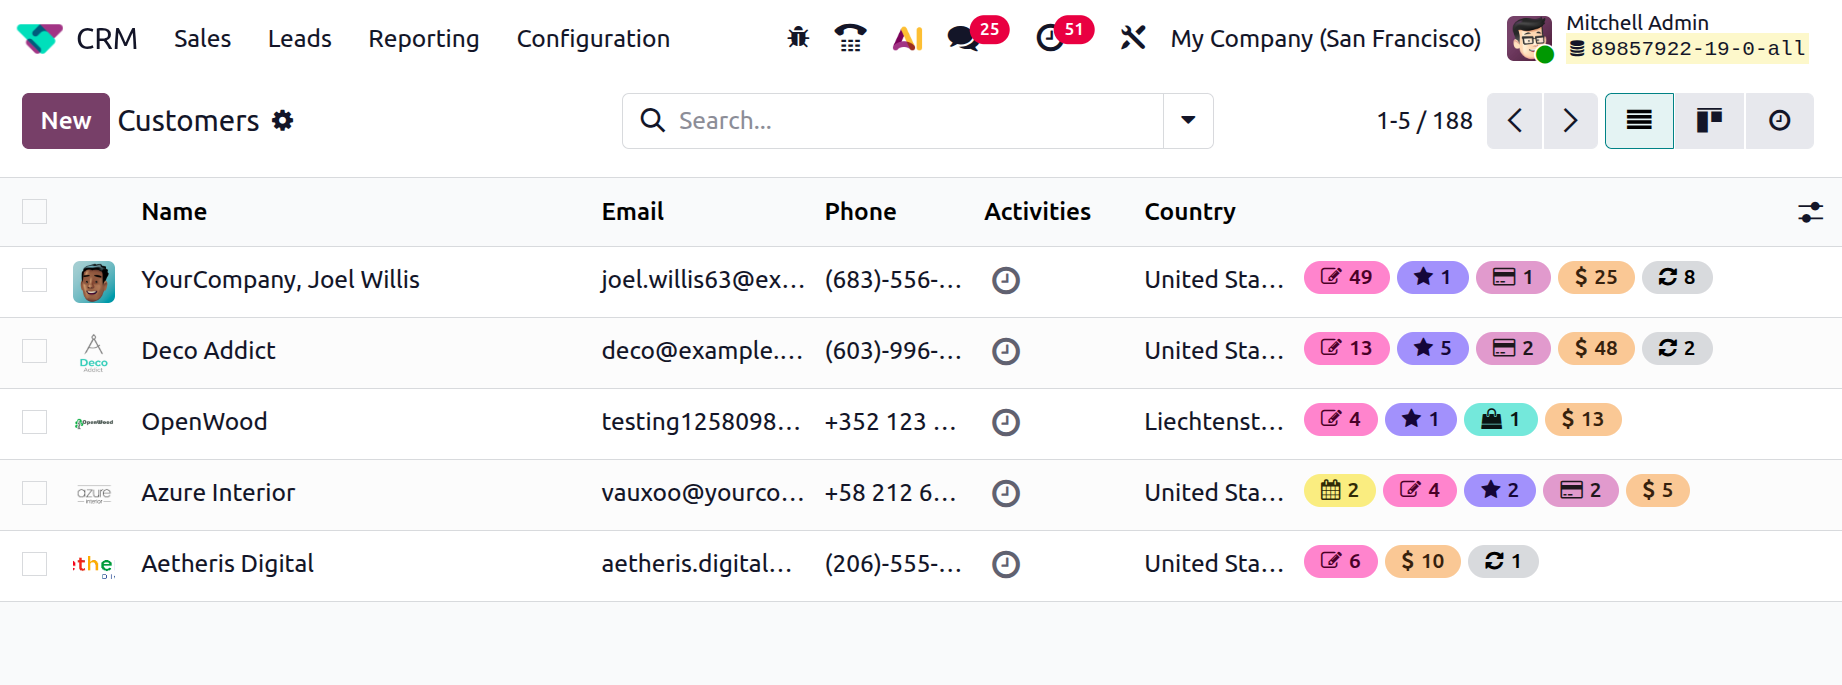
1.5 CUSTOMERS:
In the Customers window, you can view the details of customers, including Name, Email, Phone, Activities, and Country. All customer details for new leads will be automatically uploaded to this window. Next, click the New button to create a new customer, where you can enter all the necessary details.
This is where you can enter the details of the new customer. In the following chapter, we will provide a detailed guide on how to create a new customer.