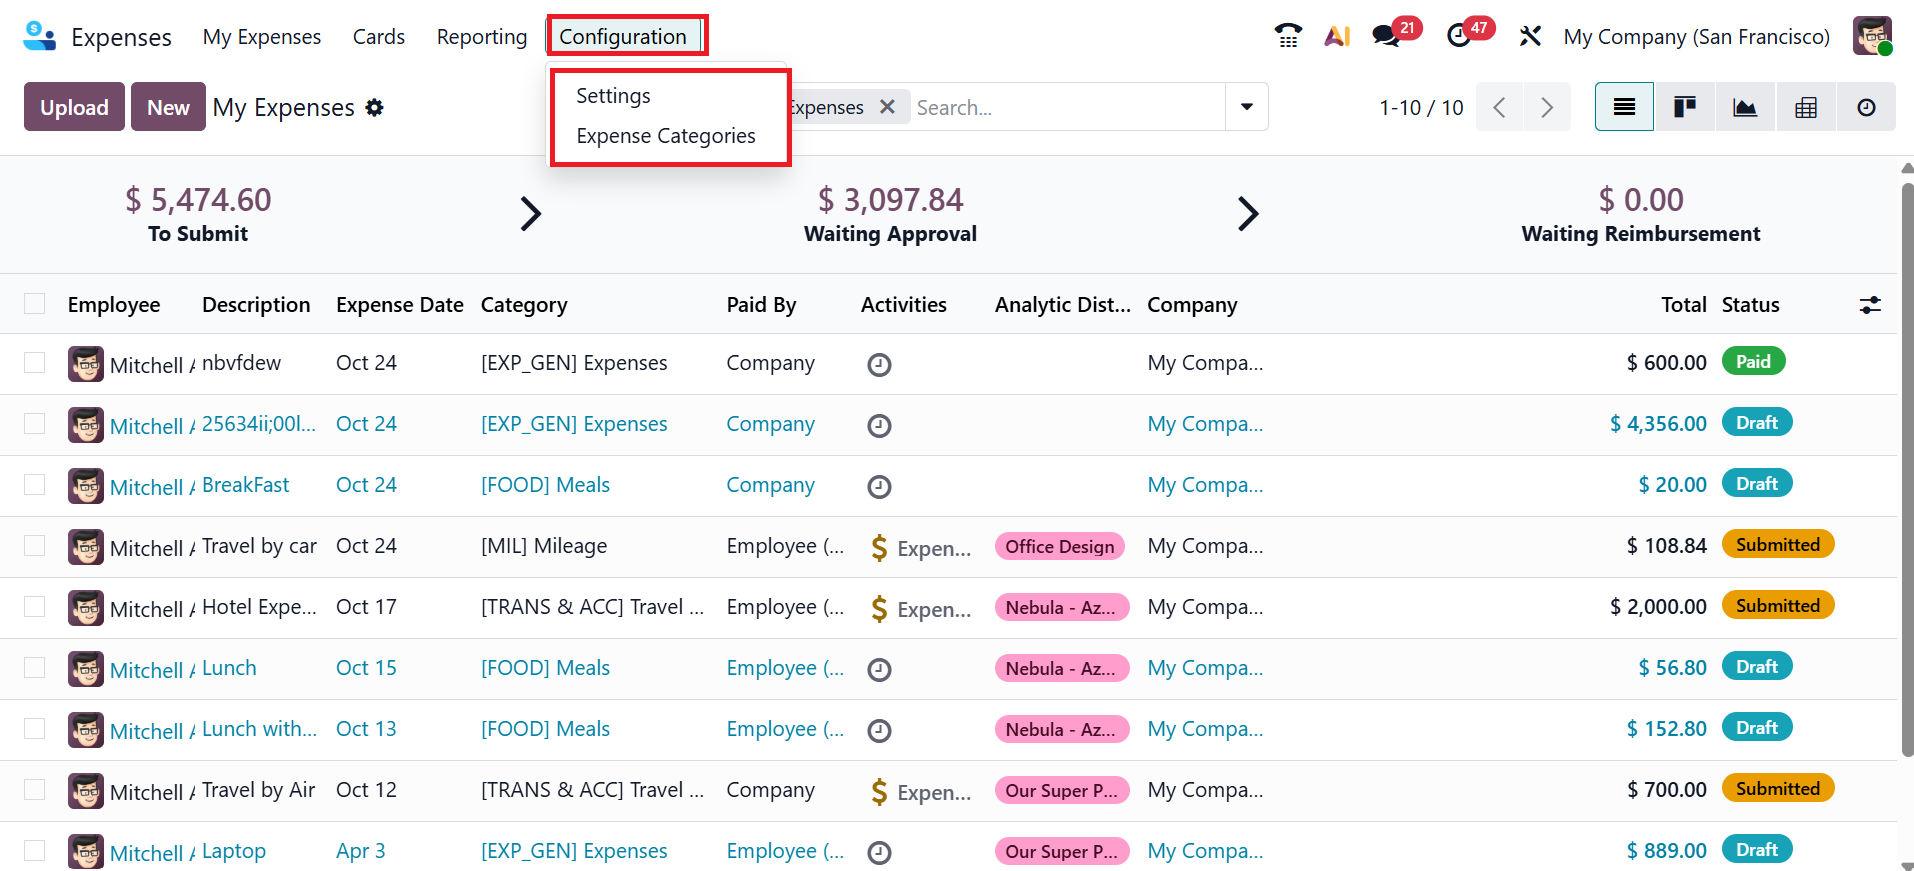
Configuration
In the Odoo 19 Expense module, the Configuration menu lets you customize and manage expenses. This menu includes two options: Settings and Expense Categories.
1.1 Settings:
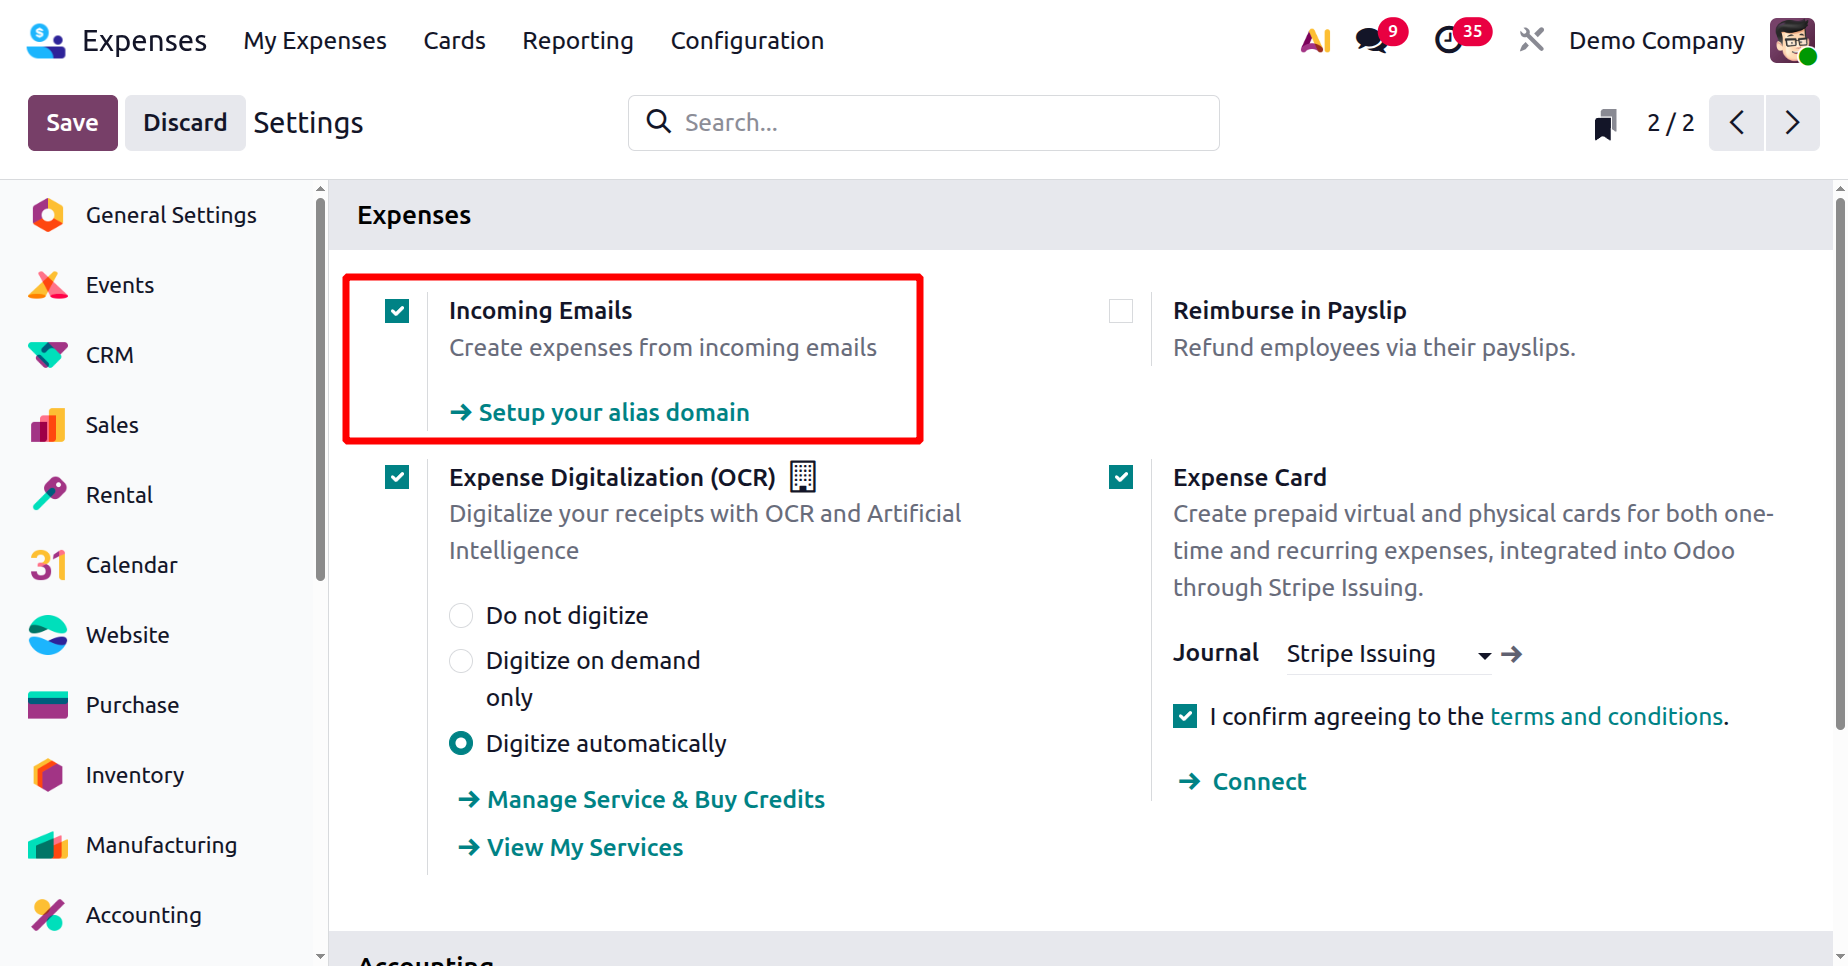
The Settings option under the Configuration menu lets you configure how expenses are created, digitized, reimbursed, paid, and recorded to support efficient expense management.
Under the Expenses tab, enable Incoming Emails to create expenses from emails sent to a specific alias automatically. It simplifies expense entry by capturing and converting incoming expense emails directly into expense records.
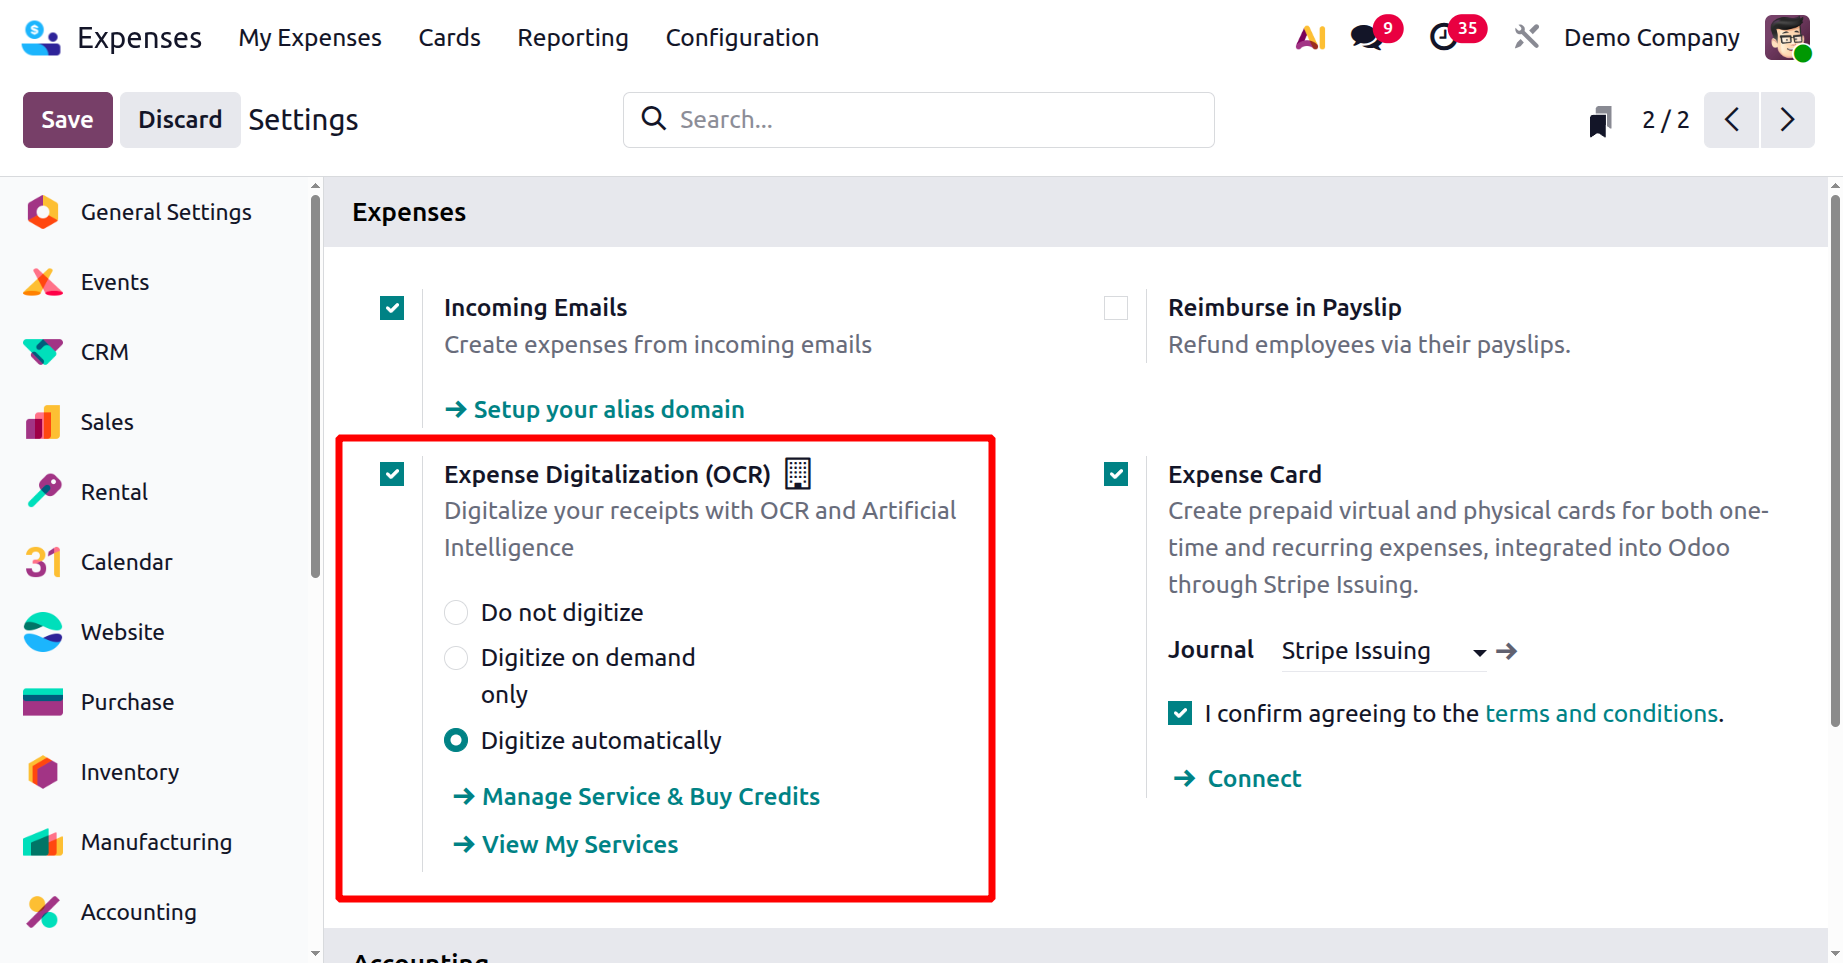
Enable Expense Digitization (OCR) to scan and extract data from uploaded receipts using AI automatically. You can select the digitalization method as Do not digitize, Digitize on demand only, or Digitize automatically. The Manage Service & Buy Credits option lets you manage your OCR service and purchase additional credits for receipt scanning. The View My Services option displays details of your current OCR service usage and subscription.
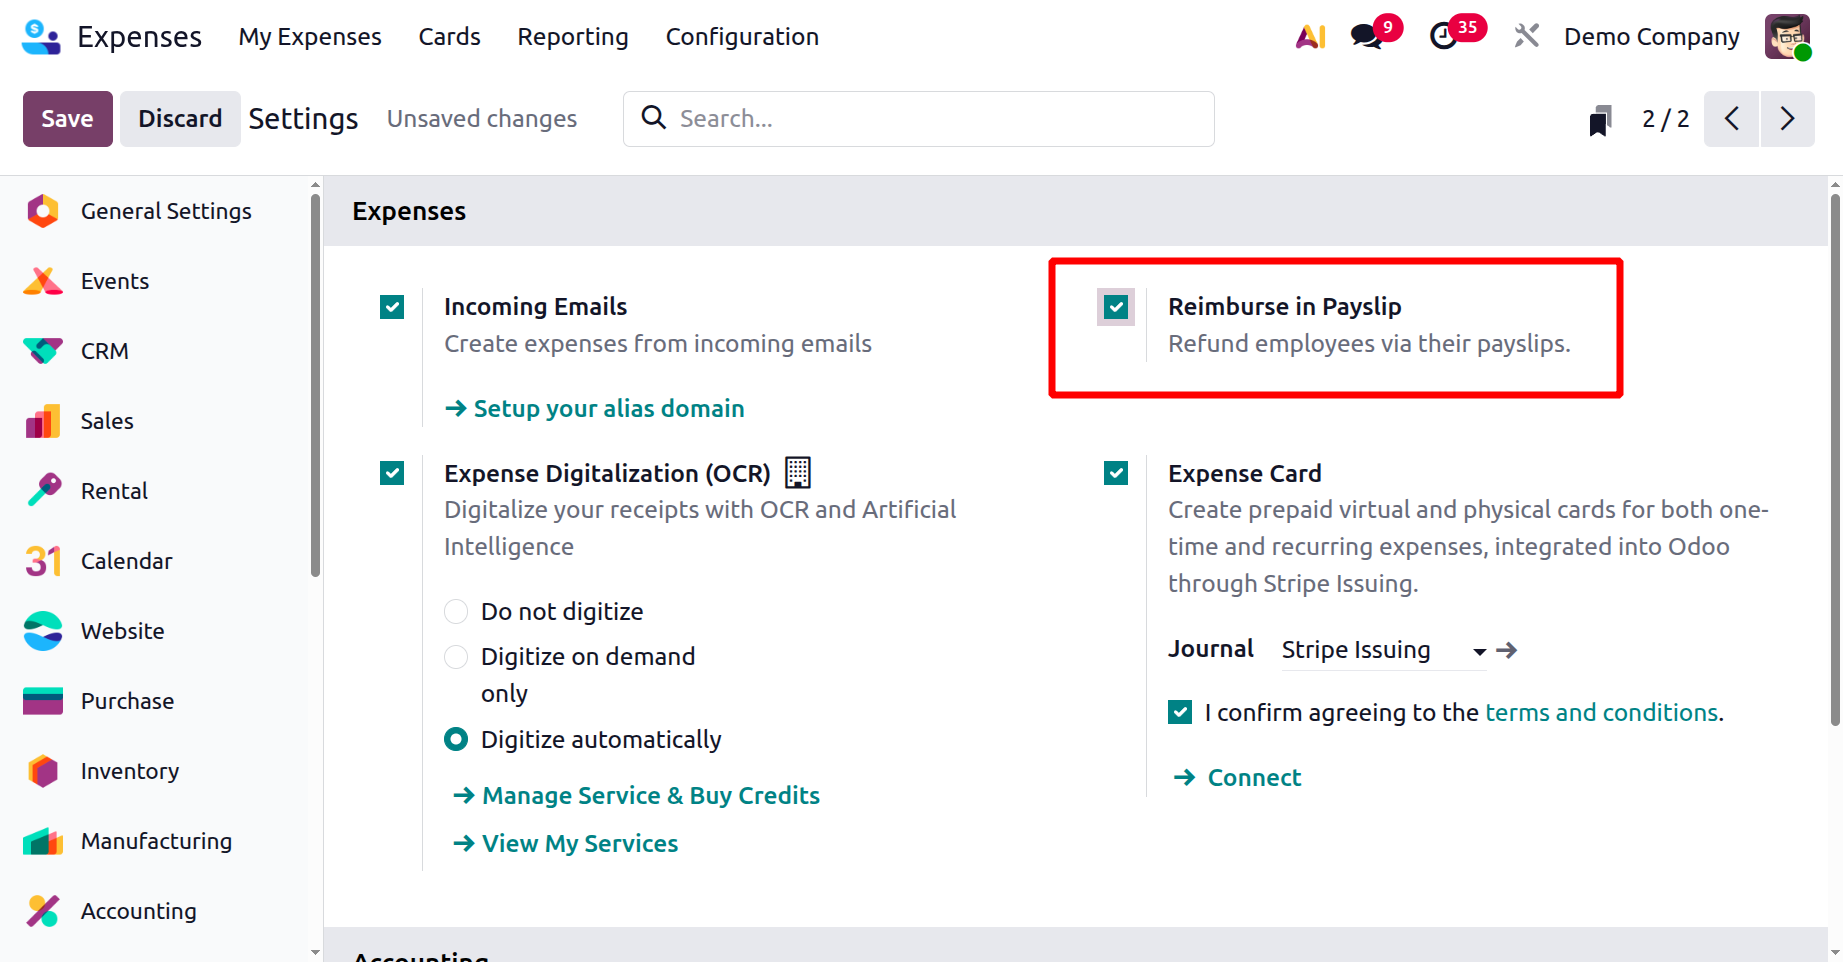
Enable the Reimburse in Payslip option to reimburse employee expenses through payroll rather than a separate payment, which is explained in the above section.
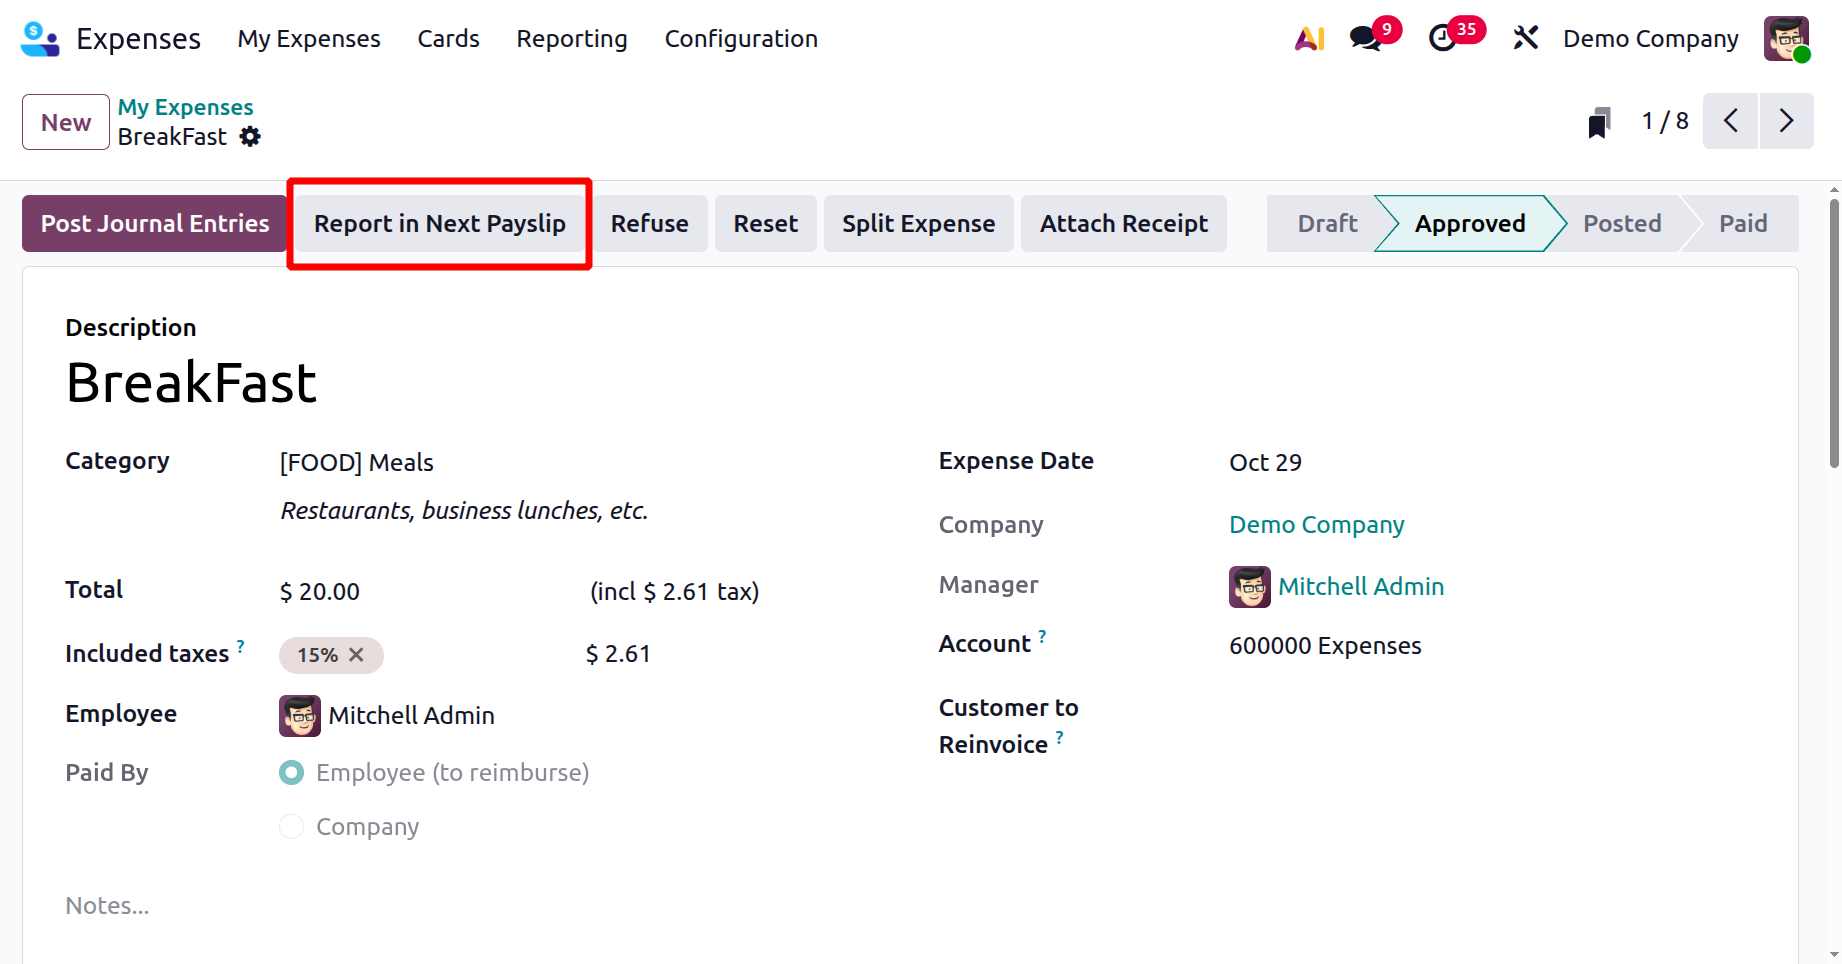
After enabling the Reimburse in Payslip option, a new button appears inside the approved expense. Click on the Report in Next Payslip as shown below:
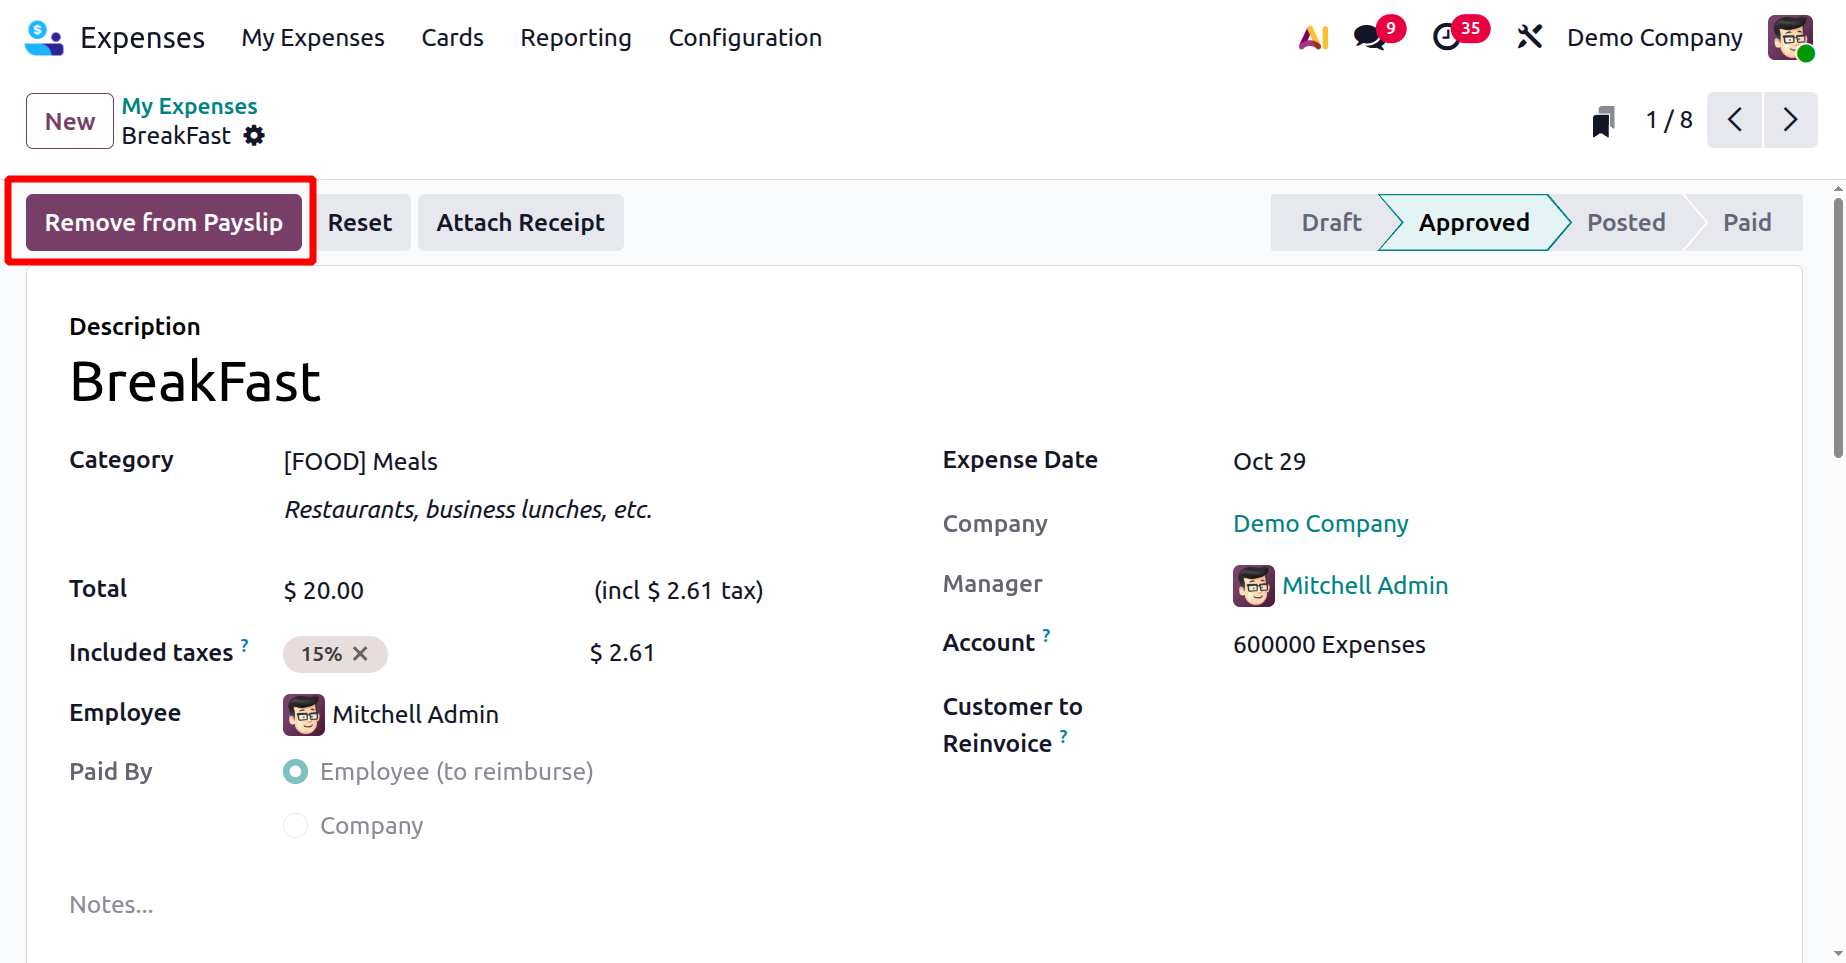
After clicking on it, the expense will be added to the employee's payslip. Then, to remove expenses from the payslip, click the Remove from Payslip button.
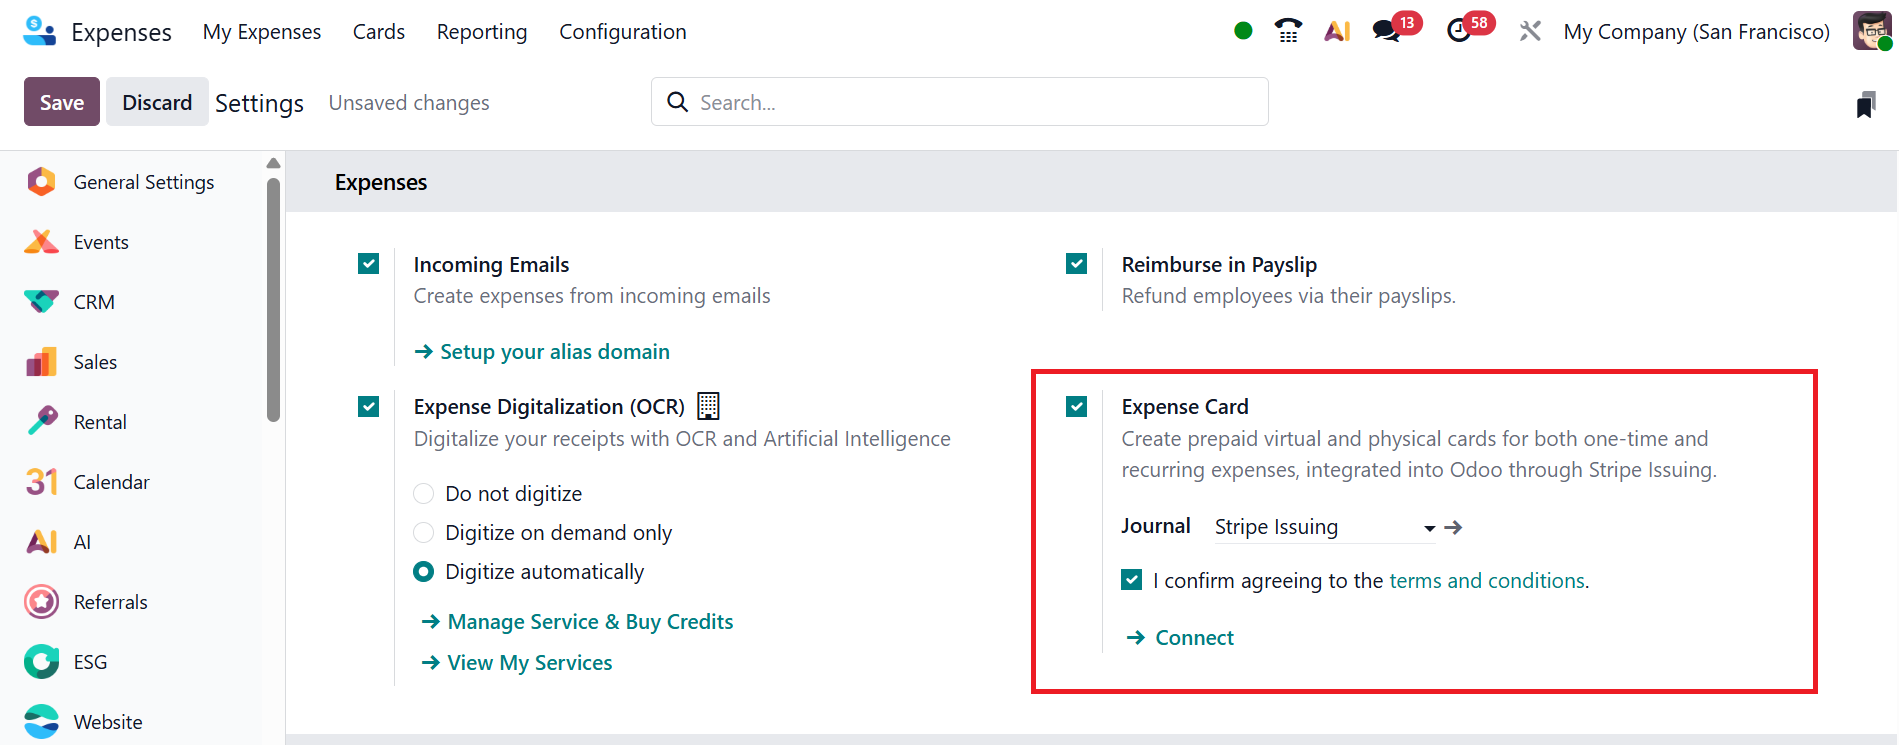
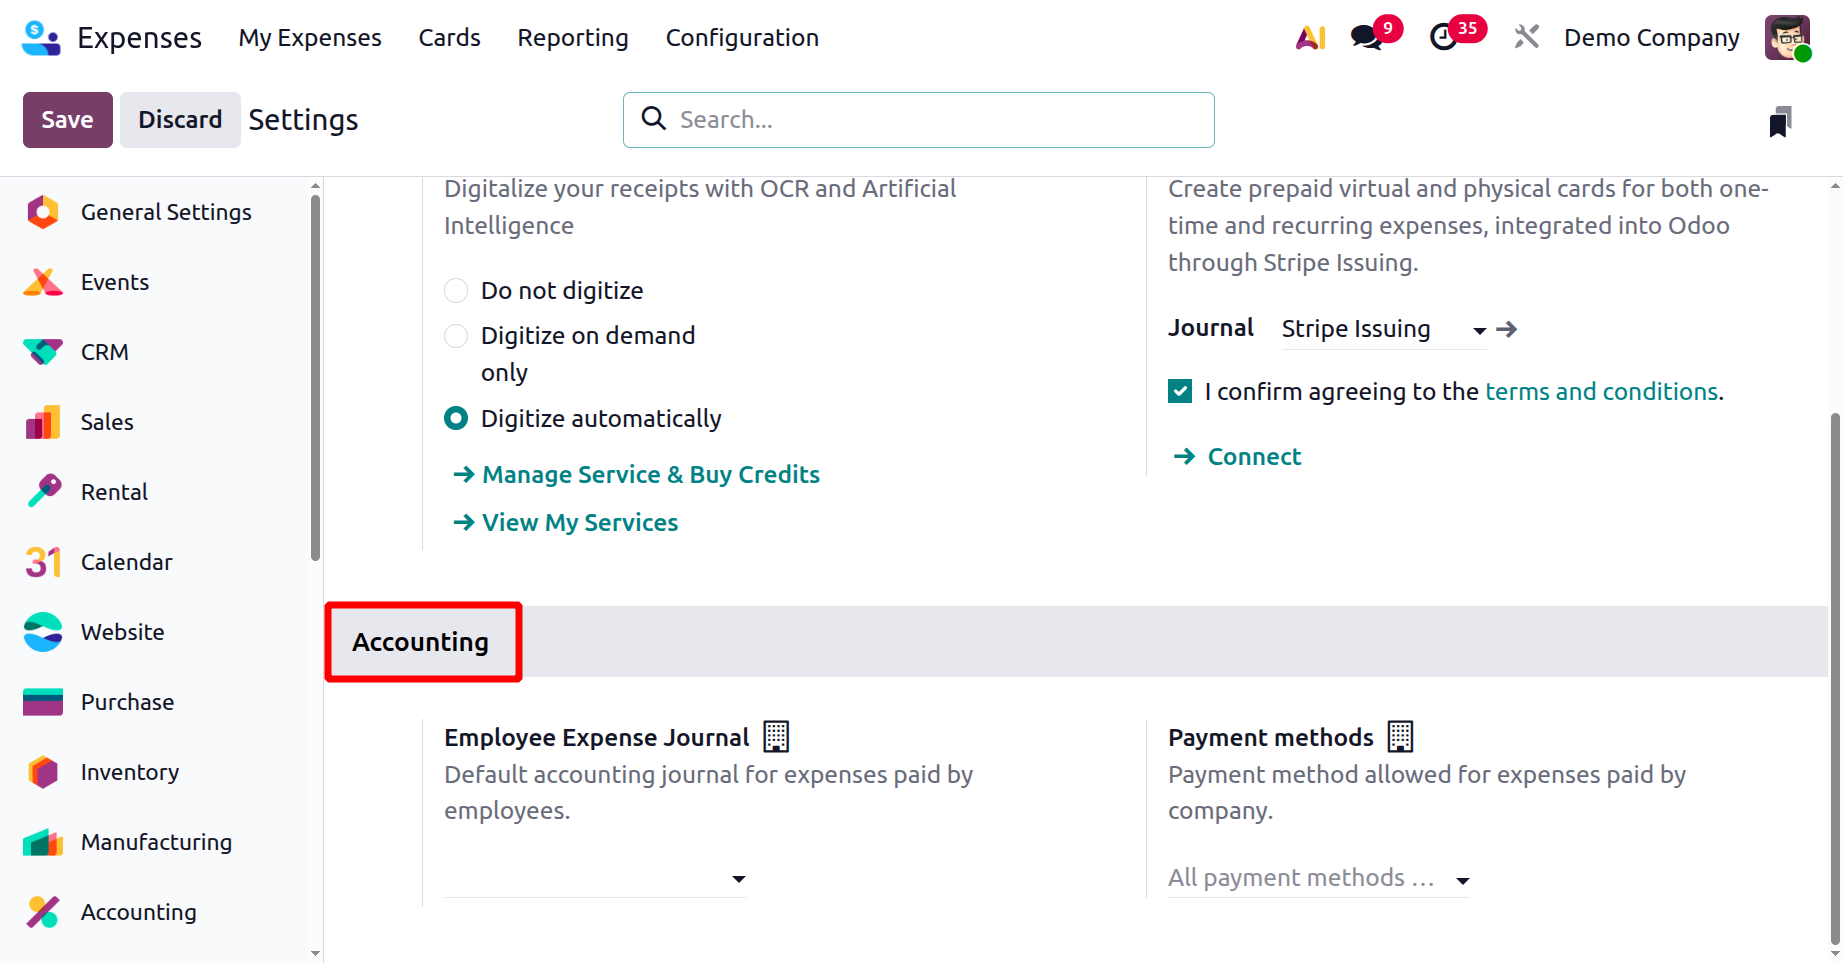
Enabling the Expense Card option allows the creation of prepaid virtual or physical cards for employees to make company-approved purchases. You can select a journal record for all financial transactions made through expense cards. It ensures that each card transaction is tracked correctly. You must confirm agreement to Stripe’s terms and conditions before enabling the Expense Card service.
The Employee Expense Journal is a default accounting journal for recording expenses employees pay on behalf of the company. You can select the Employee Expense Journal from the
drop-down menu list.
The Payment methods are used for setting default payment methods for the expenses paid directly by the company. It ensures clarity in how each expense was settled and simplifies reporting.
1.2 Expense Categories:
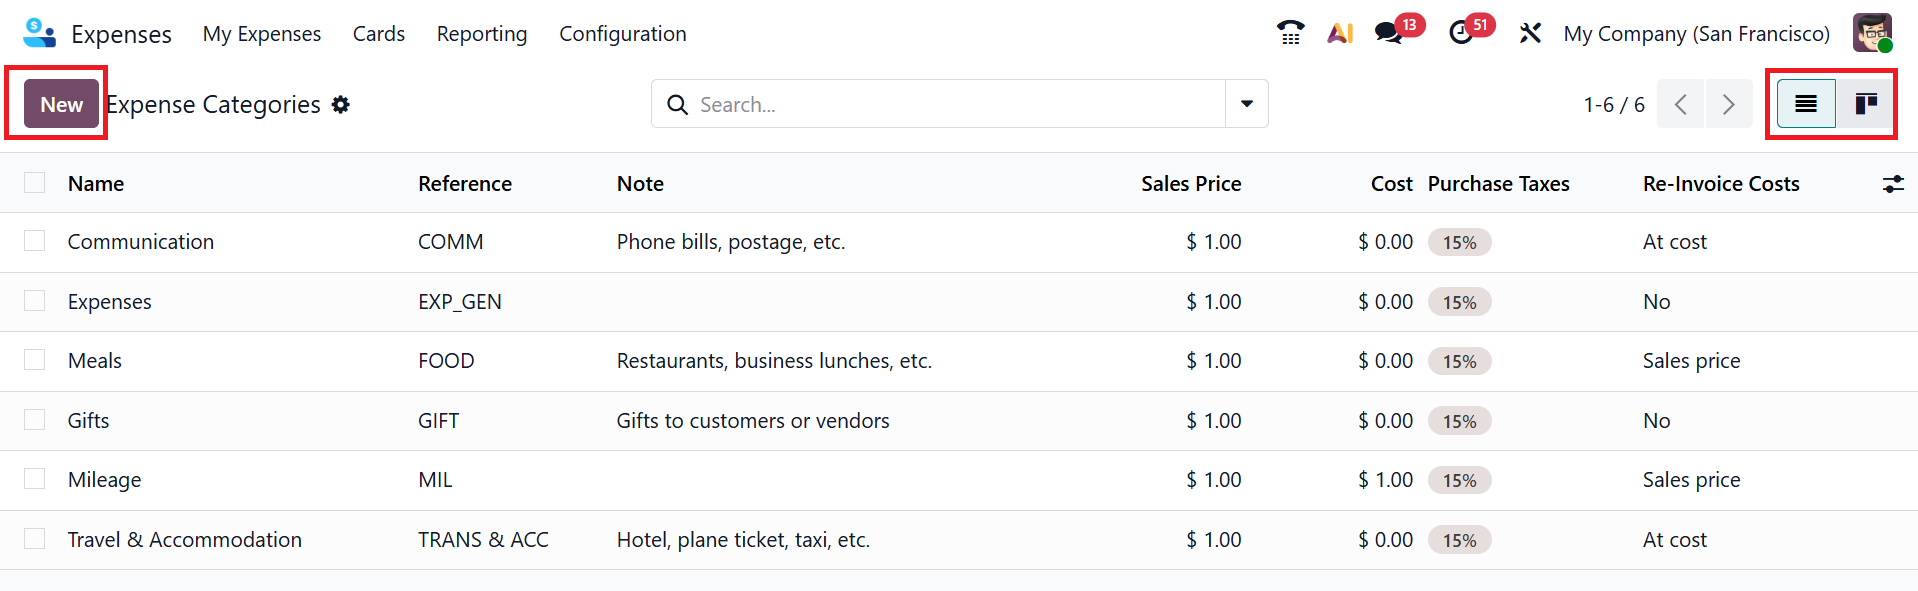
The Expense Categories are predefined expense types that help classify and organize employee spending. Here, you can view details of the expense categories, including Name, Reference, Note, Sales Price, Cost, Purchase Taxes, and Re-Invoice Costs. By default, the expense categories option is set to List view; you can also switch to Kanban view.
To create a new expense category, click the New button.
Then, under the Product Name field, enter the name of the expense item. In the Cost field, add a cost for the expense category. The user can easily add an internal reference to identify the expense category in the Reference field. In the Category field, add a classification for this expense. Specifies which company the expense category is assigned to in the Company field. You can add rules or notes for employees on how and when to use the expense category in the Guidelines field.
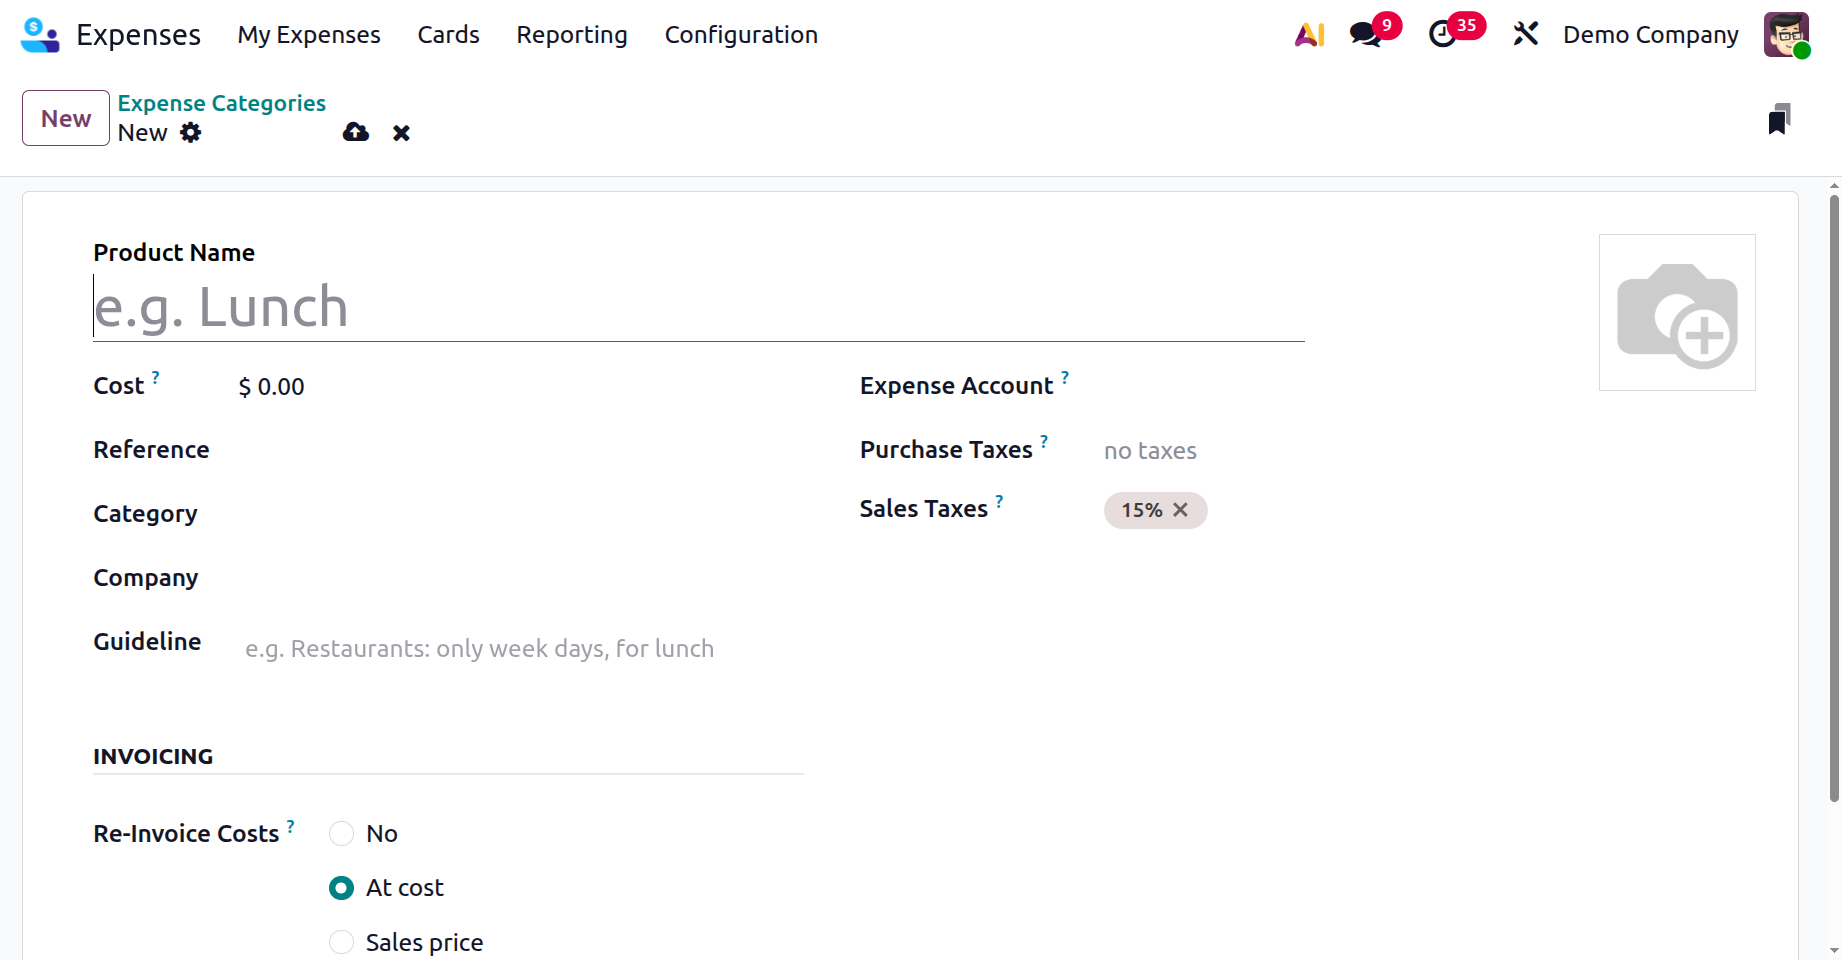
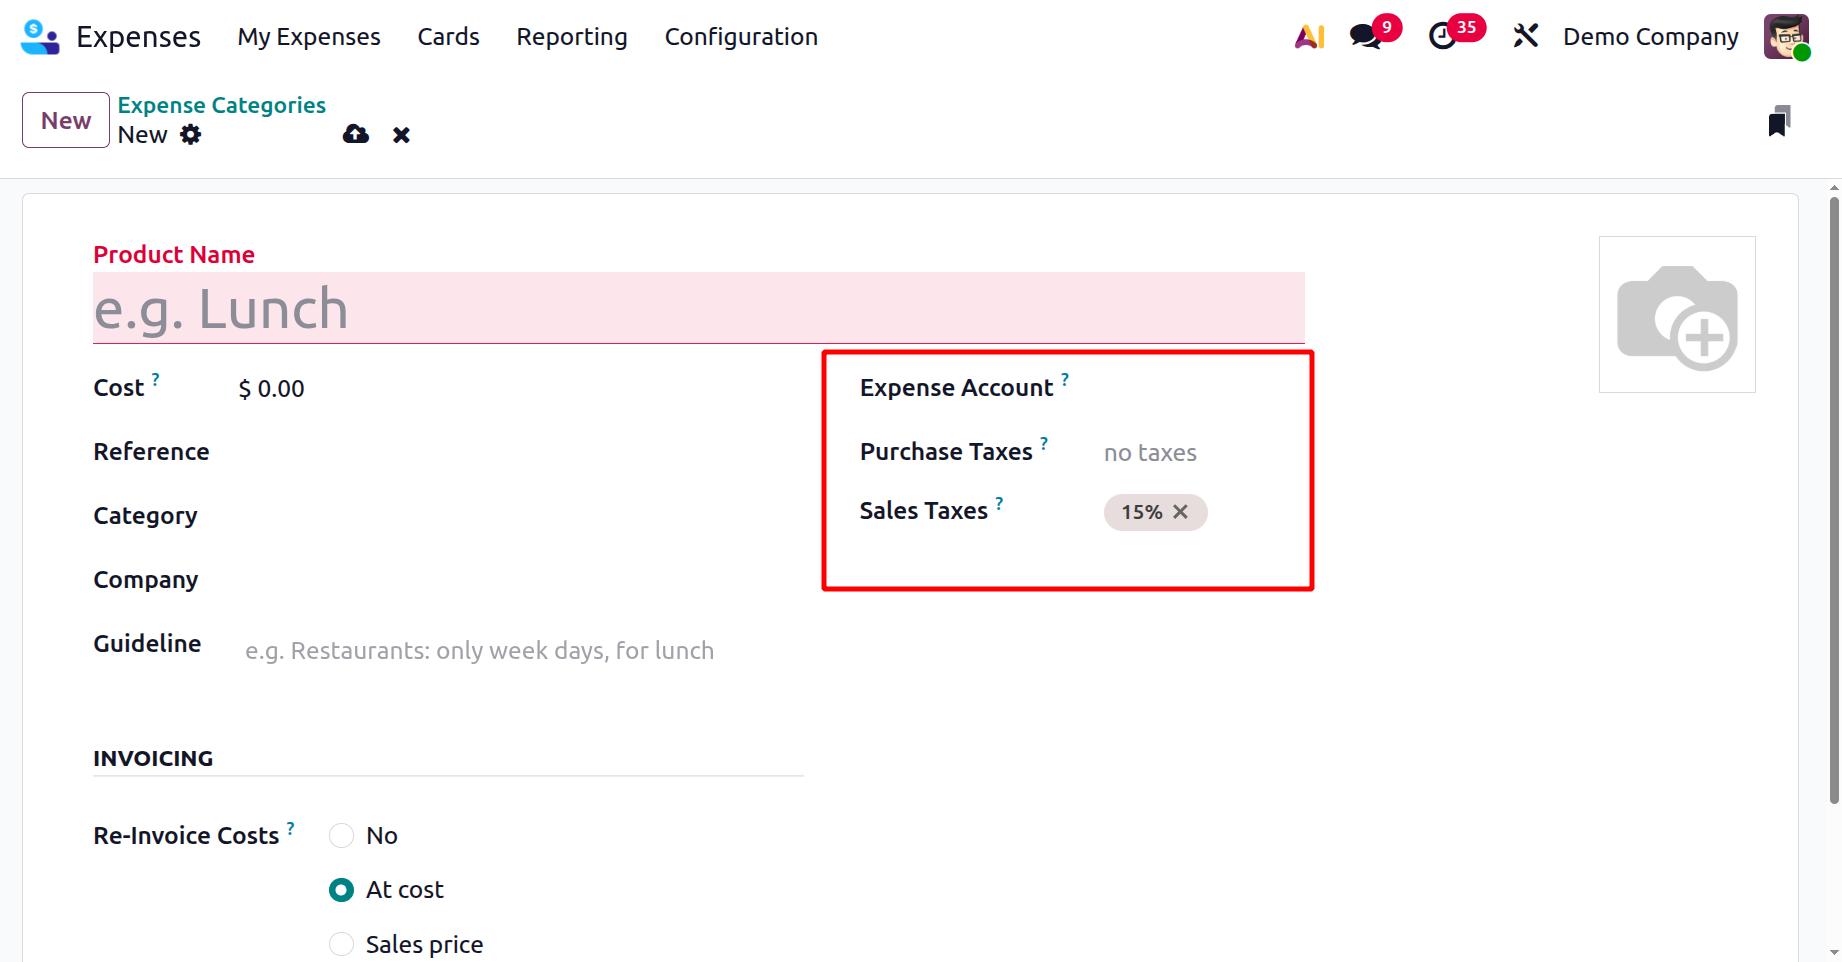
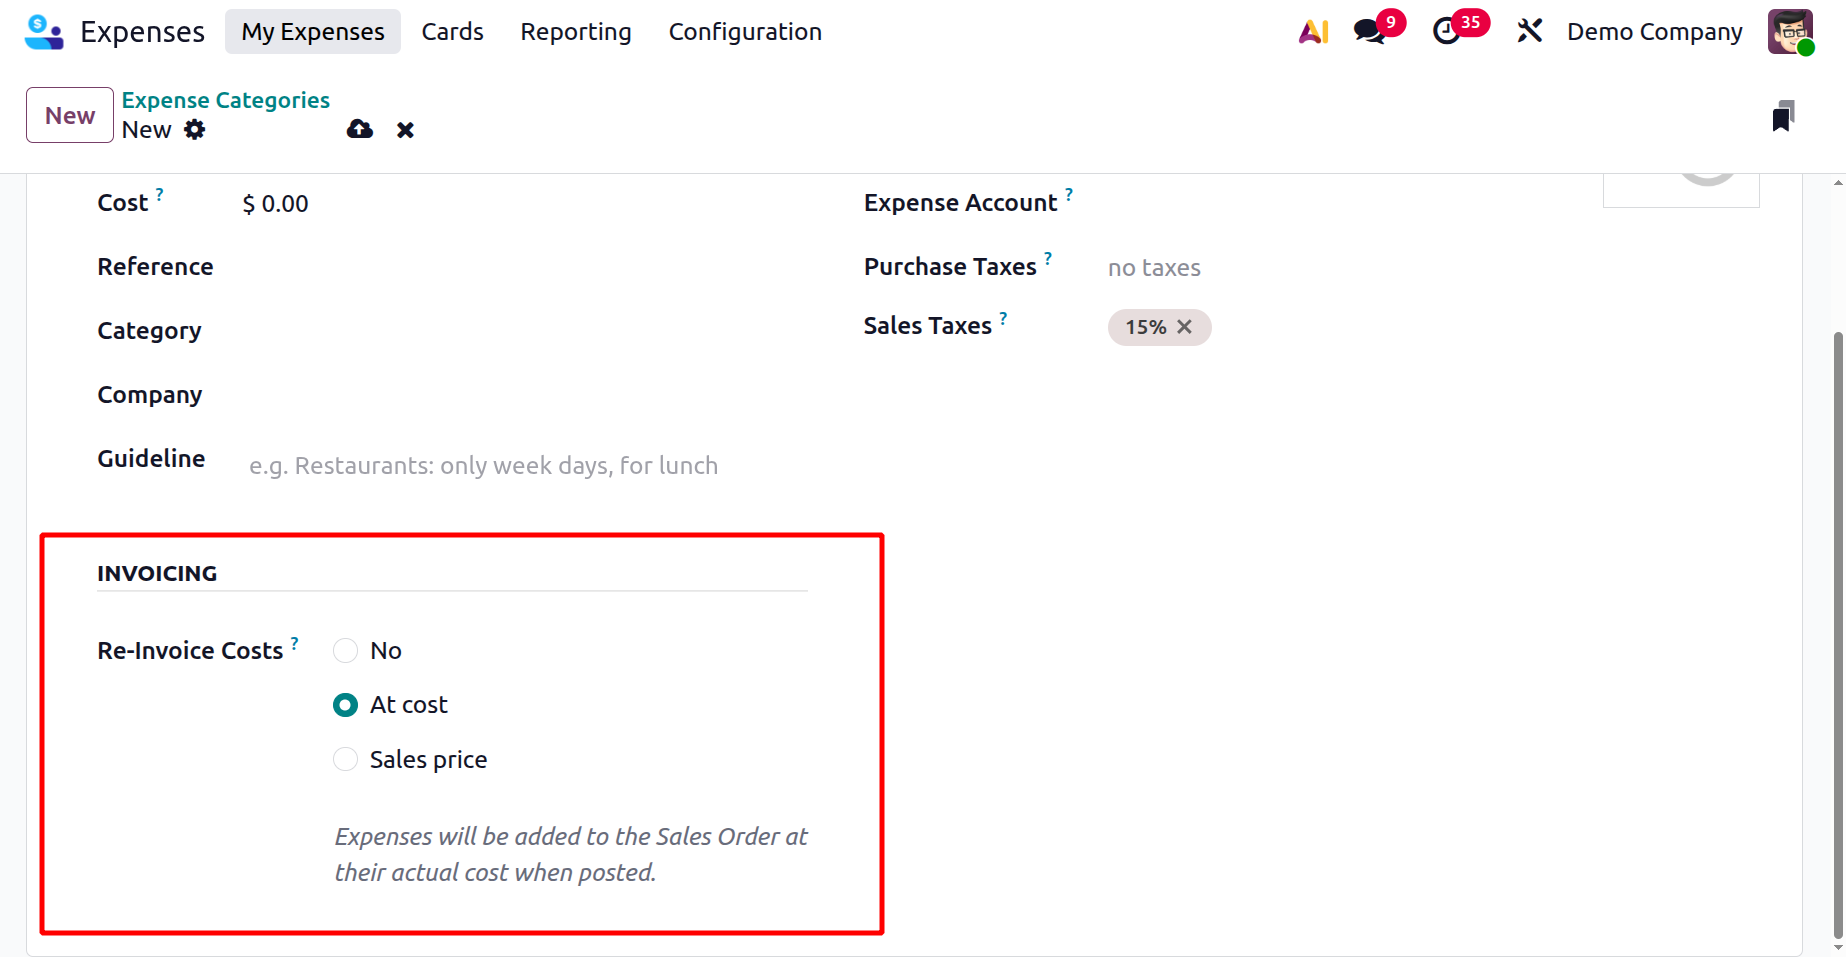
In the Expense Account field, select the account where the expense will be recorded. You can add the tax rate applied when the company pays for the expense in the Purchase Taxes field. In the Sales Taxes field, it defines the tax rate applied if the expense is re-invoiced to a customer.
Under the Invoicing tab, select the Re-Invoice Costs (allows the expense to be reimburse to a customer) as No, At Cost, or Sales price.
1.3 Activity Types:
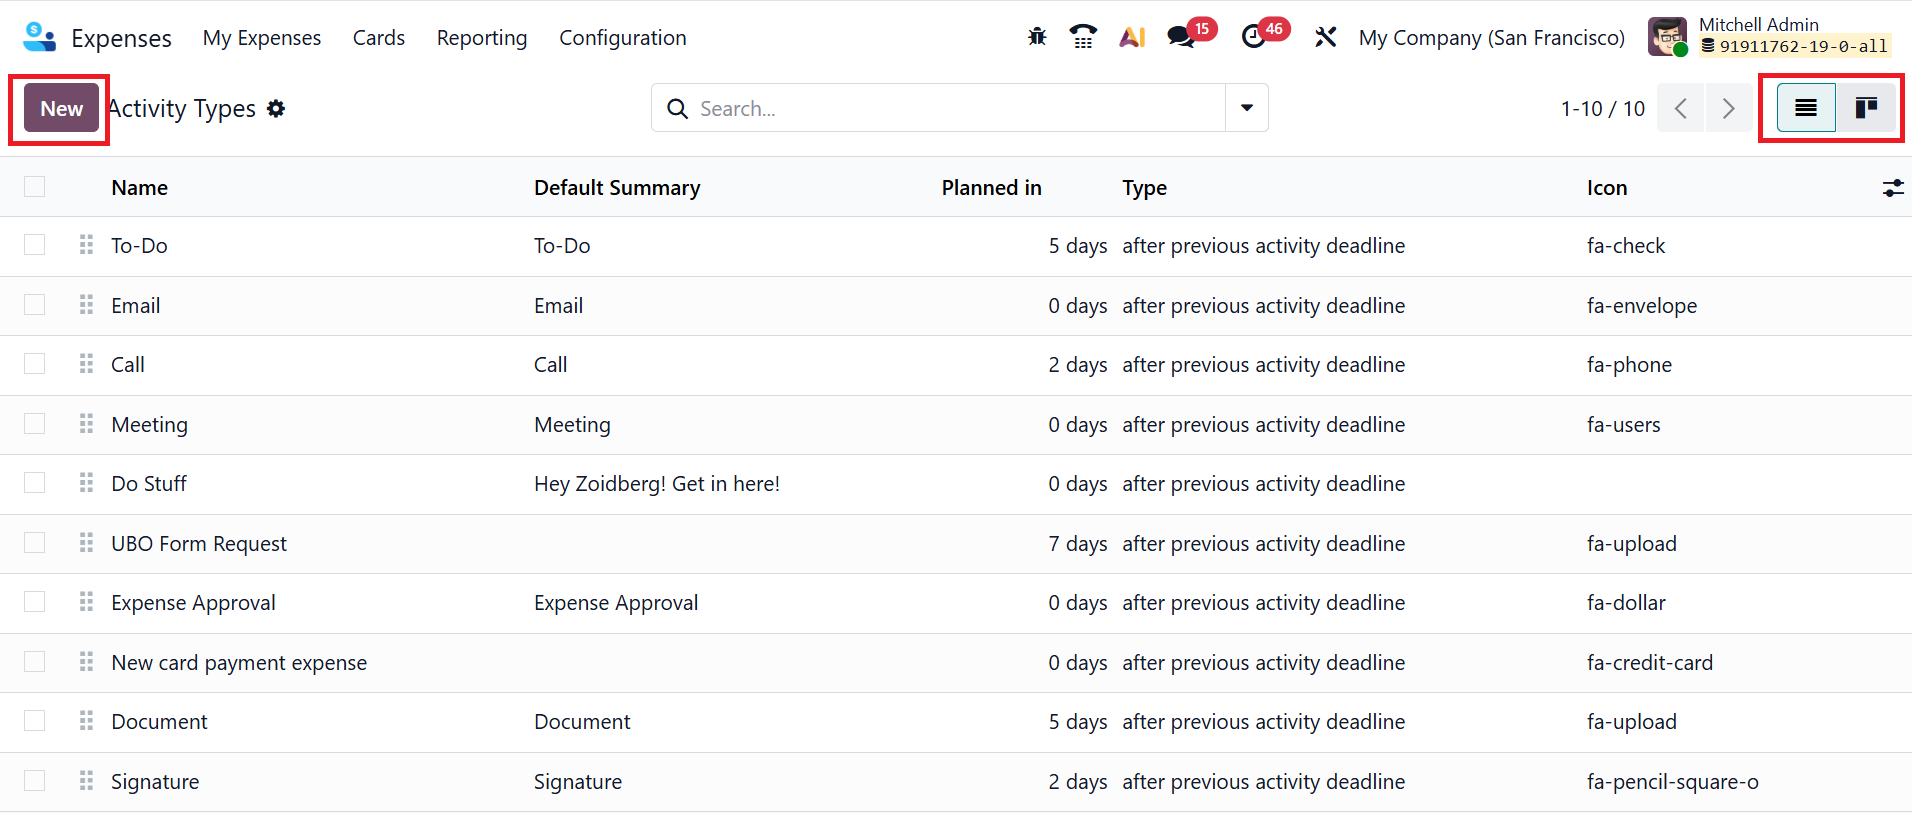
When you activate the Developer Mode in the Settings module, a new option named Activity Types will appear under the Configuration menu. Details about Activity Types—including Name, Default Summary, Planned In, Type, and Icon—can be found here. You can also view the Activity Types in the List and Kanban views. Click the New button to create a new Activity Type.
Enter a title in the Name field, then configure the two sections below: Activity Settings and Next Activity. Under the Activity Settings, add the specific action triggered by the activity in the Action field. Set the Default User to assign a default responsible person for the activity. Use the Default Summary field to enter a short description of the activity. You can also select an Icon to visually represent the activity type. To easily identify the activity status, you can add color or a visual style to the Decoration Type field. In the Schedule field, enter the number of days after a previous activity to schedule this one automatically. Add the activity instructions or details in the Default Note field.
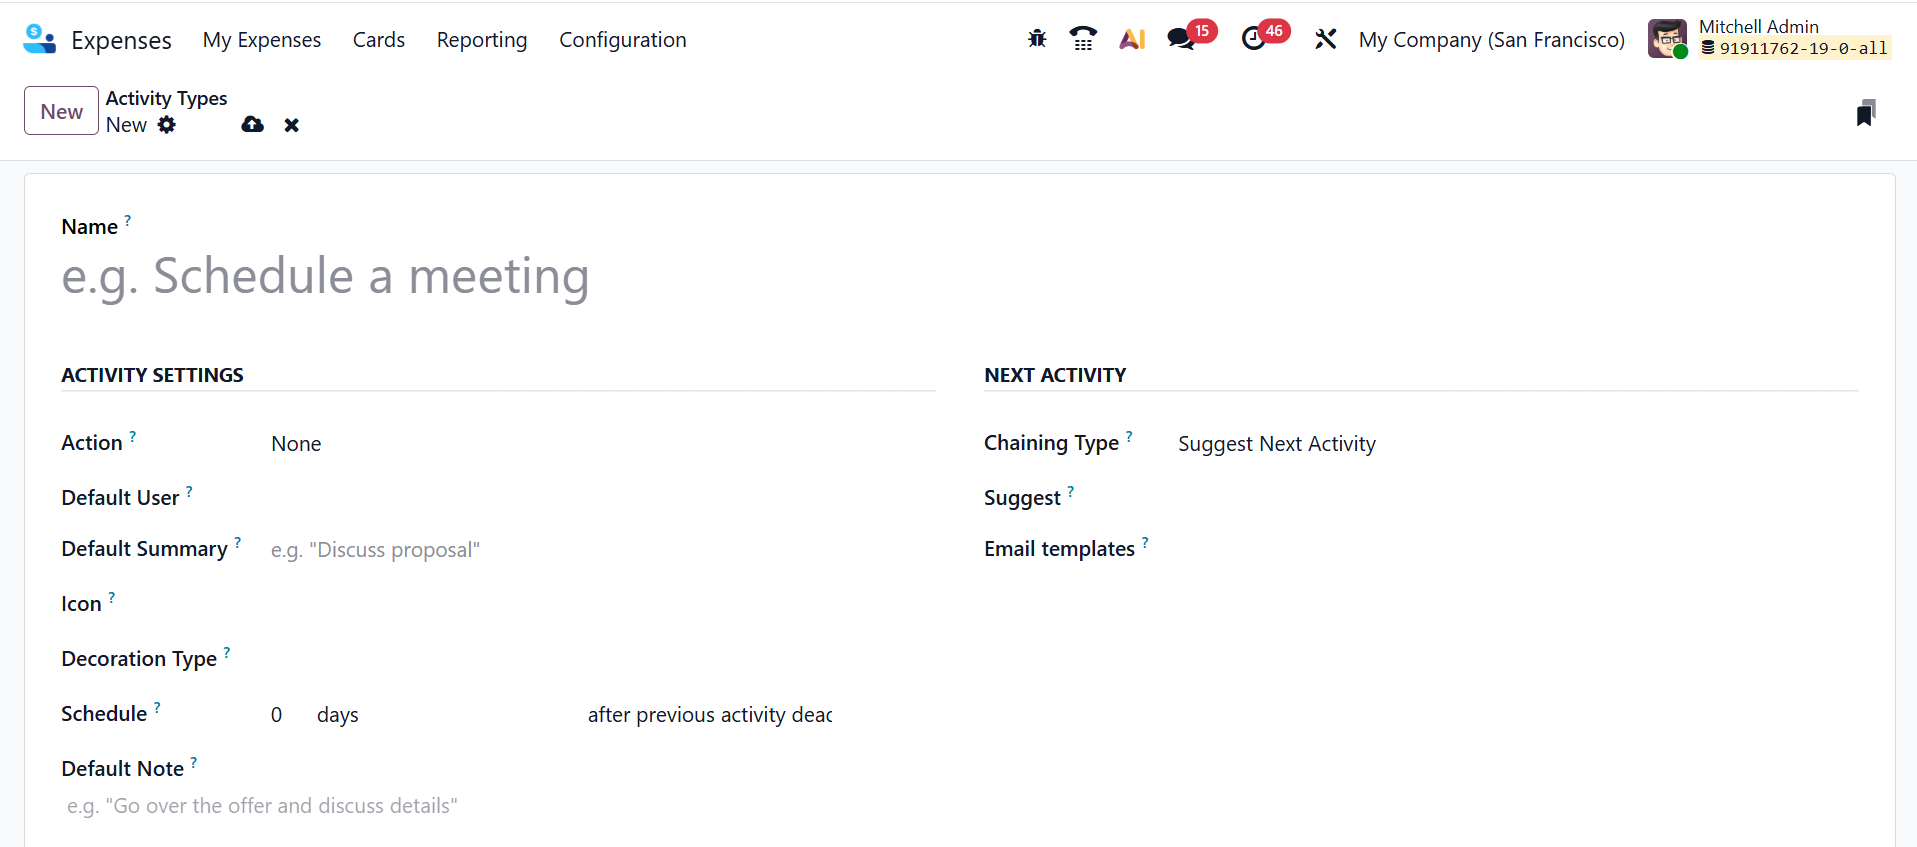
Then, in the Next Activity section, specify how the next activity should proceed by selecting Suggest Next Activity or Trigger Next Activity under Chaining Type. In the Suggest field, add the next possible activity to perform once the current one is marked as done. In the Email Template field, you can link an email template that can be used automatically with this activity.
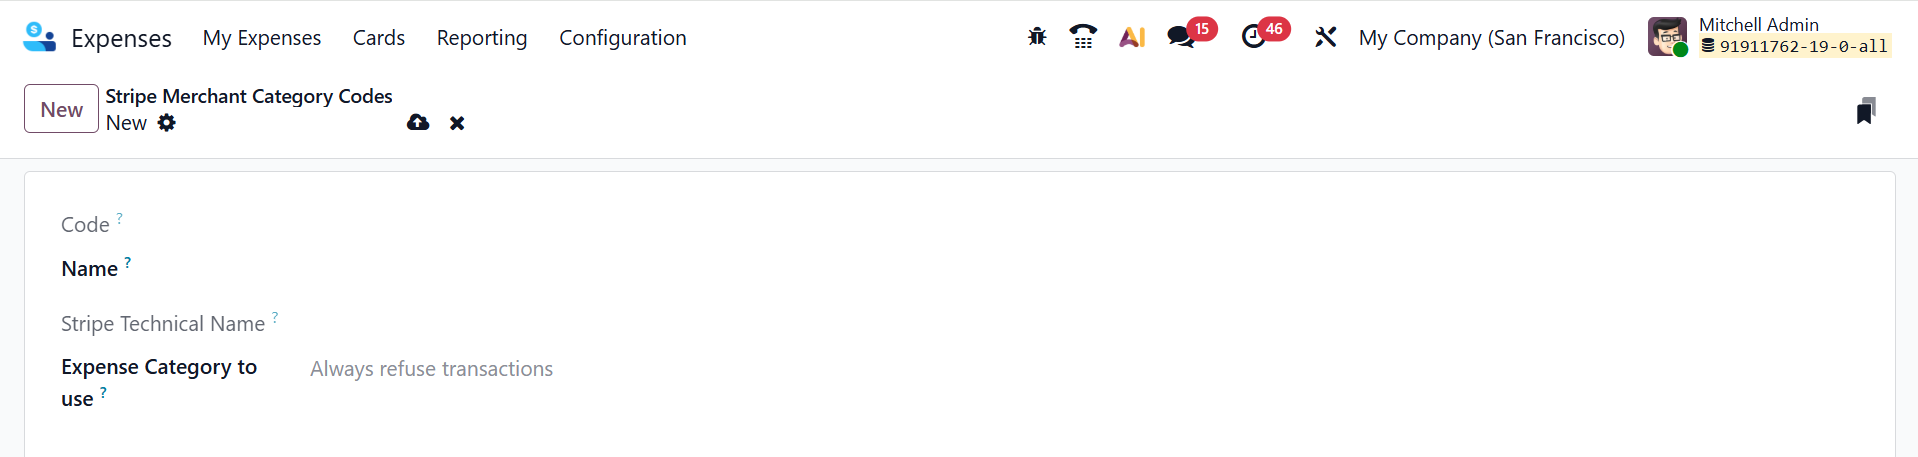
1.4 MCC:
In Odoo 19, Stripe Merchant Category Codes (MCC) are used to classify businesses based on the types of goods or services they offer. Here, you can view a list of MCCs with their Code, Name, and Expense Category to use. To create a new MCC, click on the New button as shown below:
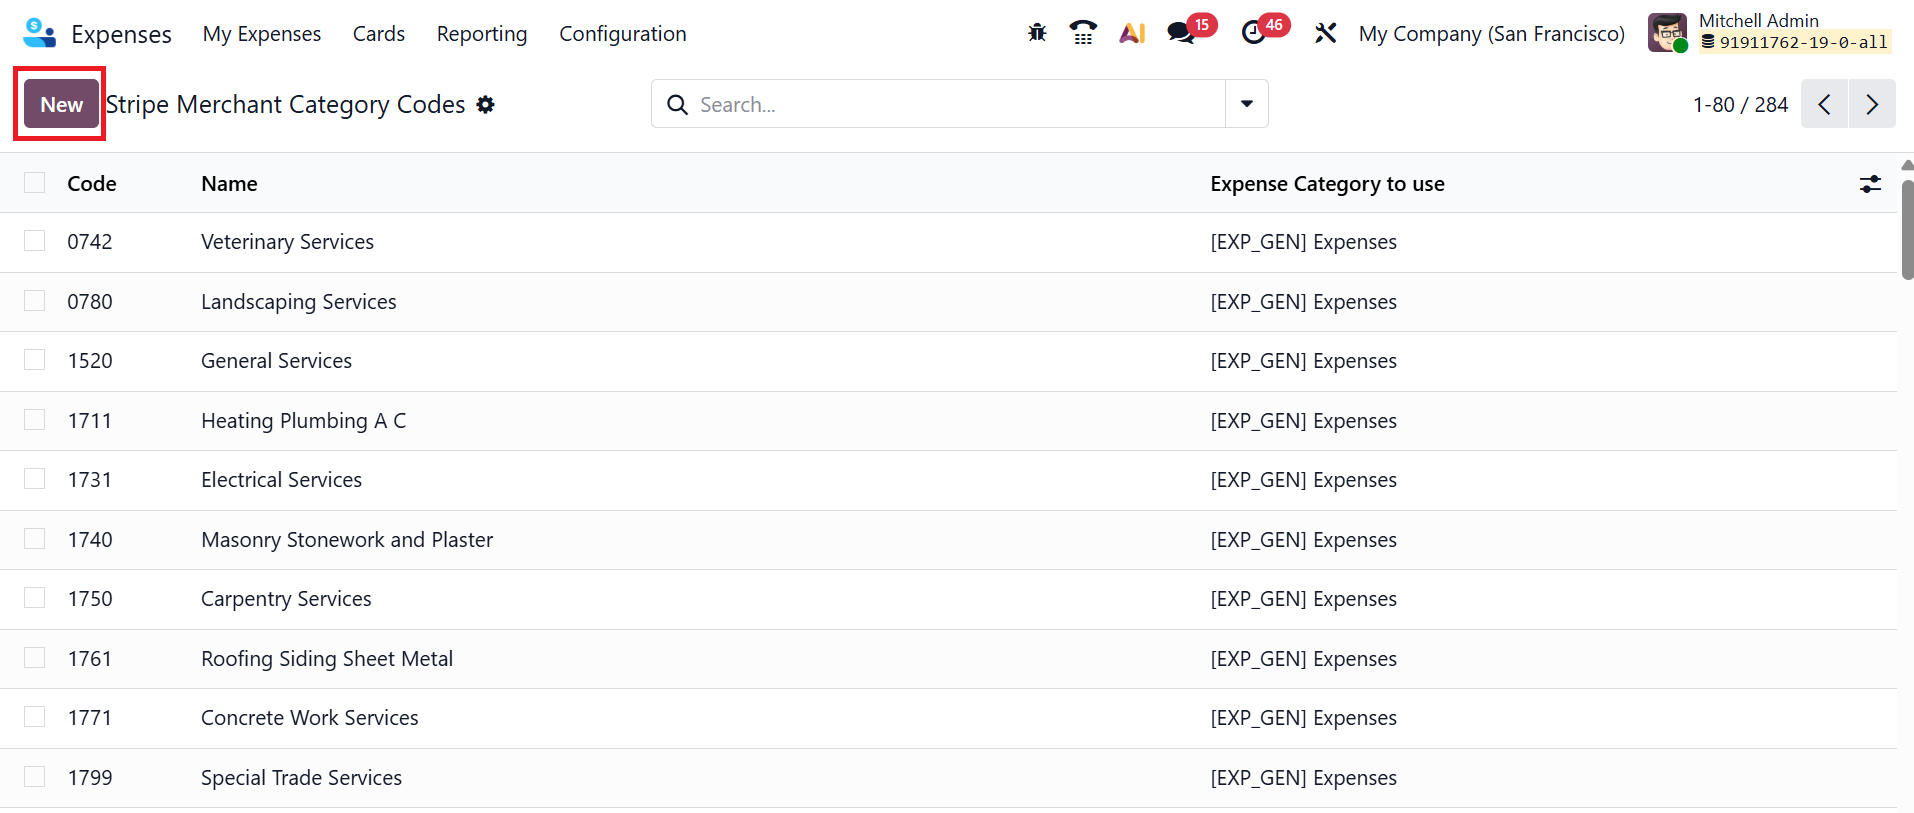
Here, you can add a descriptive name of the business category in the Name field. In the Expense Category to Use field, you can add which expense category should be used for this business category. The Code and Stripe Technical Name fields can’t be manually entered. These fields are automatically filled when Stripe’s data is imported or synced.