My Expenses
Under My Expenses, there are options like My Expenses and Expenses to Process.
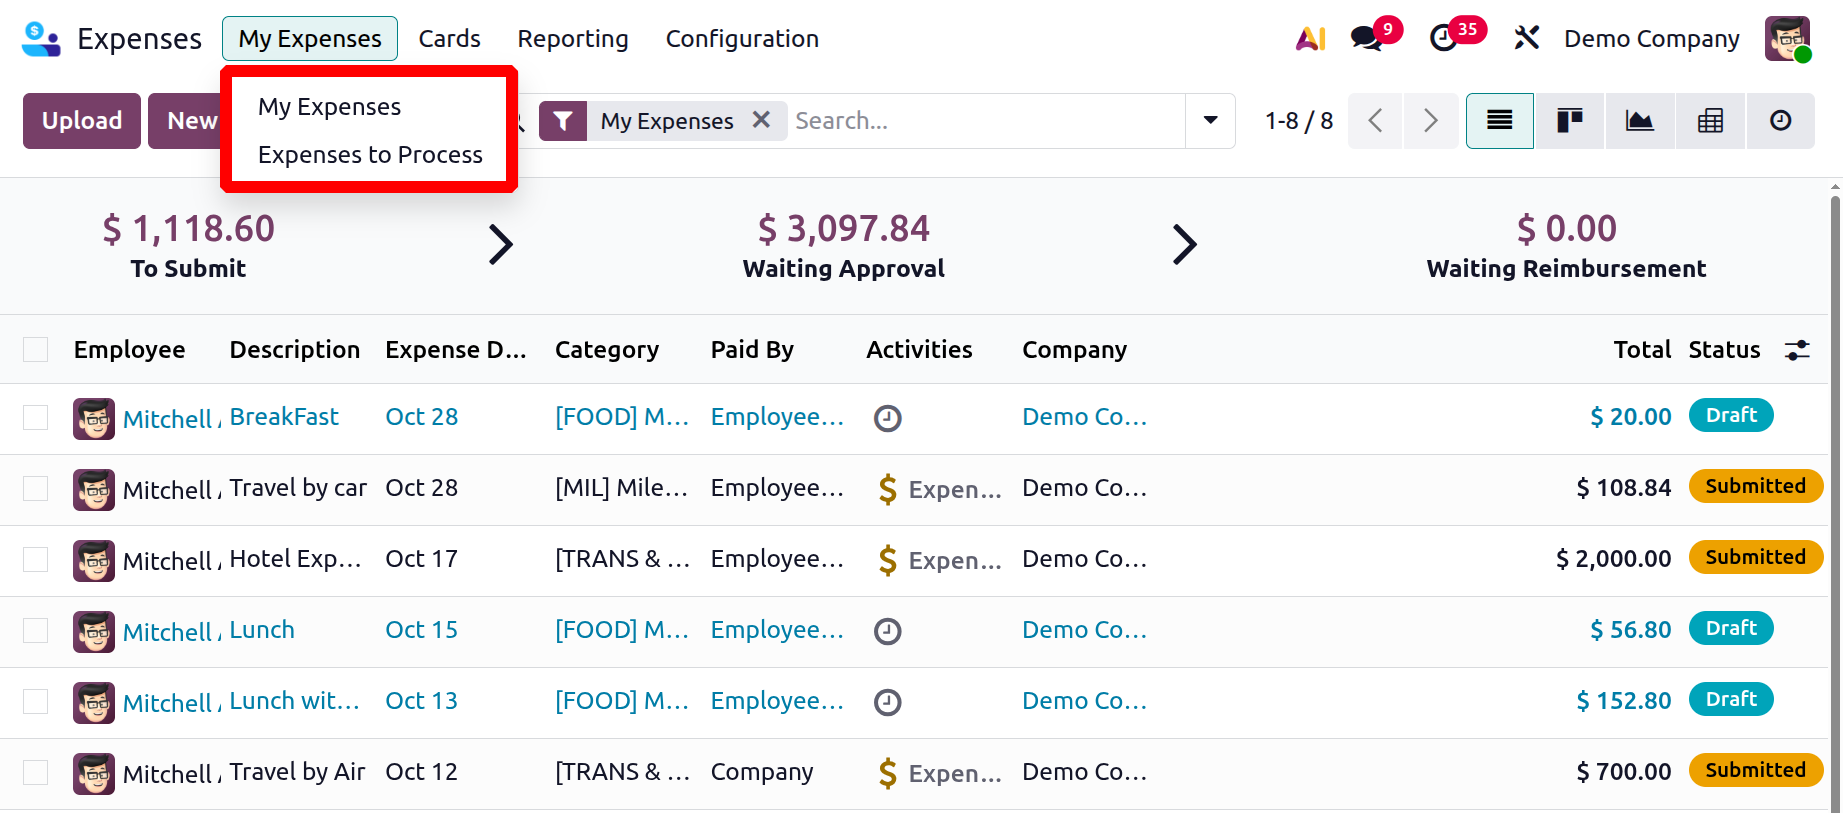
1.1 My Expenses:
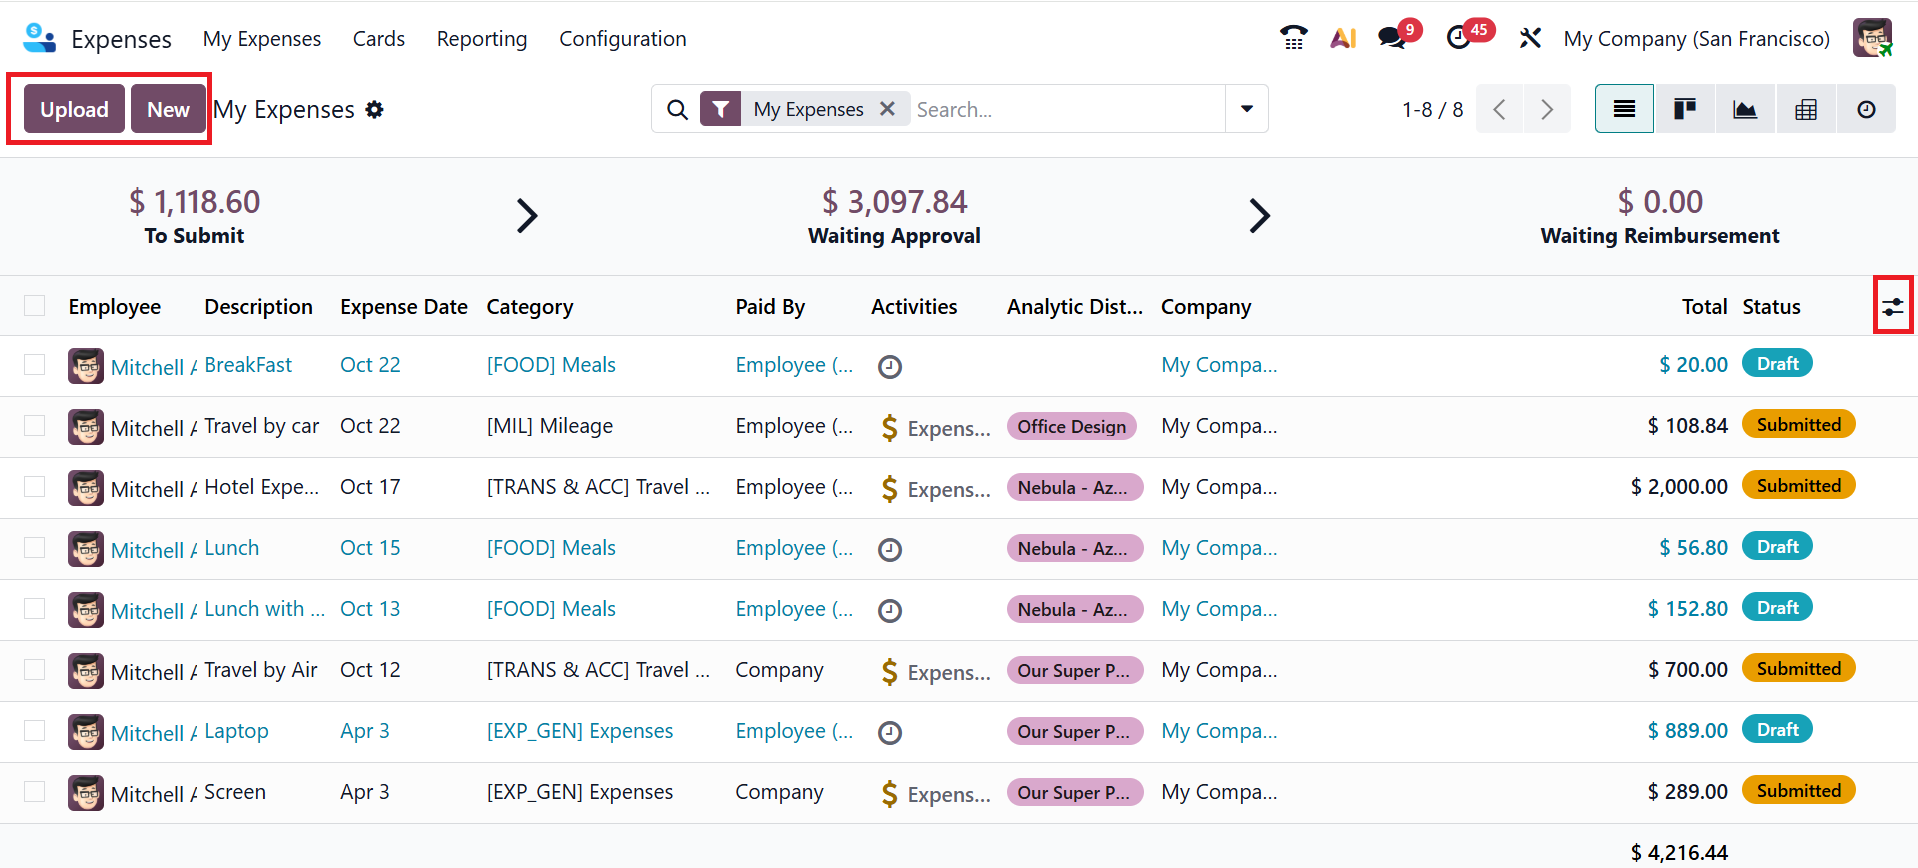
When you open the expense module, the My Expenses menu appears as the default dashboard view. There, you can see a list of expense reports' history, including the details such as Employee, Description, Expense Date, Category, Paid By, Activities, Analytic Distribution, Company, Total, Status, and you can add more details to the report by clicking on the toggle button in the right corner of the screen. By default, the My Expenses option is arranged in List view, and you can also change the view to Kanban, Pivot, Graph, and Activity.
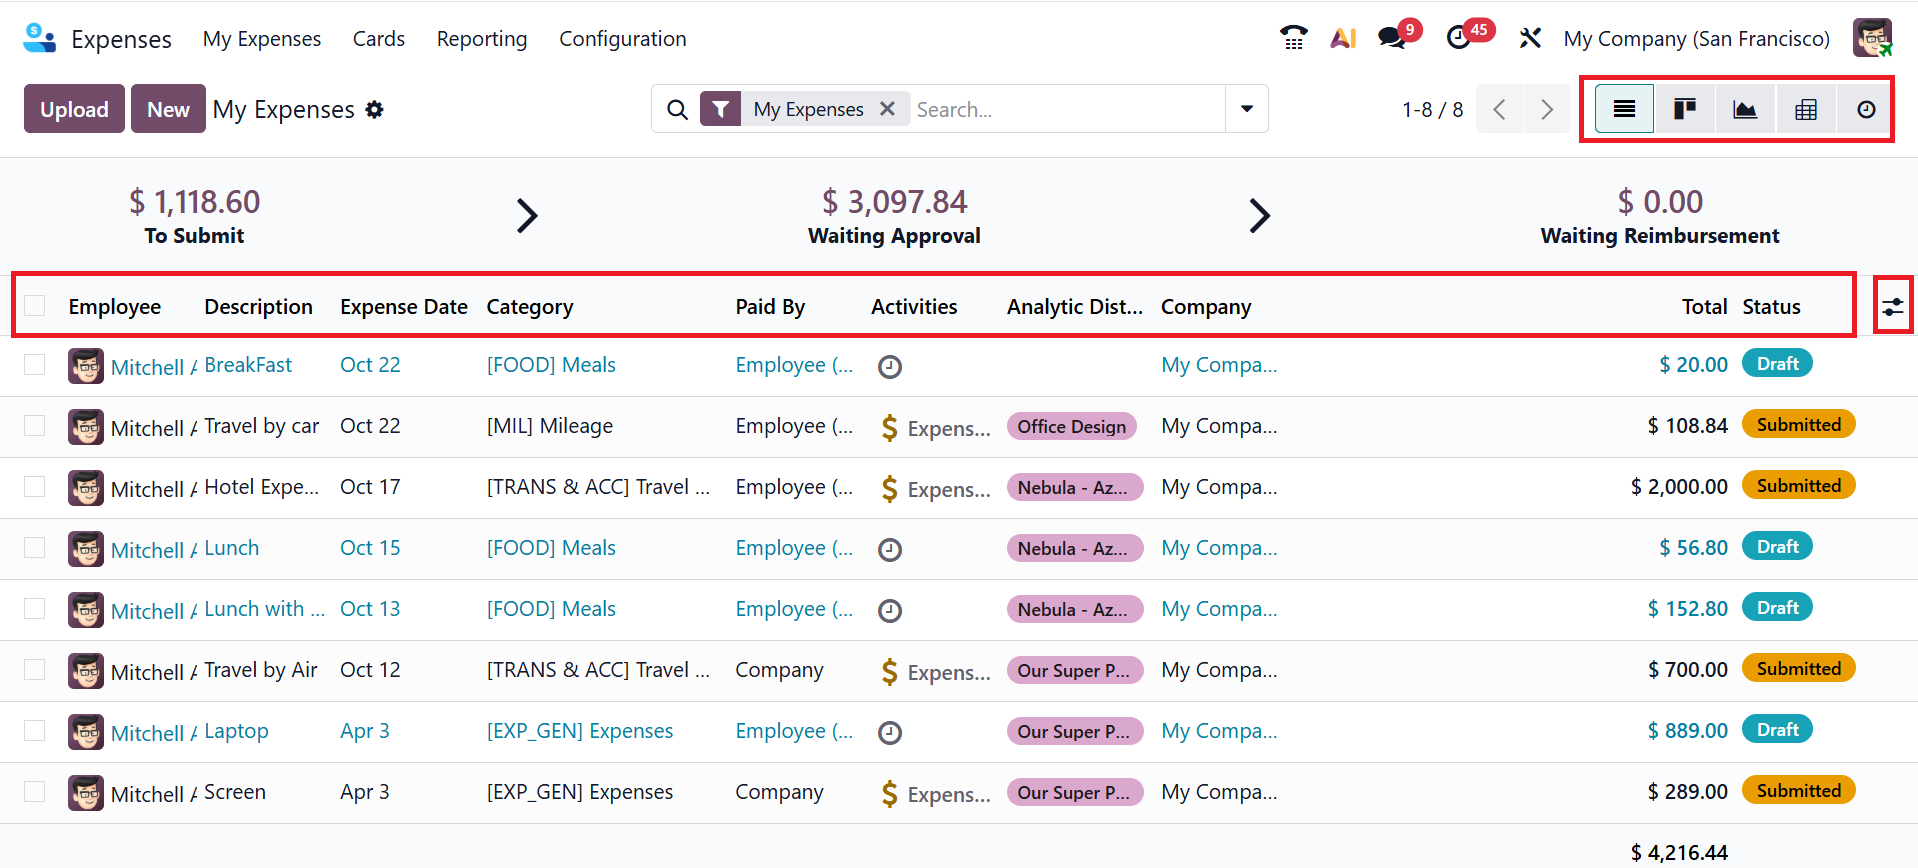
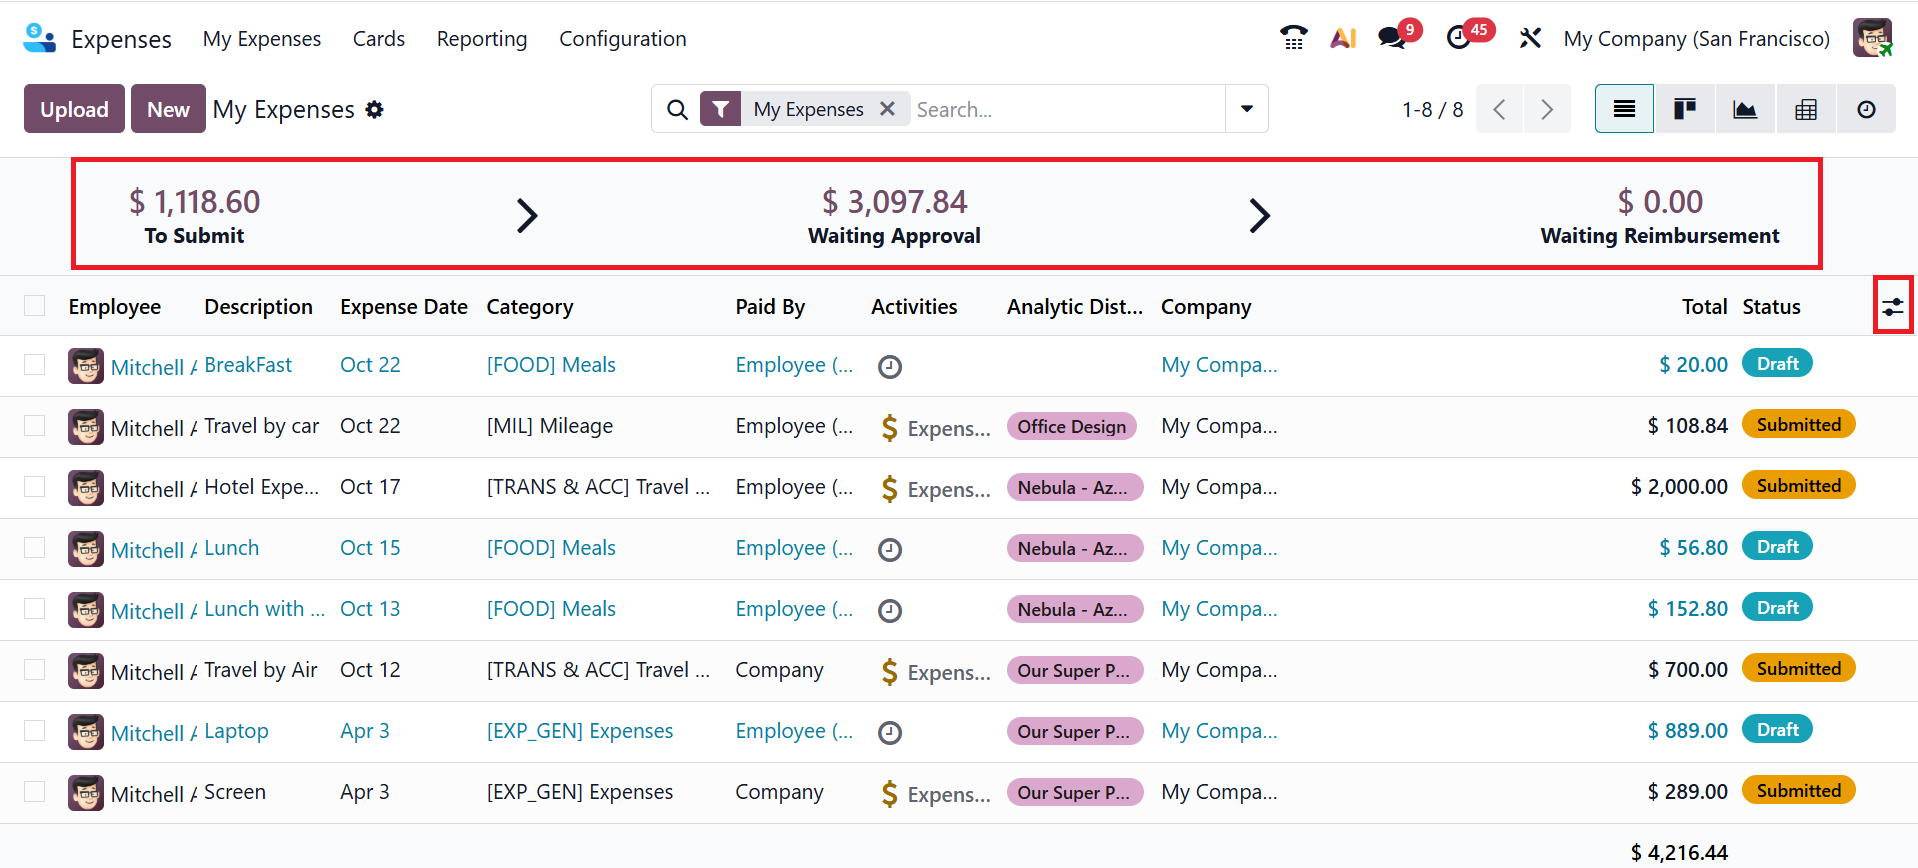
At the top of the window, users can view key expense details, including the reimbursement amount, approval amount, and reportable expenses, providing a clear overview of their spending after reviewing the report. The onboarding panel, usually located at the top of the dashboard, helps administrators or HR managers properly set up the Odoo Expenses module. It commonly displays status indicators to guide the setup process, such as:
- To Submit
- Waiting Approval
- Waiting Reimbursement
- *To Submit:To Submit stage includes expenses that an employee has created but not yet submitted for approval. They are still in draft form and can be edited or deleted.
- *Waiting Approval:After submitting the expense report, it will move to the Waiting Approval stage. This stage awaits the manager’s or accountant’s verification or approval before payment processing.
- *Waiting Reimbursement:After approval, the expense report moves to the waiting reimbursement stage, where it is ready for payment. This stage indicates that the expense has been approved, but the reimbursement is still pending.
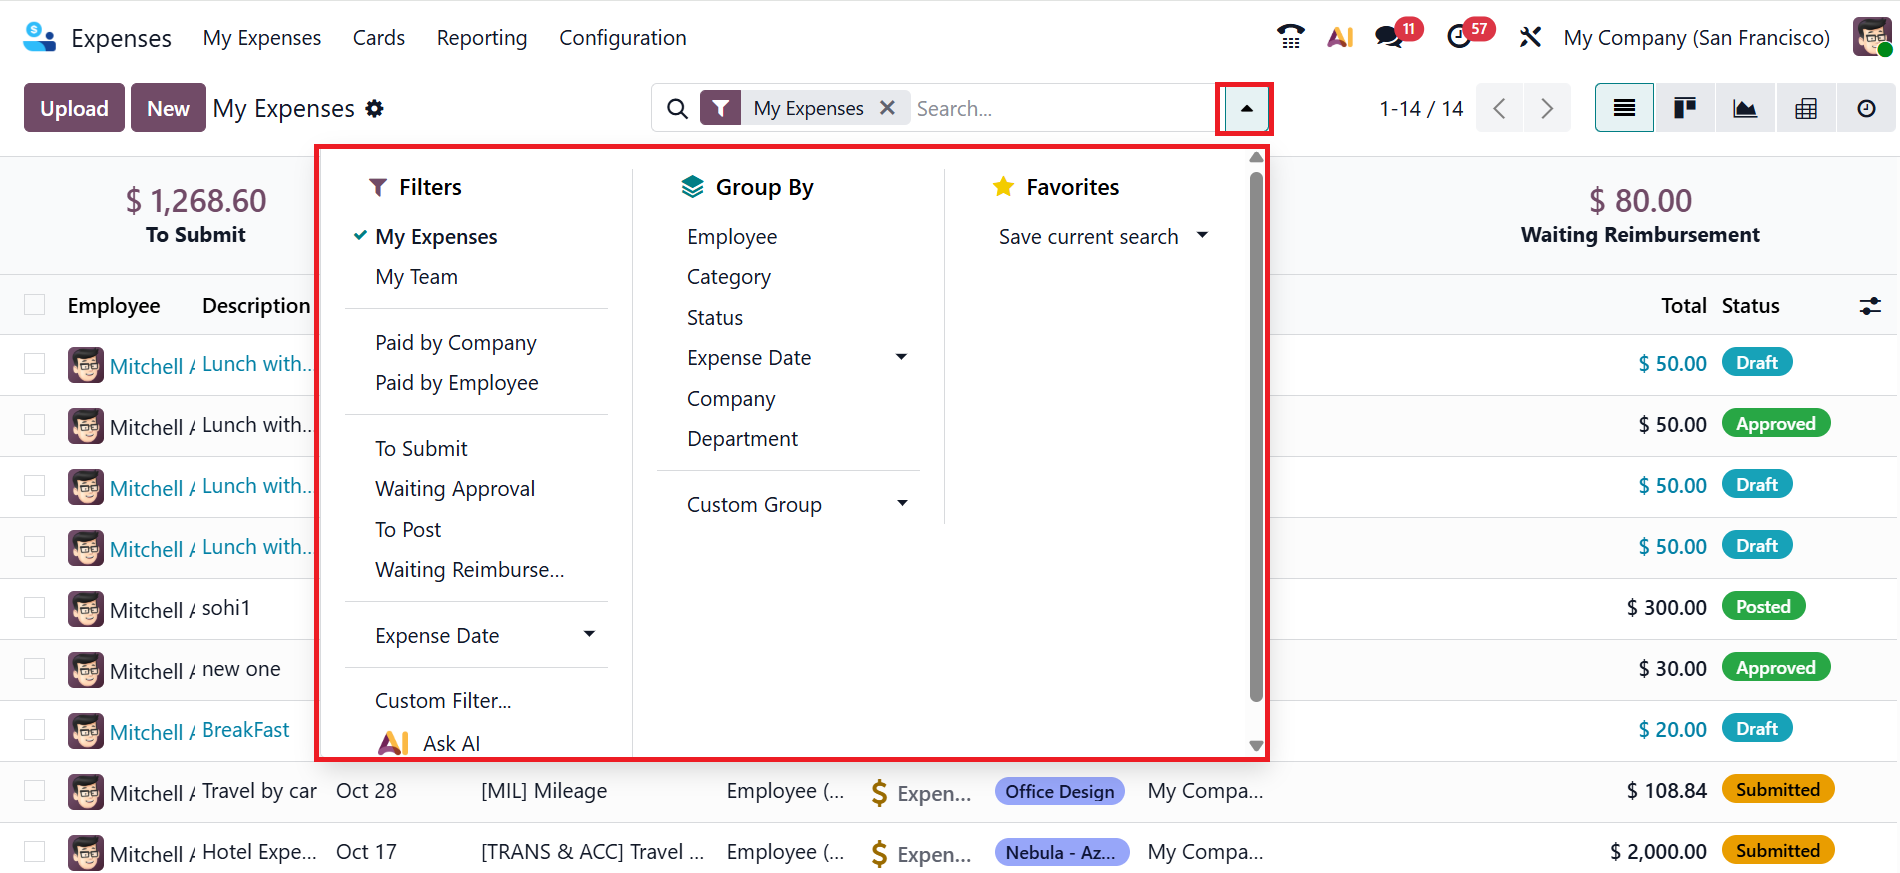
In the search bar, open the drop-down menu to reveal three options: Filters, Group By, and Favorites. You can filter the My Expenses menu based on the My Expenses, My Team, Paid by Company, Paid by Employee, To Submit, Waiting Approval, To Post, Waiting Reimbursement, Expense Date, and you can also use the Custom filter or Ask AI options. You can group the My Expenses menu by Employee, Category, Status, Expense Date, Company, Department, or use the Custom Group option. Under the Favorites option, you can save the filter for further use.
Click the Upload button to add an expense report from the system, then choose New to create a new expense entry.
Add a concise description of the expenses in the Description field. In the Category field, add an expense category from the drop-down menu. Add the total cost of the expense in the Total field. In the Tax Included field, the tax percentage and amount will appear if taxes are configured for the expense category. Add an employee from the drop-down list in the Employee field. In the Paid By field, select either Employee (to reimburse) or Company based on the selected expense category.
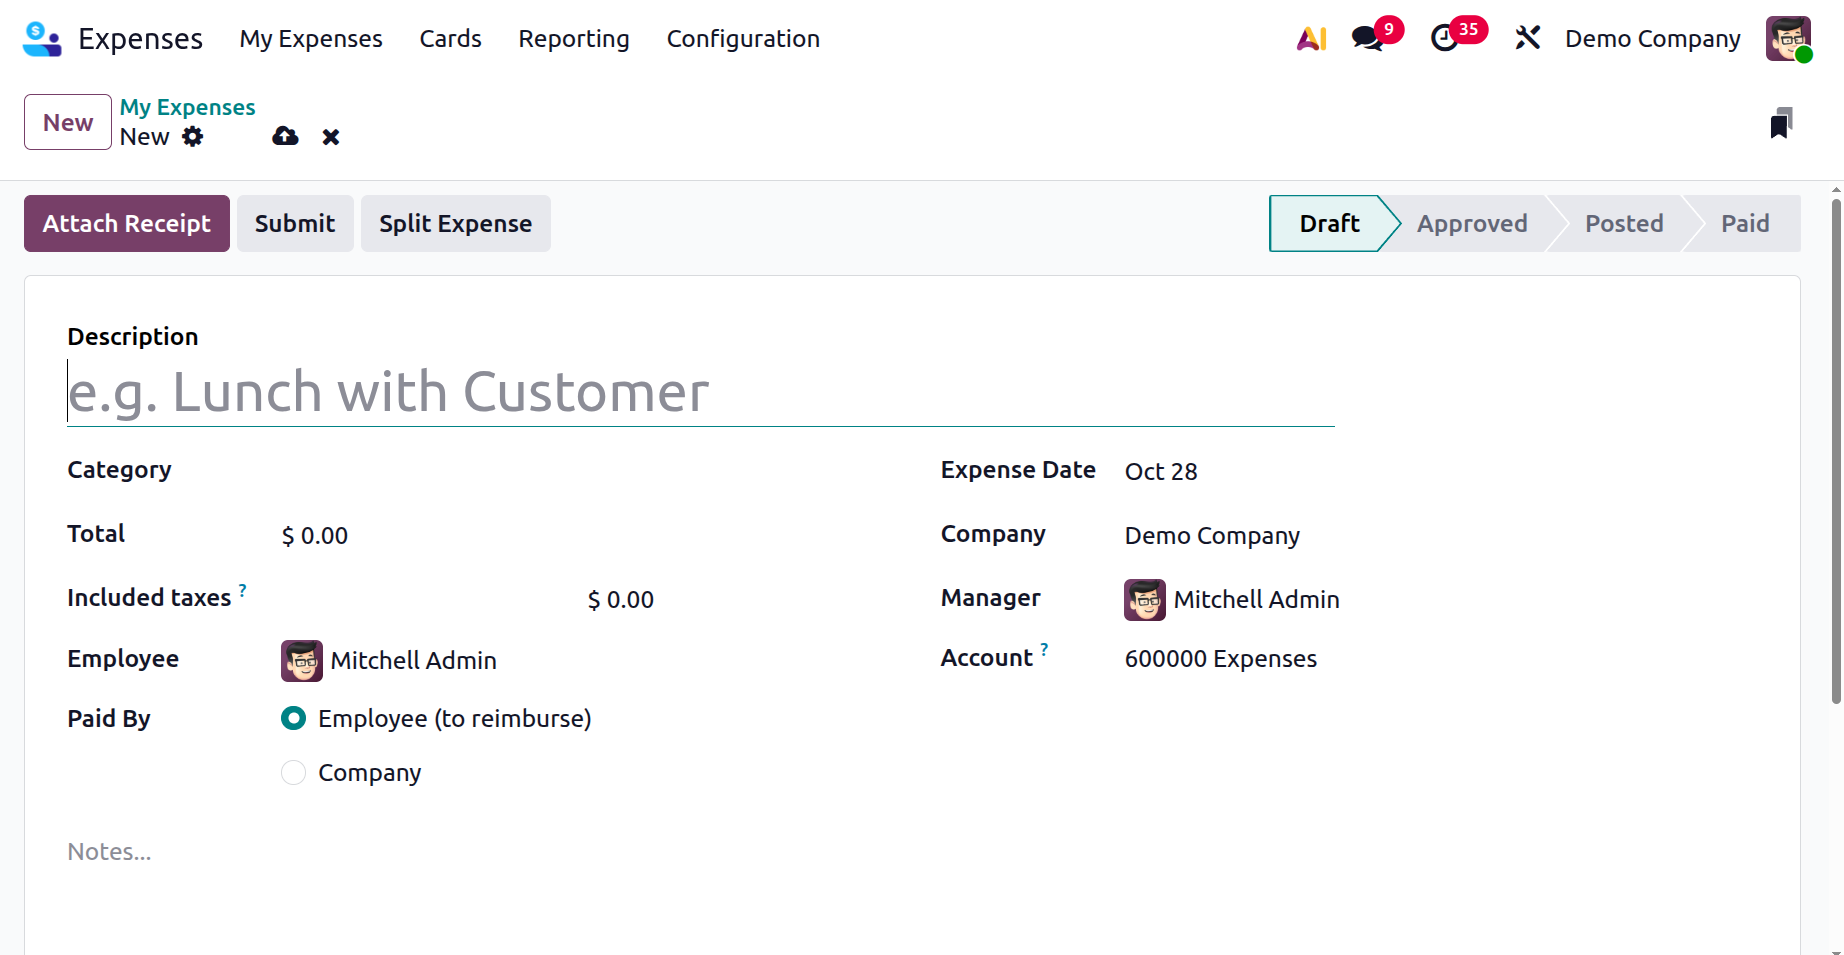
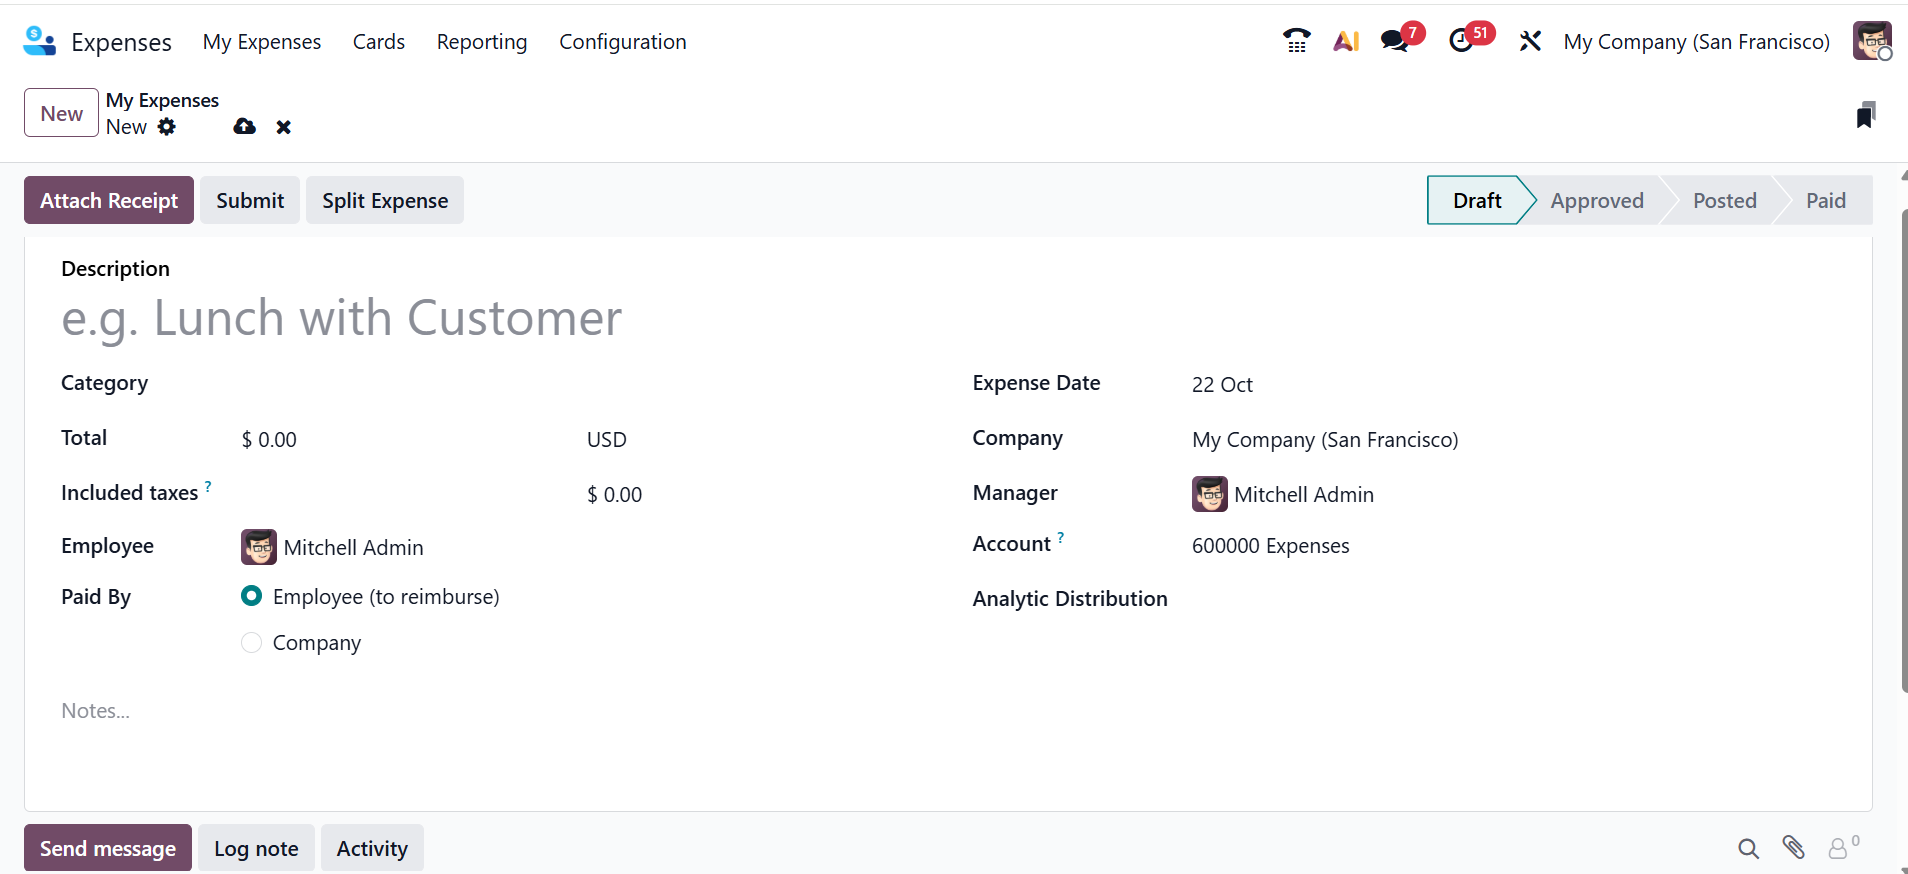
In the Expense Date field, select a date to incur the expenses. In the Account field, select an expense account to log the expense. Select a company from the drop-down to file the expense in the Company field. Select a company manager to manage expenses in the Manager field. In the Analytic Distribution field, select an account for which the expense should be written against from the drop-down menu for either Projects, Departments, or both. You can modify the percentage assigned to each analytic account, and use the Notes field to add details or comments about the expense for better clarity.
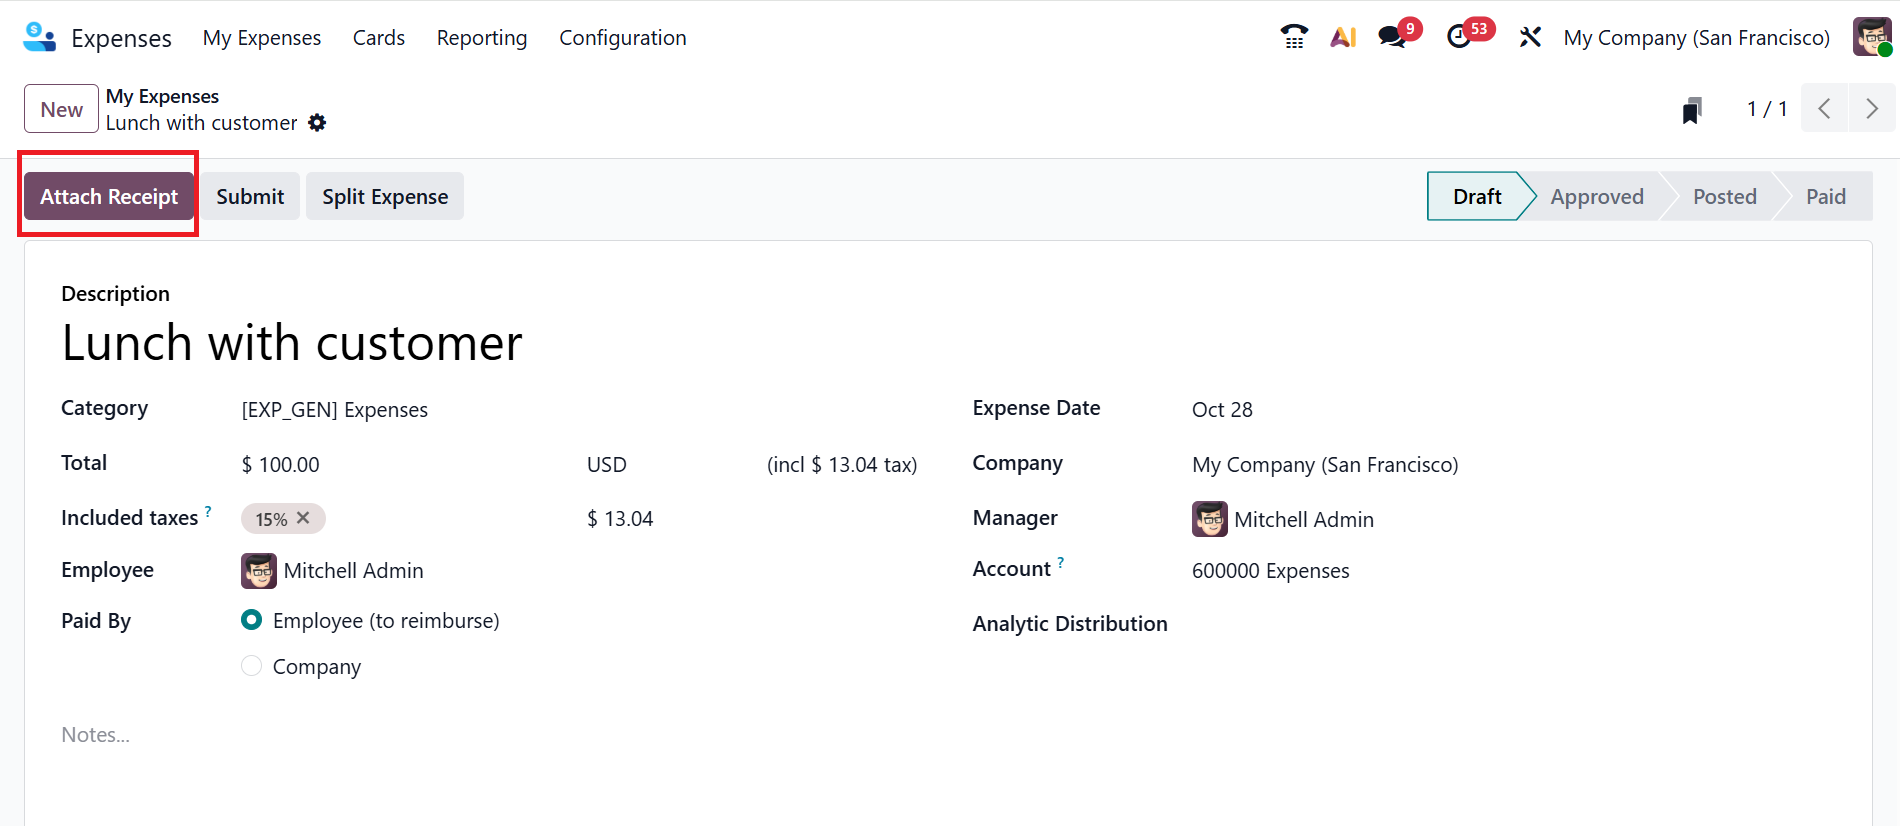
Click the Attach Receipt button to upload the expense receipt as shown below:
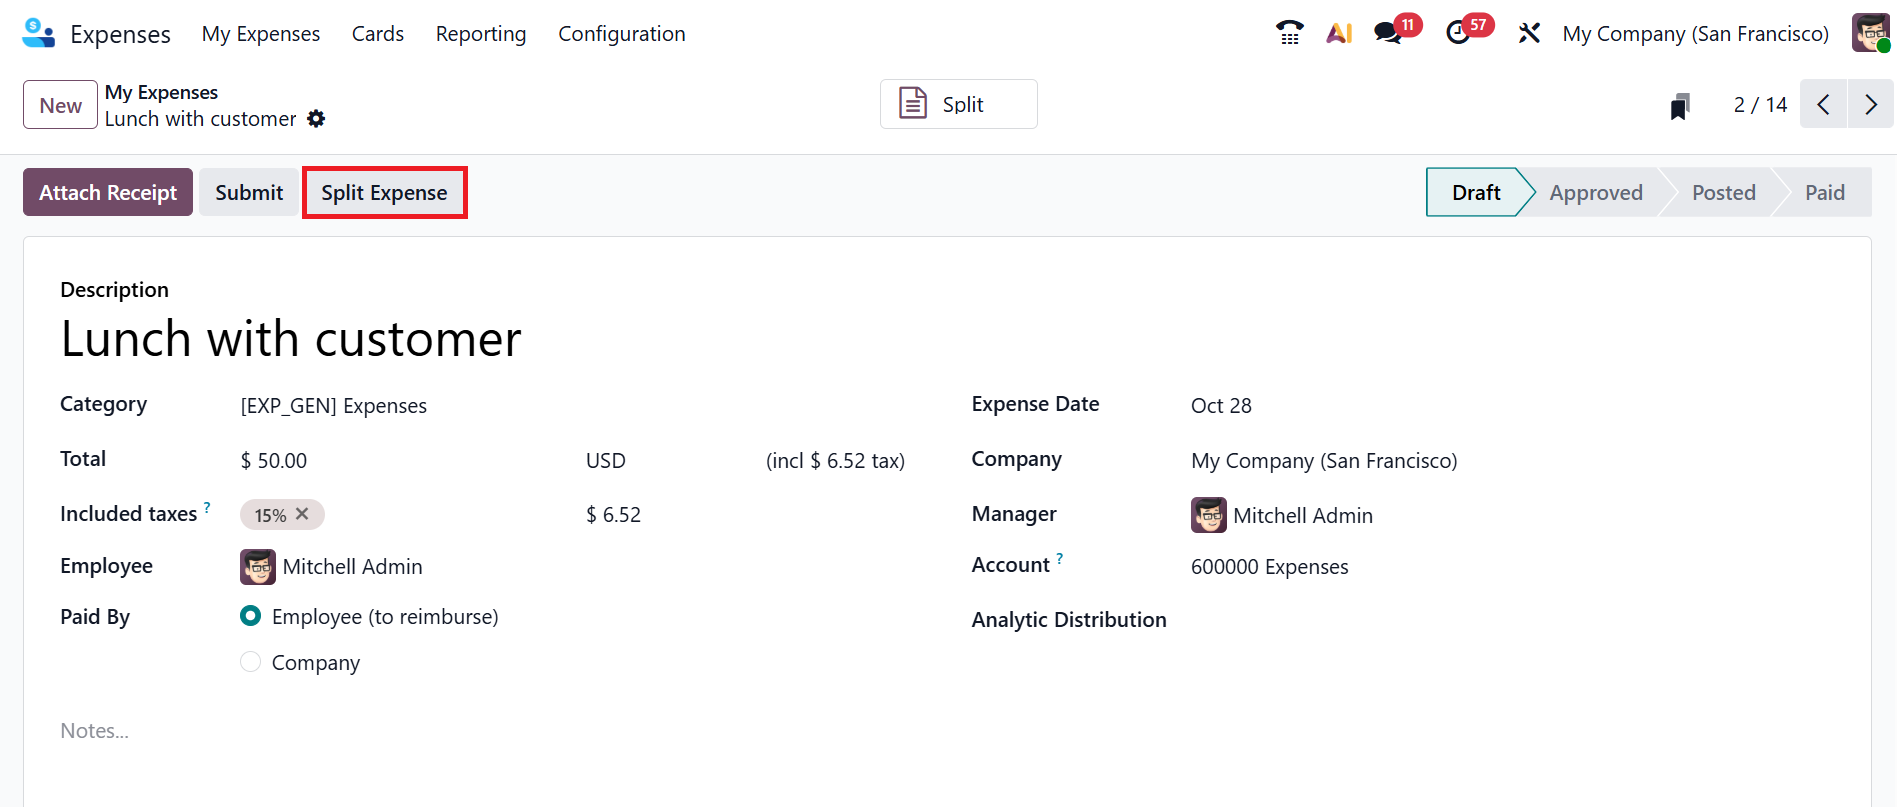
To divide the expense, click the Split Expense button as shown below:
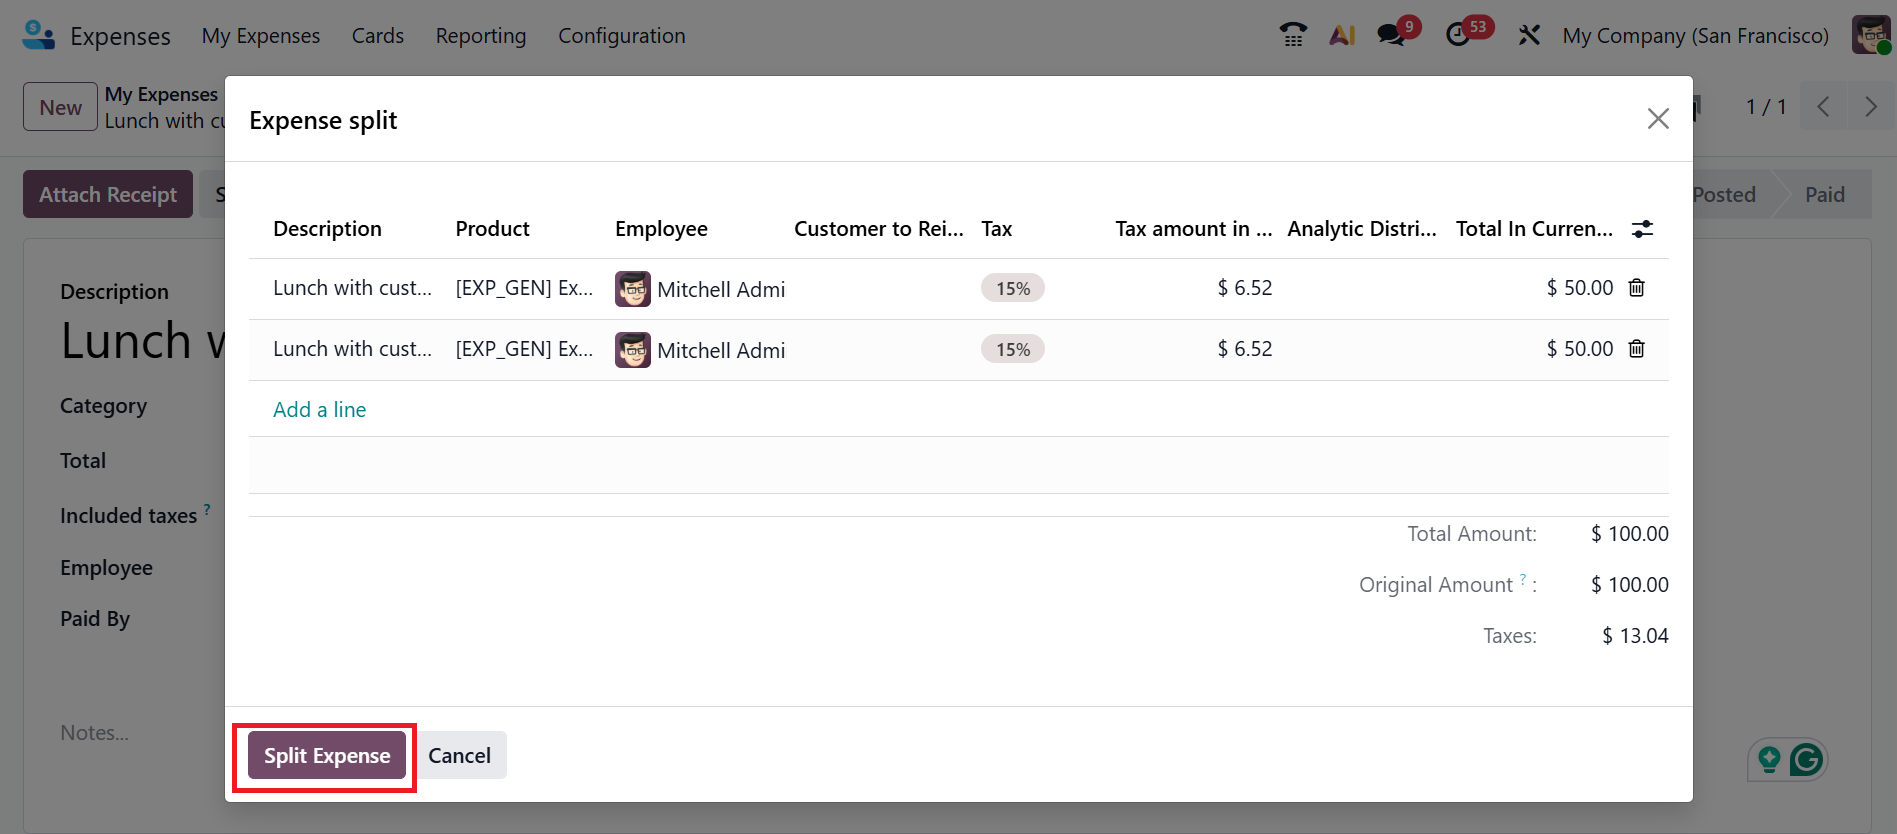
A new pop-up window will appear, where you can view the details of the expense split, such as Description, Product, Employee, Customer to reinvoice, Tax, Tax amount in Currency, Analytic Distribution, and Total In Currency. Click the Split Expense button as shown below.
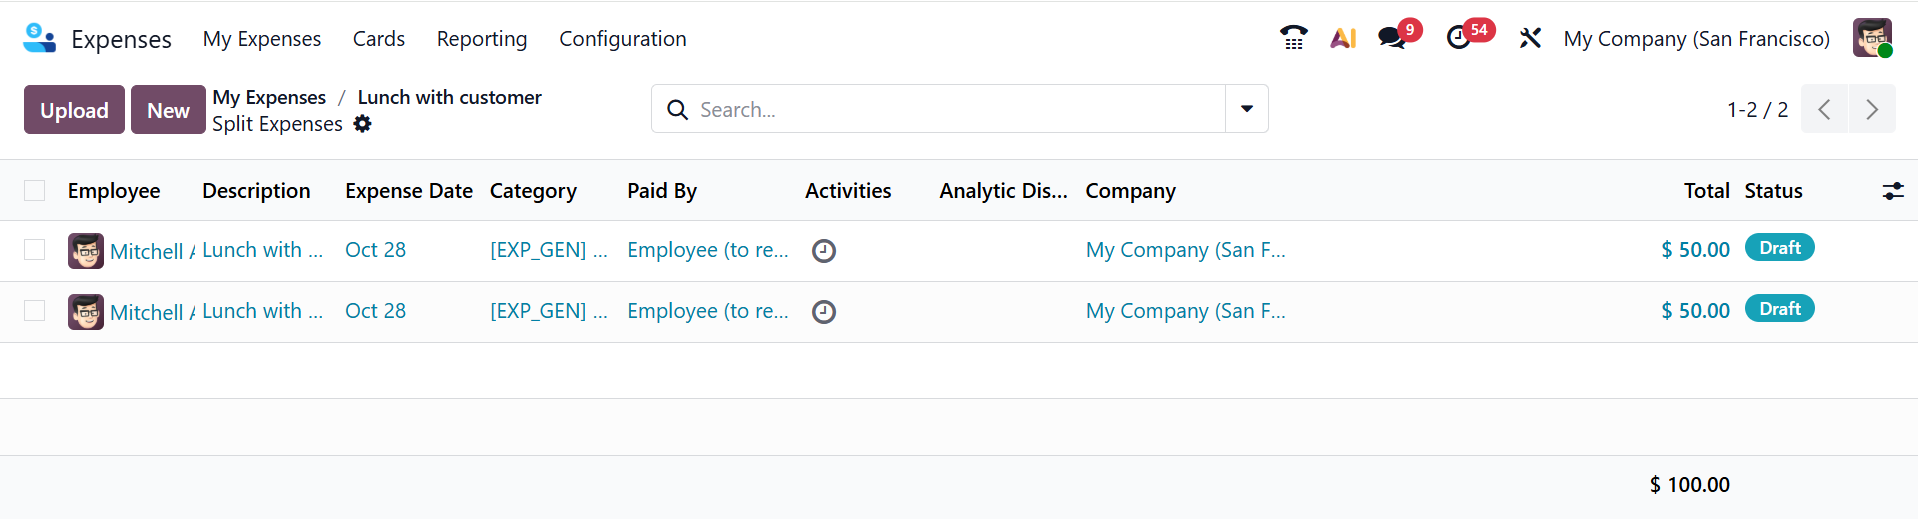
Once clicked, a new window will appear showing the individual amounts for each split expense.
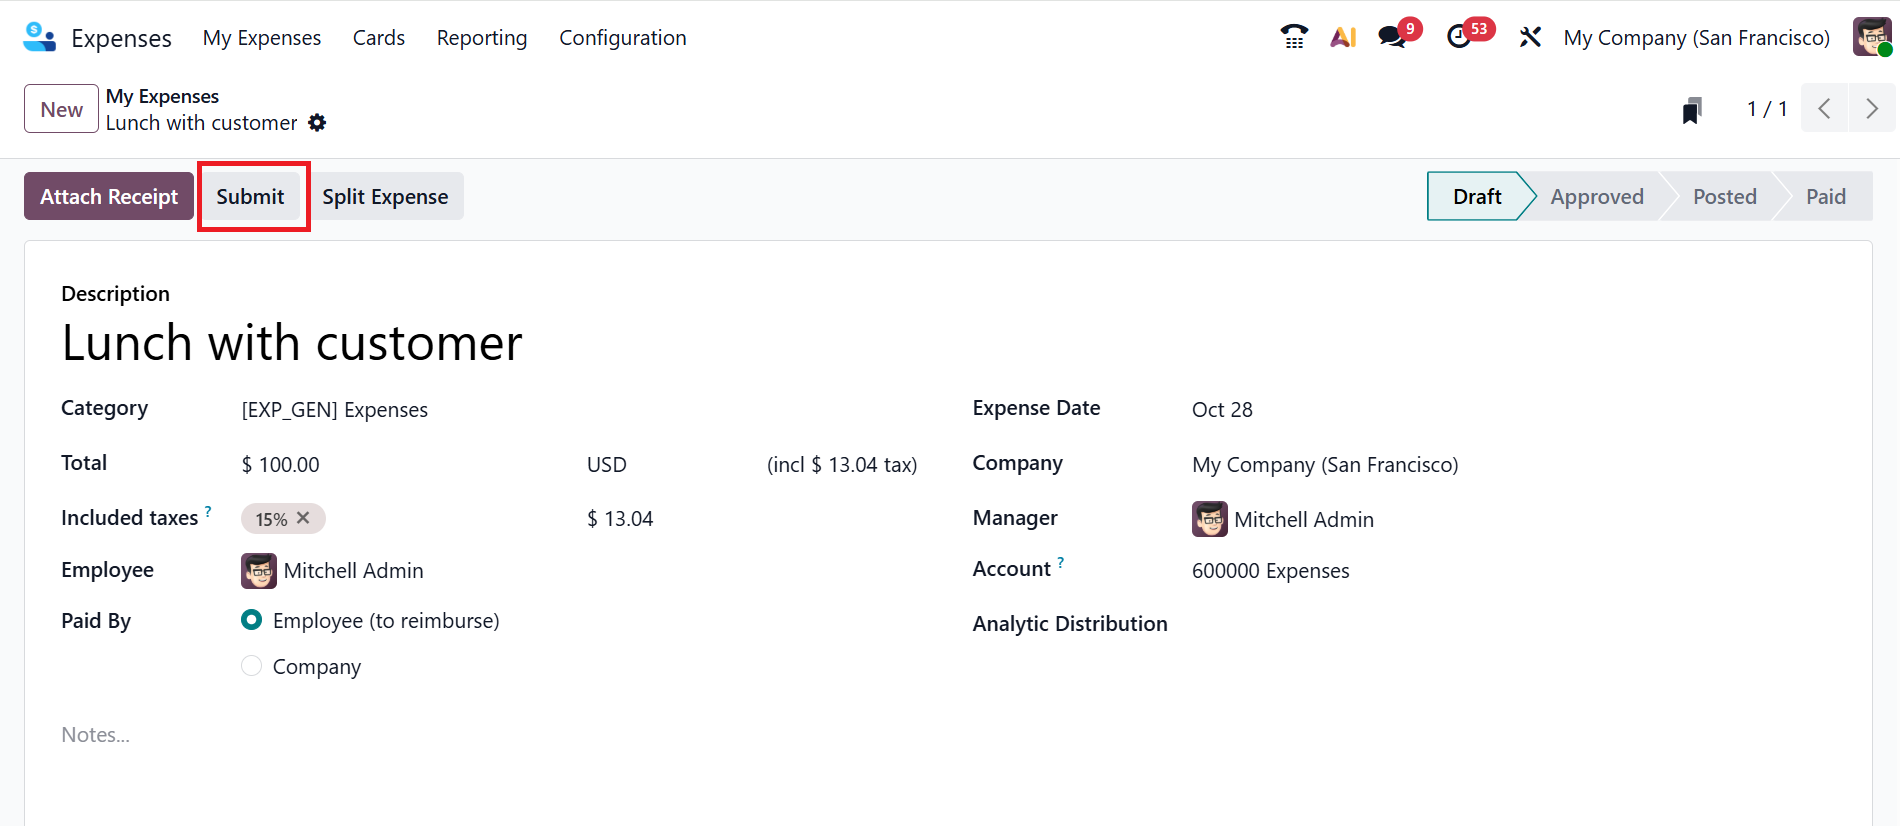
Click on the Submit button to confirm and submit the expense record as shown below:
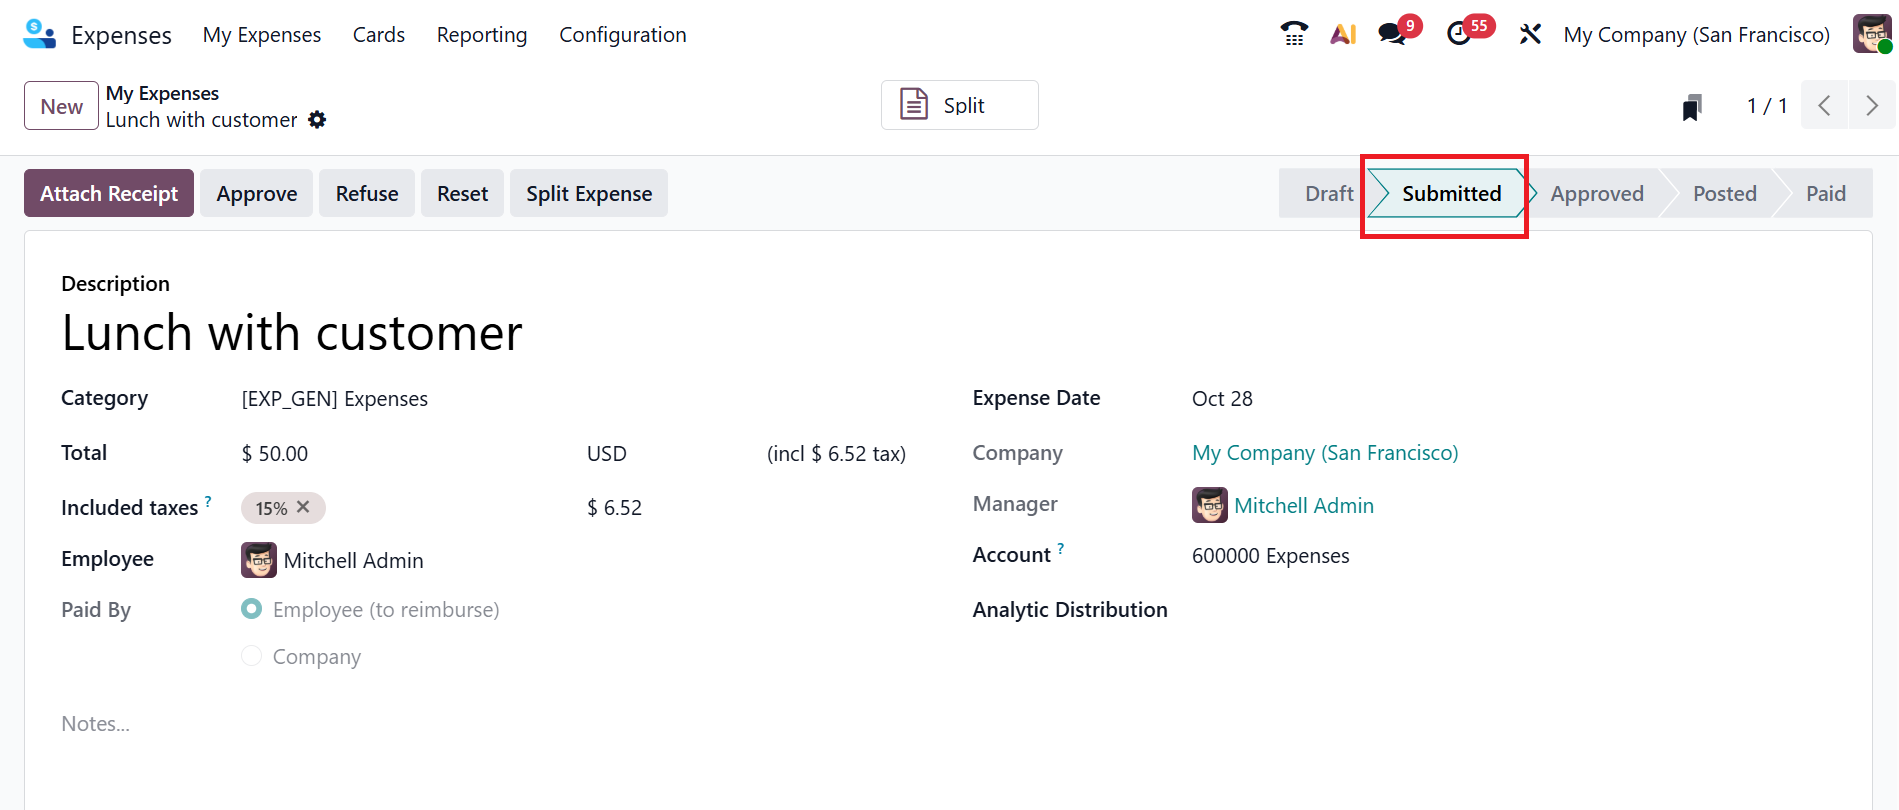
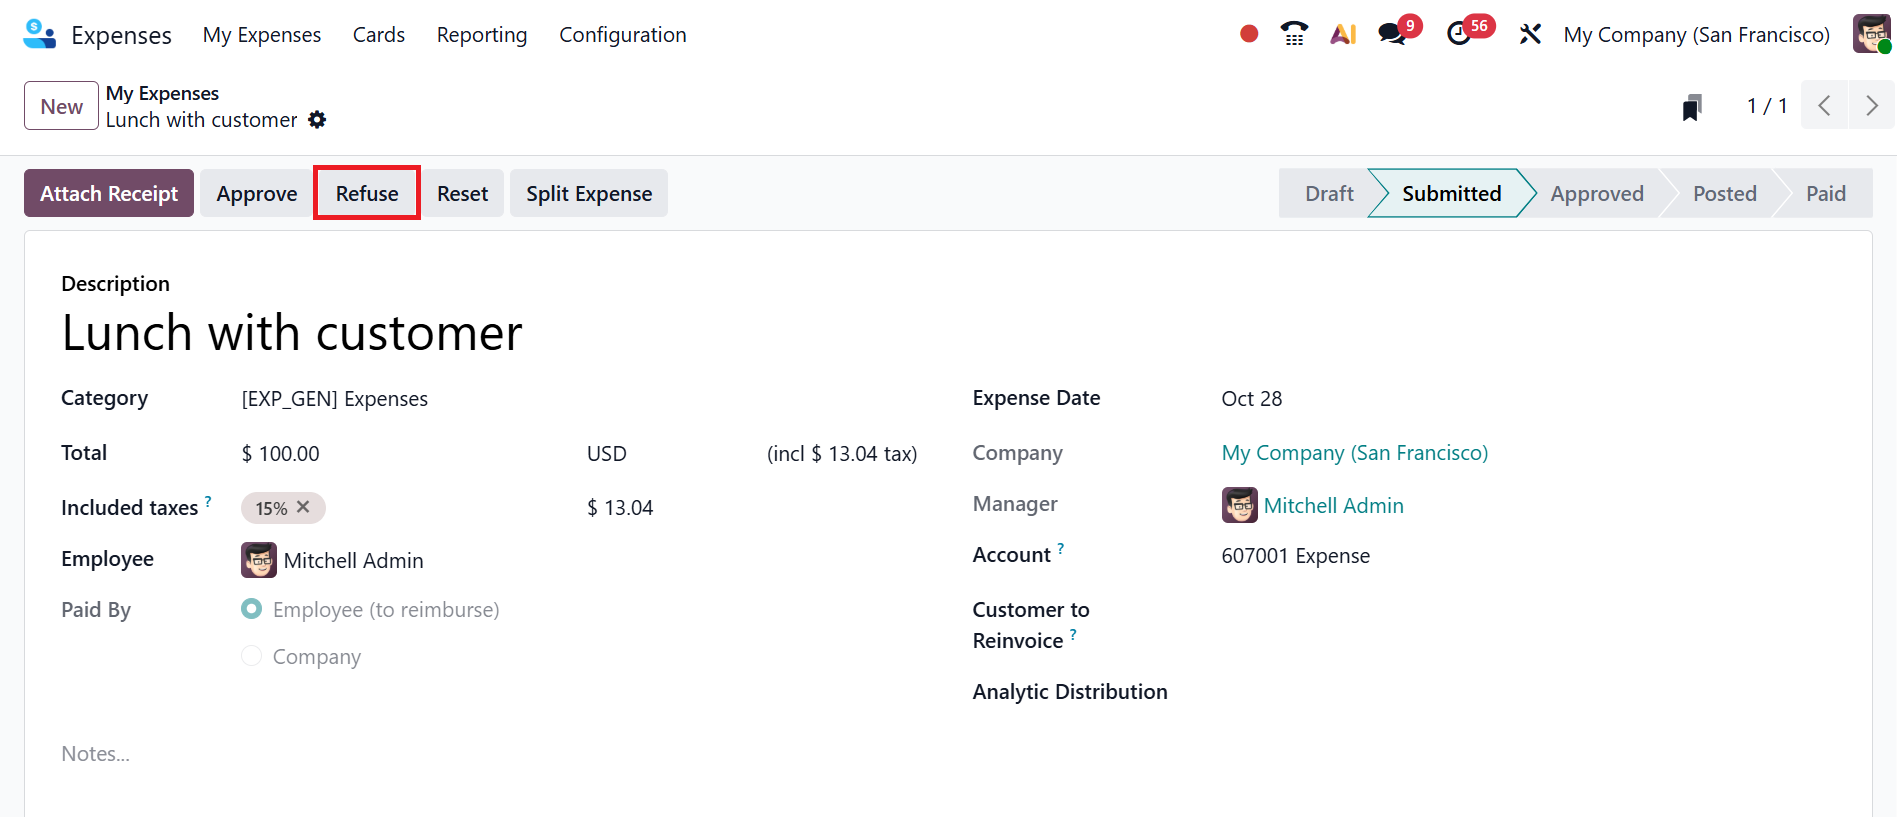
After confirmation, the expense report is moved to the Submitted stage from the Draft stage as shown below:
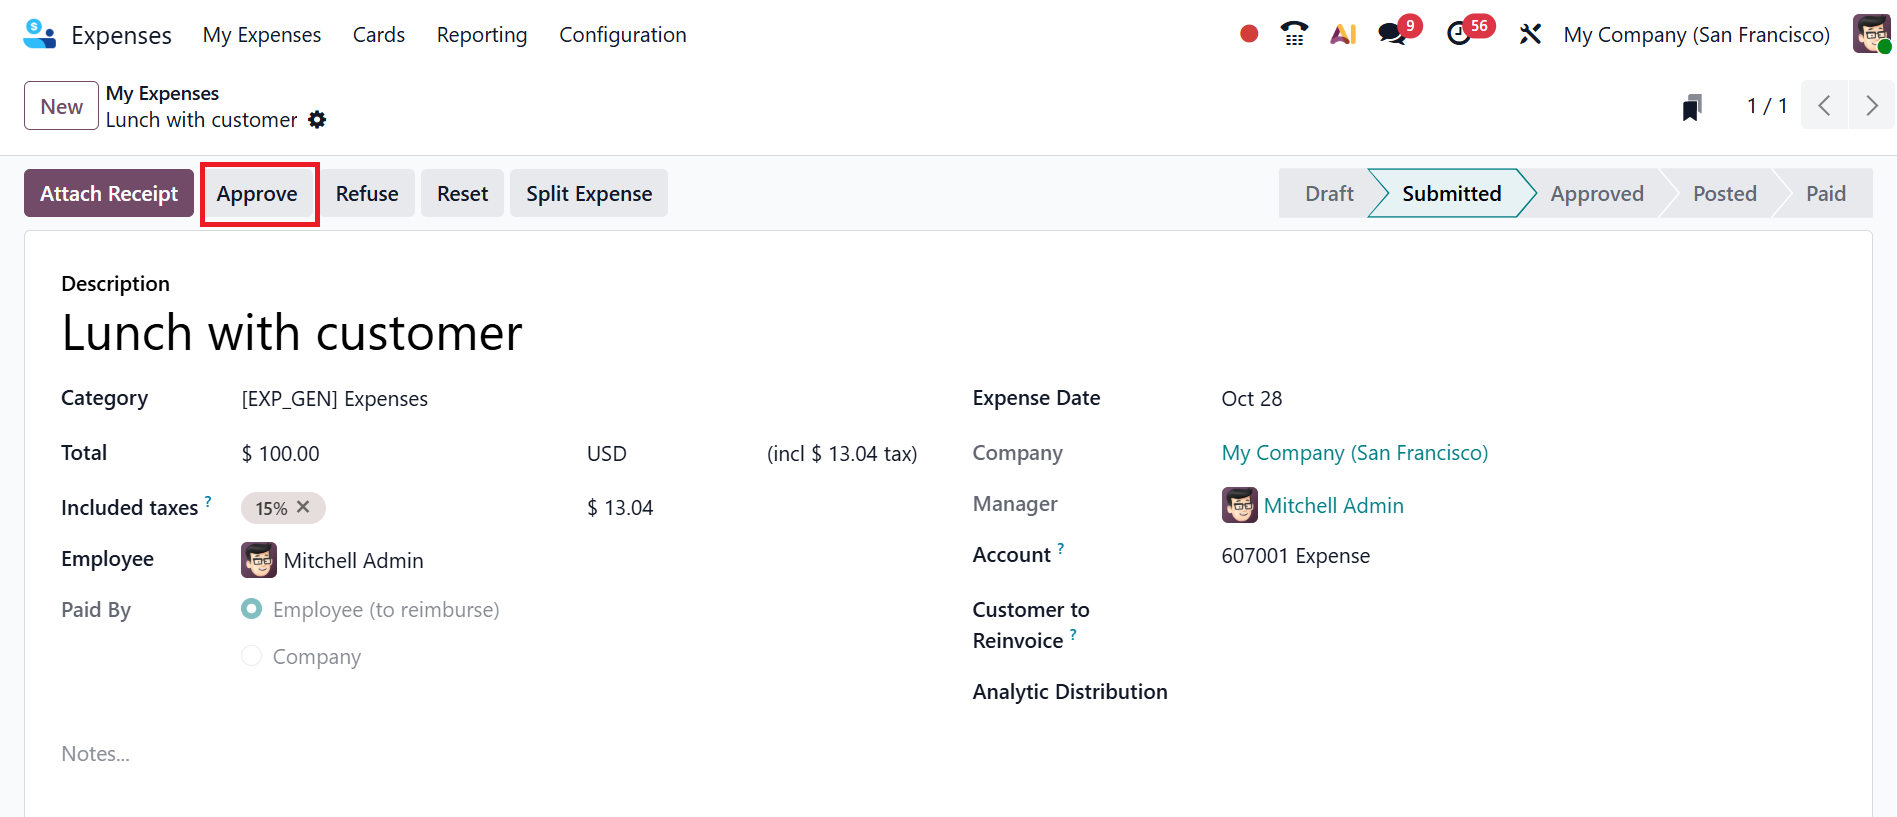
After submitting the report, managers can either Approve, Refuse, or Reset it.
To approve the submitted expense report, click on the Approve button as shown below:
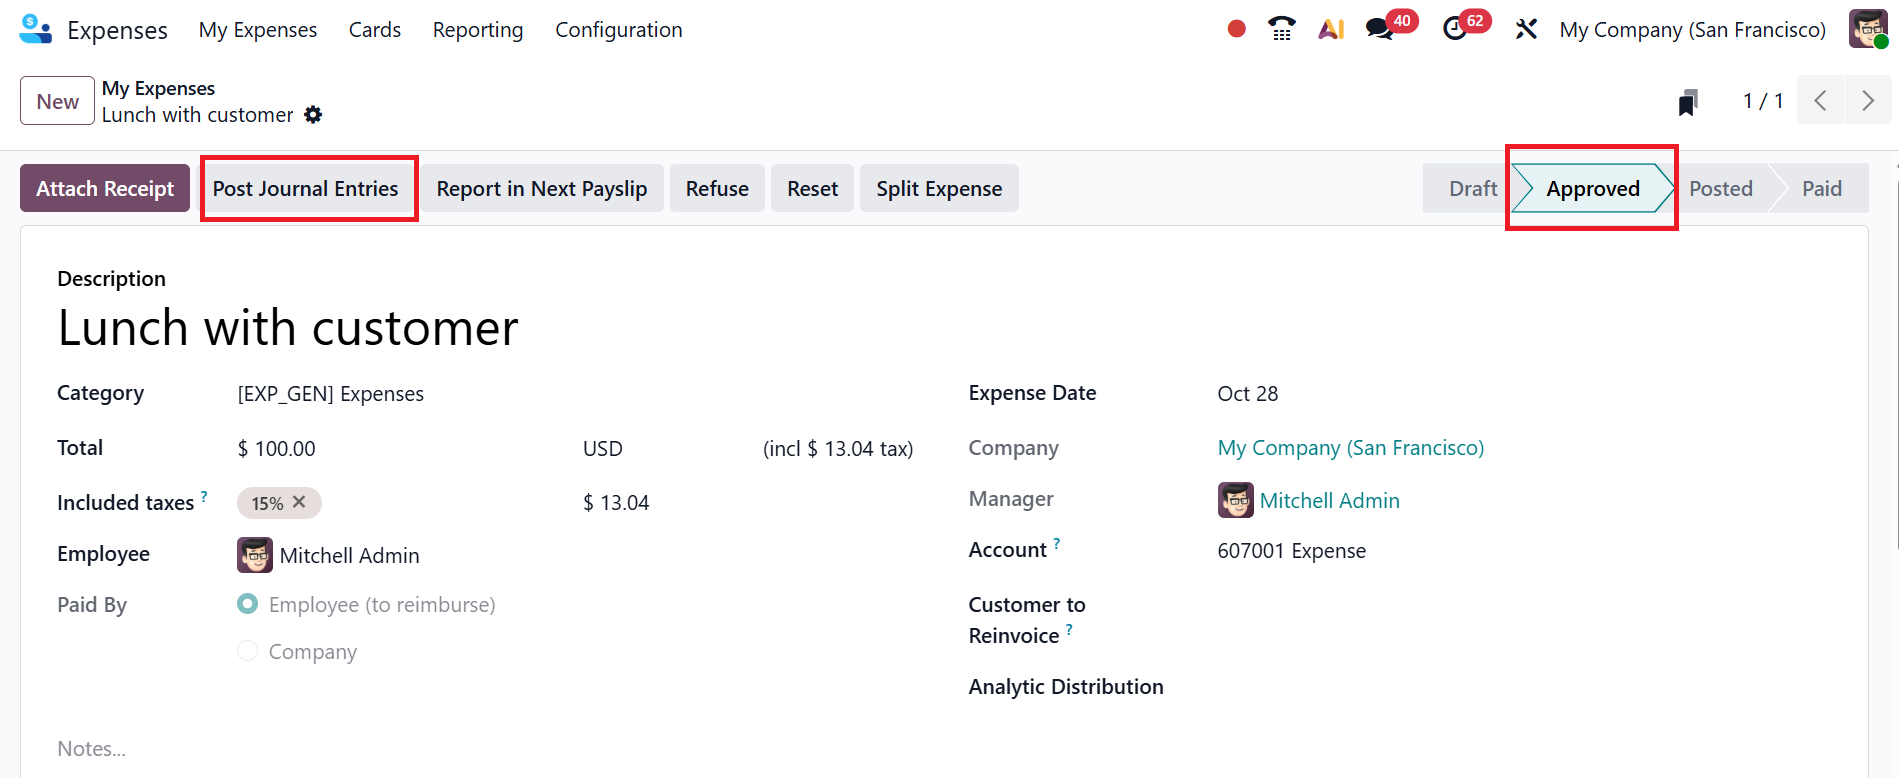
Then, you can see the expense report is in the Approved stage. Select the Post Journal Entries button to post the expenses to the appropriate accounting journal.
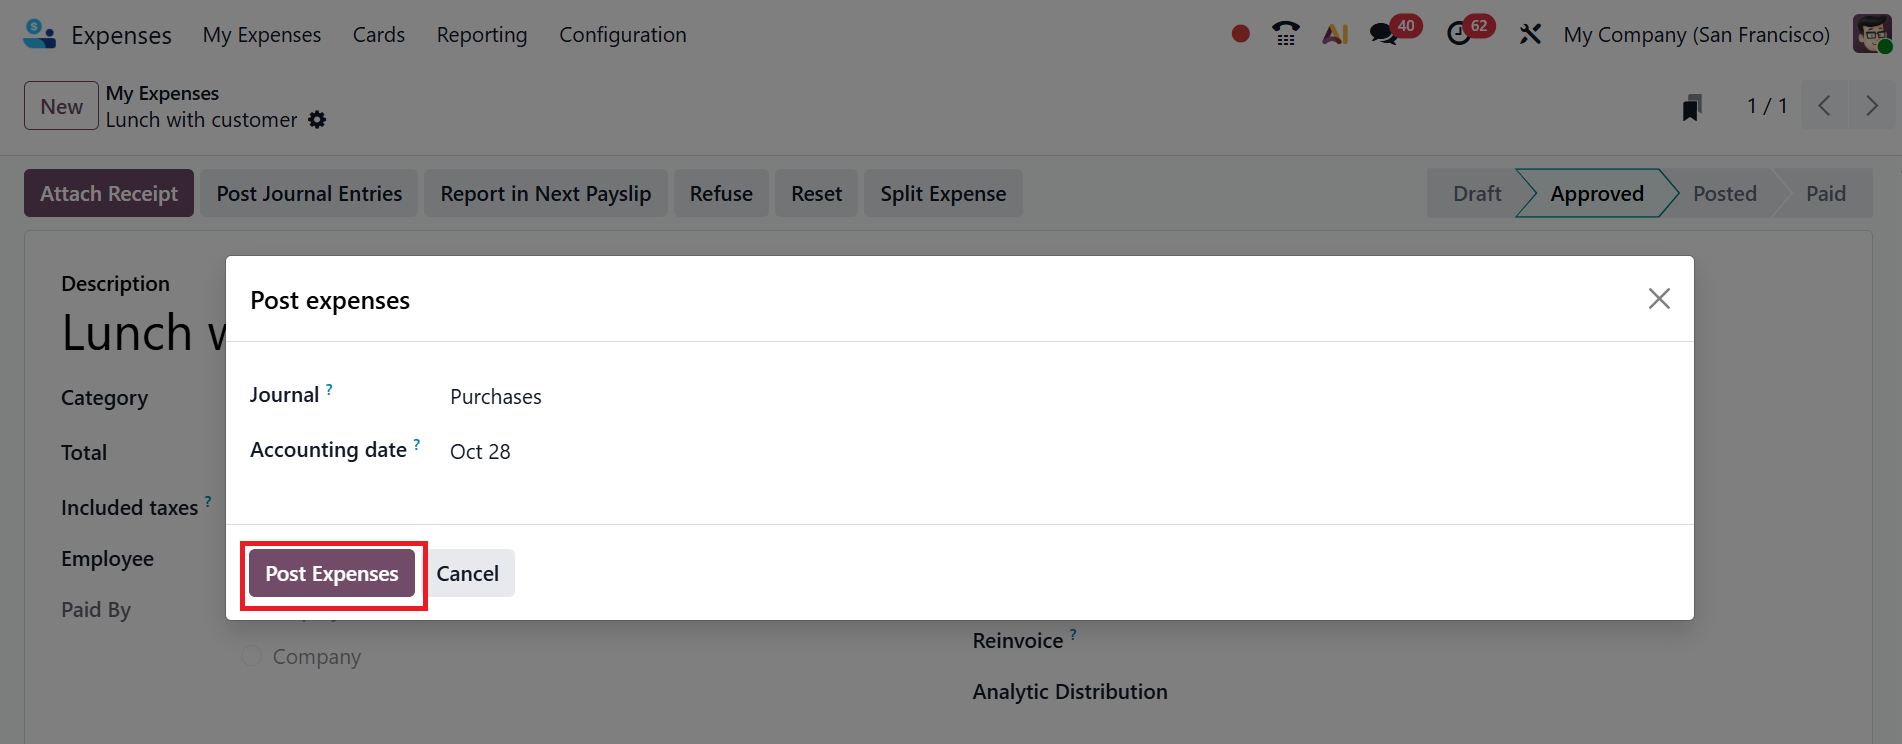
A pop-up screen will appear, where you can add a journal used when the expense is paid by the employee in the Journal field. Specify the bill date of the related vendor bill in the Accounting Date field and click on the Post Expenses button as shown below:
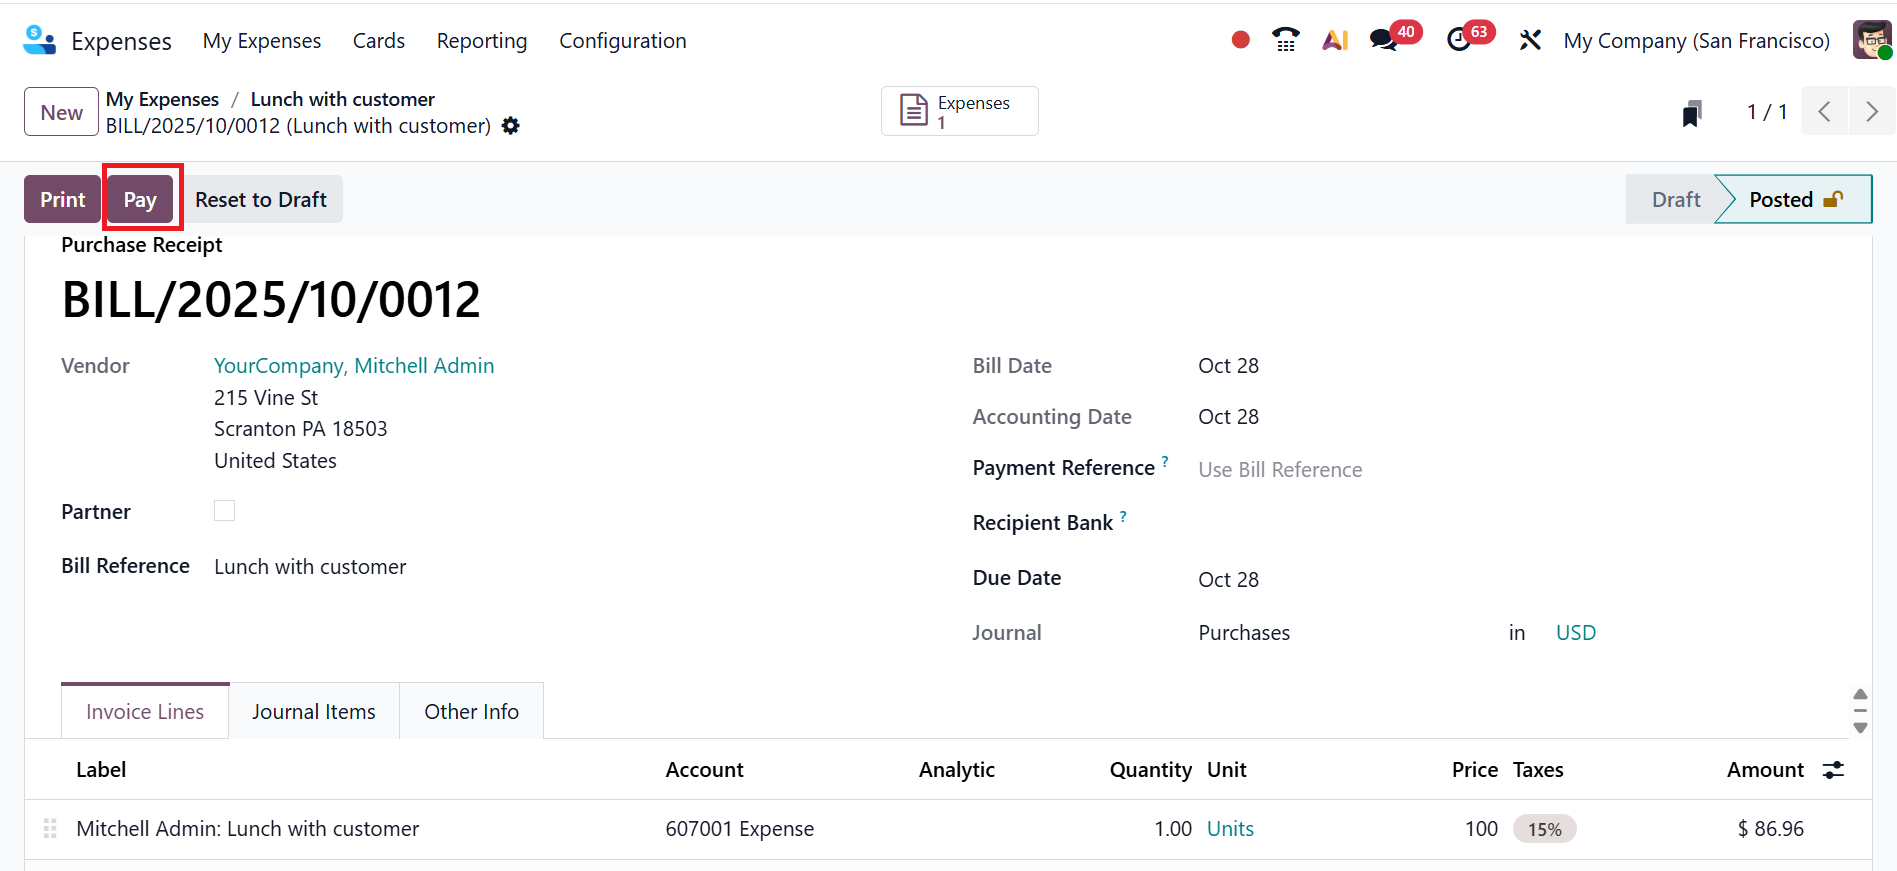
Here, you can see the bill is in the Posted stage, and click on the Pay button to pay the bill.
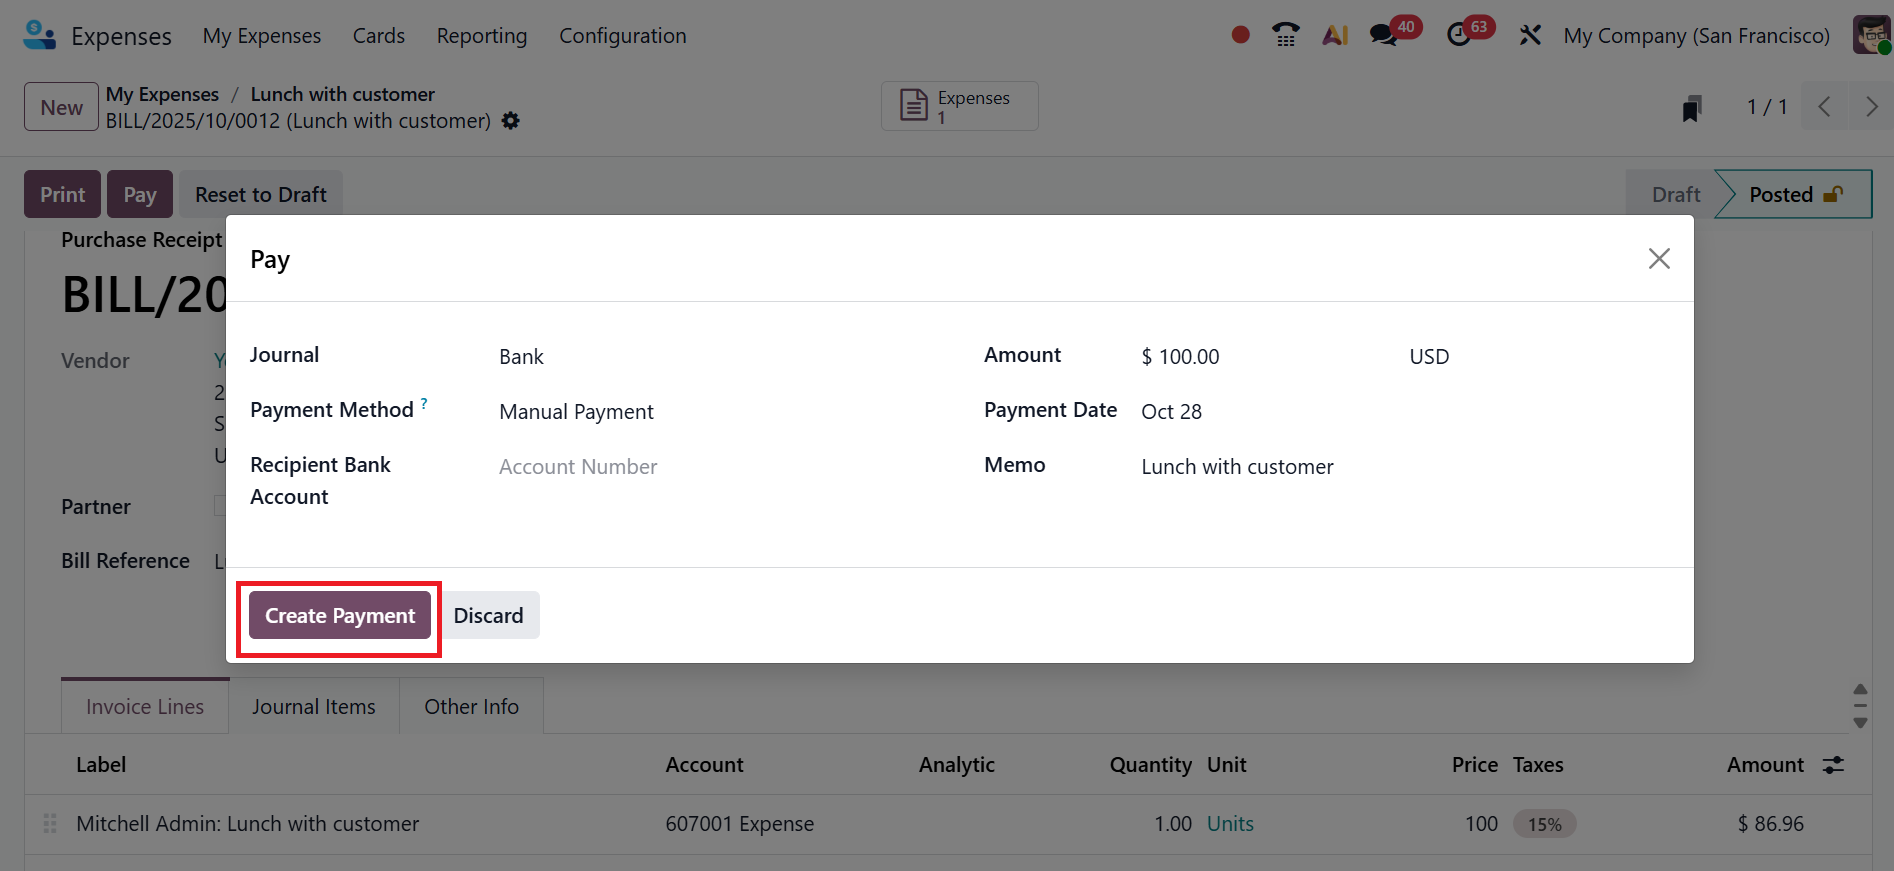
A pop-up screen will appear, where you see the payment details and click on the Create Payment button to make a payment, as shown below:
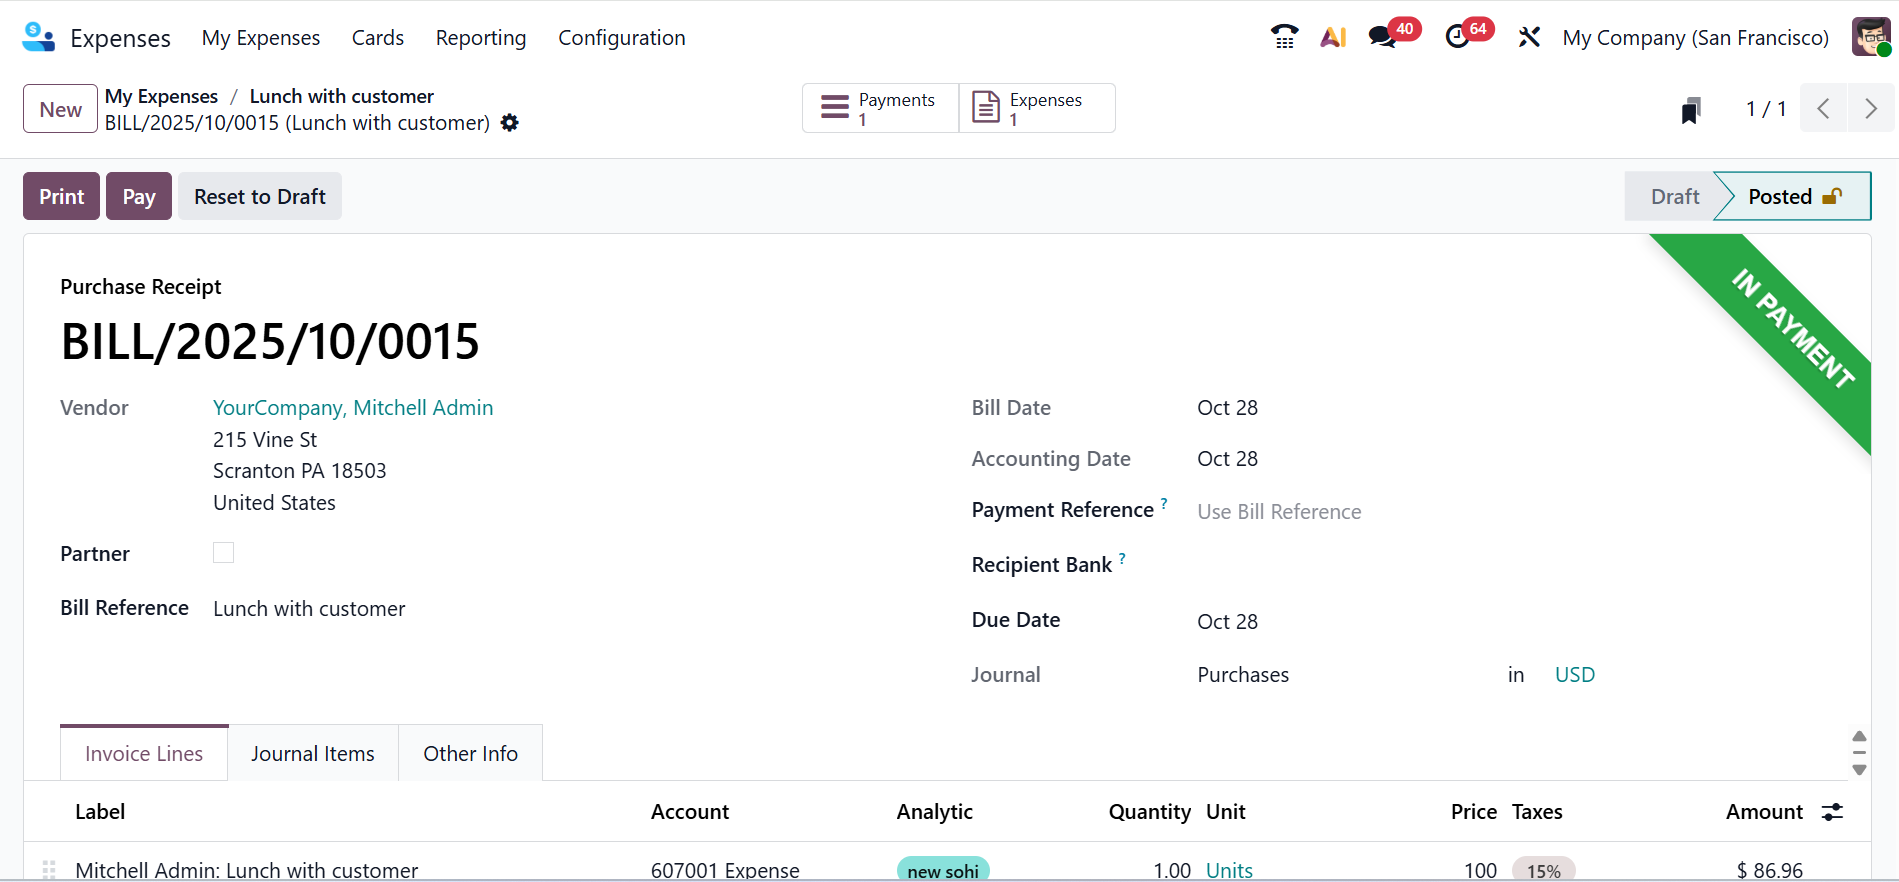
And finally, you can see the bill is in the In Payment stage.
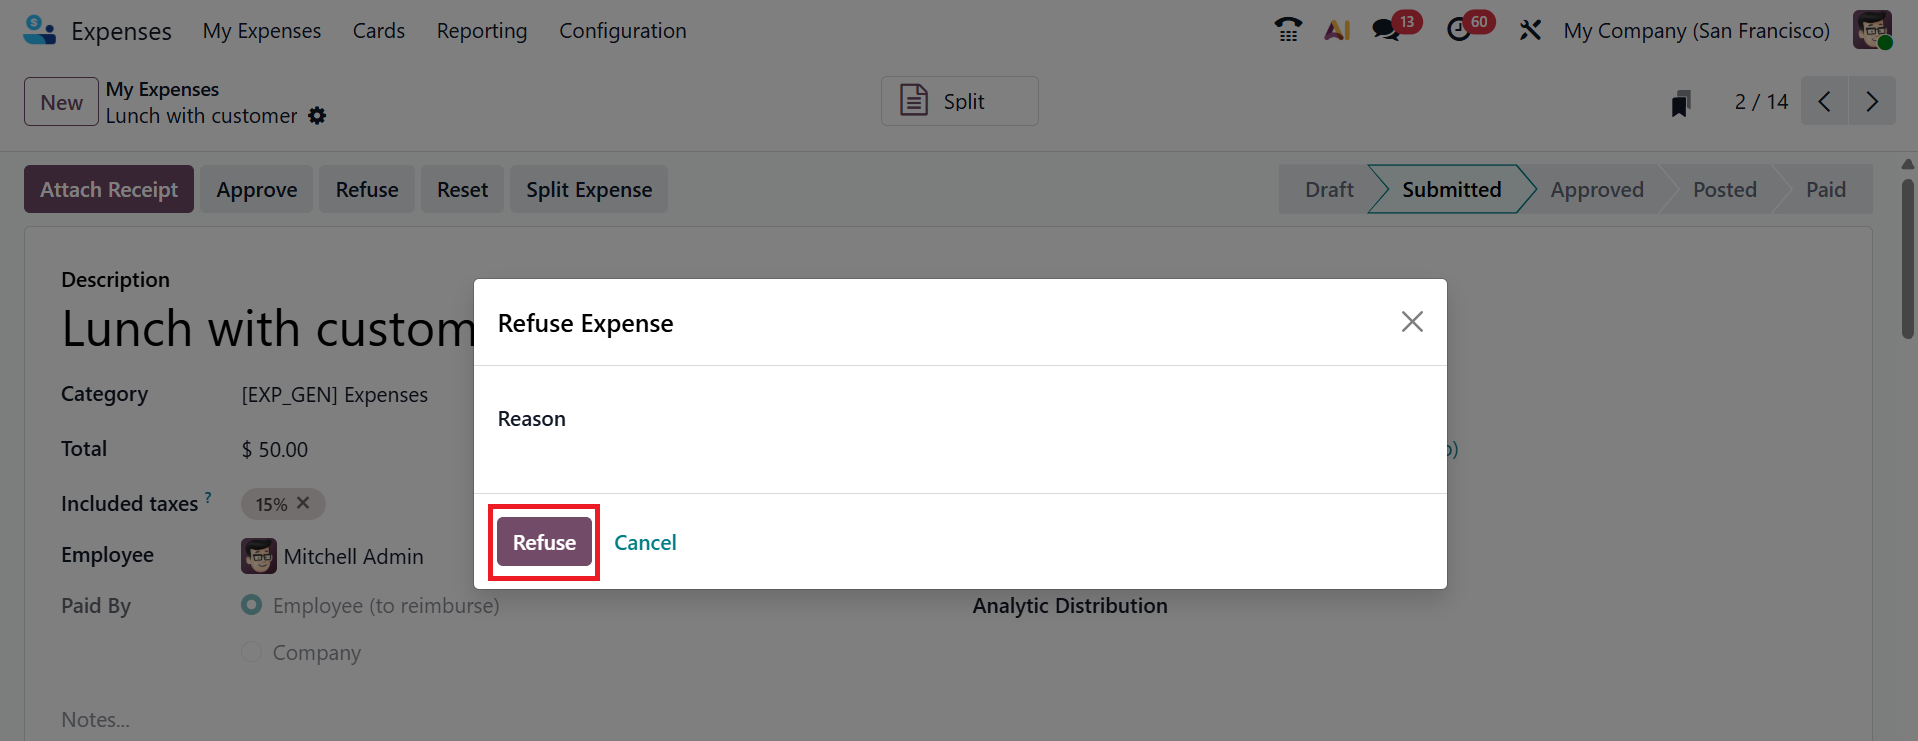
To refuse the submitted expense report, click on the Refuse button as shown below:
A new pop-up screen will appear, where you can add a reason to refuse the expense. Then, click on the Refuse button as shown below:
Here, you can see the expense report is in the Refused stage.

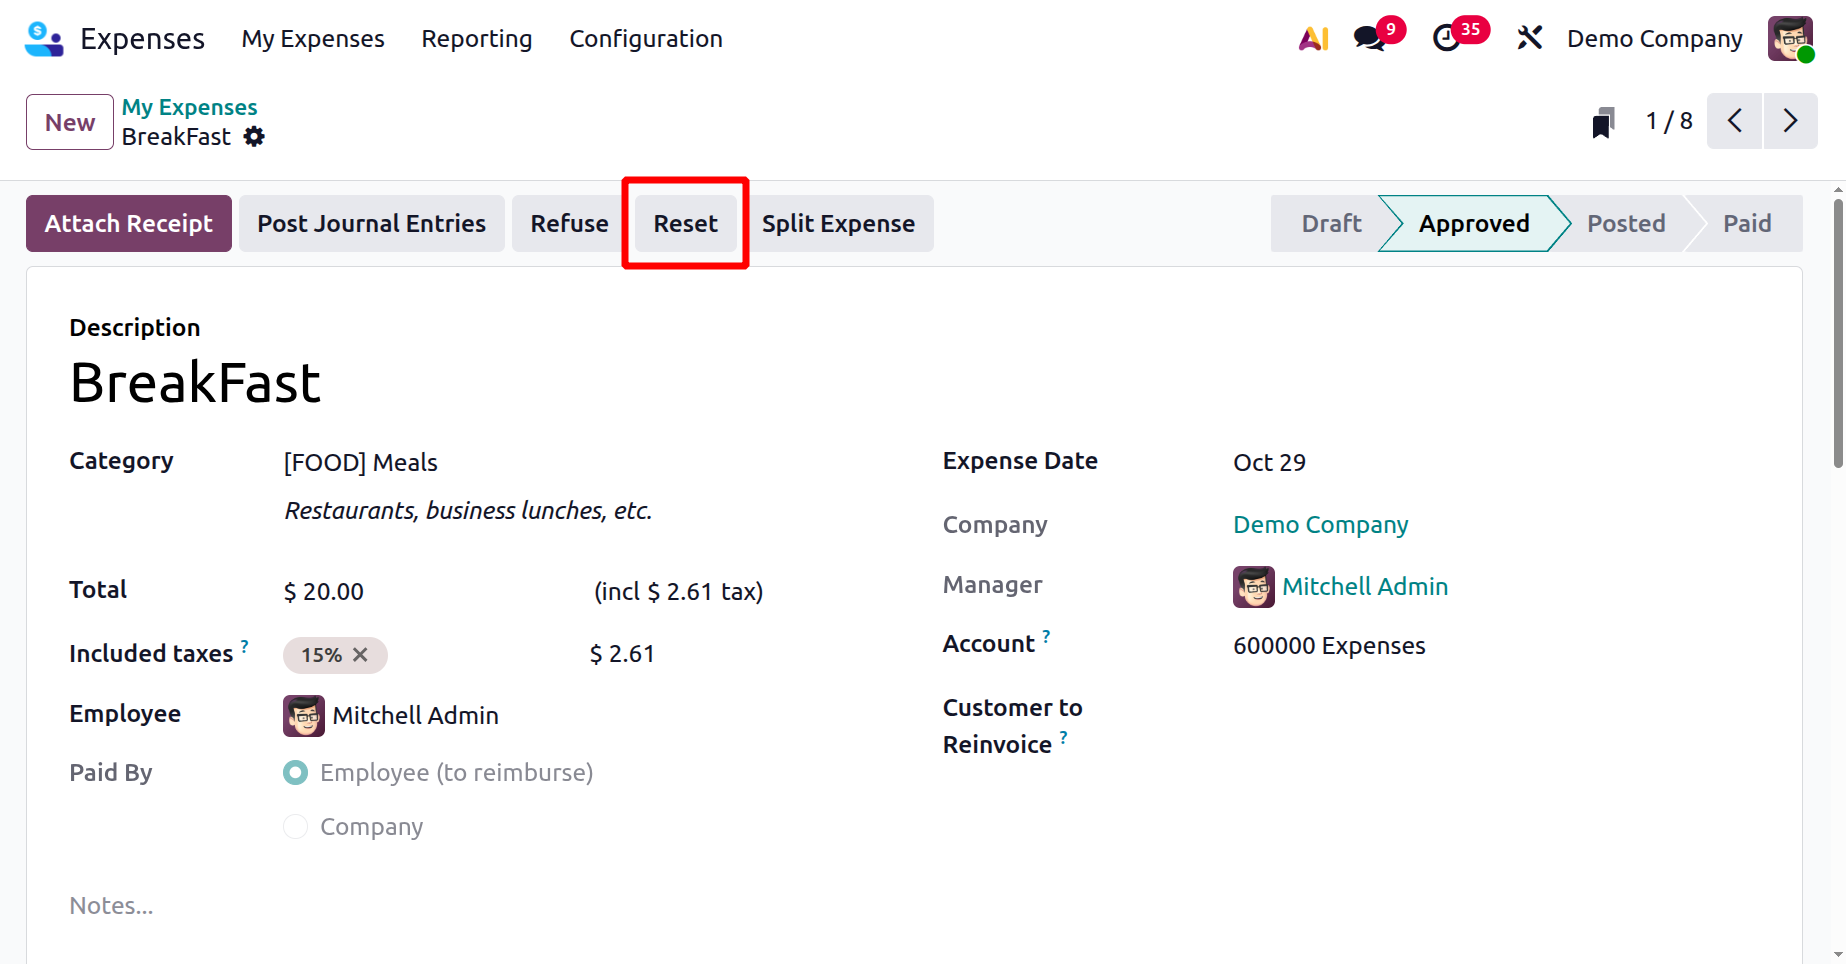
Click the Reset button to clear and restart the entire expense. When you enable the Reimburse in Payslip option under the Settings menu, you can add payments to the next payslip.
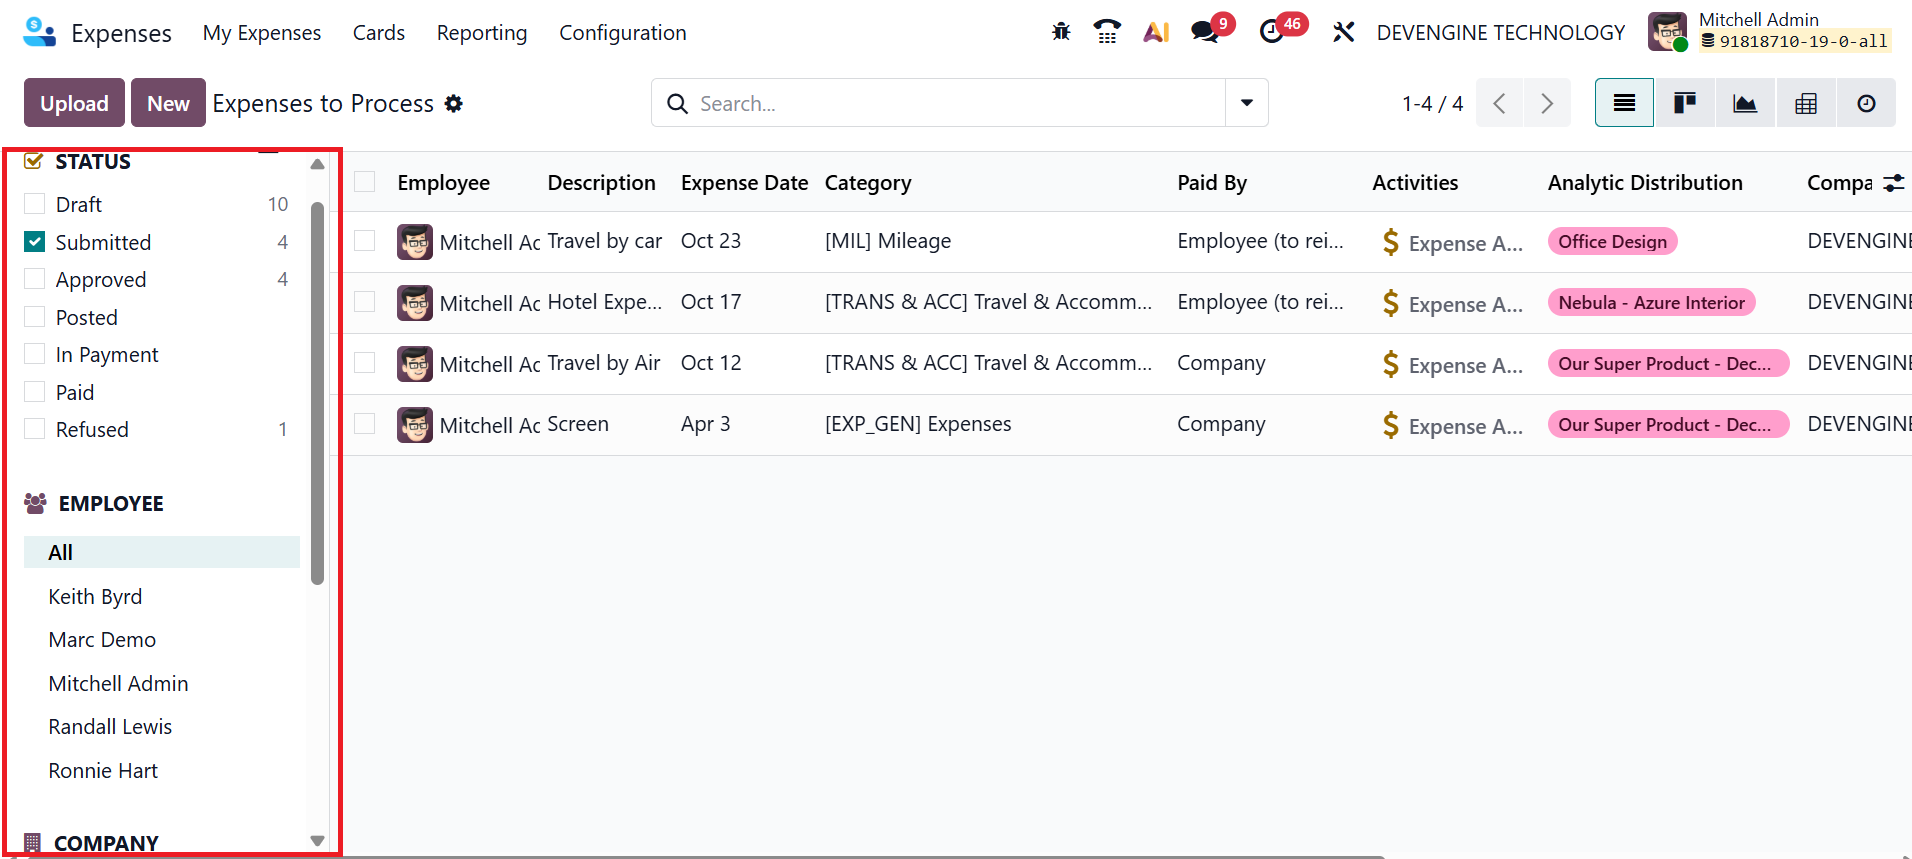
1.2 Expenses to Process:
The Expenses to Process option in Odoo 19 displays all submitted employee expenses awaiting approval, validation, or payment. It helps managers and accountants efficiently review, approve, or reimburse pending expenses. To upload a receipt, click the Upload button; to create a new expense report manually, click the New button, as explained in the above section. By default, expense records are displayed in List view. You can also change the view to Kanban, Graph, Calendar, or Activity.
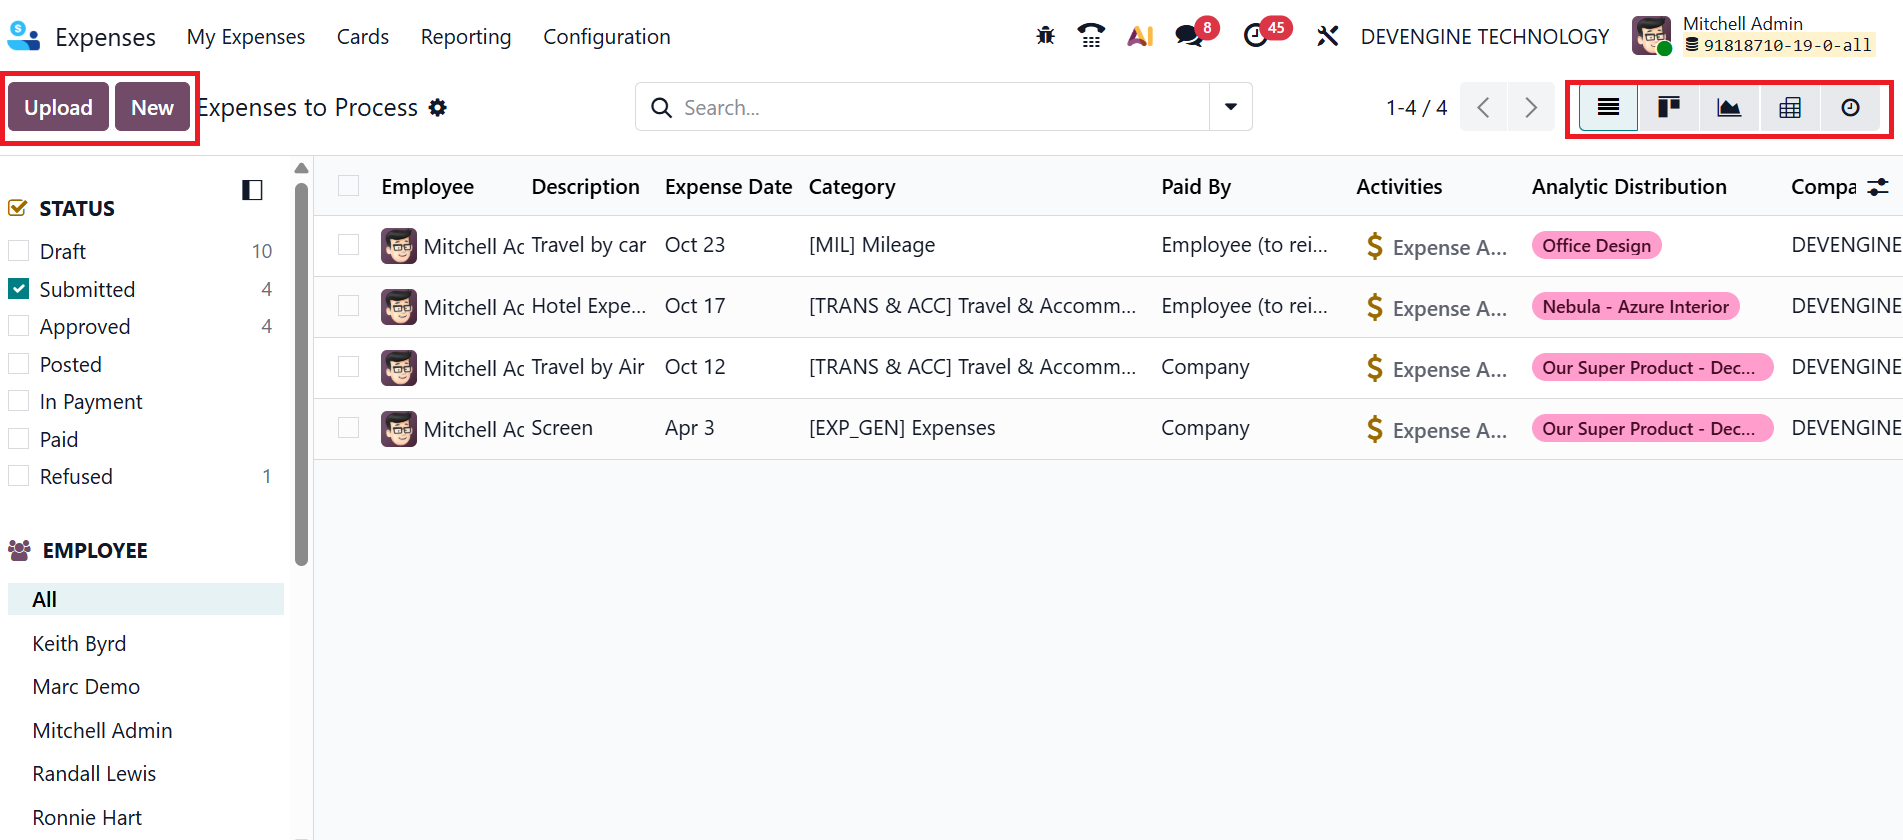
To sort the expense reports, select one of the three options on the left side of the screen: Status, Employee, or Company. The Status list helps for a quick filter to show expenses by stage. The Employee list shows the list of selected employees’ expenses. The Company list helps to filter the expense records by company.