My Task
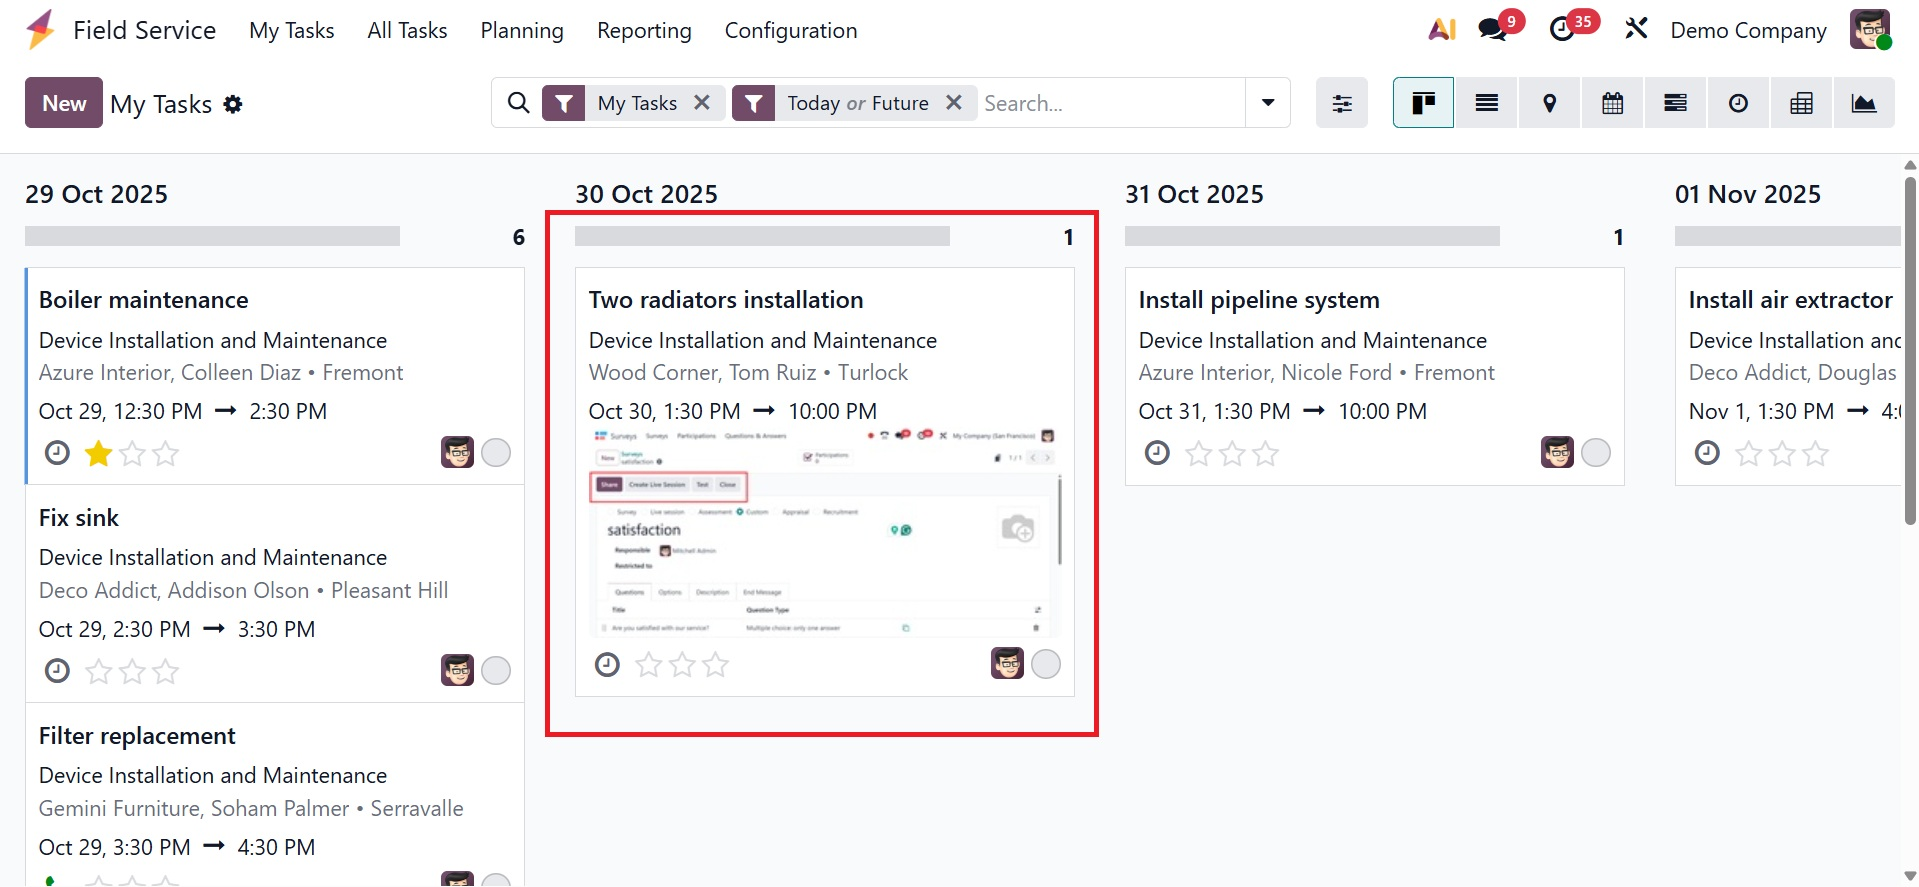
The "My Tasks" panel will show up when the Field Service module is launched, as seen in the screenshot below.
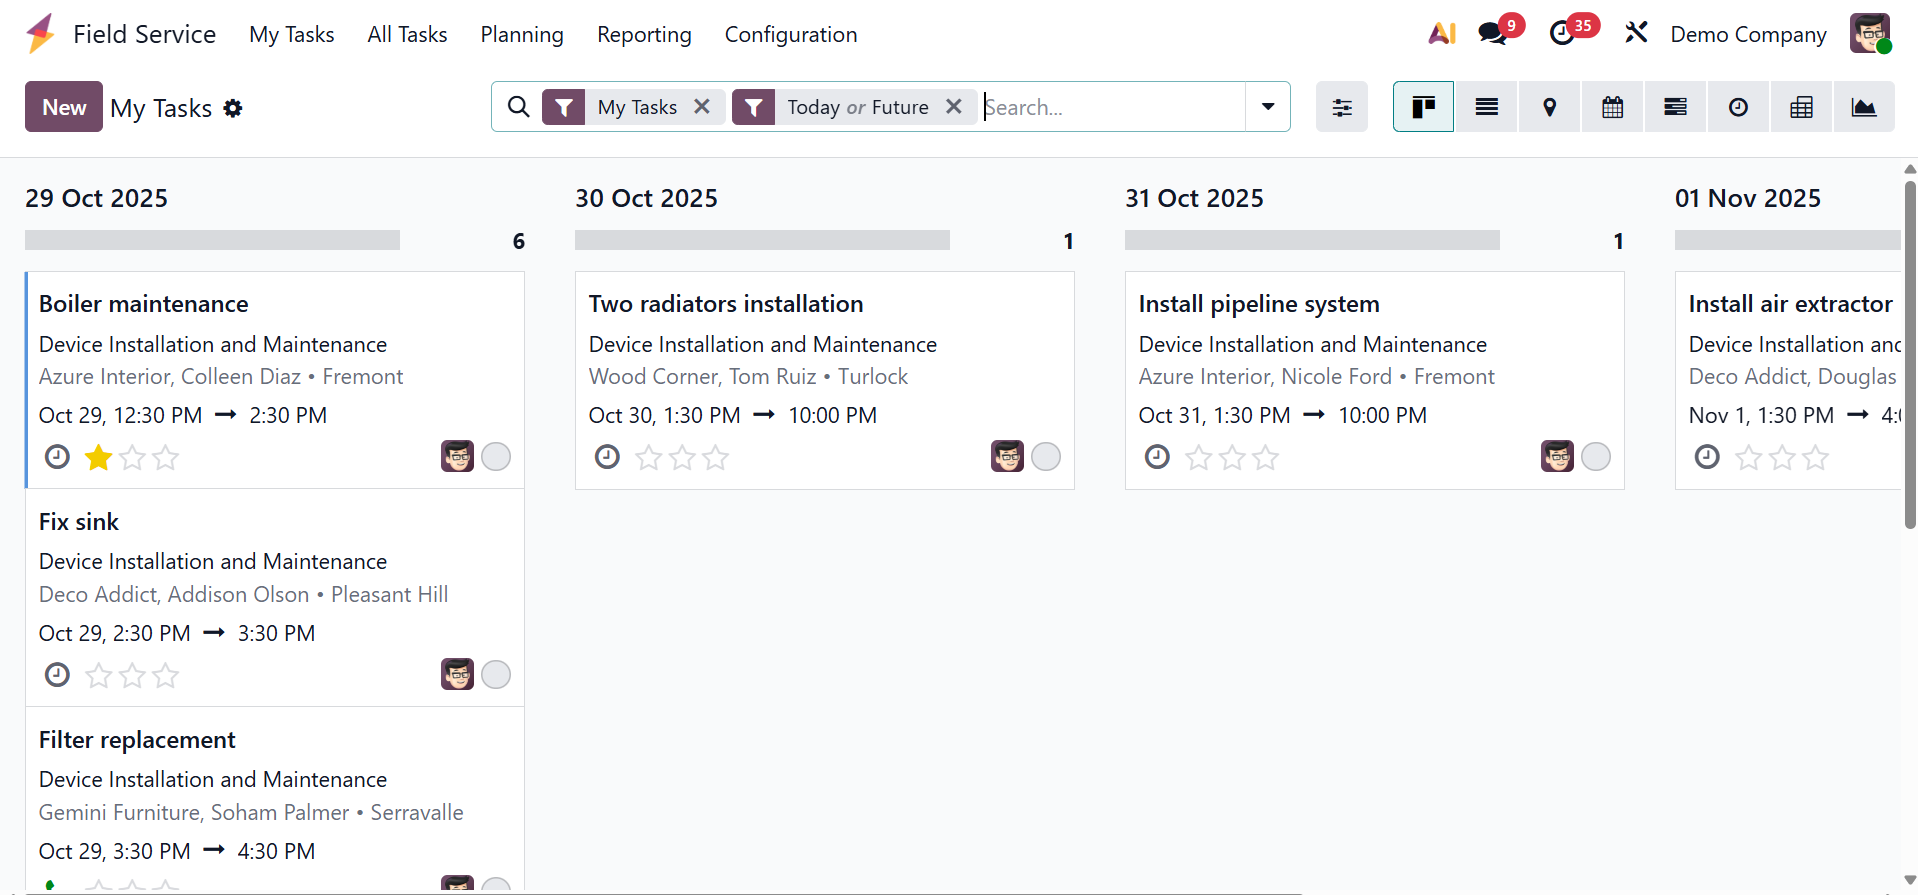
This window will show your assigned tasks in a Kanban style, enabling work management according to scheduled dates. My Tasks, Unassigned, Blocking, Favorite Projects, Timesheets 80%, Timesheets greater than 100%, Creation date, Open, Closed, Closed On, and Template are some of the filters available in this page. Predefined categories, such as Assignees, Stage, Project, Worksheet Template, Milestone, Priority, Tags, Customer, Company, ZIP, City, Creation Date, Start Date, and Last Stage Update, can be used to categorize tasks.

Kanban, List, Map, Calendar, Gantt, Pivot, Graph, and Activity views are just a few of the views available on the platform. Task information will be displayed, including name, customer, allocated staff, tags, and dates. Use the star icon to prioritize tasks.
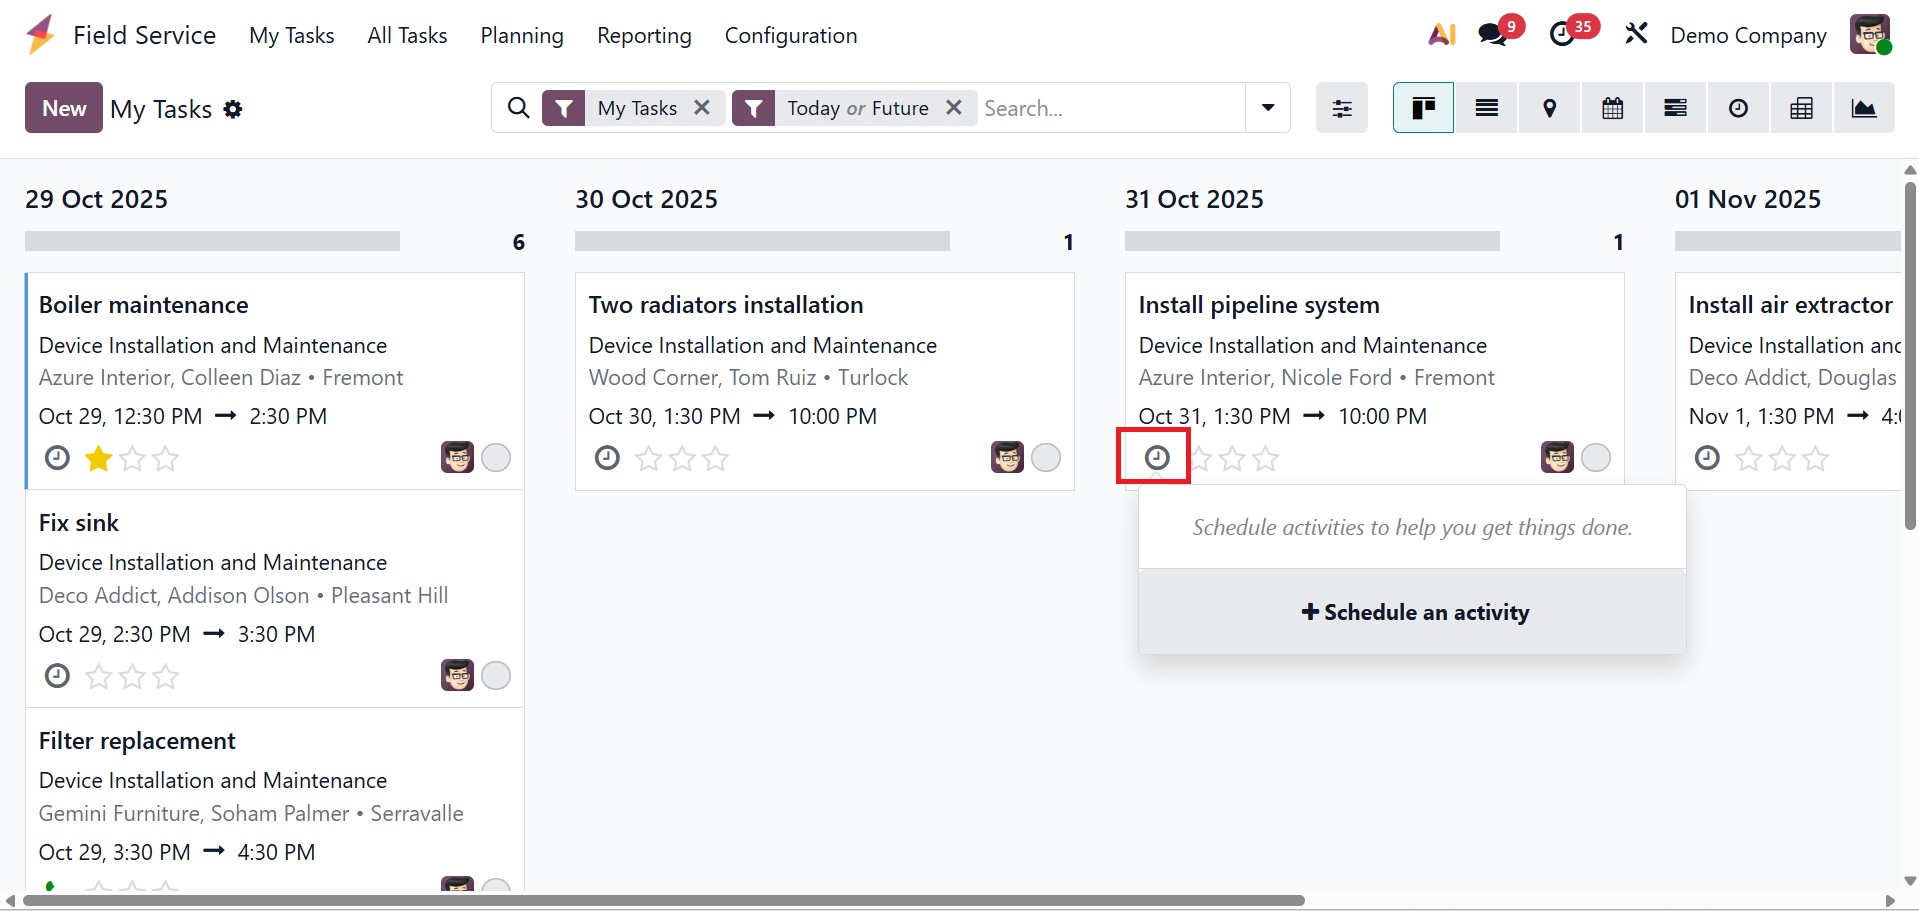
New activities can be scheduled using the time symbol on each assignment, as shown below.
As seen in the screenshot below, this pane makes direct staff assignments easier by offering room to add new workers to projects.

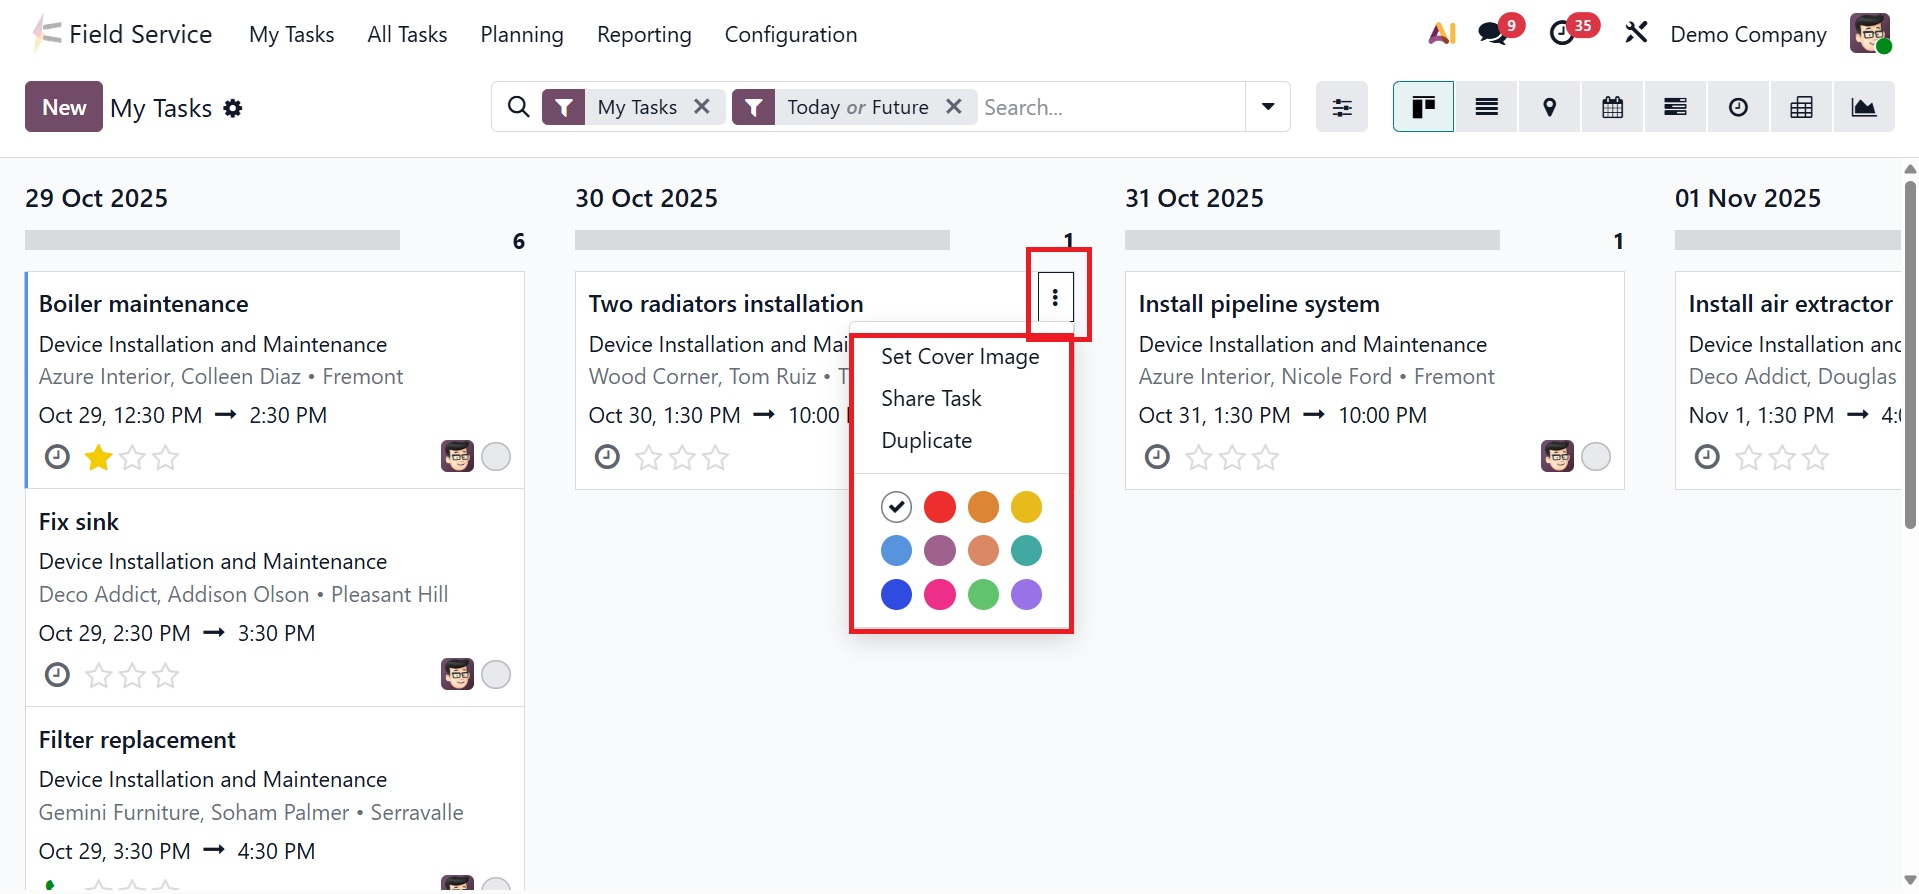
The "Schedule" button or the three vertical dots in the upper-right corner of each task allow you to access options like "Set Cover Image," "Share Task," and "Duplicate" after entering the data.
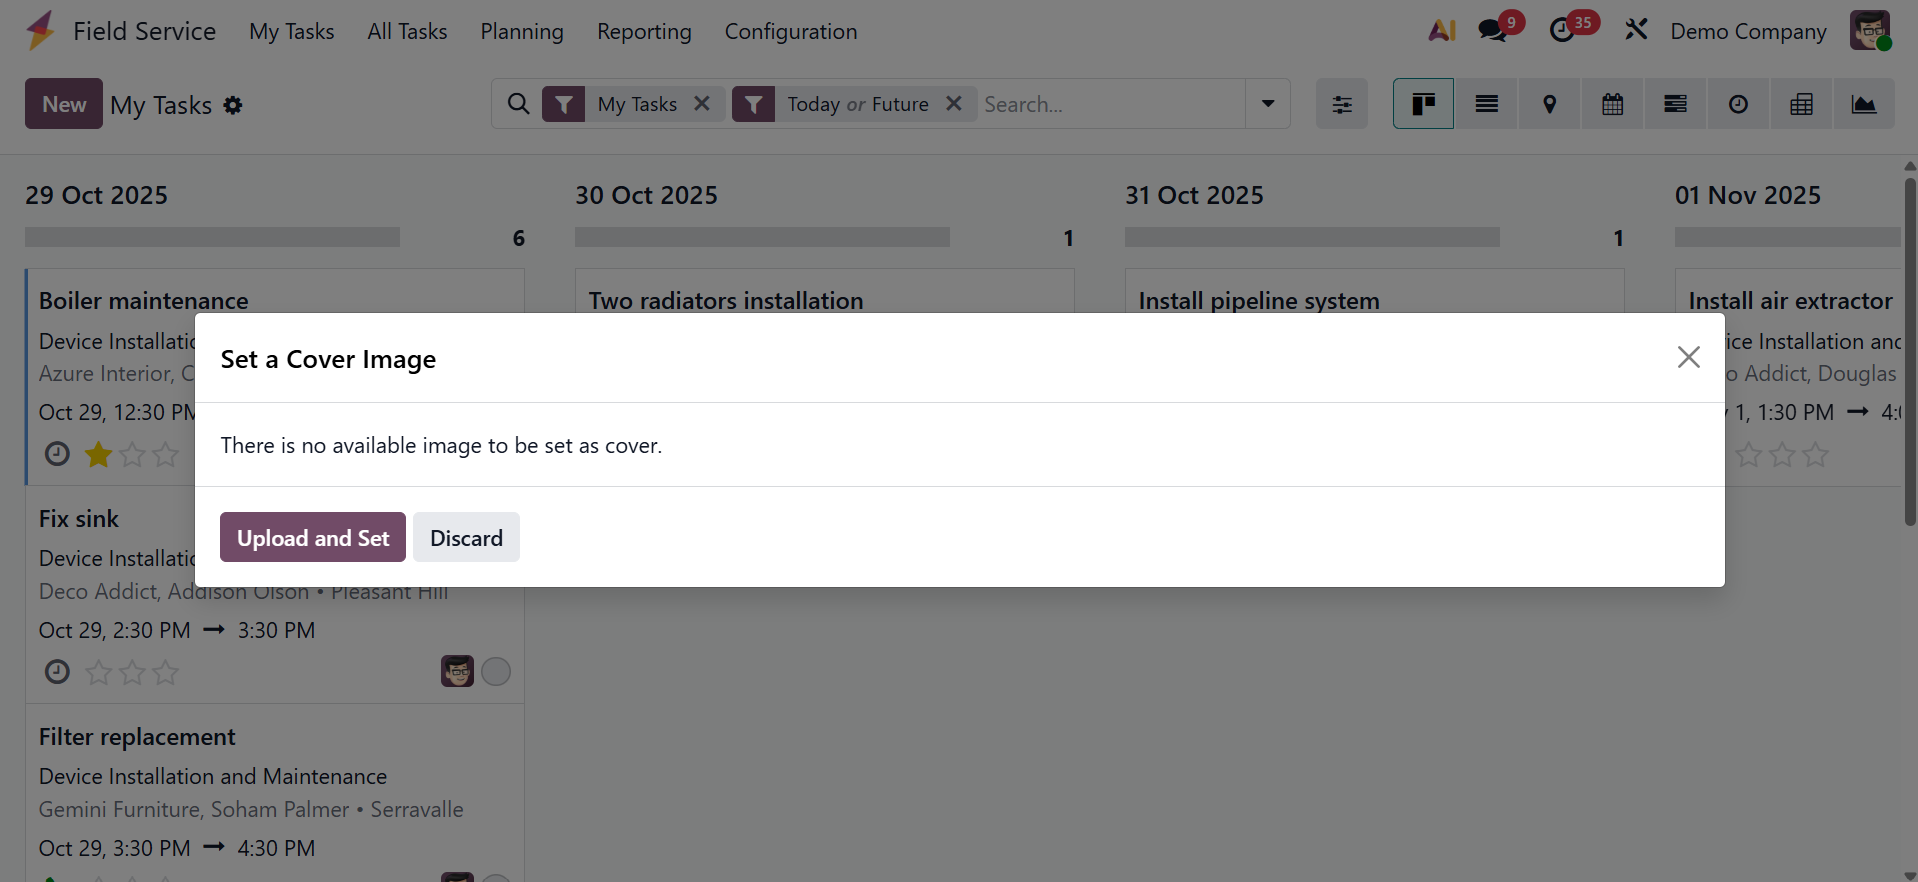
Click the "Set Cover Image" button in the task's kanban menu to set a cover image. You can upload an image file straight from your device storage by choosing the "Upload and Set" option in the pop-up window that appears, as shown in the screenshot below.
As shown in the image below, you may view the cover image inside the task's kanban view after selecting it.
Click the "Set Cover Image" option once more, select "Remove Cover Image," or select another image if you wish to alter the cover image.
You can share task details with an employee or the designated responsible person by using the "Share Task" option in the kanban interface. As seen in the screenshot below, when you click the button, a pop-up window will show up with a document sharing link and options to choose the Recipients and add or change Notes.
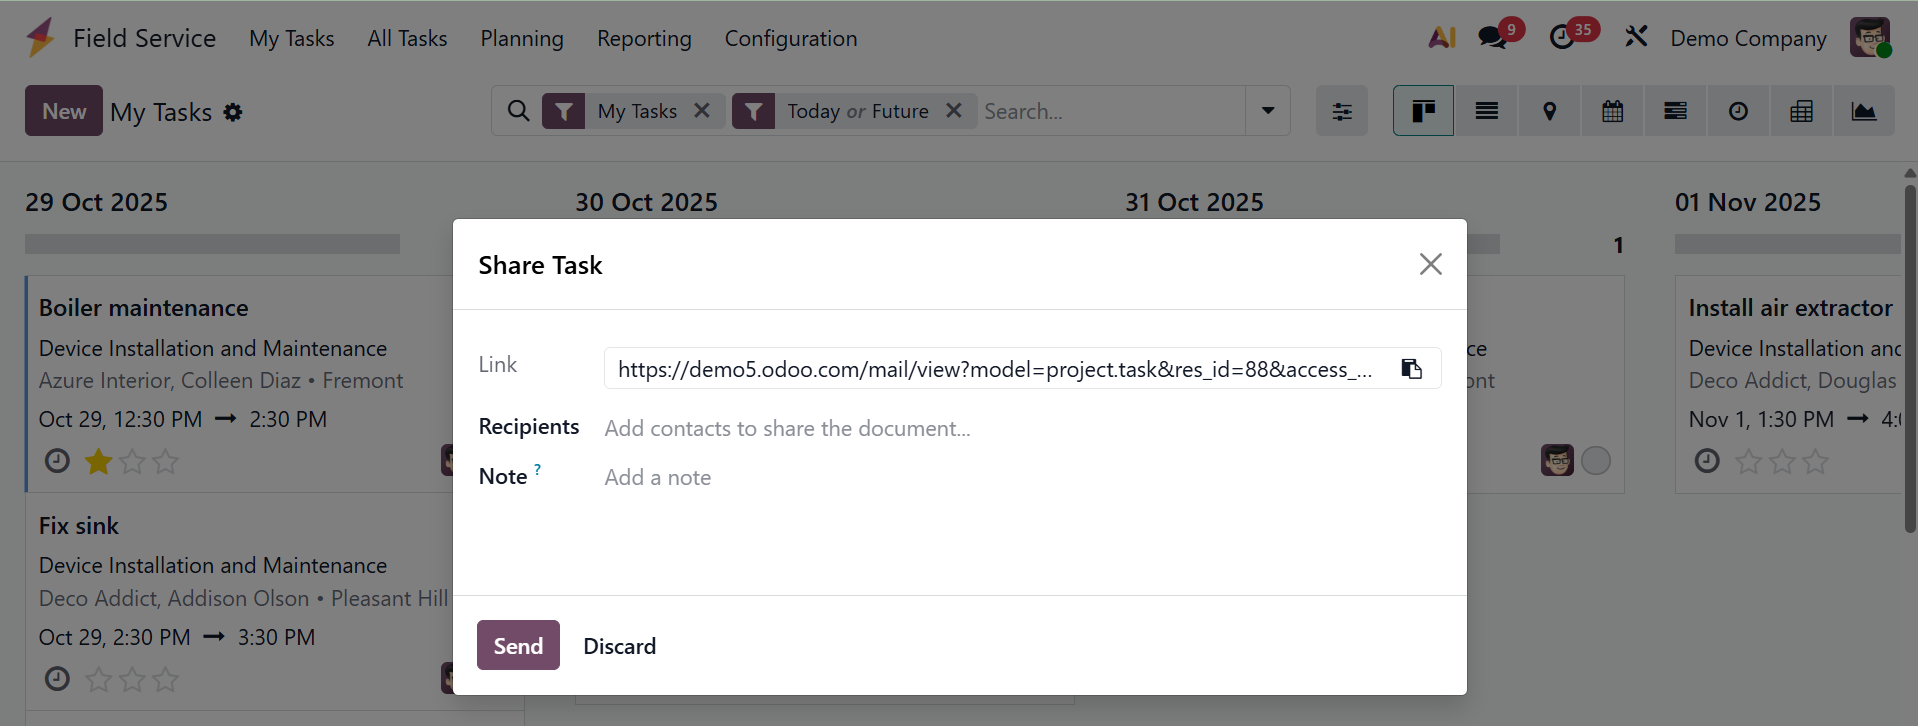
To improve transparency and enable effective task monitoring, the task details paper will be distributed via email along with a link.
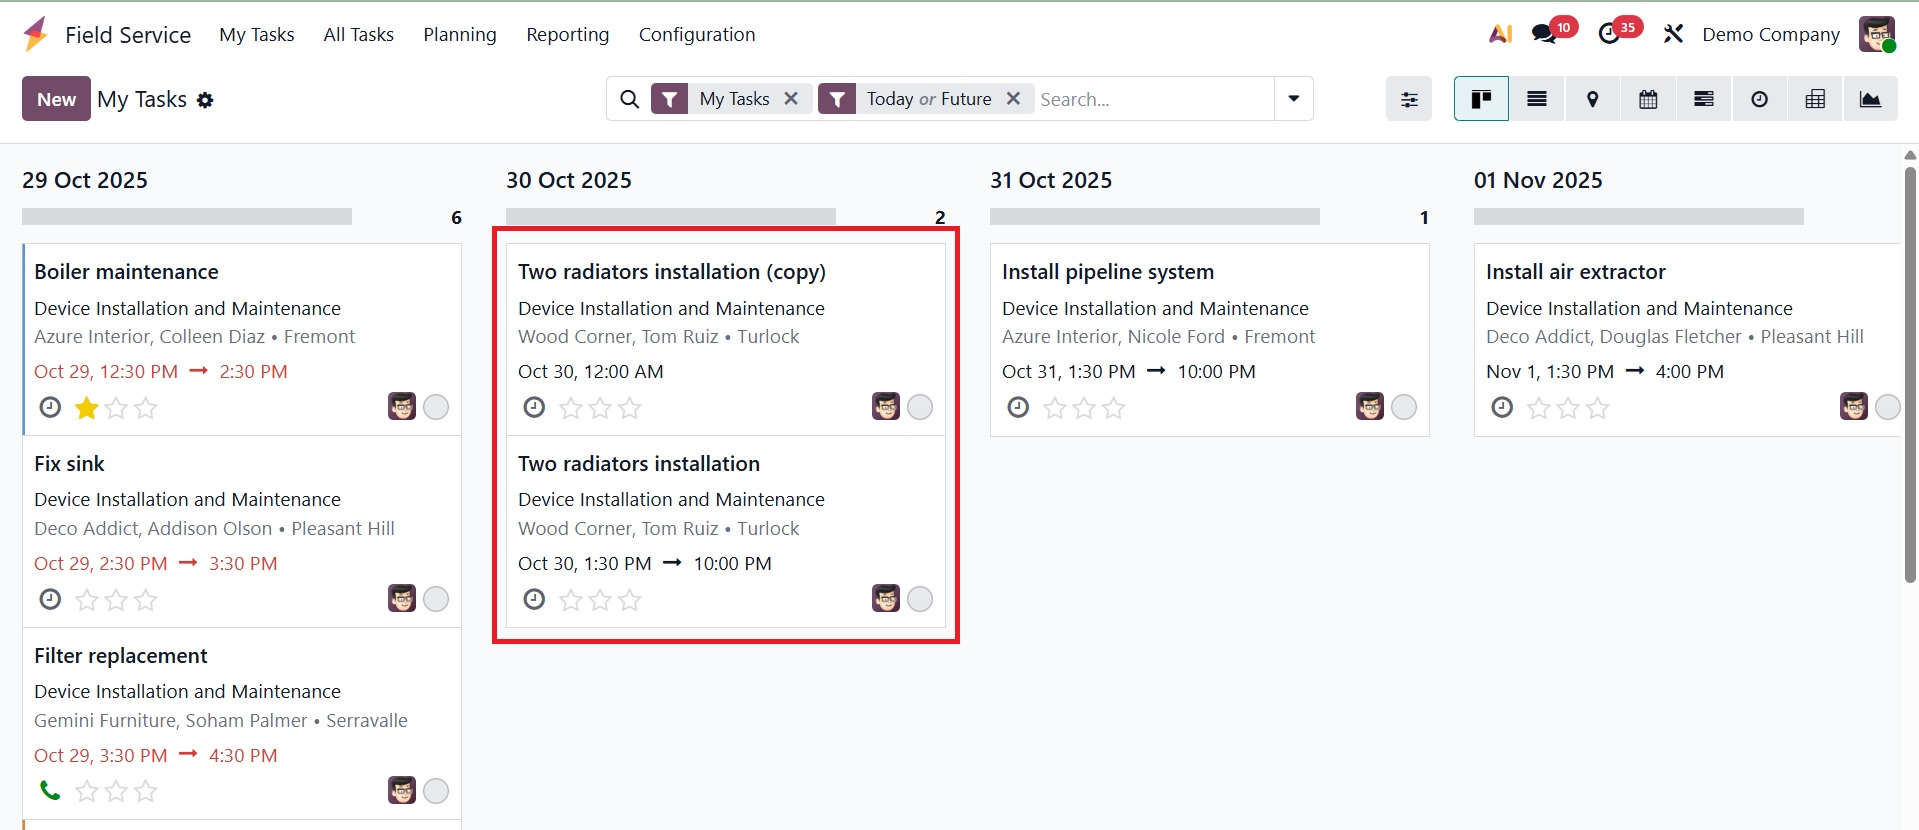
As seen in the screenshot below, the "Duplicate" button lets you make a copy of the task and generate a new one with the same details.
Clicking the "New" button will open the form view and allow you to create a new task, as shown in the screenshot below.
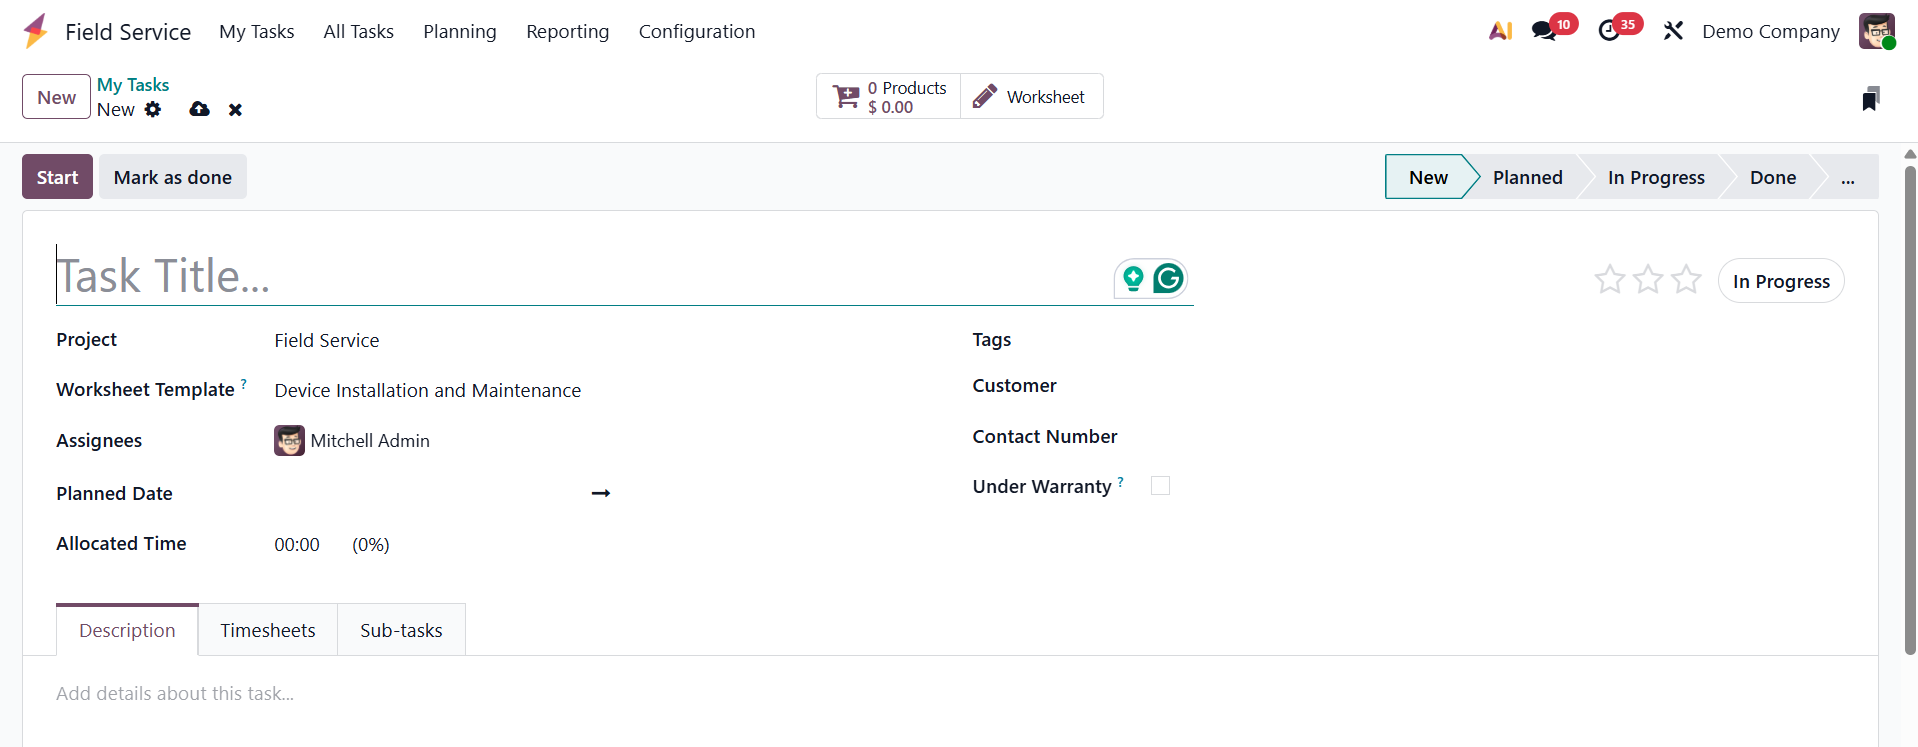
In the designated field, type the task name. In Odoo 19, tasks can be arranged under particular projects made for this service. You can choose "Project" from a drop-down menu. A worksheet template that is appropriate for the task can also be selected. The "Assignees" section allows for the assignment of employees. The "Customer" and "Contact Number" boxes allow you to enter client information and add tags that are pertinent to the assignment. Next, activate the 'Under Warranty' option to indicate that the work is covered under warranty and will be provided as a free service. The "Allocated Time" section can be used to specify the task's allotted time, while the "Planned Date" column can be used to specify the scheduled date. Here, you are also provided with a New Quotation icon, as shown below.
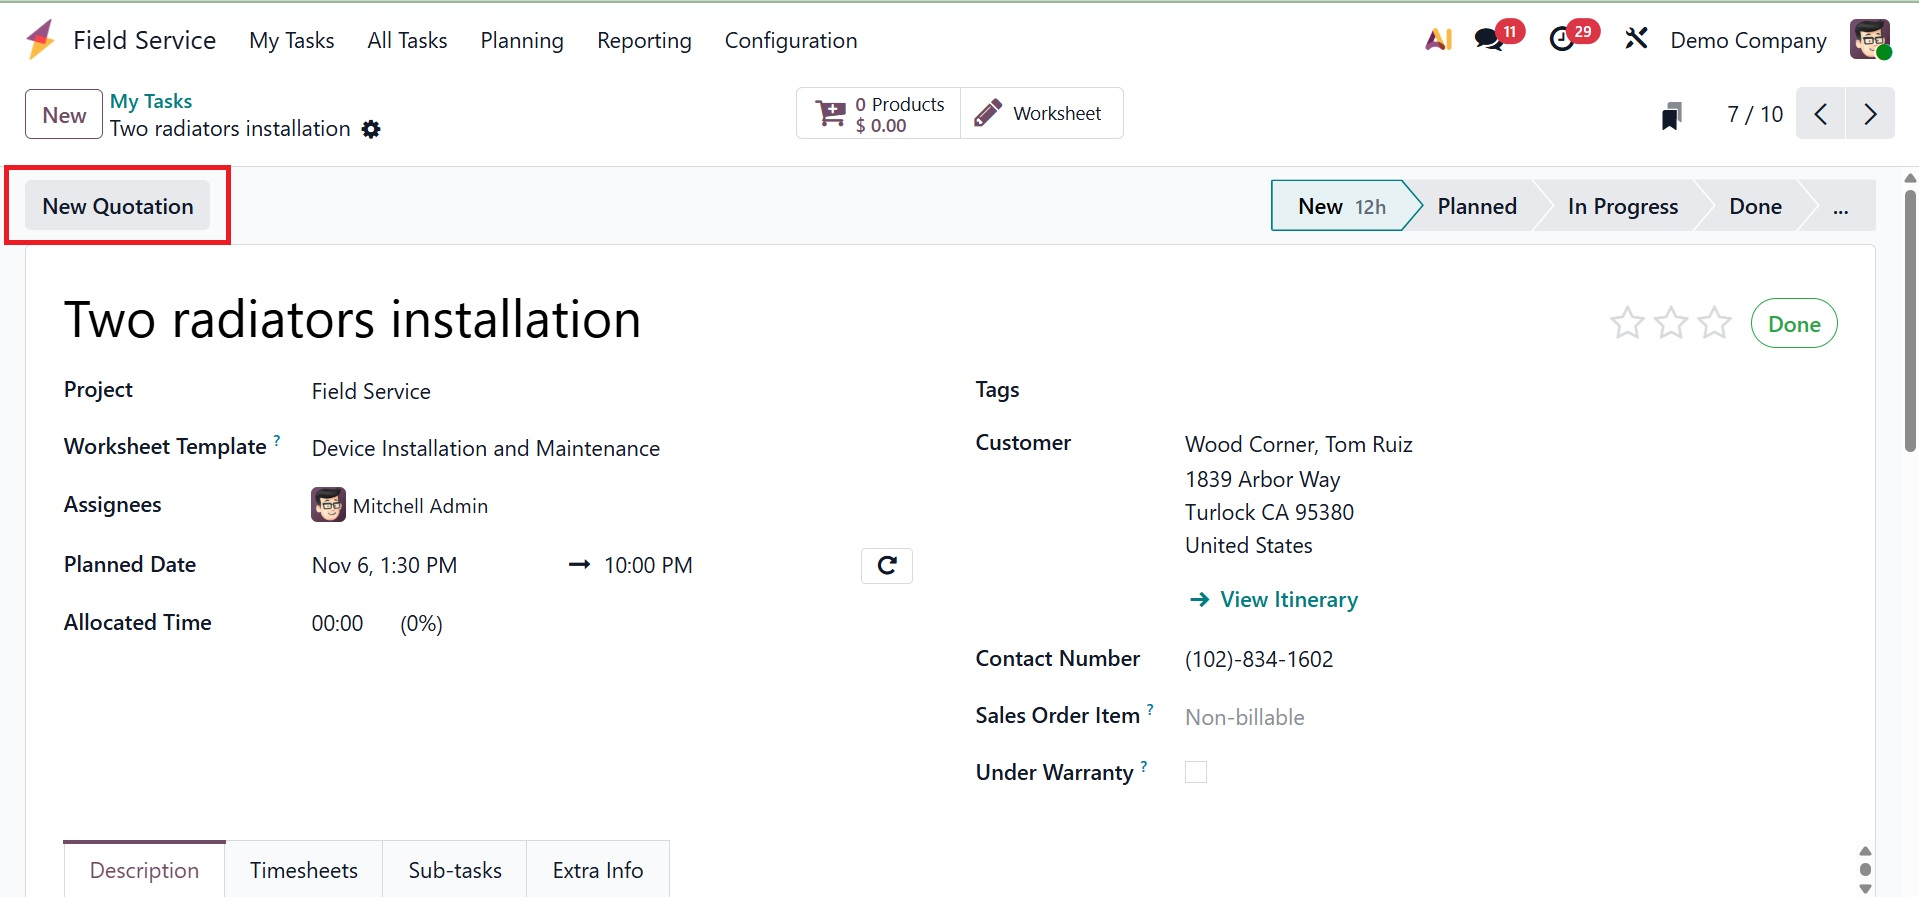
When a customer requests additional services or items connected to a work, you can rapidly generate a sales quotation from the task using the New Quotation button in Odoo Field Service (My work).
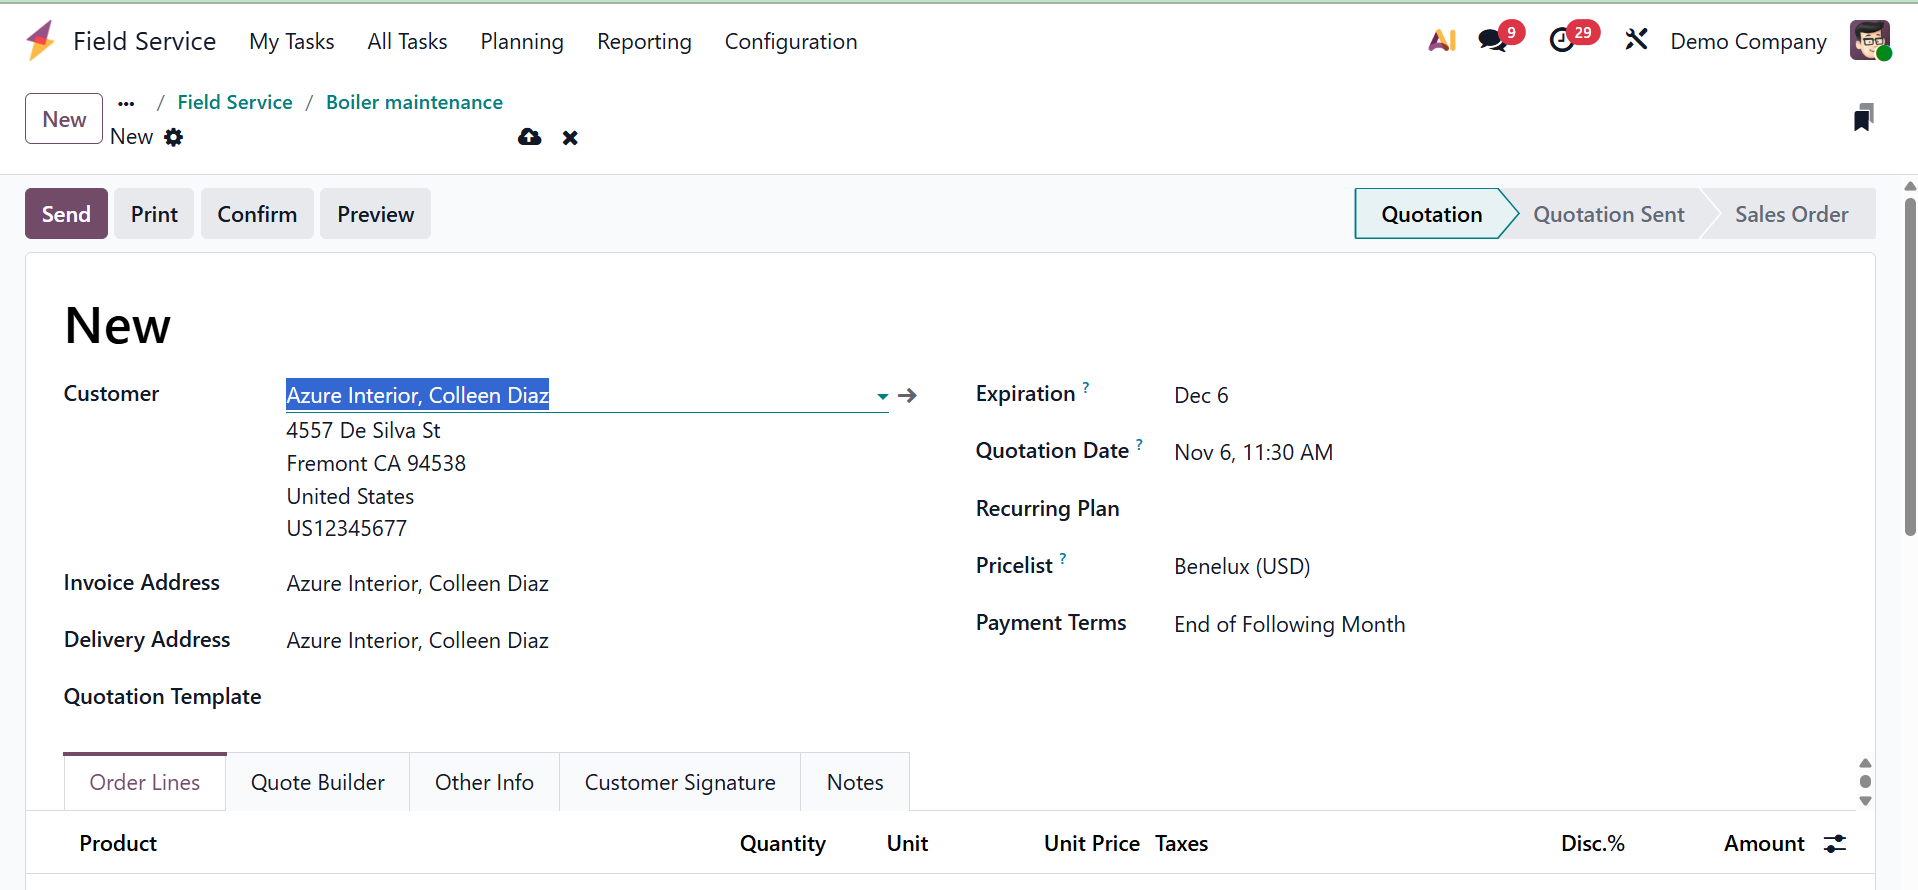
On selecting the option, you will get the page to create a new quotation.
Now, you can also view Recurring task, by going to Project, select one of your projects by clicking the three dots, then select Settings to use task dependencies in that project.
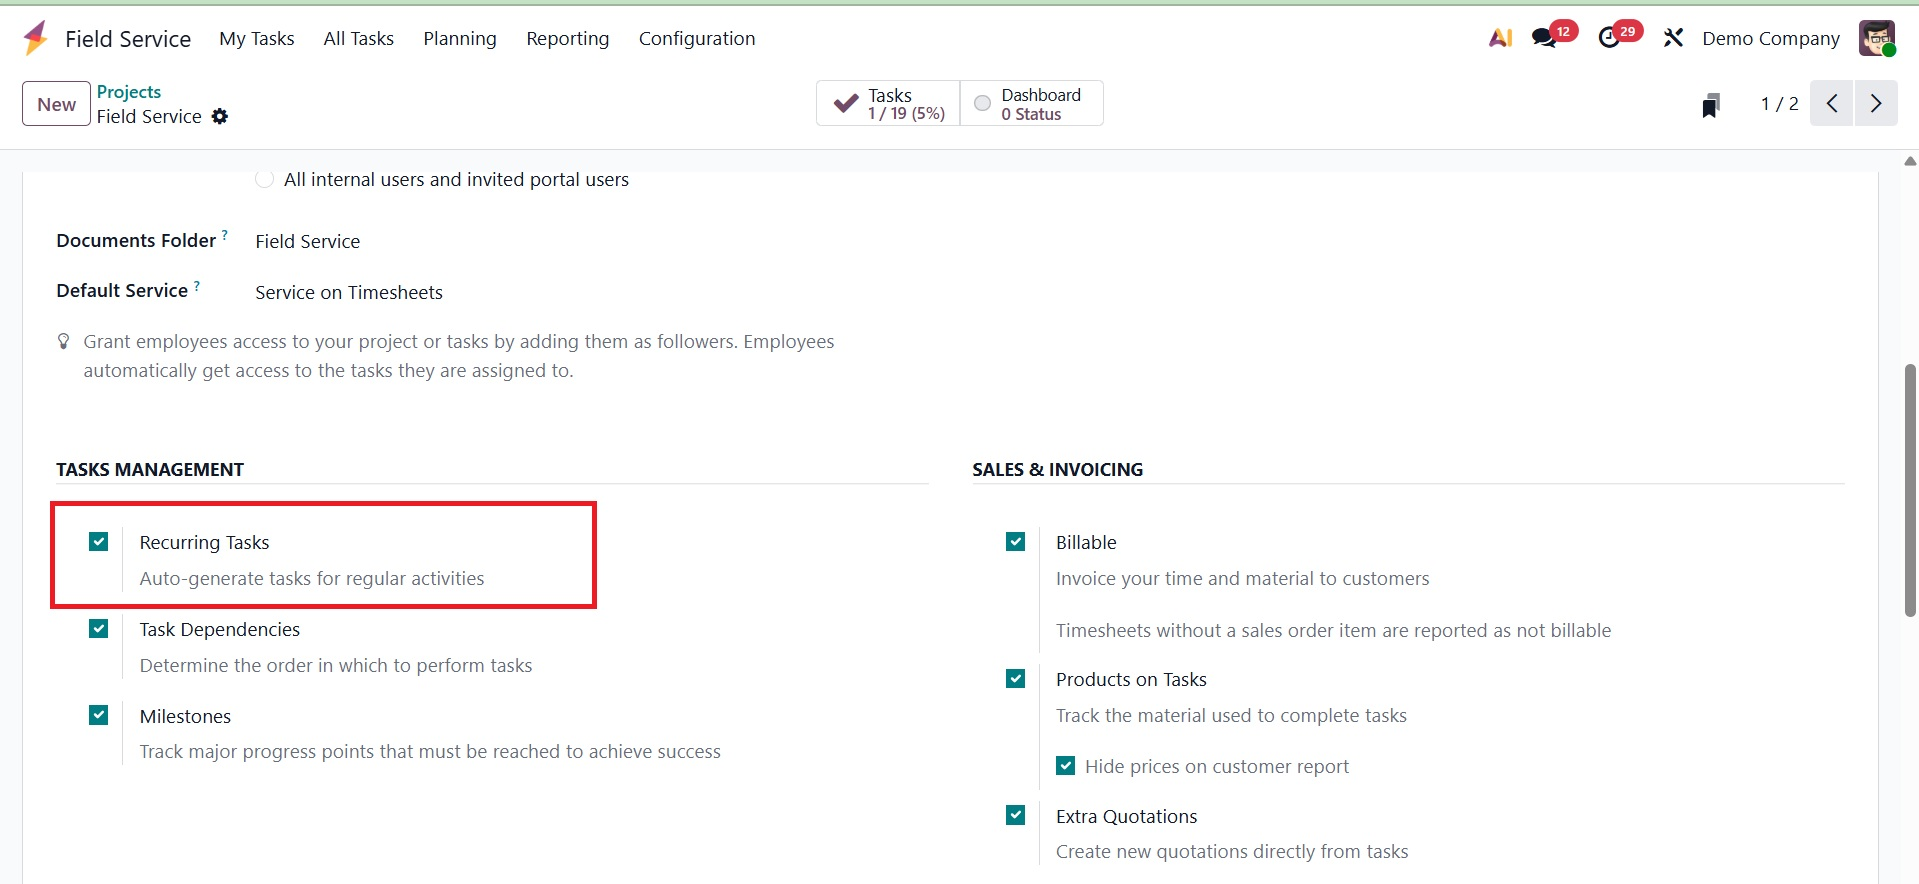
Make sure Recurring Tasks is enabled by selecting the Settings tab and searching for Tasks Management.
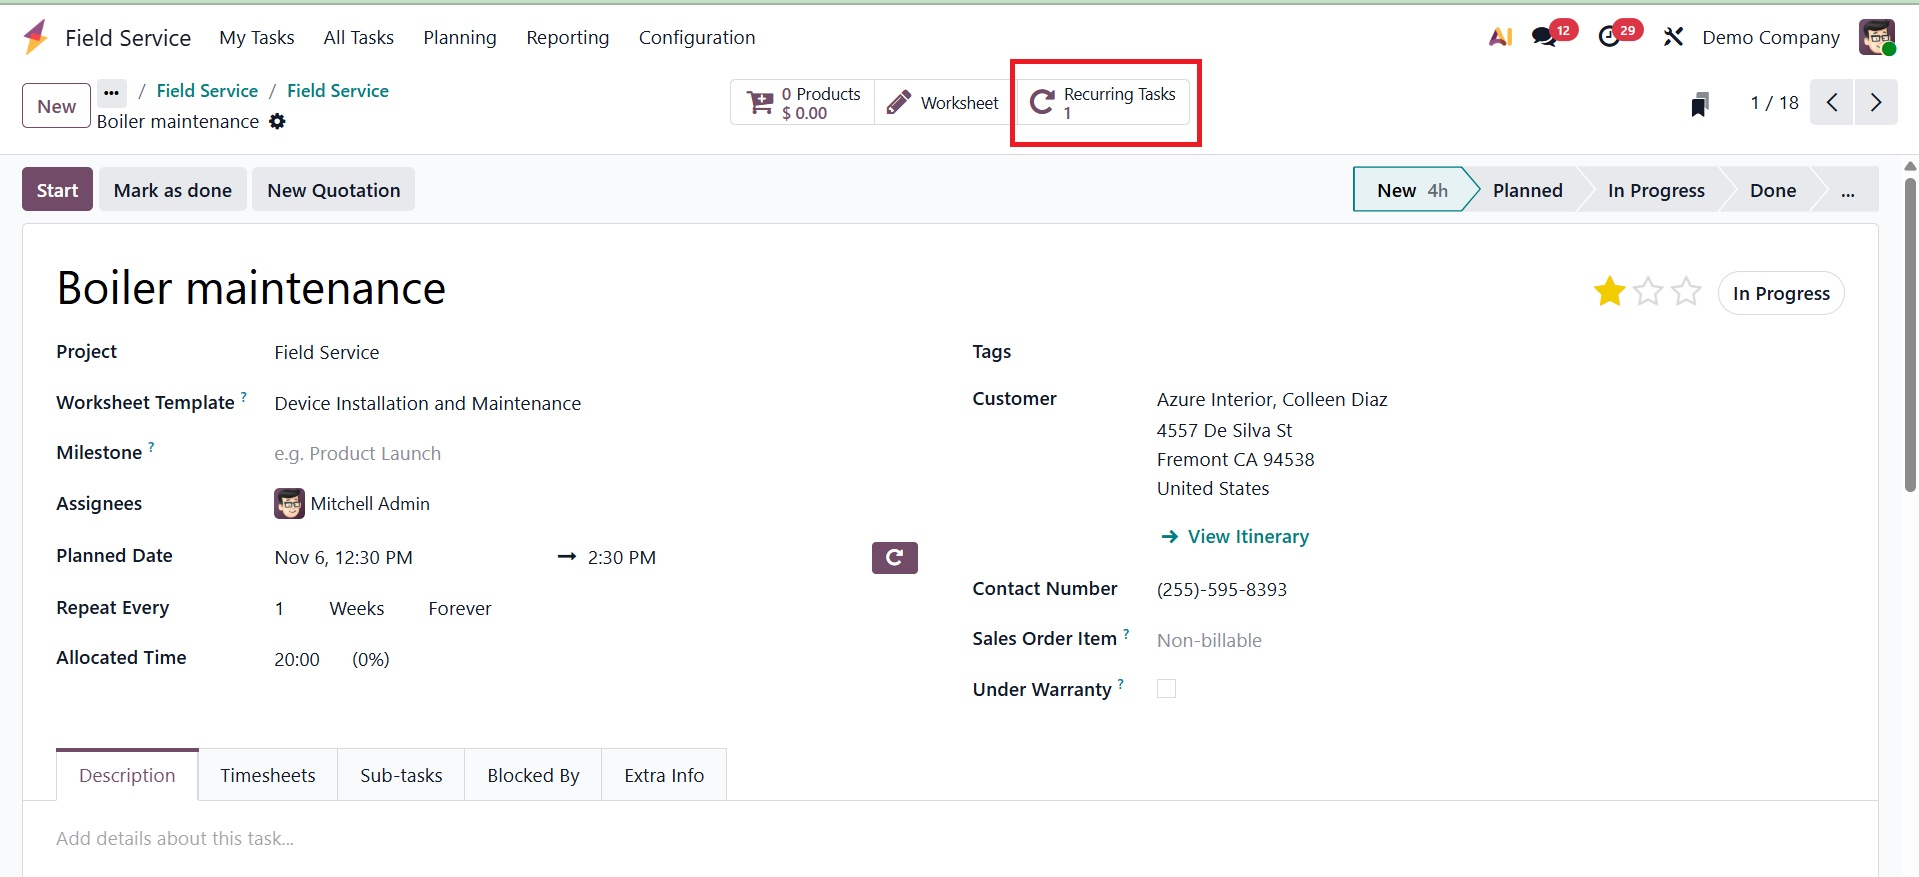
A smart button on the task shows the total number of recurrences that have been set up.
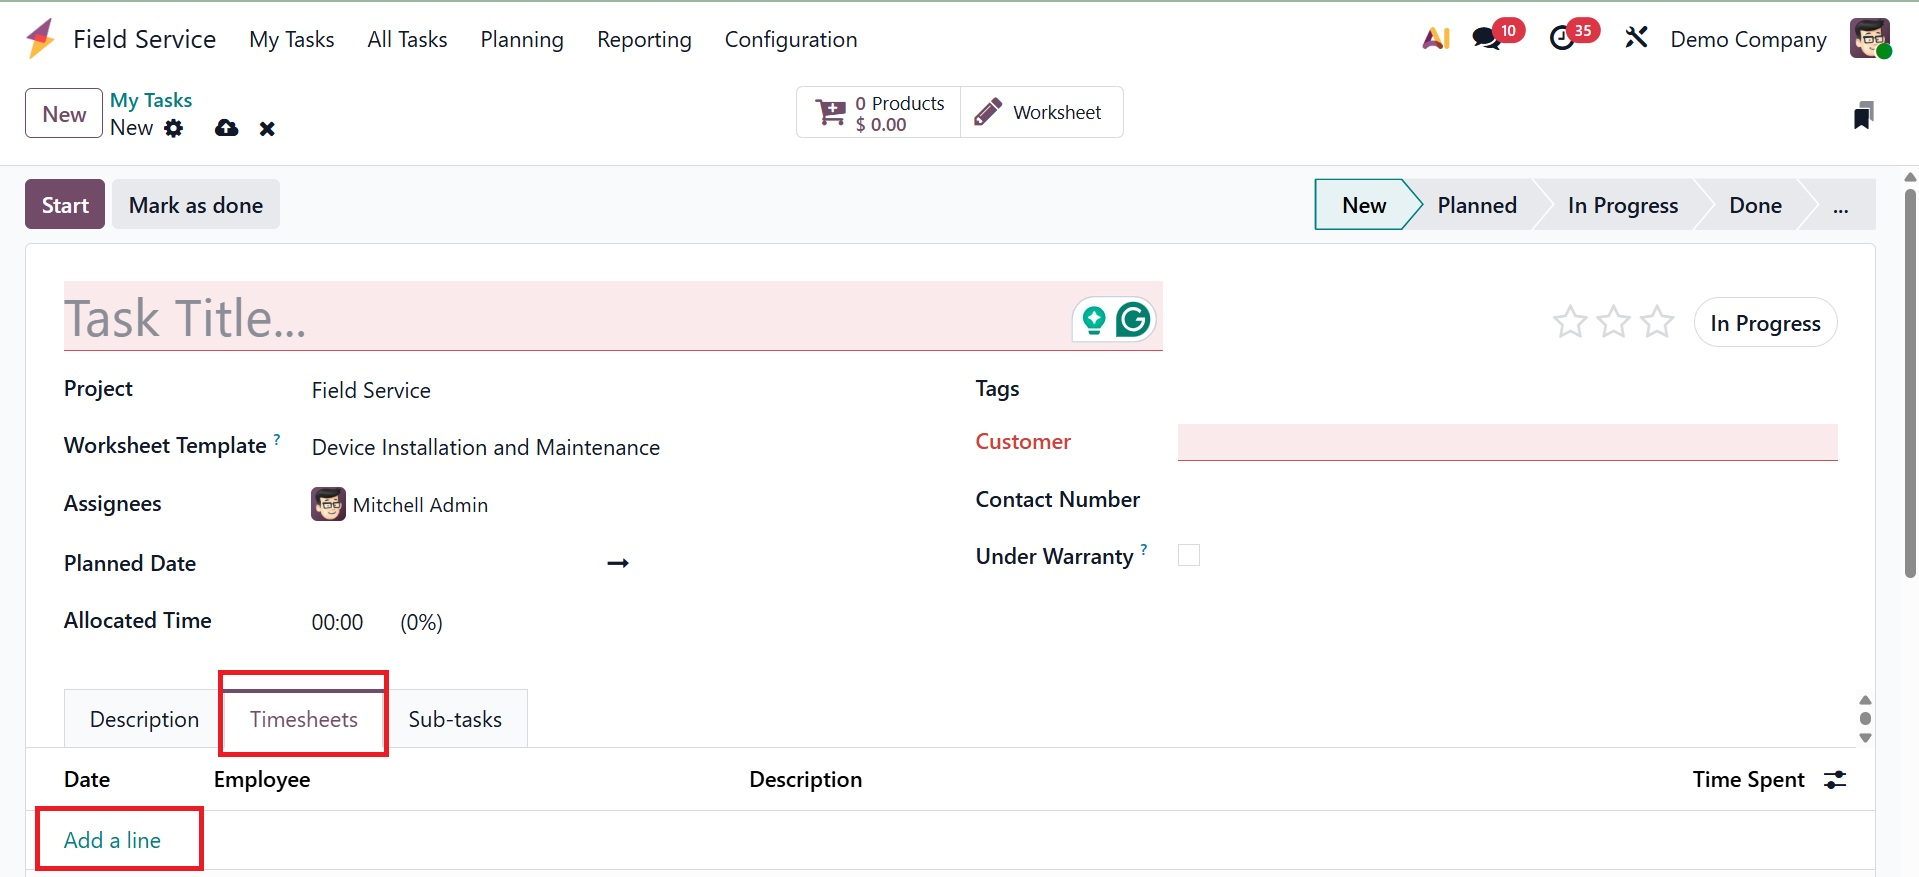
The "Description" tab can then be used to record other task details. Time spent on tasks can be tracked using the "Timesheet" tab. As seen in the screenshot below, clicking "Add a line" enables the addition of Date, Employee, Description, and Time Spent.
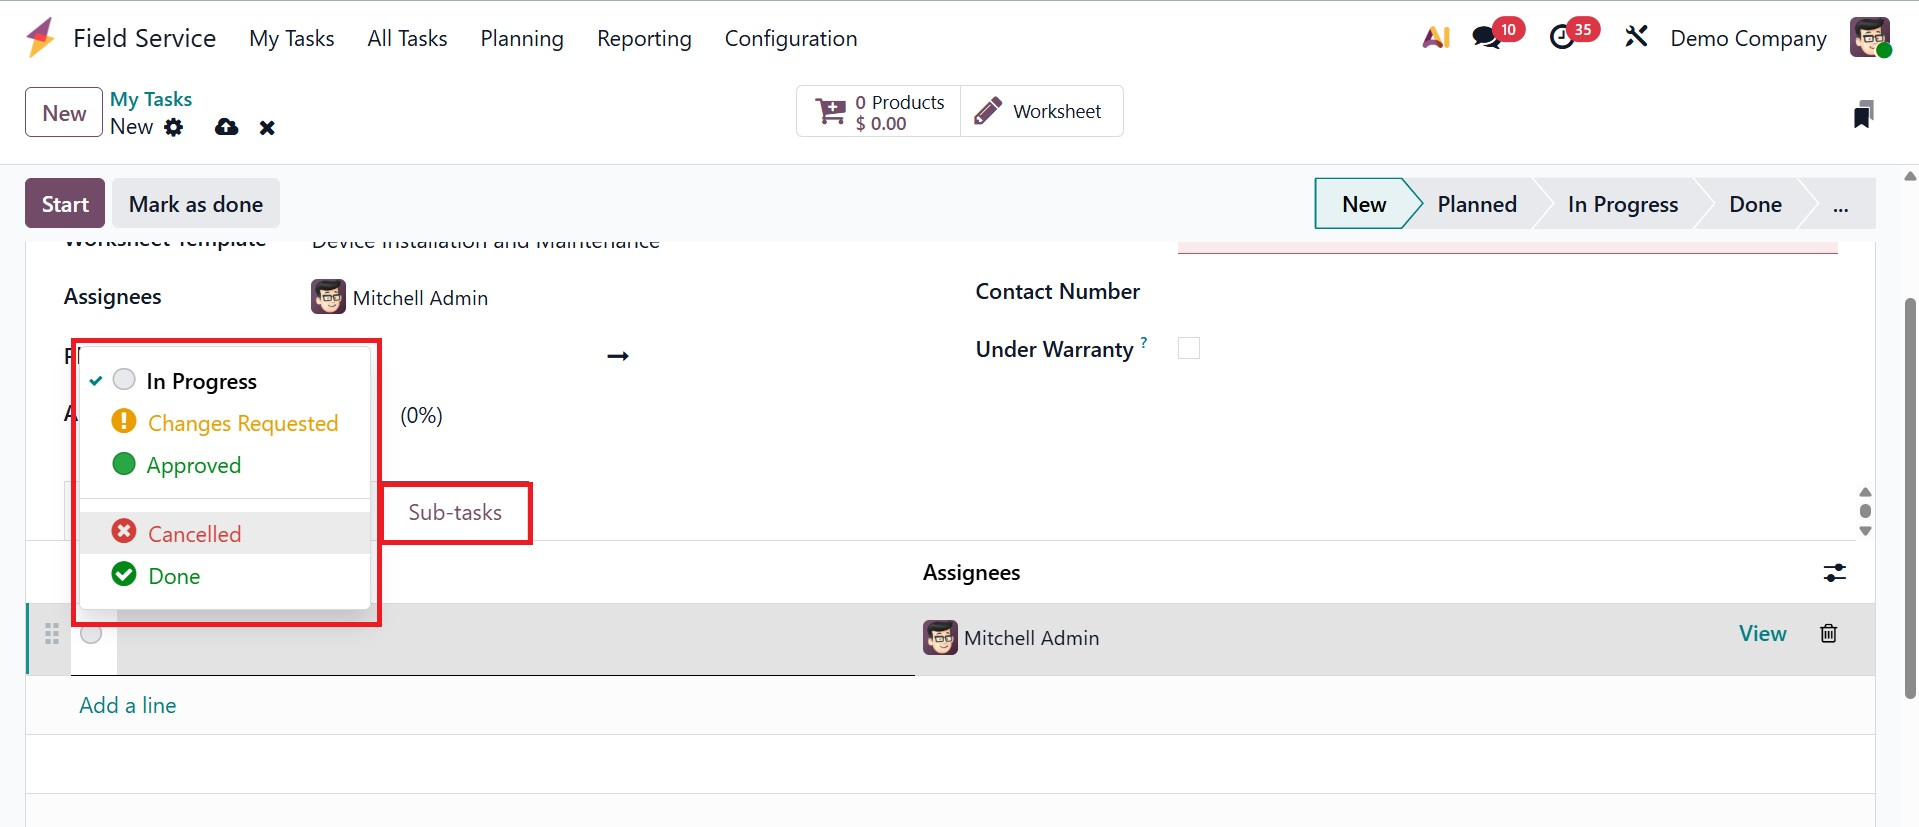
For systematic monitoring, tasks can be broken down into smaller tasks under the "Sub-tasks" section. These subtasks from this area can also be allocated to employees.
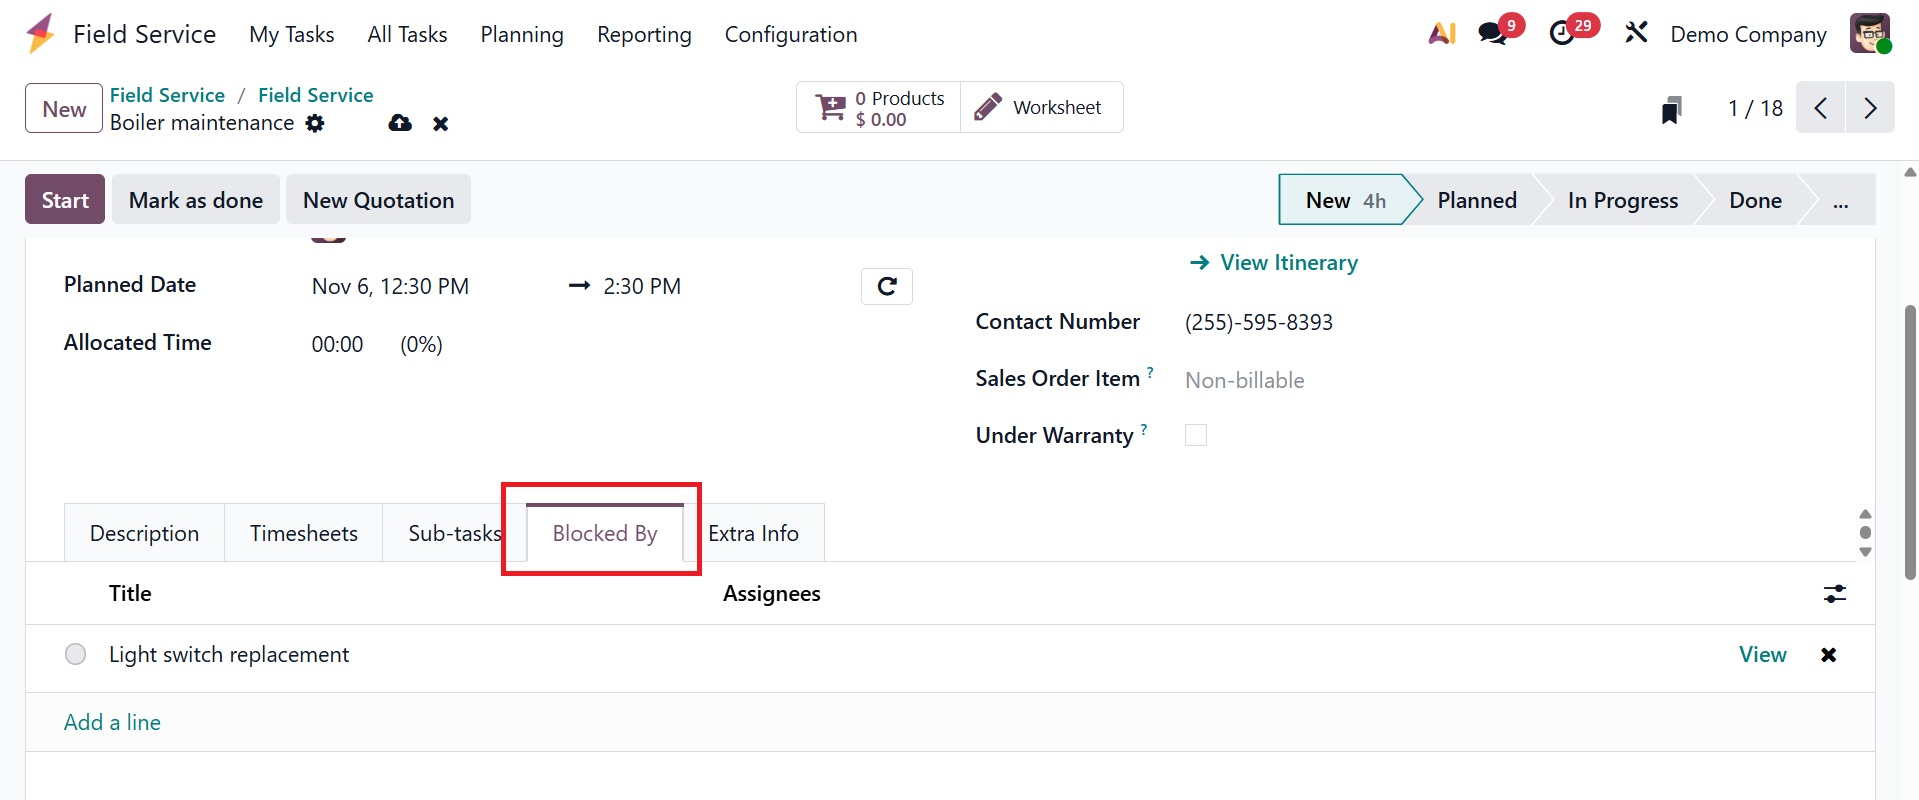
The Odoo Field Service module's Blocked By tab helps manage task dependencies and workflow order by displaying which other activities must be finished before the current activity can begin.
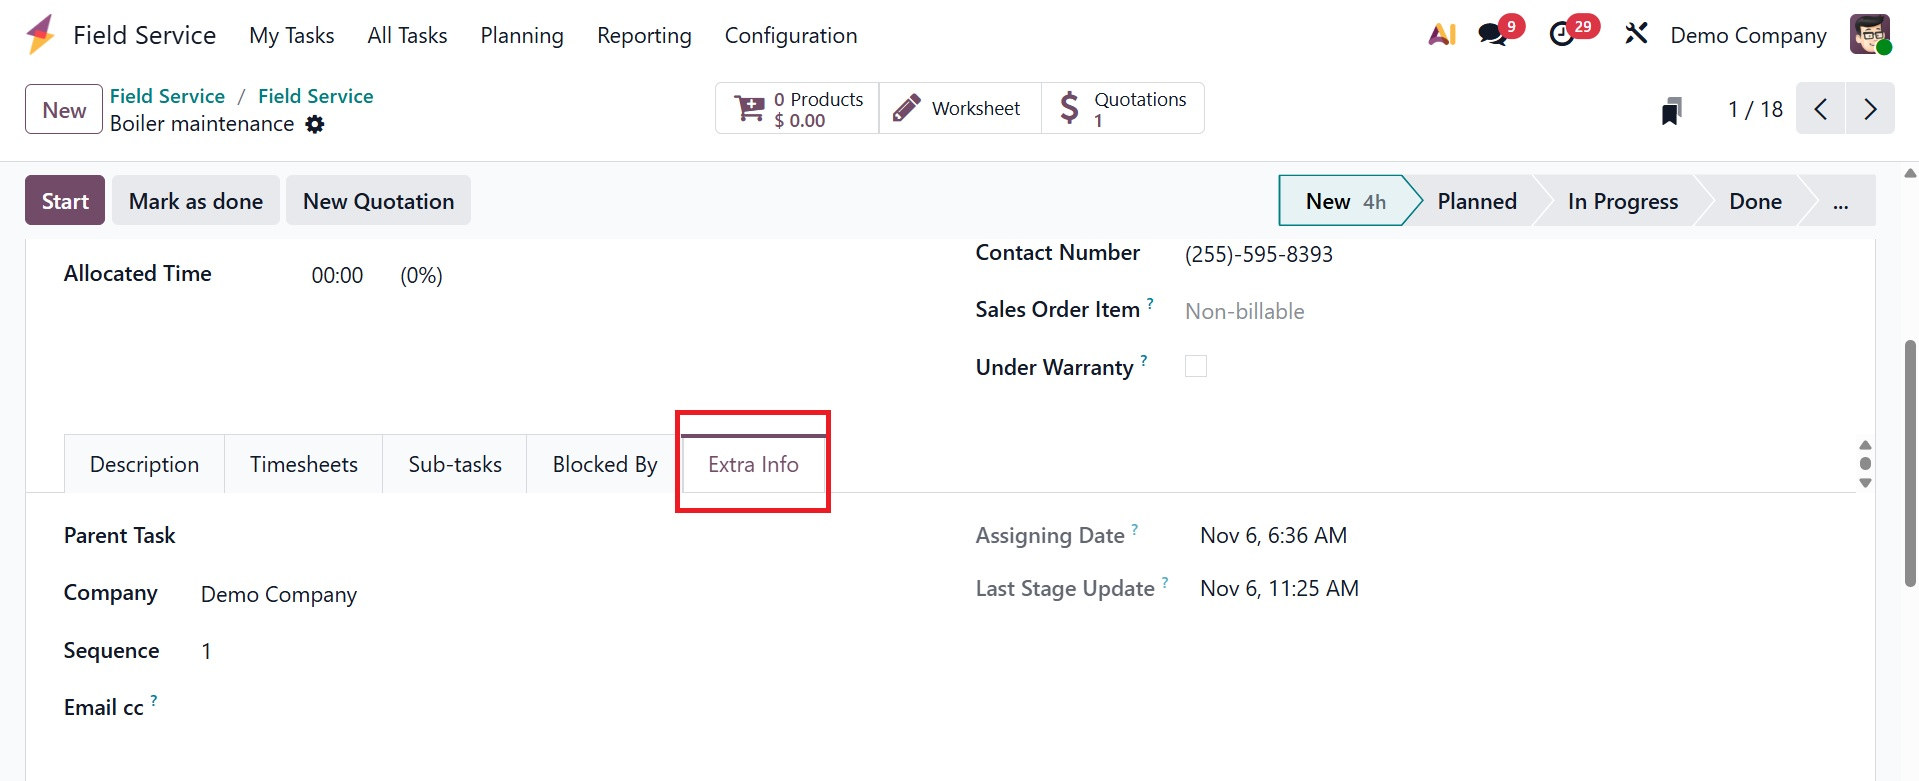
Now, under the Extra Info tab, you have the options like,
Parent task, company, sequence, email cc, assigning date, and last stage update, as shown below.
- Parent task: A field that connects the current task to a primary or higher-level task.
- Company: This field identifies the company or entity that the job is connected to.
- Sequence: A numerical field that establishes the task's presentation order in a list or project plan.
- Email cc: Users can provide a list of email addresses in this area to receive carbon copies of any correspondence pertaining to the task or record.
- Assigning Date : When a task or record is assigned to a certain user or team, this read-only field automatically logs the exact date and time.
- Last stage update: The date and time that the task's status or stage was last modified are automatically recorded in this field.
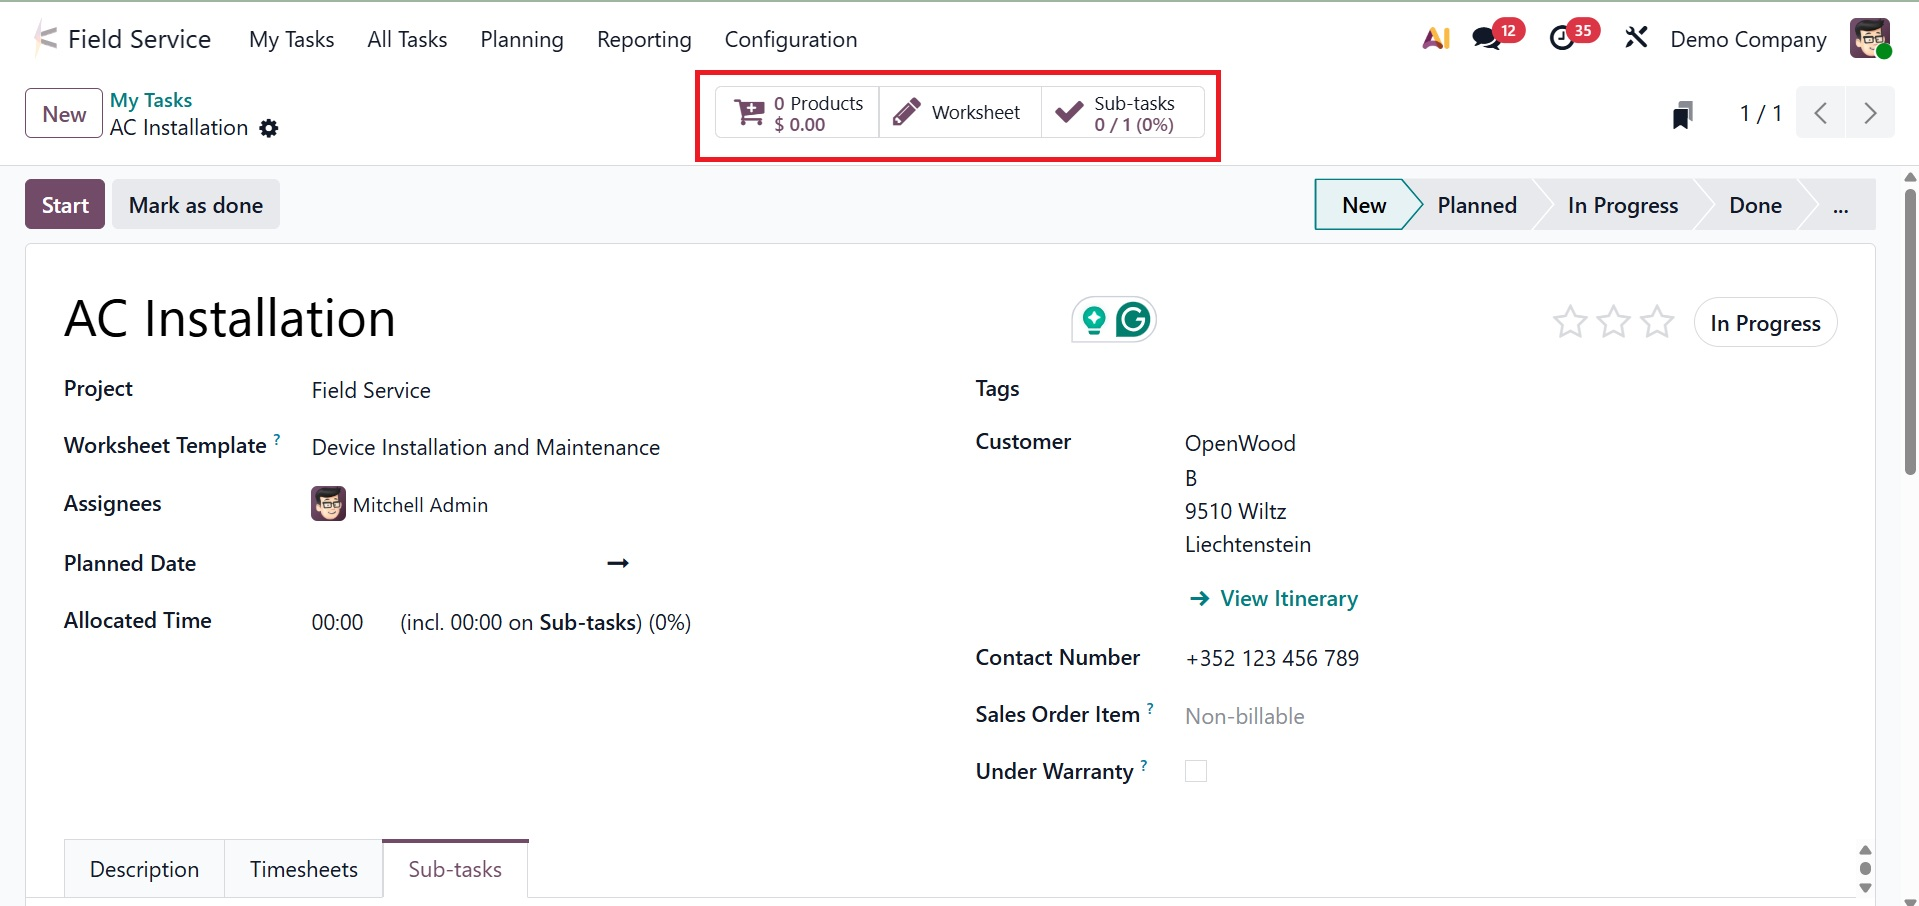
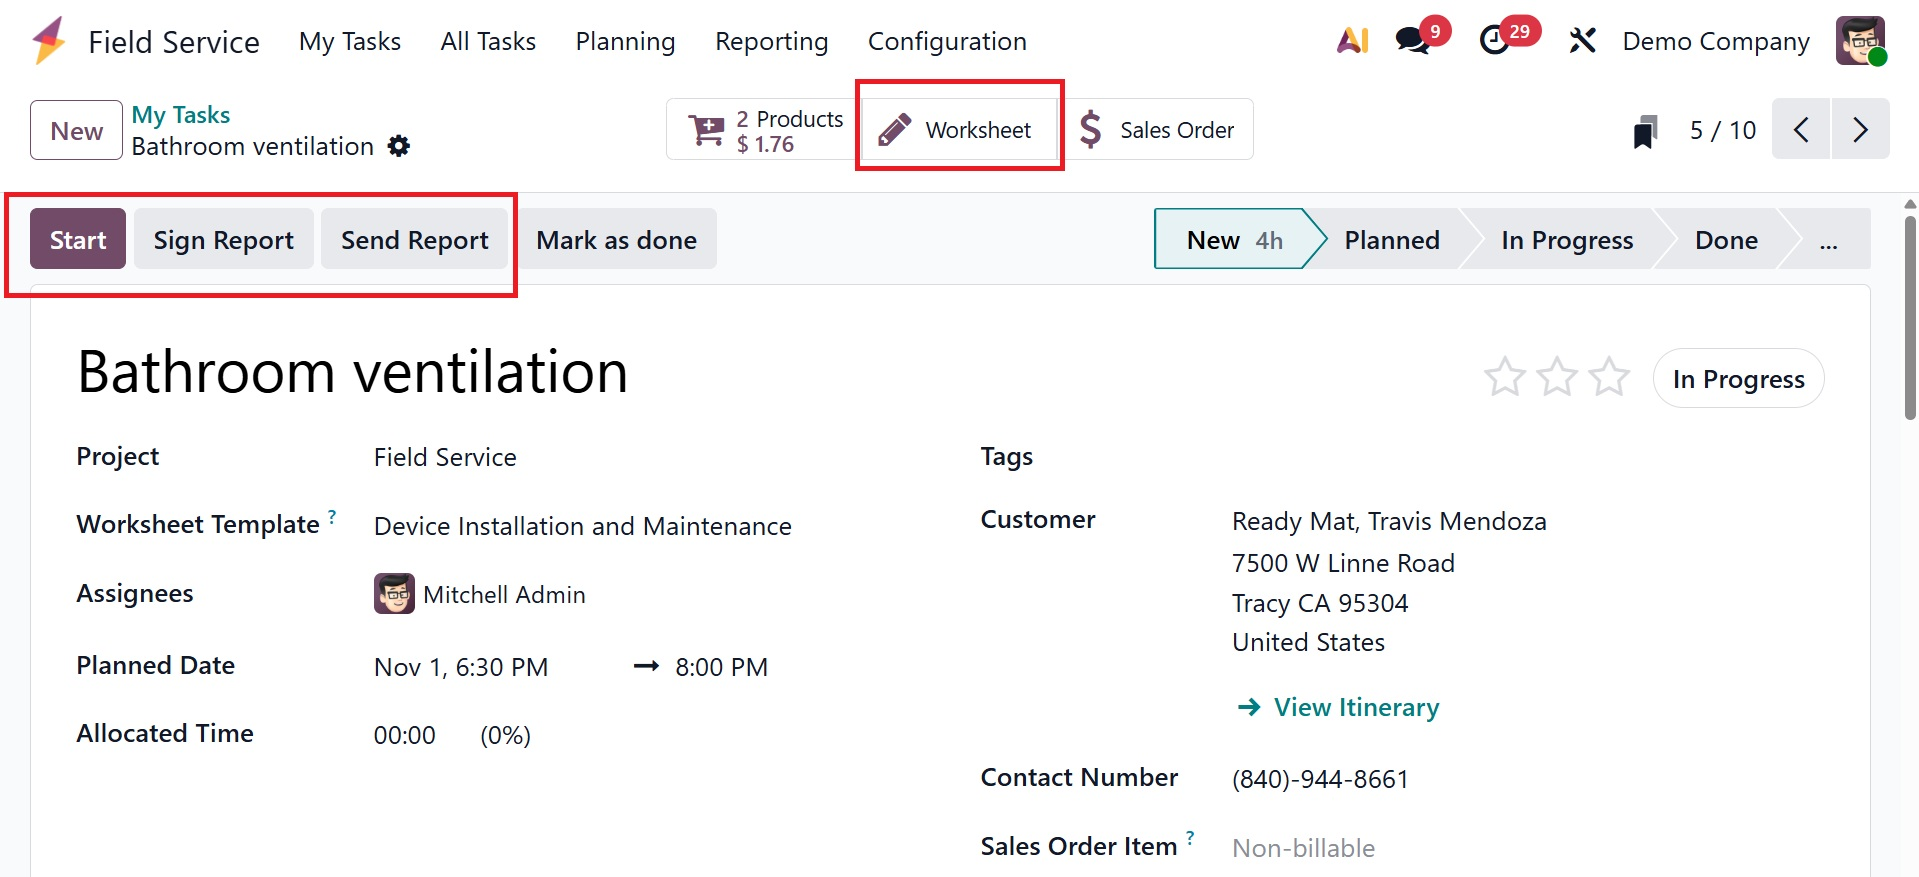
The "Products," "Worksheet," and "Sub-tasks" smart buttons in the form view offer information about related worksheets and products.
Once set up, the "Start" button will track the amount of time spent on the work automatically. When a task is finished, clicking "Stop" opens a confirmation popup to confirm the time that was logged.
Worksheets, checklists, and service-specific forms can be added to field visit activities using Odoo 19's Field Service module. Technicians can use the "Worksheet" Smart button to finish tasks during or after visits because tasks inside a project are linked to the worksheet.
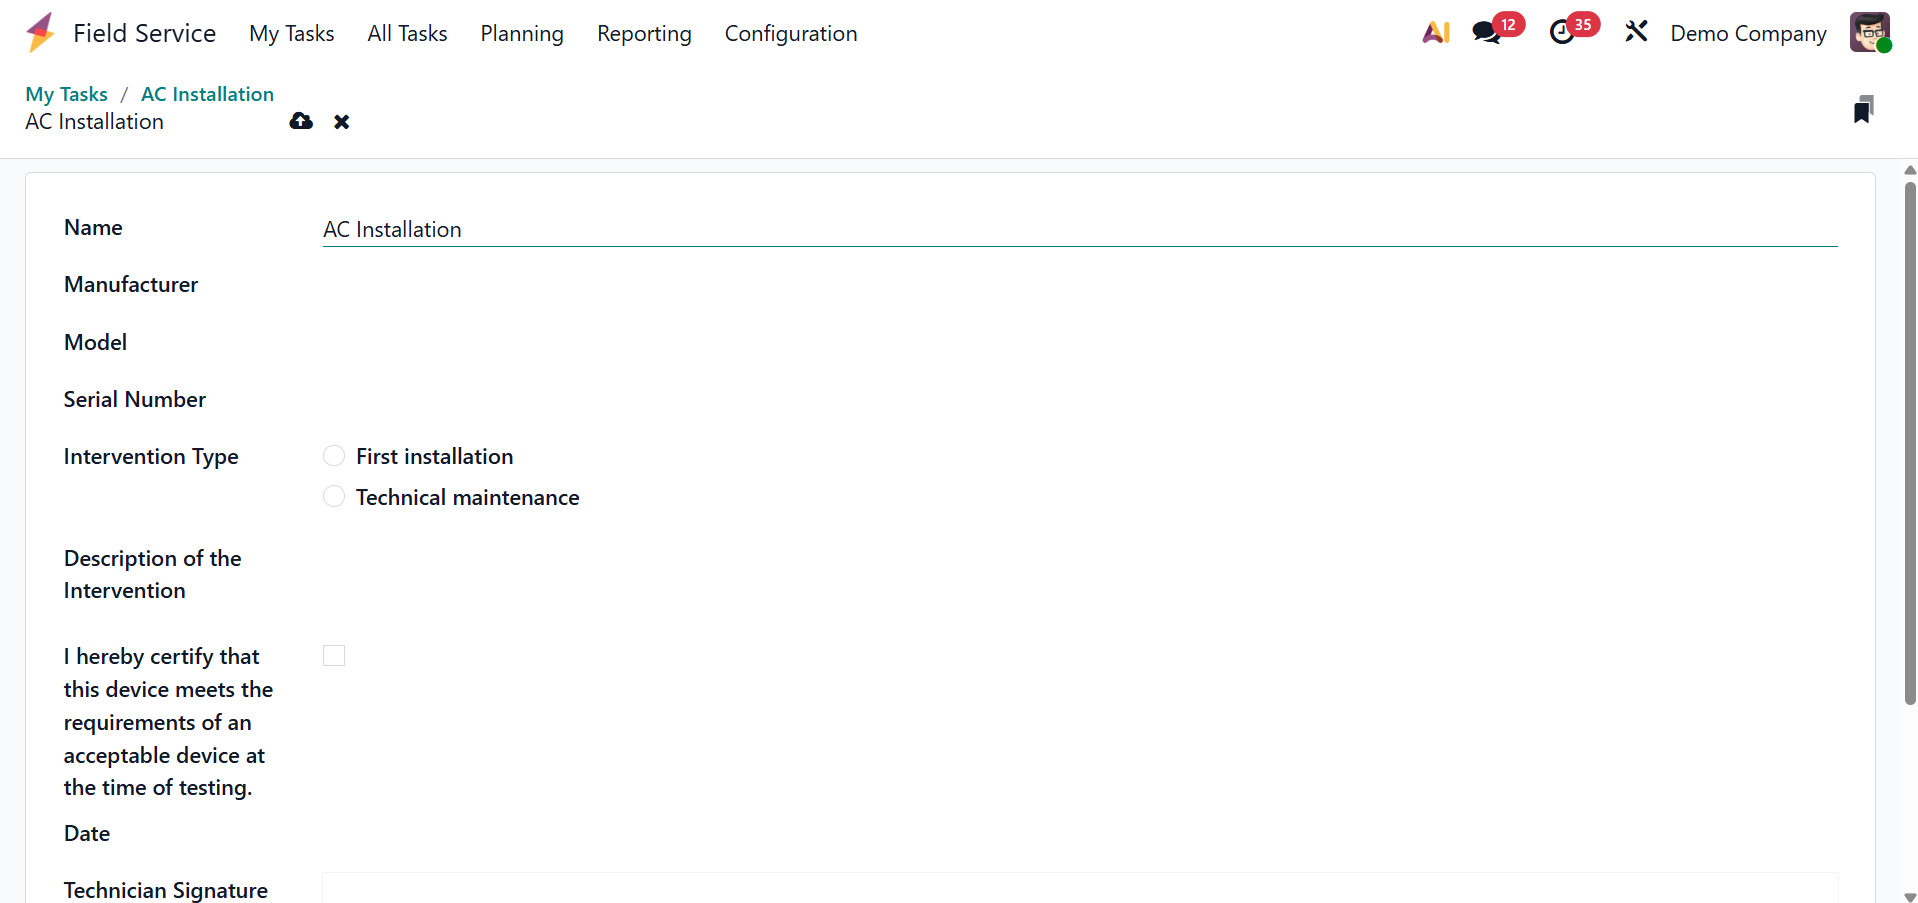
As shown in the screenshot below, the "Worksheet" smart button will open the worksheet for this specific task. There, you can enter the necessary information, such as the Task Name, Device Manufacturer, Model, Serial Number, Intervention Type, Intervention Description, Date, and a certification assurance about the product or service with an employee signature.
You can upload or sketch your signature inside the window by clicking on the signature column, as seen below.
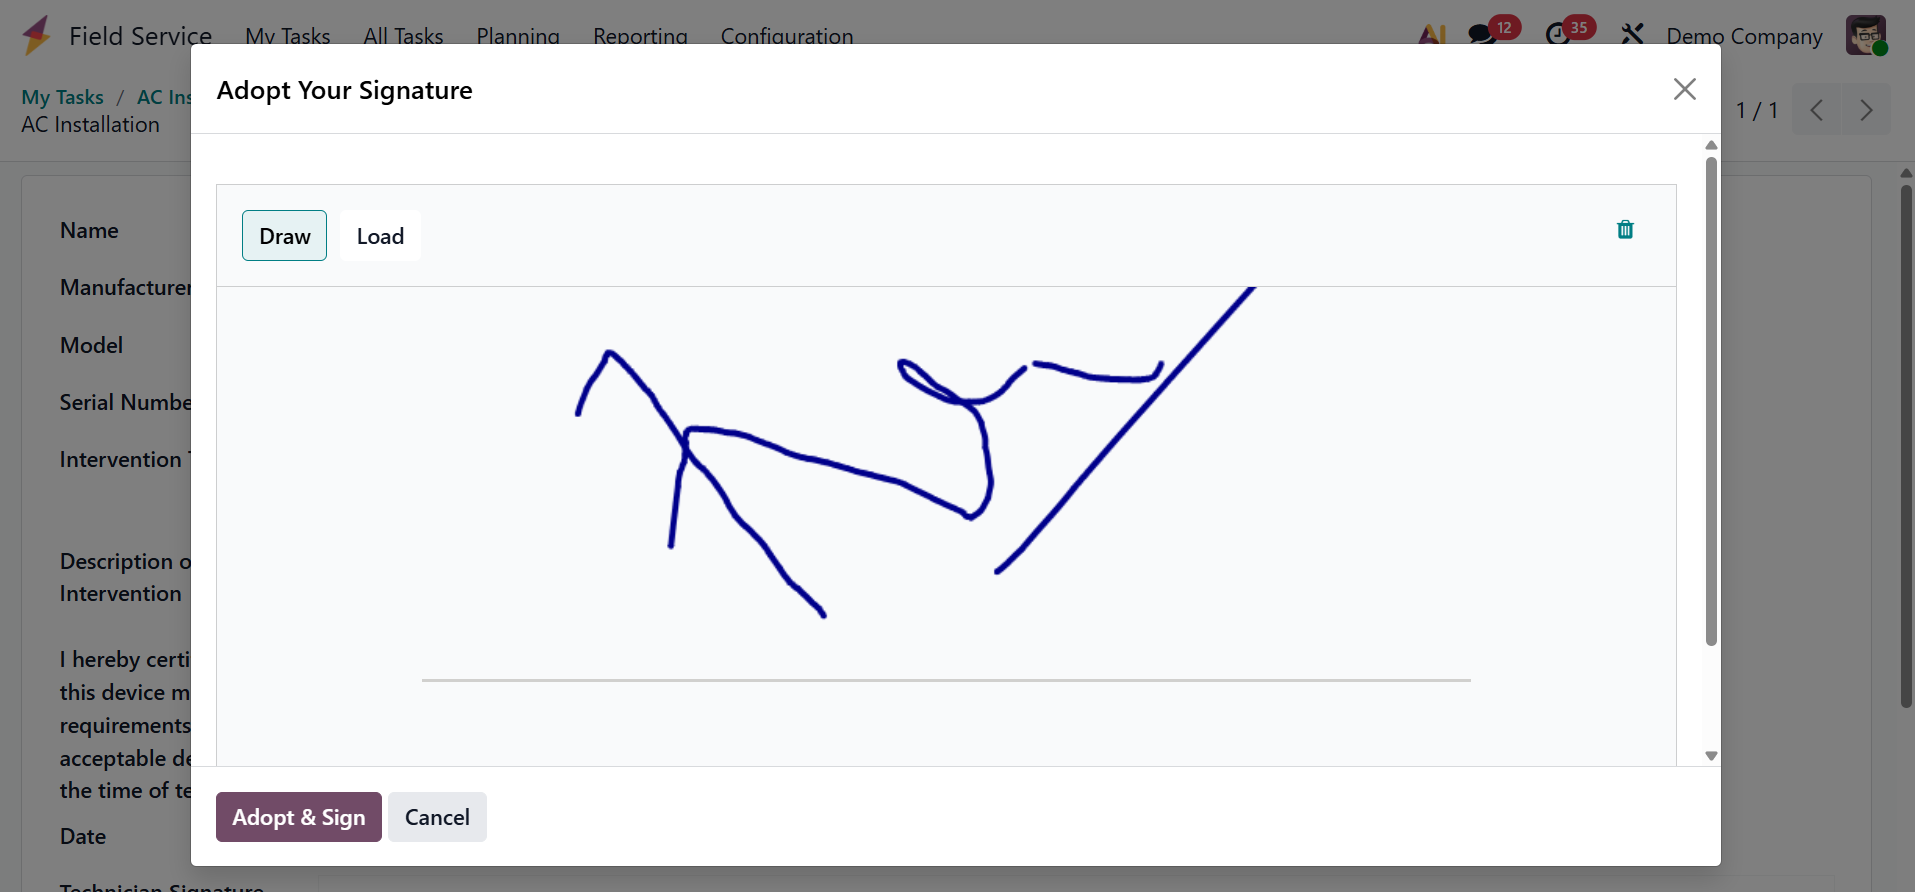
The employee's signature will be appended to the worksheet document once they click the "Adopt & Sign" button.
Once the task is finished, you can print this worksheet document by choosing the "Field Service Report" option from the "Print" button in the "Action" menu at the top of the field service configuration page.
As shown in the screenshot below, the worksheet document will download to your computer and can be printed using an external device.

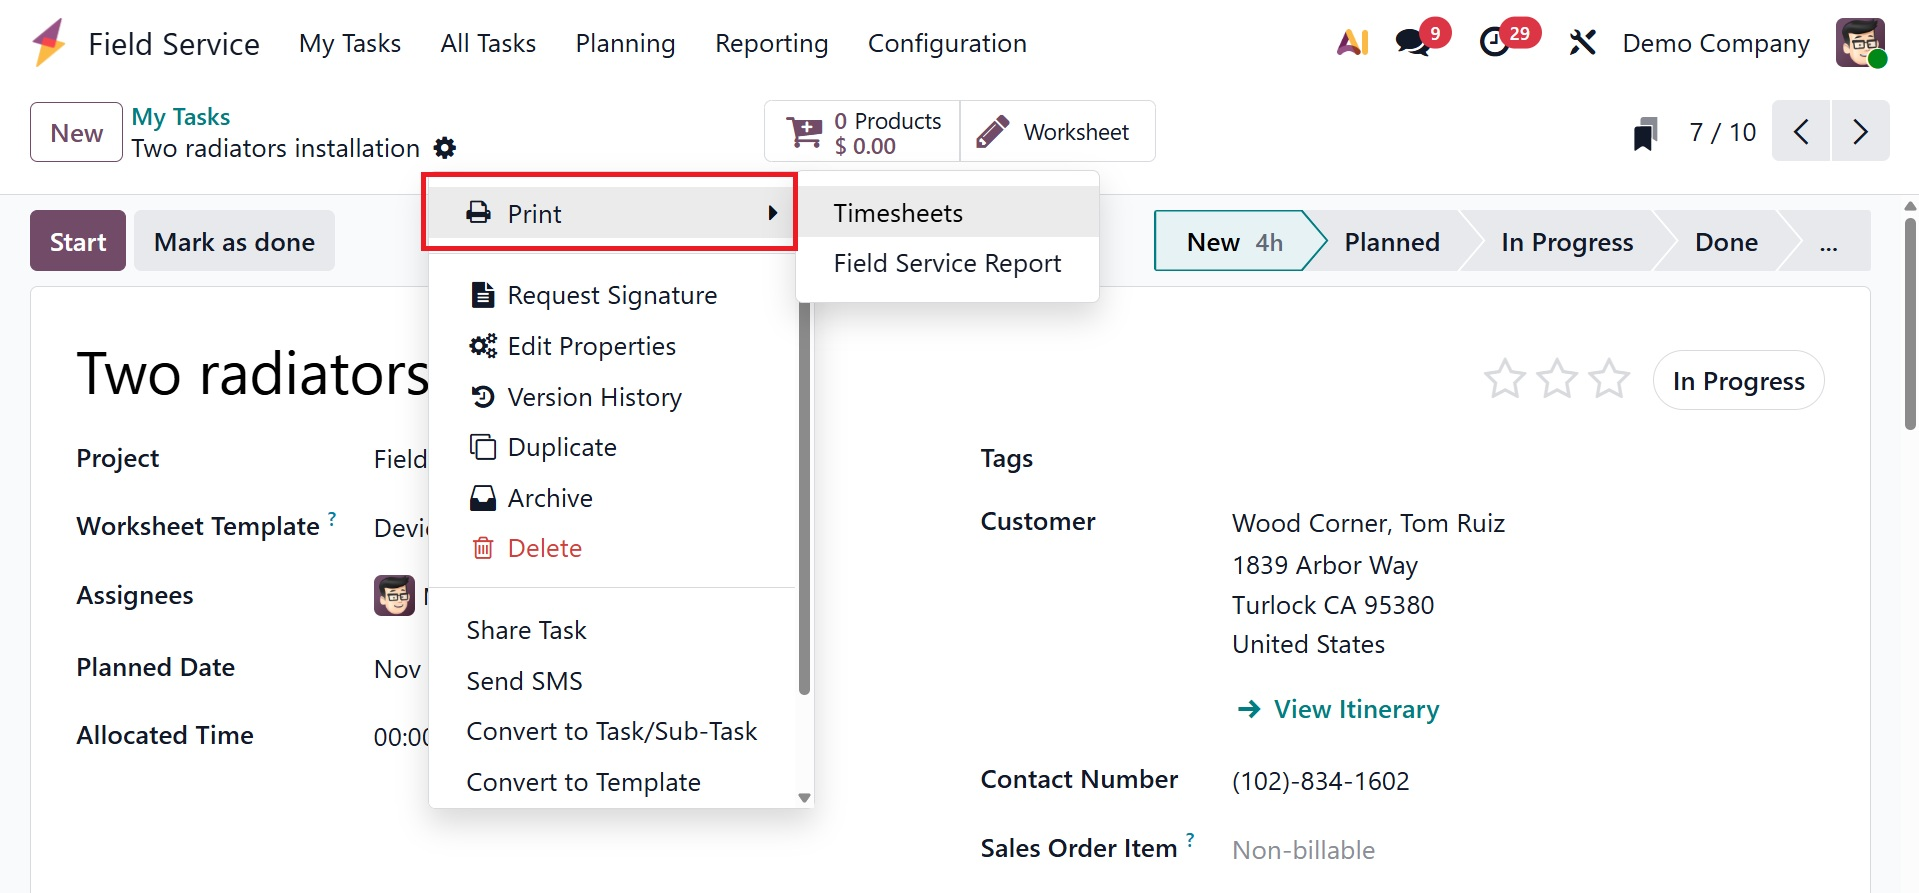
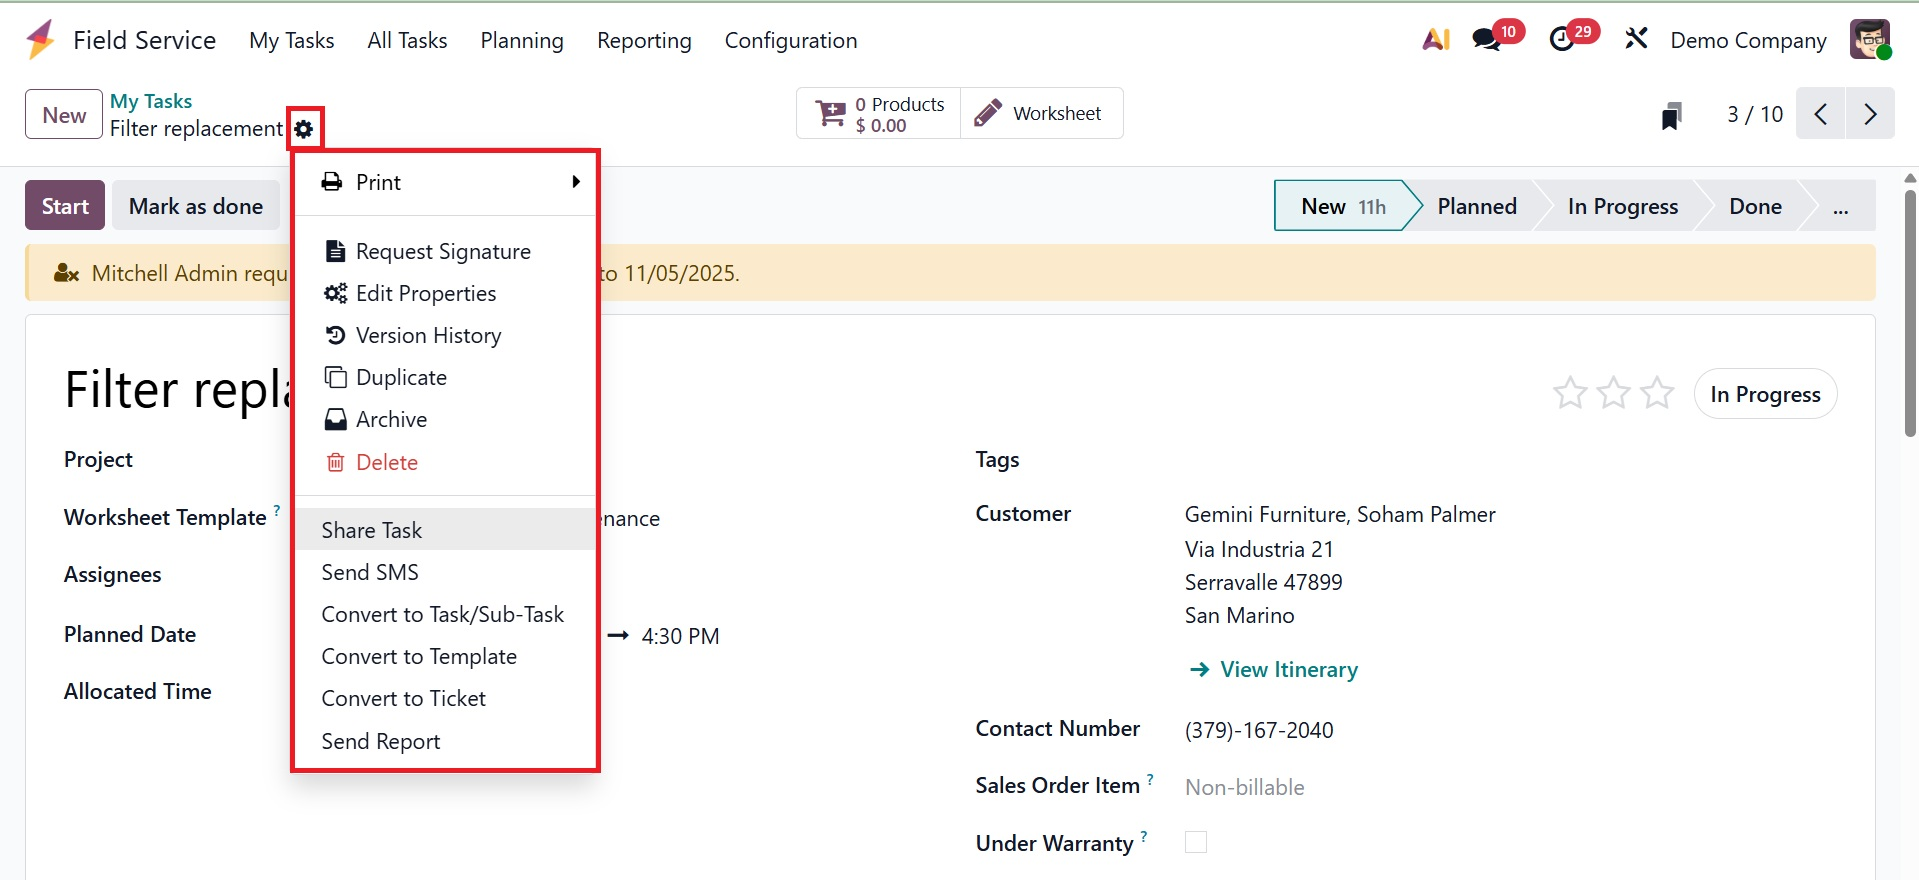
Under the action icon, you have several other options, like:
- Request Signature: Sends a digital signature request to the customer for approval or confirmation of the task.
- Edit Property: Allows you to modify additional field settings or technical properties related to the task.
- Version History: Shows a record of changes made to the task over time.
- Duplicate: Creates a copy of the current task.
- Archive: Moves the task out of active view without deleting it, allowing future restoration.
- Delete: Permanently removes the task from the system.
- Share Task: Generates a shareable link so the task can be viewed by permitted external or internal users.
- Send SMS: Sends an SMS message directly to the customer linked to the task.
- Convert to Task/Sub-Task: Changes the current item into a main task or sub-task within a project.
- Convert to Template: Converts the task into a reusable template for future similar tasks.
- Convert to Ticket: Turns the task into a Helpdesk ticket for customer support processing.
- Send Report: Sends the task report or worksheet to the customer via email.
A digital form or report that the field worker completes after finishing a task is displayed on the Worksheet tab of the Odoo Field Service – My Task site. Once the configuration is complete, click the "Start" button to initiate Odoo's time tracking. Use the "Stop" button to verify the recorded time, which will show up in a pop-up window, after the task is finished. When "Mark as Done" is clicked, the task is completed and an invoice generation button becomes available.
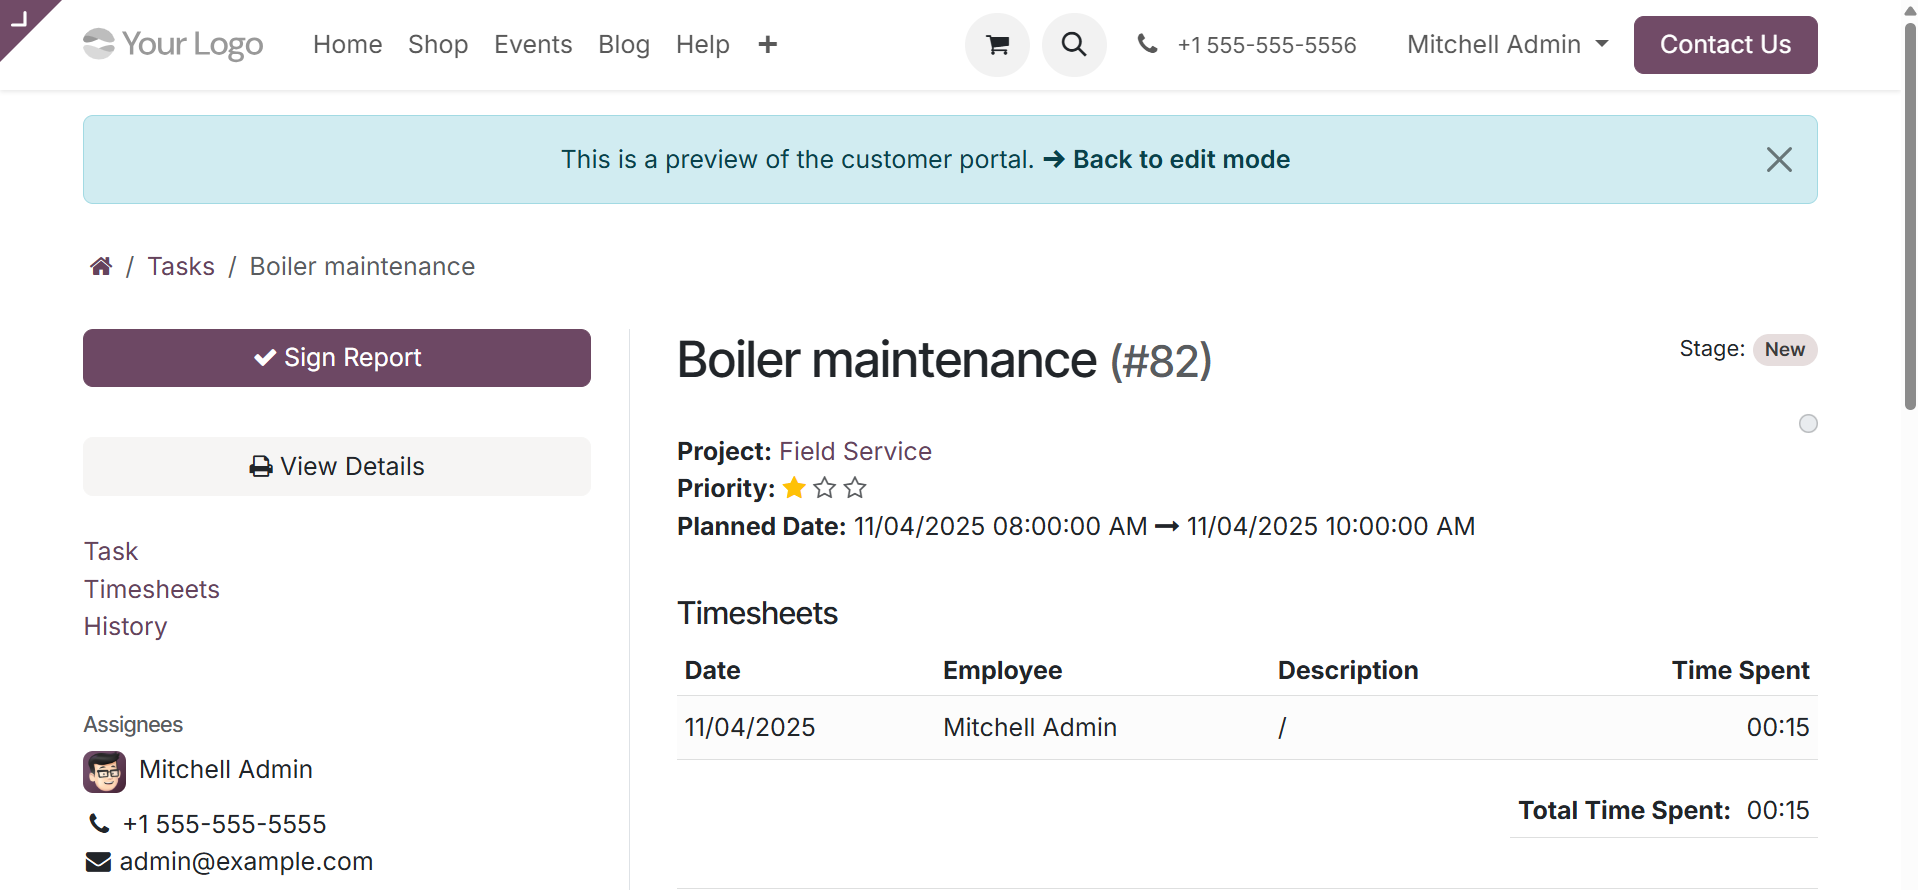
The worksheet report can be sent to the appropriate customer via an automatically created email with attachments by clicking the "Send Report" button. Users can digitally sign documents by clicking "Sign Report" to access the customer portal. On selecting the Sign Report option, you will get the page to sign the report, as shown below.
When you select the Send Report option, you will see the page shown below.
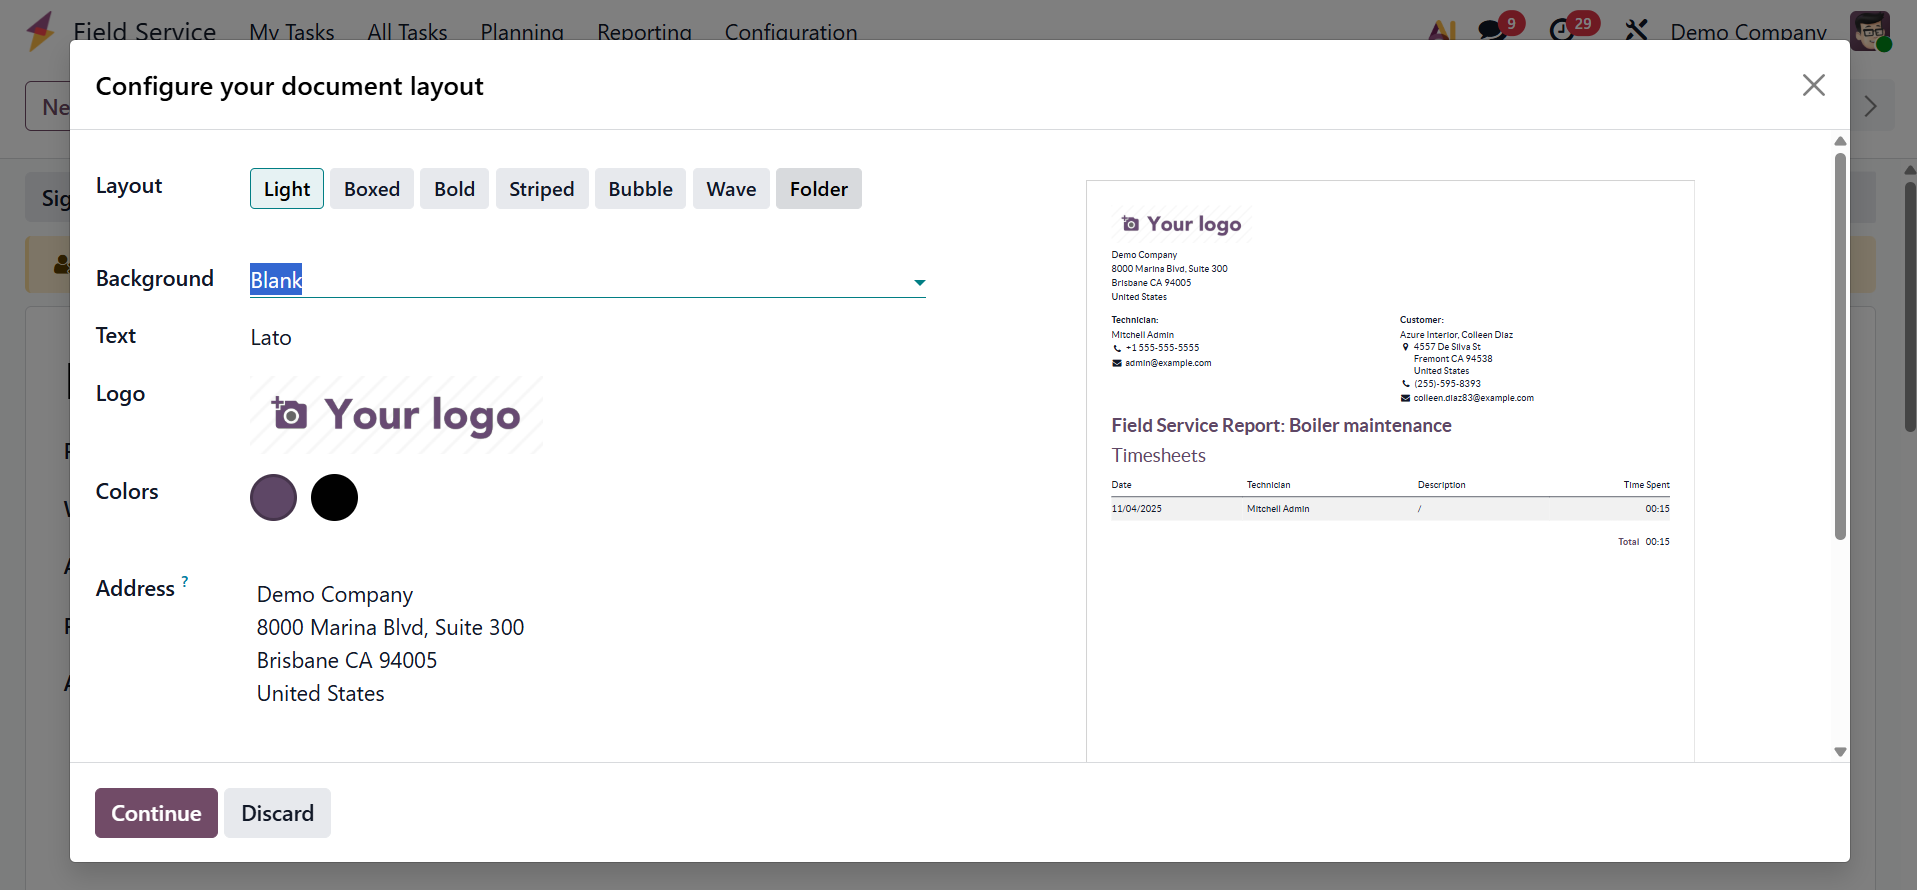
Here, you can decide the layout, background, text, logo, colors, and address, respectively.
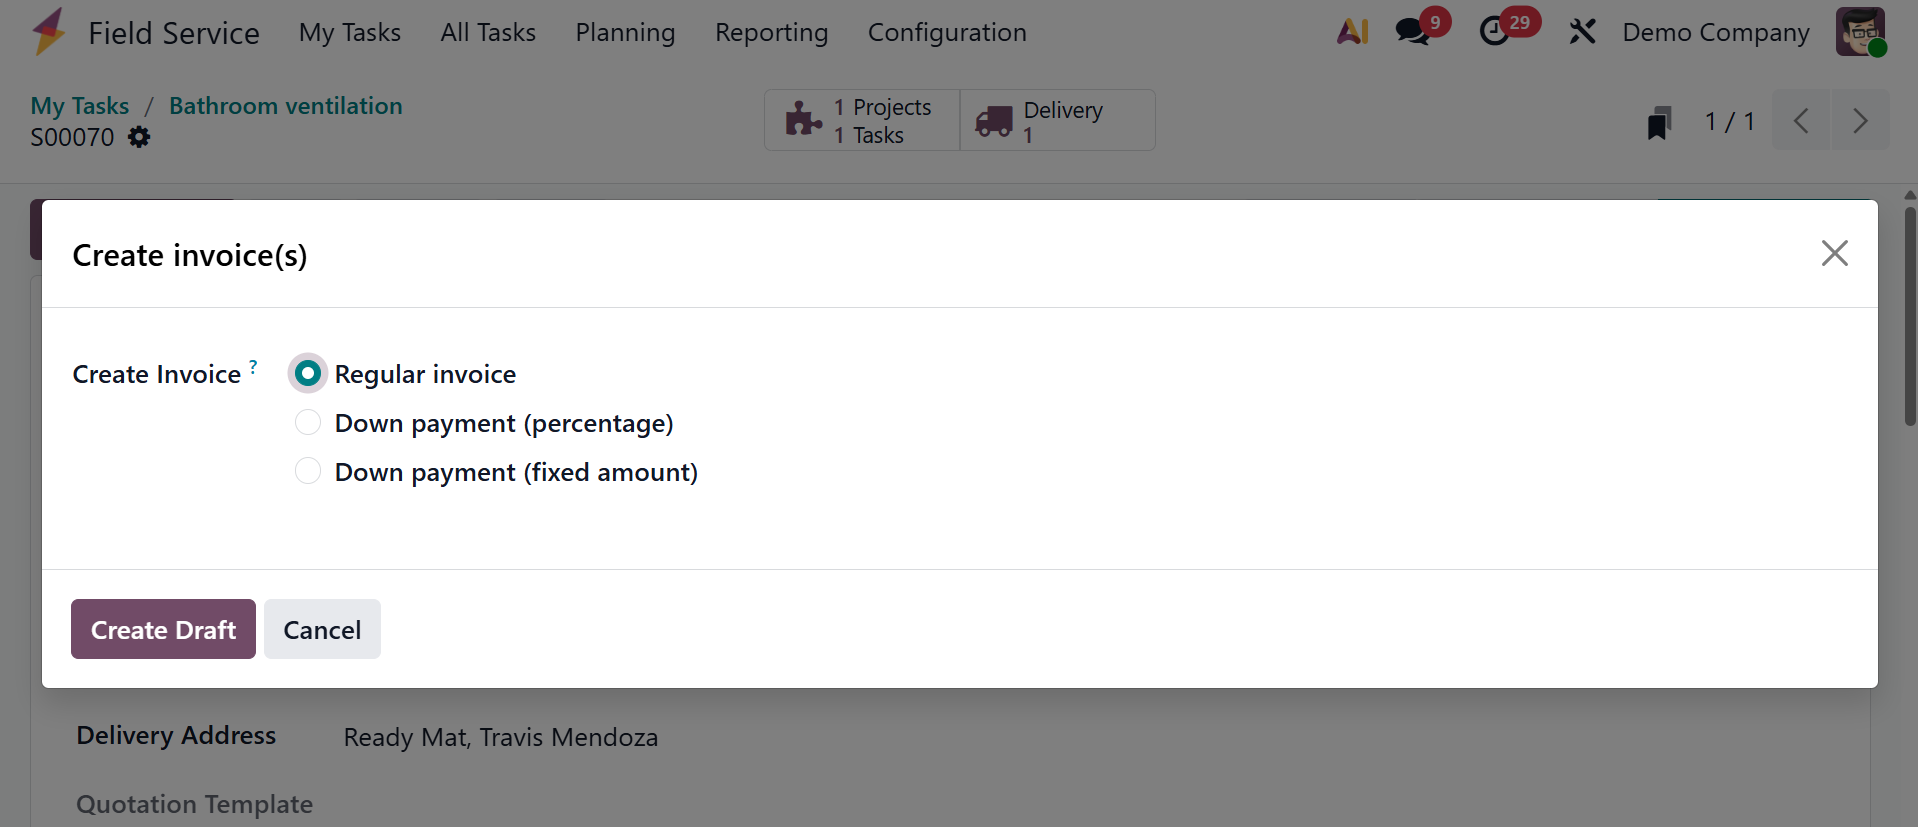
On selecting the Sales Order Tab, you will get the page with the Create Invoice option. As shown in the screenshot below, clicking the "Create Invoice" button will launch a pop-up box where you may select the invoice type, including Regular Invoice, Down Payment (percentage), and Down Payment (fixed amount) with Timesheets Period.
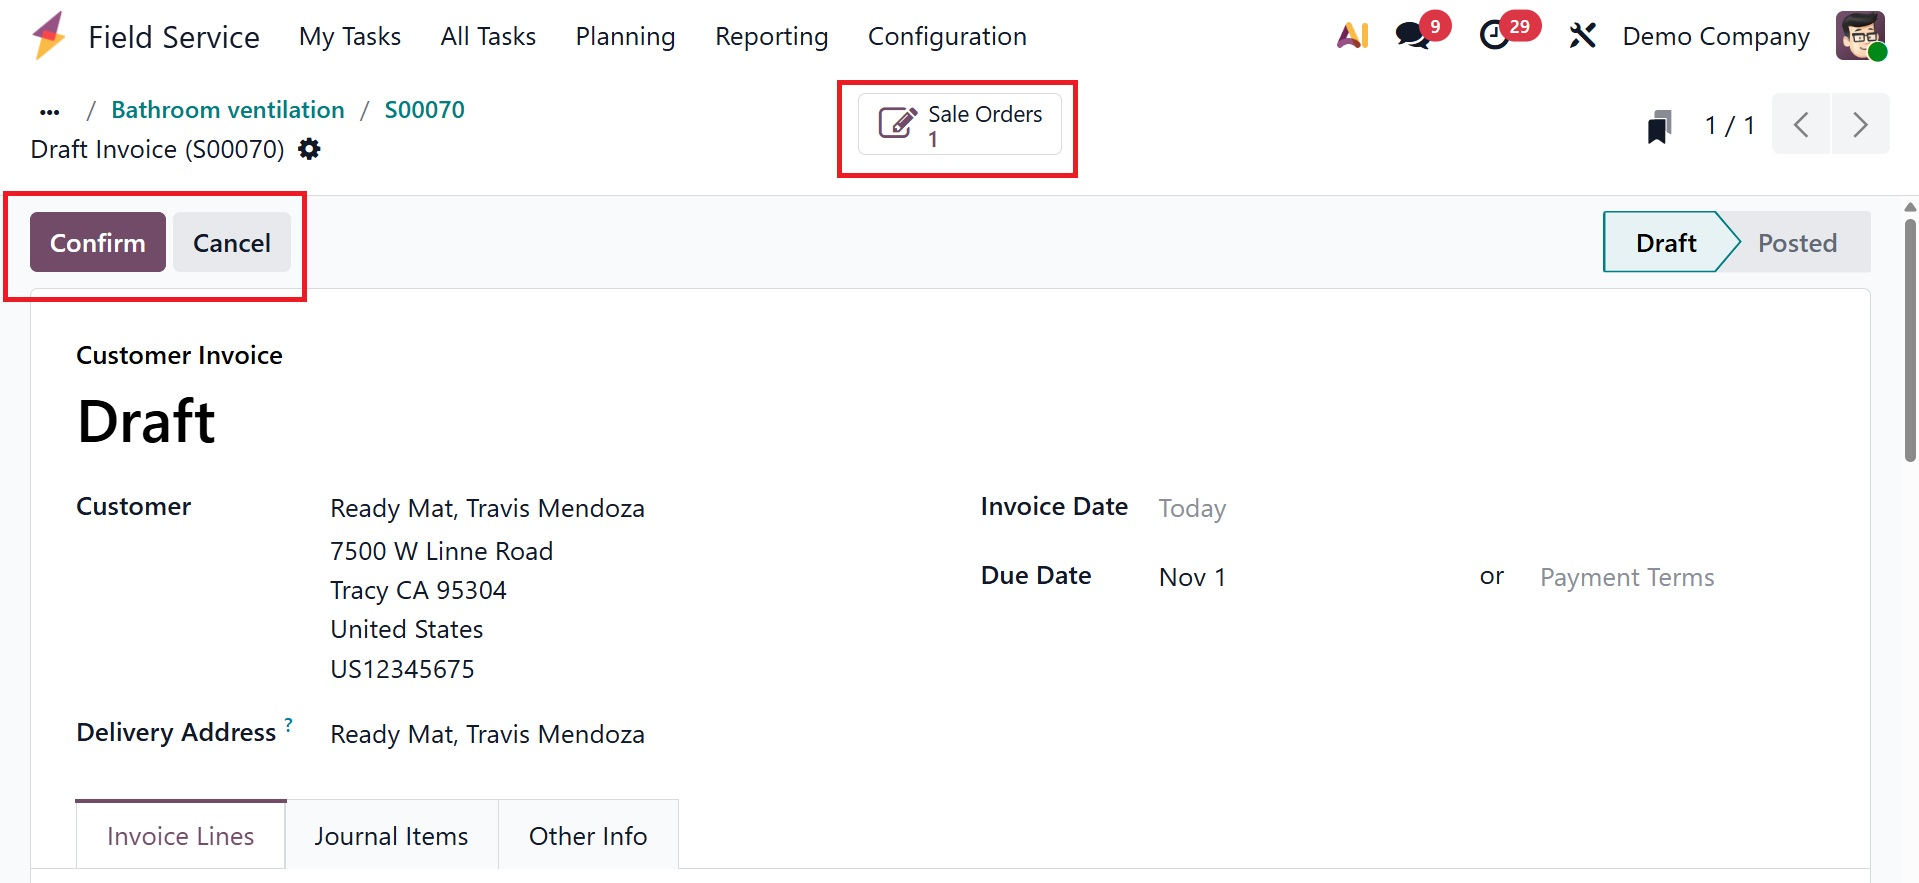
When you click the "Create Draft" button, an invoice with journal items, invoice lines, and other basic invoice details will be created.
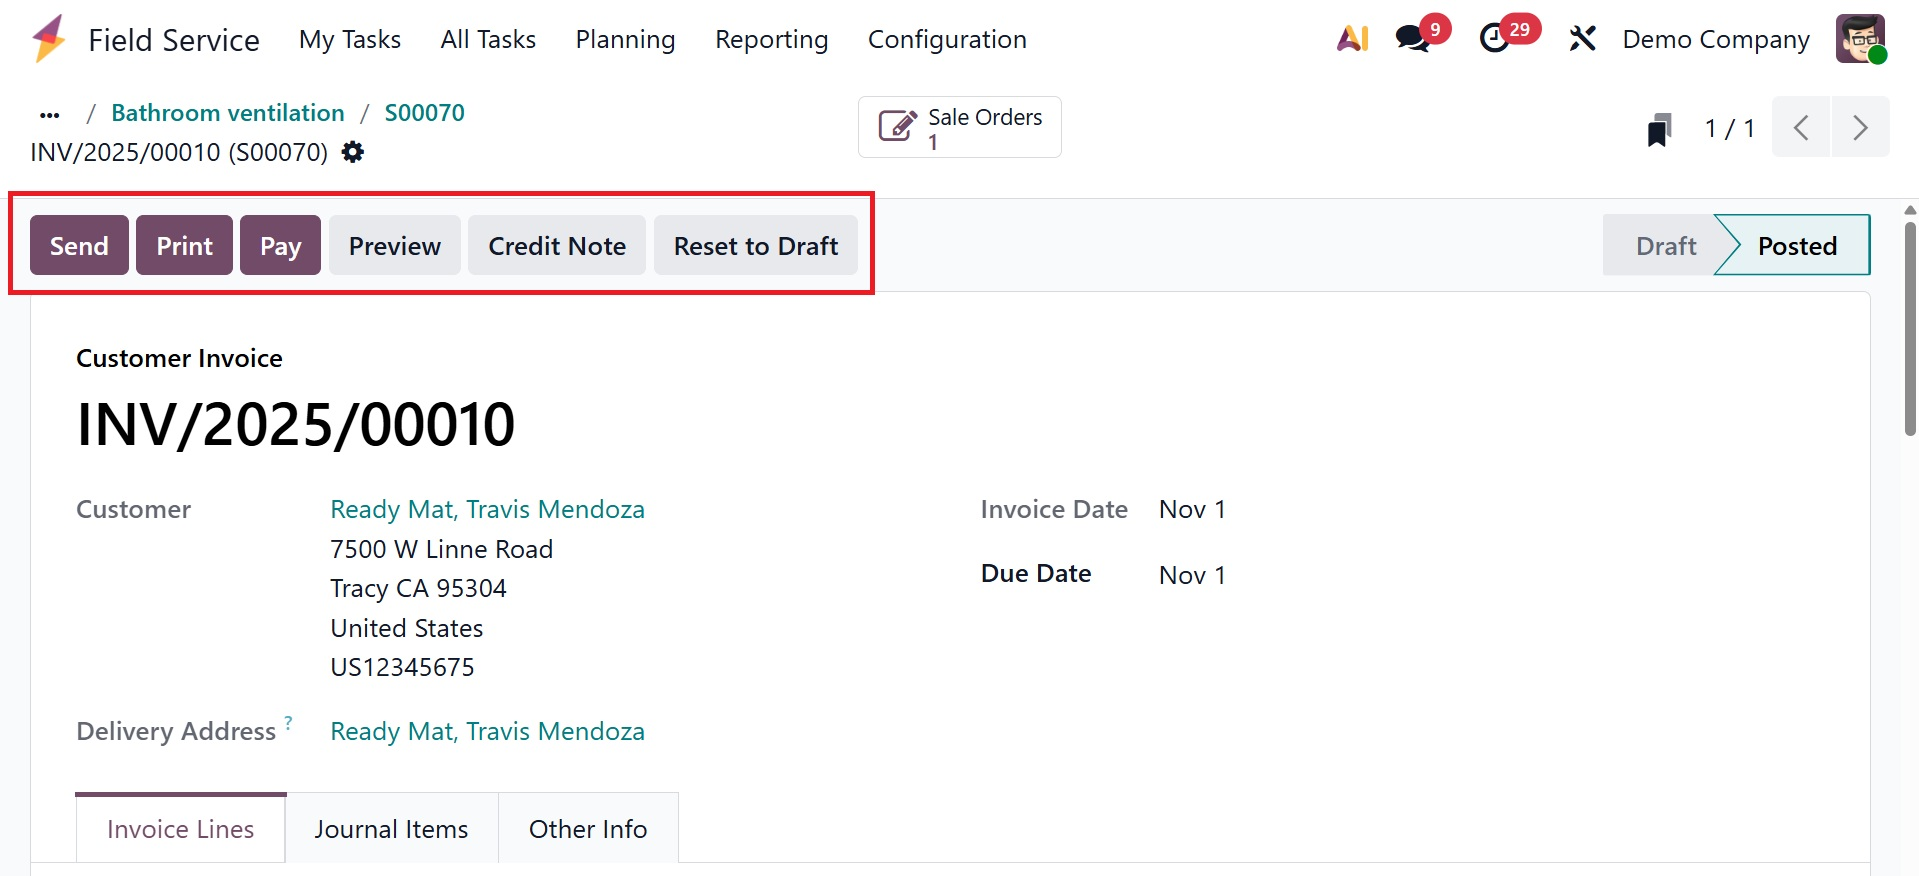
Once the invoice has been edited and verified, you can use the Send, Print, Pay, Preview, Credit Note, and Reset to Draft buttons to send, print, finish the payment, check the invoice print preview, write credit notes, and reset to draft (see screenshot below).
1.1 Map
You can visually monitor and manage tasks based on their location with Odoo 19 (Enterprise)'s Field Service module's Map view. To access the Map view, click the map icon in the upper-right corner. Tasks with verified client addresses will appear as pins on the map. As shown in the screenshot below, you can click on any pin to view additional details about the position.
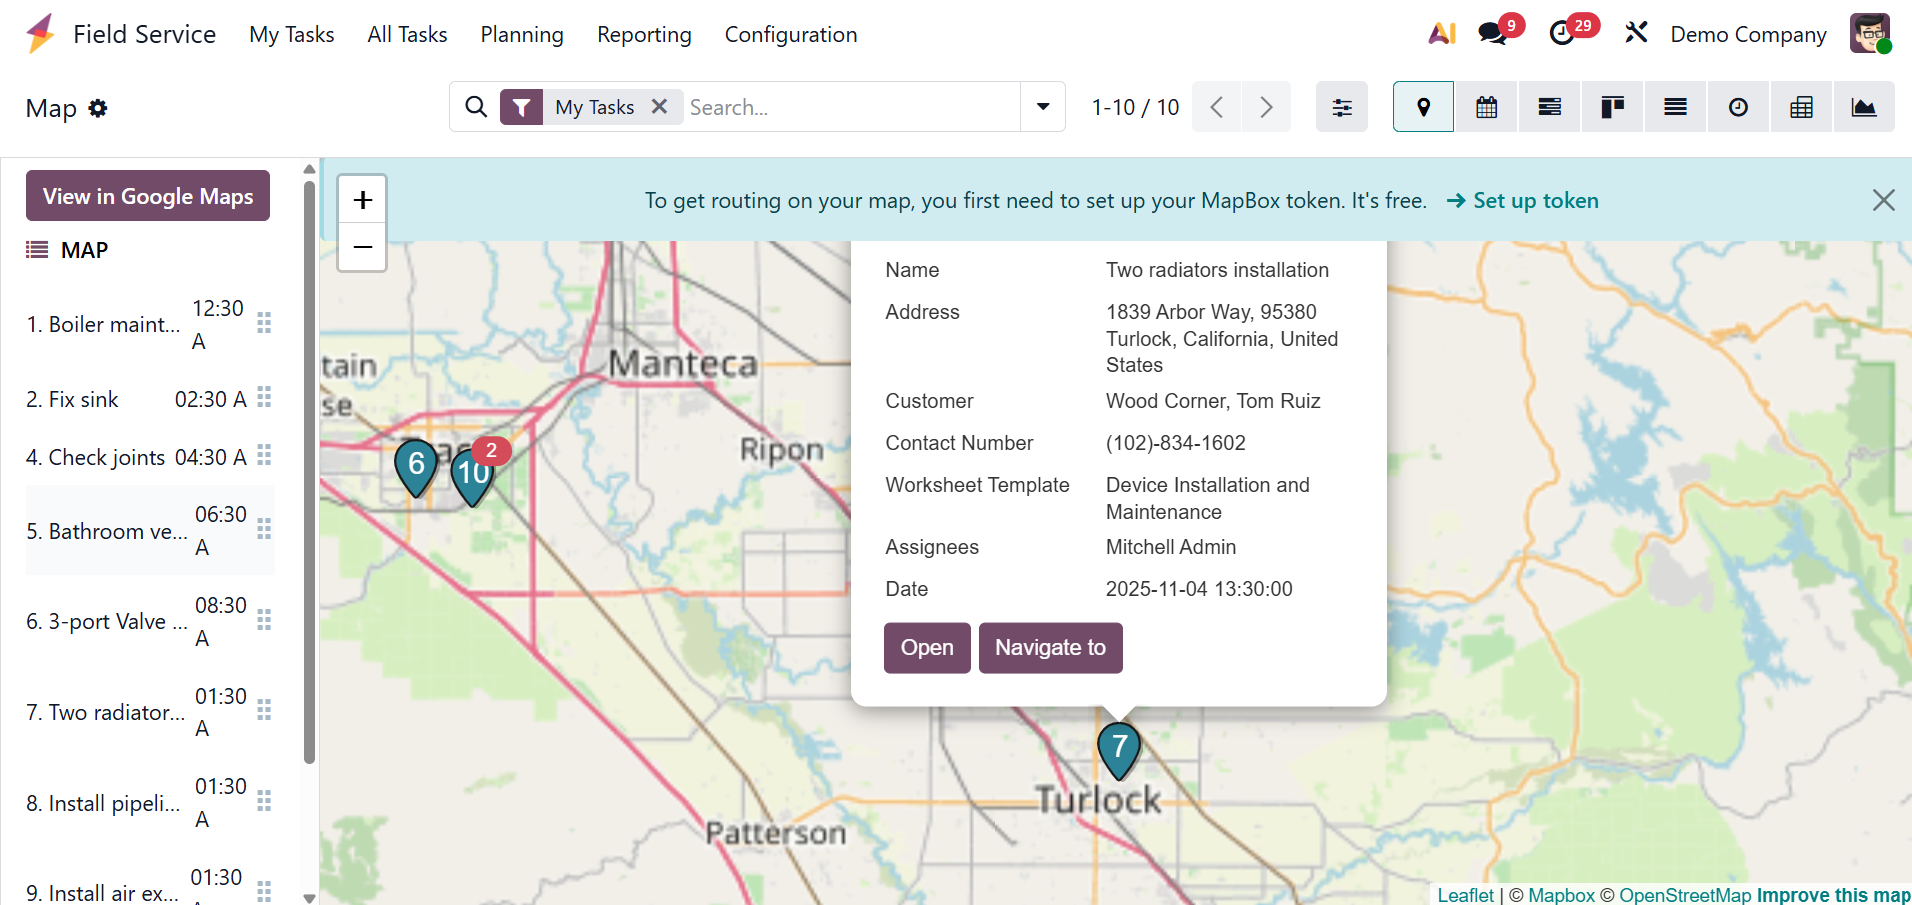
The task locations are determined by the customer's address, so ensure that it contains all pertinent information (street, city, zip code, and country) and that geolocation is enabled (typically via Google Maps or a similar application). If a task's geolocation data is incorrect, it won't appear on the map. The task configuration form for that specific task will open when you click the "Open" button on the task card in the map section. The Google map services will open when the "Navigate to" button is clicked, making it simple for field service staff to find the customer's address.
You may zoom in and out of the map view by using the '+' and '-' icons. Using the corresponding icons located in the upper right corner of the window, users can access the calendar, Gantt, pivot, list, Kanban, and graphical view of the tasks in addition to the map view.