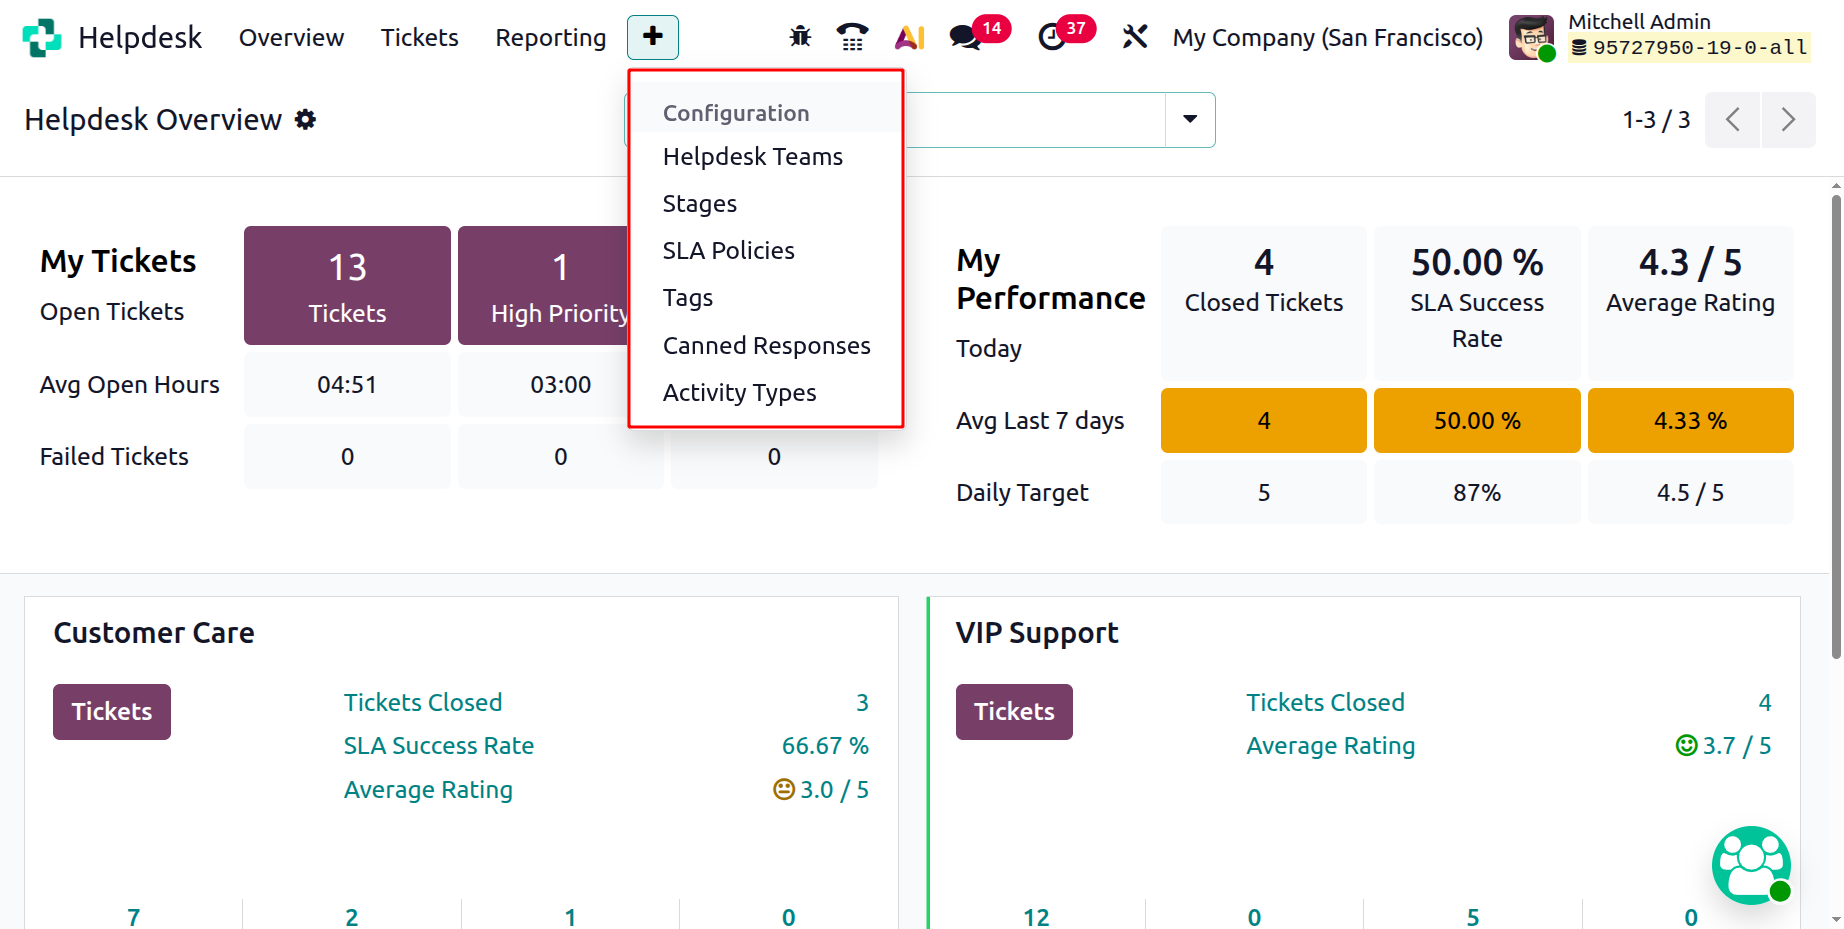
Configuration
Under the Configuration menu of the Odoo 19 Helpdesk module, you will find several important settings that allow you to organize and manage your helpdesk operations effectively. These include options for configuring Helpdesk Teams, Stages, SLA Policies, Tags, Canned Responses and Activity Types. Each of these plays a vital role in ensuring that your customer support process runs smoothly and efficiently.
1.1 Helpdesk Teams
A Helpdesk Team in Odoo 19 represents a group of employees responsible for managing tickets related to a particular product, department, or type of customer issue. Teams make it easier to divide responsibilities, streamline workflows, and monitor overall performance.
You can configure and manage these teams using the ‘Helpdesk Teams’ option from the ‘Configuration’ menu. This will show the list of available teams with their Name, Email Alias and Company details, as shown in the screenshot below.
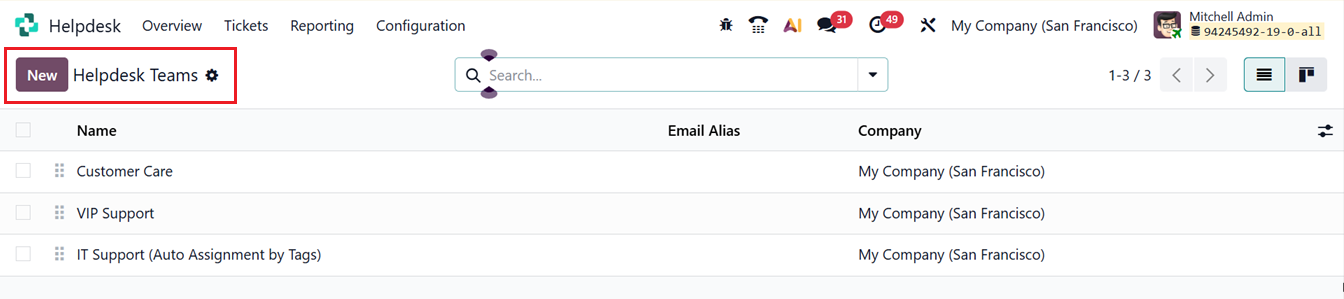
In the dashboard you can see some previously created teams. To create a new team, click on the ‘New’ button, so it will display a new form. This helpdesk team’s configuration form, includes various sections such as Visibility and Assignment, Channels, Help Center, Track and Bill Time, Performance, Self-Service, and After-Sales.
Here, you can add a ‘Name’ and in the Description field, a brief overview of the team’s purpose and responsibilities.
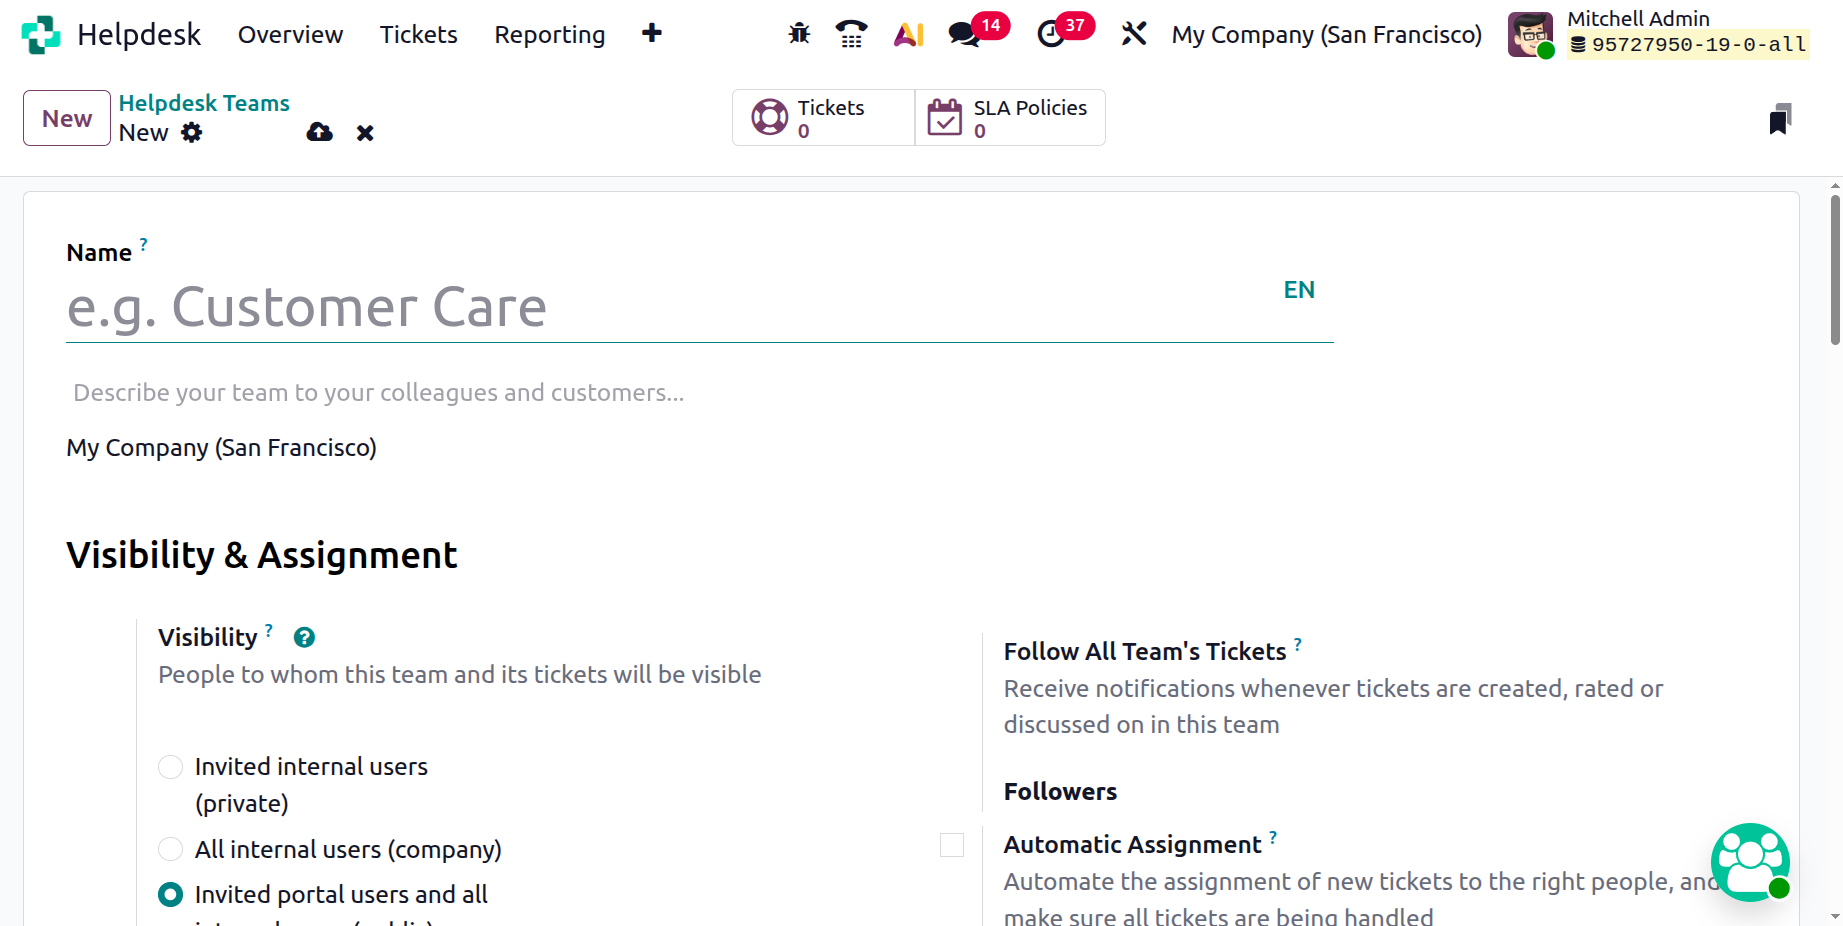
The Visibility & Assignment settings determine who can see this team and its tickets. There are three visibility options:
- Invited Internal Users (Private)
- All Internal Users (Company)
- Invited Portal Users and All Internal Users (Public)

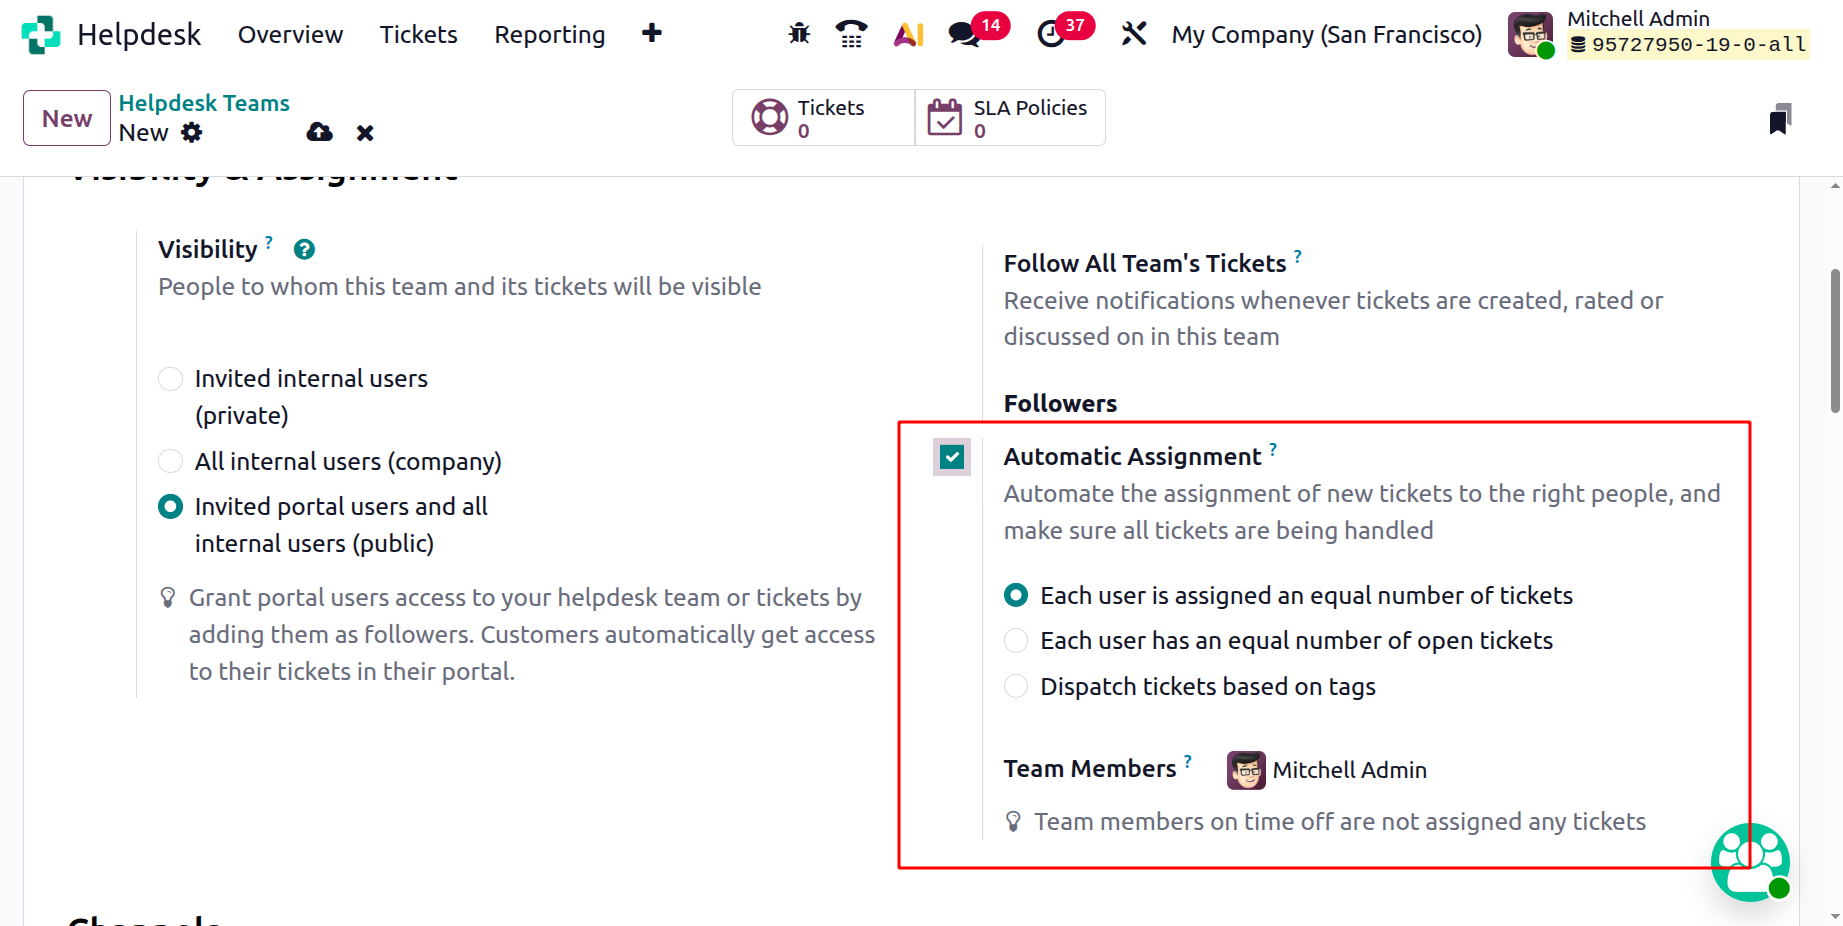
You can also add employees as Followers of the helpdesk team to give them access to tickets. Employees automatically gain access to any tickets assigned to them. By enabling the Follow All Team’s Tickets option, you will receive notifications whenever new tickets are created, rated, or discussed within that team. The Automatic Assignment option ensures that new tickets are automatically distributed to the right people, making sure that all tickets are handled efficiently. You can assign tickets in one of three ways:
- Each user is assigned an equal number of tickets.
- Each user has an equal number of open tickets.
- Dispatch tickets based on tags.
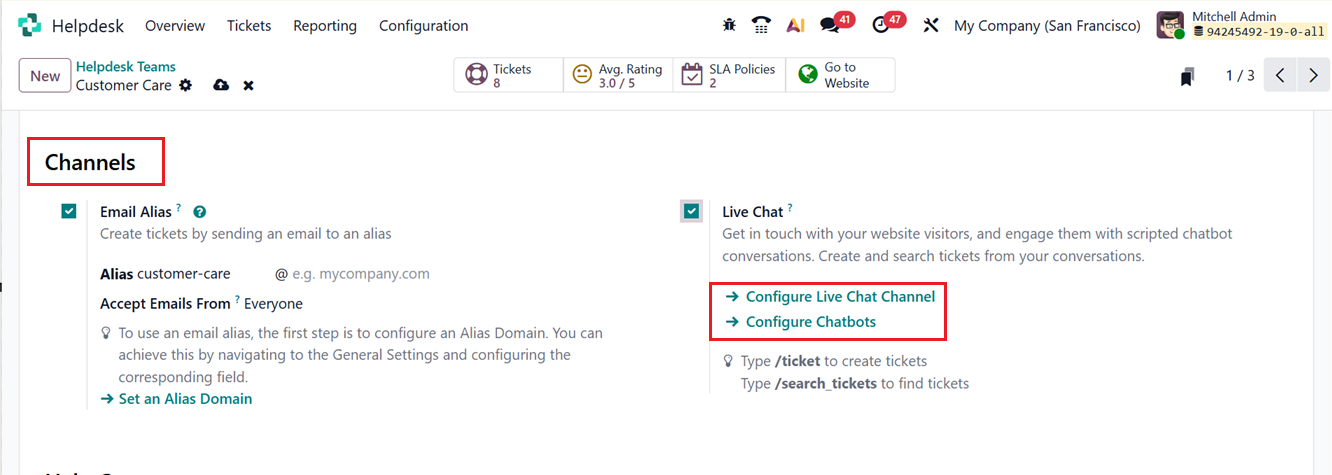
Under the Channels section, you can configure how tickets are created and received. You can set up an Email Alias to allow customers to create tickets simply by sending an email. Enter the alias email address in the provided space.
Next, you can enable the Live Chat option, which lets you engage with visitors on your website using chatbots or live agents. Through live chat, you can create tickets directly from customer conversations. When the Live Chat setting is enabled for a helpdesk team, a new Live Chat Channel is automatically created. You can customize this channel by clicking Configure Live Chat Channel.
On the channel settings page, you can edit the Channel Name, which is automatically named after the helpdesk team by default. Under the Agents tab, you can assign users who will act as chat agents.
Click on the Add to include new operators or New to create additional ones. After selecting the desired operators, click Save & Close or Save & New to finalize.
On the channel settings page, you can modify the Channel Name if needed, although Odoo automatically assigns a name that matches the Helpdesk team by default. You can also remove or modify existing operators from the Agents tab.
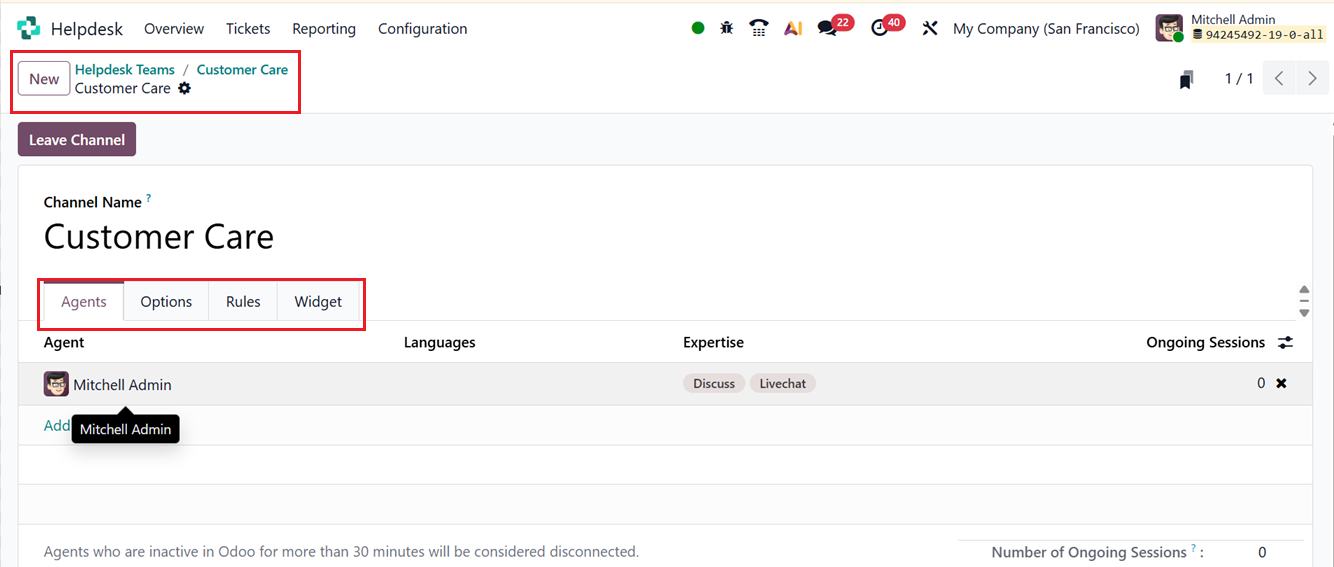
From the channel form, you can move through the various tabs to complete the configuration. In a channel, the Agents refer to the users who act as support agents and respond to customer inquiries through live chat. The user who initially created the live chat channel is added as an operator automatically. To include additional operators, open the Agents tab and click on the Add a line button.
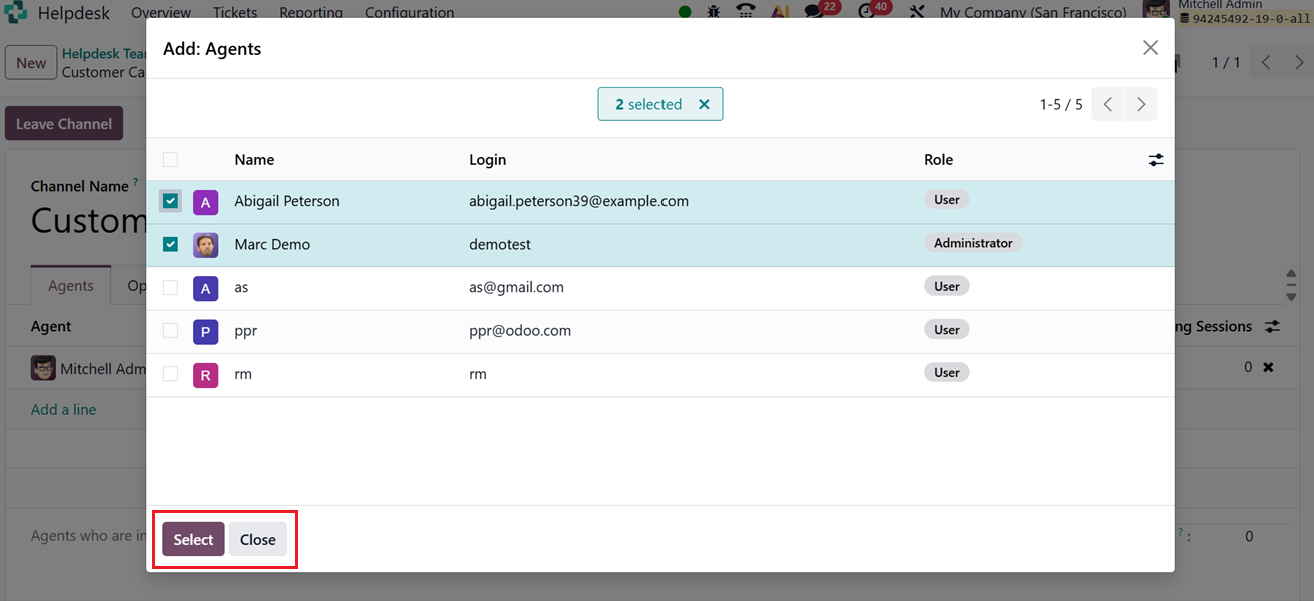
- In the Add: Agents pop-up window, select the checkboxes next to the users you want to include. Then, choose the ‘Select’ option to add them to the system.
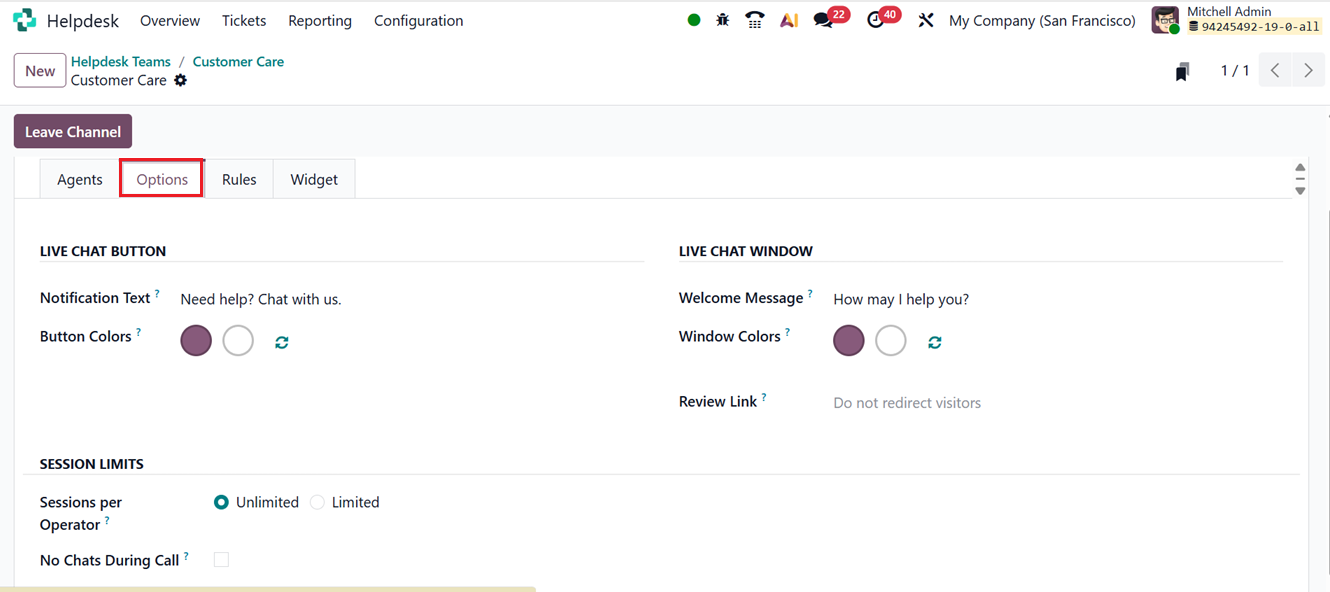
- Notification Text: This option allows you to modify the greeting message that appears in the text bubble when the live chat button becomes visible on the website.
- Live Chat Button Color: This setting lets you adjust the color of the live chat button displayed on the website. To change the color, select one of the color circles to open the color picker, then drag the cursor across the gradient to choose the desired shade. Click outside the picker to finalize your selection.
You can also configure the live chat window itself by setting a welcome message, defining the chat input placeholder text, and choosing a color for the channel header.
In the Rules tab, you can define when and where the live chat will appear on your website. You can create specific rules by clicking on the Add a Line button, as shown in the screenshot below.
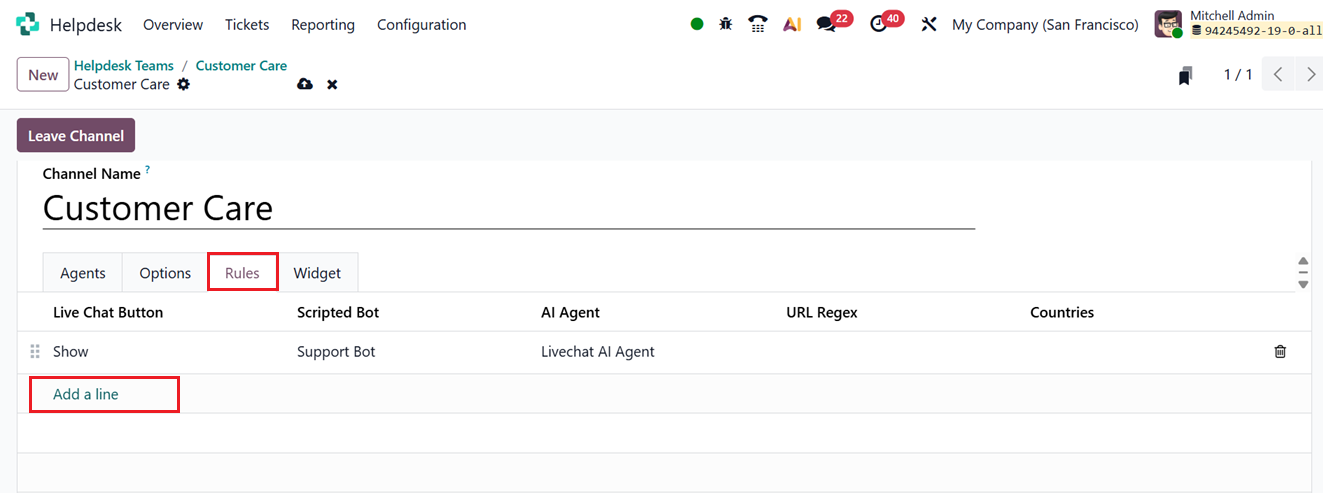
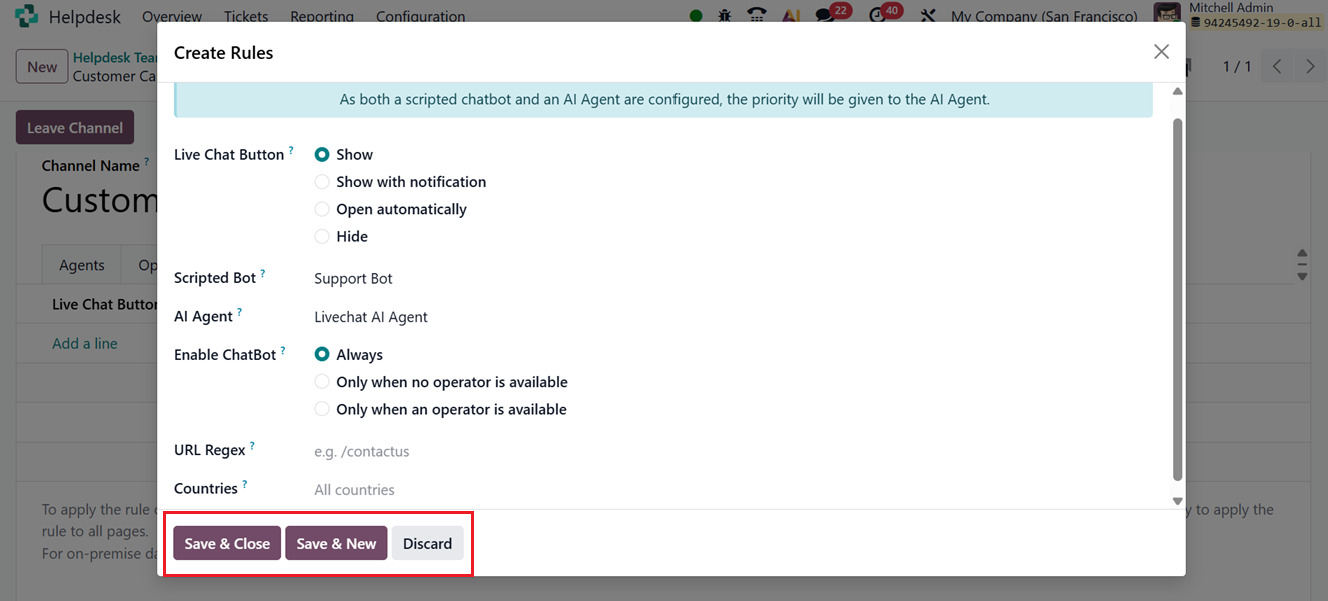
The ‘Add a line’ button will display a new pop-up window, where you can create new channel rules by entering the
- Live Chat Button that determines when the chat widget has to be Show, Show with notification, Open automatically or Hide.
- The Scripted Bot can greet users with predefined flows to gather basic details before involving an agent.
- The AI Agent provides intelligent, context-aware responses to common questions, reducing manual workload.
- The URL Regex field lets you specify exactly which web pages the rule applies to using pattern-based URL matching.
- The Countries option limits the rule to visitors from selected regions, as shown in the screenshot below.
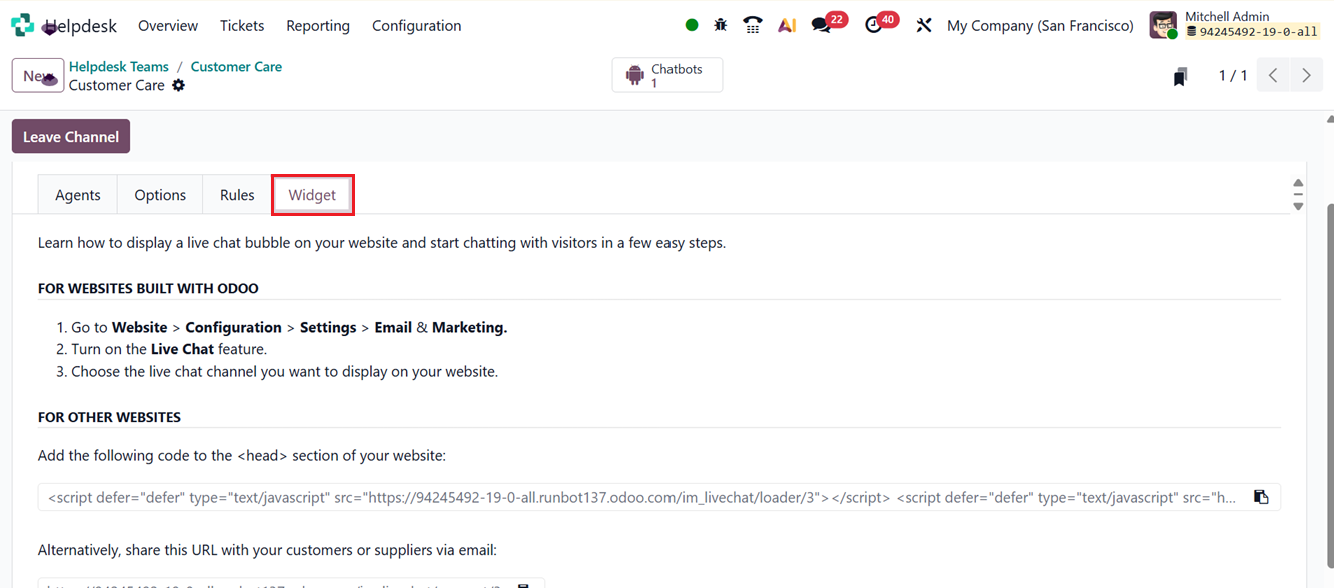
The Widget tab provides a snippet of code that you can add to external websites, as well as a direct URL for instant chat access, a s shown in the screenshot below.
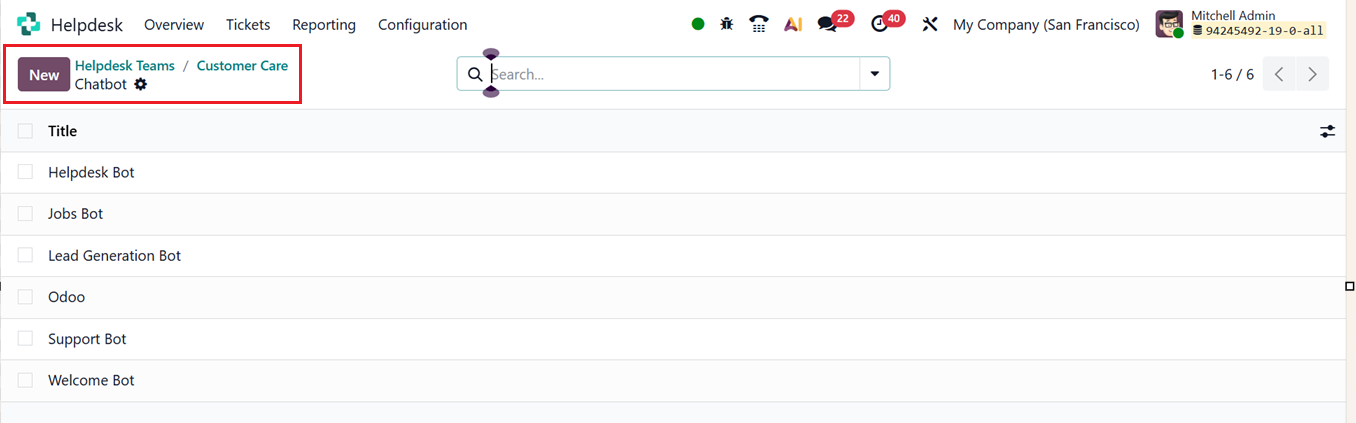
Once your live chat is set up, operators can communicate with customers in real time. You can also configure a Chatbot by selecting the Configure Chatbot option.

You can see the available chatbots in the Chatbot dashboard, as shown in the screenshot below.
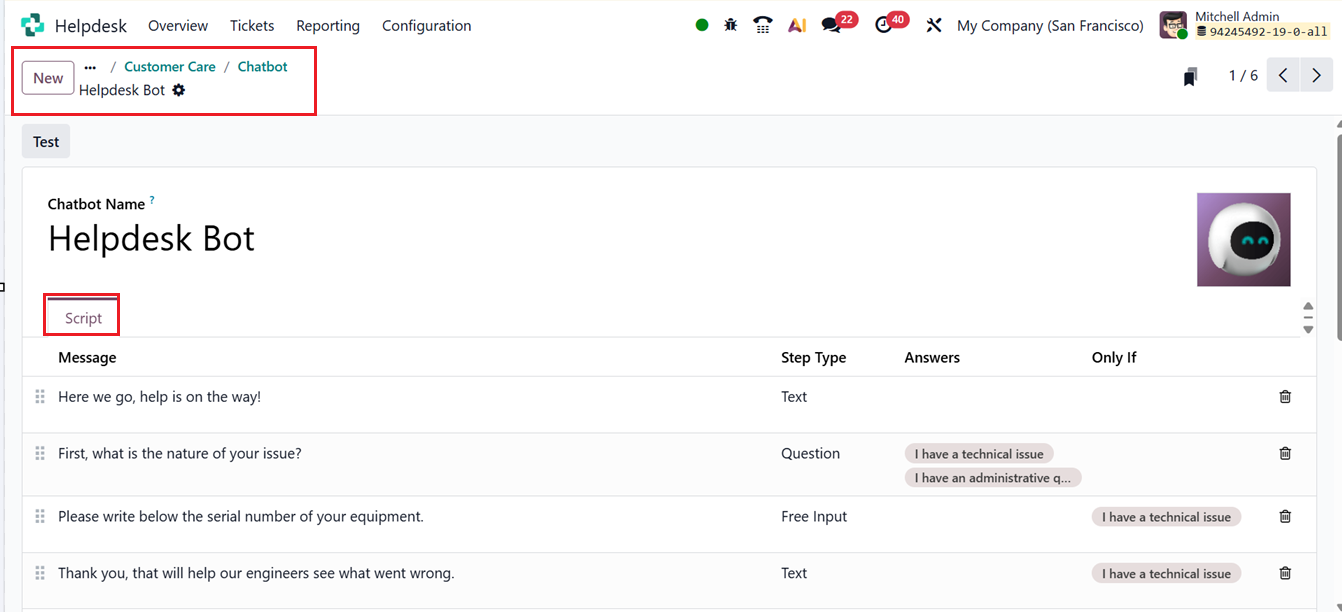
Once a chatbot is added, a new Chatbot smart button will appear on the channel settings form. Opening the chatbot configuration form allows you to create and manage automated chat scripts.
Here, you can manage the chatbot’s script including a Message, Step Type, Answers choices, and optional Conditional Logic (Only If) for customized flows. You can add new steps by clicking Add a Line and defining each message or question, as shown in the screenshot below.
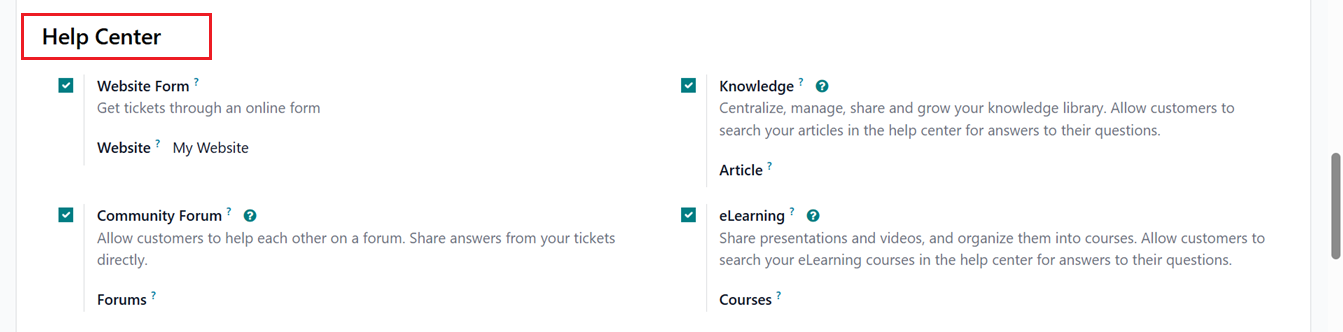
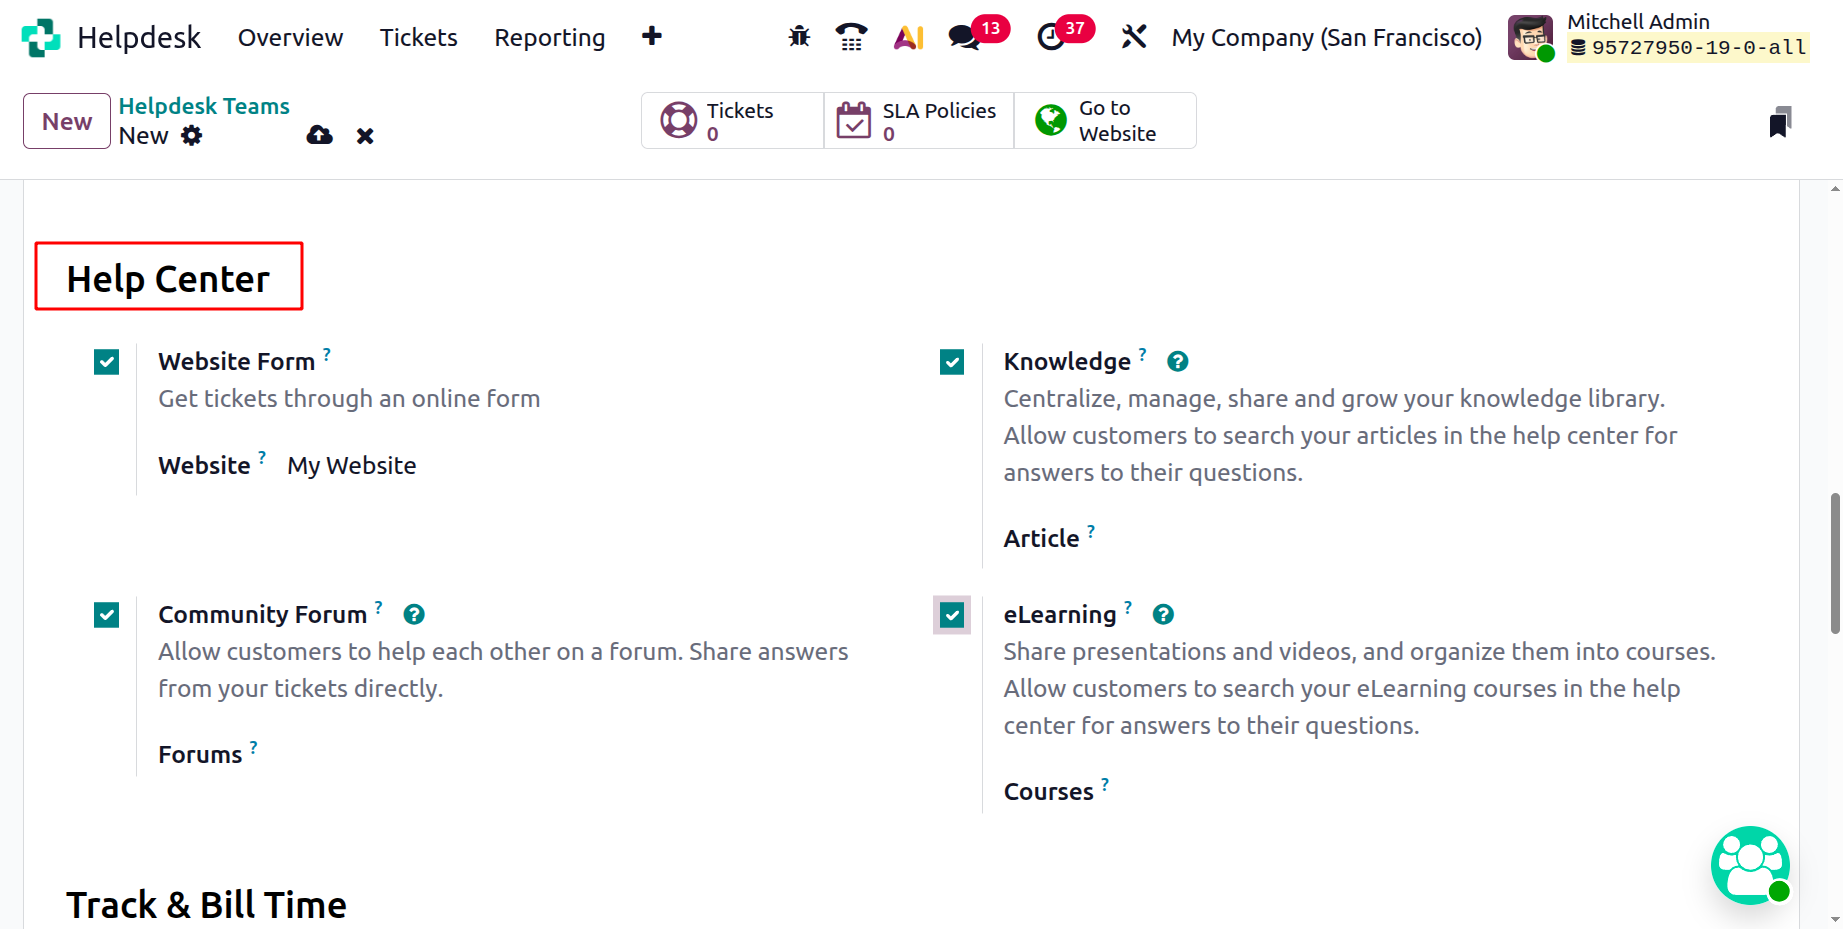
Then, come back to the main Helpdesk team configuration form. Below the Channel configuration section, you’ll find the Help Center section, which includes features like Website Form, Knowledge, Community Forum, and E-learning options, as shown in the screenshot below.
The Website Form feature allows you to collect tickets directly through your website. By enabling this option, an online form is created where customers can submit their issues. You can configure this website settings inside the website form,as shown in the screenshot below.
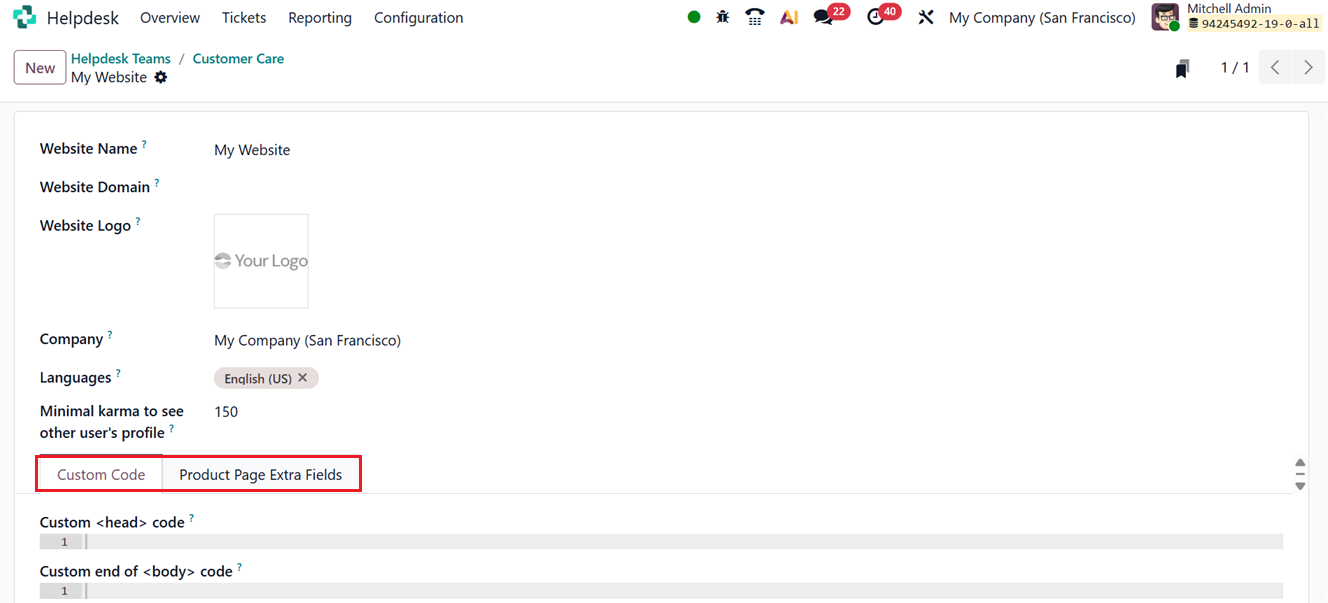
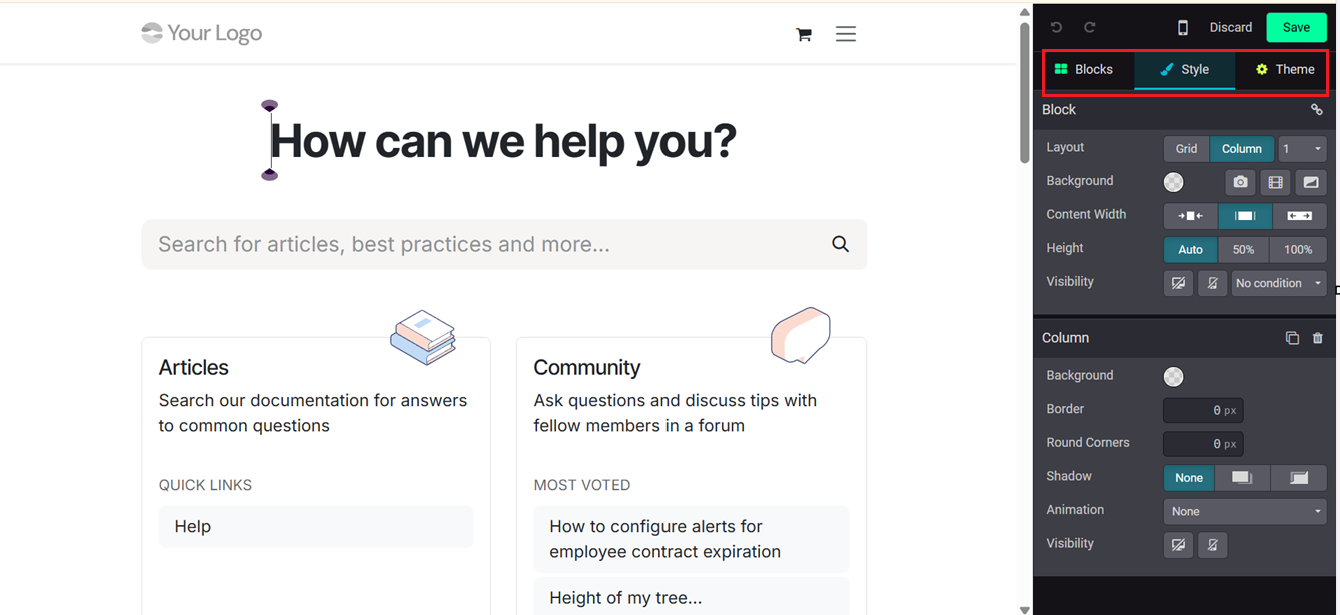
After activation, the system creates a website form that you can access by clicking on the Go to Website smart button. From this page, you can customize the form’s fields and other specifications as per your requirements using the website editing tools and themes, as shown in the screenshot below.
- The Knowledge feature allows you to build and manage a knowledge base where customers can find answers to common questions on their own.
- The Community Forum option enables customers to help each other by posting questions and sharing solutions. Once enabled, you can choose which forum to connect with your helpdesk. You can even create a helpdesk ticket directly from a forum post or link a ticket back to the forum discussion.
- The E-learning feature lets you share educational content like presentations and videos organized into courses, allowing customers to find solutions by browsing your online training material.
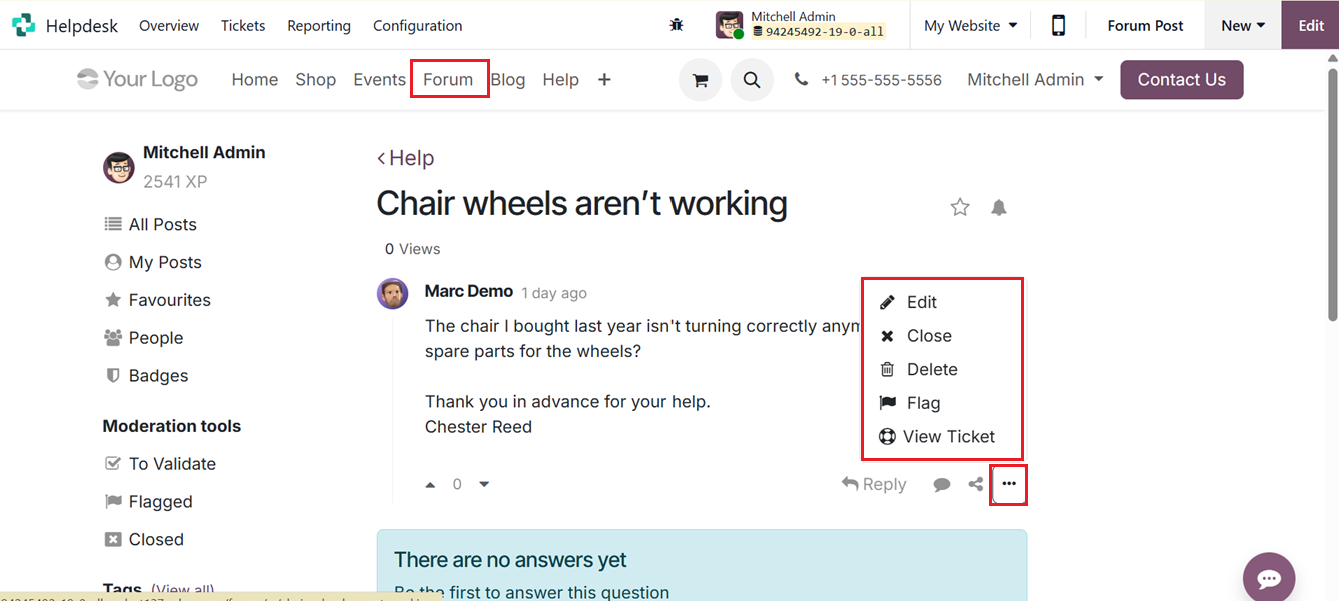
When a forum post is created, the user can click the three dots menu inside the forum post window and choose View Ticket option to see the related ticket.
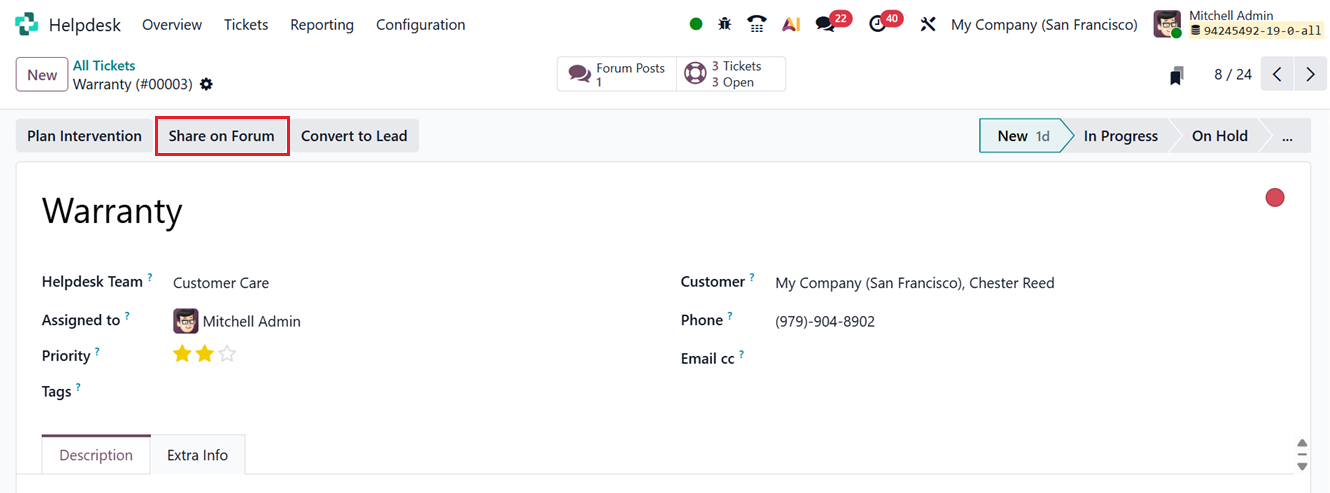
Similarly, you can navigate from a ticket’s chatter to the connected forum post and share replies directly to the forum using the ‘Share on Forum’ button, as shown in the screenshot below.
The ‘Track & Bill Time’ section includes options for Timesheets, Time Billing and Project. The Timesheet option allows you to record the time spent on tickets while the Projects field specifies the project to which the timesheet entries for this helpdesk team’s tickets will be associated. Finally, the Time Billing helps you bill customers based on that recorded time.
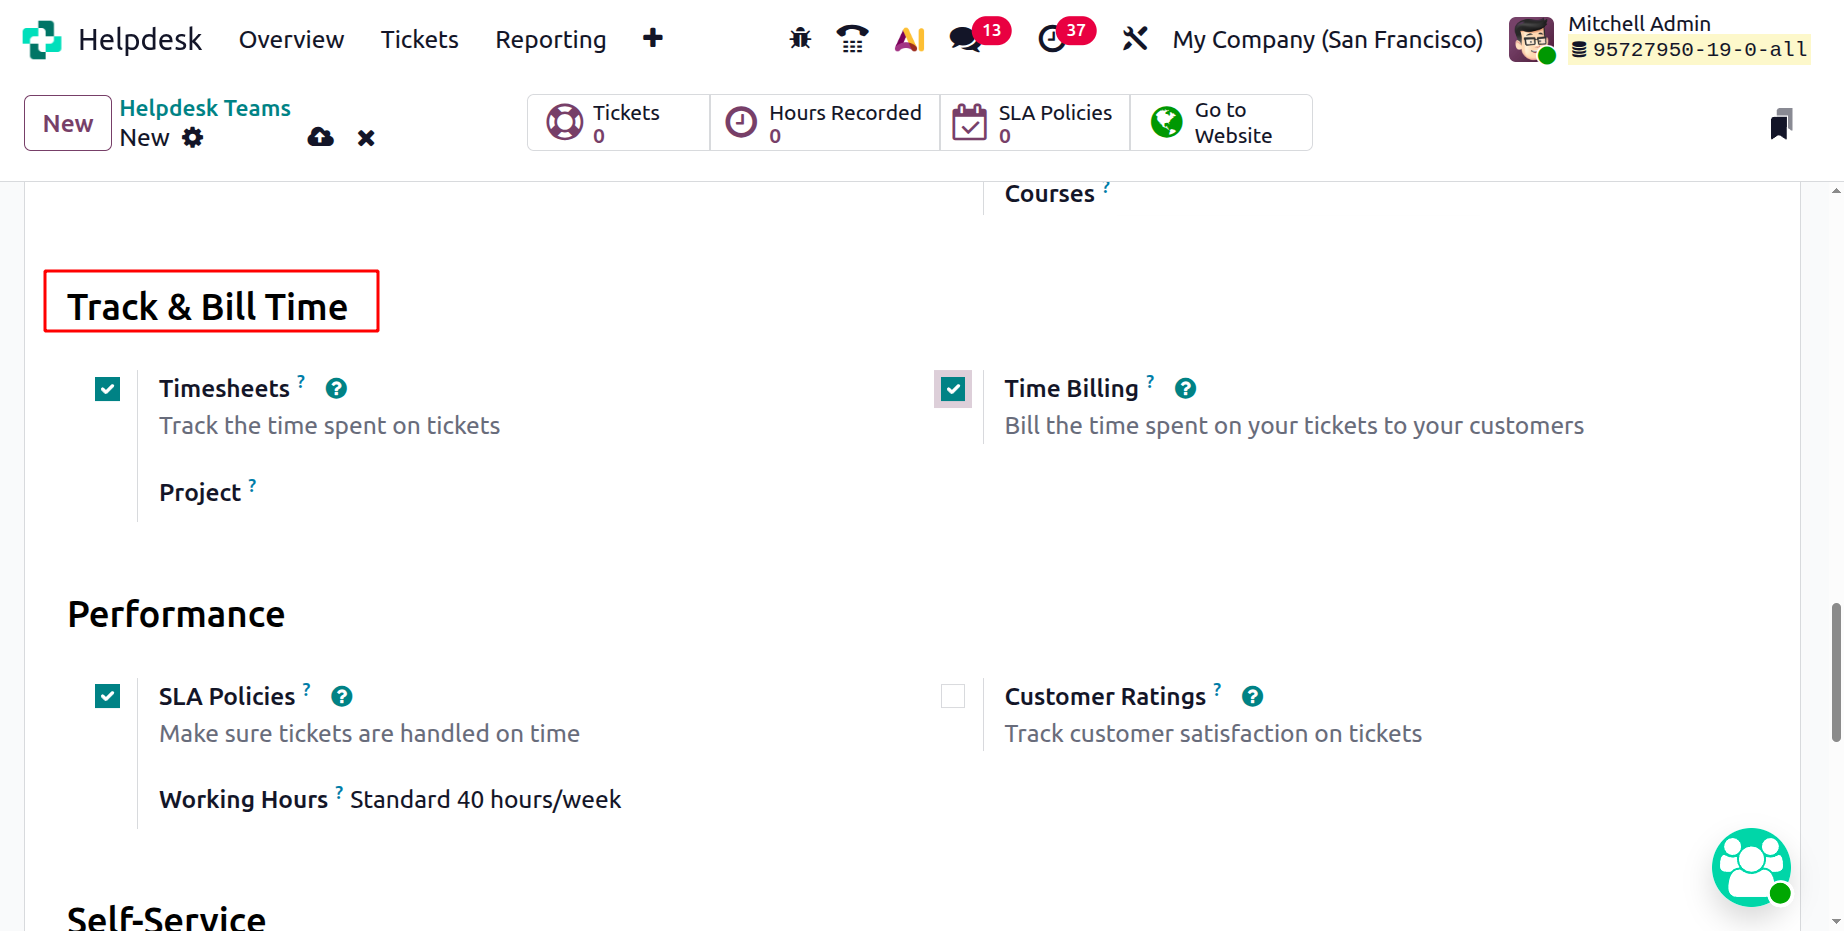
Under the Performance section you can enable SLA Policies and Customer Ratings. SLA Policies ensure tickets are handled on time, while Customer Ratings help track how satisfied customers are with the support they received.
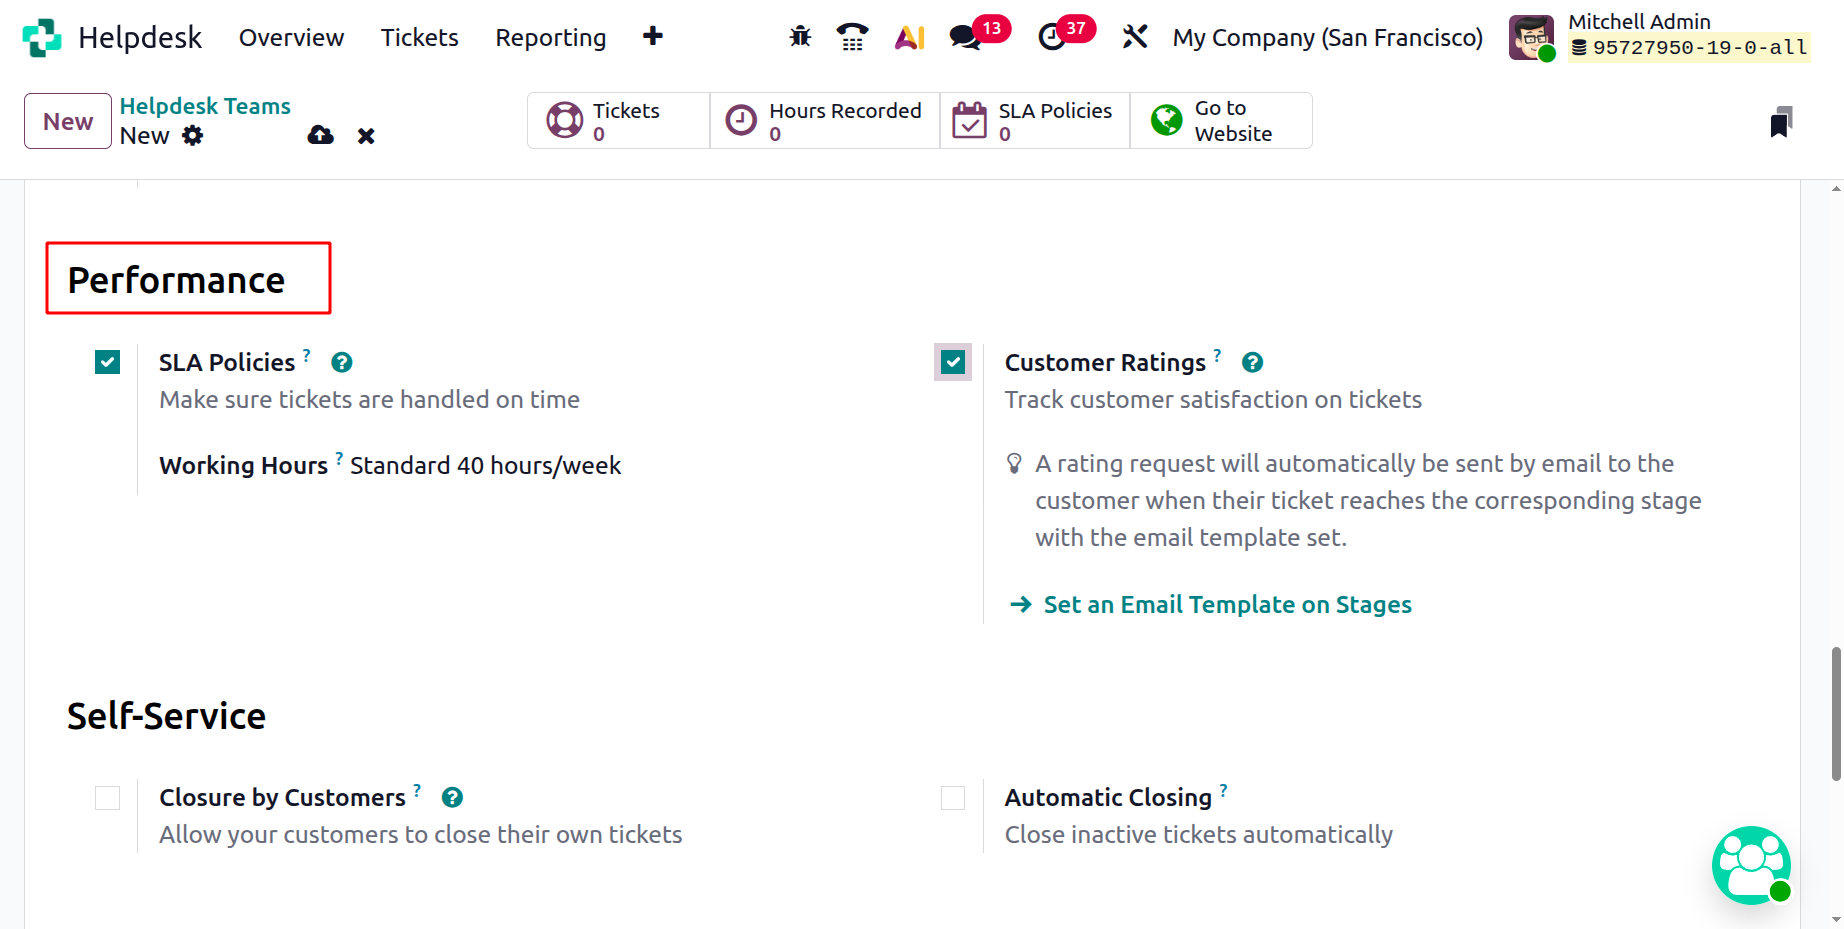
The Self-Service section offers automation options such as:
- Closure by Customer: allows customers to close their own tickets through the portal.
- Automatic Closing: automatically closes tickets that remain inactive for a set period.
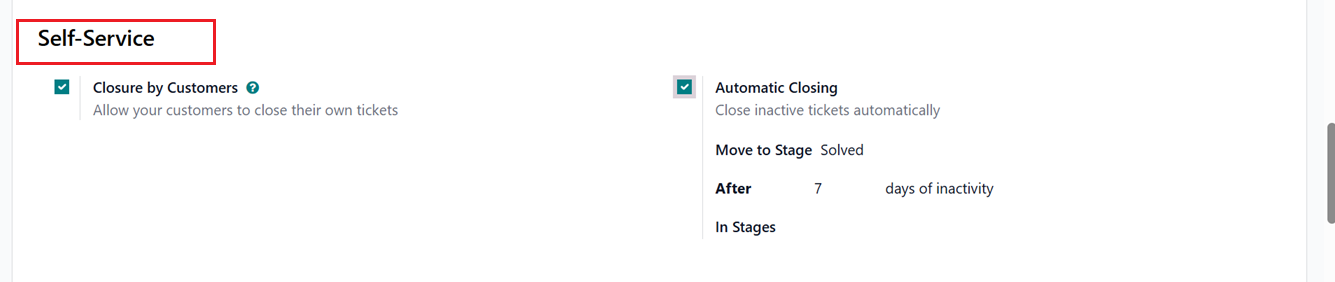
Within the Self-Service section, you can activate Automatic Closing to automatically move inactive tickets to a designated stage. The default stage selected in the Move to Stage field depends on the Kanban configuration:
- If one stage is folded, it is chosen automatically.
- If multiple stages are folded, the first one in the pipeline is selected.
- If none are folded, the last stage becomes the default.
The After days of inactivity value is set to 7 days by default and can be modified as needed, though it does not consider the working calendar. To limit inactivity tracking to specific stages, those stages can be defined in the In Stages field.
For example, consider a team pipeline with the stages New, In Progress, Customer Feedback, and Closed. Tickets often remain inactive in the Customer Feedback stage while waiting for customer responses, so these can be safely closed automatically. However, tickets in New or In Progress may be inactive due to internal delays and should not be closed.
In this case, you can mention the ‘Moved to Stage’ to the Solved stage after 7 days of inactivity, and inactivity tracking is applied only to the Customer Feedback stage in the ‘In Stages’ field.
The After-Sales section includes options for Refunds, Coupons, Replacements, Field Service, Gift Cards, Returns, and Repairs, helping you manage all post-sales interactions directly from the helpdesk, as shown in the screenshot below.
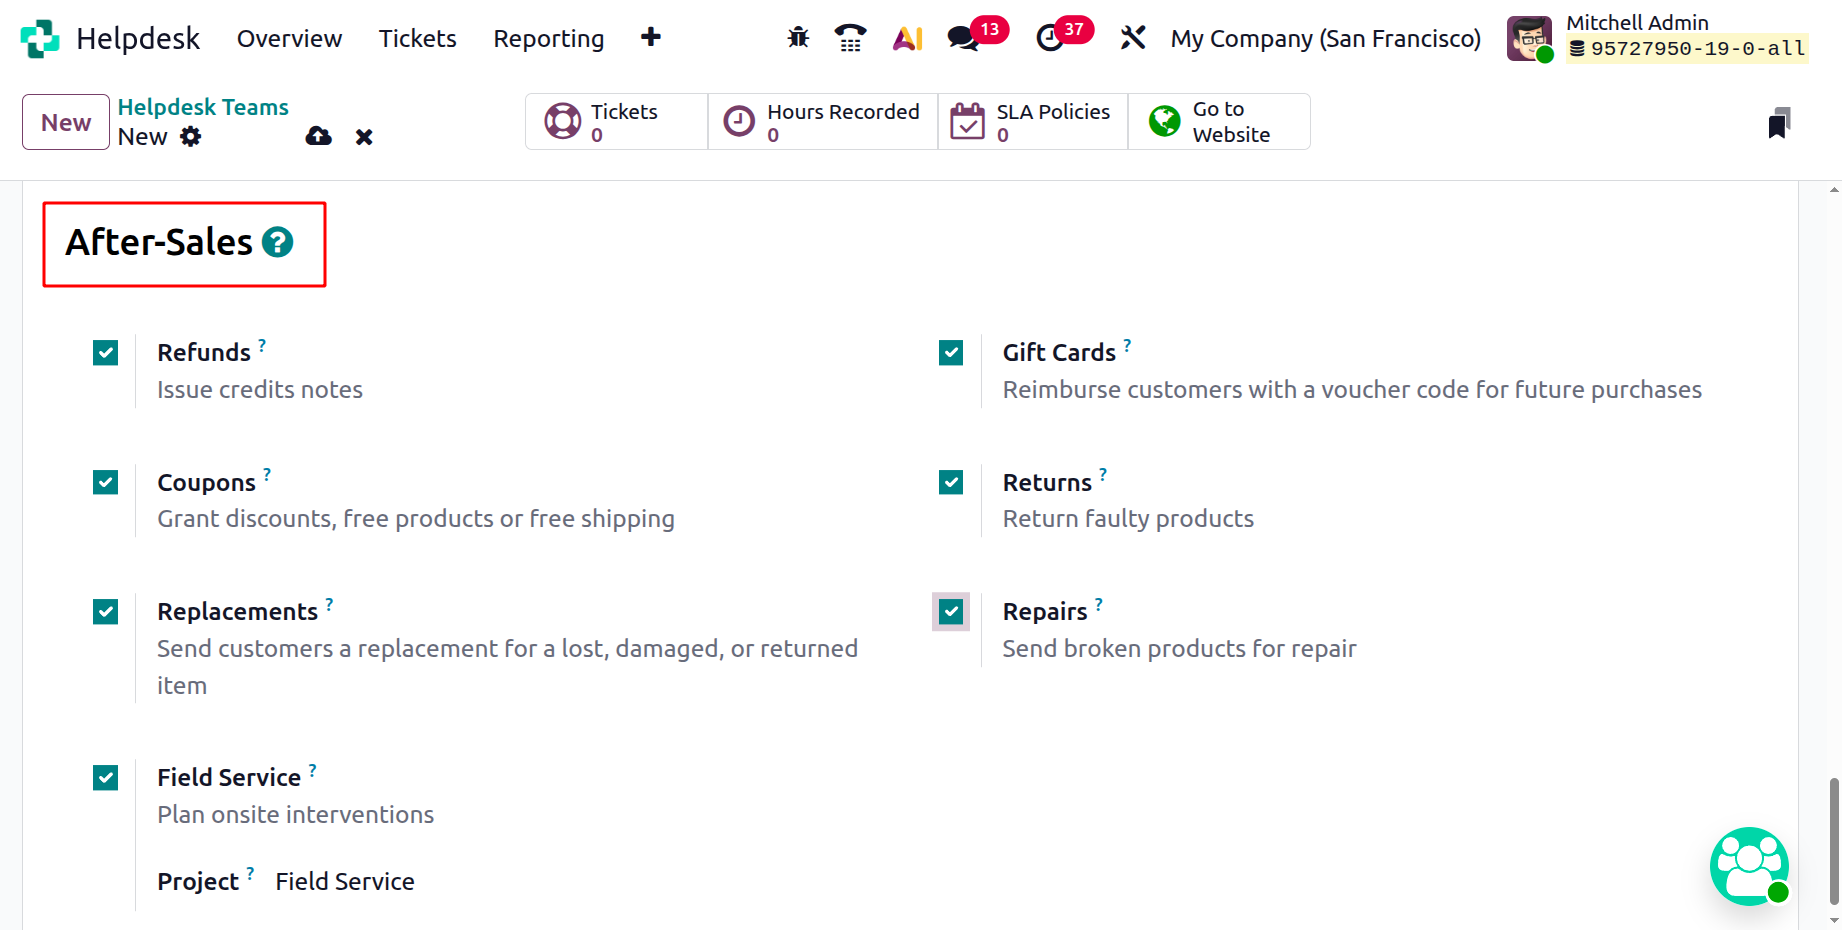
- Refunds: Allows agents to create refund requests directly from a ticket.
- Coupons: Enables the issuance of discount coupons within a ticket.
- Replacements: Lets agents create replacement orders for defective or returned products.
- Field Service: Connects tickets to Field Service tasks.
- Gift Cards: Allows agents to issue gift cards as compensation or goodwill.
- Returns: Enables creation of return merchandise authorizations (RMAs).
- Repairs: Provides access to repair orders directly from a ticket.
After saving the details, you can also access quick smart tabs that show information such as Tickets, Average Rating, Hours Recorded, SLA Policies, and a Go to Website link.
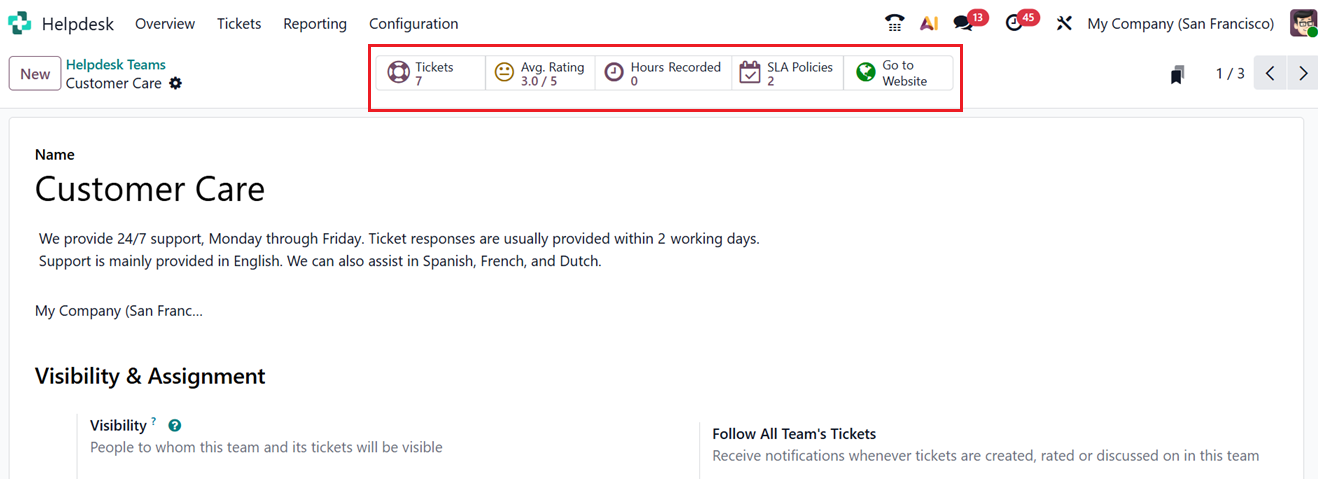
The ‘Tickets’ smart button is used to record and track customer queries; the ‘Avg. Rating’ indicates the general level of customer satisfaction. Then, the ‘Hours Recorded’ indicate the time spent responding to those requests; and ‘SLA Policies’ set the anticipated timeframes for response and resolution. Finally, you can see the helpdesk team’s website interface using the ‘Go to Website’ button.
1.2 Stages
Using different stages helps you better understand how each helpdesk ticket progresses from start to finish. By creating various stages, you can organize tickets according to their development and make it easier for your team to track their current status. To create or manage stages for helpdesk tickets, go to the Configuration menu and select the Stages option.
The list will display all existing stages along with the names of the teams that use them. To add a new stage, click the New button, which opens a new form view. In the Stage Name field, enter a descriptive name for the stage.
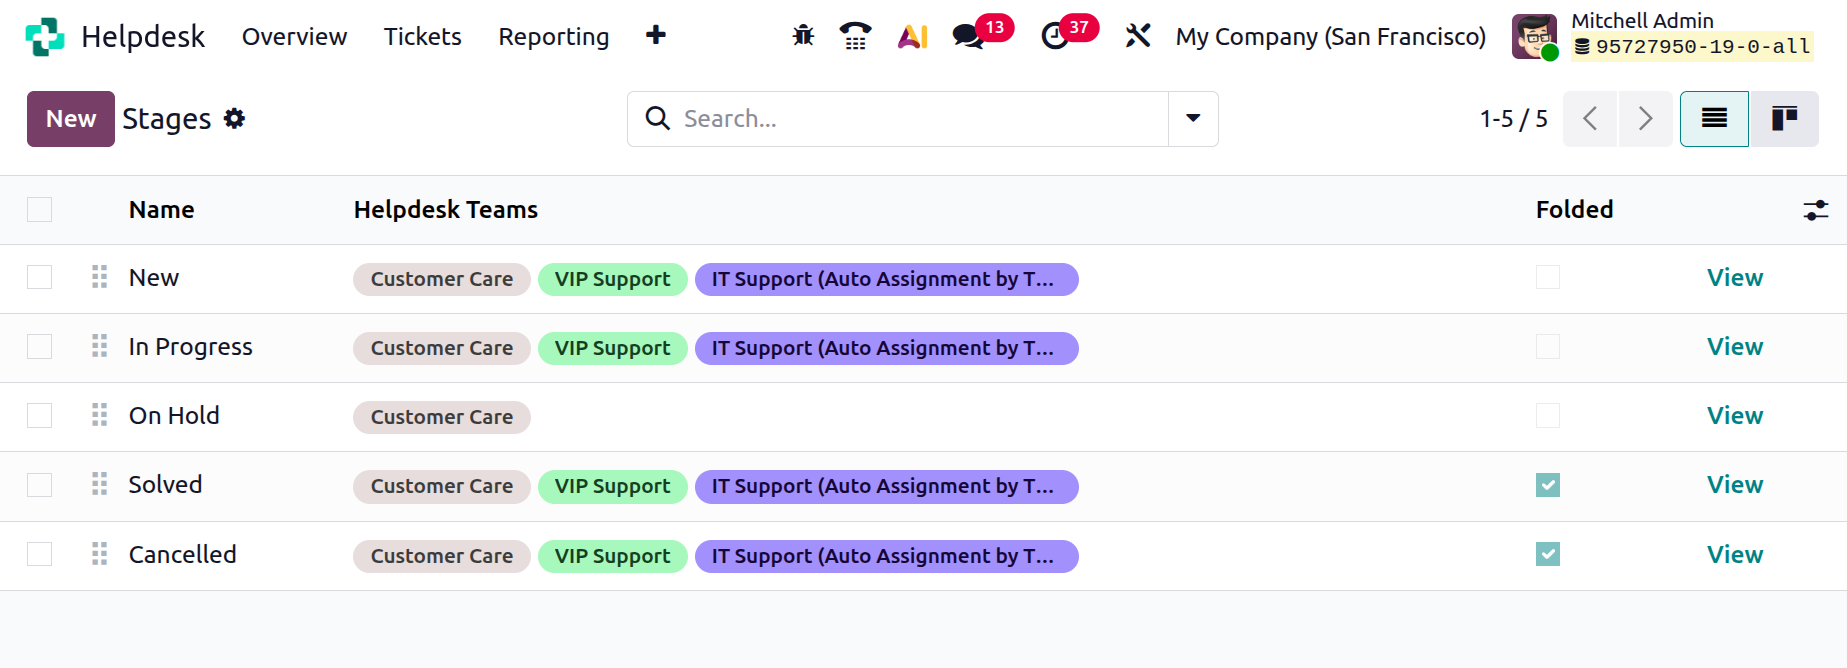
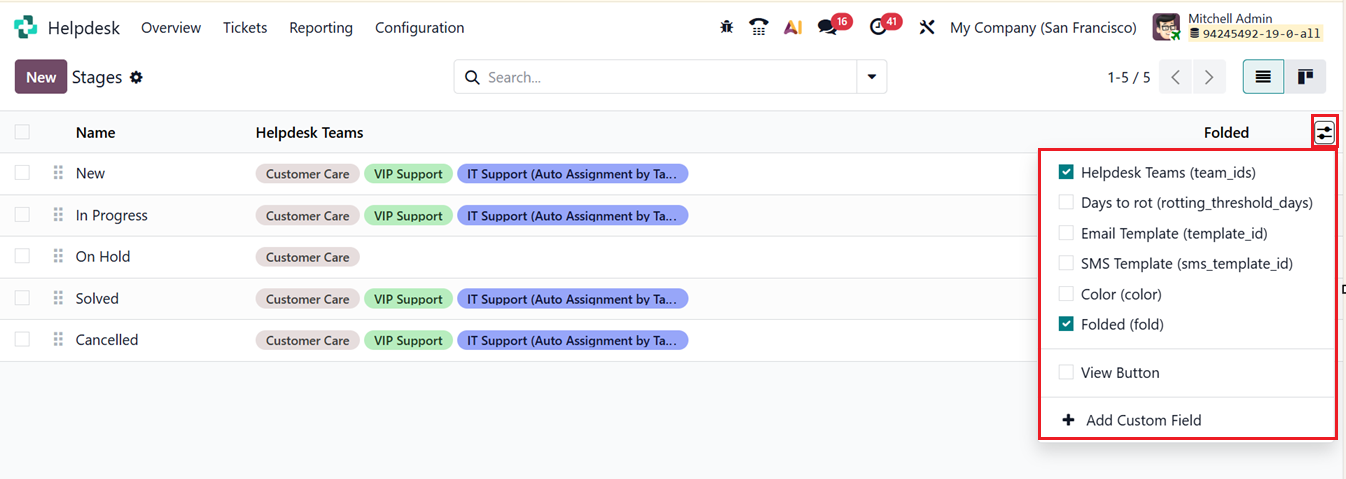
In the Helpdesk Teams field, you can specify which helpdesk teams will have access to this stage. You can also attach relevant Email and SMS Templates to this stage so that customers automatically receive notifications when a ticket reaches this point. These extra fields can be added from the small toggle menu placed at the top right corner of the window, as shown in the screenshot below.
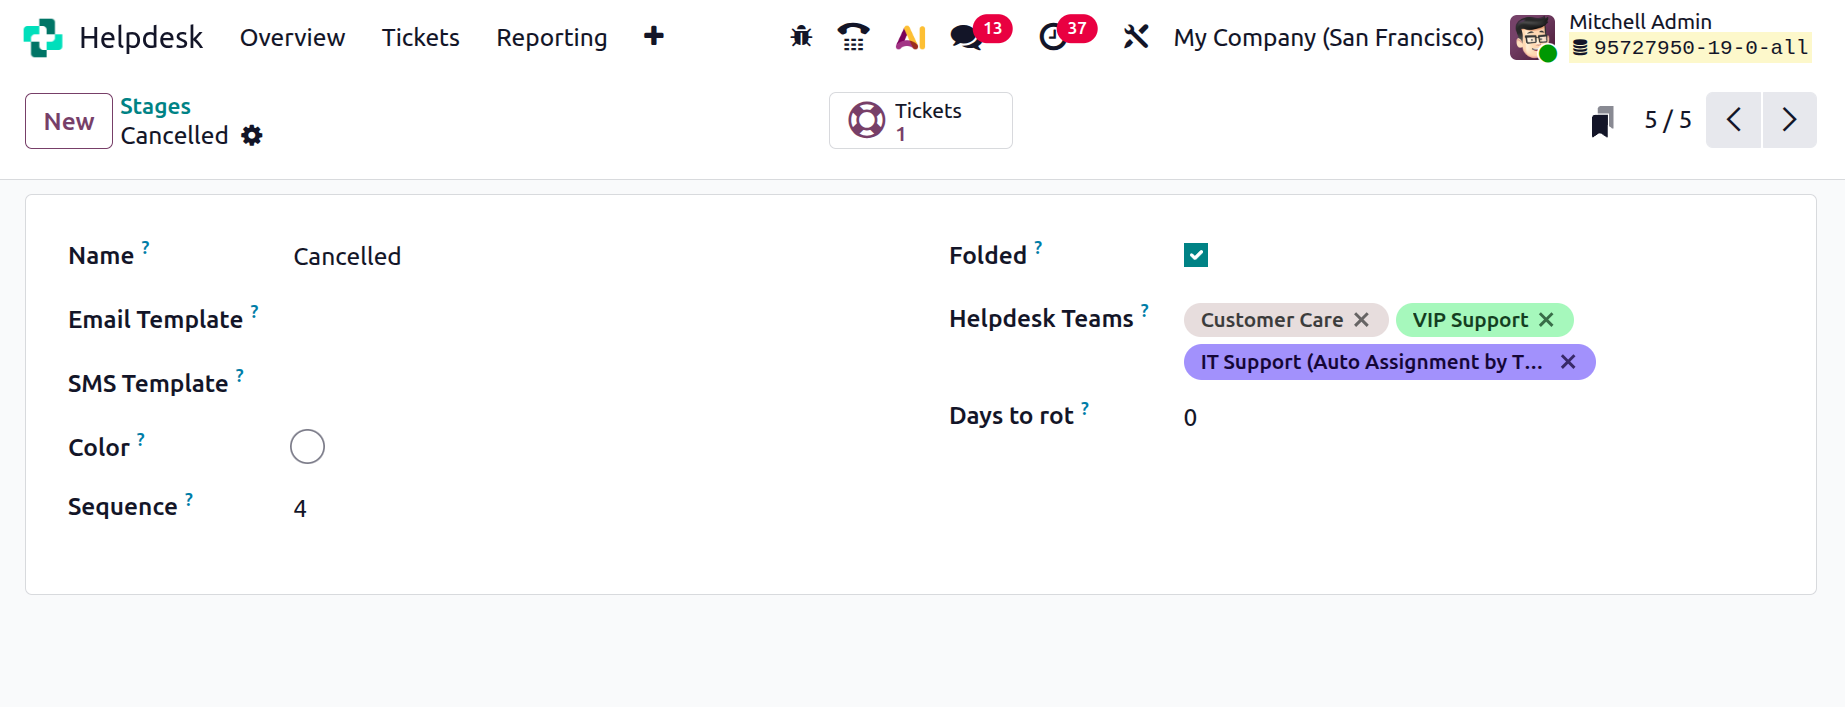
Once all details are entered, you can arrange the stages in a logical sequence to create a clear workflow. Additionally, you have the option to fold stages in the Kanban View. This means that while the stage name remains visible, the tickets under that stage will be hidden, helping declutter the display. To do this, select the Folded checkbox in the stage setup. Tickets that reach a folded stage are considered closed.
Click on the View button to view the Stage settings.
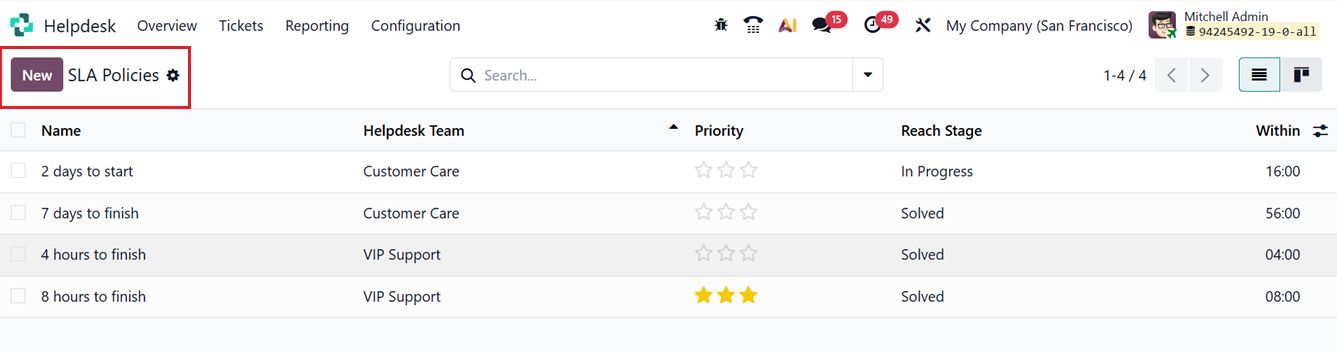
The SLA Policies (Service Level Agreement Policies) feature in the Odoo 18 Helpdesk module allows you to set up clear rules and expectations between your company and the customer. Defining SLAs ensures that both sides agree on the service timelines and performance standards before resolving any customer issues. You can create and manage these policies by going to the Configuration menu and selecting SLA Policies.
In the list view, you can see the details of all existing SLA policies, including Name, Team, Priority, Types, Reach Stage and Within, as shown in the screenshot below.
To create a new one, click on the New button. In the displayed form view, enter the Policy Name in the provided field and use the Description area to explain the policy in detail. Under the CRITERIA tab section, select the Helpdesk Team that this policy will apply to. You can also define specific Priority levels, Tags and Customers that are covered under this policy.
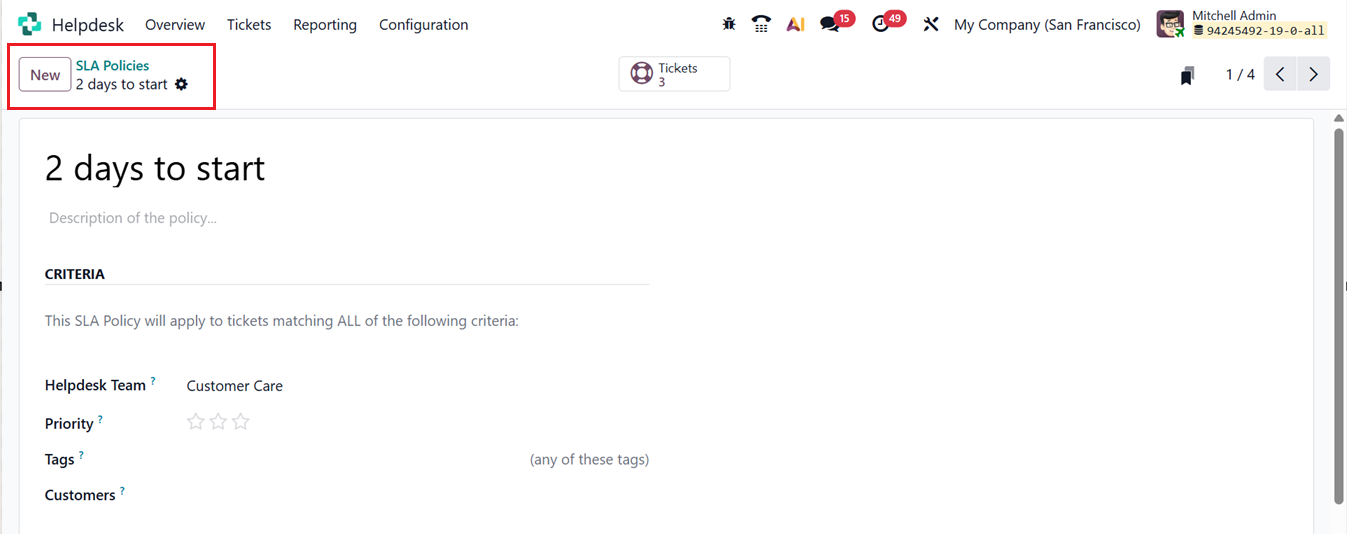
In the Target tab, you can define the Reach Stage, the minimum stage a ticket must reach for the policy to apply. You can also specify the time frame (Within) the maximum working hours allowed to reach the target stage under this SLA policy.
If there are any stages you want to exclude from the SLA time calculation, you can add them under the Excluding Stages field. This helps ensure the timing calculations remain accurate and fair. These configurations together ensure that your SLA policies in Odoo 19 clearly define service goals, maintain accountability, and improve customer satisfaction.
1.4 Tags
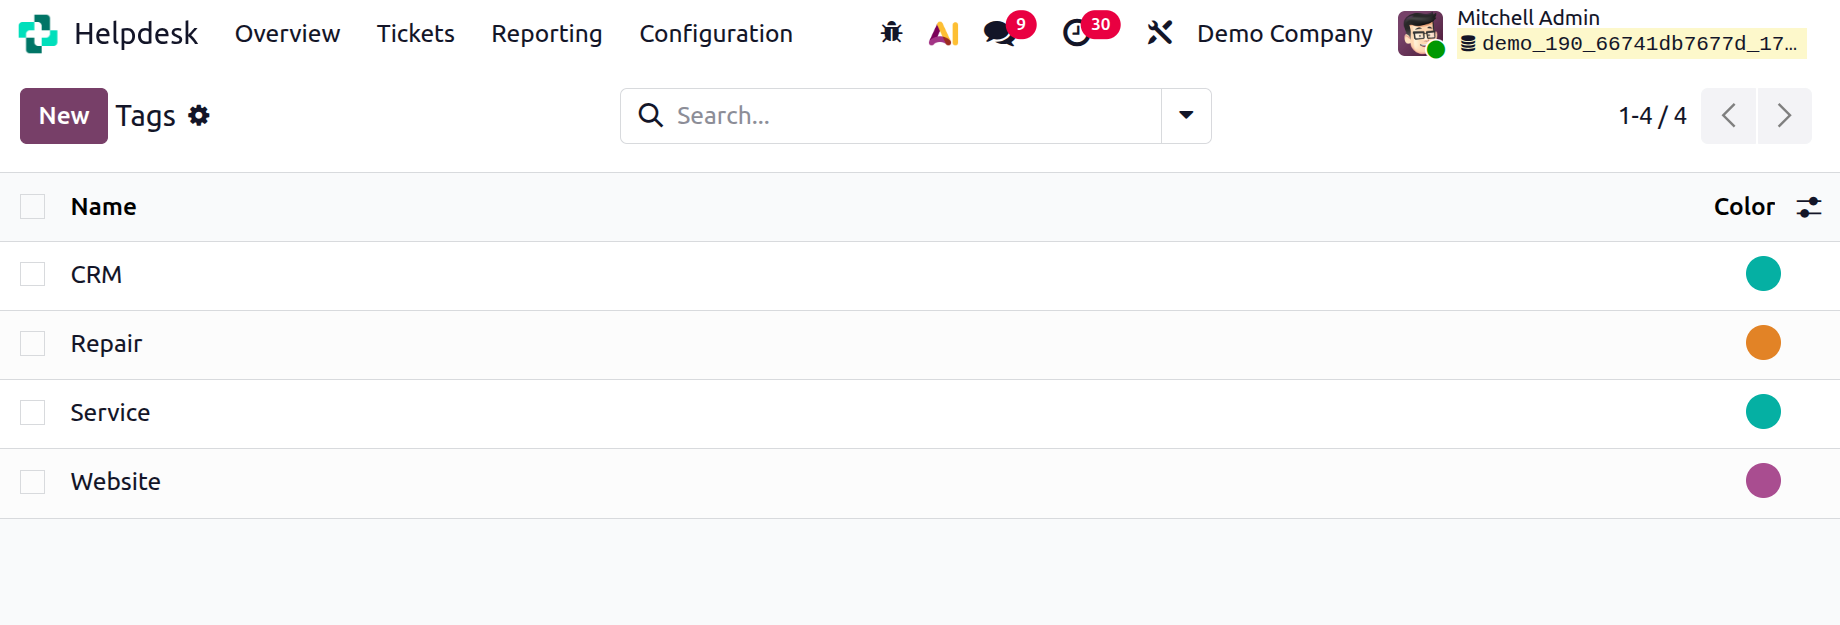
Tags are a useful way to categorize and organize helpdesk tickets. In Odoo 19, you can create custom tags to group tickets based on specific topics, issues, or priorities. This helps your support staff quickly identify and sort through tickets more effectively. To create tags, go to the Configuration menu and click on the Tags option. You will see a list of all existing tags currently used in the system.
To add a new tag, click the New button, and a new line will appear at the top of the list. Enter the Tag Name and choose a Color from the available options to visually differentiate it from others.
Tags help streamline ticket management, allowing agents to quickly locate and manage tickets related to a particular issue or category.
1.5 Canned Responses
In Odoo 19, you can save time and improve consistency by using Canned Responses pre-written messages that can be sent to customers when responding to frequently asked questions or common requests.
To create canned responses, open the Helpdesk module, go to Configuration, and select Canned Responses. Here, you will see a list of existing canned responses along with their details such as Shortcut and Substitution, as depicted in the screenshot below.
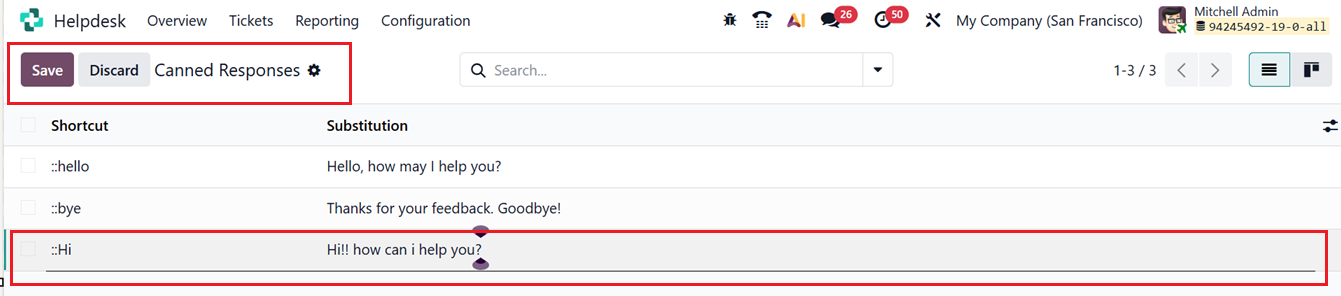
Click the New button to create a new canned response. A new line will appear where you can type your prepared message. Once you finish writing, click Save to store it. Later, when chatting or replying to a ticket, you can quickly insert one of these pre-written answers by typing “:” in the message box. This makes communication faster and ensures consistent, professional replies across your support team.
1.6 Activity Types
The Activity Types feature in the Helpdesk module is used to schedule and organize different kinds of follow-up actions linked to specific tickets or records. These activities can include sending emails, making phone calls, creating to-do tasks, and other important actions.
The ‘Activity Types’ dashboard from the ‘Configuration’ menu provides a list of the activity types with their Name, Default Summary, Planned In, Type and Icon, as shown in the screenshot below.
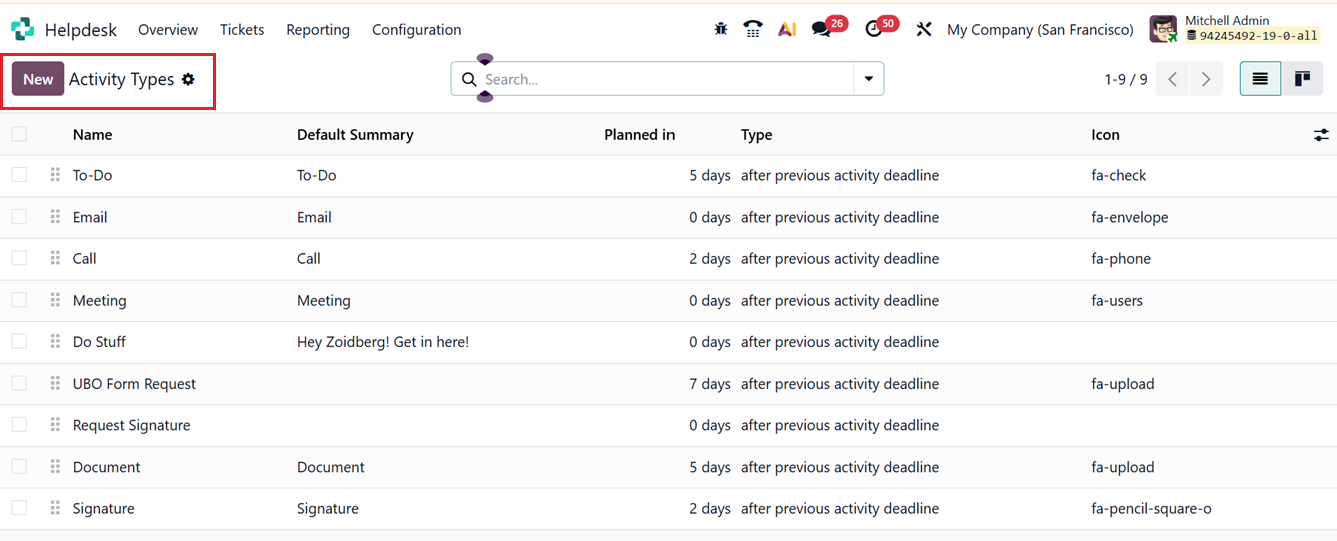
Each activity type can be customized by defining its Action Type, Default User, Model, Summary, Icon, and any other additional details, similar to the configuration options described earlier in the activity scheduling section of this book.
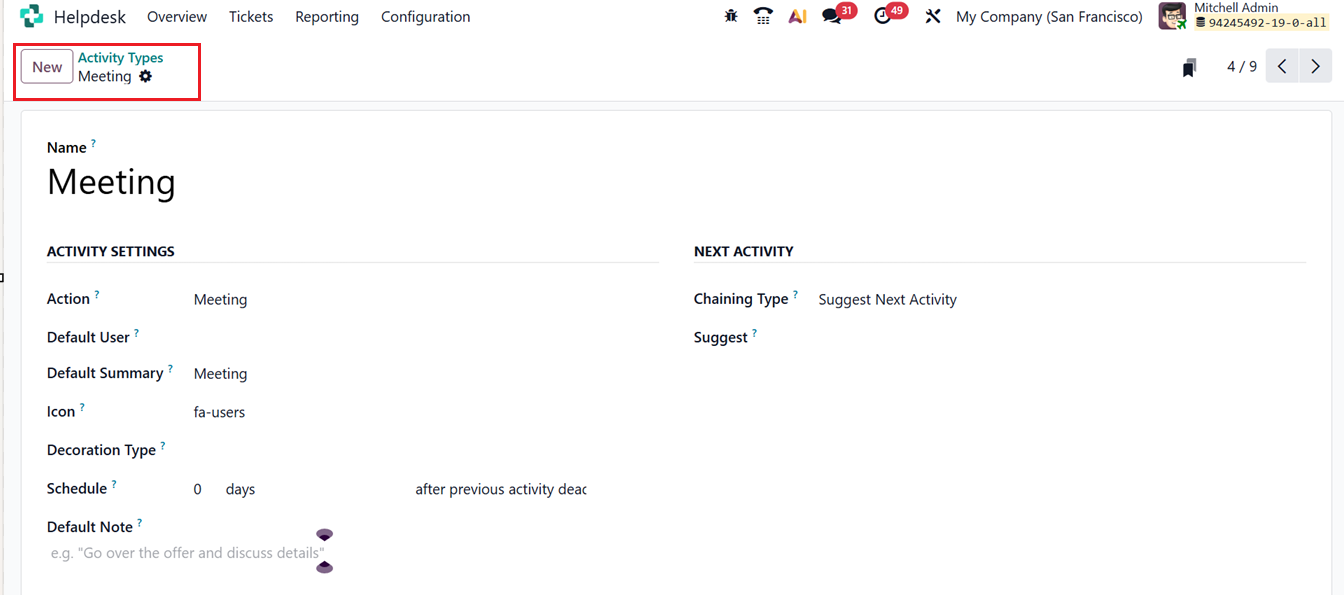
This customization allows helpdesk agents to clearly define their next steps and ensure that no follow-up actions are missed. Activity types are particularly useful for improving workflow organization and keeping all customer interactions timely and consistent.