Tickets
In Odoo 19, customers can reach out with questions or report issues through multiple channels, including live chat, messaging, the Contact Us page, forums, the website, email, or phone calls, enabling quick and efficient support through the Helpdesk module. When a customer requests assistance, a ticket can be manually created to document the concern, while automated ticket creation can also be enabled to generate helpdesk tickets automatically upon receiving customer queries or complaints.
All such tickets, whether created manually or automatically, are organized and managed within the Tickets menu of the Odoo 19 Helpdesk module. Under the Tickets menu, you will find two main options: My Tickets and All Tickets.
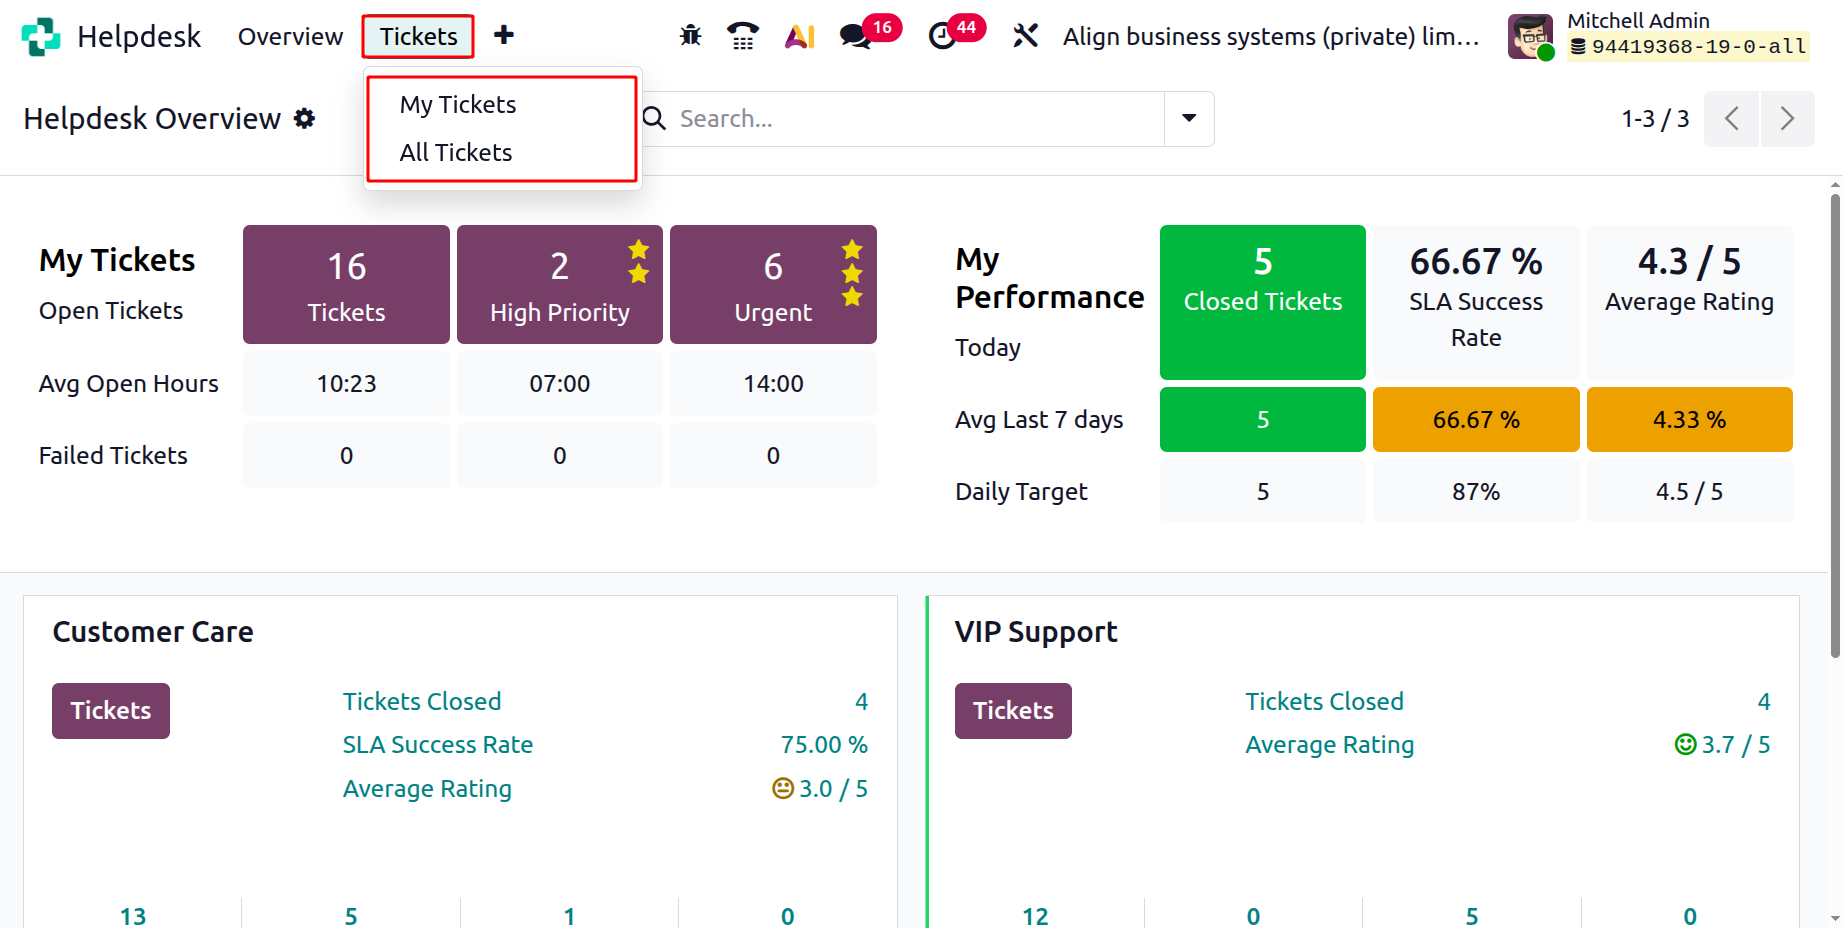
1.1 My Tickets
The My Tickets page displays a list of all the tickets that are currently assigned to you. In this section, you can view various details such as the Ticket ID, Priority, Name, Assigned User, Customer, Activities, SLA Deadlines, and the Stage of each ticket, as shown in the screenshot below.
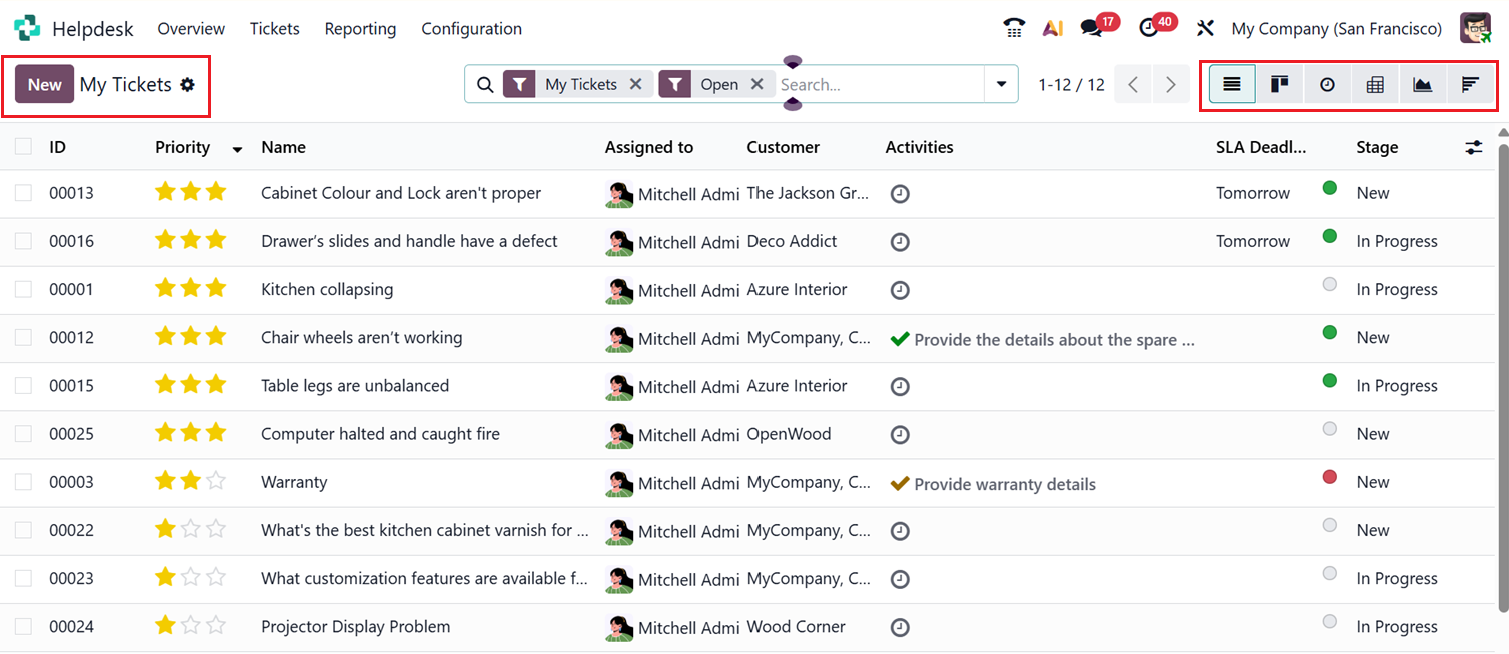
The My Tickets page can be viewed in multiple formats List, Kanban, Activity, Pivot, Graphical, and Cohort views depending on how you want to analyze or organize your data. In the List View, tickets are displayed in a table format where you can easily see their essential details, as shown in the related image.
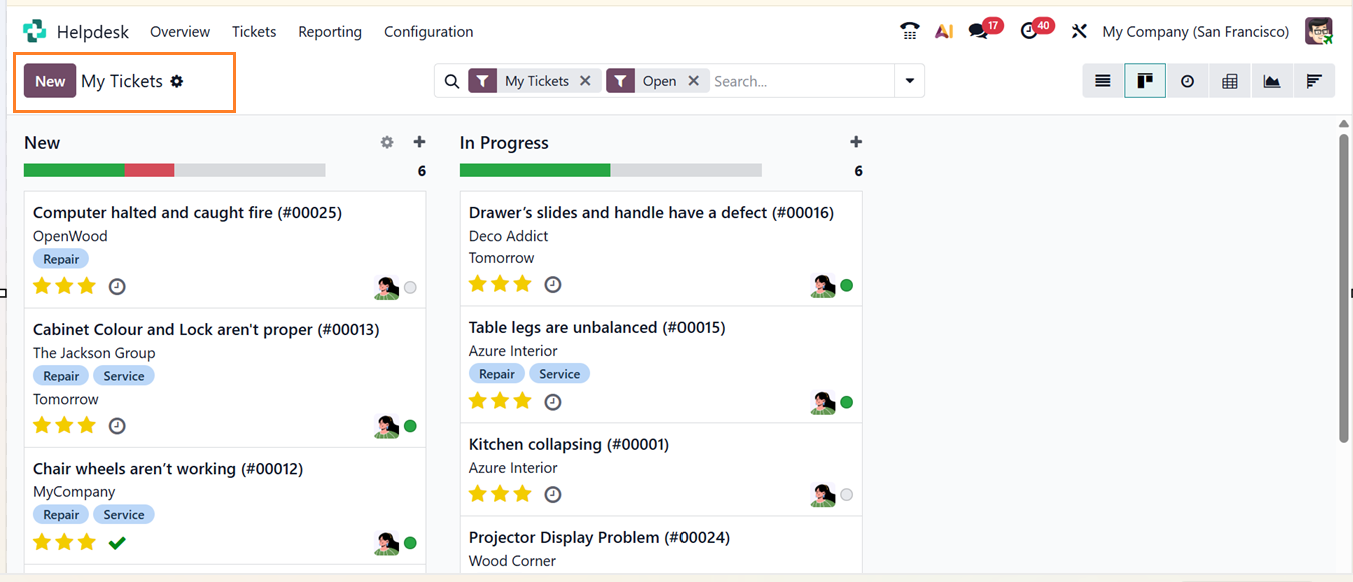
The Kanban View presents the tickets in columns that represent different stages of progress. Each card in this view represents a ticket, and you can drag and drop tickets between stages to update their status.
Next, the Activity View shows upcoming or completed activities linked to each ticket. This layout helps you track what actions need to be taken or have already been done. The tickets are highlighted in Green, Yellow, and Red colors to mention the task priorities based on timings for the same day, previous day and upcoming dates, as shown in the screenshot below.
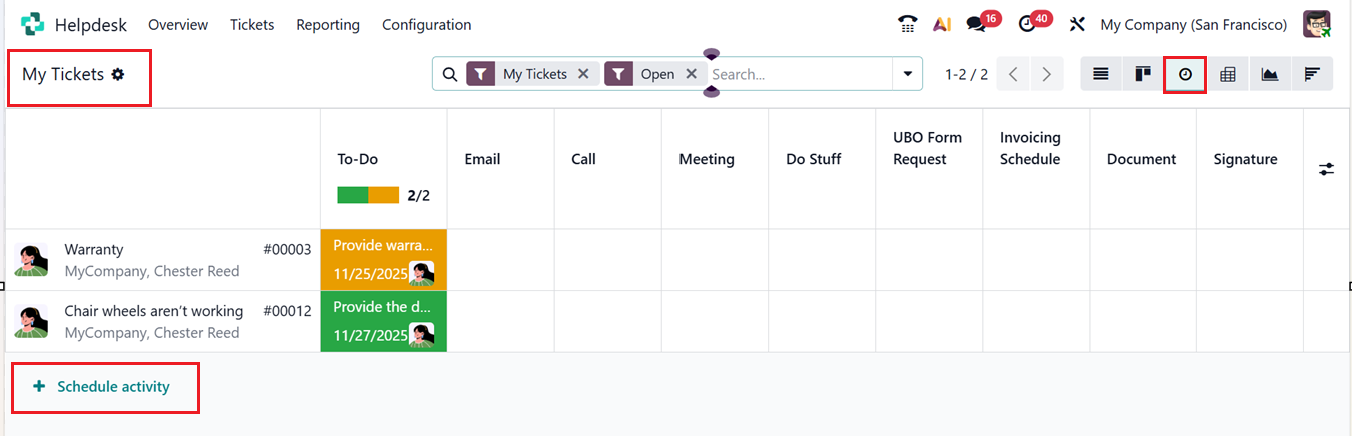
Using the ‘+Schedule Activity’ option, you can plan new activities directly from this view for example, follow-up calls, email responses, or meetings.
The Pivot View allows you to summarize ticket data into a spreadsheet-like format for better analysis. You can group and measure data fields based on specific parameters like team, priority, or customer.

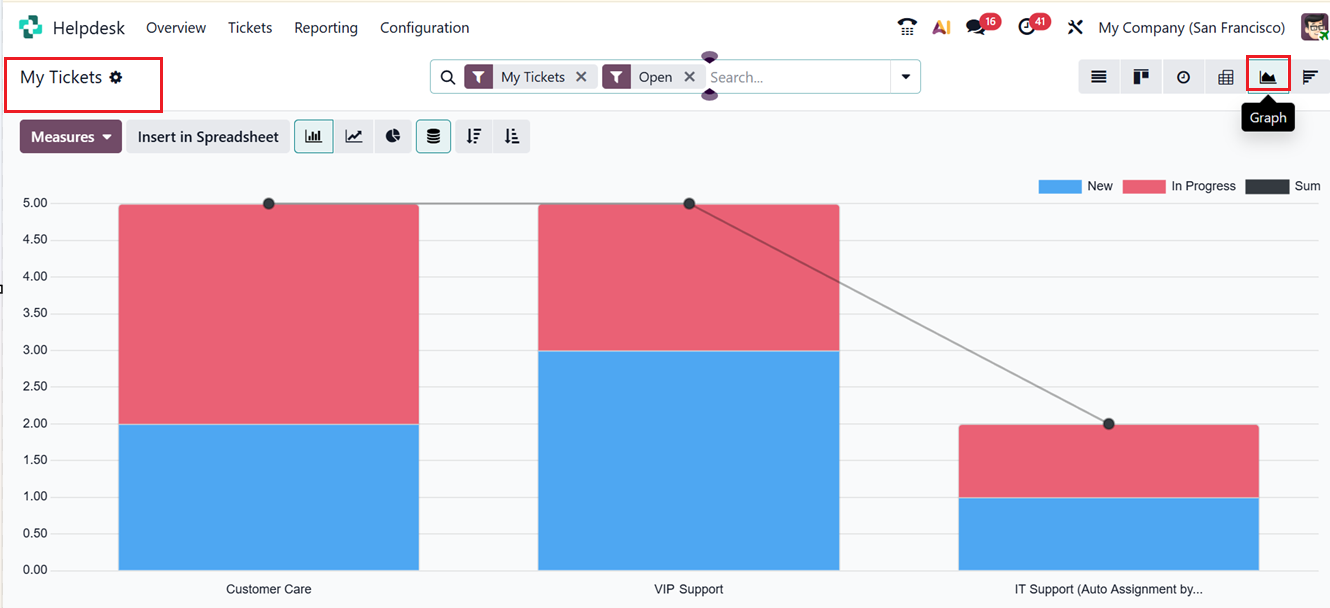
The Graphical View gives a visual representation of your ticket data using bar, line, or pie charts, helping you easily identify patterns or performance trends.
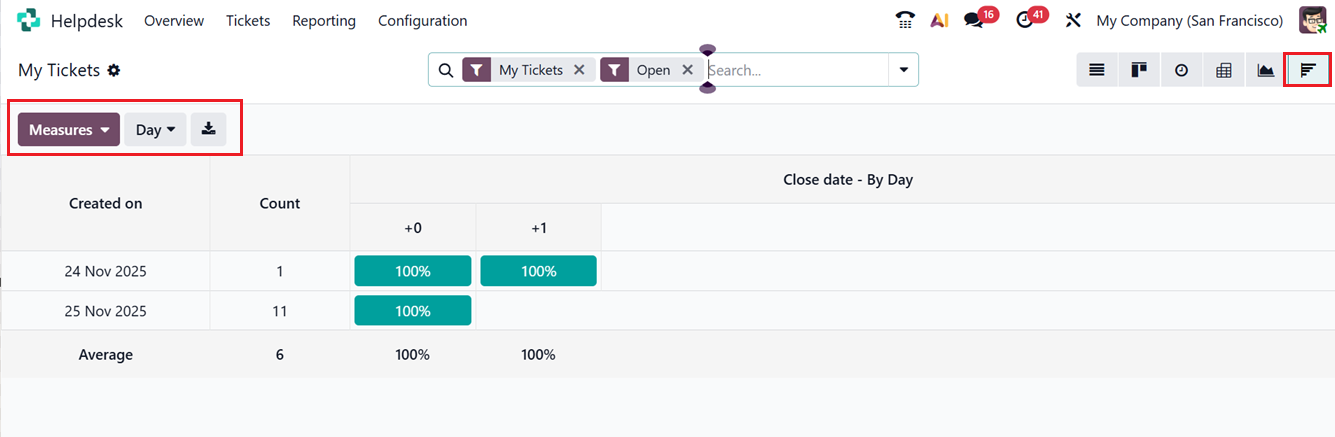
Lastly, the Cohort View displays information based on ticket creation and closing dates, allowing you to analyze performance and resolution times over specific periods.
1.2 All Tickets
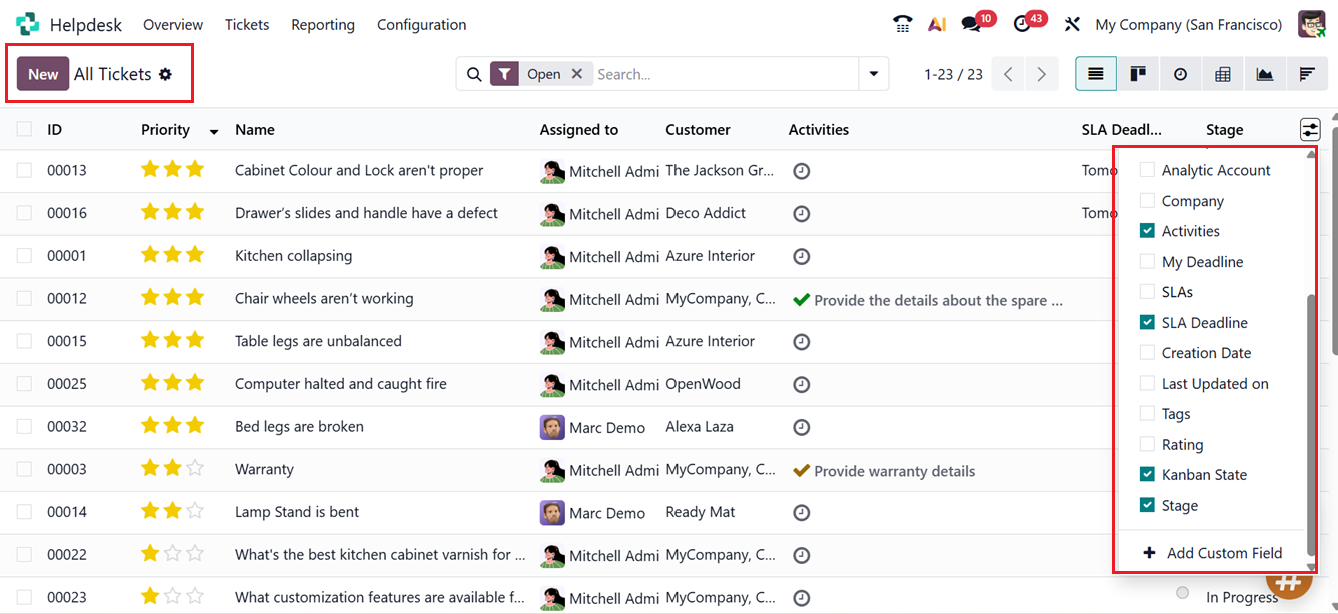
The All Tickets section allows you to view and track all the tickets created by your company’s helpdesk team, not just your own. In this area, you can access a comprehensive list of all tickets, as shown in the image provided.
In the List View, you’ll find details such as ID, Priority, Name, Team, Assigned To, Customer, Company, Activities, SLA Deadline, and Stage. To customize the view, click the menu icon at the top right corner and select additional fields to display. Like the “My Tickets” section, you can choose between multiple views such as List, Kanban, Activity, Pivot, Graph, and Cohort depending on your analysis needs.
Using the field selection menu placed at the top right corner of the stage titles area, you can activate include ID, Priority, Helpdesk Team, Assigned To, Customer, Company, Activities, My Deadline, SLAs, SLA Deadline, Creation Date, Sale Order Item, Last Updated On, Type, Tags, Stage, Rating, and Kanban State, as shown in the screenshot below
This platform also provides a wide range of default filters such as My Tickets, Followed, Unassigned, My Customers, Urgent, High Priority, Medium Priority, Low Priority, SLA Success, SLA in Progress, SLA Failed, Open, Rotting, Closed, Closed On, Happy, Neutral, Unhappy, Creation Date and Archived. You can also use the Custom Filter option to create personalized filters for specific conditions.
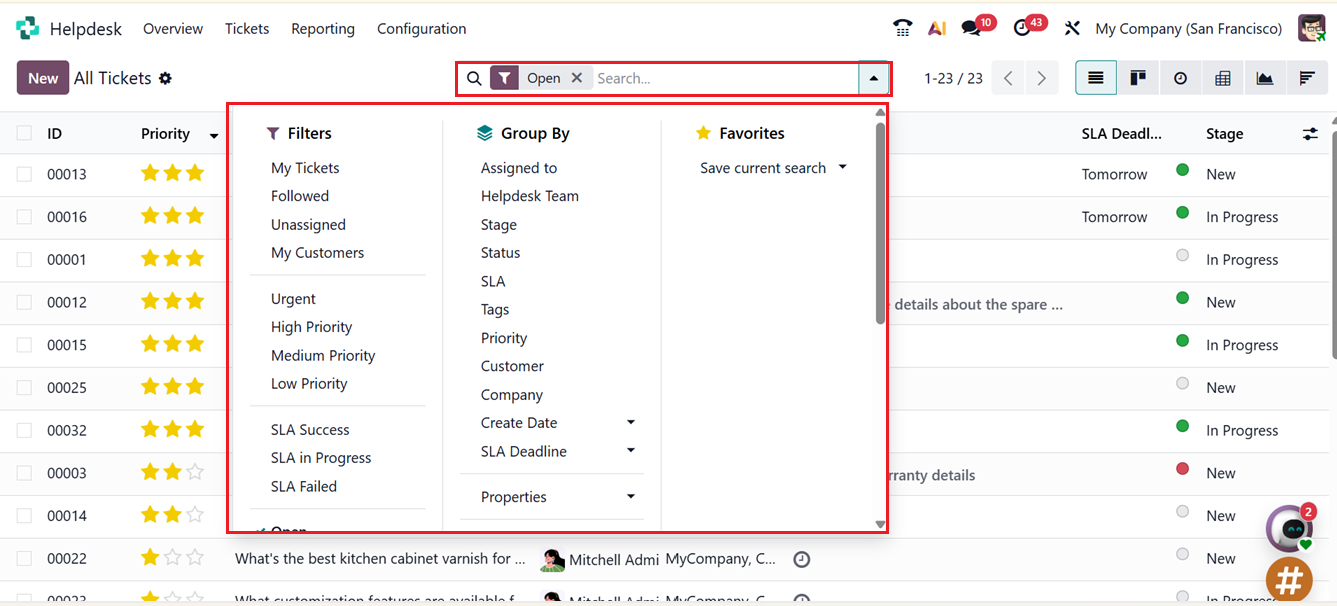
Default Group By options include Assigned To, Helpdesk Team, Stage, Status, SLA, Tags, Priority, Customer, Company, Creation Date, SLA Deadline, Properties. You can also create customized groups using the ‘Custom Group’ button. These help organize tickets into structured categories for better tracking.
To manually create a new ticket, click on the New button. This opens a new form where you can fill in details about the issue reported by the customer, as shown in the screenshot below.
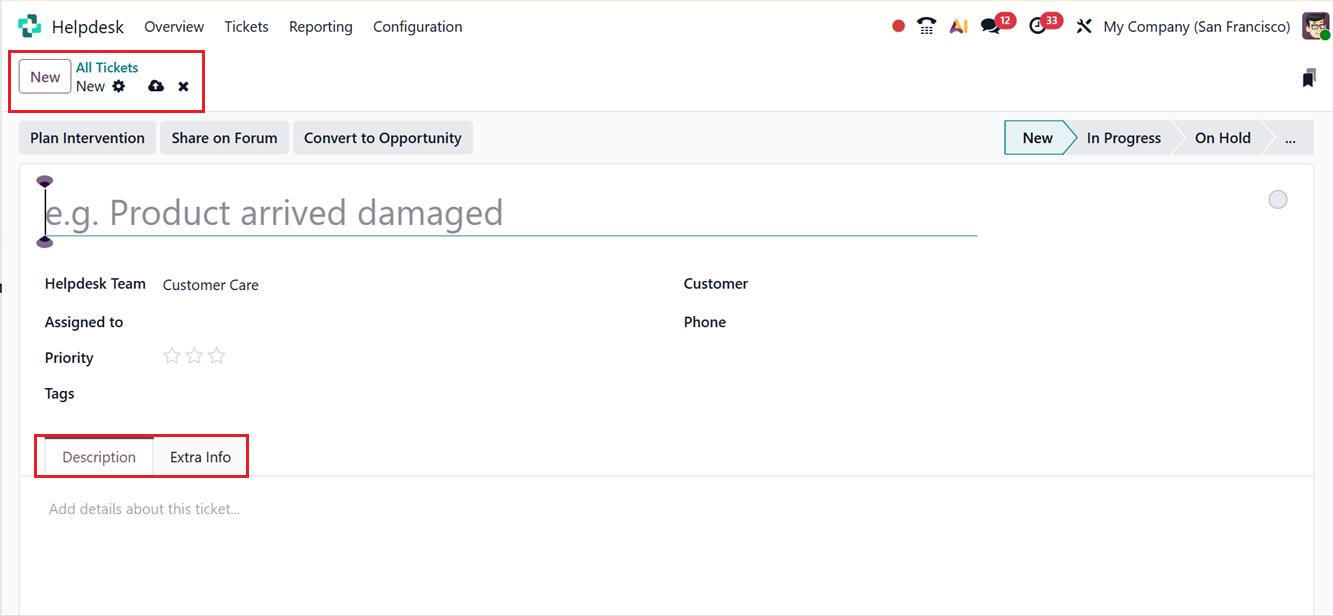
In the Title field, enter a descriptive name for the ticket. Based on the problem, you can choose the relevant Helpdesk Team. Then, the relevant SLA Policies and SLA Deadline will automatically apply to the ticket. You can assign the ticket to a specific employee by selecting their name in the Assigned To field. The ticket Priority can be set by adding stars the more stars, the higher the priority. You can also fill in additional information such as Tags, Customer Name from the dropdown list automatically fills in their Phone details. If the ticket is related to a product purchased from your company, you can link the related Sales Order in the Sales Order Item section.
When the issue concerns a specific Product, you can enter its name and even include its Serial Number or Lot Number. The Edit Properties button allows you to include extra custom fields to capture additional information about the ticket.
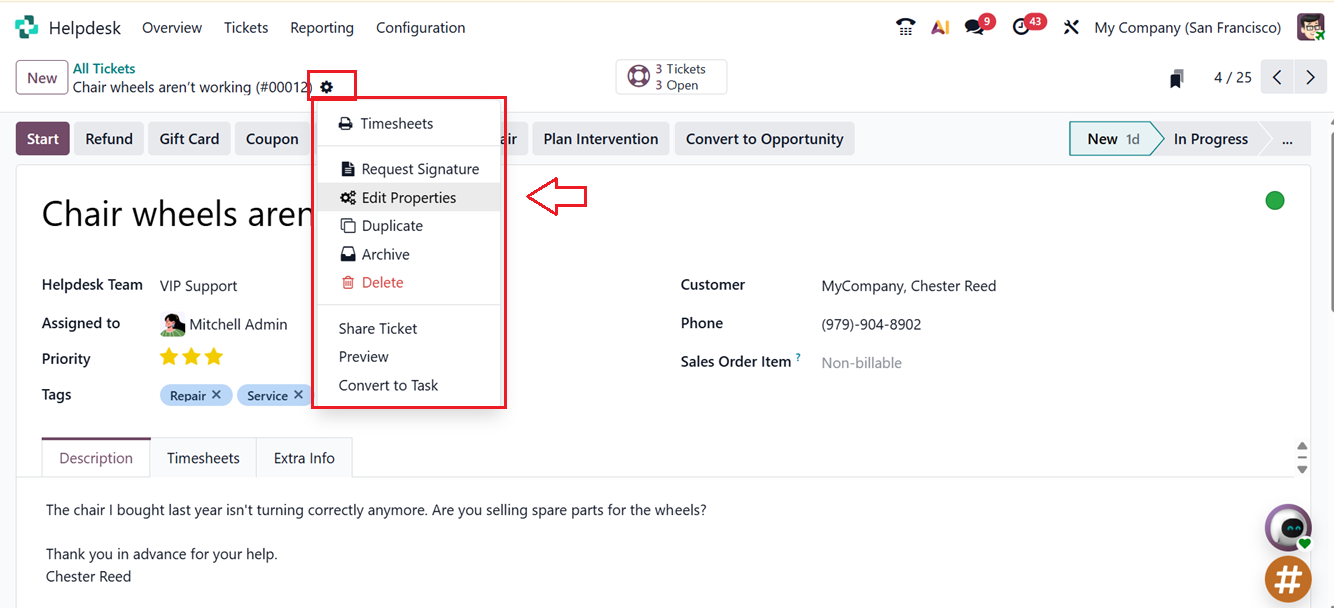
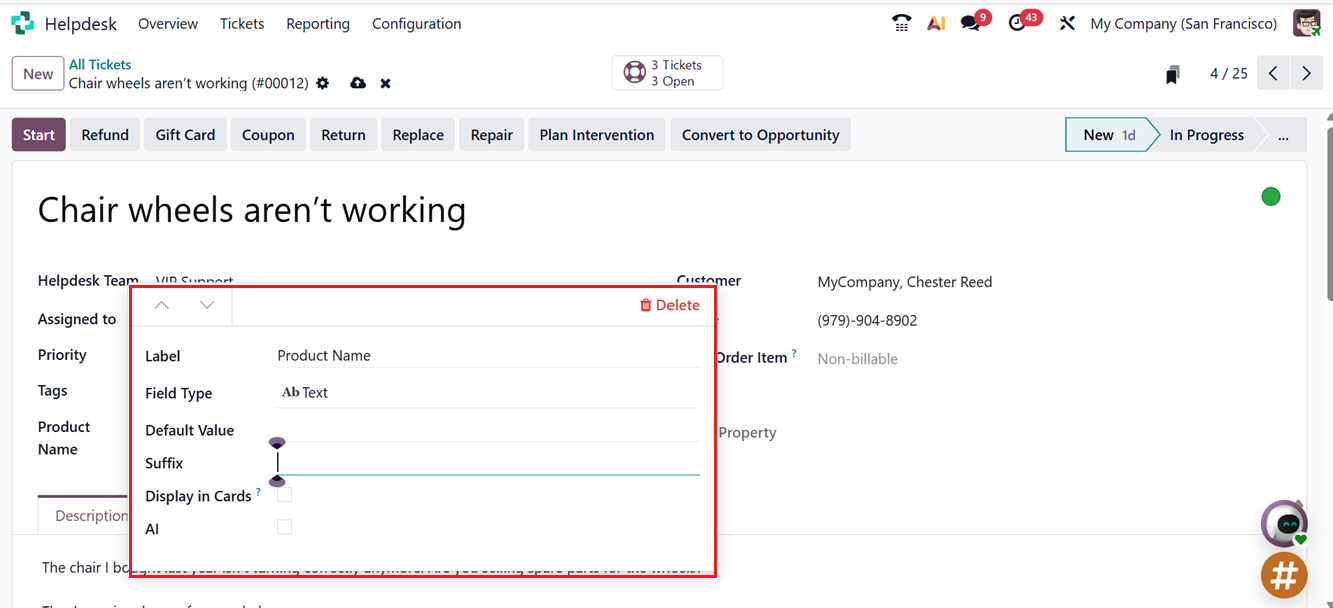
To create additional form fields, click the Edit Properties button. This action opens a pop-up window where you can specify the name of the field by entering the desired value in the Label section. After naming the field, you can select the appropriate Field Type from the dropdown list, which includes various options such as a standard text field, multiline text field, checkbox, integer, date, decimal, or selection field, among others. Once the field type is chosen, you may configure additional parameters such as defining a Default Value (when applicable), adding a Suffix, enabling Display in Cards to whether or not display this property field in calendar, cards and kanban views, and activating AI assistance, as illustrated in the screenshot below.
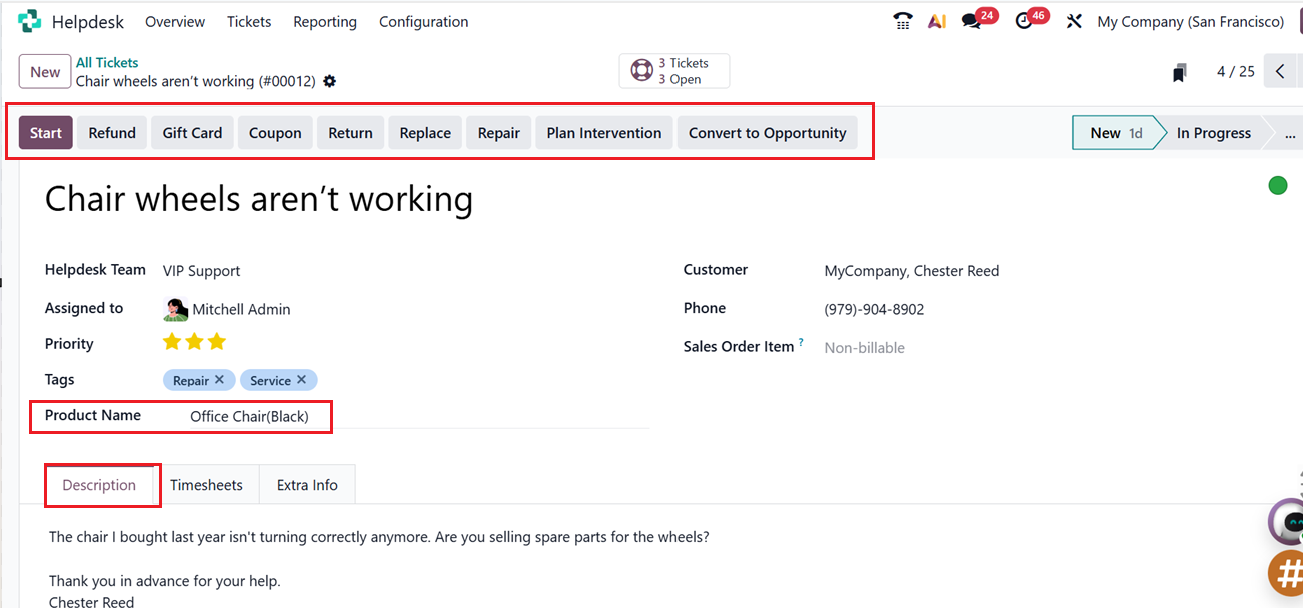
In the Description tab section, you can provide detailed information about the issue reported by the customer and any relevant observations.
By clicking on the Start button, you can record the time your helpdesk staff spends on resolving the issue. When a team member presses the Start button, Odoo 19 automatically begins tracking the work time, as shown in the screenshot below.
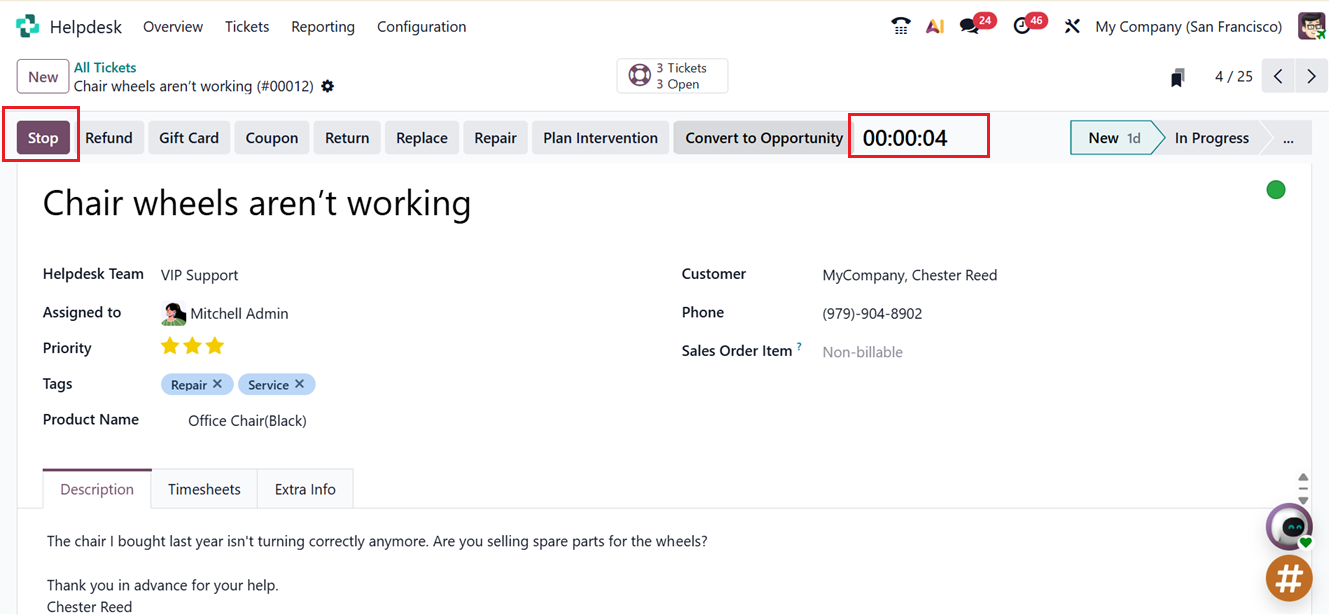
Once the task is finished, press the Stop button to end the timer. Odoo 19 will then display a pop-up window where you can review and confirm the recorded time using the ‘Log Time’ or ‘Resume Time’ buttons.
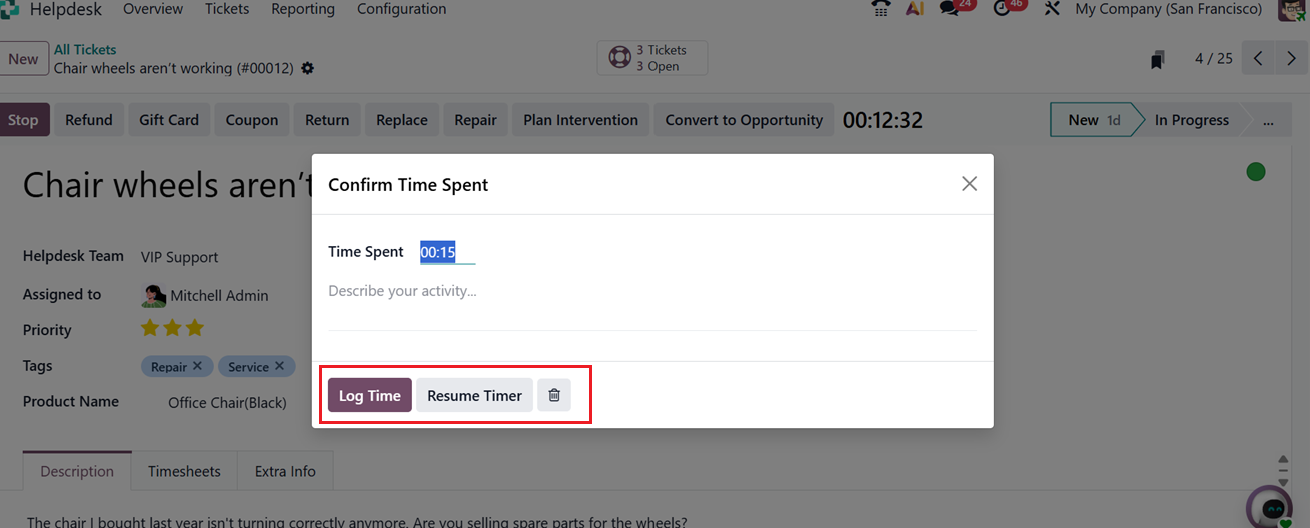
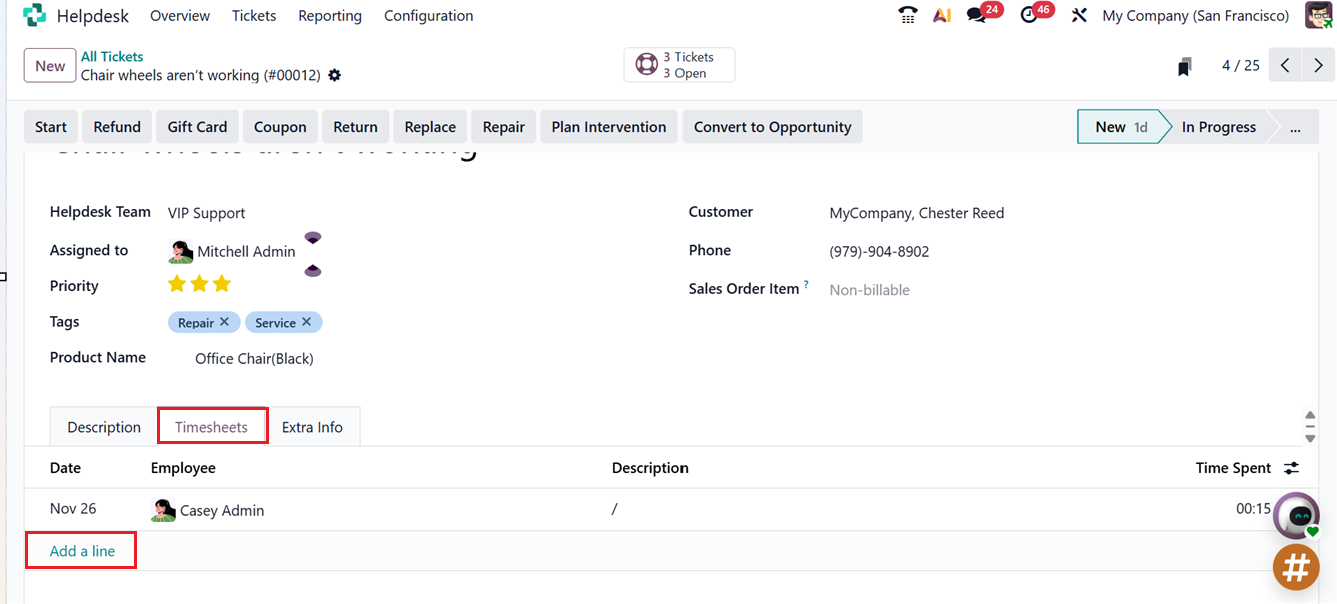
After confirming the time, you can describe the performed activity in the provided space and click on the ‘Log Time’ button to log the entry into the timesheet. On the Timesheet tab, you can view all time entries along with their Date, Employee Name, Description, and Time Spent.
You can also add manual timesheet details using the ‘Add a line’ button, as shown in the screenshot below.
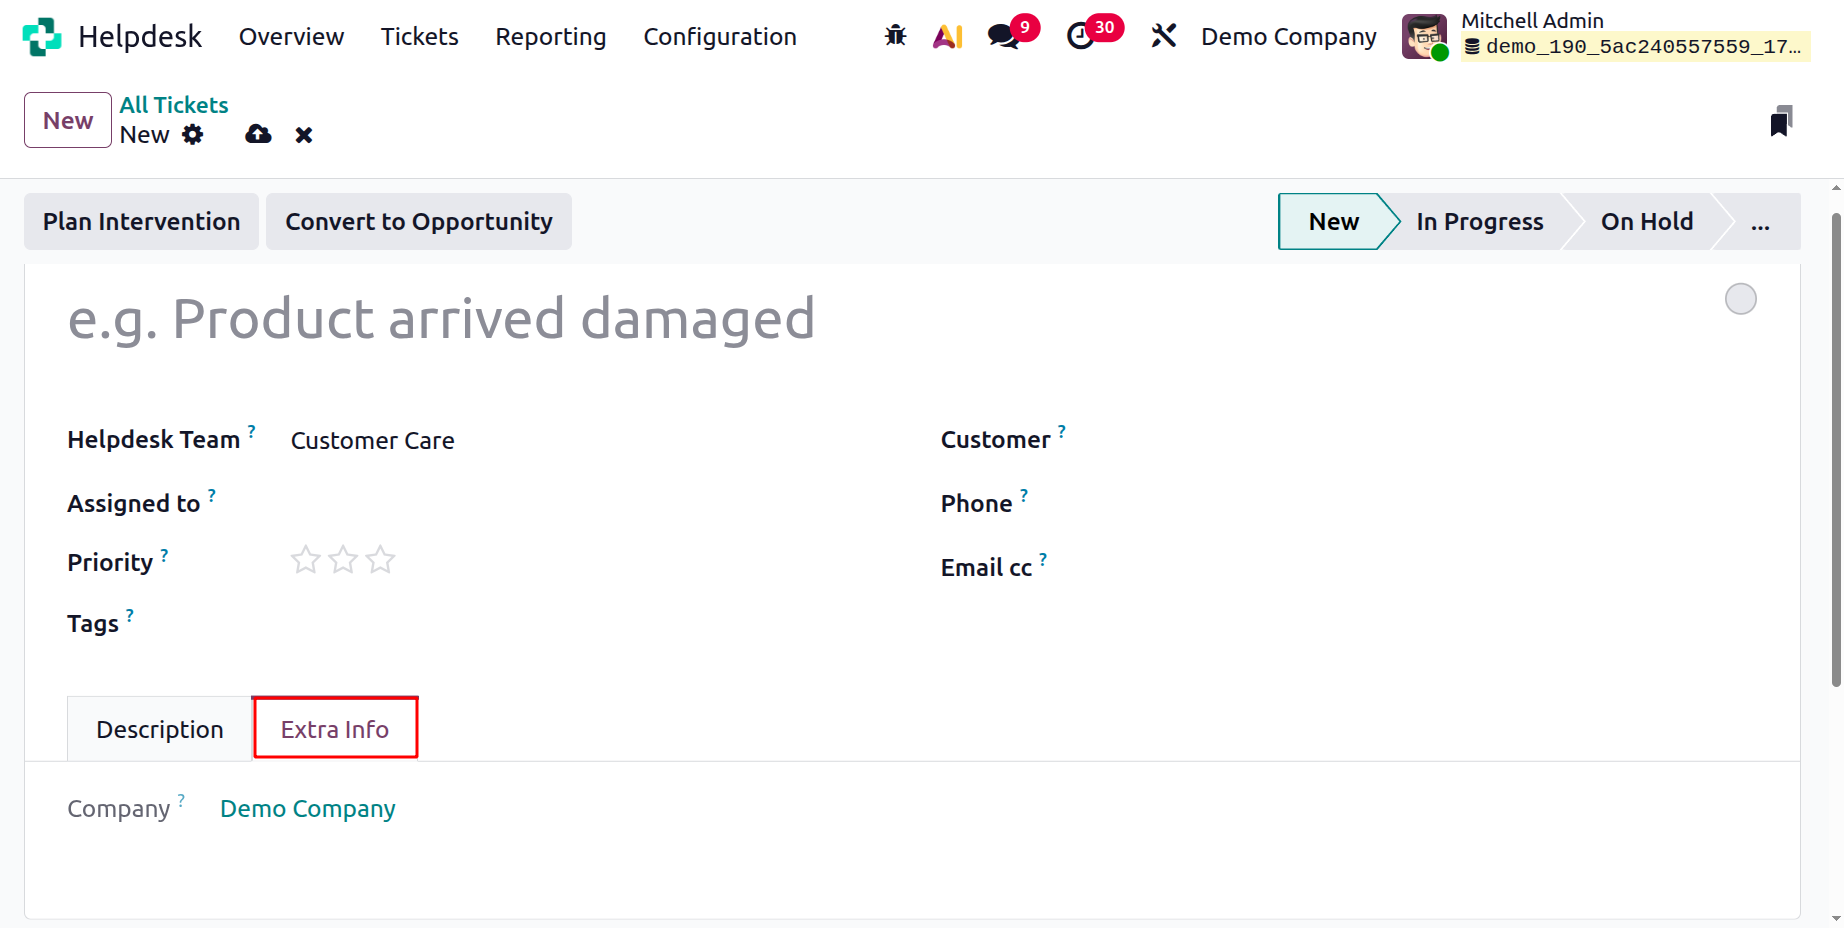
The ‘Extra Info’ tab can be used to edit any extra descriptions or notes regarding the issue or ticket.
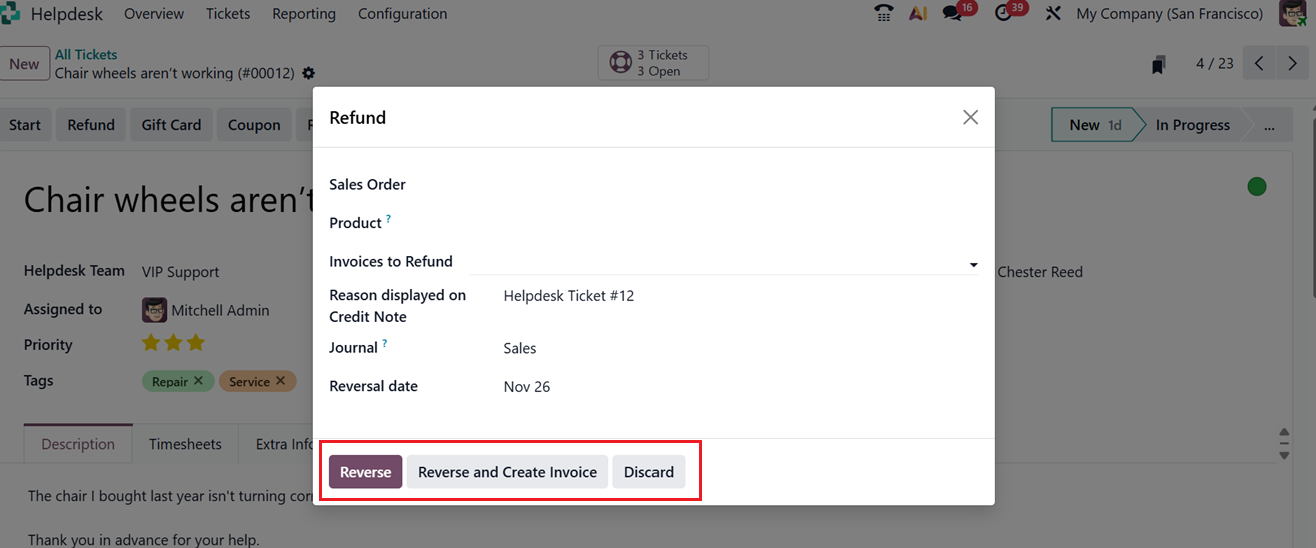
Sometimes, companies may issue refunds to customers under specific terms and conditions. You can process a refund directly from the Ticket Form by clicking the Refund button. This will open a pop-up window, where you can enter details such as Sales Order, Invoices to Refund, Reason, Reversal Date, and Journal. Selecting the Reverse option will create a Customer Credit Note by reversing the original invoice, as shown in the screenshot below.
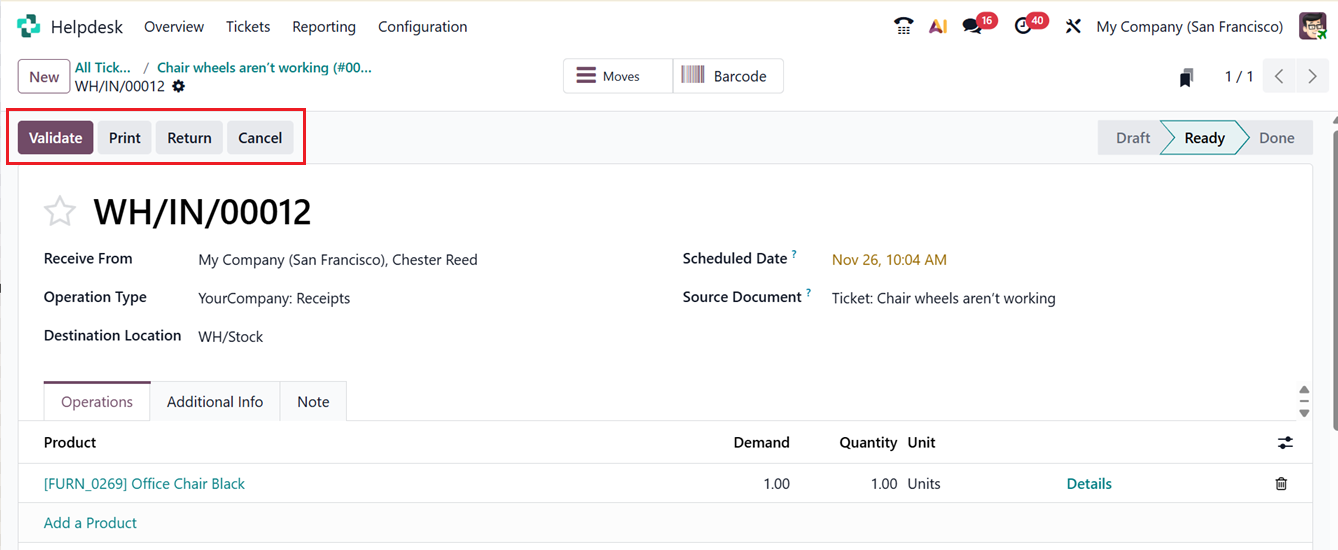
If a customer wants to return a product purchased from your company, you can record this by clicking the Return button on the ticket form. This action opens a pop-up window where you can verify the details before confirming.
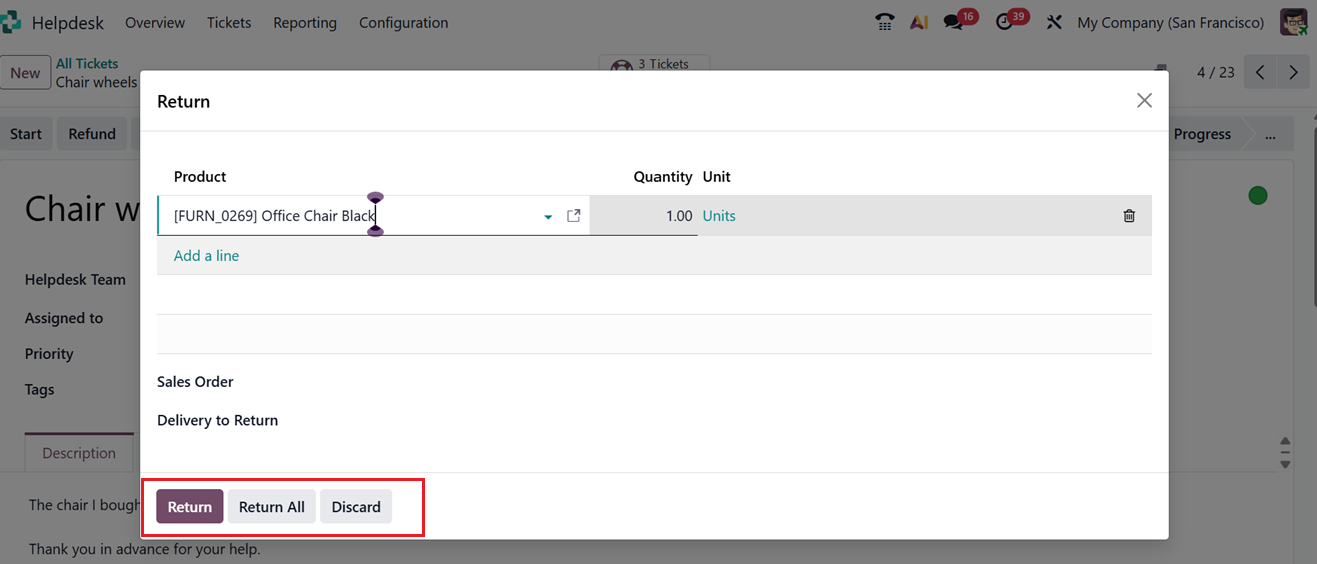
Once all the details are verified, click on the ‘Validate’ button to finalize the return order.
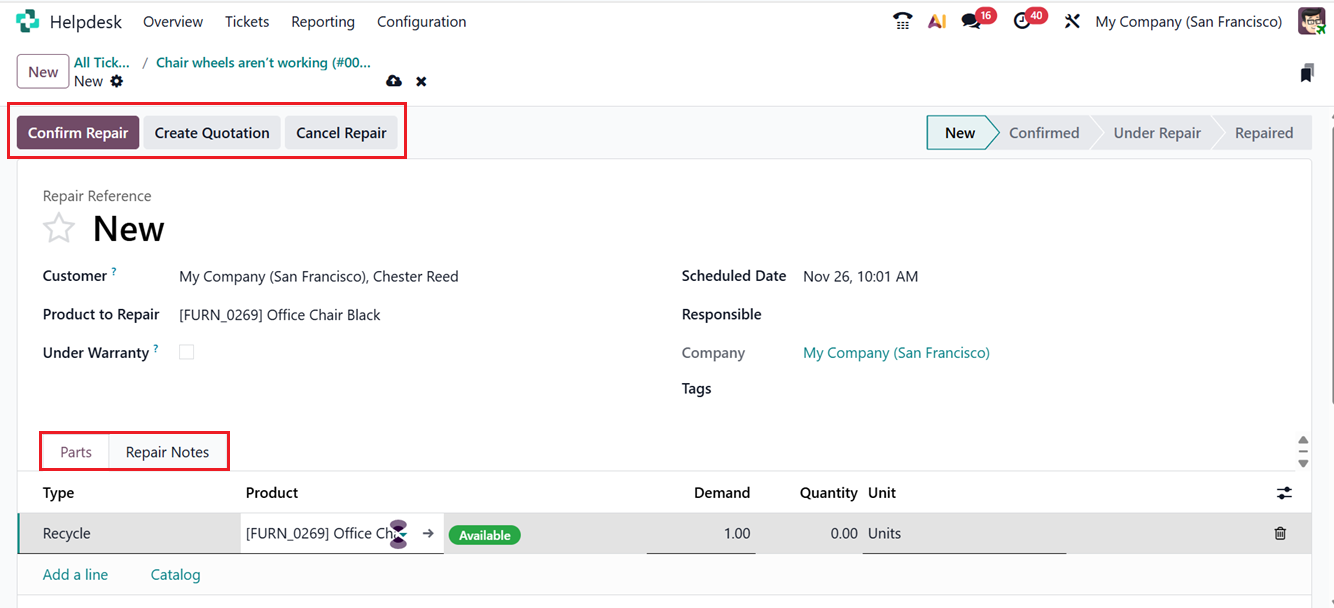
If a product needs to be repaired due to defects or damage, you can click the Repair button to generate a repair order. After reviewing the repair details, click on the Confirm Repair button to approve it, as shown in the screenshot below.
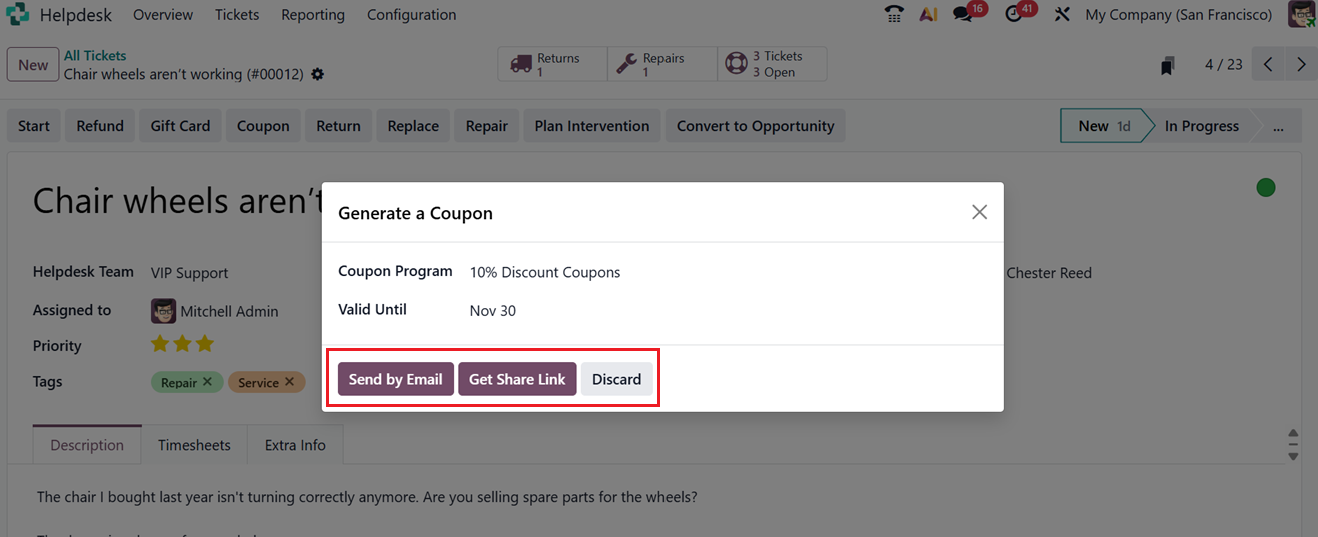
You can also offer coupons or gifts to customers using the Coupons button. When you click this option, a pop-up window appears where you can choose the ‘Coupon Program’ and ‘Valid Until’ date you want to apply for. Then, send or share the coupons through mails or as URL links using the ‘Send by Email’ or ‘Get Share Link’ buttons, as shown in the screenshot below.
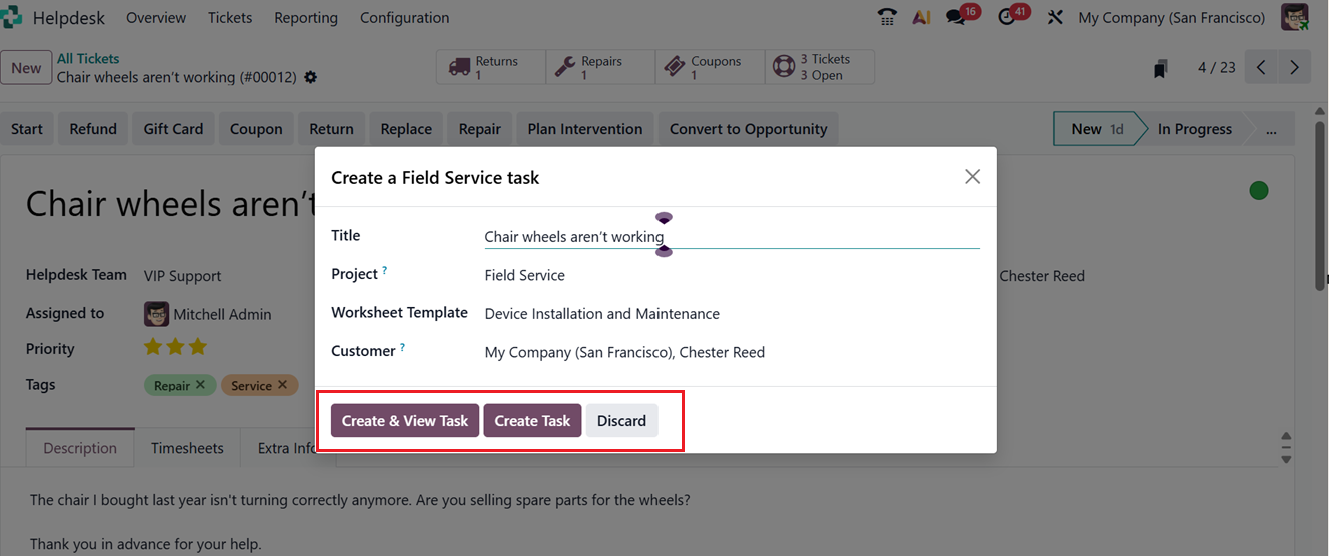
In addition, you can create a Field Service task directly from a helpdesk ticket by clicking the Plan Intervention option. This is useful when a technician needs to visit the customer’s location or perform on-site service. In the new form, you’ll find fields for Title, Project, Worksheet Template, and Customer, as shown in the screenshot below.
After the on-site work is completed, you can close the ticket and manage the completed task through the Field Service module.
The “Convert to Opportunity” button in a helpdesk ticket form allows you to turn a support ticket into a sales opportunity in the CRM module, making it useful when a customer inquiry indicates potential business. It automatically creates an opportunity by transferring relevant customer details, ticket information, and communication history, helping bridge support and sales, improving follow-up, and maintaining clear traceability between the ticket and the newly created opportunity.
When you select this option, a pop-up window appears where you can enter lead details such as: CUSTOMER and SALES TEAM, as shown in the screenshot below.
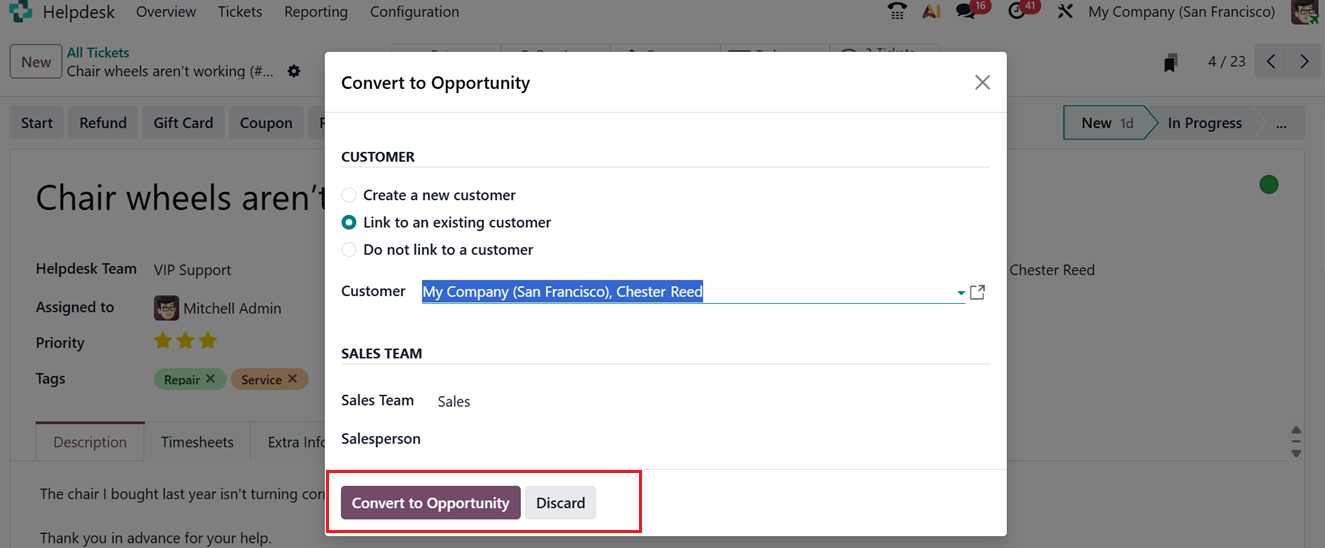
- Customer: You can link the lead to an existing customer, create a new one, or leave it unlinked
- Sales Team: Assign the lead to a specific sales team.
- Salesperson: Choose the salesperson responsible for handling the lead.
Once the details are filled out, click on the Convert to Opportunity button to create the opportunity in the CRM module. This feature effectively connects customer support with sales, ensuring that potential business opportunities discovered through helpdesk interactions are actively pursued by the sales team.
The ‘Returns,’ ‘Repairs,’ ‘Coupons’ and ‘Tickets Open’ smart buttons on the top of the form provides a comprehensive data of the returns, repair orders, coupons, gift cards or tickets associated with this helpdesk ticket.