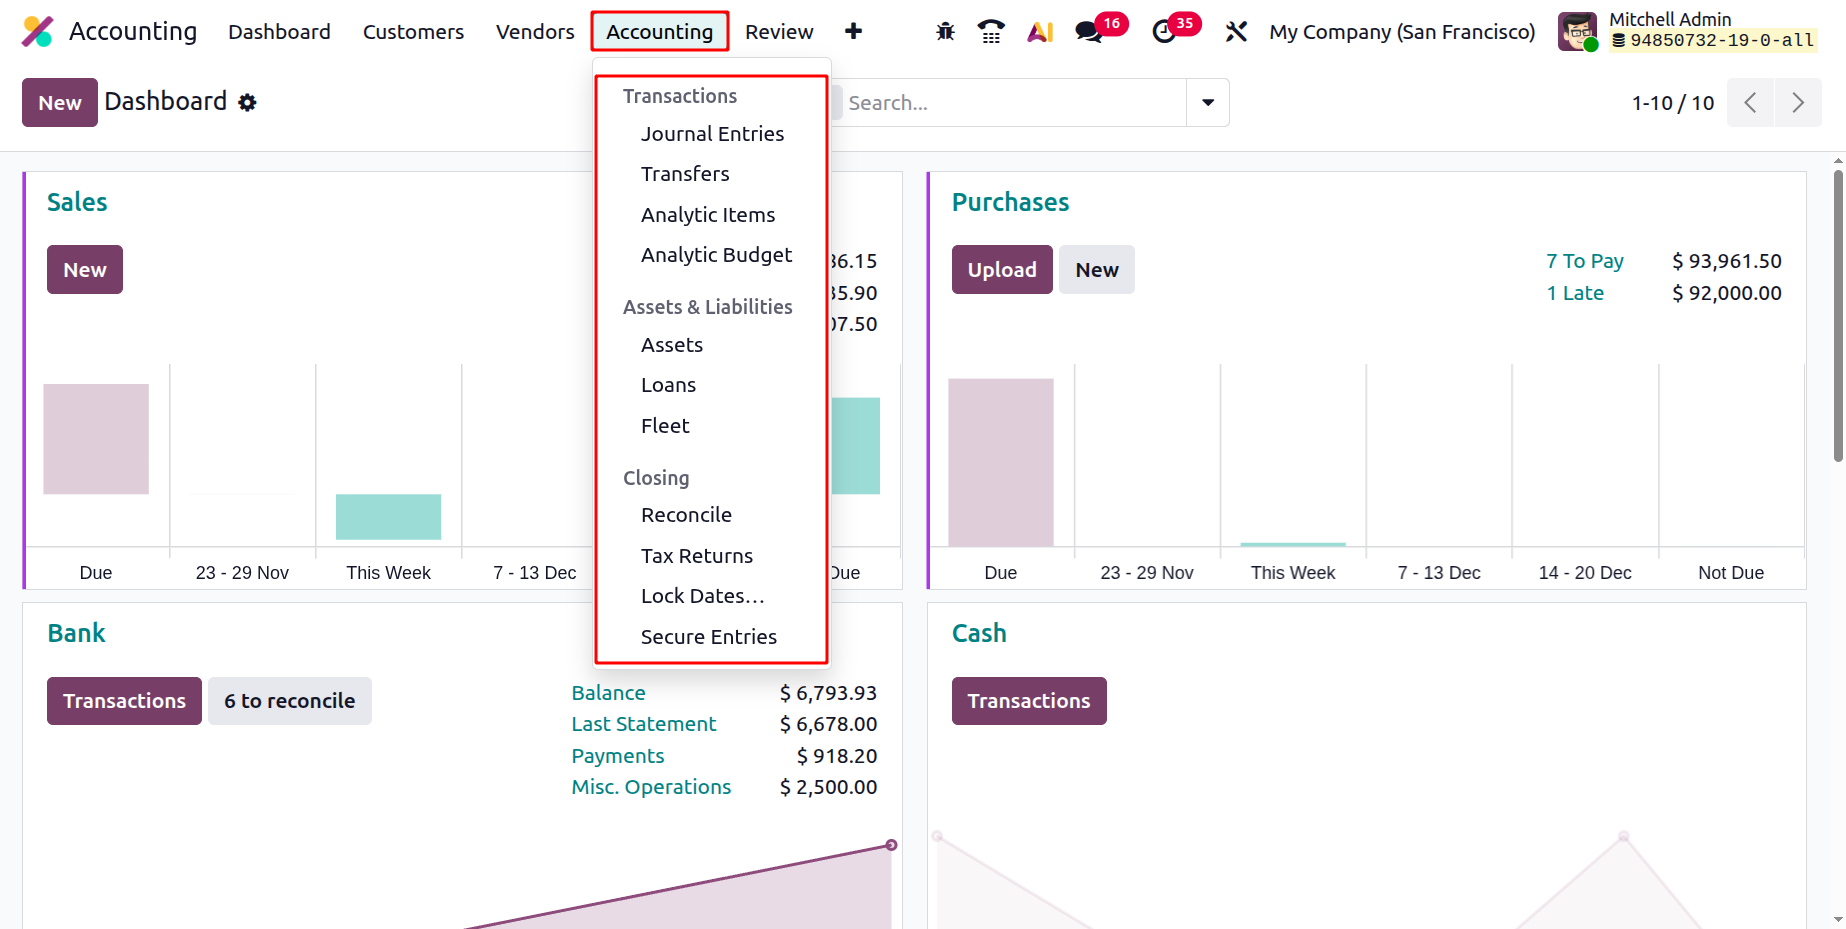
Accounting
Next is the Accounting menu, which contains Transactions, Assets & Liabilities and Closing sections.
1.1 Journal Entries
In Odoo 19 Accounting, a Journal Entry represents the detailed recording of every financial transaction within a specific journal, forming the backbone of the accounting system. Each entry captures essential elements such as the accounting date, debit and credit amounts, partner details, and descriptive references. Following the Double Entry Bookkeeping System, Odoo ensures that every journal entry includes at least one debit and one corresponding credit line, with total debits always equaling total credits. The individual components of a journal entry are known as Journal Items, and together, they ensure the precision and balance of a company’s financial data.
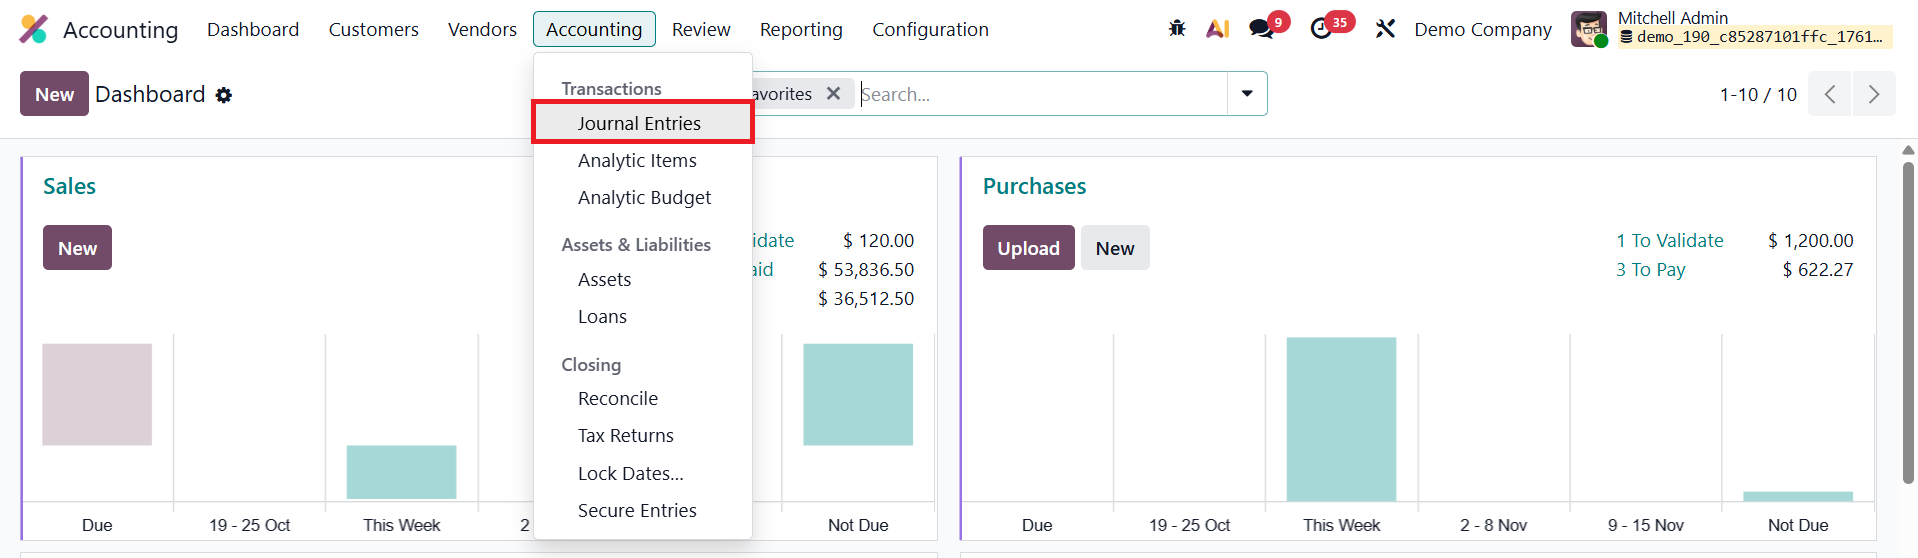
All journal entries can be accessed through the Accounting → Accounting → Journal Entries menu, where the list view displays key information including the Date, Entry Number, Partner, Reference, Journal, Company, Total Amount, and Status.
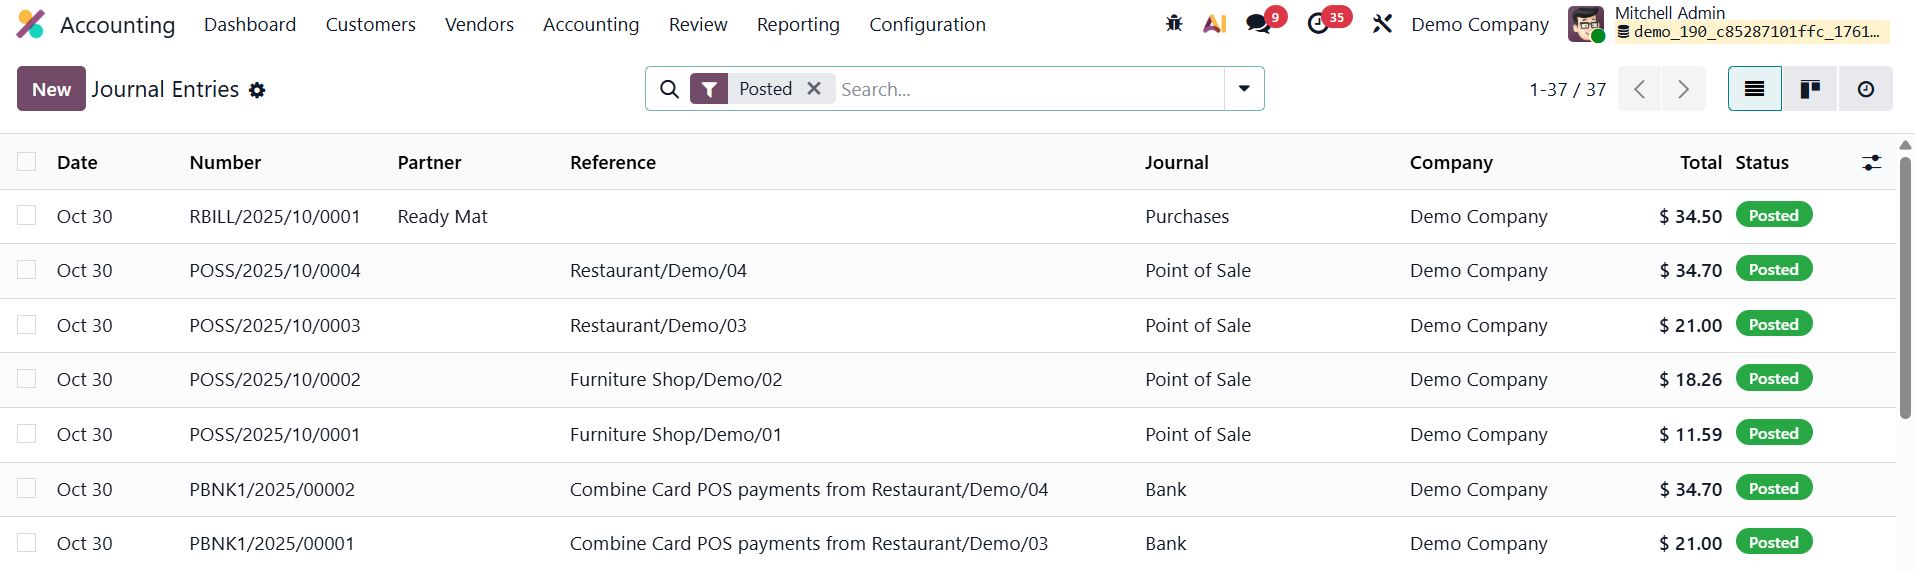
This view gives accountants a clear snapshot of the financial movements recorded within the system. To create a new journal entry, users can click the New button, which opens a detailed form for data entry.
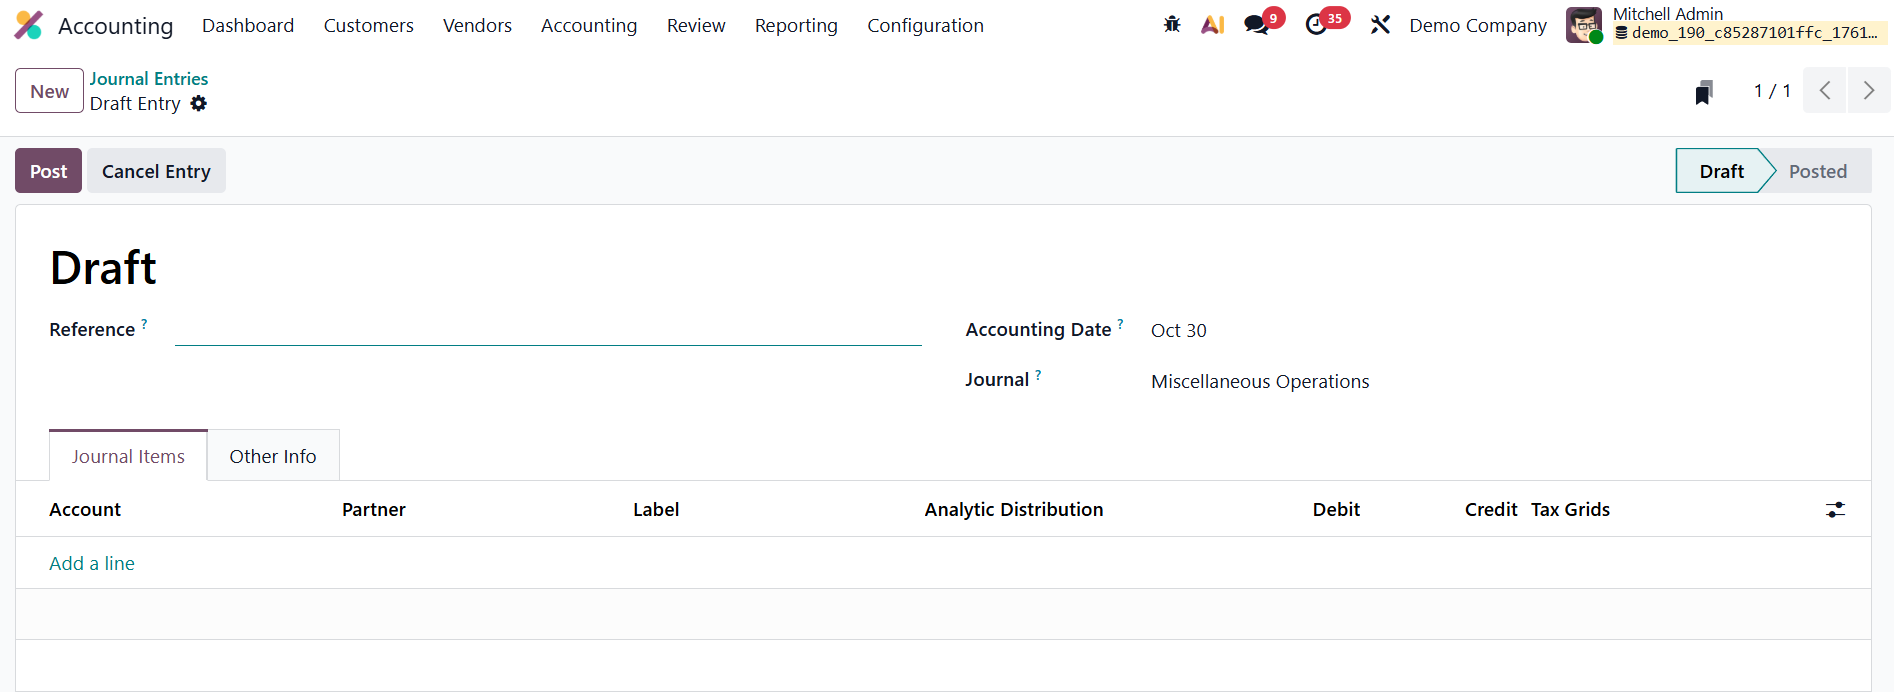
The form includes fields for entering the Reference (used to link supporting documents), Accounting Date (indicating when the transaction should be posted), Journal (to categorize the entry as sales, purchase, bank, etc.), and Company details, which are automatically populated but can be adjusted in multi-company environments.
By clicking Add a Line, users can enter individual Journal Items specifying the Account, Partner, Label, Analytic Distribution, Debit, Credit, and applicable taxes. These lines together make up the complete journal entry. Odoo validates the balance of each entry, ensuring that total debits equal total credits before allowing it to be posted, thereby maintaining the integrity of financial records.
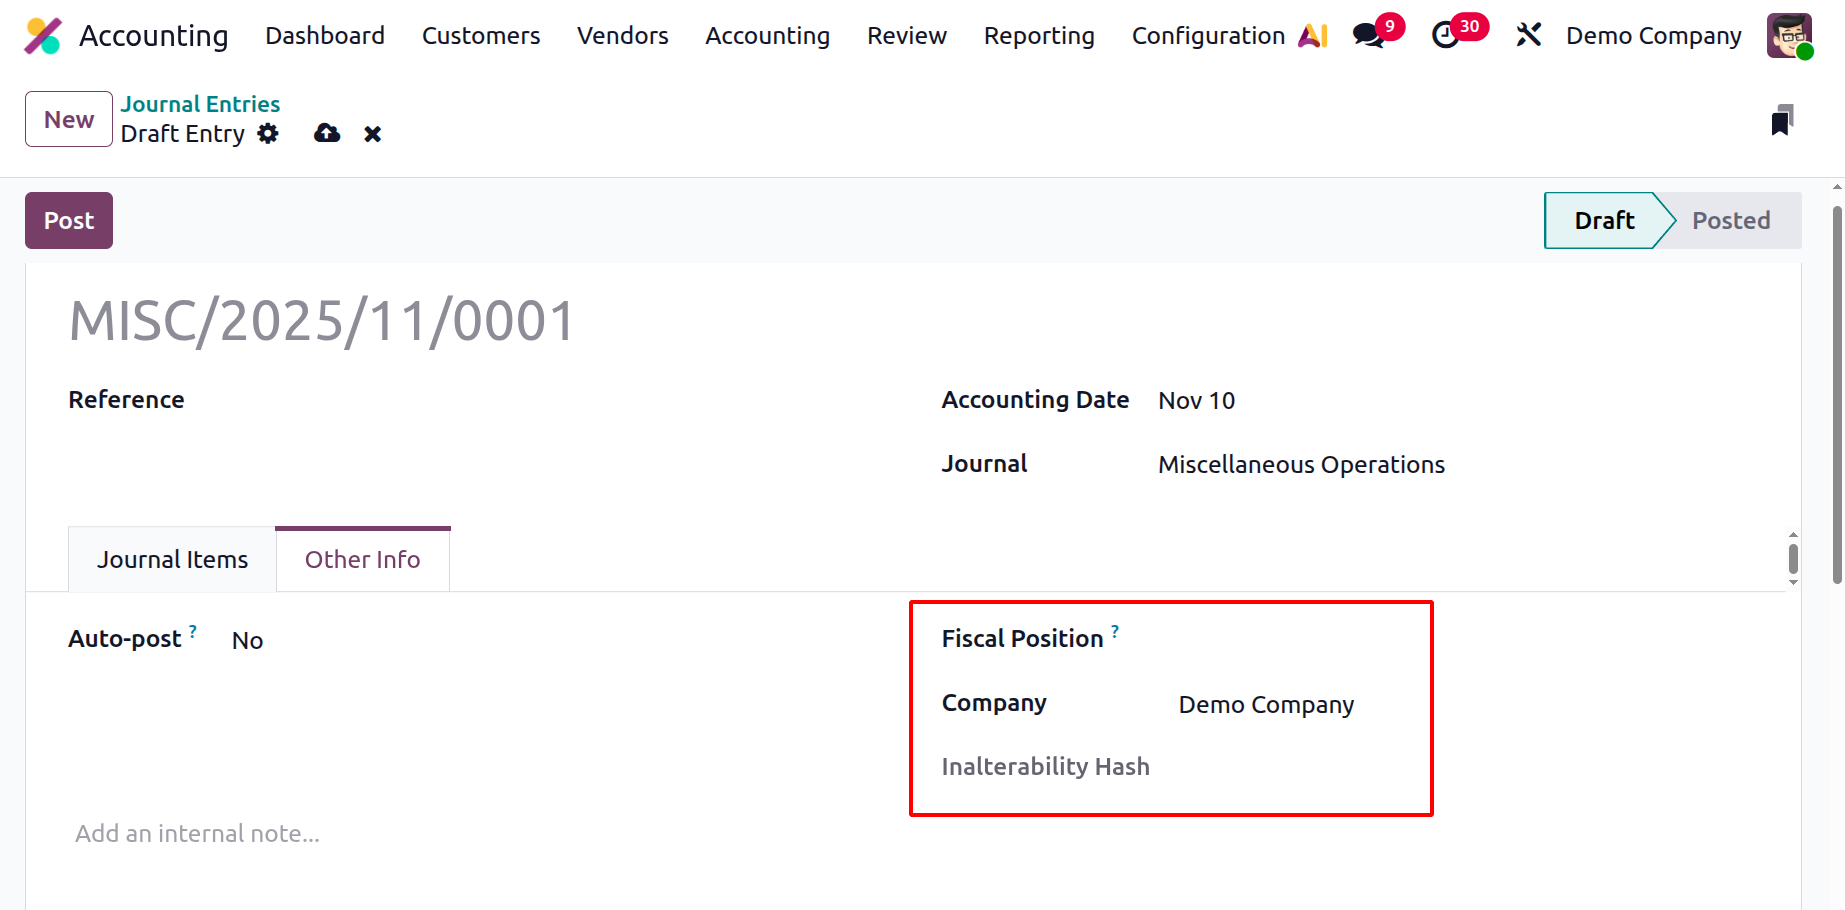
The Other Information tab provides additional configuration options for automation and compliance. Users can also specify the Fiscal Position, which determines tax and account mapping rules based on the partner’s configuration, as well as the associated Company for the transaction.
The Auto-post feature enables automatic posting of the entry on the designated accounting date.

Once the information is complete, clicking Post confirms and finalizes the transaction, locking it for reporting and reconciliation.
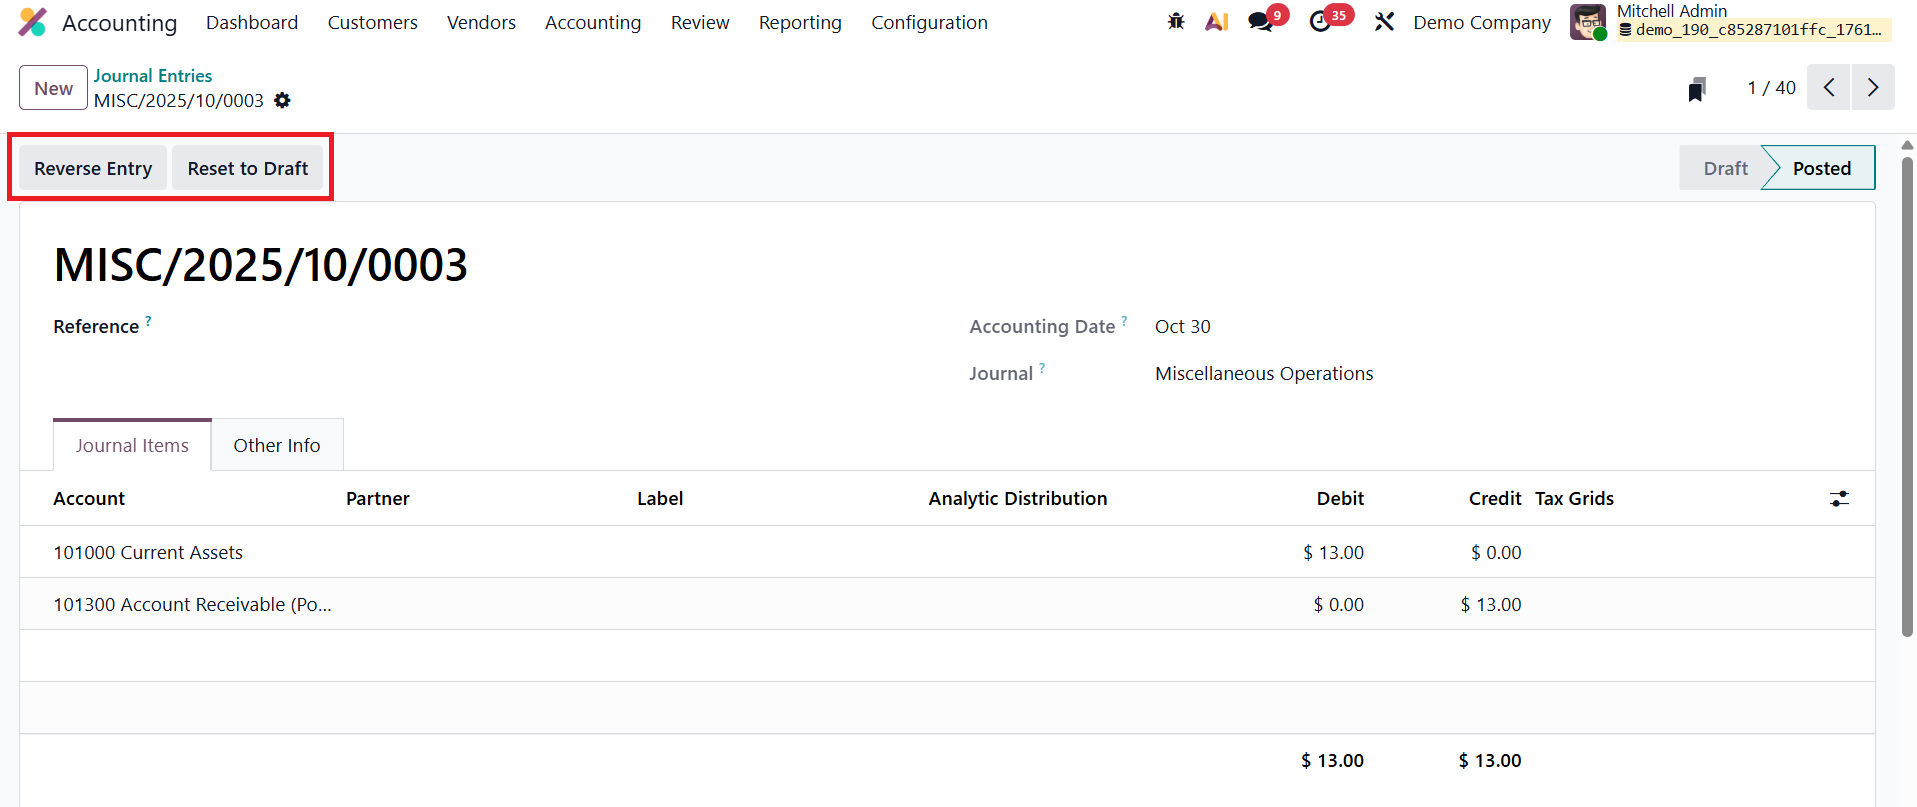
If a correction or reversal is needed, Odoo 19 offers the Reverse Entry feature, which automatically generates an offsetting entry to negate the effects of the original transaction.
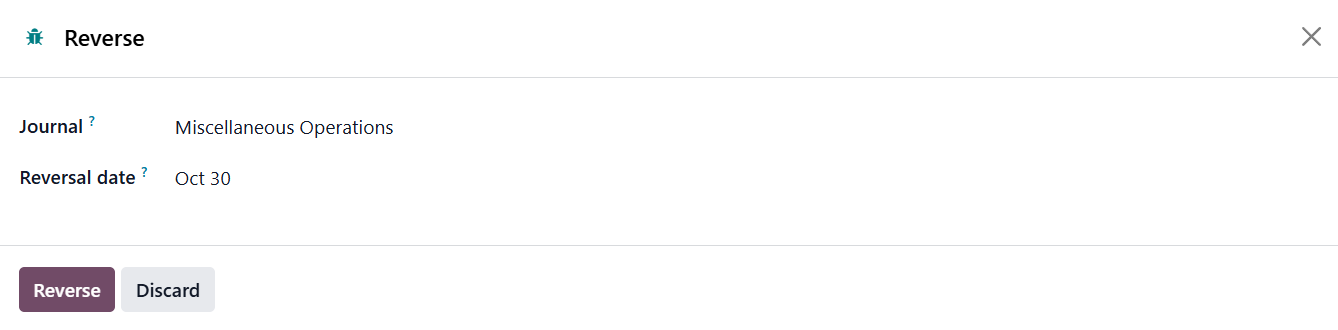
Users can define whether the reversal should occur on the same date as the initial entry or a new date, and can also select the appropriate journal for the reversal.
Overall, the Journal Entries feature in Odoo 19 provides a structured, transparent, and flexible system for recording every financial movement within a business.
1.2 Transfers
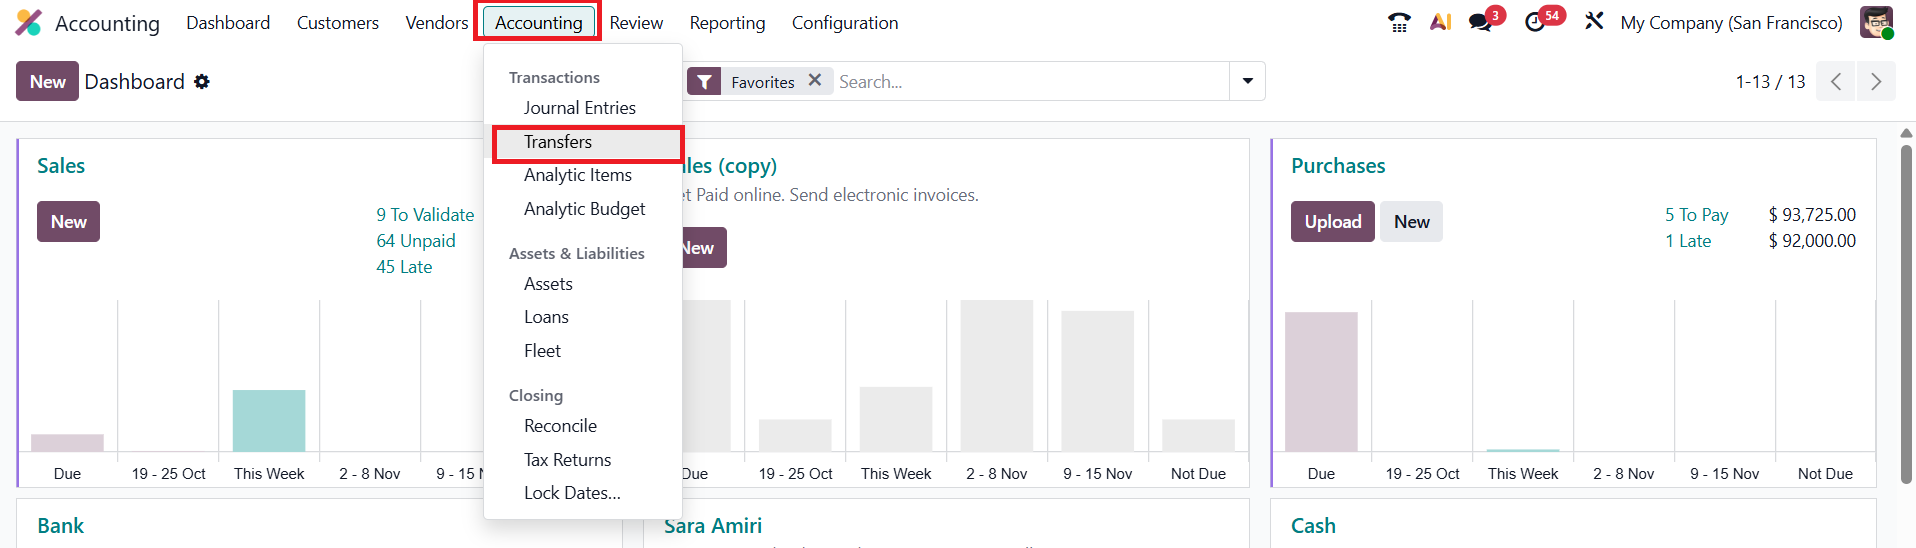
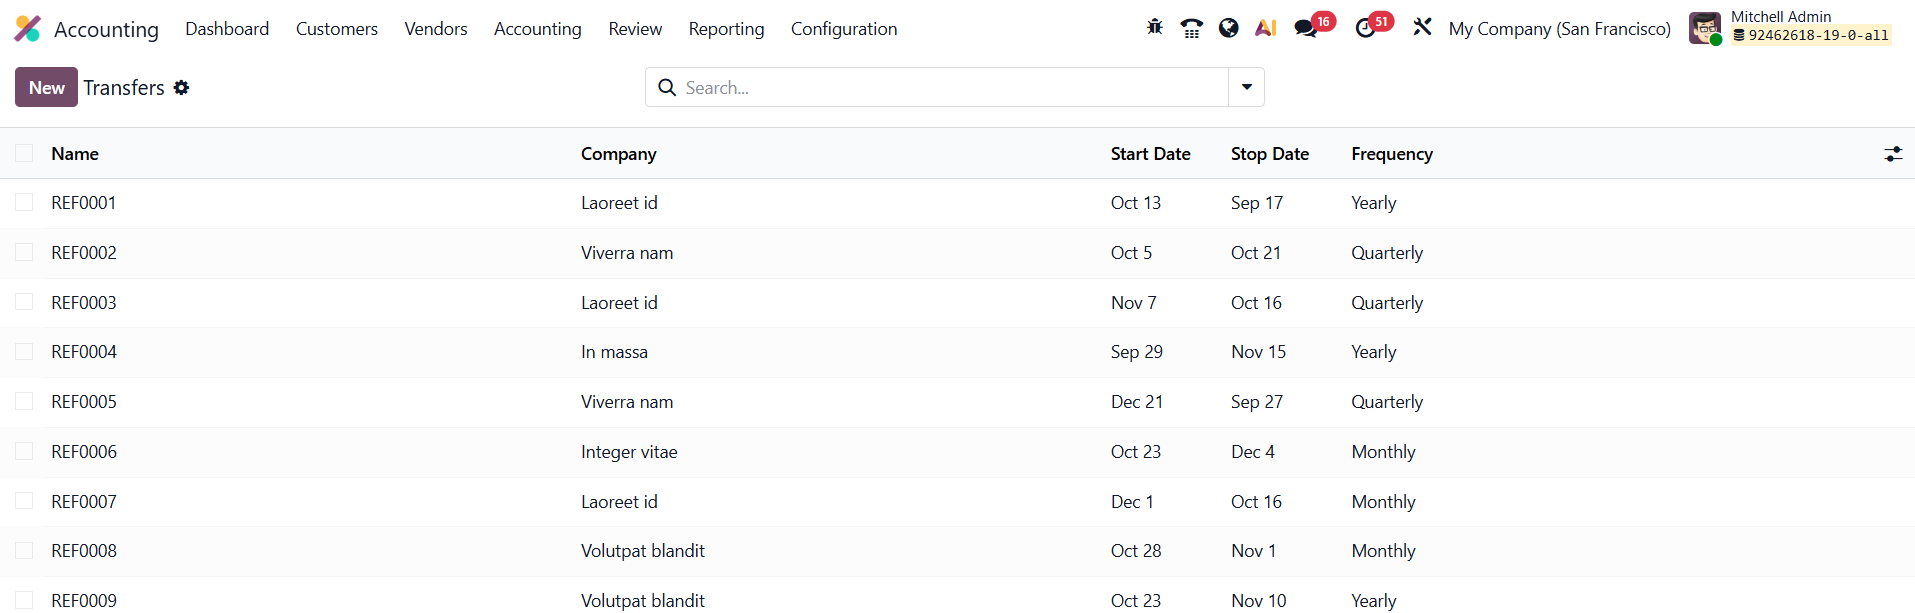
In Odoo 19 Accounting, the Automatic Transfers feature provides an advanced and streamlined approach to automating internal transfers between accounts over specific time intervals. To access the feature, navigate to the Accounting module and select Transfers under the Accounting menu.
The window will show the list view of the Transfers with the details of the Name, Company, Start Date, Stop Date, and Frequency.
To configure a new automated transfer, click New and begin by entering a meaningful Description for the transfer.
Define the active period by setting the Start Date and End Date under the Period field. Then, specify the Frequency, whether monthly, quarterly, or yearly, to determine how often the transfer should occur. Assign a Journal where the resulting accounting entries will be recorded; this ensures that all automated movements are properly logged for tracking and reconciliation.
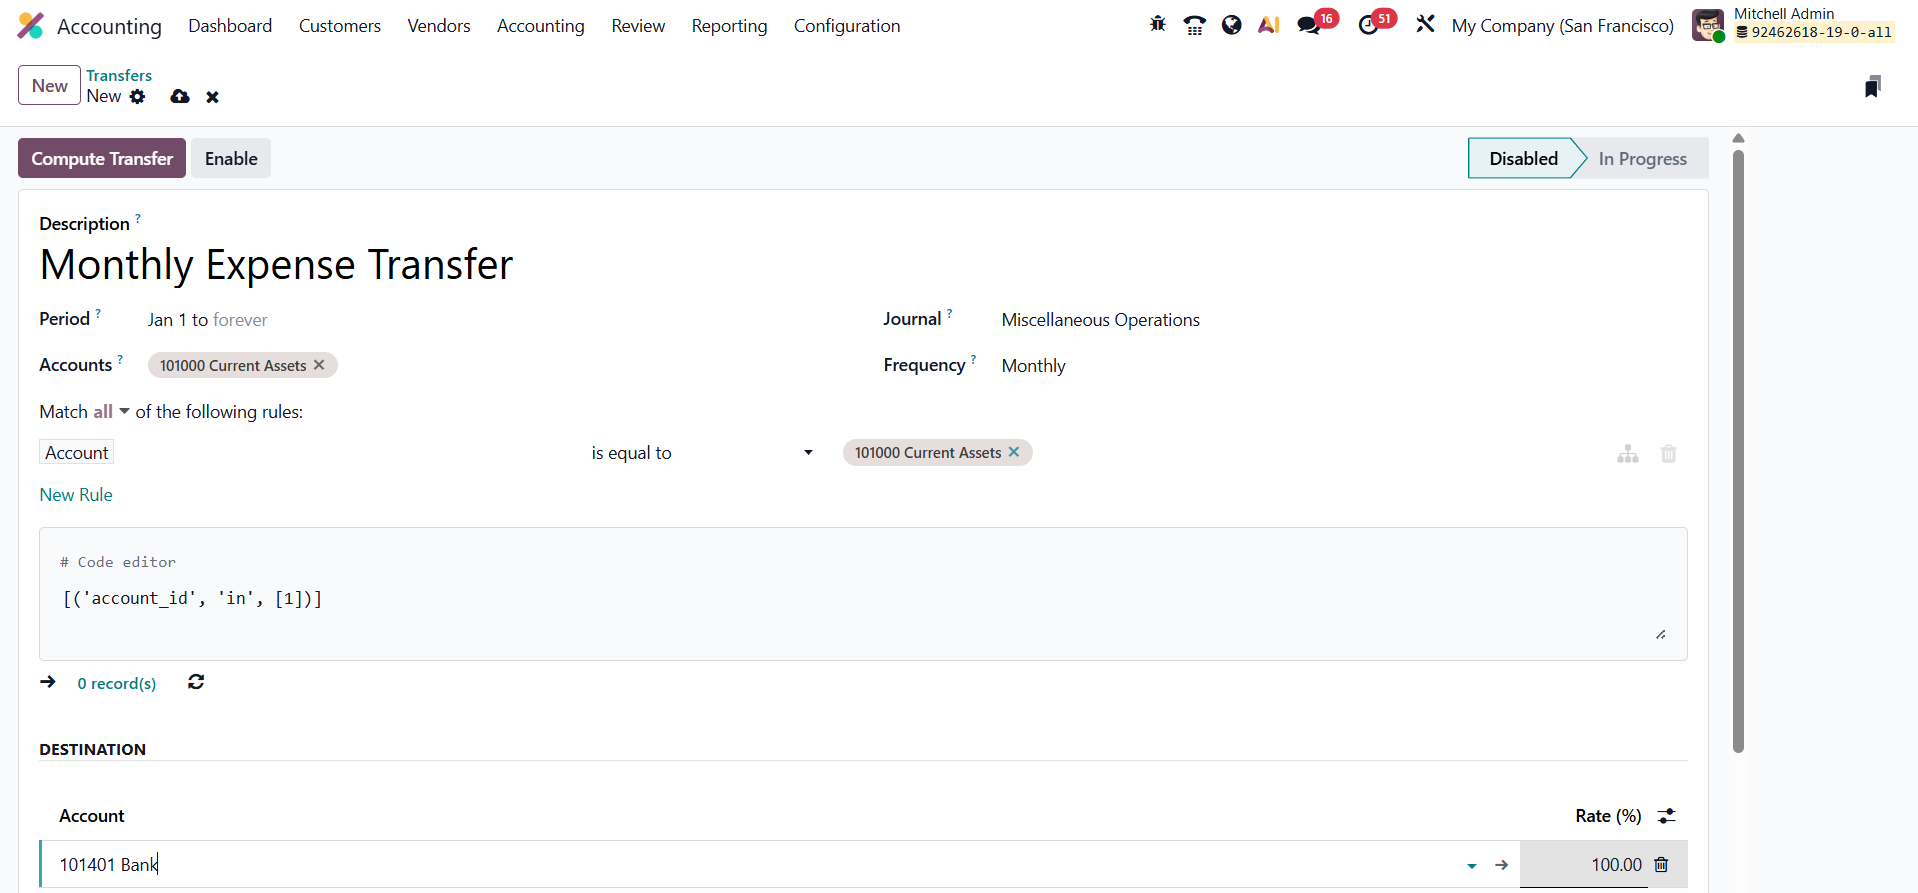
Under the Account section, select one or more accounts from which the amounts will be transferred. Define the Destination Account(s) that will receive the funds. The Rate field lets you determine the proportion of the total amount from the origin accounts to be transferred automatically. Once all configurations are complete, click Enable to enable the scheduled transfer.
You can then use the Compute Transfer button to execute the transfer and generate the corresponding journal entries for the defined period.

The Transfers smart button provides instant access to all computed and executed transfers, offering full transparency over automated financial movements. If needed, you can stop an ongoing schedule at any time by clicking Disable.
1.3 Analytic Items
In Odoo 19 Accounting, Analytic Items continue to play a crucial role in providing a deeper understanding of internal cost and revenue distribution across various business dimensions, such as departments, projects, or cost centers. Each analytic item corresponds to a financial transaction linked to an analytic account, offering granular insights that support budgeting, cost control, and performance analysis.
You can access and manage analytic items by navigating to the Accounting module and selecting Analytic Items under the Accounting menu.
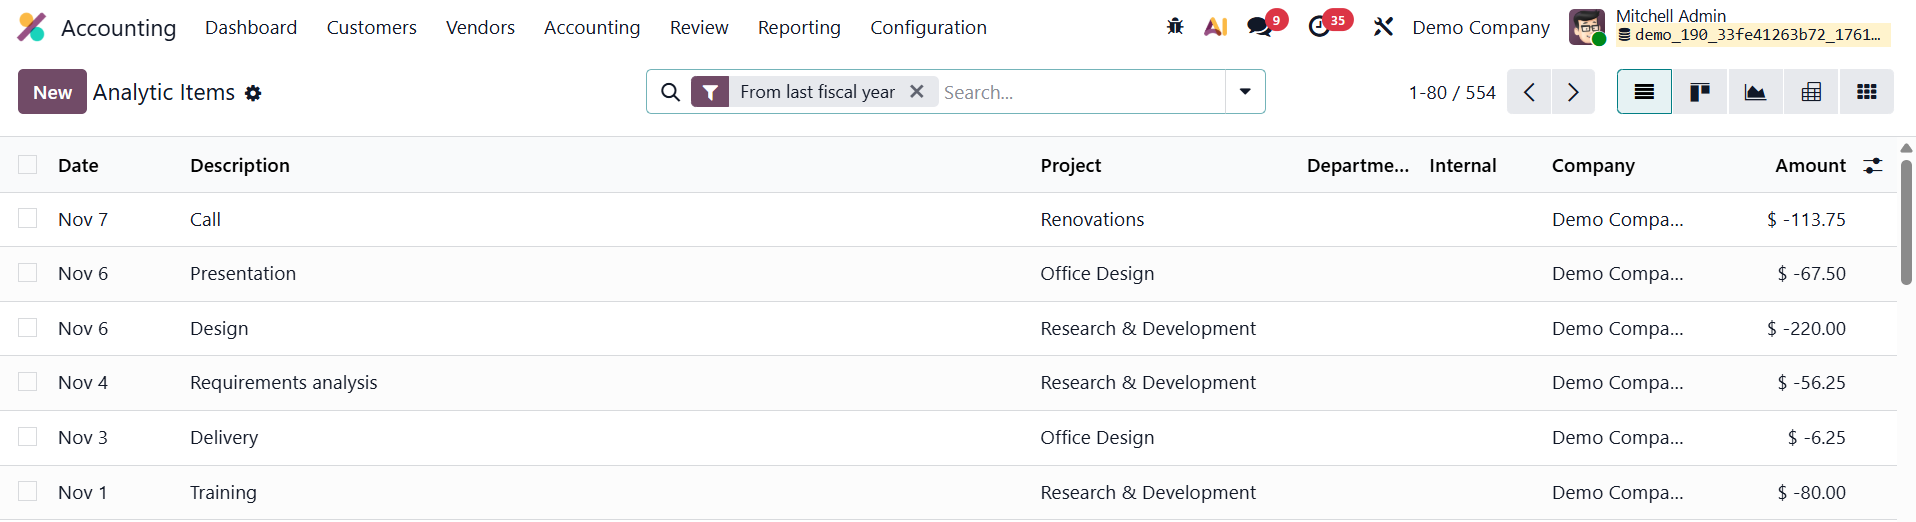
The list view presents essential details such as the Date, Description, Analytic Account, Project, Company, and Amount, helping users visualize how specific transactions contribute to various operational or project-related financial flows.
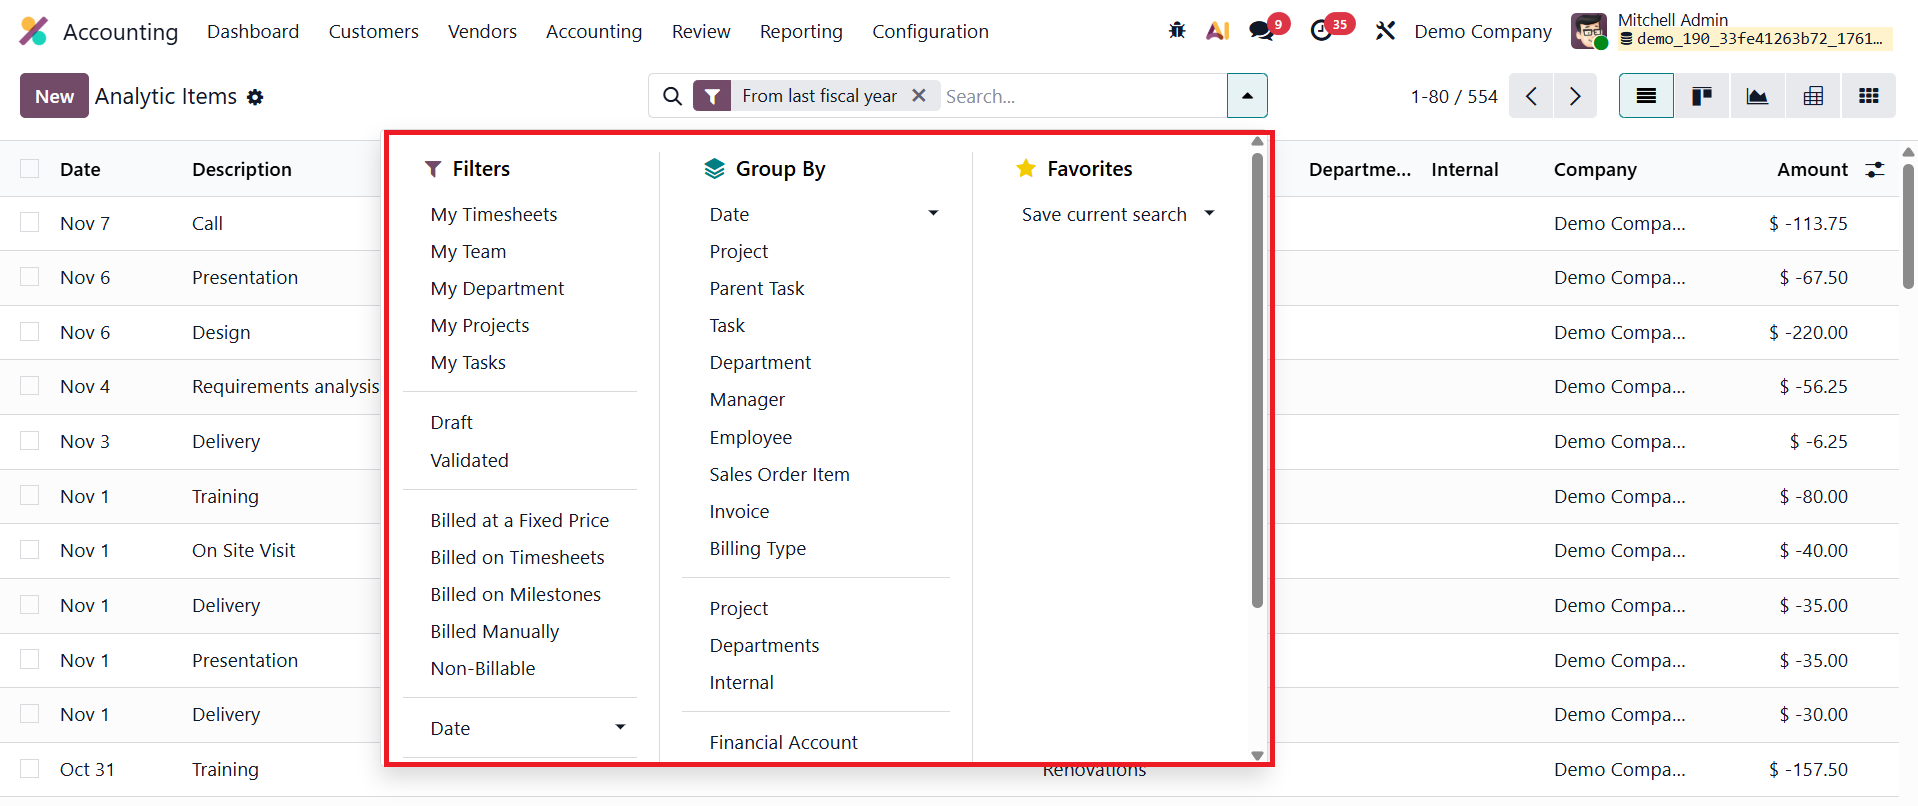
Odoo 19 enhances usability with improved filtering, grouping, and pivot analysis features, allowing users to organize data by analytic accounts, projects, partners, or other dimensions for clearer insights.
To manually create a new analytic item, click New and fill in the relevant fields.
'
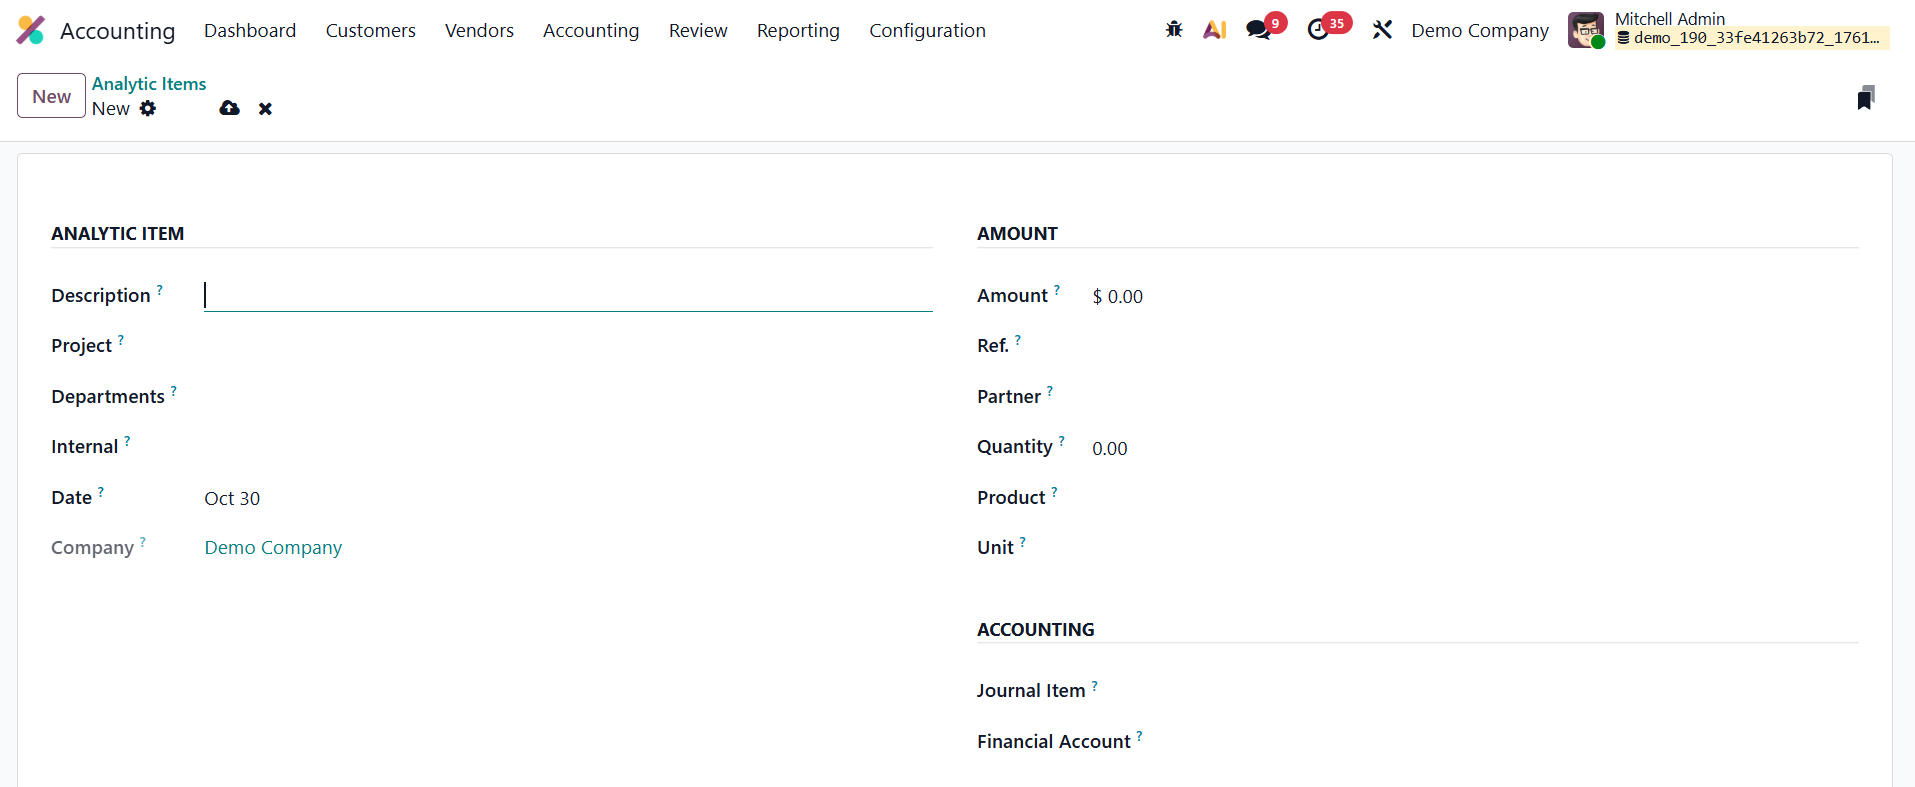
The Description field lets you define the nature or purpose of the transaction. The Date field determines the posting date, ensuring synchronization with accounting periods. The Company field is especially useful in multi-company setups, ensuring proper allocation. The Analytic Account field links the item to a particular cost center or project, while the Project and Department fields offer additional classification.
In the Amount field, you can enter either income (positive values) or expenses (negative values). The Reference field helps associate the analytic item with source documents like invoices or bills, ensuring traceability. You can also specify the Partner, Quantity, Product, and Unit of Measure, providing more context for each transaction, such as hours worked or goods sold.
Finally, you can link the analytic item to a Journal Item or a Financial Account, ensuring accurate mapping between analytic and general ledger data. Once saved, the analytic item becomes part of the system’s analytic reporting, allowing businesses to monitor financial performance across different operational levels.
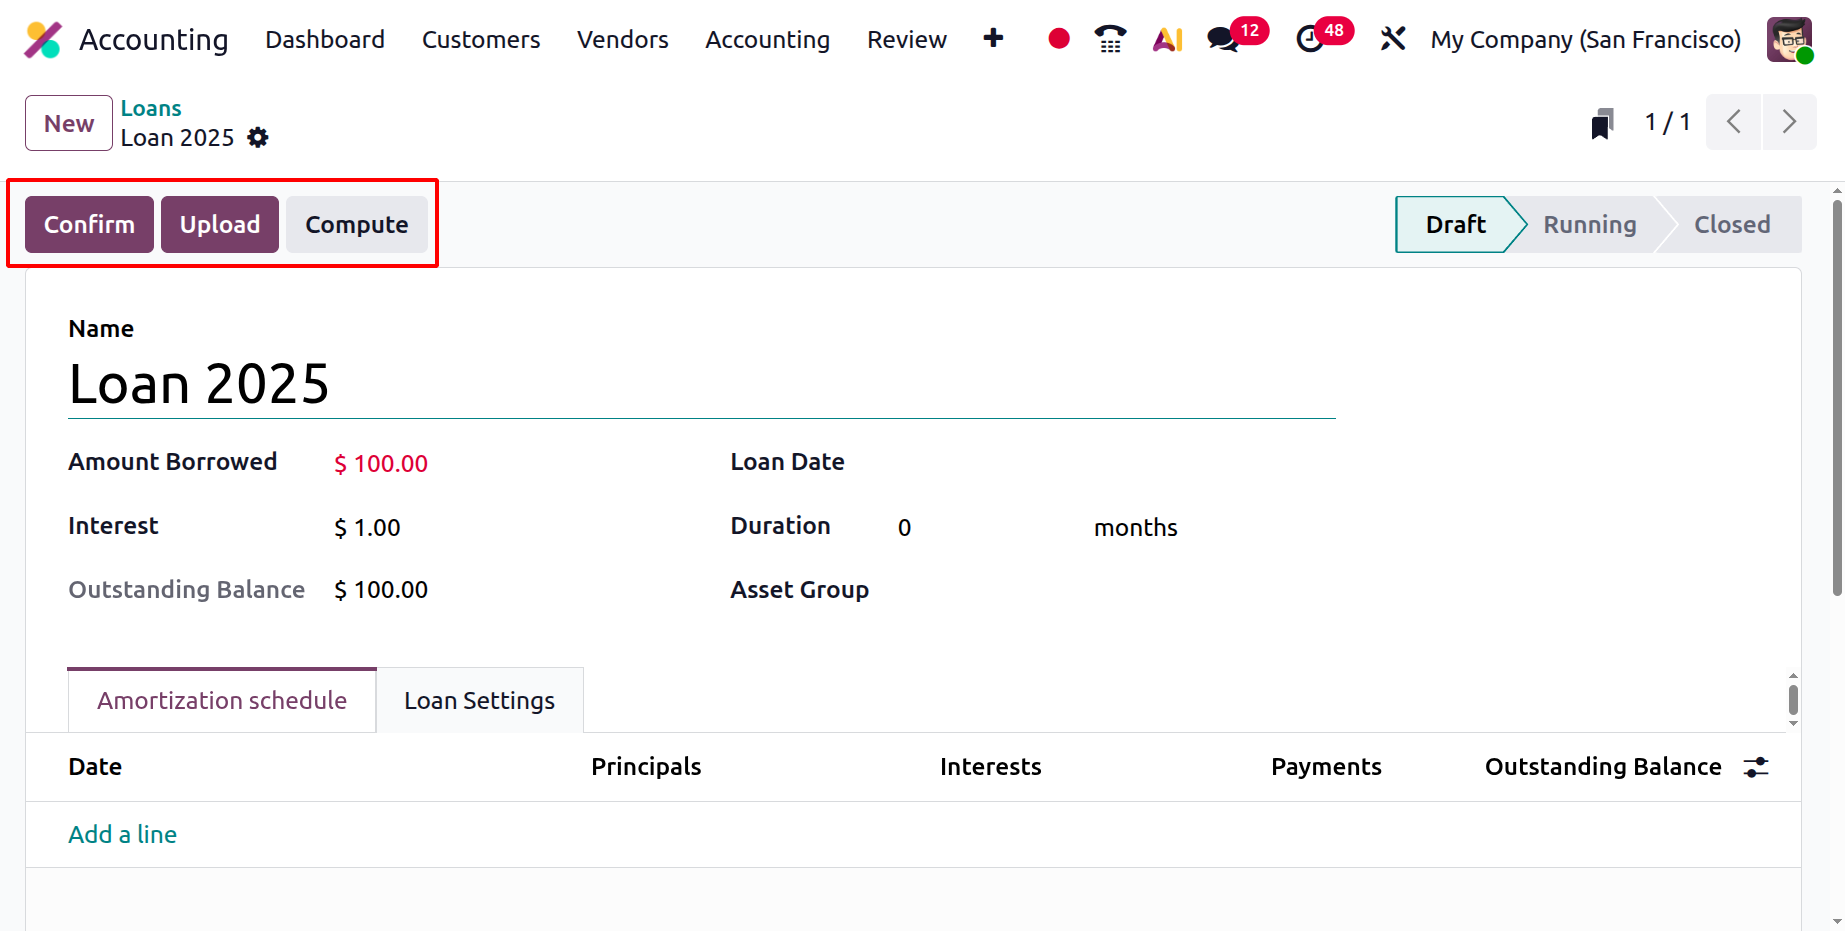
1.4 Loans
In Odoo 19 Accounting, the Loan Management feature has been further refined to provide an integrated and automated solution for handling business loans and long-term debts, such as mortgages, equipment financing, or vehicle loans. This feature enables organizations to seamlessly connect loans with corresponding fixed assets, monitor repayment progress, and maintain accurate financial records throughout the loan lifecycle.
You can access this feature through Accounting › Loans, where the Loan Dashboard offers a centralized overview of all existing loan agreements.
Each entry displays vital details such as the Name, Start and End Dates, Amount Borrowed, Outstanding Balance, and Status (e.g., Draft, Running, or Closed).
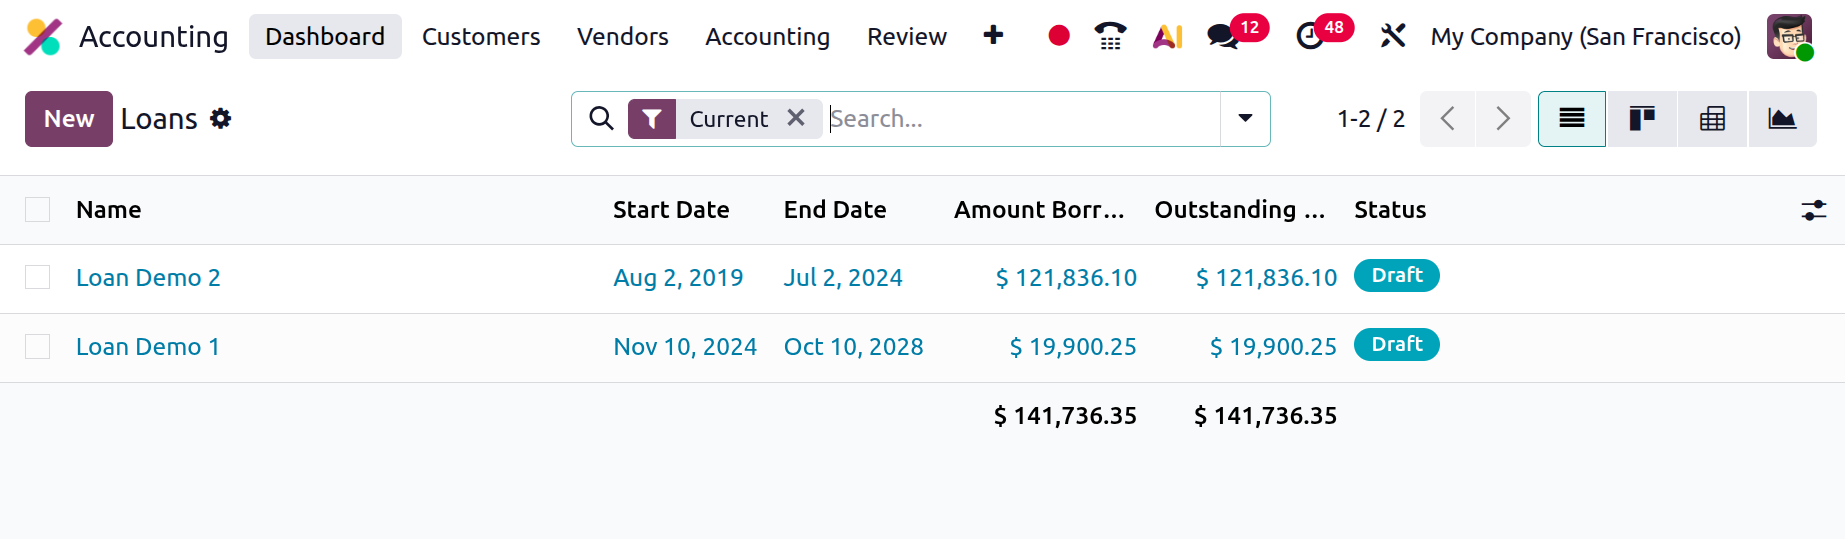
This dashboard helps accountants and finance managers quickly assess the financial obligations of the company and track how each loan is performing over time.
Clicking New opens a configuration form where you can provide a Name, Amount Borrowed, Interest, Duration (in months or years), Loan Date, and Asset Group.
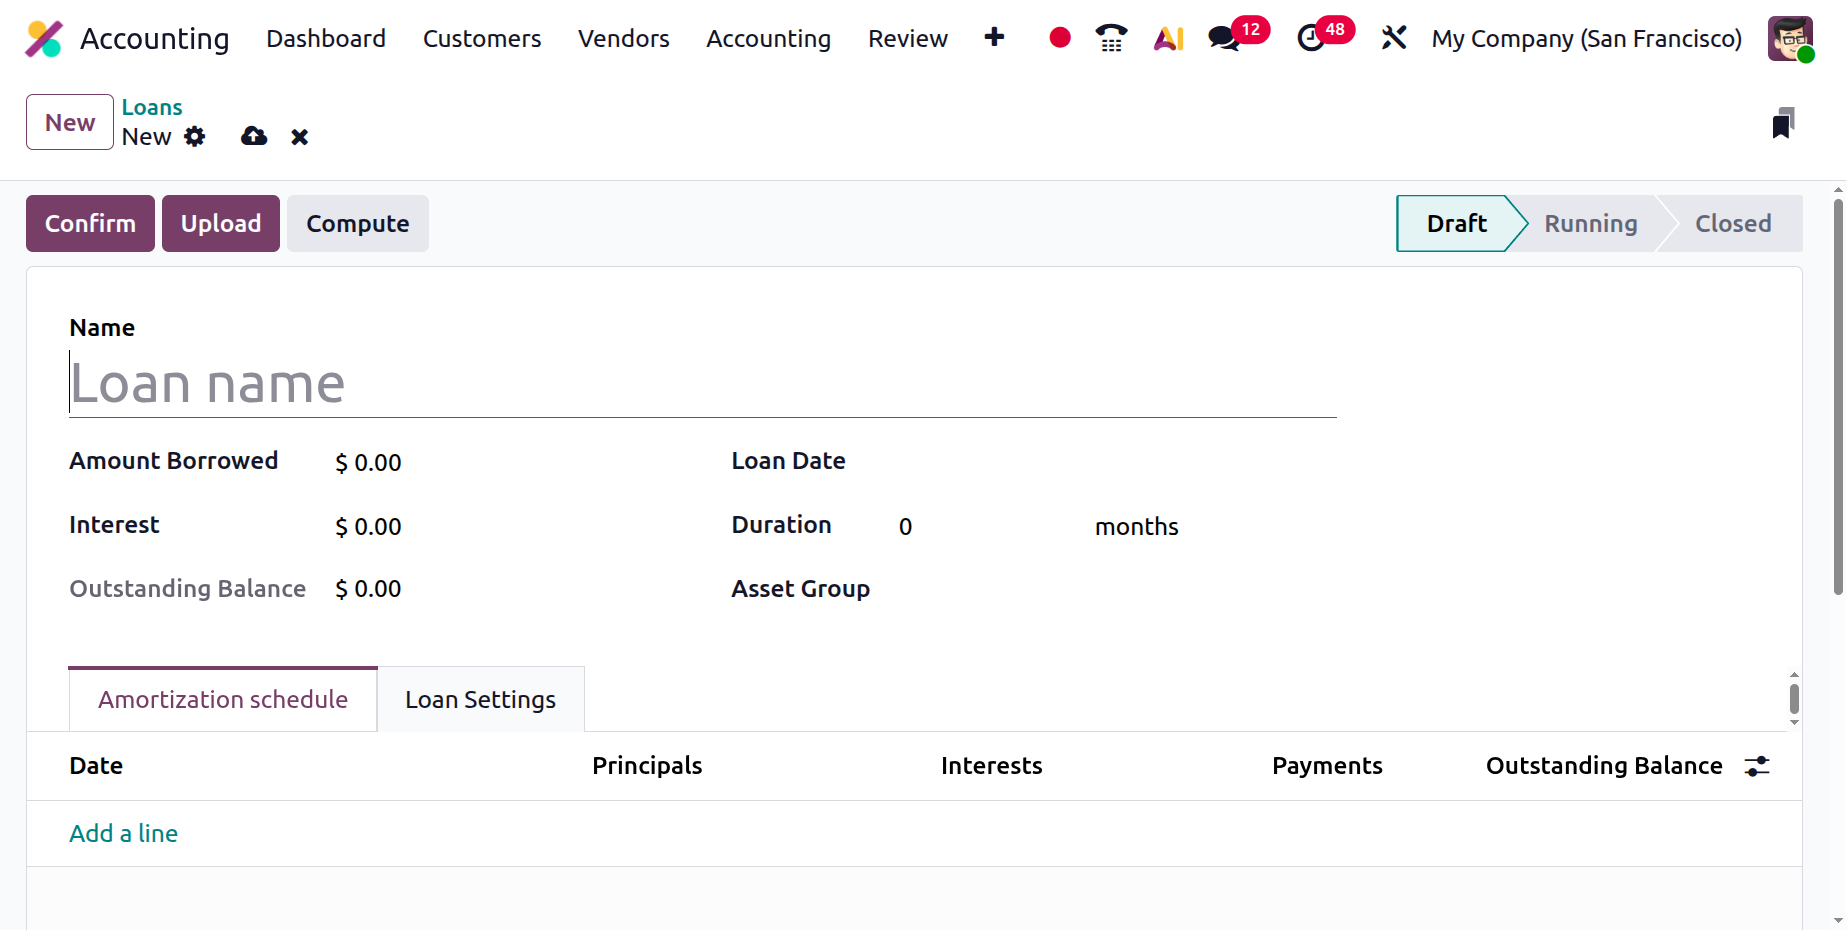
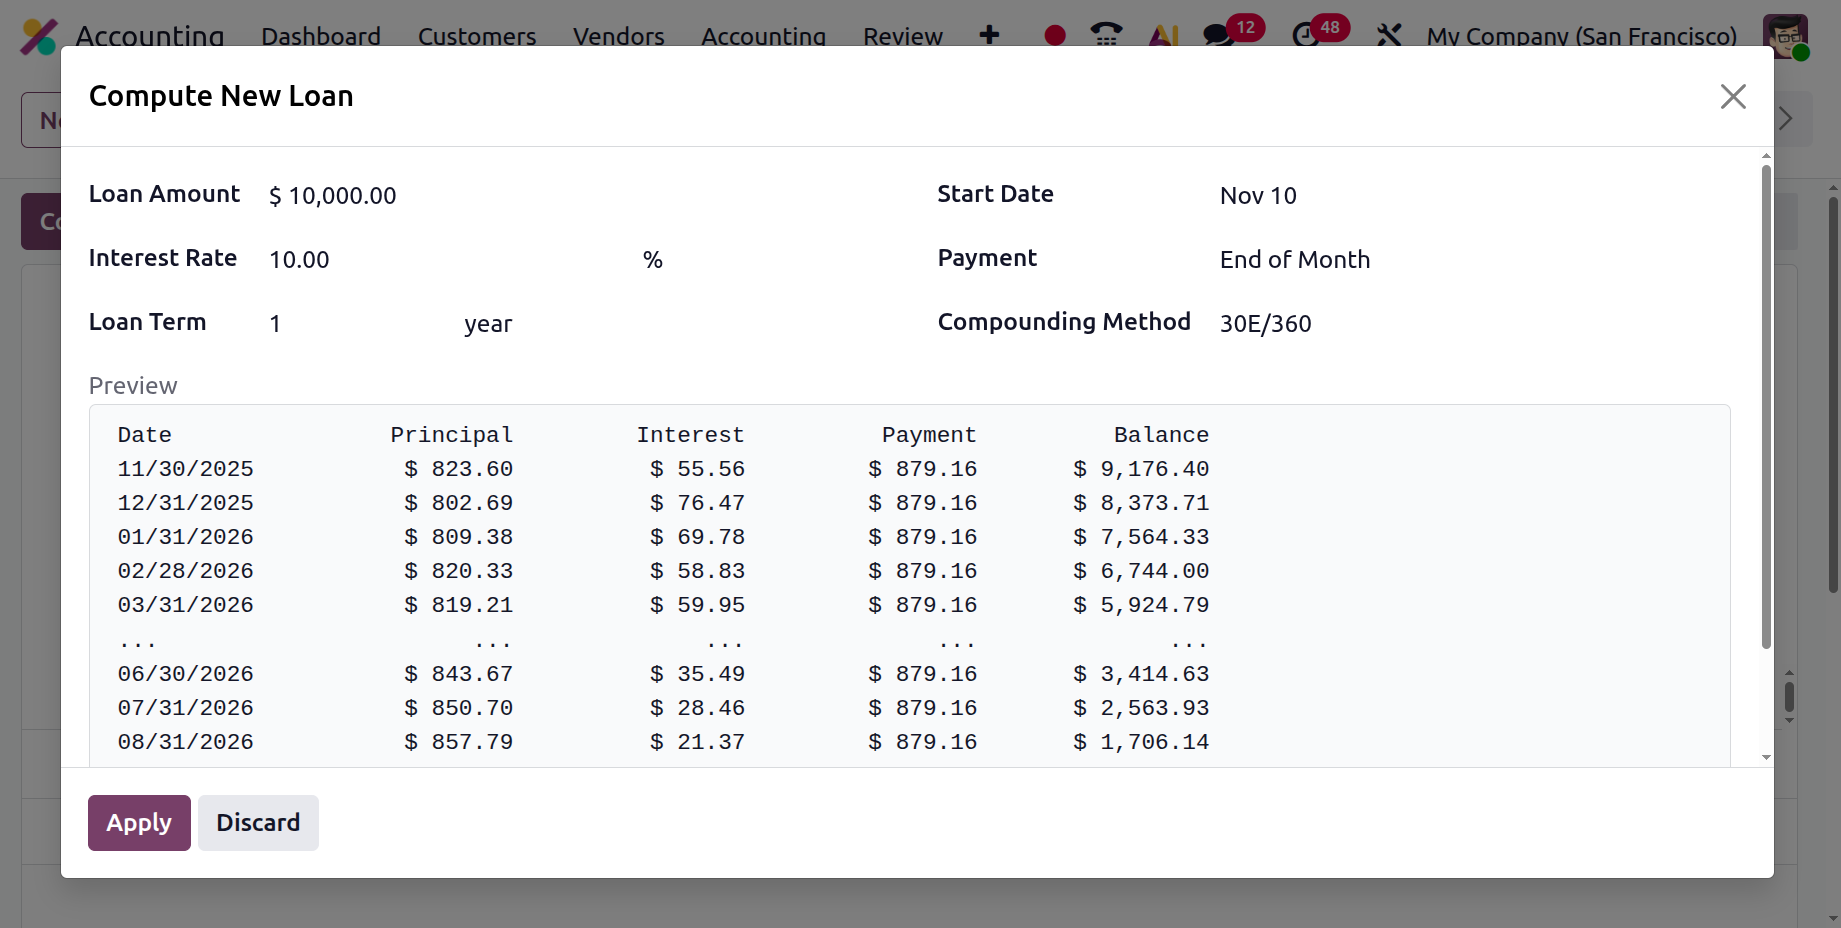
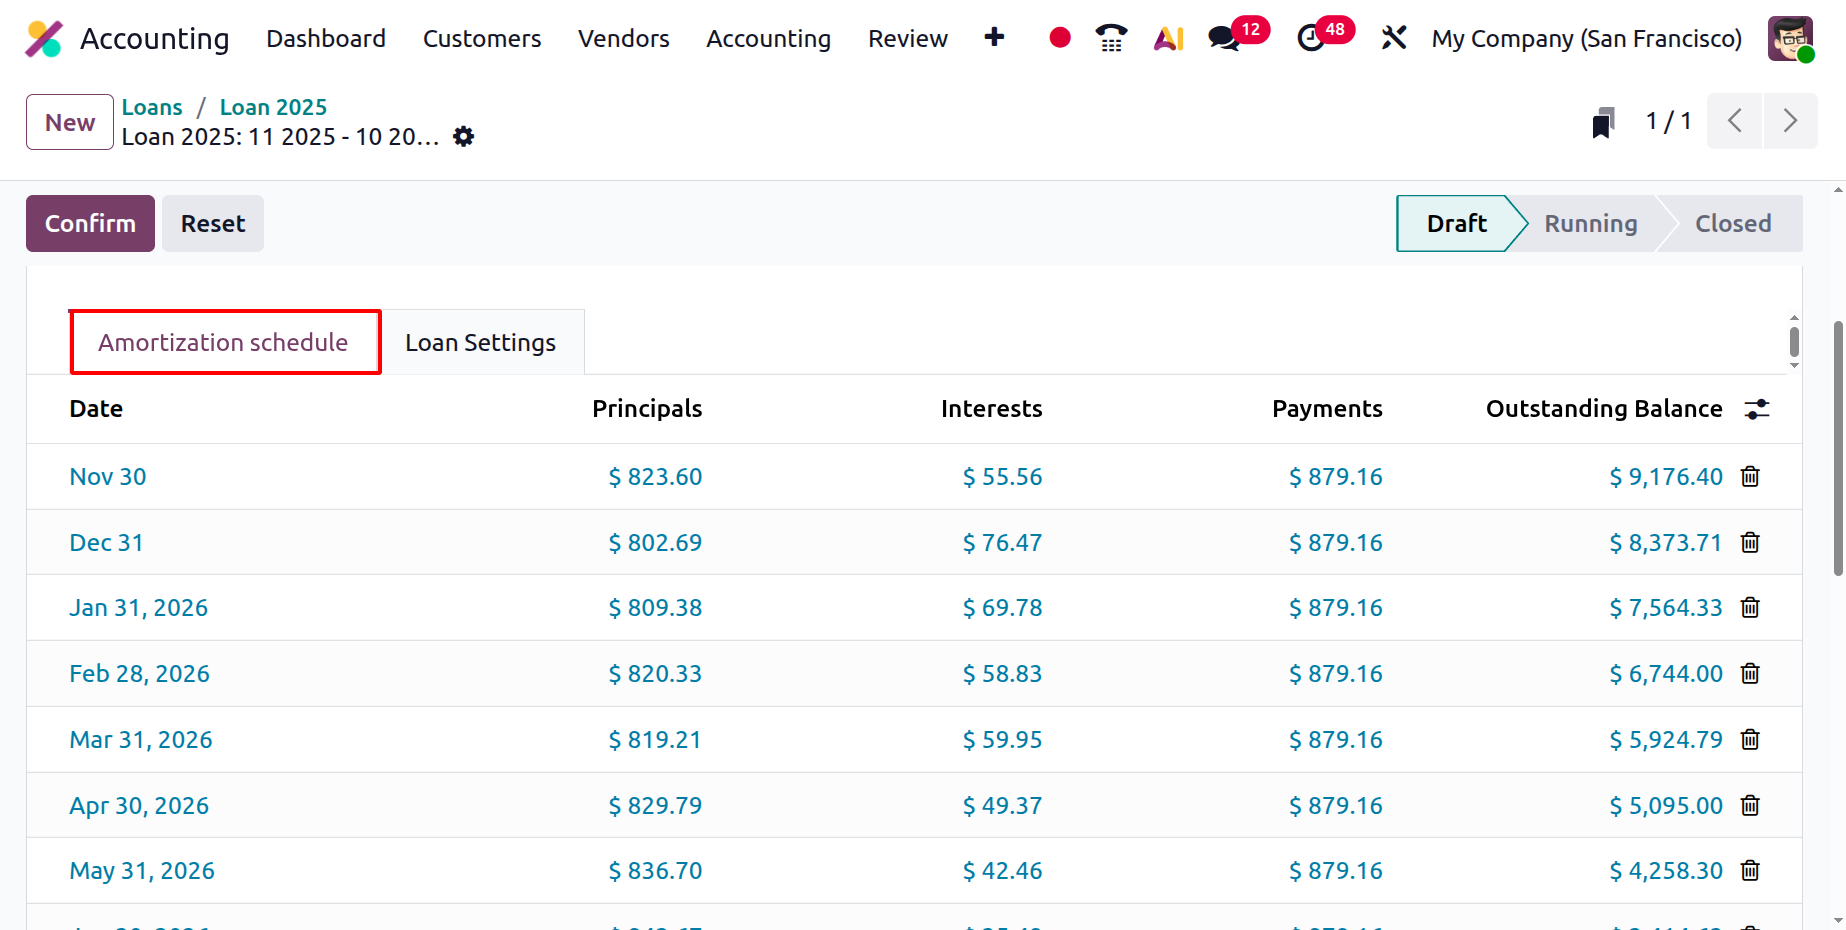
Once these parameters are entered, the system automatically computes the repayment schedule and outstanding balance, reflecting the distribution between principal and interest over the defined period.
A major enhancement in Odoo 19 is the ability to generate a full amortization schedule automatically based on the selected compounding and repayment method. Each installment is itemized, showing the principal, interest, total payment, and outstanding balance. Users also have the flexibility to manually add or edit installment lines if custom scheduling is required, for example, when loans have irregular repayment structures or special terms.
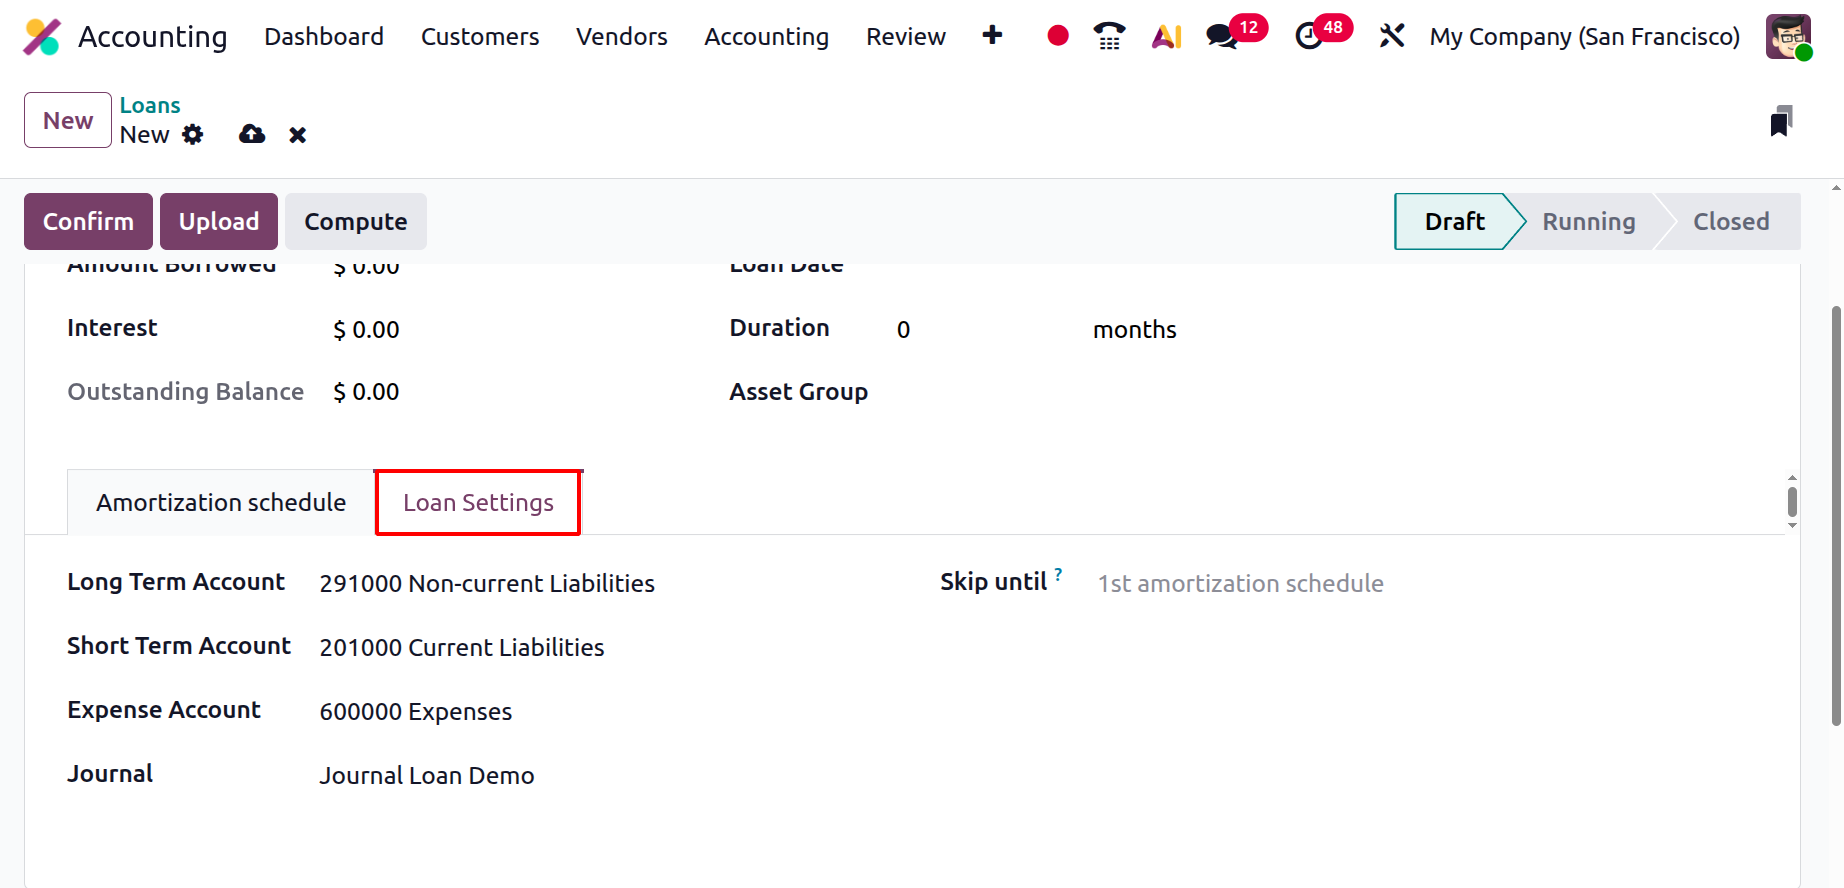
Under the Loan Settings section, you can specify critical accounting configurations such as the Journal, Expense Account (for interest), Long-Term Account (for principal owed beyond one year), and Short-Term Account (for the current portion of debt). A Skip Until Date option is available to prevent duplicate postings when earlier installments were already recorded manually before creating the loan in Odoo.
At the top of the form, three key actions streamline the loan workflow:
- Confirm – activates the loan and begins automated accounting.
- Upload – lets you attach supporting documents such as loan agreements, approval letters, or bank statements for record-keeping.
- Compute – opens a recalculation wizard where you can revise the loan’s financial terms (amount, rate, duration, or frequency) and instantly regenerate the amortization schedule.
Once the schedule is confirmed, the loan status transitions from Draft to Running, and Odoo 19 starts posting journal entries automatically based on the defined schedule.
Each repayment entry reflects accurate accounting movements: a debit to the Long-Term Liability Account (reducing the principal), a credit to the Short-Term Liability Account (reclassifying the current portion), and a debit to the Expense Account for the interest portion. This automation ensures that all related financial entries are precise and compliant with accounting standards.
To facilitate review and transparency, a Posted Entries smart button provides instant access to every generated journal entry, enabling users to trace principal repayments, interest expenses, and liability reallocations in detail.
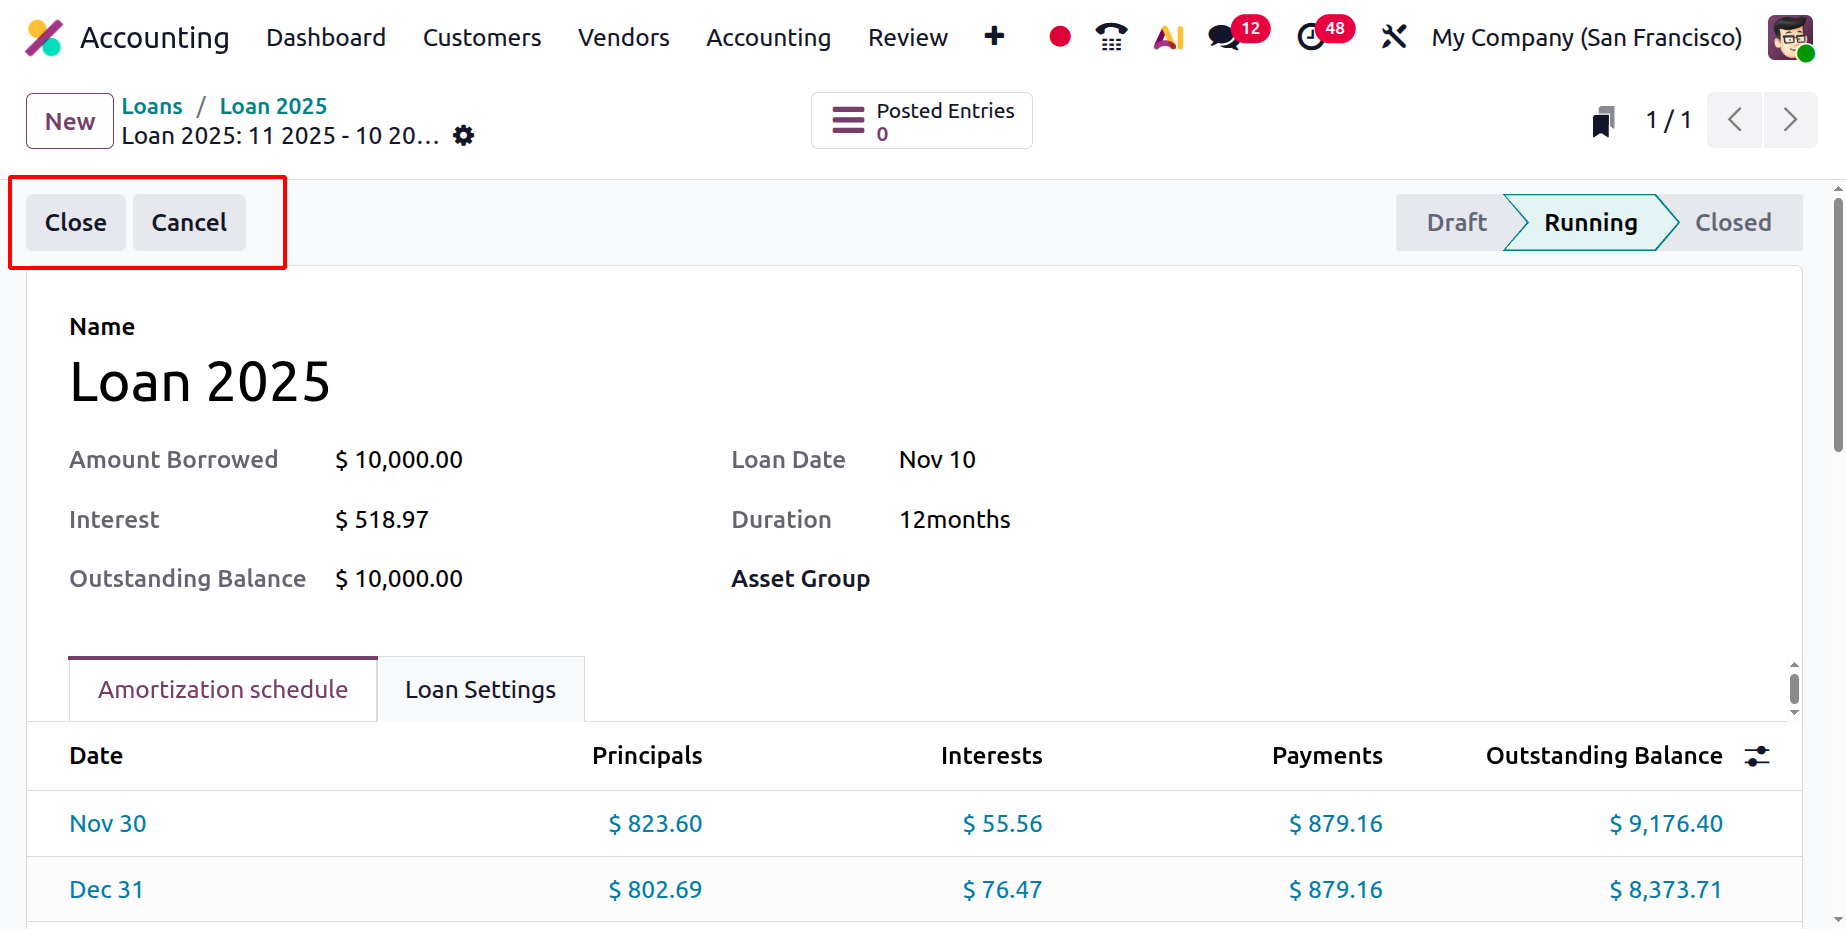
Once the amortization schedule is fully executed, Odoo automatically transitions the loan to Closed status. Alternatively, users can manually close the loan early by selecting the Close button, which finalizes the record and cancels any unposted installments.
1.5 Fleet
In Odoo 19, the Fleet Management feature in the Accounting module provides a centralized platform to efficiently manage all company vehicles, along with their corresponding documentation, maintenance schedules, and driver assignments.
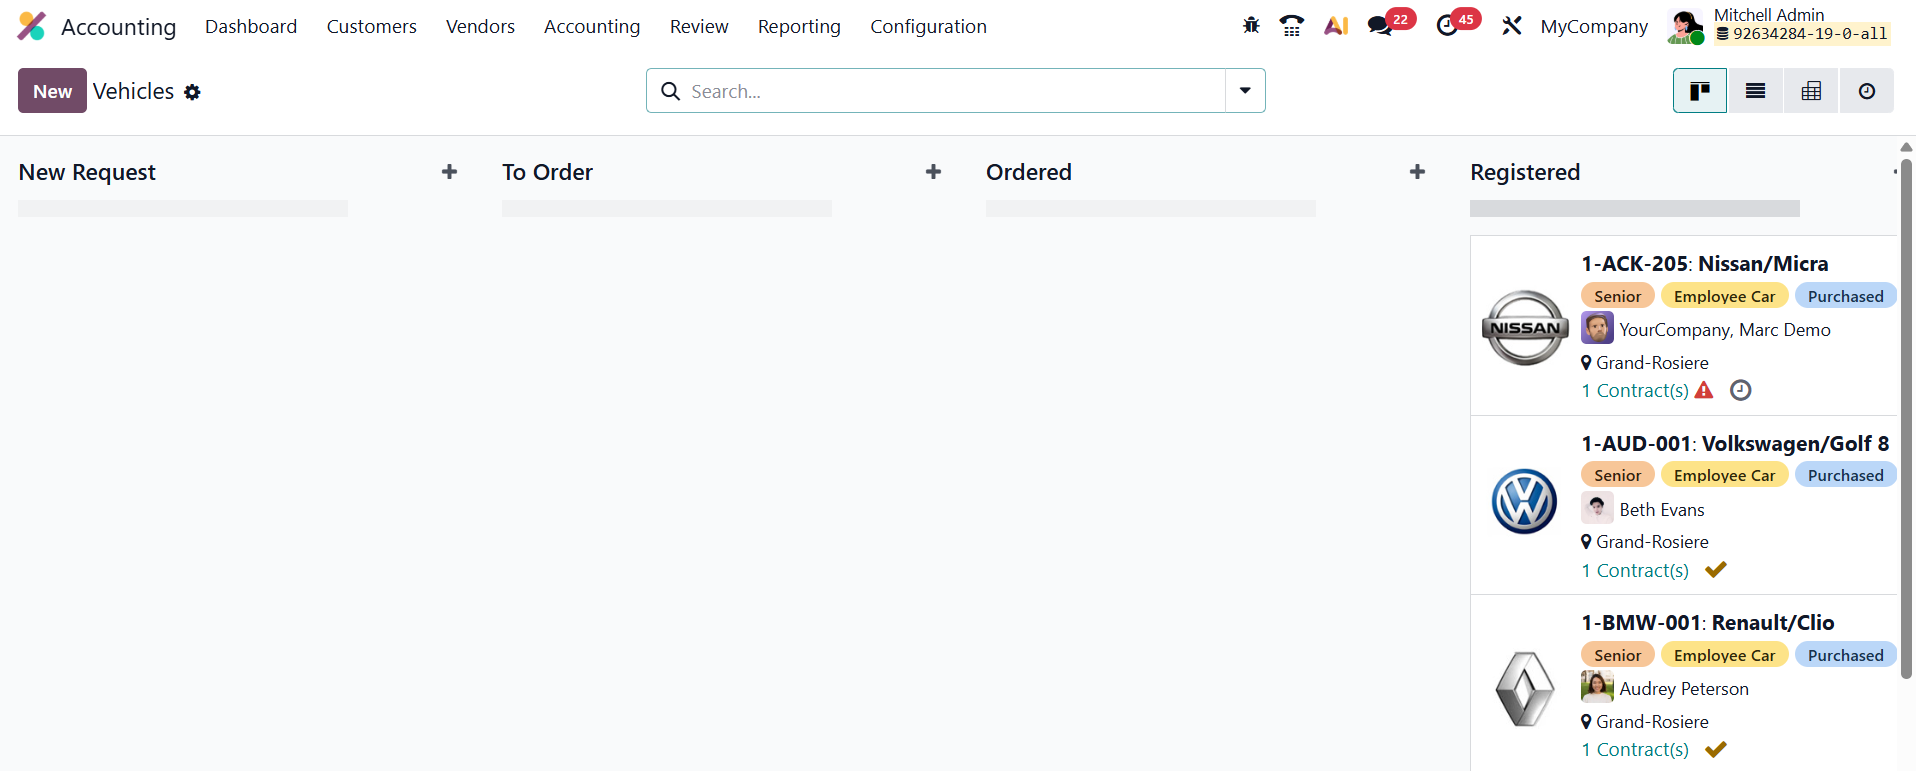
Upon opening the Fleet menu, users are greeted with the Vehicles dashboard, which serves as the default view. Here, all vehicles are displayed in a Kanban layout, organized by their current operational stage. The default stages include New Request, To Order, Registered, and Downgraded, allowing for a clear visual representation of the vehicle’s life cycle and operational status.
To register a new vehicle in the system, click the New button in the top-left corner of the dashboard. This opens a detailed vehicle form where users can enter all relevant information.
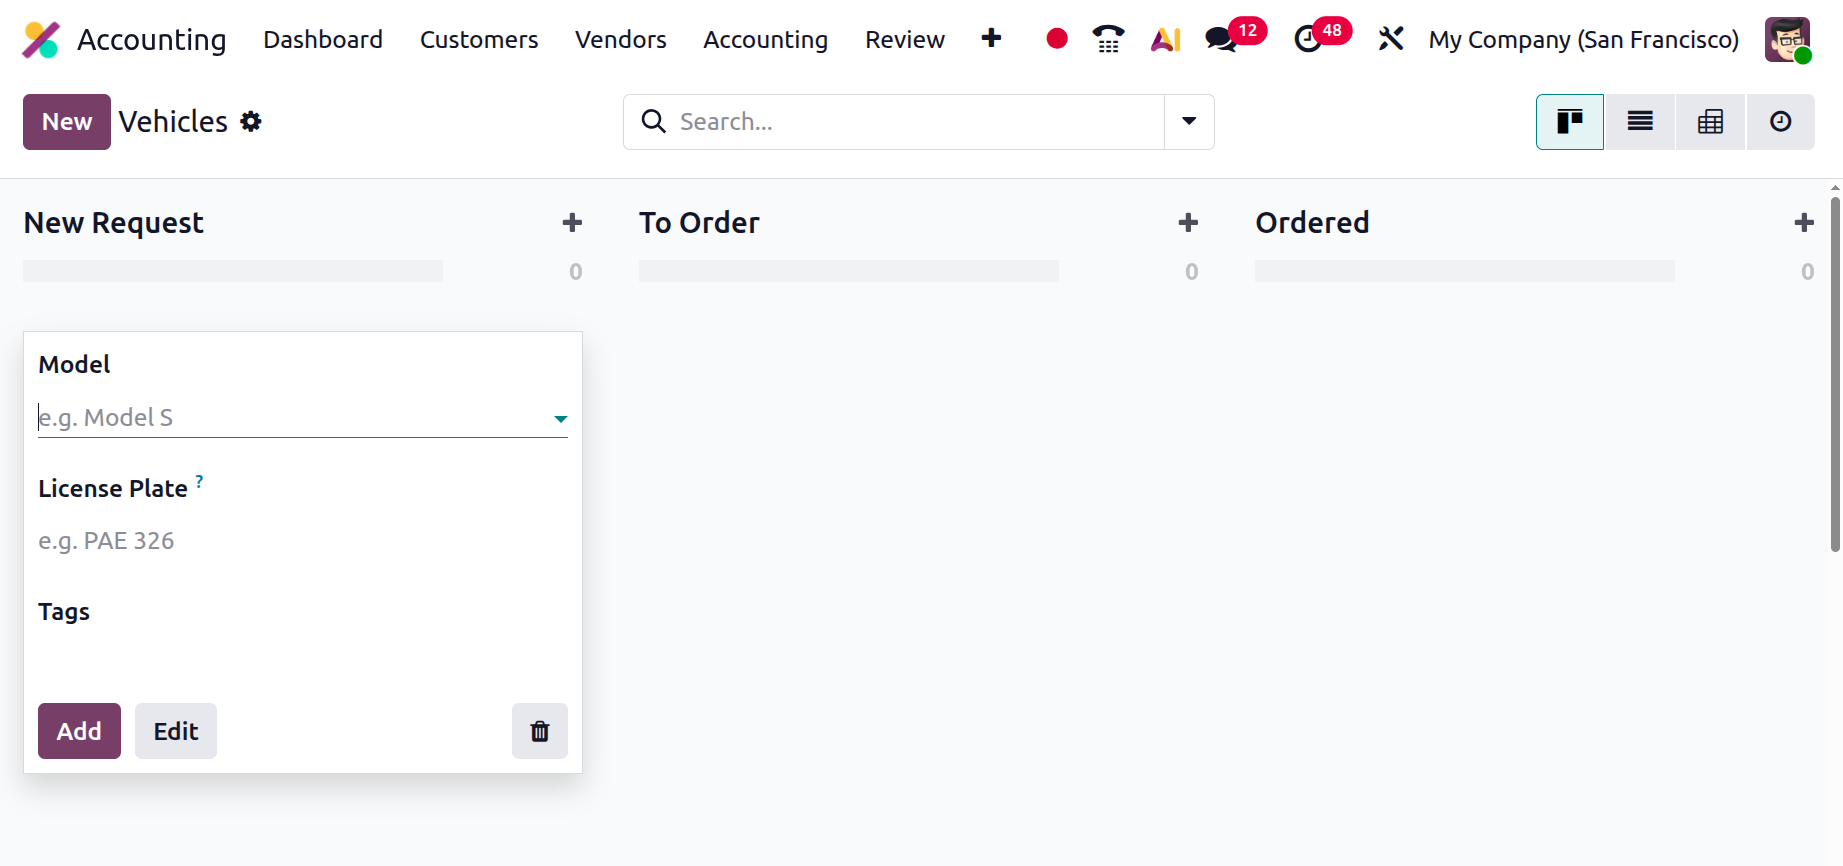
The Model field allows you to select the vehicle model from a drop-down list. If the desired model is not already available, you can create a new one instantly using the “Add” or “ Edit” options. Once a model is chosen, related fields such as engine type or fuel specifications may automatically populate based on existing configurations.
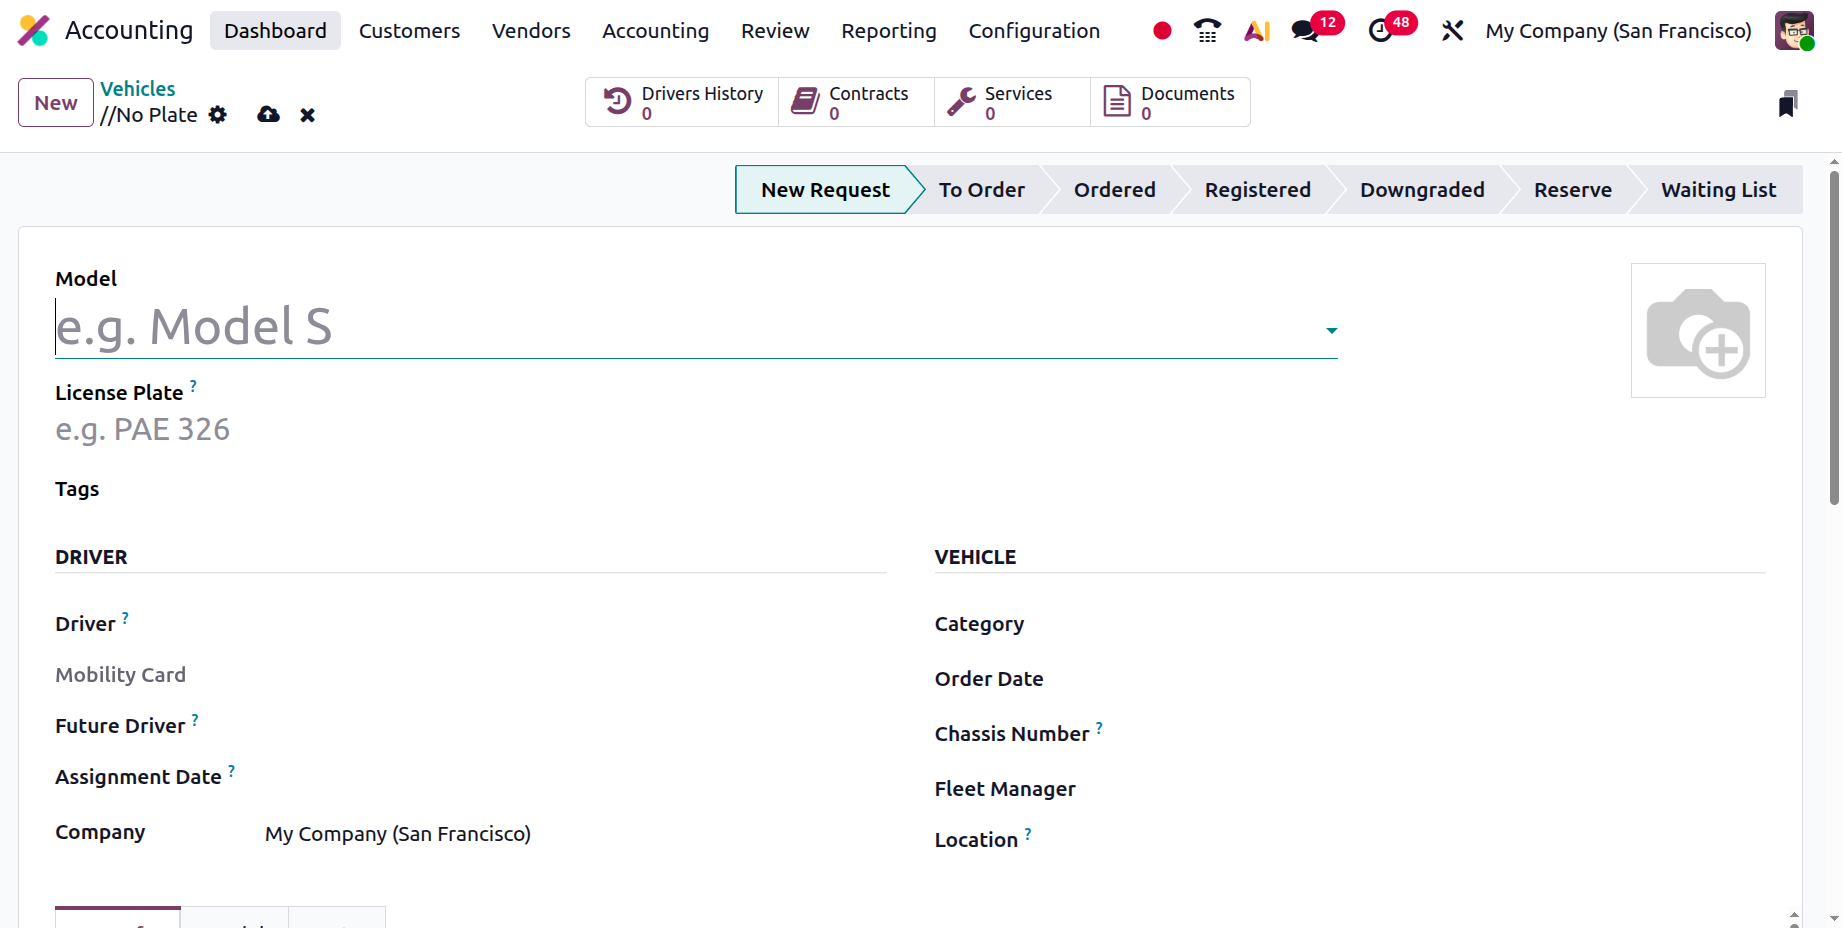
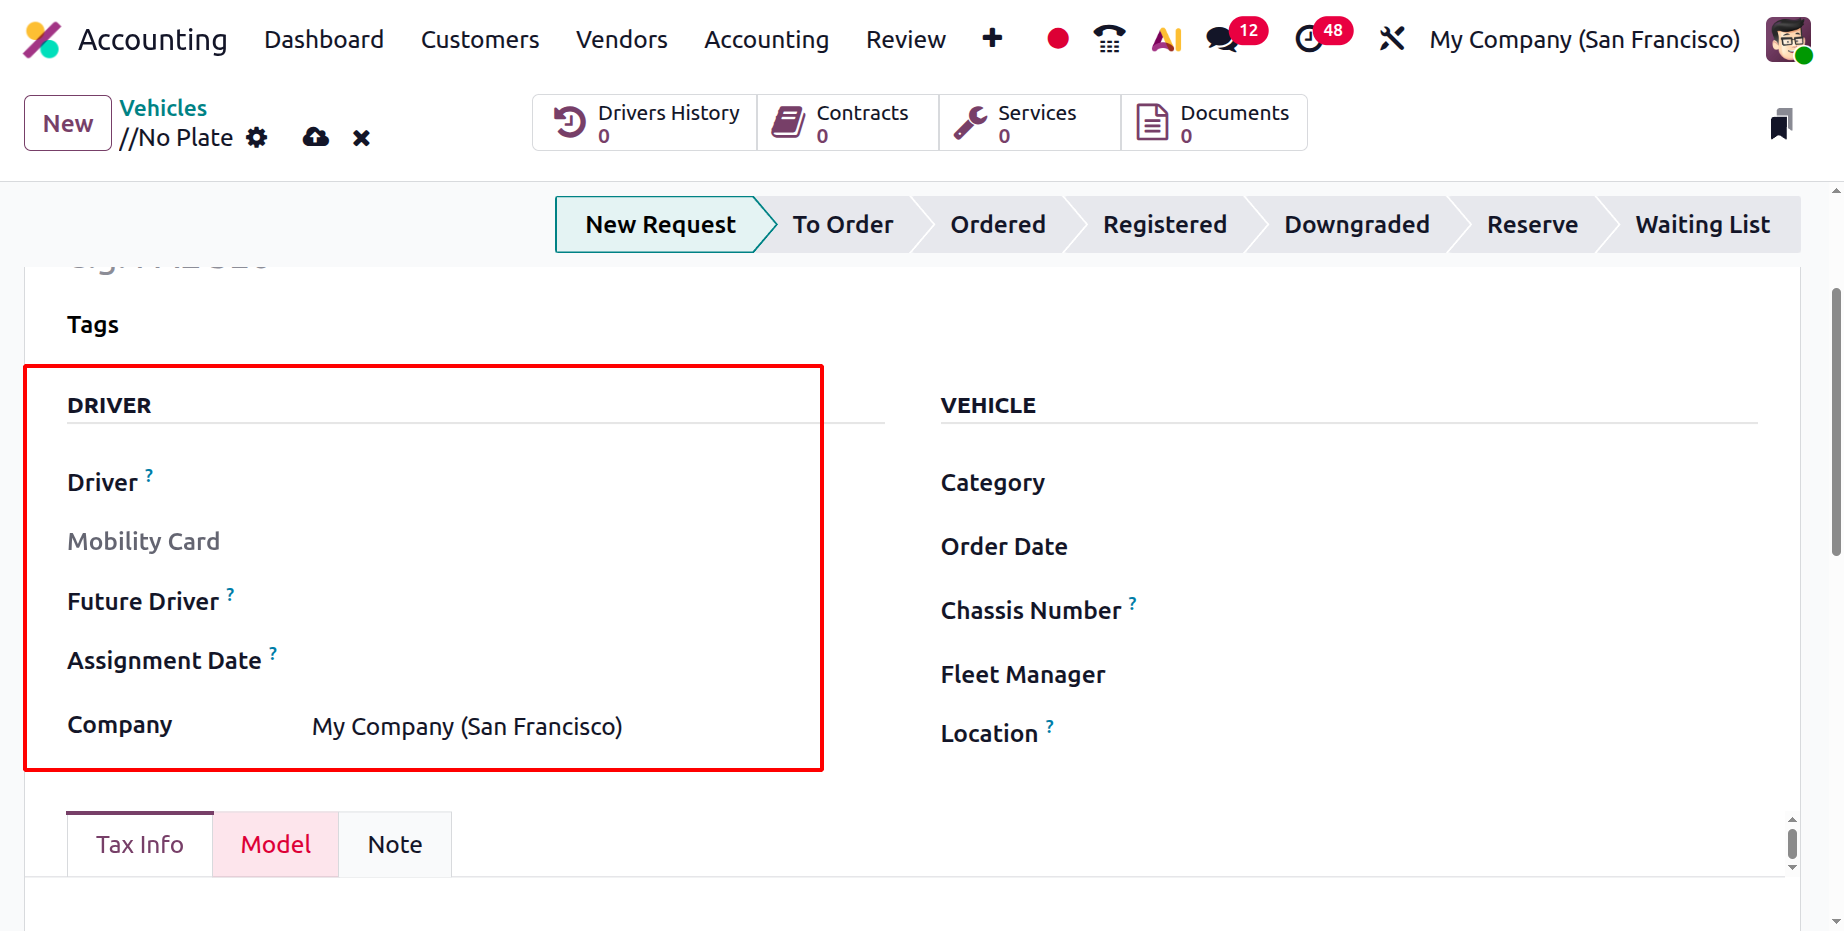
Next, the License Plate field is used to record the vehicle’s official registration number, while Tags can be applied to categorize or group vehicles by department, usage type, or project. The Driver field lets you assign a driver from the list of employees, and if the selected driver has a Mobility Card (such as a fuel card) configured in their employee profile within the Employees app, it will appear automatically. A Future Driver can also be assigned if the next designated driver is already known. The Assignment Date field specifies when the vehicle will be available for reassignment, and leaving it blank means the vehicle is immediately available. For multi-company environments, the Company field ensures that the vehicle is linked to the correct entity.
The Vehicle section captures all physical and operational details. Here, users can define the Category (useful when integrated with Inventory for dispatch purposes), as well as record the Order Date, helping track the vehicle’s lifecycle from acquisition to retirement. The Chassis Number (or VIN) uniquely identifies each vehicle, essential for insurance and legal purposes. The Fleet Manager field identifies the person responsible for managing the vehicle, while the Location field specifies where the vehicle is stored or operated, such as “Main Garage” or “Head Office Parking.”
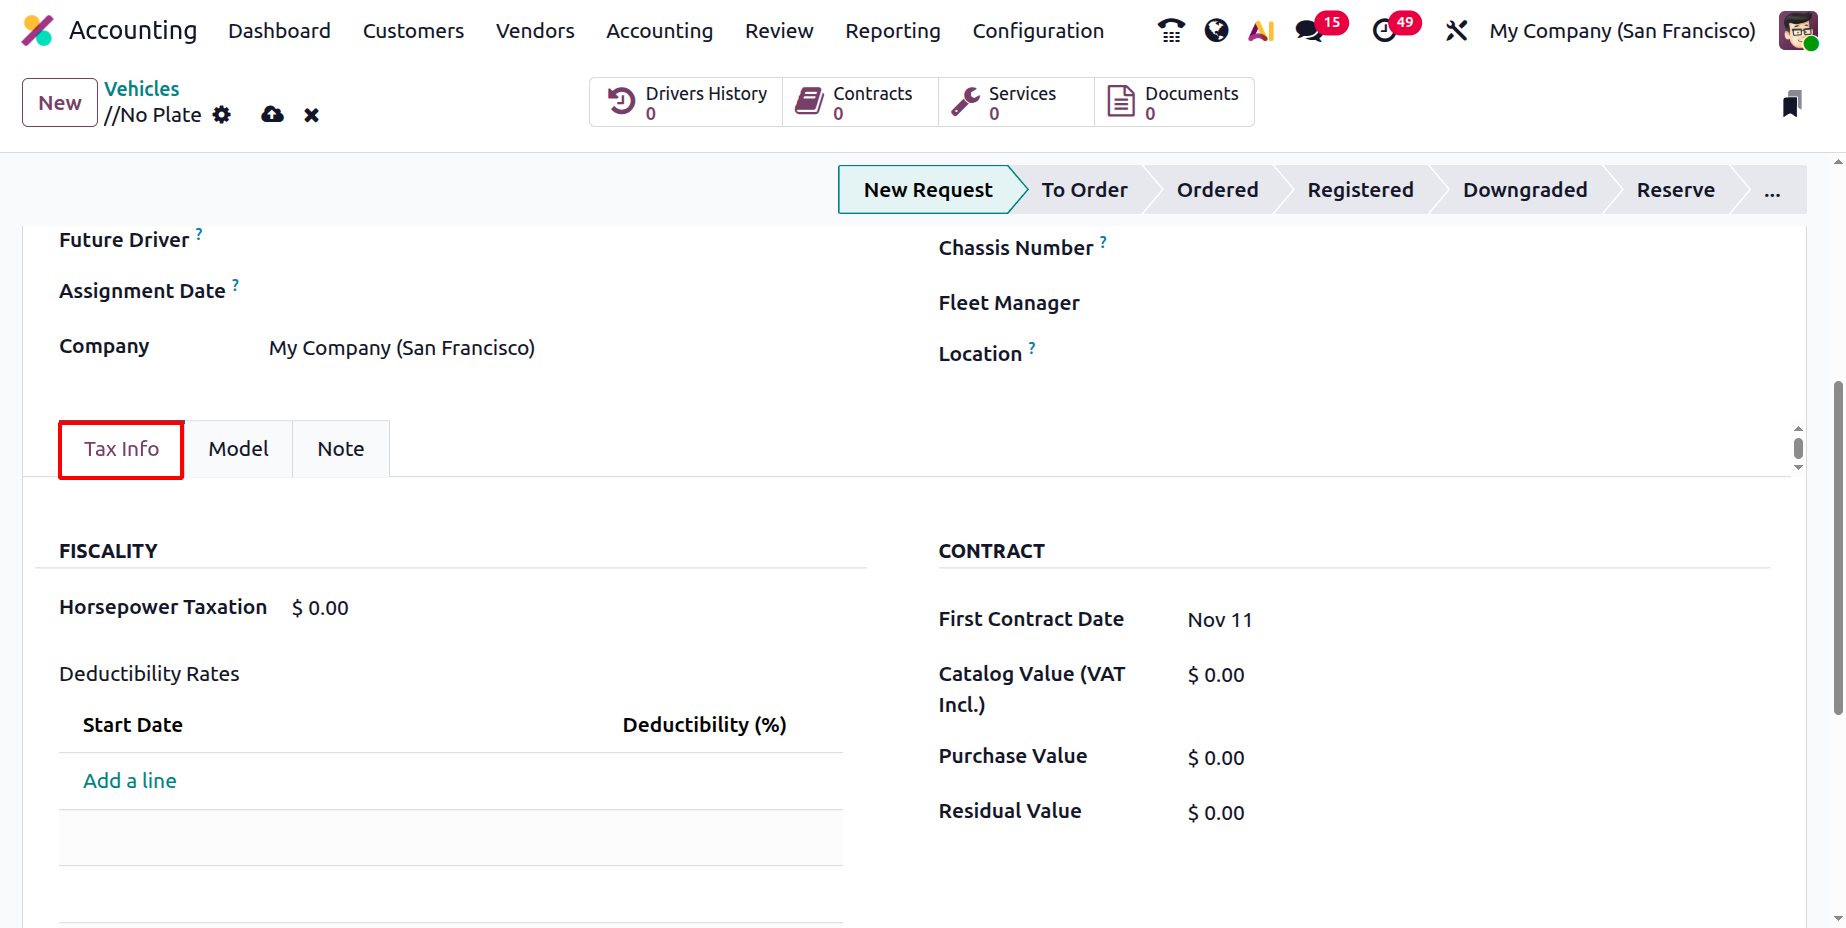
Under the Tax Info tab, the Fiscality section allows users to define Horsepower Taxation, which determines the vehicle’s taxable value based on engine capacity, and to configure Disallowed Expenses Rates, which specify what percentage of fuel, maintenance, or depreciation costs cannot be claimed as tax-deductible.
In the Contract section, users record key financial details such as the First Contract Date (the purchase or lease start date), Catalog Value (VAT Incl.), Purchase Value, and Residual Value, providing a comprehensive overview of the vehicle’s financial status and depreciation over time.
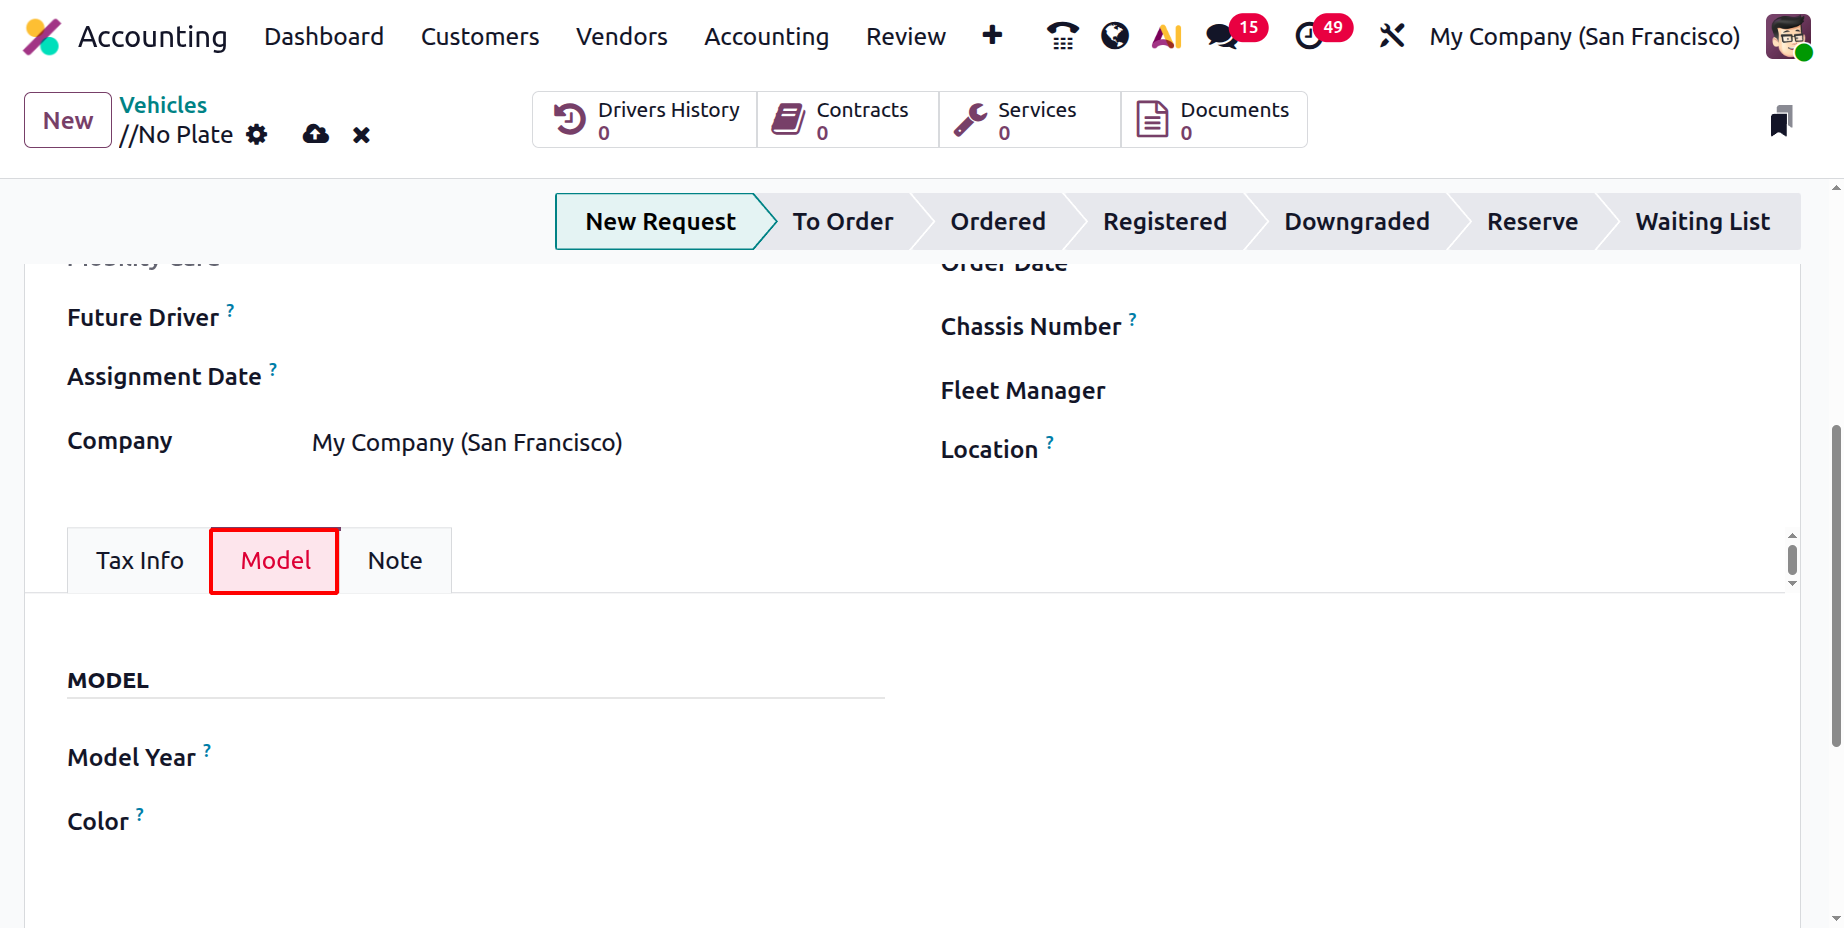
The Model tab displays technical specifications automatically if the model already exists in the database. Otherwise, users can manually configure new model details such as Color and Model Year.
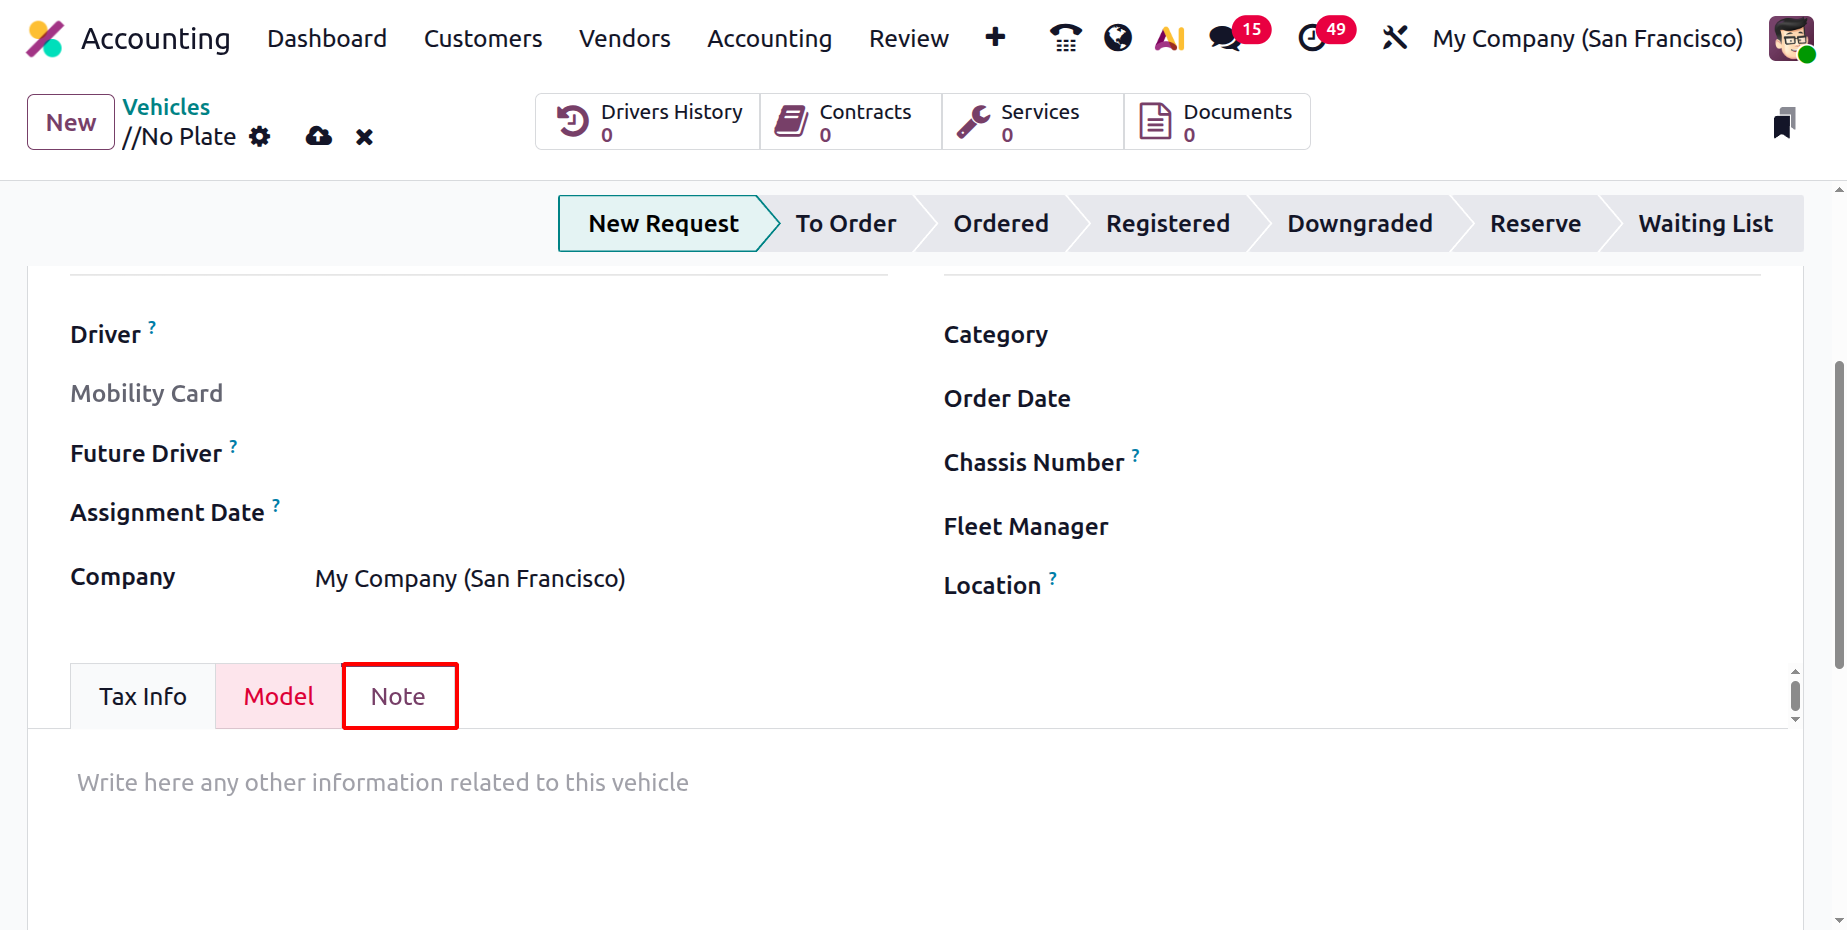
Finally, the Notes tab provides space for recording any additional remarks, such as maintenance reminders, insurance details, or driver feedback.
1.6 Reconciliation
In Odoo 19, the bank reconciliation process can be fully or partially automated depending on your business workflow. If your reconciliation process meets all the conditions for automation, you can completely bypass the manual workspace by using the Auto-reconcile feature.
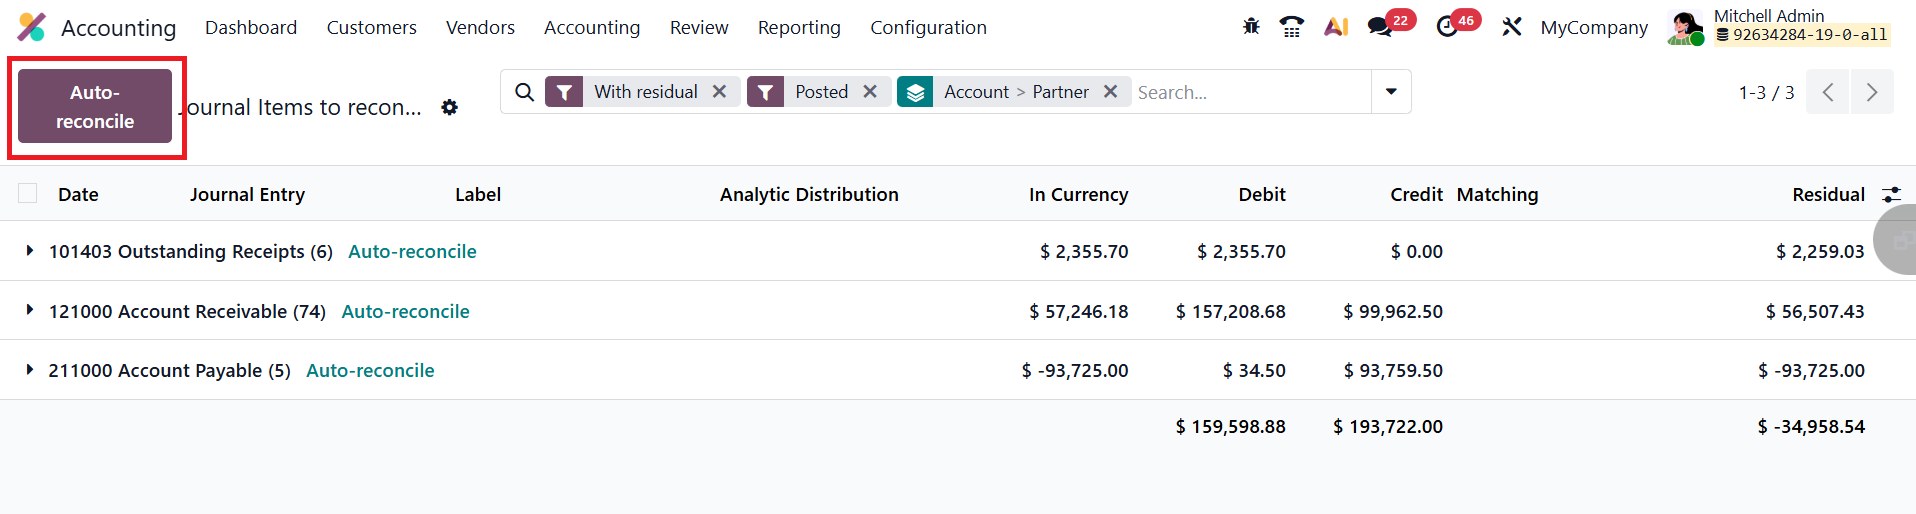
To do this, navigate to Accounting ▸ Reconciliation , select Auto-reconcile, specify the date range and accounts to be scanned, and let Odoo handle the rest.

The system automatically creates and posts all the required journal entries in a single batch, following the same advanced logic that powers Odoo’s payment matching feature.
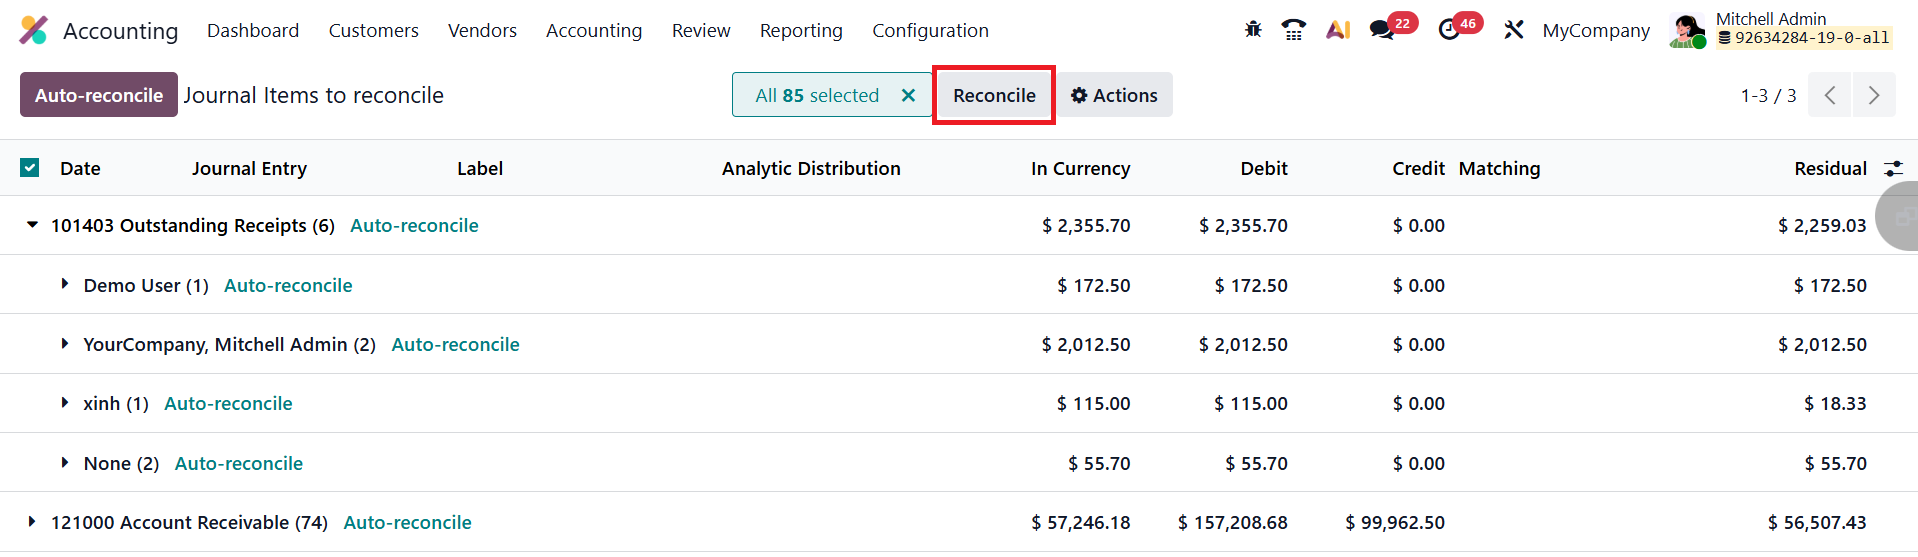
However, when certain transactions require manual review, for instance, when the transaction description is unclear or a partner is missing, you can opt for the Reconcile option instead. This allows you to carefully examine and reconcile each transaction line by line, ensuring that all records are accurate and correctly categorized.
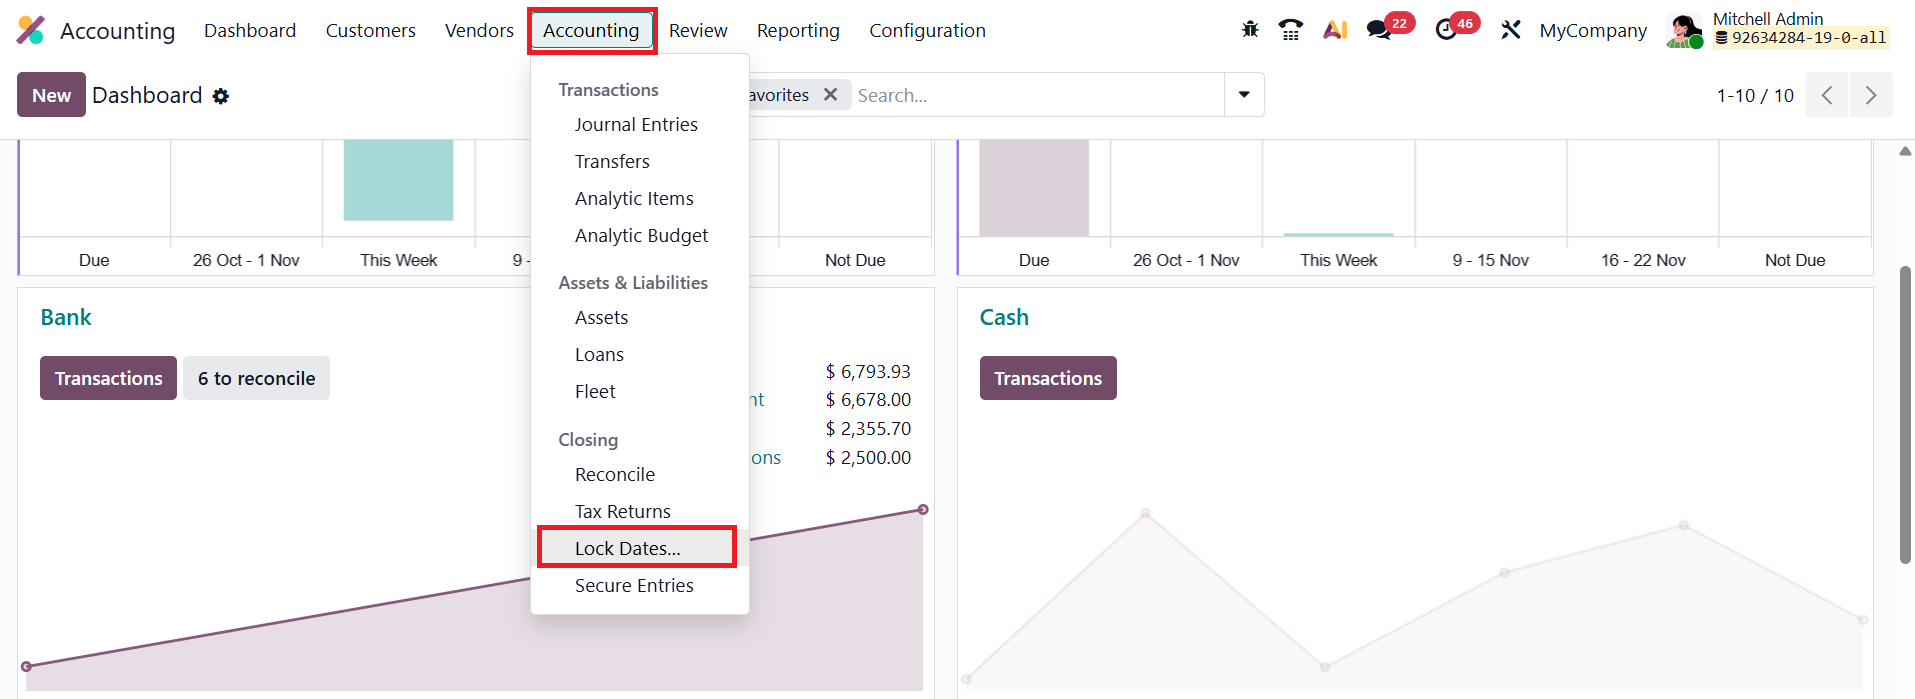
1.7 Lock Dates
In Odoo 19 Accounting, the Lock Dates feature provides enhanced control over your financial periods by preventing users from back-dating or modifying transactions before a specified date. You can access this option from Accounting ▸ Lock Dates.
Odoo 19 allows you to set separate lock dates for Sales, Purchases, Tax Returns, or the entire General Ledger.
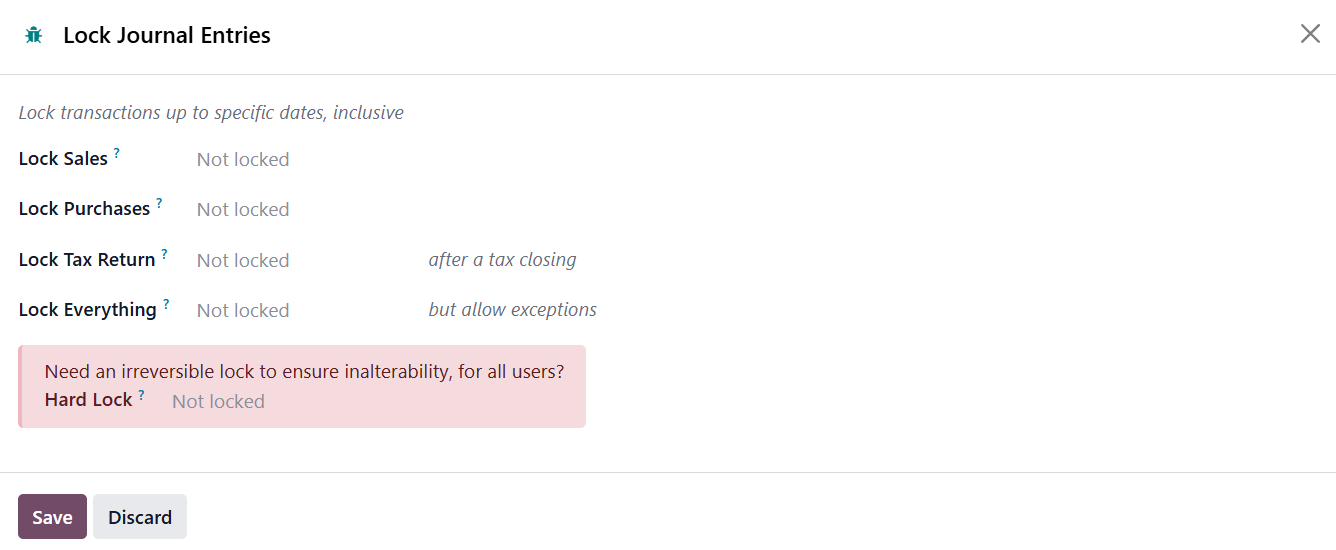
The Lock Sales option restricts any changes to customer-related transactions such as invoices and credit notes, ensuring revenue data remains accurate once finalized. Similarly, Lock Purchases prevents modifications to vendor bills and other supplier documents, protecting the accuracy of expense reporting. The Lock Tax Return setting is used after submitting VAT or tax declarations, ensuring that no taxable entries are altered for that period, thereby safeguarding compliance and audit accuracy.
The Lock Everything option provides the highest level of control by blocking all types of accounting entries, including journal adjustments, bank transactions, and inventory valuation postings, prior to the lock date.
Once a lock date is defined, any attempt to create or edit entries dated on or before that day triggers an error message, ensuring data integrity. The standard lock can be adjusted later if you need to reopen a period for corrections. However, enabling the Hard Lock option makes the restriction permanent, only a user with direct database access can undo it. This provides an additional layer of security for finalized accounting periods.
1.8 Secure Entries
In Odoo 19 Accounting, the Secure Entries feature ensures the integrity of your financial data by making all past journal entries uneditable after a specified date. To use this tool, first enable Developer Mode, then navigate to Accounting ▸ Secure Entries.
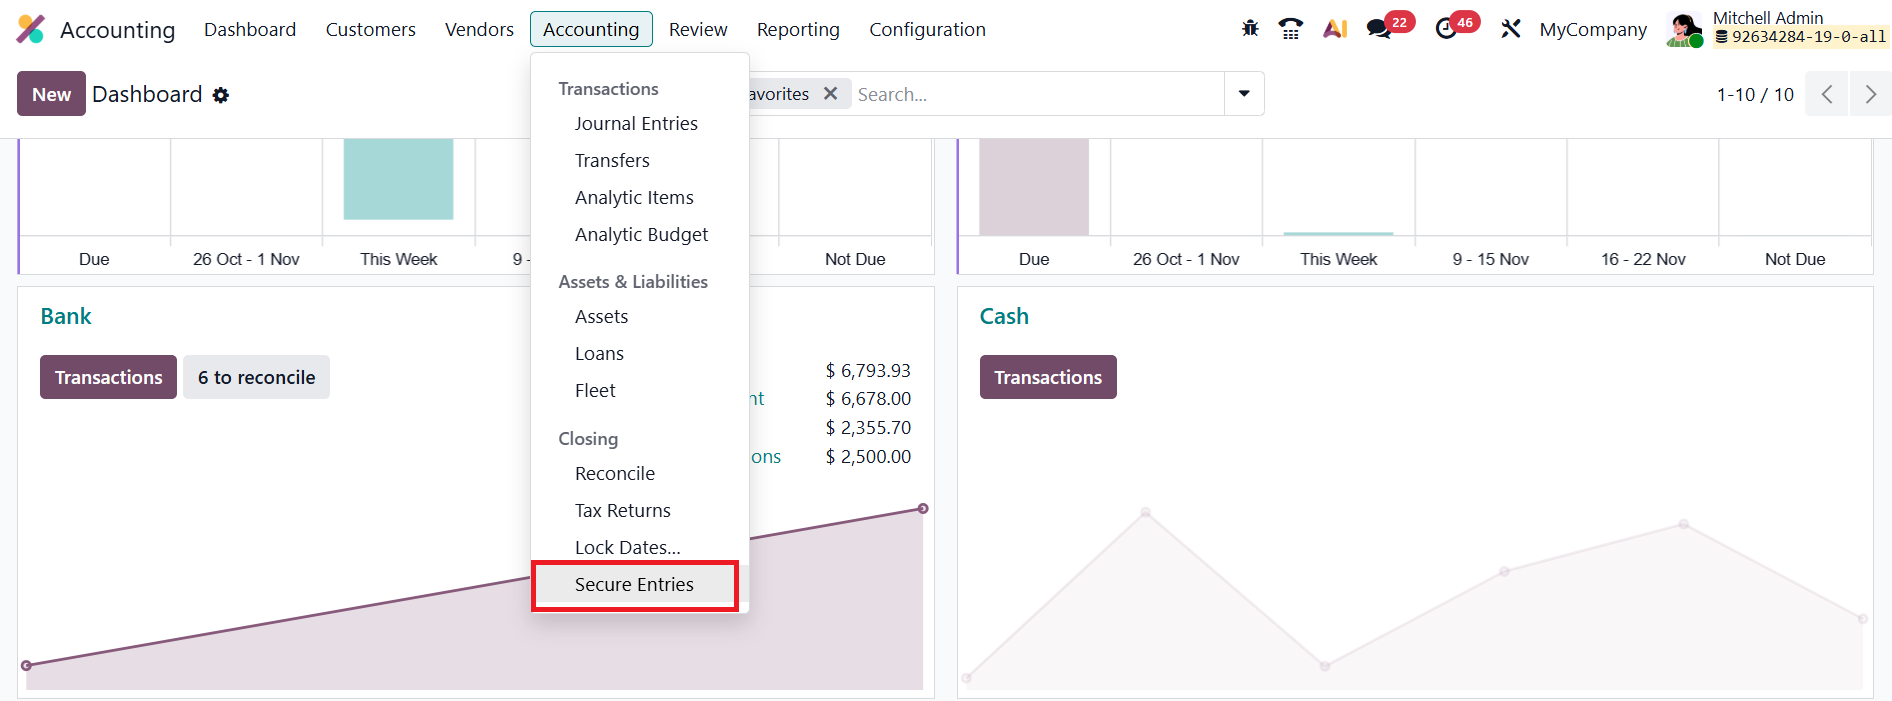
Select the desired cut-off date and click Secure Entries.
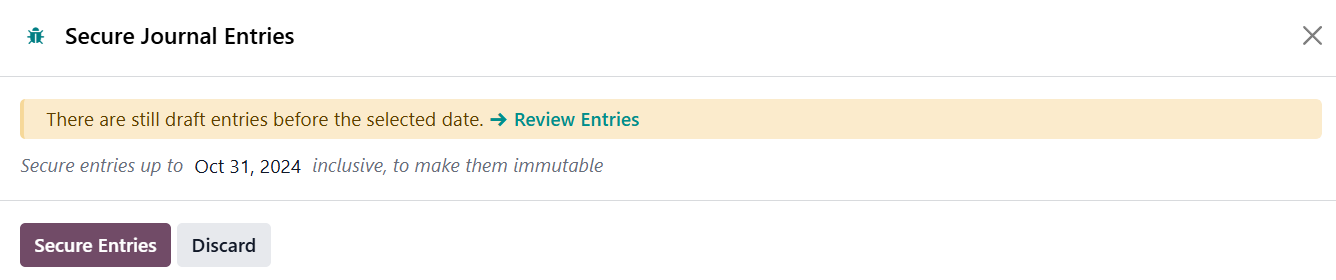
All journal entries dated on or before that date become permanently read-only, preventing any accidental or unauthorized modifications. Only users with access to the Secure Entries security group can execute this action. Once secured, these entries remain locked, preserving a reliable and compliant audit trail for your accounting records.