Vendors
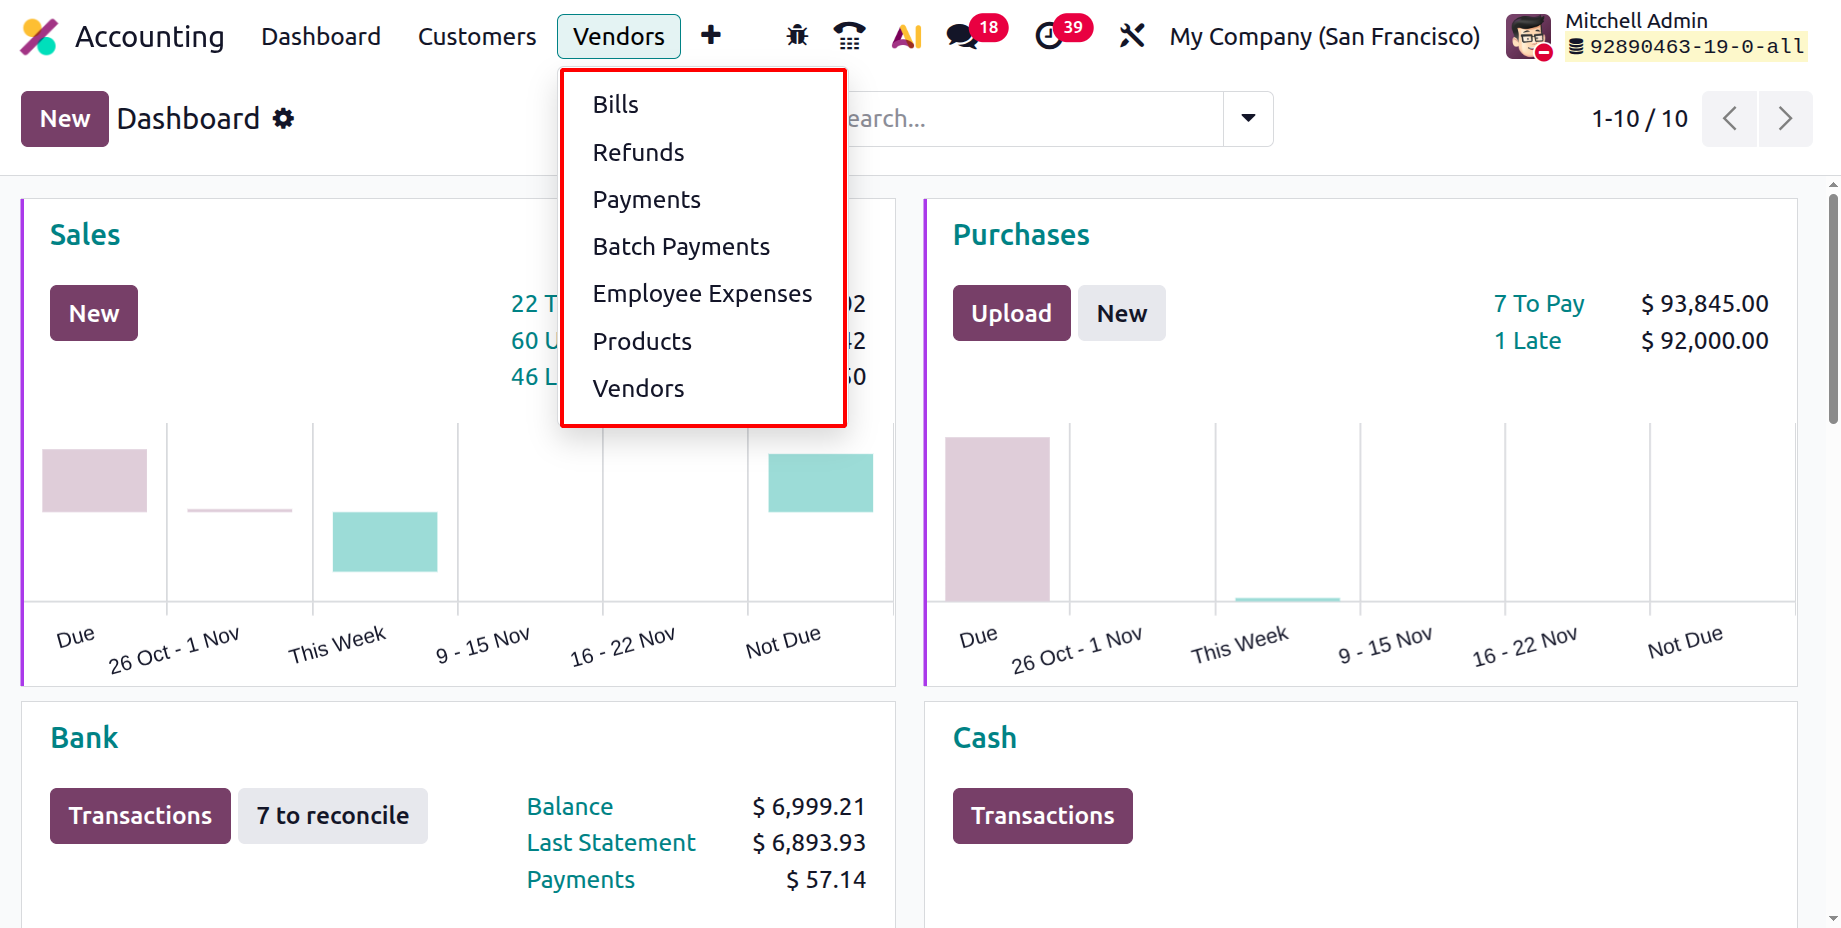
Next is the Vendors menu. Under the Vendors menu the available options are Bills, Refunds, Payments, Batch payments, Employee Expenses, Products and Vendors.
1.1 Bills
In Odoo 19 Accounting, the Bills feature continues to play a crucial role in managing vendor-related financial transactions, offering a more intuitive and automated workflow. Vendor bills represent the amounts a business owes to its suppliers for goods or services received. When a Purchase Order is confirmed, Odoo 19 allows users to automatically generate a vendor bill, ensuring that payable obligations are accurately recorded without manual intervention.
All vendor invoices created through the Purchase module are automatically synchronized with the Accounting module, offering seamless visibility and centralized financial control.
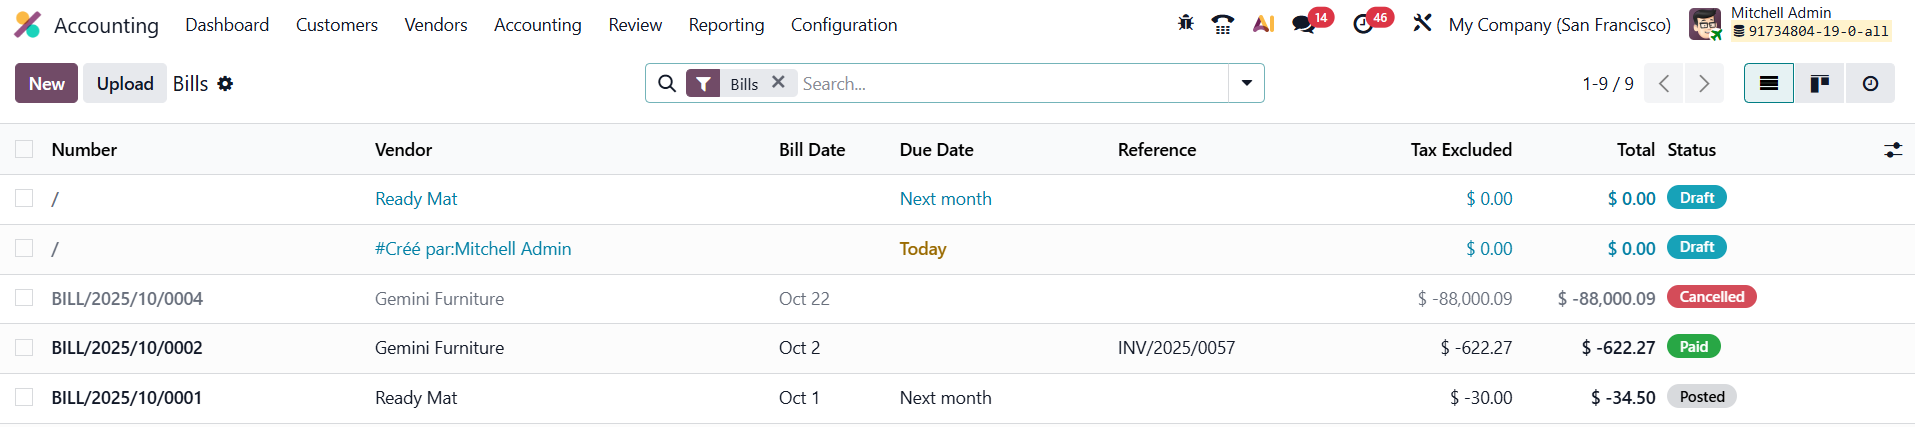
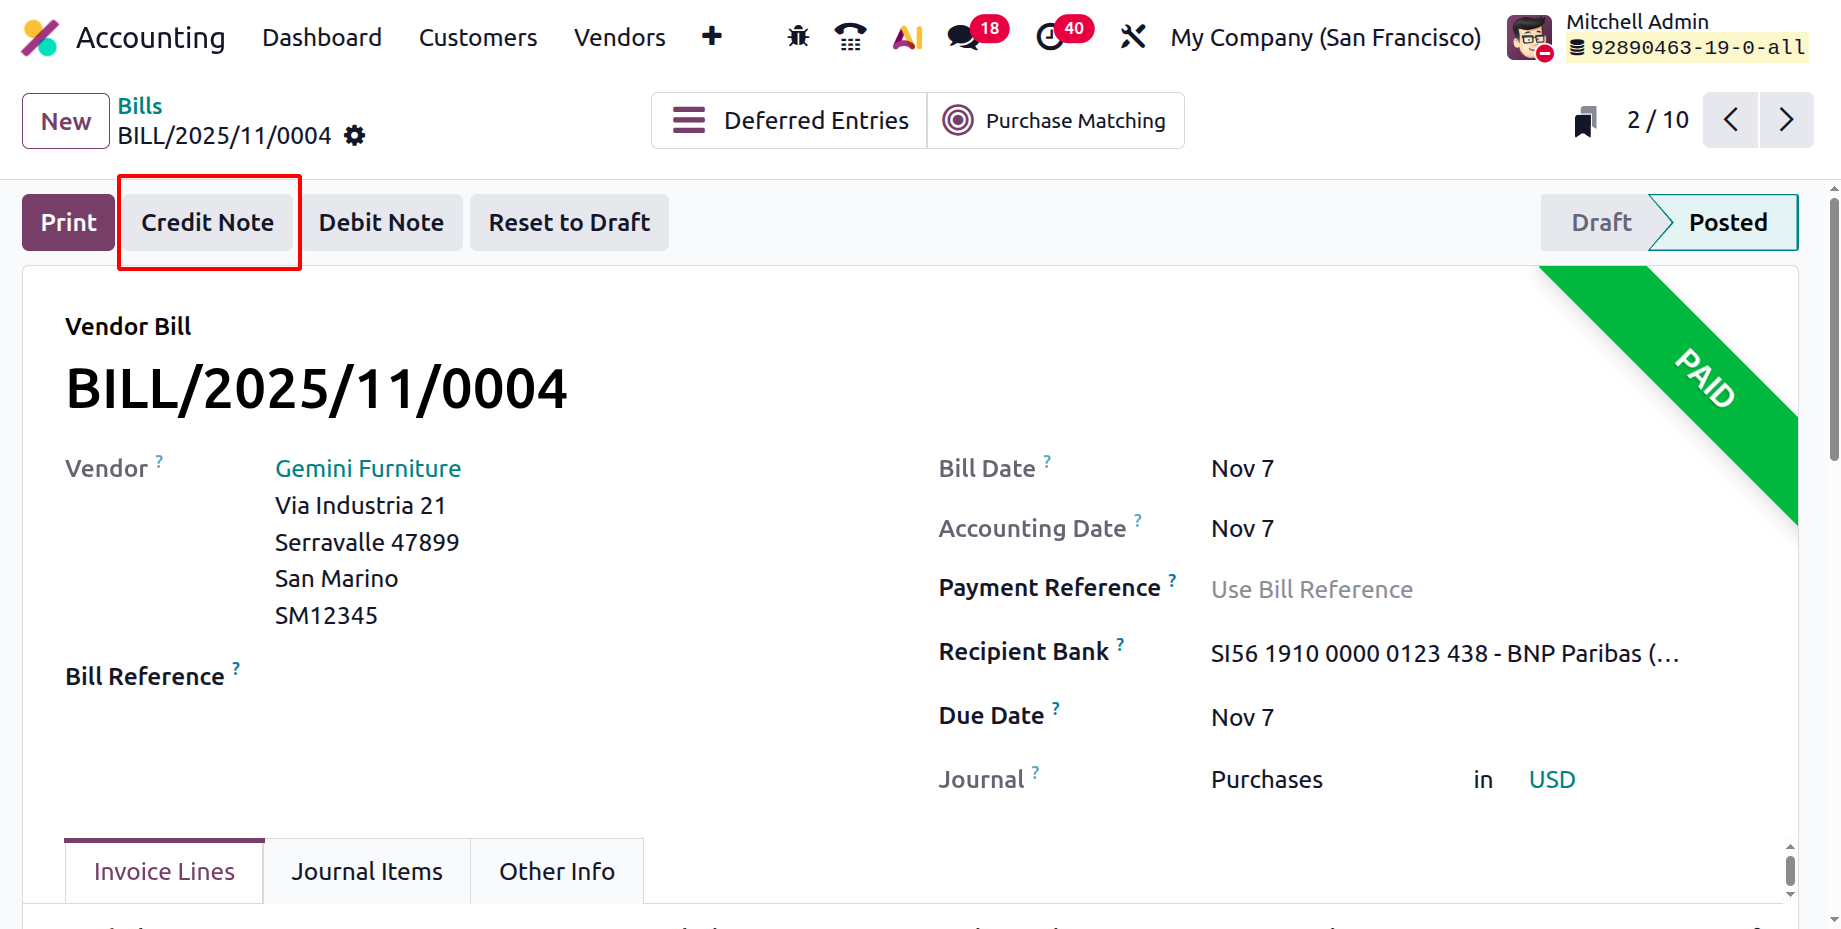
To access and manage vendor bills, navigate to Accounting → Vendors → Bills.

The Bills dashboard provides both List and Kanban views, displaying essential information such as Bill Number, Vendor Name, Bill Date, Due Date, Reference, Payment Status, Tax Excluded, Total, and Status. Users can personalize the display using the Column Configurator, Filters, and Group By options.
Default filters include Draft, Posted, Cancelled, To Review, To Pay, In Payment, Overdue, Bills, Refunds, Receipt, SDD Mandates, and Debit Notes, with additional options for creating Custom Filters and Groupings by Partner, Sales Team, Peppol Status, Electronic Invoicing Status, Journal, Status, Payment Method, Company, or Date. These tools help businesses categorize and analyze payable data efficiently.
To manage vendor bills, users can either upload digital copies using the Upload button or create a new bill manually by clicking New.

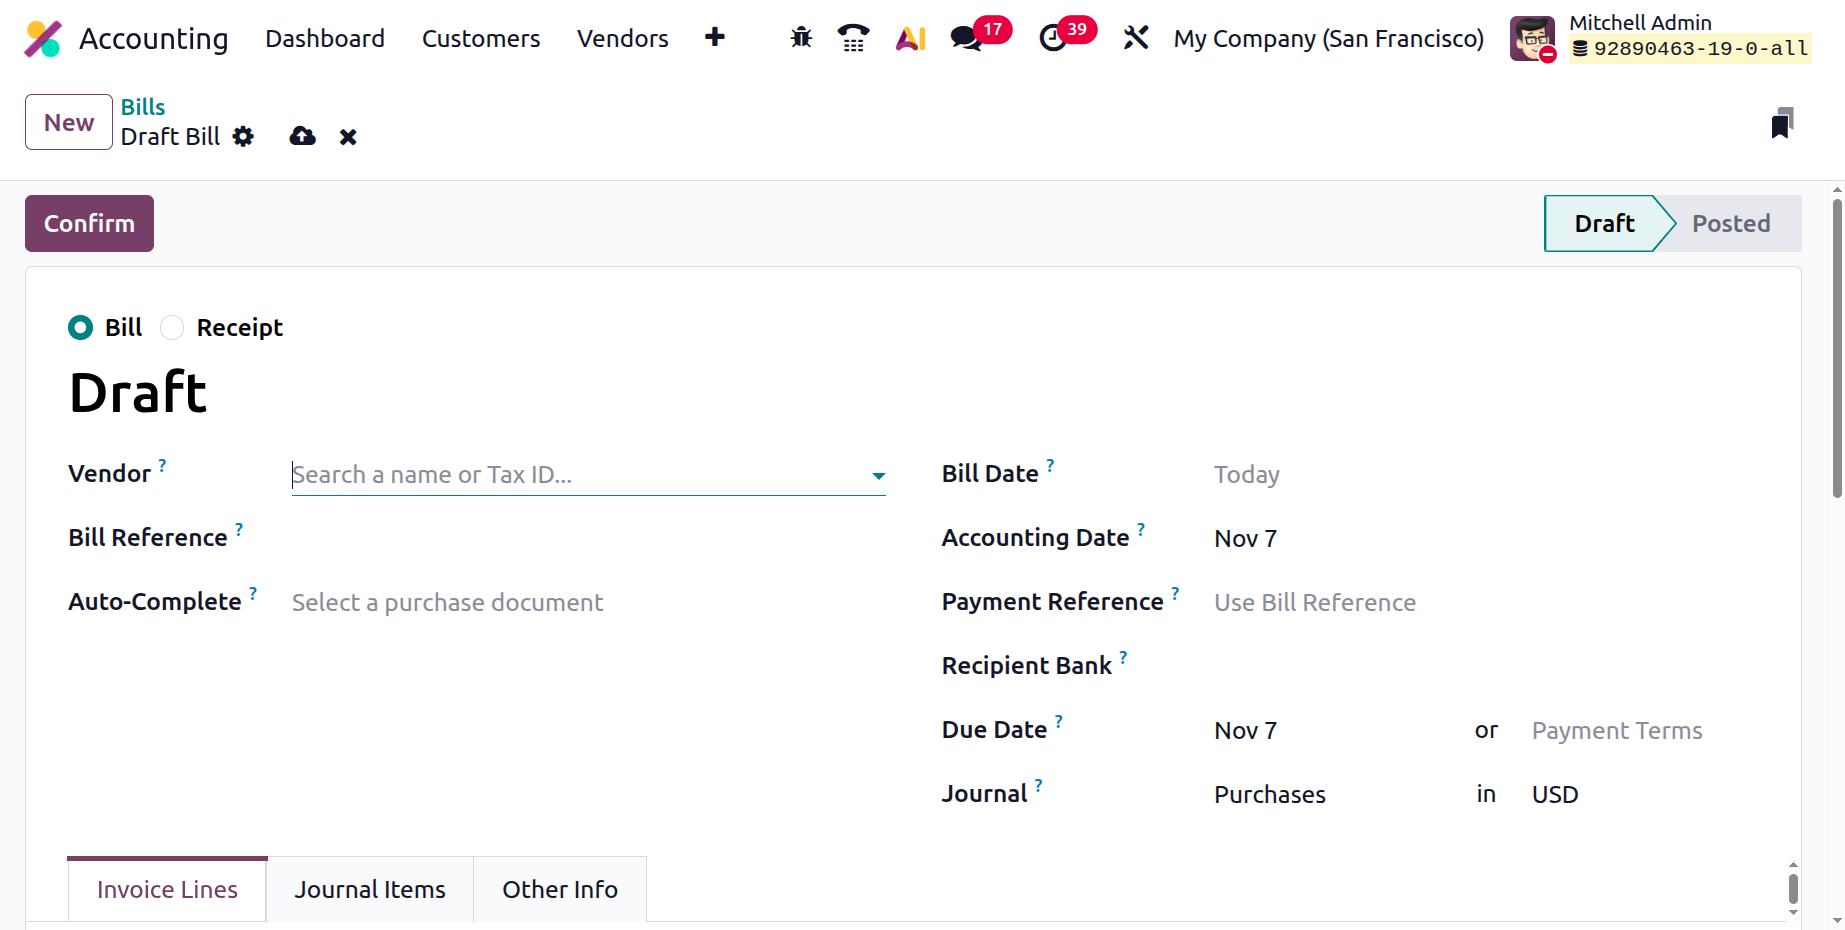
In Odoo 19 Accounting, the bill creation form includes a new boolean field that allows users to choose whether they want to create a Vendor Bill or a Sales Receipt. This enhancement provides greater flexibility in managing financial transactions from a single interface. By selecting the appropriate option, users can accurately define the nature of the document, whether it records a payable amount to a vendor (Vendor Bill) or acknowledges payment from a customer (Sales Receipt).
When creating a new bill, key details must be filled out, including:
- Vendor: The supplier issuing the bill.
- Bill Reference: The vendor’s invoice number for tracking and cross-referencing.
- Bill Date: The date the vendor issued the invoice.
- Accounting Date: The date when the transaction should be recorded in the company’s books.
- Payment Reference: A custom identifier used for linking the bill to its payment.
- Recipient Bank Account: Specifies the vendor’s bank details for fund transfers.
- Due Date: Automatically computed based on the payment terms associated with the vendor.
- Journal: The journal to which the bill details will be recorded.
With the Auto-Complete, Odoo auto-populates key bill details (such as vendor name, reference, total, and taxes) from scanned or uploaded invoice documents, significantly reducing manual effort and the chance of errors.
The bill form includes three major tabs:
- Invoice Lines: Where you enter products or services, quantities, unit prices, applicable taxes, and analytic accounts.
- Journal Items: Displays the automatically generated accounting entries for verification.
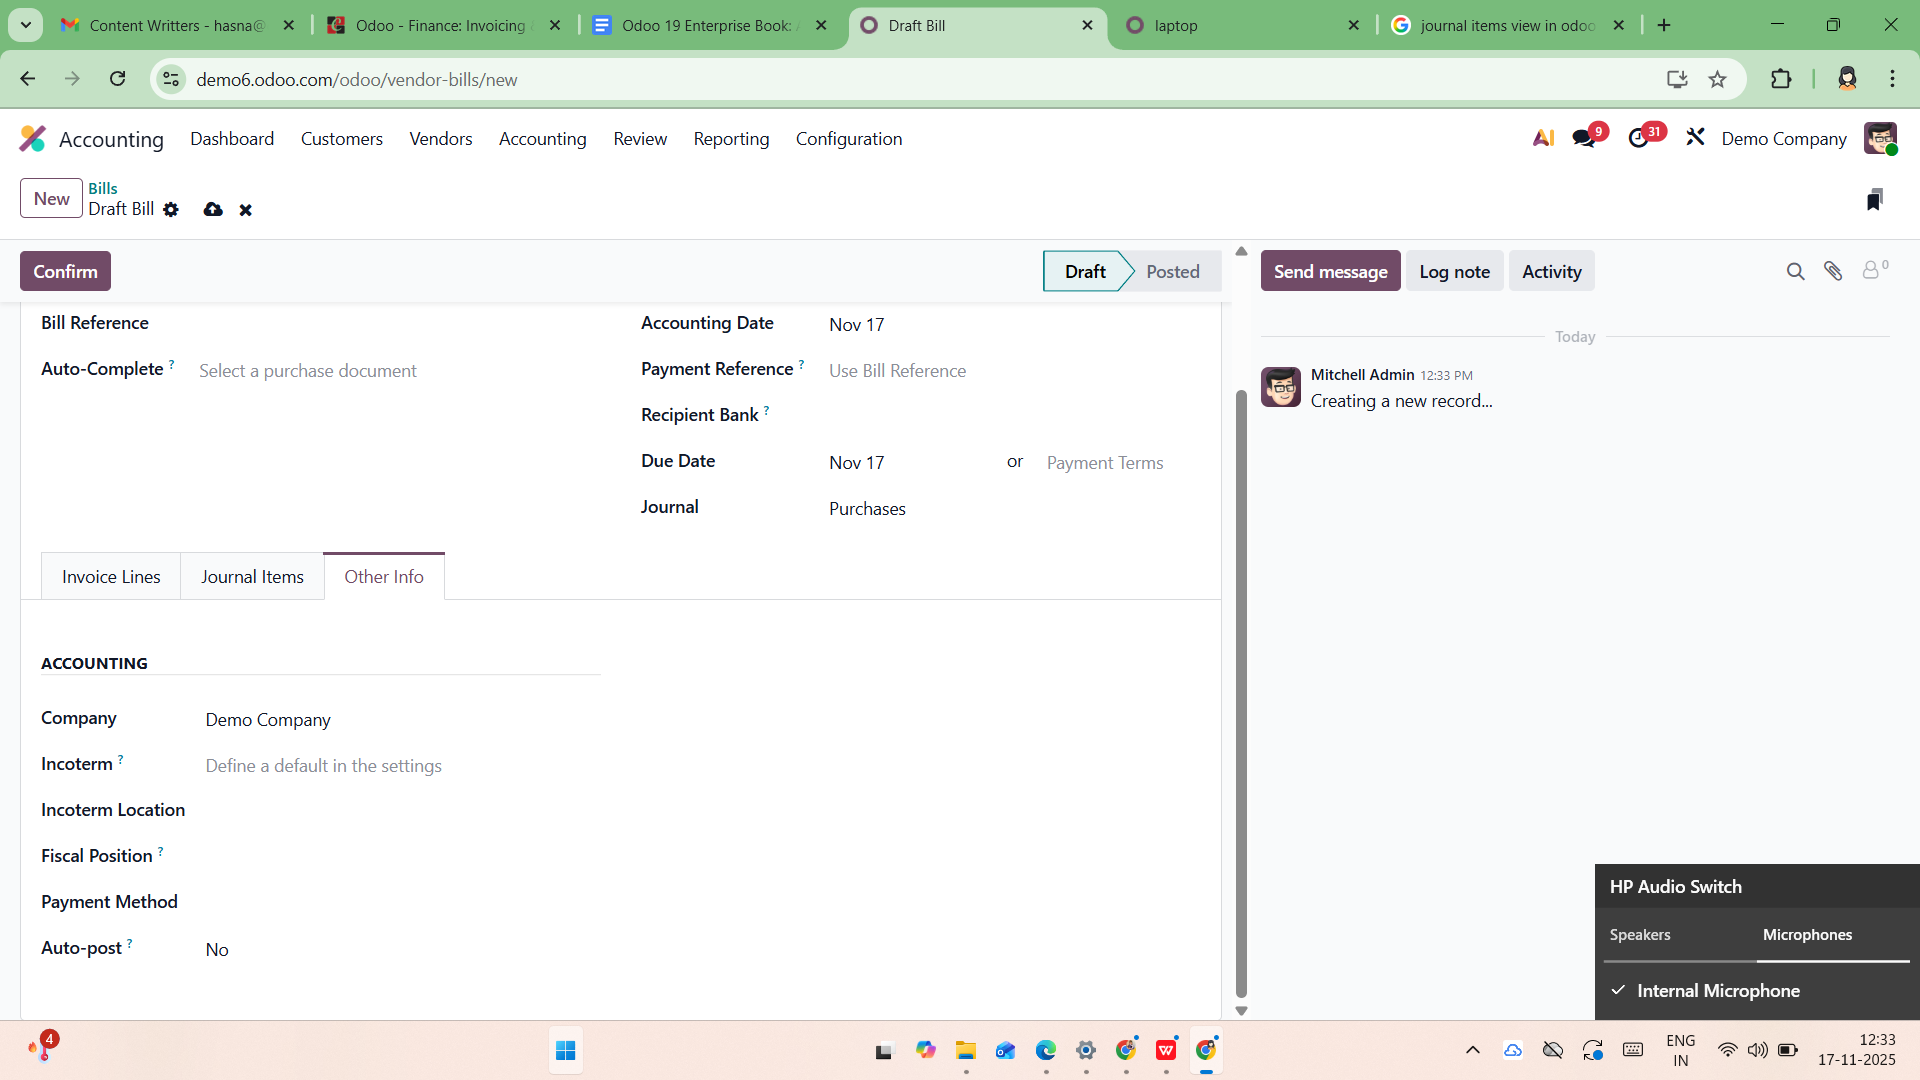
- Other Info: Allows adding metadata such as Purchase Representative, Fiscal Position, Payment Terms, Bank Account, Sales Team, and Campaign Information.
In the Other Info tab of the bill creation window in Odoo 19 Accounting, the Company field simply displays the company under which the bill is being recorded. The Incoterm field allows you to specify international commercial terms that define the delivery conditions between the buyer and the supplier, and if needed, you can set a default Incoterm in the system settings. The Incoterm Location field lets you record the specific place associated with the chosen Incoterm. The Fiscal Position field is used to automatically adapt taxes and accounts based on the supplier’s tax status or geographical location, ensuring proper tax handling. The Payment Method indicates how the bill will be paid.
Finally, the Auto-post option determines whether the bill should be automatically posted on its accounting date, allowing the system to confirm and record the bill without requiring manual posting, which is useful for scheduled or recurring entries.
Once all details are verified, clicking Confirm changes the bill status from Draft to Posted, making it ready for reconciliation or payment.
1.2 Refunds
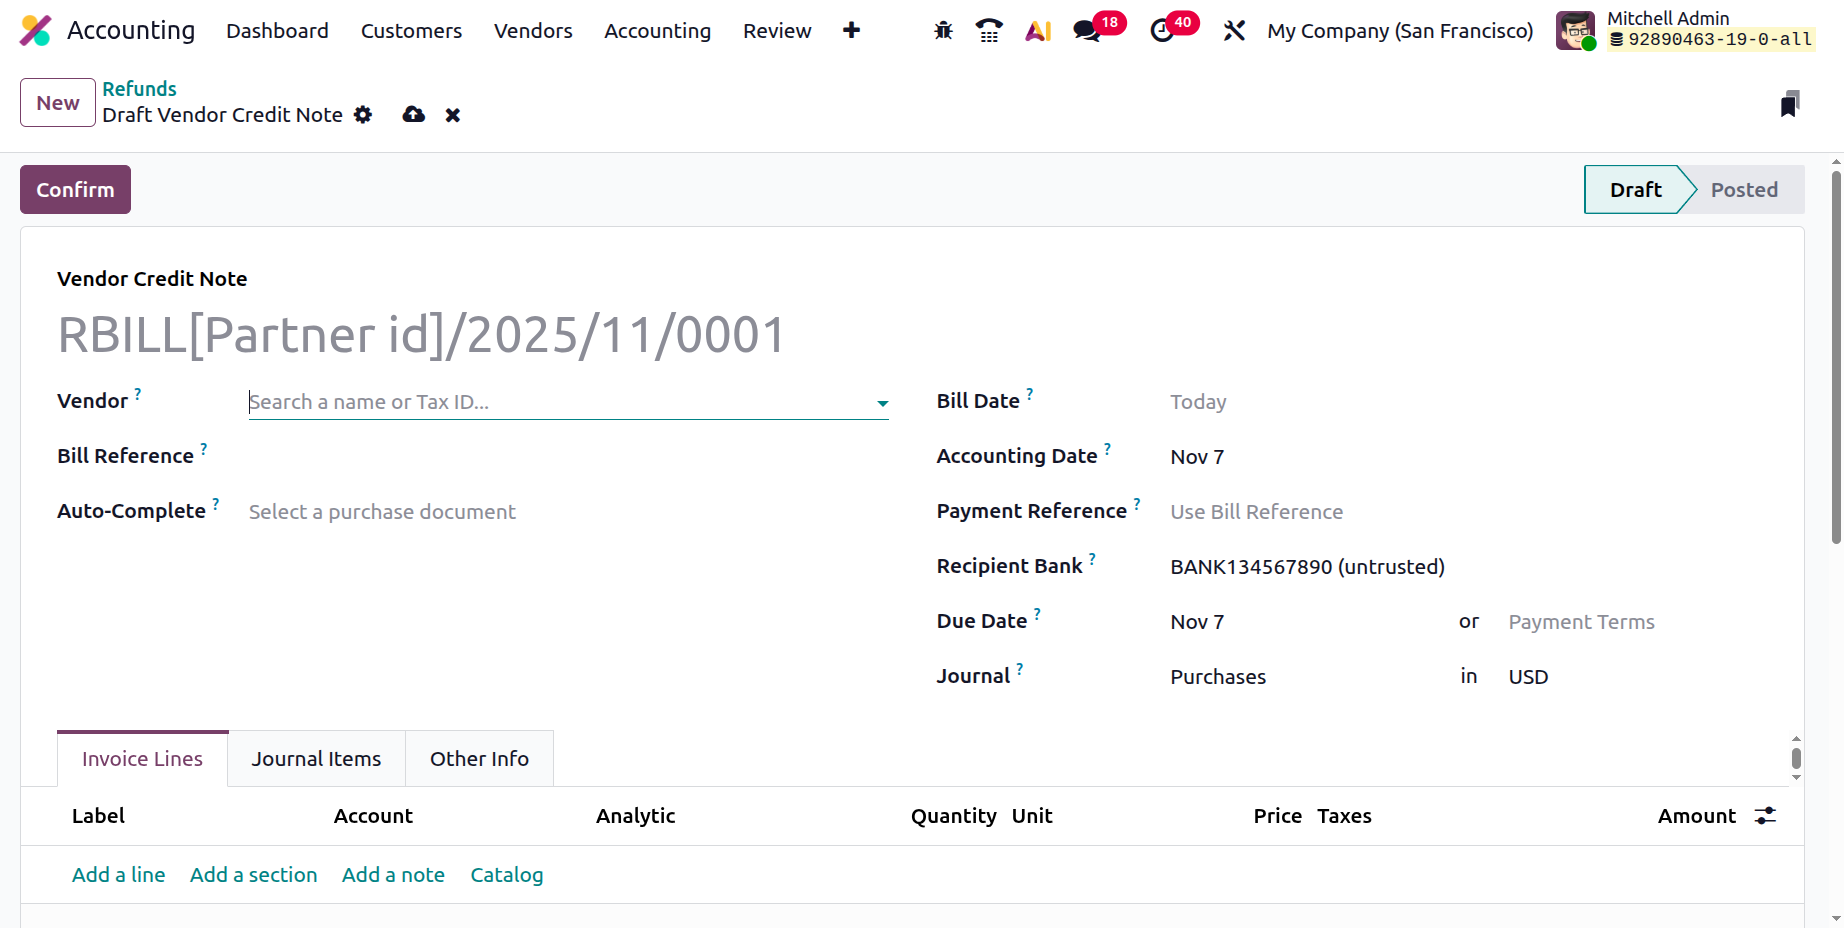
Vendor refunds are managed seamlessly under Vendors → Refunds, where users can view or create refund entries.

Within an existing vendor bill, the Add Credit Note button initiates the refund process, automatically creating a credit note that appears under the Refunds section.
Refunds can also be manually generated using the New button, following the same structure as a standard bill.
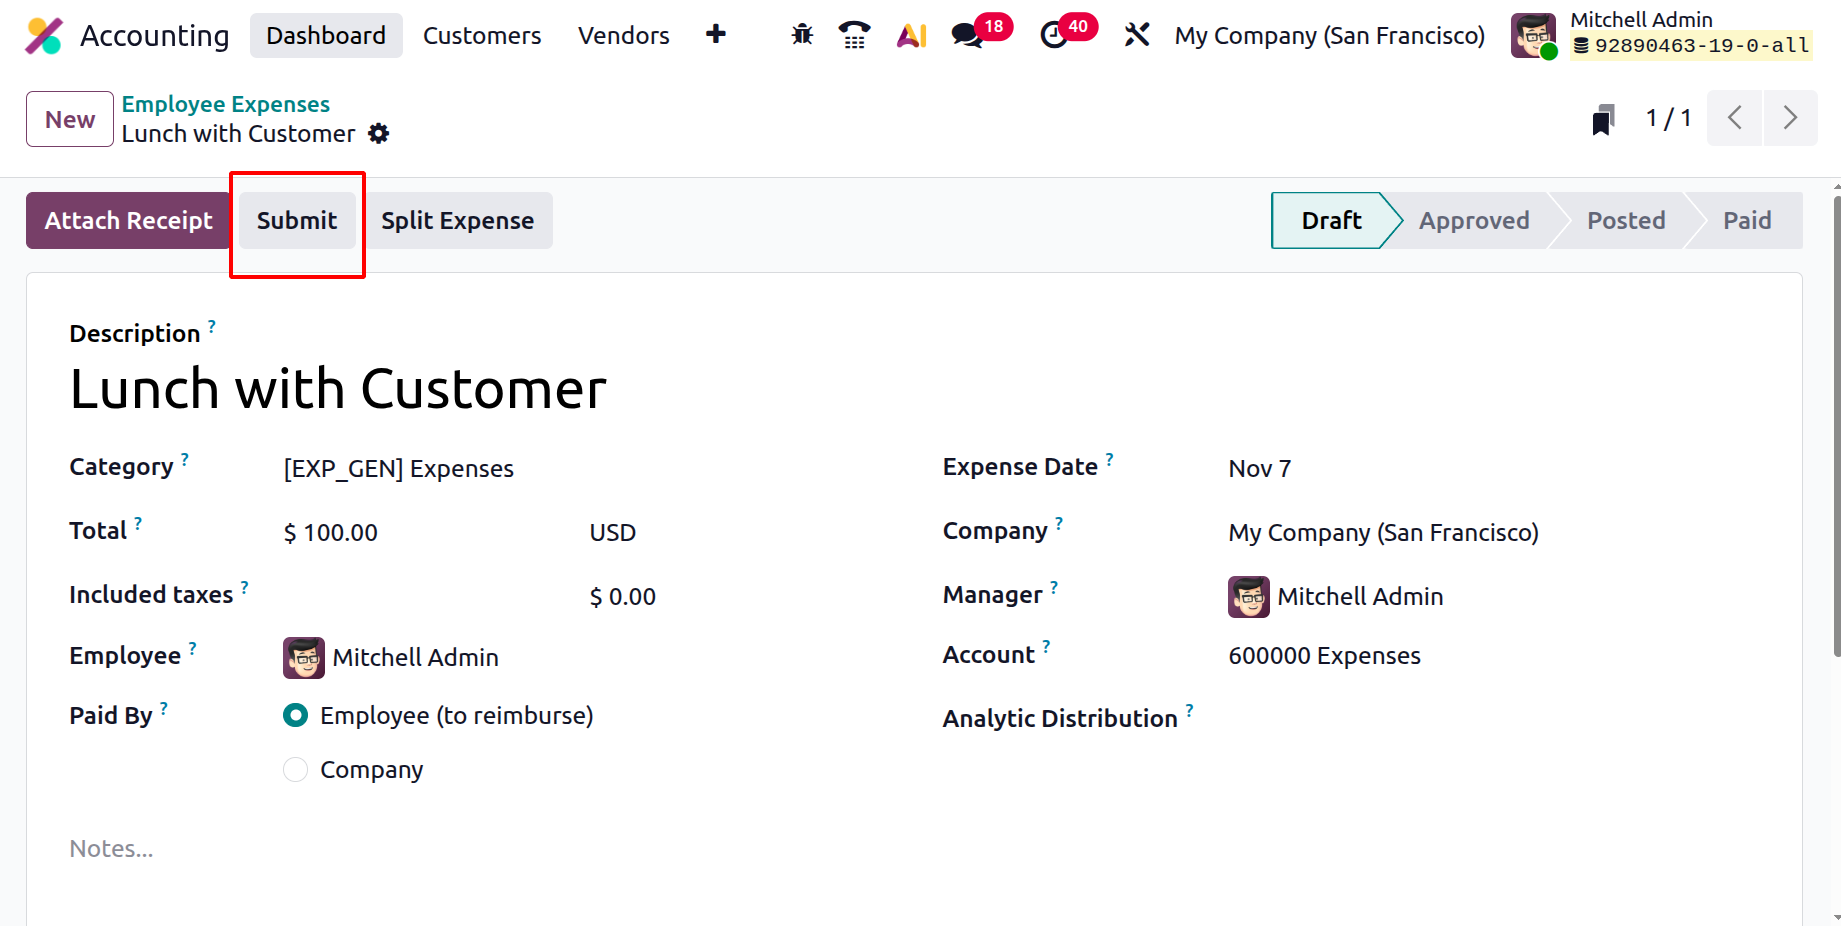
1.3 Employee Expenses
In Odoo 19 Accounting, the Employee Expenses management feature has been further refined to improve clarity, approval workflows, and integration with accounting records. Accessible via the Vendors menu in the Accounting module, this feature allows companies to efficiently document, track, approve, and reimburse employee expenses with enhanced accuracy.
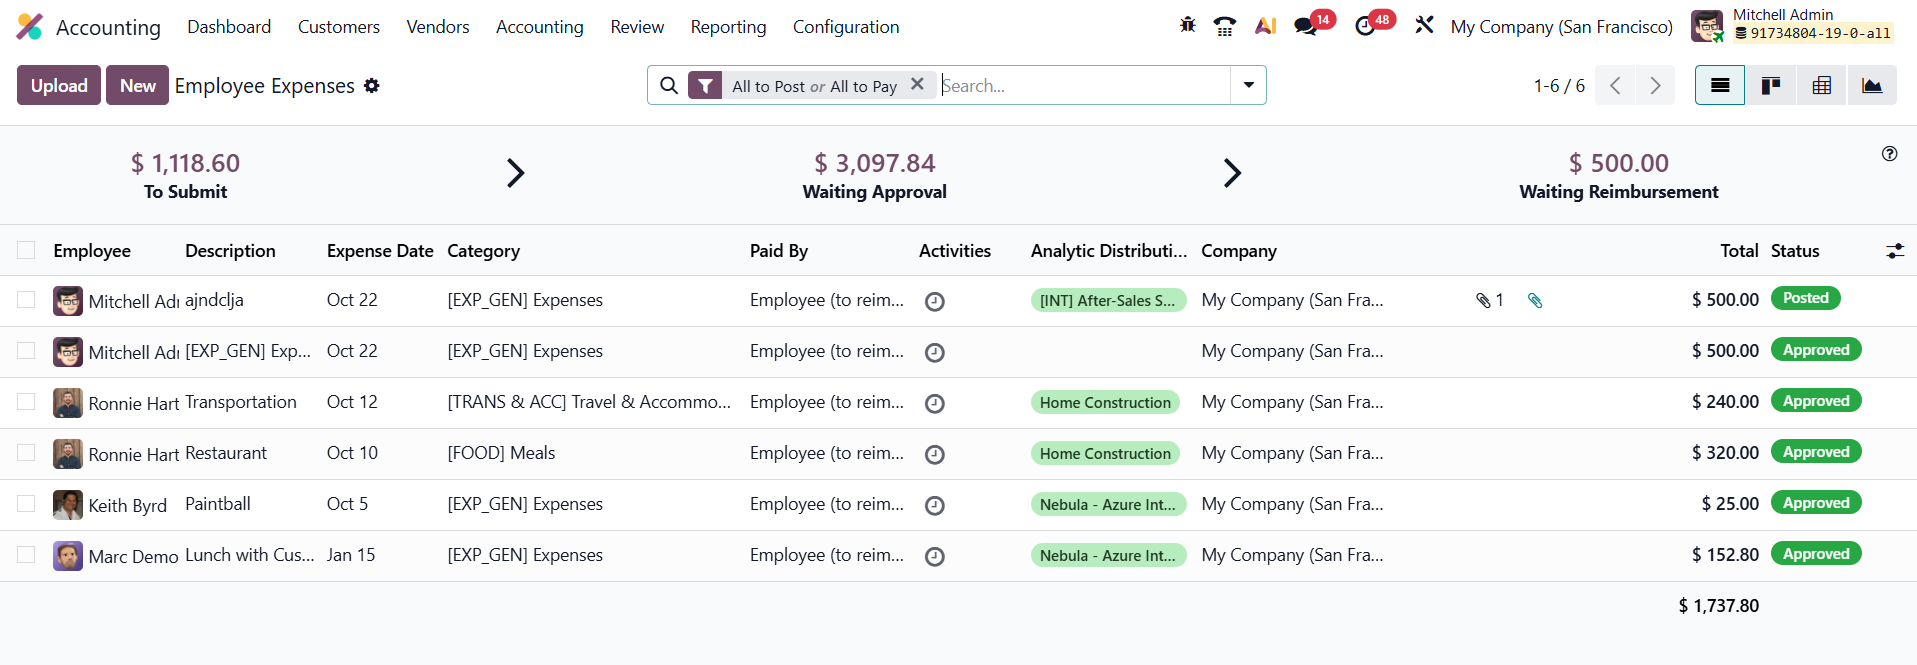
When you open the Employee Expenses section, you’ll find a well-structured list view displaying crucial information such as the Employee Name, Description, Expense Date, Category, Paid By, Analytic Distributions, Company, Activities, Total, and Status. This helps finance teams maintain a clear overview of all ongoing expense reports.
To create a new expense report, click the New button.
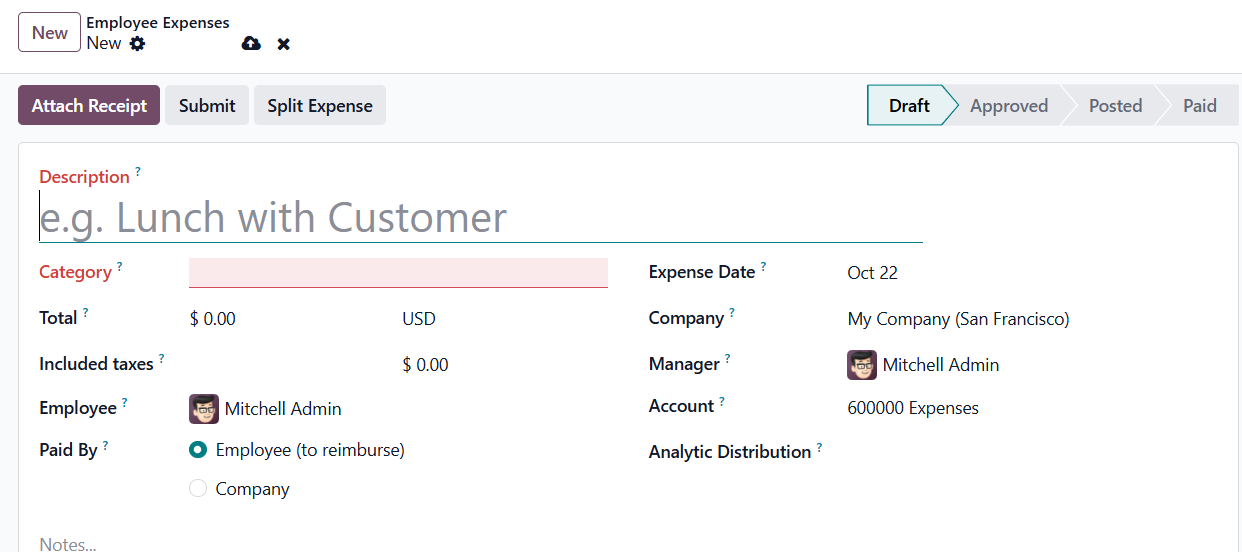
The Description field is used to enter a brief yet clear summary of the expense, for example, “lunch with client” or “hotel for conference.” Next, the Category field allows the user to select the most relevant expense category from the drop-down list, such as travel, meals, or accommodation. The Total field records the full amount spent on the expense. Any Included Taxes configured in the selected category are automatically applied and displayed beneath the total amount.
The Employee field identifies the staff member for whom the expense is being recorded, chosen from the drop-down list. The Paid By option determines who made the payment, selecting either Employee (for reimbursement) or Company. Depending on the category, this field may or may not appear. The Expense Date field records the date the expense was incurred, which can be selected using the convenient calendar popover.
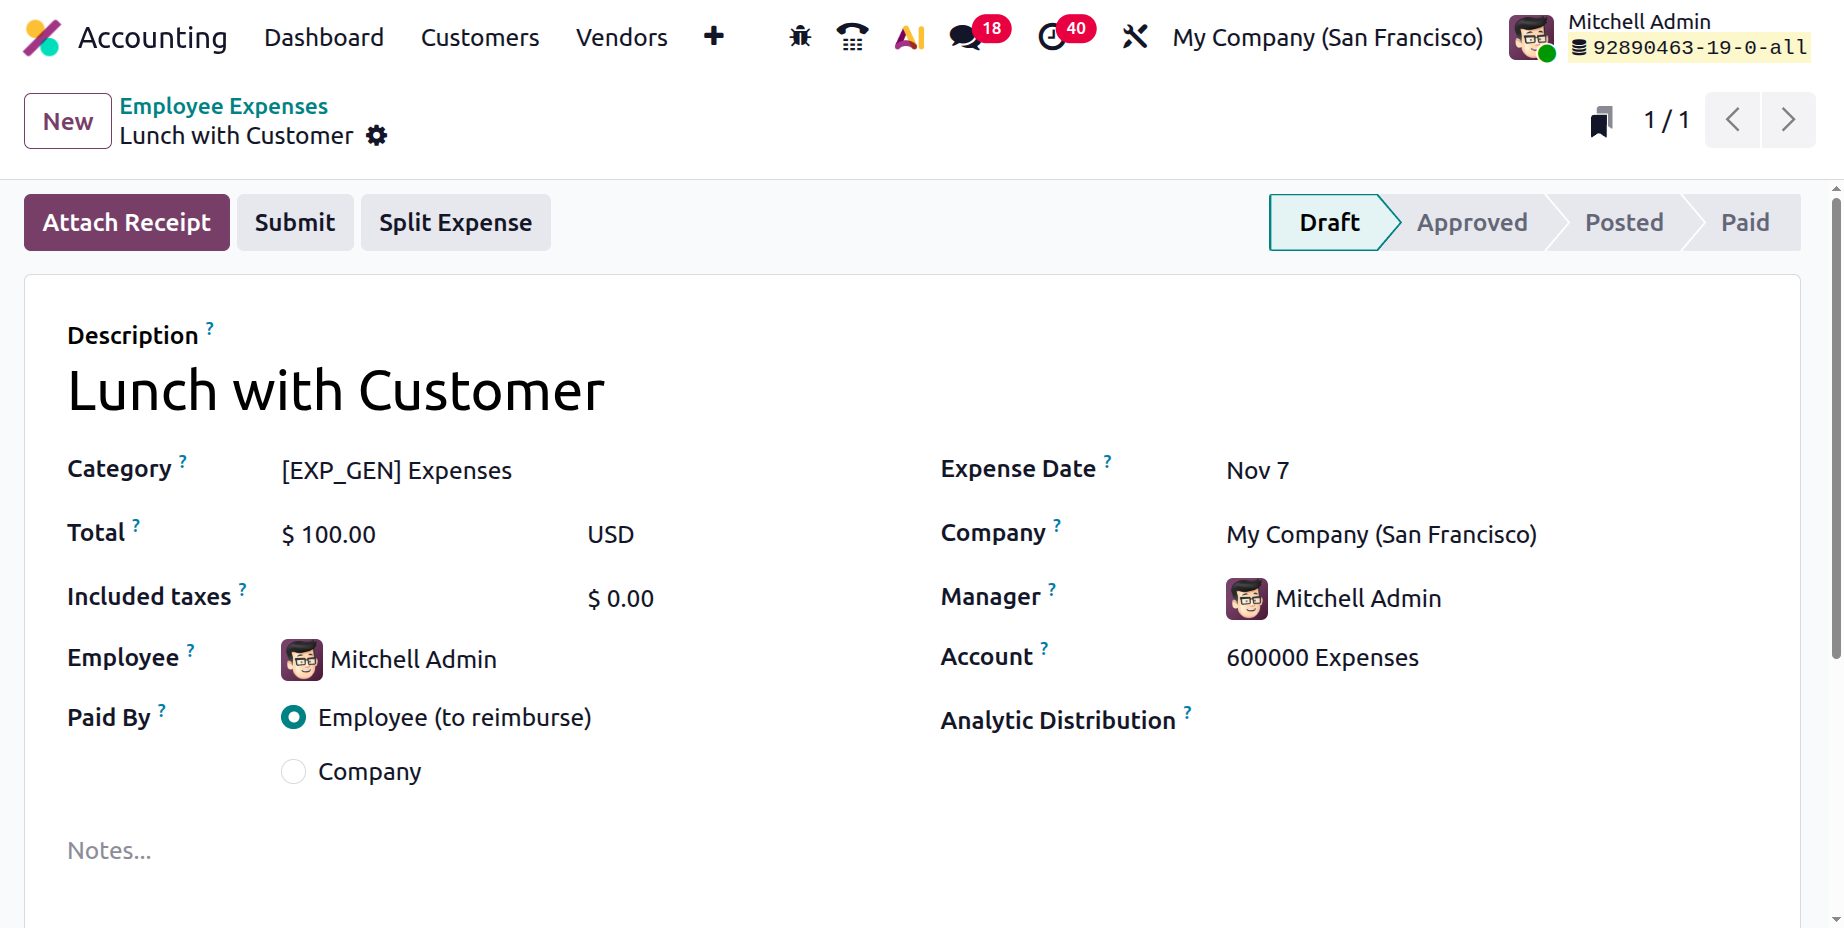
The Account field specifies the appropriate expense account to which the cost should be posted. For analytical tracking, the Analytic Distribution field enables users to allocate the expense across different projects, departments, or cost centers. Multiple analytic accounts can be added, and percentage allocations can be adjusted for each account to ensure precise cost distribution.
If the system is configured for multi-company management, the Company field allows users to select the appropriate company under which the expense falls, by default, Odoo auto-fills the current company. Lastly, the Notes field can be used to add any additional comments or explanations about the expense, providing clarity for reviewers and approvers.
After creating an expense record in Odoo 19 Accounting, the next step is to attach the corresponding receipt for verification and record-keeping. To do this, click the Attach Receipt button, which opens a file explorer window.
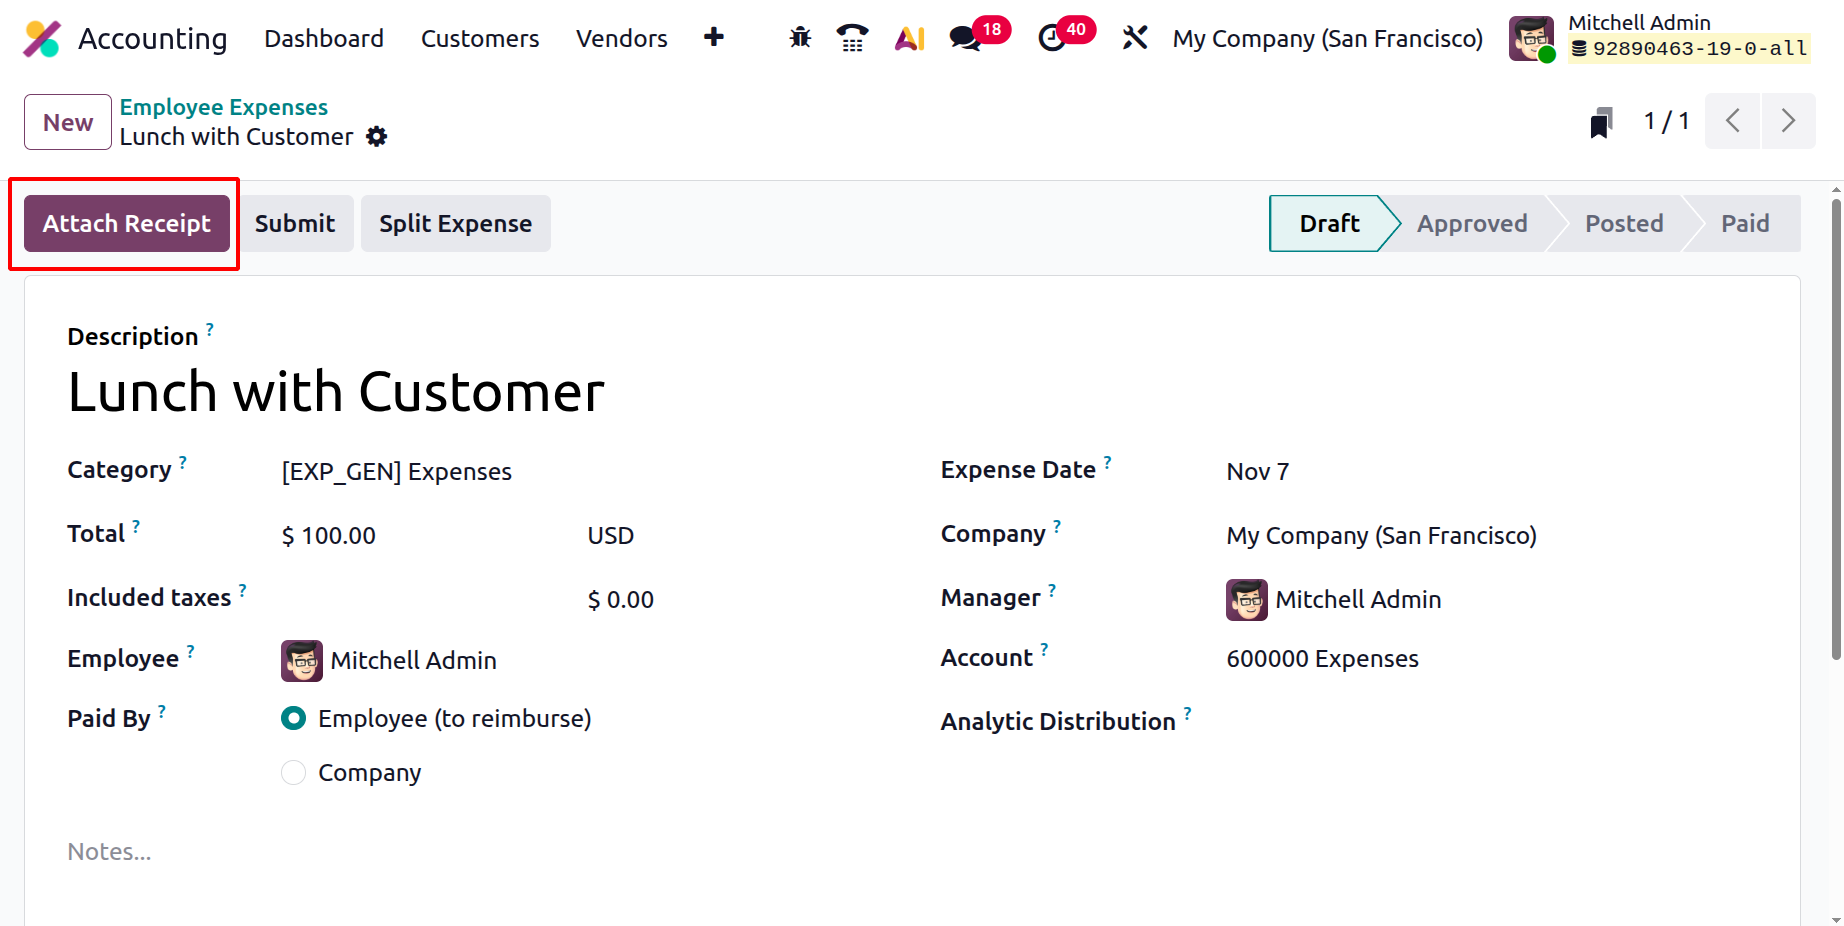
Odoo 19 allows multiple receipts to be attached to a single expense record, ensuring that users can provide complete documentation for complex or combined expense claims.
If an expense needs to be allocated across multiple categories or projects, the Split Expense option in Odoo 19 Accounting can be used. This feature allows users to break a single expense into multiple line items.
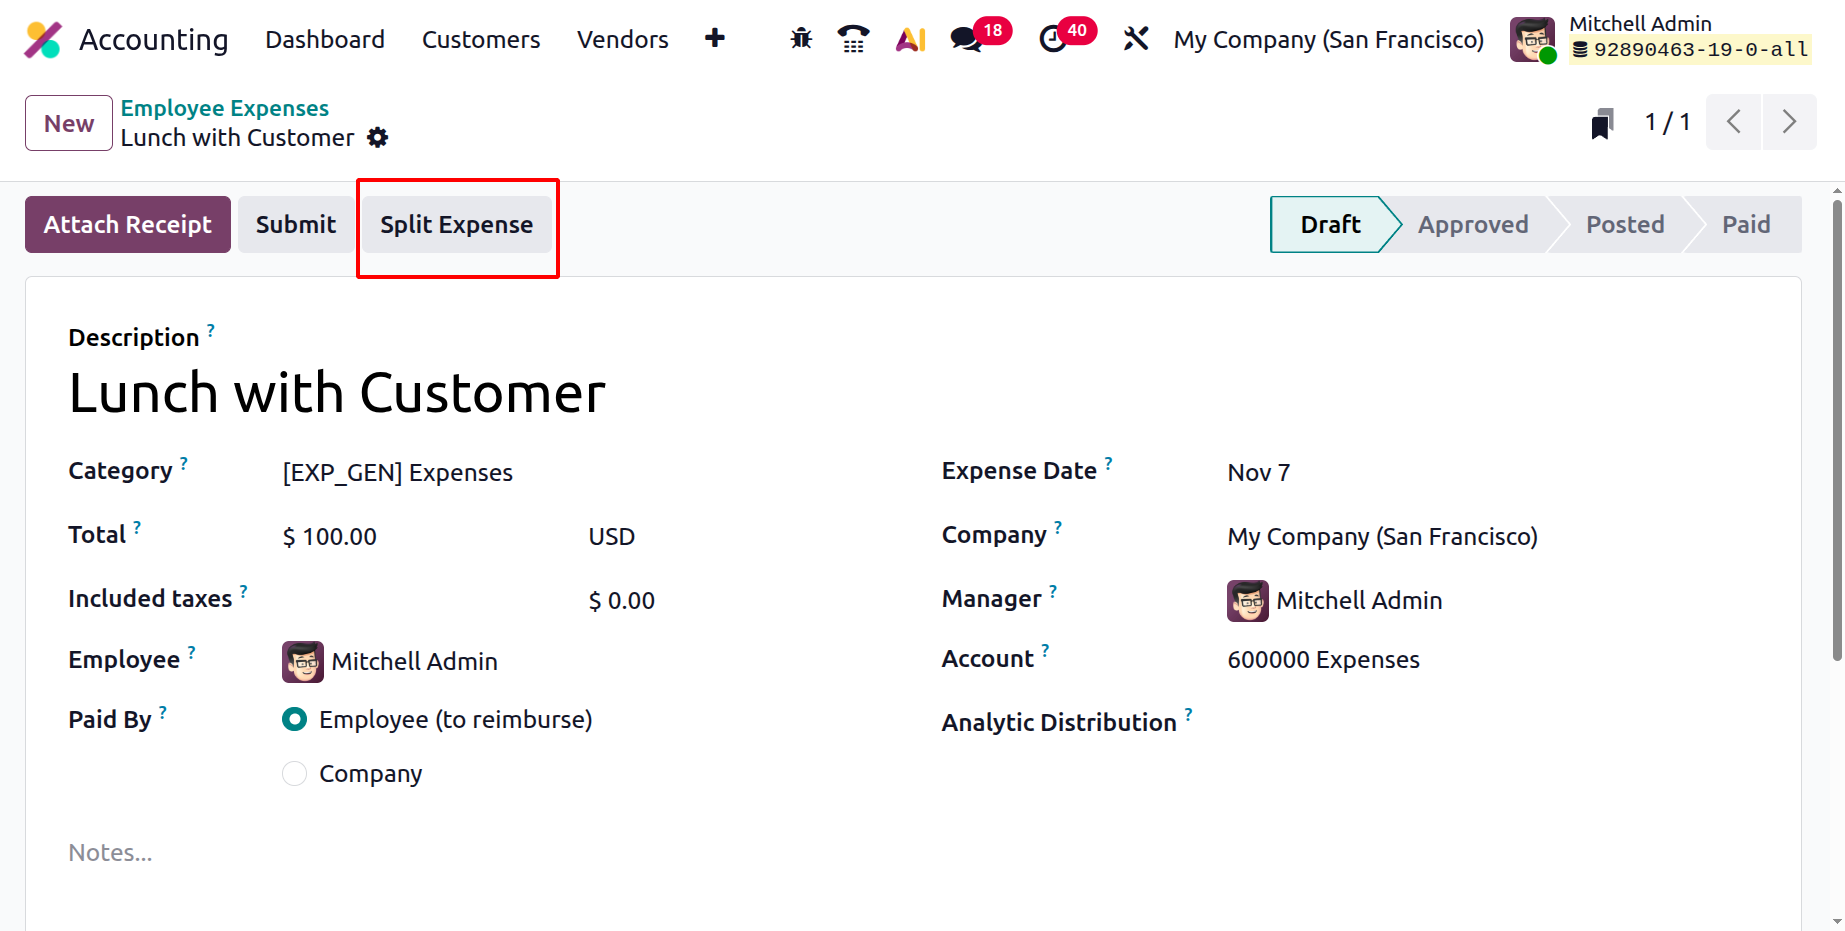
Each line can have its own amount, analytic account distribution, and cost allocation.
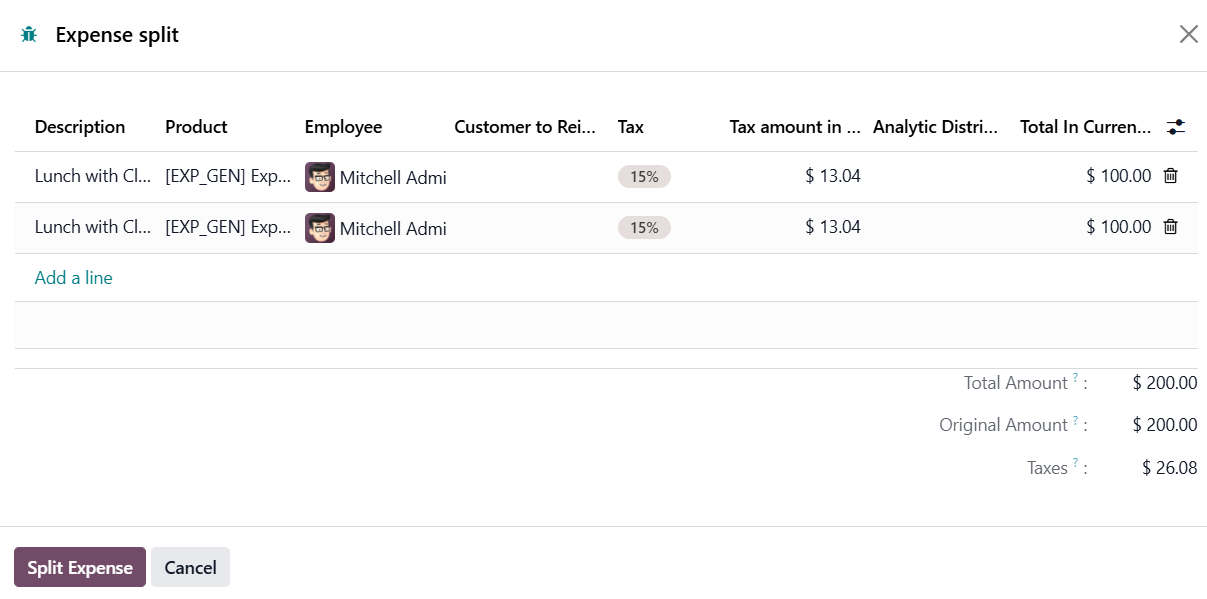
By using this approach, businesses can achieve more detailed financial reporting and accurate cost management without losing the integrity of the original expense record.
Once all expenses are recorded, the report can be submitted for review using the Submit button.
The designated manager can then Approve, Refuse, or Request Changes. Odoo 19 enhances transparency by allowing managers to add comments during approval or refusal, making the process more collaborative. After approval, the expense report is ready for posting to the Journal Entries, linking the approved expenses directly to the company’s accounting records. When payments are processed, Odoo automatically updates the Payment Status to reflect whether the reimbursement has been completed.