Odoo 19 Enterprise's Maintenance module is a potent tool that helps businesses schedule maintenance tasks, manage equipment, and minimise downtime. It tracks machine performance, centralises all maintenance requests, and uses intelligent scheduling rules to automate preventive maintenance. Users can monitor the equipment's lifespan, repair history, and health with real-time insights. Production workflows are ensured by the module's seamless integration with Manufacturing, Inventory, and Quality. The Maintenance module facilitates effective operations and increases overall productivity by enhancing planning, reducing unplanned malfunctions, and maximising resource utilisation.
Types of Maintenance Management
- Preventive Maintenance:Planned to keep equipment operating efficiently and reduce the risk of unplanned malfunctions. To guarantee that machines are serviced before problems occur, it uses predetermined intervals or predictive triggers.
- Corrective Maintenance:When a malfunction or failure is reported via a maintenance request, corrective maintenance is carried out. It concentrates on swiftly resolving the problem so that equipment can resume regular operation
1. Dashboard:
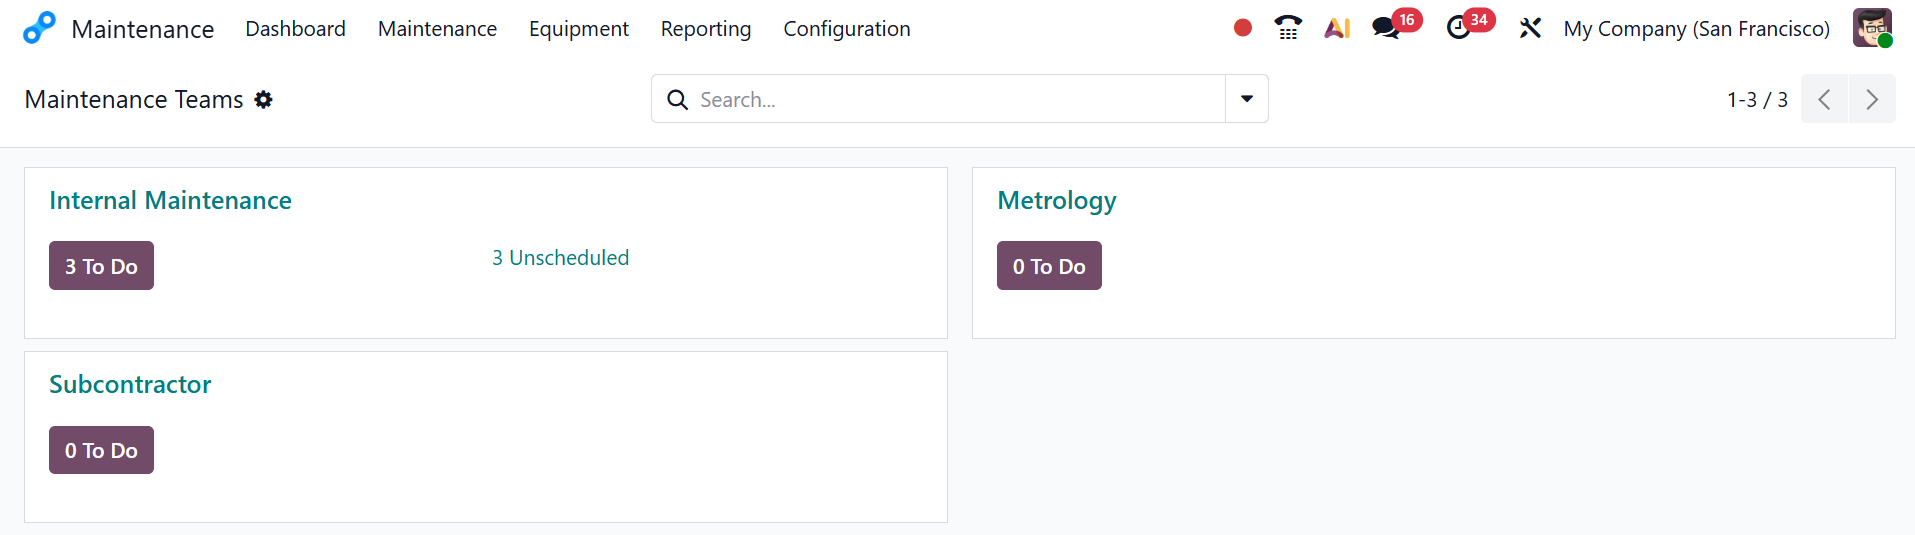
When you open the Maintenance module in Odoo 19, you see a kanban-style dashboard that provides an overview of all teams responsible for maintenance activities within the company, allowing them to organize work by skill, responsibility, and workload. This dashboard helps you to understand how many tasks each team has, which tasks are scheduled or unscheduled, and how maintenance activities are distributed across the organization.
Here, you can see three maintenance teams, where each team has its own section and task counters:
- Internal Maintenance:This category is the default team responsible for handling all in-house maintenance requests created in the system. It manages tasks like corrective repairs, preventive maintenance schedules, and equipment issues assigned to company technicians.
- Metrology: This category is specialized maintenance related to calibration, measurement accuracy, and precision instruments. Odoo treats it as a separate team to ensure calibration-related activities do not mix with general repair work, improving tracking and compliance.
- Subcontractor: Under this category, tasks are assigned to third-party service providers instead of internal employees. The companies can track which repairs are performed externally, monitor costs, and separate them from internal tasks.
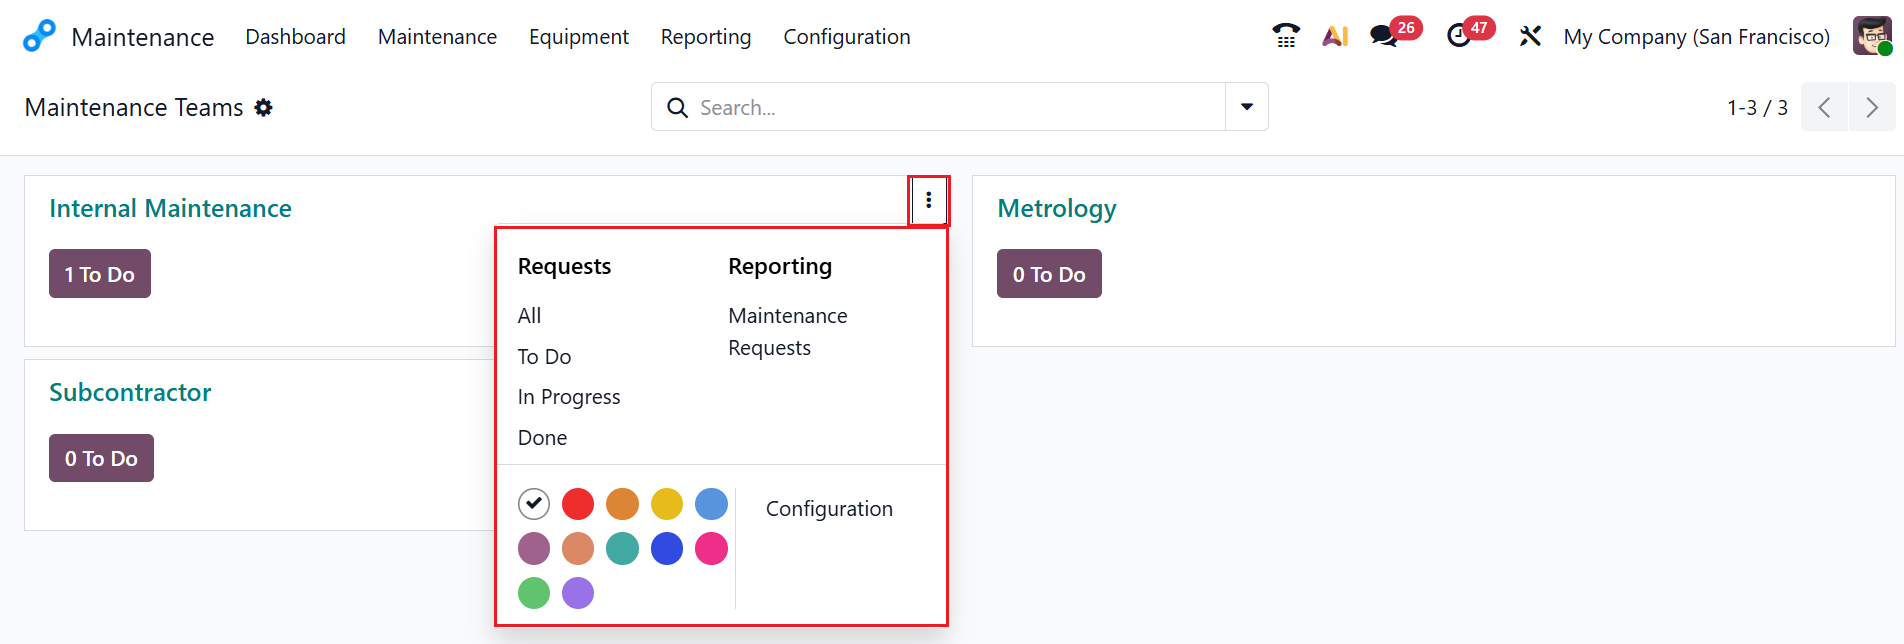
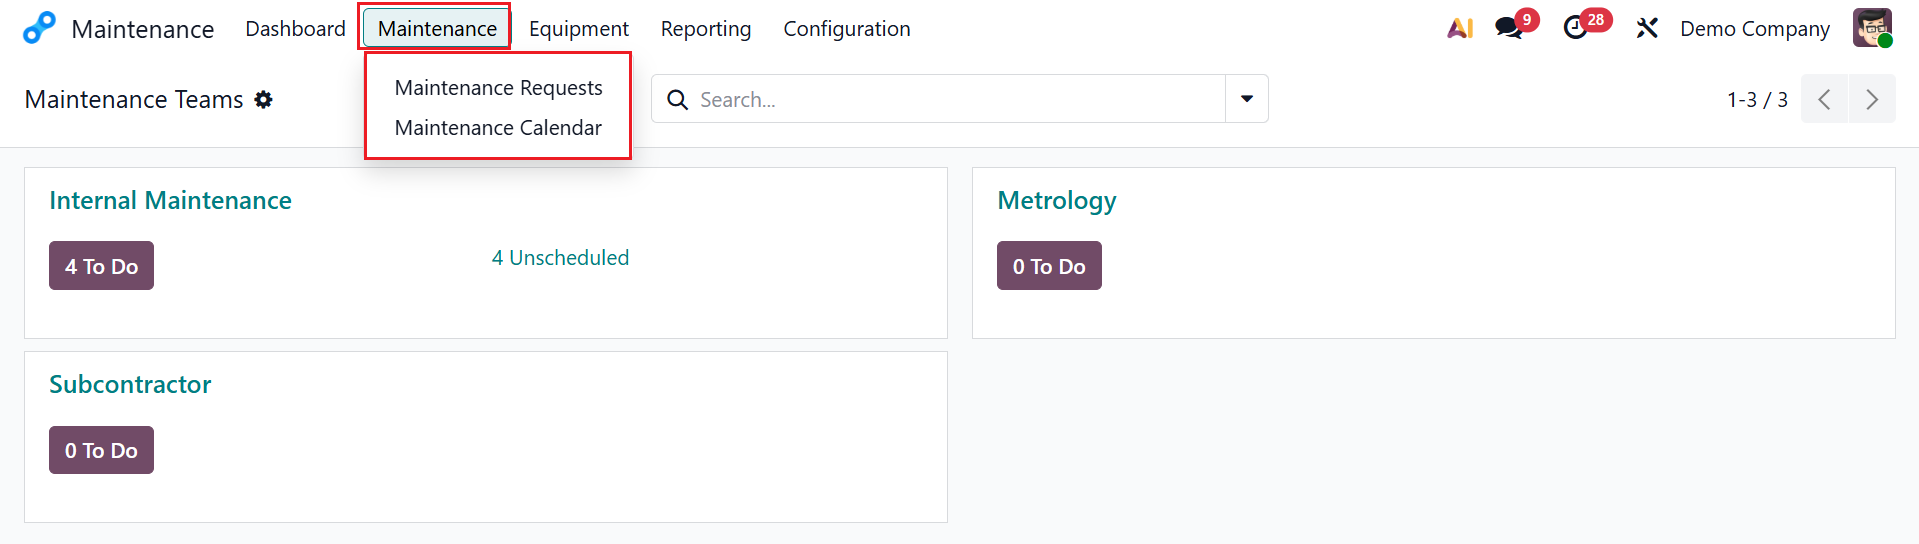
Click on the three-dotted vertical menu in each maintenance team, as shown below. A new section will appear where you can view the options such as Requests, Reporting, and Configuration.
Under the Requests option, you can view the status of maintenance requests: All, To Do, In Progress, and Done. The Reporting option provides you with an analysis of the maintenance team's maintenance requests. Use the Configuration option to update the details of the chosen maintenance team. Odoo 19 introduces a new feature that lets you assign a unique color to each team.
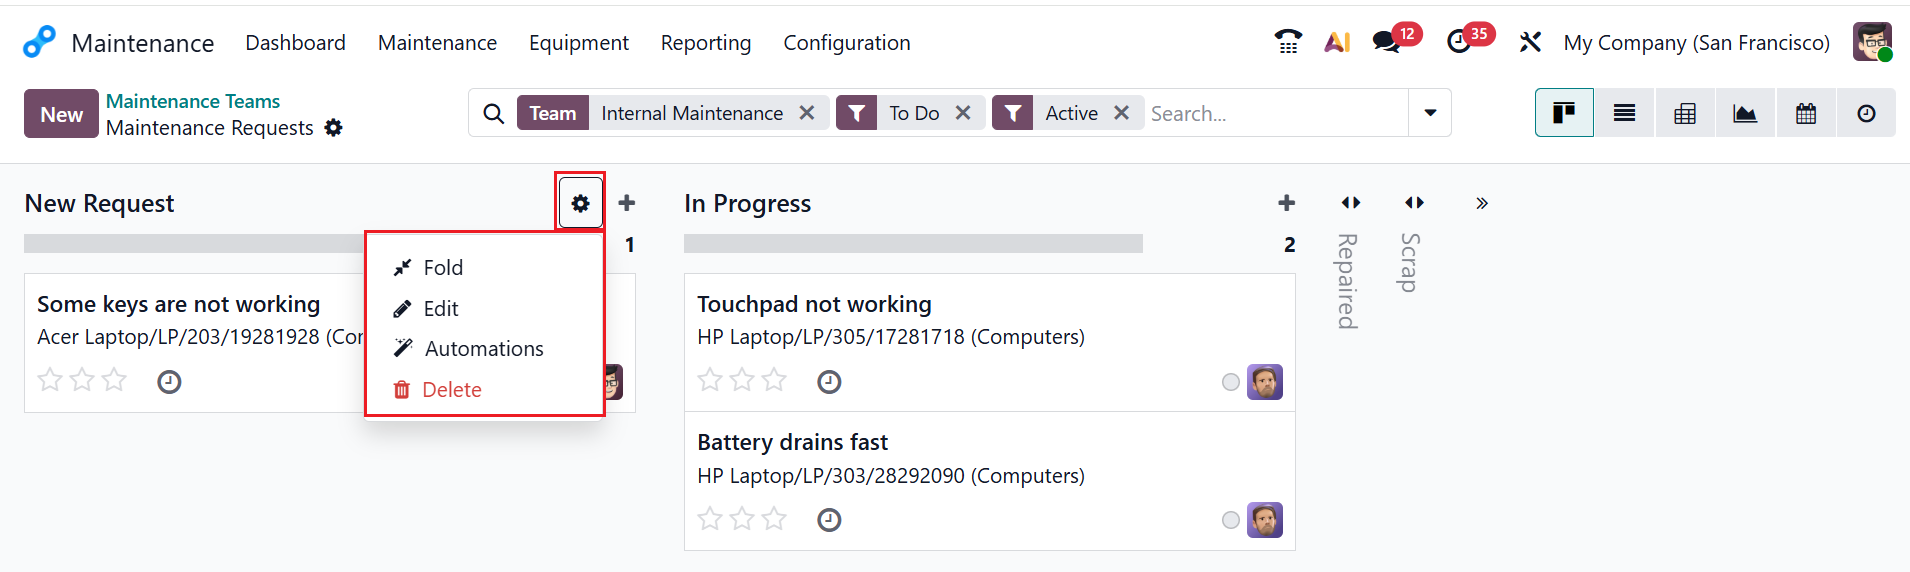
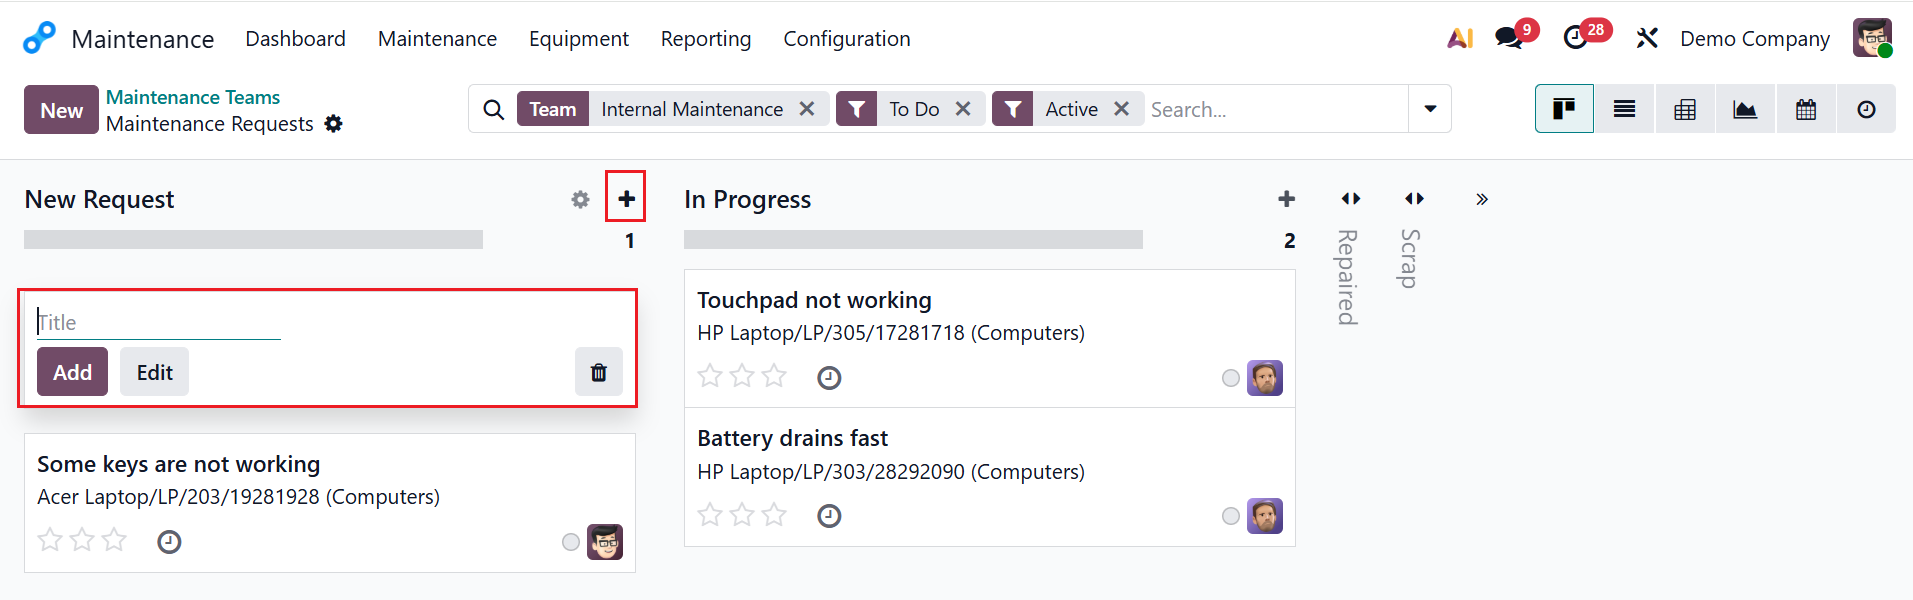
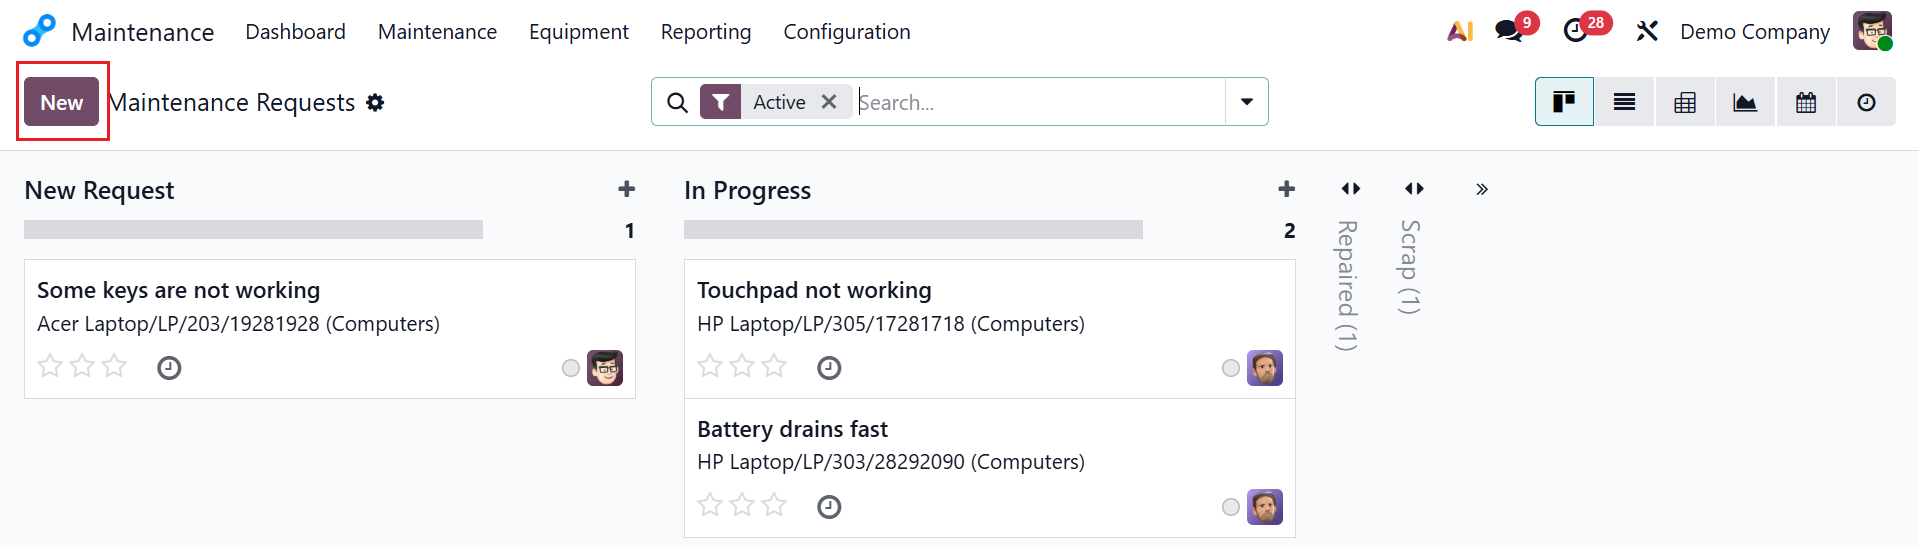
Click the To Do button for each maintenance team to view all maintenance requests. By default, the maintenance requests can be viewed as Kanban. You can also change it into List, Pivot, Graph, Calendar, or Activity views. You can also see that the maintenance requests are in different stages, such as New Request, In Progress, Repaired, and Scrap, as shown below. To create a new stage, click >>Add Stage, then enter a title.

Click the gear icon in the top-right corner of a stage to access options like Fold, Edit, Automations, and Delete. The Fold button helps you to hide or minimize the stages. Use the Delete button to permanently delete the stage.
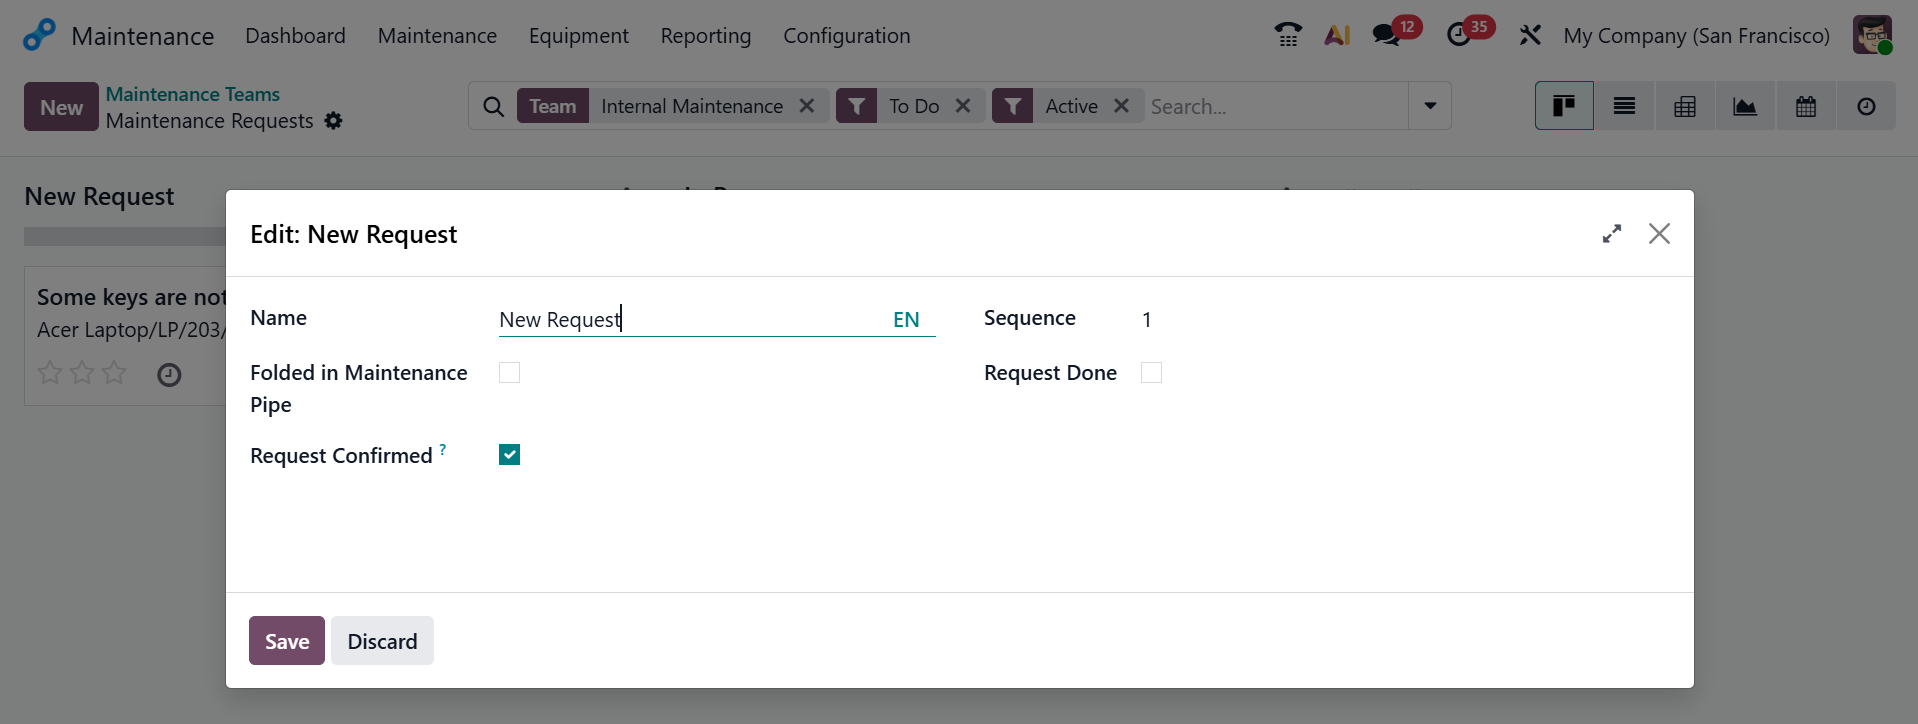
Clicking the Edit button opens a new pop-up window, as shown below. If needed, you can change your stage's name in the Name field. You can enable the Folded in Maintenance Pipe option to hide the stage, and the Request Confirmed option to mark the maintenance request as officially approved and ready for processing. The Sequence option helps set the order of the request in the list. Once the maintenance work is fully completed or closed, you can also enable the Request Done option.
Stages of maintenance requests can be automated according to preset rules and specifications. Click the Automations button to open a new window, then click New button as shown below.
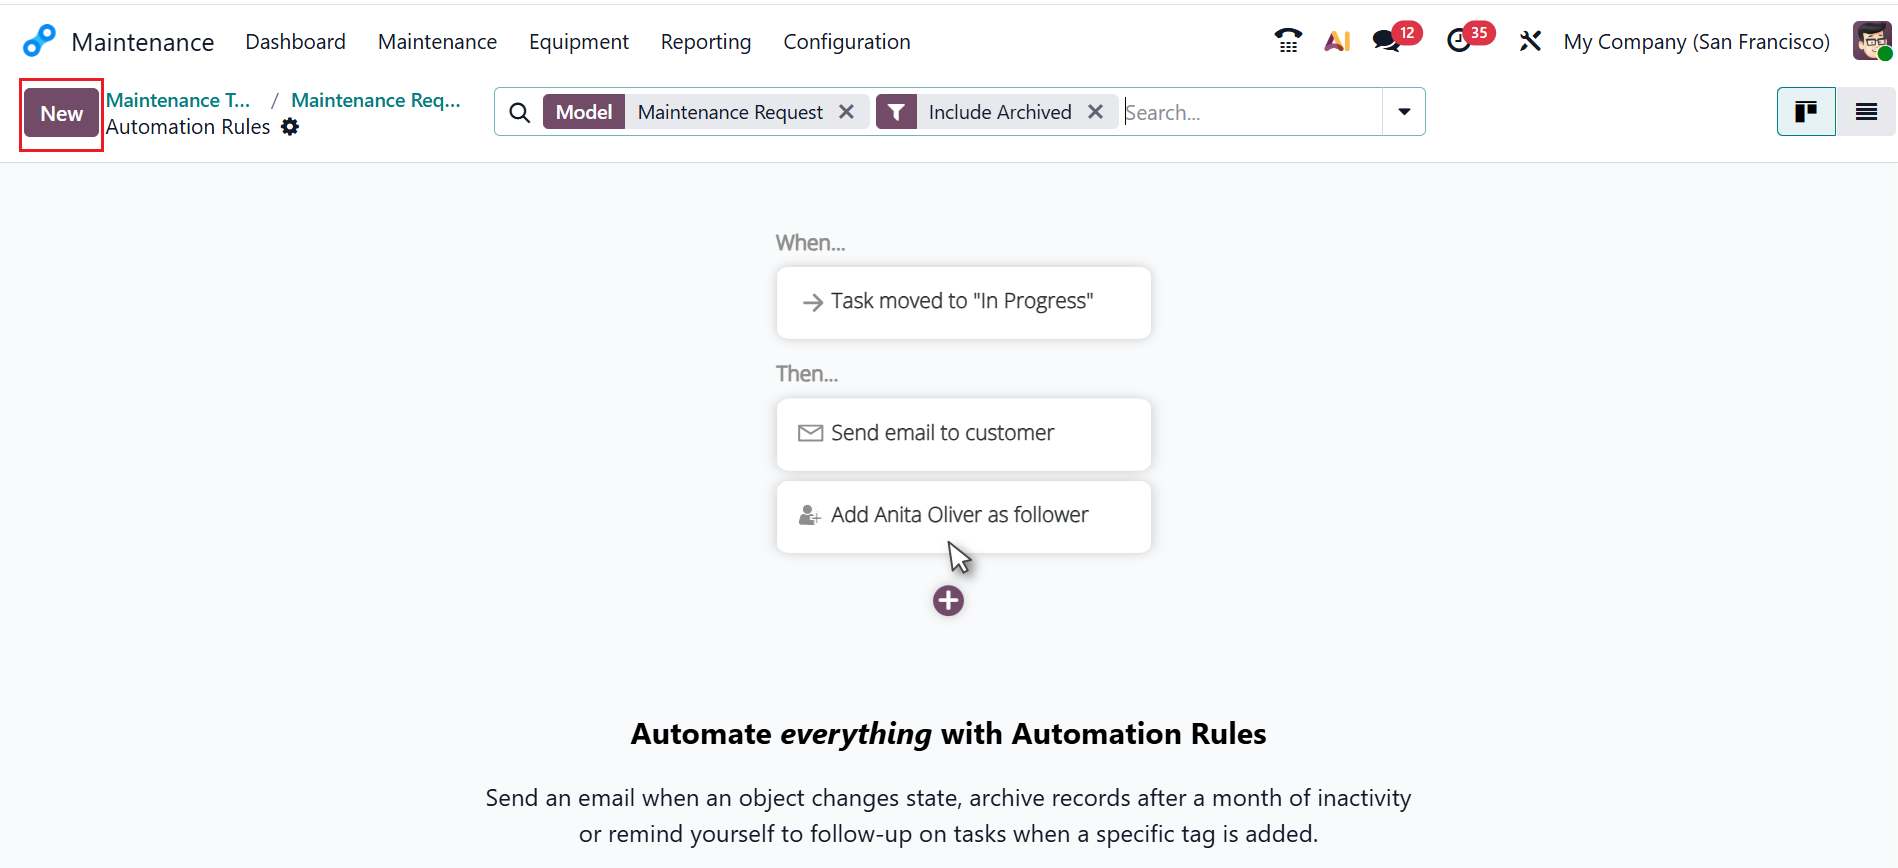
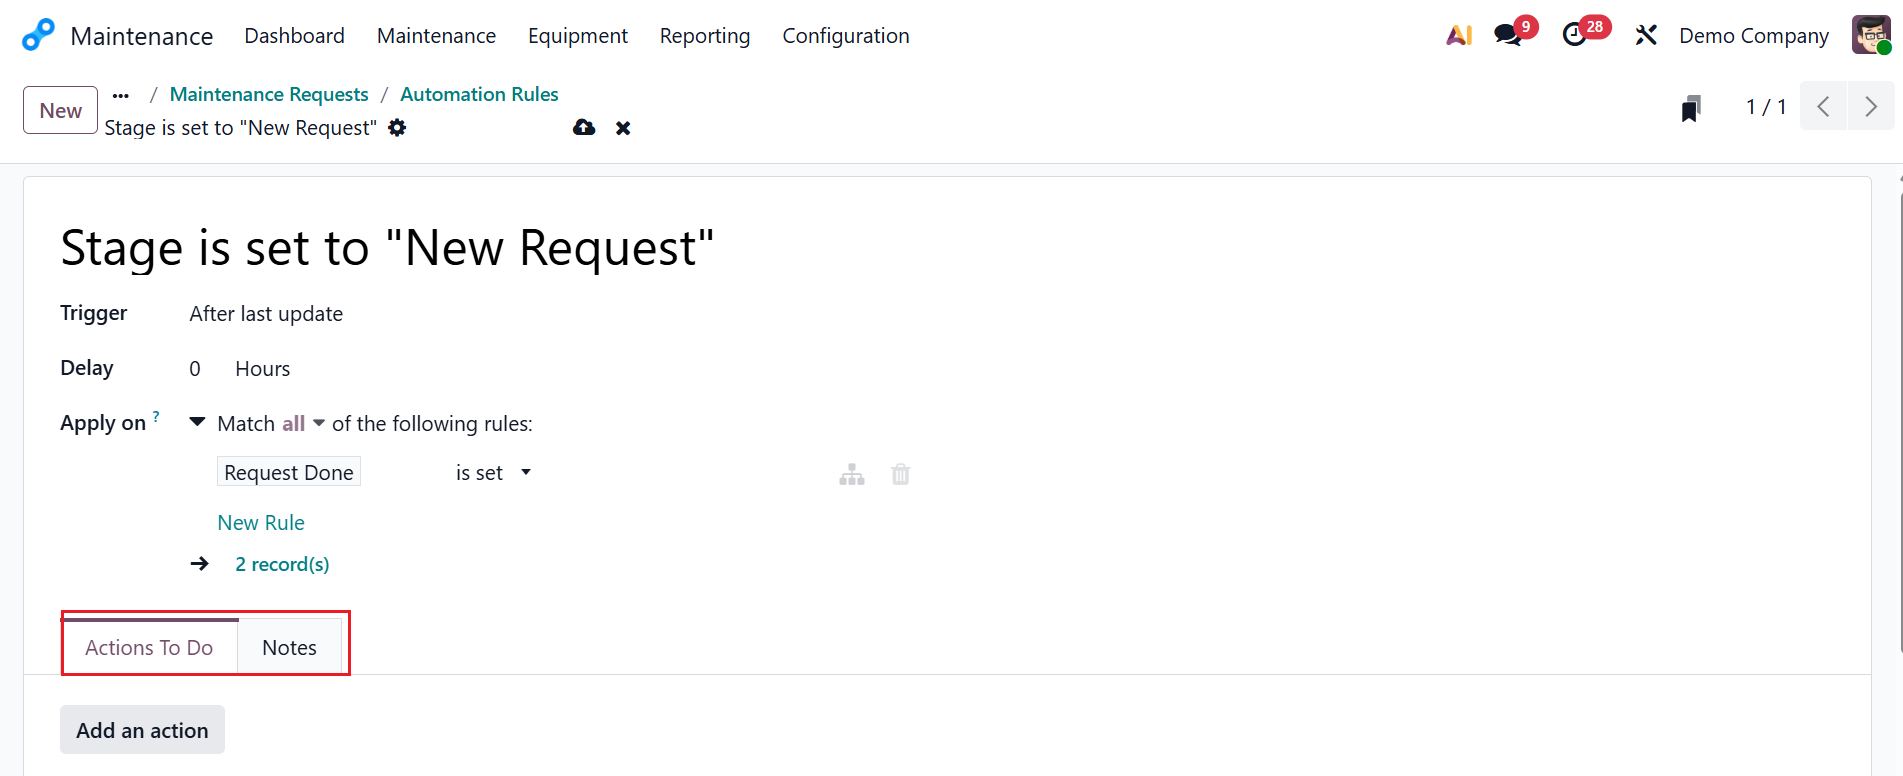
Use the new window to create a rule and specify conditions. The automation rule's title will be automatically updated. You can set an appropriate Trigger action. In the Delay field, you can set the time to upgrade to the new stage after the last update. In the Apply On field, you can select a condition to specify stage automation based on your rules or filters by clicking the +Add Condition button. Here, I've chosen a simple rule in this example as the "Request Done" column is “set.” You can view two tabs: Actions To Do and Notes.
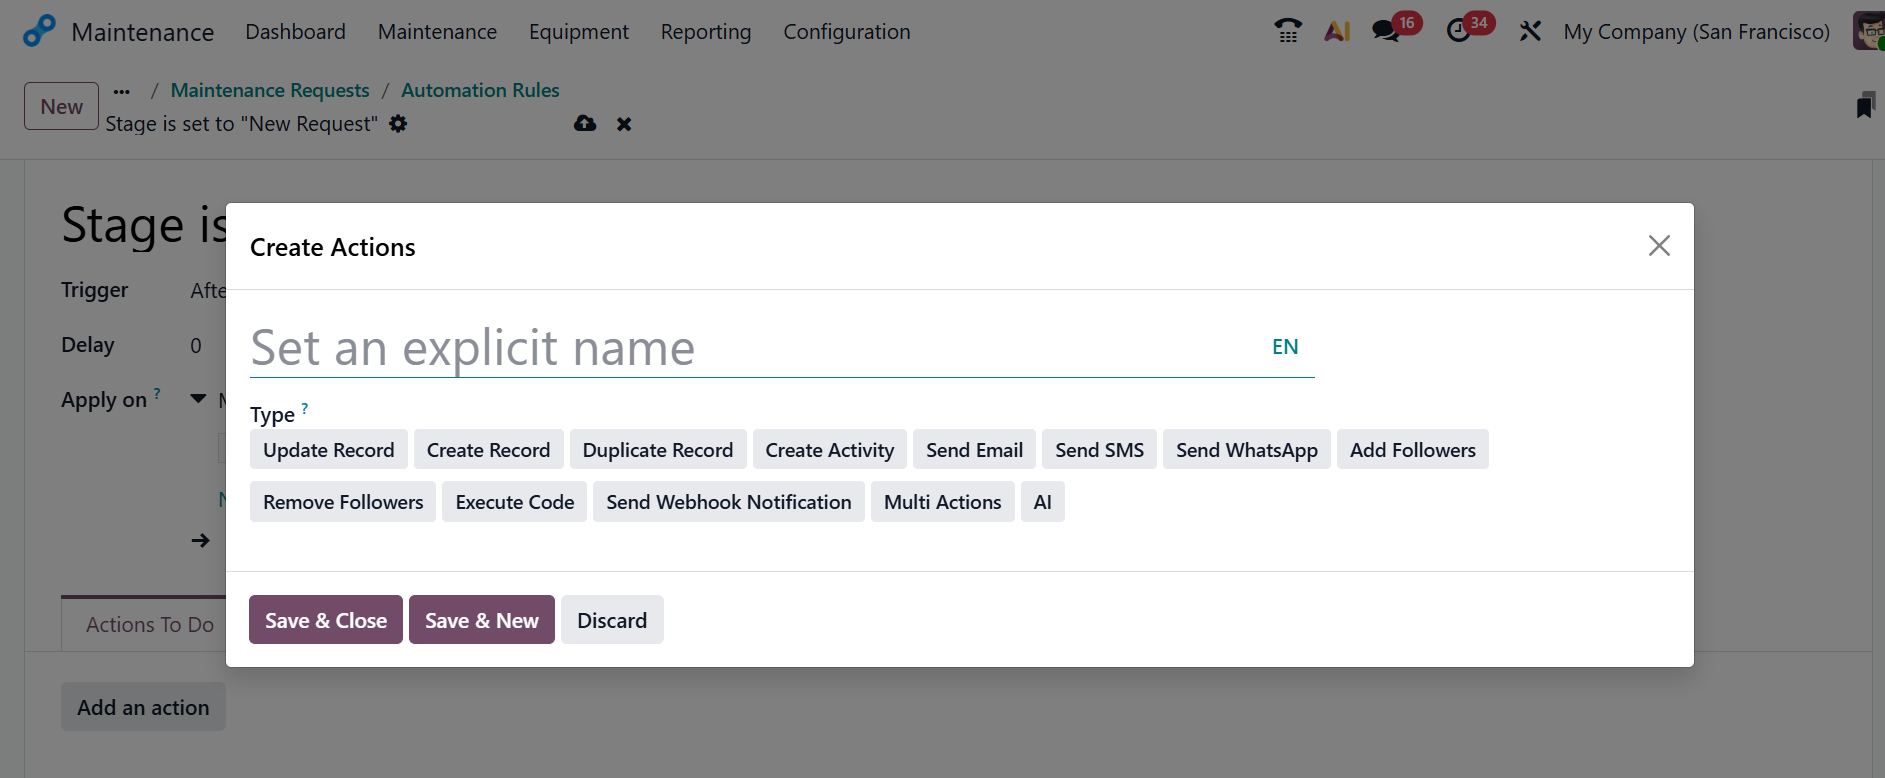
In the Actions To Do tab, use the Add an Action button to define what should happen when the selected trigger action occurs. In the pop-up window, you can define a name for the condition and choose the appropriate action type, such as Update Record, Create Activity, Send Email, Send SMS, Send WhatsApp, Add Follower, Remove Follower, Execute Code, etc., as illustrated in the screenshot below.
Click the + button in the upper-right corner of a stage to create a new maintenance request. Provide a title and click the Add button to initiate the request. Use the Edit button to make any changes.
When you click the Kanban card of each request, a new window will appear where you can add more details about the maintenance request, which will be explained in the sections below.
2. Maintenance:
The Maintenance menu is the central place to manage all maintenance requests and maintenance activities in Odoo 19. You can use it to track machine health, manage requests, and oversee task progress. You can view two options under Maintenance Requests: Maintenance Requests and Maintenance Calendar.
2.1 Maintenance Requests:
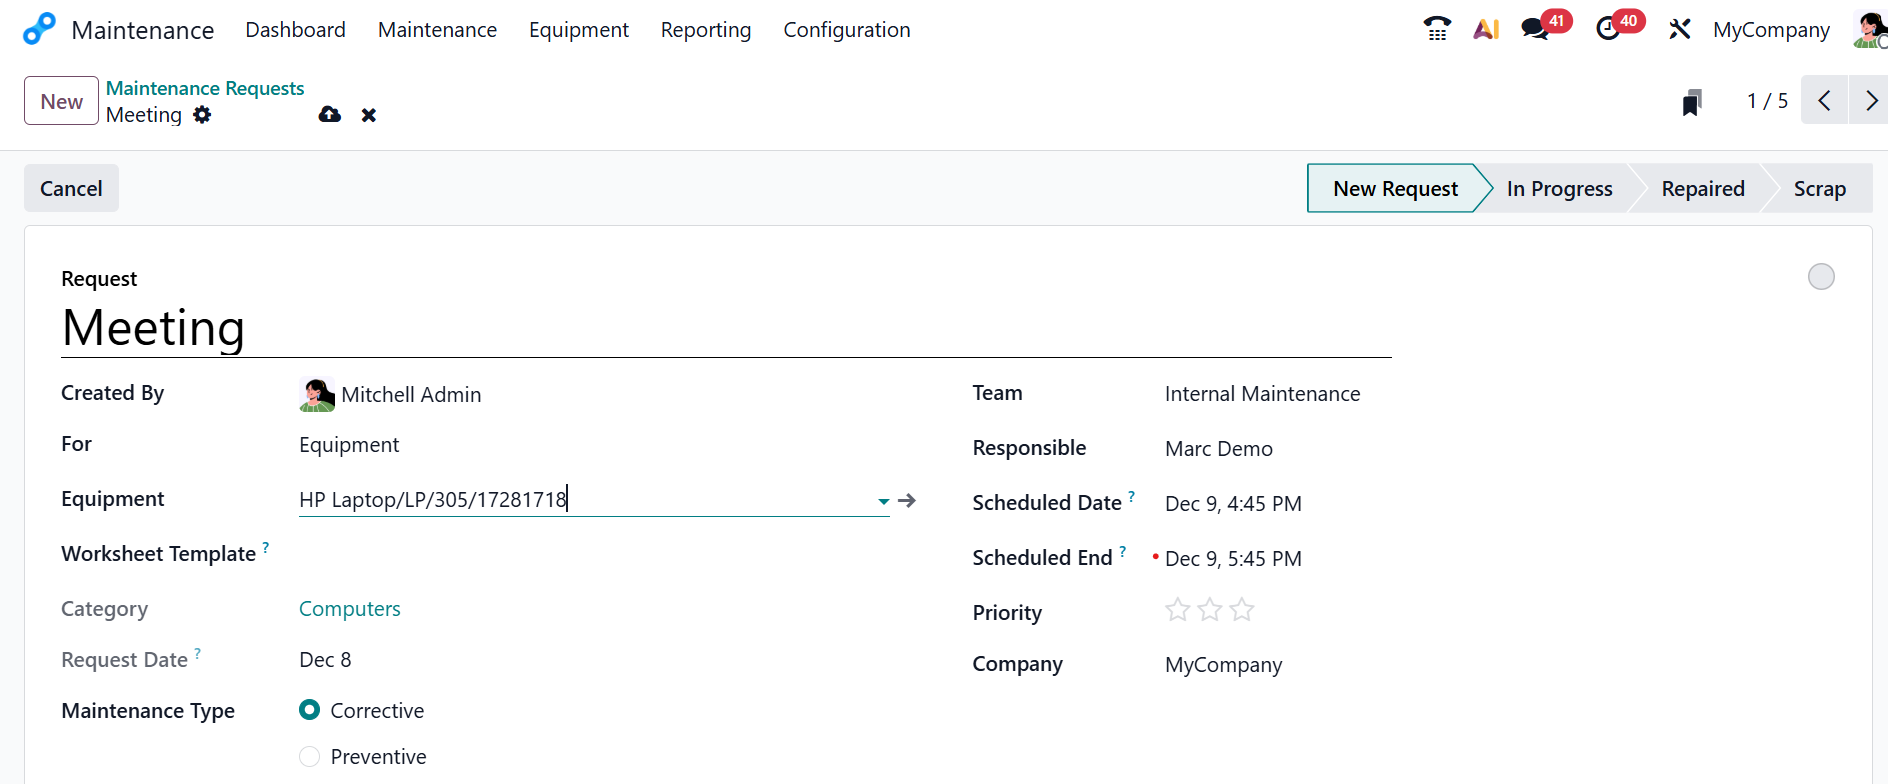
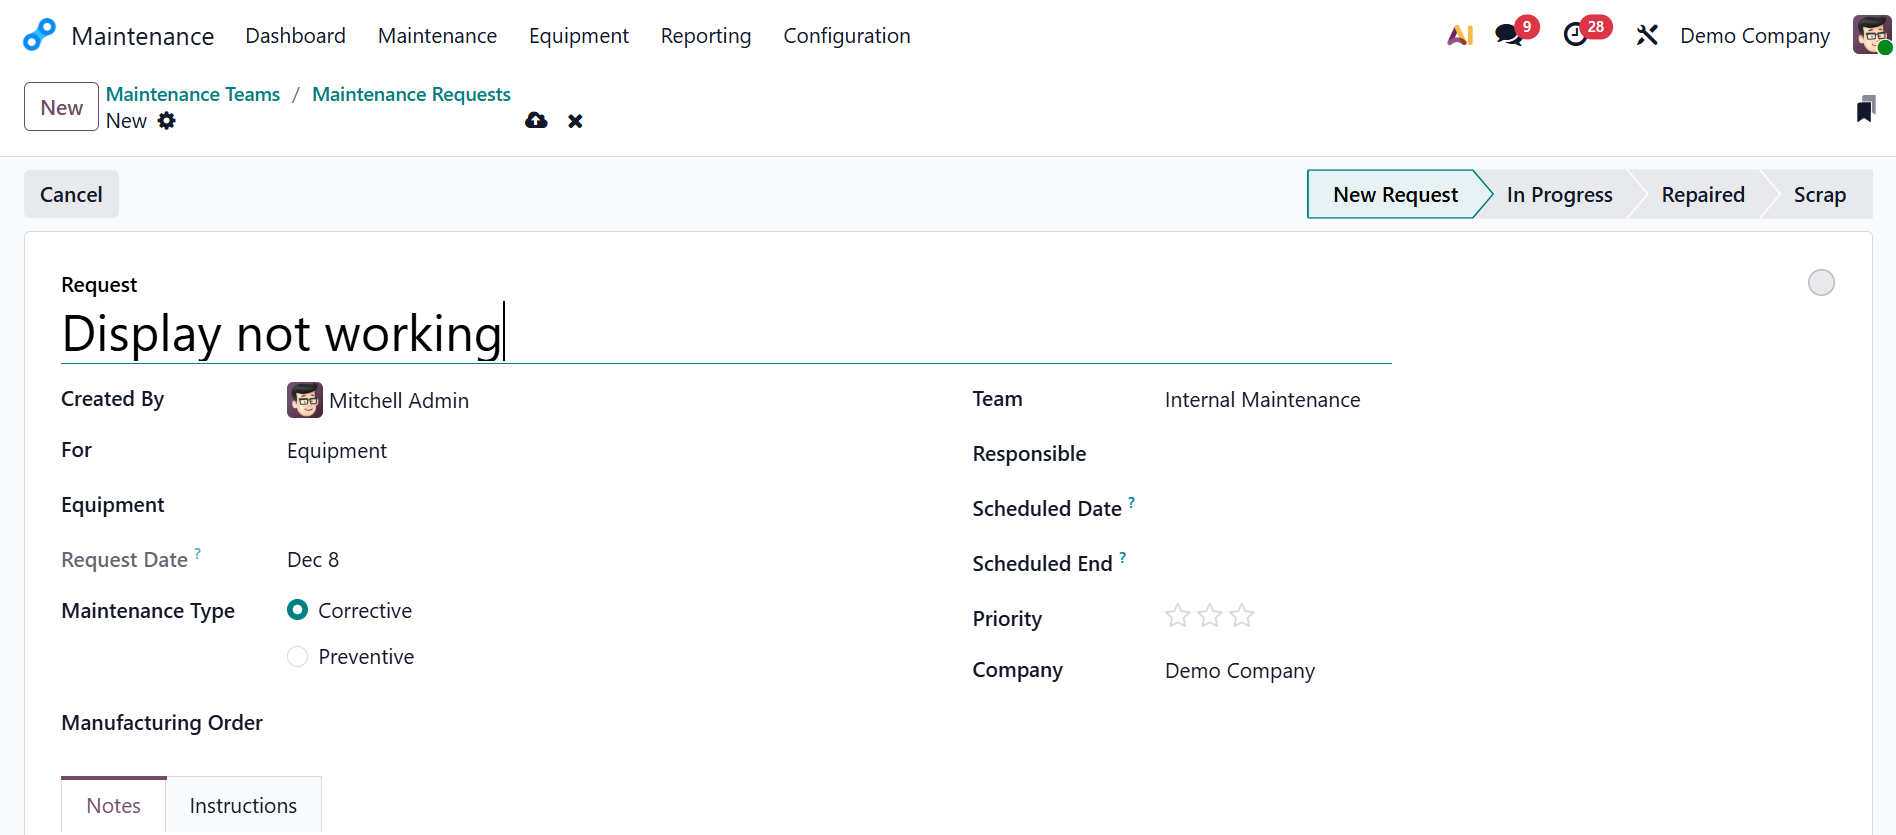
The Maintenance Requests option helps you to report problems or schedule preventive maintenance for any equipment. They allow you to record the issue, assign it to a maintenance team, and follow its status. In the maintenance requests dashboard, you can view all active requests and their status. Either click on any active request or click the New button.
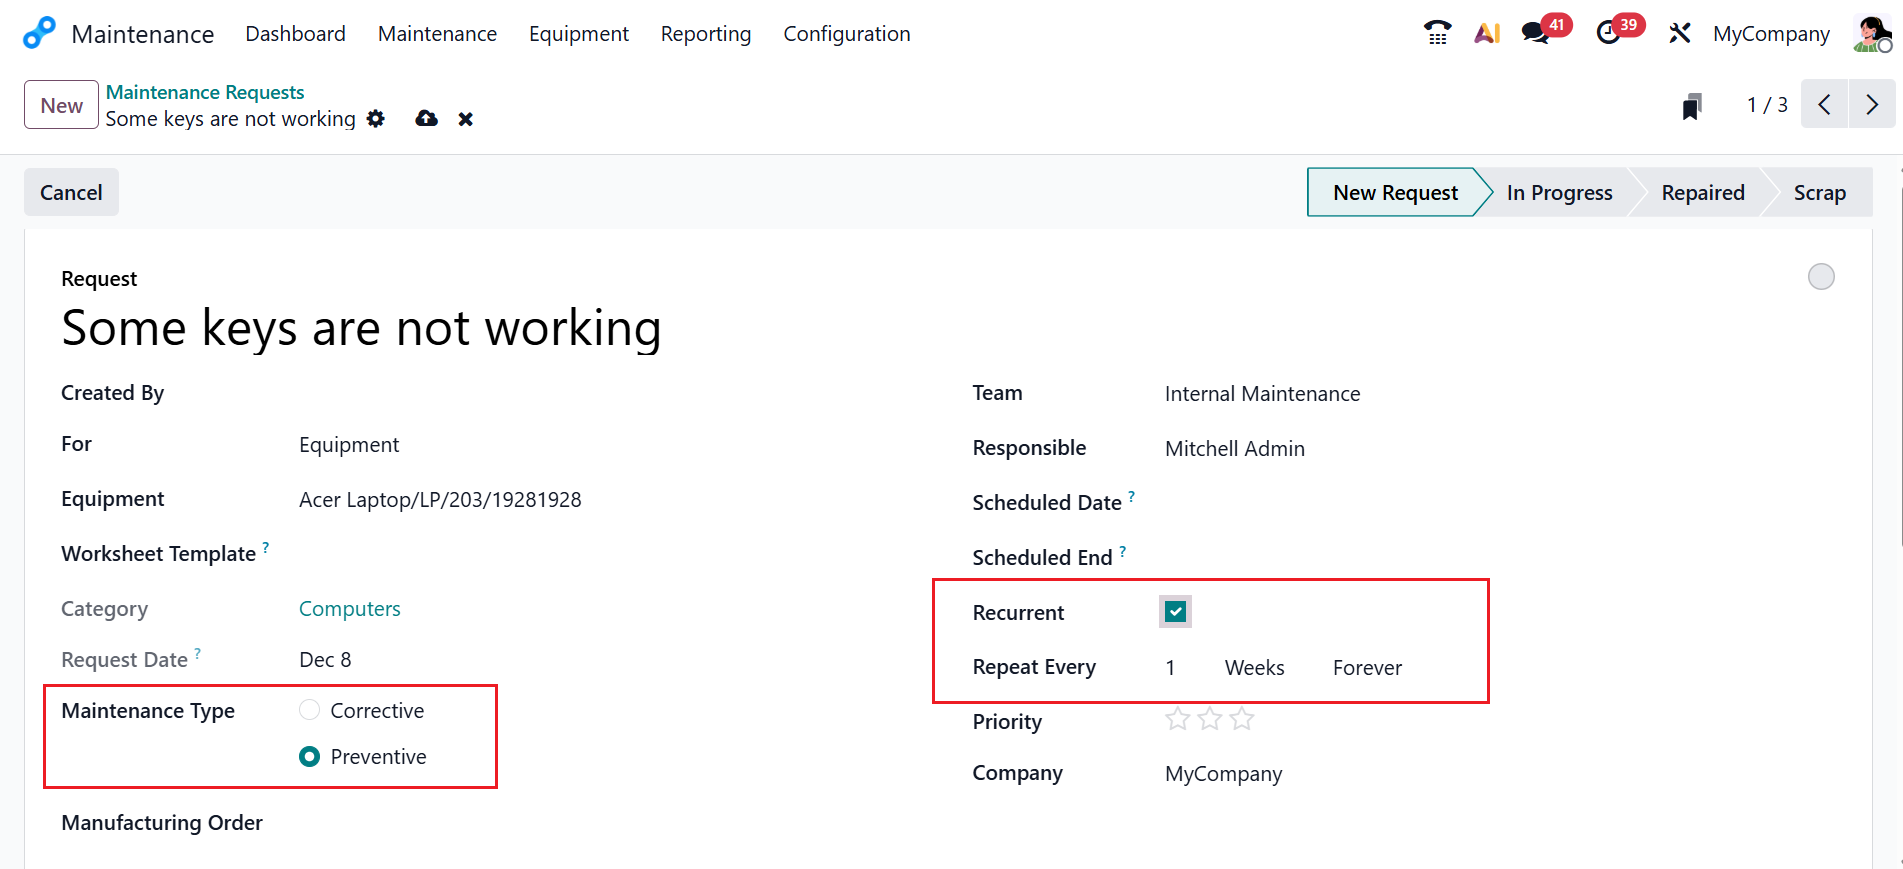
In the Request field, add a title for the request. The user will be automatically added to the Created By field, and you can also add another user from the drop-down menu. In the For field, select either Equipment or Work Center. Based on the For field, the following field will appear as either Work Center or Equipment. In the Worksheet Template field, you can select a worksheet for the employee to fill out. The Category and Request Date will be automatically generated based on the form fields and the request date in the relevant fields. In the Maintenance Type Field, select either Corrective or Preventive. In the Manufacturing Order field, select a specific MO if the request is addressed to an issue.
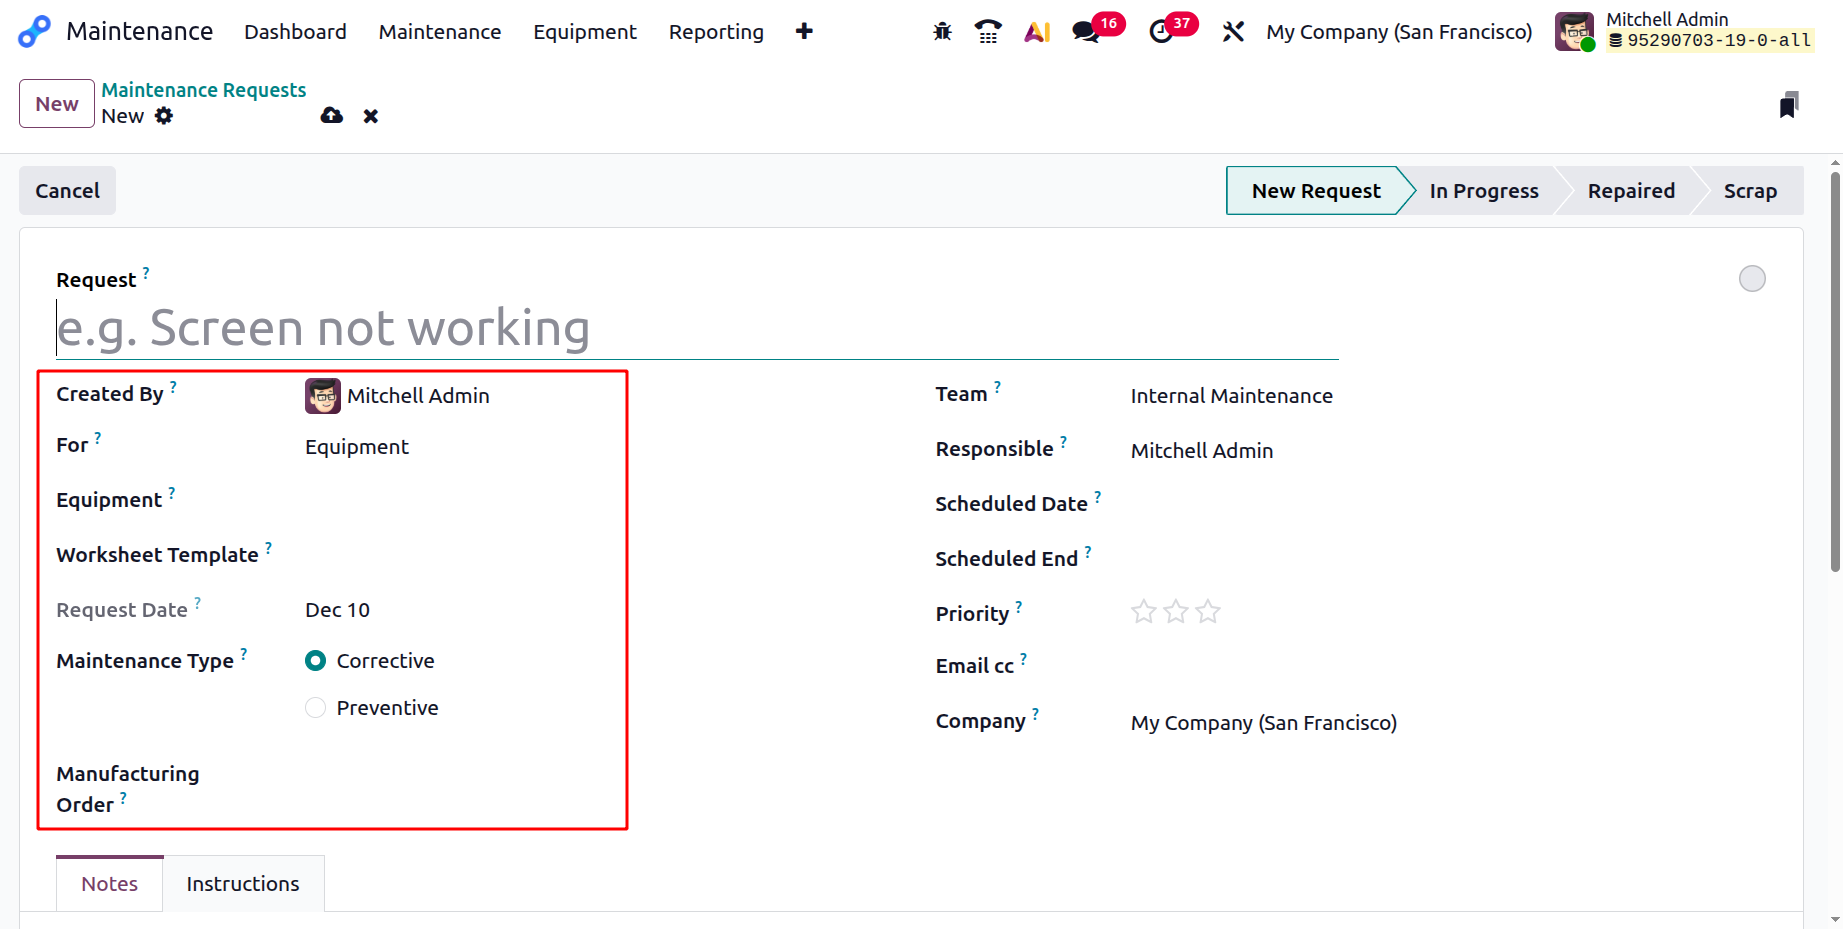
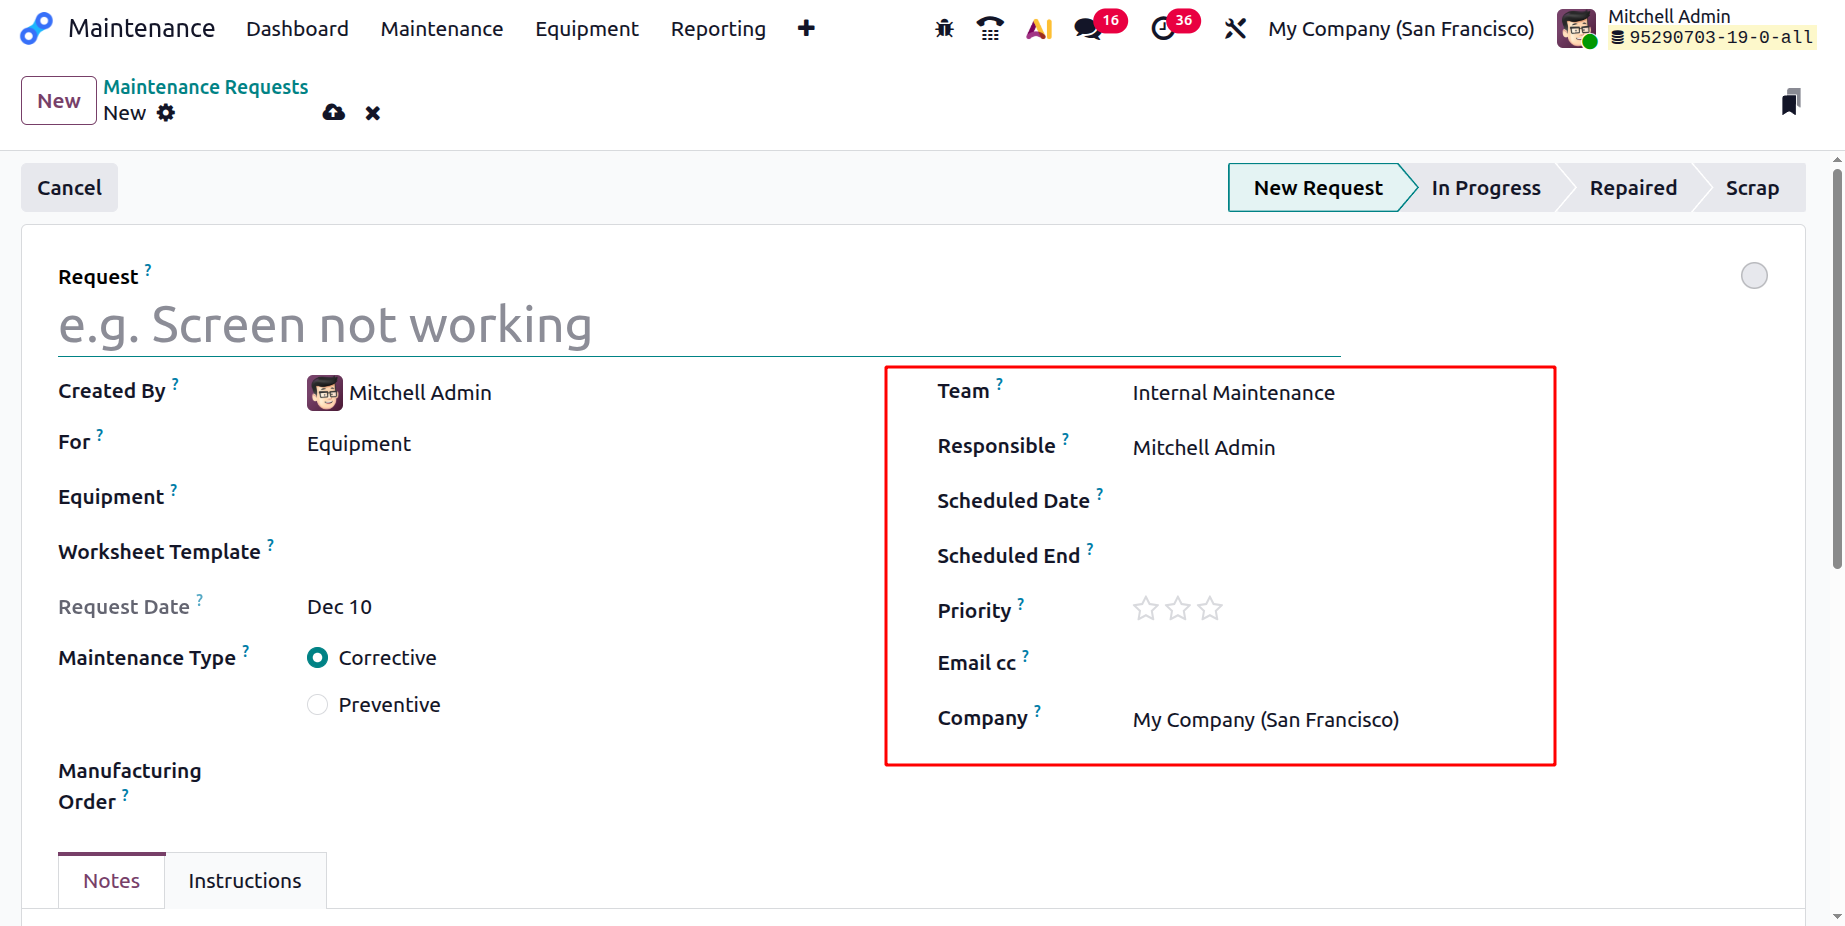
Select the maintenance team responsible for managing requests in the Team field. Choose the appropriate team member in the Responsible field to assign responsibility for the request. In the Scheduled Date field, add the date and time at which maintenance should take place. Specify the time when the maintenance will be completed in the Scheduled End field. In the Priority field, mark the star based on the importance of the maintenance request.
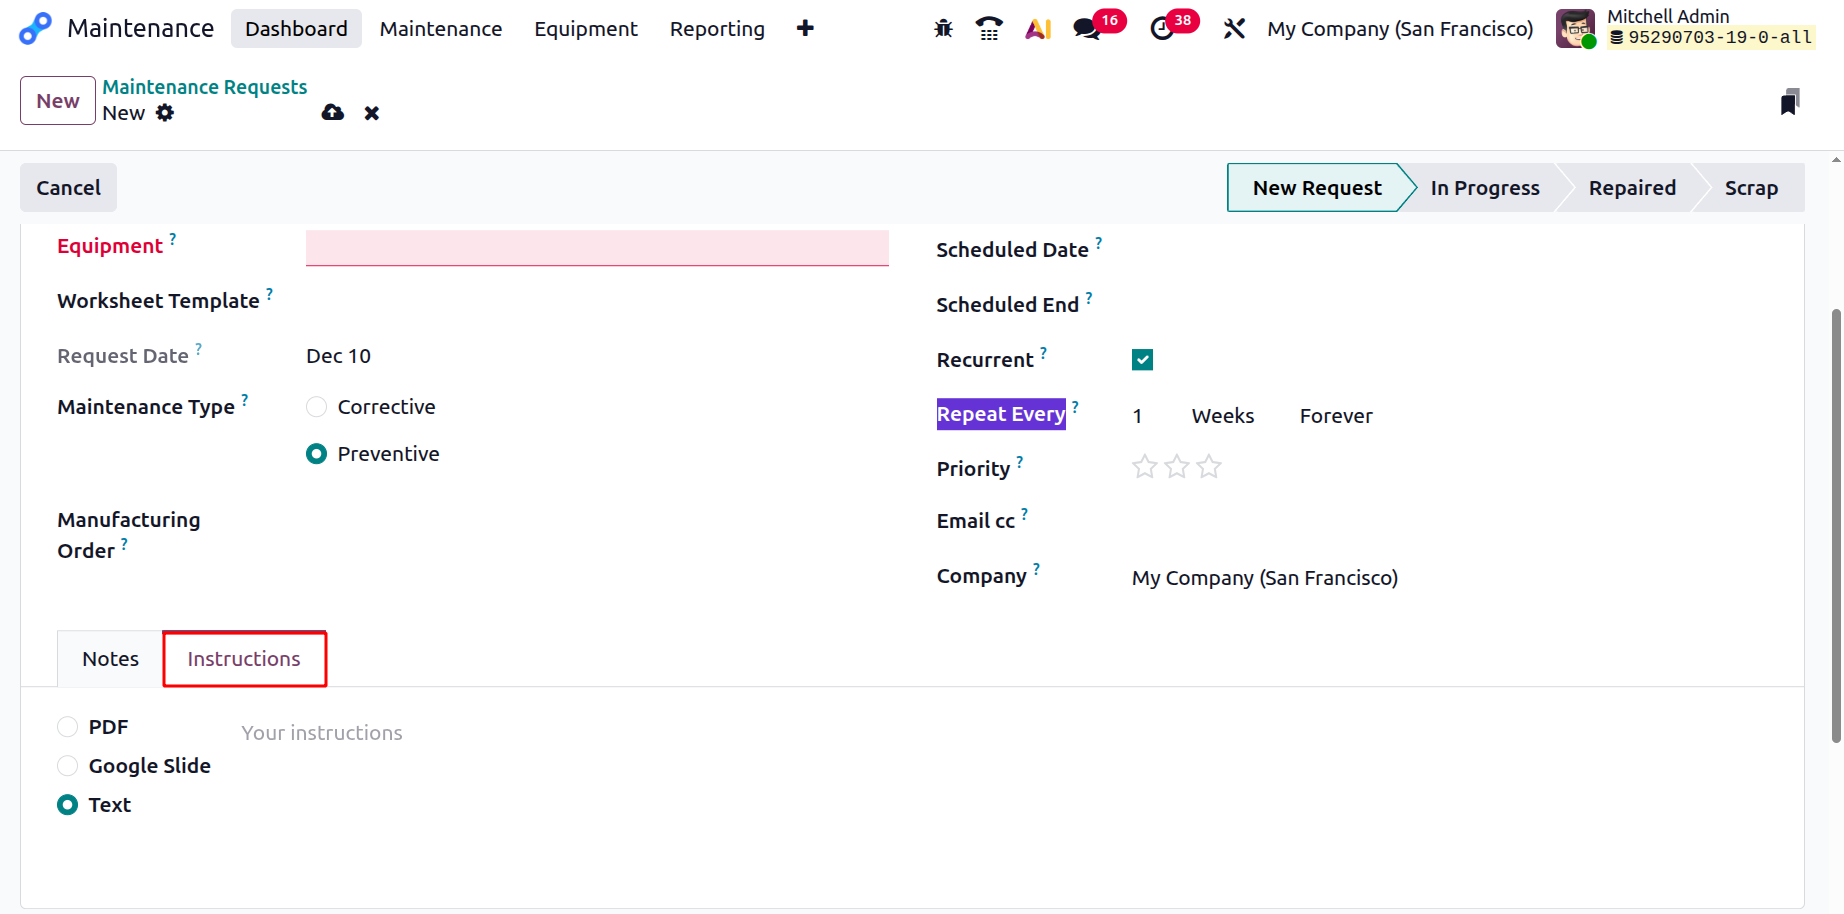
When you select the Maintenance Type as Preventive, you can view two additional fields: Recurrent and Repeat Every. Enable the Recurrent field to automatically create the same maintenance request. In the Repeat Every field, you can add how often the request should be repeated. After all the details are added, the maintenance request will move through the In Progress, Repaired, and Scrap stages.
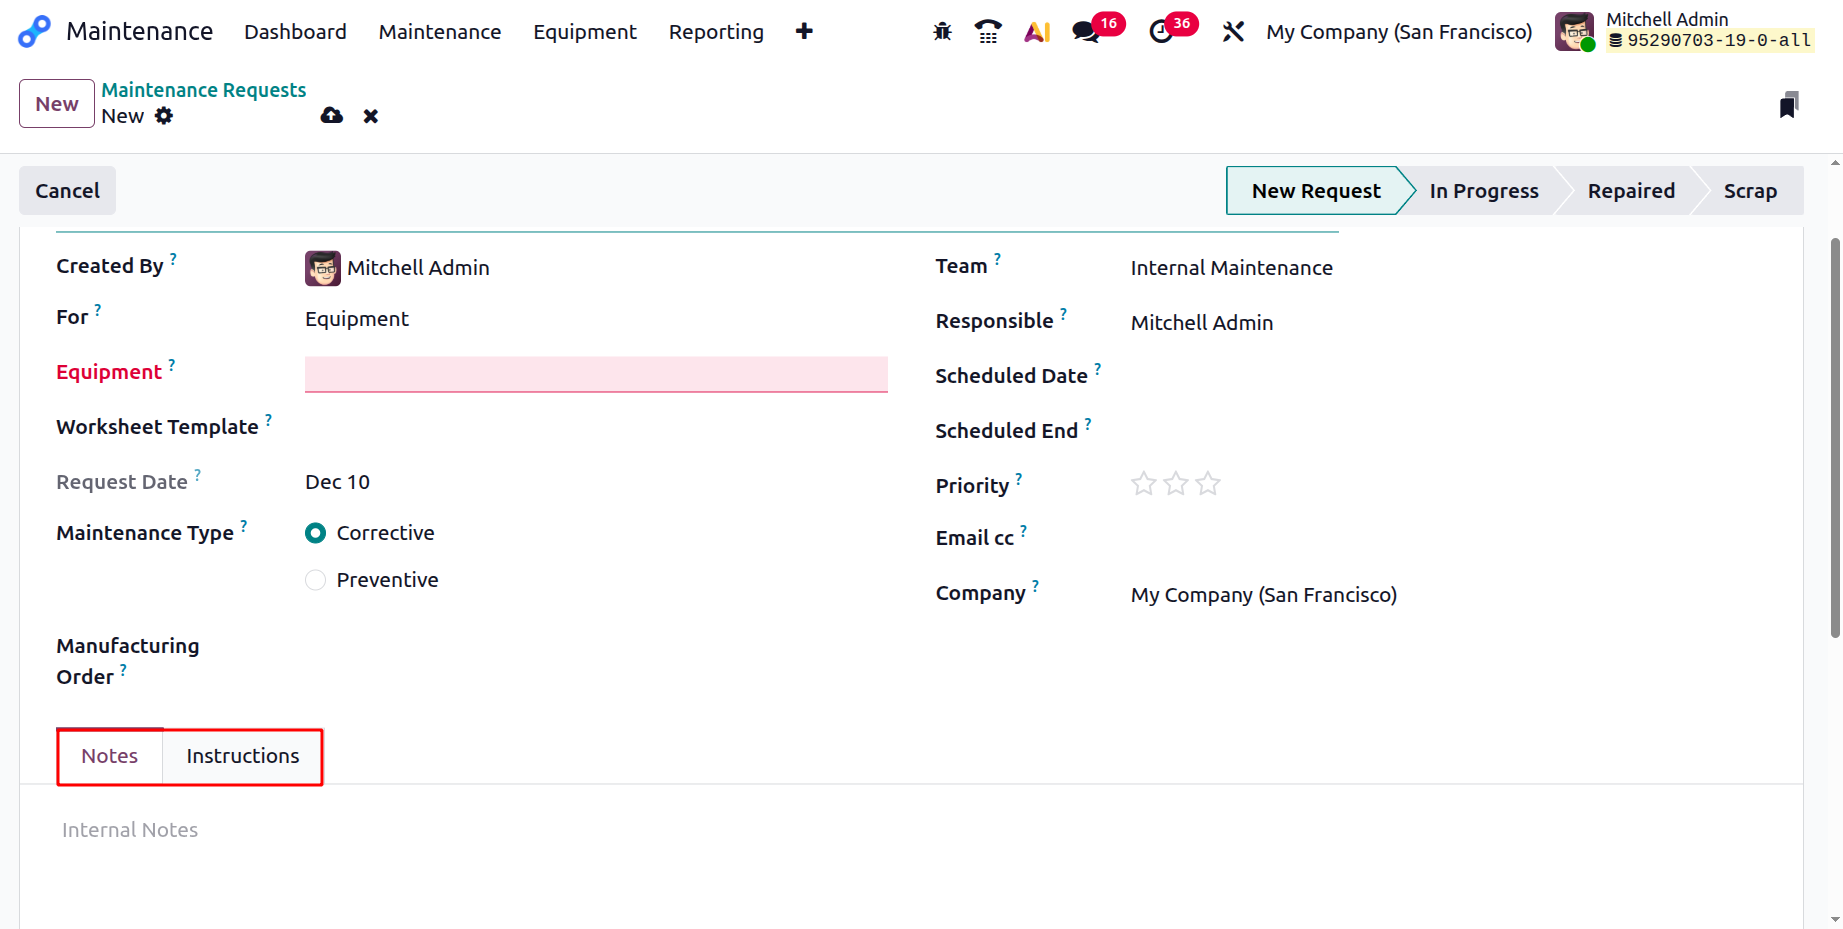
Here, you can view two tabs: Notes and Instructions. In the Notes field, add short information about the maintenance request.
Under the Instructions tab, you can add instructions for performing maintenance. You can also view three options:
- PDF:You can upload a file from the system by clicking the Upload your file button.
- Google Slide: You can add a Google Slide link of the instructions.
- Text: You can enter instructions in the field.
2.2 Maintenance Calendar:
The Maintenance Calendar displays all scheduled maintenance activities–both preventive and corrective–in a clear calendar view. It allows you to visualize tasks by day, week, or month, making planning easier and helping prevent conflicts.
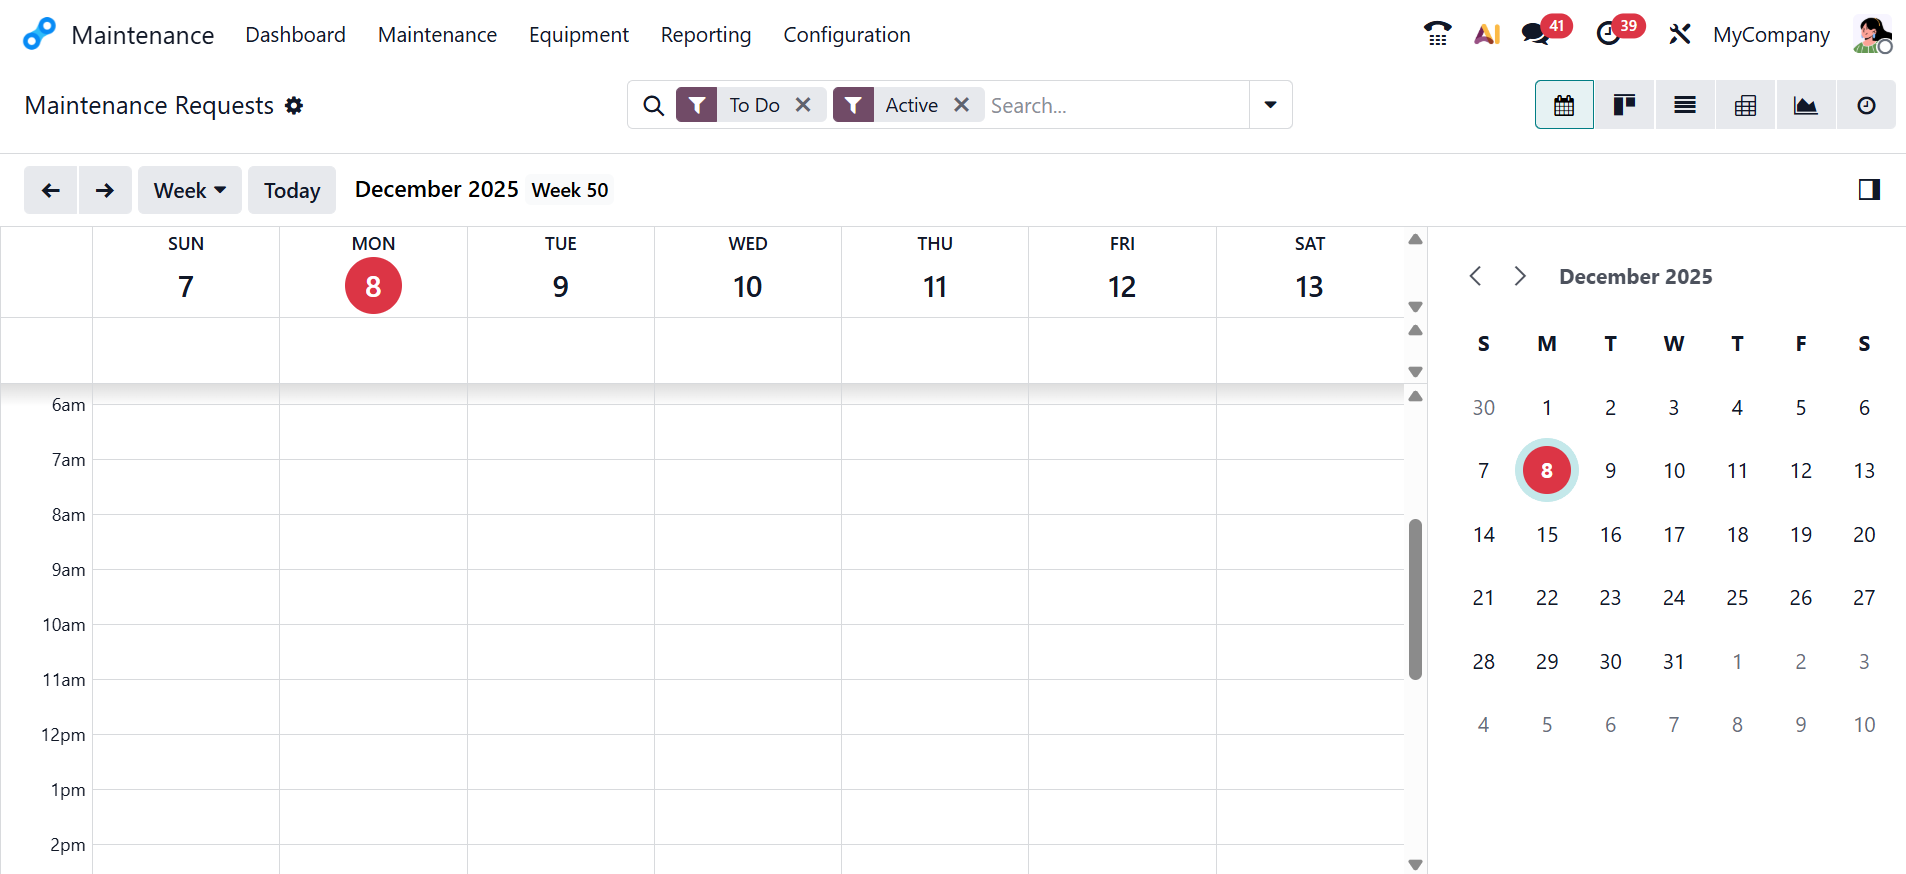
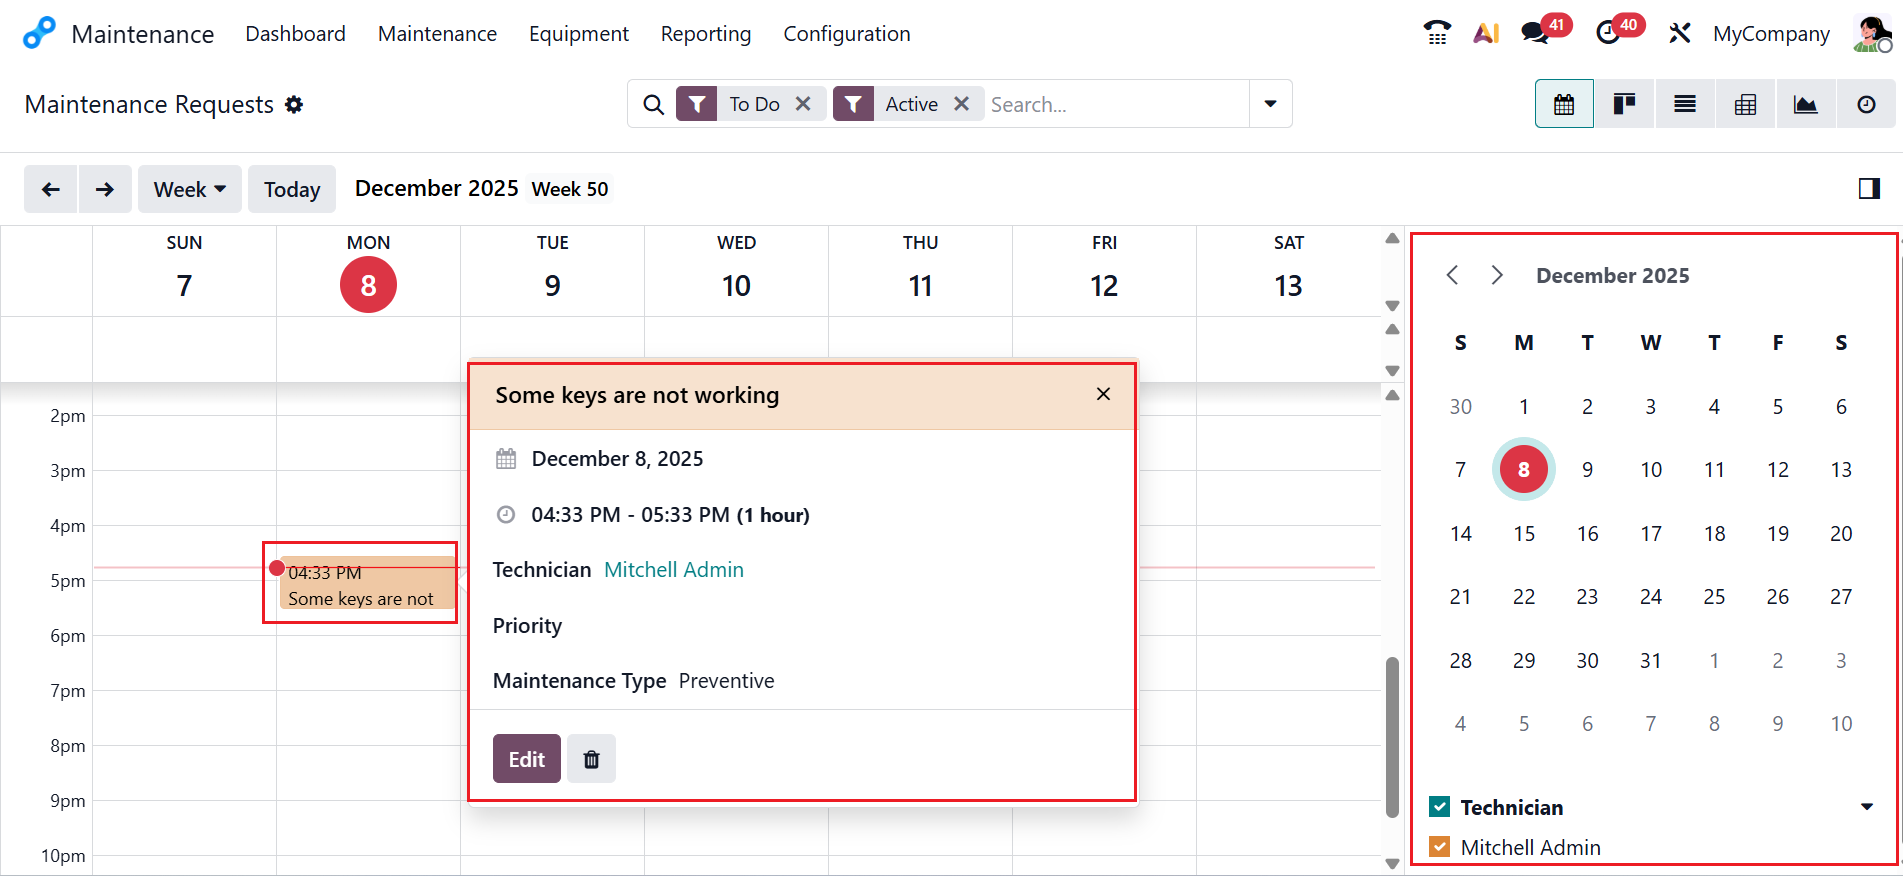
You can click on any date to view the scheduled task details. You can also edit or reassign functions from the calendar view, as shown below:
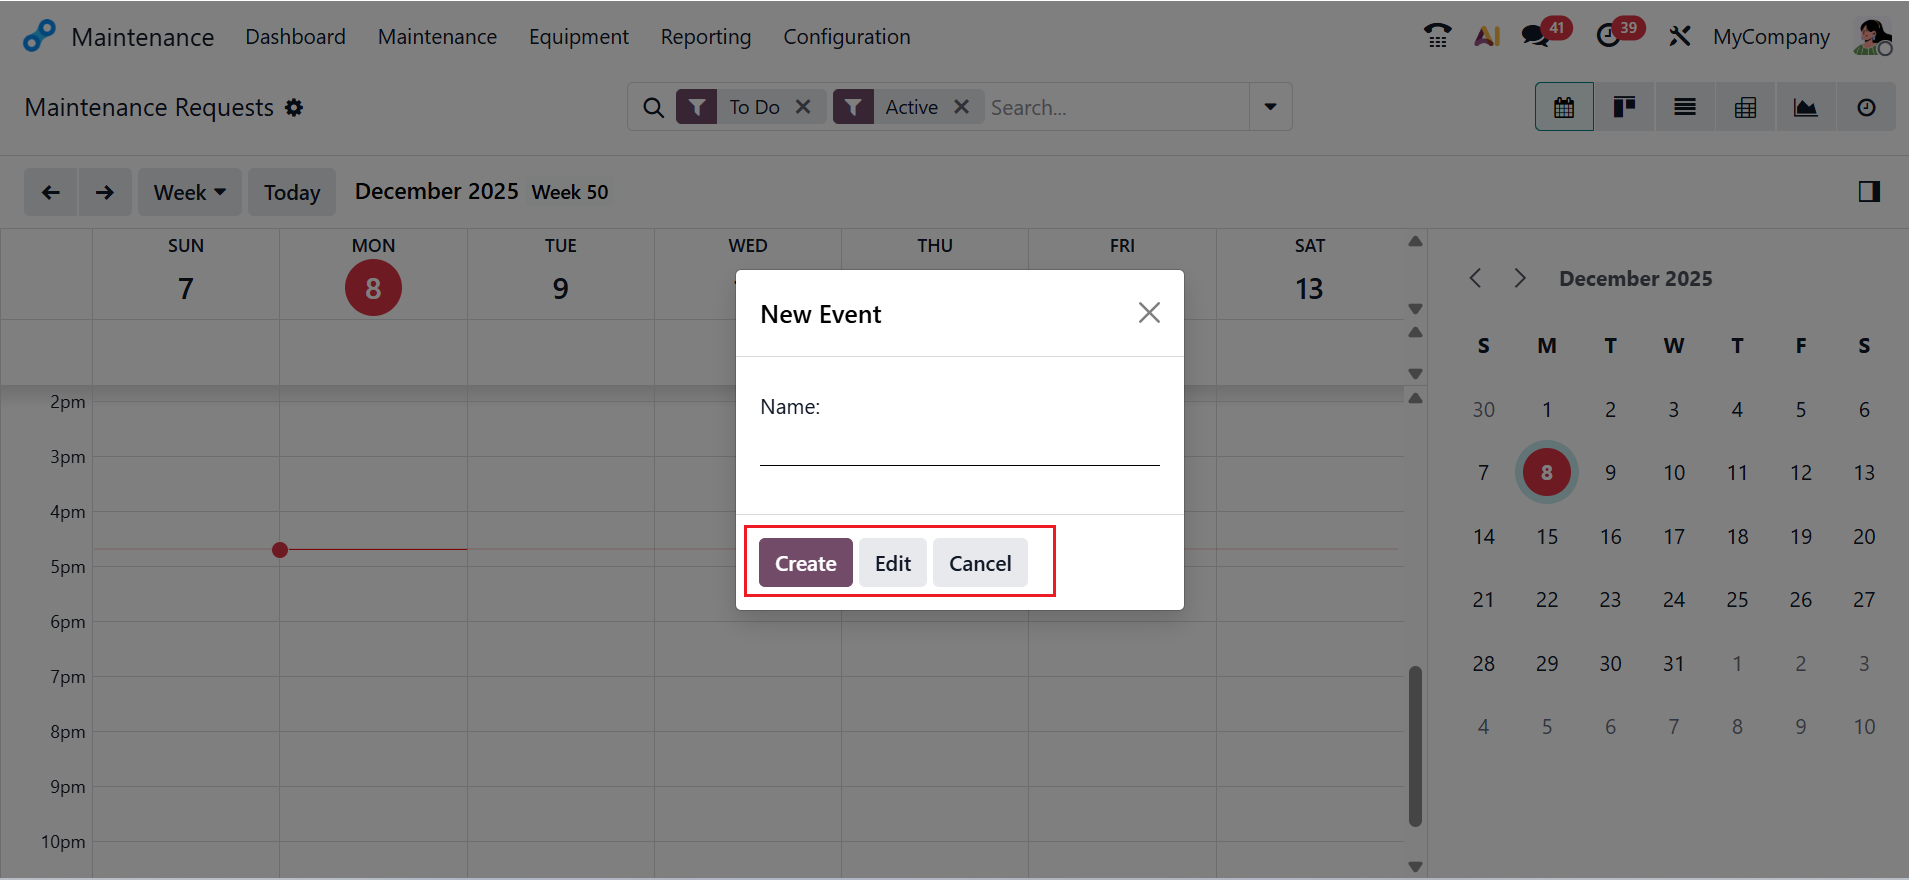
Here, you can create a new maintenance request by selecting a date from the calendar view. A pop-up screen will appear, and there you can add an Event Name and click on the Create button.
Once an event is created, use the Edit button to modify it. Then, you will move to the new window where you can view details of the maintenance request as shown below: