Equipment:
The Equipment menu in Odoo 19 lists all the machines, tools, devices, and assets a company maintains and tracks in the maintenance module. The Equipment menu has two options: Work Centers and Machine & Tools.
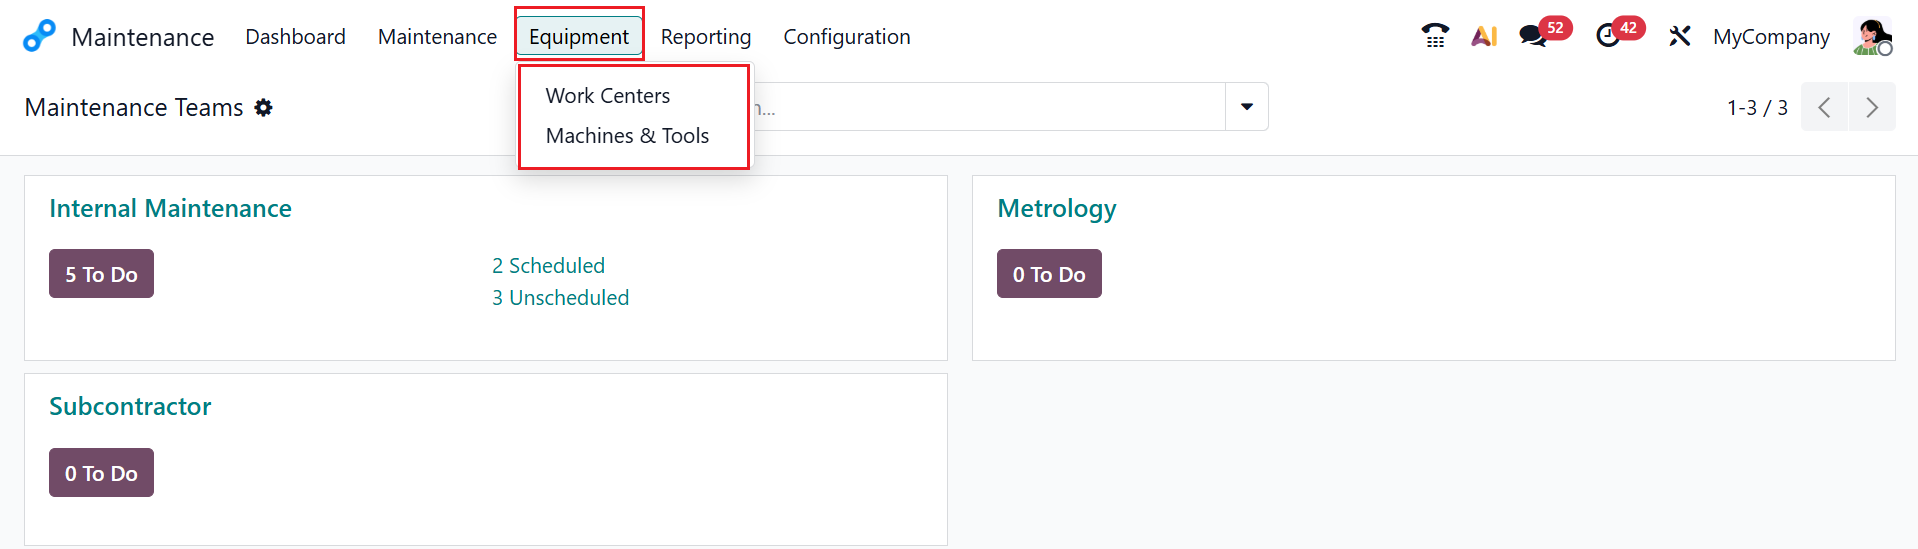
1.1 Work Centers:
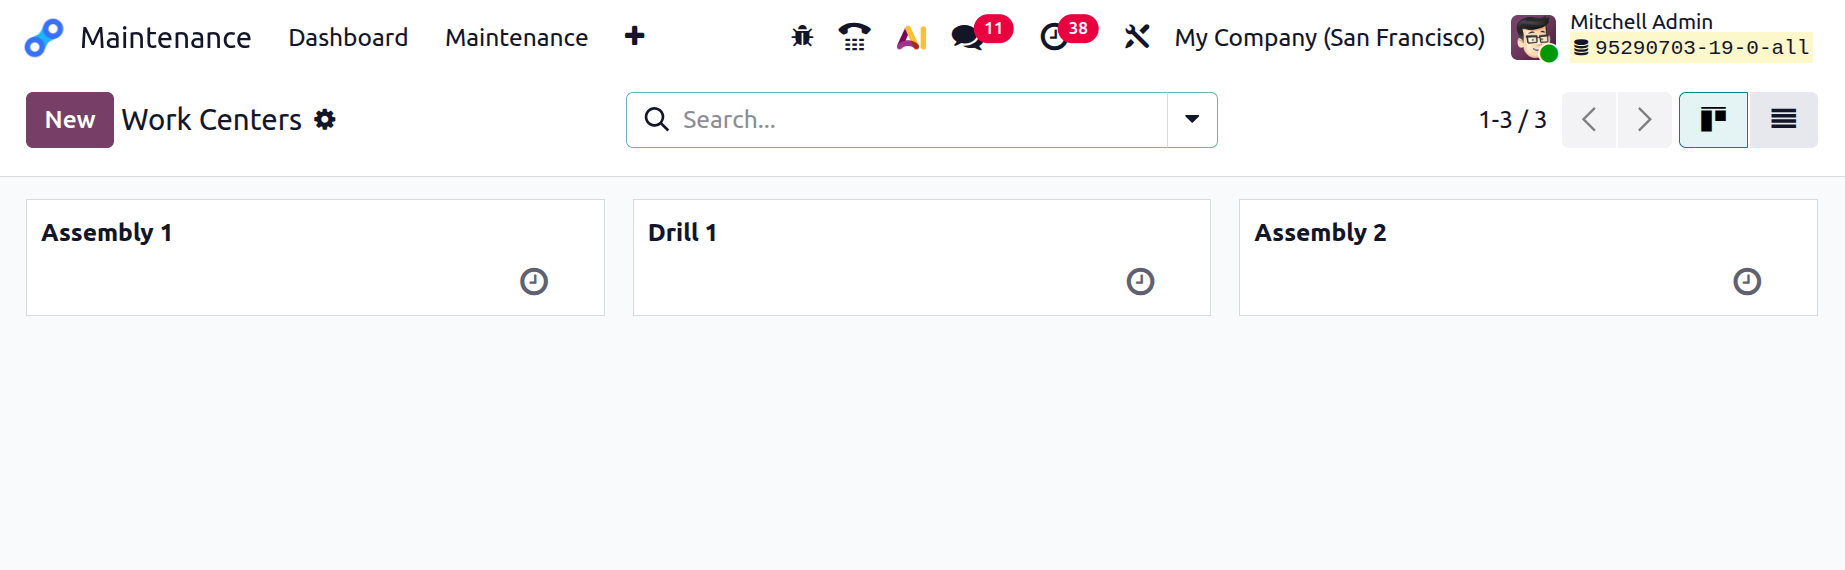
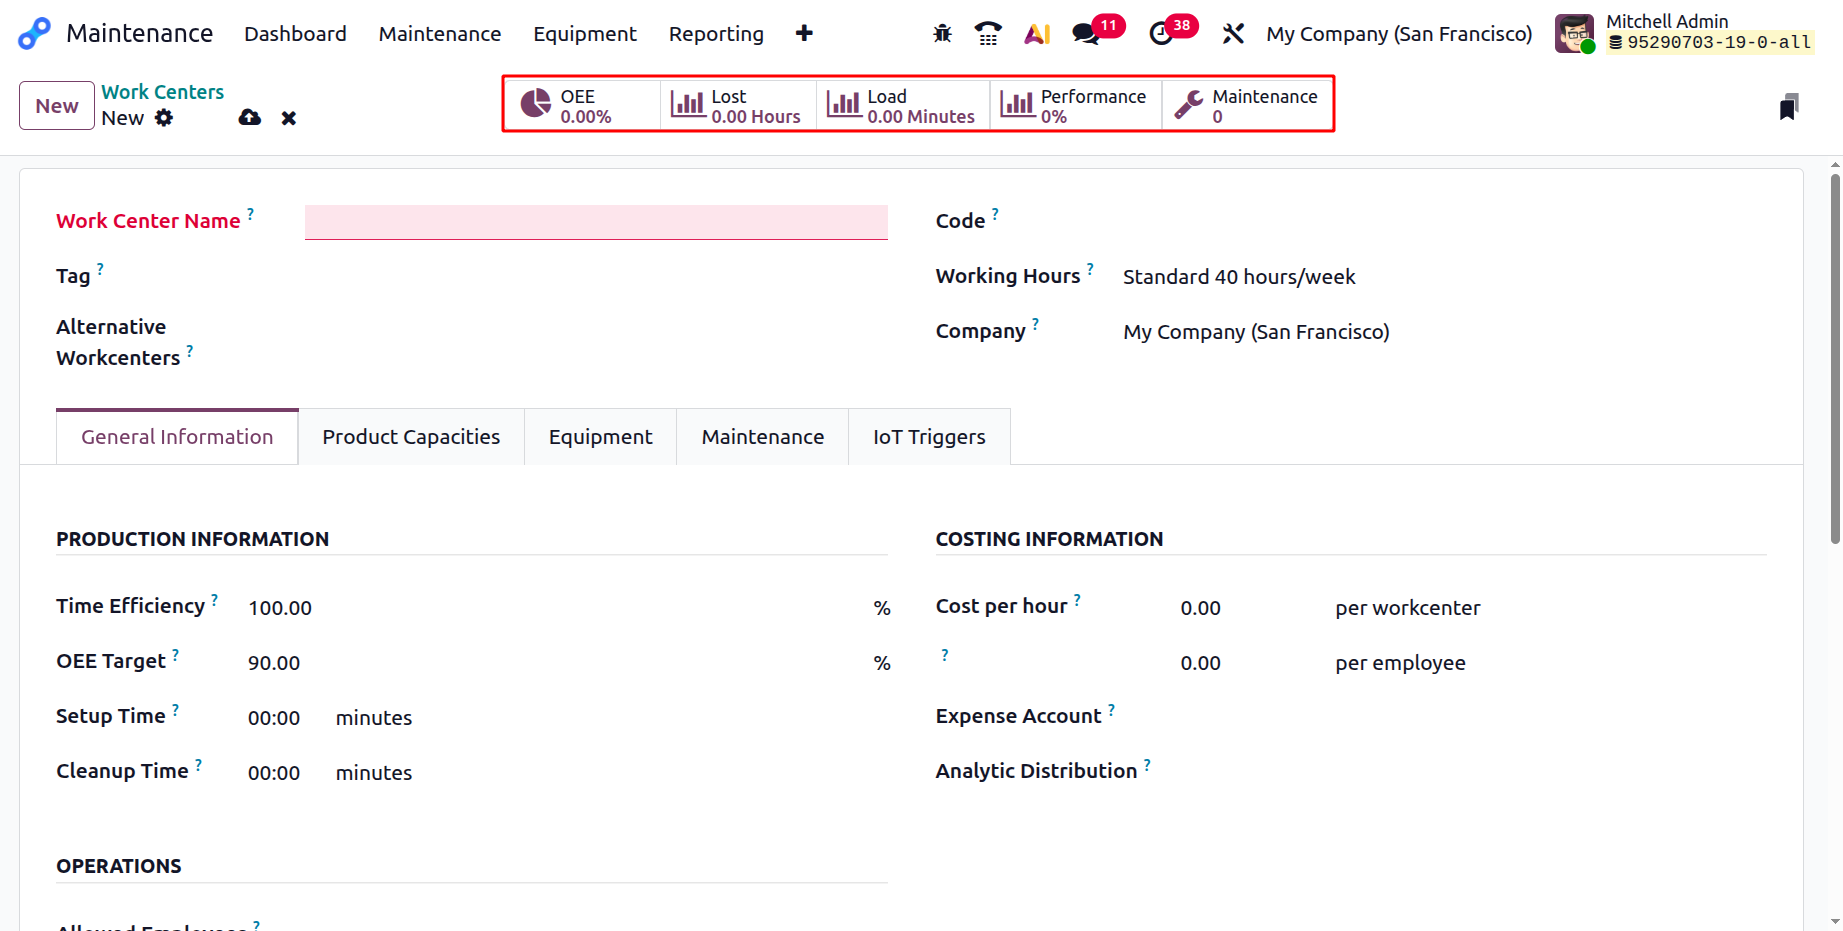
A Work Center in Odoo 19 is a specific production area or machine group where manufacturing operations take place and are tracked. In the work center dashboard, you can view an overview of all the available work centers. To create a new work center, click on the New button as shown below:
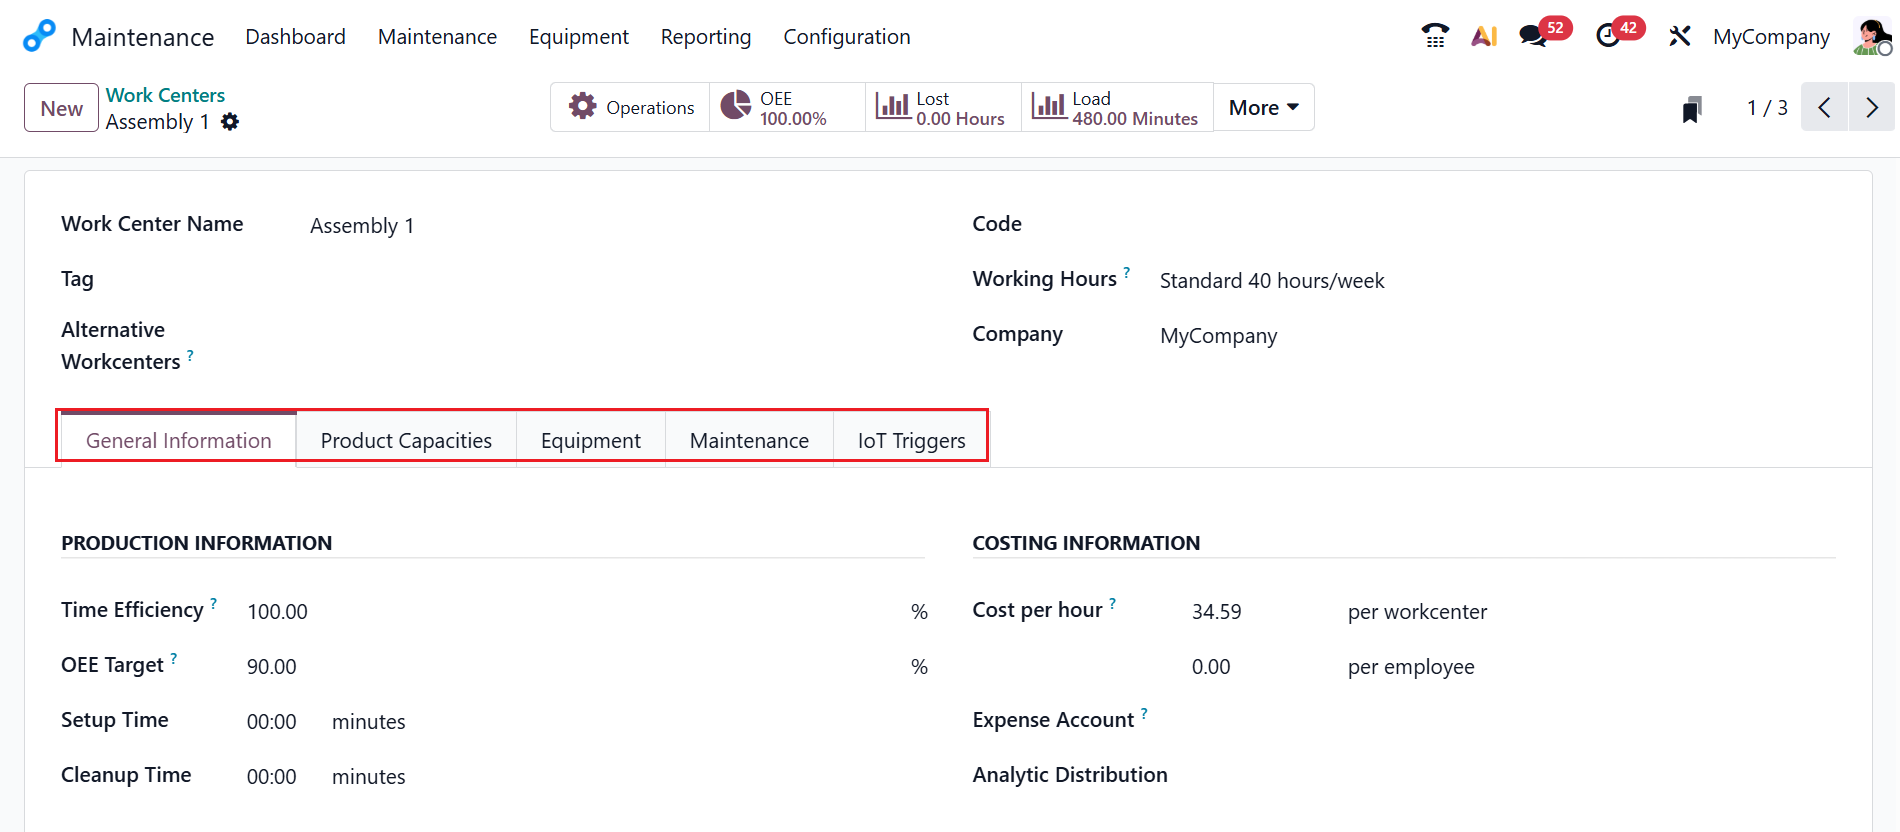
Here, you can edit the details of the work center, such as Work Center Name, Tag, Code, Alternative Workcenters, Working Hours, and Company. The Work Center has five tabs: General Information, Product Capacities, Equipment, Maintenance, and IoT Triggers.
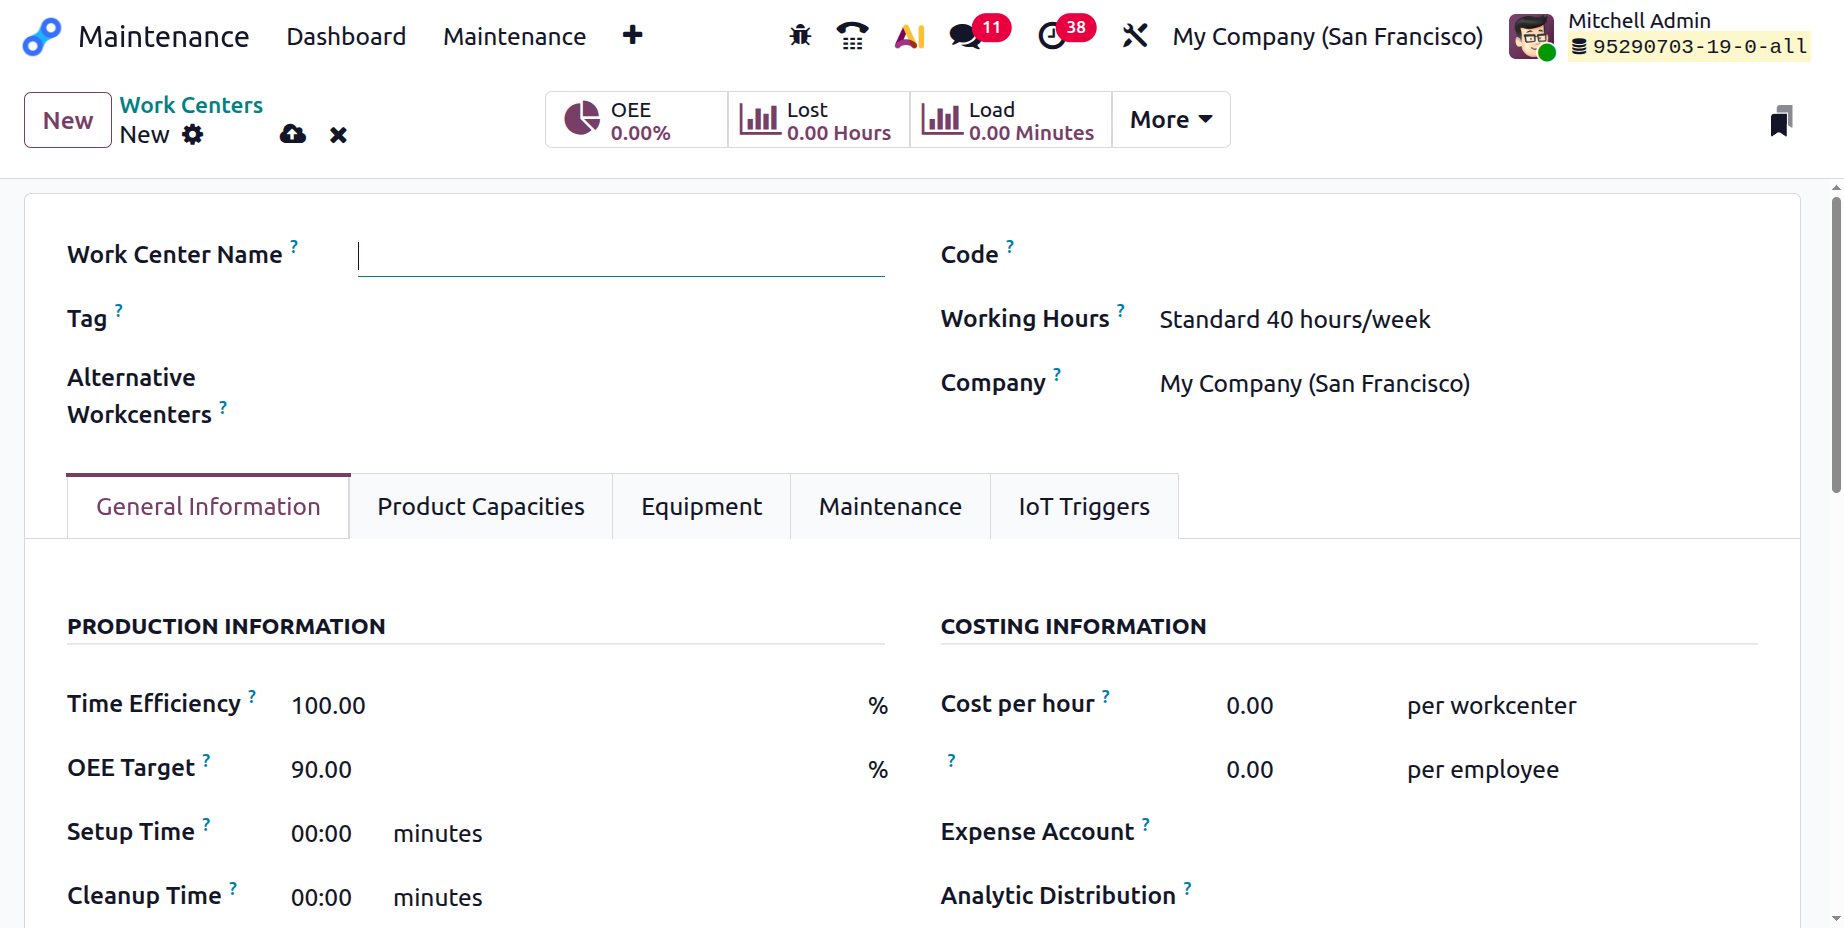
Under the General Information tab, the Time Efficiency field is used to calculate the expected duration of a work order. The OEE Target field shows the overall equipment efficiency in percentage. The Setup Time allows you to add the time needed to prepare a work center before production starts. The Cleanup Time will allow you to add the necessary time to tidy up and reset the machine after the operation is complete.
In the Cost per hour field, add the hourly processing cost. You can add an account when the manufacturing order is marked as done in the Expense Account field. You can also link an Analytical Account to track expenses related to materials and activities.

In the Allowed Employees field, you can add employees who are allowed to work, access, or perform tasks. Enter details about the work center in the Description field.
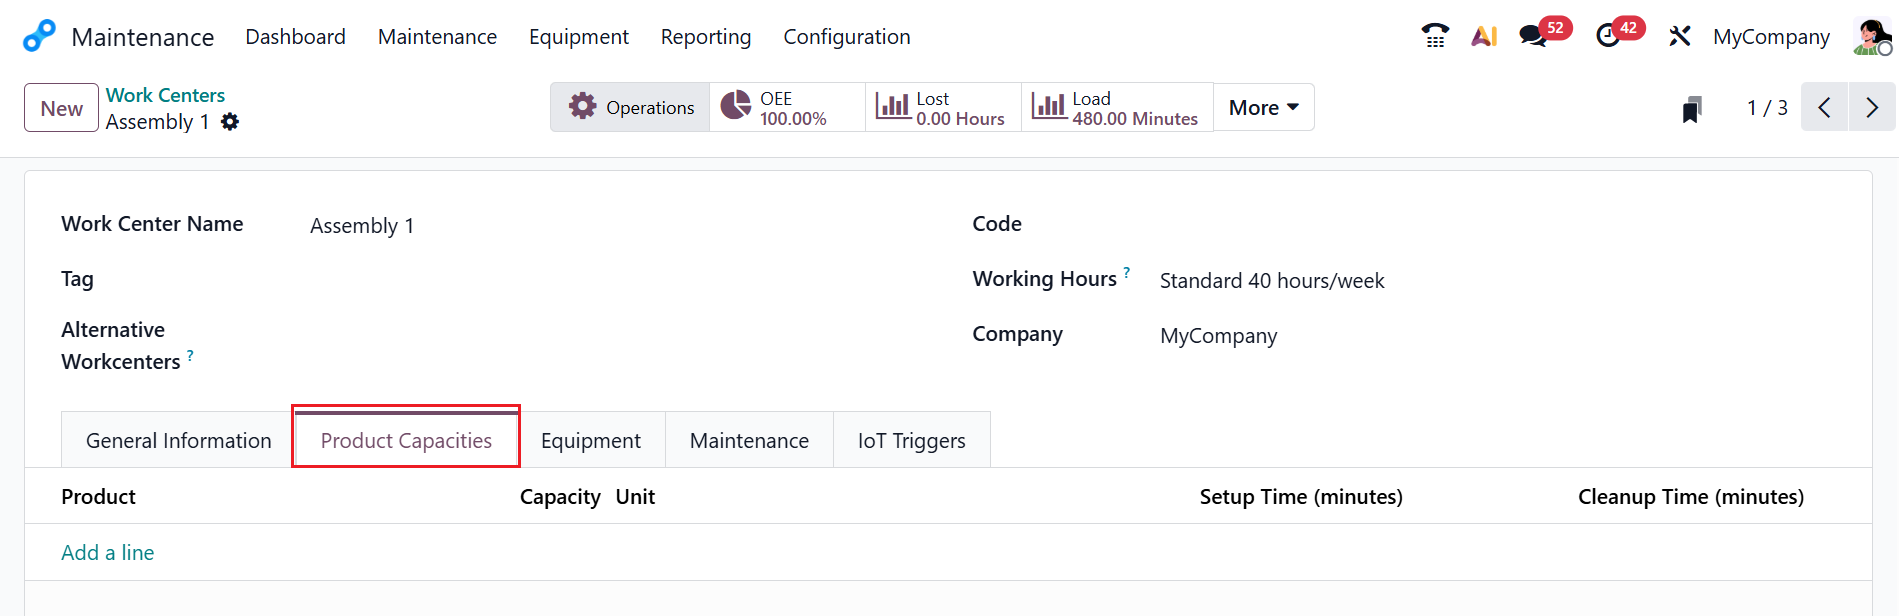
Under the Product Capacities field, you can define the maximum quantity of a product that a work center can produce within a specific time. Click the Add a line button to enter details, including Product, Capacity, Unit, Setup Time, and Cleanup Time.
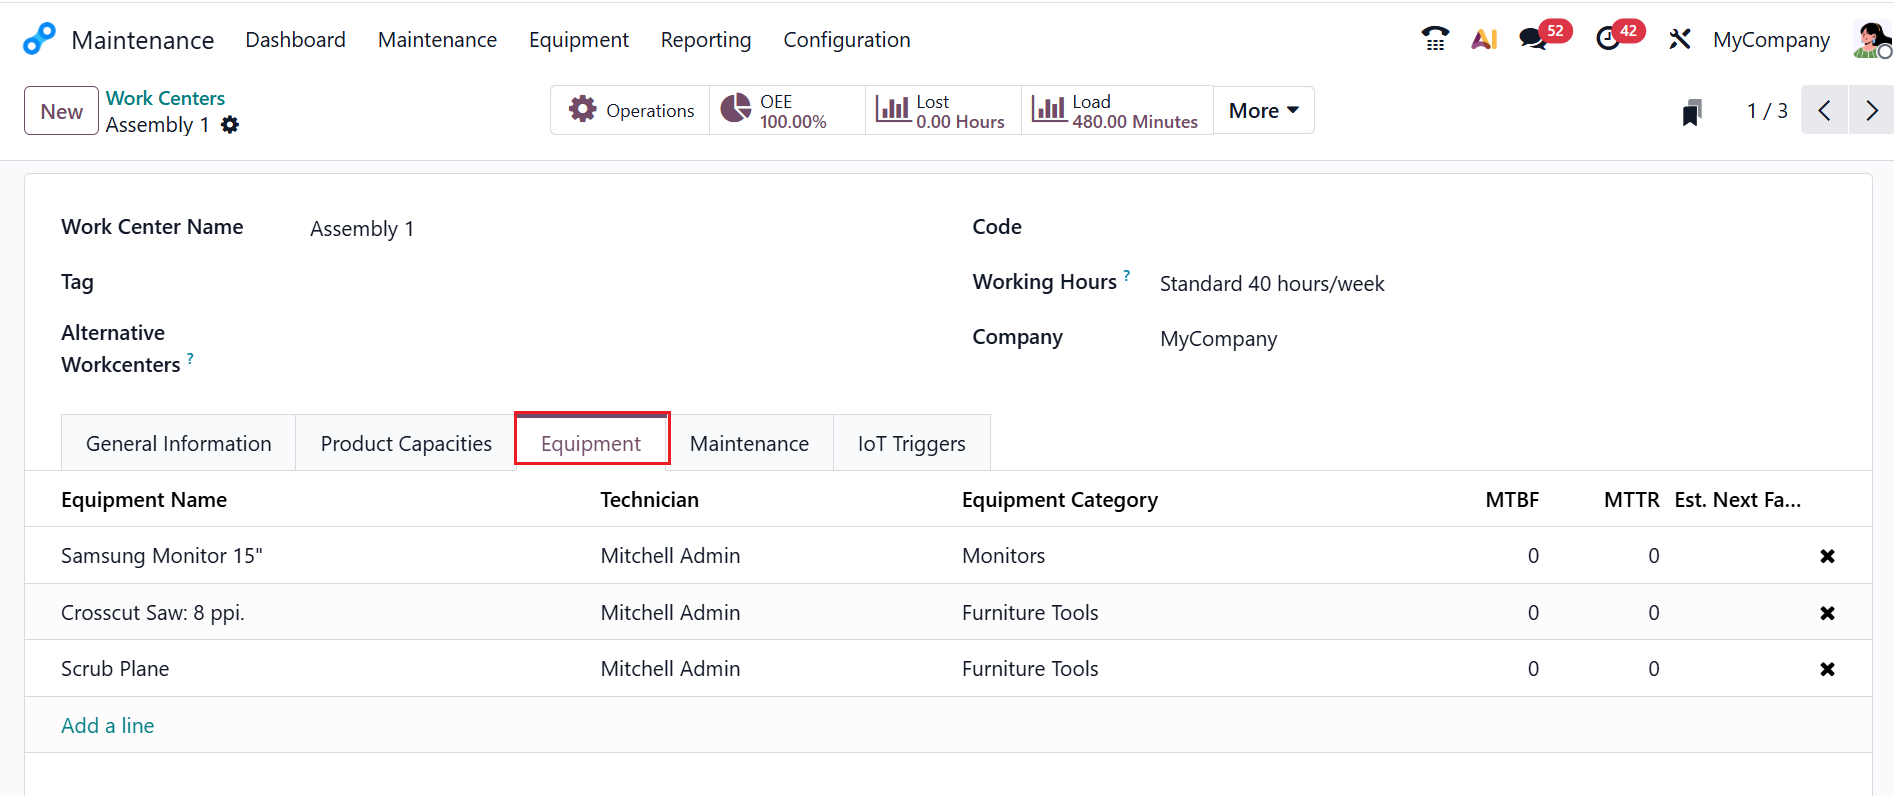
Under the Equipment tab, click the Add a line button to add the details such as Equipment Name, Technician, Equipment Category, MTBF, MTTR, and Est. Next Failure.
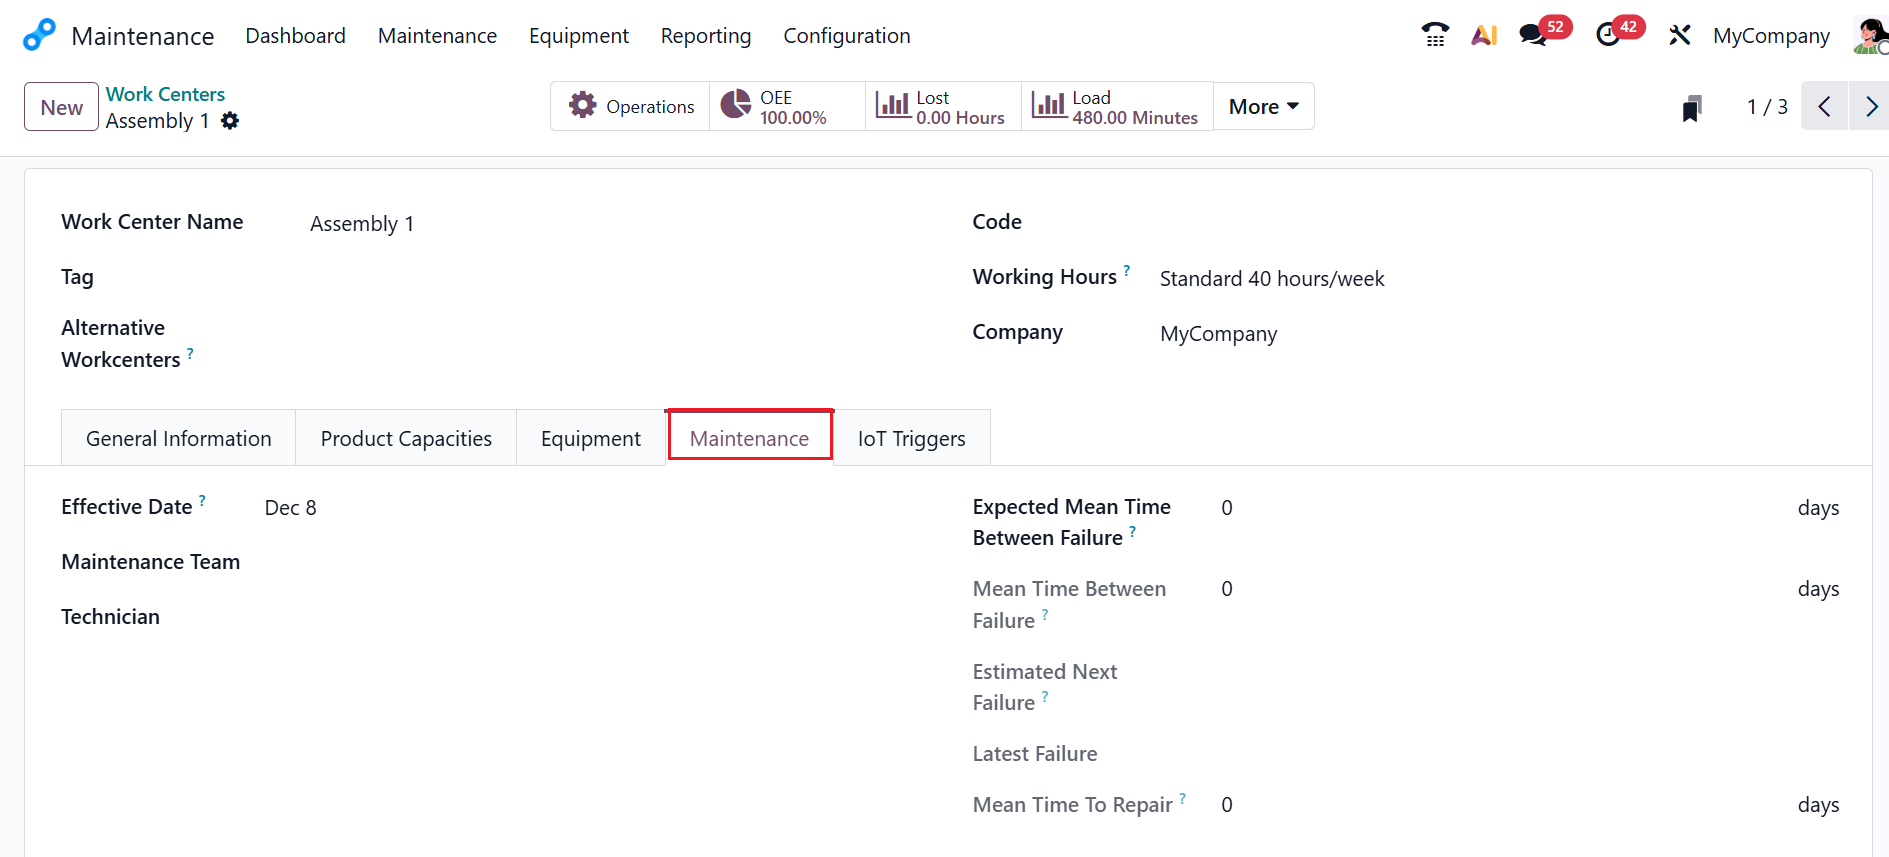
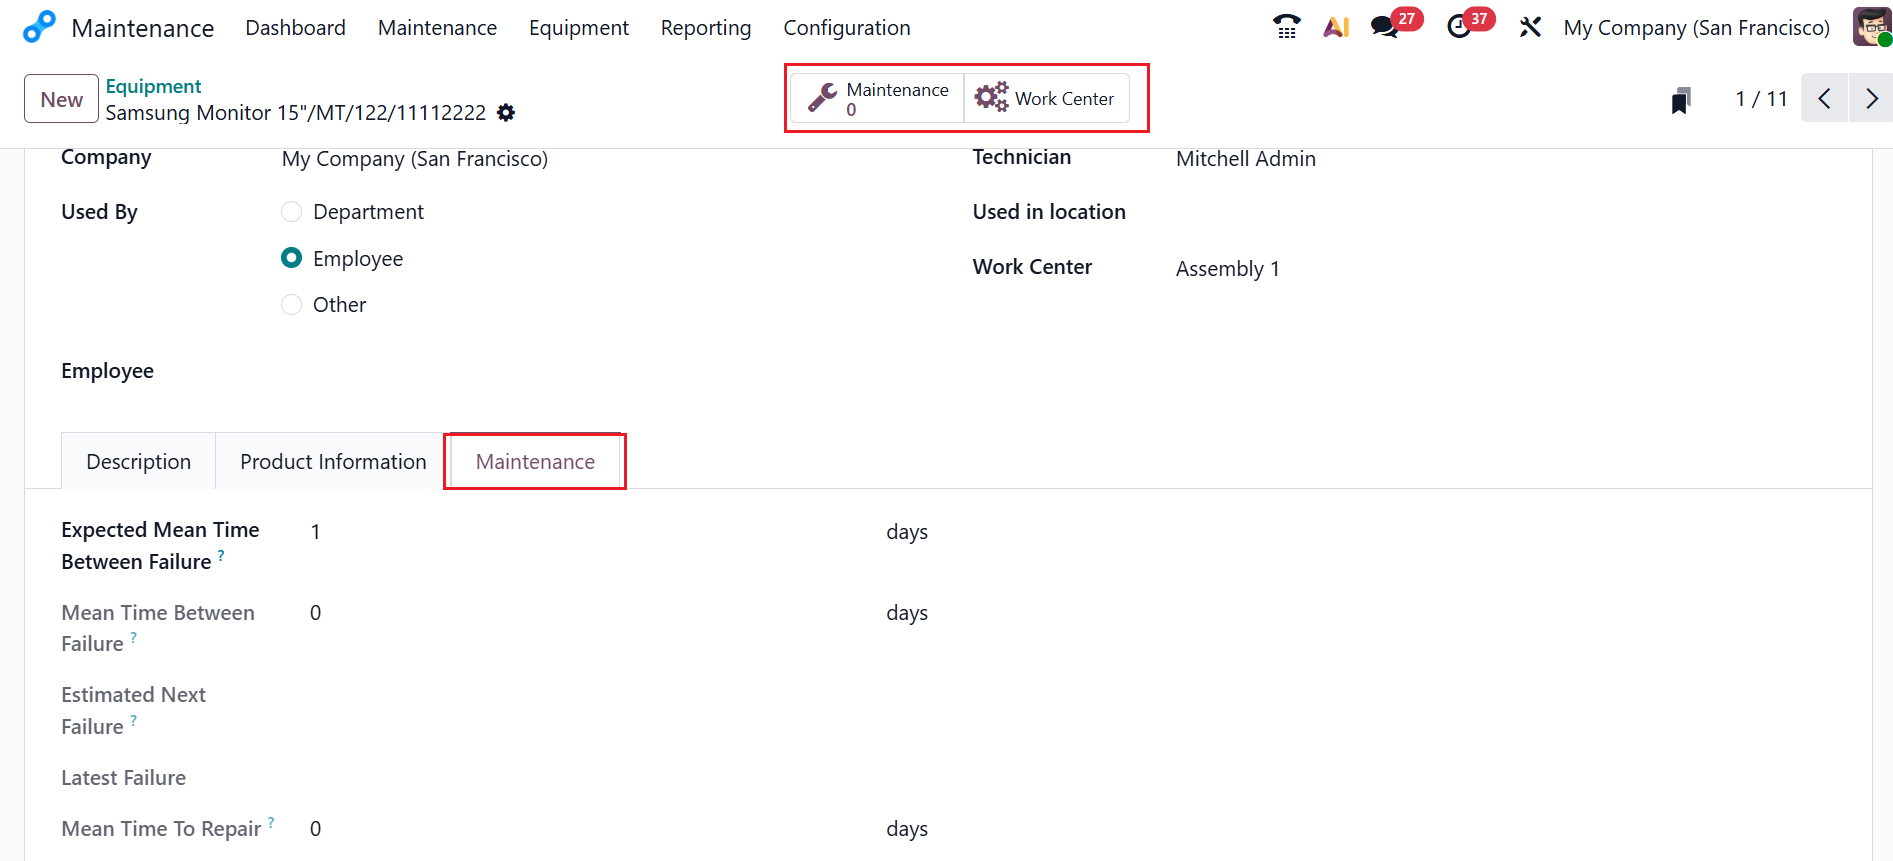
Under the Maintenance tab, you can add a date to compute the Mean Time Between Failure in the Effective Date field. Then, select a Maintenance Team and Technician. Enter the expected average operating days between failures in the Expected Mean Time Between Failure field. Use the Mean Time Between Failure field to specify the average number of days the equipment runs between failures. In the Estimated Next Failure field, update the estimated date of the equipment's next failure. The Latest Failure field shows the most recent date the equipment failed. In the Mean Time to Repair field, enter the equipment’s average repair time in days.
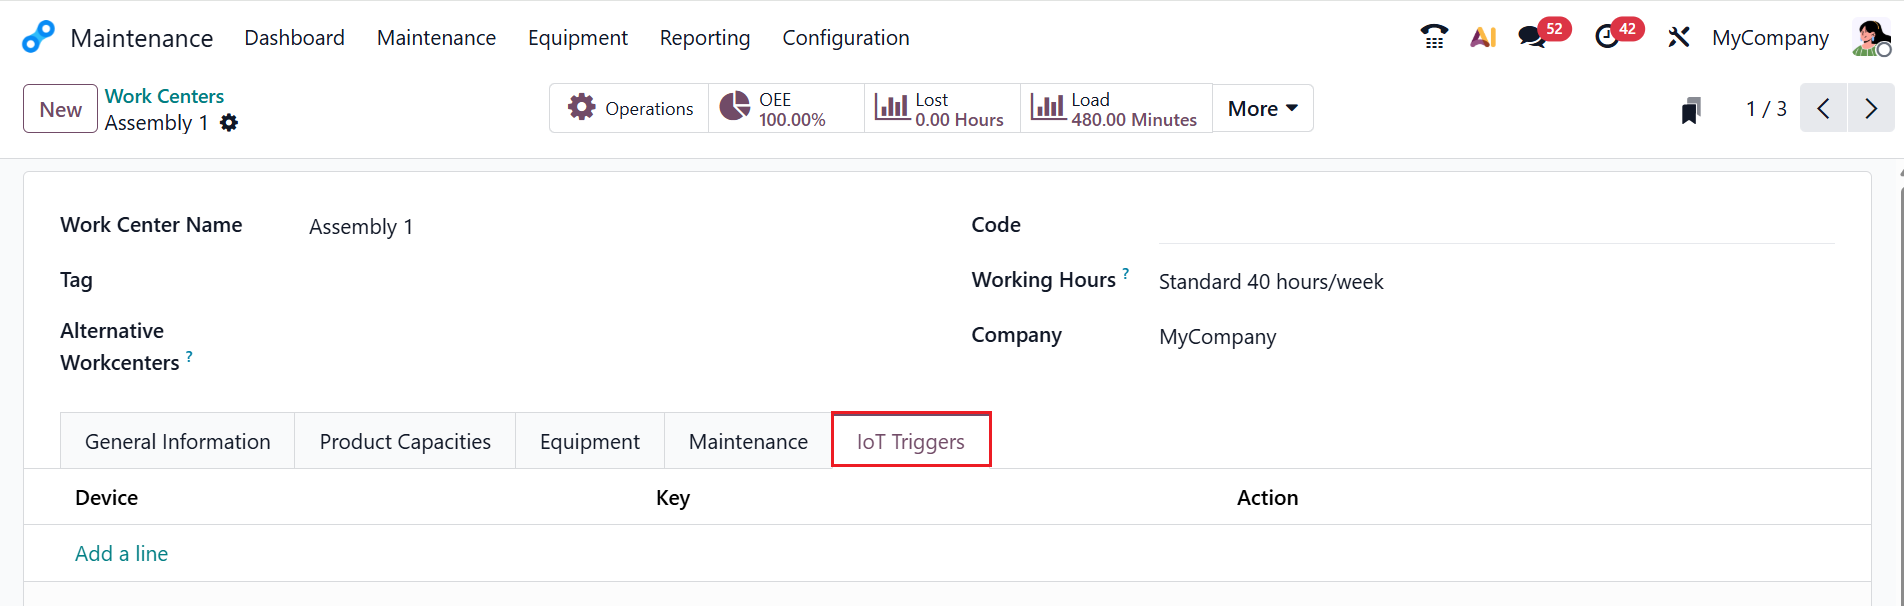
Under the IoT Triggers tab, click the Add a line button to enter details of the external devices, such as Device, Key, and Action.
To view insights into ongoing operations in work centers, use the smart tabs at the top of the form, as shown below. The smart tab includes Overall Equipment Effectiveness (OEE), Operations, Lost, Load, Performance, and Maintenance. By leveraging these features, manufacturers can ensure optimal use of their work centers and maintain high productivity levels.
1.2 Machines & Tools:
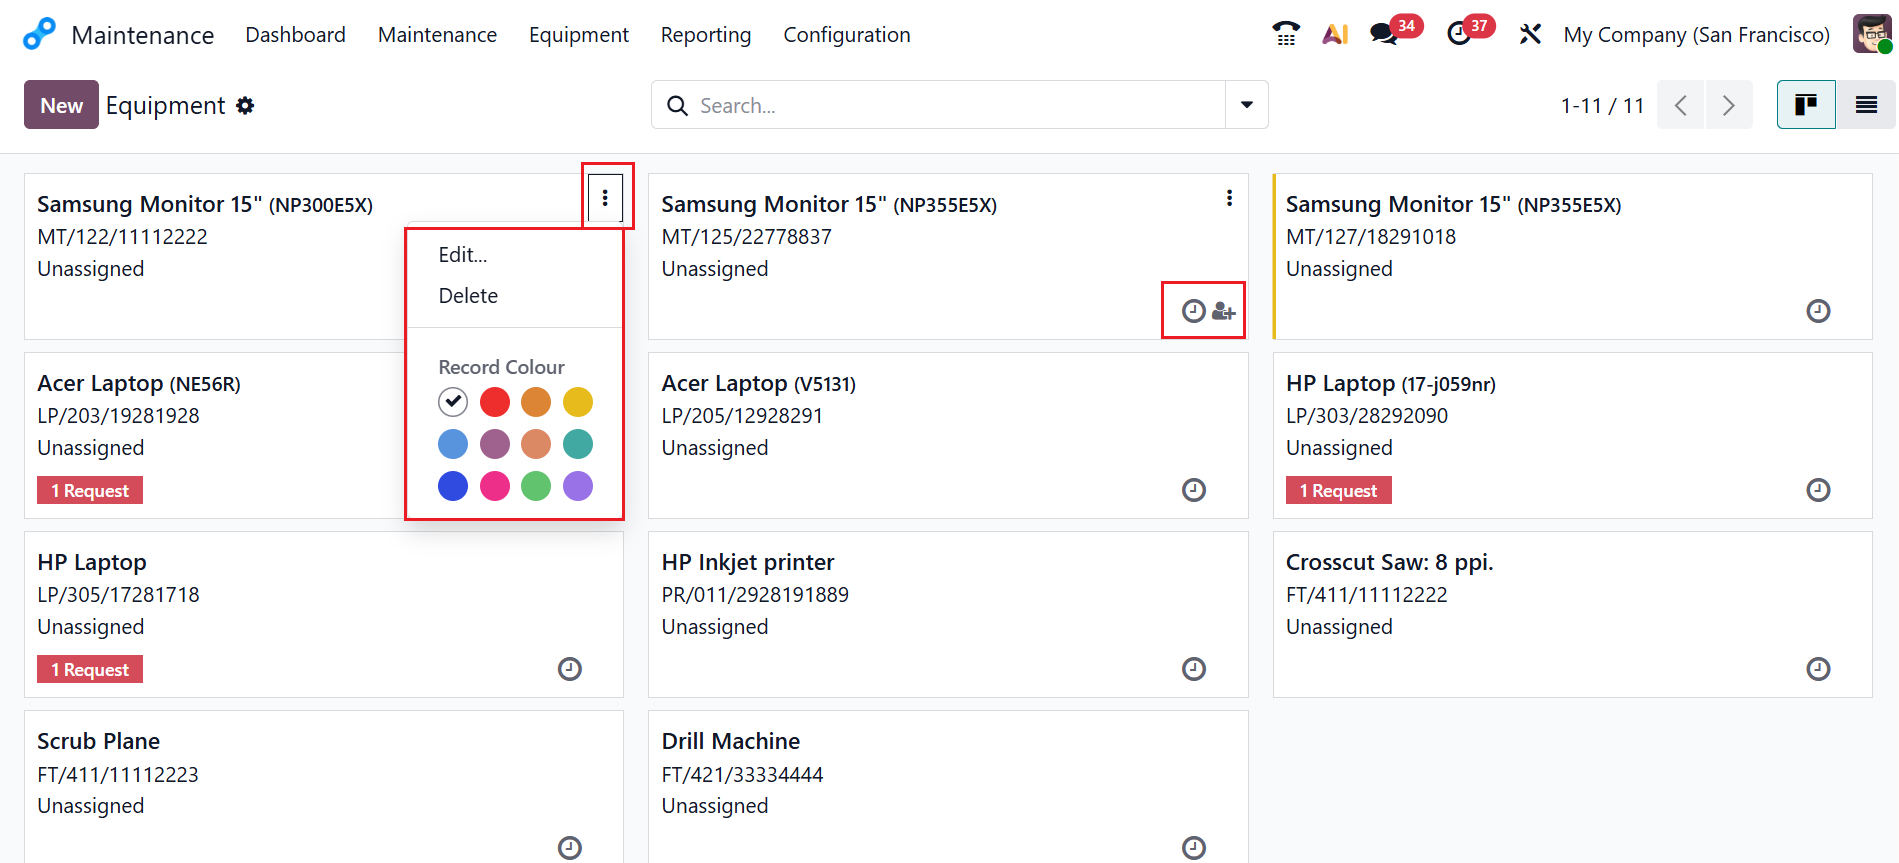
In Odoo 19, the Machine &Tools option shows a list of all maintenance equipment. The dashboard displays as either a Kanban or a List view. Here, each kanban card shows the equipment details, including model name, model number, assigned statuses, activities, and maintenance requests, as shown below. Click on the three-dotted line in each card to show the Edit, Delete, and Record Color options. The clock icon helps you schedule activities, and the assign icon helps you assign specific equipment to a responsible person.
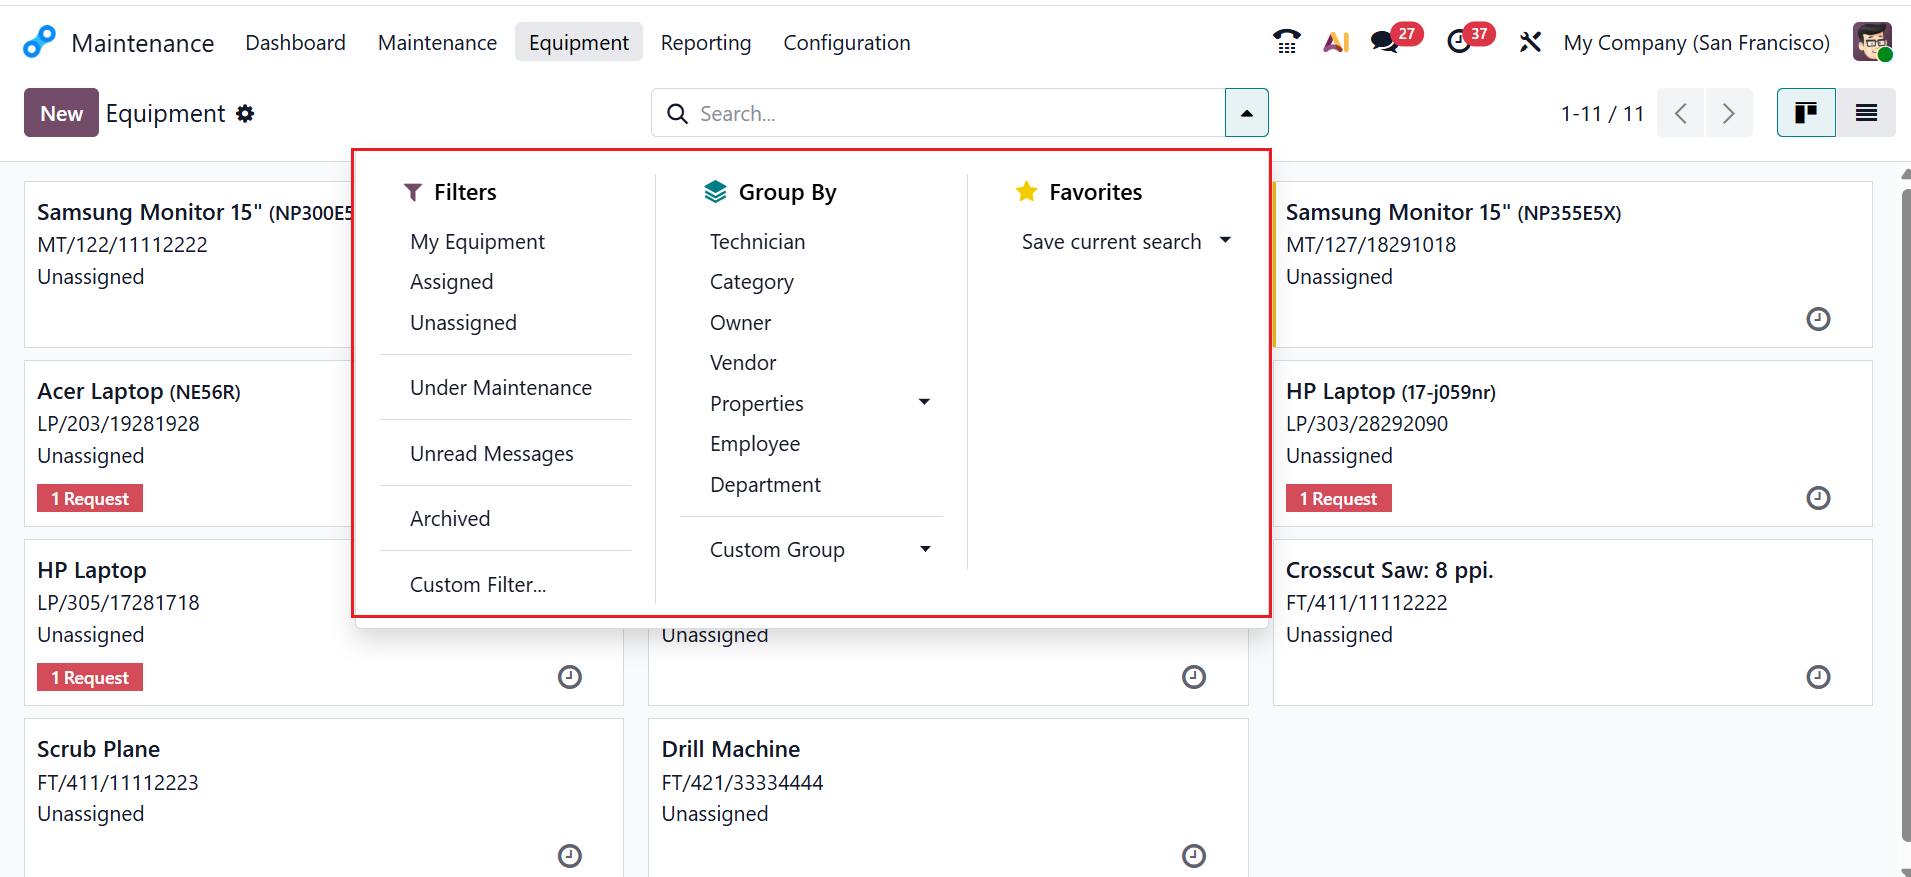
Click the drop-down menu in the search bar to see the options: Filters, Group By, and Favorites. Under Filters, you can choose from options such as My Equipment, Assigned, Unassigned, Under Maintenance, Unread Messages, Archived, and Custom Filter. The Group By section shows the options, such as Technician, Category, Owner, Vendor, Properties, Employee, Department, and Custom group. The favorites section helps save searches for future use.
Use the New button to create a new equipment record. Then, you can add the equipment details, such as Equipment Name, Equipment Category, Company, Used By (select either Department, Employee, or Other), Employee, Maintenance Team, Technician, Assigned Date, Scrap Date, Used in Location, and Work Center, as shown below. The equipment option has three tabs: Description, Product Information, and Maintenance. Use the Description tab to enter additional information about the equipment.
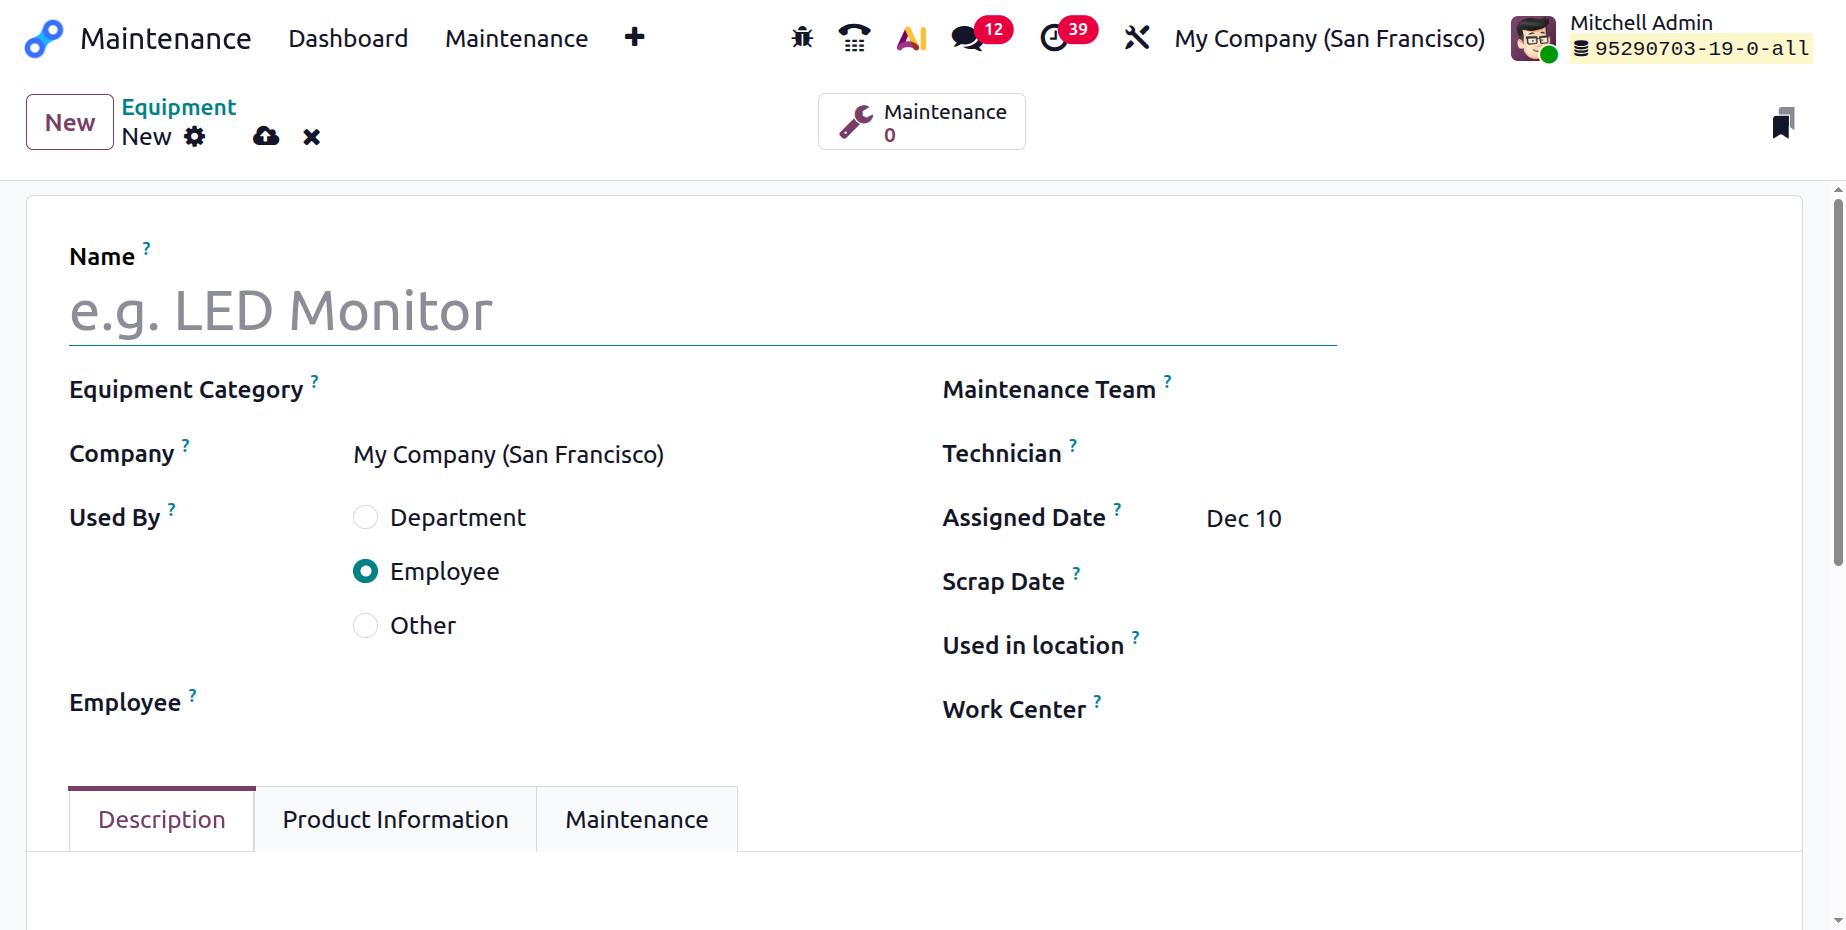
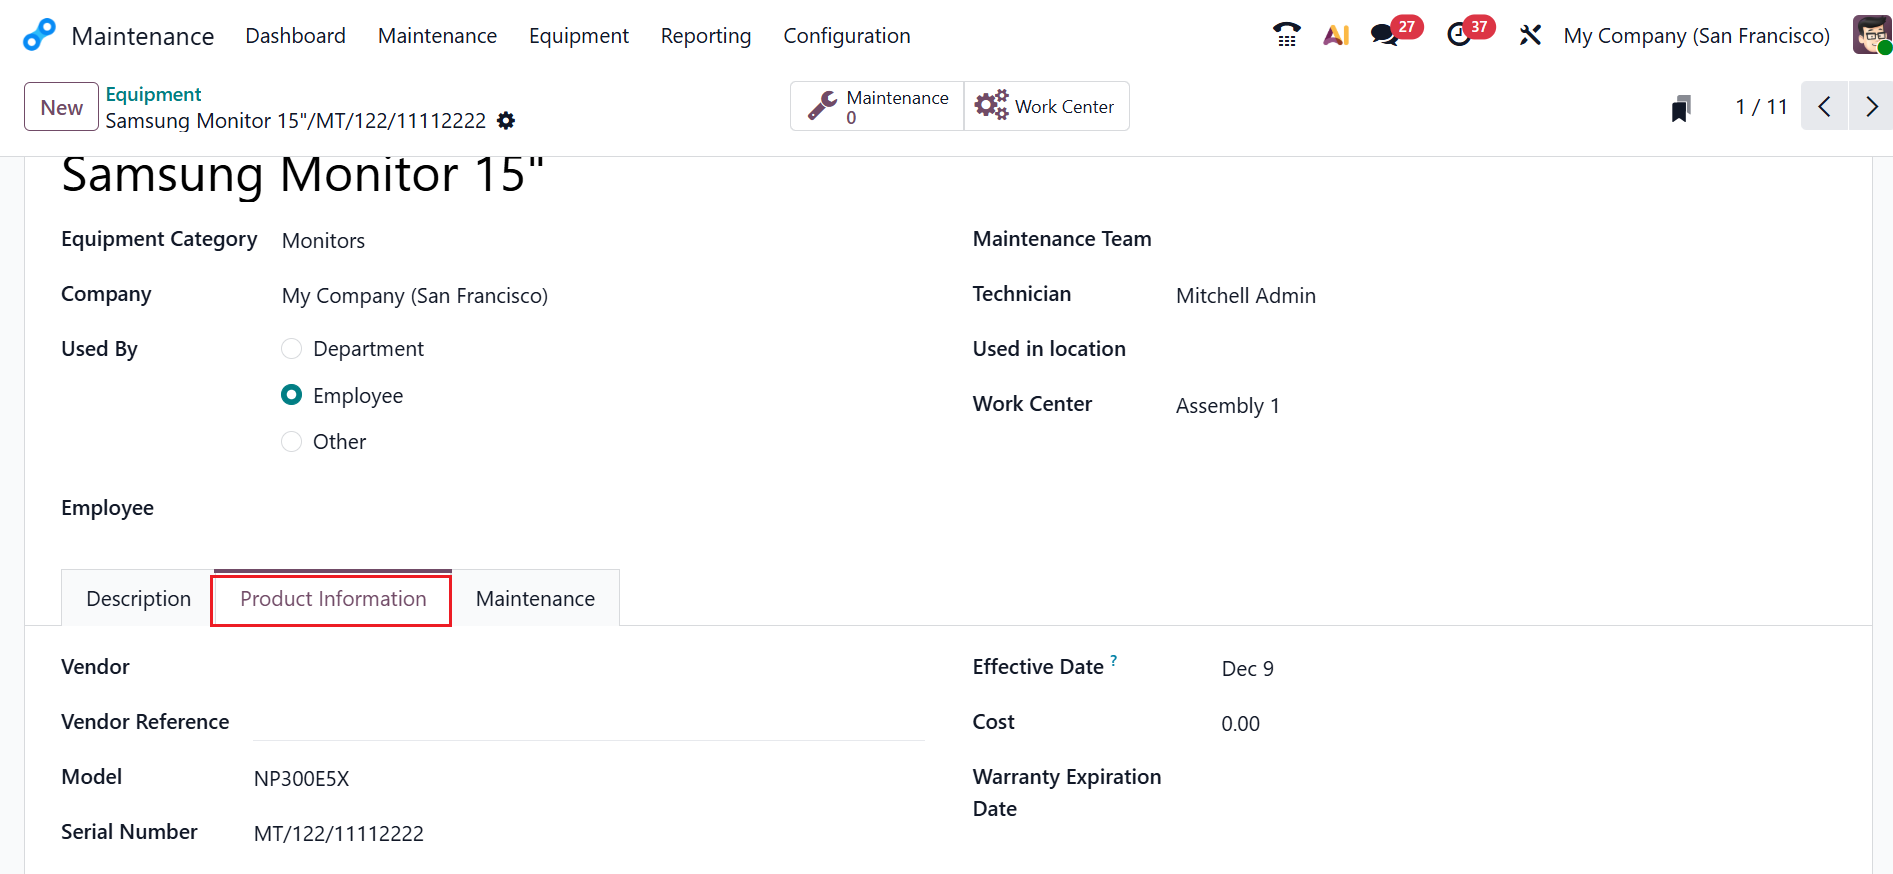
In the Product Information tab, fill in details including Vendor, Vendor Reference, Model, Serial Number, Effective Date, Cost, and Warranty Expiration Date.
Information about the Maintenance tab is covered above. In the Equipment option, you can see two smart tabs: Maintenance and Work Center.
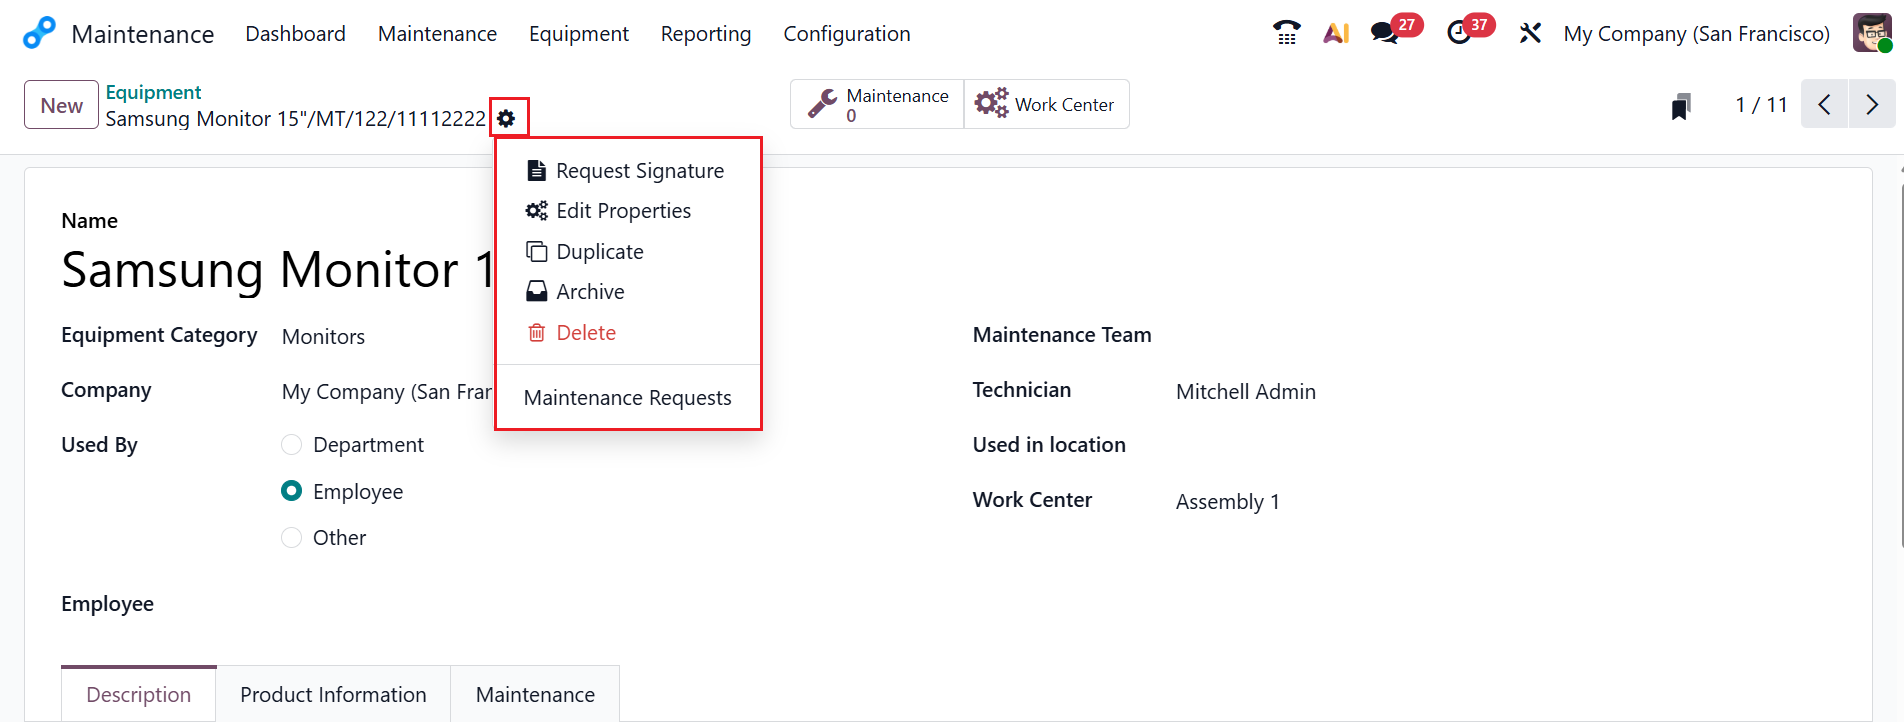
Once all the details are edited and saved, click on the Actions button to view options such as Delete, Duplicate, Archive, Edit Properties, Request Signature, and Maintenance Requests.
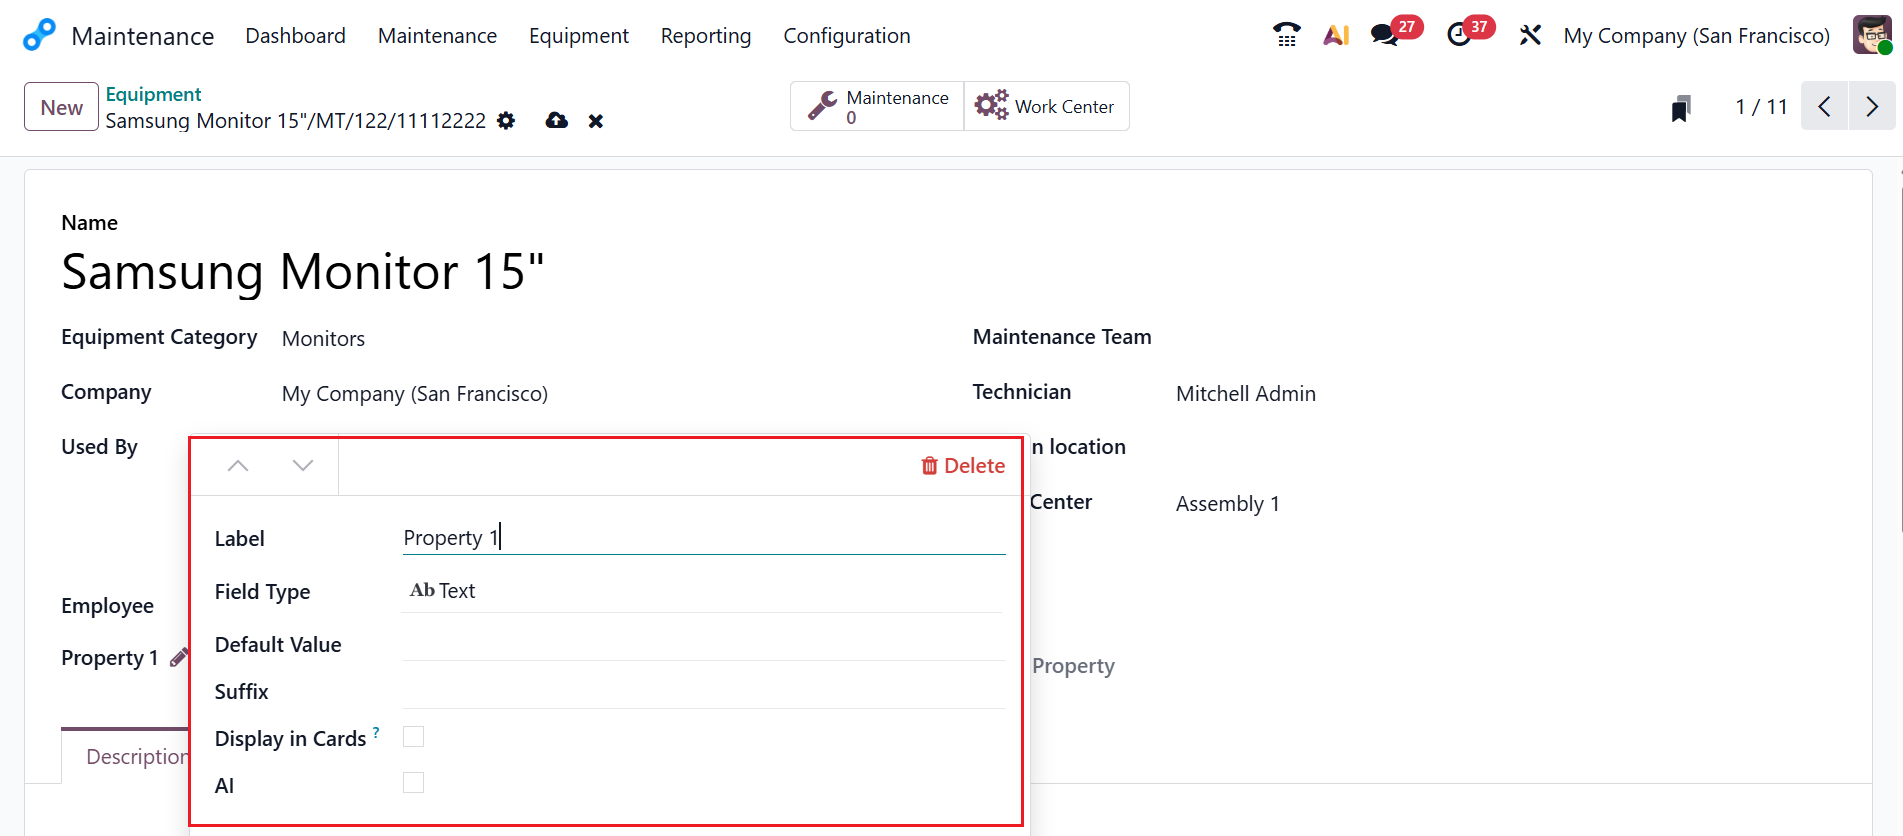
Click on the Edit Properties button to add more fields. A pop-up screen will appear, where you can edit the Label Name. The Field Type can be set to a standard Text Box, Date, Date &Time, Decimal, Integer, Check Box, Selection Menu, etc., as per the field's specifics or requirements. In the Default Value field, you can provide a value that cannot be edited. The Suffix is the extra text shown after the field value. Enable Display in cards to quickly view product or equipment cards. Enable the AI field to fill or suggest a value. In the Prompt field, you can add instructions to AI so it knows how to generate or indicate the value.
The Maintenance Request option helps to manage all the maintenance requests for the created equipment.